-
Posts
3,298 -
Joined
-
Last visited
Content Type
Profiles
Forums
Gallery
Events
Everything posted by Cathead
-
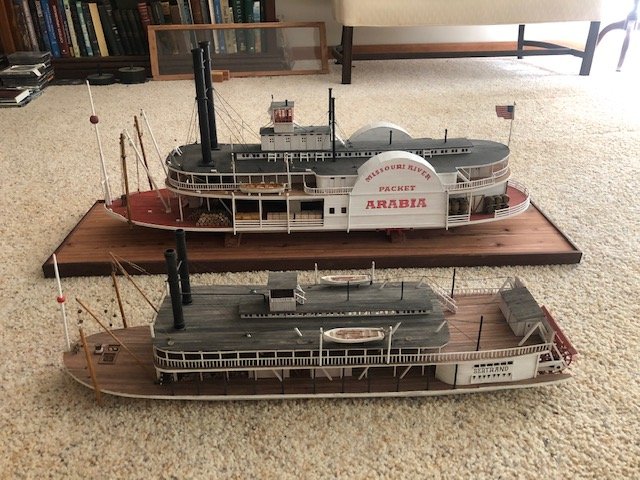
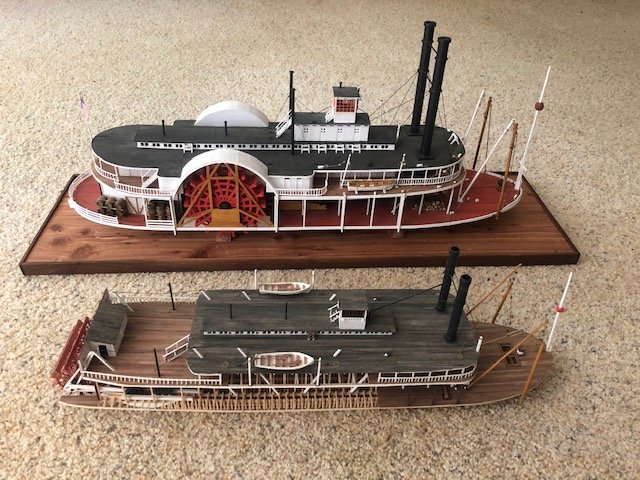
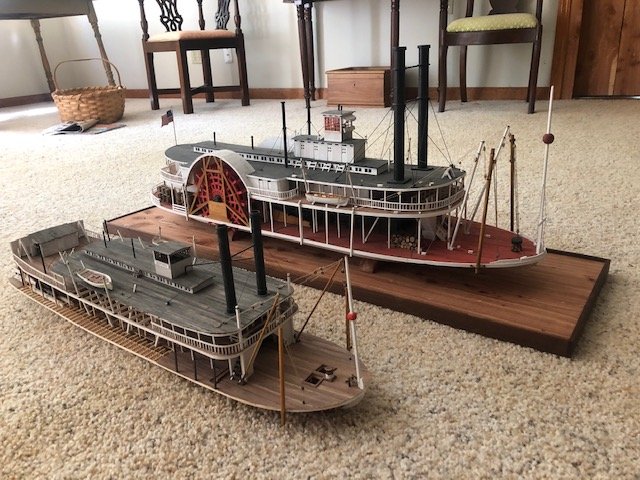
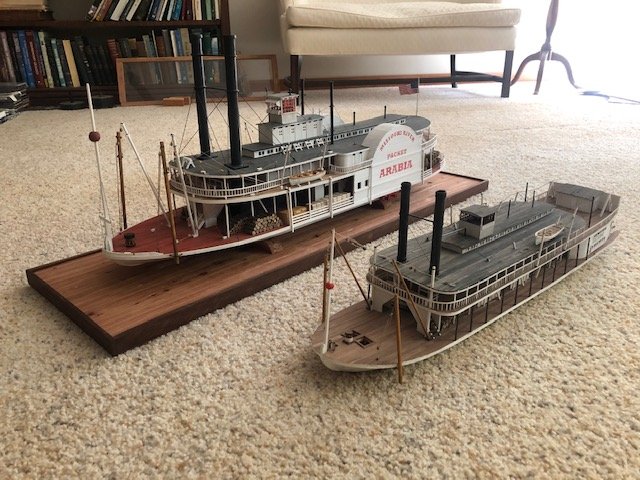
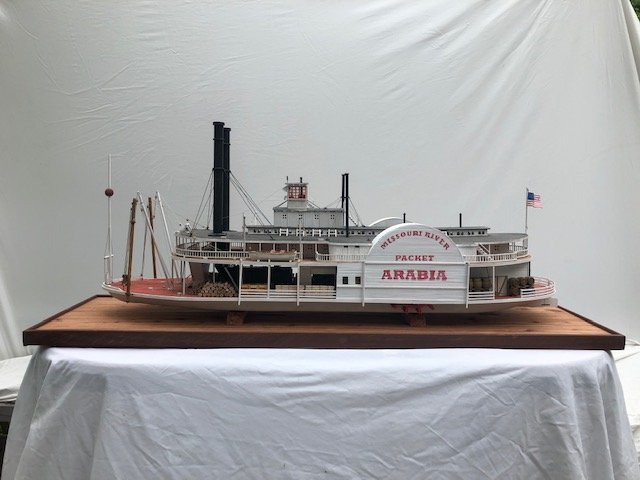
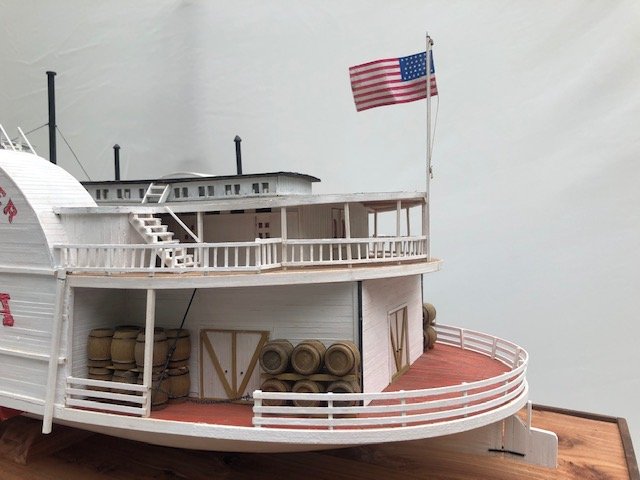
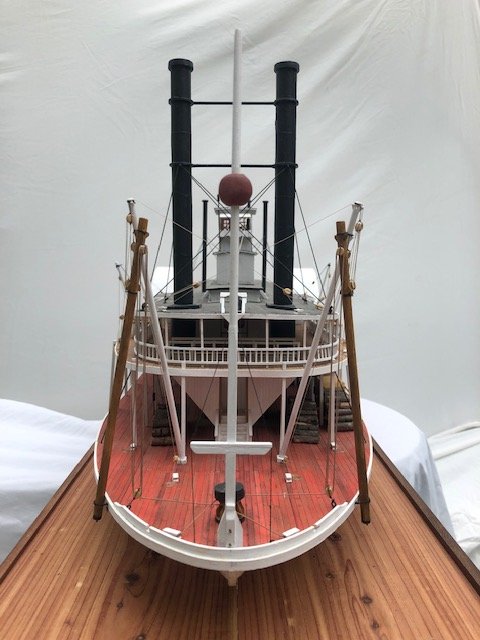
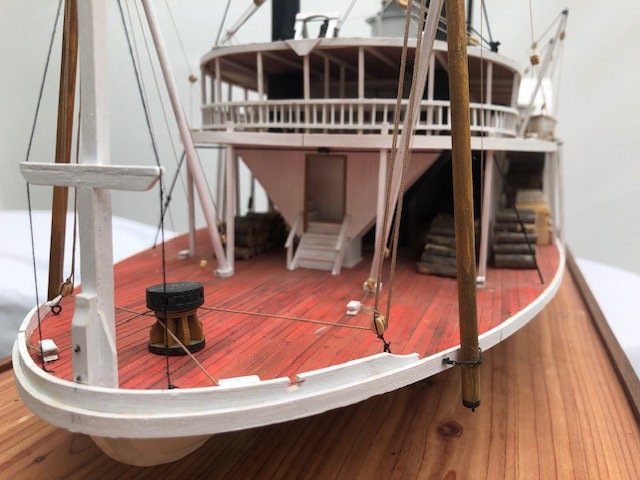
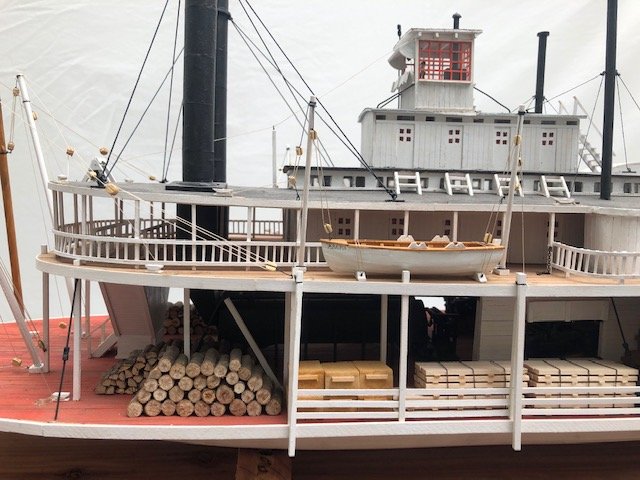
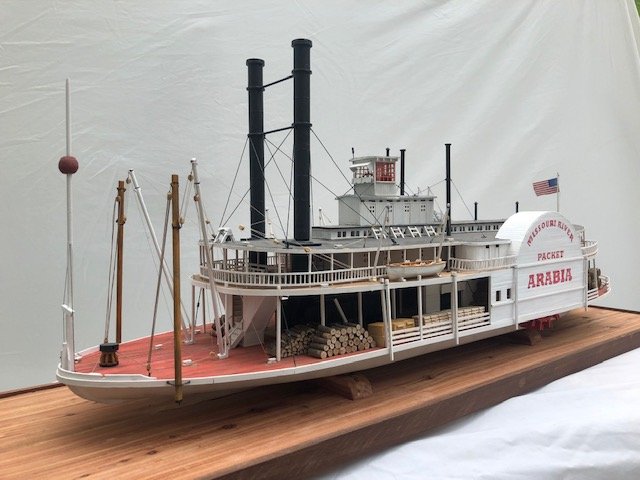
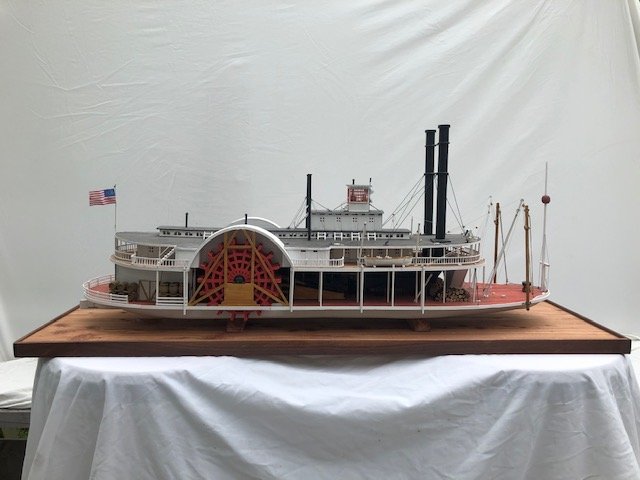
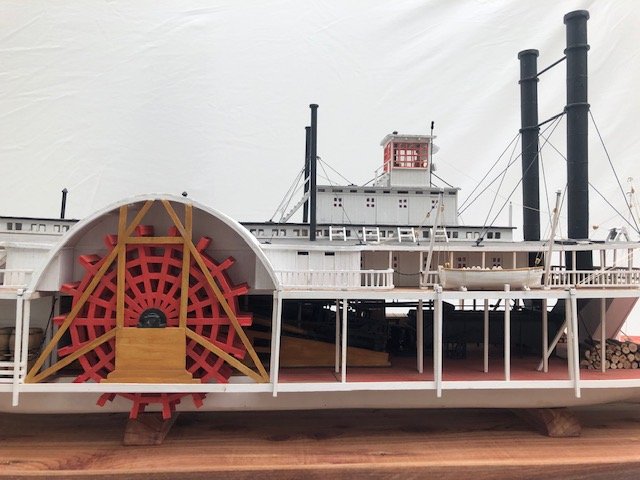
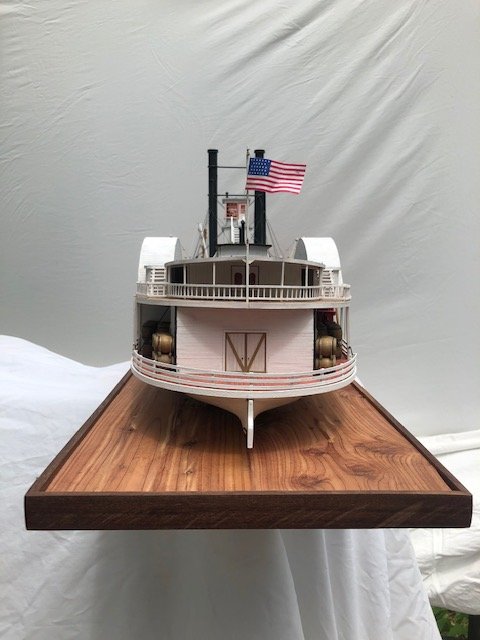
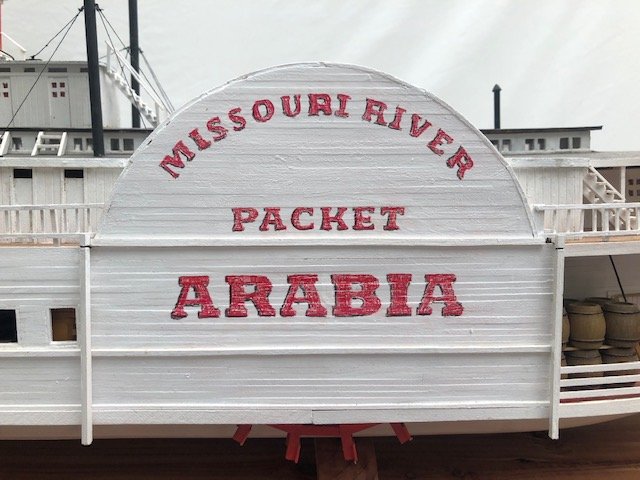
It'll make you want to build models in 1:87, that's for sure. That and the widespread availability of window/door castings, figures, and other such things were a major factor in deciding to build the Bertrand in that unusual (for ship models) scale. Well, that and I wanted to display it on my model railroad depicting a late 1850s Missouri River town.
- 599 replies
-
- sidewheeler
- arabia
-
(and 4 more)
Tagged with:
-
Brian, It's purchased from Northeastern Scale Lumber, which primarily supplies model railroaders. All my stock is leftover from when that was my primary hobby focus, I built a lot of my own buildings. They have a wide array of different siding styles (boards, clapboard, board and batten, etc.) in different widths. Well worth checking out.
- 599 replies
-
- sidewheeler
- arabia
-
(and 4 more)
Tagged with:
-
Nice! Great to see you back at work. Is your new home still in "far north Texas"? I worked in the Panhandle for a summer after college, at Alibates Flint Quarries National Monument and Lake Meredith National Recreation Area, doing geological surveys for both parks as well as public interpretive work.
- 133 replies
-
- chaperon
- model shipways
-
(and 2 more)
Tagged with:
-
I worked on the main cabin walls this week. Here's a small bit I made to test out my intended method: It's pretty straightforward, just panels of scribed wood spaced below the upper window assembly, which keeps the whole thing straight. I made the doors the same way as before, by drilling holes and then finishing with knife and file. I have to make lots of these and they're pretty fiddly, but I listen to an audiobook and it goes pretty smoothly. Close-up, you can see some rough edges that I've been having a hard time fully smoothing down, but they seem to blend into the background when viewed beyond a camera lens. Here's the rest of the starboard outer wall: All the doors are made and painted but I haven't installed them yet. The backing strips holding this together and straight are scrap from past wooden kits (the stuff around laser-cut parts); I have a whole box of this stuff because I hate throwing things away, and it comes in really handy here as it's straight and strong but doesn't cost me anything. Here's the wall loosely placed on the model for visual inspection: Certainly gives the right idea. I think this came out well and the next one will go faster now that I have the method down. Thanks for reading.
- 599 replies
-
- sidewheeler
- arabia
-
(and 4 more)
Tagged with:
-
Chuck already has a dedicated thread in this same section, where people praise and otherwise interact with him and where he routinely answers questions and provides updates. It's very active and I'd suggest that there's no reason to duplicate it here. https://modelshipworld.com/topic/12476-syren-ship-model-company-news-and-forthcoming-new-projects-products/
-
I took a break from planking to work on the boiler deck structures (i.e, the main cabin). This is complicated as it contains multiple curved deck levels above and a raised central skylight running along most of its length. I started by drawing out the shapes of the fore- and aft-most walls, since they define the curve of the hurricane deck (the third one up, after main and boiler). I decided to use pre-scribed wood for the cabin walls at this level for three reasons. First, they need to be especially structurally solid given their complexity and I can get their shapes more similar using solid pieces. Second, they won't be as visible as the main superstructure walls because they'll be more hidden under overhanging decks. Third, I've been underestimating my strip wood use and this gets expensive to keep reordering, whereas I have plenty of scribed stock sitting around. So that's how it is. Fore (left) and aft (right) main cabin walls with handmade doors. The ribs along the top provide extra support for the next deck up. I put the worse of the two doors on the fore cabin wall as this will be especially well-hidden under a deep and long overhang, where as the aft one will be a lot more visible. I made the doors by tracing the oval windows (using a dowel for the curve), drilling out their outlines, then cutting and sanding the hole. I then attached thin strips of wood to make the framing, as seen in the first photo. Here they are painted and installed in the walls. The third piece (upper right) sits a bit forward of the aft wall because the skylight doesn't run all the way back. This will be clearer when I get further along in the build. Next step on these is glassing the windows and adding some curtains to block the view, as I don't want to show any interior. These are the doors that access the main dining/social cabin that runs the length of this structure; the lower portions to either side house the individual cabins, kitchen, and other areas that are accessed from doors on the outer and inner walls. Here's a cross-section of a typical sidewheeler from Wikimedia Commons in case it helps clarify what I'm working on here (the area above the boilers): As a preview, here's the aft-most wall propped up in its intended location. I like how these came out; they were a good test for the even more complicated task of building the long side walls full of cabin doors and other details, which is next. Thanks for reading!
- 599 replies
-
- sidewheeler
- arabia
-
(and 4 more)
Tagged with:
-
Does anyone have a sense of how accurate the kit is? I've read that some other kits are just modified version of other ships rather than actually designed to be the Beagle.
-
Good point on not waiting too long, wefalck, especially with soft basswood. I'll try that.
- 599 replies
-
- sidewheeler
- arabia
-
(and 4 more)
Tagged with:
-
Brian, I'm using wood glue because (a) I've heard mixed reviews about the longevity of CA and (b) it's more benign to be around, which is important to me. CA gives me a headache pretty quickly, while I can use wood glue all night long. Unlike Chaperon, I'm not gluing planks to a smooth surface but just to the very thin cross beams above the main deck, so spreading glue along the bottom of the plank would (a) waste a lot of glue and (b) create a really ugly under-surface as the boiler deck can be seen from below. So what I'm doing is placing small dots of glue on each beam and then settling the plank over it. What's happening isn't seepage directly up through the plank, it's bits of glue squeezing upward in the seams between planks, then soaking in from the side or top. It creates the little darker patches you can see if you look closely at the planking photos. The best approach is just to be really careful in how much glue is used, but sometimes I get it wrong or it gets up there anyway. Also, early on I made the mistake of trying to wipe it up right away, which just spread wet glue further over the absorbent surface and made the spot bigger. I think it's better to let any beads dry and then scrape/sand them away. The core problem is that the planks aren't sealed in any way, and soft basswood is really absorbent. But that's the price of doing the individual planking the way I like it done in this case (i.e., without paint). Given that most of this will be under another anyway and only seen in partial shadow from the side, I don't think most people will notice. It would cost me points in any model competition for sure, but as that's not my goal it's ok. Thanks for the feedback, it's nice to have other steamboat modellers on board. My brain is already working ahead to thinking about trying Chaperon and customizing it various ways to backdate it to a mid-century Missouri River sternwheeler, and the more build logs there are the more I learn about the kit.
- 599 replies
-
- sidewheeler
- arabia
-
(and 4 more)
Tagged with:
-
Interesting question. I have a very linear mind and tend not to have several things running in parallel. I only work on one model at a time and then only one one step at a time. In theory it would be more efficient to jump around and build other parts ahead of time while working on an earlier step, but my mind just doesn't work like that. I like to think about the context of what I'm doing with each step and I can't do that if I'm way ahead (for example, building some bit of superstructure before the hull is finished). Part of this is that I've learned that I often like to change my plans as I go along, or adapt details to the way a project is going, so if I build ahead, I may end up with something I don't actually like or want when it's time to use that bit. Building every step to fit the model in front of me helps guarantee that I'll get what I want each step of the way. I couldn't handle more than one project at once, though I'm quite susceptible to "dreaming ahead" when I'm not even halfway through a given project. Plus, I like to finish what I start and doing more than one thing at once seems to guarantee endless projects.
-
Boiler deck planking is mostly done: The blank spot in the center is where the cabins will go, I'm not showing the interior of these so there's no need to plank this carefully. As the underside of the deck is vaguely visible if you look from just the right angle, I used sheets of pre-scribed wood for this to mimic just enough planking in the shadows. For the visible planking, I stained the individual strips using the same vinegar/rust mixture I've used before on this model, then rubbed each plank with subtly different shades of pastels. This produced a nice variation effect and was a lot faster than painting. I'll sand the whole surface down when it's done, blending them together a bit more. If you were wondering why this deck isn't red, too, there are three reasons. First, this is the only other deck that will be visibly planked (everything above this will be covered with tar paper), and I thought it would look interesting in a more raw wood state, a bit of visual variability. Second, as this deck is mostly covered by the decks above and doesn't get as much use as the main deck (for things like cargo handling), I decided it didn't need the extra coat of red paint. Third, I'm out of red paint and don't want to buy another whole bottle when I might not use the rest for a year or more. Here's a closer look at the foremost part of the boiler deck, showing where the chimneys and main stairwell come through. You may notice that the former look a bit off-kilter. That's because they are. I didn't get the boilers lined up perfectly and these were not quite aligned the way I wanted them, so I built up the area around them to make them parallel again. This will be entirely invisible once the chimneys are sitting on top. You can also see some places where glue leaked through the planking. I was trying to be careful, but using unpainted thin wood makes it super-sensitive to glue spills. I don't think it'll be very noticeable once the next deck is covering this and all the railings are one. I was still annoyed by this, though, no matter how hard I tried the occasional bead came seeping up through and trying to wipe it off just made the area bigger. Along with this, I'm starting to lay out the main cabin superstructure. It's quite complicated and will take me a while to get right, along with probably some annoying mistakes and do-overs. I'll try to take more photos; I didn't take many of the planking process because it's so straightforward. Thanks for reading. We're heading for the first real heat wave of summer here, so maybe some extra focus on modelling for a bit.
- 599 replies
-
- sidewheeler
- arabia
-
(and 4 more)
Tagged with:
-
I like to use a pair of flush cutting nippers for trimming rigging like that. They're not expensive and are widely useful. They let you get really close to the knot without danger of cutting into it. Nice work!
- 50 replies
-
- model shipways
- 18th century longboat
-
(and 1 more)
Tagged with:
-
I like to decide early on which side of a model is the "display" side and always work on the other side first to ensure I figure out any bugs before doing the "good" side. Your work certainly looks nice to me.
- 104 replies
-
- revenue cutter
- BlueJacket Shipcrafters
-
(and 1 more)
Tagged with:
-
I love Duluth and would definitely attend a conference there. One branch of my family is Norwegians from the Iron Range. I second Roger in that it's the Midwest's turn again.
- 599 replies
-
- sidewheeler
- arabia
-
(and 4 more)
Tagged with:
-
Any chance the NRG wants to hold a convention in KC before 2026? The Arabia museum and the WWI museum are world-class attractions and the Bertrand museum near Omaha could be a long day trip. The KC convention center is even built to look like a steamboat (I realize it's bigger than the NRG would need)!
- 599 replies
-
- sidewheeler
- arabia
-
(and 4 more)
Tagged with:
-
Kurt, Yeah, I've actually known about this for a while (note the 2018 date on the linked story). It's such a big story that I've been wanting to write up something properly about, and keep not getting to it. Meanwhile, you finally scooped me! There are multiple inter-related storylines happening here: The Arabia museum is outgrowing its space in the current downtown KC location; they don't have enough room to display anywhere near their full collection, much less expand. The lease is up soon (2026) and there's no room to expand on-site. Hawley has known where the Malta is for quite some time, but doesn't want to excavate it until he has a clear home for it, including processing, storage, and display space. That can't happen at the current museum's location. There's a nascent movement to create a National Steamboat Museum in Jefferson City, MO (the state capitol, a lovely small city located on a blufftop over the Missouri River). See, for example, this passionate column from local journalist Bob Priddy and detailed followups on the current challenges here, here, and here (such as opposition from the casino industry for a proposed tax to pay for this idea). In theory, this could all come together to create an amazing new space for multiple excavated steamboats on a blufftop property (he claims the owners are willing to make it available) in downtown Jeff City (as we locals call it). For example, here's a rendering Priddy shared that he attributes to Dave Hawley: I find this idea super-exciting, but so overwhelming I haven't been able to get my head around how to write about it here or elsewhere. It's a really cool idea, but Missouri hasn't exactly been known for investing in the future lately (for example, our infrastructure is crumbling, but voters rejected a modest gas tax increase even though it's lower than most neighboring states and the legislature doesn't have the guts to pay for this anyway). EDIT: Meant to add a link to this set of now-dated posts by Dave Hawley about the early search for Malta and some background info.
- 599 replies
-
- sidewheeler
- arabia
-
(and 4 more)
Tagged with:
-
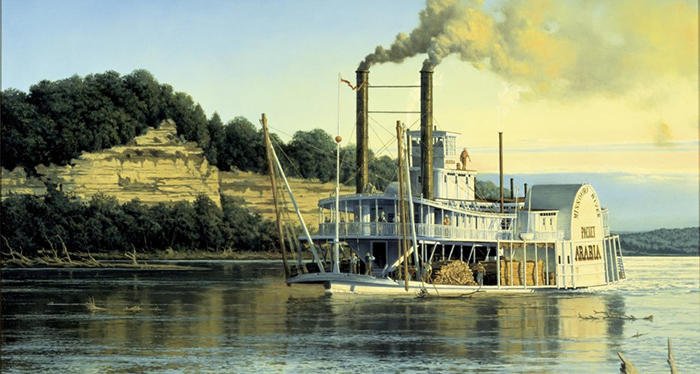
Brian, Yes, the wheels add a massive amount of weight that's entirely supported beyond the hull in either case You're right that the hulls themselves aren't much different, but where you mount the wheels makes a huge difference in the weight distribution both laterally and longitudinally. There are a lot of reasons to choose either design. Sidewheelers were more maneuverable but their wheels were more prone to damage from river debris, which is one reason most upper-river or shallow-water boats (especially on the Missouri) tended to be sternwheelers. The sternwheel also made it easier to push or pull the boat over or off sand bars, not an issue in the lower rivers where sidewheelers predominated. Also, the placement of the engines and wheels on sidewheelers helped counteract the long, thin hull's natural tendency to hog (sag at bow and stern, rise in the middle), which was a huge problem for sternwheelers, especially with the wheel levering itself off the back end of the hull. That's one reason most sternwheelers had much larger longitudinal chains (sticking up way beyond the decks), while sidewheelers needed more transverse chains instead. Finally, sternwheelers tended to have narrower guards (the main deck extensions beyond the hull), so they didn't need as much lateral support. On the crates, I "cheated" too, just didn't take photos of doing so. I didn't add rear handles to any crates that wouldn't show them and didn't scribe the front boards on any non-visible angle. I also used particularly crappy wood for the hidden parts (all of those were made from shop scrap); if you could see the other side of that stack, you'd see gouges and other damage in the wood. The way I wanted to display them meant that I had to have the full crate length because you'd be able to see around the edges of the stack, so I couldn't just use a false front as you did. Plus, there will likely be two small windows into that area (take a look at the original painting at the beginning of this log), so I needed solid crates there too. Overall, I decided it wasn't any extra work to make all the 3D crates from the same template rather than designing various different "false" styles. All I did was cut square stock to the length of each crate and glue flat pieces top and bottom, after scribing a fake front/back plank on the stock. The handles are just scrap stock glued on. Nothing fancy and didn't take long to make.
- 599 replies
-
- sidewheeler
- arabia
-
(and 4 more)
Tagged with:
-
Mark, it's a good general idea and in a more solid model you'd likely be right, but as I'm just leaving the whole starboard side open, I don't think I need any glass. The support posts add enough structural integrity and any glass would probably detract from the view inward due to reflection and distortion. It'll look almost realistic anyway as the lack of walls is somewhat subtle given that much of the infrastructure is open anyway. I think the presentation will become more clear over time. Adding the deck will cut down on the light getting into the detailed area, but I can always supply a flashlight to shine in there.
- 599 replies
-
- sidewheeler
- arabia
-
(and 4 more)
Tagged with:
-
I've never done coppering, so I have no advice, but your approach makes sense as it's basically the same idea as proper planking. If an item already has the shape it's supposed to, it'll be more likely to hold that shape when being glued. My other suggestion would be to read through build logs of similar kits using that style of plates and see what they did.
- 104 replies
-
- revenue cutter
- BlueJacket Shipcrafters
-
(and 1 more)
Tagged with:
-
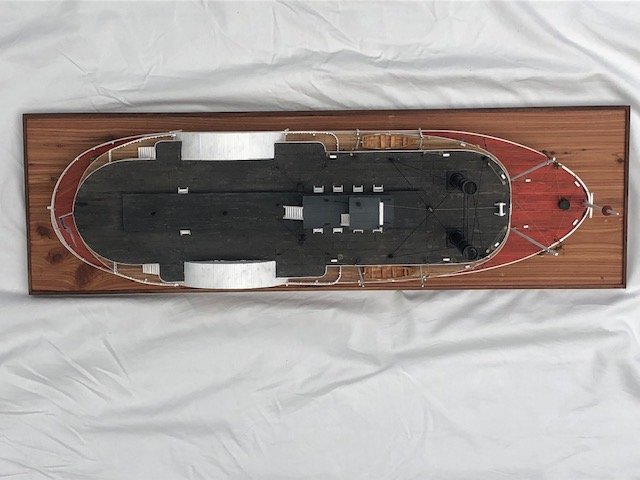
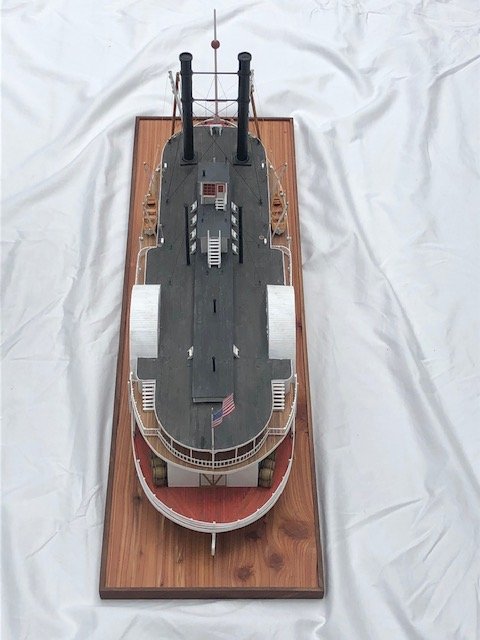
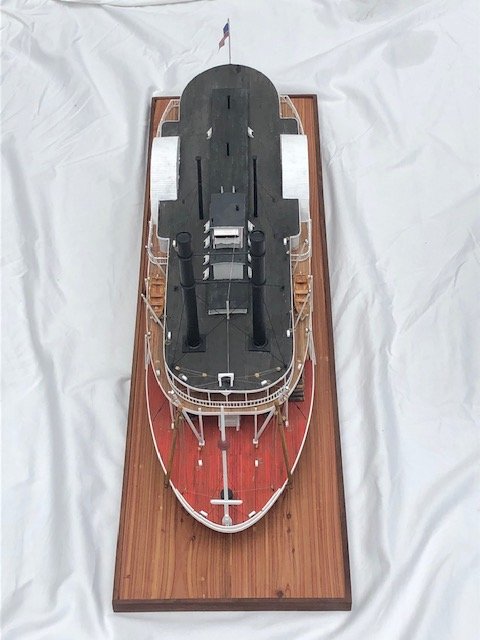
I've managed to fill in some useful details in the last few weeks. First, I added a few support rods dropping from the boiler deck to hold up the steam lines between the boilers and engines: Next, I started adding the outer support posts between the main & boiler decks. First, the stern: Then, a sequence from the bow: You may also notice that I added another transverse chain right in front of the main stairwell. Kurt had suggested this, and I decided it was a good idea as the main deck extends pretty far from the hull here with very little support from above (as both the boiler deck and the hull curve sharply inward). It adds some nice visual detail, too. Next, I started filling in the port wall in front of the paddle box. At the last moment, I couldn't bring myself to fully block off the view of the port engine, so I borrowed an idea from many sternwheelers and included some ventilation/access hatches next to the engine. No idea if this is accurate for sidewheelers, but I think it looks pretty neat. I also built a set of basic crates to fill in the cargo area here. Below, they're loosely stacked in what's likely their permanent arrangement. There will be an outer wall here from the paddle box to the first support post, so they'll only really be seen from the front, thus it doesn't matter if there's nothing at the bottom of the stack. I based these on Google Image searches for Civil-War-era crates (I chose the easiest design to replicate for a detail that will be mostly hidden). In the background of the previous photo you get another hint of what the "loaded" vessel will look like. And last, here's an overhead view of the current model. I think the next step will be starting to lay down the boiler deck, so this may be the last unobstructed view of the main deck. There's a lot of detail left to add to the main deck, but all of it is toward the outer edges where I can do it when the model is closer to being finished. In other news, I had a pretty neat experience over the last month. A few years ago, when I first started building wooden nautical models, I built a rough version of an upper Missouri River keelboat, the kind commonly used by fur trappers and other rivermen to float goods down from the mountains (like furs, gold, etc.). These were usually knocked together from rough lumber, took one trip, then were sold for their lumber upon reaching St. Louis. Mine was based on a variety of images, including some of the full-size replicas used in the 1952 film The Big Sky. Here's a nice, long article with lots of images for those interested in these craft. Anyway, here's the model: A fellow browsing MSW saw this model in its gallery and got in touch with me through the NRG. I assumed he was just interested in learning more about keelboats (or was maybe an expert who wanted to correct something), but it turns out he's a huge fan of the film mentioned above and was interested in buying the model! We came to an easy agreement and I carefully packed and shipped off the model. I never thought I'd actually sell a model, and it's a really neat feeling to know that my work is making someone other than me happy! Fun note, the sails are made from scrap fabric left over from Mrs. Cathead's wedding dress, 11 years ago. Next up, I'll be working on the boiler deck and casting deep shadows over all that main deck detail. Enjoy it while you can! Thanks for reading.
- 599 replies
-
- sidewheeler
- arabia
-
(and 4 more)
Tagged with:
-
Nice job, congratulations on finishing! Depending on the nature of the ex, you can always put a log through the bow and display it canted over at a 30° angle...
- 60 replies
-
- king of the mississippi
- artesania latina
-
(and 1 more)
Tagged with:
-
Depends on how you define it. We actually haven't had rain in a few days, but the big rivers are carrying so much water that that doesn't matter much. The Mississippi will crest in St. Louis on Sunday (here's what it looked like a few days ago, from the National Weather Service). The Missouri is holding steady or slightly falling, but there's so much floodwater that it's going to take a long time to draw down even if the whole region turns dry, which isn't in the regional forecast. Once water gets past levees and floods the bottoms, it gets trapped there by those same levees because it can't get back out again easily. Another downside to the levee system; a natural floodplain would drain itself.
- 599 replies
-
- sidewheeler
- arabia
-
(and 4 more)
Tagged with:
-
That's awfully nice of you, Chris. My own work looks pretty rough to me, in comparison with the precision of many other modelers here, but I've learned to be comfortable with what my skill set allows for any given project. Otherwise it would cease to be fun. I do agree that a great deal of the appeal of modelling (to me) is learning about and understanding the subject, not just the actual building or viewing.
- 599 replies
-
- sidewheeler
- arabia
-
(and 4 more)
Tagged with:
-
I finished off the starboard side of the aft superstructure this week, using the same methods as the port side. Once it was done, I added the other transverse chains on both sides. I placed a few barrels and a figure for photographic interest. Once this was done, I decided I really didn't like the contrast between the manually planked sides and the scribed-planked aft (see photos in last post). Mulling it over, I realized that I'd left myself the ability to plank over the aft wall because the door there protruded enough to accommodate thin planks. So I went ahead and did that; the whole structure now looks a lot more uniform: Doing this created a mismatch at the corners, though, which I fixed with the time-tested method of installing a pipe along each corner. I'm calling them gutters draining the boiler deck; they actually come out over the guards (rather than into the hull), so this is at least plausible. I like the replanked aft for two reasons: (1) it's more consistent with the sides, and (2) it's most consistent with the model's style overall. The decks and other areas are slightly rough rather than perfectly crisp, which won't win any modelling awards but gives the model a distinct "feel" and conveys the rough-and-tumble nature of upper-river boats in a way I like. So now the presentation is more cohesive. Lesson learned on trying to take a shortcut. For reference, here's the port side again, which hasn't changed except for the installation of the transverse chain. The photo has a strange color balance between the two walls, but that's just a trick of the light. Not quite sure what I'm going to do next, there are various ways to move forward from here. Thanks for reading.
- 599 replies
-
- sidewheeler
- arabia
-
(and 4 more)
Tagged with:
About us
Modelshipworld - Advancing Ship Modeling through Research
SSL Secured
Your security is important for us so this Website is SSL-Secured
NRG Mailing Address
Nautical Research Guild
237 South Lincoln Street
Westmont IL, 60559-1917
Model Ship World ® and the MSW logo are Registered Trademarks, and belong to the Nautical Research Guild (United States Patent and Trademark Office: No. 6,929,264 & No. 6,929,274, registered Dec. 20, 2022)
Helpful Links
About the NRG
If you enjoy building ship models that are historically accurate as well as beautiful, then The Nautical Research Guild (NRG) is just right for you.
The Guild is a non-profit educational organization whose mission is to “Advance Ship Modeling Through Research”. We provide support to our members in their efforts to raise the quality of their model ships.
The Nautical Research Guild has published our world-renowned quarterly magazine, The Nautical Research Journal, since 1955. The pages of the Journal are full of articles by accomplished ship modelers who show you how they create those exquisite details on their models, and by maritime historians who show you the correct details to build. The Journal is available in both print and digital editions. Go to the NRG web site (www.thenrg.org) to download a complimentary digital copy of the Journal. The NRG also publishes plan sets, books and compilations of back issues of the Journal and the former Ships in Scale and Model Ship Builder magazines.