Cathead
-
Posts
3,556 -
Joined
-
Last visited
Content Type
Profiles
Forums
Gallery
Events
Everything posted by Cathead
-
 I've got a Viking ship you're welcome to finish. I'll happily pay to ship it to Australia. Otherwise it may end up at the bottom of my pond.
 -
I think you mean "hoops", the metal rings that hold the barrel staves together. "Coops" contained chickens. The barrels look nice, as does the rest of the model so far.
-
Oooh, my turn to show off pedantic knowledge! Geologically speaking, porphyry is an igneous rock (formed from cooling lava), whereas marble is metamorphic (physically and chemically transformed from limestone). However, in the building trade, "marble" is routinely used to refer to any crystalline rock that can be cut and polished regardless of origin. "Granite" is the same way in kitchens and baths; most "granite countertops" cause a geologist to bristle. Anyway, aside from the rare pleasure of applying my geologic background to model building, this has been such a wonderful journey through a period and ship-building style I knew nothing of. Thanks for sharing so much detail and context with us along the way. I am much the better for it. Also, what happened to the horns on the guards' helmets? (ducks)
-
Great progress. The colors complement each other well.
-
Richard, I just found your log and am glad you and others have found my past review helpful. I'm looking forward to seeing what you do with this kit! Kinda fun to see multiple Missourians in a single build log, there aren't that many of us here. I'm in rural central MO.
-
Art is so subjective. To my modern eye, influenced by Chinese concepts of dragons, most Viking dragon heads look more like cheetahs.
-
Looking very nice. Love the distinct style of this vessel.
- 28 replies
-
- 2
-

-
- Amati
- chinese junk
- (and 1 more)
-
One of the most basic questions to answer is your skill level at assembling models and what materials you want to work with. Your phrasing "put together" implies a pretty basic model, based on assembling pre-made parts with glue, which suggests a simple plastic model. For example, a couple Revell sailing ships (Bounty and Charles Morgan whaling ship) were my first entry into ship kits and look reasonably cool without needing more skills than basic gluing and painting. In contrast, most wood-based kits are not going to be "put together" because almost all require more work shaping the parts first and this can quickly get challenging if you aren't aware of what you're getting into. BlueJacket makes a whole series of intro-level wood kits that look nice and are meant for beginners. I strongly recommend reading the link Meddo gave above. But it would help to know some basic ground rules for type. Tugboat? Canoe? Sailing vessel? Battleship?
-
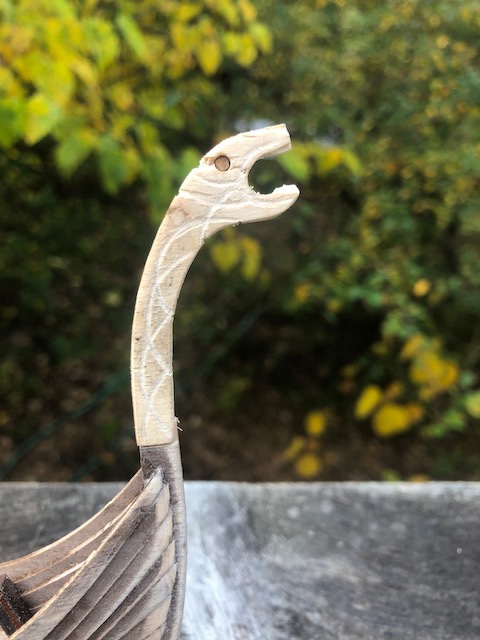
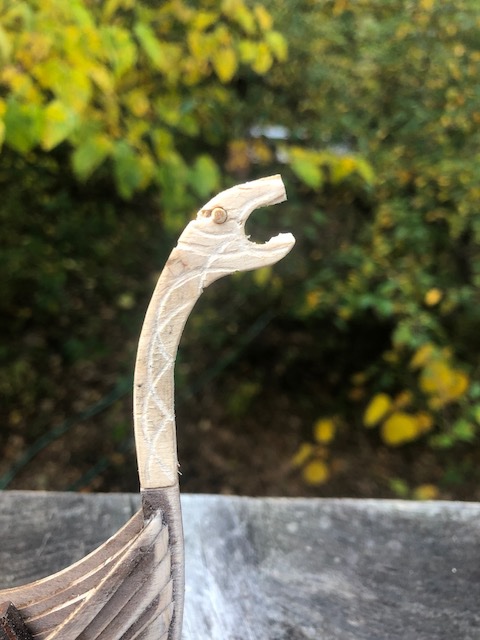
Thanks, Louie! Good to hear that I'm on the right track. As you suggested, not going for anything fancier, I don't have the skill and the plywood is hard enough to carve at this level given its coarse, strong grain. Here are three options for the dragon's eye. Empty: Protruding: Recessed: My current plan is to have the figurehead itself the same dark color as the hull, but the carved designs, teeth, and eye highlighted in colors like red and/or yellow to match certain strakes on the hull.
-
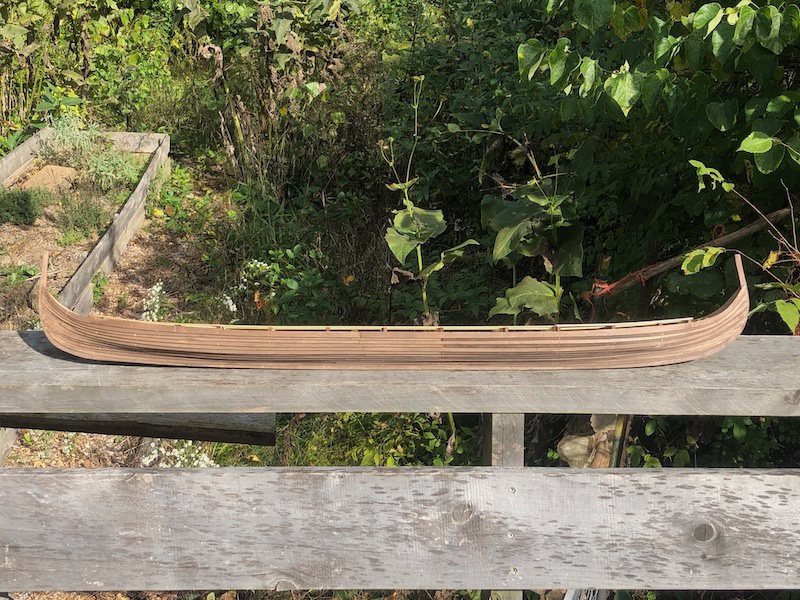
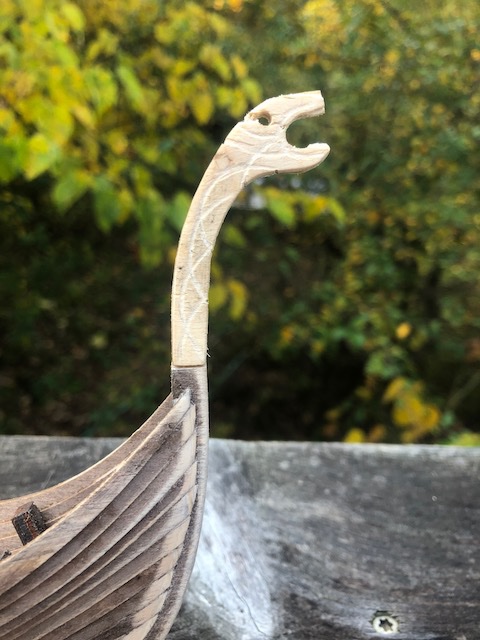
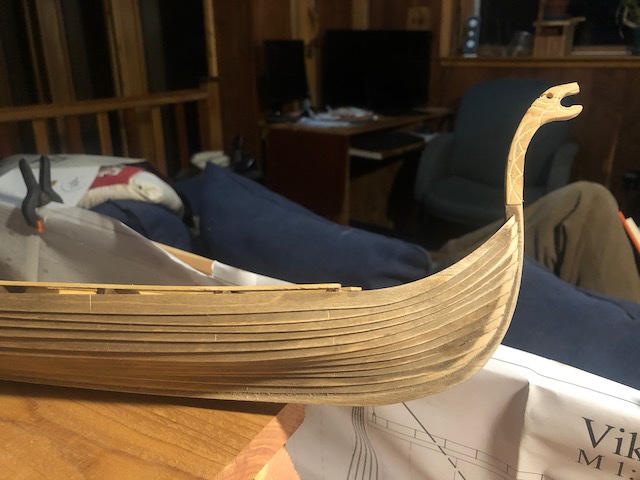
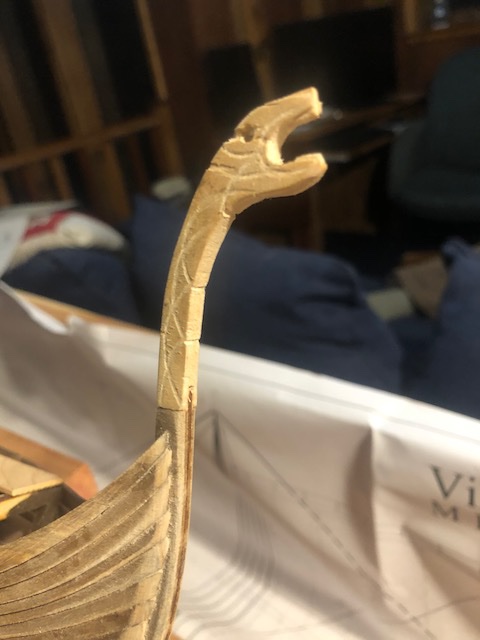
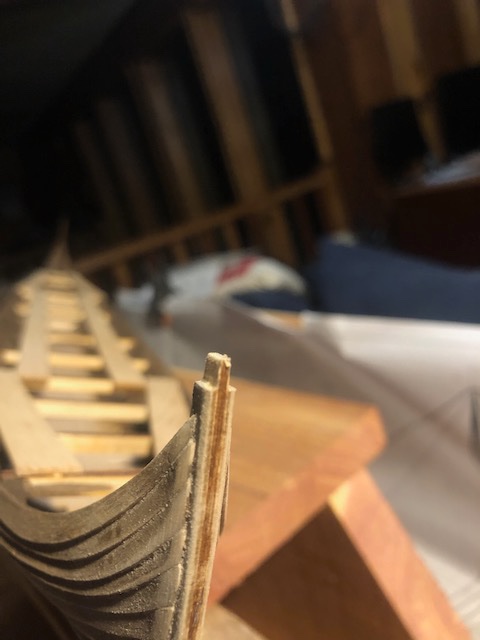
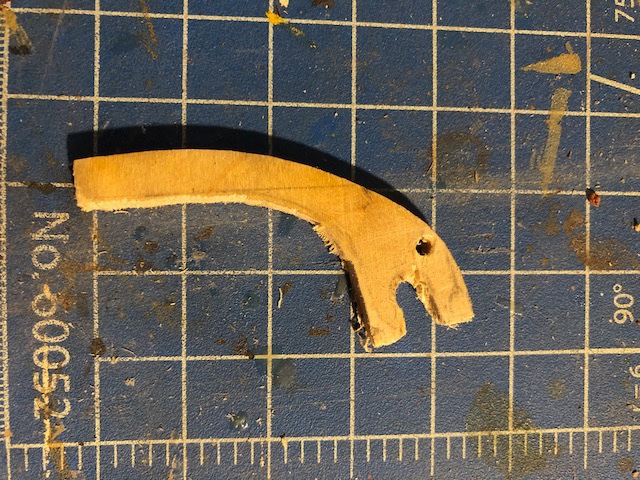
I started sanding the hull, smoothing off each strake and getting rid of any glue, while blending in the bow and stern planks. Here's an example so far: The difference in color from the stain wearing off doesn't matter as I'm going to paint all these darker. Probably didn't need to stain at all but I wasn't sure of that when I started. Here's an end view: I think it's starting to look nicer already. Having a lot of issues with planks popping loose, I've had to reglue three different stretches where the seam came undone. Not at all pleased with how fragile this is even with my extra gluing surface. I also finally started working on something more fun: a proper figurehead. There's a lot of disagreement out there about these, with different original sources and academics contradicting one another. This is especially true for the idea that figureheads may have been removable, the idea being that you would remove them when approaching friendly shores to avoid frightening land spirits but would keep them in place for more aggressive landfalls. This is mentioned in some Icelandic sagas, but to my understanding no archeological evidence for this has been found. I decided to add a removable figurehead to my vessel as (a) I love the concept and (b) there is at least cultural support for it. I'm not trying to recreate the original vessel here, just my version of a wealthy jarl's warship. I based my design from several actual carved dragon heads found in various archeological contexts. I used a piece of the same plywood sheet from which the keels were cut. This ensure that the wood was the same thickness. I used a piece with a curved edge on the outside (this came from the inside of the stem) and traced a rough concept onto it: I then roughly cut this out and did a lot of filing and sanding to get closer to the right shape: To mount this on the bow, I made use of the three-layer plywood, which likes to separate along the surface between each sheet. So I cut down the stem and cut away the outer two sheets to leave just the middle one in place: I then carefully cut away the inner piece on the end of the figurehead to make a matching slot: You'll also notice that I carved some patterns on the figurehead, again loosely following various real items. I again took advantage of the three-layer plywood to develop some details in the teeth and nose, though it seems this photo doesn't do it justice. Will try to take a better one in daylight. So here's what the semi-final product looks like: Needs some touchup work but you get the idea. I have two thoughts on the eye: either leave it empty like that or run a rod through it so the eyes stick out from the side of the head. Leaning toward the latter (will try to take better photos in daylight). I'm also going to drill a hole through the mount to simulate a large peg that might have been used to fix this in place (and remove it). I'm going to highlight the carved patterns in different colors. None of this is permanent, but it was fun to develop and starts to give the vessel a unique feel. Thoughts?

-
That's what I would have tried first. Another, possibly crazy idea, might be to make a pattern of the curve you want (like by bending a piece of wire in-place on the model) and then using that as a guide to shape a glue-soaked line that dries off the model and then is installed when stiff?
-
Looks great! Would you be willing to share a couple photos end-on? I'm curious how vertical the sides of your hull turned out so I have a comparable reference for how mine looks. Seeing how good yours looks encourages me to keep plugging away to get mine to this point.
-
Chaperon by joep4567 - 1:48 - Sternwheeler
Cathead replied to joep4567's topic in - Build logs for subjects built 1801 - 1850
They fit in nicely and help make the build even more your own. -
I often use pastels to dull model surfaces by dry-rubbing them in with either a fingertip or brush. They can add a nice complex texture to a surface. A cheap box of pastels can last a lifetime of light weathering and could help dull the rope coils. Not sure how it would work in your specific situation but you could test it on an off-model coil to find out. Just a thought.
- 950 replies
-
- 1
-
-
- syren
- model shipways
- (and 1 more)
-
Nice job on the coils. I've done that by coiling the line onto a piece of double-sided tape but your methods looks faster and the results are nice.
- 950 replies
-
- 2
-
-
- syren
- model shipways
- (and 1 more)
-
Are you going steal and dice up anything else from the rabbits as well? Realism, you know.
-
It won't feel real until I see her on the nose of a B-17.
- 599 replies
-
- 3
-
-
- sidewheeler
- arabia
- (and 4 more)
-
Chaperon by joep4567 - 1:48 - Sternwheeler
Cathead replied to joep4567's topic in - Build logs for subjects built 1801 - 1850
Yeah, I see what you mean. I've read that book how many times and never noticed that. Certainly, as always, you should make the model your own and not take anyone else too seriously. Another way to look at it is that there may have been heads and galleys on both levels to fully separate crew and passengers. A paying gentleman may not want to traverse the dirty, dangerous, cargo-laden main deck to reach the head, for example, or have the crew using the passenger's facilities (especially since the deckhands were usually of a much lower social class). Lots of ways to look at it and justify a given approach, certainly a good rule is that there was no one rule. Sorry if my post was pedantic, I should have asked about your reasons before lecturing. I just love talking about these craft and being involved with others who want to know more about them. But I'm still an amateur. Sounds like you've got plenty of justification for your plans. -
Chaperon by joep4567 - 1:48 - Sternwheeler
Cathead replied to joep4567's topic in - Build logs for subjects built 1801 - 1850
For what it's worth, latrines/heads on steamboats tended to discharge over the paddlewheel (at the stern for sternwheelers and along the sides for sidewheelers) rather than through a hole in the deck down through the hull. The idea was that the wheel helped dispose of the material. On most sternwheelers, the boiler deck extended just a bit out over the wheel to accommodate the structure needed for this. Chaperon appears to follow this design though I'm not 100% sure. The galley would also generally be located on the boiler deck, off to one side of the main cabin (in line with the passenger cabins), usually near midships. This allowed all cooking to be served directly into the central main cabin and for the stoves to vent out the hurricane deck, while leaving the main deck free for cargo and workmen. From the main deck, it'd be a loooong walk to the bow, up the main stairway, and back into the main cabin for any food. -
That instruction seems practical in a purely model-building sort of way, but rather problematic from a realism point of view. Odd that the model is designed for that to be the only way builders could get the planks to follow the hull's curve when the real thing managed without. Or am I missing something?
-
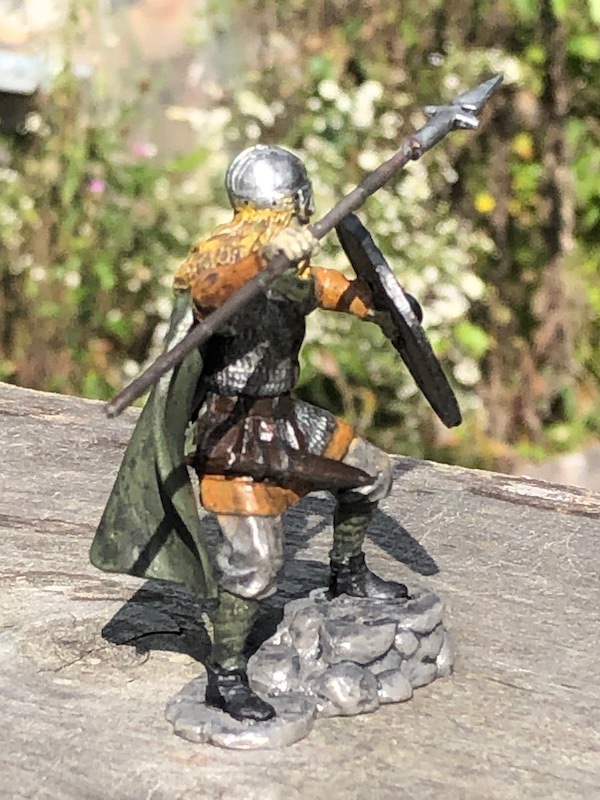
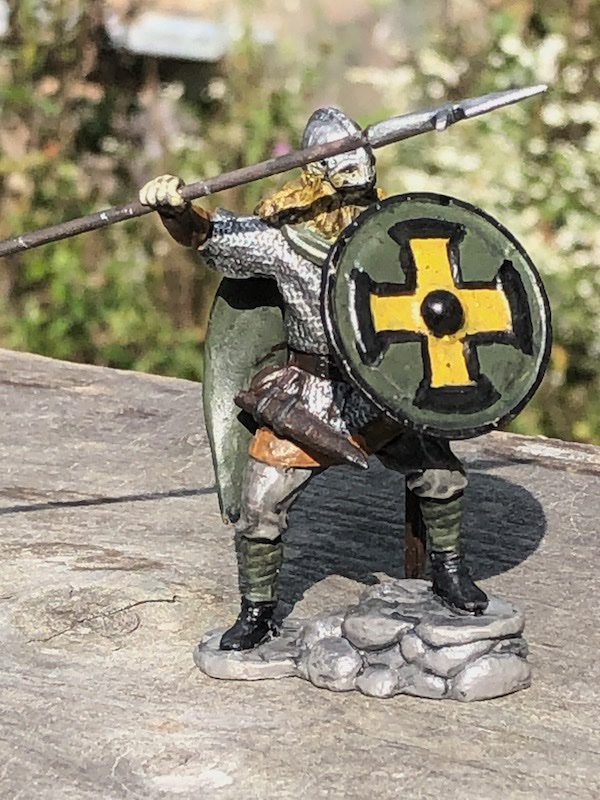
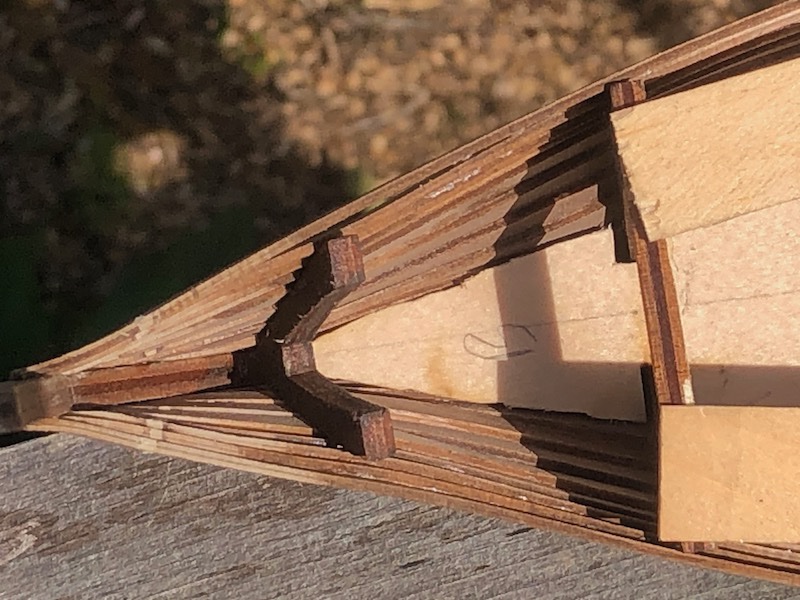
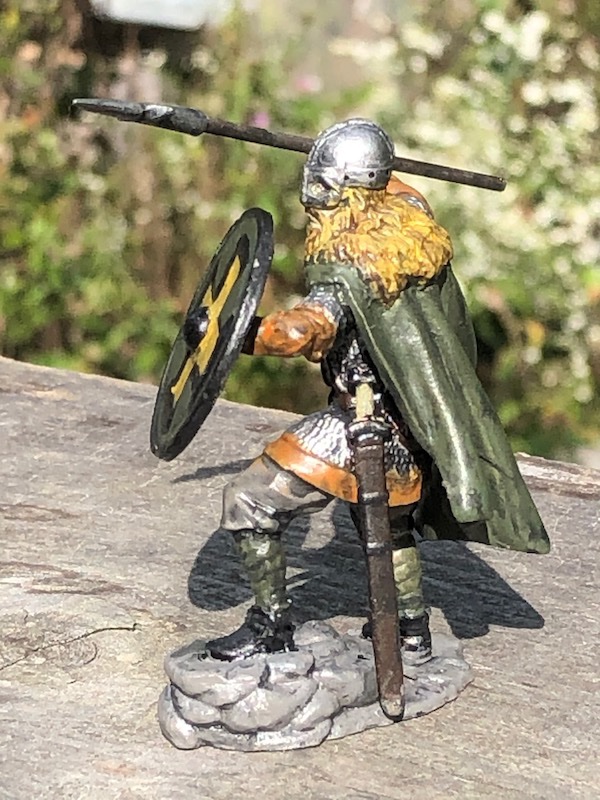
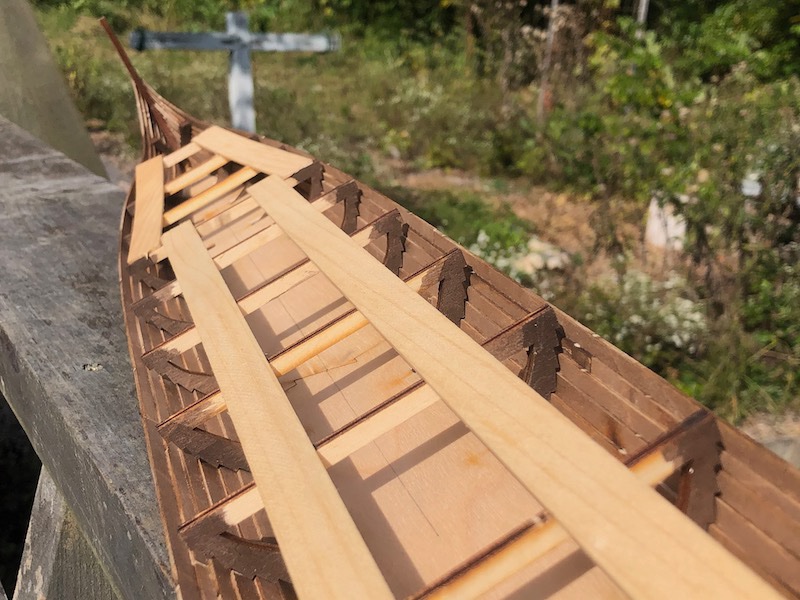
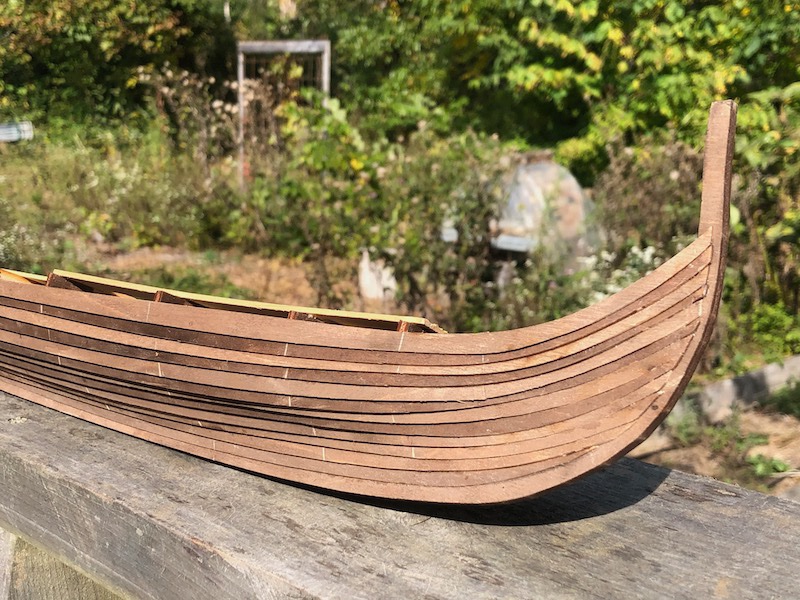
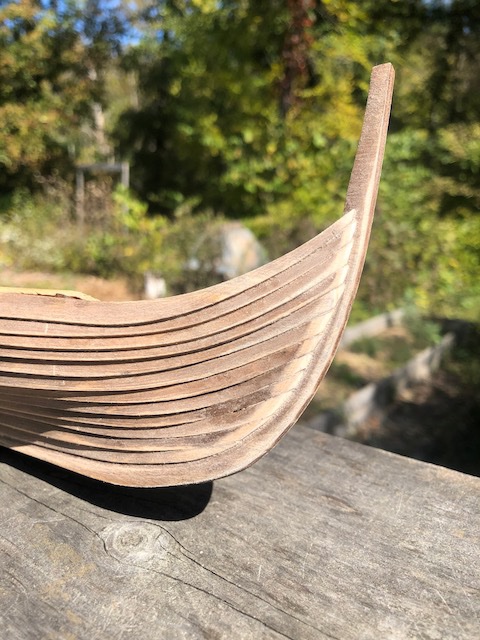
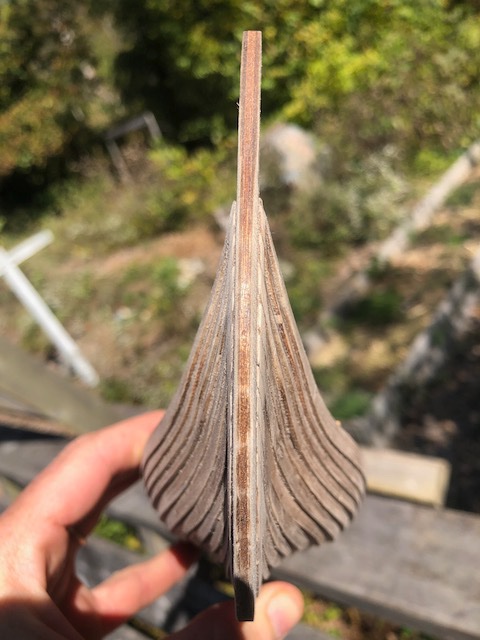
More progress: the hull planking is done: However, finishing it demonstrates some ongoing frustrations: Above, you can see that the planks don't follow the intended curve of the hull but bow outward. I clamped them to the frames every time I glued in a new strake, but they insisted on bowing outward as soon as the pressure was released (and keep in mind that they cannot be glued to the frames, which need to be cut out above the deck). And I soaked, bent, and dried each strake, so they conformed to the intended shape as much as possible. So instead of the final strake being nearly vertical, it bows out at something like 30 degrees off vertical. That'll make hanging the shields awkward. Also, if it wasn't clear from the above photo, the planking finished well short of the actual frame height by as much as a full plank width: I knew this was occurring but could do little about it. It happened because the notches cut into the frames to hold the planks in their intended position allowed for almost no overlap between planks (i.e., almost no gluing surface between them in the clinker overlap). They simply didn't hold together when placed in that arrangement, so I started subtly shifting each plank a little bit downward to allow for sufficient contact. This snowballed until, by the end, they came out a full plank short (which is why you can see the frames sticking up rather than being nicely hidden behind the uppermost strake). Proof that I needed the extra overlapped gluing surface comes from the fact that even so, several of the strakes have become separated and you can see daylight through them, even though I used plenty of wood glue and lots of clamping (I will need to do quite a bit of filing to eliminate various glue spots squeezed out from between the planks). So goodness knows how many planks would be popping loose if I used the kit's ultra-thin pre-arranged overlaps. Finally, remember my annoyance with the Y-shaped frames at bow and stern, the ones that don't get removed and that I assumed the planks needed to be glued to because otherwise why are they there? Well, here's what happened when I started letting the last few strakes following the natural clinker curve of the hull rather than forcing them into those Y frames: You can clearly see how that frame forces the planking into a sort of unnatural curve that messes with the natural flow of the wood, and how the last few strakes just don't match it at all. I would have been better off completely ignoring that frame and just letting the planks flow naturally from the previous frame to the bow/stern. As it is, it looks ridiculous because the lower part of the hull is contorted inward and the upper part doesn't even touch this frame. This is at the bow; the stern isn't quite as bad but still not good. As always, I'm open to the idea of user error here if the kit designer intended something else to happen, but I'm a reasonably experienced builder and the instructions and plans were of no help whatsoever in understanding what was supposed to be done here. I'm still sticking with the idea that this is the roughest the hull will look and I can improve it. Once I do a bunch of sanding and filling (especially at bow and stern), start painting the planking and detailing the interior, I think most of these issues will vanish from casual sight and I don't intend to win any contests with this thing. I have a clear plan in my head for how to make it look cool overall for most viewers. Speaking of which, I balanced the ongoing annoyance with the kit by having a lot of fun painting another figure. Meet Ragnar, again named for a character from Bernard Cornwell's Saxon Tales, this time a moderately wealthy jarl (no, not Ragnar Lothbrok). The shield design was premolded so I had little choice regarding its shape. Here are Ragnar and Sihtric together: Note anything odd? They're supposed to the same scale, but either Ragnar's a giant or Sihtric is about 10 years old (despite the beard). Sihtric is close in scale to the model (he works out to be around 5'7" (1.7 m), just about average for men of that era. Ragnar, on the other hand, is closer to 7' tall (over 2 m). I just won't place them next to each other. I'm finding that I really enjoy figure painting. Oh, before Louie corrects me, I know most shield rims were leather rather than iron. I like the visual symmetry of the black rim but am considering repainting it brown, torn between accuracy and aesthetics. Anything else that might be correctable, let me know!