


UpstateNY
-
Posts
466 -
Joined
-
Last visited
Content Type
Profiles
Forums
Gallery
Events
Posts posted by UpstateNY
-
-
-
-
Hi Jesse,
Been enjoying your build...really challenging with such a fragile glass bulb.
On the sea...just a thought but would a thin layer of Scuply perhaps work so it isn't too heavy? Comes in many colors and could be painted as well. Could be textured to make some waves and lightly rolled to get it in before opening it out. Some white paint once it is in may allow some white caps as well.
Just a thought.....good luck!
Cheers,
Nigel.
-
Hi Hamilton,
Very much enjoyed catching up on your build to date....great work! Thanks for highlighting how you've checked and then shimmed all the parts to match the plans. I am sure this will pay big dividends as you complete the hull.
Pulling up a chair for the rest of the voyage if you don't mind.
Cheers,
Nigel.
-
Thanks for stopping by and for the nice comments and likes everyone!
Hi Lionfish,
I'd need to add a few ice sailing mods to sail my Dragon on Lake Champlain pretty soon! Champ is safe for another season!
Cheers,
Nigel.
- Omega1234 and Dimitris71
-
 2
2
-
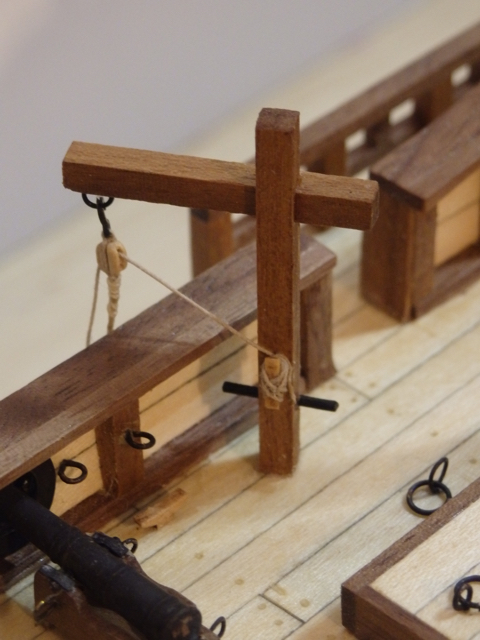
Hi All,
Thanks again for all the kind comments and of course for the likes.
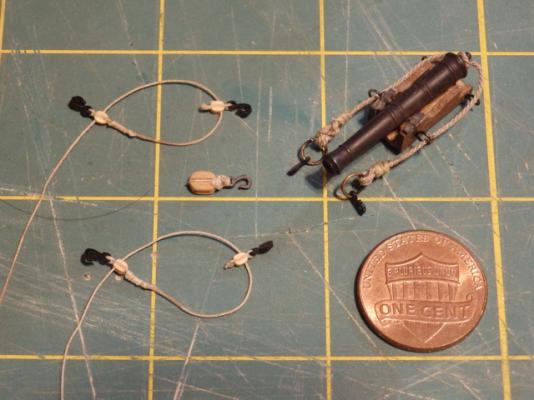
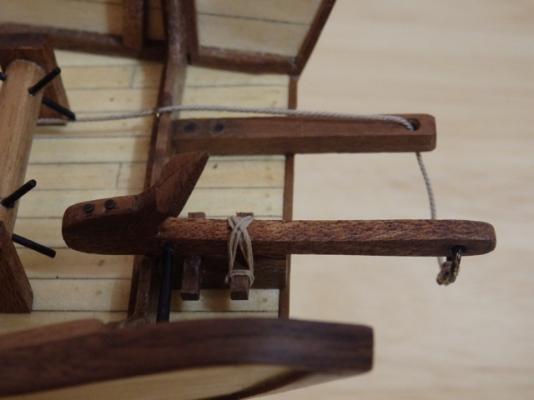
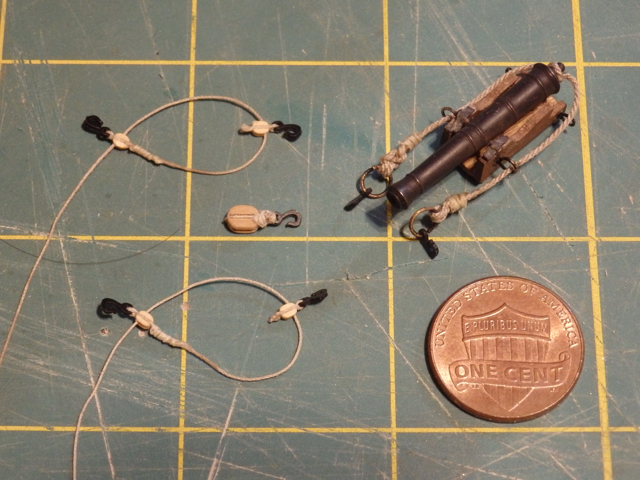
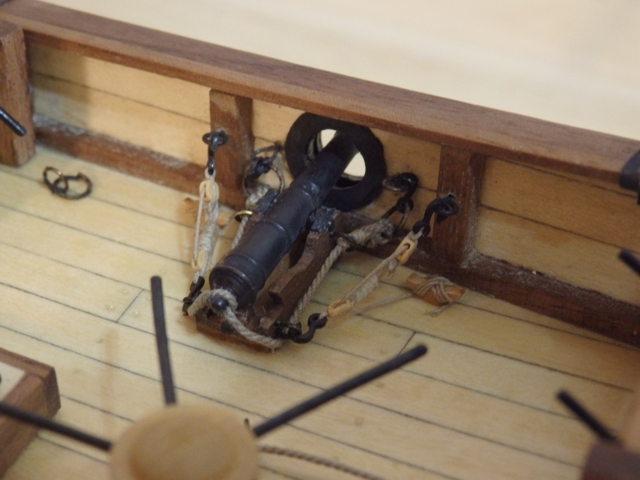
Well, I finally managed to complete the cannons. Tackles used Syren 2mm blocks, 4mm hooks and 0.008in rope; breaching lines were 0.025in rope, combined some 4mm hooks and rings. An anchor bend was used to attach the breaching ropes to the rings and the tackles were tied off to Syren boxwood cleats. Overall, I am pretty happy with how the cannons turned out and I'm glad I managed to use the 2mm blocks. You can see how large a 4mm block looks in the first image.
I also attached and rigged the anchor I made a few posts back. An anchor bend was again used to tie the 0.025in rope to the ring and I made up a walnut support so I could tie down the anchor.
I need to do some touch up here and there on the metal work which has lost some finish and then it is time to start the standing rigging!
Thanks for reading and images below.
Cheers,
Nigel.

- Fred01, kiwiron, CaptainSteve and 8 others
-
11
-
-
-
Hi Popeye,
Glad to see you back building again.
Sorry about the redo's, but she is looking great!

Cheers,
Nigel.
-
Hi Dimitris,
Great to see the deck furniture starting to be added. I always really enjoying watching this part of every build...seems to make the model come to life.
Congrats on your Royal Caroline as well!
Cheers,
Nigel.
- Dimitris71 and Omega1234
-
2
-
Hi Nenad,
The 'Like" of course is for some support as I am very sorry to hear your mother in law is unwell once again...will hope and pray the antibiotics help.
Love your CS cabin build work, looking really good.
As for the firewood...yep it is that time of year here as well..just glad my wood is also split and stacked given fall is now in full swing!
Cheers,
Nigel.
- Omega1234, GLakie, CaptainSteve and 3 others
-
6
-
Nice to see you building again Captain!
Looking forward to watching your modifications take shape.
Cheers,
Nigel.
-
Hi Nils,
That is simply staggeringly good work.
Seems almost a shame to paint over all this wonderful plating, but l am certainly looking forward to that as well!
Cheers,
Nigel.
- Dimitris71, Mirabell61, mtaylor and 2 others
-
5
-
I think your doc is well on his way to getting two wonderful models!
He is going to love both!
Cheers,
Nigel.
-
Thank you so much for the kind comments and the likes guys! Really encouraging.
Cannons are in progress, but jeez these 2mm blocks hard to hold on to! First line took me an hour, but progress is slowly being made.
Cheers,
Nigel.
- Omega1234, Mirabell61, CaptainSteve and 1 other
-
4
-
-
Hi All,
Thanks for the more kind comments and of course for the likes. Support is really appreciated.
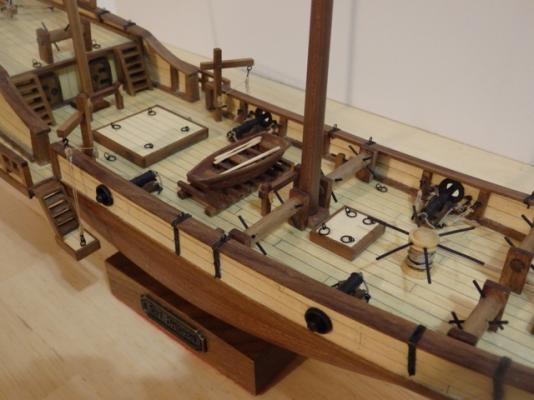
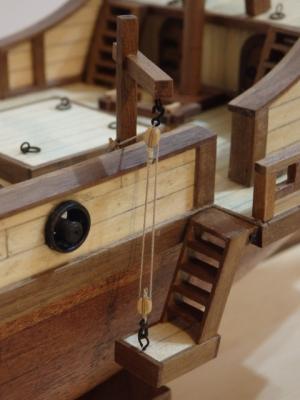
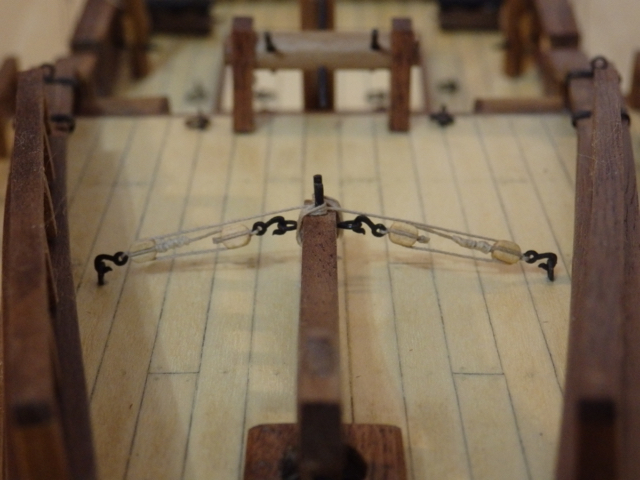
So, a little more progress as the tiller rigging has been redone using the 3mm Syren blocks. Glad I did this as I think the 3mm blocks work better than the 4 mm blocks I used before.
I also glued down the gallery stairs and support posts. Stair rigging was completed in the same way as the tiller except the lines were tied off to one of Chuck's cleats. Overall I am pretty happy with these first tries given I am starting on the rigging learning curve. Next up are the cannons!
Thanks for reading!
Cheers,
Nigel.


-
-
Best wishes for today Patrick.
Cheers,
Nigel.
- GLakie, mtaylor, Dimitris71 and 1 other
-
4
-
Hi Dave,
Enjoying your build greatly, including the fun color choices! Lovely work!
Congrats on getting the IV out...I can't even imagine how much better you feel with that gone!
Good luck on the golf course...enjoy the 19th especially as a small celebration seems in order now the IV is gone!
Cheers,
Nigel.
-
-
-
Hi All,
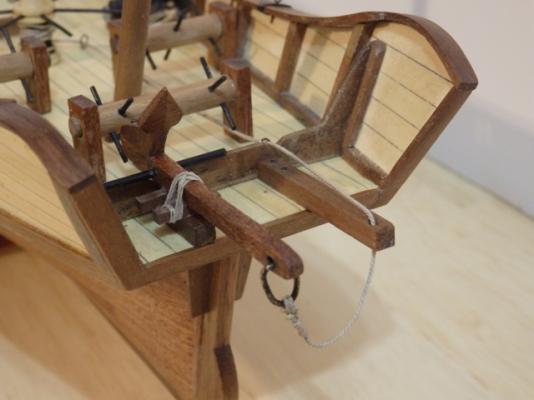
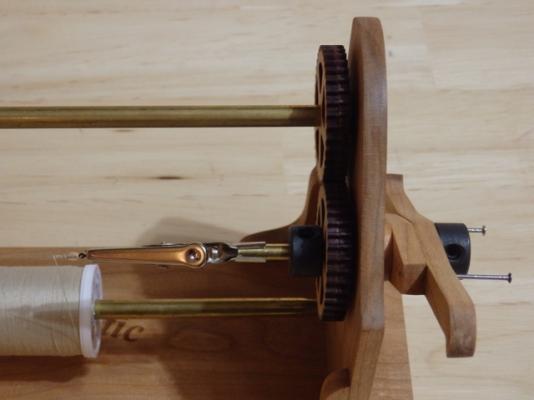
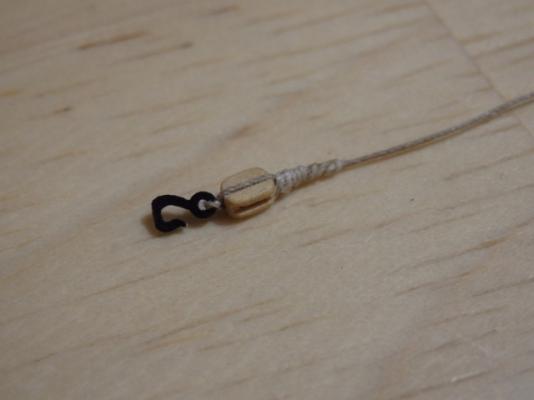
From my first attempt at rigging my tiller a few posts back, one problem I had was neatly seizing the blocks. Things just got worse as to help with the scale, I've reduced the my block size to 3mm from 4mm and I am also using much thinner seizing thread as Brian recommended. Now I bought Chuck's Serv-o-matic during his recent sale and thought of a way this past weekend to use it to help me seize my blocks. Perhaps this is old stuff to many, but figured I'd share in case it helps someone.
Pictures tell the story, but I clamped some 3/16in brass tubing to the gears using some 3/16in drill stops. I then glued some connector clips to the 3/16in brass tubing. These fixtures, that are quickly removable, allowed me to hold the small hook and block firmly and use the Serv-o-matic to seize the block. I still need a lot more practice, but you can see in the final picture there is some neater seizing starting to emerge. The looser part you can see was because I removed the block from the machine before the 50/50 glue mix had dried fully and the rope loosened slightly. Fewer turns may help things look neater as well.
Anyway, I think I now have a way to seize these small blocks neatly and also much faster. Acid test will be when I try to use the 2mm blocks I bought to do my cannons!
Hope you found this of some interest...now it's back to my rigging which is proving pretty fun!
Cheers,
Nigel.

- Jack12477, SawdustDave, _SalD_ and 5 others
-
8
-
Hi Nenad,
Really like the way you have planned and then worked through making these panels.
Great work and the result is wonderful.
Cheers,
Nigel.
- CaptainSteve, Omega1234, GLakie and 1 other
-
4


Red Dragon by UpstateNY - FINISHED - Artesania Latina - Scale 1:60
in - Kit build logs for subjects built from 1851 - 1900
Posted
Hi All,
Again, thanks for all the comments and likes everyone..
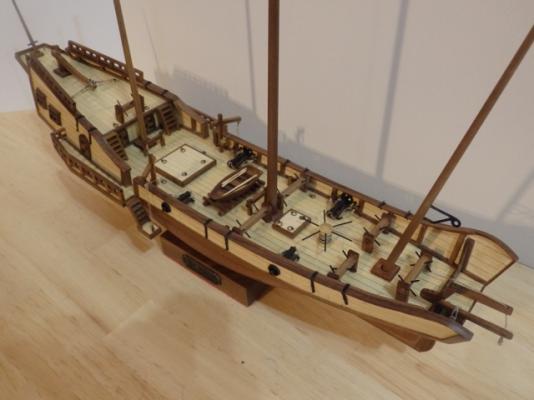
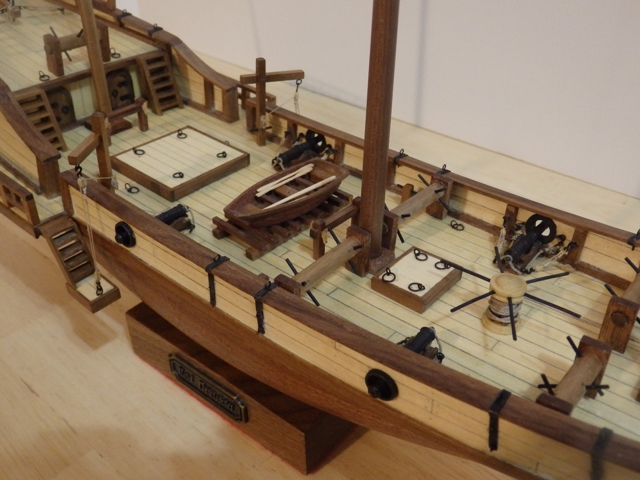
It has been slow going as I learn, but I've made a little progress on the rigging. All the double blocks for the shrouds have been seized to the eyebolts ready for attaching to the chainplates. Hard to tell from the pictures, but the top of the mainmast shrouds were then served where they wrap over one of the metal crossbars at the top of the mast. Finally, before tightening the shrouds, pairs of single blocks were attached to the mast using the other crossbar. These pairs of blocks will be used later when the sails are added.
Now on to complete the fore and mizzen mast shrouds...hopefully this will go a bit faster!
Cheers,
Nigel.