


IgorSky
-
Posts
1,651 -
Joined
-
Last visited
Content Type
Profiles
Forums
Gallery
Events
Posts posted by IgorSky
-
-
Wow, amazing work Igor! You certainly are a master and an inspiration to other ship-in-bottle builders. Thank you for sharing your techniques!
Can I ask about the wave caps? When you first put the acrylic gel on the sea, it looked very white but in the final image, it looks like the wave cap color mellowed very nicely. Did you have to do anything to achieve that? Or did the acrylic gel become clear on its own?
Thank you Mike!
Yes, you are right! This gel becomes clean after drying.
- Omega1234, Chasseur, Landlubber Mike and 1 other
-
 4
4
-
From such chaos, such beauty emerges. I don't know how you keep it all straight with all those threads.
Bob
Hi Bob!
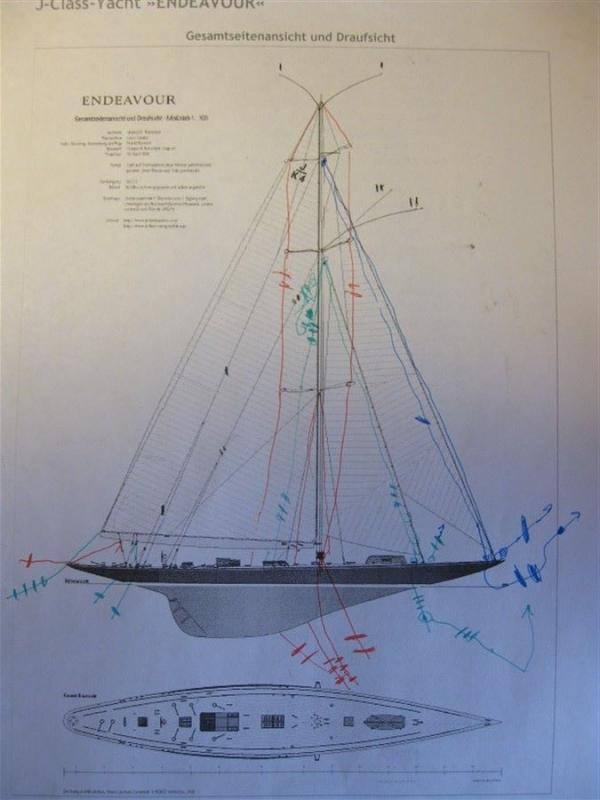
At this time I am prepared more carefully the algorithm of building model in a bottle and drew the scheme for it.
And I remember the main rule - do not rush! In the words of one of the ancient Chinese sages:to hurry - it is to do slow motions without stopping.

But as I said earlier, I felt horror, when I was looking at the slipway with the upper part of the hull and was seeing is this large number of yarns.

- Tadeusz43, Landlubber Mike, mtaylor and 4 others
-
7
-
Another marvelous build Igor. You are a very accomplished SOB builder
Many thanks for your compliments, Carl! But, of course, I'm just learning
Igor you are amazing! I would have been happy to have made the yacht as beautifully as you did. but then you had to go and fit it into a lovely bottle, I just sit and shake my head,...
Michael
Oh, thank you very much, Michael!
I have always with admiration watch your build logs, and, of course, I try to learn from you too!
With my best regards!
Igor.
-
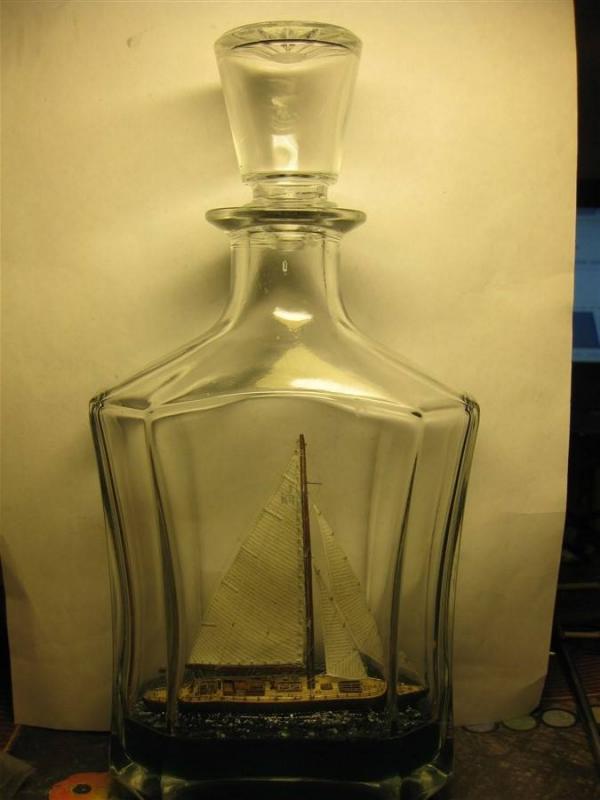
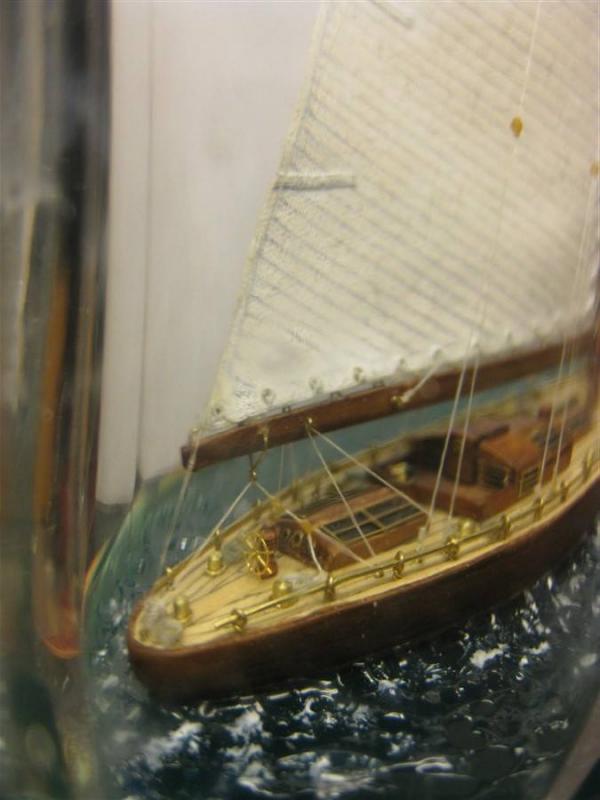
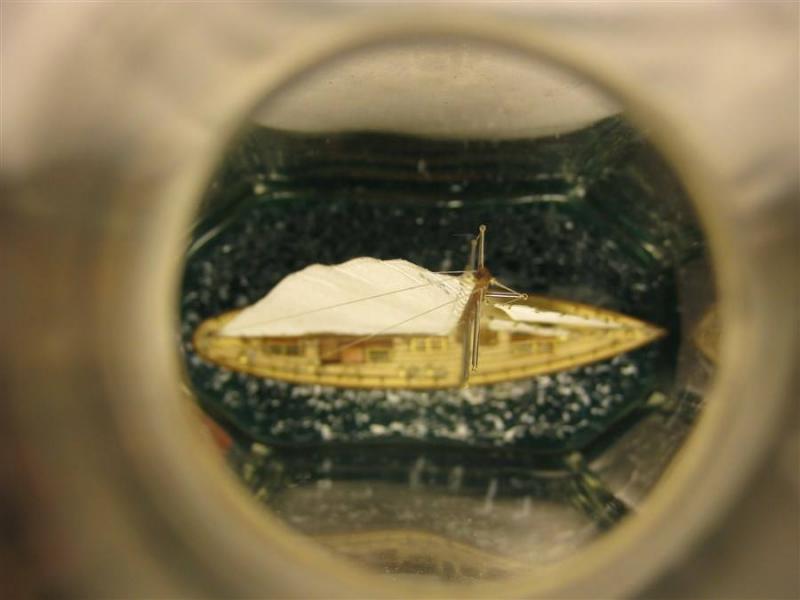
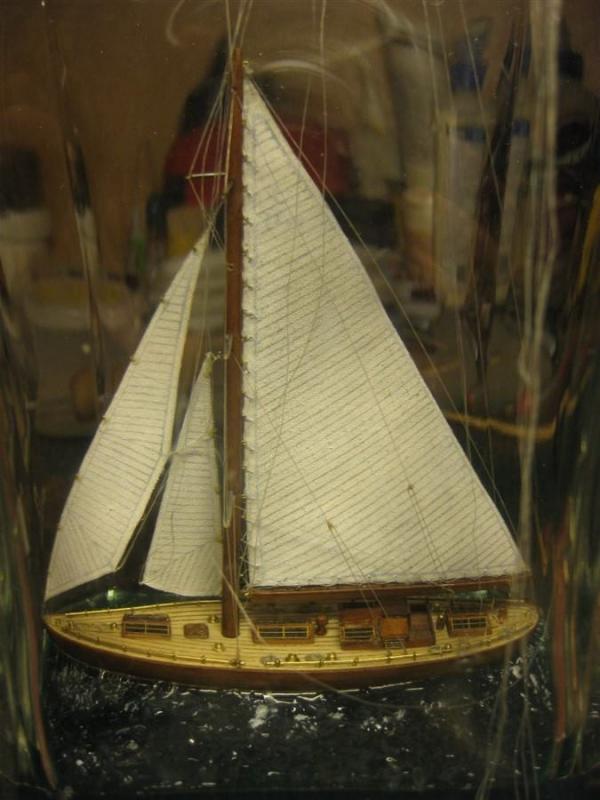
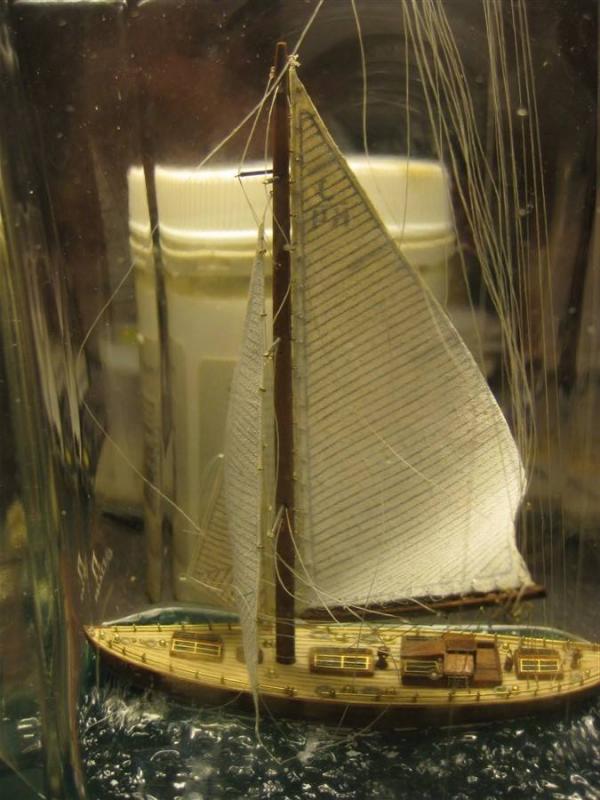
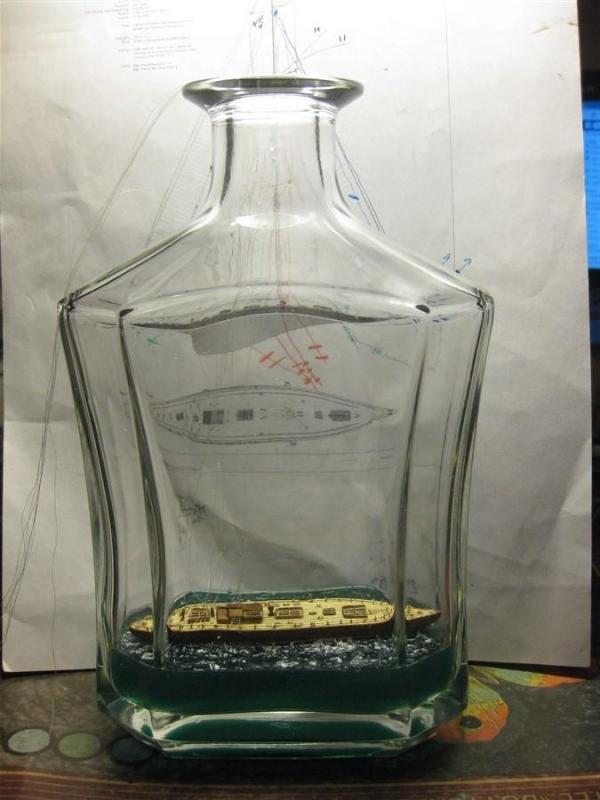
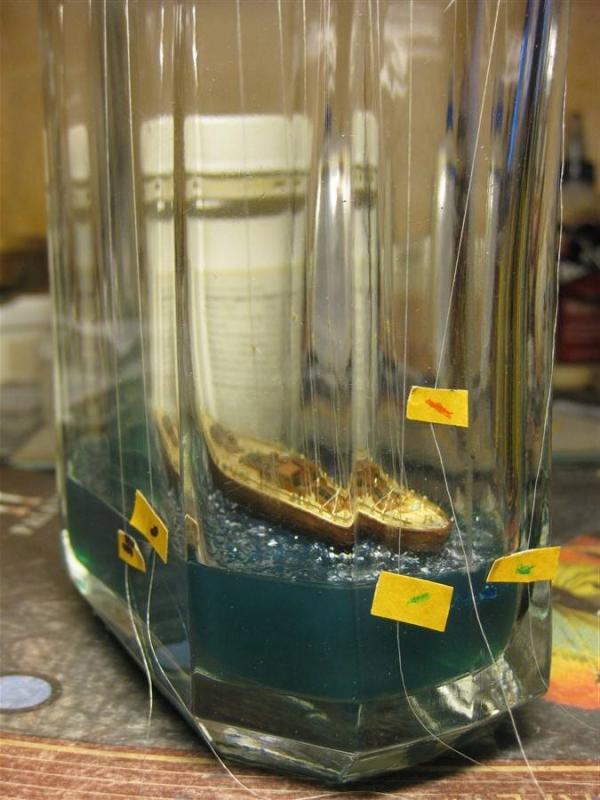
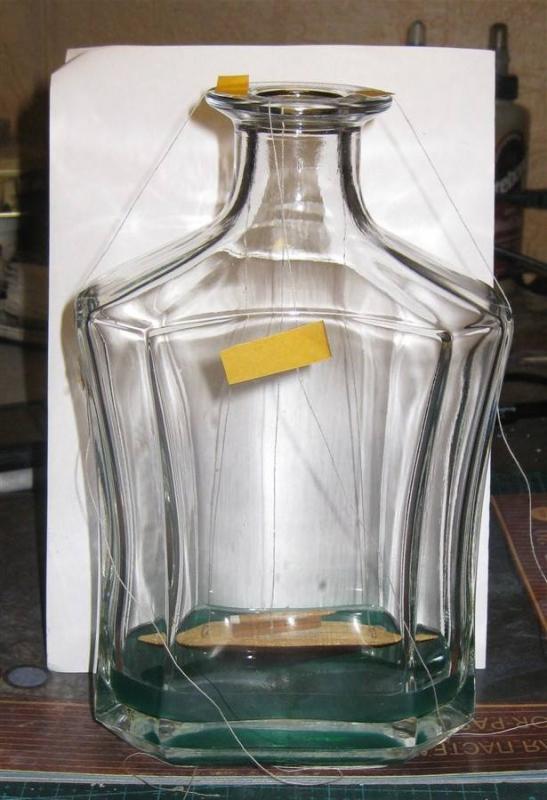
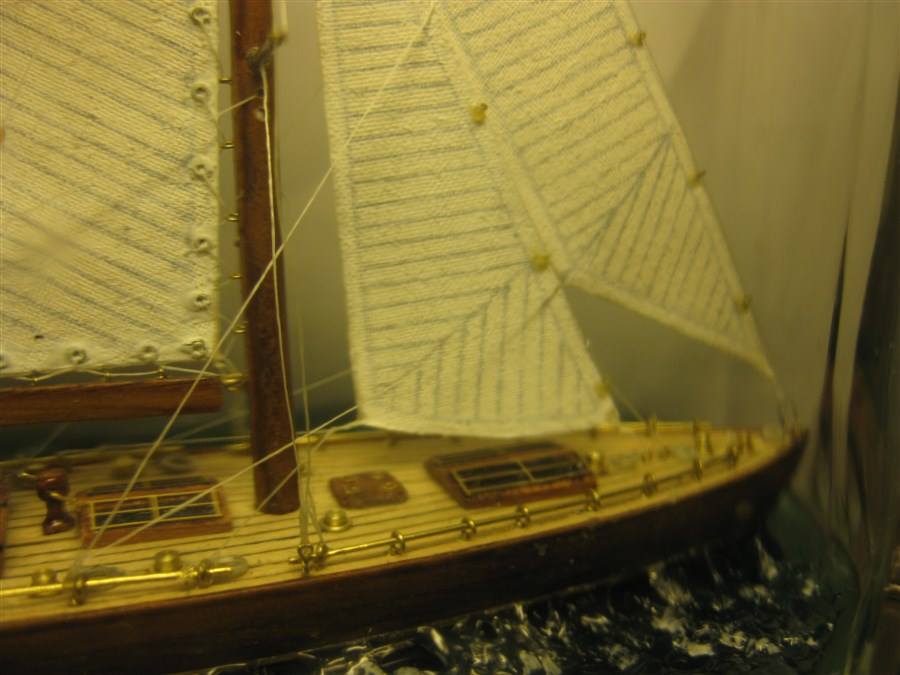
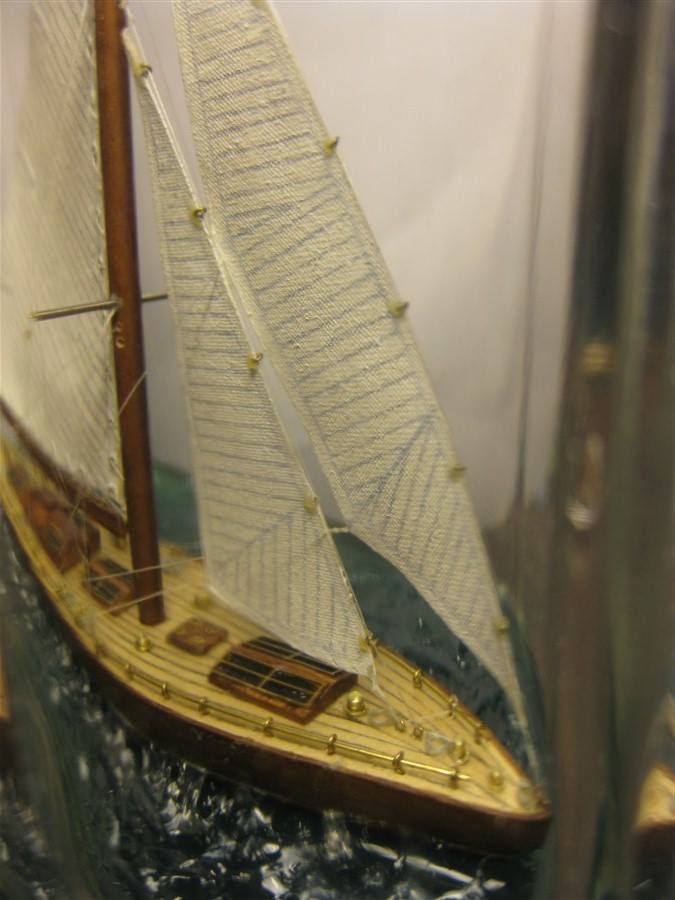
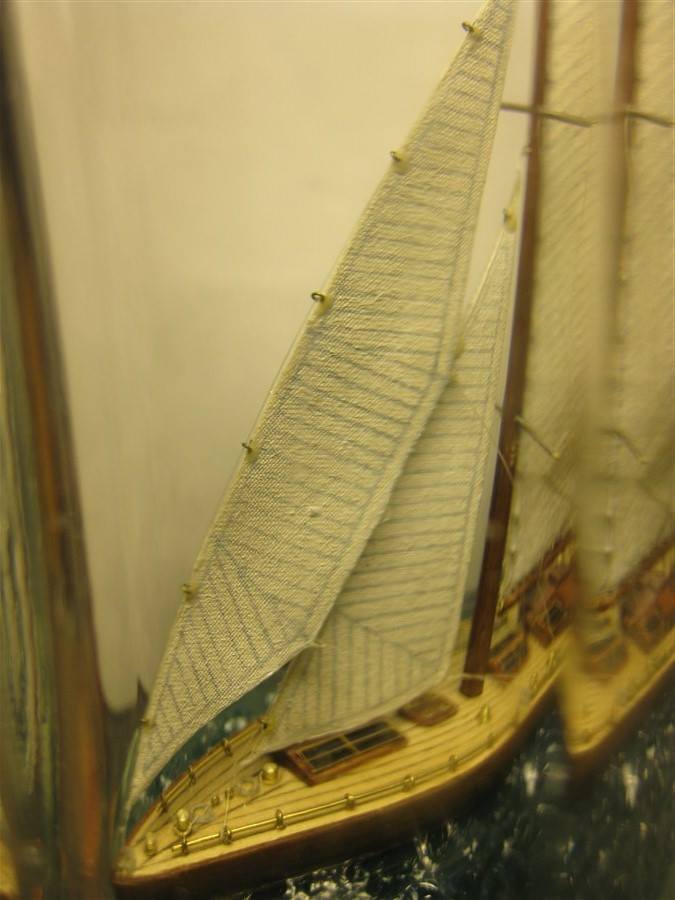
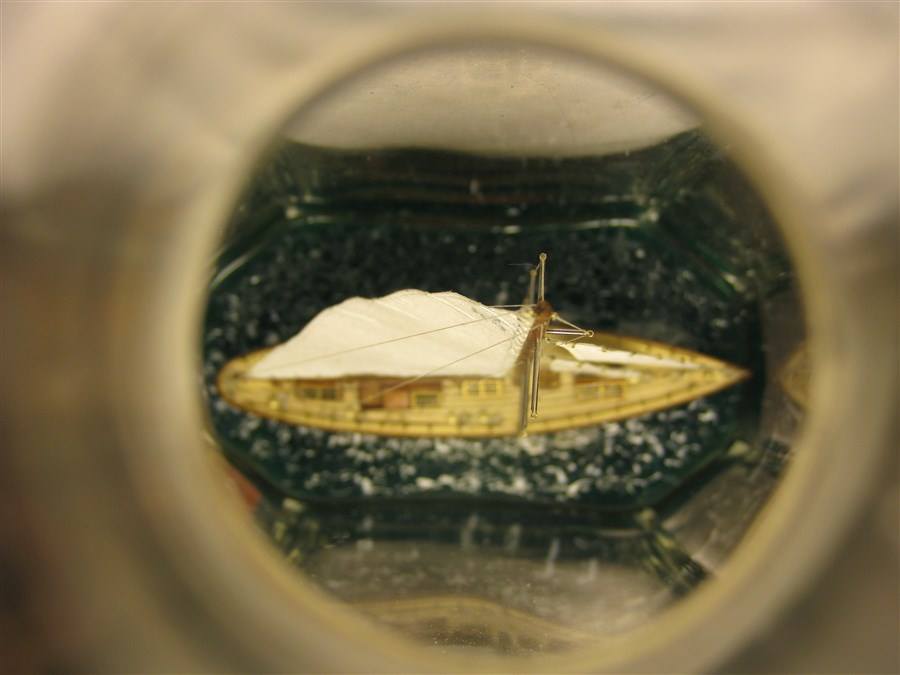
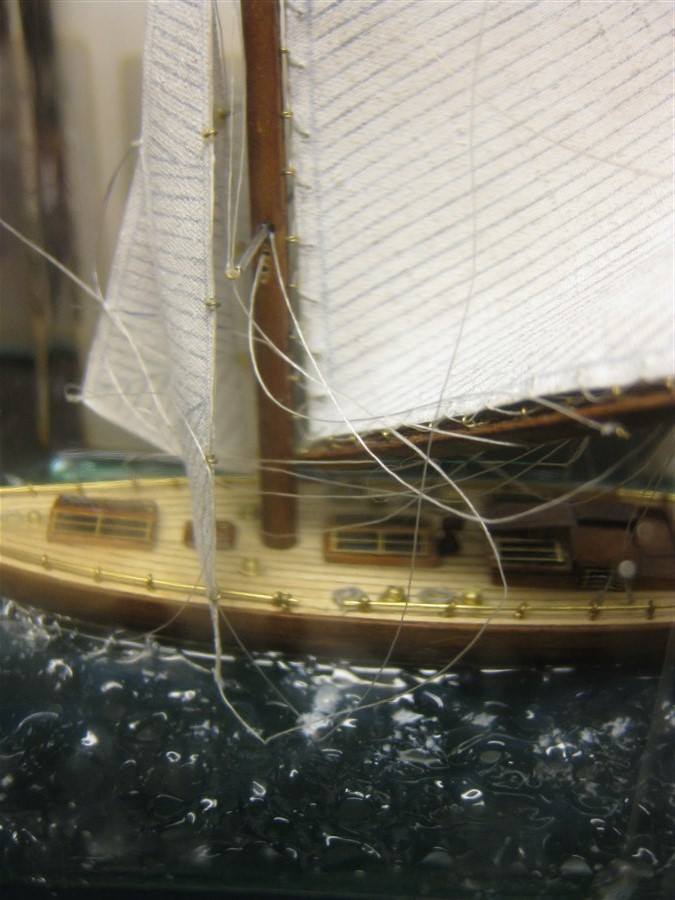
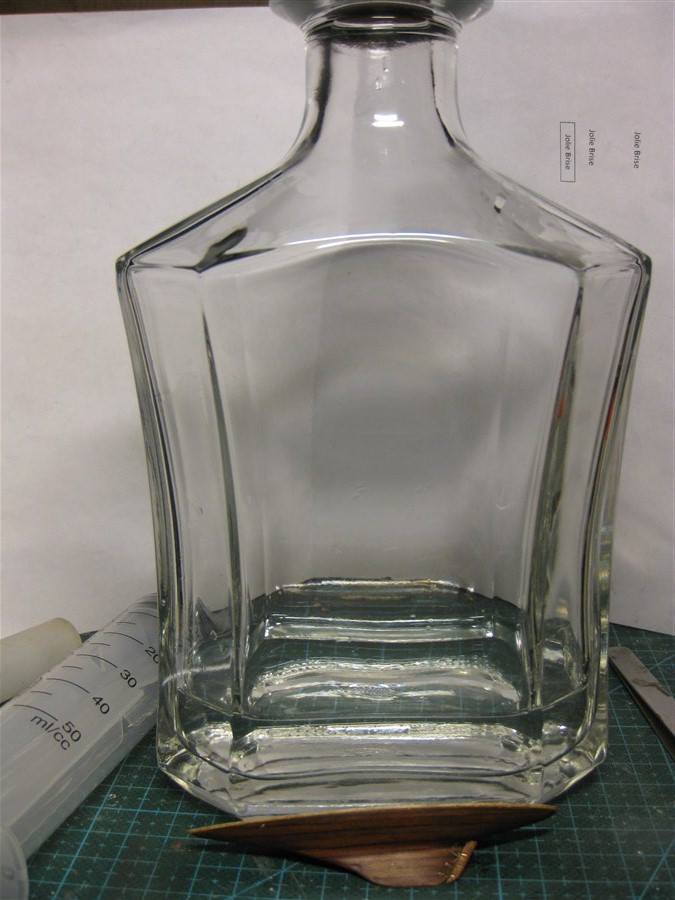
Well, I finally fixed and cut the last thread. I can relax and take a photo of the model with her spars and rigging through the bottle wall. Now, I still have time to clean the inside of the bottle, finalize the design of the cork, and other things associated with the blockage of the bottle.


- mtaylor, captainbob, GrandpaPhil and 4 others
-
7
-
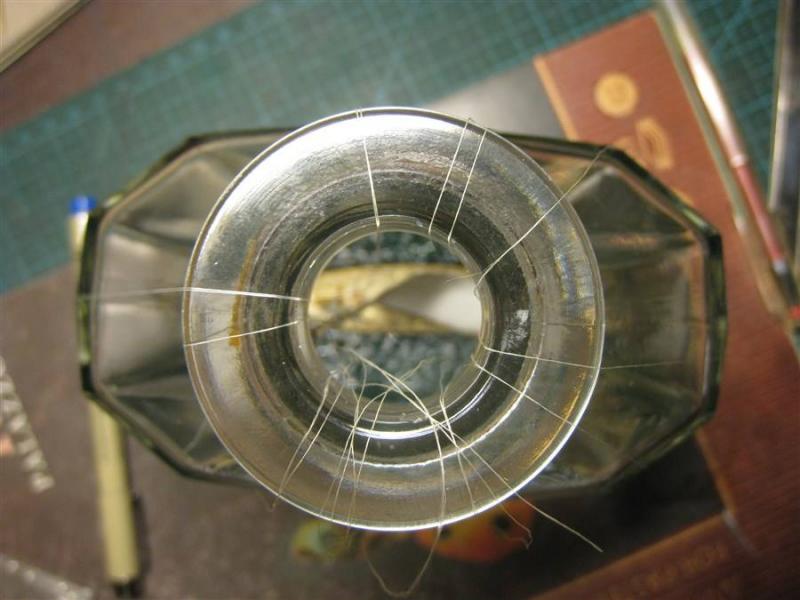
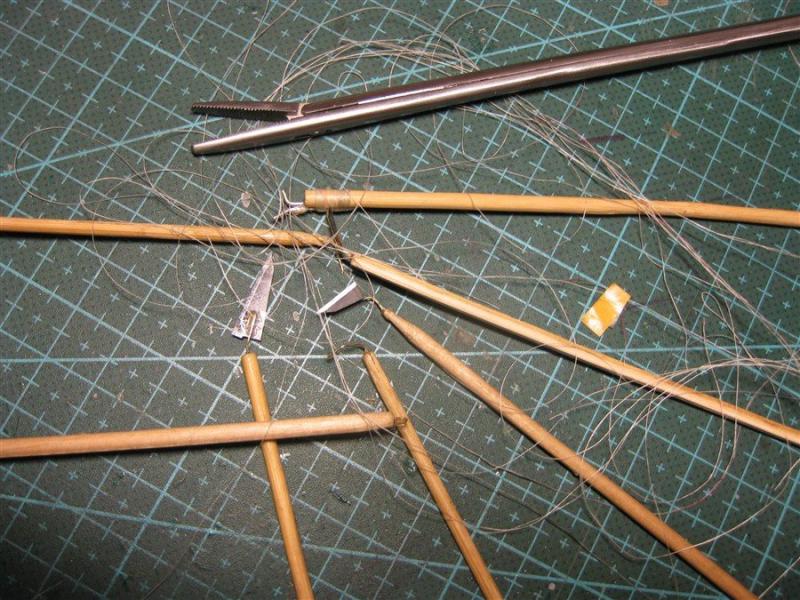
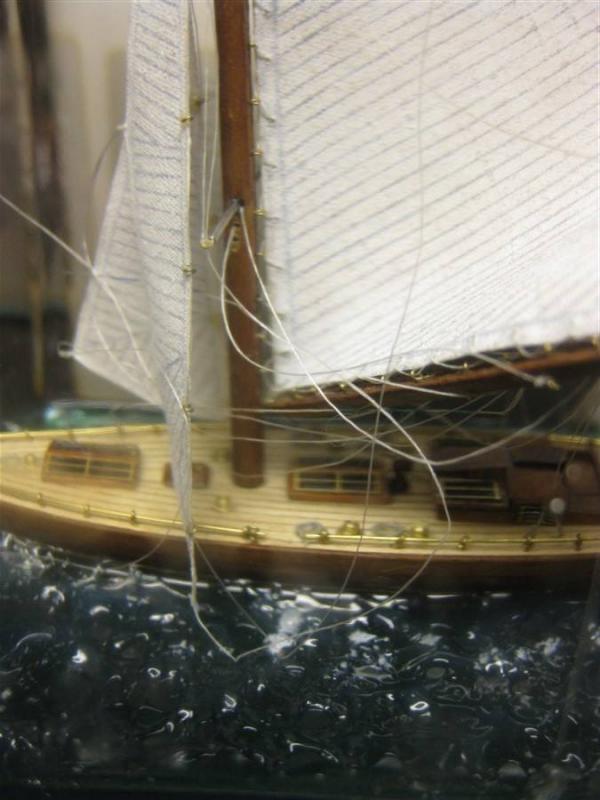
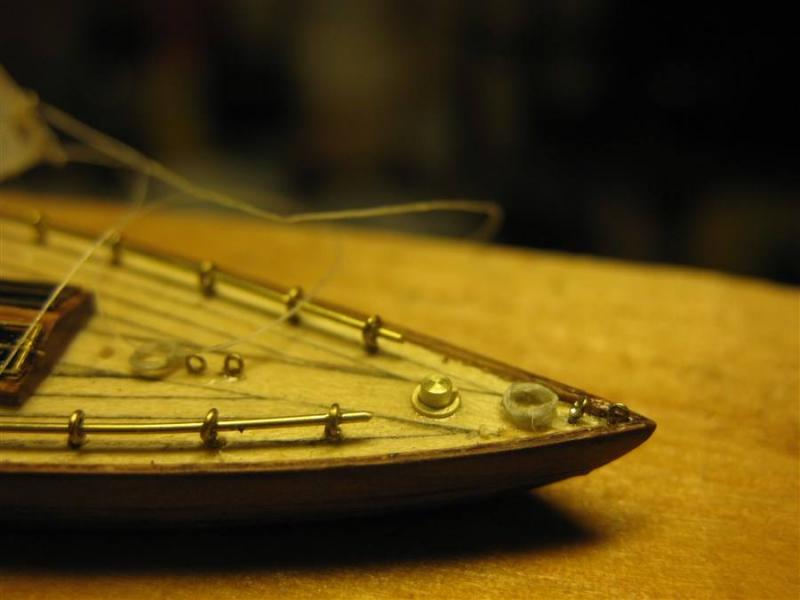
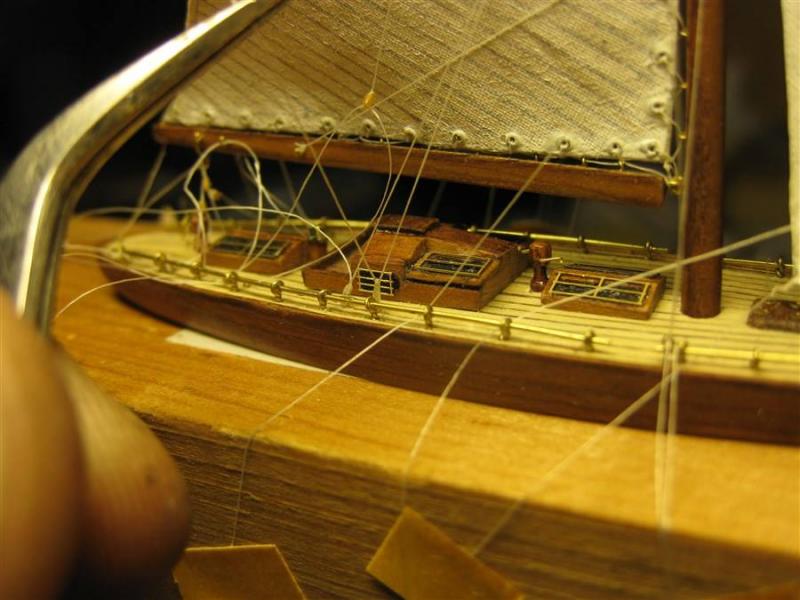
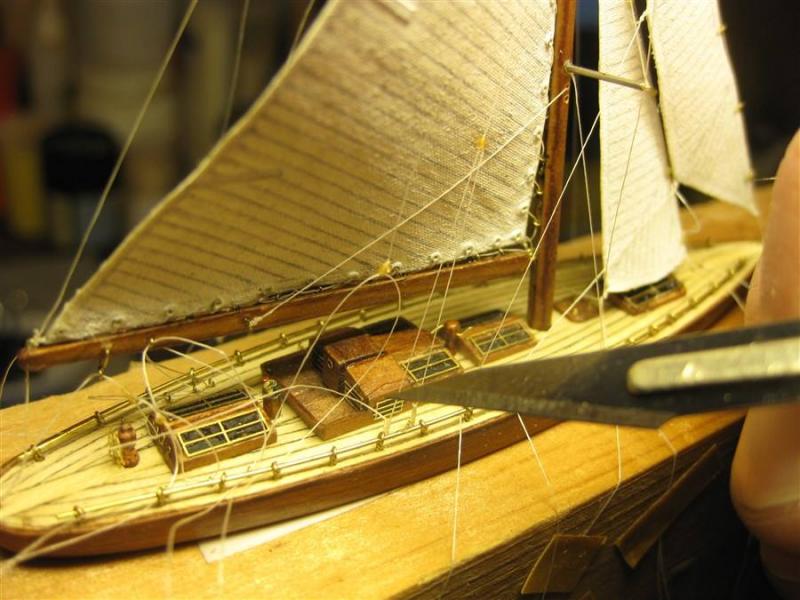
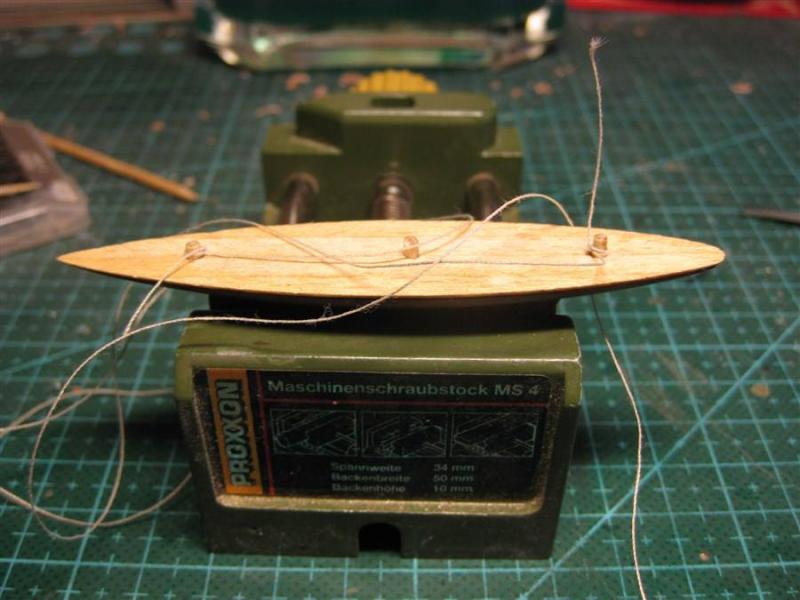
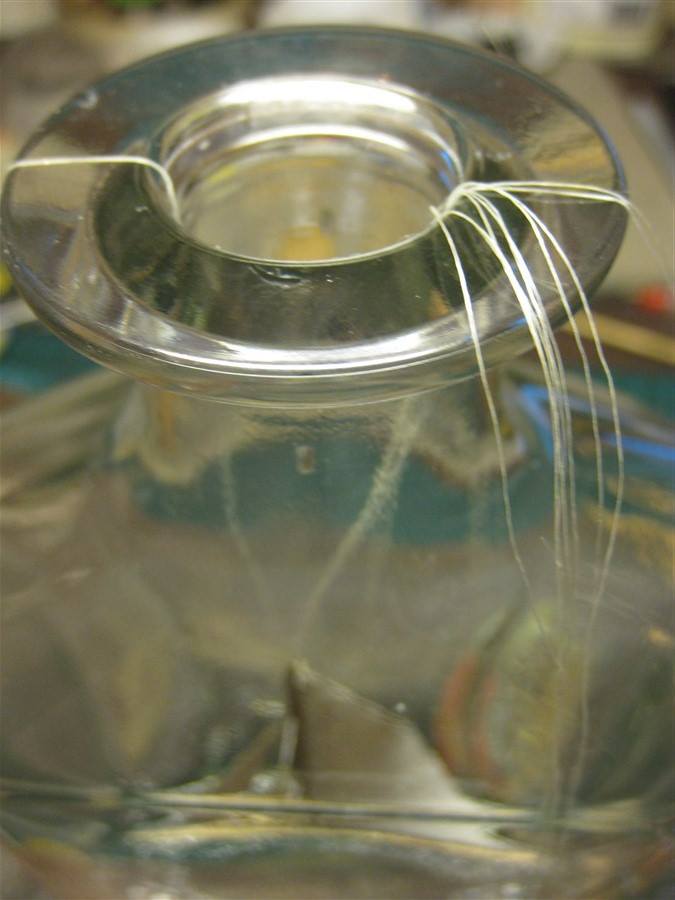
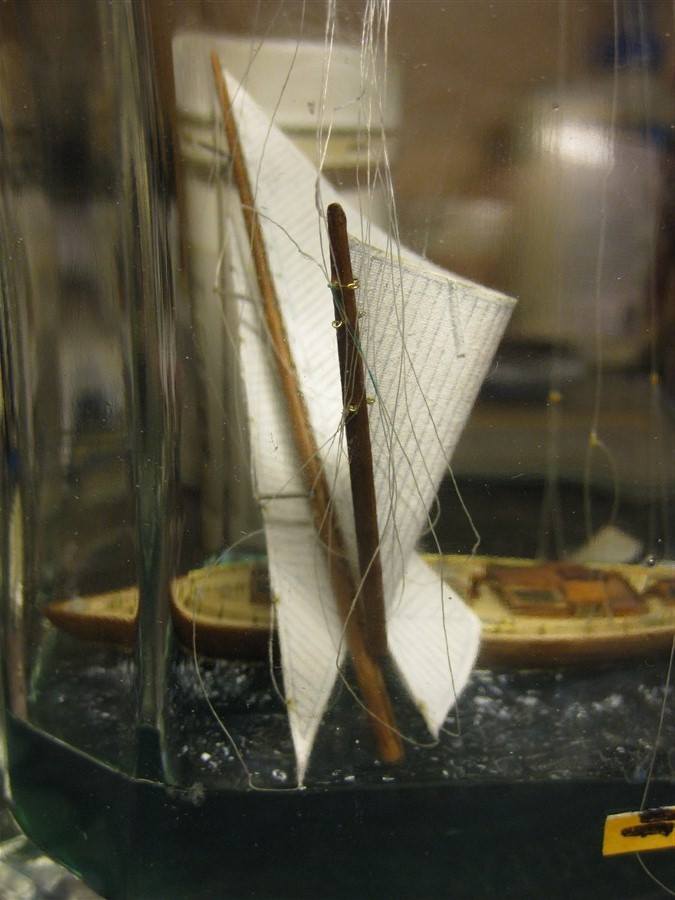
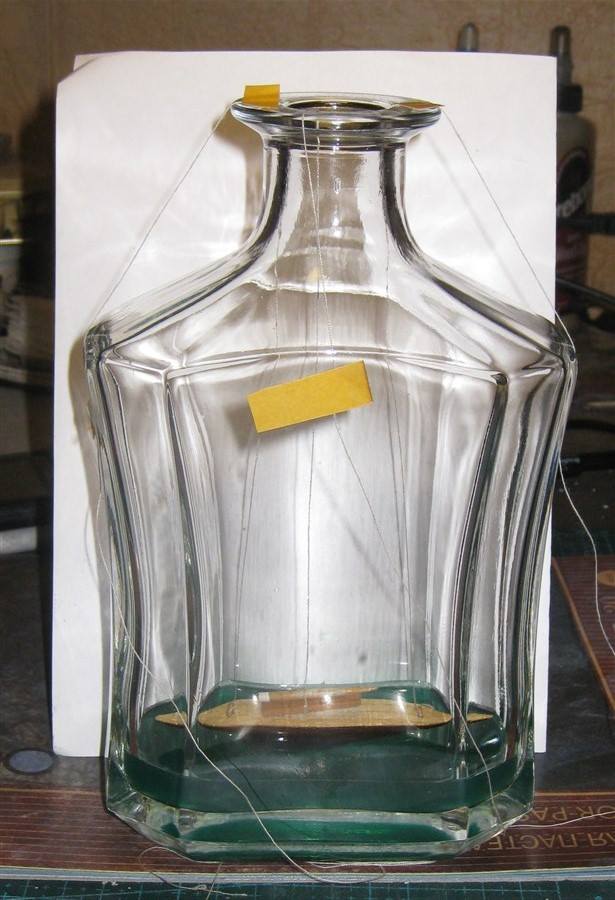
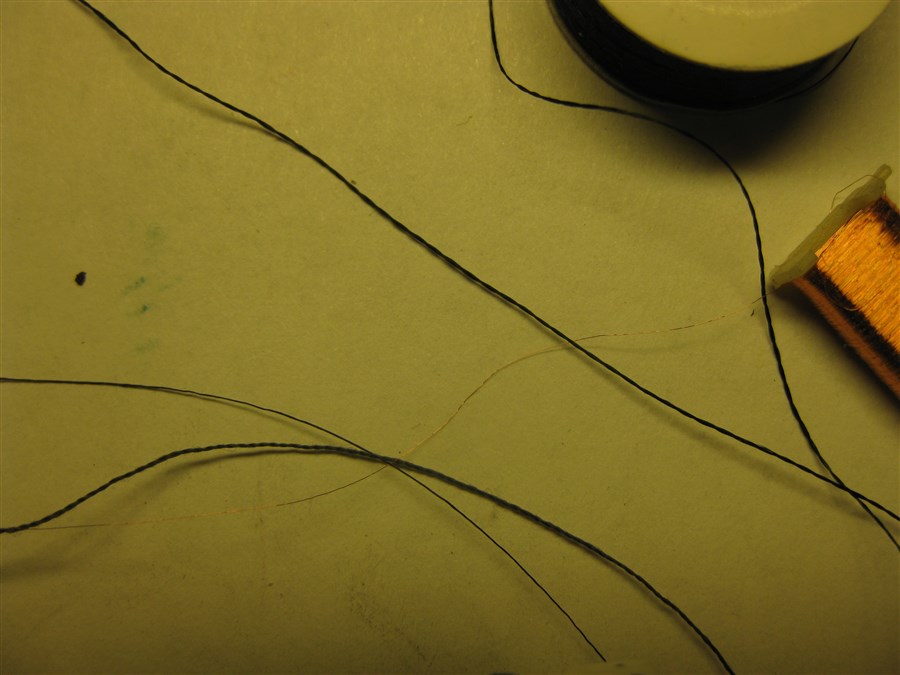
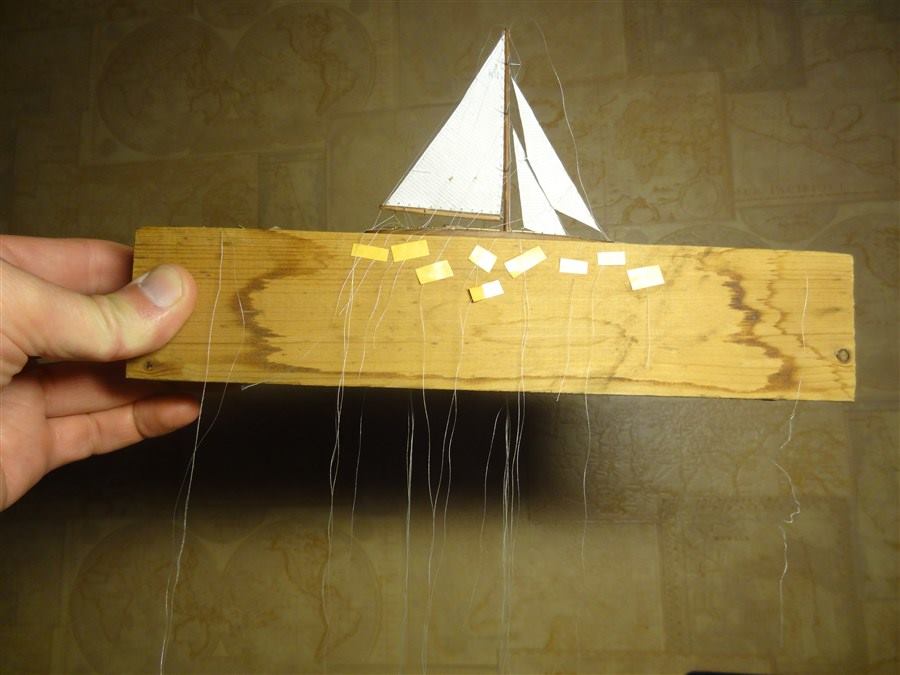
Next to me was necessary to sort out the threads, temporarily fasten the ends on the outside of the bottle with tape, and, slowly, begin their stretching, fixing, and cutting excess.


-
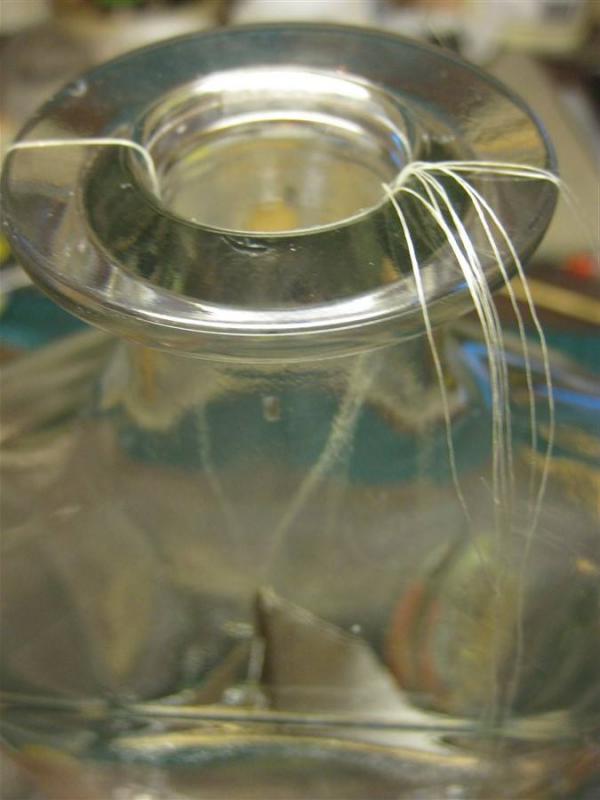
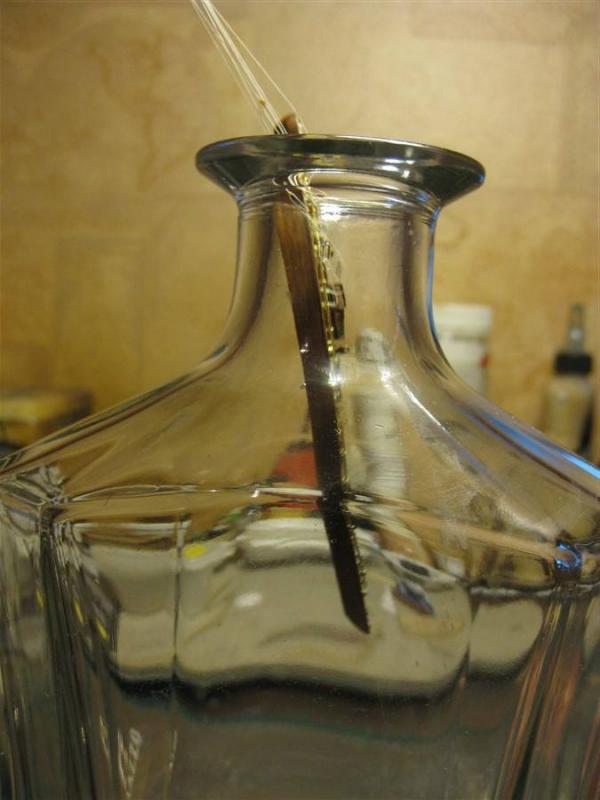
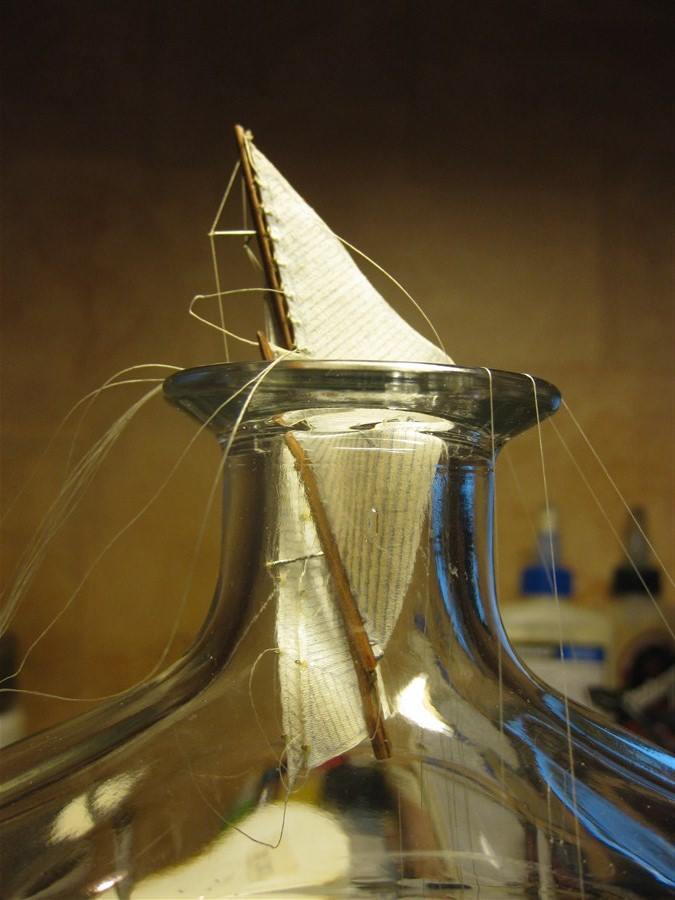
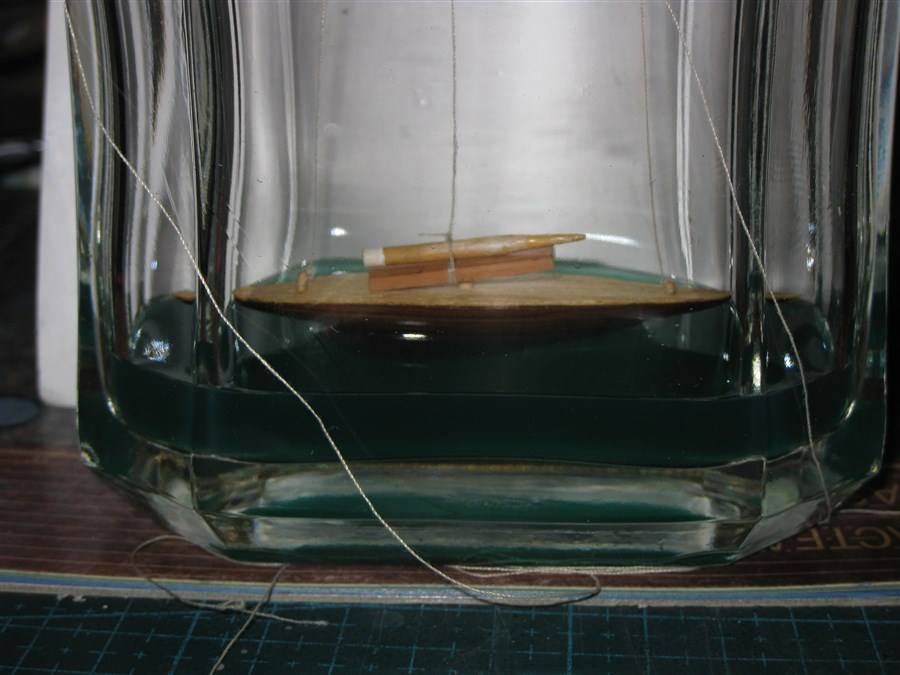
Well, that's ... I went to the most interesting and dreary part of the whole construction - installation of mast and tension of the rigging inside the bottle.
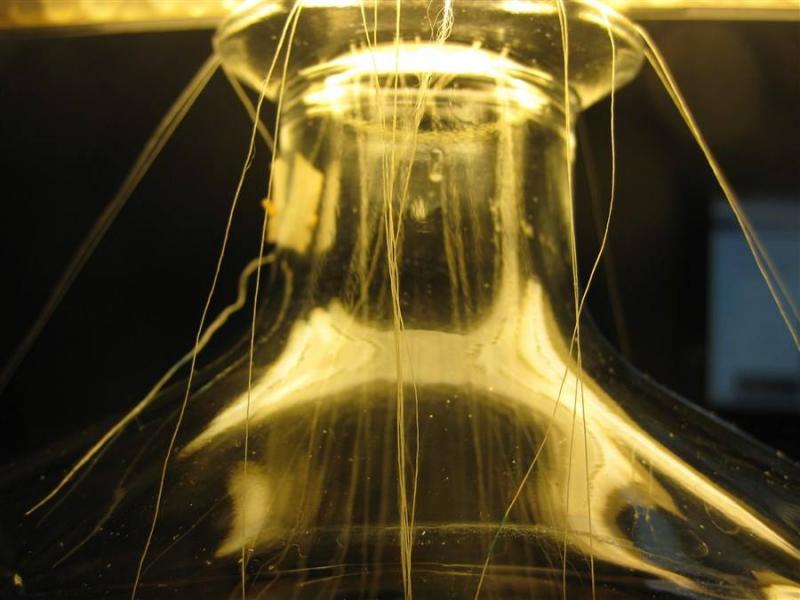
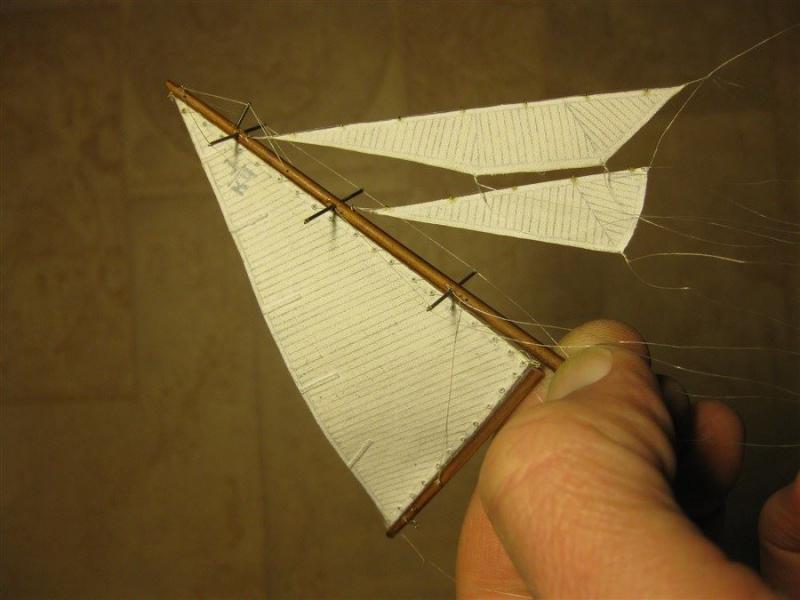
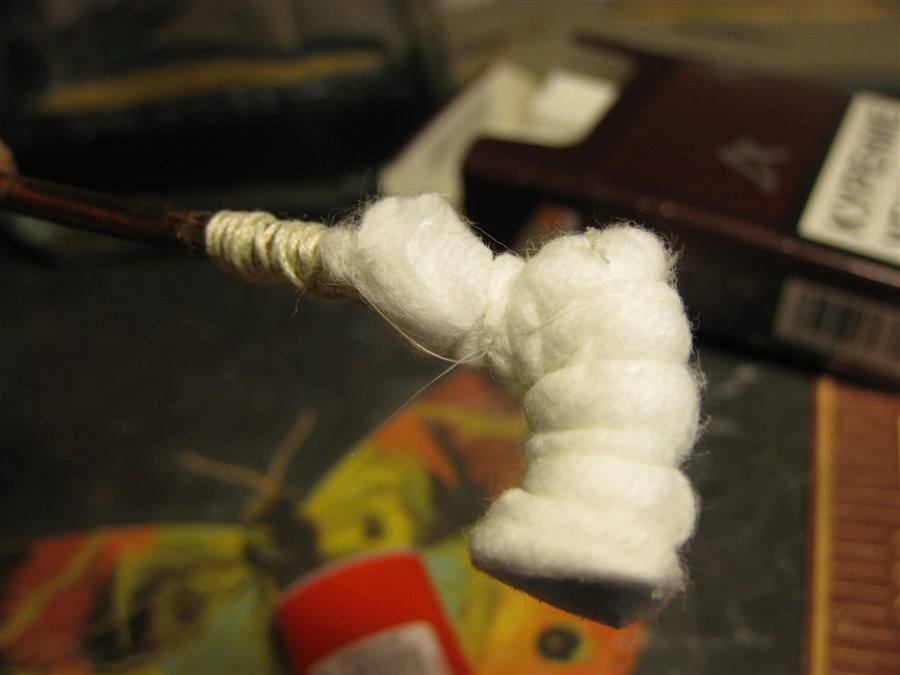
The boom is made movable, so I picked the mast with sails in a compact package and put it all into the neck of the bottle. Then I put the mast in a hole in deck. As a result, I got a not fixed mast and a bunch of threads coming out of the throat of the bottle.


- michael mott, KeithAug, cog and 2 others
-
5
-
-
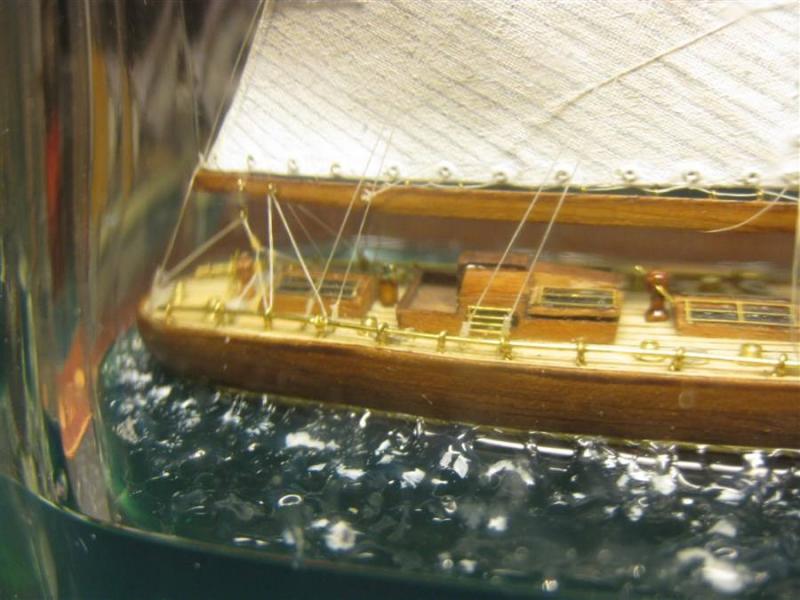
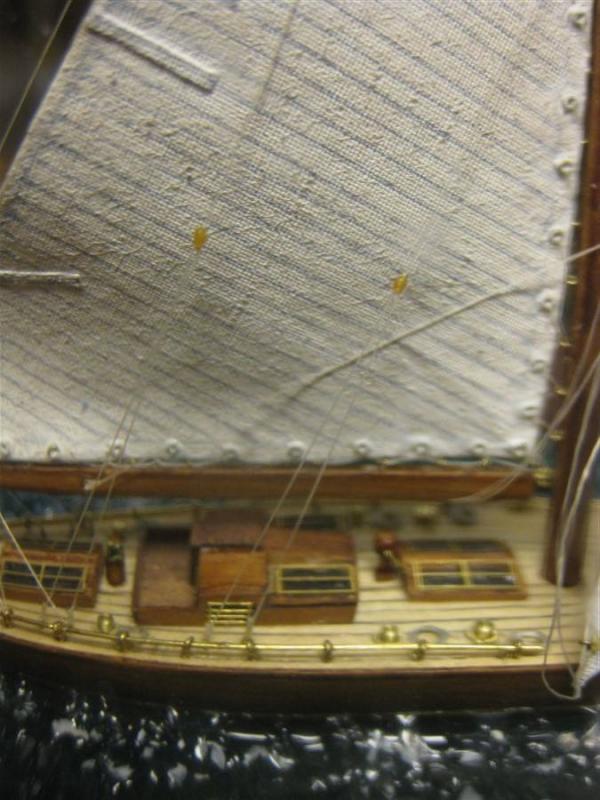
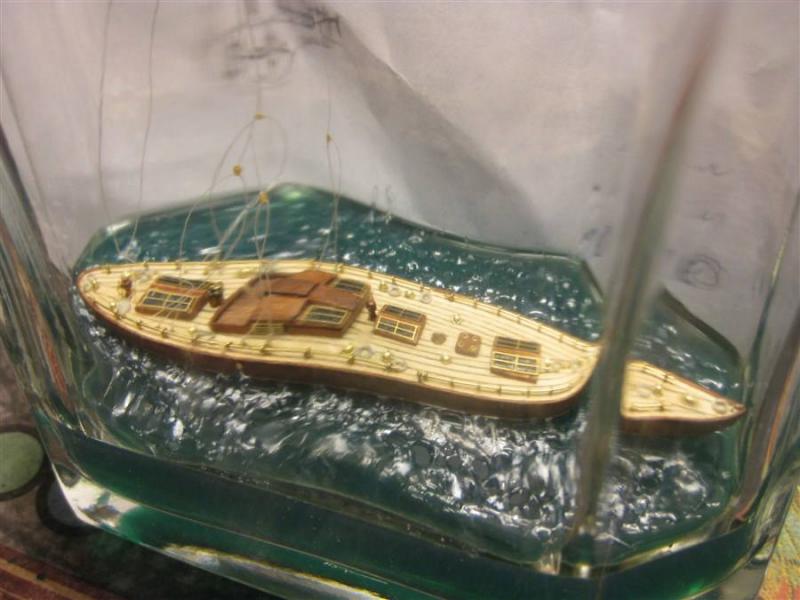
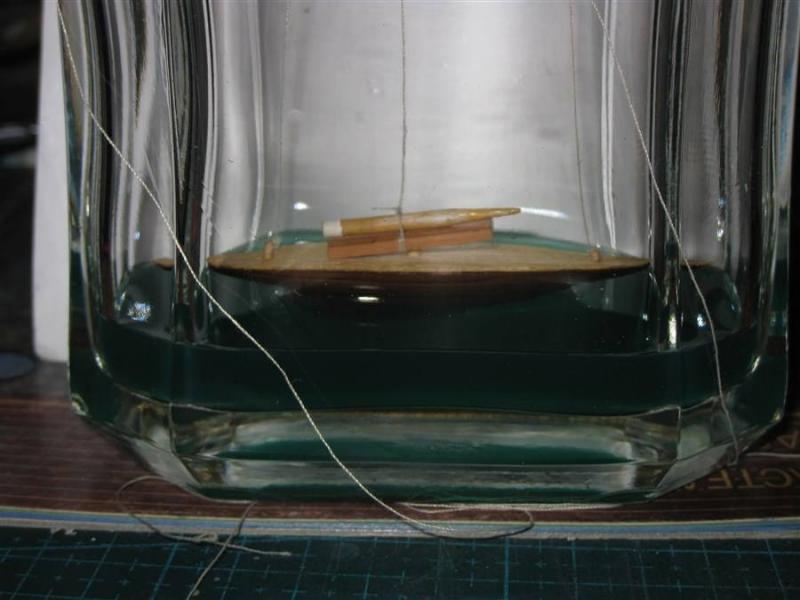
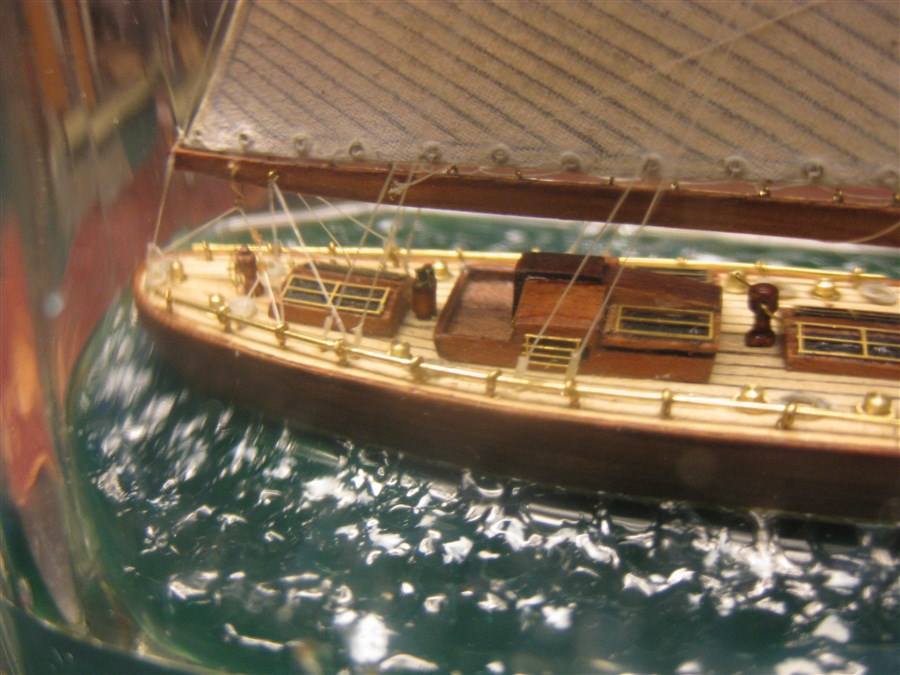
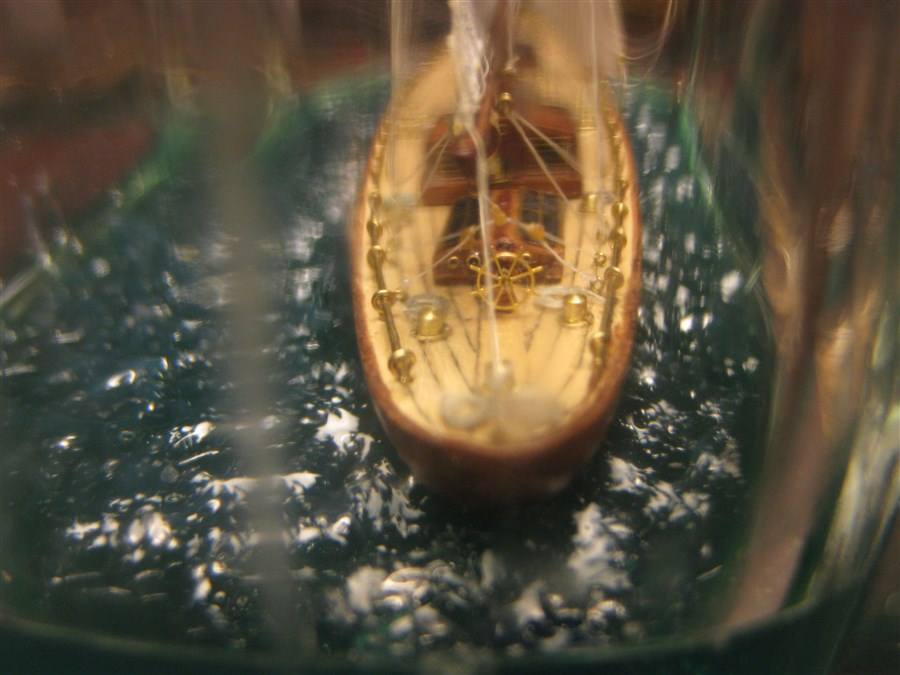
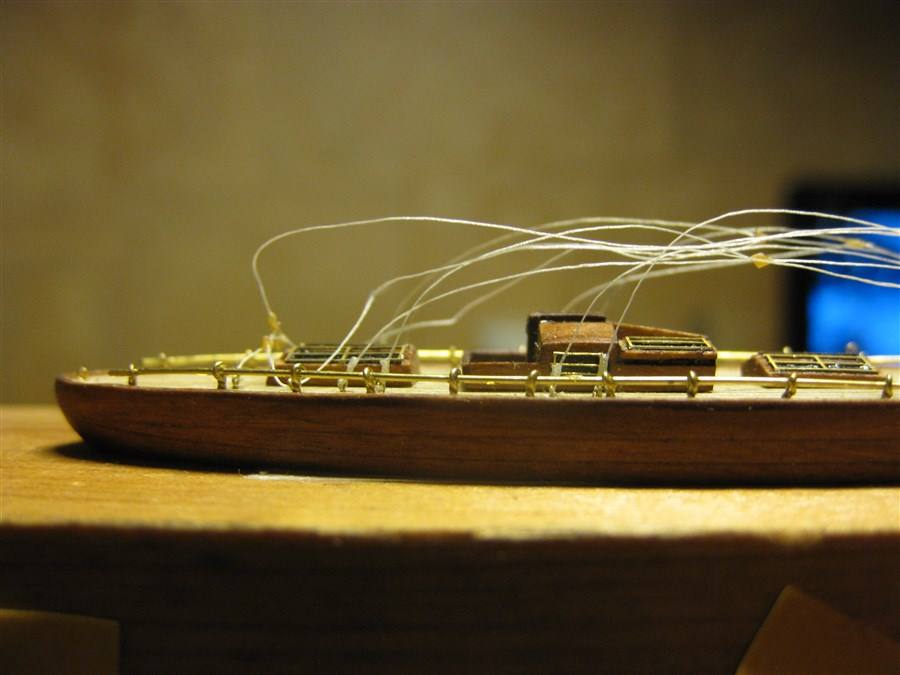
Now all are ready to place the above-water part of the hull in the bottle. I put it in a bottle. Then planted it on the studs, protruding from the lower part of the hull, put a little the glue in places connection of both parts and pressed. Then I unraveled part of the rigging, coming out of the throat of the bottle, and gave the thread ends on the outside of the bottle, so that they are not confused.

- KeithAug, michael mott, Omega1234 and 5 others
-
8
-
-
-
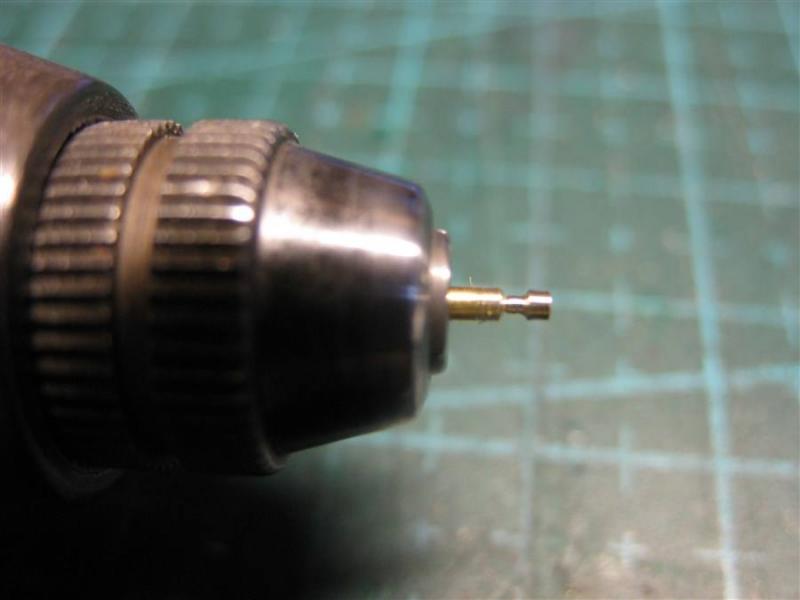
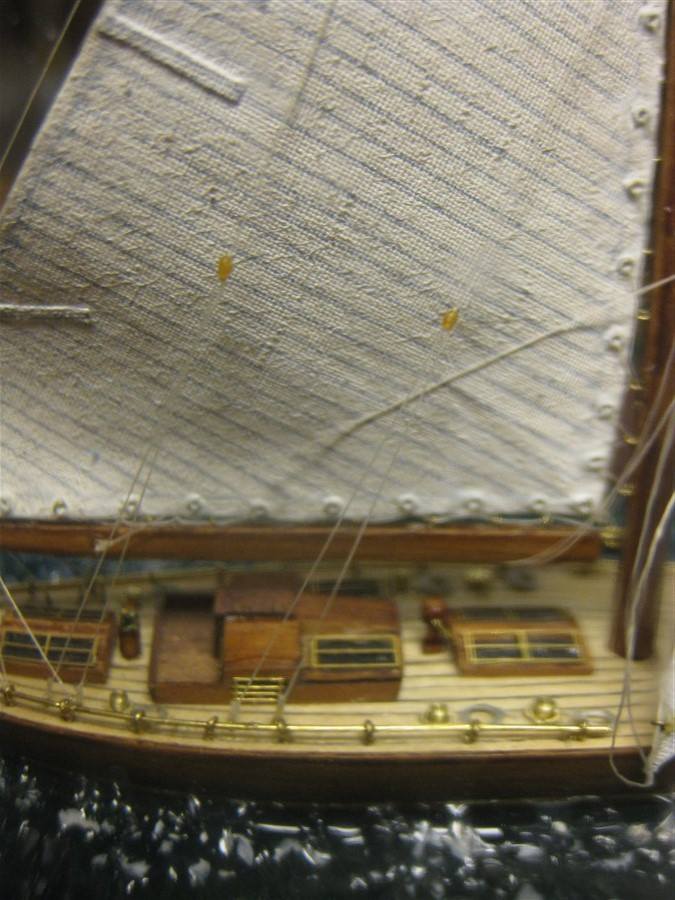
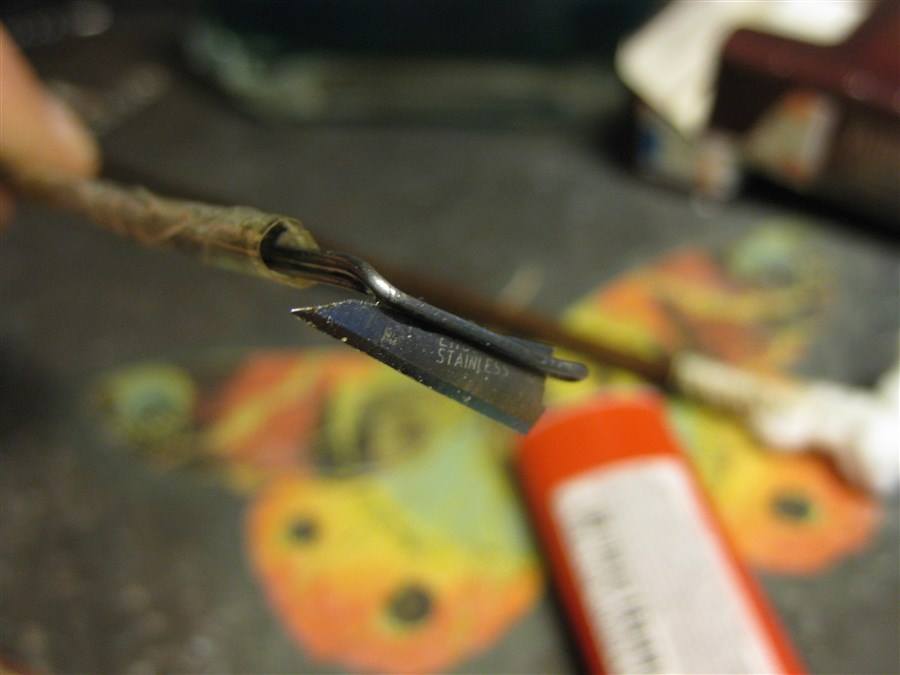
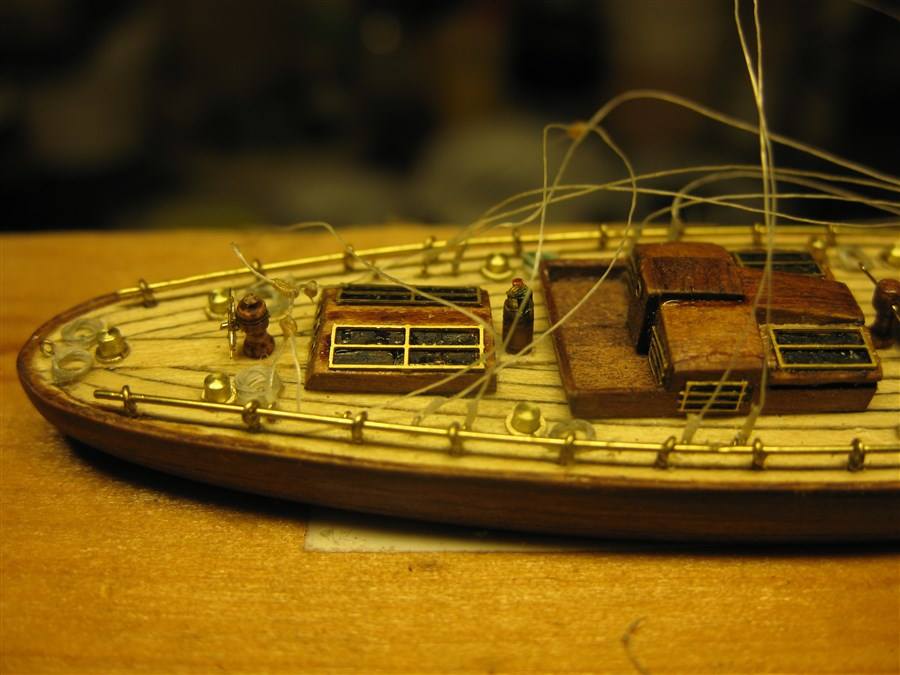
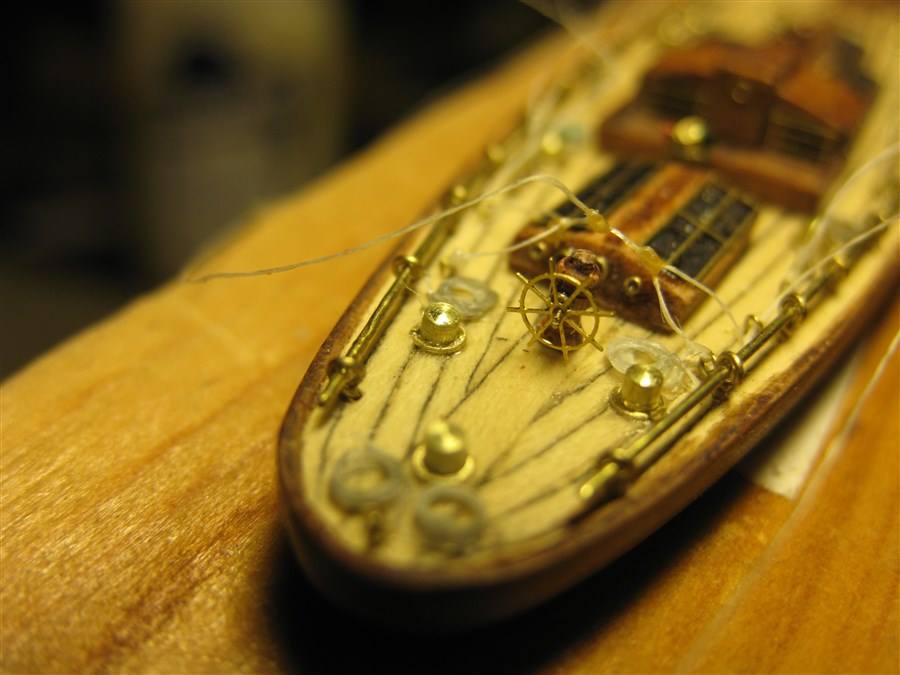
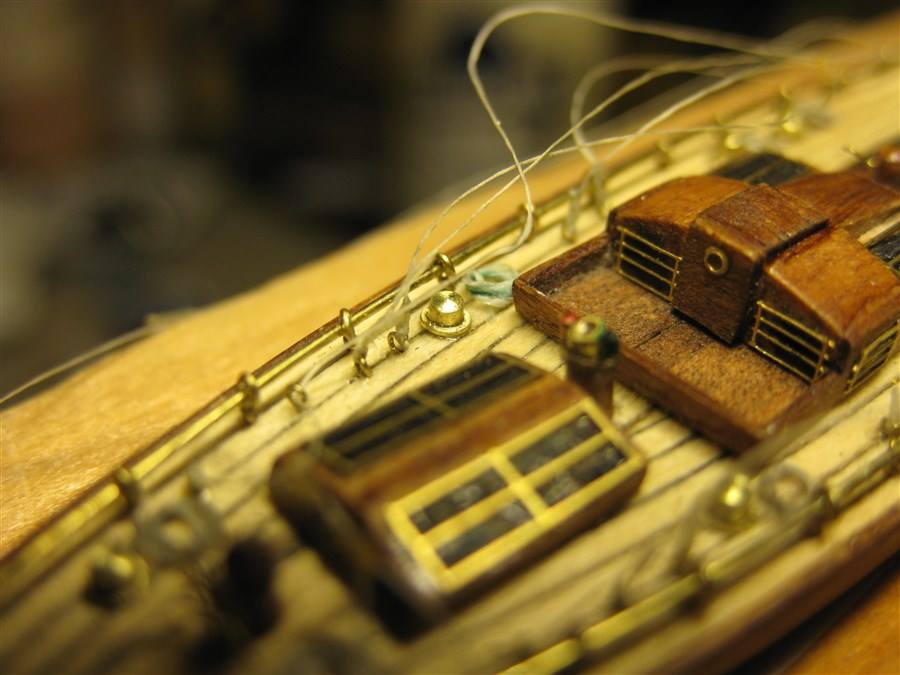
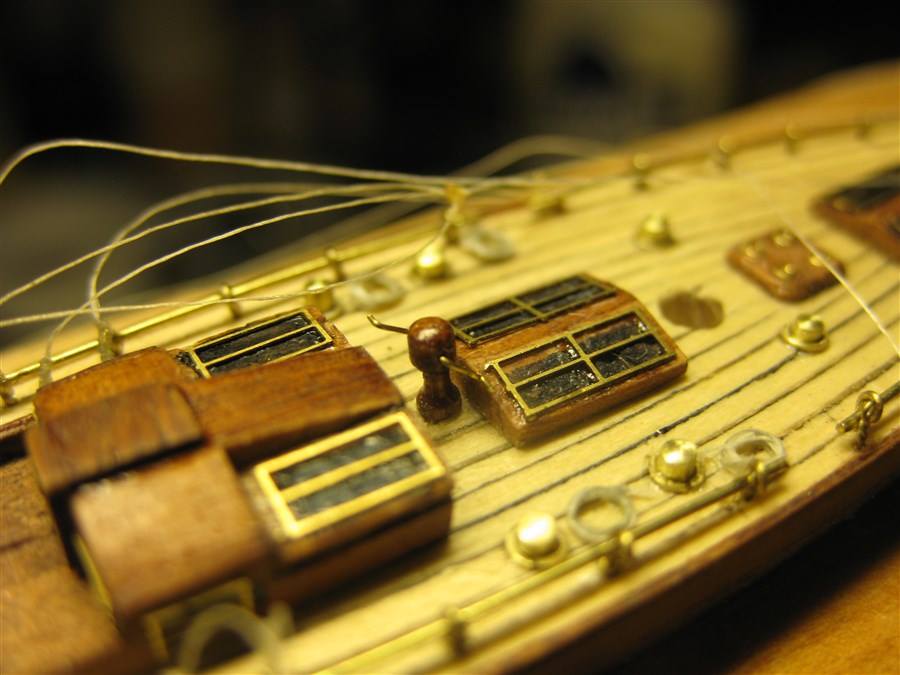
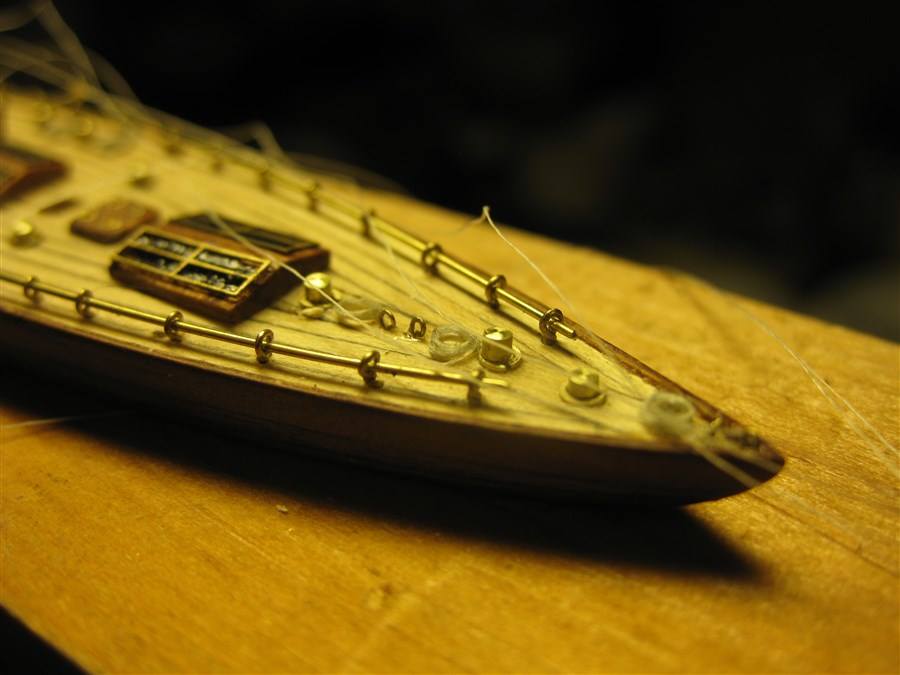
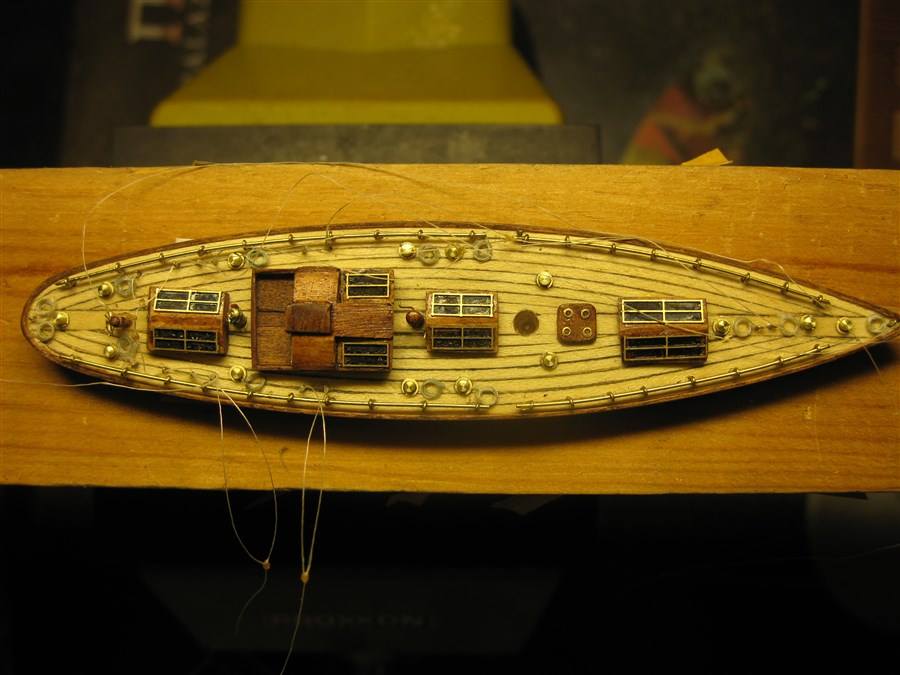
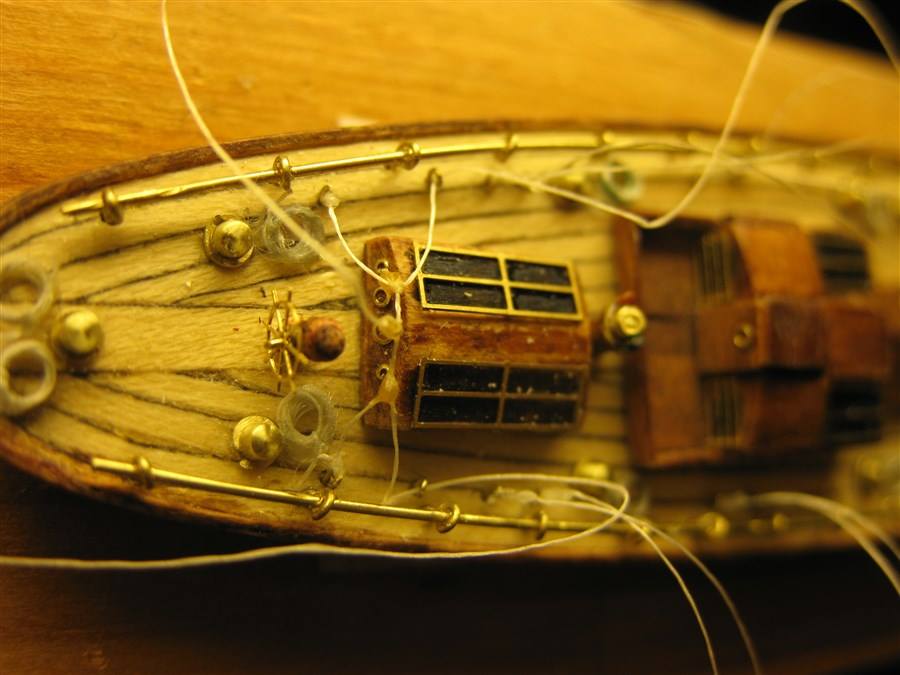
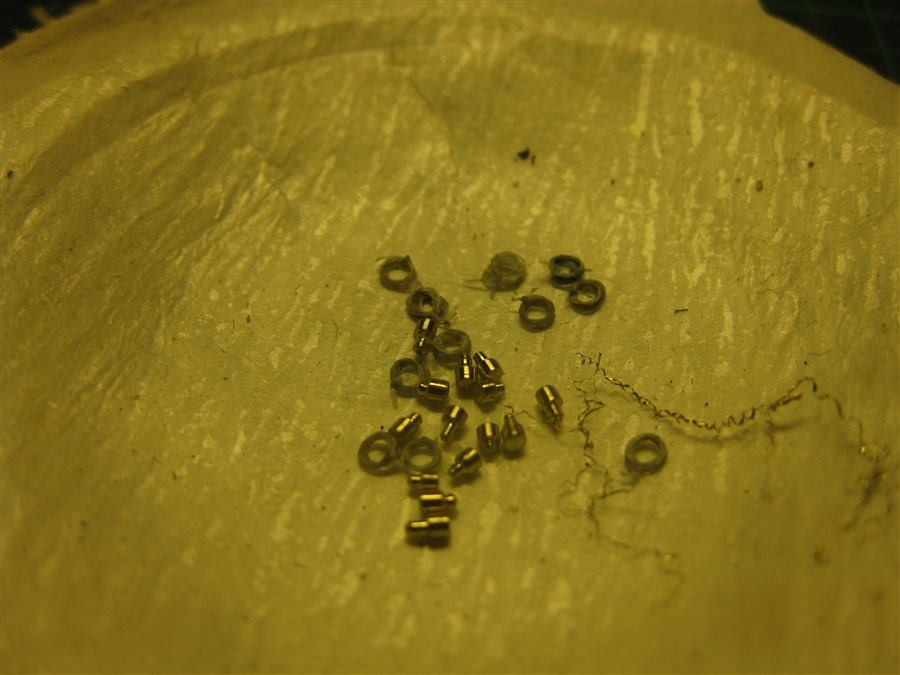
Then I remembered that I still wanted to place several winches on the deck and to put at the deck several the small winding running rigging. So I had to quickly to make the winches. I used to do that a thin rod of brass, drill and needle files purchased during vacation. Yes, a good tool ... it's just a song! The base of the winches - rings of brass wire, ground off on both sides with sandpaper.

- cog, Landlubber Mike, Omega1234 and 4 others
-
7
-
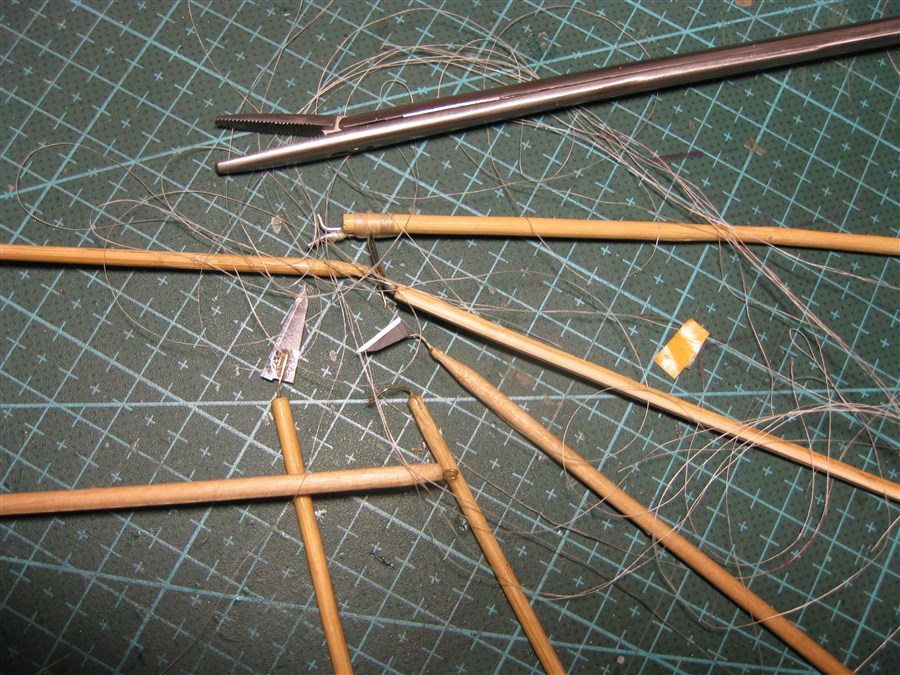
Thus, the gel was applied and, while the "wave" was drying, I proceed to the finalization of the process preparation of rigging to accommodation the top part of the hull into bottle. Firstly, it is necessary to fix those ends of the cut and the rigging which should be originally fixed on the deck. Secondly, I need to separated all parts of the rigging, at the same time making drawing assembly scheme and to mark these yarns in accordance with this scheme.
-
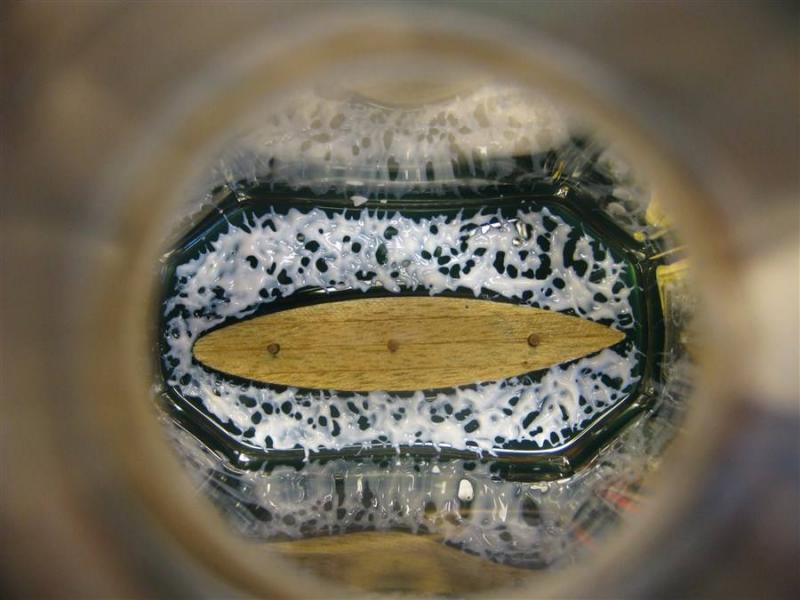
After waiting during another day, I realized that I did not receive the required level of transparency
 . That is, if I look at the top or bottom, the result is not bad, but when viewed from the side, the hull has been not seen through the "sea" as much as I needed. You may need to do the color is much less intense and do not use more pigments. In parallel, I quickly made another small project, for which I used this material. But has been used quite a small amount of silicone and "sea" was more transparent. T .e. was identified the need to continue to experiment with this silicone.
Well, while I continued to work with the "sea". The next step - an imitation of the waves with the help of clear acrylic gel.
-
-
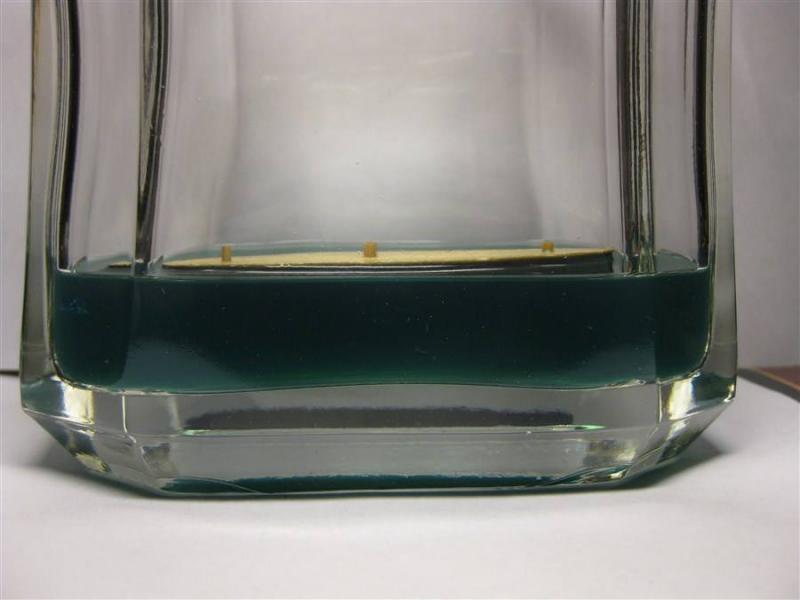
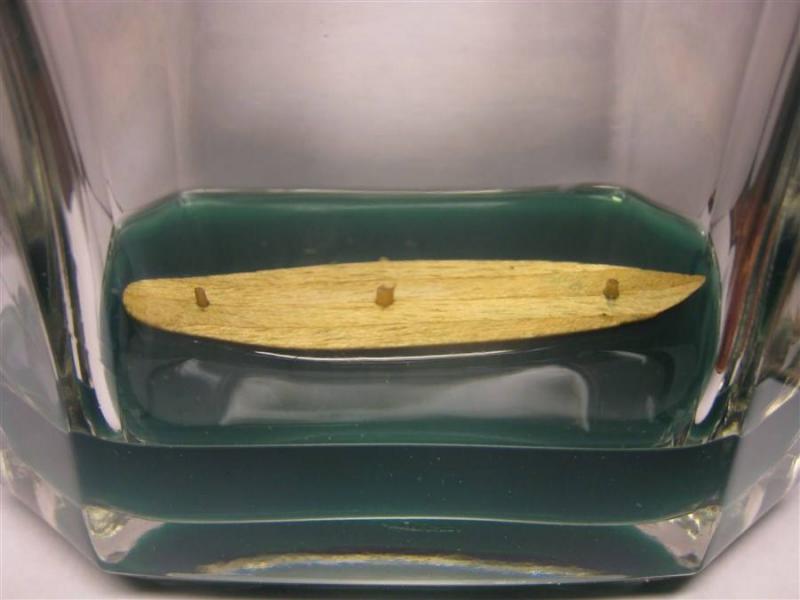
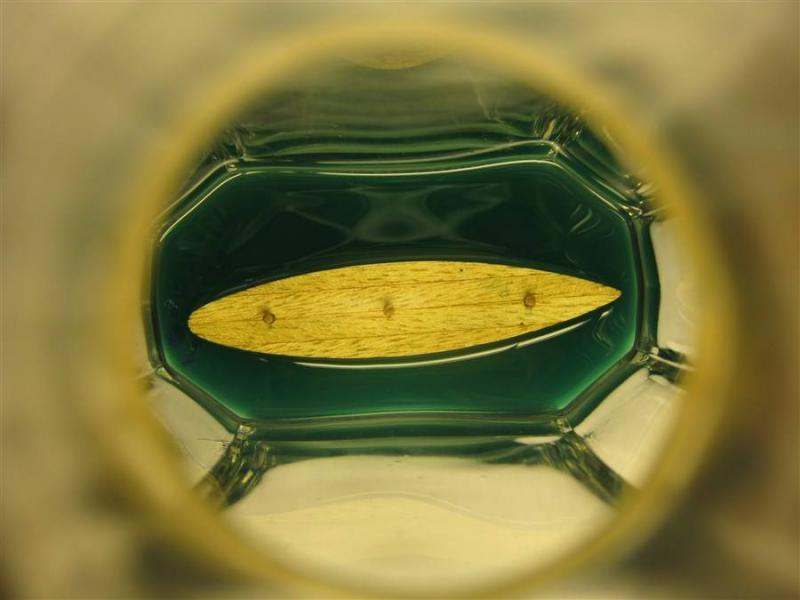
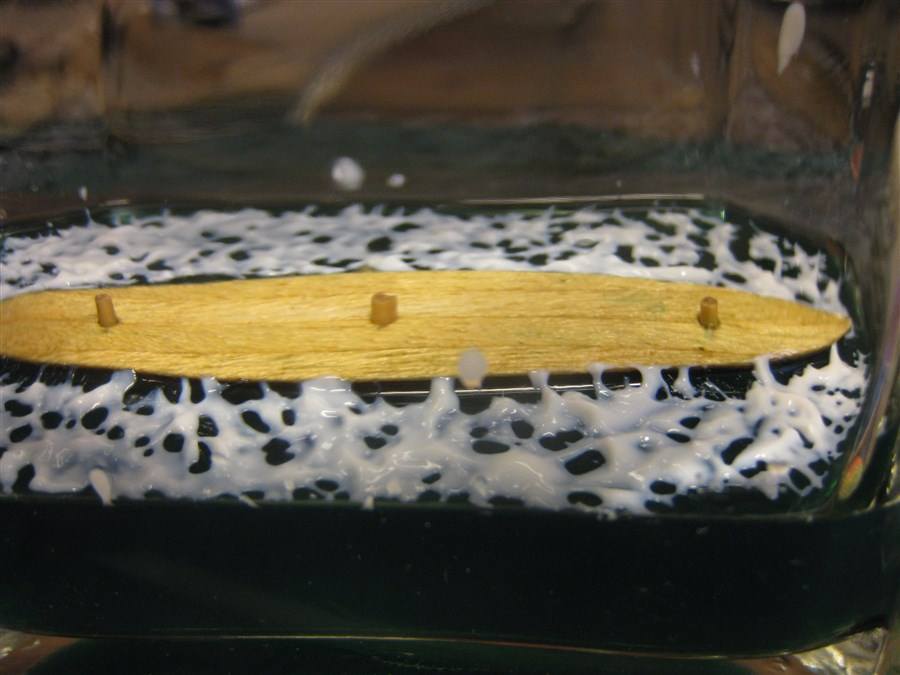
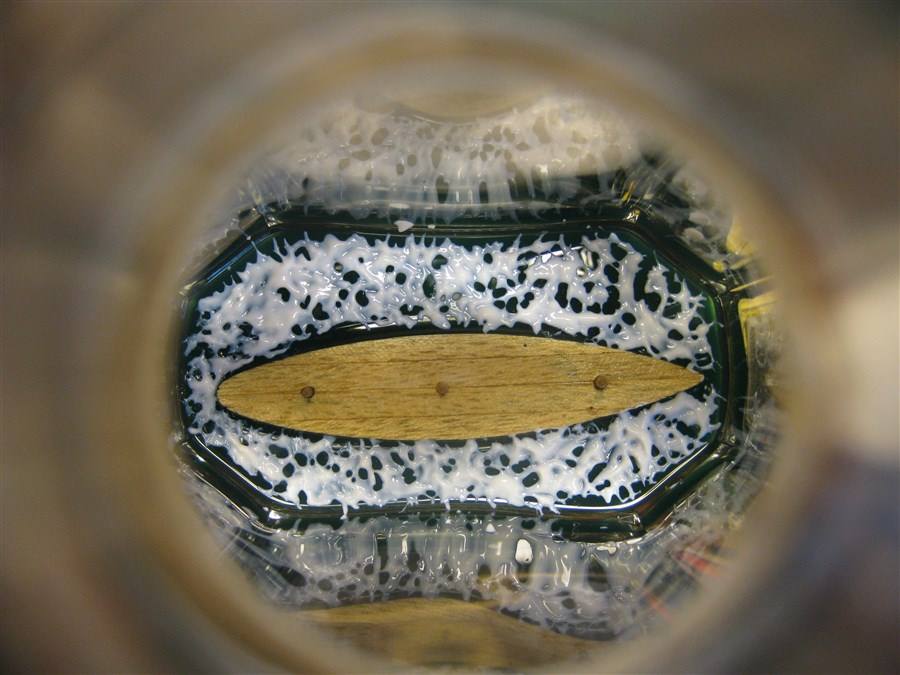
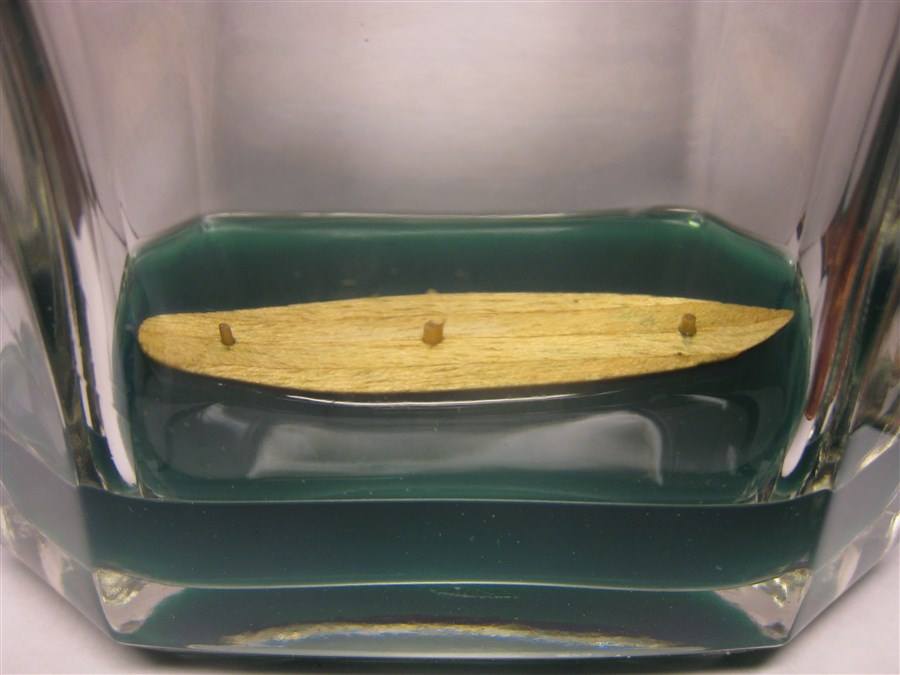
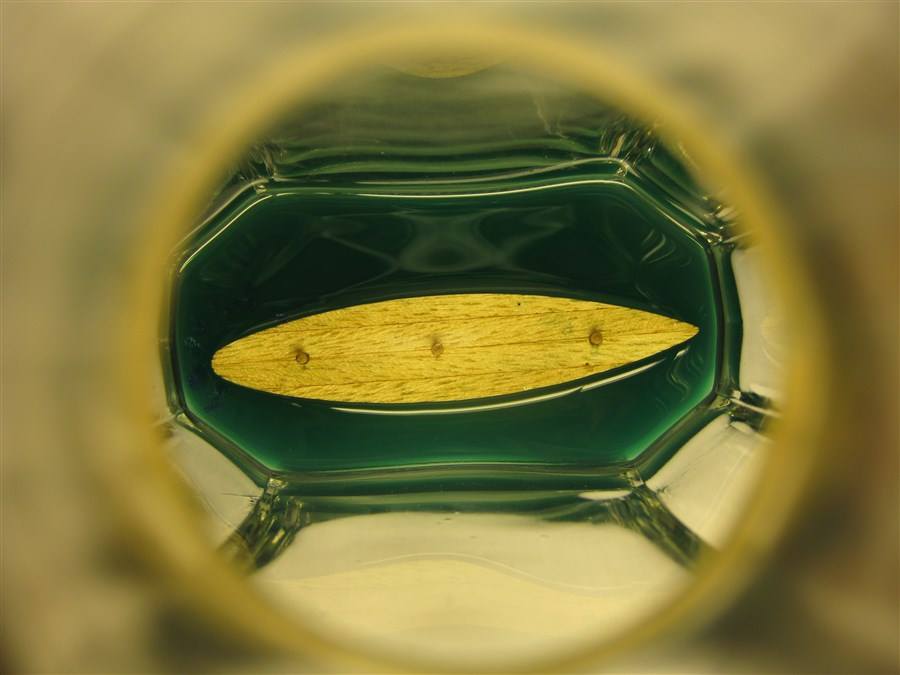
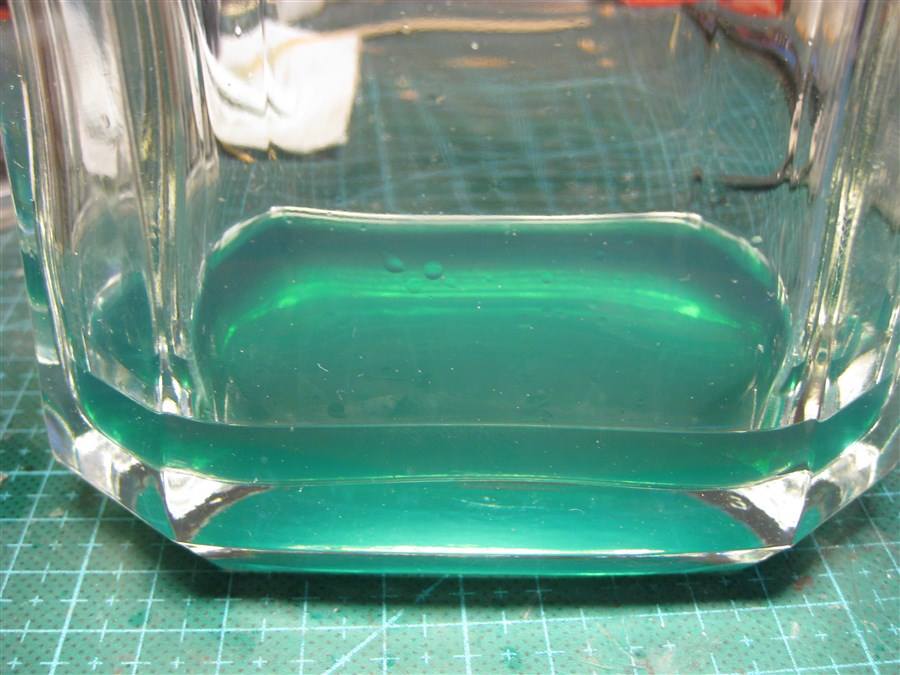
About a day later, I started to fill the second layer of silicone. I mixed the remaining 40% of the colored component A with an equal amount of the component B and the resulting mix I filled into the bottle. The surface of the "sea" was almost flush with the line cut of the hull along which is going the waterline.

-
-
Nice start on the water.
Bob
Thank you, Bob!
So, I continue the story.
According to the instructions this mix dries during 24 hours while respecting the proportions of components and the ambient temperature. Therefore, without special hurry, I have prepared the lower part of the hull to place in the bottle. I hung it on two threads, plunging the keel to the required depth. Still on the same thread, I just go down a small weight to finally align the hull. Thereafter, the bottle was removed from the desktop into the cabinet, not to accidentally push her.
-
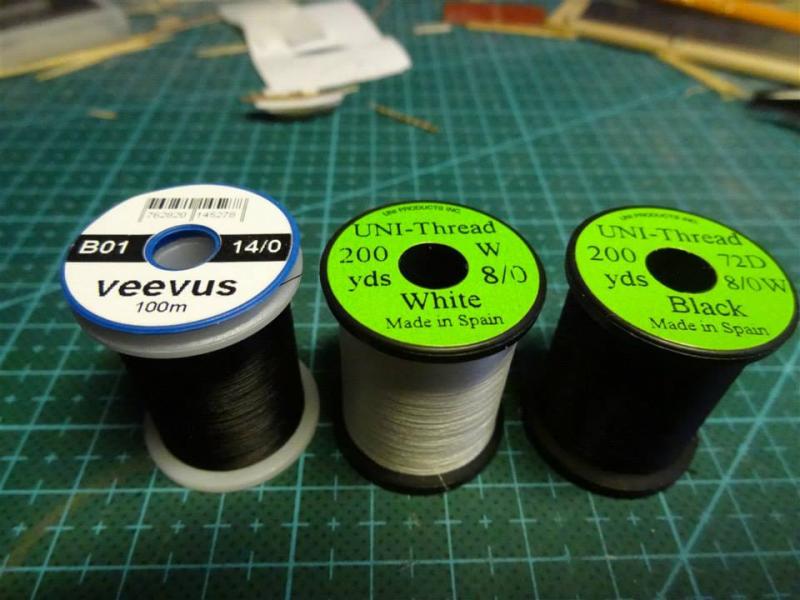
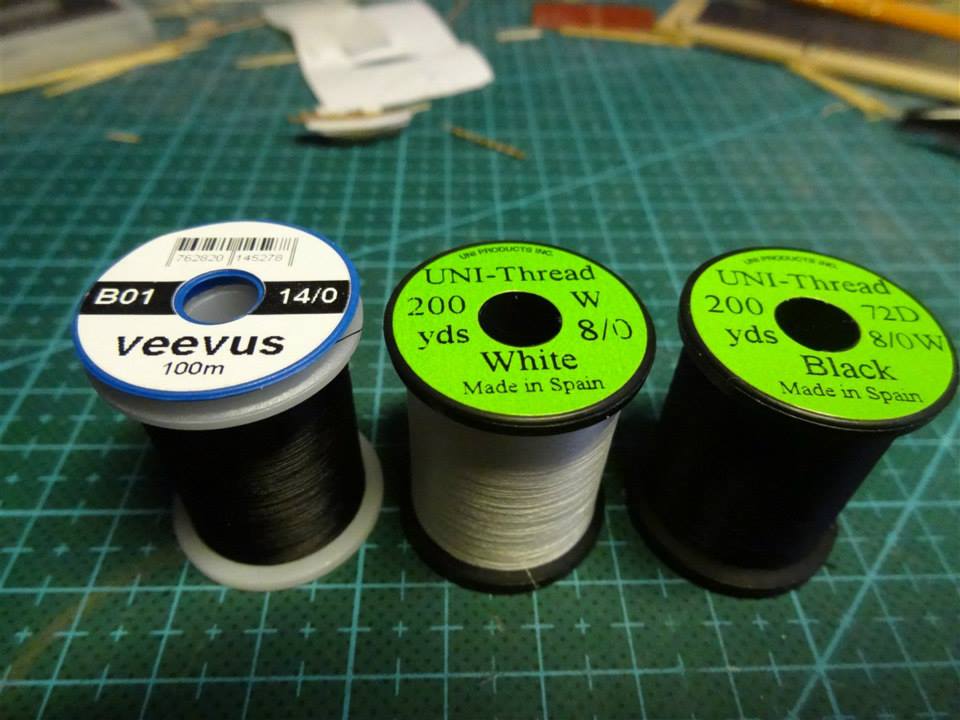
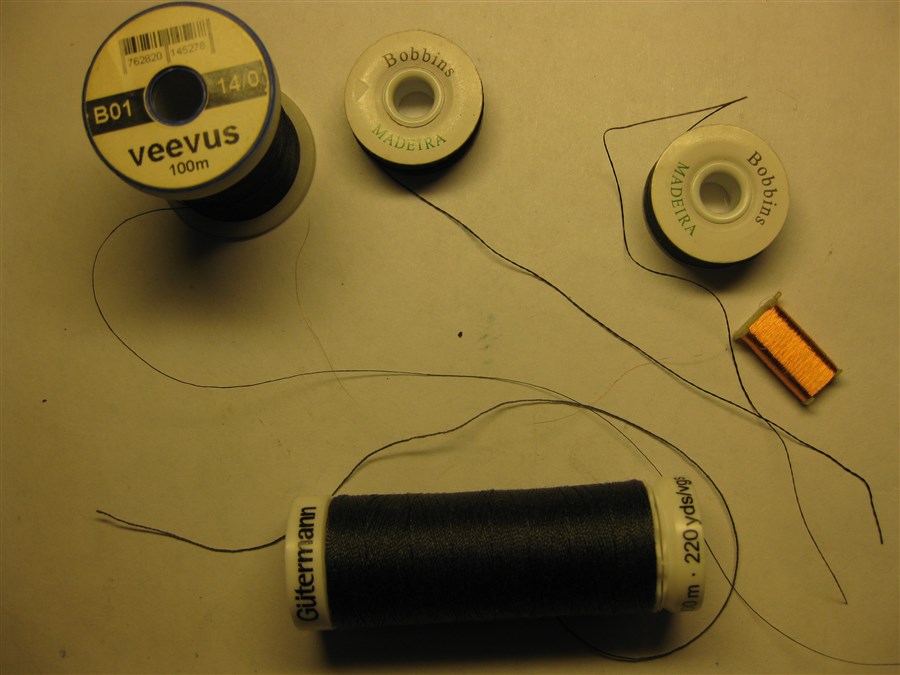
Love the photo for comparisons and I am liking Veevus 14/0. I'll see if the outdoors shop where I get my thread can bring some of that in for me. Otherwise I'll have to split a Cat Wisker in two!
Hi Jeff!
This is mounting yarn for tying "flies". You can ask this yarn in stores for fishermen.
-
-
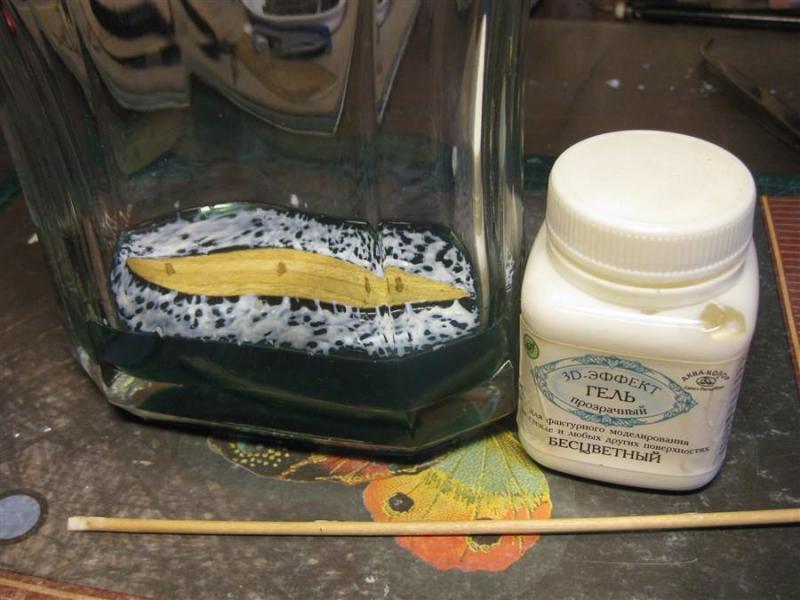
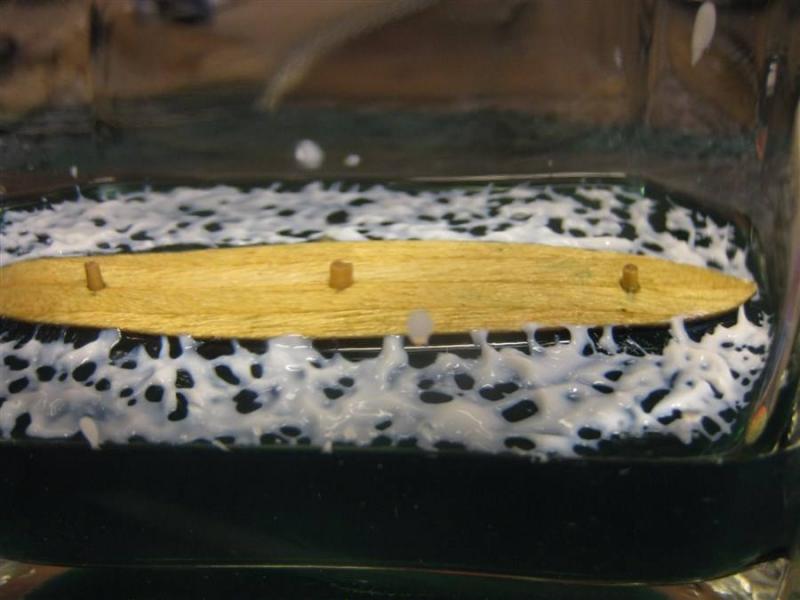
This time I had to, finally, to try out the new material for the making of the "sea".
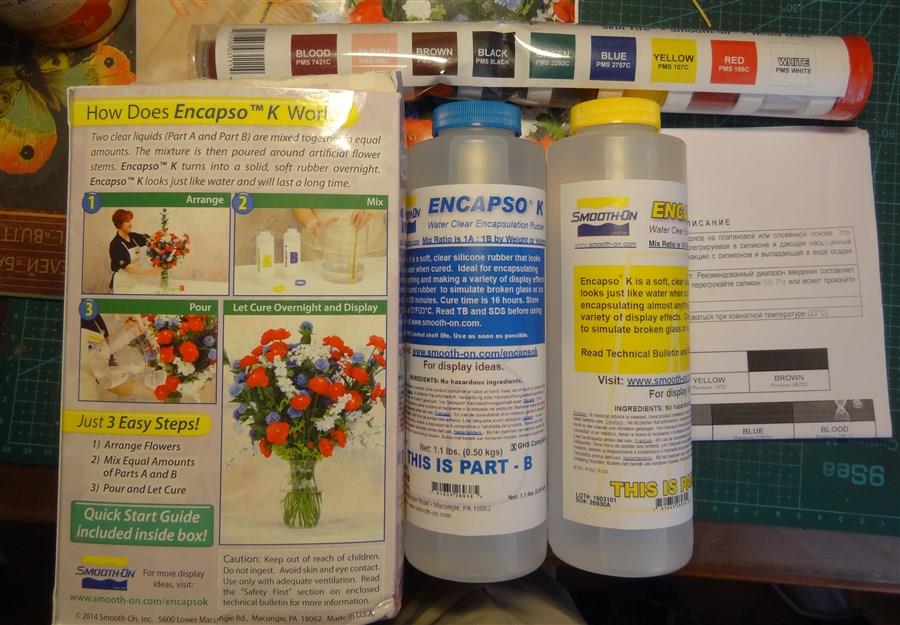
In one of my current project it is very important for me to get a clear sea. At the same time the sea must be filled in layers and is highly desirable that this "layered" was not noticeable. To this end, it was purchased the kit of two-component silicone Encapco K and the set of pigments for him.
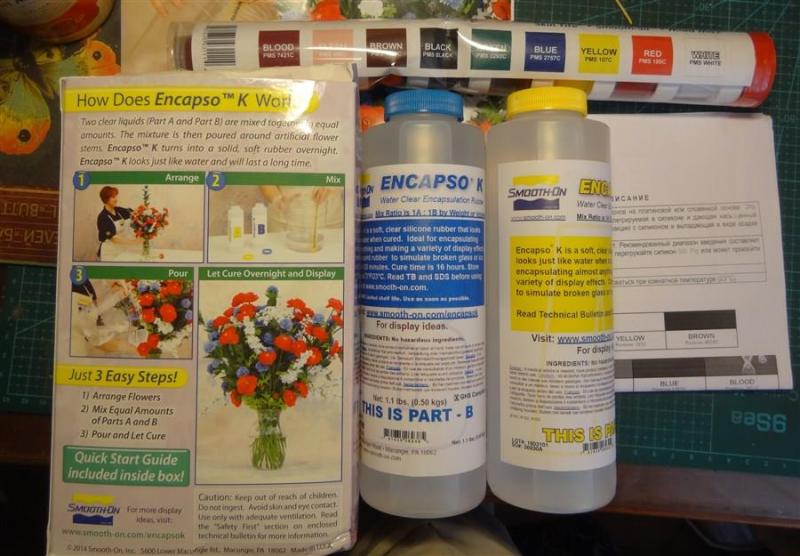
Portions of this silicone need mixed in equal proportions. For coloring necessary to add pigment to component A. Components are quite liquid, as compared with an epoxy resin.
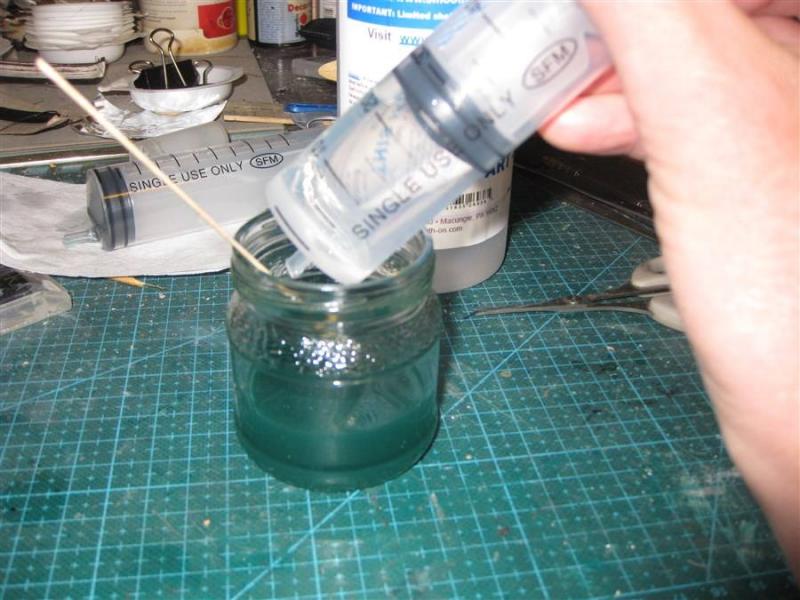
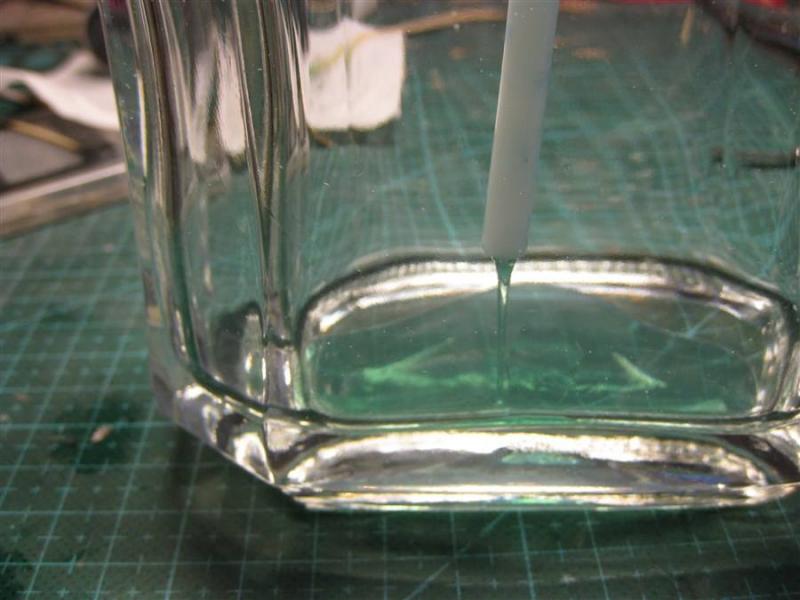
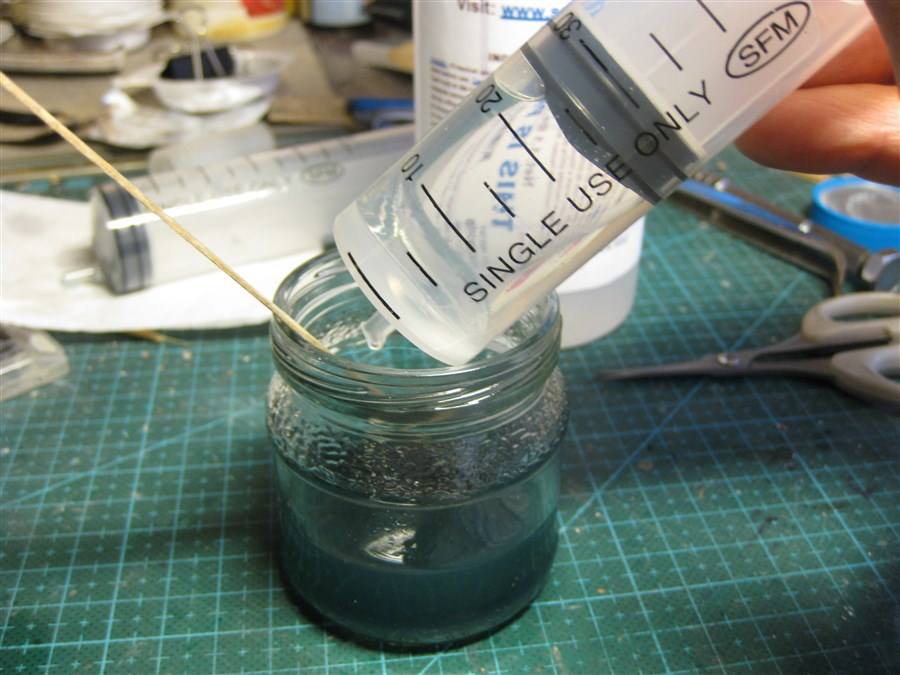
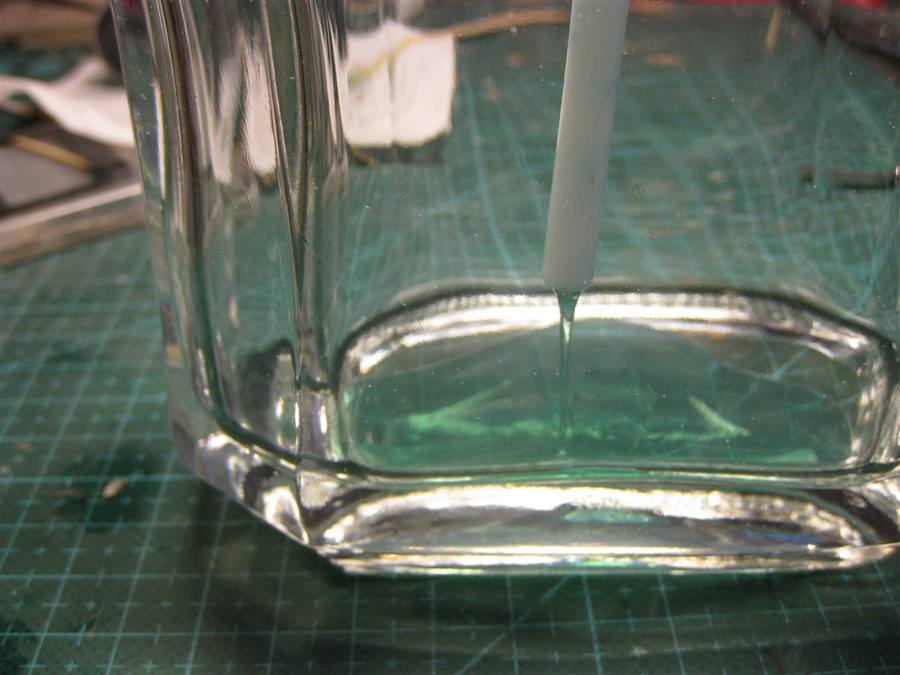
So I added a little bit of blue, green and yellow pigment in a measured amount of component A, mixed thoroughly and got the desired color. Further I separated 60% colored component and mixed with the same amount of component B. The resulting composition I mixed well and filled into the bottle with a syringe with a long nozzle.


- Chasseur, captainbob, hexnut and 4 others
-
7
-
I like this quote. It's so true. Very often you look at the mess of lines and wonder how you'll ever get it straightened out. You do it though. One line at a time. I have no fears for you Igor. She'll make it in and looking great by the time your done.
Many thanks, Daniel, for your words of support!
After returning from vacation, I proceeded directly to the manufacturing phase of the sea and move the model into the bottle.
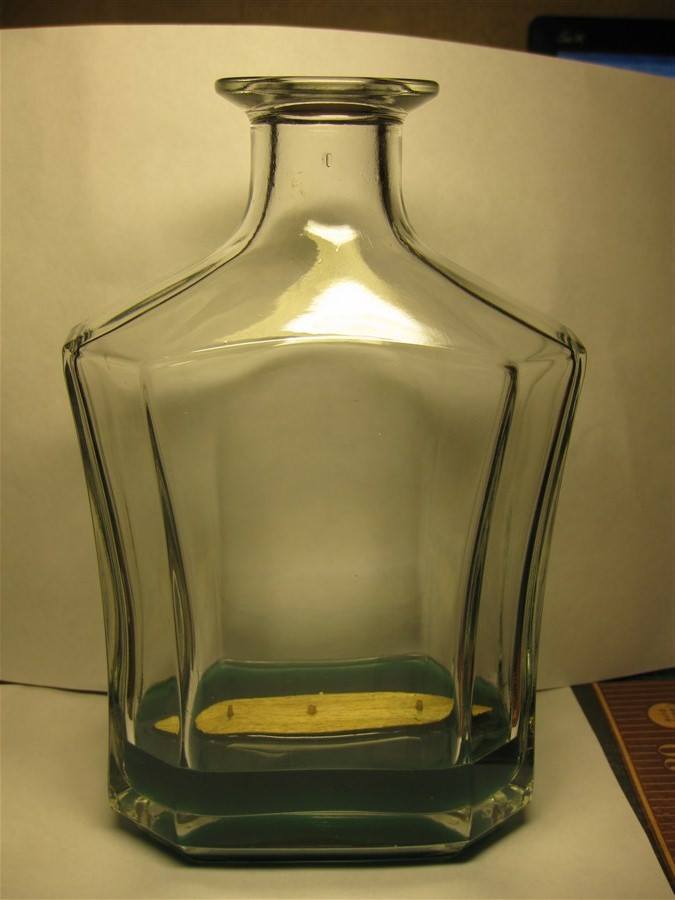
Bottle has been selected and prepared a long time ago. And the first thing I did was the exactly define volume of the future "sea".

-
-
-
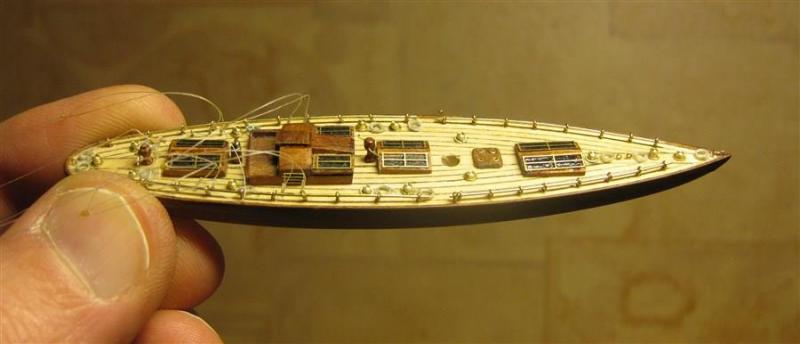
Great job. Without anything in the pictures to give scale, it looks like a 1:48 scale boat instead of 1:300.
Oh, Bob , I sometimes think that the smaller the scale, the easier it is to work, because my mistakes on a small scale are less visible
Igor, you are amazing! But I swear, you must have a crew of Lilliputians hidden somewhere.
Julie, perhaps this is true, but I cannot photograph them
Your rigging, standing and running, is really confusing ... so many. I would be lost if I had to set her up properly
Ha-ha, Carl! Do you think that I can without fear and confusion to look at it?

Piet, good luck to you in your future build!
Best Regards!
Igor.


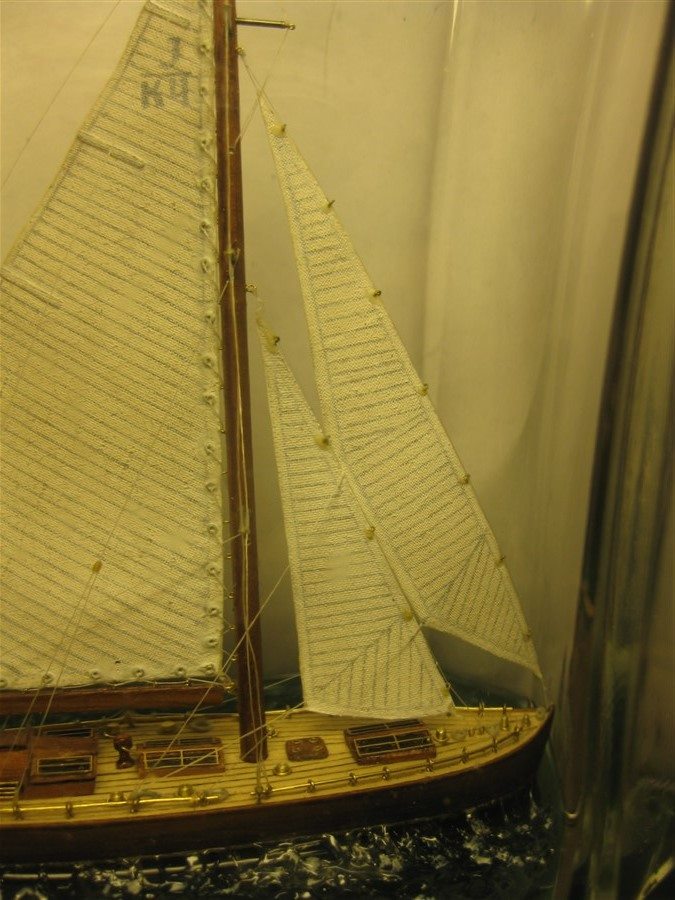


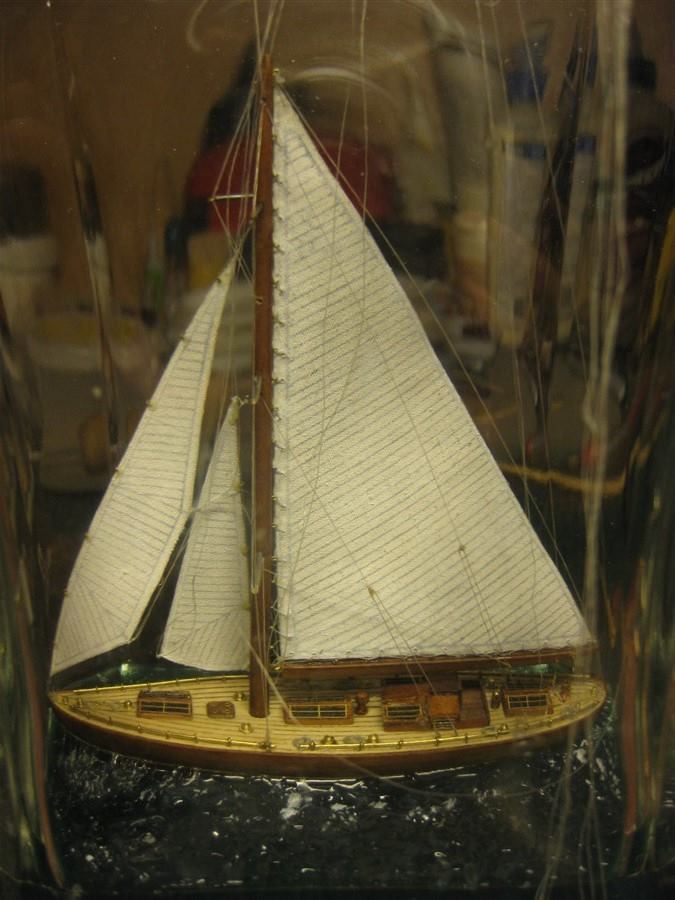


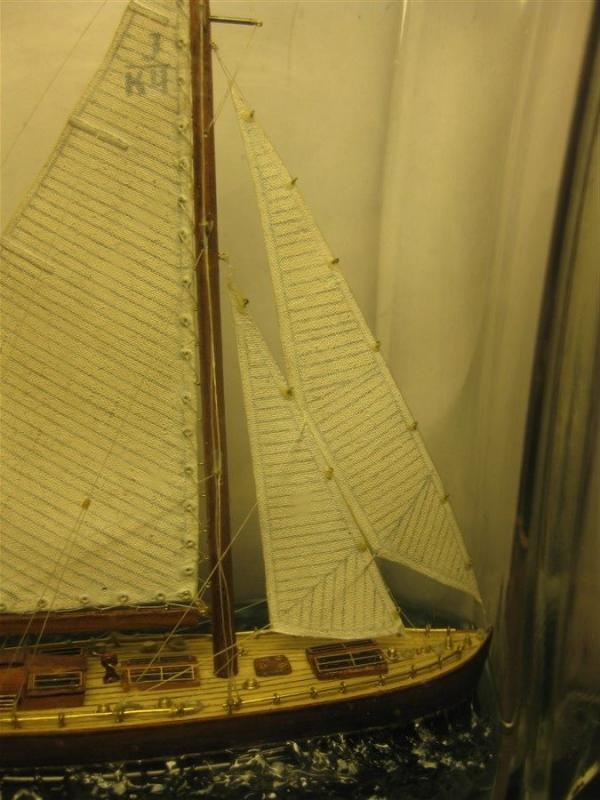
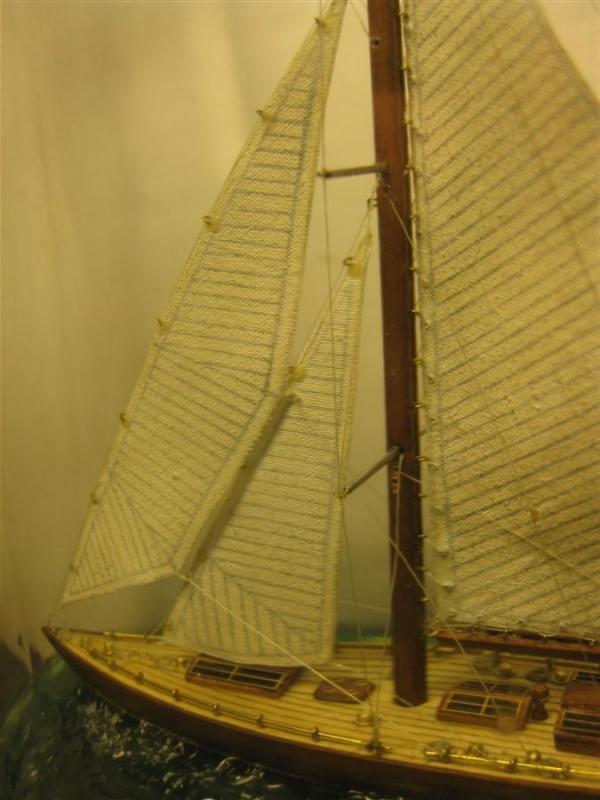
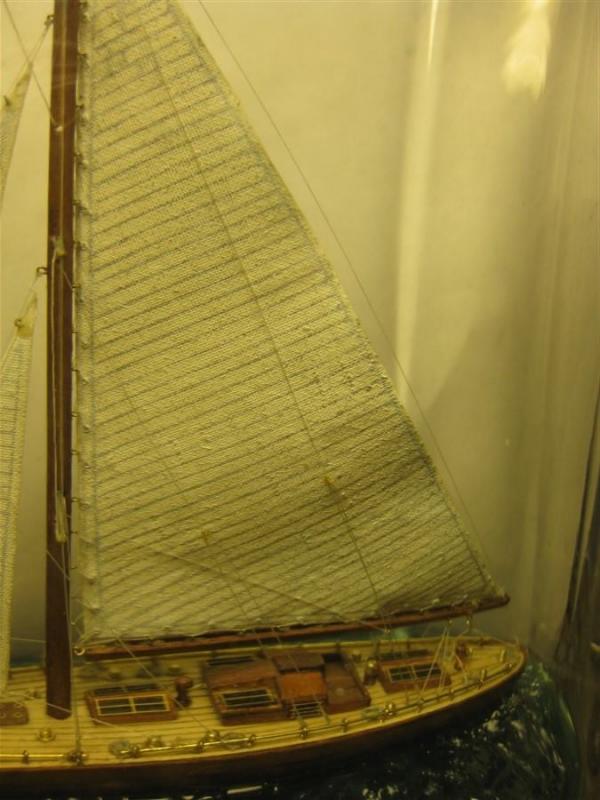
J-class Yacht by IgorSky - FINISHED - Scale 1/300 - BOTTLE
in - Build logs for subjects built 1901 - Present Day
Posted
Oh, Carl, I think that our communication here is a good way to learn from each other.