


amateur
-
Posts
3,460 -
Joined
-
Last visited
Content Type
Profiles
Forums
Gallery
Events
Posts posted by amateur
-
-
To add on this, in the Netherlands it was not the first shrould going single, but the last one. This is a pic of a contemporeneous modell (1650, destroyed in WWIi in Berlin), showing the Dutch solution of that period
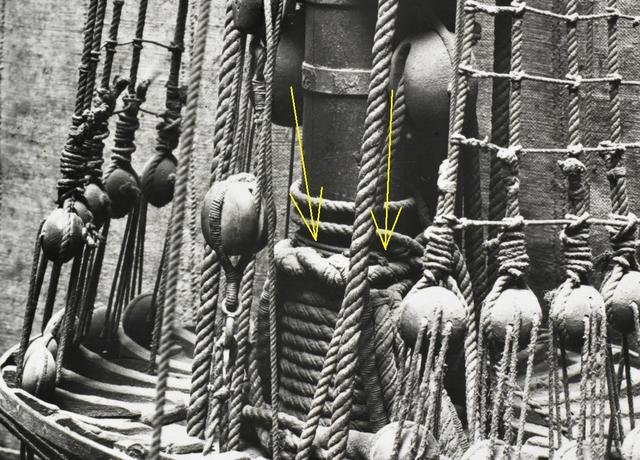 just a single rope, with a half-hitch around the masttop.
- jeff watts and mtaylor
-
 2
2
-
-
Larger than I thought. ..
Jan
- Old Collingwood, mtaylor, Canute and 2 others
-
5
-
Maybe, but this one looks fabulous.
Something different from the "steamloco's are black or green"-standard. (Did you intentionally leave out the camo-stripe on the left side of the driver-cabin?)
btw: I am still guessing for the size of this machine. How long is the model?
Jan
-
Other type of br52, but you get some idea of how Br52 looks on the inside
Jan
- popeye the sailor, mtaylor, CDW and 4 others
-
7
-
-
1 hour ago, CDW said:
I have been looking for quite a while at those pics. I would have believed anyone telling me these are pics of the real car, and not a model.
Jan
- popeye the sailor, mtaylor, Canute and 1 other
-
4
-
-
Hello Ab,
in anorher thread you explained you building method: grey card for the framing, soft cardboard for the outer hull.
I tried to find that softer board. My local supplier (arts and crafts) doesn’t sell it. What is more, they don’t recognize my description. They come up with atiff passepartout-board, or foamboard, or even bristol-board.
on the internet I can find so-called finnpappe (can only find it in German sites), but they charge ridiculous prices for transport to this side of the border.
So here is my question: where do you buy yours?
Jan
-
Ah, this is were you are hiding
")
Nice work on the loco's!
Jan
- popeye the sailor, mtaylor and Canute
-
3
-
-
The fingertip in one of those instructions is helpfull
Just for my idea: how large(small) are those airplanes? I guess you can get at least two on your thumbnail?
Jan
-
Going to be fun (for us, at least)
Jan
-
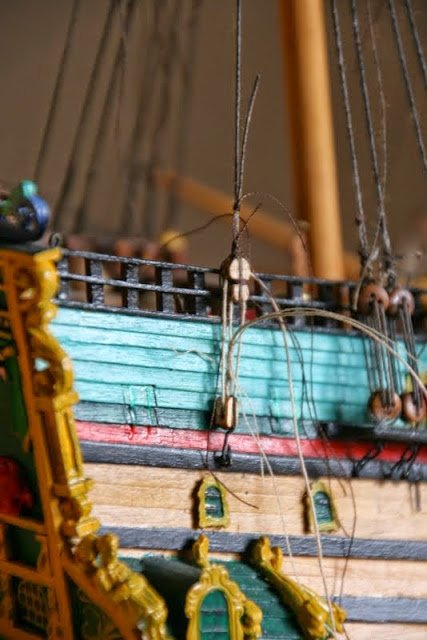
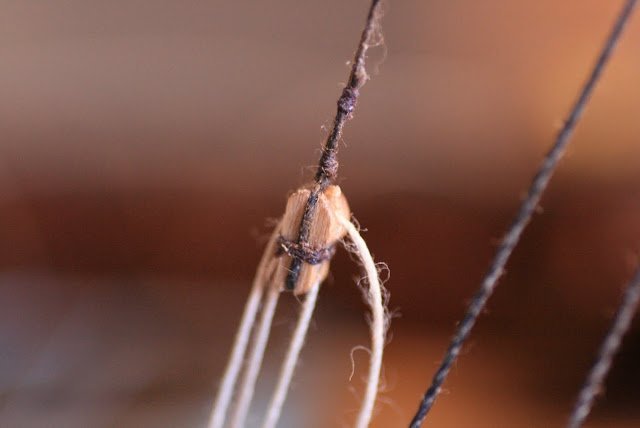
Two pics from my build: the long tackle block is secured with a half hitch, and two seizings : the first pic is just after making the seizings, the second in the final (and due to loooong building times, somewhat dusty) state.
fir reference: block is 5.5 mm, serving thread is gutermann machine tarn from the shop around the corner.
Jan- mtaylor and captain_hook
-
2
-
It also depends on the scale: what os acceptable ar 1:100 might be rather unsightly at 1:24 scale.
at large scales you will need to strop the block, and splice the rope into the strop.
at 1:100 you can gake a lot of things, without creating visual problems (unless you are a purist,than you have to strop at 1:100)
After much trial an error I landed at : rope around block, half hitch under the blick to secure the block in place, and a seizing to fix the running end. Fix with diluted white glue (which makes sure it holds, but can bevremoved when really necessary)
Works easy, quick, and the result looks fine to me
Jan
- mtaylor and captain_hook
-
2
-
No, the fun starts when/where he is doing something wrong
")
He will do more research, rips down his wrongs, and start all-over.
Jan
- popeye the sailor, dafi and mtaylor
-
3
-
Although I like your little parts, I start wondering: when (if ever) will work on the 'main model' continue??
Jan
- davyboy, dafi and popeye the sailor
-
3
-
The carpetmonster took one more than he was allowed to.
one portlid to go on this side. The others are done. I'm pleased with the looks of it.
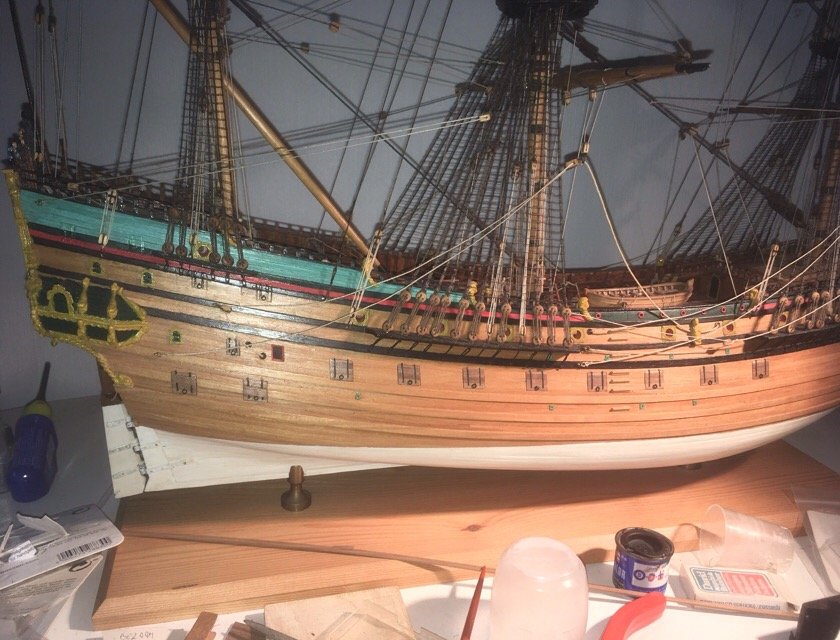
not the best of pics (iphone with flash on short distance in an otherwise dark room), but you get the general idea.
I wonder how long it will take for the portlids to blend in with the planking of the hull. This wallnut is changing colour as a result of daylight-exposure. But as I like the lighter version better than the original darker one, I don't complain.
Jan
- DARIVS ARCHITECTVS, cog, J11 and 5 others
-
8
-
-
So am I.
There is a build-log on a German forum for some years (so: not going in a Danny speed). And that guy claims there are some issues with the laser0cut parts for the frame.
He decided not to use them, but use the laminated parts in stead.
For all of you that can take some german : http://www.die-kartonmodellbauer.de/index.php?thread/1470-hcp-1-6-2-bulgar-1-25-modelik/&pageNo=1
btw: how many parts are there in the kit? (quite a few, I guess)
Jan
- Canute, mtaylor, thibaultron and 1 other
-
4
-
Nice work!
hope you have a speady recovery
Jan
- mtaylor, J11, popeye the sailor and 3 others
-
6
-
I don't know how it was/is done in eastern parts of europe, but here it is not both buffers convex on one side, and both concave on the other side: it is a left/right business: the left one (when standing in front of the wagon) being the mushroom-one, the right one flat. So, there never is any problem when turning around, or sorting.
Good to hear your loco finally made it to australia !
Jan
-
-
2-6-6-4 "Bulgar" Steam Locomotive by Dan Vadas - Modelik - 1:25 - CARD - FINISHED
in Non-ship/categorised builds
Posted
It looks as if those are mrealy functional brakes....
great job on the wheels.
Jan