


amateur
-
Posts
3,460 -
Joined
-
Last visited
Content Type
Profiles
Forums
Gallery
Events
Posts posted by amateur
-
-
-
The deck is a little bit too clean, otherwise you could almost think these are pics of the original. Your detailing is great!!
Btw: it looks as if you do far more than cutting on your cutting mat......
jan
- cog, kees de mol and mtaylor
-
 3
3
-
I understood that, but I tried to make the point that selling in a Dutch context, the price could perhaps be higher.
Jan
- thibaultron and mtaylor
-
2
-
-
It is not an unusual subject (at least not here
") ) It was (is) a famous ship: the personal yacht of Beatrix, presented to her for her 18th birthday.
) It was (is) a famous ship: the personal yacht of Beatrix, presented to her for her 18th birthday.
This kit was available i. The seventies ans eighties in almost all hobbyshops around, as well as other kits of authentic shipmodels. Decent quality for a fair price. Your Dutch market will be limited, however: most people who want to do this model already did it 35 years ago
(and no, I did not build her, but it is slightly too large for me)
Jan
- thibaultron and mtaylor
-
2
-
Or Popeye uses a very old version of iOS.....
The vids don't work on my somewhat outdated Ipad, but function without problems on my new Iphone.
And to Popeye: the vids are better than the pics
")
Jan
- popeye the sailor, CDW and Canute
-
3
-
Ok, it is a bit on the late dide (1608),
but this drawing shows them attached to the shrouds
-
Or for that matter the books of Philip Reed are very instructive. (clear text, and very detailed photo's)
Reed uses wood shavings mounted on thin paper. These can be cutted with a knife to the desired width. These planks in turn are used to plank the (solid) hull.
Jan
- thibaultron, pythagoras, mtaylor and 2 others
-
5
-
Not to be started for a while, but just to let you know that Johan Scherft did another of his wonderful birds.
This time it is a bluethroat. I think that it is a European bird, not known in the America's or Australia. The blue is very blue indeed, size of the bird is about 'finch'


for those who want to give birdbuilding a try: www.johanscherft.com
Jan
- popeye the sailor, Baker, ccoyle and 5 others
-
8
-
-
I never had thought that Disney based its ship on an existing ship
Where did you get the drawing of the ship? The only version I know is a very low-resolution one in the internet, but that is hardly enough to recognize it as a ship.
and another question: how long is your model? Those VOC-ships were around 130/140 feet, which is slightly under 40 meters. At scale 1:100, that would come at 40 centimeters. Yours does look longer than that.
Jan
-
-
But Icouldn't resist.... So, here ist the redo (better now
)
and one of the guns. Five parts (one of them being .5 mm styrene rod).
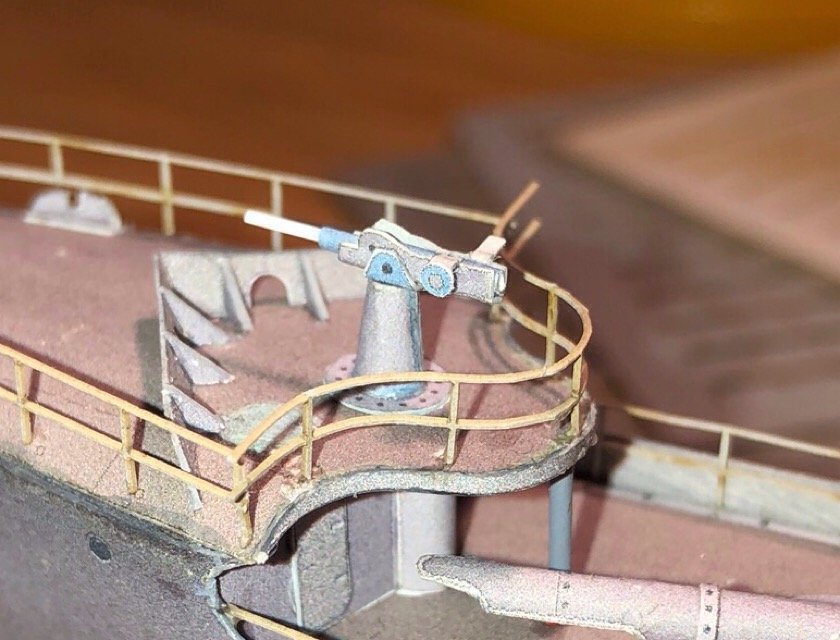
and a front view, not quite symmetrical, but almost
The starboard canvas railing cover turned out better tham the left side. Some sources show the railing on the topdeck with canvas, but the light does not stand high enough to get above the railing, so, no canvas there
Jan
- ccoyle, Canute, GrandpaPhil and 1 other
-
4
-
Missing in the tutorial Chris made, are the screws. I now understand why
These eleven parts make up the screw and the shaft. (To be made of wire/styrene rod).
It is not difficult, but the parts are tiny (nad my fingers are not). Took me the better part of the afternoon. For those who are going to do the hull, beware: in the aft frames is a hole for the shaft and a lighter red indication on the hull. Both should be opened to insert the shaft. As my skin tended to kink in that popstion, I did not open the skin. The result being that I had to cut the round red tube to a reasonable fit on the hull. Let's say that the largest problem is not visible when the model is placed upright
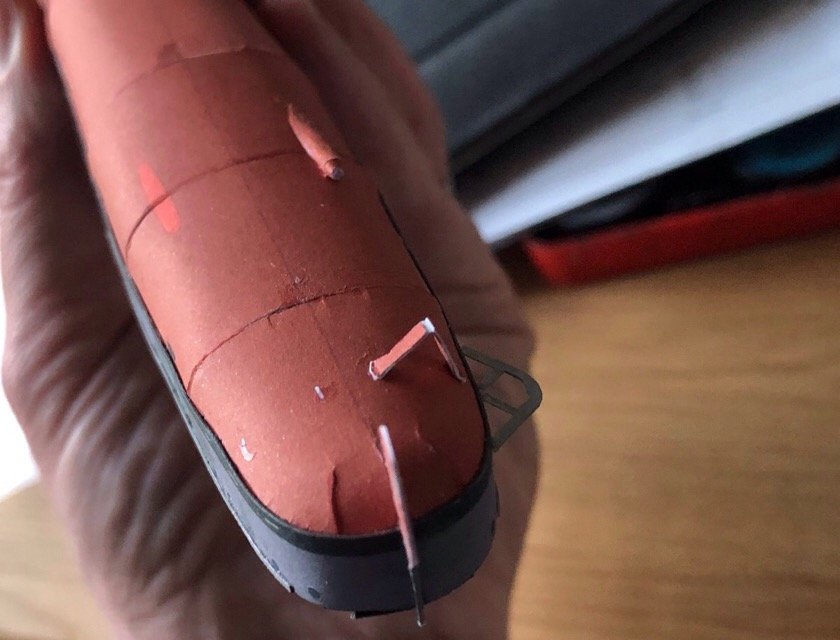
And this is the screw (my cellphone absolutely redused to focus on this part, the styrene rod is .8 mm diameter. So it is tiny. Diameter of the screw is around 8 millimeter.

And all mounted. (My watercolours won't do the styrene. Need another walk to the shop for a acryllic red paint)
I'm not going to do the second one today
(btw yesterdays railing will need a redo)
Jan
- GrandpaPhil, Canute and mtaylor
-
3
-
-
Hi Piet,
good to see you!
this paper model is at a larger scale than your java, so it isn't that small
I like paper: rather easy, and cheap. Especially the downloadmodels have a large advantage: when you screw up, the solution is in your printer. Just another copy, and retry. (Unless you're too lazy to get up and walkto your printer).
Jan
-
-
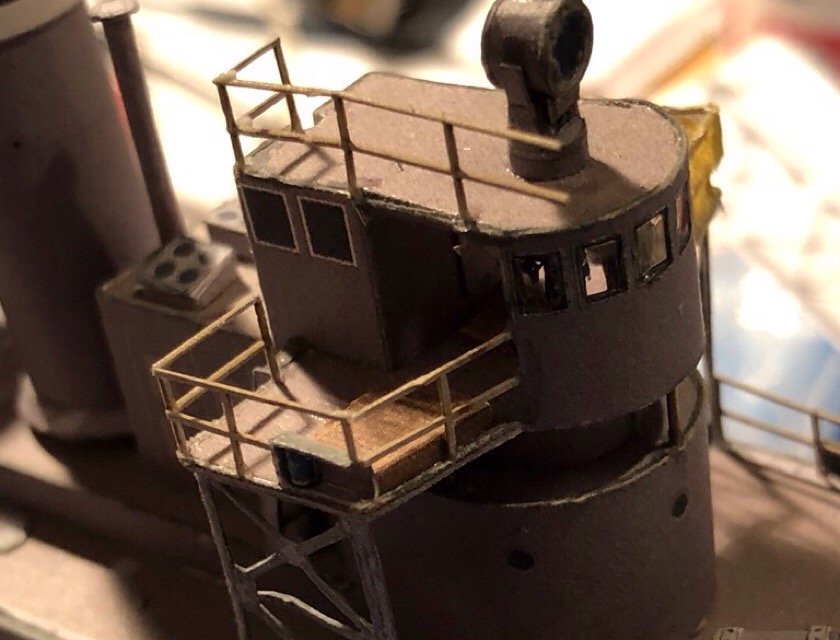
I tried another part of railing.
I'll check tomorrow atviewing distance, but chances are that this will become a redo
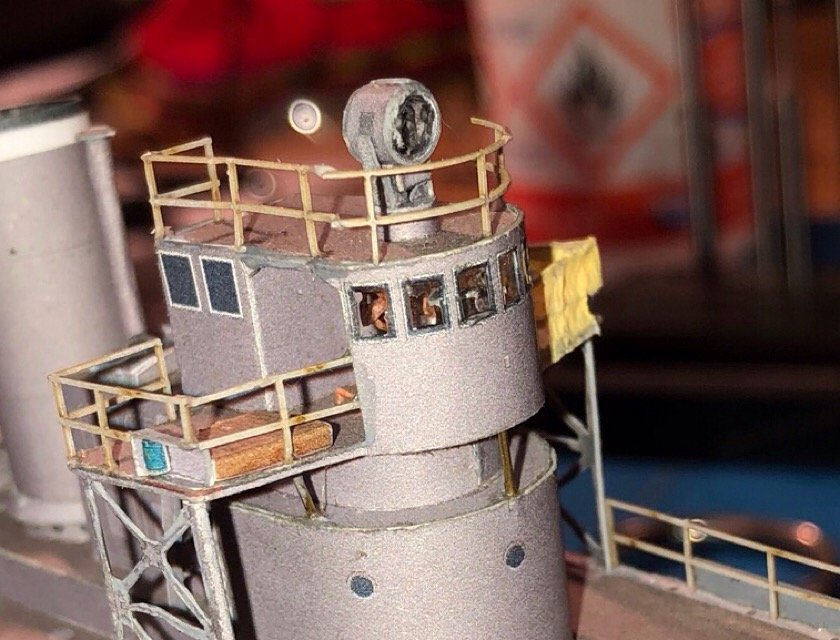
btw: in broad daylight the paper railings arenot so far off in colour. As they are paper ones, and prone to splittibg, I don't want to fuss to much around with them, so: no painting before placing them, and probably also not afterwards.
They can be curved rather "easily", as long as put over a round object. Bending between fingers will lead to nothing.
Jan
-
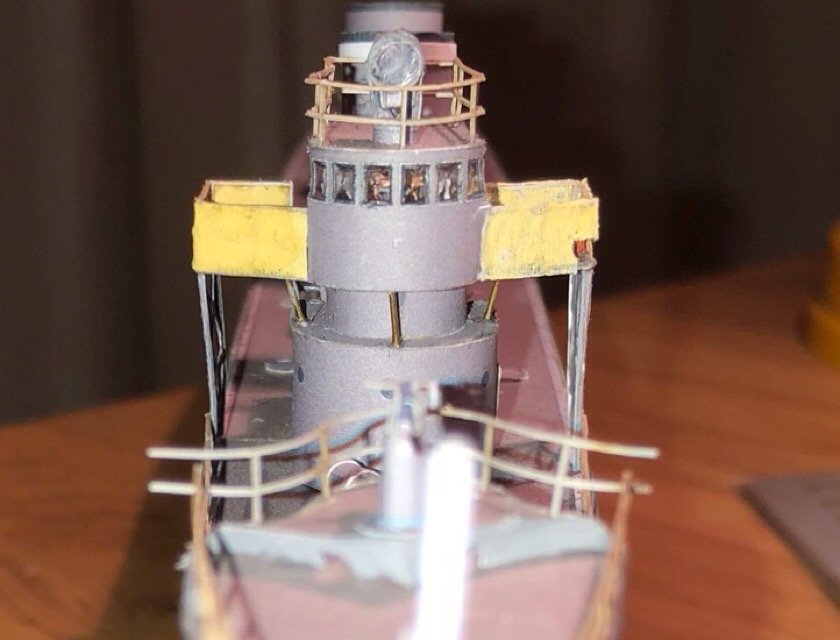
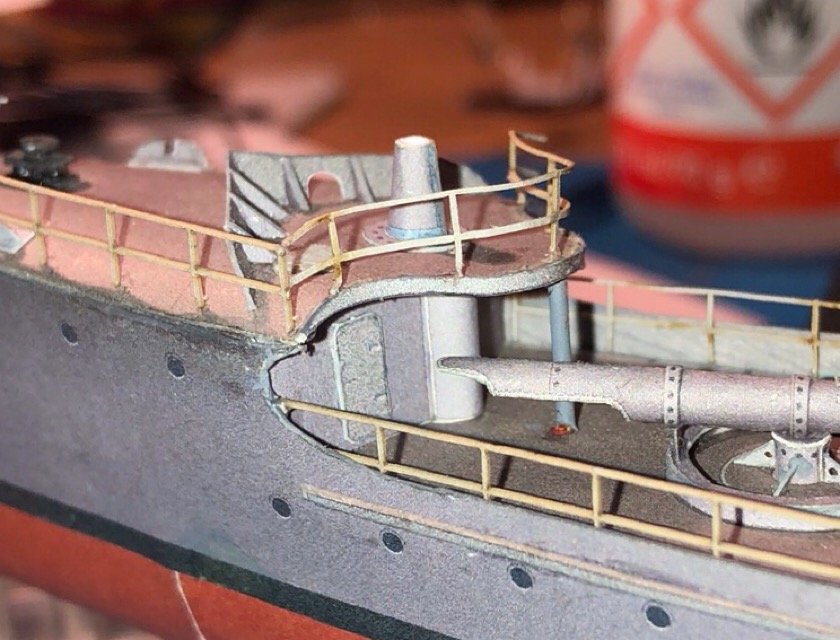
Todays work. Some railing on the bridge (more to come
)
the anchor handling crane. Awfull little thingy. Chris suggested making an opening for the pulley. I cheated, and halved the pulley, and glued from two sides.
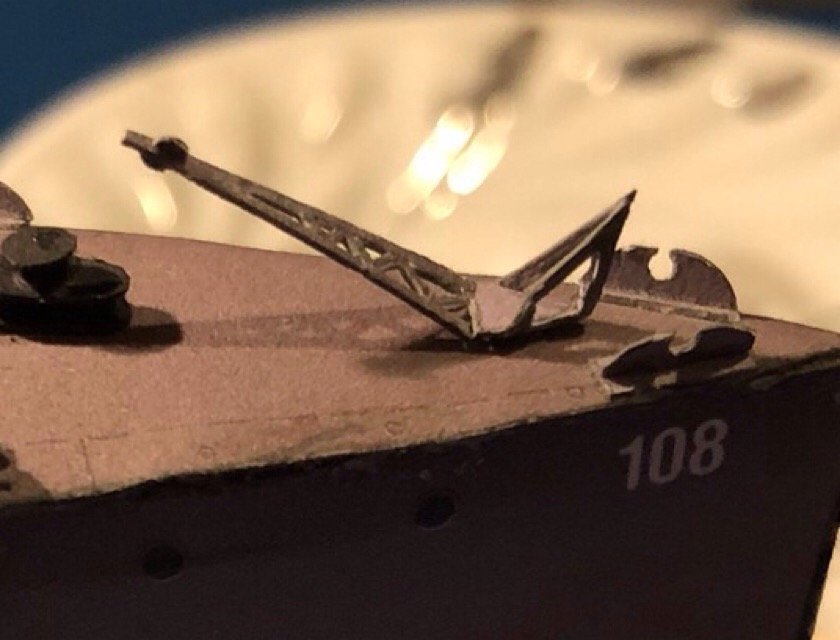
and I mounted the boat (before that, I gave the boat a good clean-up, as I made it long ago
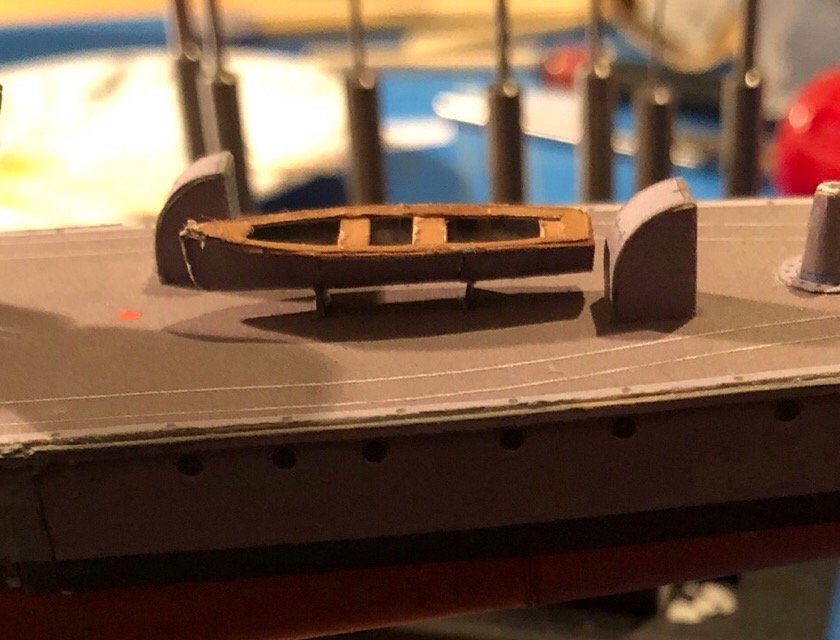
It feels as if almost done, but those little parts take a lot of time (and redo's: gone is really, really gone. No way of finding back pieces of a square millimeter)
Jan
-
Birds, however..... I did a second wren today. Didn't like the colours of the first one.
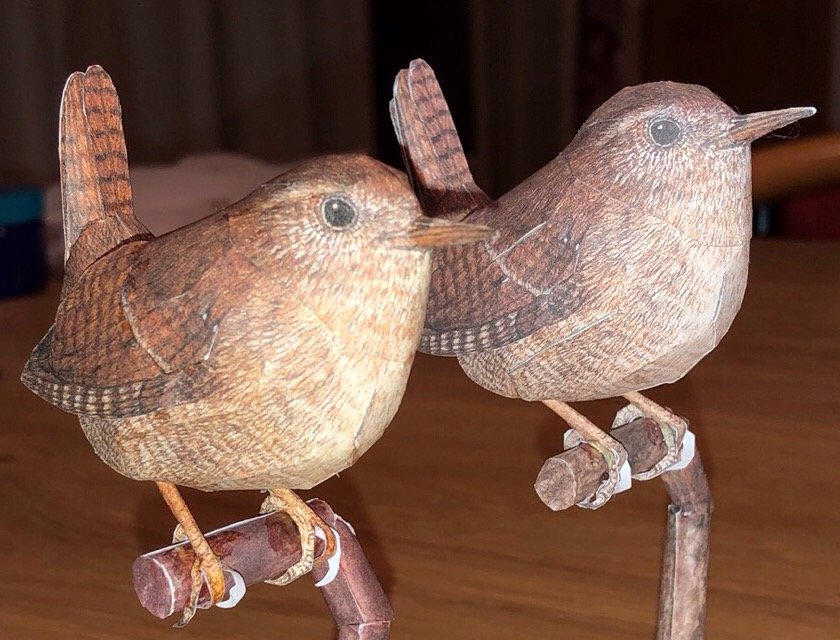
Today's work on the left side.
Jan
- mtaylor, GrandpaPhil, Canute and 1 other
-
4
-
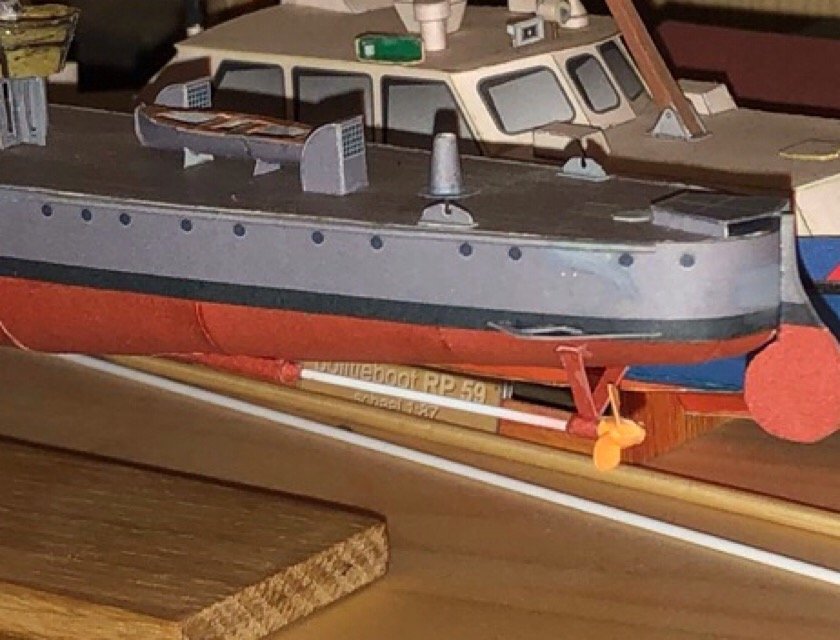
Finally, after some birds and loco's I took V108 out of the dust.
Took some time, and still, the macro's show that I should have done a better job....
The aft platform got its railing and canvas. I used tissuepaper for canvas, but it didn't like the painting......Looks Ok from a distance, but doesn't pass the macro-test.
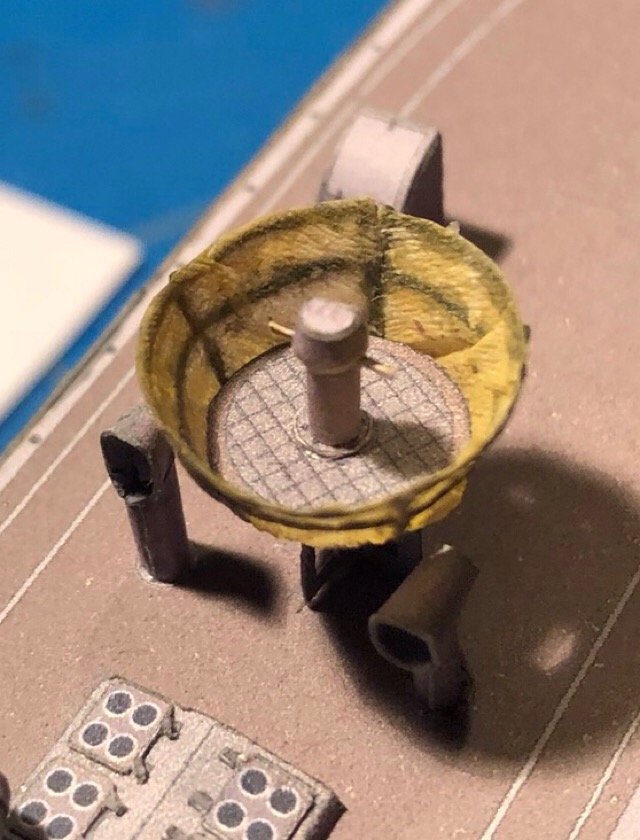
Then I did the canvas on the bridge-deck. Even worse (a well, the viewer should step back
)
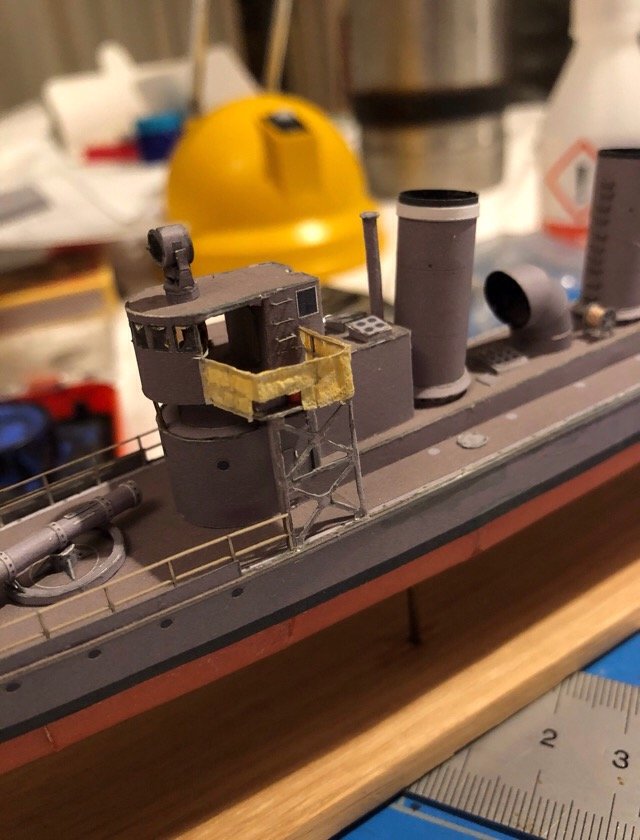
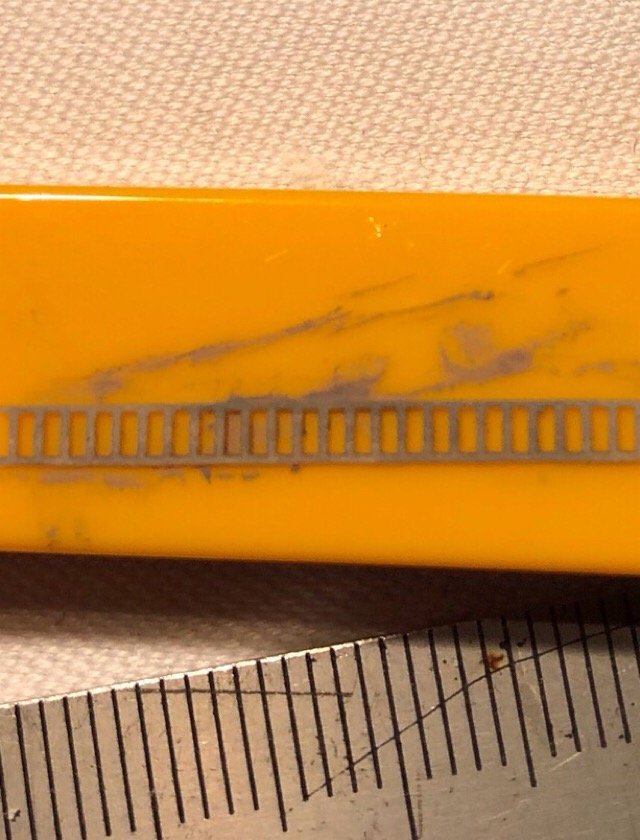
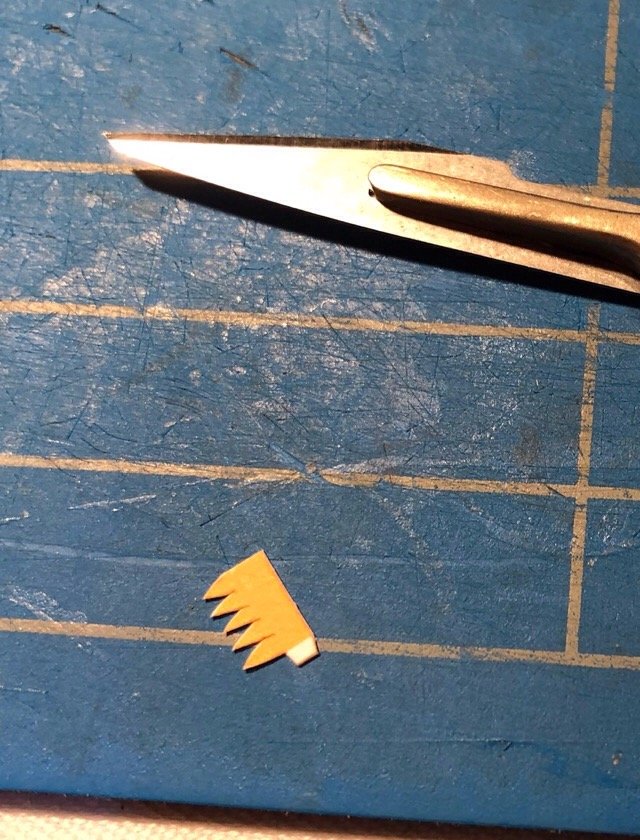
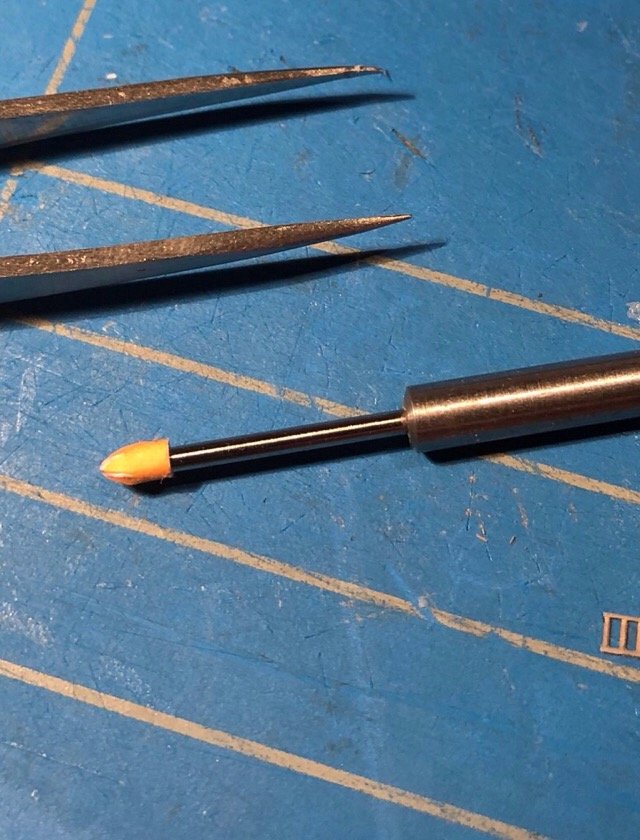
you may notice that I also did some steps on the bridge, and on the aft funnel. The front one still has to be doen, but those ten little pieces took over an hour ...(and some not-so-nice words )

the steps are cut from a paper laser-cut ladder (drafmodels poland, nice stuff and not expensive. Not water-resistant
)
And I made a start with the screws. I need a stronger optivisor and smaller fingers
Tomorrow I have other business to do, perhaps on sunday some progress...
Jan
- mtaylor, Canute, GrandpaPhil and 1 other
-
4
-
If they weren't so awfully spaceconsuming, I would go for the architectural models.
Castles and cathedrals. Won't fit in the available space, though....
Jan
- popeye the sailor, mtaylor and Canute
-
3
-
-
Hi Ab,
In a sense, yes: the possibility to do it at the table in the living, without making a lot of dust, makes it a nice wayof modelling. For the moment, I stick to the 'not-so-elaborate' kits. Not too much stress, no need to work years on the same subject. The advantage of downloadable kits is that when you do it wrong, you just go to your printer and print a replacement-part.
I like it. (although the very difficult models of e.g. HMV have some attraction
)
Jan
- popeye the sailor, Canute and mtaylor
-
3
Stropping Blocks
in Masting, rigging and sails
Posted · Edited by amateur
But as you gun tackles wont have svere stress, the method shown in your manual works fine, and will prevent uggly oversized knots.....
the two ends that need to be glued are half hitched to each other, so no diffucult splicing or so.
Jan