


amateur
-
Posts
3,460 -
Joined
-
Last visited
Content Type
Profiles
Forums
Gallery
Events
Posts posted by amateur
-
-
On second thought: what do you meanby 'the kit has no plans'
do you mean that there are no drawings included? In that case I would ask for them by the seller, as building a model without drawings is near impossible.....
- mtaylor and Marco Silva
-
 2
2
-
Vincezo Lusci was an Italian writing some books on modelbuilding, somewhere around the late sixties. He made a couple of ship plans, that showed kind of 'archetypical ships', with a good sounding name on it.
In germany you had Rolf Hoeckel, doing the same.
I am pretty sure that this model is based on a number of paintings showi g spanish galleons, and not a historically accurate model of a specific ship.
these 60-iesmodels make attractive models, but not historically accurate models. Even if it was a model depicting the state of the art knowledge on historic shipbuilding, the research has moved on since the 60-ies, so presumably not accurate and state of the art nowadays.
having said that: it still makes and attractive looking model.
and I don't see why there is a strange configuration near the keel: what I see is that the planks run a bit high along the stern, but that is due to the fact that all older kits, and quite a few modern ones, use rather stiff straight planks for the hull, while they should be spiled, and slightly inward curving. But perhaps you see something I don't....
Jan
- Ondras71, Marco Silva and mtaylor
-
3
-
-
-
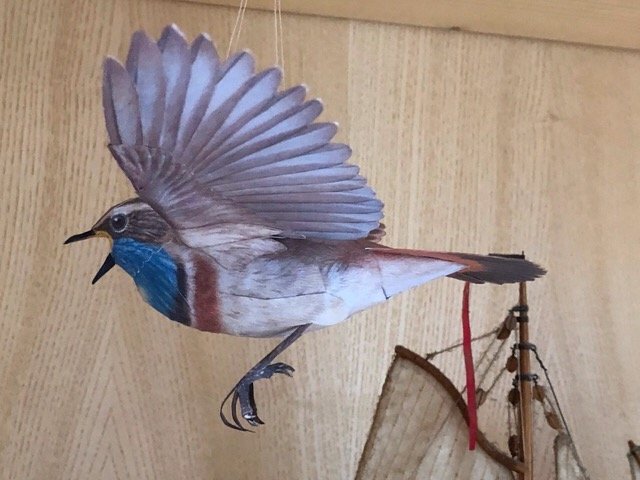
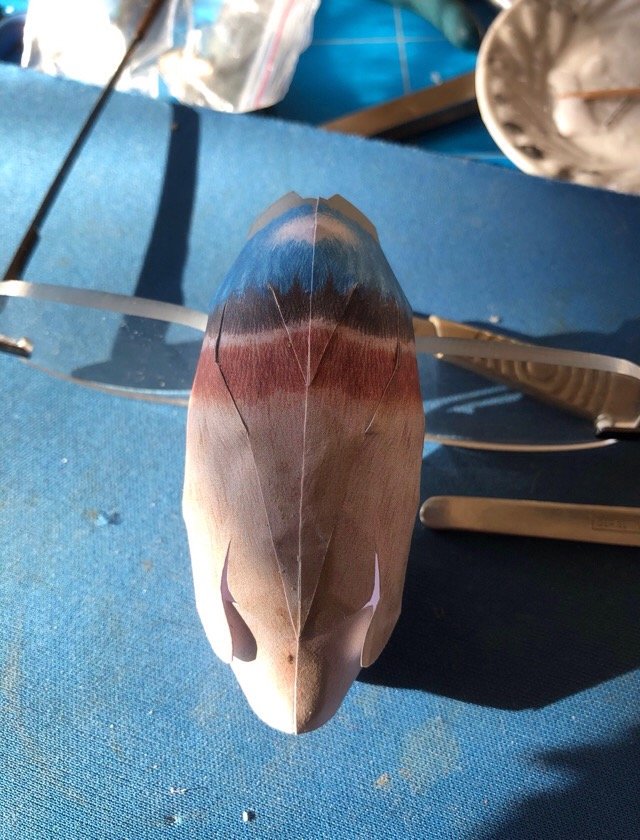
And nowit is done.
the beak is a bit too dark. The instructions said black, and I already toned it down a bit with wome white. I think it should be grey, with some brown added. At least, now it is too stark.
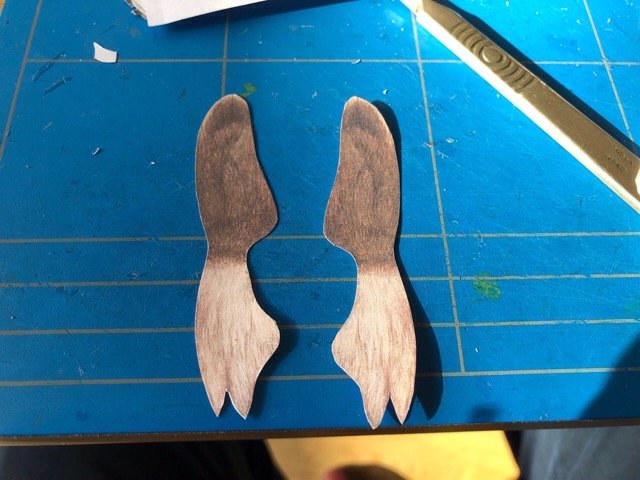
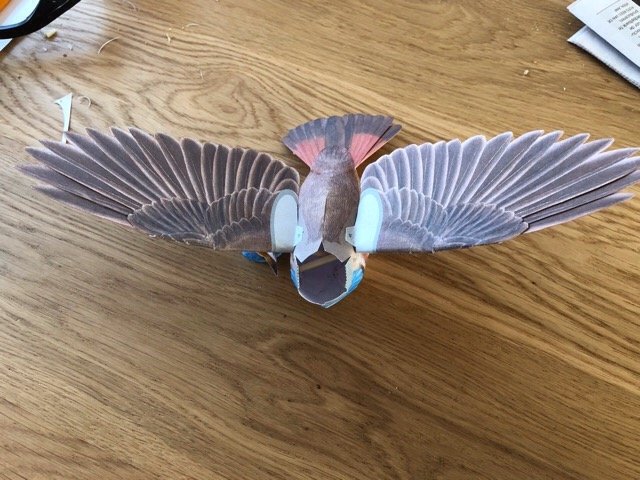
the two parts for connecting wings and body. They proved to be a bittrickyto get i the rightlocation. I have some remaining gaps in the front edge of the wing.
And all done. I tried to take some pics in a more fitting background (garden), but the wind turned out too strong, so the bird flew away too quick toget some decent pics. But youget the general idea of thefinished product. As usual, small amount of parts, not much time needed (couple of hours, and you're done), but great run, and rather convincing result.
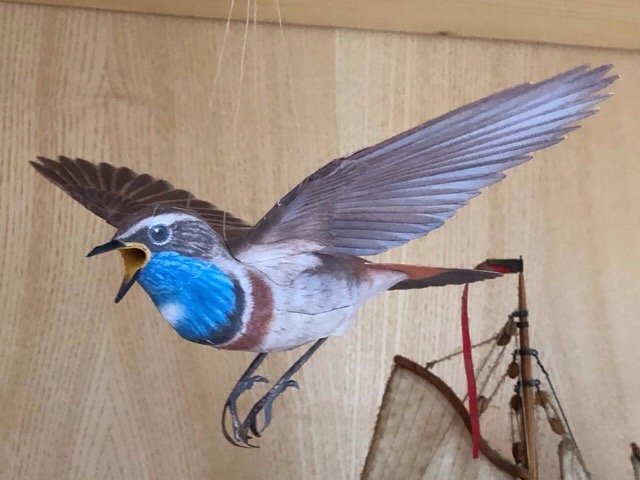

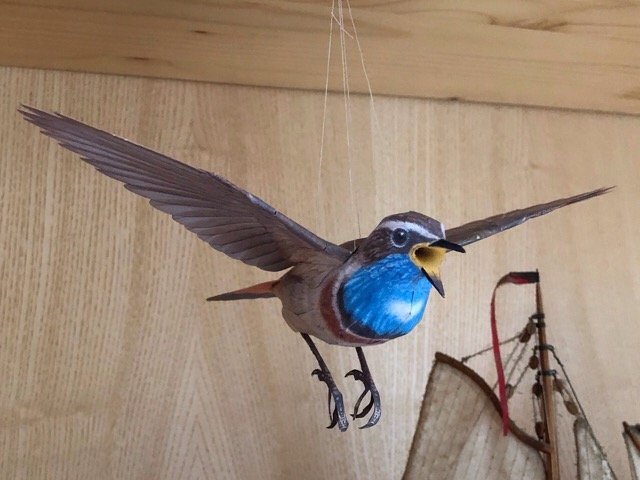
Thinking what bird will be next....
Jan
- mtaylor, Egilman, GrandpaPhil and 4 others
-
7
-
-
Fantastic work on this little large gun.
If you remove that little coin, nobody would ever guess the gun is this small.
")
just a question: is it my screen, or is e cent not round in the pictures. To me it looks as if the foto' have been resized in a wrong length-width ratio.
Jan
- mtaylor and Keith Black
-
2
-
Yesterday my mobile's battery went flat.
So, no pics of separate pieces, blobs of glue, just the result of an evenings work.
wings are on
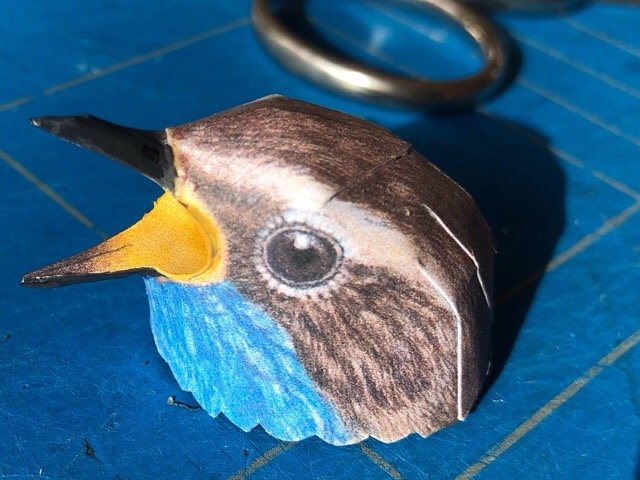
and here is the birds head, with an open (still unpainted) beak
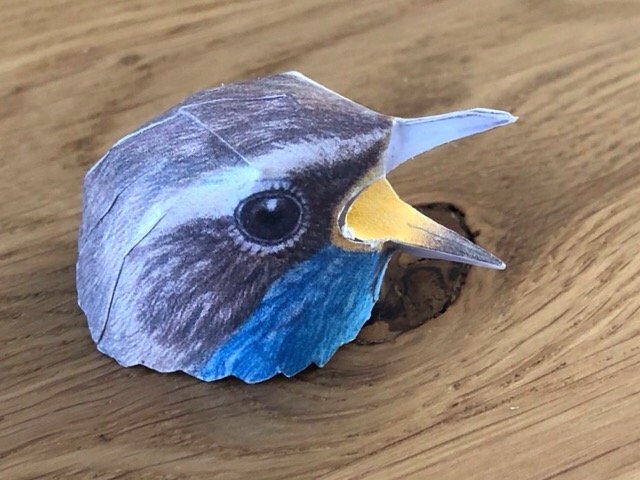
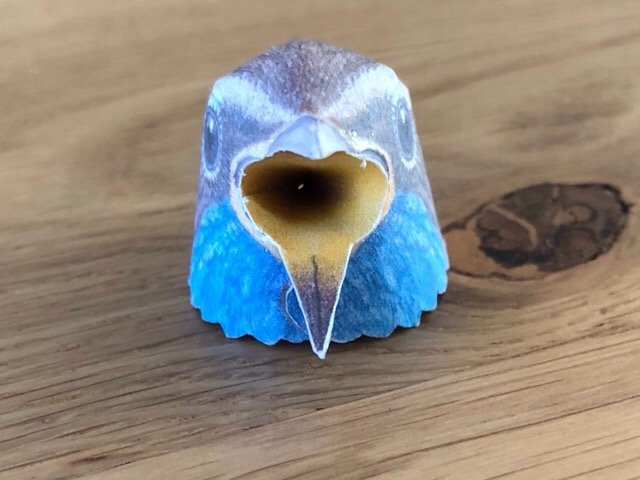
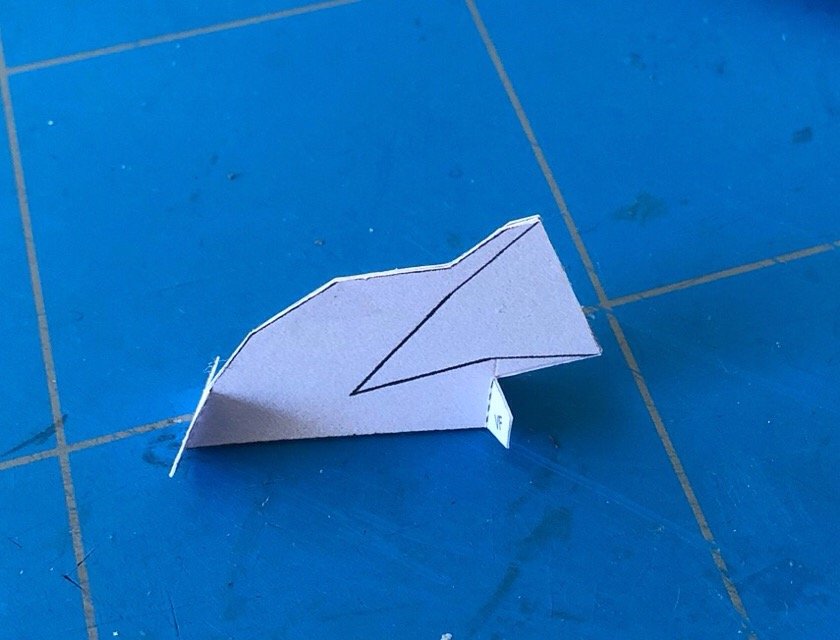
the beak is a cleverly shaped cone, placed inside the template shown in the previous post:
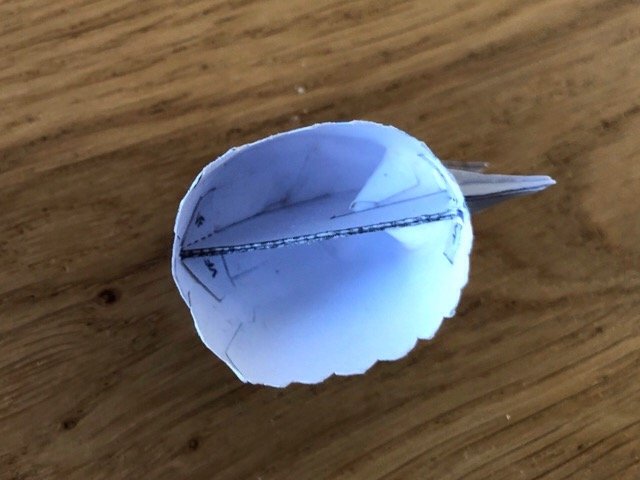
the outside of the beak is build up using a couple of layers of glue (took me some time to realize that PVA worked better than normal paper glue: PVA has gap-filling properties. Paper glue has not.
Also the sides of the beak have been filled using PVA. Some paint nedded to get the thing in the correct colour.
Gluing the head to the body, two legs to be added, and two flaps to hide the gluing tabs on the wings. Should be possible to show you the flying thing tomorrow.
Jan
-
A coupleof months ago you showed another one that looked promising to me. Any news on this one?
jan
- AlanDavison, chris watton, coxswain and 2 others
-
5
-
Given the level of detail you are adding, including the actual food is almost a must.....
Jan
- Canute, thibaultron, Jack12477 and 2 others
-
5
-
-
Even if we have shut down, work will continue....
No additional time to read or build

Jan
- mtaylor and thibaultron
-
2
-
But as in the german cardforum guys started their corona-trigered spring-building, I couldn’t resist.....
First the flat paper:

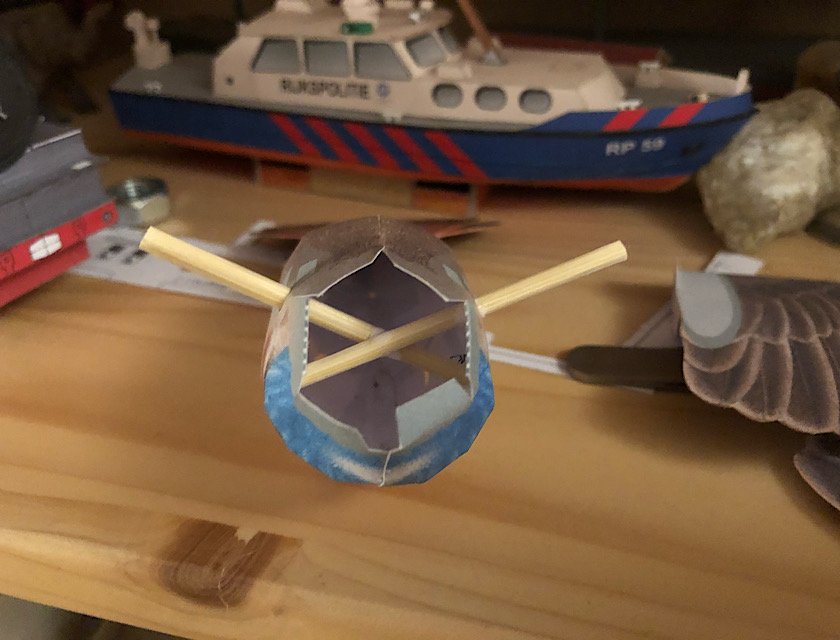
Resulting in a nice curved body. Closing was a bit fiddly, but worked out OK
Next came the tail section. Getting it properly inside the body proved to be a bit difficult. IN the end the section matches up with the tabs, but the tail is not completely level with the body....
And the preparations for the wings: the downloadkit does not provide the skewer, but the skewer is needed to get the wings in the prober angle, and to give them some firmness, preventing them to get loose.
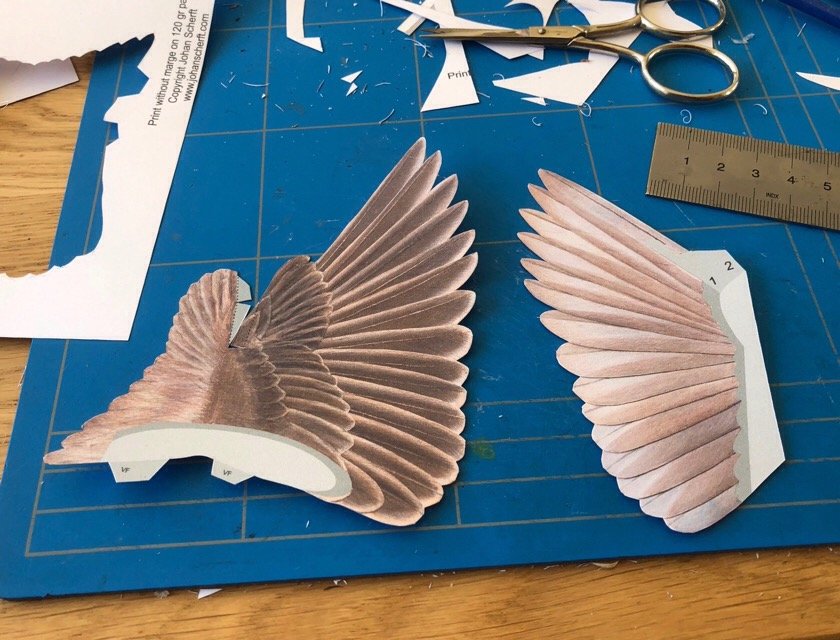
The wings itself were rather straightforward, although in the end not without a small problem:
Upper and underside
As the surface is quite large, and need to be glued, I placed a line to help me align both parts without having the need to adjust two quite soft, sticky surfaces.
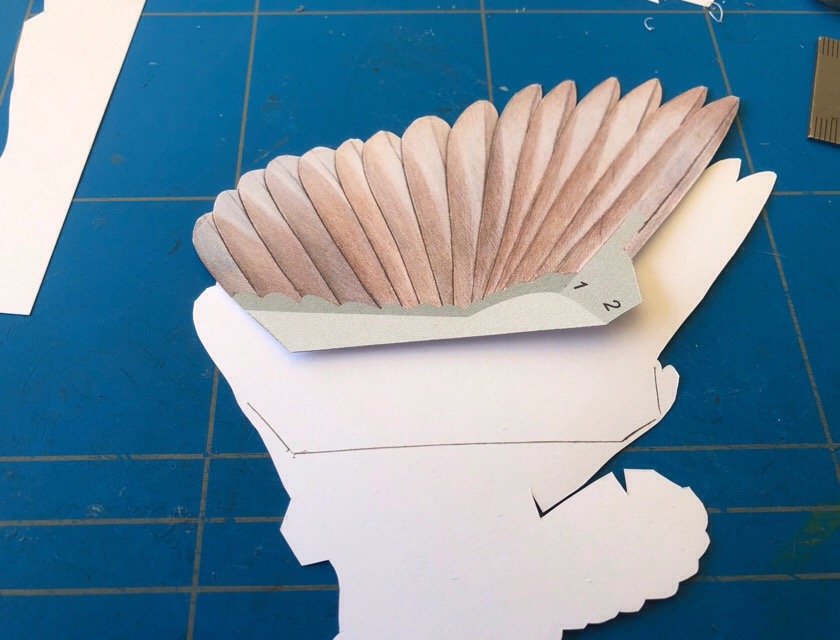
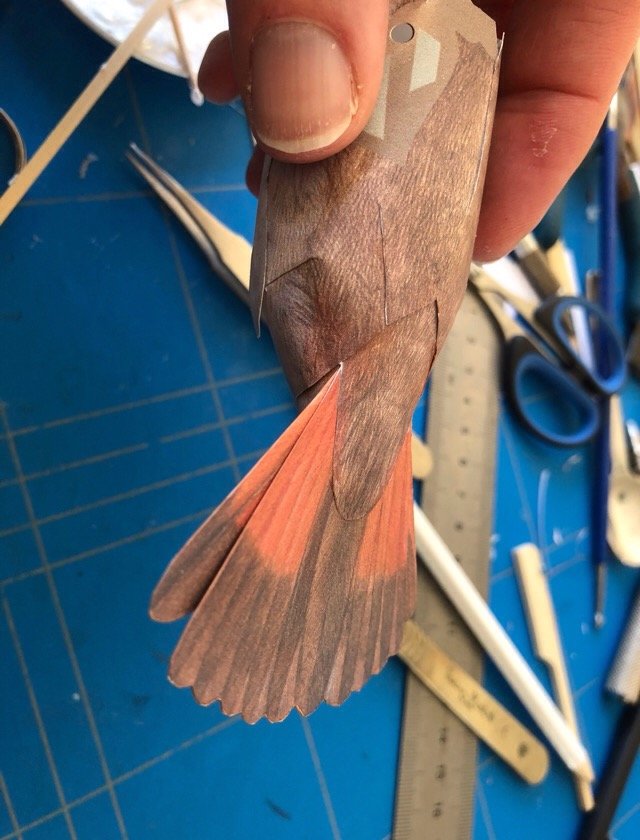
And all parts together: the two outmost feathers are modelled as separate parts.
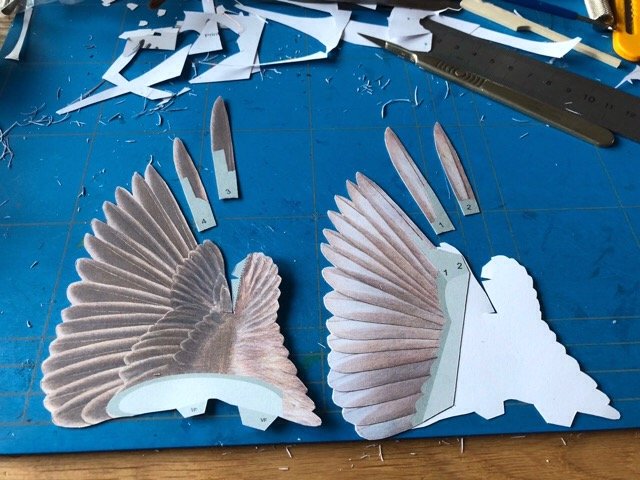
And there the small problem arose: bending over the underside of the wing turned out problematic: at the elbow the card tended to kink: no way to get the underside aligned with the indicated gluing area, getting the front side at the right angle and the card flat.
Ah well, perhaps I wil do it again.
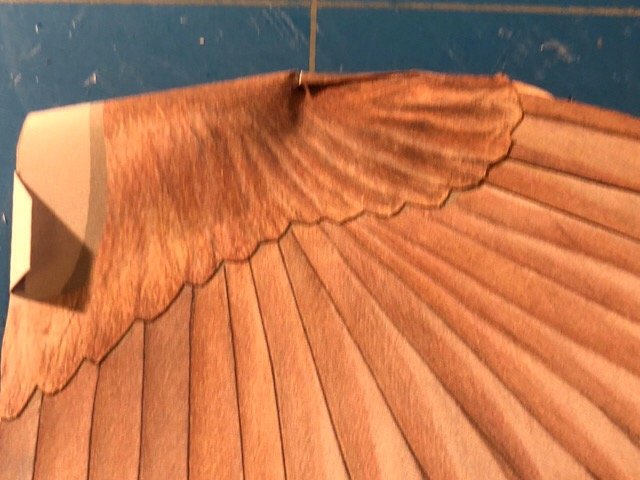
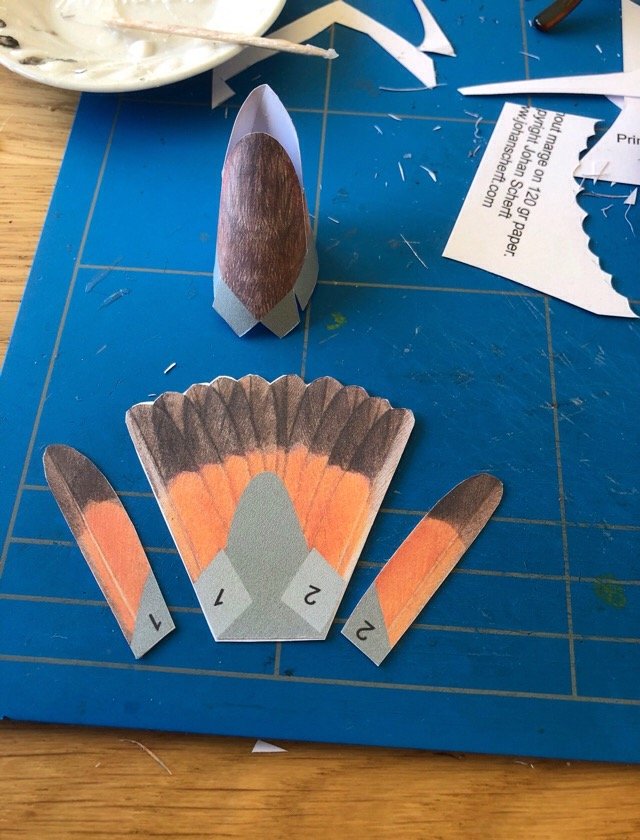
Next the first part of the head:
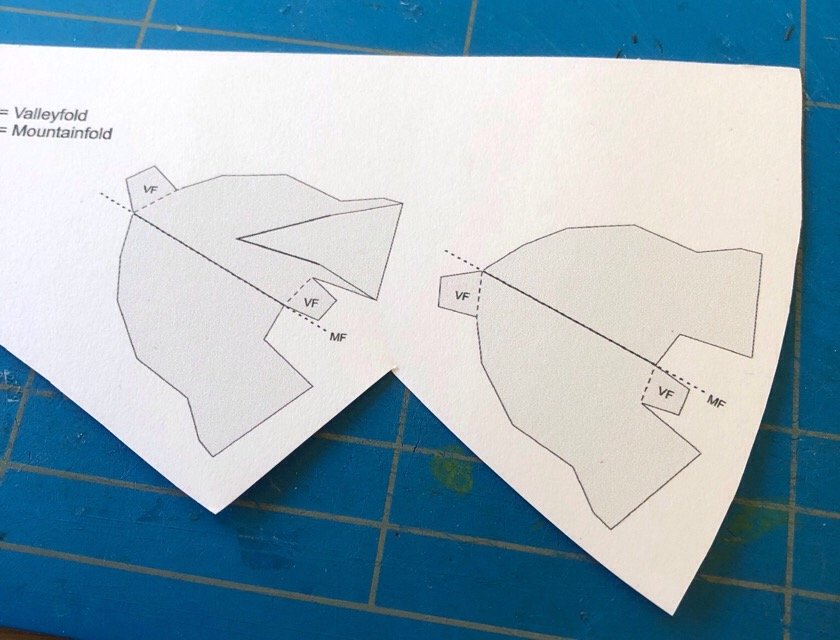
Clever construction: as the bird is singing, you need a way of aligning its beak (inside and outside). This rather stiff, four-layered card is a template: it has to be glued inside the head, then the beak is cut out, its throat glued in place, and the outside modelled, building it up to the desired thickness using layers of glue. Will see how that works out.
Jan
(to be continued)
- GrandpaPhil, mtaylor, hof00 and 3 others
-
6
-
I already found the answer to my question. Pet is on the internet (wiki-page crew works railway). So much to read and learn
")
Jan
- Canute, michael mott, mtaylor and 1 other
-
4
-
You mean there is something technical you don't know about?
Now that is a surprise
Your little machine is coming along nicely. What was its original duty? Was it tram-loco, or some kind of industrial loco (or one of those coal or peat transporters?)
Jan
- druxey, mtaylor, popeye the sailor and 2 others
-
5
-
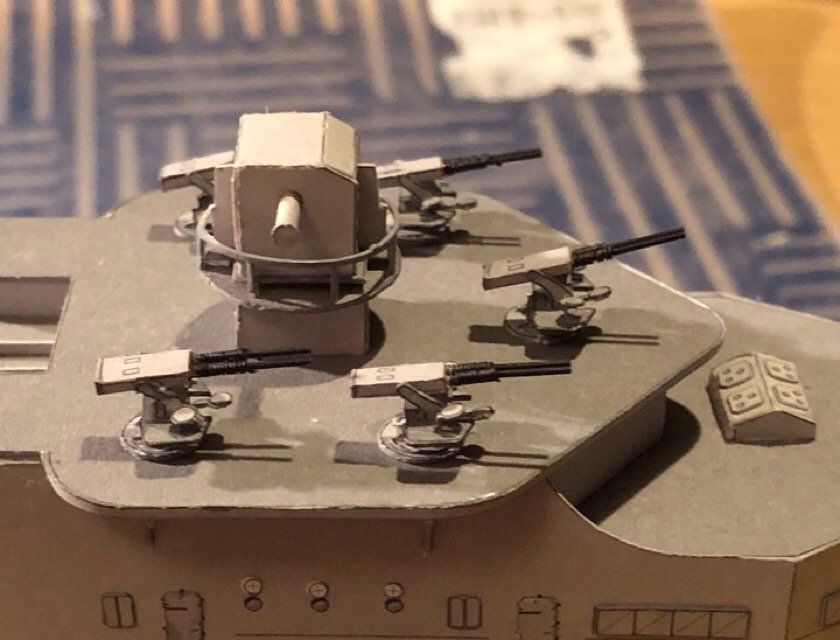
Almost a year ahead. It was not rainy today, but Idid the bofors.
The pics are a bit lousy, but the result is more or less as it should be.
The Scaldis/JSC card has the tendency to delaminate when sharply folded: the small seats therefore were a bit of a problem

and I made a small start on the ships boats.
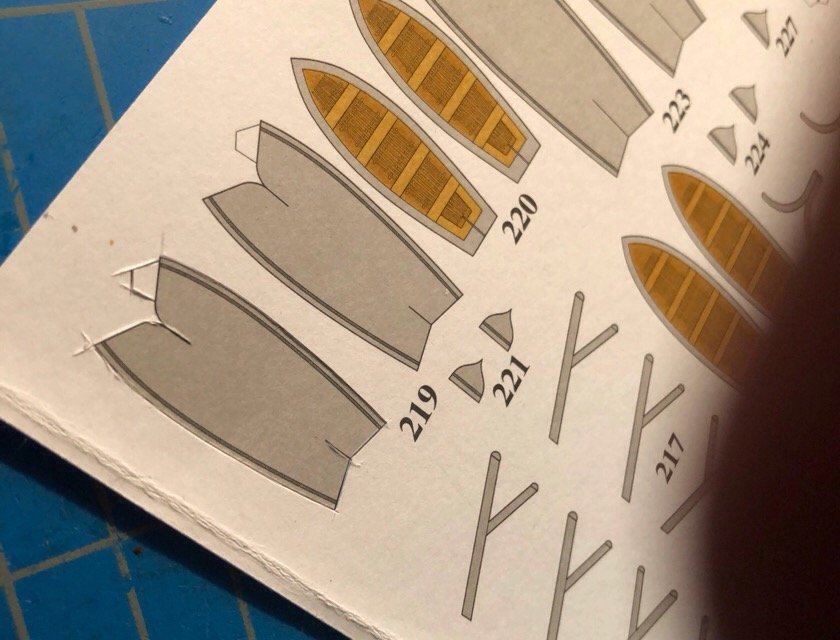
I decided to do those 'as printed', and not by replicating part 220 and adding the boats interior.
See you next year
Jan
- Canute, mtaylor, popeye the sailor and 3 others
-
6
-
-
I don't know whether this counts as progress : all (but three) pieces have been used, the evergreen been painted (yes, I know, thee colours are off, but not as far as these pics suggest).
Remaining work is masts and rigging. I tried myevergreen rods, but they are not stiff enough. So, I have to find some steel or brass inthe correct thickness, and delivered by a webshop with decent postage-costs. I hate ordering little thingies costing under 5 euro's and paying four times as much due to the stamp that is on it.
)
Today's pics
Knowing myself, it will remai. In this state quite a long time. I have now three or four models in this 'almost done' category, some for over a decade
Jan
- mtaylor, Canute, Ryland Craze and 3 others
-
6
-
Nope: build the hull took me three years. Rigging still hasn't finished in almost 7 years.
I guess the halfway point measured in parts is something different han halfway measured in time (not to speak in terms of motivation
)
But why bother over the half-way point? Two things count (at least to me): the fisished product and the fun while working on it. No fun: no work and some longer time till the finished product.
So what? put it aside when the fun is over, take it up again when you feel apt for building. As long as it is not your primary source of living, counting hours and parts isn't that important, or is it?
Jan
-
Nobody believes that.... That sounds so simple, so it can't be true.
madness is setting in here too. Meetings cancelled, people forced to work at home, schools closing at first cough.
Interseting chain reactions: scholl closing, kids at home, parents not being able to go to work (or asked to stay at home when the kids feeling not completely well)
On the bright side: plenty of space in the commuters train
Jan
-
Did Zara ever had a camouflage pattern, or will she just be plain (ah well, we know what you do with plain
) grey?
Jan
-
PS: third question: what are the blocks made of? They look quite smart
Jan
-
What a nice model you made out of that Heller kit!
Two questions: what did youuse for the sails? The material looks quite good (both in colour and in texture)
and the second one: did you paint the lines between the hull planks just freehand?? I see no belading, runnin gor other issues in the paint.... I can't even paint a full size door without my paint running in all directions
Jan
-
Great, another masterpiece on the go!
Jan
- thibaultron, popeye the sailor, RGL and 3 others
-
6
Galleon San Luis, please help
in Nautical/Naval History
Posted
I've been searching, and I have seen two (incomplete) buildlogs of this model on italian fora. Both logs showed the contents of the box: lots of parts, and a booklet with pictures, no drawings.
I also found that the drawings by Lusci do not really match the model by disar....
Looks as if you are more or less at the deep end .
Jan