kurtvd19
-
Posts
3,043 -
Joined
-
Last visited
Content Type
Profiles
Forums
Gallery
Events
Everything posted by kurtvd19
-
 Here is what I did. The plans were updated after I contacted the kit designer to show the problem - have no idea of how many sets were initially printed but eventually the correction will show up in kits sold. Kurt
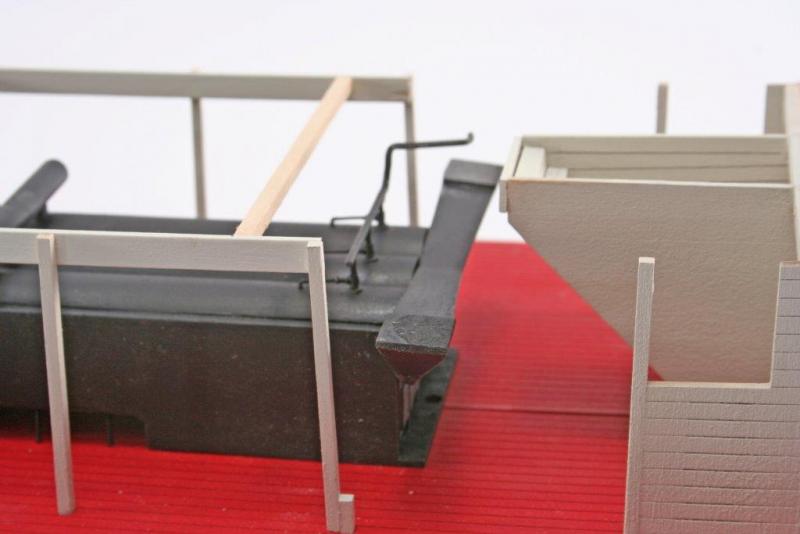
- 296 replies
-
- 5
-

-
- chaperon
- model shipways
- (and 1 more)
-
Cathead is right on going with white. Whitewash was cheap and plentiful and helped with vision in cabins with small windows. By far the most common colors on riverboats were white and red due to the cost and availability of other colors in that era. Some boats had brown or green decks, but few had anything other than white on the walls. Kurt
- 296 replies
-
- 5
-
-
- chaperon
- model shipways
- (and 1 more)
-
Ken: Great work as usual. A very attractive model. Great news about Scale Hardware! I buy a lot from them and was very unhappy when the doors closed. Glad it was bought up and I can get parts again. Kurt
- 162 replies
-
- 8
-
-
- dirty dozen
- fishing
- (and 2 more)
-
I like it as is. I think it will look great when installed - the limited visibility of the boiler when installed will make the weathering look very realistic. Kurt
- 296 replies
-
- 6
-
-
- chaperon
- model shipways
- (and 1 more)
-
Len: The box is the insulating part that covers the individual boilers. I would leave it as is and add details to the assembly if you want to upgrade. Kurt
- 296 replies
-
- 5
-
-
- chaperon
- model shipways
- (and 1 more)
-
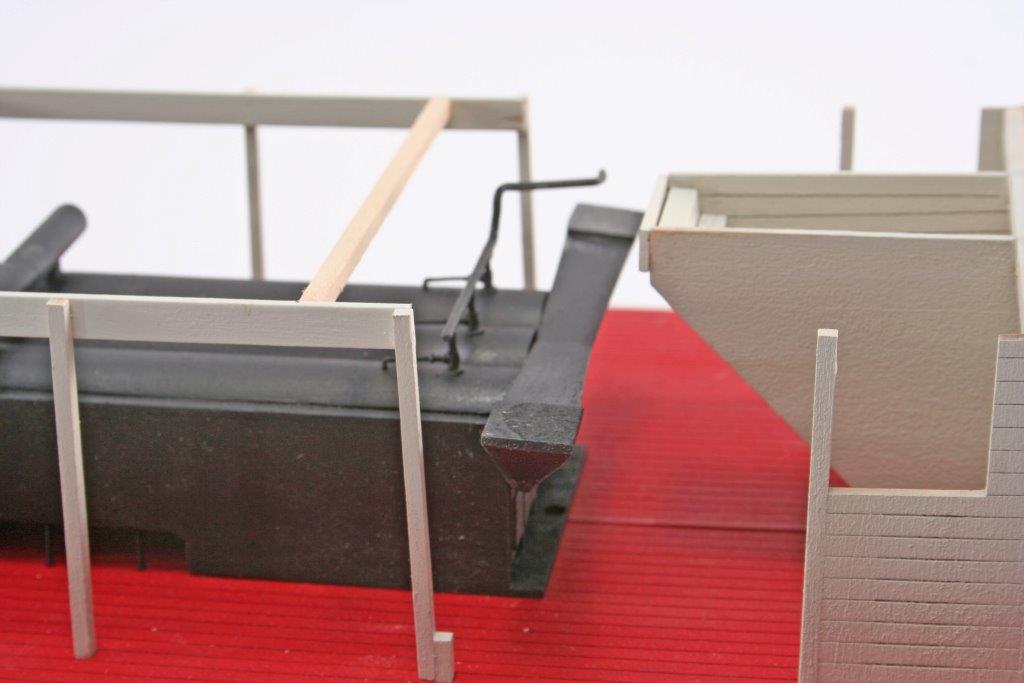
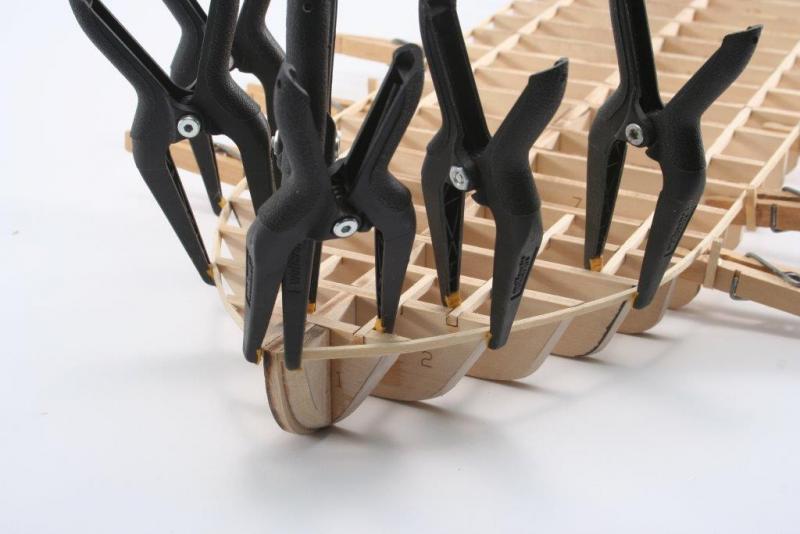
Len: To the right side of the attached photo of the hull of my Chaperon during assembly you can see a simple home-made planking clamp made from a common clothes pin. This type of clamp does no provide a lot of force, but it you soak the plank for a few minutes and clamp it in place to dry then when it's dry glue in place the use of a lot of force is not needed. Kurt
- 296 replies
-
- 6
-
-
- chaperon
- model shipways
- (and 1 more)
-
ofencer - We have established a policy acceptable here - please don't muddy the waters with what is done elsewhere. Please read the policy and posts that were linked in my earlier post. Kurt
-
Ken: For a discussion on Copyright, the following link will take you to a much discussed topic - http://modelshipworld.com/index.php/topic/12628-copyright-beware/?hl=copyright The official policy regarding Copyright on this site is posted on the last page of the link above. You are perfectly able to do anything on your own for your model w/o worry about copyright - it's only when posting the drawings or selling the drawings that you run the risk of violating the law (or our rules here). The link above should clear this up for you. Building the model and posting on MSW is encouraged. You mention selling copies later - that would certainly depend on your work not infringing the copyright of others - but also follow the rules here on MSW about selling. It is entirely feasible for you to do up CAD plans and sell them w/o violating copyright - depending on how you go about the project, what you add to the work, etc. There is all sorts of information regarding copyright on the internet. My suggestion would be for you to do some research into copyright and then decide on how you proceed with your project. If you have any specific questions you can send me a PM. Kurt
-
Sternwheeler "Zulu"
kurtvd19 replied to Kishmul's topic in CAD and 3D Modelling/Drafting Plans with Software
It's another riverboat log - I am on board. The ZULU was a cover on an old Model Boats - the R/C magazine from GB - and a how to. I have it in my files and will be digging it out. If this is the same ZULU, it had two wheels at the stern that could be reversed independently for very responsive steering. I have a set of R/C sidewheels I intended to use on a model of this boat - but I think I am done with R/C - but as a static model I am very interested in this build. Kurt -
Poochie: Midwest has a list of tools needed to build the kit in the instructions for their Lobster Smack. There are additional or replacement tools that will make it easier to build but the minimum are listed right in the instructions. Kurt
-
Jim Byrnes Thickness Sander
kurtvd19 replied to Landlocked123's topic in Modeling tools and Workshop Equipment
I have not bothered with an adapter but my Fein vac hose, which is metric, traps every bit of the dust when I just set it into the top port. Someday I will remember to get the adapter and will have a tight fit - but it's not been necessary yet. Kurt -
When to varnish
kurtvd19 replied to medic's topic in Painting, finishing and weathering products and techniques
Short answer = No. Long answer - read Jaager's first paragraph above - the slightest nudge, bump or pull will beak the bond. Kurt -
Looking good Elijah! I see you got the poster board for a clean background. For everybody following Elijah's build I want to tell you that when he comes to the local club meetings he is always asking how to do something in a better way and takes all the club members, as your suggestions/help, to heart. He's well on his way to tackling much tougher subjects. It's great to see his progress. Keep up the good work Elijah. Kurt
- 701 replies
-
- 8
-
-
- phantom
- model shipways
- (and 1 more)
-
Survey of wooden Mississippi riverboat kits.
kurtvd19 replied to skipper1947's topic in Wood ship model kits
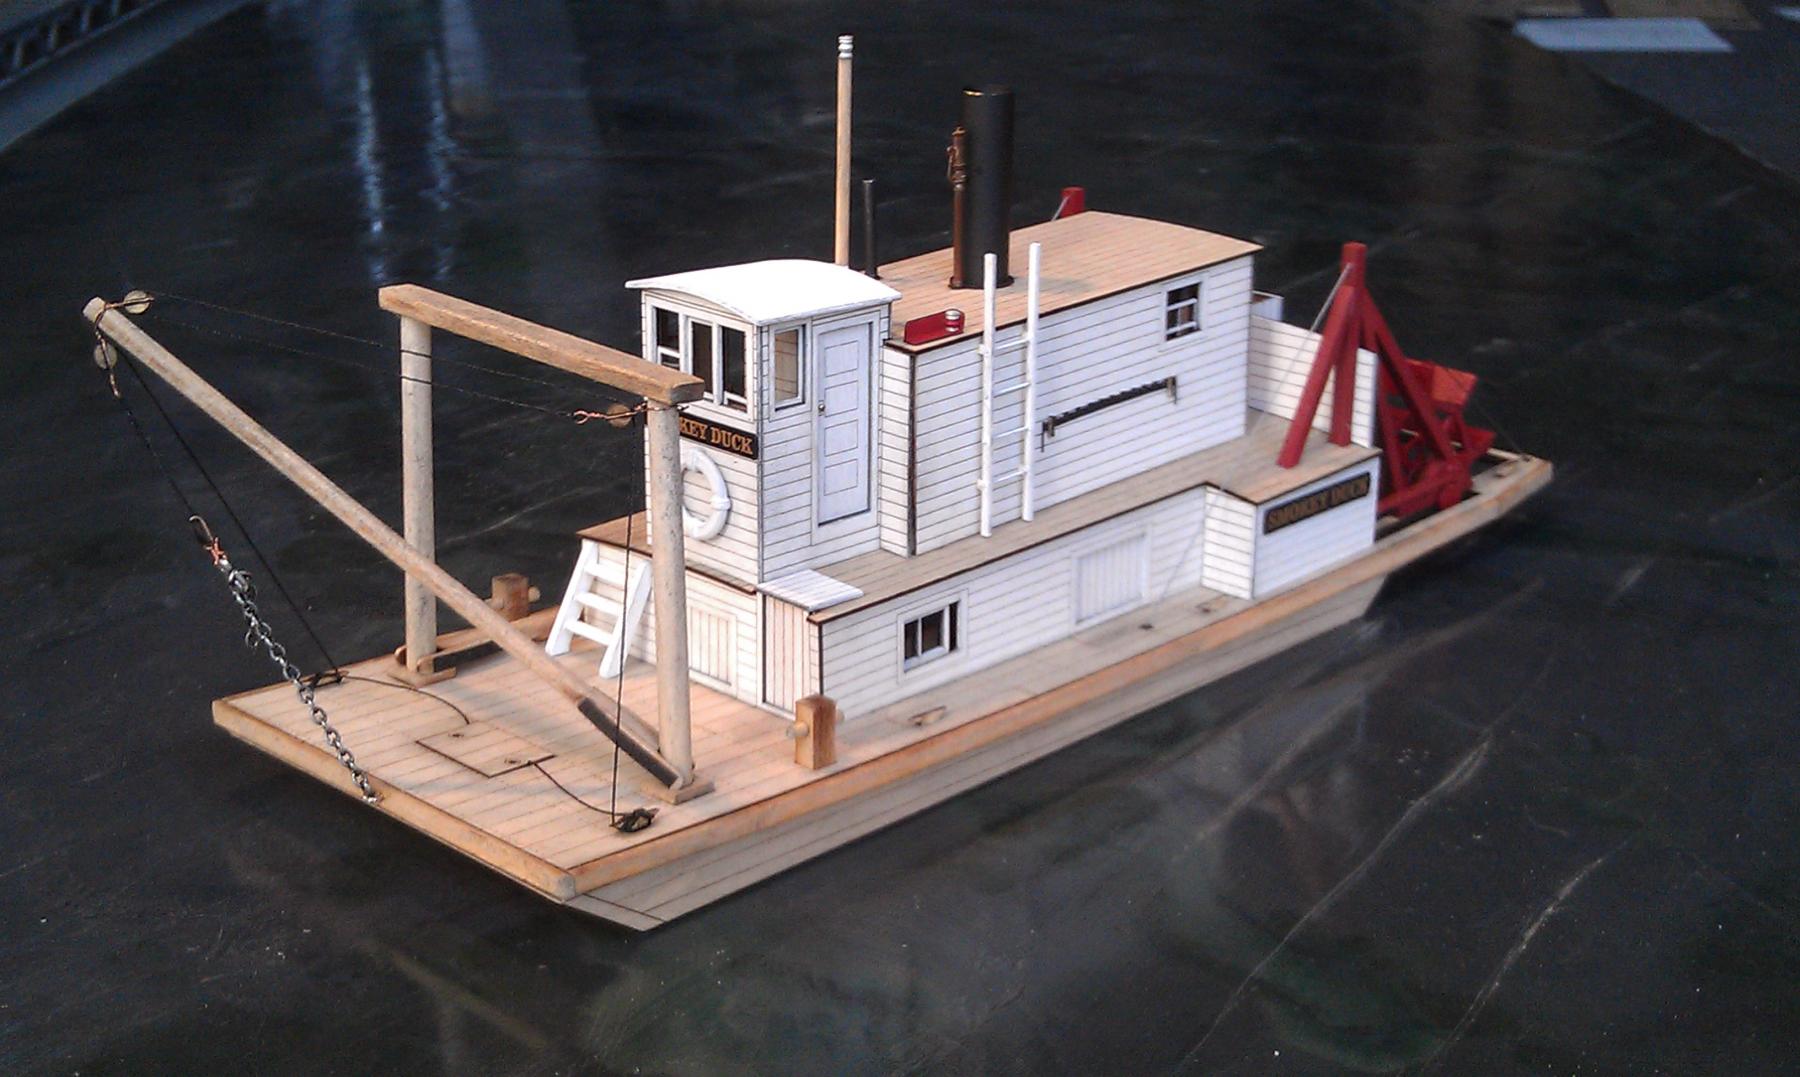
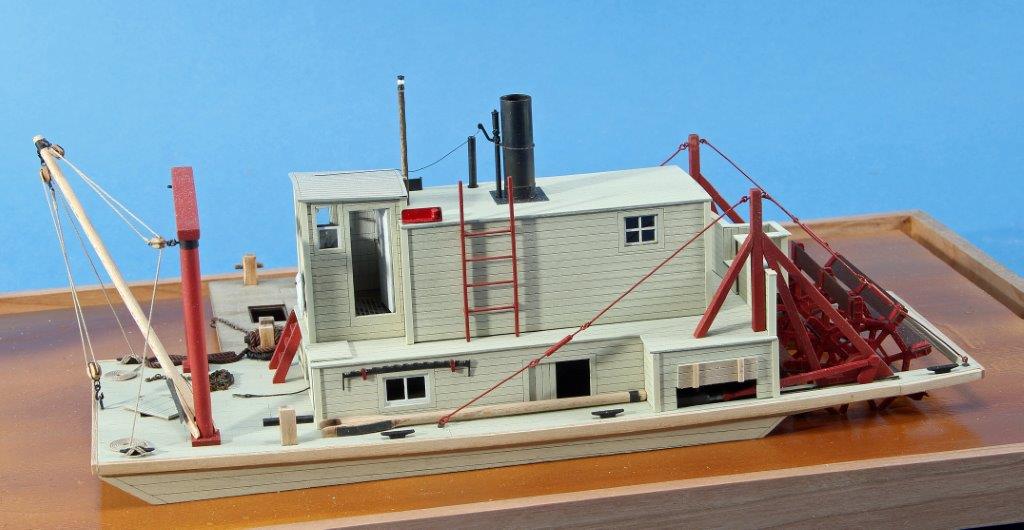
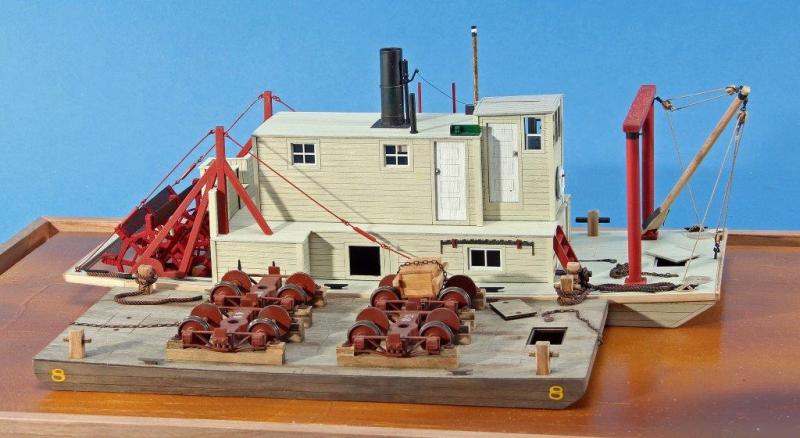
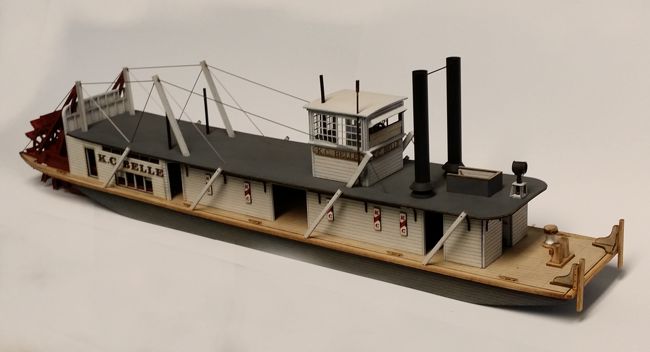
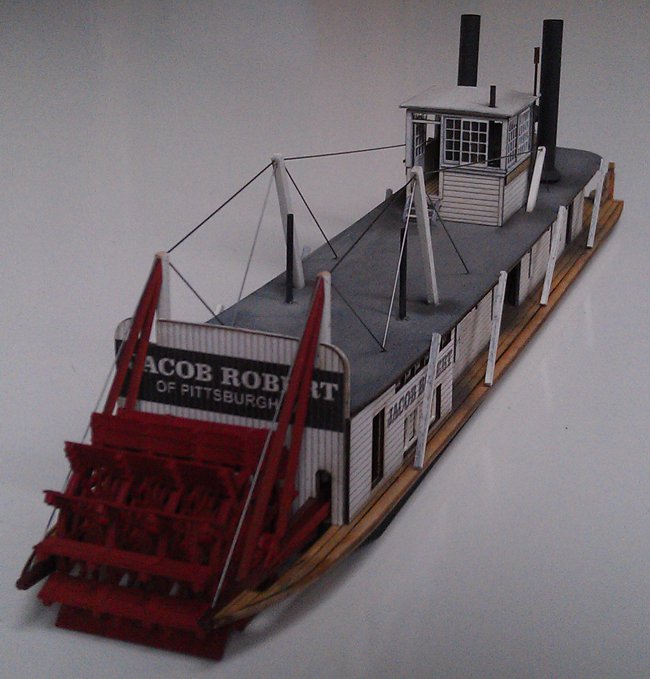
Roger: Thanks, I was going to mention the models by Train Troll - www.traintroll.com - and got ahead of myself and posted the previous bit - thanks for mentioning the Train Troll kits. The top image is Train Troll's photo and the other two are of my completed model from the Train Troll kit of Smokey Duck. This isn't a Mississippi River boat, but it does show the quality of the Train Troll kits. The other two photos of the larger Mississippi River type boat are from Train Troll -the HO scale boat. These kits are great. The Smokey Duck is by far the best fit of laser cut parts in any kit I have built (or even checked out). Kurt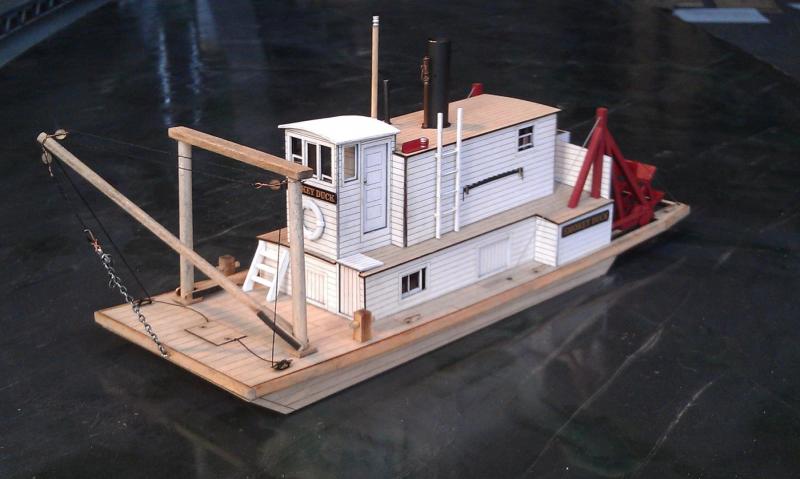

-
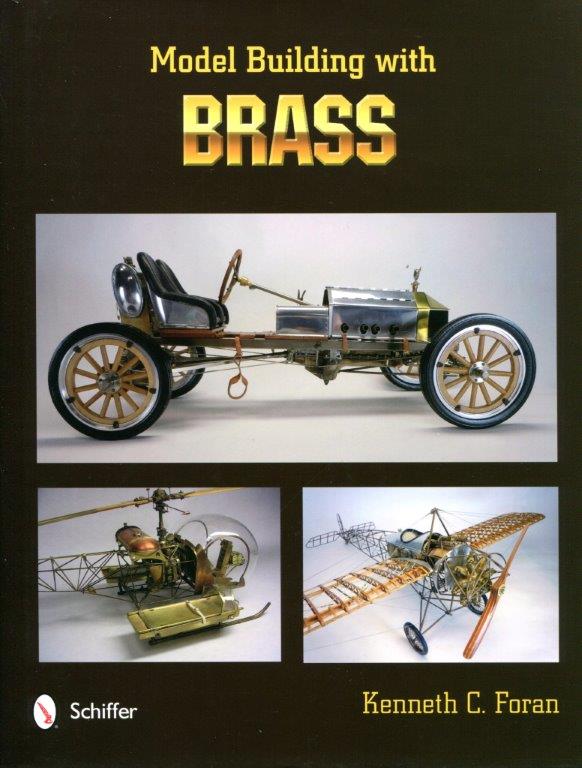
For my review of Ken's book check out the link to the book reviews below. The review was published in the Guild's Nautical Research Journal but not here on MSW. I highly recommend the book - and I regret I was unable to make it to the NRG Conference where Ken spoke on the subject of working with brass, but I arranged for a local club member to take my copy to San Diego so I could get Ken's autograph in the book. Kurt http://modelshipworld.com/index.php/topic/14922-model-building-with-brass/
-
This book by MSW member Ken Foran has been worth every penny spent on it and I highly recommend it if you work with brass at all. This review was originally published in the NRG's Journal but with some recent discussion on Ken's build log I thought I would post it here. Model Building with Brass By Kennneth C. Foran Schiffer Publishing Ltd. 4880 Lower Valley Road Atglen, PA 19310 ISBN : 978-0-7643-8 Hardcover 8.5 x 11 inch format – 160 pages $34.99 List Price The subject of building models with brass is very well covered in this book with the emphasis on how to make parts from brass without being a machinist. The tools the author uses are probably already in the workshops of most intermediate to advanced modelers. The only power tool routinely referred to in the book is a drill press but modelers with fully equipped shops will certainly figure out how to use their power tools instead of the hand tools used in the book. Mr. Foran shows how the non-machinist modeler can make even very complex parts and assemblies from brass, using mostly hand tools, by thinking about the building process in a different manner than usually presented by model machinists. The process described in depth in this book is best described as building up a part rather than machining away material to make a part. Over 300 clear and sharp color photographs are used to illustrate the various techniques and operations explained in the book. The author explains how to use various brass shapes, tubes, bars, flat sheet and wire to make up parts by the additive process. The need to anneal brass before working with it is fully explained as are the problems encountered by not annealing the pieces. Soldering is extensively covered as would be expected. Also covered is how to prevent pieces being used for alignment during soldering operations to not be soldered to the parts being joined. I found this technique to be very helpful and one that I had not seen explained previously in my reading of various metal working articles and manuals. Cutting of pieces from flat stock as well as from bars, tubes and shapes with hand tools is thoroughly covered with many tips on using the jeweler’s saw and picking the proper blade for the job at hand. I had less than satisfactory results using a jeweler’s saw with brass before reading this book and broke many blades. I recently had occasion to need to cut several pieces of brass for an oval port hole assembly on a 1/12 scale model. Following the tips from this book my results were very good and I will be using my jeweler’s saw more often now. Cleaning brass before and after soldering and prior to plating or other finishing is covered thoroughly. Chemical blackening of parts and plating parts is thoroughly explained. This is a book that belongs in the library of every modeler who works with brass pieces regardless of the type of model being built. I originally wrote this review in late 2013. Since then this book has found a spot in my shop so it is easy to grab when I need to check out a detail on a point that I remember from my previous reading of the book. I can only reinforce my original recommendation that this book belongs in your shop if you ever work with brass.
-
Survey of wooden Mississippi riverboat kits.
kurtvd19 replied to skipper1947's topic in Wood ship model kits
Skipper The Chaperon is the only one that I would recommend as it's pretty accurate and the others are just vague ideas of what a riverboat was. A lot of research went into the development of the Chaperon kit and the kit builds to a very close copy of the actual boat. I have a lot of historic photos of the real boat to compare the kit against. There are plenty of historic photos of the boats you mentioned to compare to the photos of the kit - check them out and I think you will decide on the Chaperon. Kurt -
Ken: I like the way you are proceeding - using the old CAD method to back up the newer CAD drawings. The word you are looking for referring to the raised bulkheads around the engine compartment is "coaming". Kurt
- 162 replies
-
- 6
-
-
- dirty dozen
- fishing
- (and 2 more)
-
Ken: Yes, in the scratch built section. The big difference in building for yourself vs building for a customer is that time ='s $$. The more time you take the less you make. So, it is critical to establish the degree of detail the customer expects and how long that takes to accomplish, so that a reasonable profit is made. If the customer isn't paying for your time to build in extra details they need to be left out or you don't make any profit. This needs to be established up front. And then the build is started and the builder needs to fight the urge to add this or that detail like they would on their own model where time isn't a factor. This is a bit off topic for the Constitution build so I will contact you privately for more thoughts on this. Take care, Kurt
-
Ken: Please consider doing a build log on the Dirty Dozen. I think it might be very educational to the forum members to see what is involved with a museum commission, which is different than a model built for pleasure and the home (if it doesn't show don't build it - as one example). Kurt
-
Ron: I put mine on flush with the deck planks. Installed centered would trap rain water on the deck. Kurt
- 63 replies
-
- 4
-
-
- chaperon
- model shipways
- (and 1 more)
-
Mick: Very nice work. Love the stove! Very well done. May I use the photo of your burned finger for my presentation on shop safety? I have a section on fire and heat hazards and I don't have an illustration for a burn and this would do nicely. I can make it an anonymous finger or give you full credit in the presentation. I have photos of what a Byrnes saw can do but no burns. Keep up the good work - minus injuries. Kurt PS: Shipped plan set #80 yesterday - surprised there are not more builds.
- 504 replies
-
- 7
-
-
- washington
- galley
- (and 1 more)
-
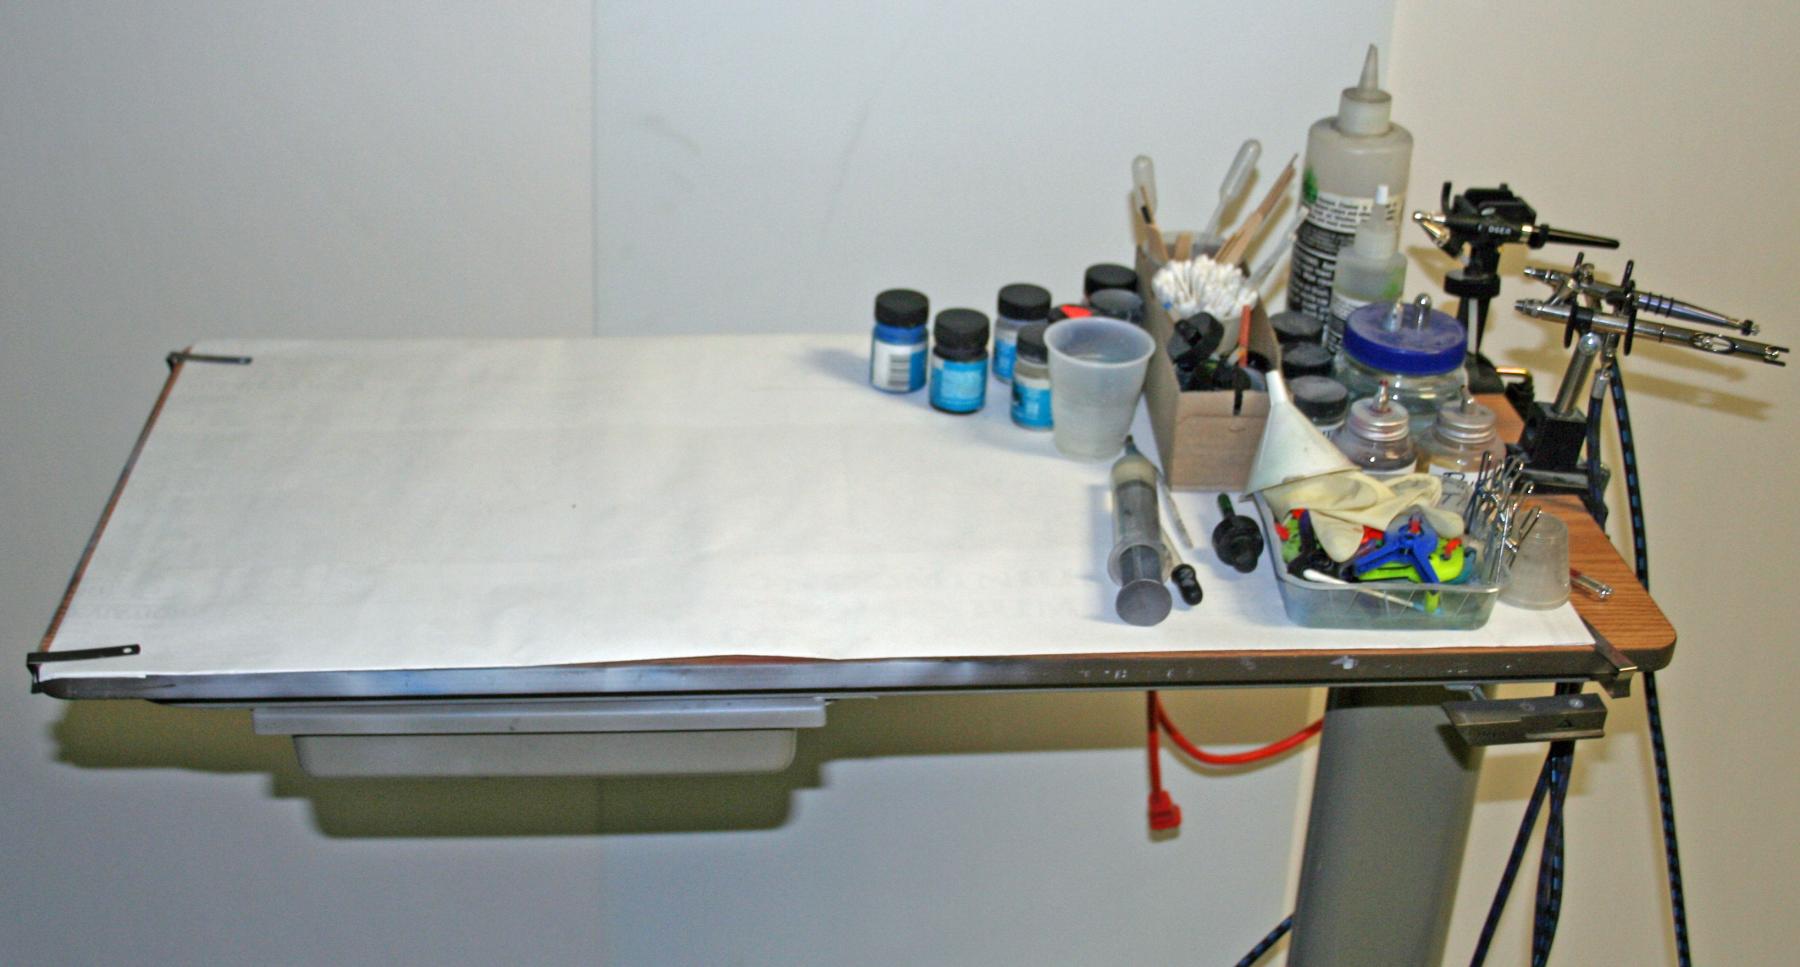
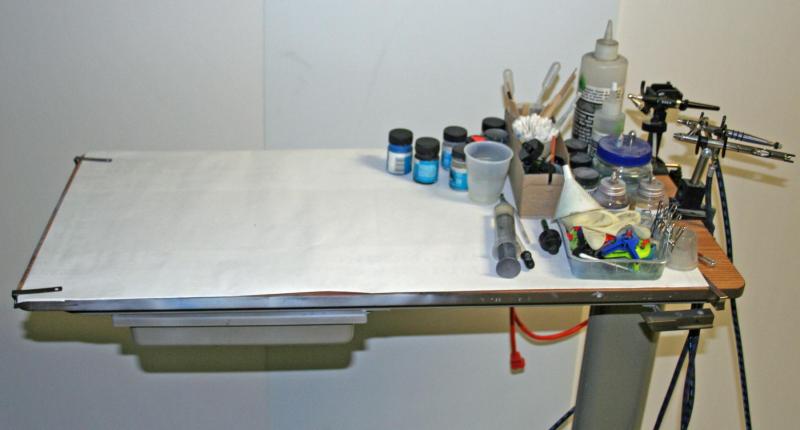
An affordable alternate to the height adjustable bench is an adjustable drafting chair. I have one for my shop and I can sit low or high depending on what I am working on. When I was doing a lot of restoration work I got a cantilever type of hospital bed table - it looks like a squared off "C": from the side and the top is height adjustable. With the drafting chair and the hospital table I could sit at a comfortable height for any job especially rigging. Working on the deadeyes the chair could be lowered and the table raised. Working on the tops, the table could be lowered and the chair raised. Put the work at a comfortable height. I now use it for airbrushing as shown in the photo attached (in case the description of the table wasn't clear. Kurt
-
If you get a dust collector unit that hands from the ceiling you will also need another fan to set up a rotation of air in the room. I have a unit and was not happy with the dust it was missing and did some research (read several articles on dust control in woodworking magazines) and found that for optimum effectiveness there needs to be a circulation of air in the room. The recommendation is to have the other fan blowing opposite the hanging unit on the other side of the room. Doesn't need to be a big fan just need to get the air on the other side of the room moving. After setting up the other fan the effectiveness of the unit increased noticeably. Kurt
-
This works with brass and copper wire too. Kit's provide wire in a looped roll - impossible to use in that form. I don't know if I have ever felt the stretch but by exerting a steady pull the wire stays straight when it's pulled tight enough. If it's not straight - pull again with a bit more force. Kurt