Landlocked123
-
Posts
449 -
Joined
-
Last visited
Content Type
Profiles
Forums
Gallery
Events
Everything posted by Landlocked123
-
 Hi Ed, I'm a huge fan and just picked up your two Naiad books. I'm basically a newbie at model ship building, but I have extensive experience with modeling and fine woodworking. I think the hull building technique your showing here is great. My question involves glueing the plans to the wood and then glueing more wood to that surface. I learned a long time ago a trick from an old wood turner. If he wanted to make a half balustrade, he would take two pieces of stock and glue them together with a piece of paper between them. He would then turn the balustrade normally. When finished would dampen the joint between the halves along the paper and easily split them apart. My question is, won't all the wood/paper/wood present some potential weakness and splitting problems down the road? I'm looking forward to hearing your thoughts. Best, John
- 191 replies
-
- 4
-

-
- young america
- clipper
- (and 1 more)
-
Thanks Mark, One more question. Did you have much CAD experience before you started working with the laser? It seems to me that there would be a steep learning curve to using both for the first time. Right now, I've finally finished making saw dust on my first kit. I should be way further along, but as my skills have improved, I'm constantly redoing old work. I should begin rigging any day now and will be looking for advice/help soon. After the schnooner I'm working on is done, I'm going to build the MS New Bedford Whaleboat ala the model by Greatgallions in the gallery. I'm going to the New Bedford Whaling Museum in a couple of weeks for a curator's tour. After that I'm going to build the MS Bluenose to learn planking and sails. Hopefully it will go pretty fast since I've already learned quite a bit about fishing schnooners in my current build. AND THEN......I'm going to attempt my first scratch build. Probably something like the Amistad or Eagle, but likely some sort of gaff rigged, top sail schnooner. Something sleek. So you see, I'm pretty far from needing the laser and CAD, but as you can see, I'm thinking pretty far down the road. Best, John ps. I'm pretty much an out of control tool junky. Since I can't retire, I'm trying to take advantage of my last earning years by buying as many toys as possible!
-
Hi Mark, As you know I followed your trials and tribulations in getting your laser to where you could use it reliably. However, it seems to me that given all the set up required to cut parts, if it's realy much more suited to situations where you want to cut many copies of the same part, for example if you are manufacturing a kit. I know you've lamented your scroll saw skills, but is it really time effective to use as a day to day tool? I don't know the trade-offs but I am truly curious. I find the technology intriguing, but I would like to get a better idea about the trade-offs in time and materials when doing a "one off" build and need to create a unique part. Best, John
-
Hi MK, I am certain that thread is significantly cheaper than the value of your time. Go to a quilting or sewing shop and you will be able to buy exactly what you need for a couple of bucks. Best, John BTW. This link for a you tube showing how to tie rat lines was posted on MSW a while back. I think it's pretty good. http://youtu.be/yMmGFWJhi8E
-
Hi All, I'm a big fan of Tamiya tape and have used it for many years on plastic models before I graduated to real modeling
-
Need help with rigging on the French Chebec Indiscreet.
Landlocked123 replied to DougM's topic in Masting, rigging and sails
Hi, A picture is worth a thousand words. John -
Threads on miniature nuts & bolts
Landlocked123 replied to jhearl's topic in Metal Work, Soldering and Metal Fittings
Hi John, I'm not sure this will meet your needs, but I was playing with the jewler's tap and die set I bought on e-bay recently. To make the nut and bolt pictured below I used 1/32" brass rod and 1/16" square brass tubing. The length is completely arbitrary. Using a jewler's saw I cut two lengths of the tube about 1/16" long. In one I ran a tap equal to the die I used to make threads on the wire and then forced the other end into the hole on the other piece which I then silver soldered in place. A couple of passes on some 400 sand paper and your done. I can't testify to the strength of nut, but it's definitely strong enough to stay in place. Best, John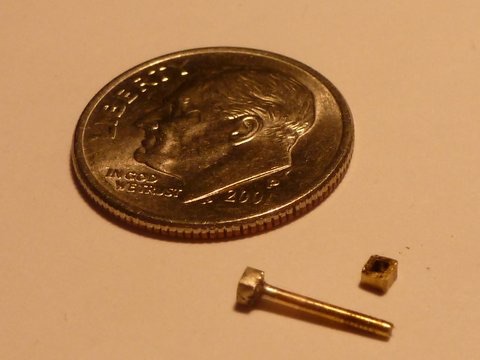
-
Hi Danny, As usual your workmanship is impeccable. You continue to raise the bar! I've been trying to understand the "rolling bevel". I've been staring at the pics for 15 minutes and am still trying to get my head around it. It's important to me since I'm planning on scratch build of a Glouchester Mackeral Seine boat which will be clinker planked as well. Thanks. Best, John
-
Somehow, I guess, they weren't worried about lawsuits!!!
- 728 replies
-
- 1
-
-
- le fleuron
- 64 gun
- (and 1 more)
-
Workshop Set Up Question
Landlocked123 replied to ChrisLBren's topic in Modeling tools and Workshop Equipment
Hi Chris, I lived in Highland Park for about 10 years in the 80s/90s and the one thing that no one who's ever lived in Chicagoland forgets is the winter temperatures. I now live in Connecticut and my workshop is in sort of a wing off the main basement. You absolutely have to find a way to heat the workshop space. I try to use an electric heater but it's just not up to the job. In the winter, I wear a sweater, sweatshirt, and cap. The problem is that I get so caught up in my work, I pay no attention to how cold I'm getting. My wife thinks I come close to hypothermia. I'll work until my hands freeze up, come upstairs and then shiver for half an hour. It may not be as bad since you're adjacent to a heated space, but my guess it would be easier to deal with it now than later. Best, John -
Hi Elia, In the post above you mention your "white mix". I have been trying everything to get a white which covers without building up. It looks like you accomplished realy crisp whites. Would you share your "white mix"? A member of my club suggested Zisser a stain/knot covering highly pigmented varnish. I look forward to your advice. Best, John
-
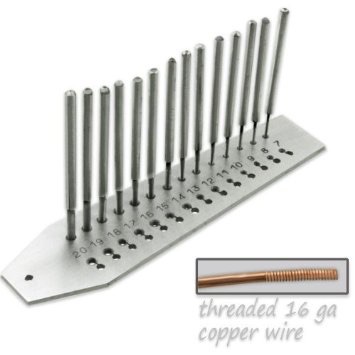
Hi All, John (AKA Jim Ladd) suggested in another forum (Metal Work) that if I was crazy enough, I might want to try to use a jeweler's tap and die. Well I went ahead and picked this up on E-bay for not a lot of $: I've played around with it with some small success. Now....can any one help me use it correctly? Cutting threads is pretty straight forward and easy. I was even, after quite a bit of trial and error, able to tap a hole which fit the threads. My question is basically if there a way to determine the size hole to drill for the tap? I would assume it would be the inside diameter of the thread, but how do I figure that out. I'm hoping there is something simple which has to do with the corresponding holes in the die, but right now that eludes me. Best, John PS. I tried it out tonight and came up with this: The bolt head needs to be filed down a bit but the other end actually screws into the loop. Regardless, if any one has any pointers on how to best use this tool, I would appreciate it. Thanks. John
-
Clevises - I think?
Landlocked123 replied to Landlocked123's topic in Metal Work, Soldering and Metal Fittings
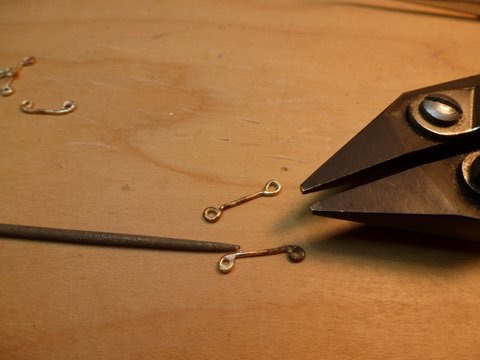
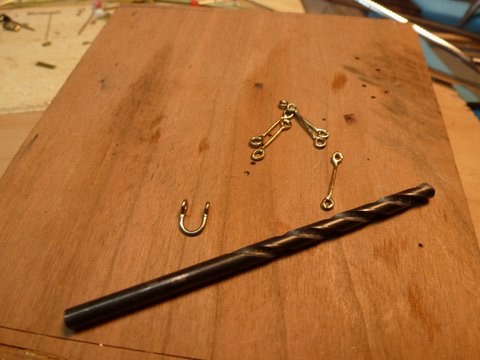
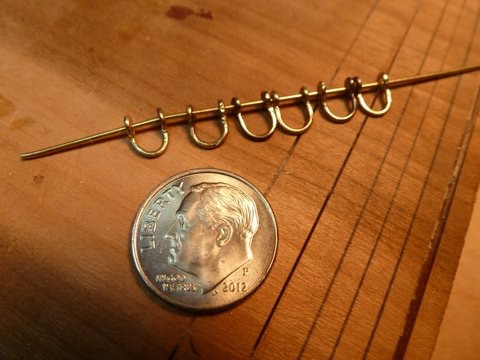
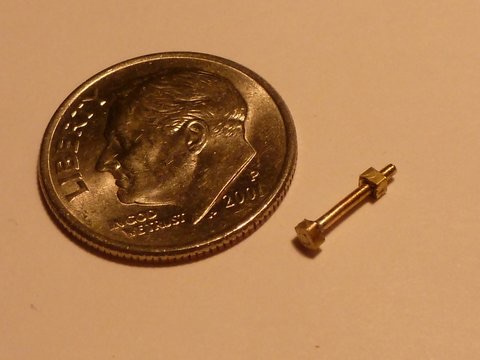
Hi All, When I got home from work tonight I thought I'd spend a few minutes playing with my new toy. While I still don't know what I'm doing, I thought I would test the limits of what I could come up with. Here is the result: I managed to make a square bolt head (it needs to be a bit thinner) and the other end actually screws into the loop. It's almost too small for my build, but I enjoyed seeing how small I could go. The only negative is that my wife has said she will use this photo for proof to get the guys with the big nets to put me in the rubber room.
-
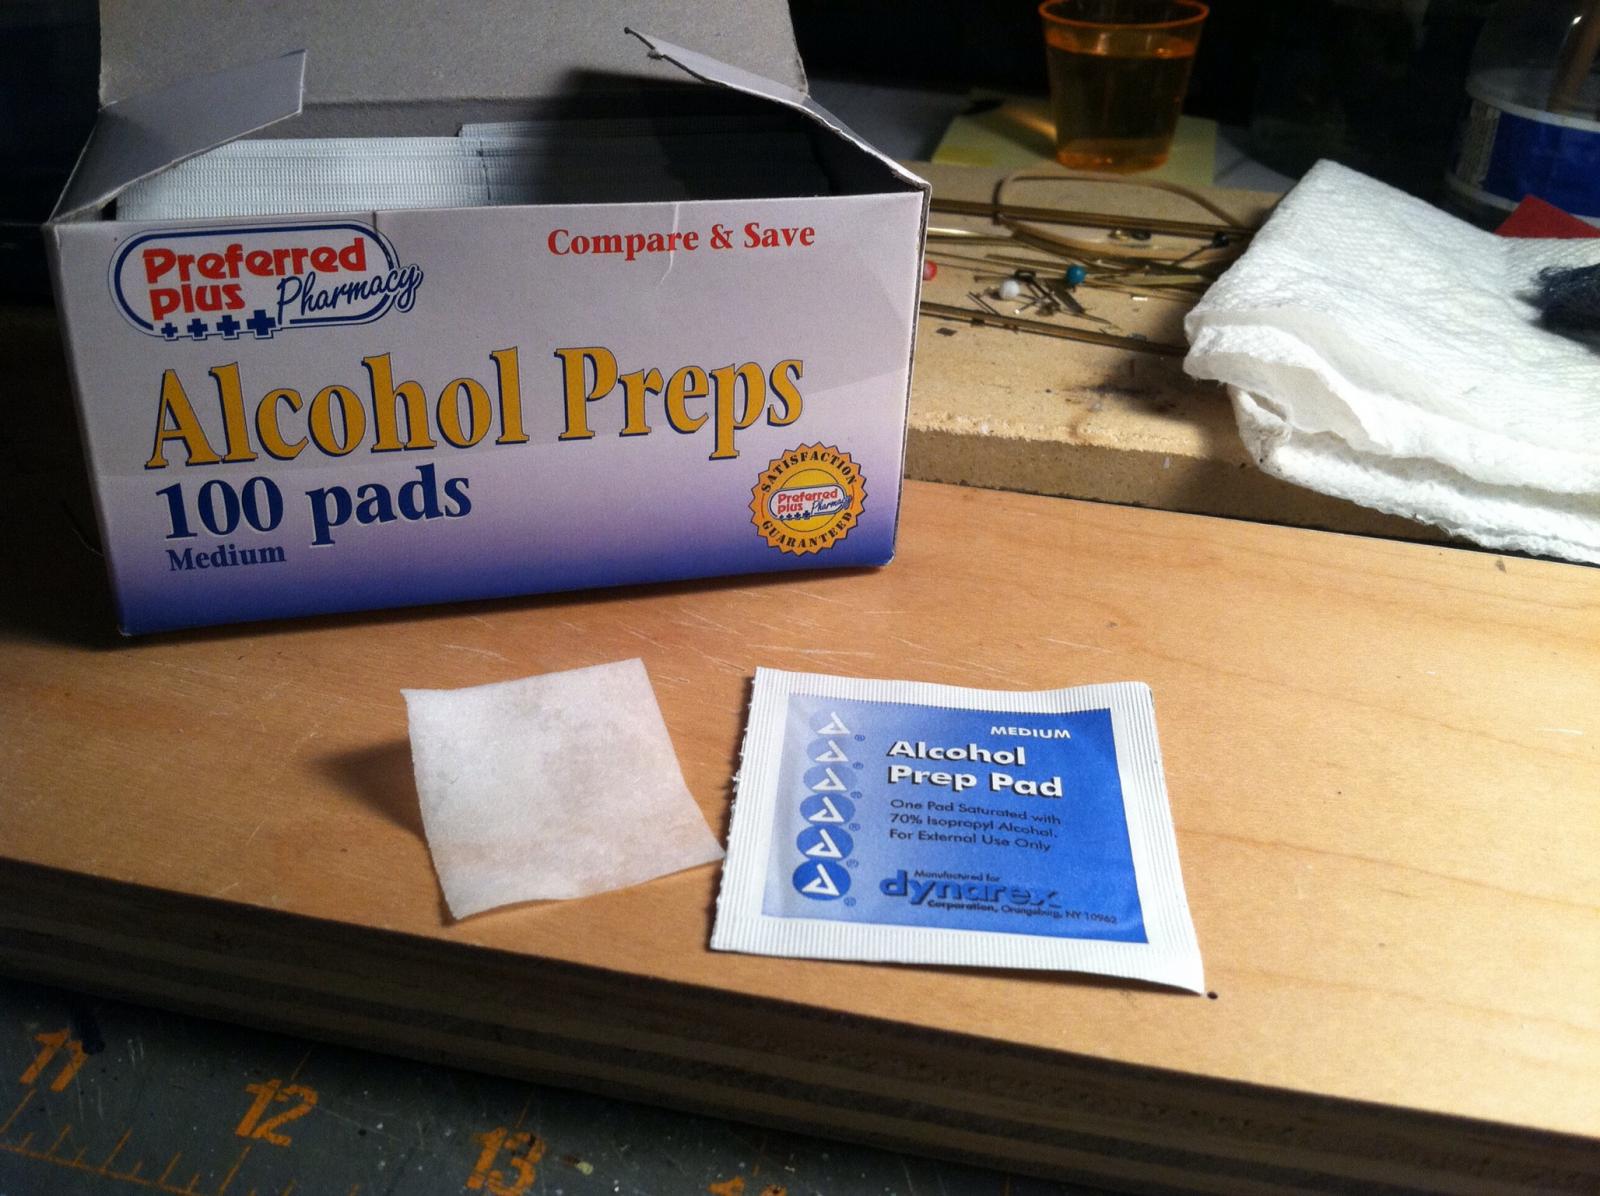
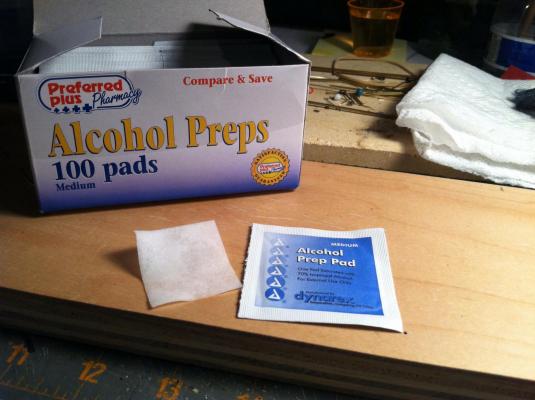
Hi Greg, I'm with you on the no name baby wipes. My only concern is that they contain soaps and fragrances and I don't know what else. I like nothing but alcohol which evaporates almost immediately. Best, John
- 396 replies
-
- 4
-
-
- Idea
- Bright Idea
- (and 1 more)
-
Thanks Mark, For all the jokes I've made I believe this is a very important technology and the applicability to our hobby (or more truly, second vocation) is great. You are really taking the role of an "early adopter" and hopefully will make things easier for us down the road. Best, John ps. It sounds like it may be going back after the 30 days? J. pps. It sounds like it's going to need a hell of a lot more work before we put it on sharks!!!
-
Table Saw Hand Safety
Landlocked123 replied to rtropp's topic in Modeling tools and Workshop Equipment
Bill, I hear you. There is nothing like using a well tuned tool, either power or hand, to give one confidence and enjoyment working with them. Best, John -
Table Saw Hand Safety
Landlocked123 replied to rtropp's topic in Modeling tools and Workshop Equipment
Hi George, You're absolutely correct and no sentient person can blame others on their failure to to use tools properly with appropriate instruction and caution..........but when has that ever stopped a trial lawyer looking to make a buck.......or a million? -
Table Saw Hand Safety
Landlocked123 replied to rtropp's topic in Modeling tools and Workshop Equipment
A while back, I saw those youtubes you mentioned. It is really an amazing technology! Does it add a lot to the cost of the machine? I would think that if it does, after a while it would even out as lawsuits against manufactures who don't provide it would add up. I can picture a lawyer in court asking a saw manufacturer "why is it sir you did not incorporate this safety feature in your product?" Best, John -
Table Saw Hand Safety
Landlocked123 replied to rtropp's topic in Modeling tools and Workshop Equipment
See enough blood and it becomes hard to forget. John -
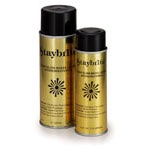
Hi JerseyCity, I've been dealing with this issue since I can remember since my family had lots of brass antiques like lamps, candle sticks, fireplace tools and the like. Since I was a kid it was my responsibilty to keep it all bright. Having said that, please keep in mind that none of the brass was used constantly around water. First, there are MANY commercially available polishes, Noxon, Brasso, and the like. Regardless of what they say, they all leave a residue, which I believe actually accelerates tarnish. Sell more polish that way! What I have learned is that unless something is going to remain completely untouched, sooner or later you're going to get some tarnish. The real issue is what does it look like and how easy is it to get bright again. So here's my two cents worth. 1) if the brass is not going to receive much, if any contact or use, use whatever commercial polish you like, wipe thoroughly with Naptha or Lacquer thinner (preferably wearing cotton gloves) and spray with "StayBrite", a spray can lacquer developed especially for brass. The REAL downside is that after the item starts to tarnish (and it will) is that you have to remove ALL the lacquer before you can polish it again. I only use lacquer with complicated surfaces which are not going to be handled much. 2) For simple shapes like candle sticks etc. I prefer to use the commercial polish, rinse in warm soapy water, dry throughly and let be. It will tarnish again, but it will be very easy to re-polish. Besides, the brass gets an even "mellow" look before it gets bad enough to polish again. 3) My preferred method for almost every thing is to follow the steps in "1", but instead of using lacquer, I used beeswax and turpentine. (chop up beeswax, cover with turpentine in a small jar, and let sit for a few days. Adjust thickness by adding more wax or turpentine). It holds back tarnish as well as lacquer but is much easier to remove when it comes time to re polish. Think about it......if brass didn't tarnish, why would we need gold? Best, John
-
Table Saw Hand Safety
Landlocked123 replied to rtropp's topic in Modeling tools and Workshop Equipment
Hi All, I read through this entire topic and I don't have much to add, except one of the first posts in the topic said to stick with hand tools if your frightened. While that's probably sage advice, after 40+ years around power tools, I have to admit, that after some of the things I've seen, I'm ALWAYS a bit afraid around table saws (large and small), band saws, lathes, and routers. I think a little bit of fear keeps me on edge and very focused on what I'm doing. Anyway, it works for me. Best, John -
Clevises - I think?
Landlocked123 replied to Landlocked123's topic in Metal Work, Soldering and Metal Fittings
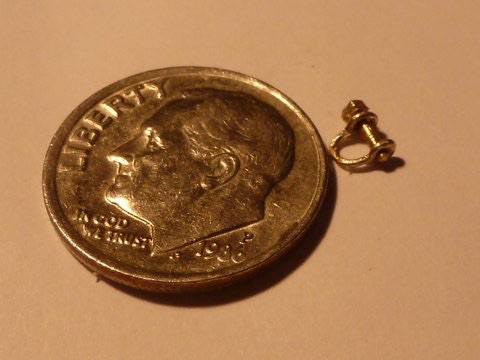
Hi All, I followed John's (Jim Ladd) advice to the crazy and picked up the mini tap and die set here: Now....can any one help me use it? Cutting threads is pretty straight forward and easy. I was even, after quite a bit of trial and error, able to tap a hole which fit the threads. My question is basically if there a way to determine the size hole to drill for the tap? I would assume it would be the inside diameter of the thread, but how do I figure that out. I'm hoping there is something simple which has to do with the corresponding holes in the die, but right now that eludes me. What I have figured out is how to create scale bolts. As soon as I get some time I'll post some pictures. Best, John
-
Hi All, I'm not sure if this is exactly appropriate, but recently I received a few boxes of alcohol wipes from a relative who, shall we say, no longer needed them. I find my self using them constantly to clean painted surfaces with smudge marks or finger prints, or on tools which got a bit of glue on them (especially Titebond and the like). For that matter, I use them to clean up anything. They don't seem to affect any of the surfaces I've used them on. I got them for free, but checked and they are available for about 5 bucks for 200. Best, John
- 396 replies
-
- 7
-
-
- Idea
- Bright Idea
- (and 1 more)
-
Clevises - I think?
Landlocked123 replied to Landlocked123's topic in Metal Work, Soldering and Metal Fittings
I guess I was using up too much some thing or other and I had to split this into two posts. So...... In order to have the eye perpendicular to the shaft, you need to "break the neck". To do so, I hold the shaft in a pair of pliers with the eye right against the side. Then with the point of a round file inserted into the loop, I bend it into position. Once everything is straight, clean them up with a Dremel wire wheel, bend around a drill bit and your done. Please let me know if you have any questions. Best, John ps. John (Jim Lad) I took the crazy route and ordered a jewlers tap and die. Should be here any day. J.