xken
-
Posts
841 -
Joined
-
Last visited
Content Type
Profiles
Forums
Gallery
Events
Everything posted by xken
-
 Dave, Great job! Now your mornings are free to exercise!
- 742 replies
-
- 4
-

-
- constitution
- frigate
- (and 1 more)
-
Michael, another source for thin leather is modelmotorcars.com Marvin has a selection of leathers used for upholstery for Pocher car kits.
-
Bob, another option to consider is if you have a local Maritime Museum consider a permanent loan or even donation. The reason I say that is because our local Museum here in Morro Bay, CA is looking for me to build them a ship which may be a sister to yours the South American that also worked the San Francisco trade route. Where are you located?
-
Straightening thin brass wire
xken replied to vossy's topic in Metal Work, Soldering and Metal Fittings
Chris, hold one end of wire in vise and the other in jaw of pliers bent 90 degrees and give a slow pull and “feel” for the slight give and should be straight. It has just been work hardened. This can also be b done for brass strip as well. Hope this helps. Ken -
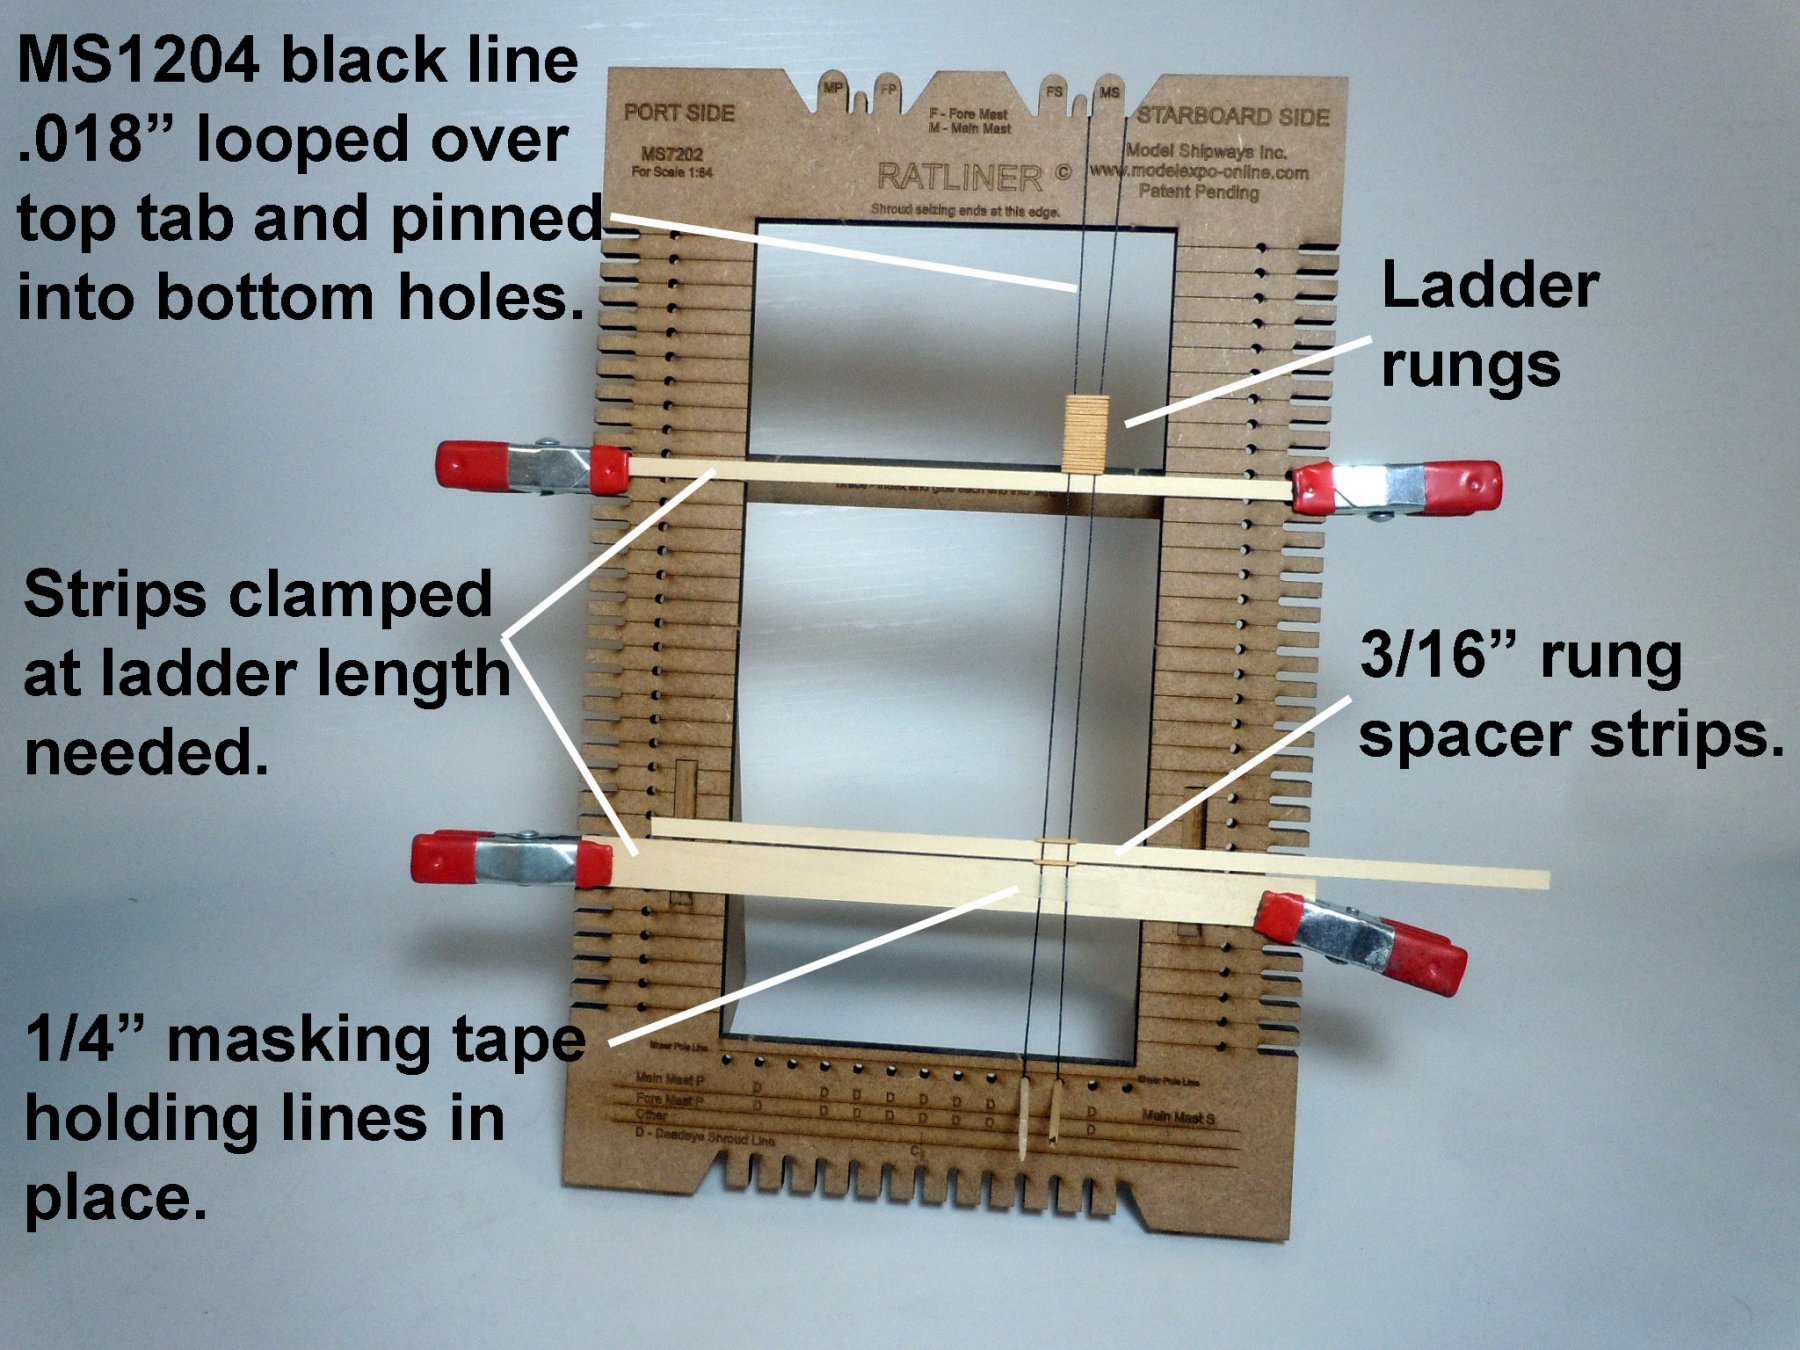
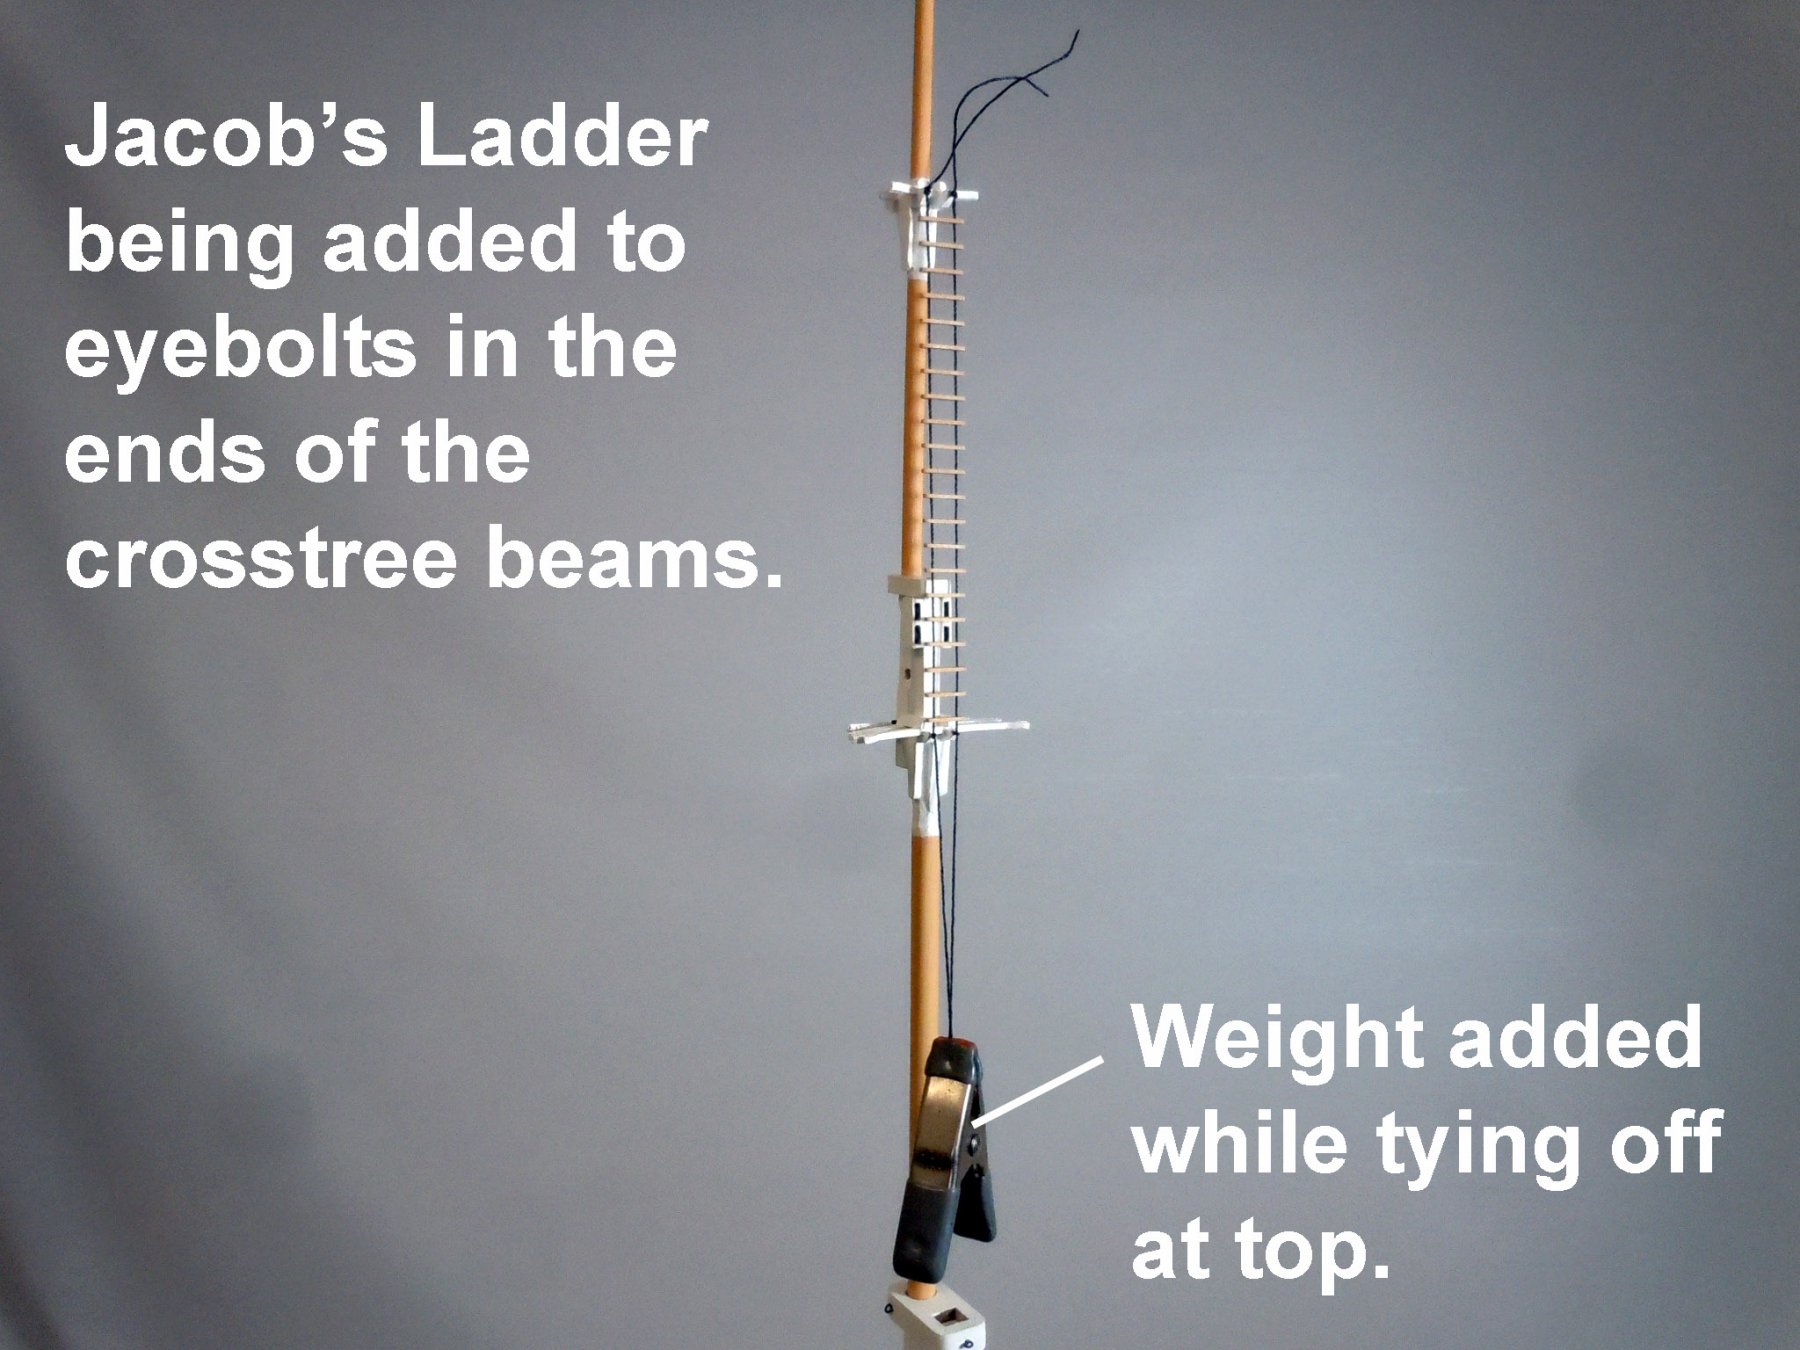
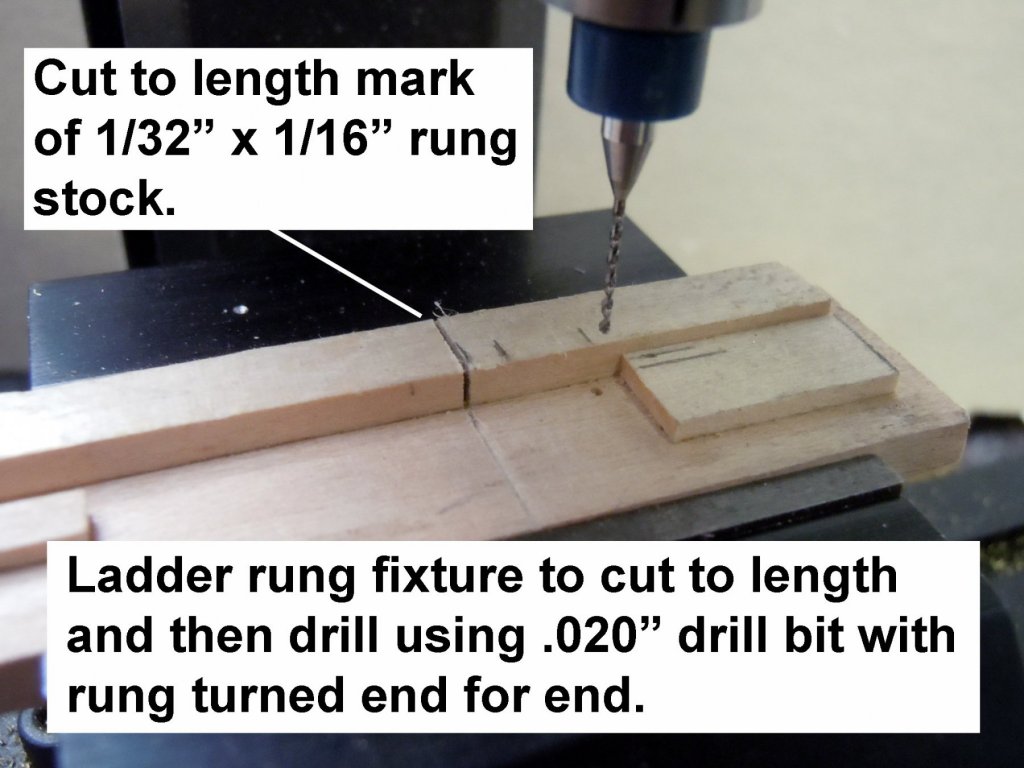
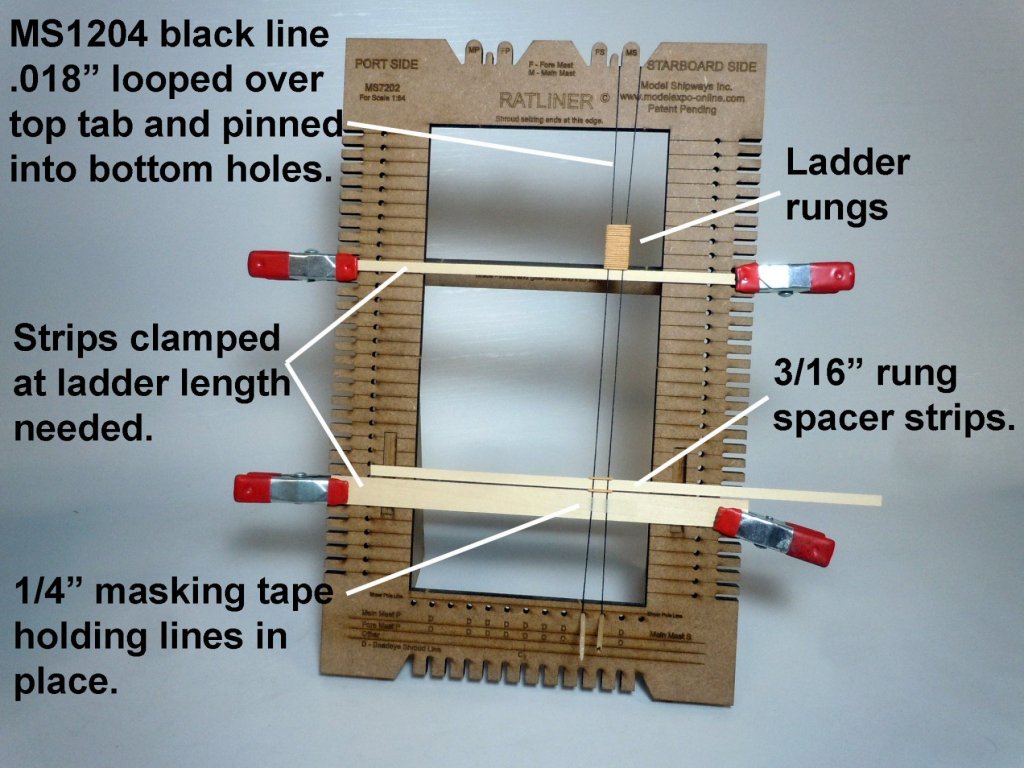
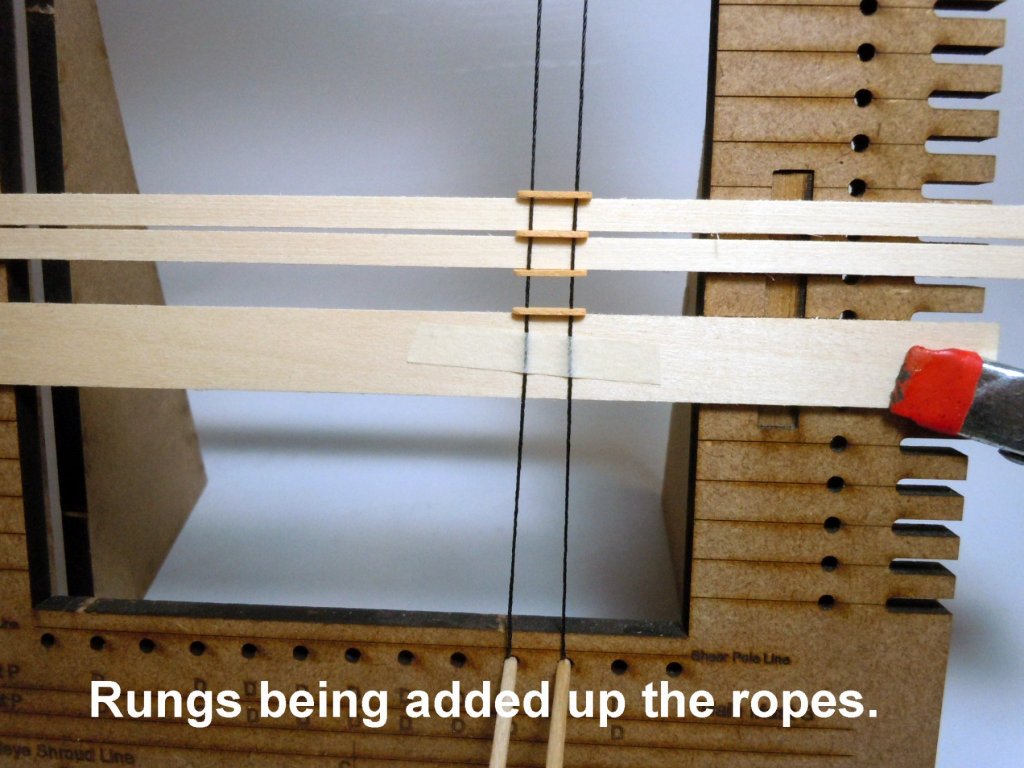
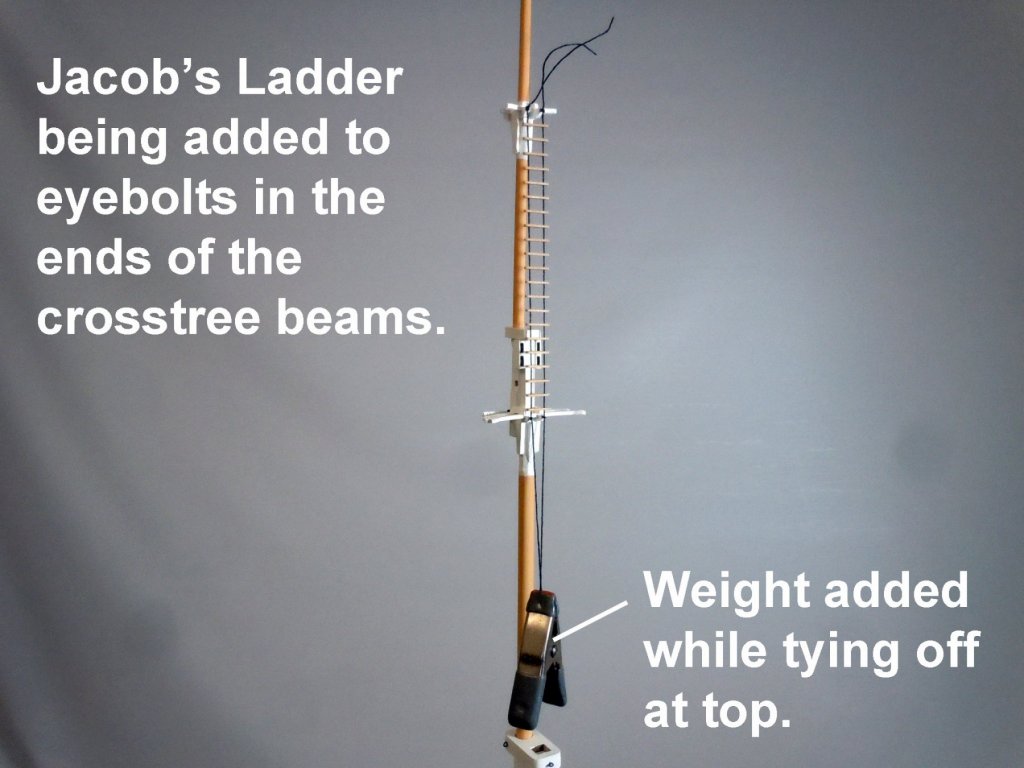
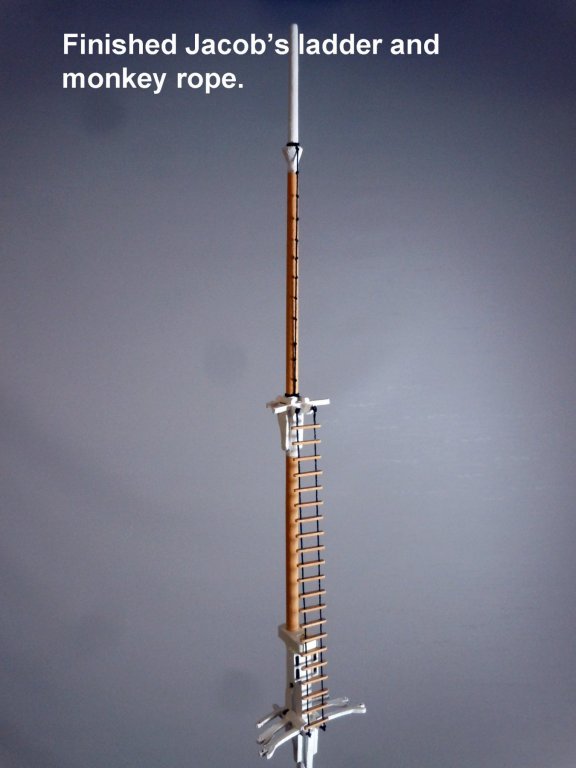
Dave, I mentioned the Jacob's ladders and monkey ropes at the top of the masts and I am working on a project where I just finished doing them. I just thought I might share with you how I went about doing them using Model Expo's Ratliner. The picture are self explanatory, but if you have a specific question please ask. First I made a fixture to cut the rungs to length and drill holes, fairly simple like me. Notice just for you I left the Clove hitches off as an alternative. Hope this helps with your build.
- 742 replies
-
- 9
-
-
- constitution
- frigate
- (and 1 more)
-
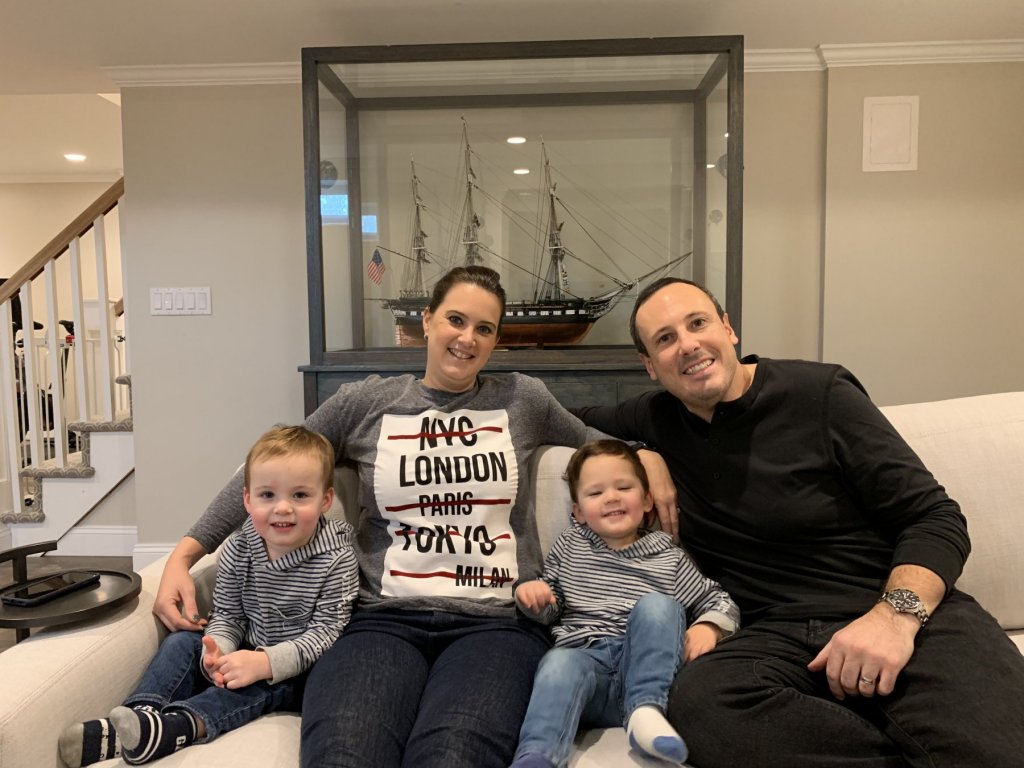
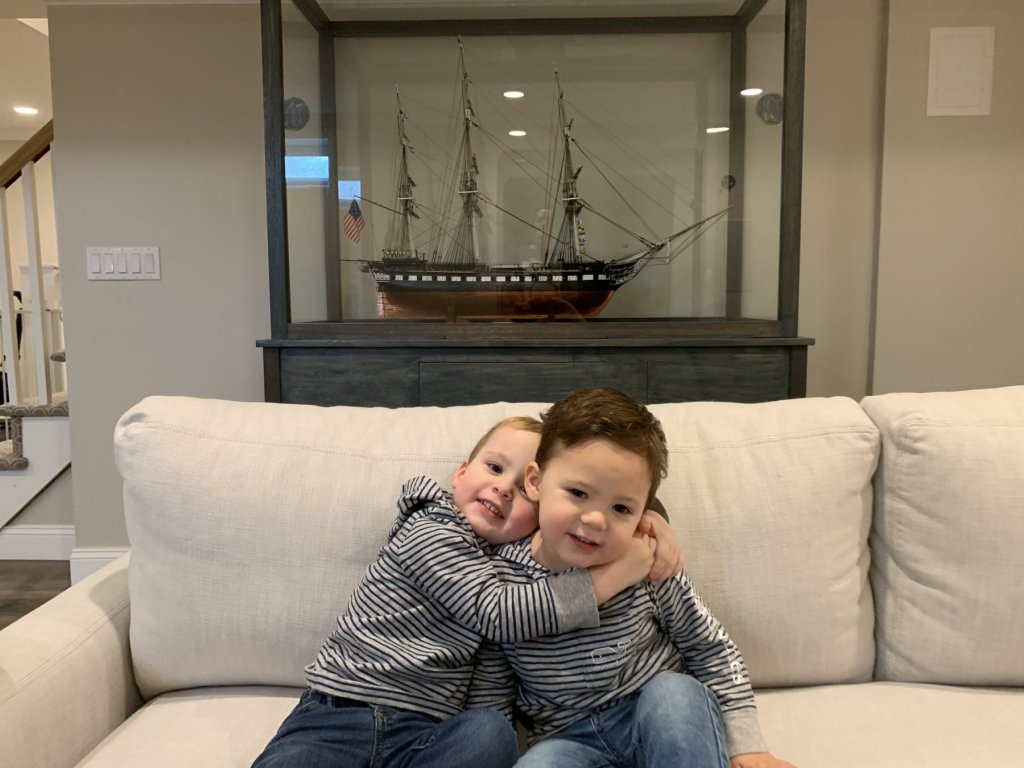
Final update the ship is in the case and the boys enjoy looking at it. Fingerprints on the glass are indications of wanting to touch. It has just taken awhile for the pictures to come given very busy work schedules. Enjoy!
-
Just catching up and you are off to a great start. I rigged mine from the main mast out and top down since it is easier to rig the running rigging long lines without the lower gear in place. Also you may wish to add the ladders and monkey rope at the topsails before starting the running rigging. The ladders will renew your familiarity with clove hitches. Keep up the great job you are doing and pace yourself.
- 742 replies
-
- 4
-
-
- constitution
- frigate
- (and 1 more)
-
Tom, congratulations on a great build! Now on to the next one.
- 1,352 replies
-
- 2
-
-
- constitution
- model shipways
- (and 1 more)
-
Jon, great to hear all went well, now relax and recover.
-
My top 4 most useful tools
xken replied to Tim Moore's topic in Modeling tools and Workshop Equipment
1. Eyes 2. Hands 3. Brain 4. All the above working together.- 27 replies
-
- 12
-
-
Dave's 1951 XK120 Jag Roadster - FINISHED - 1/24th scale
xken replied to SawdustDave's topic in Non-ship/categorised builds
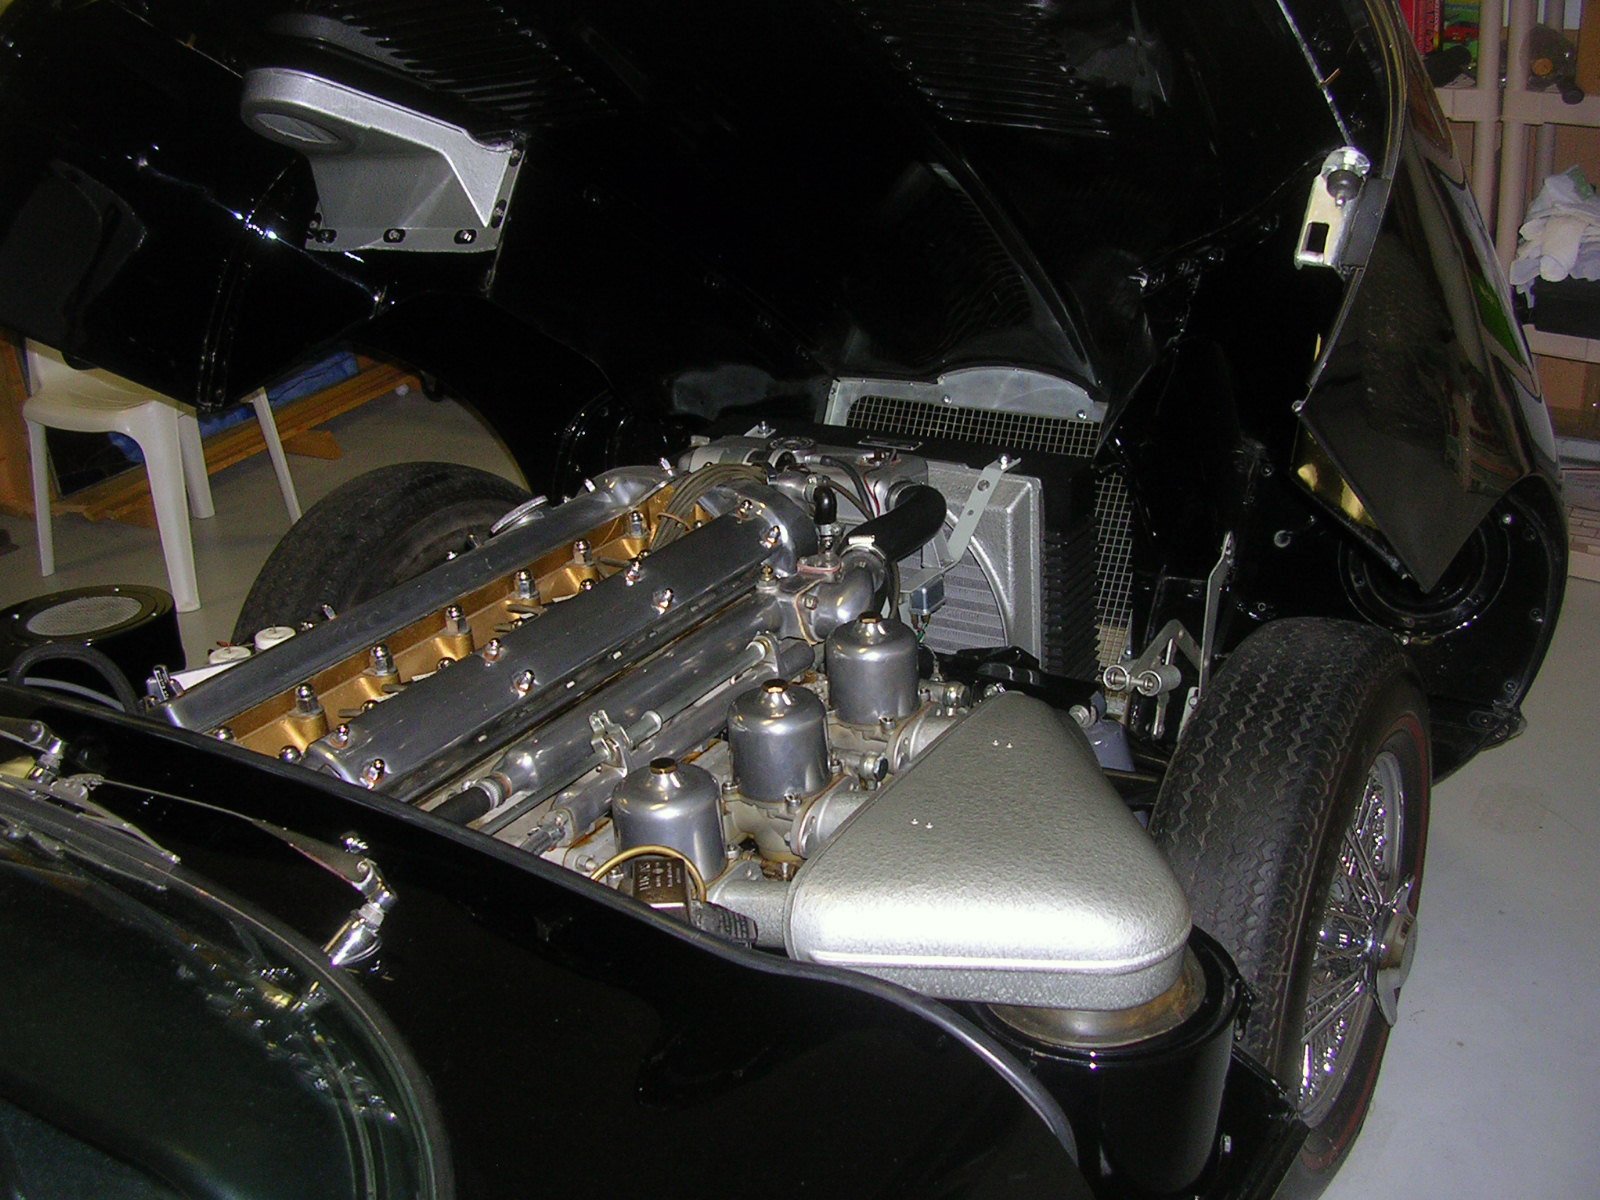
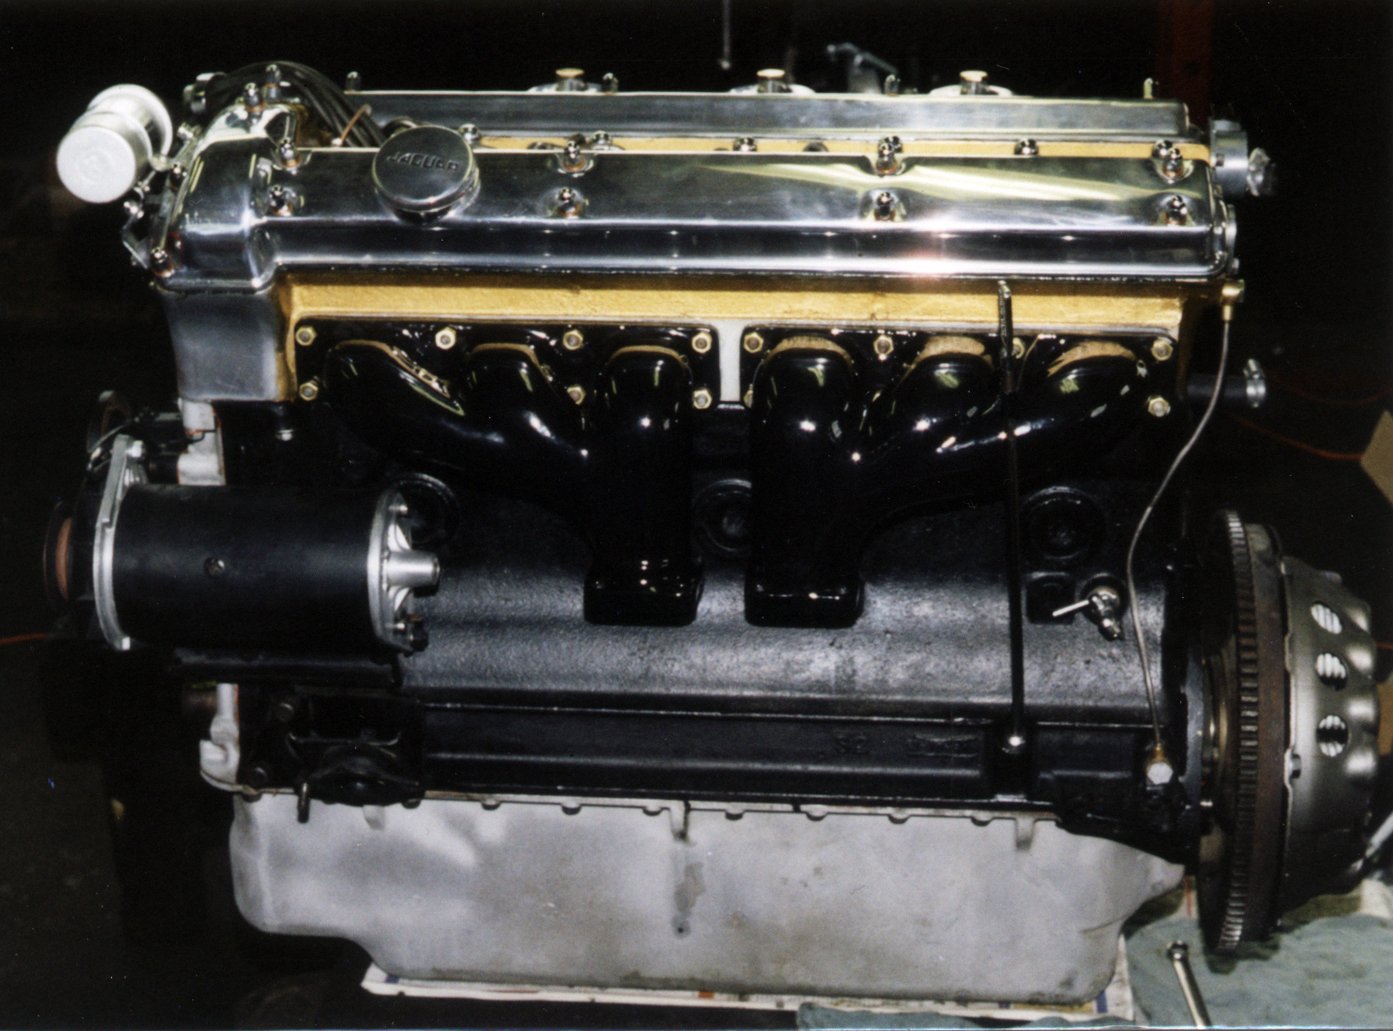
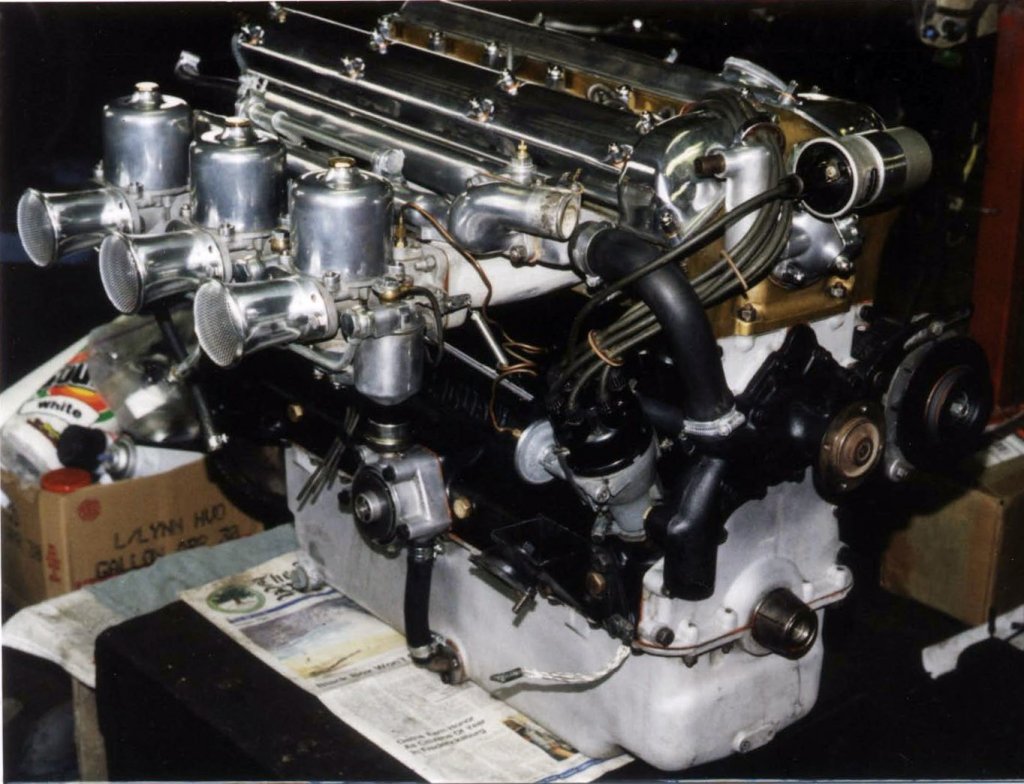
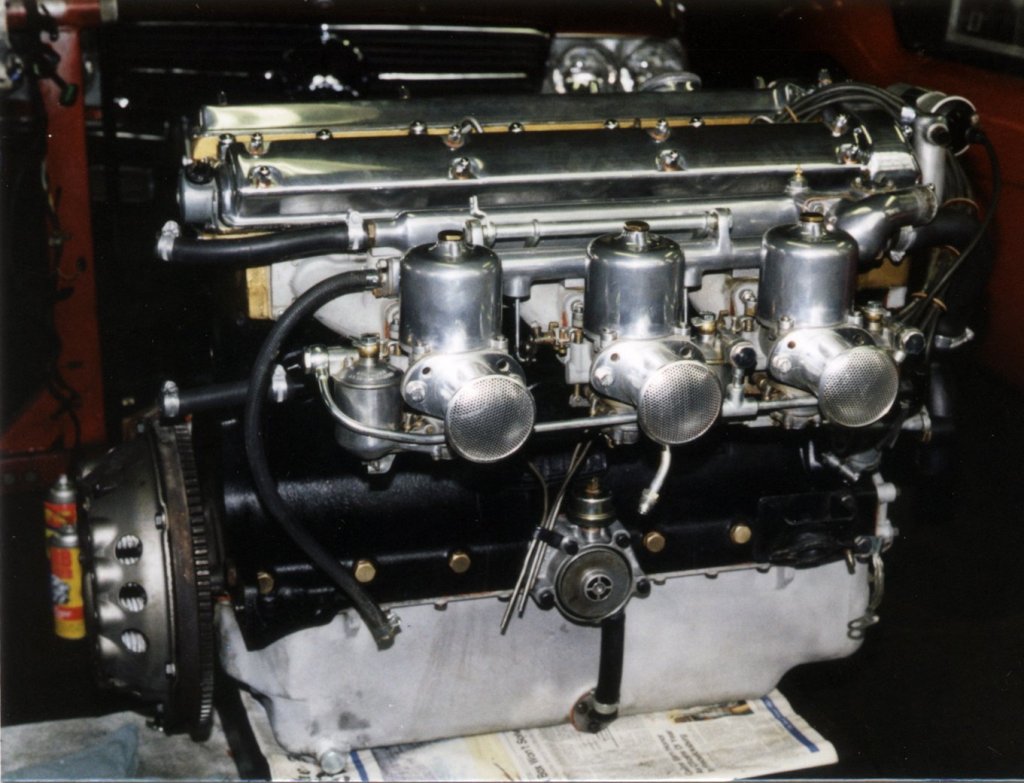
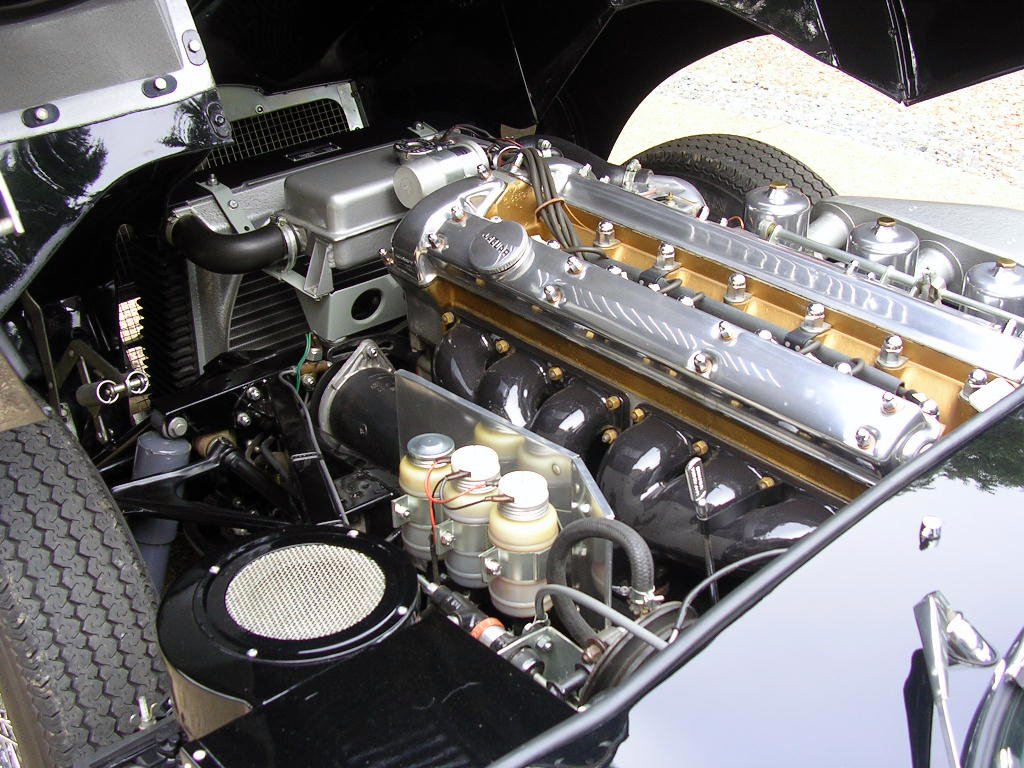
Here are some reference photos of the 1962 XKE I restored. Let me know if you need any other details of the engine. Ken

-
Dave's 1951 XK120 Jag Roadster - FINISHED - 1/24th scale
xken replied to SawdustDave's topic in Non-ship/categorised builds
Great build and when you get to the interior, if you want real leather and detail hardware check out www.Modelmotorcars.com they even have .5mm and 1mm chromed acorn nuts and other goodies that you may be interested in. Keep up the great work! Ken -
Kmart, I hope you enjoy the book when you get it. Also just FYI I noticed the way you have positioned your grates. I laser cutting the true dimension is on the bottom side of the carrier sheet which also results in minor draft which increases with the thickness of the wood sheet. If you turn your grates upside down you will have the "good" side up. This also applies when setting bulkhead frames with the angles (usually 1/4" thick wood) setting forward and rearward to get the cut angle to work with you and less sanding required. Keep up the great work you are doing, more fun lies ahead. Keep in mind on the deck plan view the stern starboard side is greater from the centerline than the port side on the spar deck. Just check the plan layout to justify the planking when you get to that point. You can see this called out in my build.
-
Michael, Check or cash not setup for cards. See you there.
-
The title is “Model Building with Brass” buy the second edition. If you come to the NRG conference I will be selling and signing them there.
-
Dan, Great job and it really came out exquisite with all the details! Ken
- 287 replies
-
- 2
-
-
- michelangelo
- ocean liner
- (and 1 more)
-
Tom, that was the reason I made the boat cradle removable so that I could tie down the ship for transport. Lucky that it will only be a nose job. Nice new digs to work in.
- 1,352 replies
-
- 1
-
-
- constitution
- model shipways
- (and 1 more)
-
Something else is also going as well, I see what looks like a drip spot from a liquid on the base wood surface. Could drastic swings in temperature cause moisture condensation on the anchor with enough buildup to drip over time? I have also see this type of corrosion on parts using blackening agents and not being rinsed thoroughly with water after being treated. This usually starts in a hole or recess in a part.
-
Jon, your build is coming along nicely and going into more detail at the bow and stern than I did. Keep up the great work you are doing!
-
Captain Steve, l have enjoyed following along your journey and unfortunately your being done in by a curvaceous rear end. Cocoon the project so that at some point in the future you can come back to it. Have a “Dark and Stormy” or two on me as you contemplate your next project.
-
Dave, the doctors have told me that my youth is catching up with me having disintegrating disks L3 through L7 along with arthritis in both my left knee and hip. For the past few years model building has been my method of pain management and it does work. Keep up the great work you are doing!
- 742 replies
-
- 5
-
-
- constitution
- frigate
- (and 1 more)
-
Thanks for the plug Kurt and yes I will bring some and sign them for those who wish to purchase one. If not order through Amazon.
-
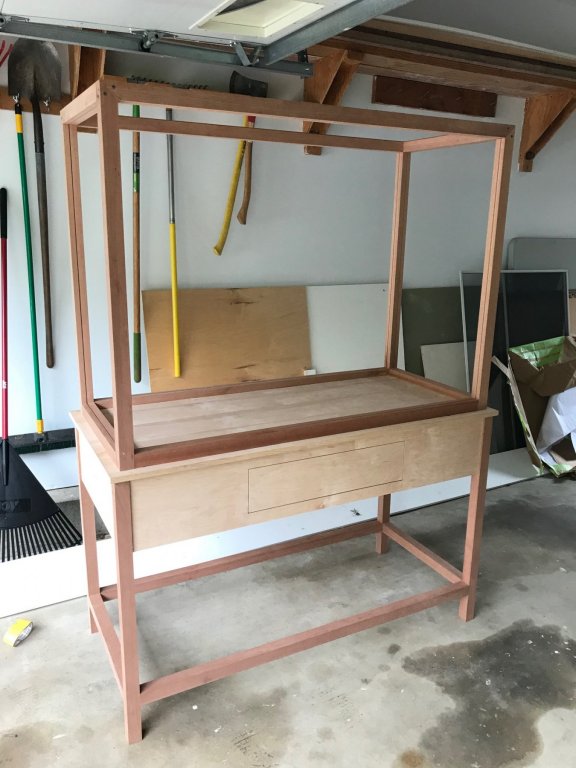
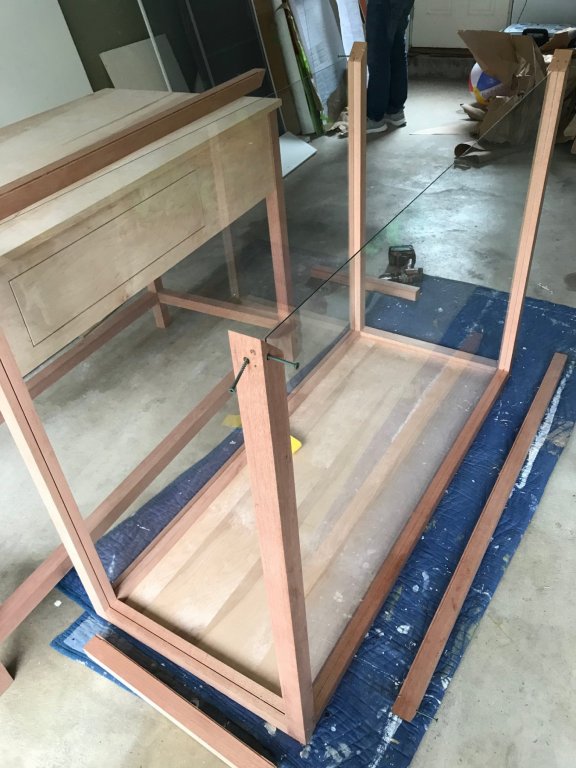
The display case is under construction, and coming along nicely. Here are a couple of in progress up dates. The drawer will hold the book and a CD of the build Just a few minor tweaks and then the stain will be applied.
-
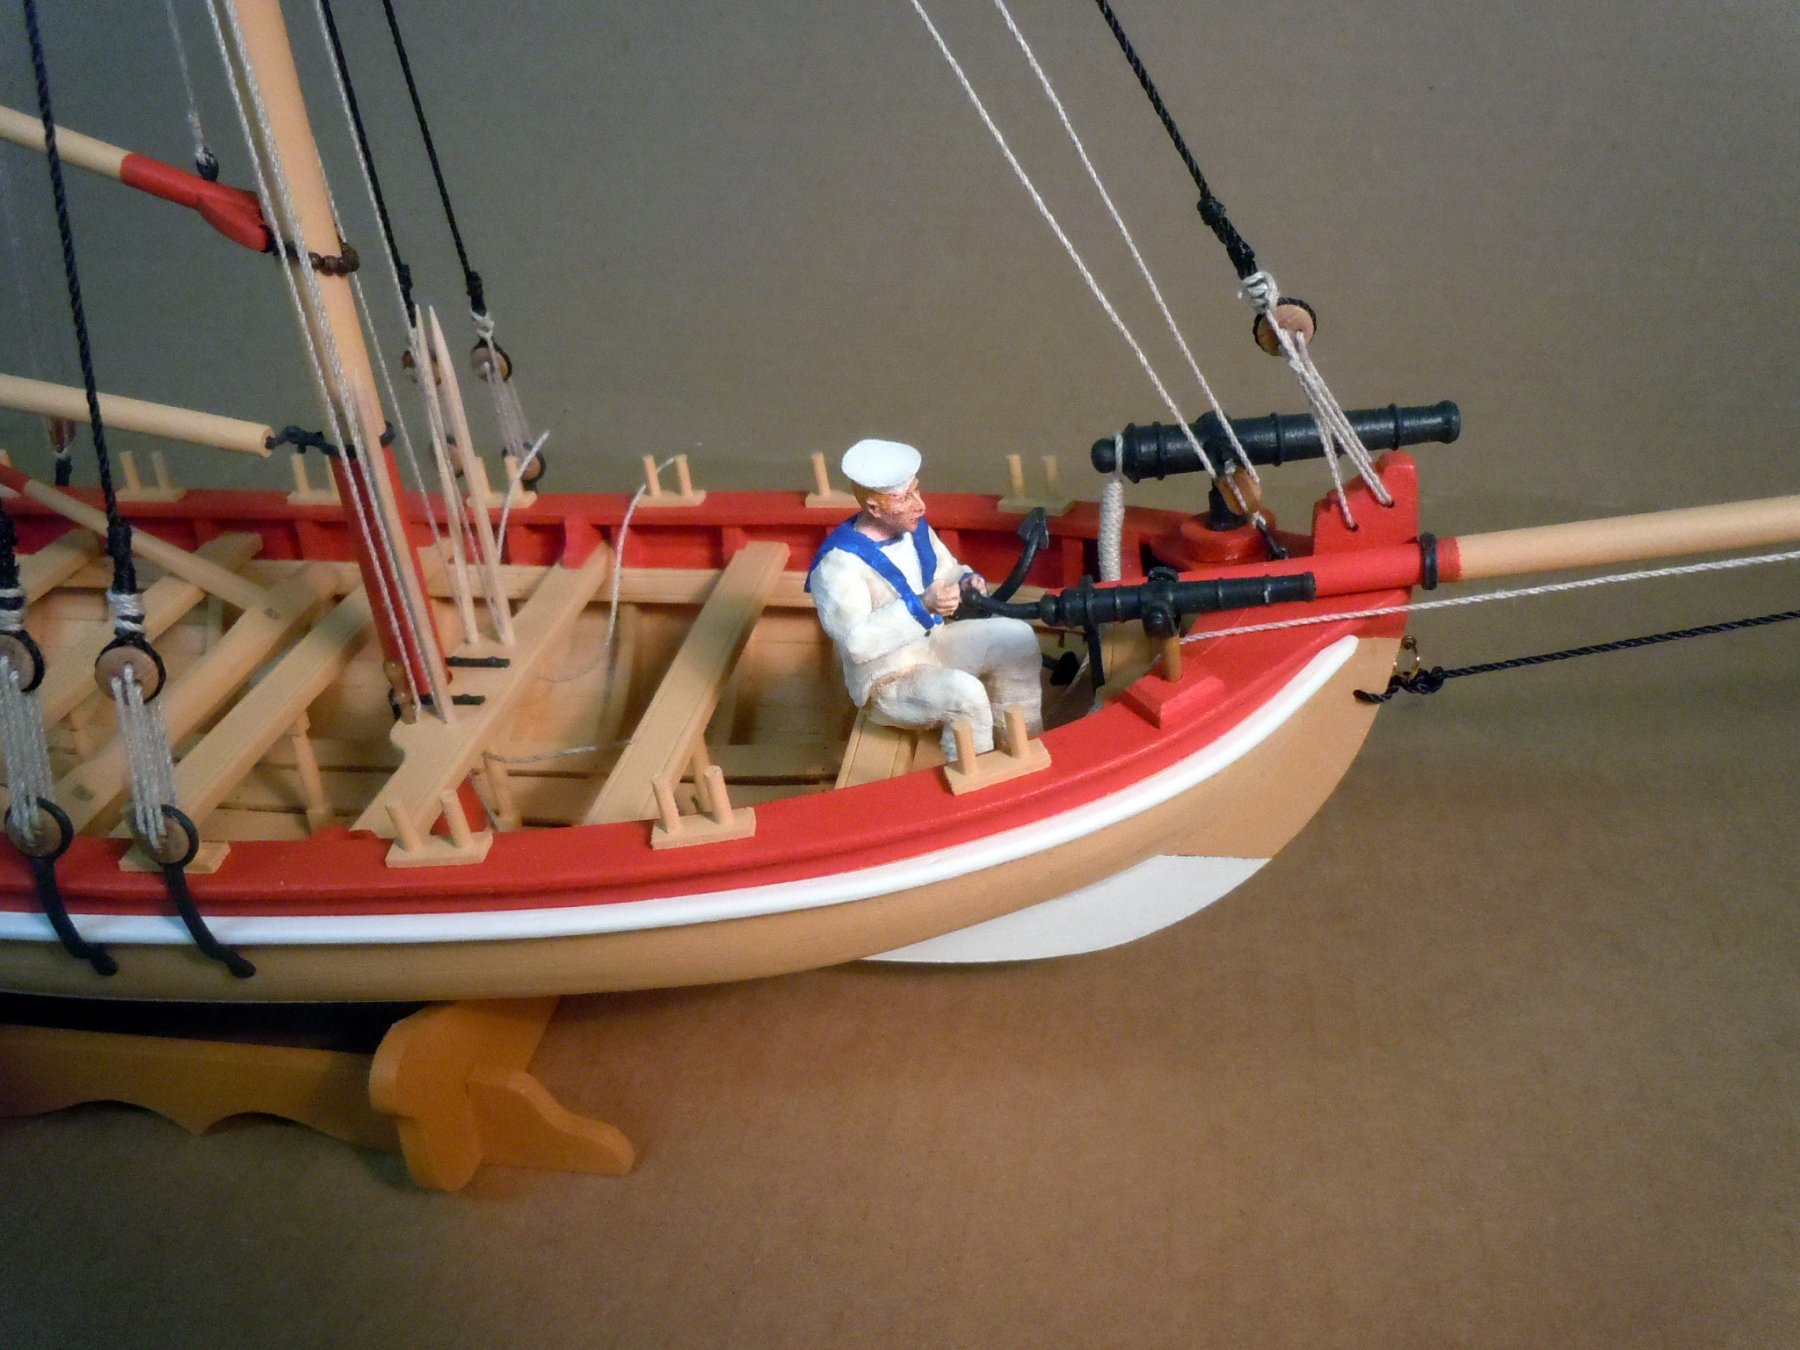
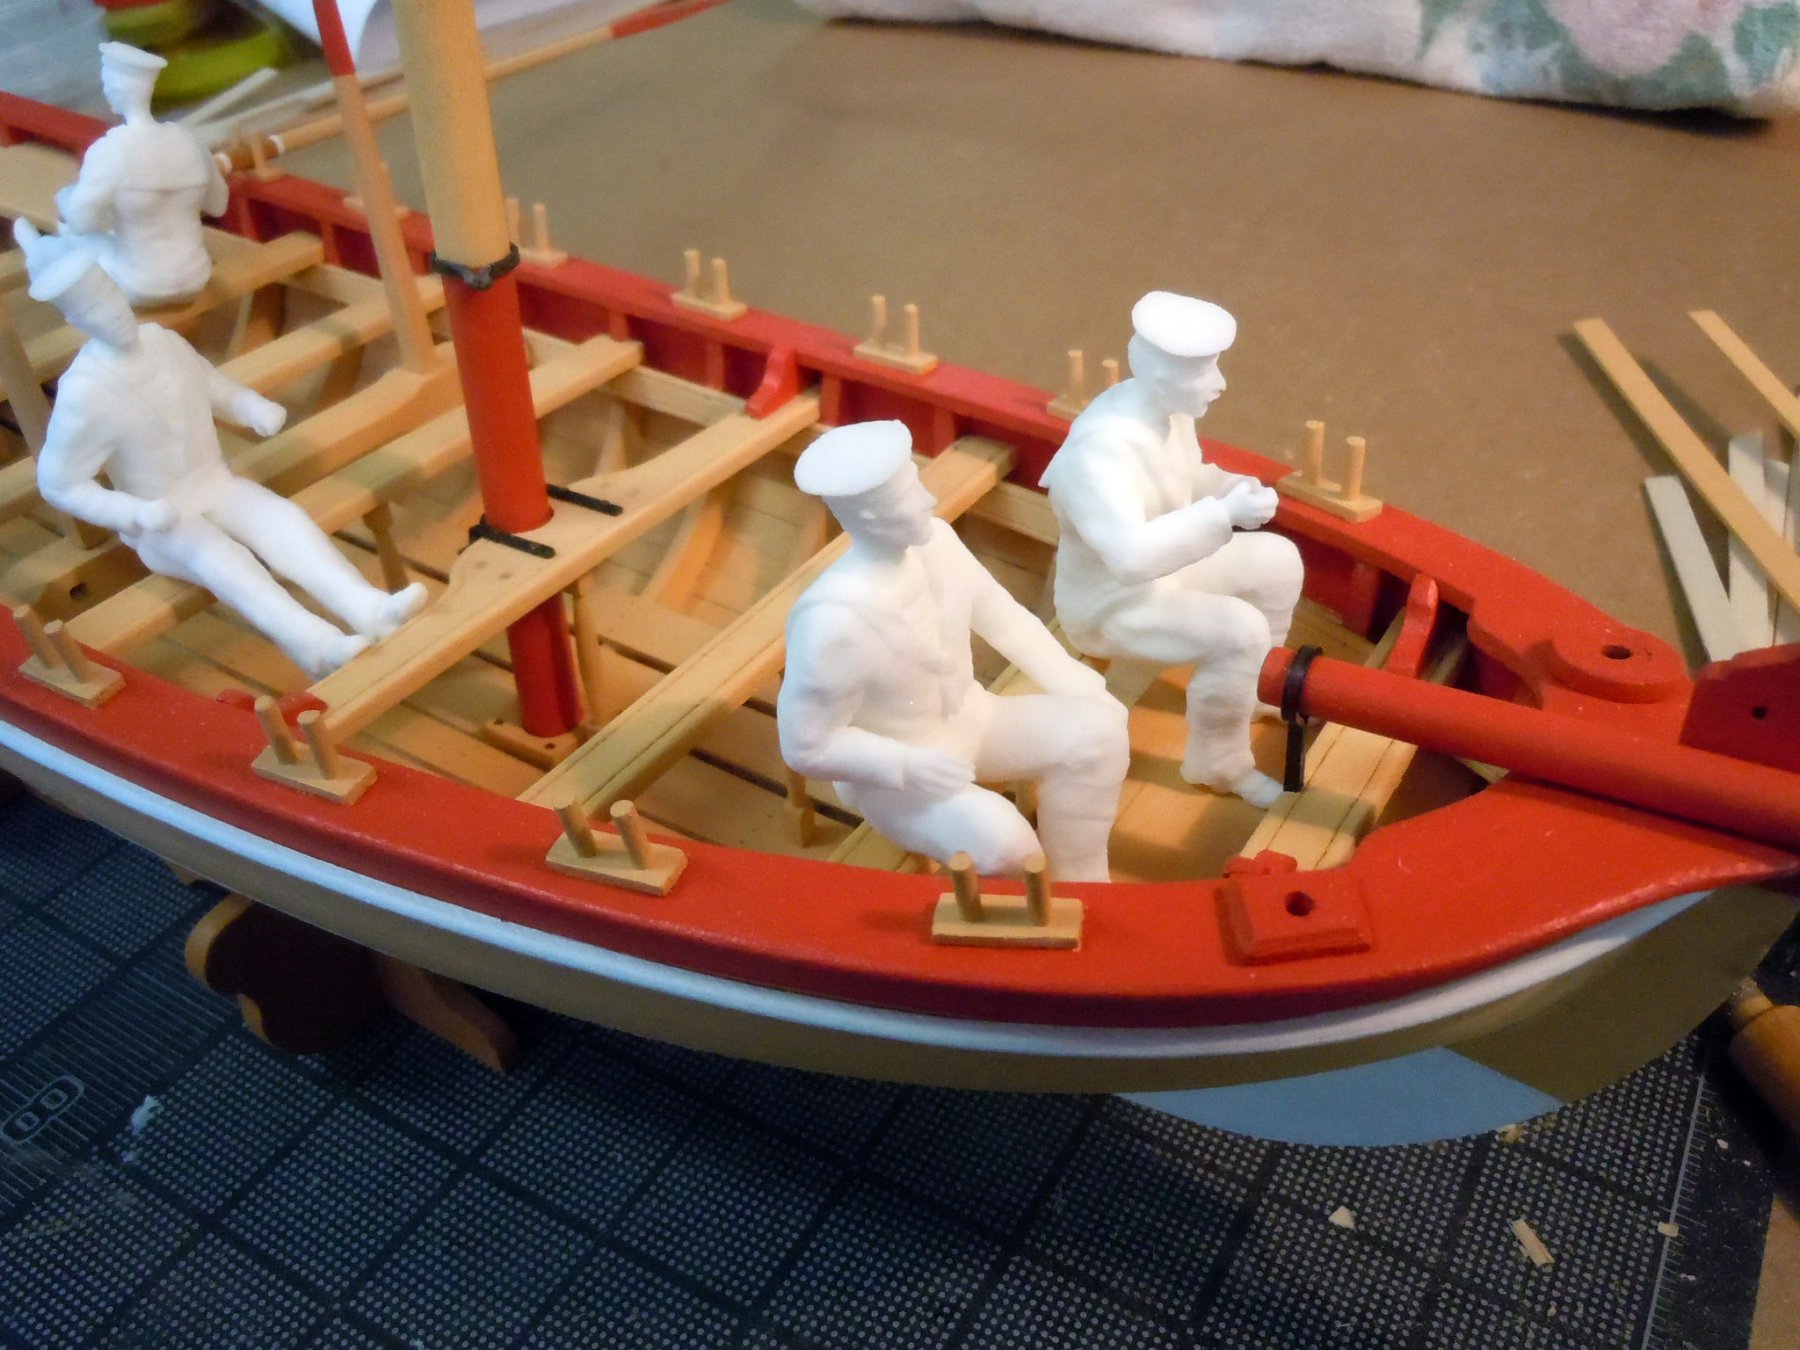
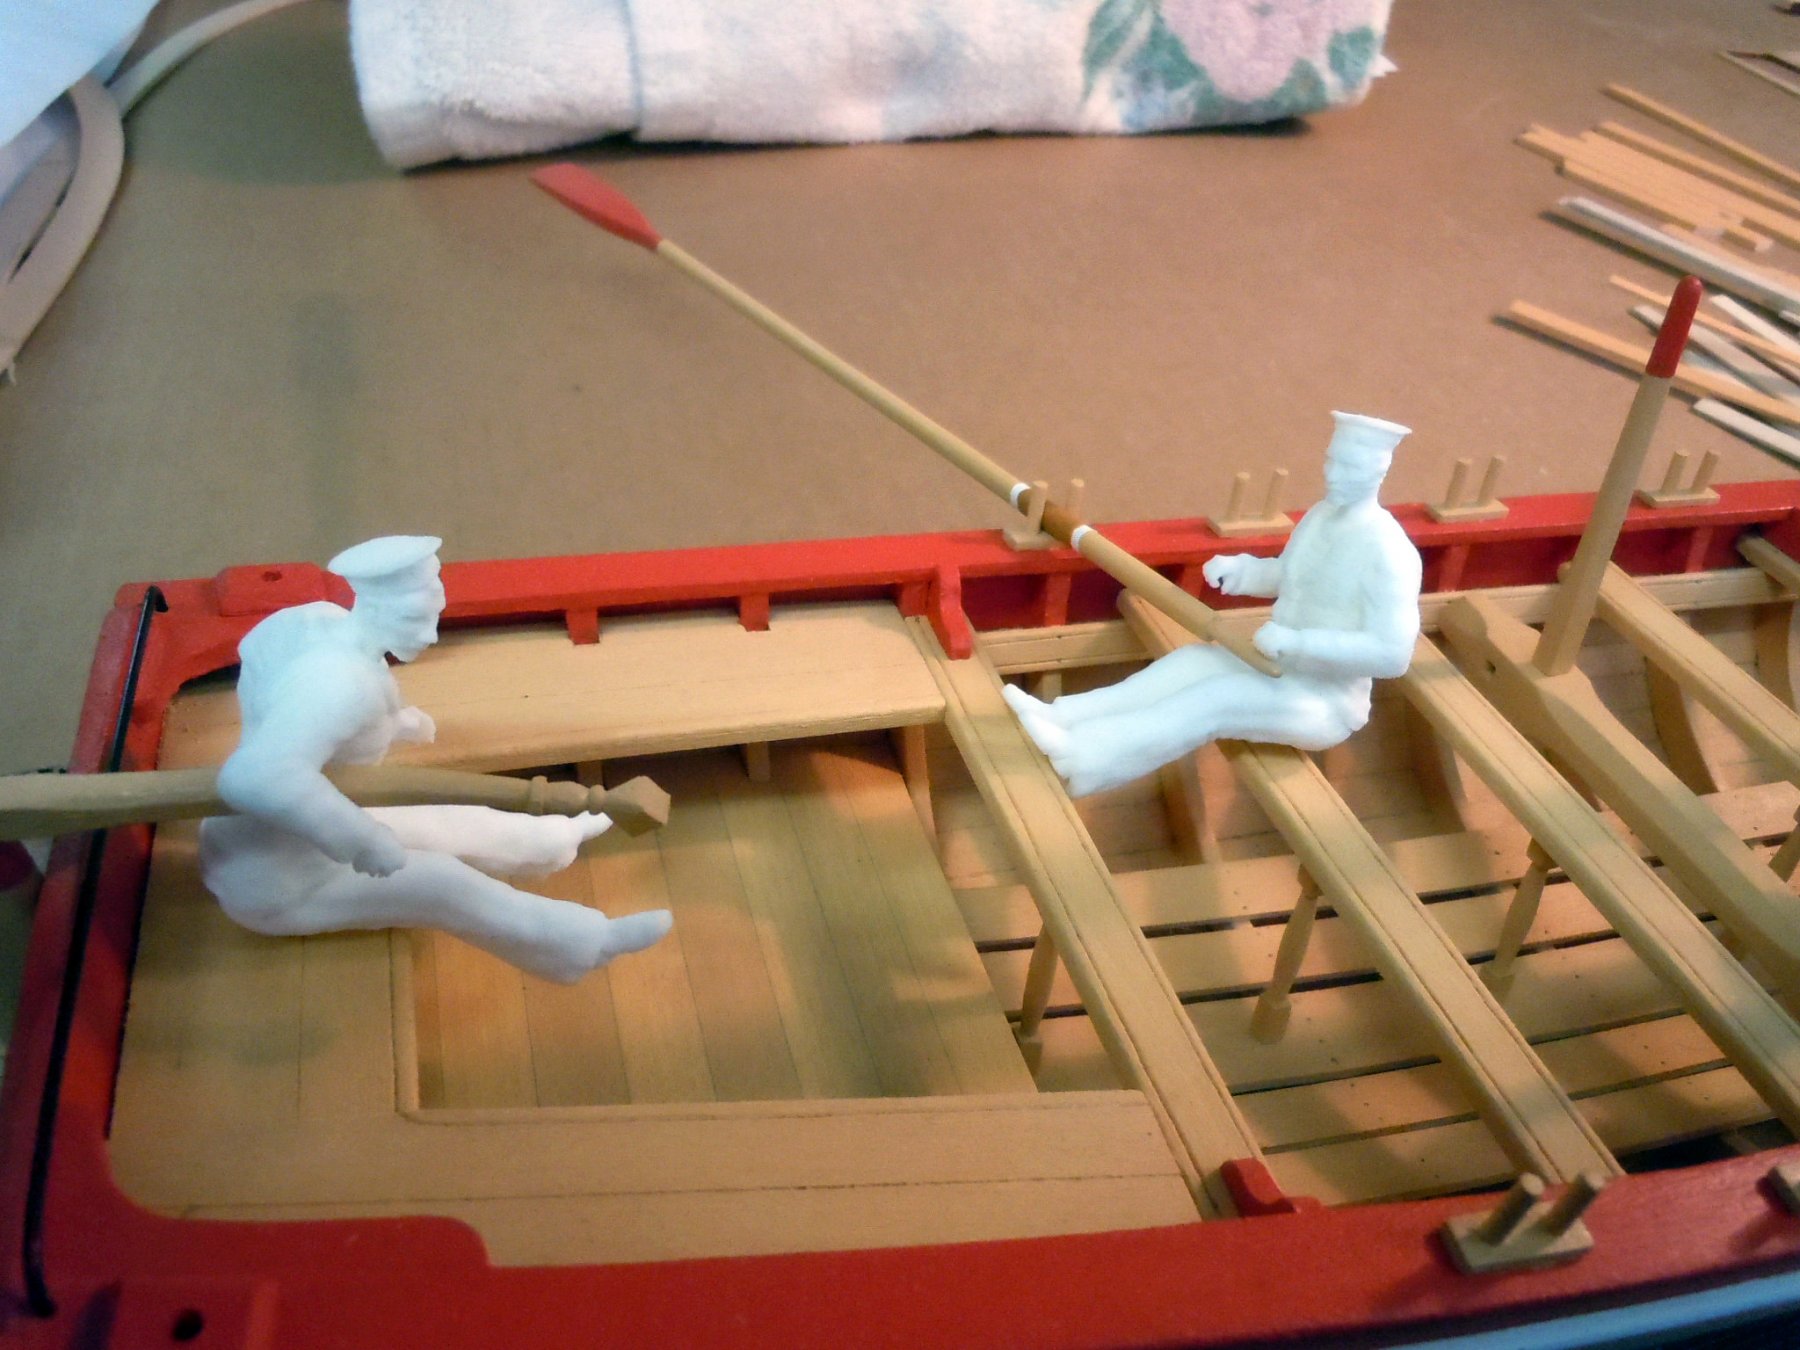
Great painting on the figures! The armed longboat would be a good choice given the scale and Shapeways has naval figures the same scale. It would be a good choice and I did design the kit with beginners in mind. All the plans are full scale as well so no conversions needed. Welcome aboard! Here is are pictures of the figures available. Here is one painted and the others as they came from Shapeways. I had to break a couple of legs to get them to fit properly. Here are the raw figures; the guy at the rudder had his legs broken to set on the deck. I am sure you could do a much better job at painting these guys than I did. That would be a great painting tutorial for you to post at some time.