


Tallshiptragic
-
Posts
551 -
Joined
-
Last visited
Content Type
Profiles
Forums
Gallery
Events
Posts posted by Tallshiptragic
-
-
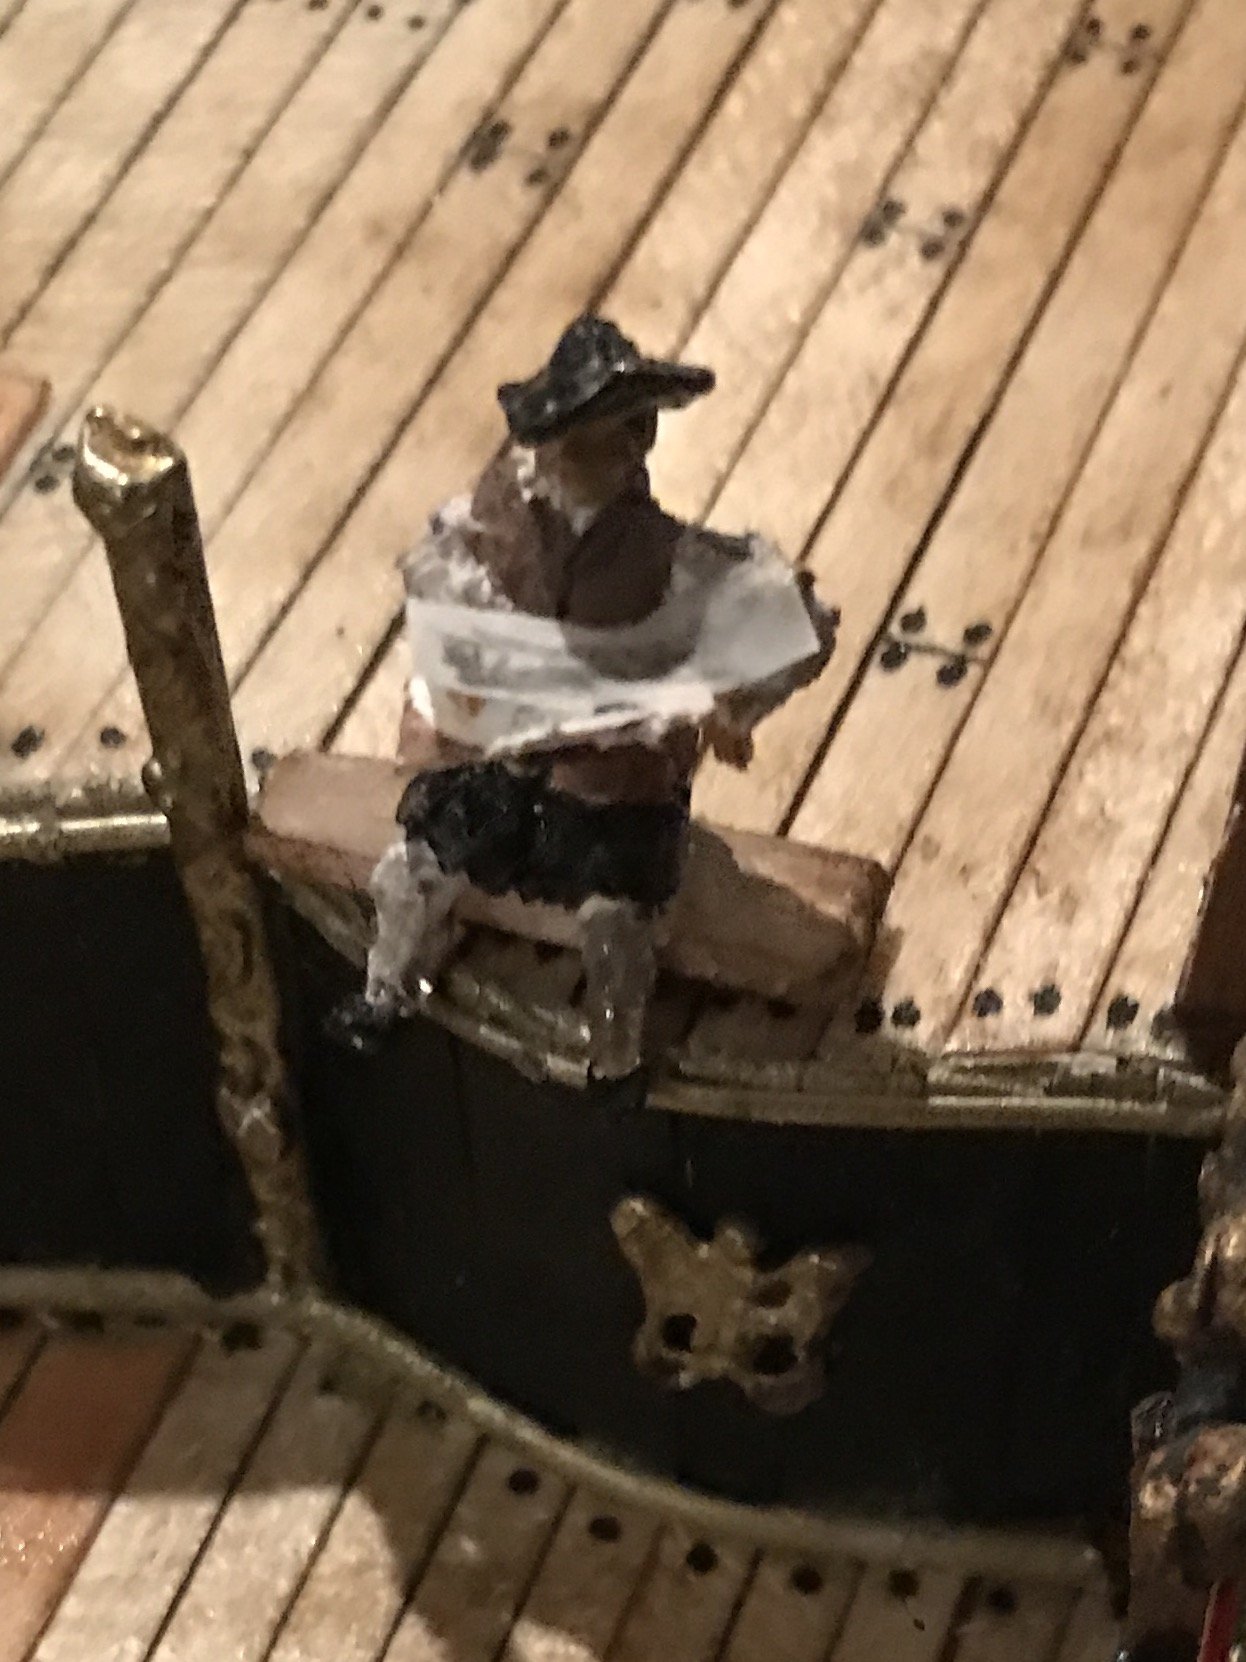
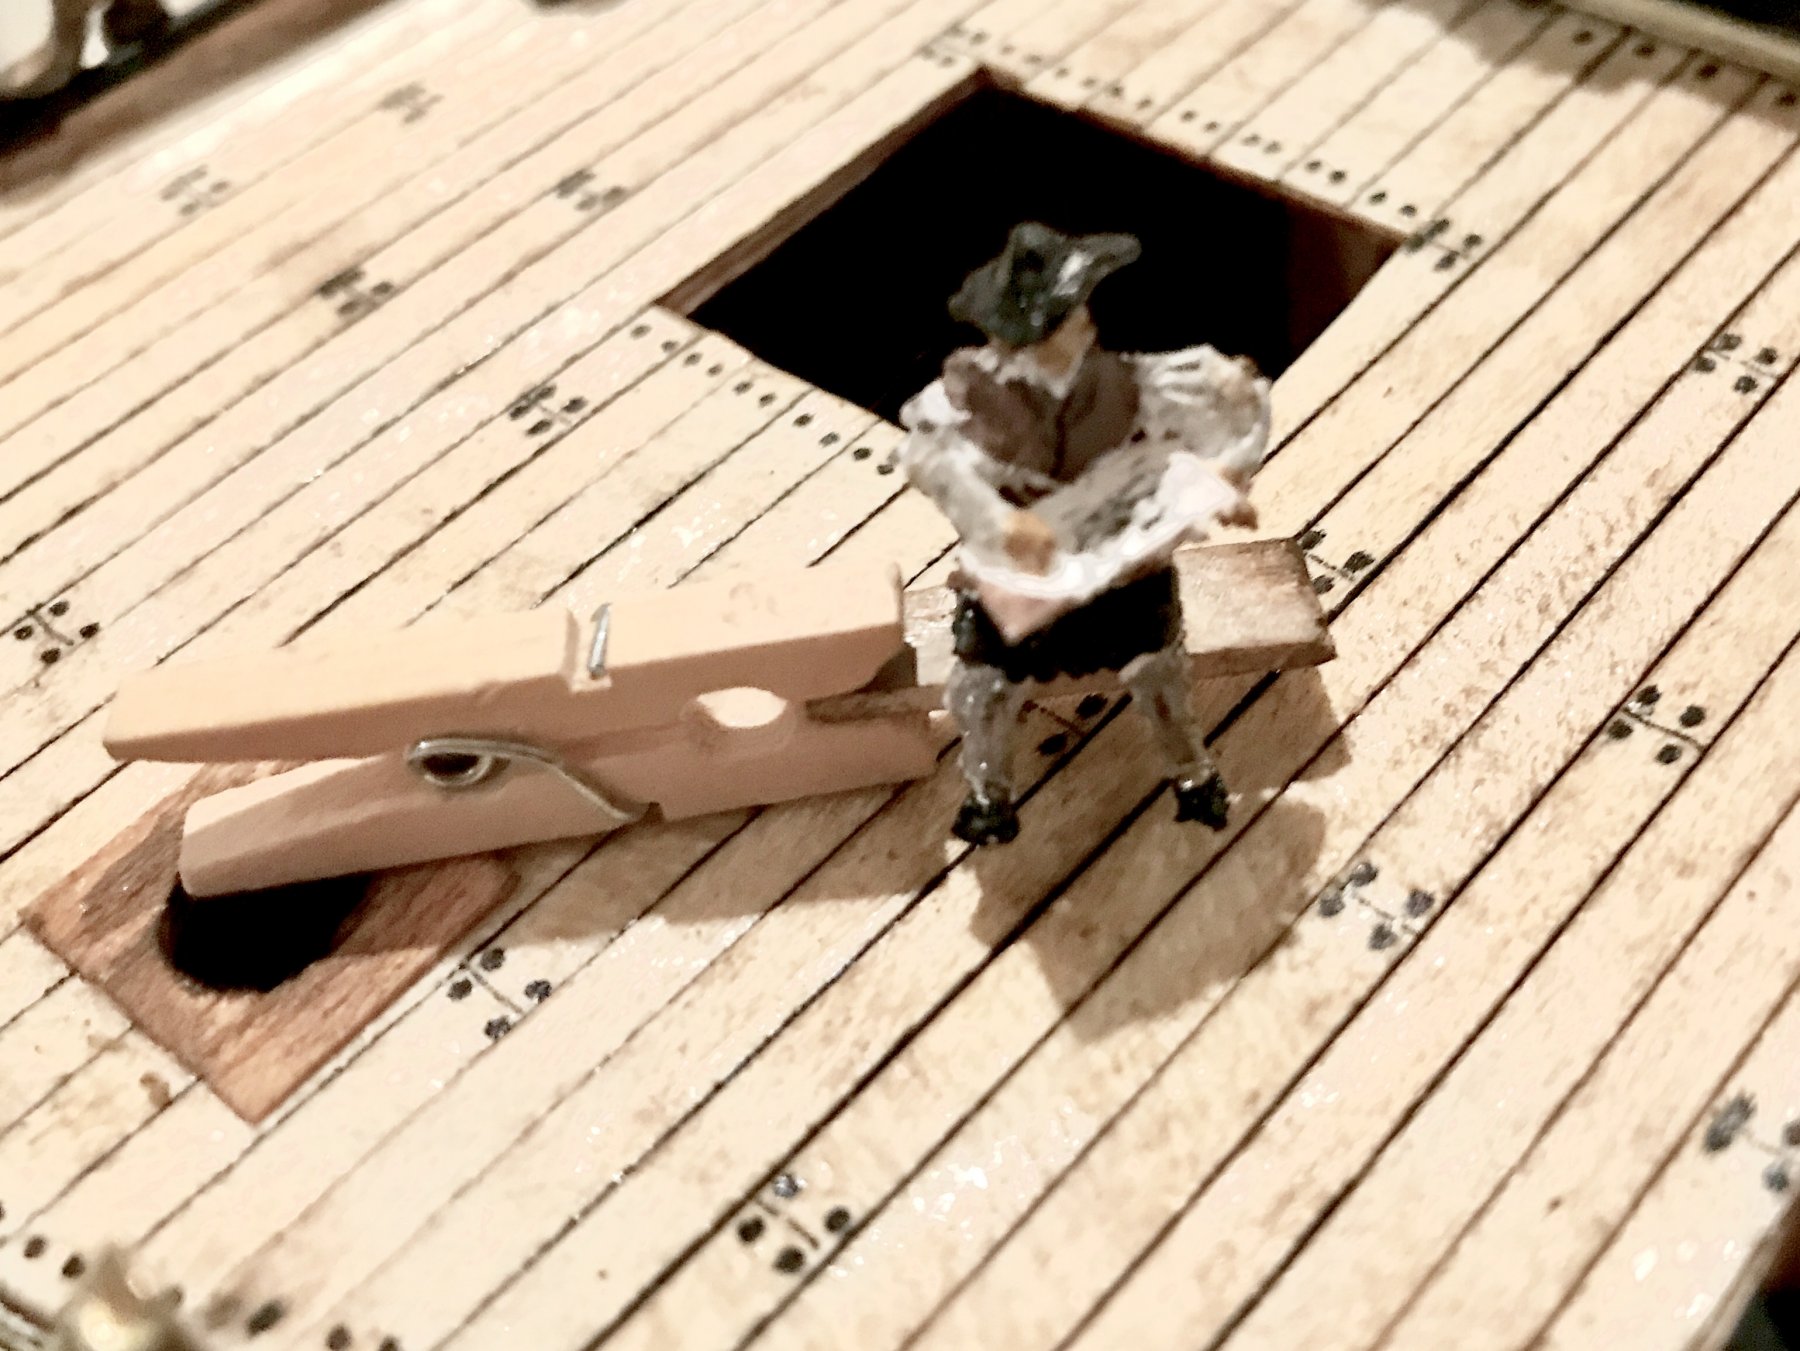
Thanks Hans, a few more details to add including the chocks on deck but once complete it should look the part.
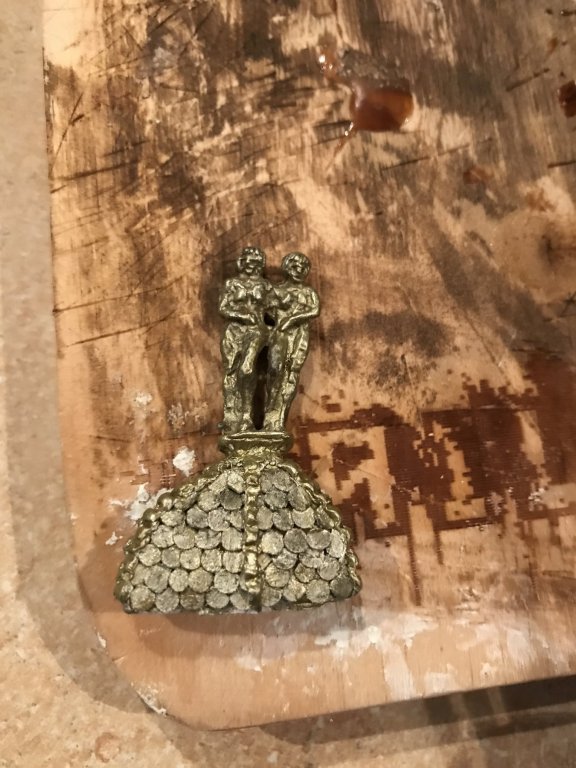
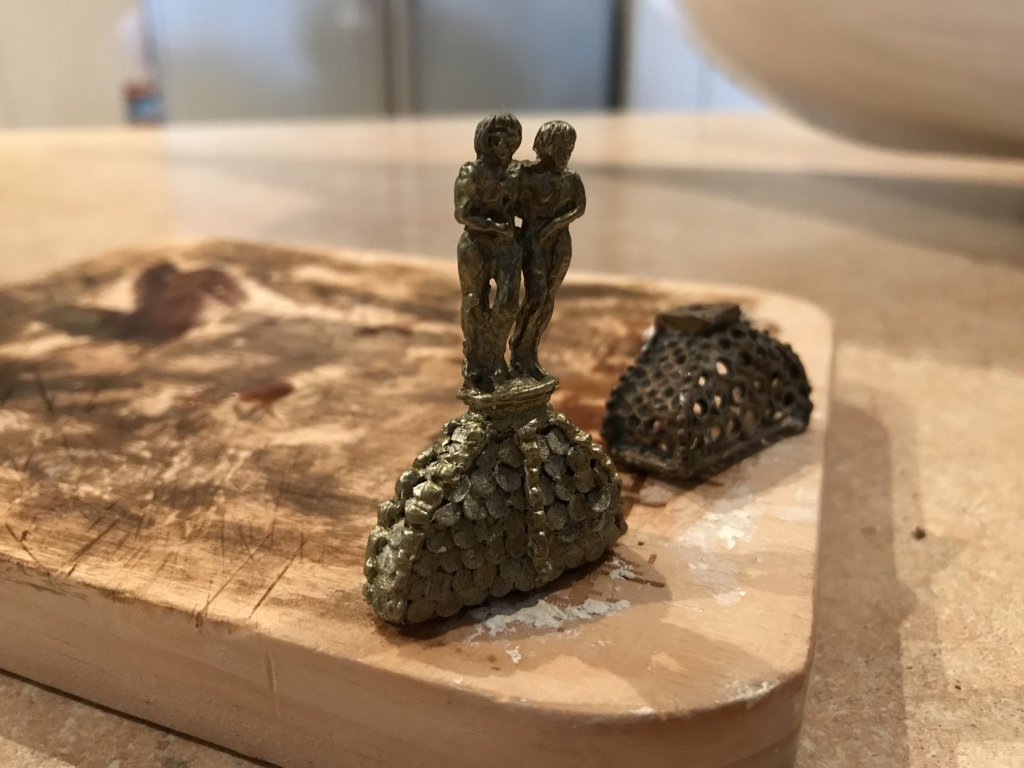
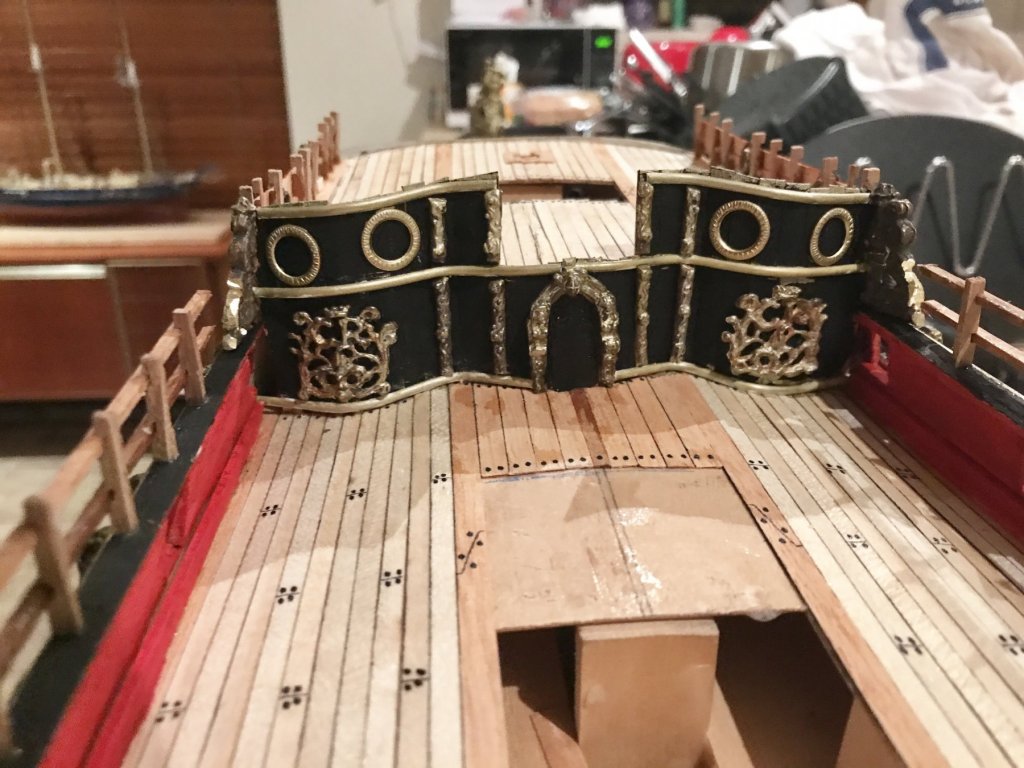
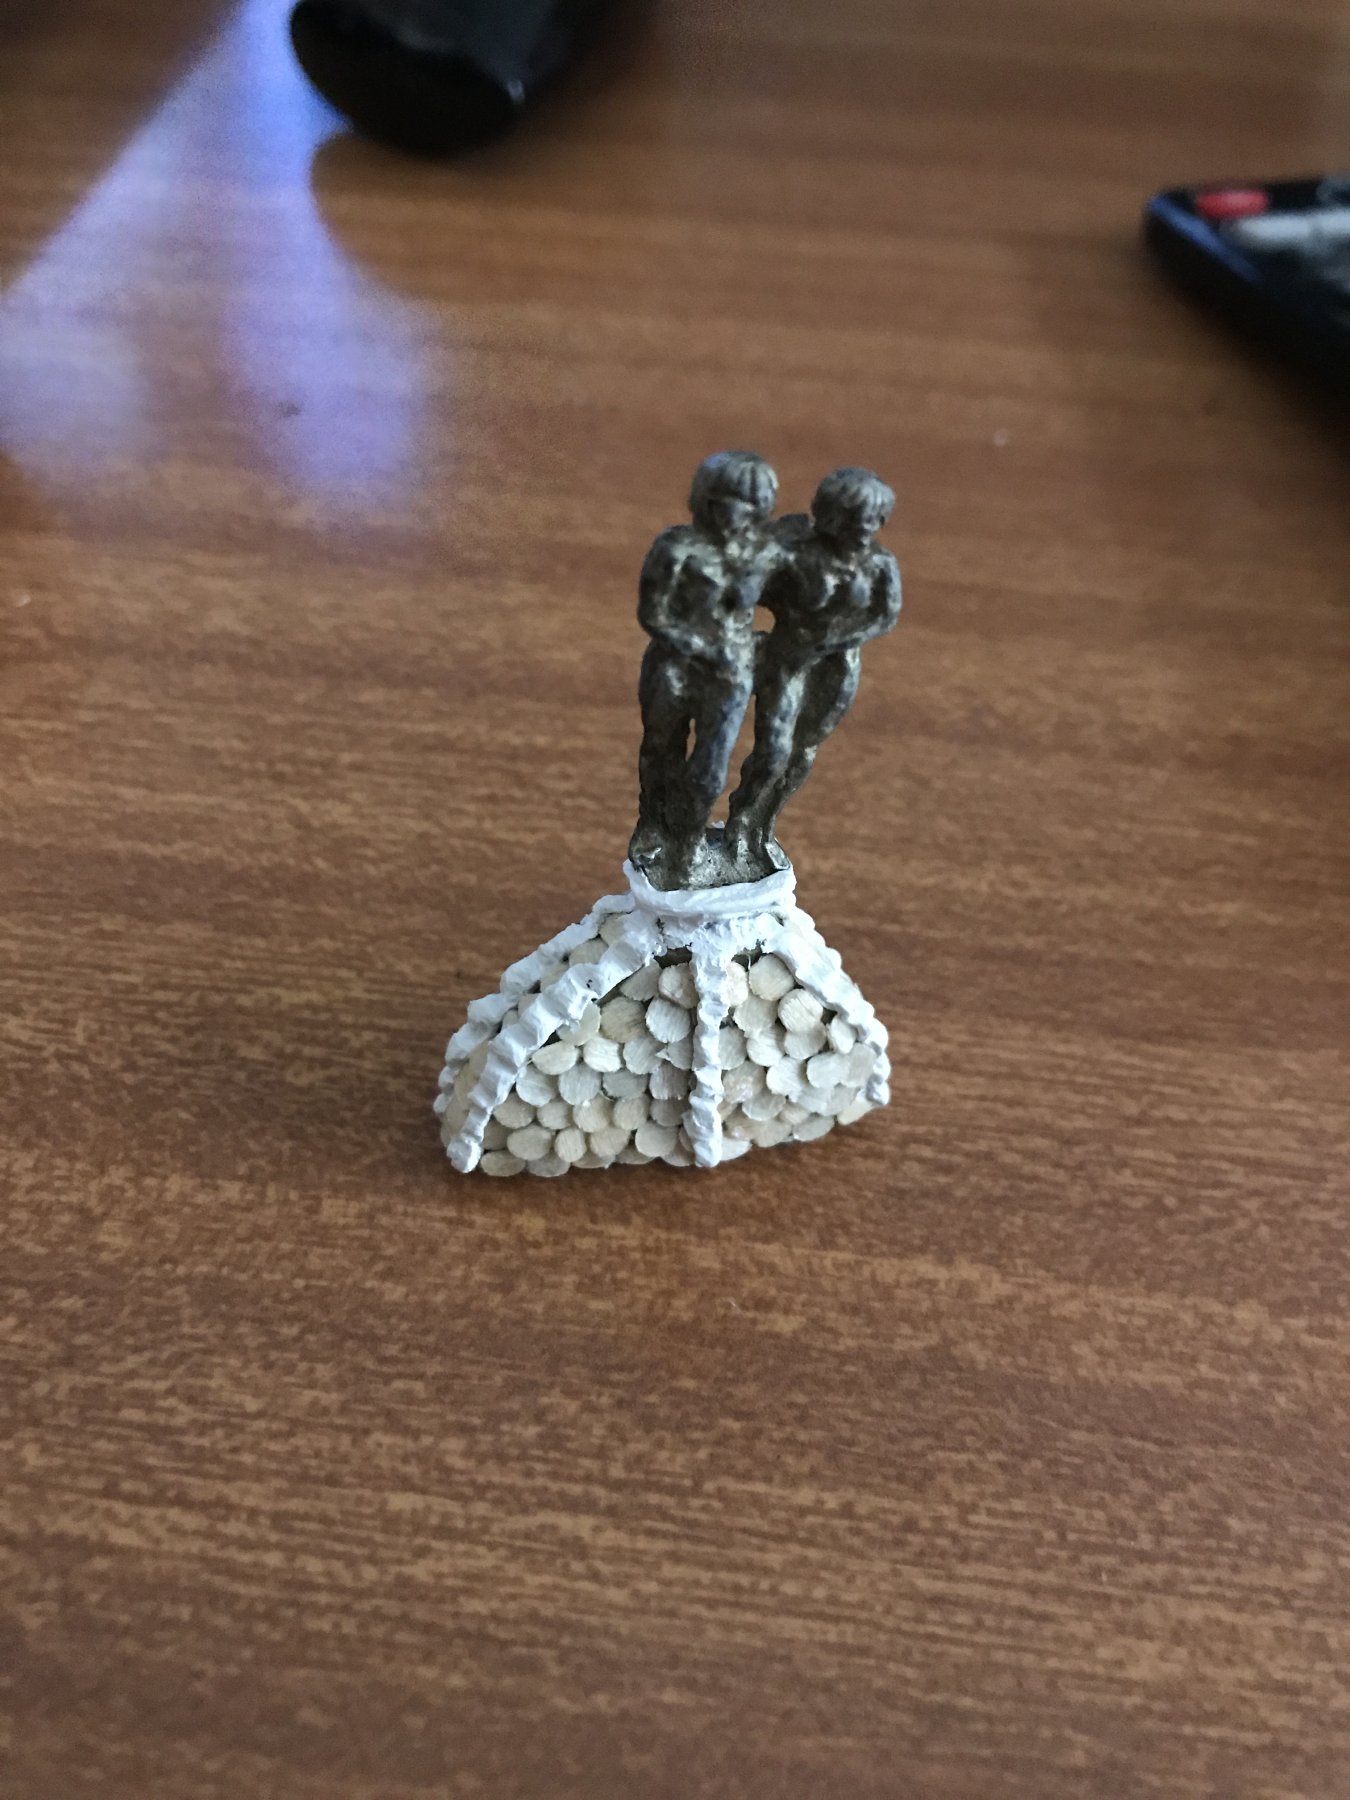
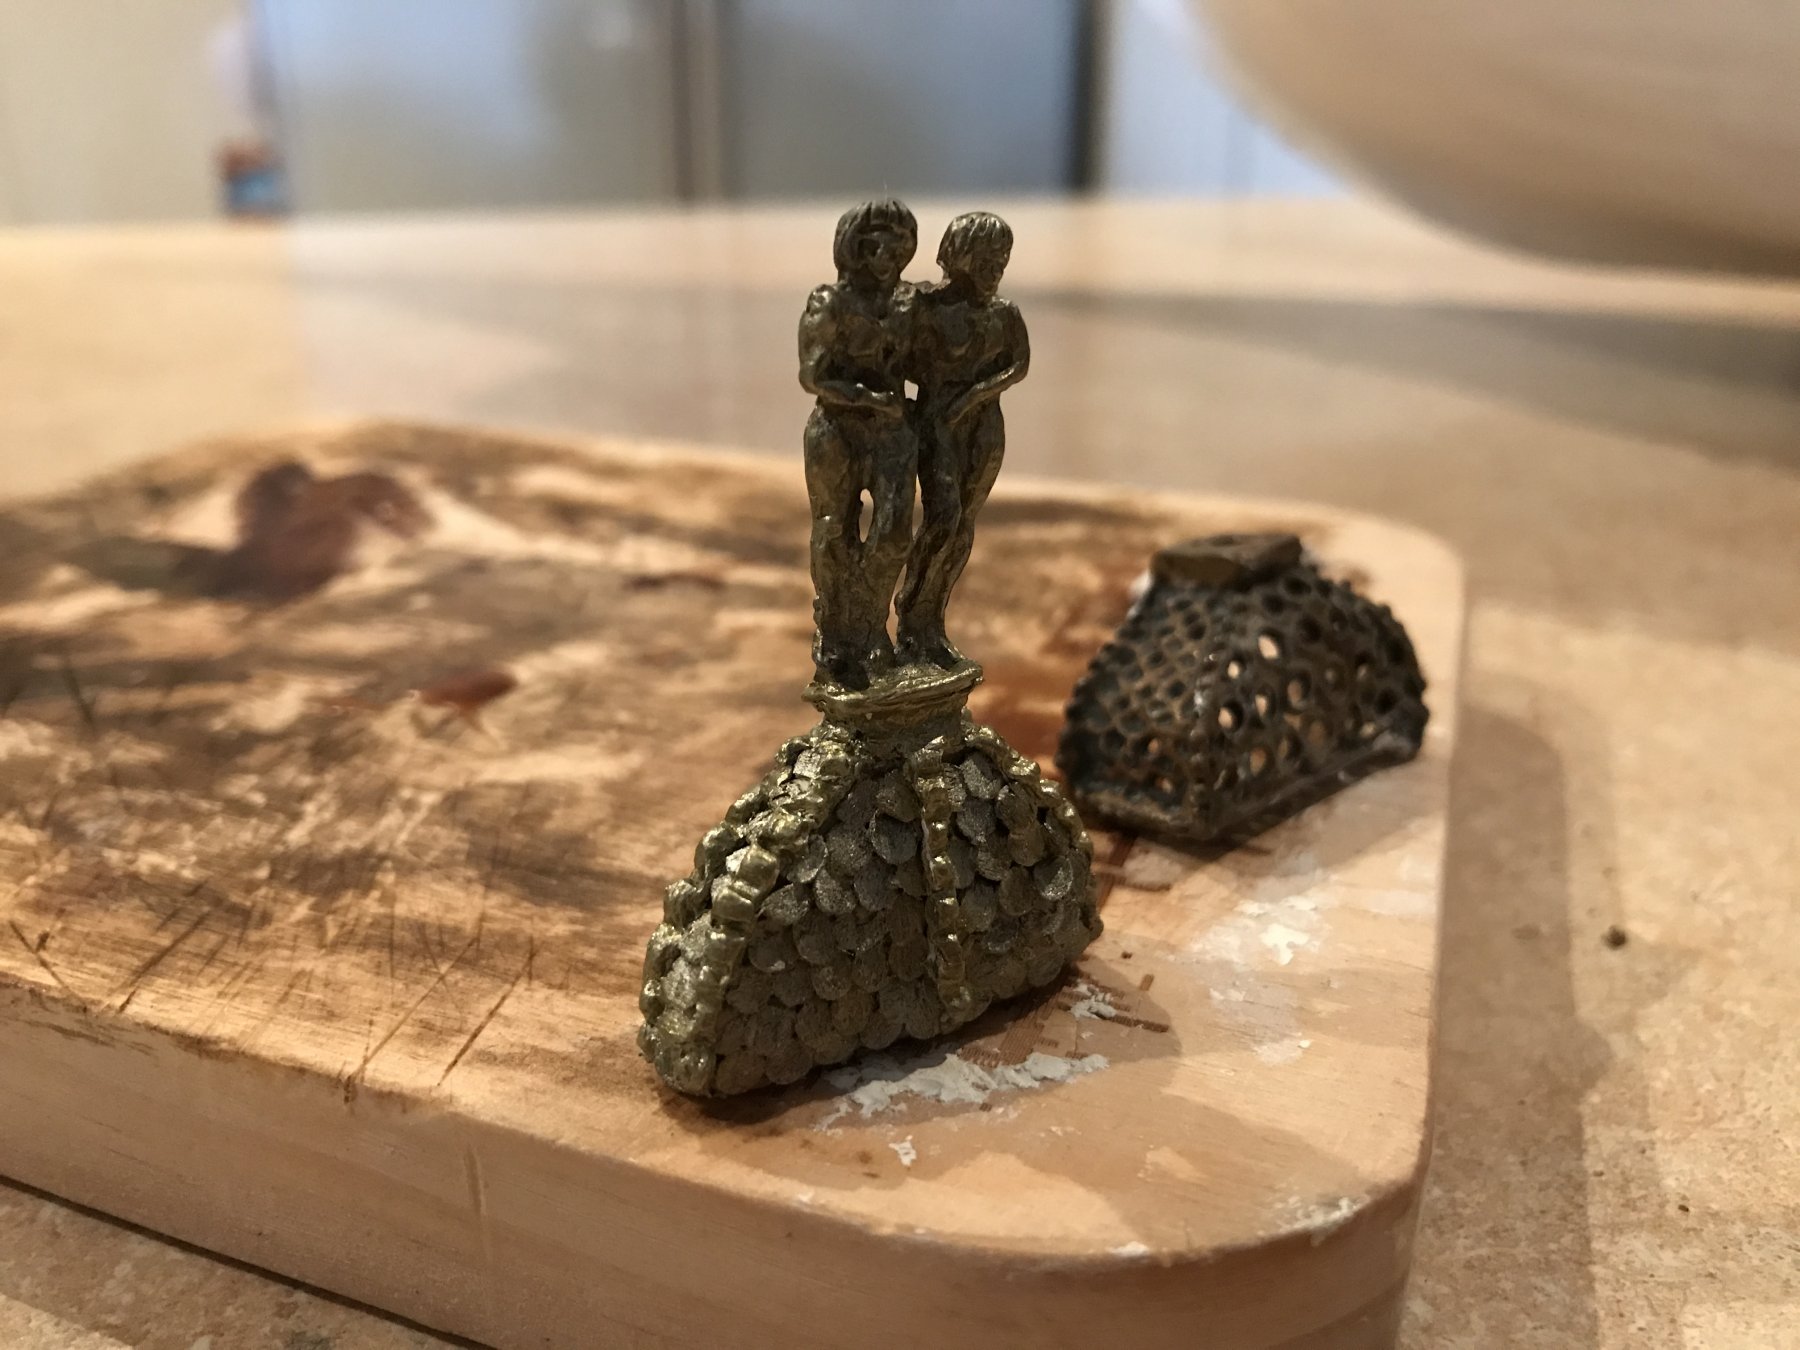
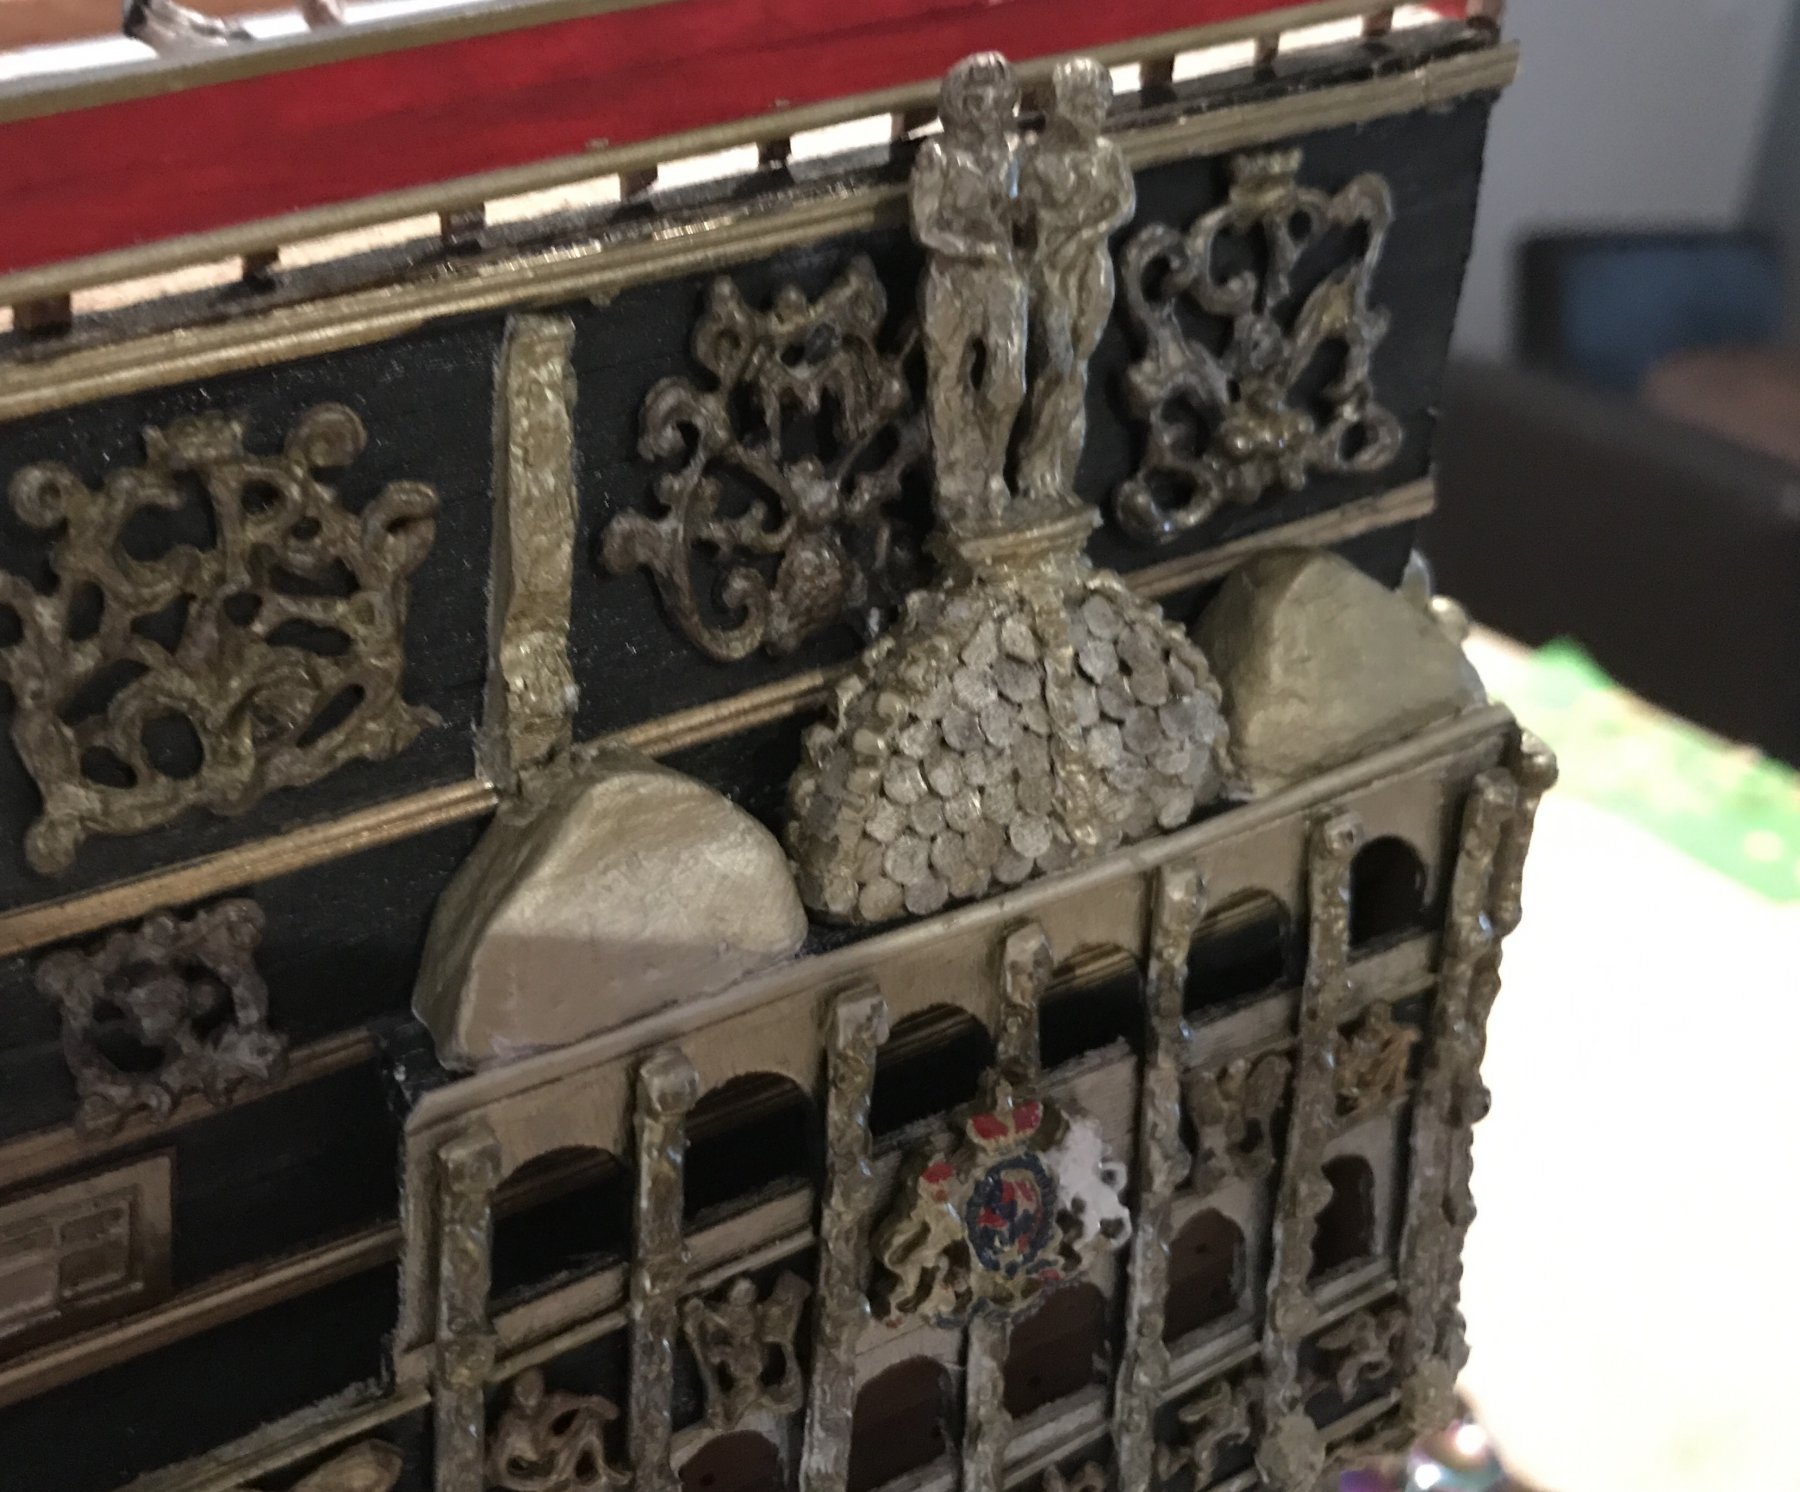
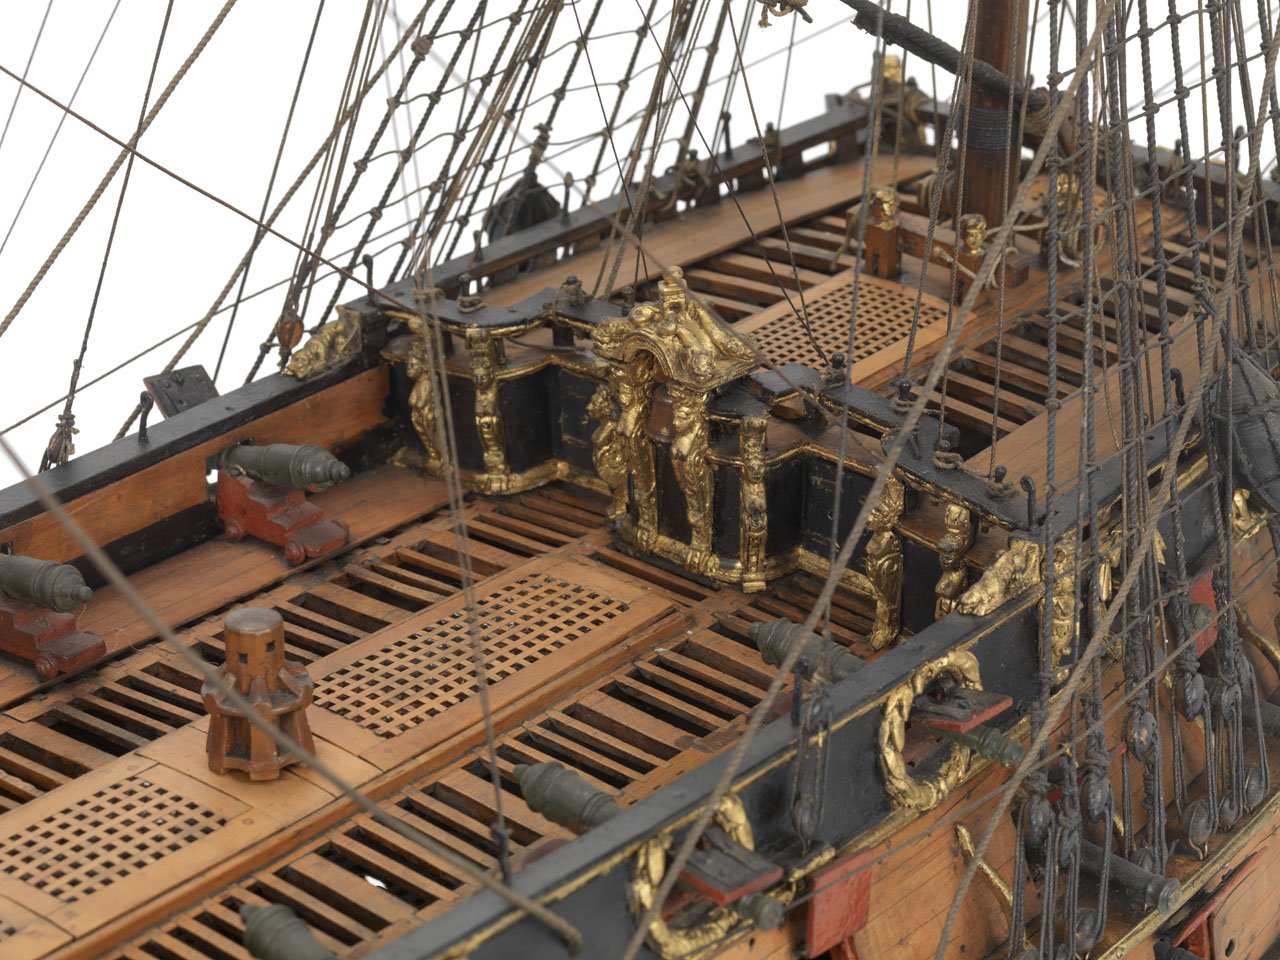
I've finished the port central turret now, and have attached pics of the finished version and painted alongside the kit offering. Now only five to go. I've used the cupids from the kit for atop the central turret, though I may change this later. There are also two lanterns on the two astriding turrets on each quarter gallery. Though the kit versions are too large so these will definitely need replacing.


-
-
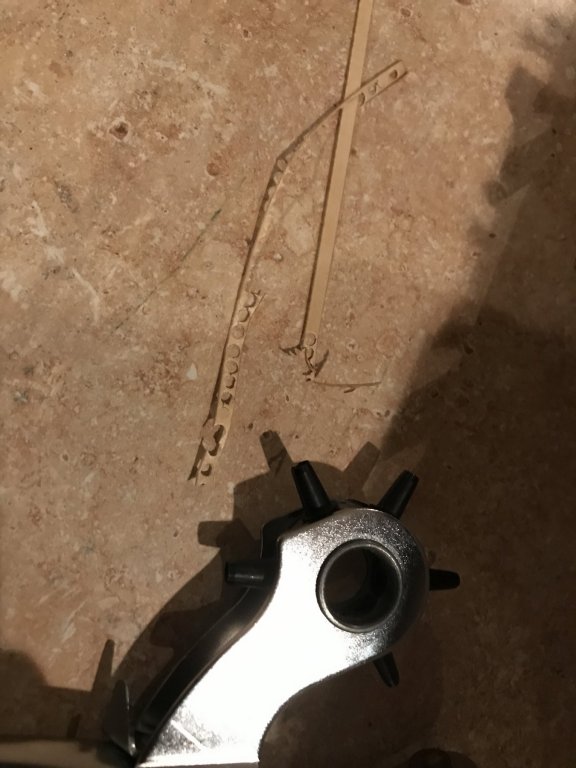
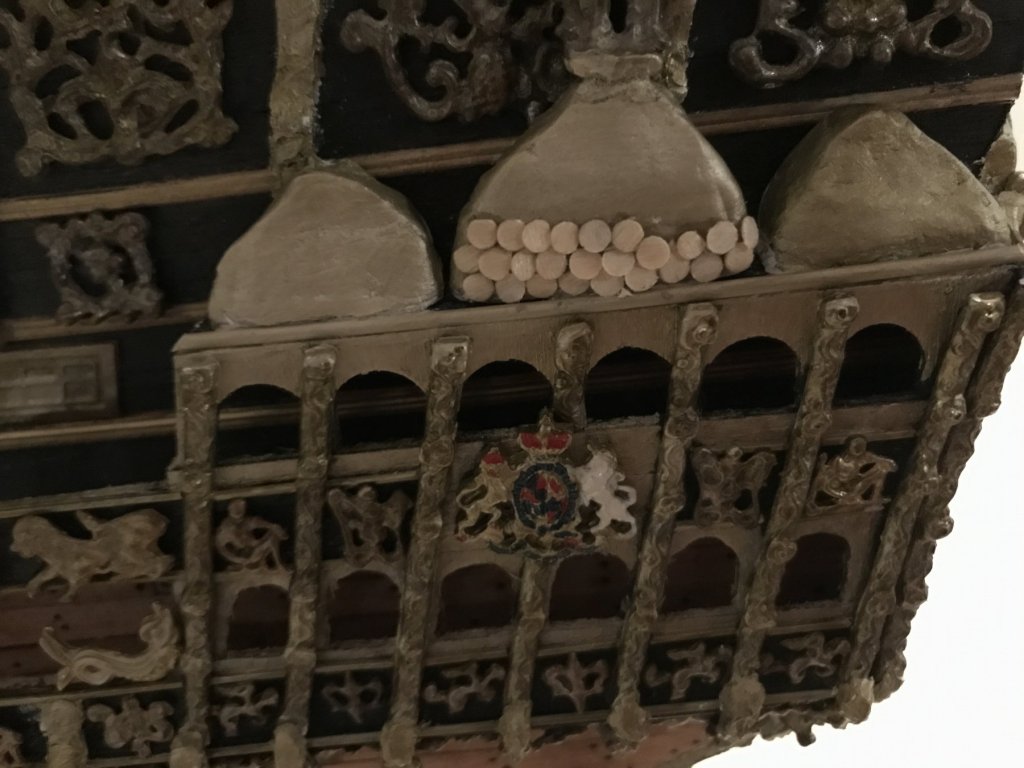
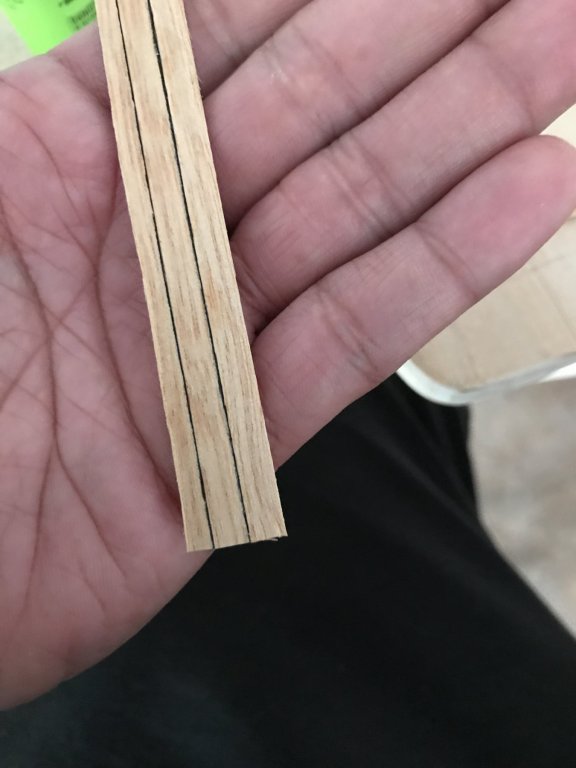
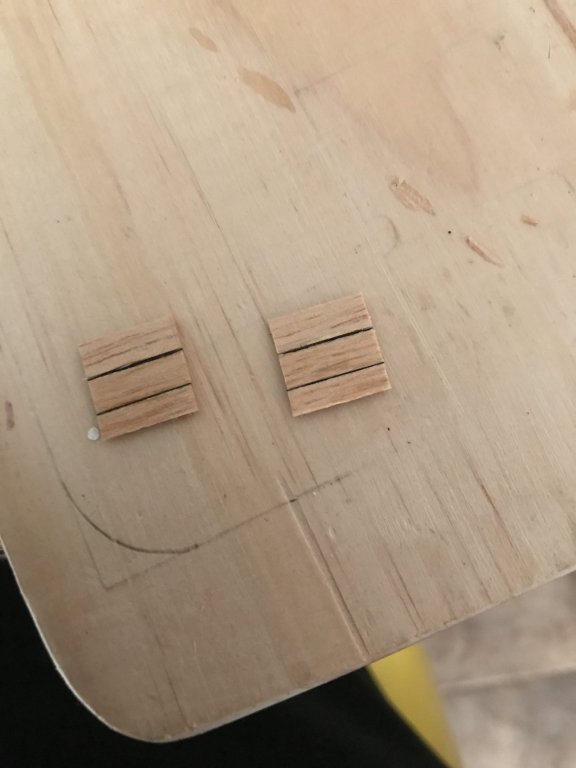
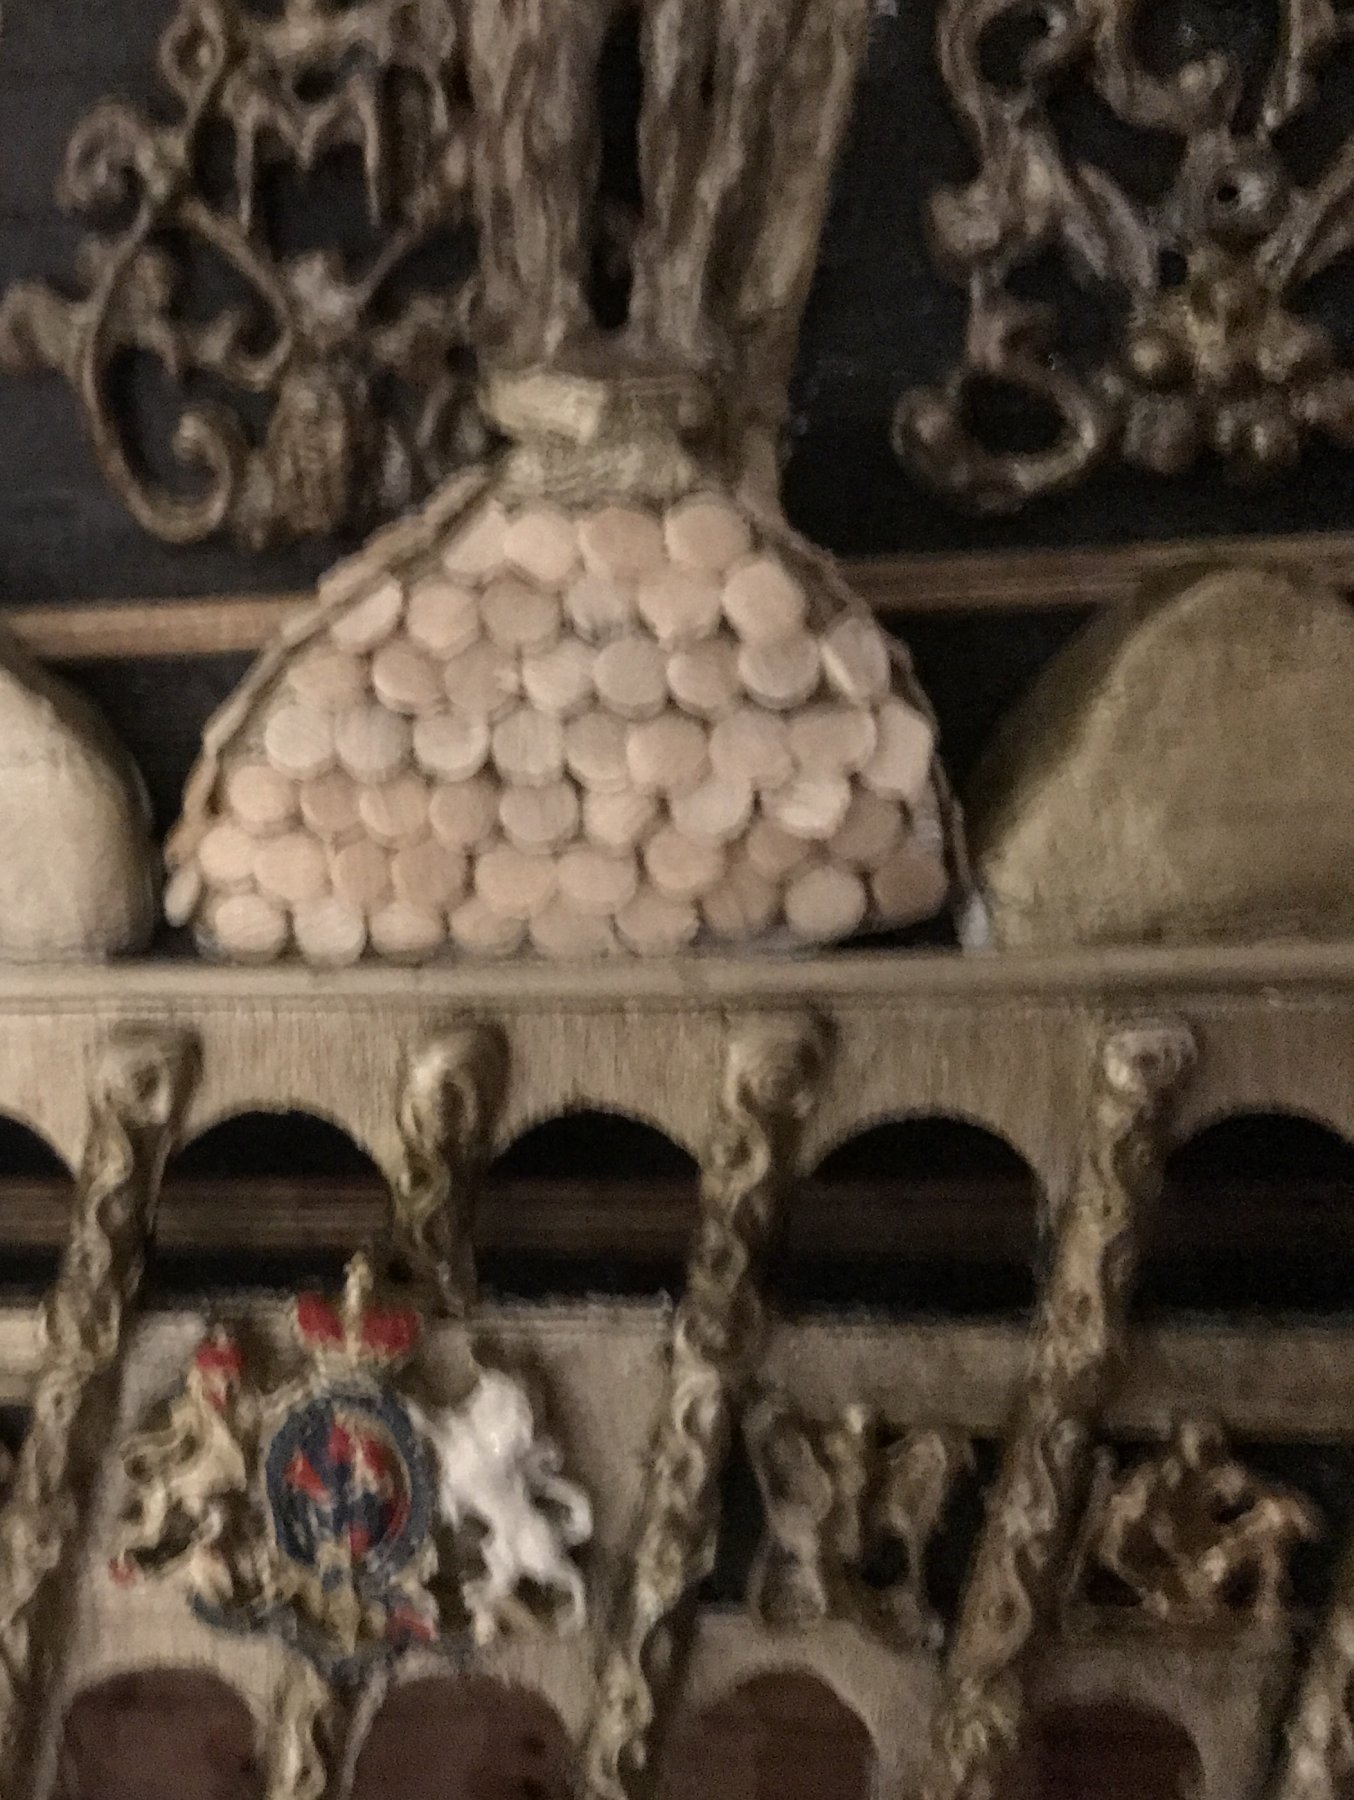
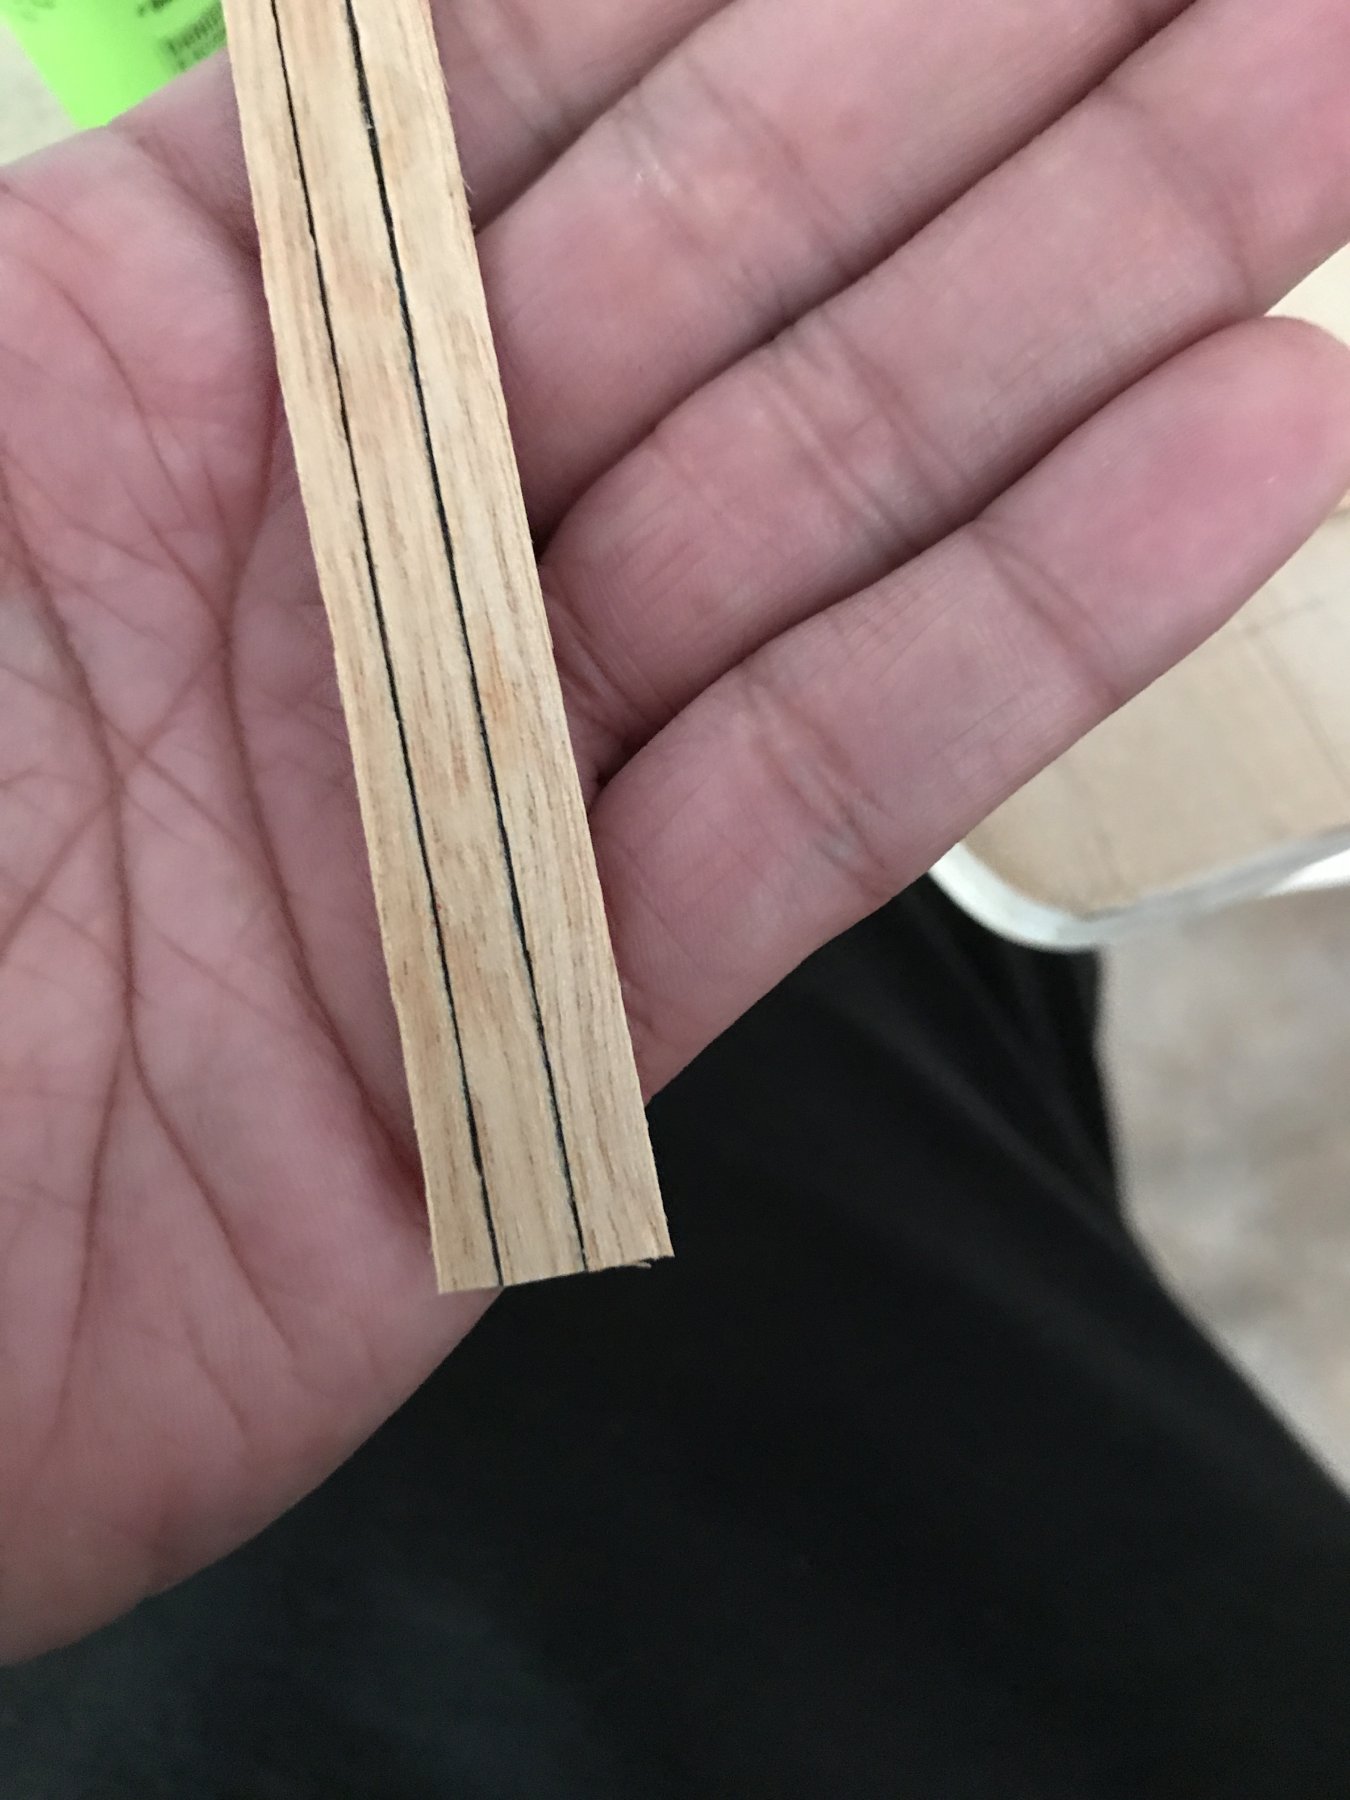
While waiting for things to dry, I started making up the shingles for the quarter gallery turrets. I use a leather hole punch which has various sizes on there to punch out .5mm ash veneer strips. Using the cast brass turrets as templates I carved out new turrets with jelatong - nice closed grain wood which is perfect for carving larger shapes. Once painted they should come up well I think. Once these are done I'll be doing the same to the belfry roof.
- coxswain, CaptainSteve, md1400cs and 2 others
-
 5
5
-
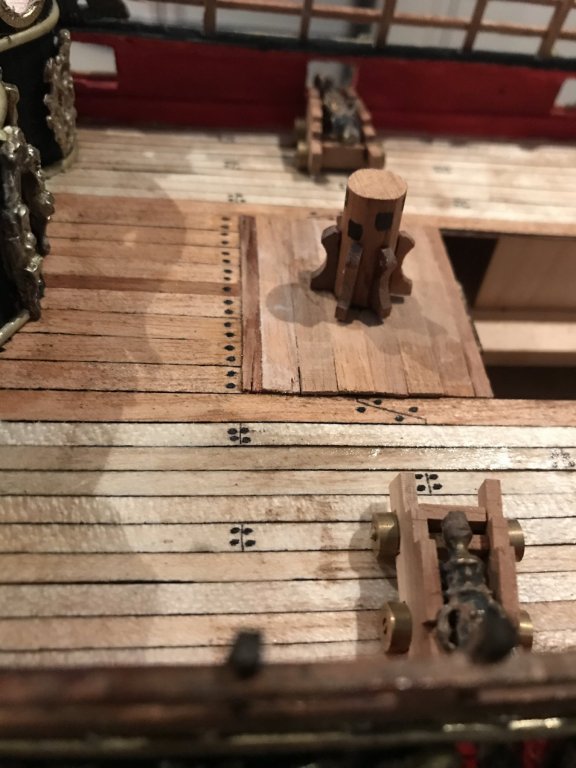
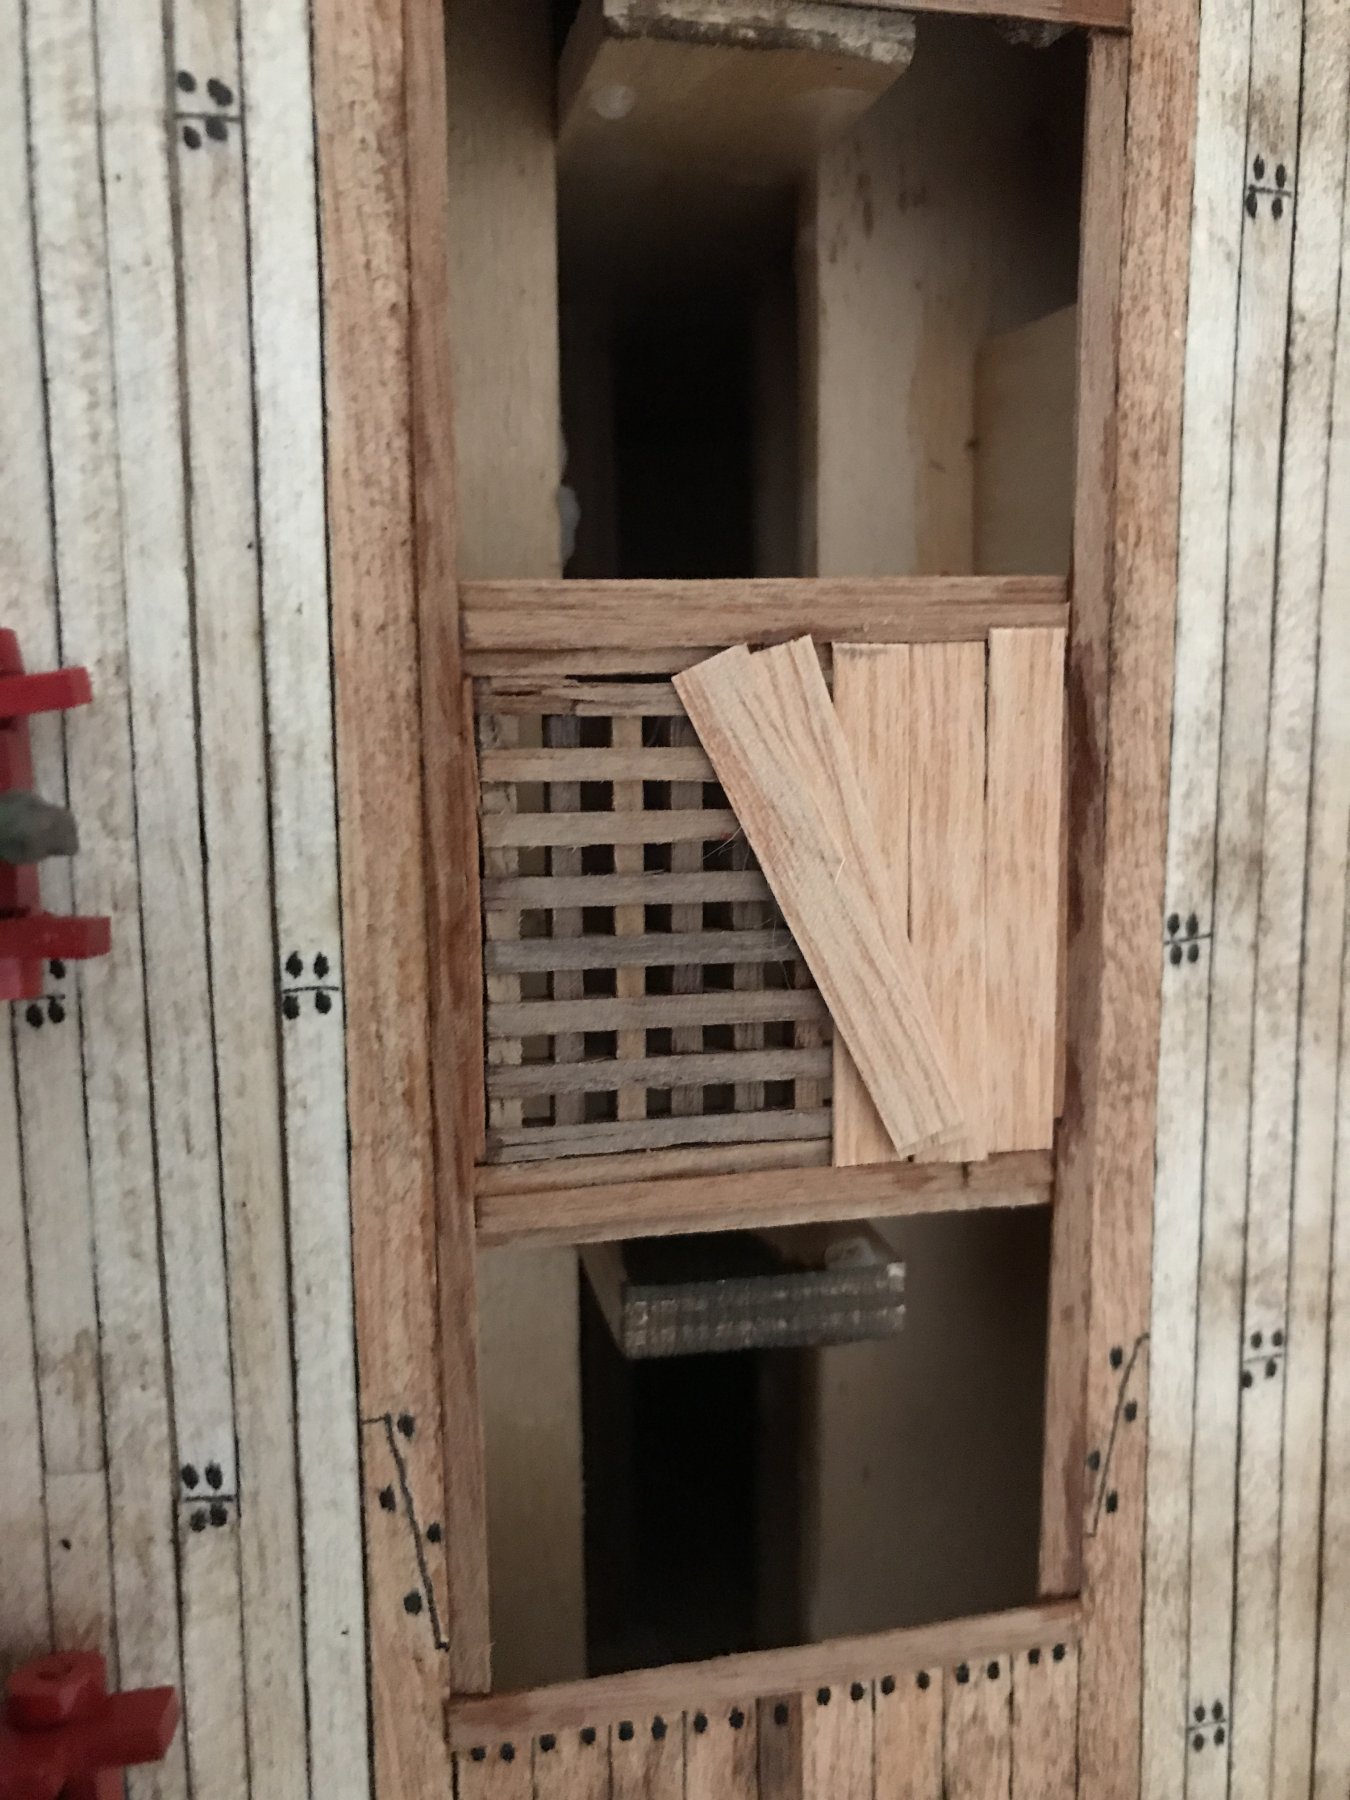
So I found some spare 1.5mm walnut gratings from some kit in my box of spares. Thought a perfect compromise to my too large grating issue.
For those that don't know these gratings are/were covered up at sea with individual boards and then a canvas cover which was tarred. They may have been opened in calmer weather for ventilation and obviously access to the holds. So a couple things you will see that I've changed is my gratings on the upper gun deck are three same sized openings over one long opening in the hull, with beams between the three sections. Sergal suggests two different sized gratings not connected on this deck. Considering nearly every large warship of the period and later shows that nearly the entire central section of these decks was gratings I've done the same. This is also similar on the Prince models, the Vasa and most paintings of ships of the time.
With the covers ive placed a few planks over the central grating to show the grating yet also the cover planks. It's also possible that the coverings over the gratings were almost like unhinged hatches as the wreck of the Vasa has shown. Also this helps as I don't have enough gratings to change all of them so covering some up leaves me with ample.

- EJ_L, rafine, CaptainSteve and 4 others
-
7
-
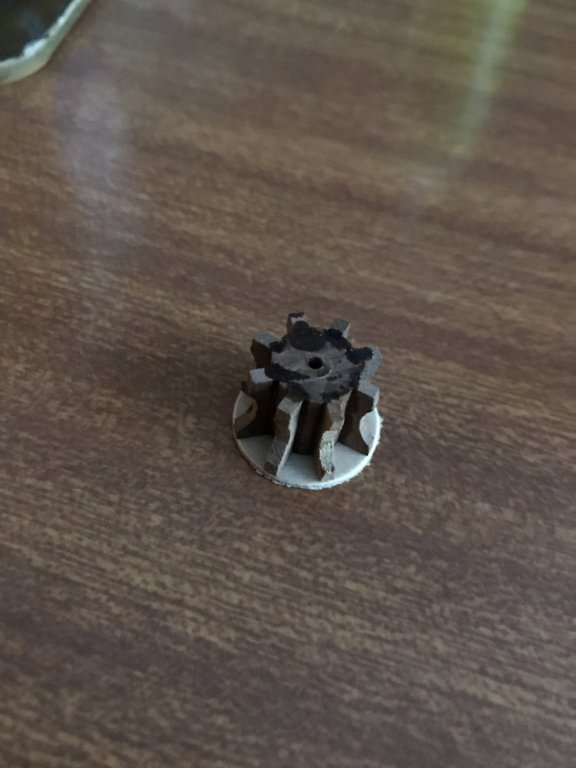
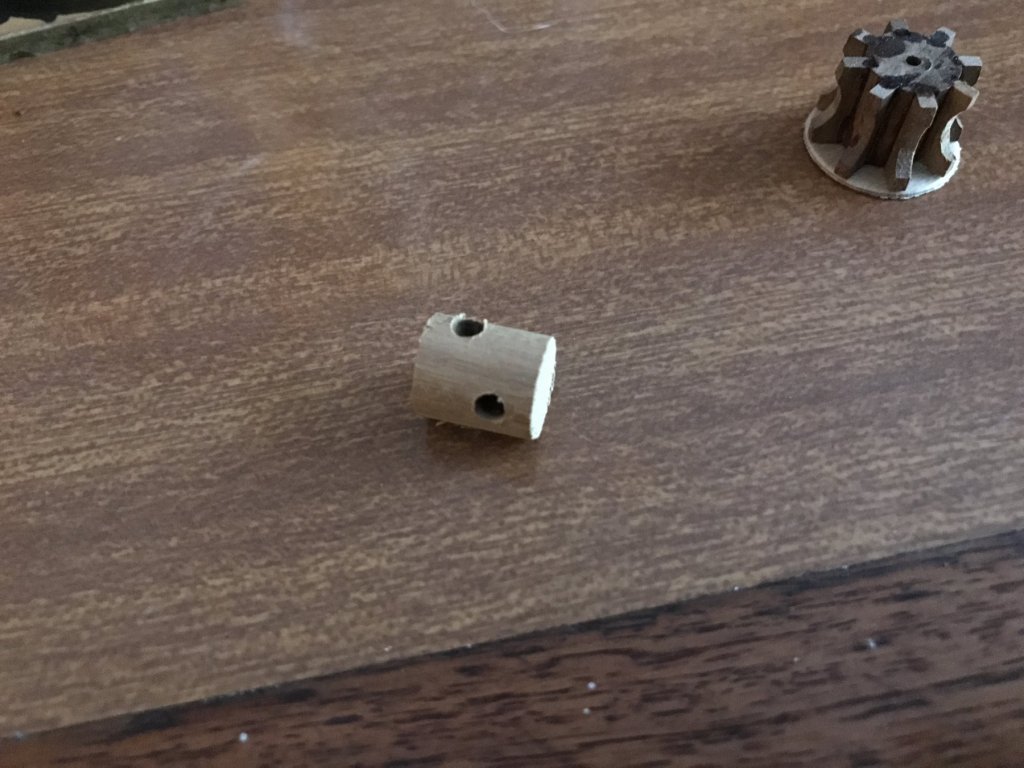
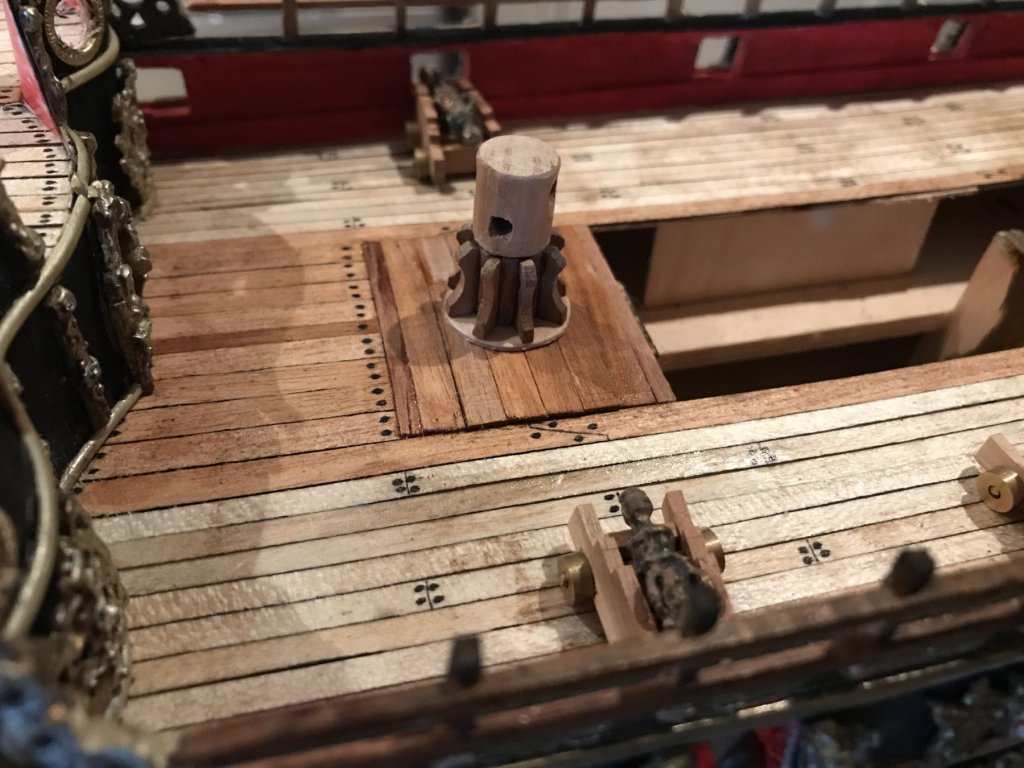
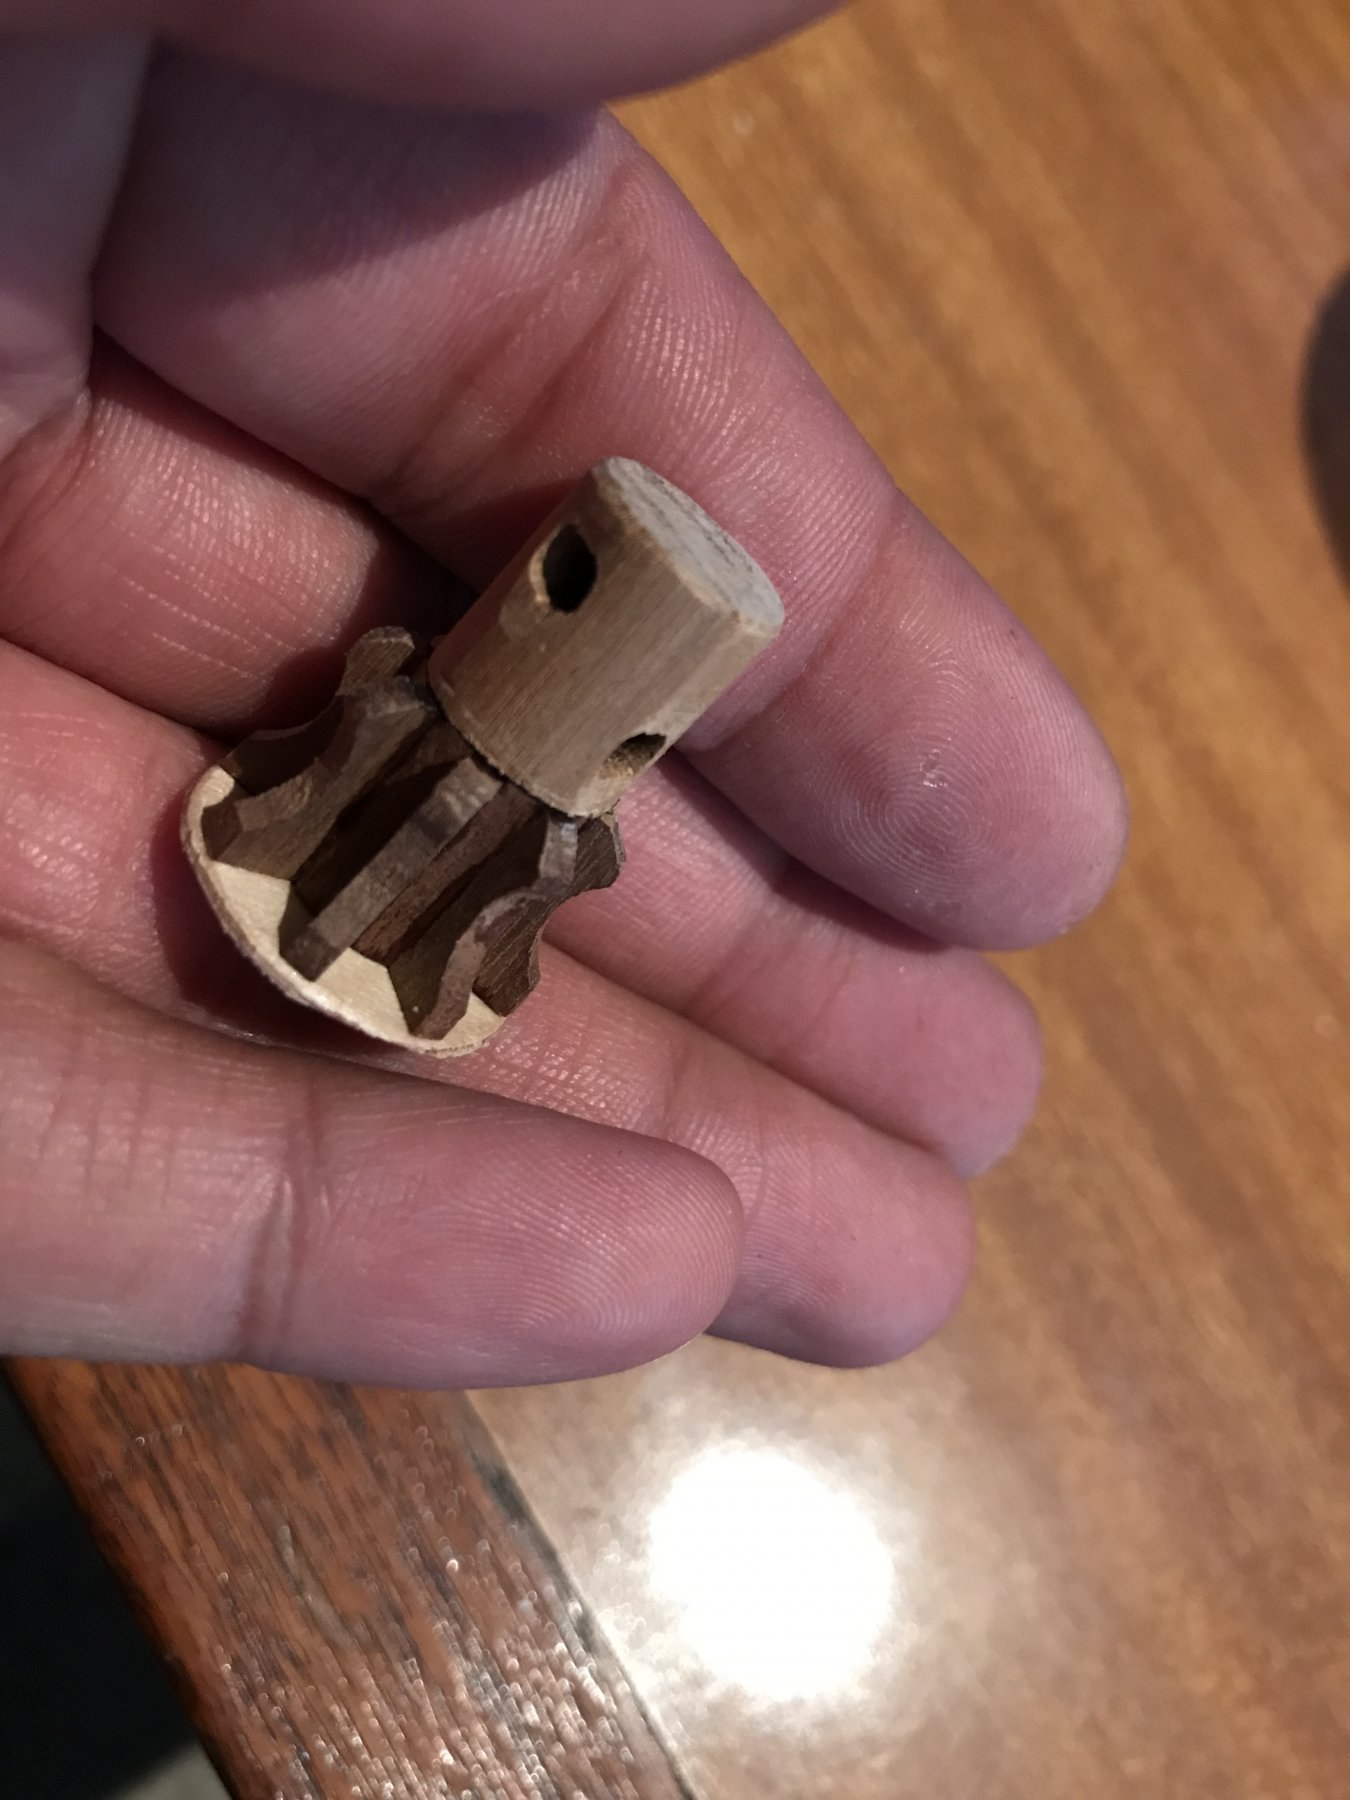
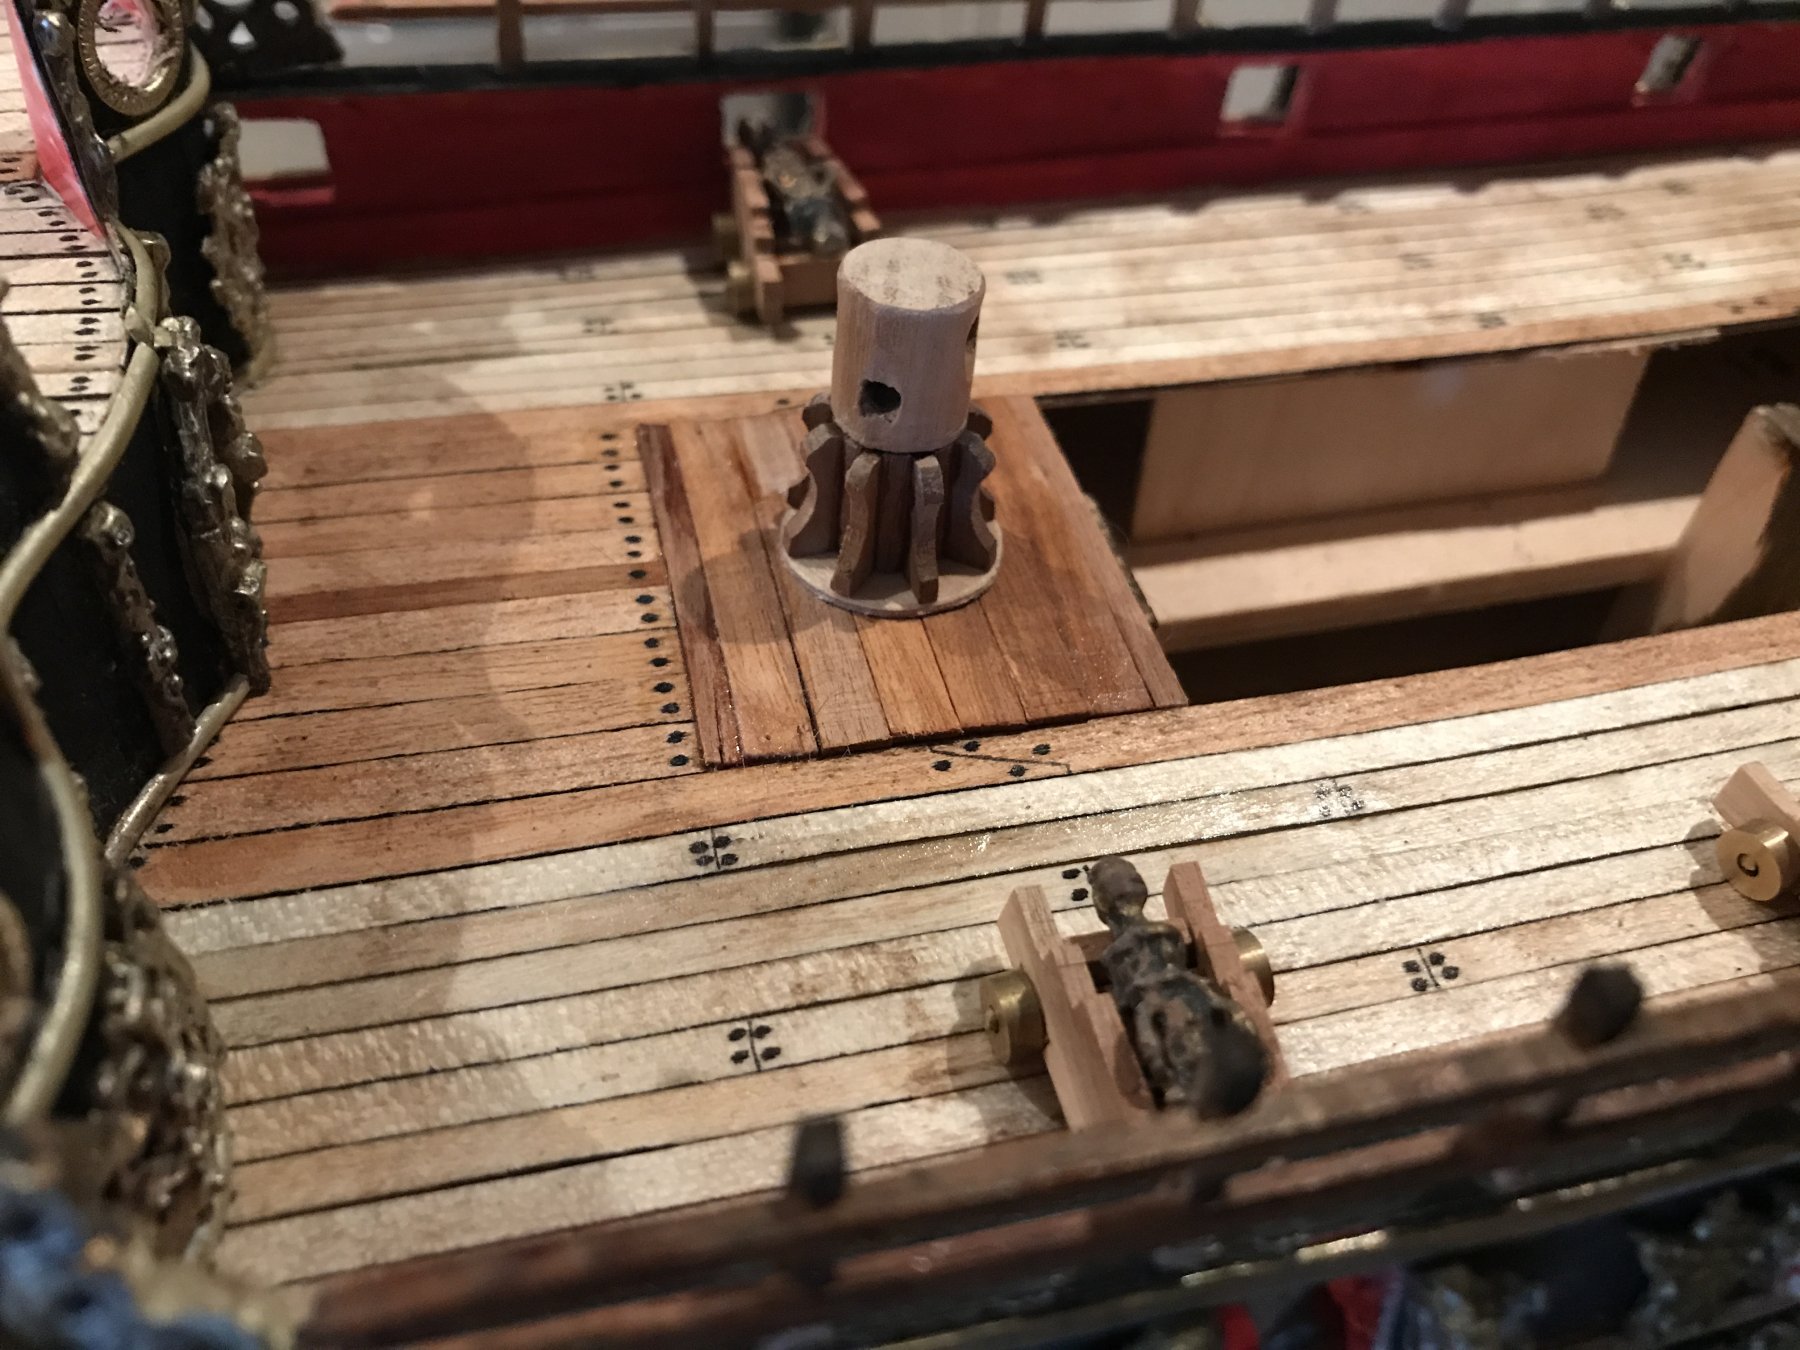
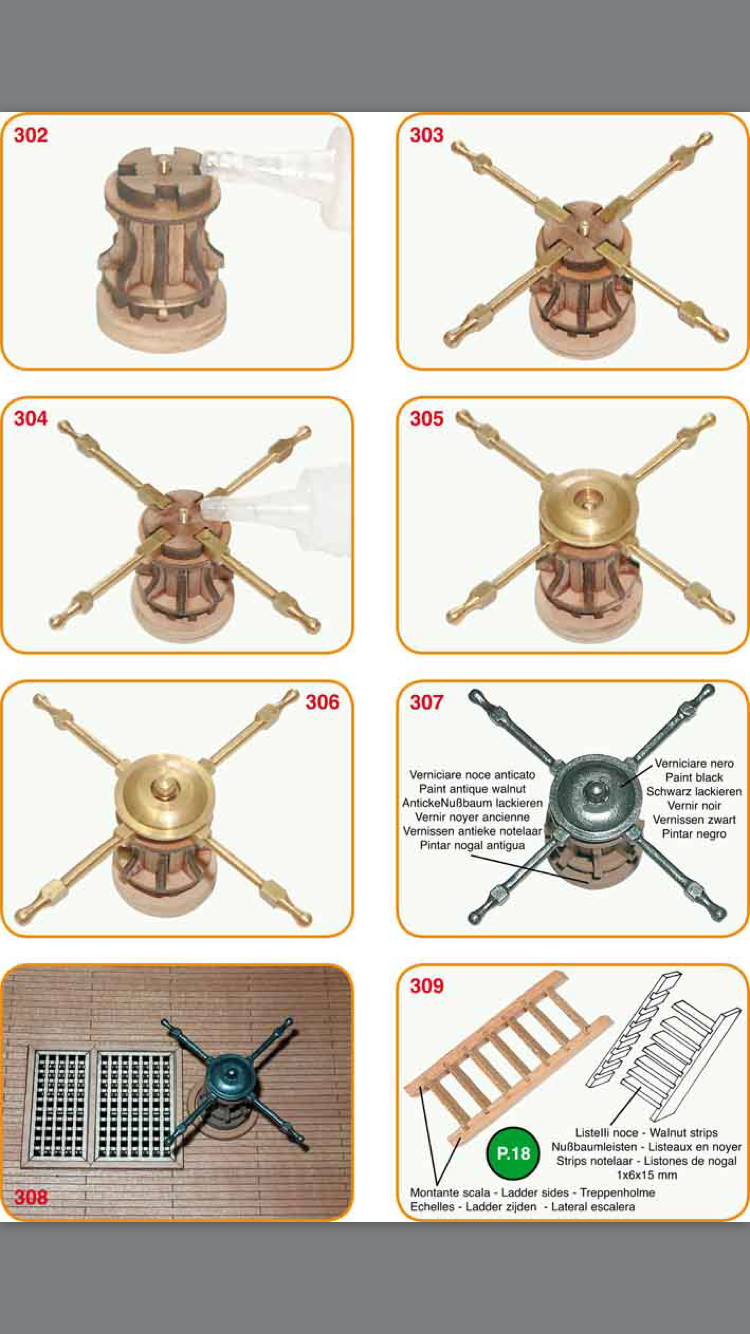
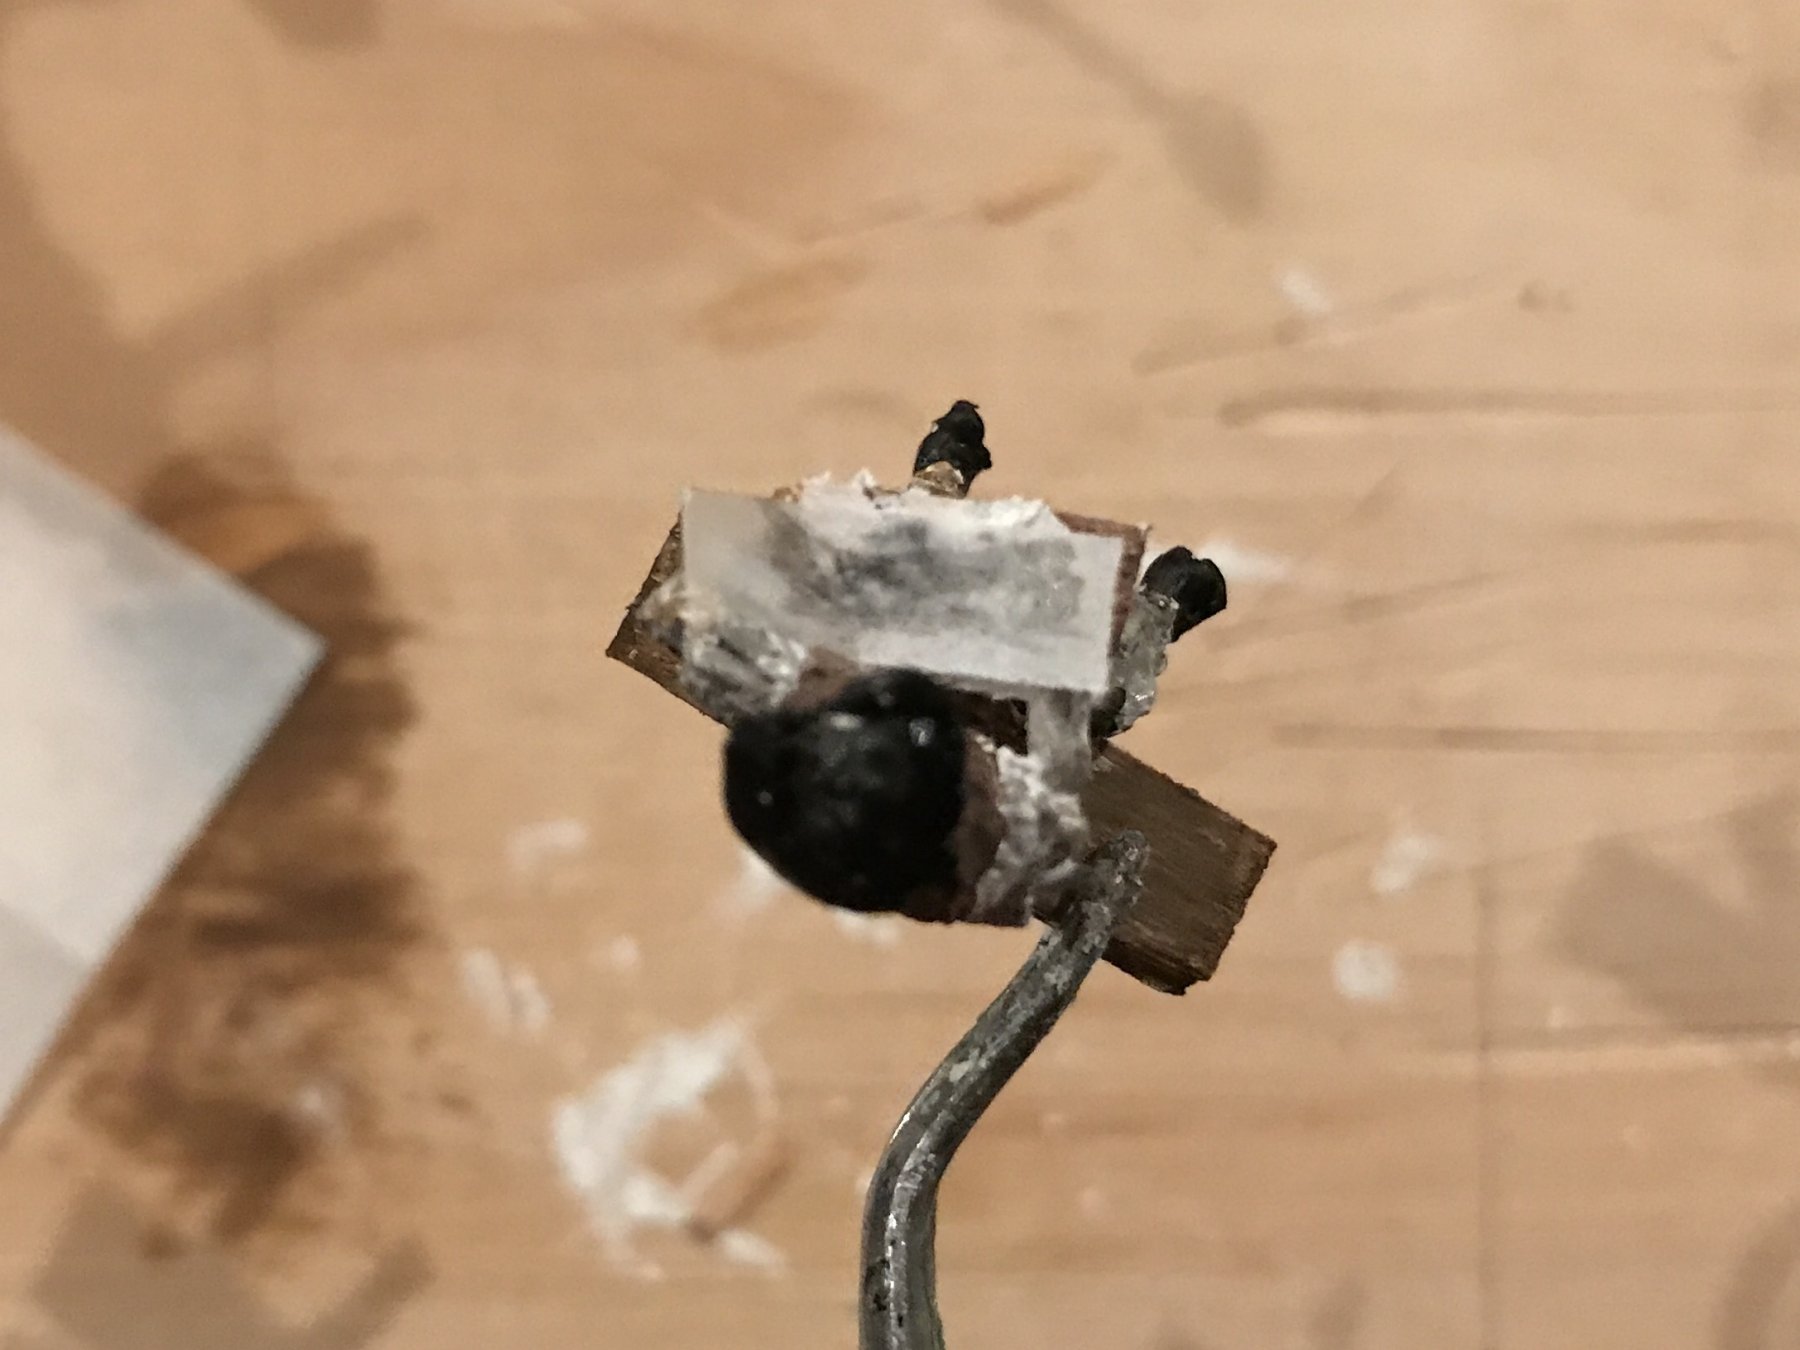
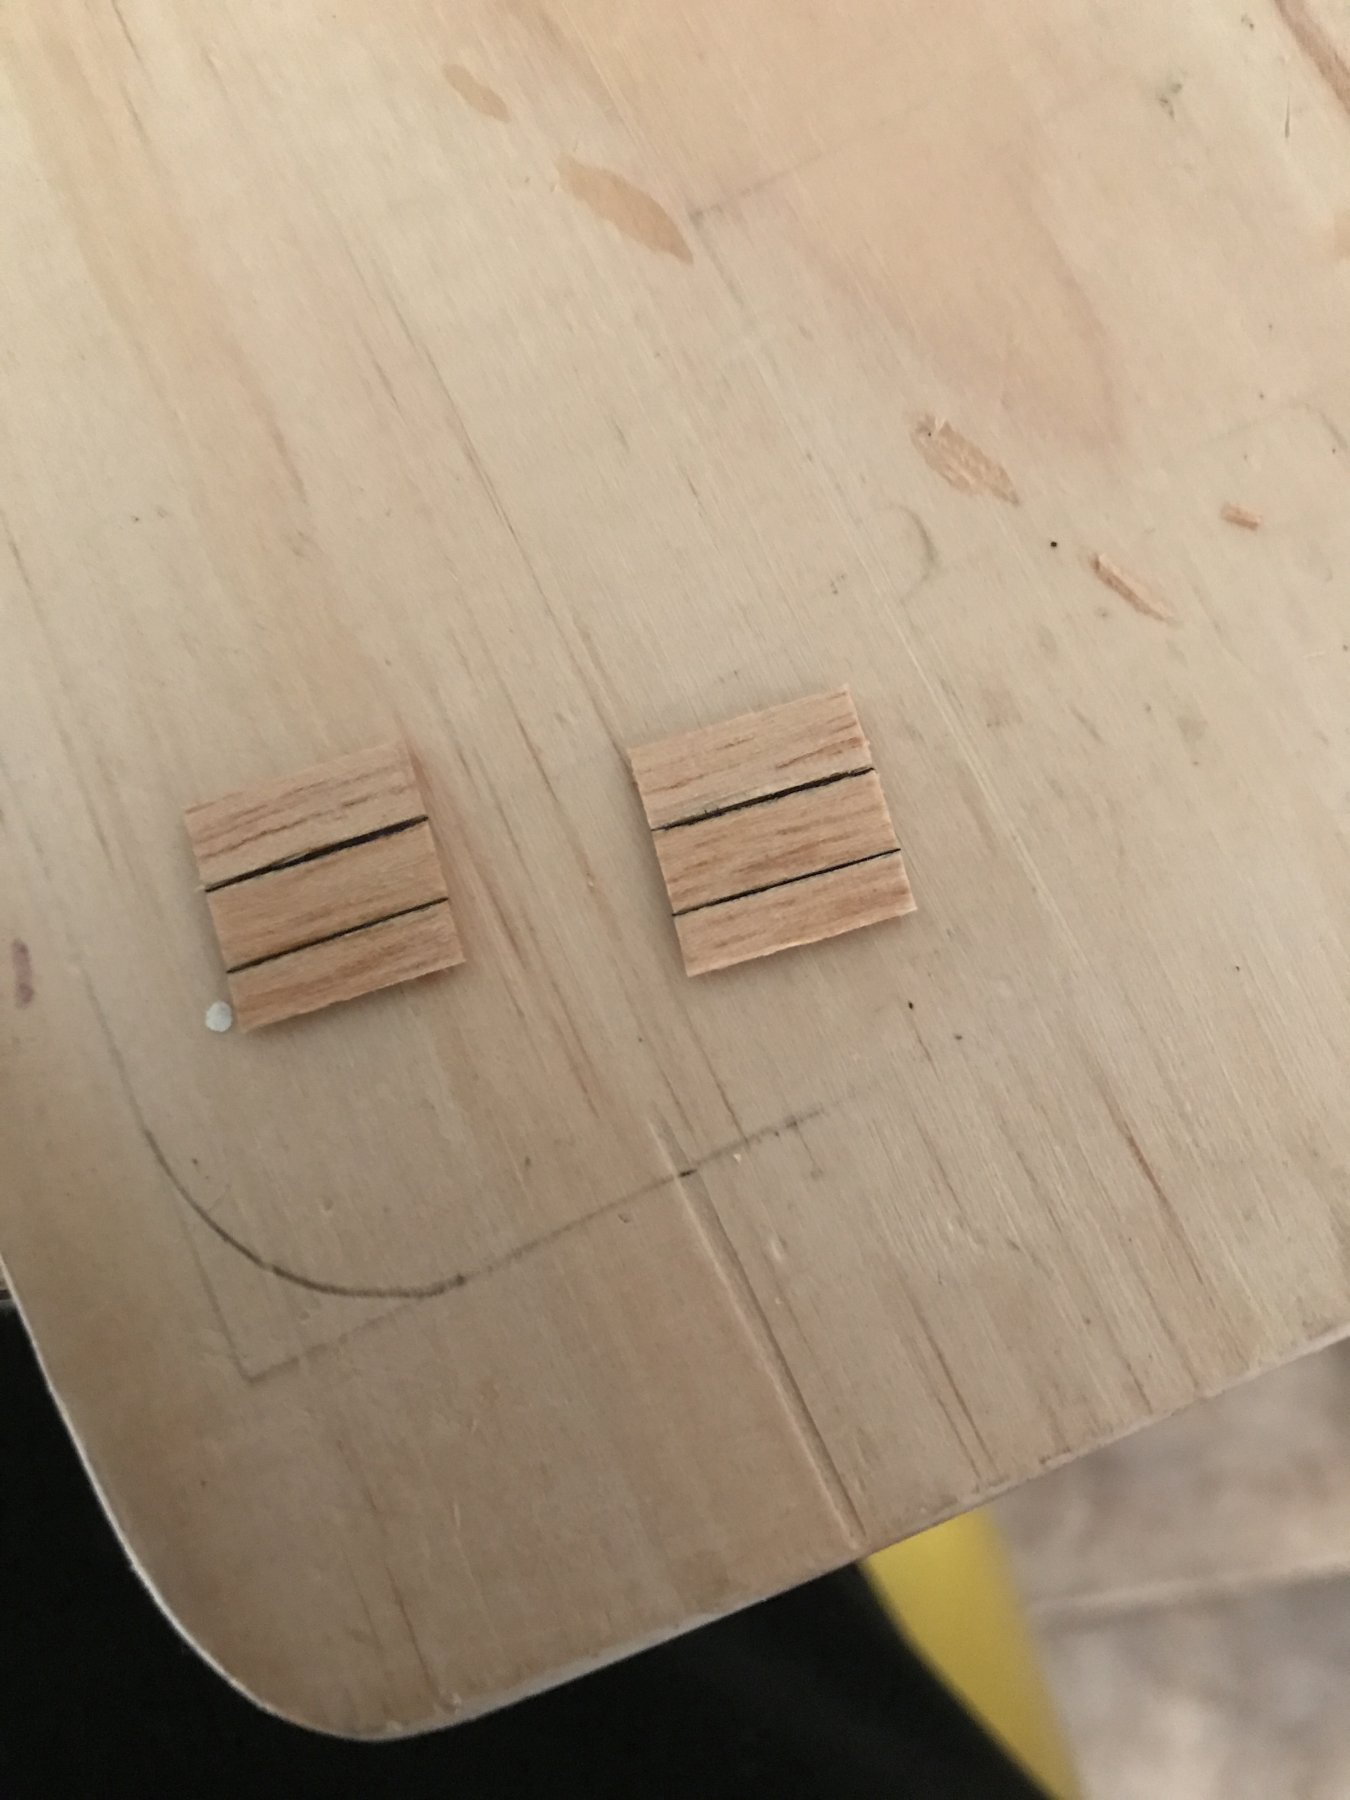
Have been going over one of the deck fittings provided and have also noted that a lot of these will also need replacing/ modifications. One of the most notable items are the capstan and gratings. The gratings are too large at 2mm thickness. At this scale a mans foot would almost go straight through these so I'll need to make up some at 1mm thicknesses.
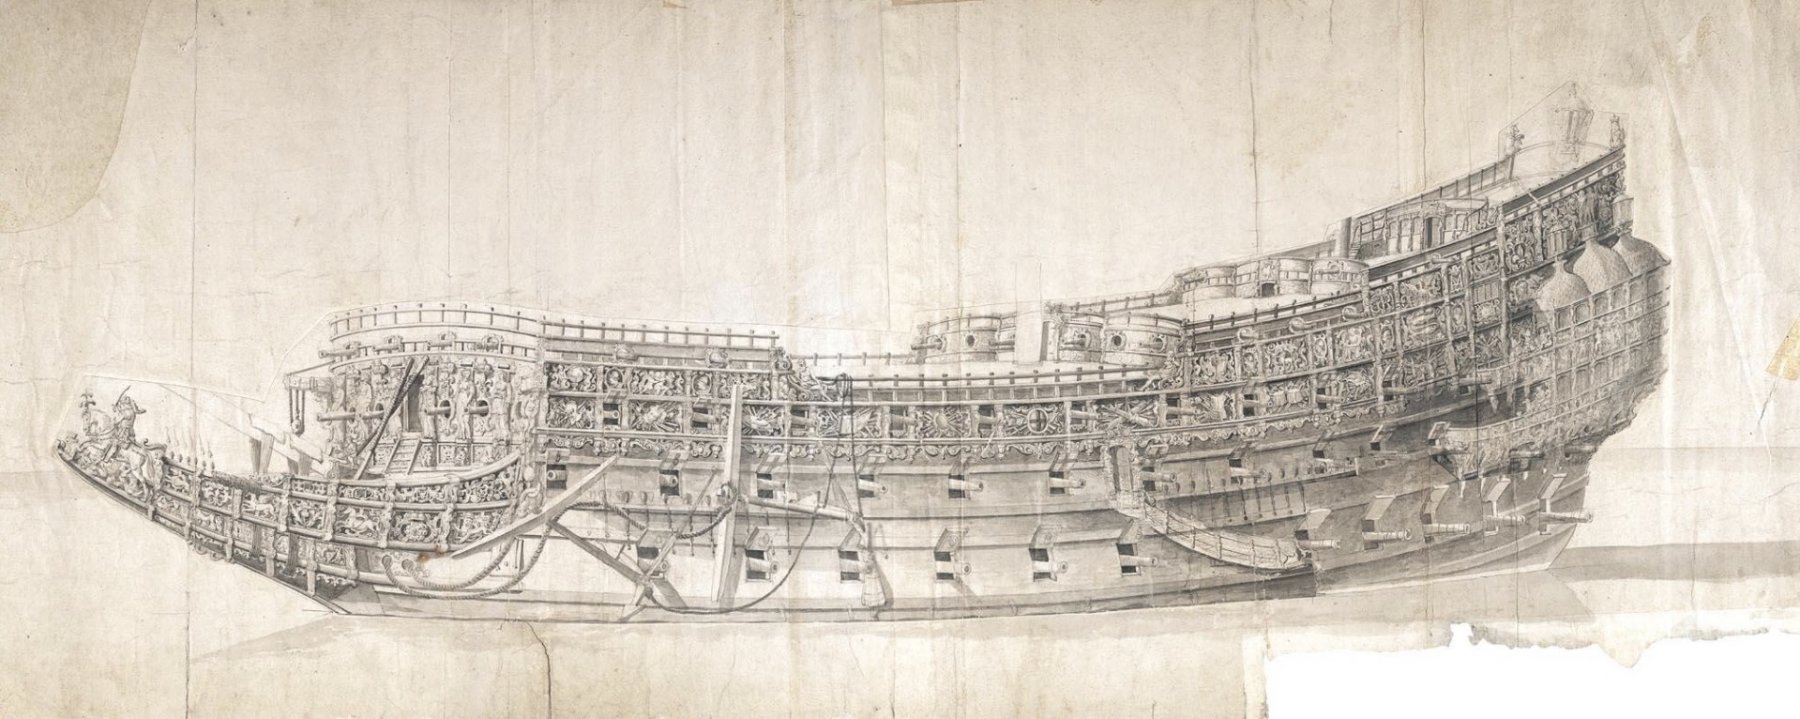
The other is the capstan which is too late for the period. The provided kit version is something you would find on the Victory and not on a ship of the 17th century. So I've made up a new one that suits. Originally I thought I'd use the kit parts, utilizing the lower barrel and with dowel making a new top but once test fitting it was just too large. So using smaller diameter dowel I made a new one. This isn't finished and only the basic shaft of the capstan but the size and style is better I think. Below I've attached pics of the two I've made followed with the kit version and a contemporary model of the Prince at Greenwich showing the earlier style of capstan.


-
-
Thanks for looking in guys.
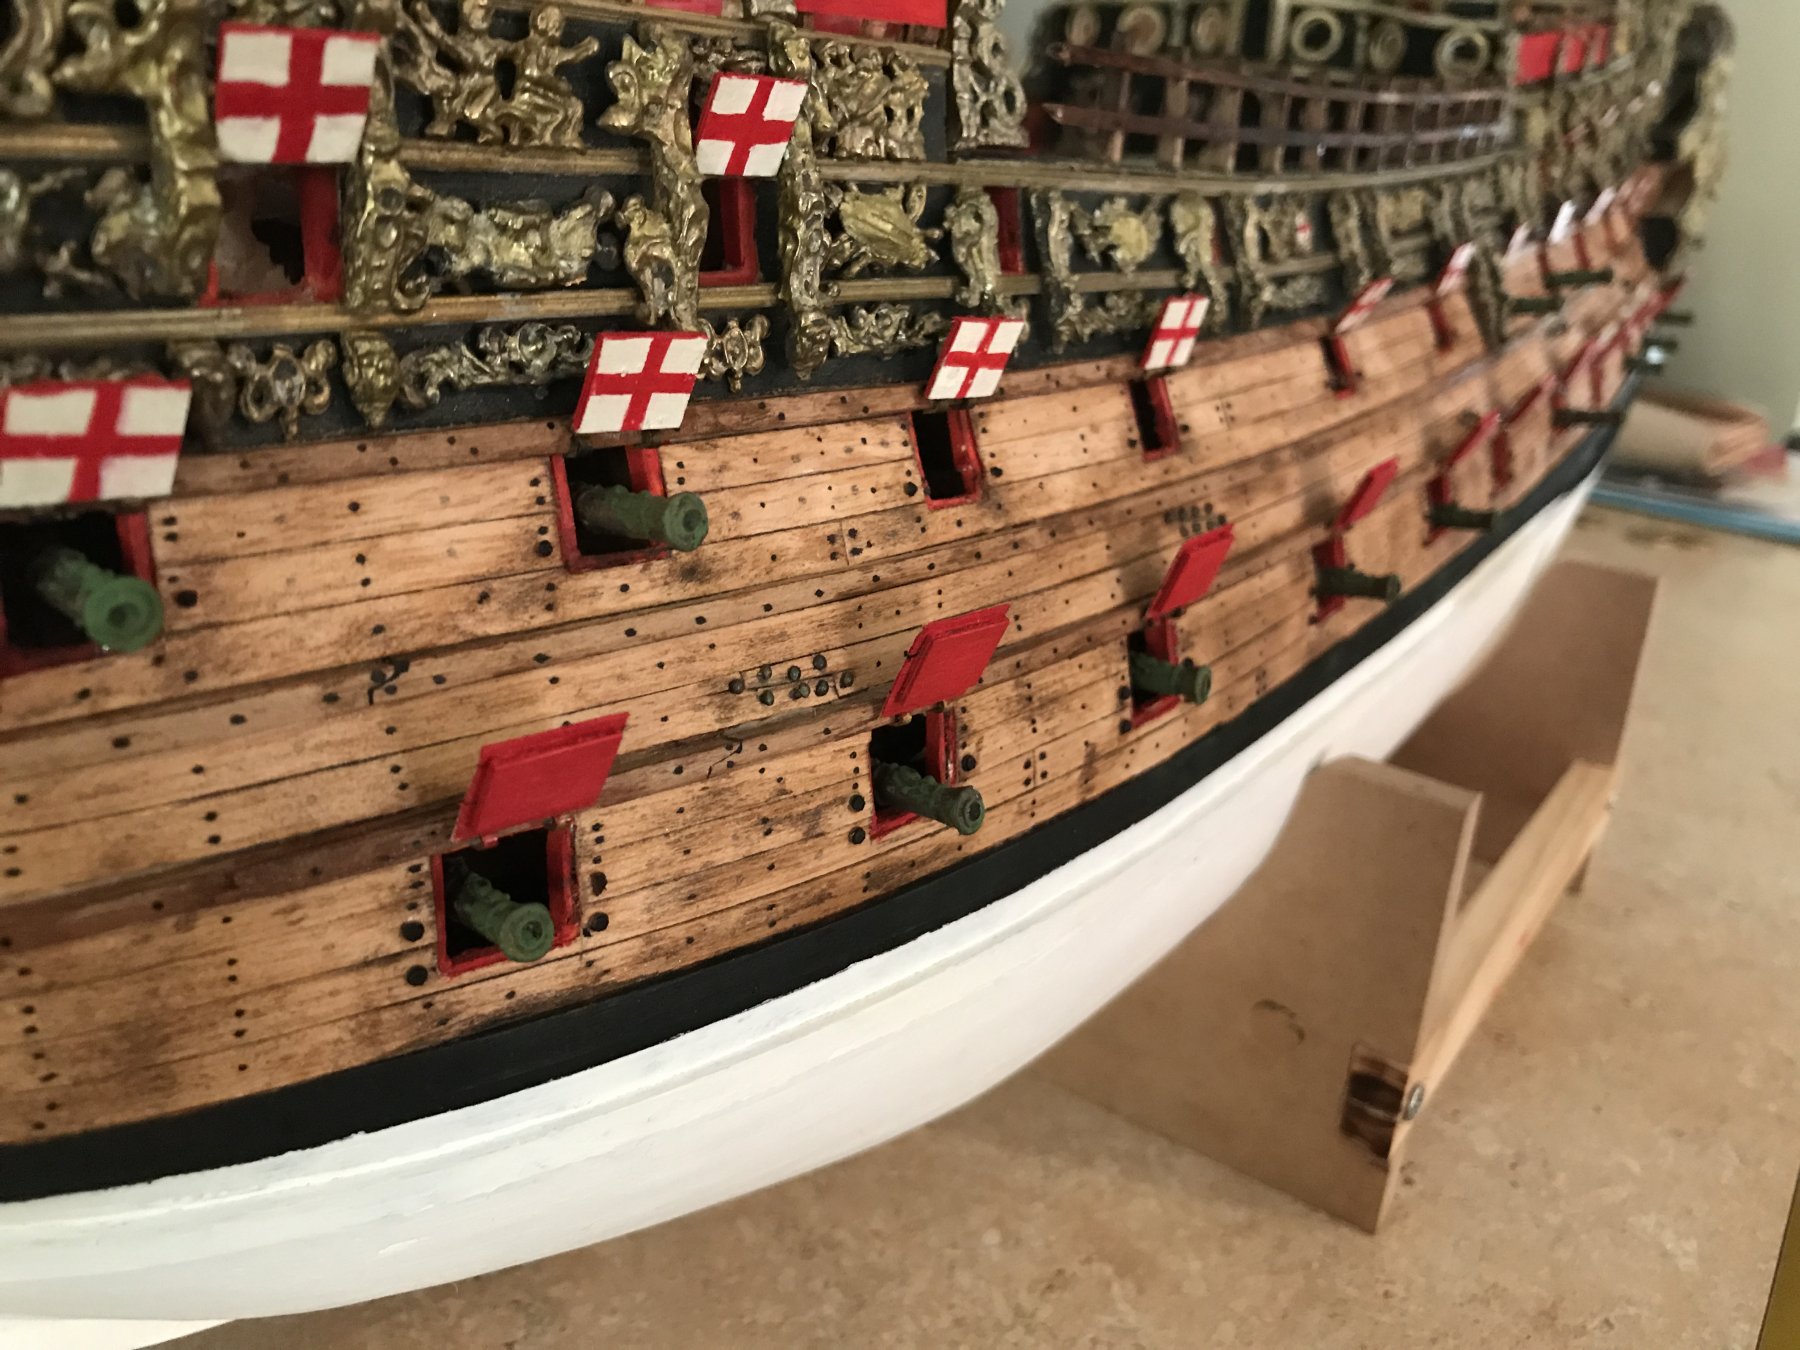
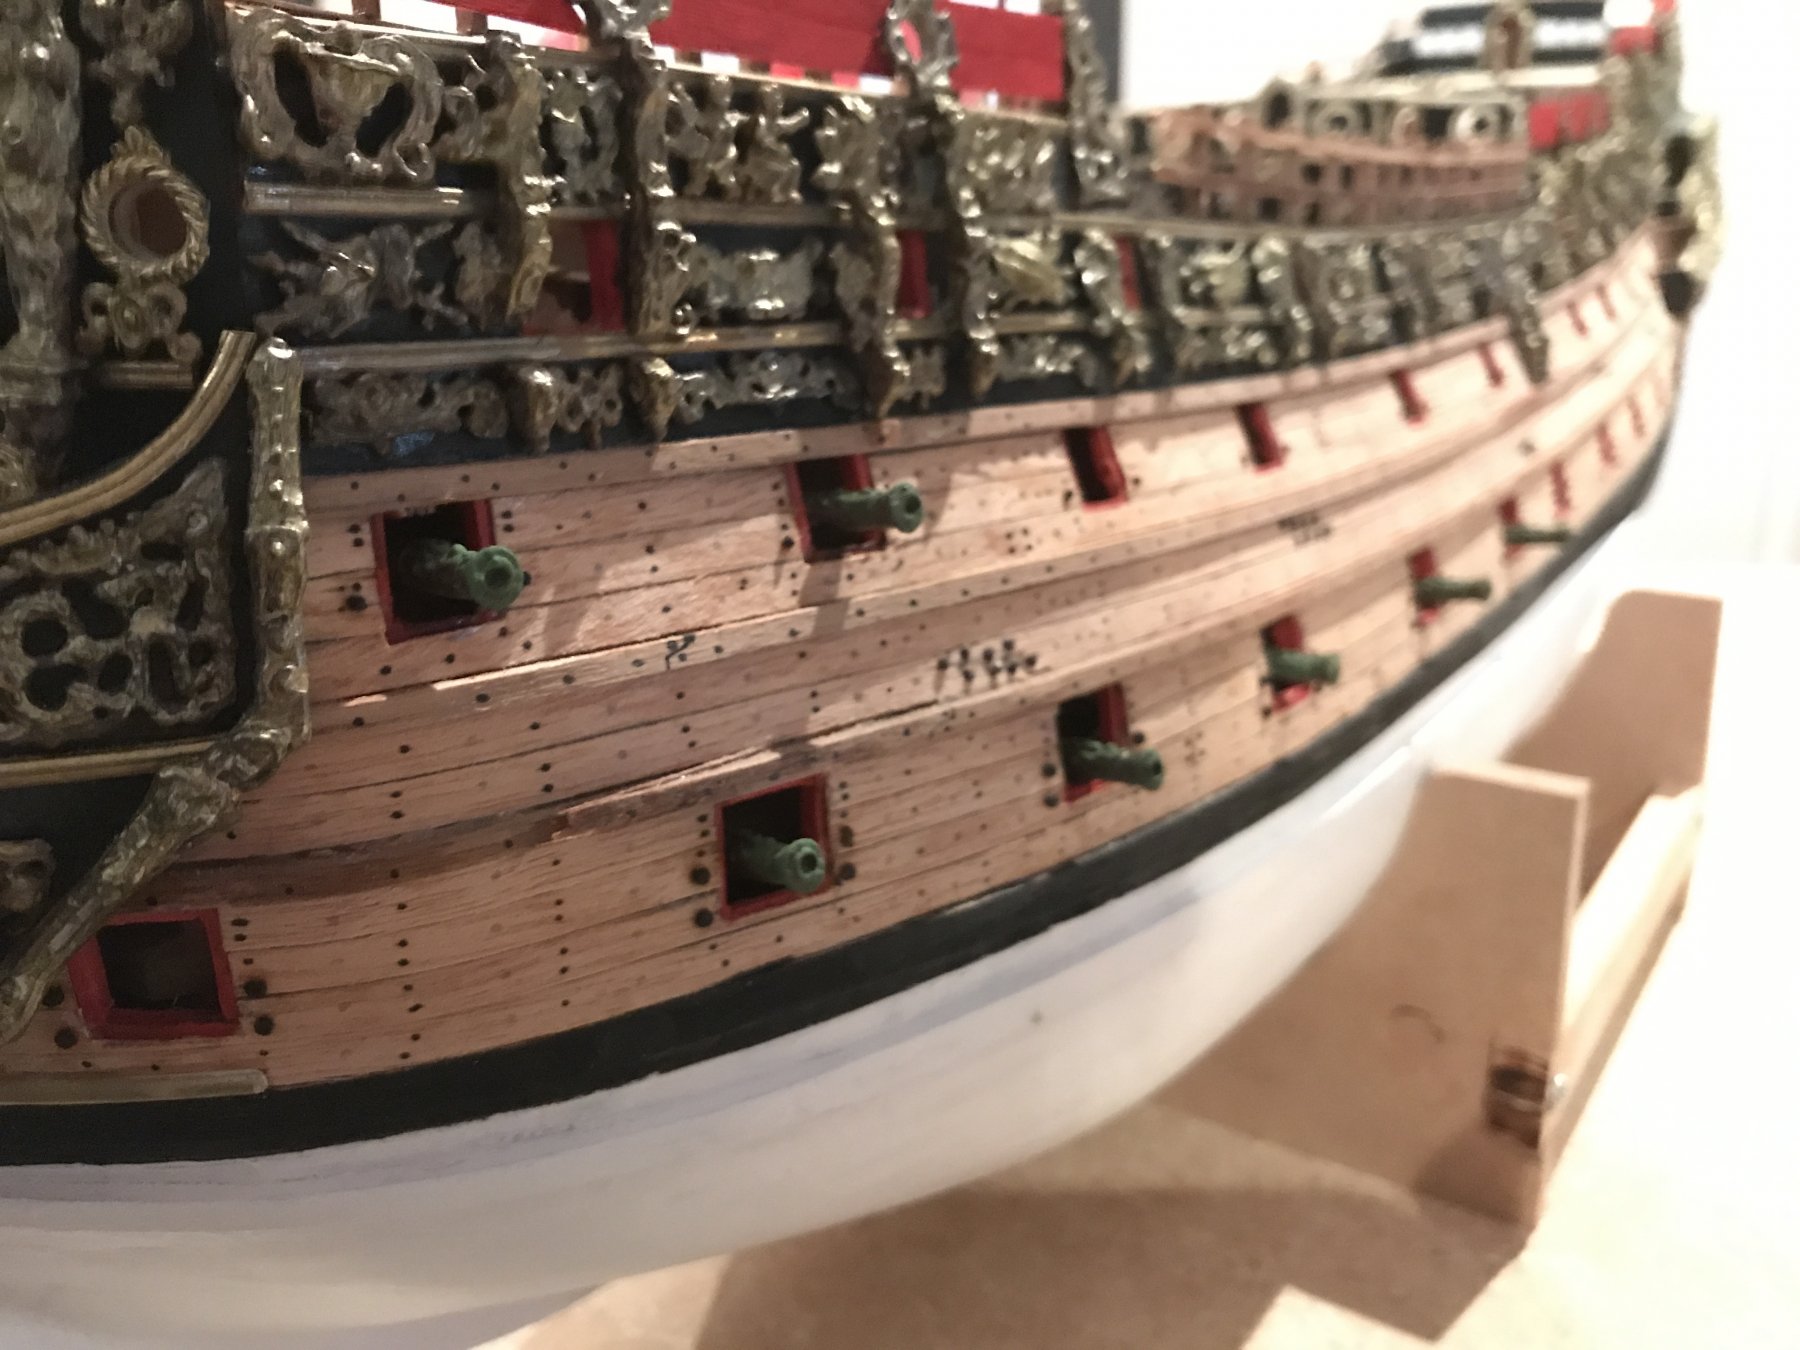
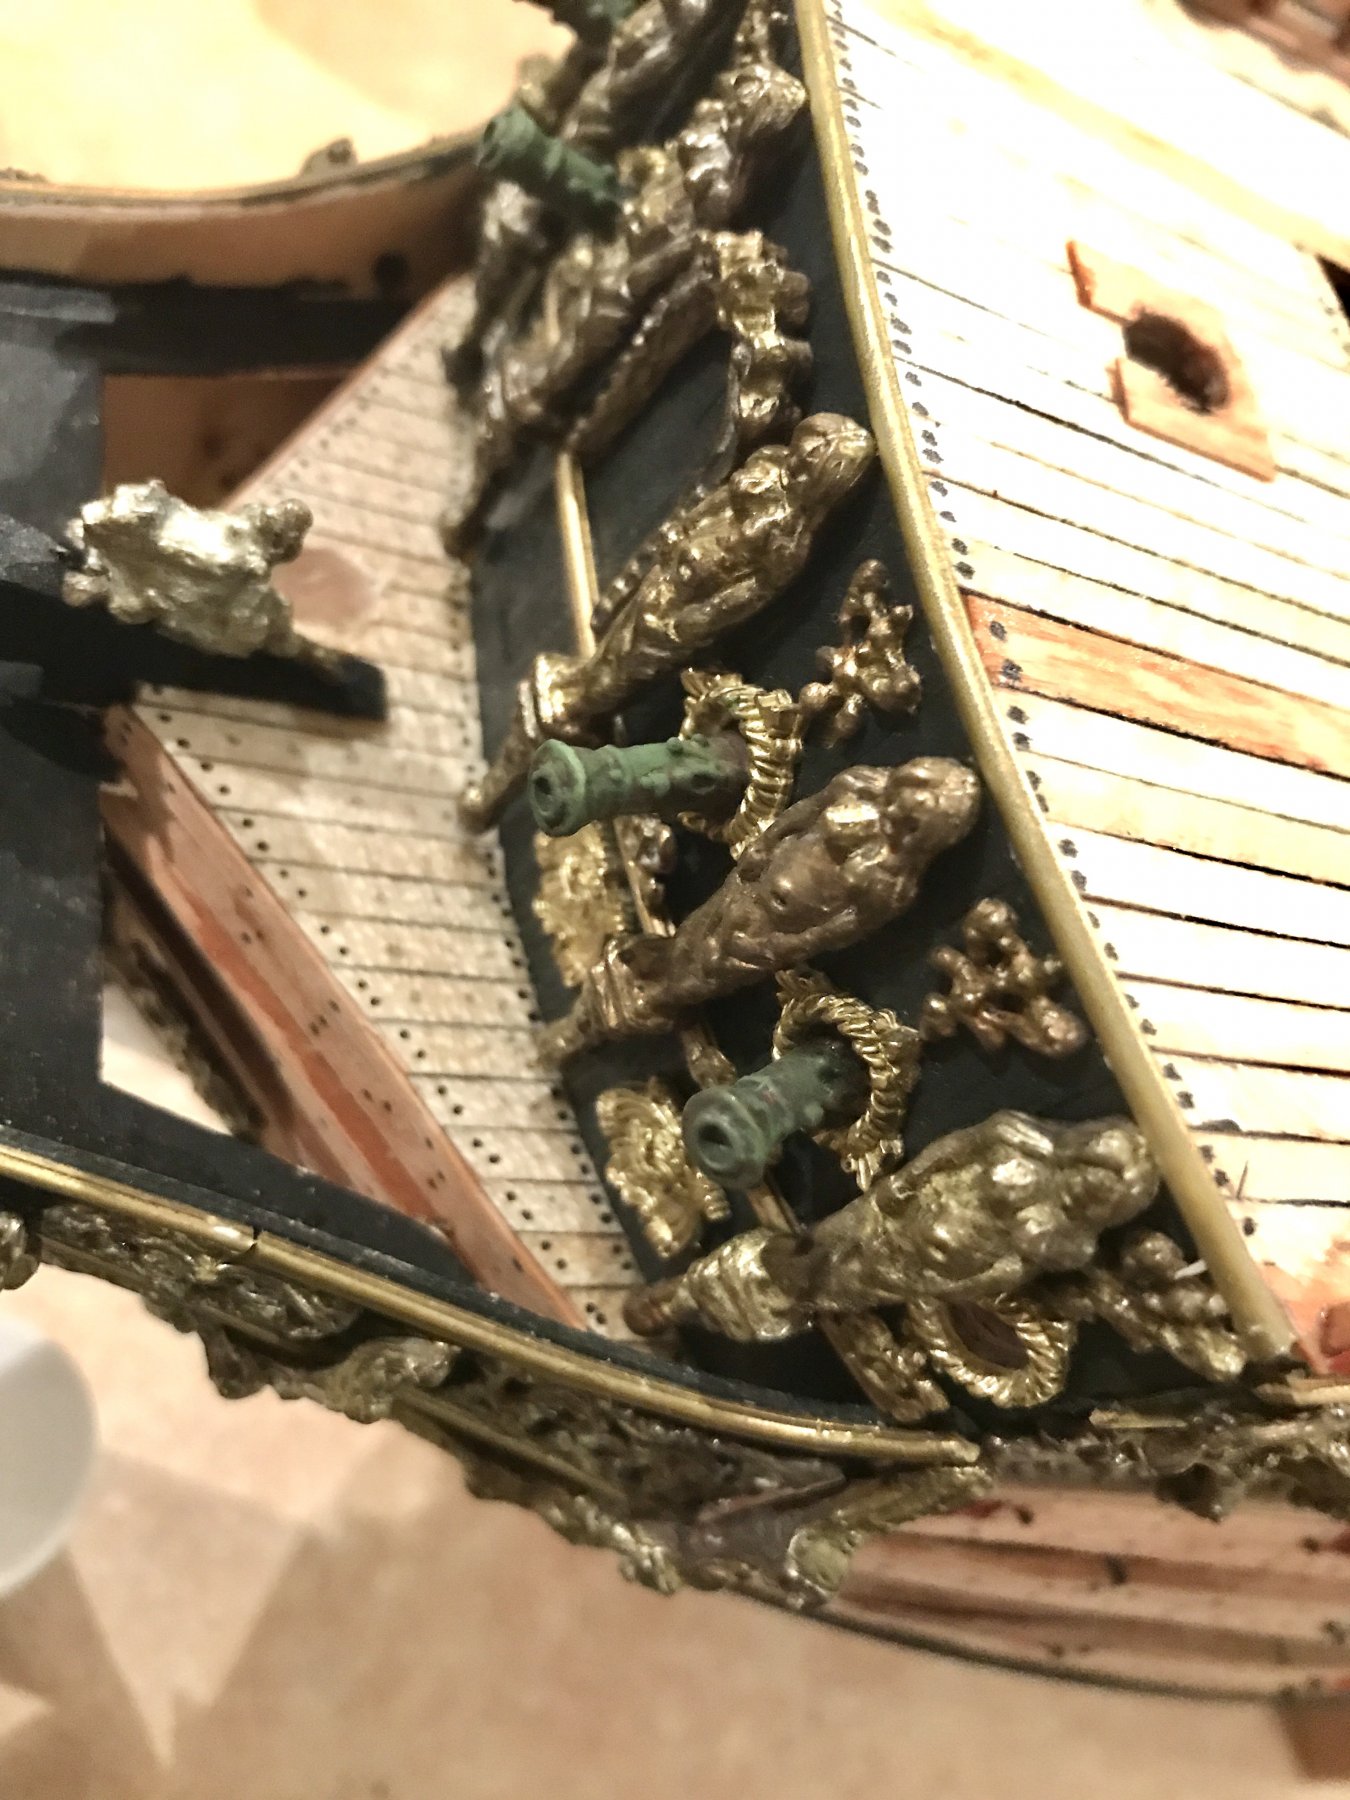
The weathering for the guns is green chrome copper from Vallejo pigments same brand as the gold for the decorations and the hull is a mixture of oak wood stain added by dry brushing (coat the brush lightly and brush it off so there's barely any left on the brush before dabbing it on) and drybrushing with browns and yellows.
- CaptainSteve, Hennie and EJ_L
-
3
-
-
Awesome milestone EJ! Just imagine crawling out to the end of that yard without foot ropes in a gale!
- Hubac's Historian, EJ_L, Eddie and 1 other
-
4
-
-
-
Thank you very much EJ
") it does help having the free time to build.
it does help having the free time to build.
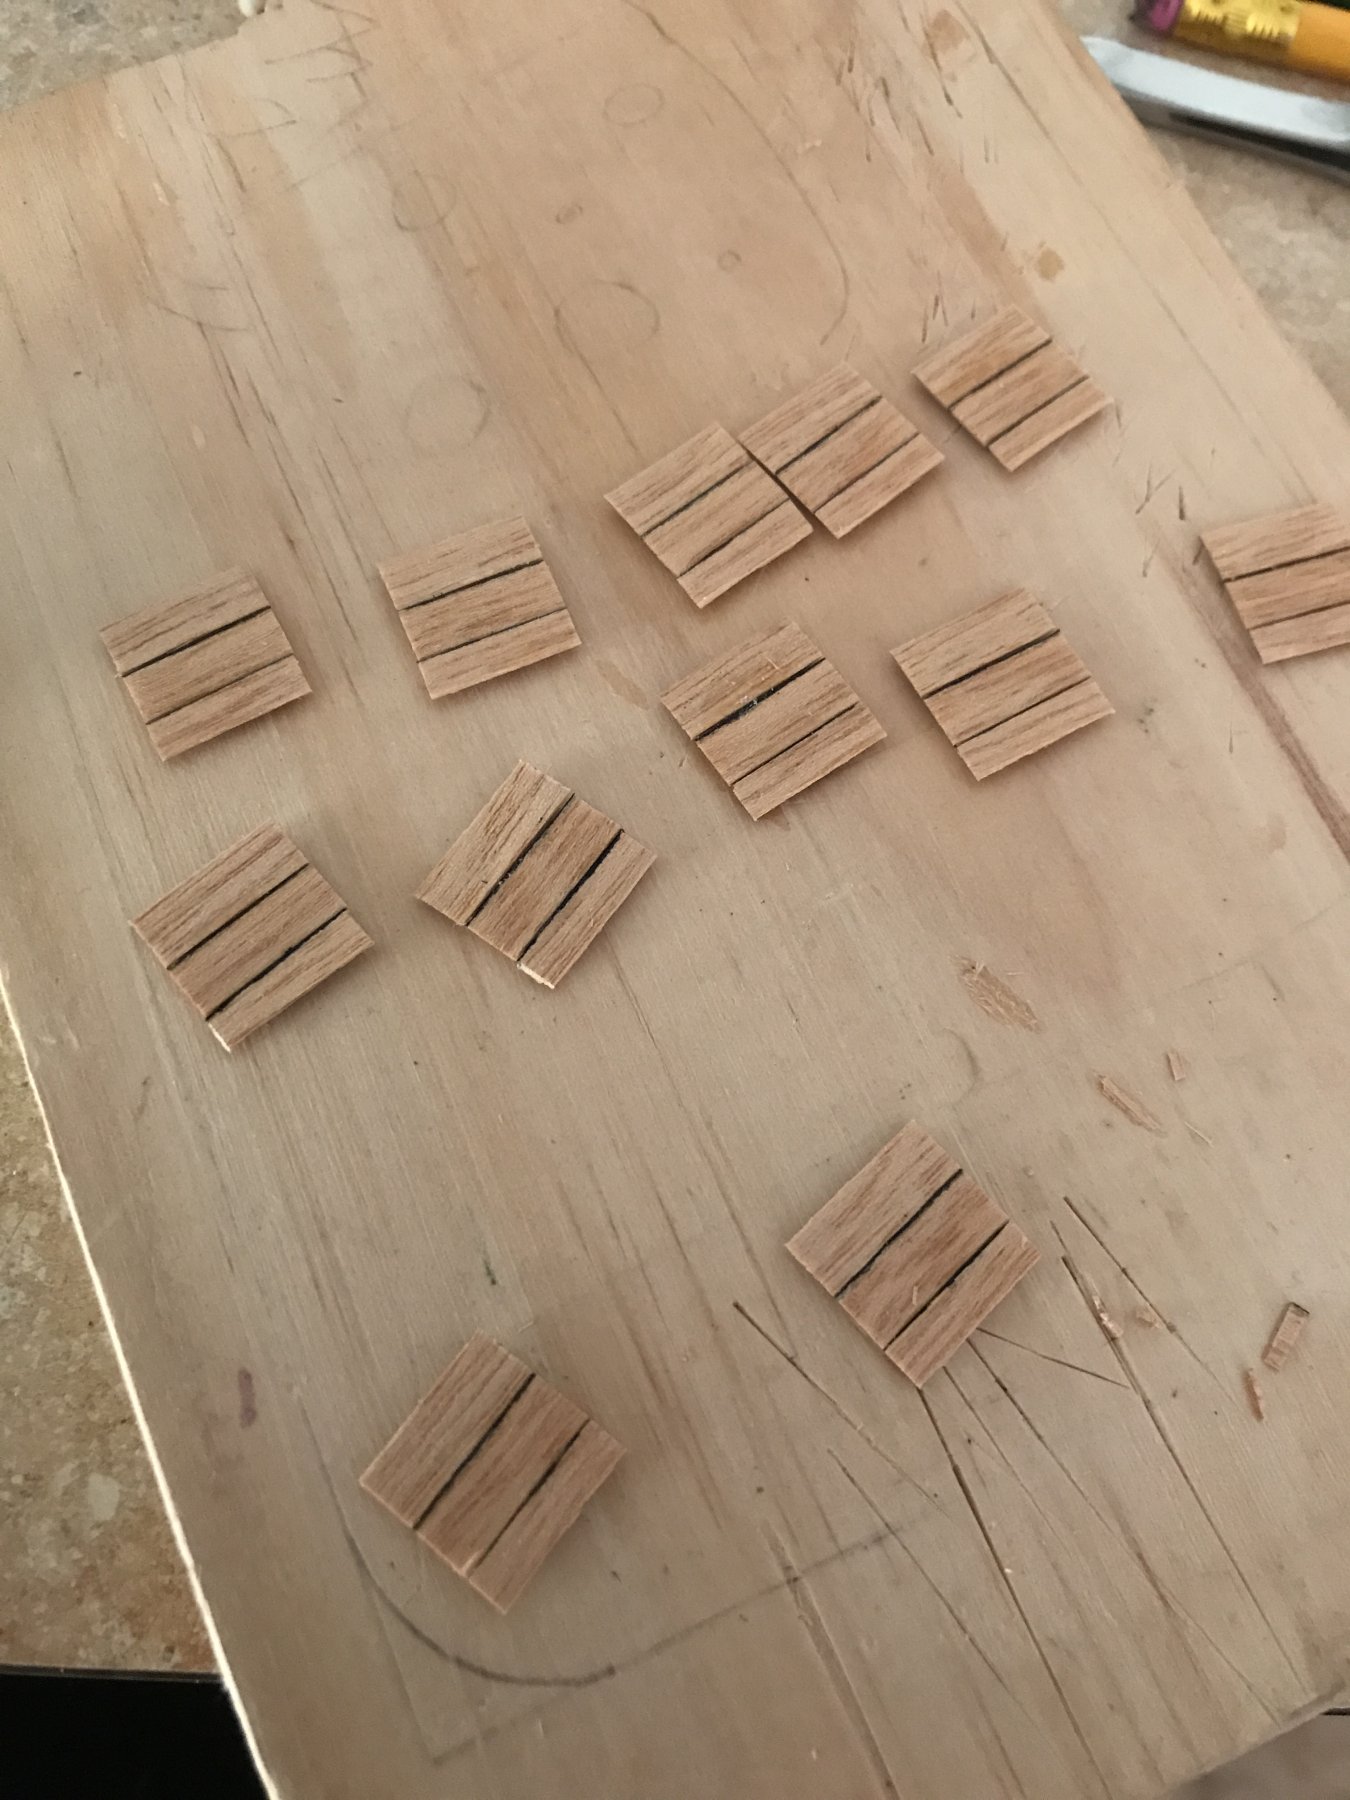
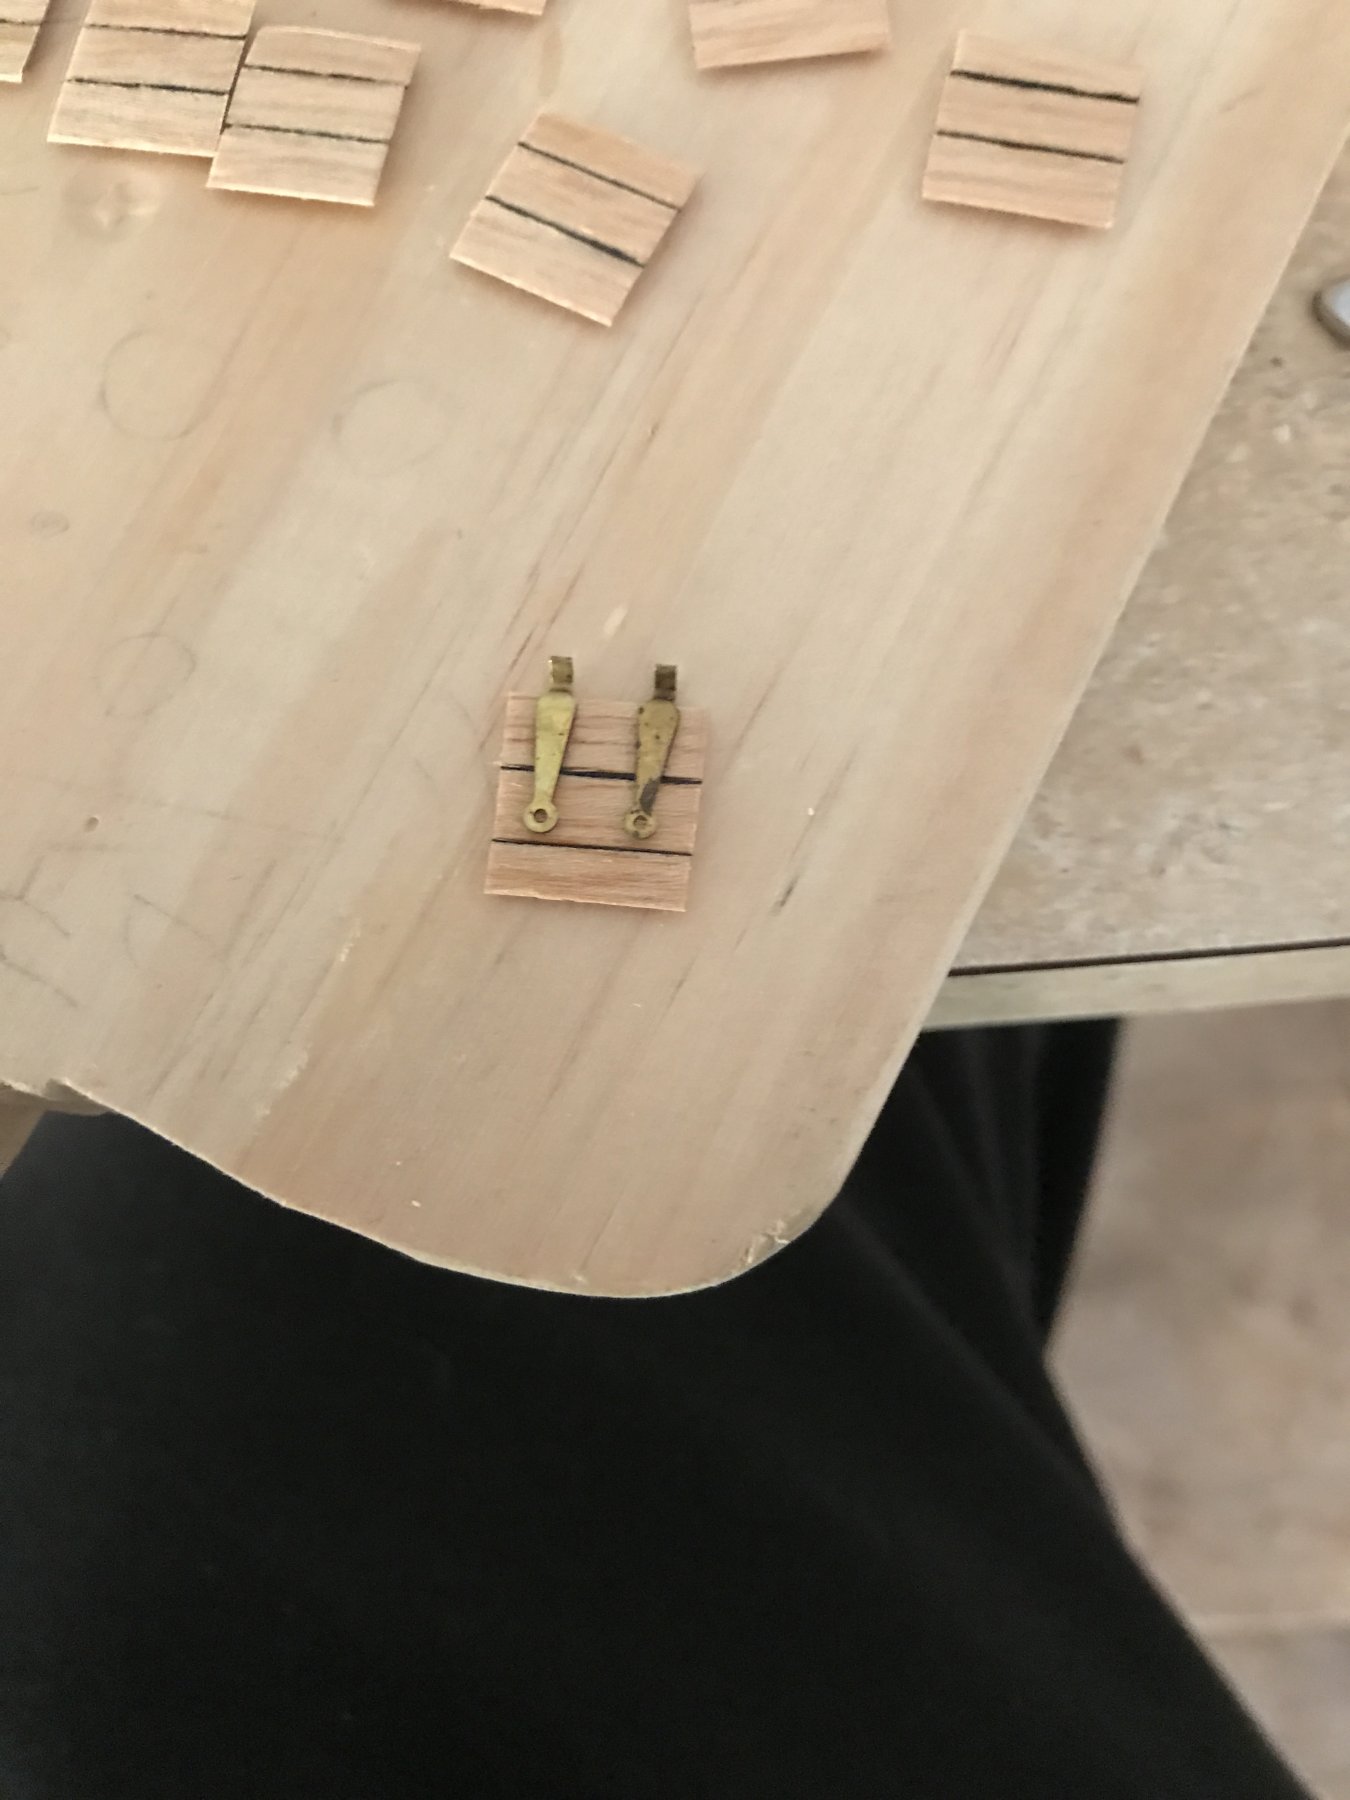
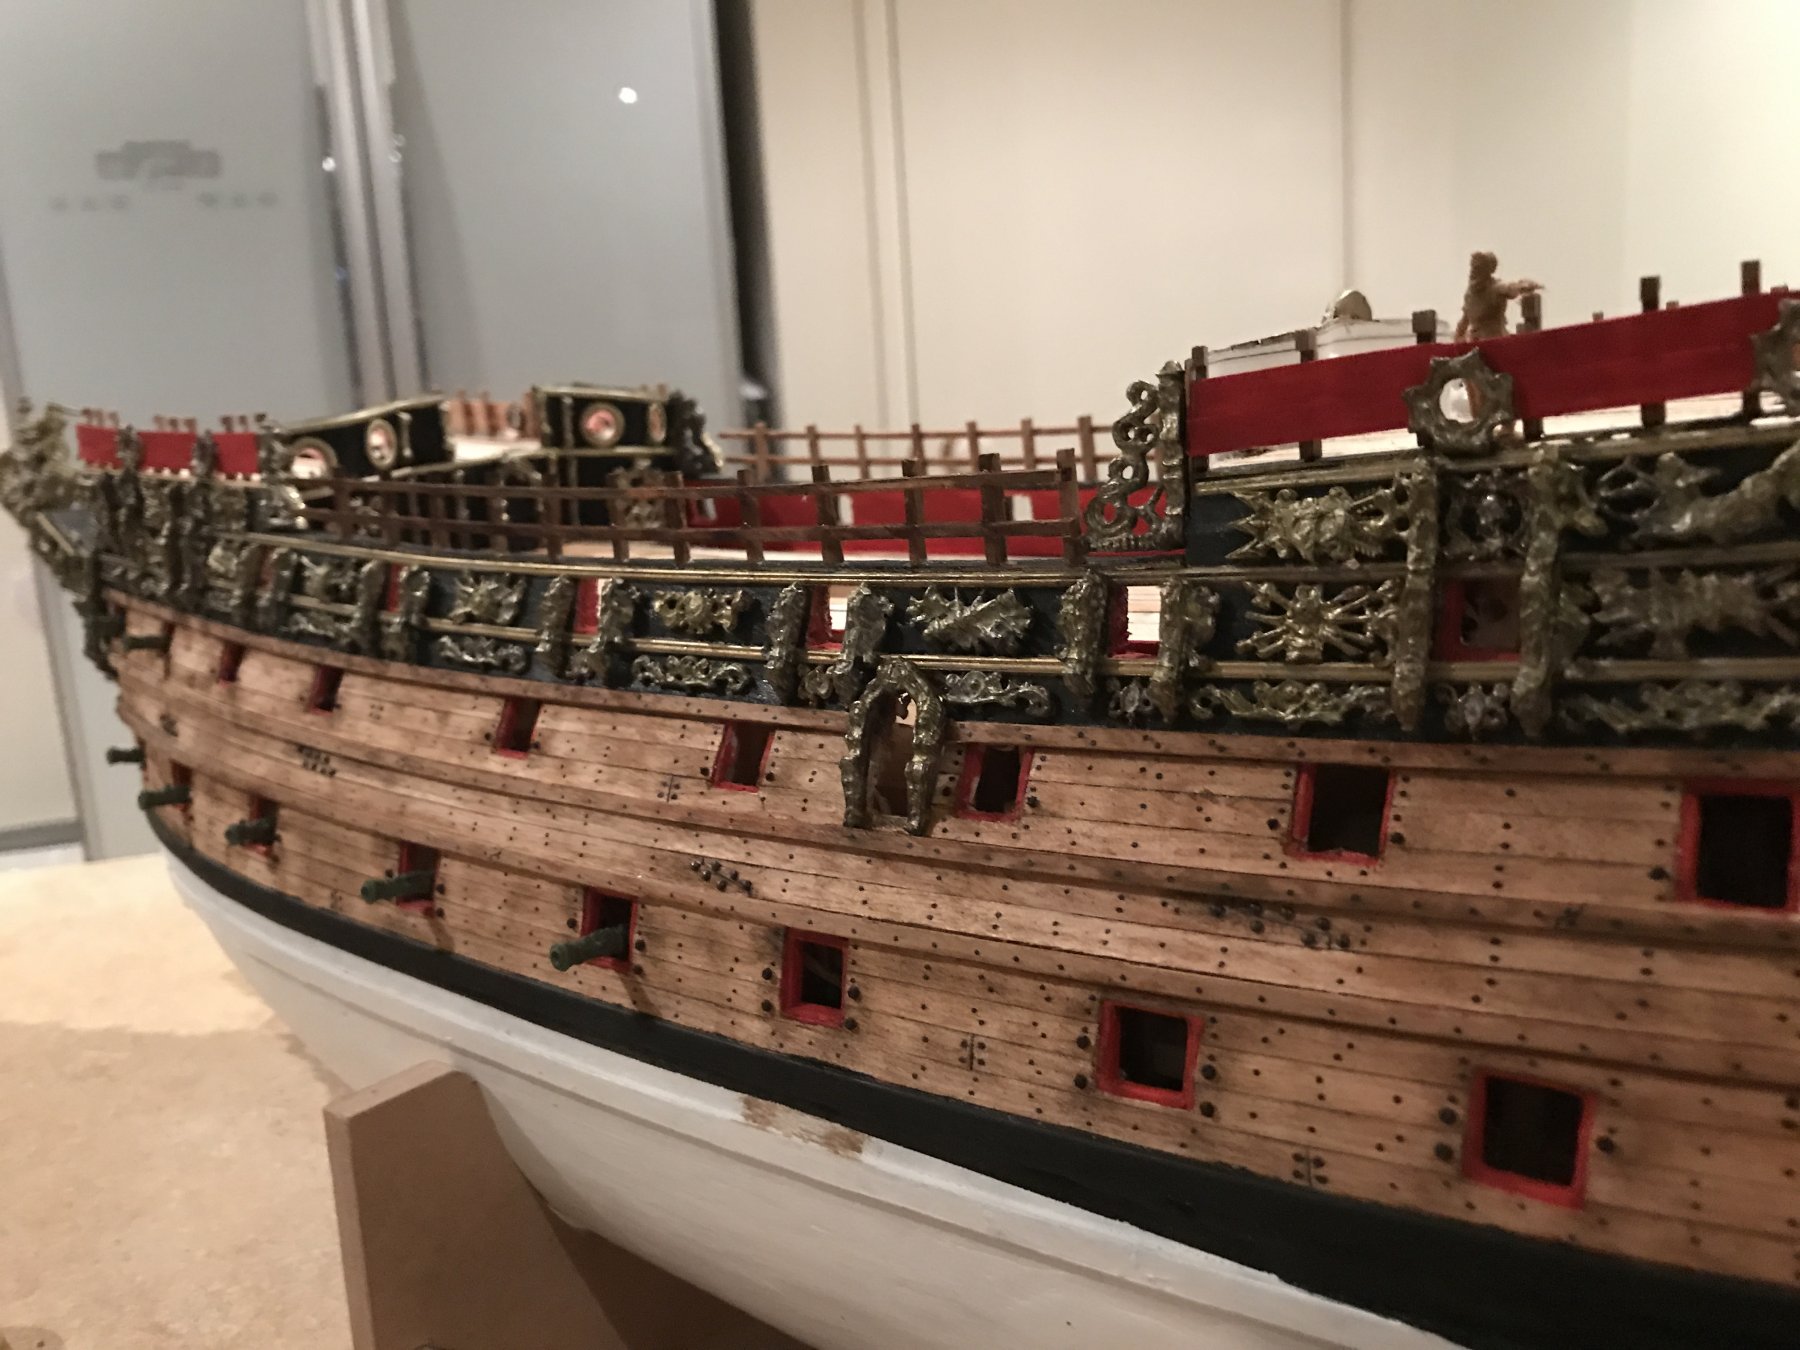
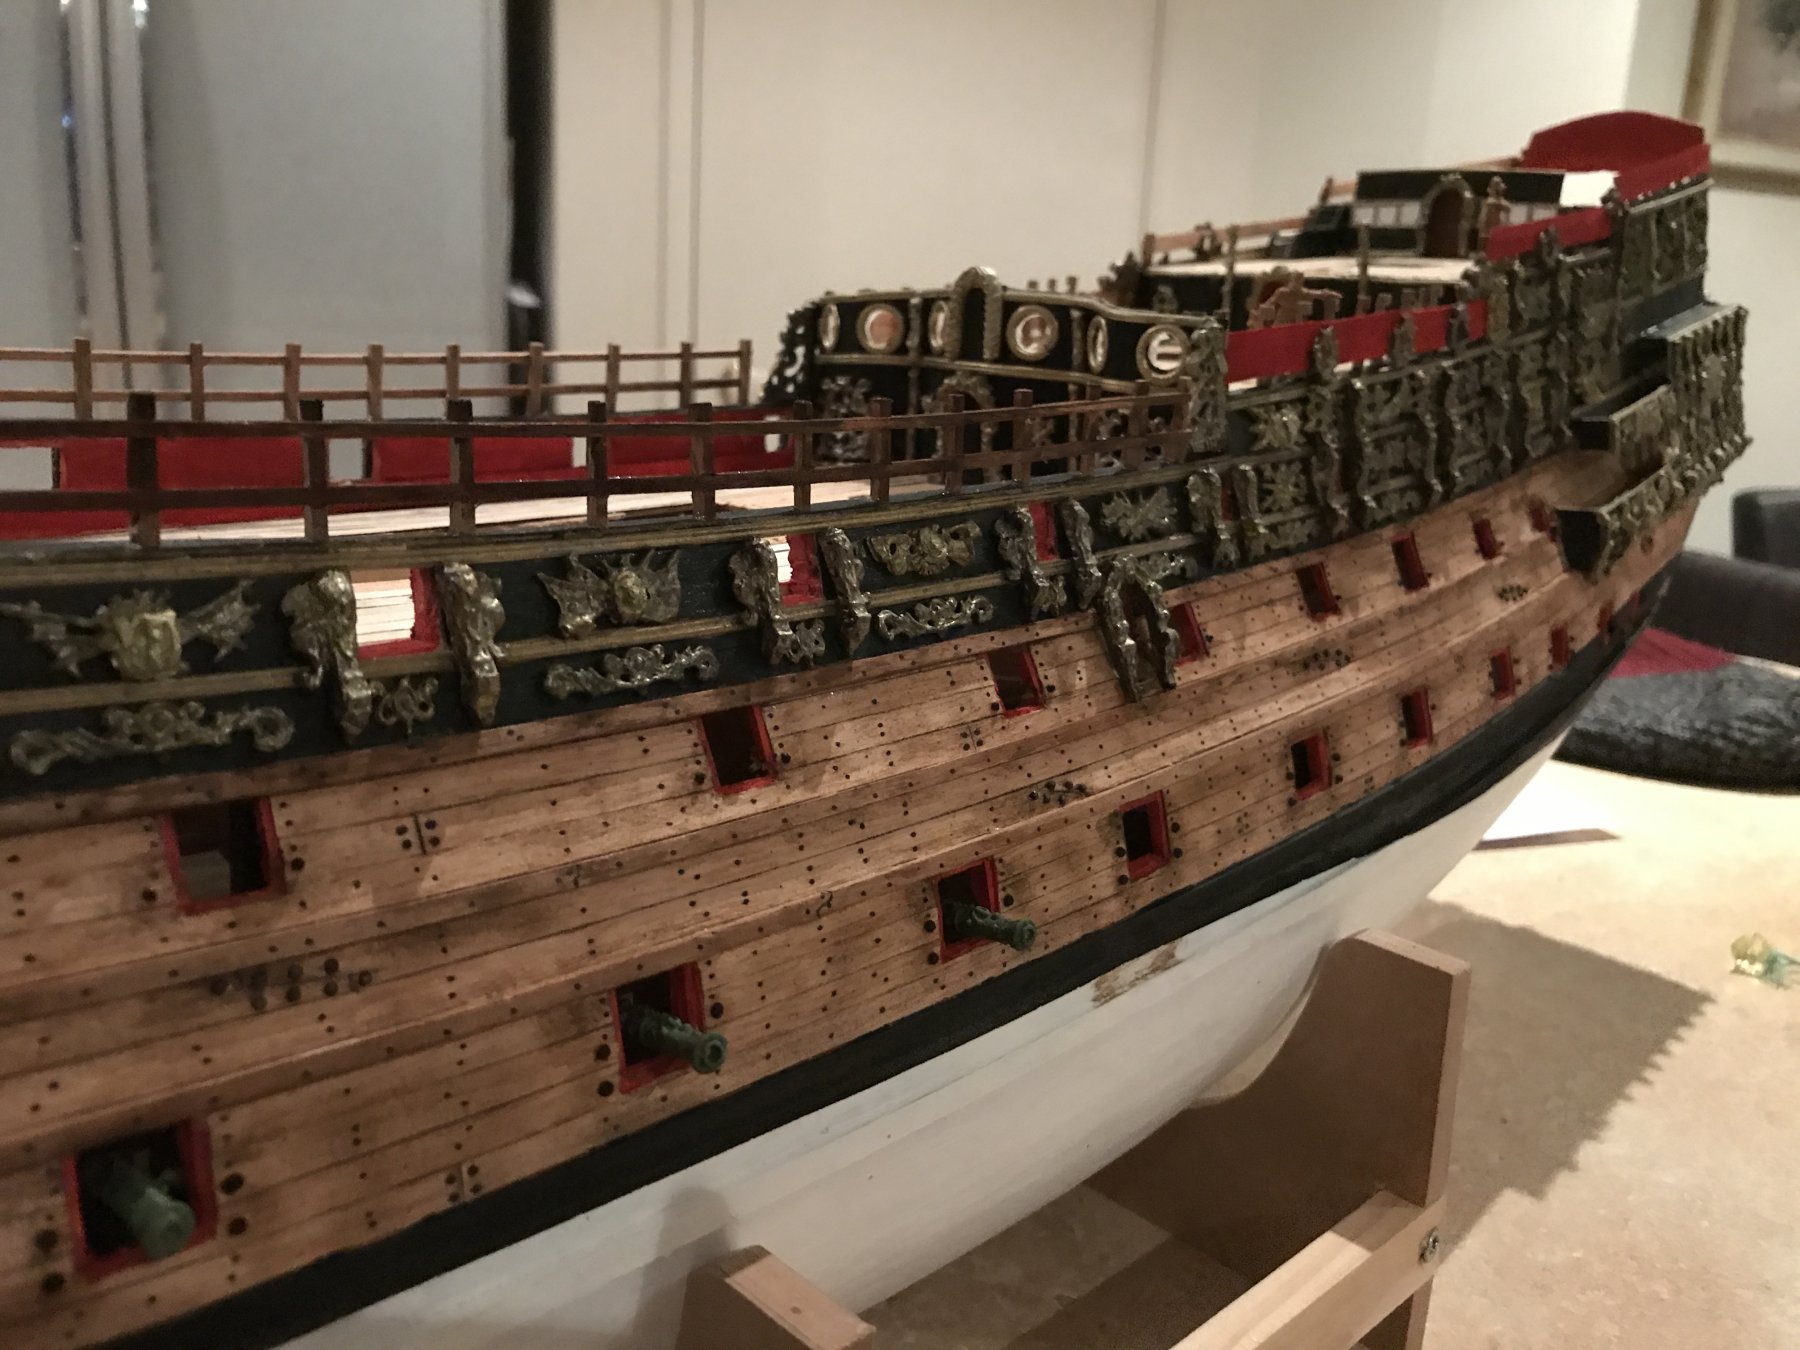
Played with some of the gun ports on the port side. I'll be building her with closed starboard ports and open port side. On one of the original engravings presented to King Charles which the ports are closed, there are lion heads on the outsides of the port lids which would be an interesting look. On various prints of the ship the middle and upper gun port lids have on them painted the St George Cross - white background and Red Cross. There isn't anything shown on the lower gun deck lids which could have had lions heads like the Vasa and what is shown on some engravings, however on the Van der Velde sketch of which I've referred too for most of my build, only the two upper rows with the St George cross are shown and nothing on the lower lids.
Ive attached pics of how I go about the lids, using ply for the insert piece which is added to strips of planks matching that out the outer hull. Hinges added (I've used the kit ones provided) and attached to the hull. The tops of the brass hinge are over engineered to fit over brass rod to fit over. As these are over scale, on the closed ports these will be trimmed down and I'll make my own hinges on the hull. For the open ports these I find are perfect to fit into the hull side itself. I incise a bit of plank and this brass tab is slid in place and glued. Brass rod is added above to represent the hinge itself. I don't have these working so it looks right even though it doesn't move anything. Single eyelets will be added to the center of the lids with brass eyes for which the inside line will be added. These I've yet to attach.


- realworkingsailor, ken3335, Hennie and 6 others
-
9
-
-
-
-
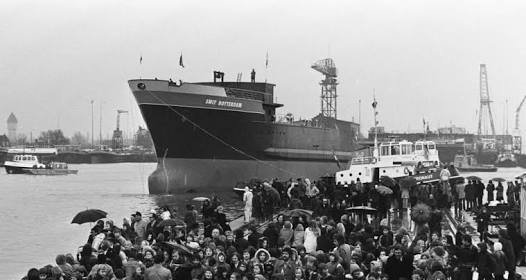
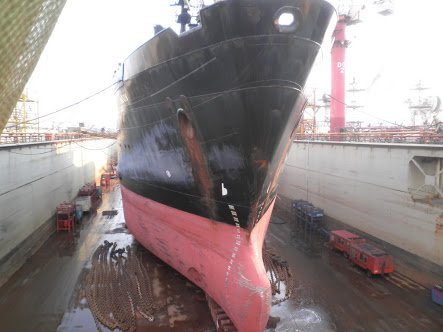
This is the launching of Rotterdam
- popeye the sailor, cog, Sjors and 1 other
-
4
-
This is the smit London in dry dock one of the three sisters of Rotterdam, London and Singapore. The bulb is a little pointy in real life, not 90 degree flat surface.
-
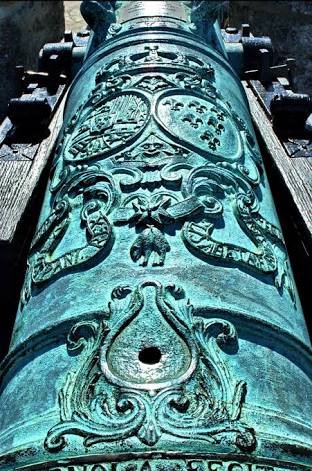
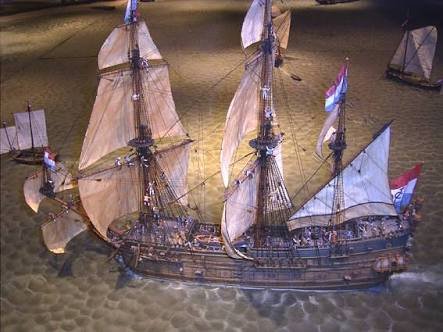
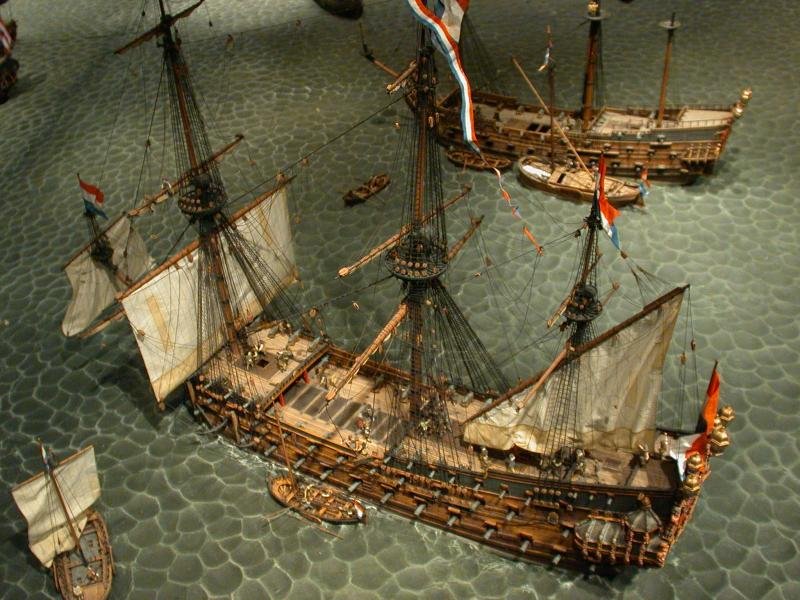
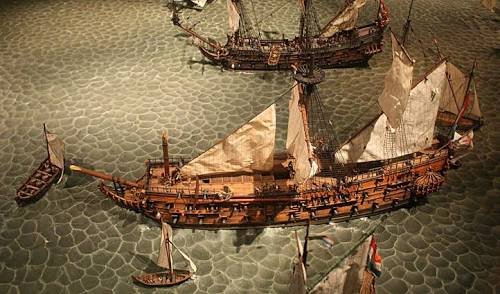
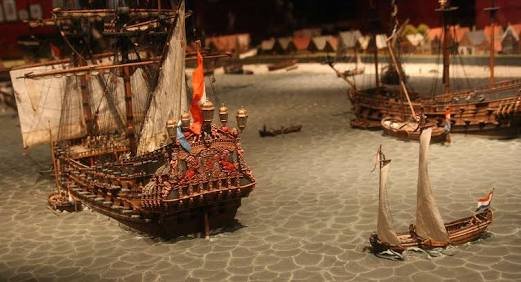
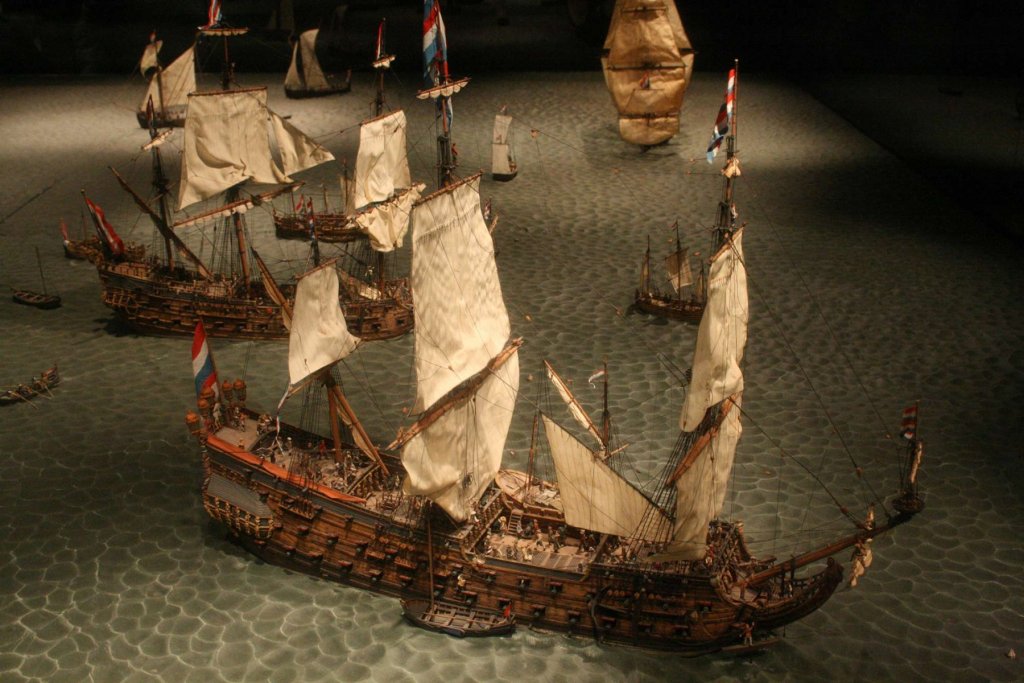
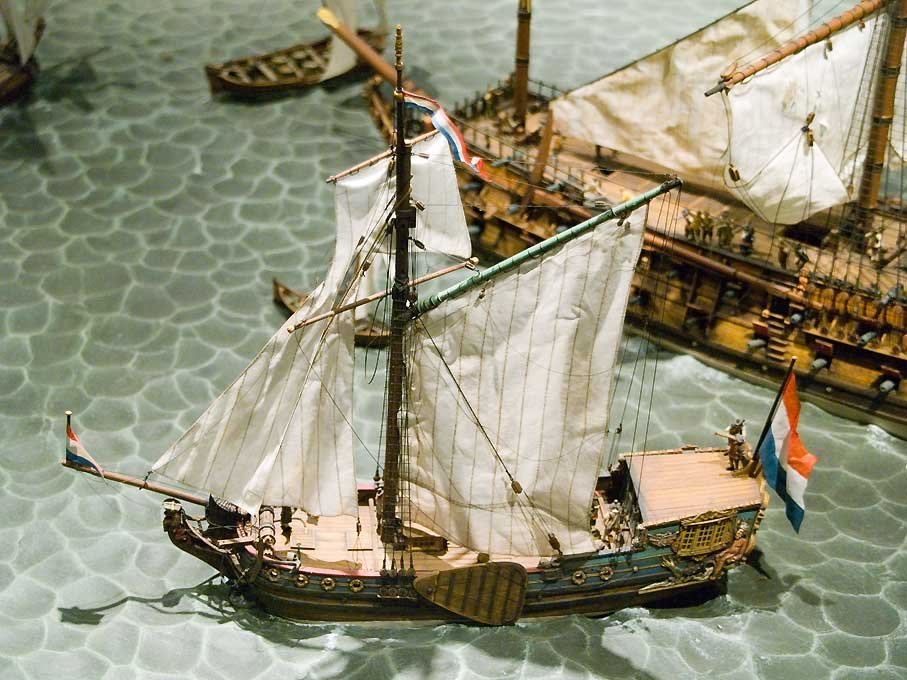
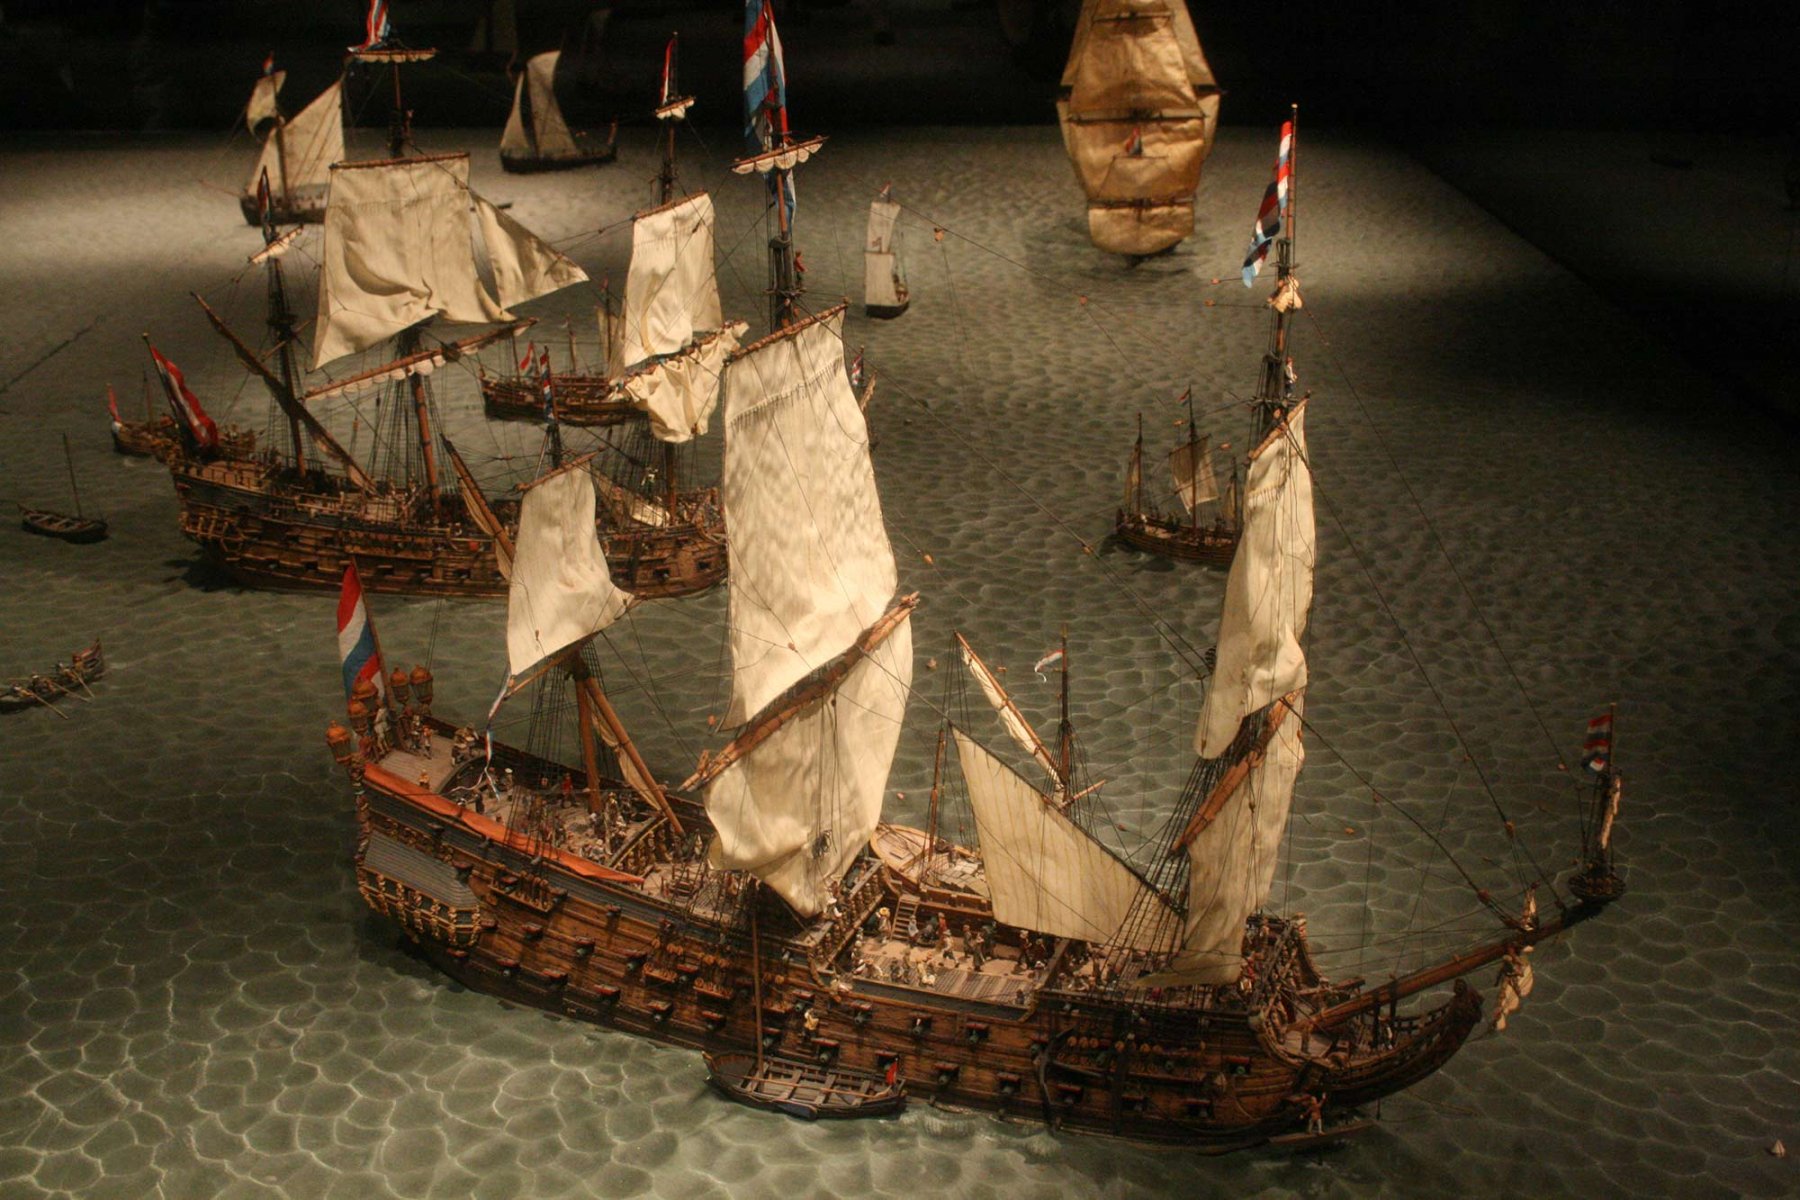
Thought I'd show some pics of the Artitec diorama of Texel roads after the four days battle in 1666. An amazing work by artitec where the models are CAD designed resin and pe models after the sketches of Van der Velde.
The first pic pic is just a bronze gun with the green patina.
Second is a Dutch VOC vessel hollandia,
next is the Dutch flagship De Zeven Provinciën, then the captured British ship Swiftsure. A total of six British ships were captured during the four days battle and only four Dutch ships sunk.
A shot of the Provinciën from the port quarter. Another two Dutch warships and finally a statenjacht sailing past the swiftsure.
-
-
I do love these models enhanced with PE. I'm keen to try my hand at it, though I have large fingers which scare me off!
- popeye the sailor, CDW and Canute
-
3
-
-
Nice progress
my father actually built this kit back in the 80's and I always loved this ship due to the power and size of her. The model is now with the Fremantle port authority and not sure if it's still on display or not to be honest.
-
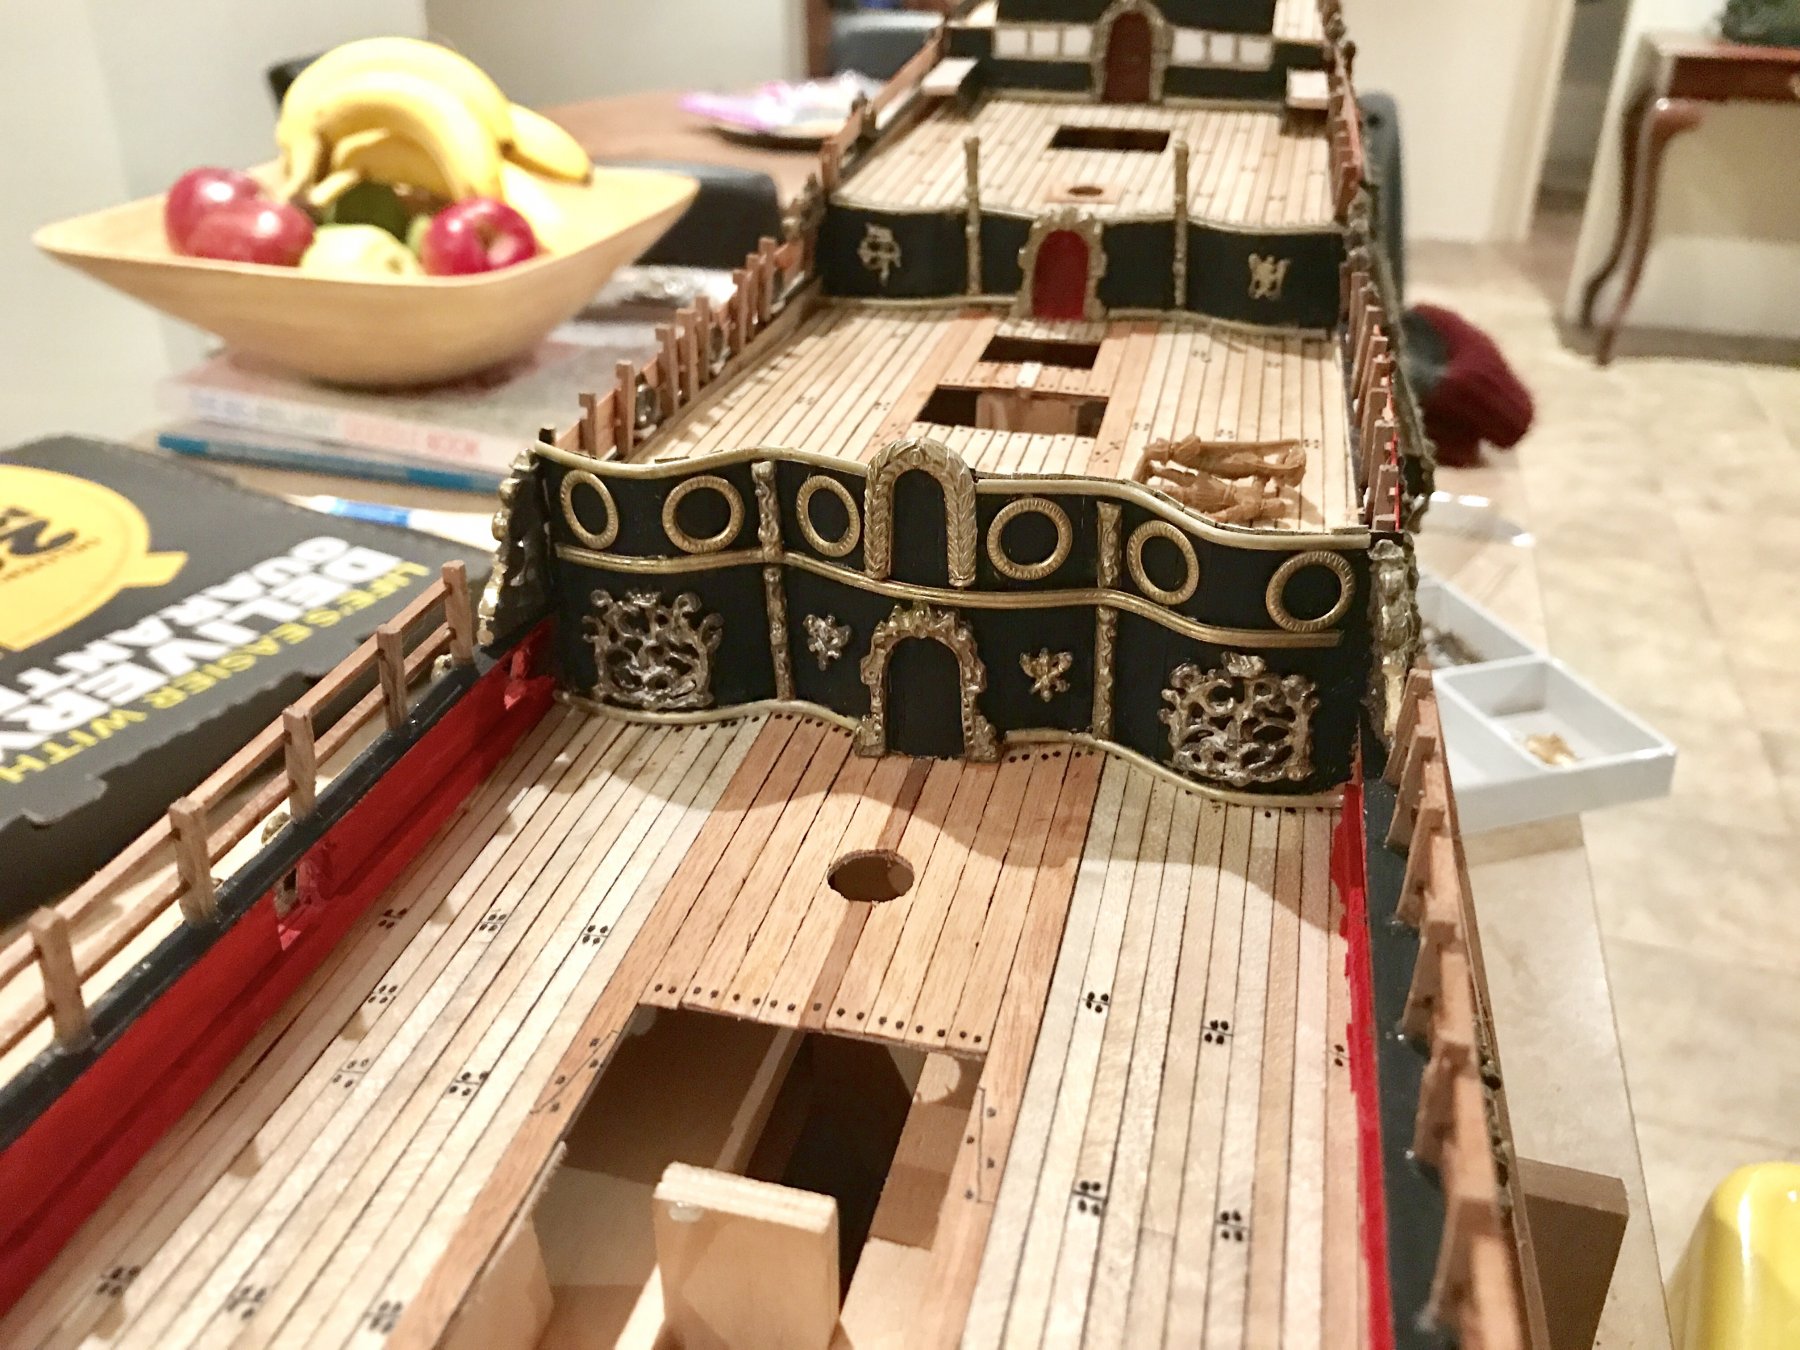
As a note to the bulwarks above, there is no real description to what was on them. If they had open walkways or any carvings at all. Again all the paintings/ engravings etc the lower parts are concealed under the spar decks... so I've gone with the suggested decorations from the kit. While this will be covered on my model also, it does fit in with the rest of the ships topsides covered in carvings. I'm happy with the result so far.
-
Thanks for the comments guys
Havent done too much work on her today just working out the spar decks above the waist and half deck. However have done a little more on the inner bulwarks between the decks and some weathering trials on the bronze guns.
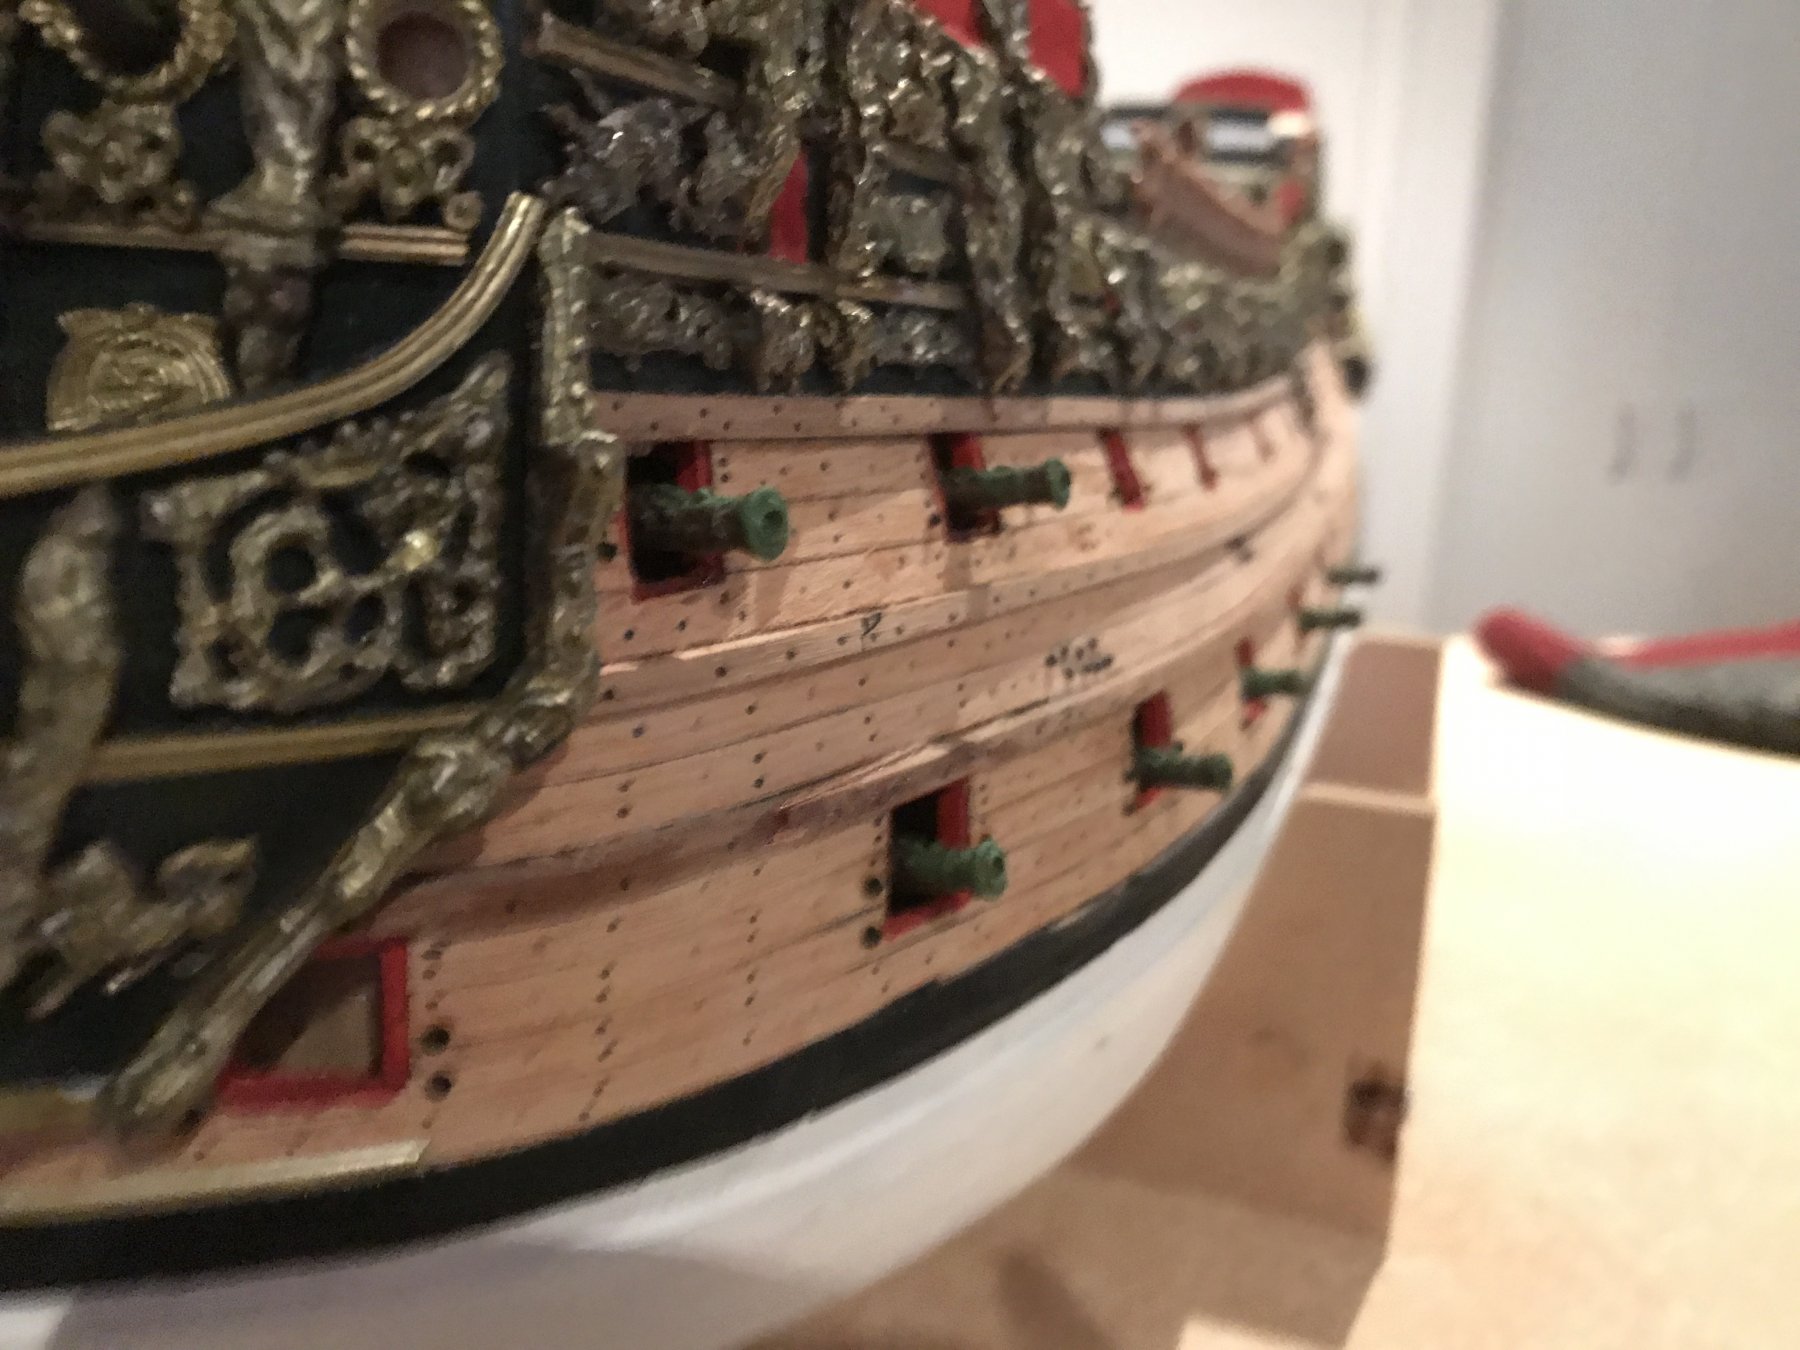
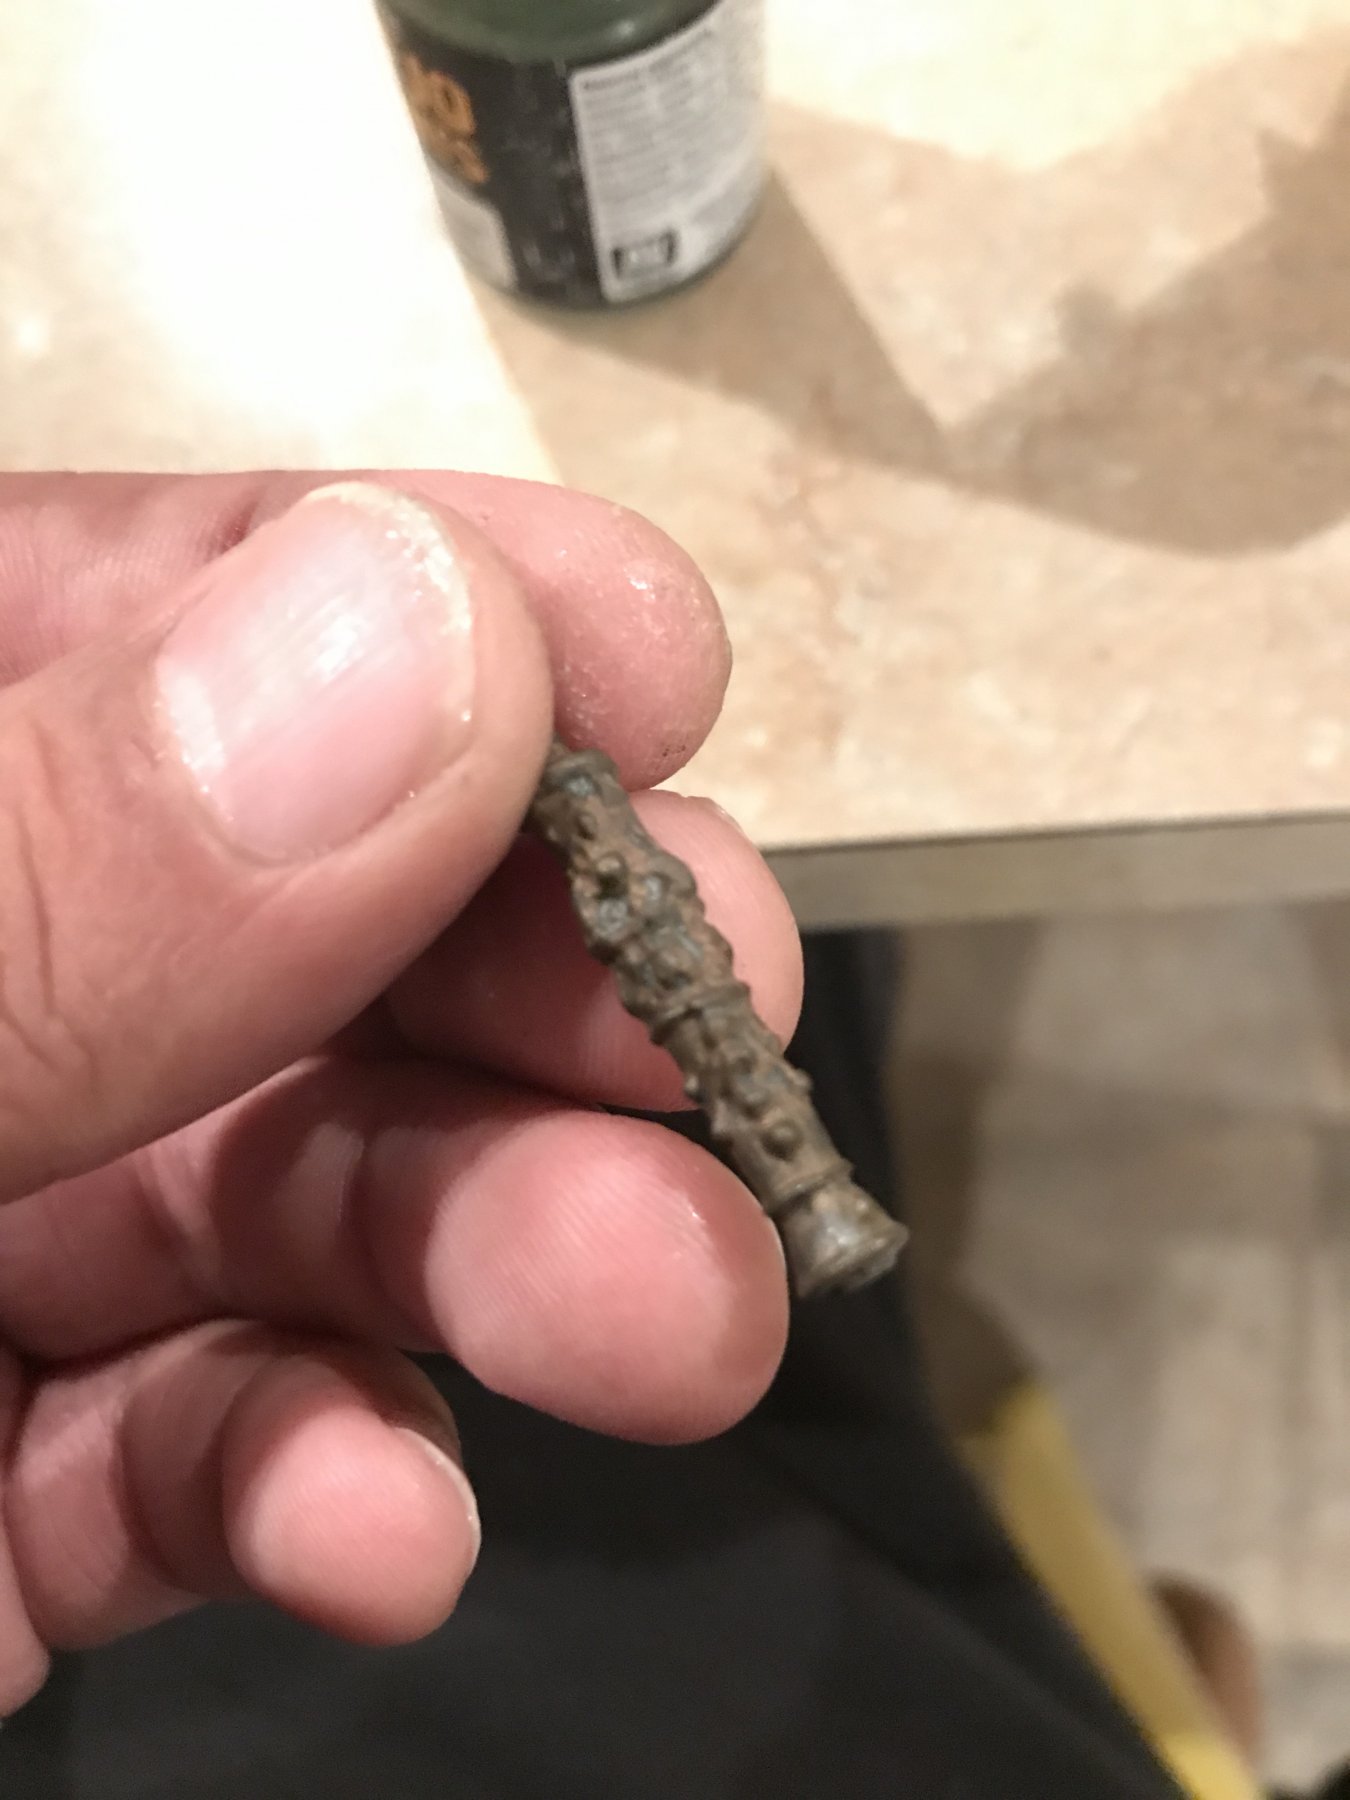
Having an original Sergal release of this kit all my metal fittings including guns are actually brass and have thus in time naturally discoloured and formed a dark patina. It actually gives a rather authentic look to what the bronze guns may have looked when not polished. Saying that, these ships were in the sea and as a result affected by the salt spray. So basing my ideas from Dutch paintings of the time and the marvelous diorama of the Dutch fleet in Texel after the four days battle in which 6 British warships were captured including the Swiftsure which is depicted in the diorama - if you do not know what I'm referring too, google Artitec Texel warship diorama - I've decided to give my guns a weathered look. This is that greenish colour of which bronze guns turn after sea salt and water dry with the air.
Anyway picked up some Vallejo weathering pigments and gave my bow chasers a trial run. See what you think.


HMS Victory by Zarkon - Constructo - Scale 1:94
in - Kit build logs for subjects built from 1751 - 1800
Posted
Hi Jeff,
Victory is an ambitious build very it's a first kit or a model for an experienced modeler.
I can can relate to building something smaller first, however there is little difference in the actual building. Most modelers will build a smaller vessel as they get to see a finished result much sooner than that of a three decker, however as long as you're patient any modeler can accomplish marvelous results with more complex kits. Just keep asking for advice and take your time with anything that concerns you.
Now a building board is very useful for the initial construction to help keep the false keel and frames at straight angles to get a true shape of the hull. Now if your keel in the kit is meant to be added after planking, make sure when you make up the building board that there are slots for the frames to sit in. Now the keel that isn't straight are you meaning the ply false keel for the frames or a walnut finishing piece that mounts on the ply false keel? Soaking or steaming then placing under weights can work however there can be some shrinkage. Personally I'd just replace the piece and cut a new one that is true using the plans.