rafine
-
Posts
2,932 -
Joined
-
Last visited
Content Type
Profiles
Forums
Gallery
Events
Everything posted by rafine
-

Cutter Cheerful by iosto - 1/4" scale
rafine replied to iosto's topic in - Build logs for subjects built 1801 - 1850
Wonderful work Iosto. Bob -
Everything's looking very good, Erik. Bob
-
HMS Naiad 1797 by albert - FINISHED - 1/48
rafine replied to albert's topic in - Build logs for subjects built 1751 - 1800
Absolutely beautiful, Albert. Bob -
Cutter Cheerful 1806 by rafine - FINISHED
rafine replied to rafine's topic in - Build logs for subjects built 1801 - 1850
Thanks so much Grant and Tom and the "likes". Grant, that is one of the choices I've had in mind. I've loved the job you and Mobbsie (and Rusty earlier) had done with it. In my fashion, I'll probably put off any decision for as long as I can. Bob- 525 replies
-
- 5
-

-
- cheerful
- Syren Ship Model Company
- (and 1 more)
-
Cutter Cheerful 1806 by rafine - FINISHED
rafine replied to rafine's topic in - Build logs for subjects built 1801 - 1850
Thanks so much Chuck, George, Erik, Mobbsie, Sjors, Grant and Rusty for the kind words and thanks also to all of the "likes" for your continuing interest and attention. Funny that so many would ask about what's next. I've just started thinking about it, and I really don't have a clue. I've wanted to do Chuck's Winchelsea, but that seems well off in the future; I've thought about another cross-section; I've gotten interested in river steamboats as a result of the great logs on MSW; I've even given thought to a plastic or resin warship, but the scale just seems too small for my aging faculties. As I said, I really have no clue. Suggestions are welcome. Bob- 525 replies
-
- 4
-
-
- cheerful
- Syren Ship Model Company
- (and 1 more)
-
Cutter Cheerful 1806 by rafine - FINISHED
rafine replied to rafine's topic in - Build logs for subjects built 1801 - 1850
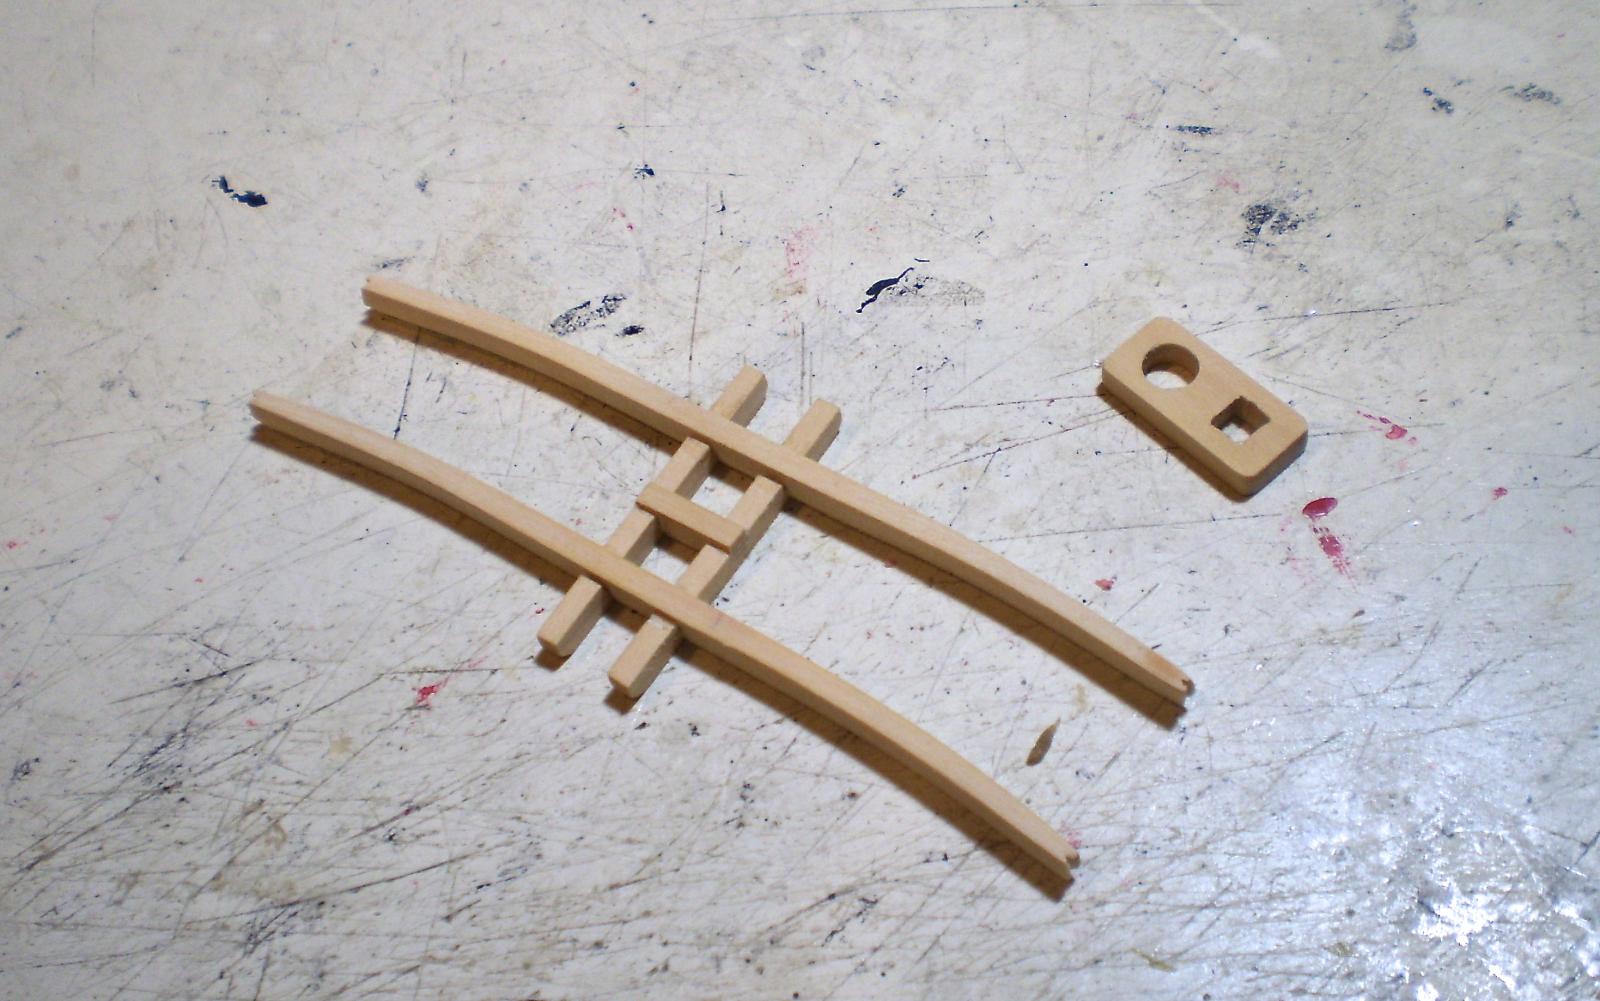
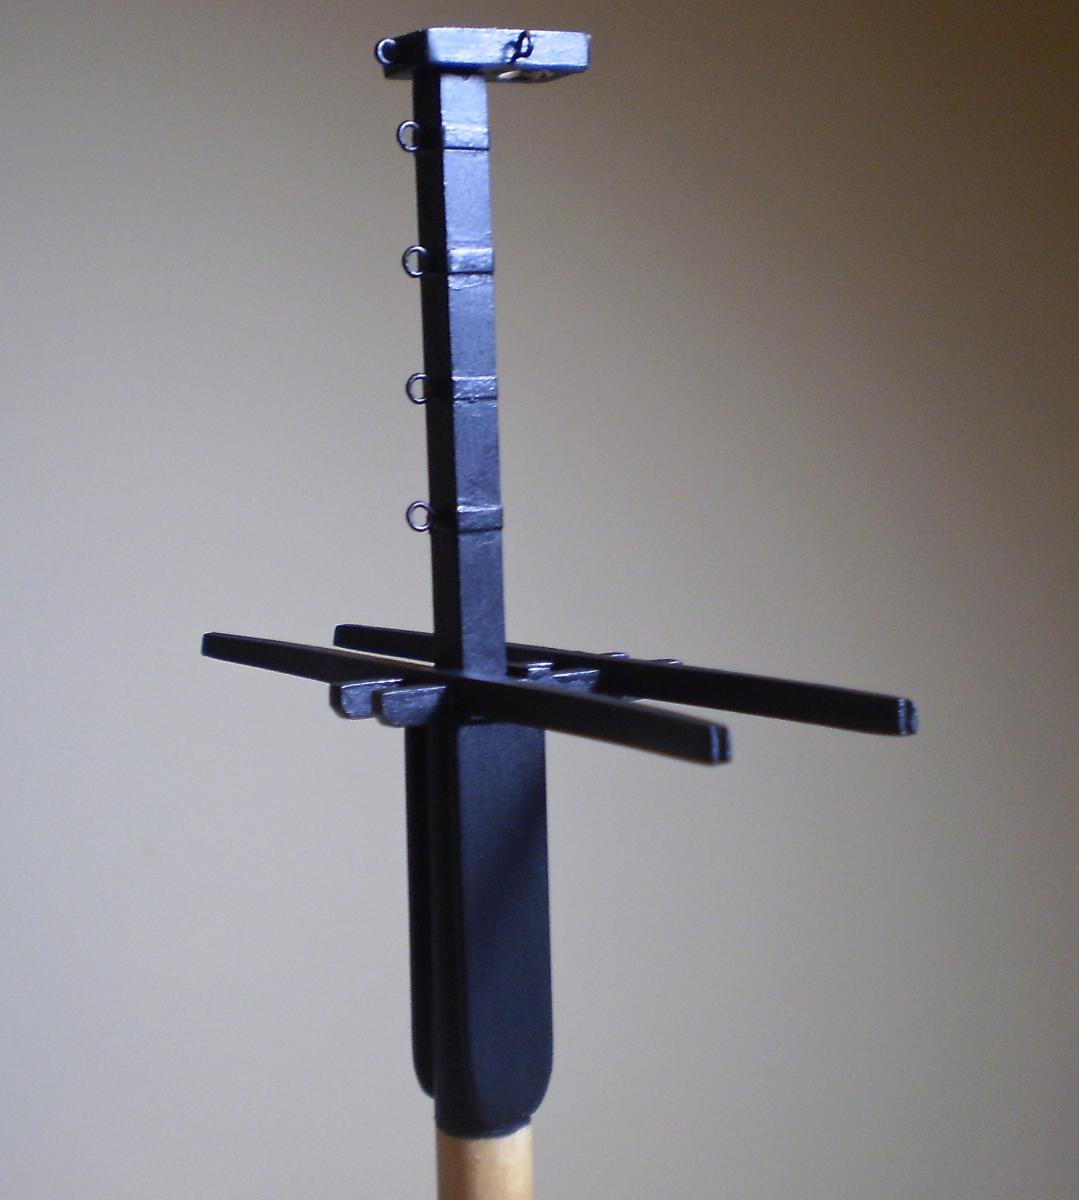
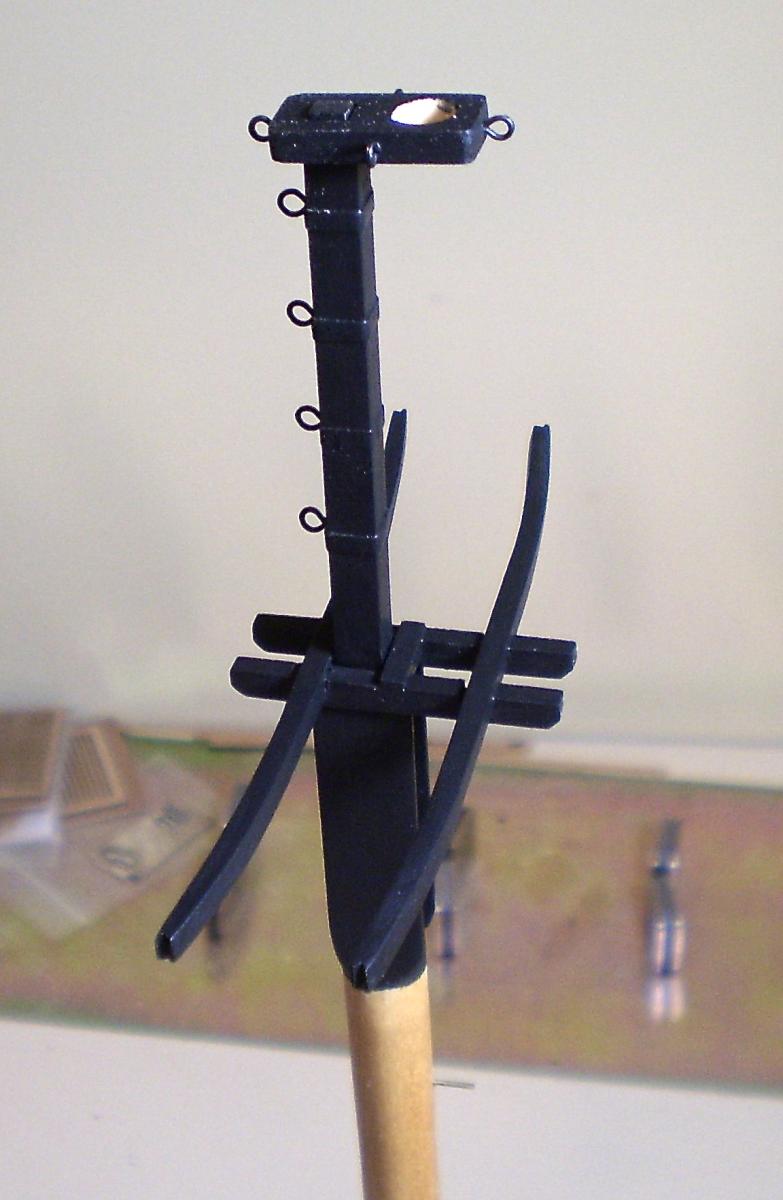
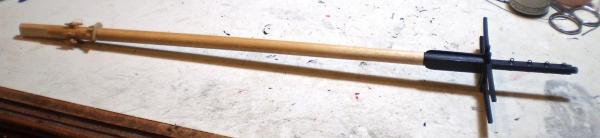
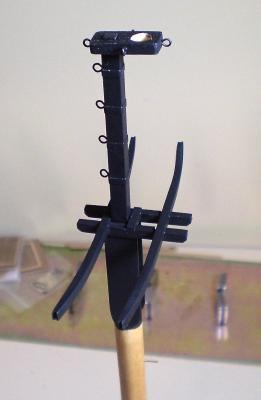
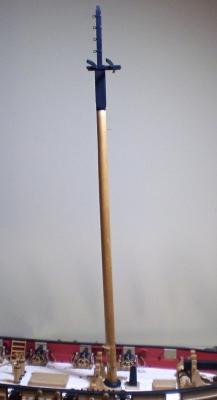
With work on the hull complete, it was time to work to begin work on the mast (the bowsprit was already done in connection with the interior detailing). I began with the lower mast. The process was straightforward: I started with a dowel cut to a length that included the below deck portion, the head and the tenon for the cap; the below deck portion was filed to a shape to fit the four sided slot that I had long ago created on the bulkhead former; the head was cut and sanded to it's square shape and the tenon was further cut and sanded to it's smaller square shape; flat areas were sanded below the head for the cheeks. The mast below the cheeks was stained golden oak and given a coat of Wipe-on Poly. The mast was now ready for the addition of it's various fittings: this began with the cheeks which were cut from boxwood sheet and glued in place; next was the boom rest, which was cut from boxwood sheet, glued in place and it's supports added, made from boxwood strip; lastly, I made cleats from boxwood strip and pinned and glued them in place. Next, I made up the trestletrees and crosstrees from boxwood strip. Slots were sawed and chiseled to fit the pieces to the head. The crosstrees were bent to shape and the parts were assembled and glued in place on the head. I then painted the head and the trestletree-crosstree assembly black and lastly added black painted paper bands on the head and eyebolts through the after side of the bands. I also added a pin to the mast to hold the main yard in place. The last work was to make the mast cap and mast coat. Both were cut from boxwood sheet with appropriate holes drilled and filed before they were cut out. Eyebolts were added to the cap and both parts were painted black. Finally I installed the mast in the hull slot. I prefer to glue it in place permanently for stability, although I know that there are differences of opinion about this. Bob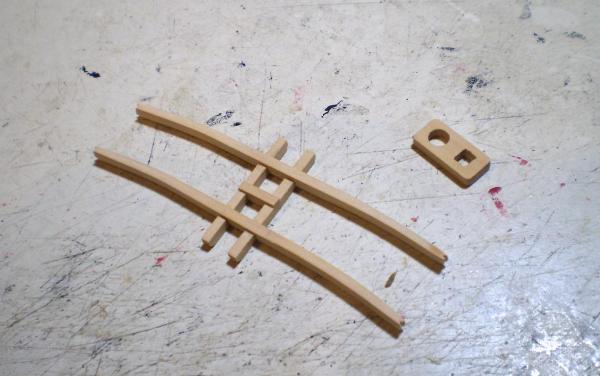


- 525 replies
-
- 37
-
-
- cheerful
- Syren Ship Model Company
- (and 1 more)
-
Roger, they produced all of the fittings in an extended garage behind the elder Irwin's house. The equipment was fascinating. It was ancient overhead belt driven and there was literally a machine for each kind of brass part. I sometimes sat and watched in awe as Bob Irwin turned out the parts. The machines were irreplaceable, and I assume that the new owner doesn't have the machines or make the brass parts. Bob
-
I really admire your meticulous approach Charlie. Bob
-
Looking good Rusty. The fun part is fairing the inside of those frames. Bob
- 310 replies
-
- 2
-
-
- cheerful
- Syren Ship Model Company
- (and 1 more)
-
Ed, the original Fisher company closed when the owner, Bob Irwin, died some years ago. I heard that some of the business had been picked up by someone, but I don't know what part, or by whom. Bob
-
Cutter Cheerful 1806 by rafine - FINISHED
rafine replied to rafine's topic in - Build logs for subjects built 1801 - 1850
Thanks so much Iosto and Richard and the "likes". Bob- 525 replies
-
- 2
-
-
- cheerful
- Syren Ship Model Company
- (and 1 more)
-
Sovereign of the Seas was a kit offered by the AJ Fisher Co of Royal Oak , Michigan. I built one in the 1980's and still have the plans, which show an original date of 1940. Bob
-
Cutter Cheerful 1806 by rafine - FINISHED
rafine replied to rafine's topic in - Build logs for subjects built 1801 - 1850
Thanks so much Thomas and Tom and the "likes". Bob- 525 replies
-
- 3
-
-
- cheerful
- Syren Ship Model Company
- (and 1 more)
-
Cutter Cheerful 1806 by rafine - FINISHED
rafine replied to rafine's topic in - Build logs for subjects built 1801 - 1850
Thanks so much Chuck, druxey, Sjors, Mark, Albert and Grant for the generous comments and also the "likes". As always, your interest and attention is appreciated. Thanks Chuck for the quick response on the rigging question. I'm afraid that it's likely to be only the first of many questions. Bob- 525 replies
-
- 4
-
-
- cheerful
- Syren Ship Model Company
- (and 1 more)
-
Druxey, your quest for perfection is a pleasure to watch. Bob
- 641 replies
-
- 3
-
-
- greenwich hospital
- barge
- (and 1 more)
-
You're doing a really nice job on her Tony. Bob
-
Cutter Cheerful 1806 by rafine - FINISHED
rafine replied to rafine's topic in - Build logs for subjects built 1801 - 1850
Thanks so much Chuck, Deon , Ken and Mike for the nice comments and also the "likes". I'm looking forward to the rigging as well, although I have many questions after looking at the plans, photos of the contemporary models, and rigging sources (Lees, Lever). First among them: is the bobstay a doubled line?; is it served? Bob- 525 replies
-
- 6
-
-
- cheerful
- Syren Ship Model Company
- (and 1 more)
-
Cutter Cheerful 1806 by rafine - FINISHED
rafine replied to rafine's topic in - Build logs for subjects built 1801 - 1850
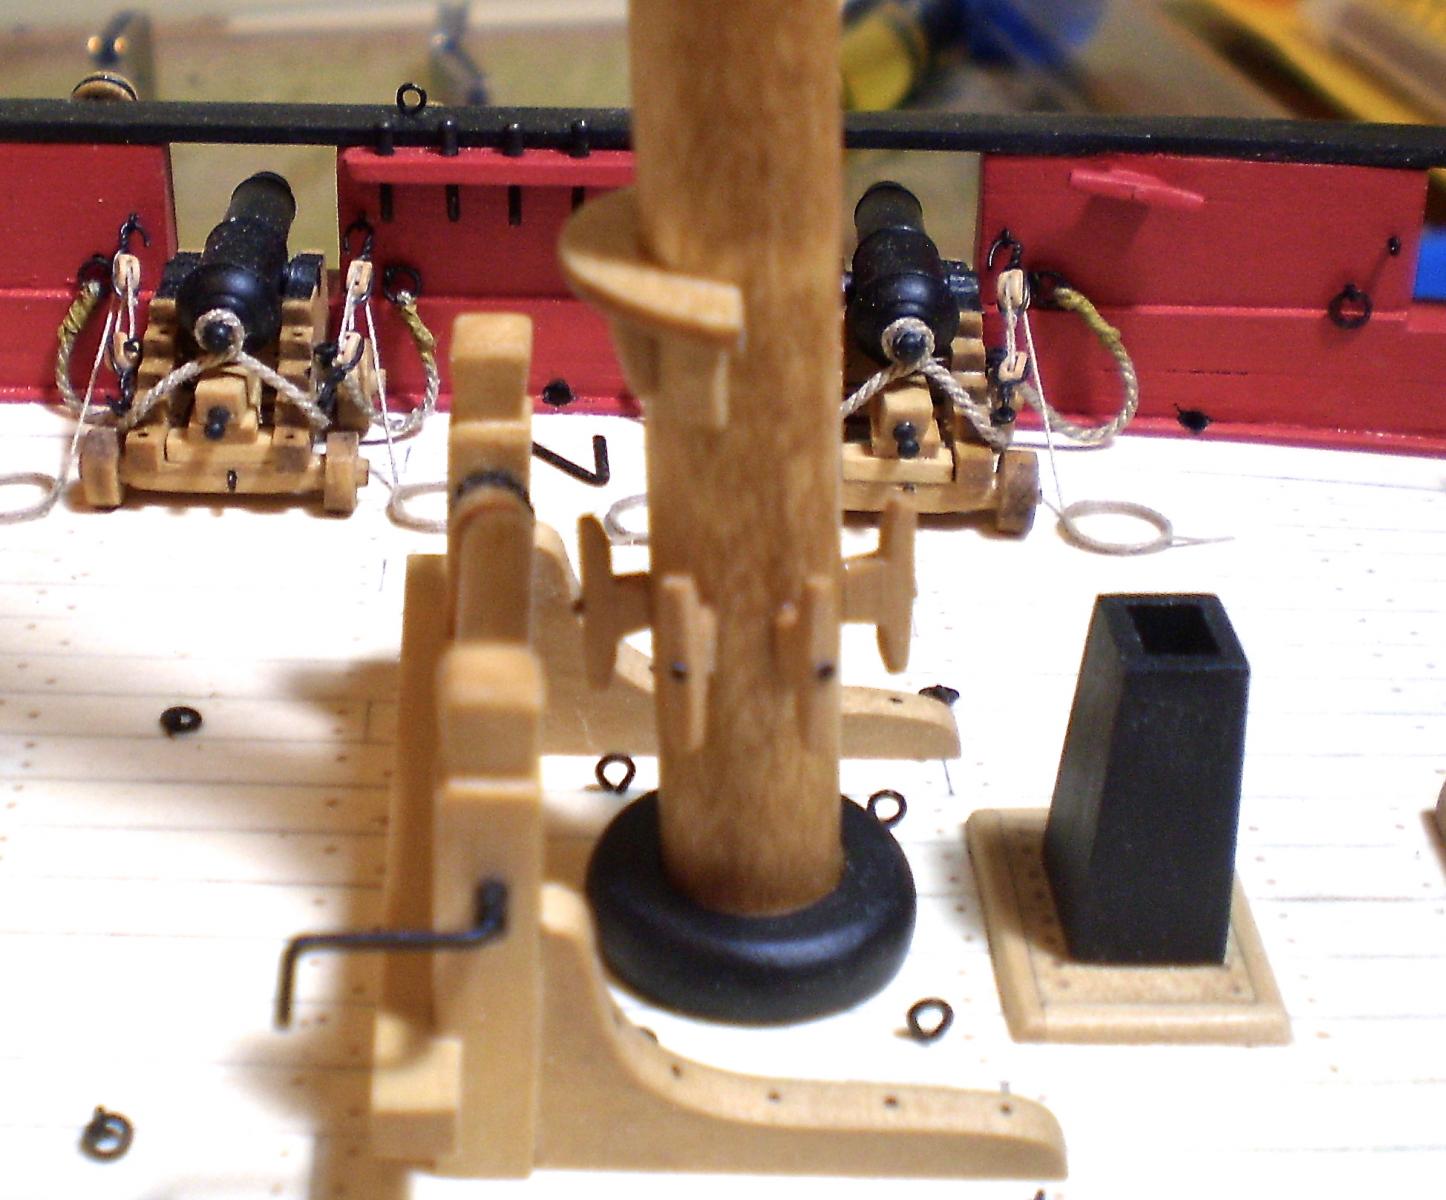
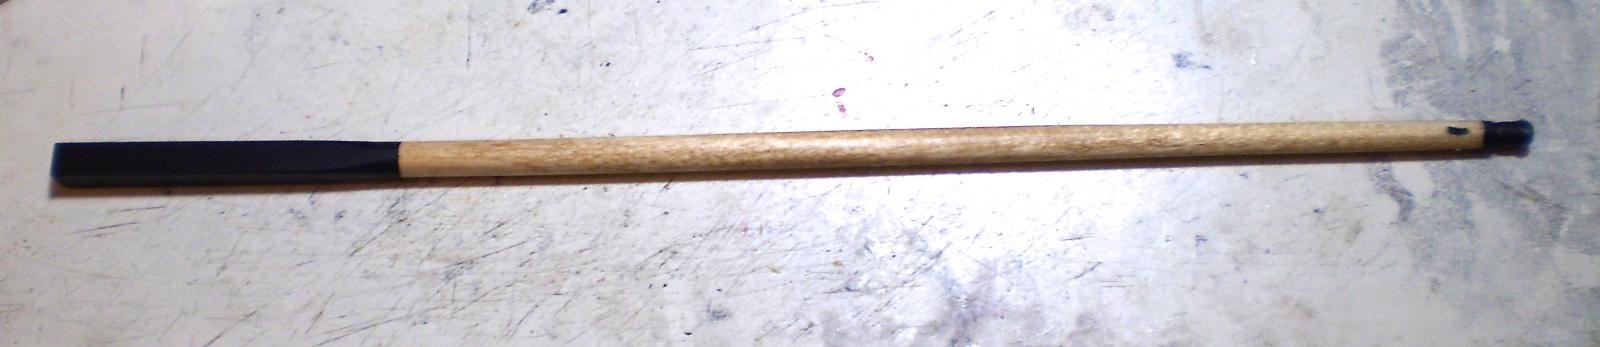
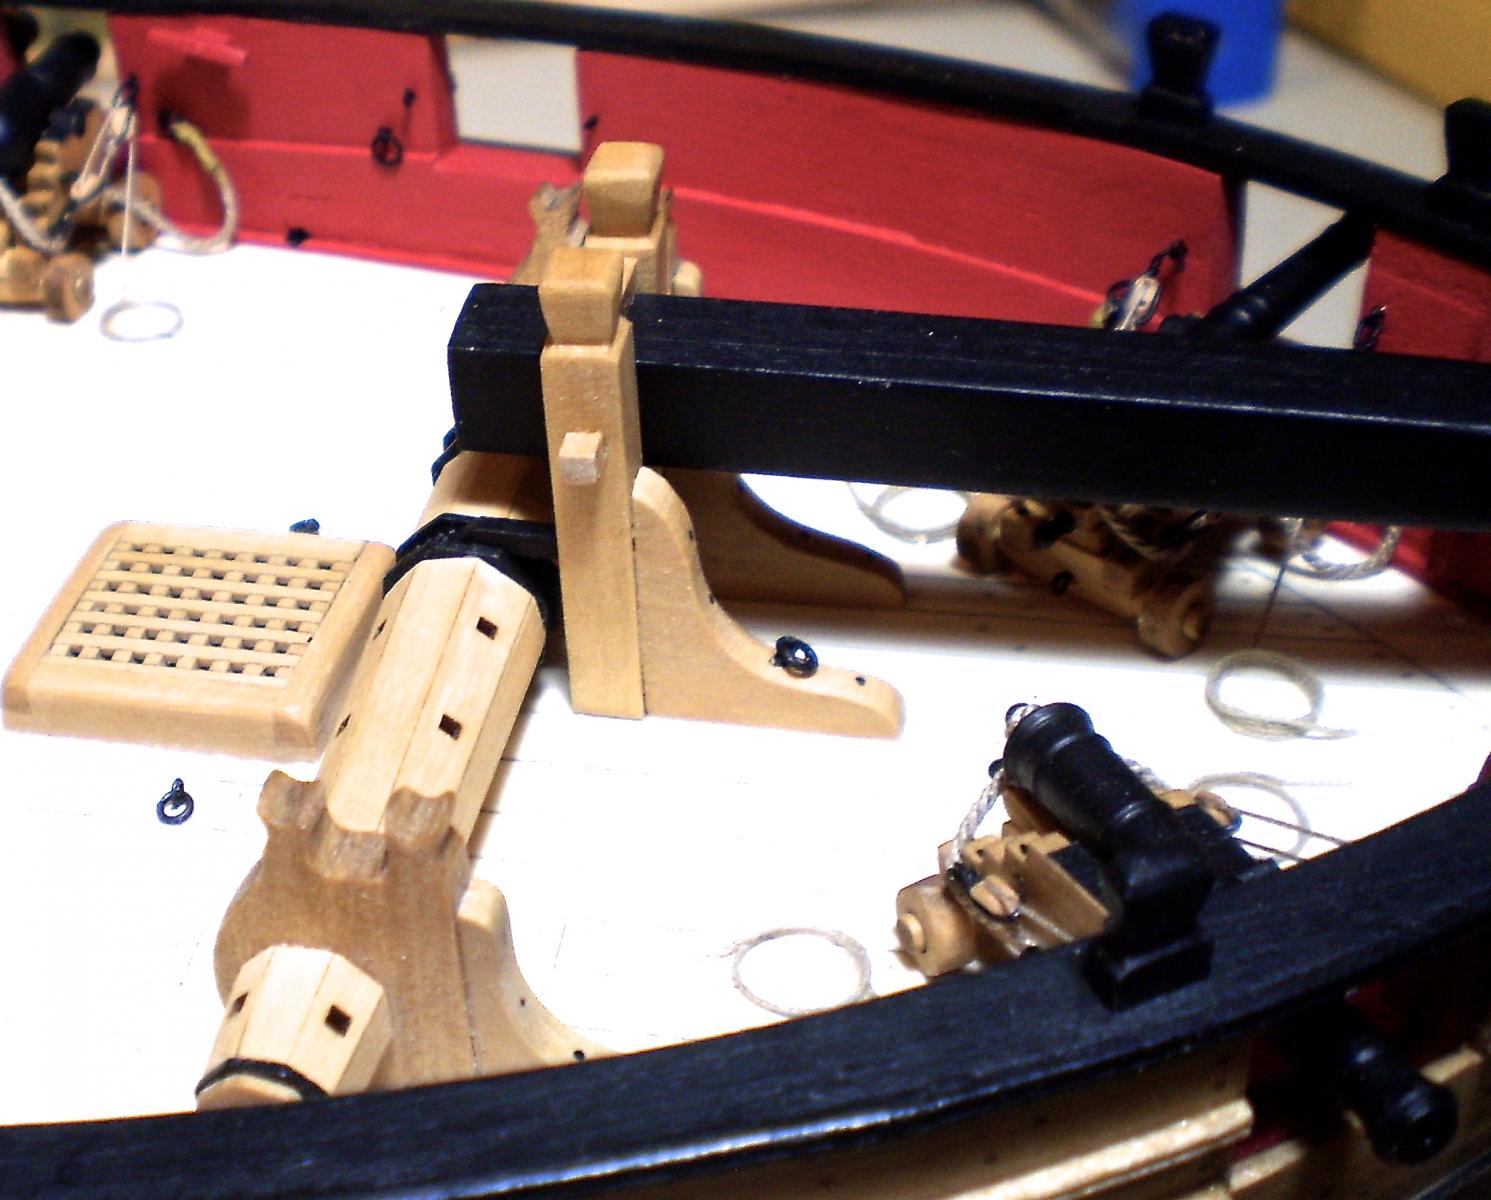
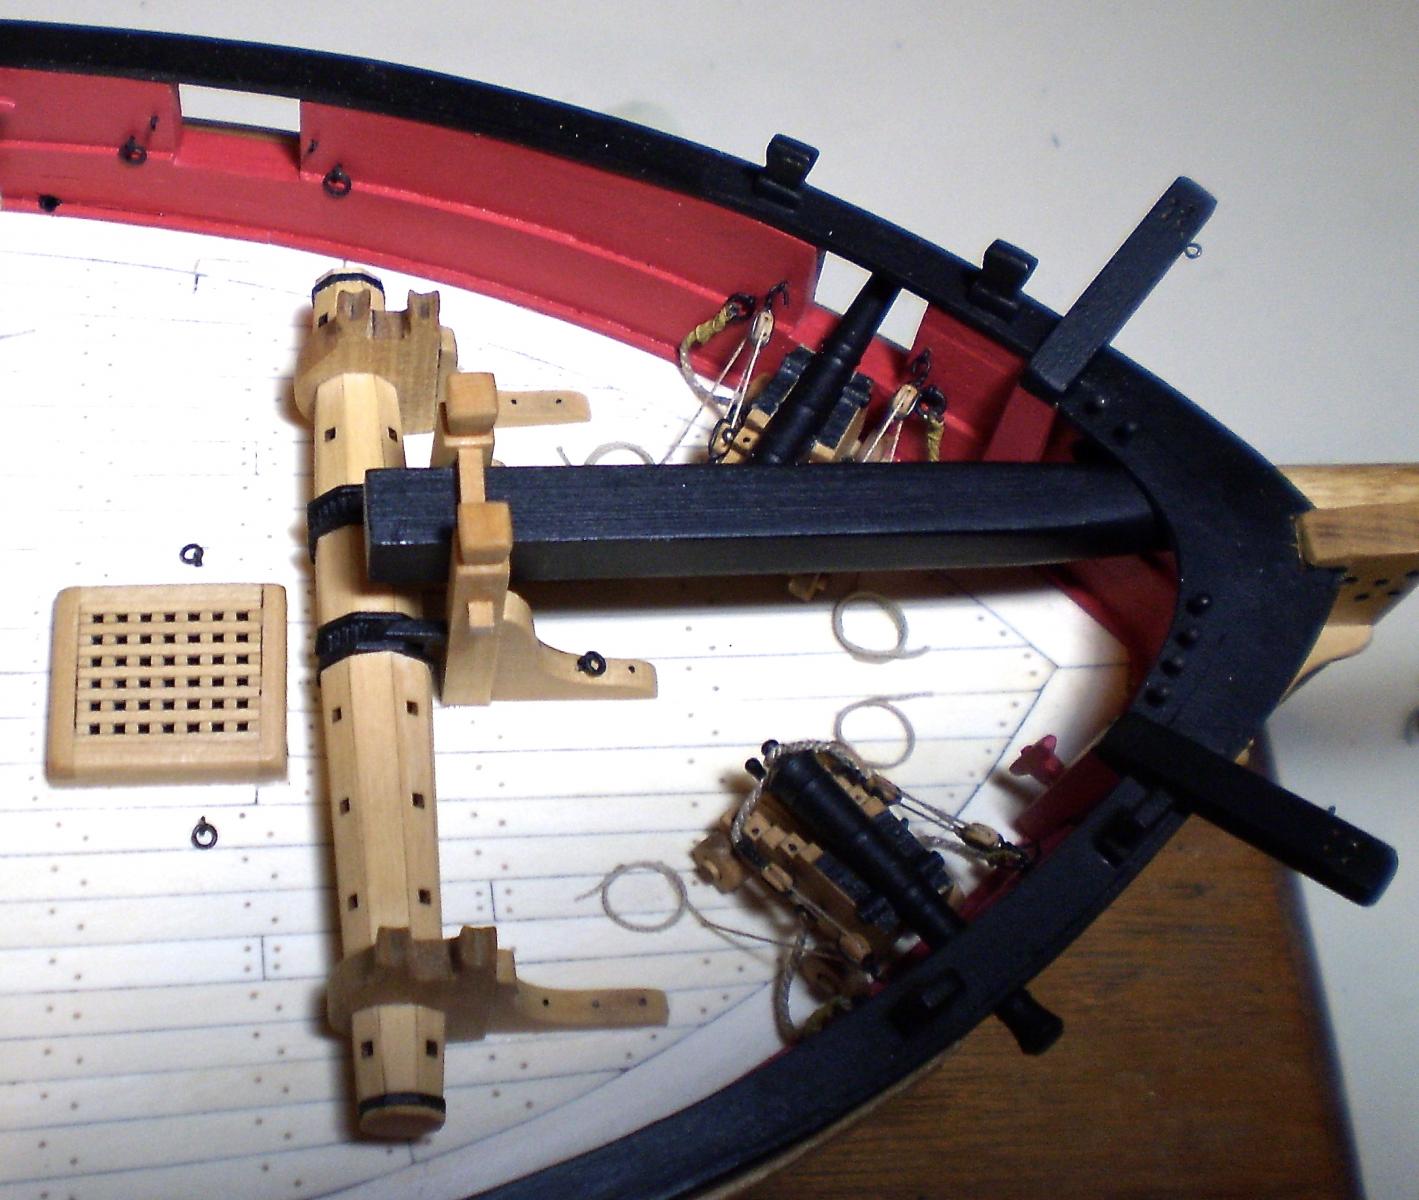
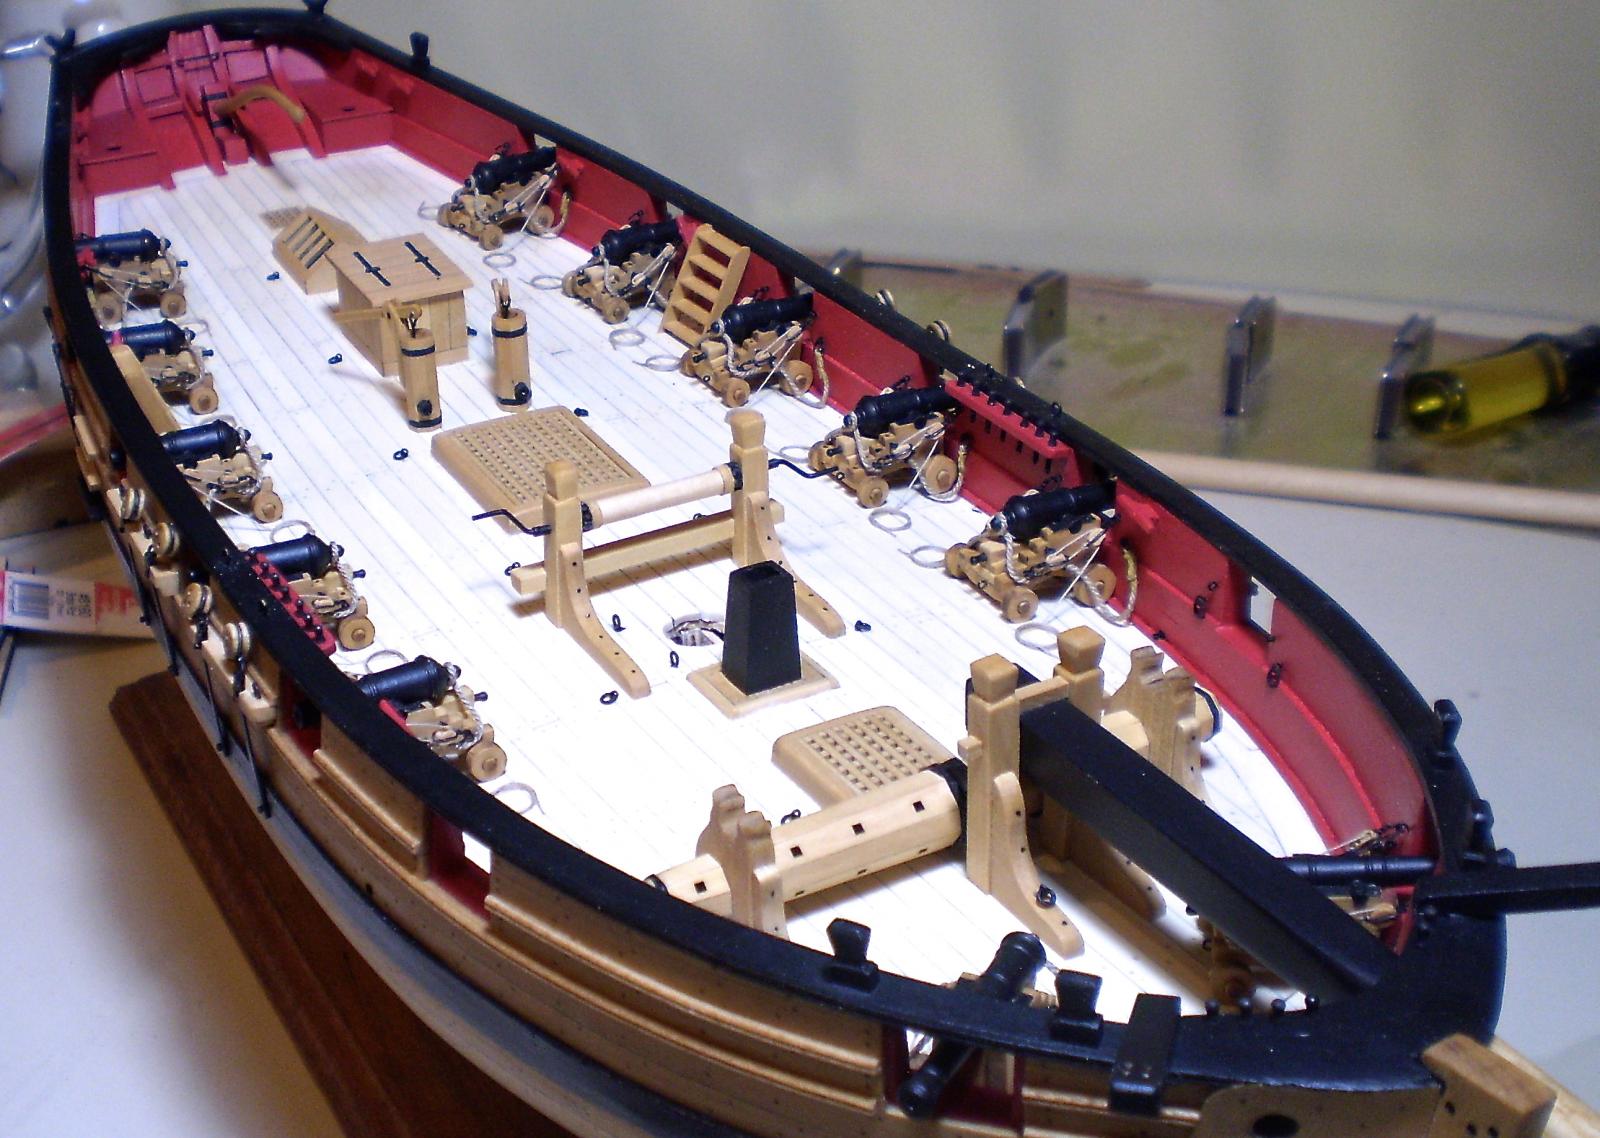
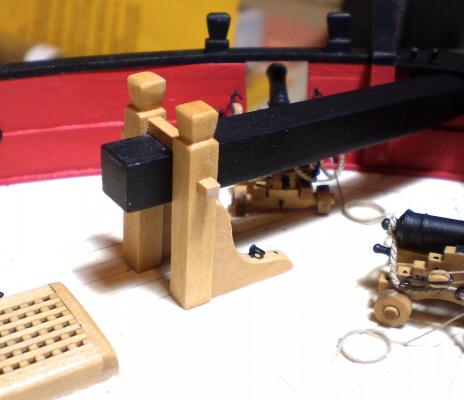
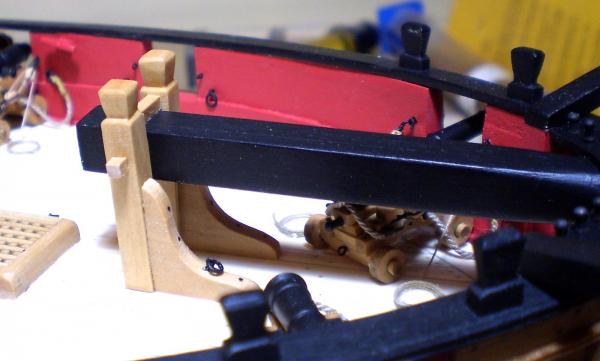
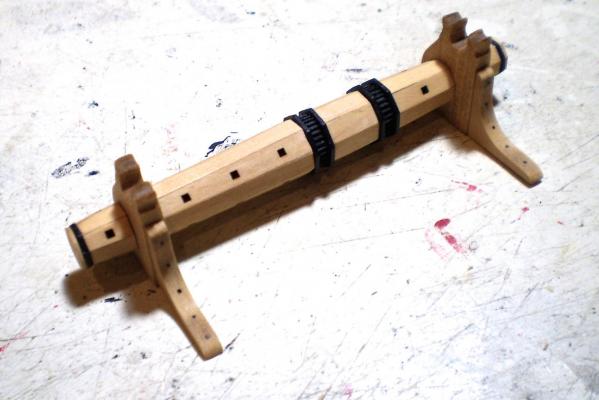
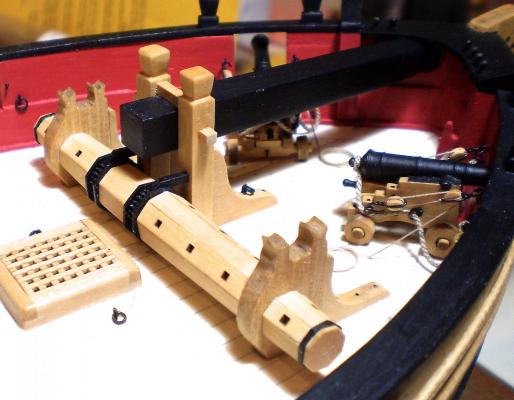
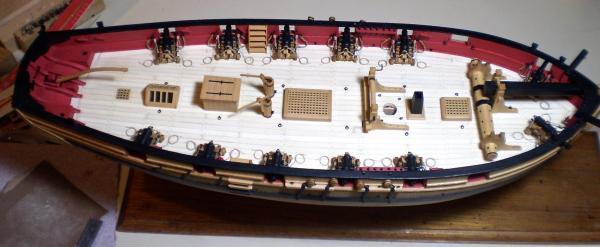
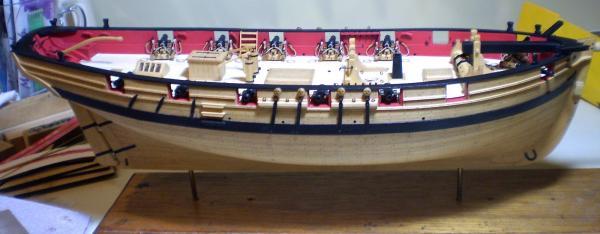
I guess this is a milestone post. The hull is now essentially complete (a few exterior eyebolts to be done during rigging, the anchors and entry rope stanchions, to be done when they won't get in the way). As I indicated in my last update, to finish the deck items, I had to do the bowsprit. My lack of a lathe caused me to make this in a somewhat different way. The bowsprit consists of a tapered round portion and a square section inboard. I chose to dowel and glue a square piece of boxwood to a round dowel and fair it in by sanding. I then tapered the round portion by sanding, filed in the shoulder and shape of the forward end and drilled and cut in the sheave. The bowsprit was finished by staining the dowel portion golden oak and painting the inboard and most forward portions black. The bowsprit bitts were made from boxwood strip filed to shape with knees cut from boxwood sheet. After temporarily positioning the bowsprit and marking locations, holes were drilled through the bitts and the square portion of the bowsprit for a brass rod to hold the bowsprit in position in the bitts. The bitts were then pinned and glued to the deck, the bowsprit was permanently mounted by inserting the brass rod and boxwood pieces were glued on to cover the holes in the bitts and above the bowsprit. The last deck piece was the windlass. This was made using Chuck's mini kit. I actually had made this up earlier and it took a couple of days to do. It is a marvel of design and engineering. While I believe that I could have done this from scratch, it would have taken me weeks, rather than days, and would not not have looked nearly as good as this. After the windlass was glued in place, I added pawls, made from black painted strip, from the bitts to the windlass gears. For whatever reason, the photos won't attach in the order that I chose, and appear below in random order. They include three that reflect the current state of the model. Bob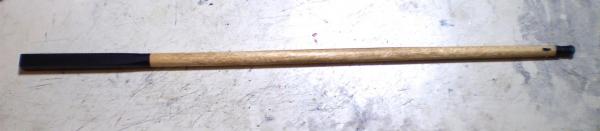


- 525 replies
-
- 37
-
-
- cheerful
- Syren Ship Model Company
- (and 1 more)
-
Cutter Cheerful 1806 by rafine - FINISHED
rafine replied to rafine's topic in - Build logs for subjects built 1801 - 1850
Thanks Greg. I checked them out and it seems they still have inventory of some, but not nearly all colors. Could be useful. Bob- 525 replies
-
- 3
-
-
- cheerful
- Syren Ship Model Company
- (and 1 more)