rafine
-
Posts
2,932 -
Joined
-
Last visited
Content Type
Profiles
Forums
Gallery
Events
Everything posted by rafine
-
 Your work on the Morgan is terrific, Bruce. You seem to be doing just fine with the rigging, and I'm certain that it will only get better as you move on. Bob
 -
Cutter Cheerful 1806 by rafine - FINISHED
rafine replied to rafine's topic in - Build logs for subjects built 1801 - 1850
Thanks so much Maury, druxey, Jaxboat, George and Remco for the generous comments and also to the "likes". Greatly appreciated,as always. Thanks druxey for the confirmation of the term. Looking at the parts, it does seem appropriate. I have some Vallejo paint Jaxboat, but I've yet to really try it. Soon, perhaps. Bob- 525 replies
-
- 4
-

-
- cheerful
- Syren Ship Model Company
- (and 1 more)
-
Cutter Cheerful 1806 by rafine - FINISHED
rafine replied to rafine's topic in - Build logs for subjects built 1801 - 1850
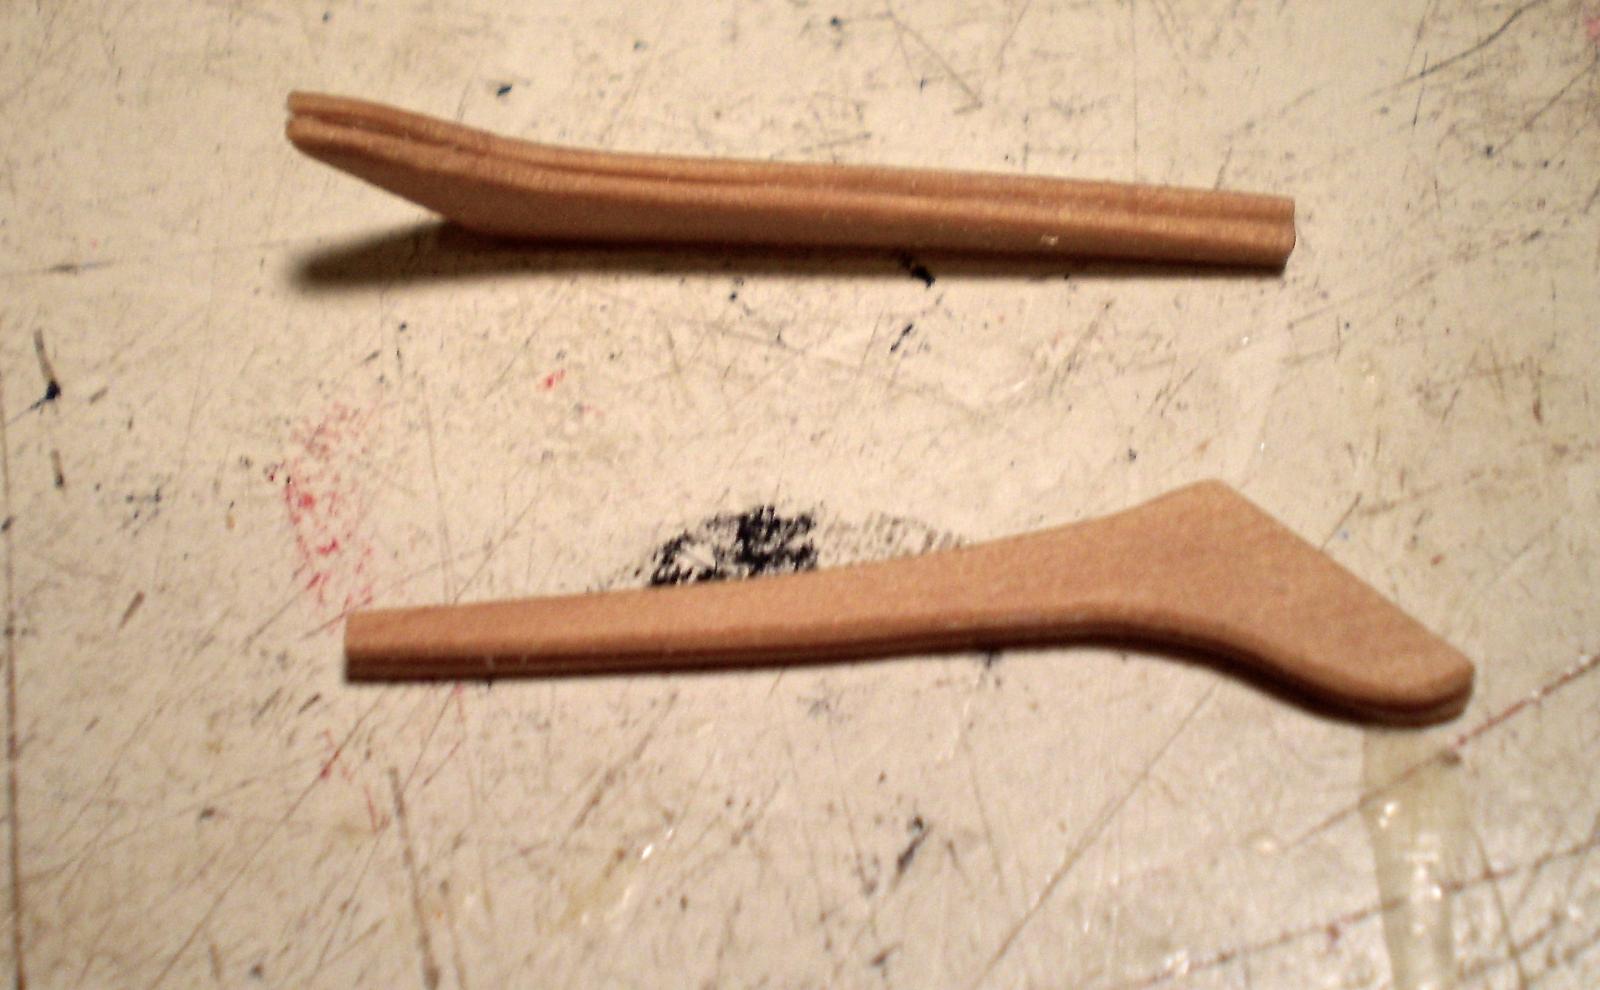
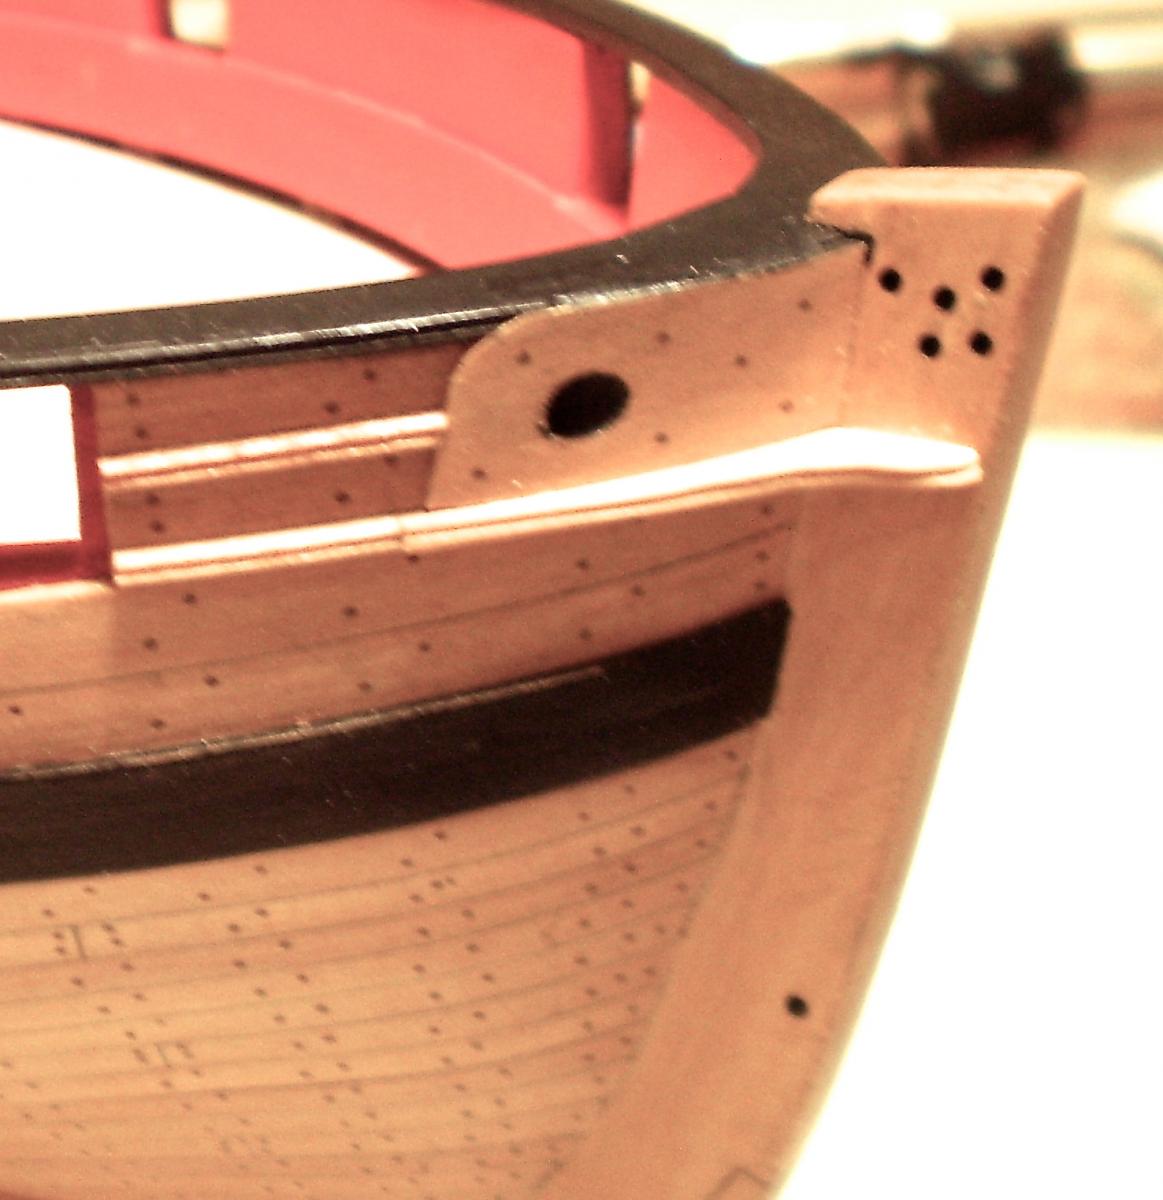
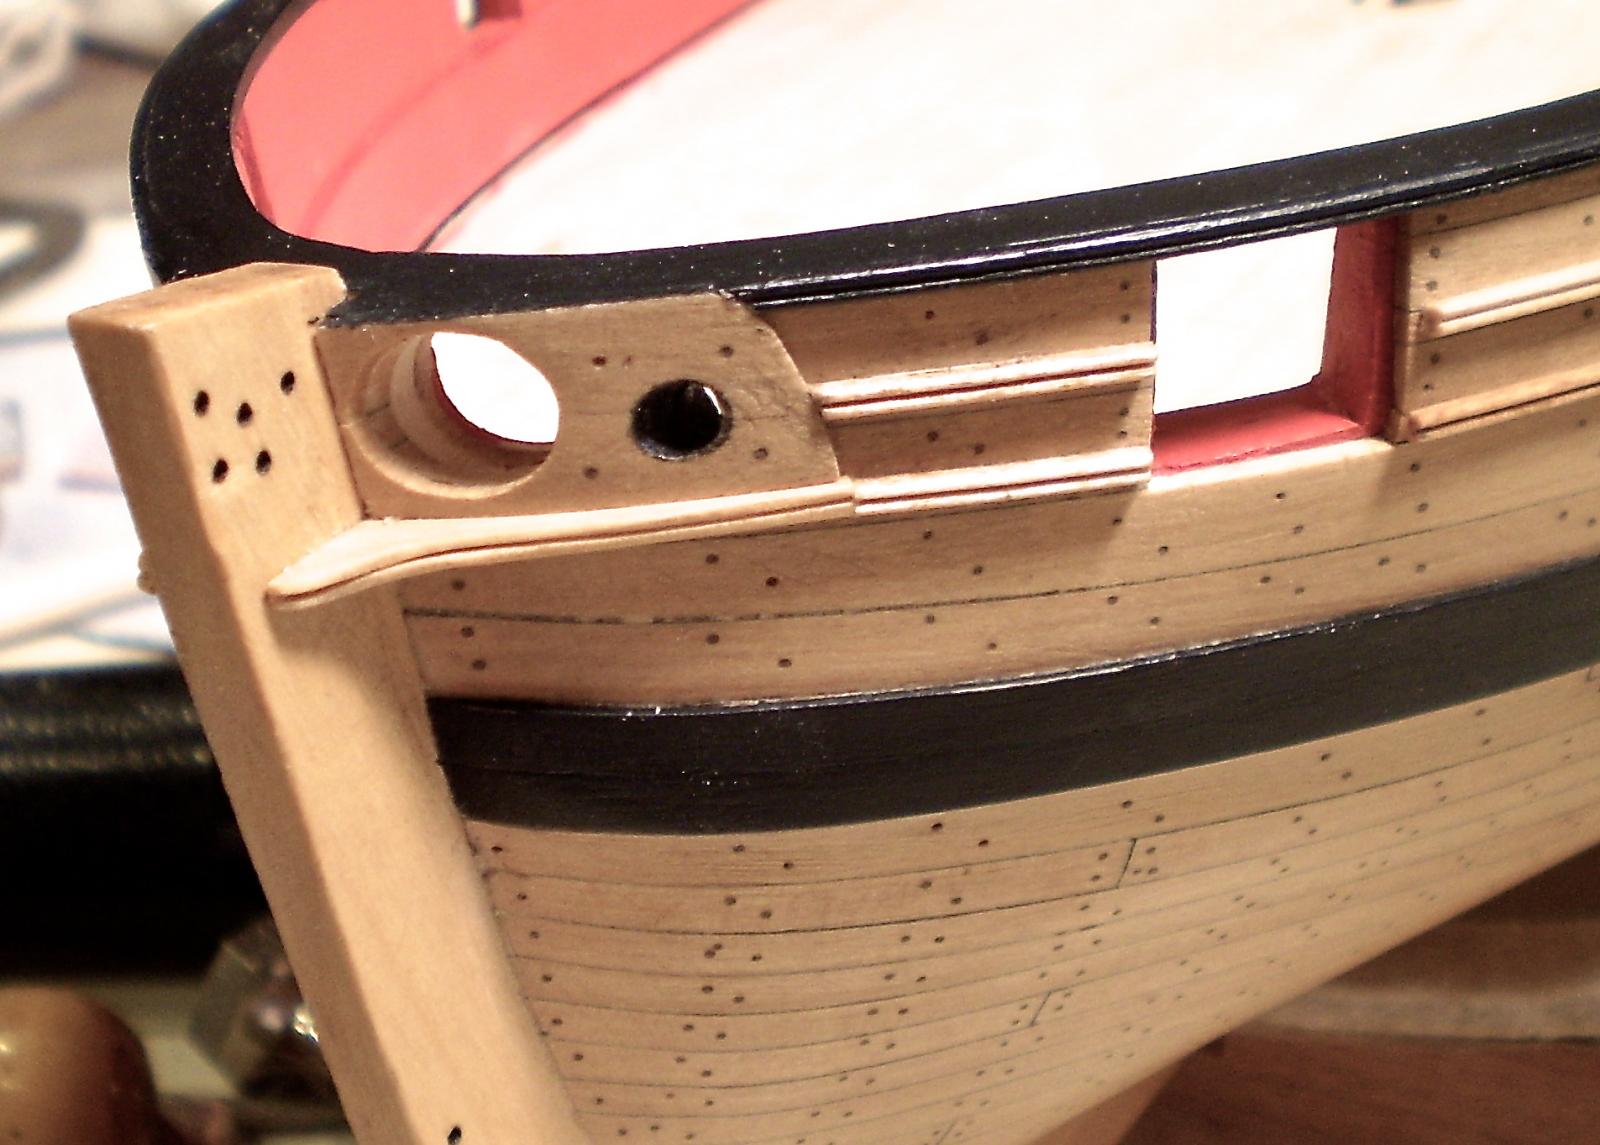
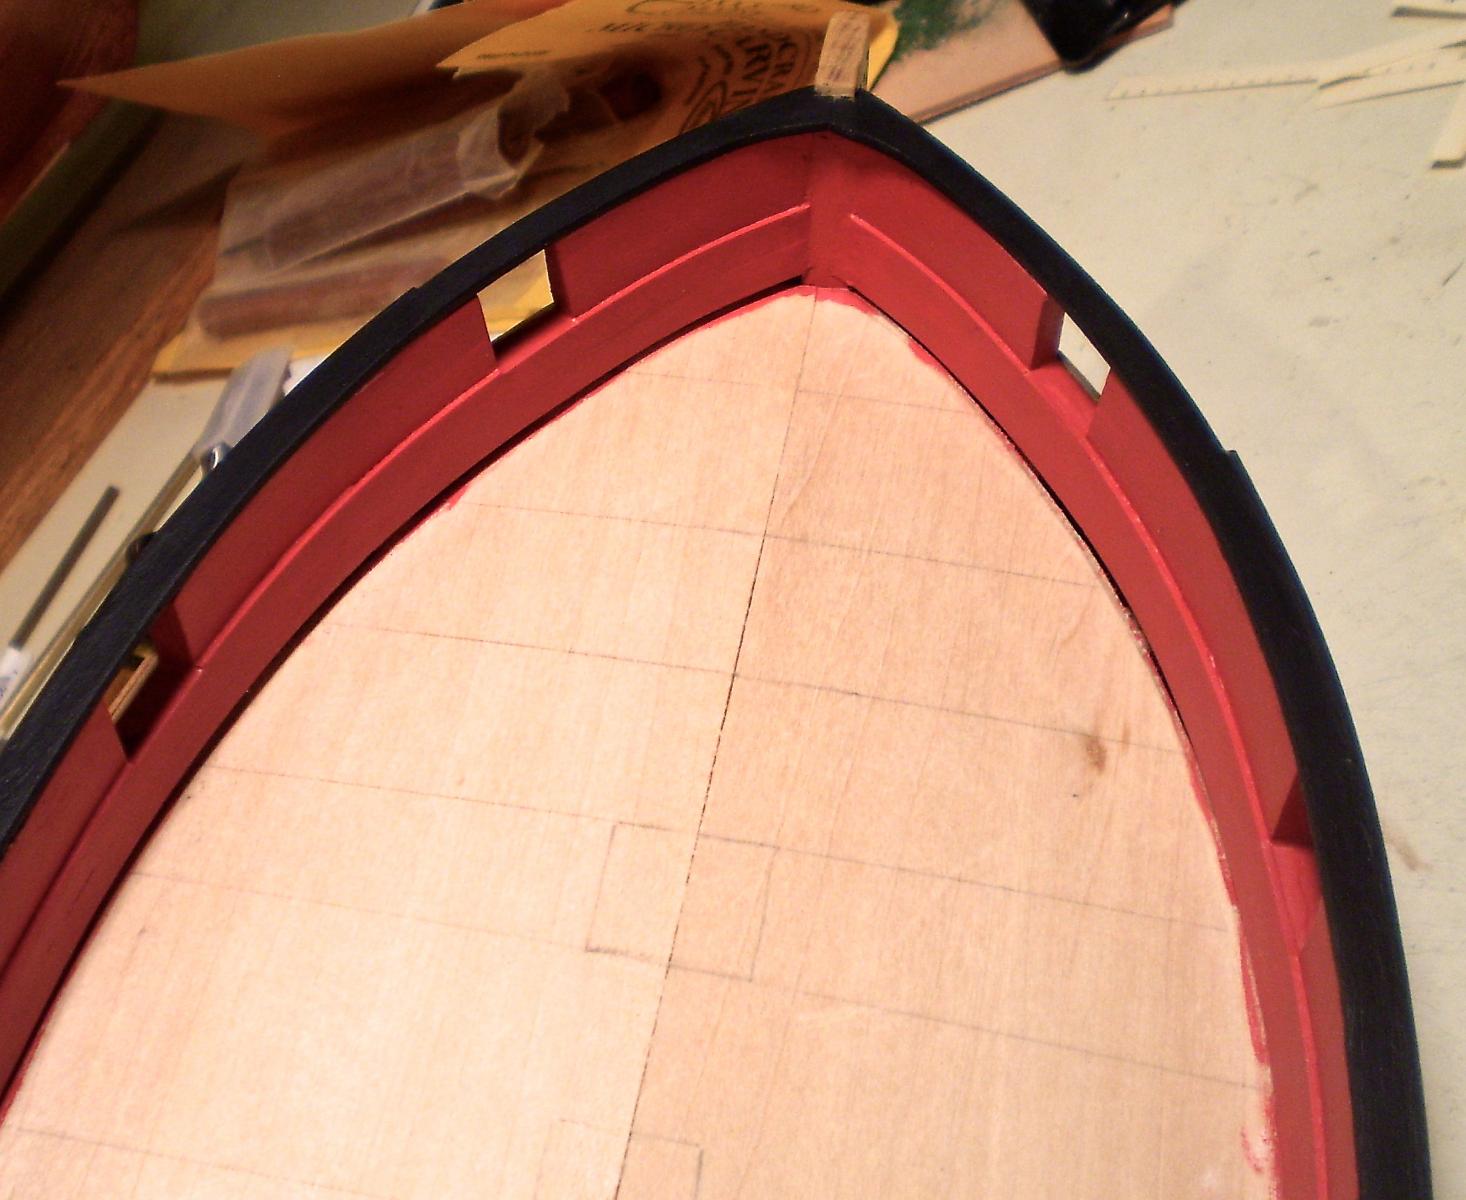
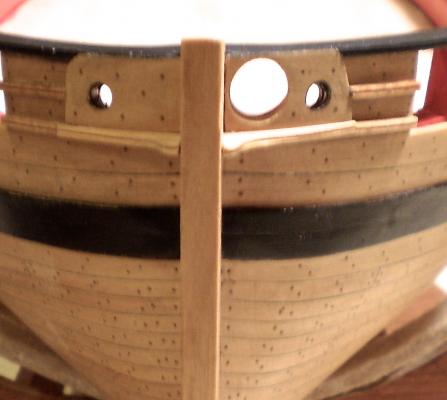
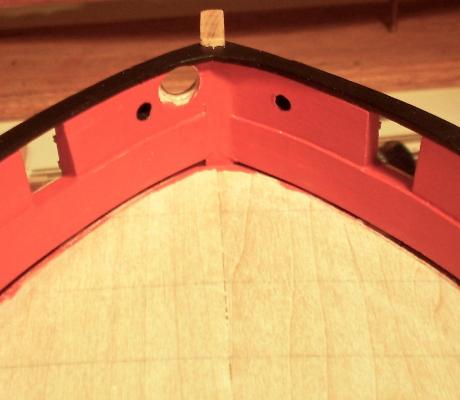
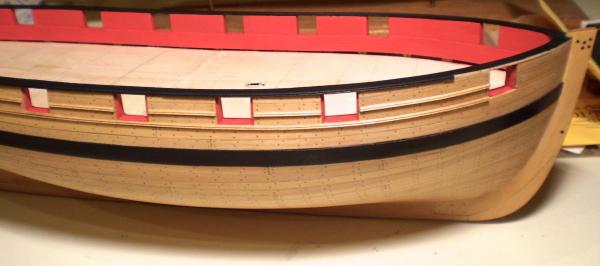
I've now finished off the work at the bow with the addition of the hawse plates and the remaining moldings. The hawse plates themselves are simple, but getting the holes through them, particularly for the bowsprit, proved tricky. All of the holes must be done parallel with the keel and at the proper angle. The large size of the bowsprit hole made this critical.To be cautious, I drilled a hole no more than half the required size for the bowsprit, and then used round files to open it out to the full size. It became a matter of filing and fitting until I could just get a dowel of the diameter of the bowsprit at that point through the hole at the proper alignment and angle. This was a tedious process. After finishing that work, I added the remaining moldings to the hull side and the cap rail edge, including the little molding extensions that Chuck has called "ears". The ears required a couple of tries to get them right. I finished up this work by giving the entire cap rail two additional coats of black paint. Next, I am beginning the deck planking process by doing the margin planks and waterway. Bob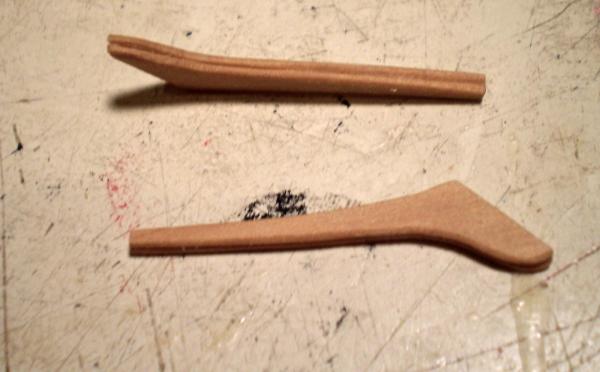


- 525 replies
-
- 29
-
-
- cheerful
- Syren Ship Model Company
- (and 1 more)
-
Chuck, it seems like there should be at least one more step. It is about 2 1/2 feet from the top step to the rail. Bob
- 1,051 replies
-
- 3
-
-
- cheerful
- Syren Ship Model Company
- (and 1 more)
-
Cutter Cheerful 1806 by rafine - FINISHED
rafine replied to rafine's topic in - Build logs for subjects built 1801 - 1850
Thanks so much Tim, Chuck, Mike and the "likes". Tim, I don't usually use the Poly on the painted areas. I like the eggshell finish of the Pollyscale paints. Who knows what I'll do when I finally run out of them? Chuck and Mike: No fair making fun of me just because I'm not lazy like some guys. Seriously, Chuck, the last thing I want to do is get ahead of you. Nothing is more helpful to me than to see how you do everything. So, as Mike says, pick up the pace. Bob- 525 replies
-
- 6
-
-
- cheerful
- Syren Ship Model Company
- (and 1 more)
-
Cutter Cheerful 1806 by rafine - FINISHED
rafine replied to rafine's topic in - Build logs for subjects built 1801 - 1850
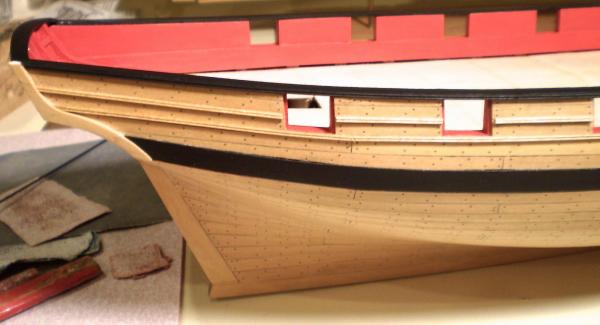
A busy week. First, I made and added the moldings on the upper hull. They are boxwood strip done with a simple razor blade scraper. Unlike Chuck, I did only one shape. I left off the bow portions until I do the hawse plates -- the next order of business. After the moldings, I made and added the cap rail. The forward portions and the piece over the transom were cut from boxwood sheet, using card templates for the shape. I was able to edge bend the remaining portions from strip.After mounting, I added the molding strip to the outer edge of the rail. I left off the molding at the bow until the hawse plates are added. The rail assembly was painted black. I will likely do an additional coat or two of paint after the bow area is completed. Bob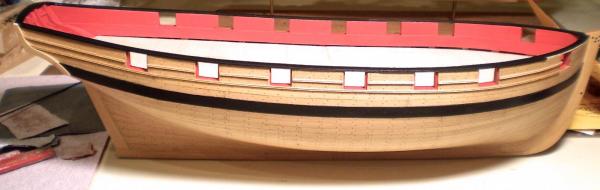
- 525 replies
-
- 30
-
-
- cheerful
- Syren Ship Model Company
- (and 1 more)
-
Cutter Cheerful 1806 by rafine - FINISHED
rafine replied to rafine's topic in - Build logs for subjects built 1801 - 1850
Thanks so much Thomas for the kind words and thanks also to the "likes". Bob- 525 replies
-
- 3
-
-
- cheerful
- Syren Ship Model Company
- (and 1 more)
-
Brian, I couldn't agree more with all of the praise for your work. It is a masterful effort. Congrats. Bob
- 831 replies
-
- 5
-
-
- Armed Virginia Sloop
- Model Shipways
- (and 1 more)
-
I'm with Patrick. Another "wow" moment. Bob
- 2,625 replies
-
- 5
-
-
- kaiser wilhelm der grosse
- passenger steamer
- (and 1 more)
-
Cutter Cheerful 1806 by rafine - FINISHED
rafine replied to rafine's topic in - Build logs for subjects built 1801 - 1850
Thanks so much Augie, Dirk and the "likes". Again Augie, best wishes for a a speedy return to good health and modeling. Bob- 525 replies
-
- 3
-
-
- cheerful
- Syren Ship Model Company
- (and 1 more)
-
Cutter Cheerful 1806 by rafine - FINISHED
rafine replied to rafine's topic in - Build logs for subjects built 1801 - 1850
Thanks so much Sjors and the "likes". We've missed you too Sjors. Bob- 525 replies
-
- 3
-
-
- cheerful
- Syren Ship Model Company
- (and 1 more)
-
Cutter Cheerful 1806 by rafine - FINISHED
rafine replied to rafine's topic in - Build logs for subjects built 1801 - 1850
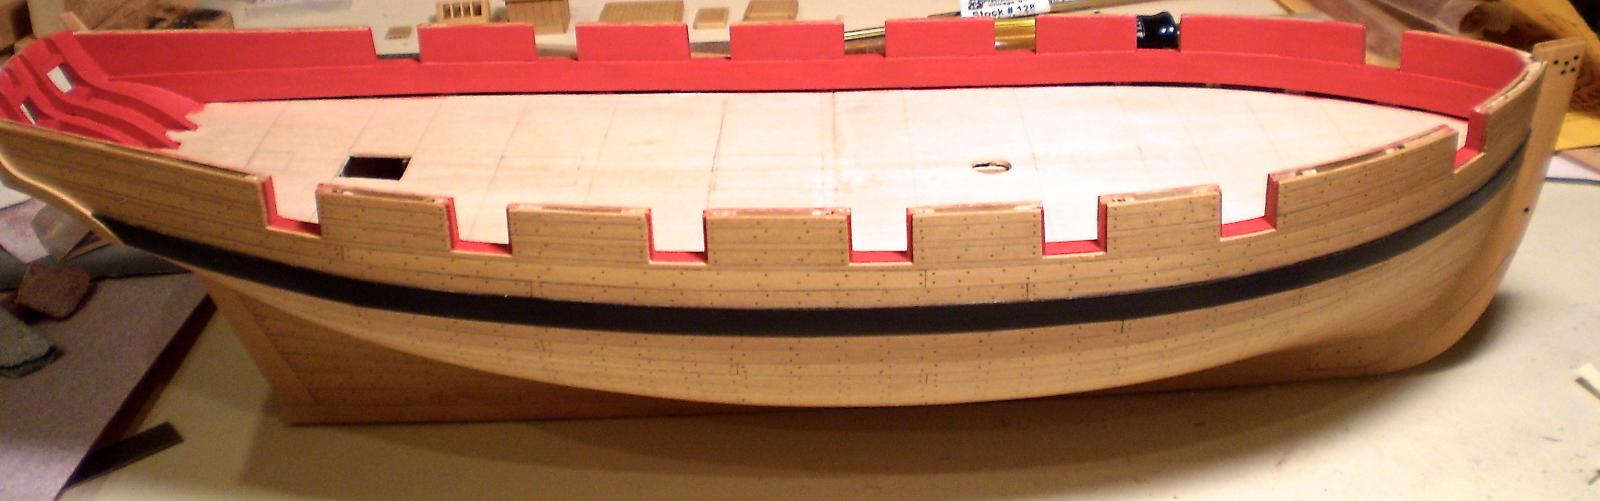
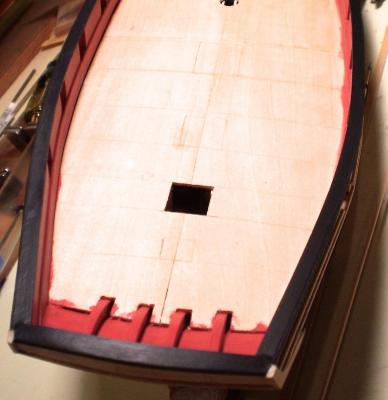
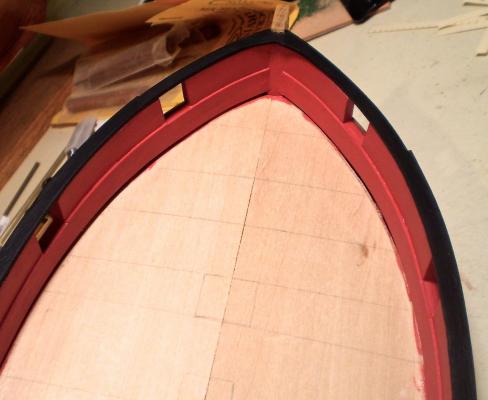
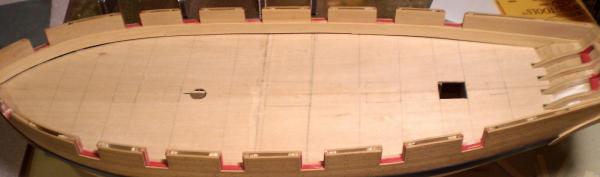
My wood order arrived and I was able to complete the bulwark planking. As Chuck has done, I did the spirketting in two layers. A nice easy method. After finishing the planking, I painted it, using my last bottle of Polly Scale ATSF red. Still a little left in the bottle. I also did the skylight. I chose not to use Chuck's mini-kit for the skylight, but to build it from scratch, from the plans. This produced a slightly different skylight from the kit and Chuck's prototype. It was made from boxwood strip with clear plastic "glass". As previously indicated, I am leaving it unpainted. Next, I will be moving back to the outer hull to do some of the detailing work there. Bob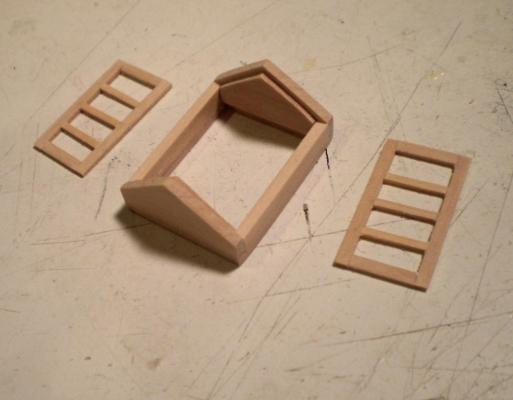


- 525 replies
-
- 36
-
-
- cheerful
- Syren Ship Model Company
- (and 1 more)
-
We are all delighted to have you back Sjors. Now get to work. Bob
- 1,616 replies
-
- 4
-
-
- caldercraft
- agamemnon
- (and 1 more)
-
US Brig Syren by Gahm - Model Shipways
rafine replied to Gahm's topic in - Kit build logs for subjects built from 1801 - 1850
Beautifully done Thomas. Bob -
Cutter Cheerful 1806 by rafine - FINISHED
rafine replied to rafine's topic in - Build logs for subjects built 1801 - 1850
Thanks so much Nigel for the nice comments and also the "likes". I think you'll find that the grating kits are an easy way to get very nice gratings. Bob- 525 replies
-
- 5
-
-
- cheerful
- Syren Ship Model Company
- (and 1 more)
-
Cutter Cheerful 1806 by rafine - FINISHED
rafine replied to rafine's topic in - Build logs for subjects built 1801 - 1850
Thanks so much Mike. I can't sleep if I want to keep up with you. Bob- 525 replies
-
- 4
-
-
- cheerful
- Syren Ship Model Company
- (and 1 more)
-
Cutter Cheerful 1806 by rafine - FINISHED
rafine replied to rafine's topic in - Build logs for subjects built 1801 - 1850
Thanks so much Hamilton, Lou and the "likes". Hamilton, the gratings didn't need any modification (other than to be cut to the appropriate sizes). Lou, my present intention is to leave the skylight natural wood. Bob- 525 replies
-
- 3
-
-
- cheerful
- Syren Ship Model Company
- (and 1 more)
-
Cutter Cheerful 1806 by rafine - FINISHED
rafine replied to rafine's topic in - Build logs for subjects built 1801 - 1850
Thanks so much Nils, Sal, Thomas, Tim and David for the nice comments and also to the "likes". Appreciated, as always. Bob- 525 replies
-
- 3
-
-
- cheerful
- Syren Ship Model Company
- (and 1 more)
-
Cutter Cheerful 1806 by rafine - FINISHED
rafine replied to rafine's topic in - Build logs for subjects built 1801 - 1850
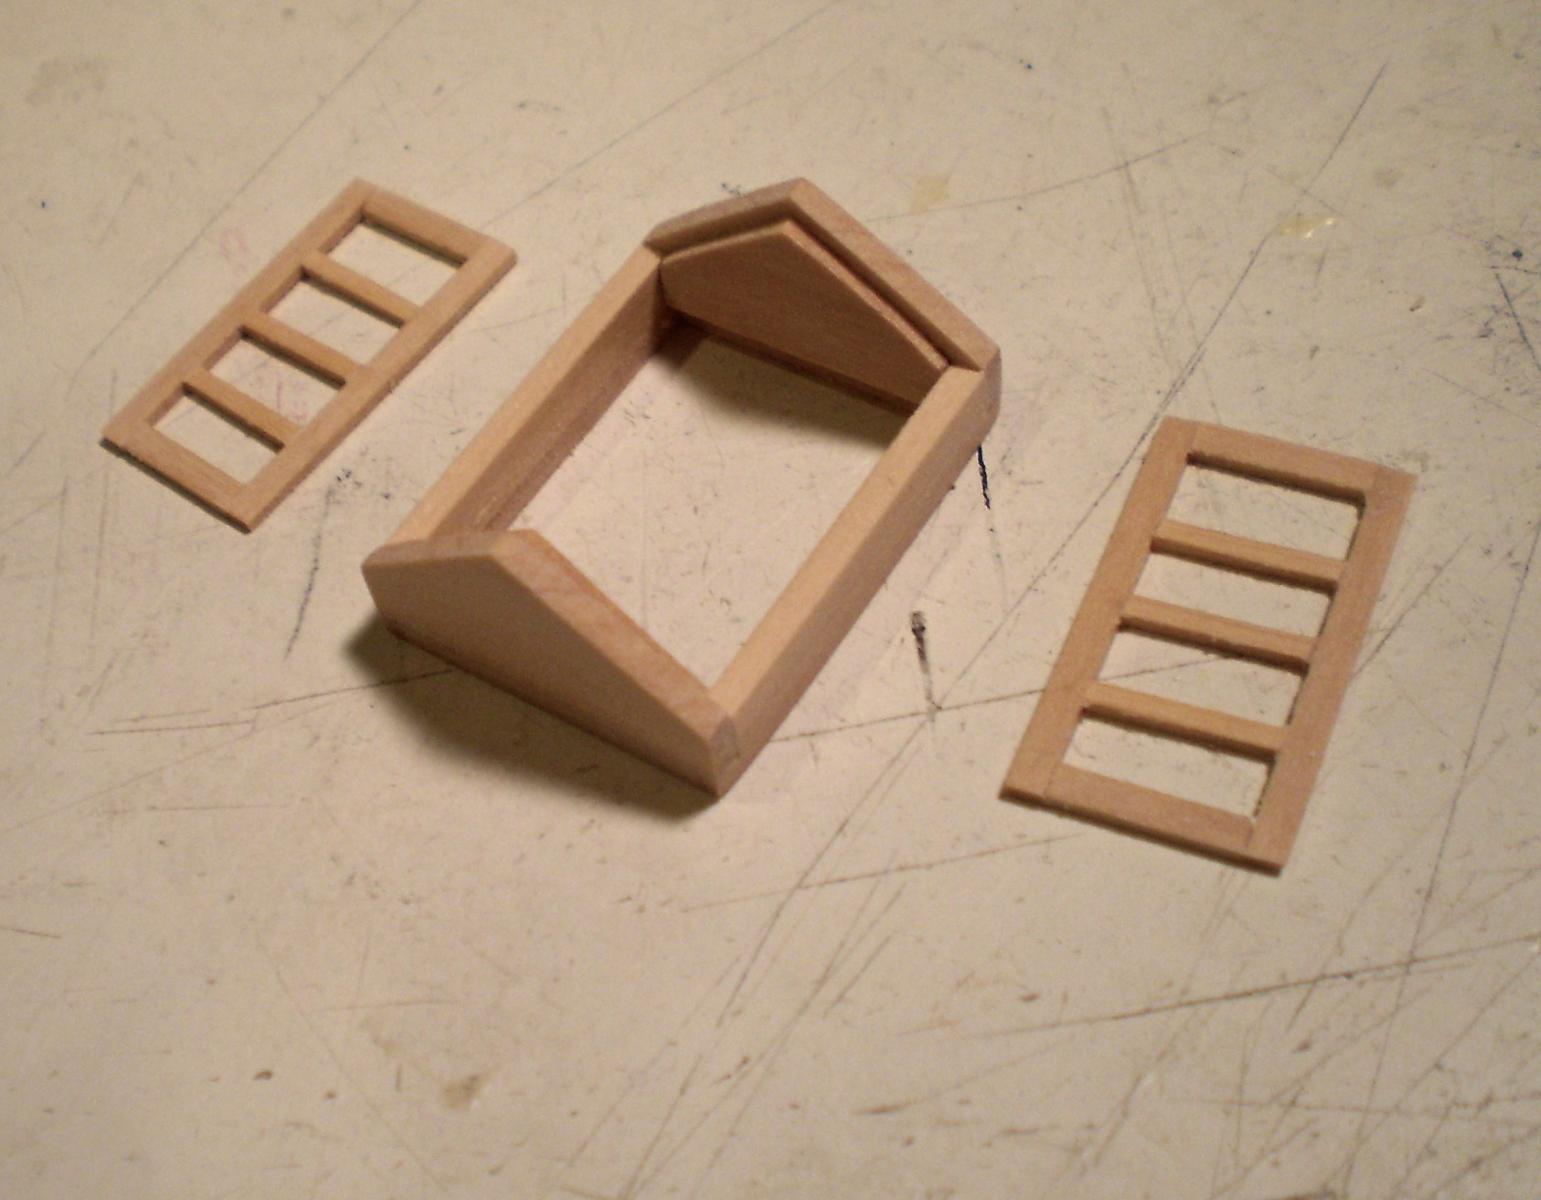
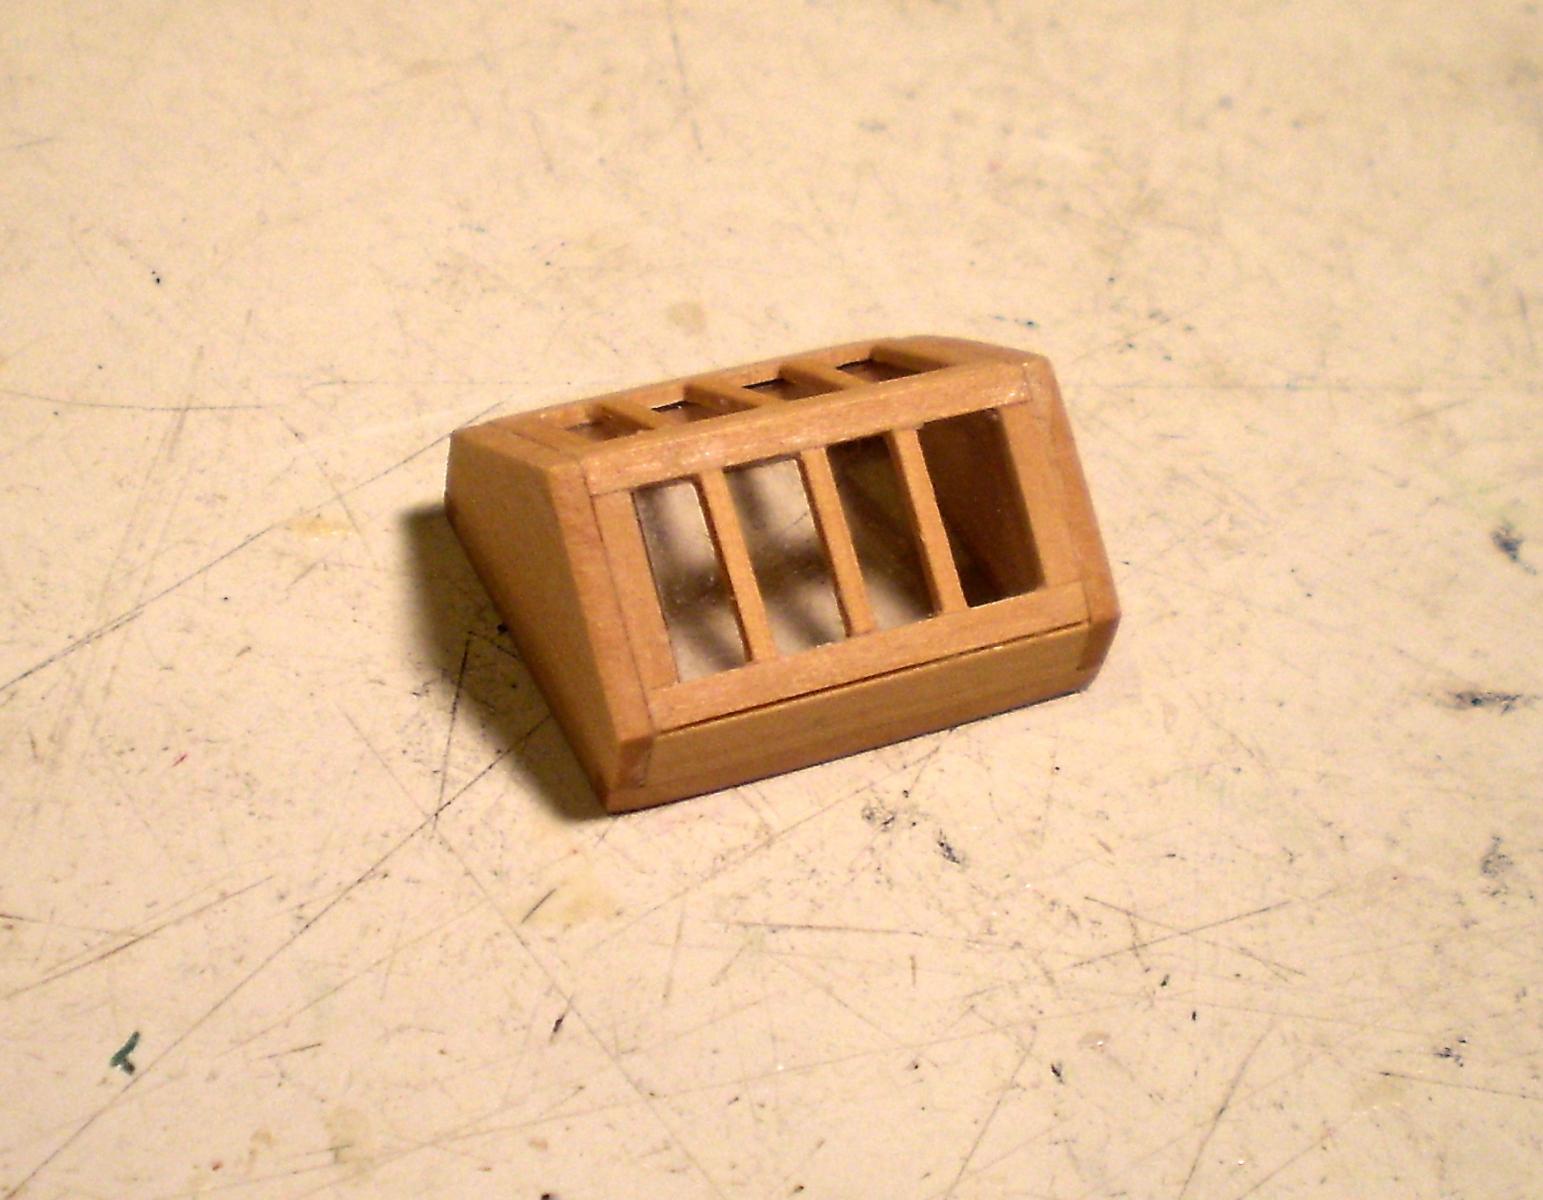
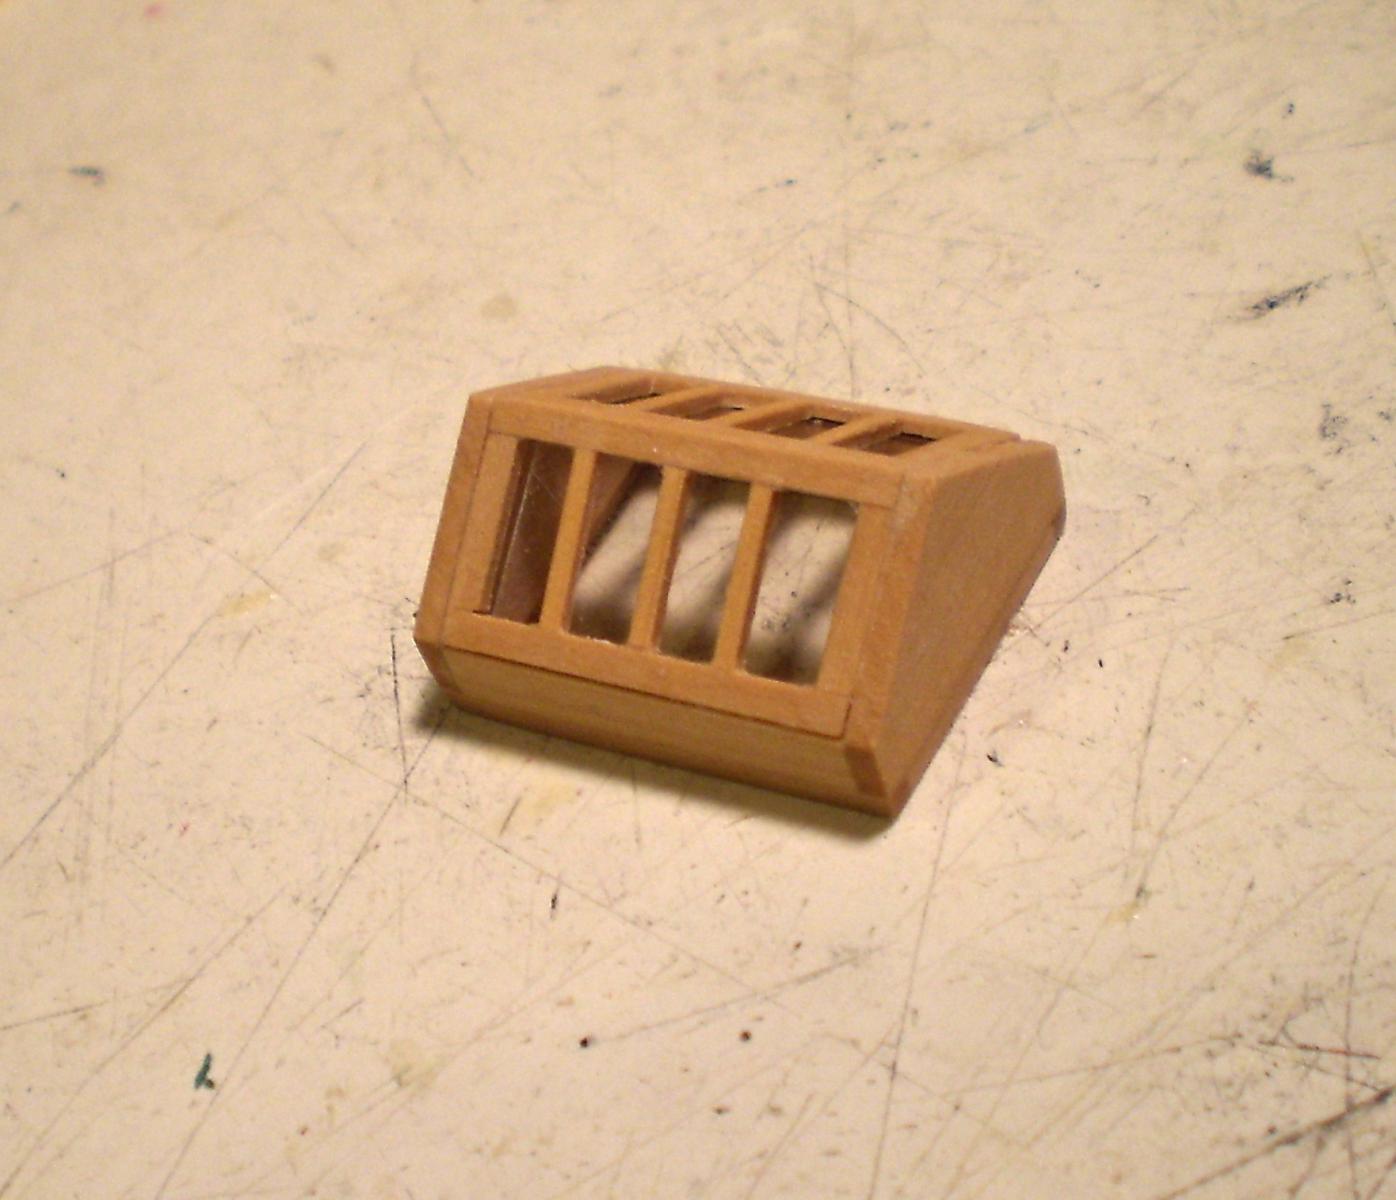
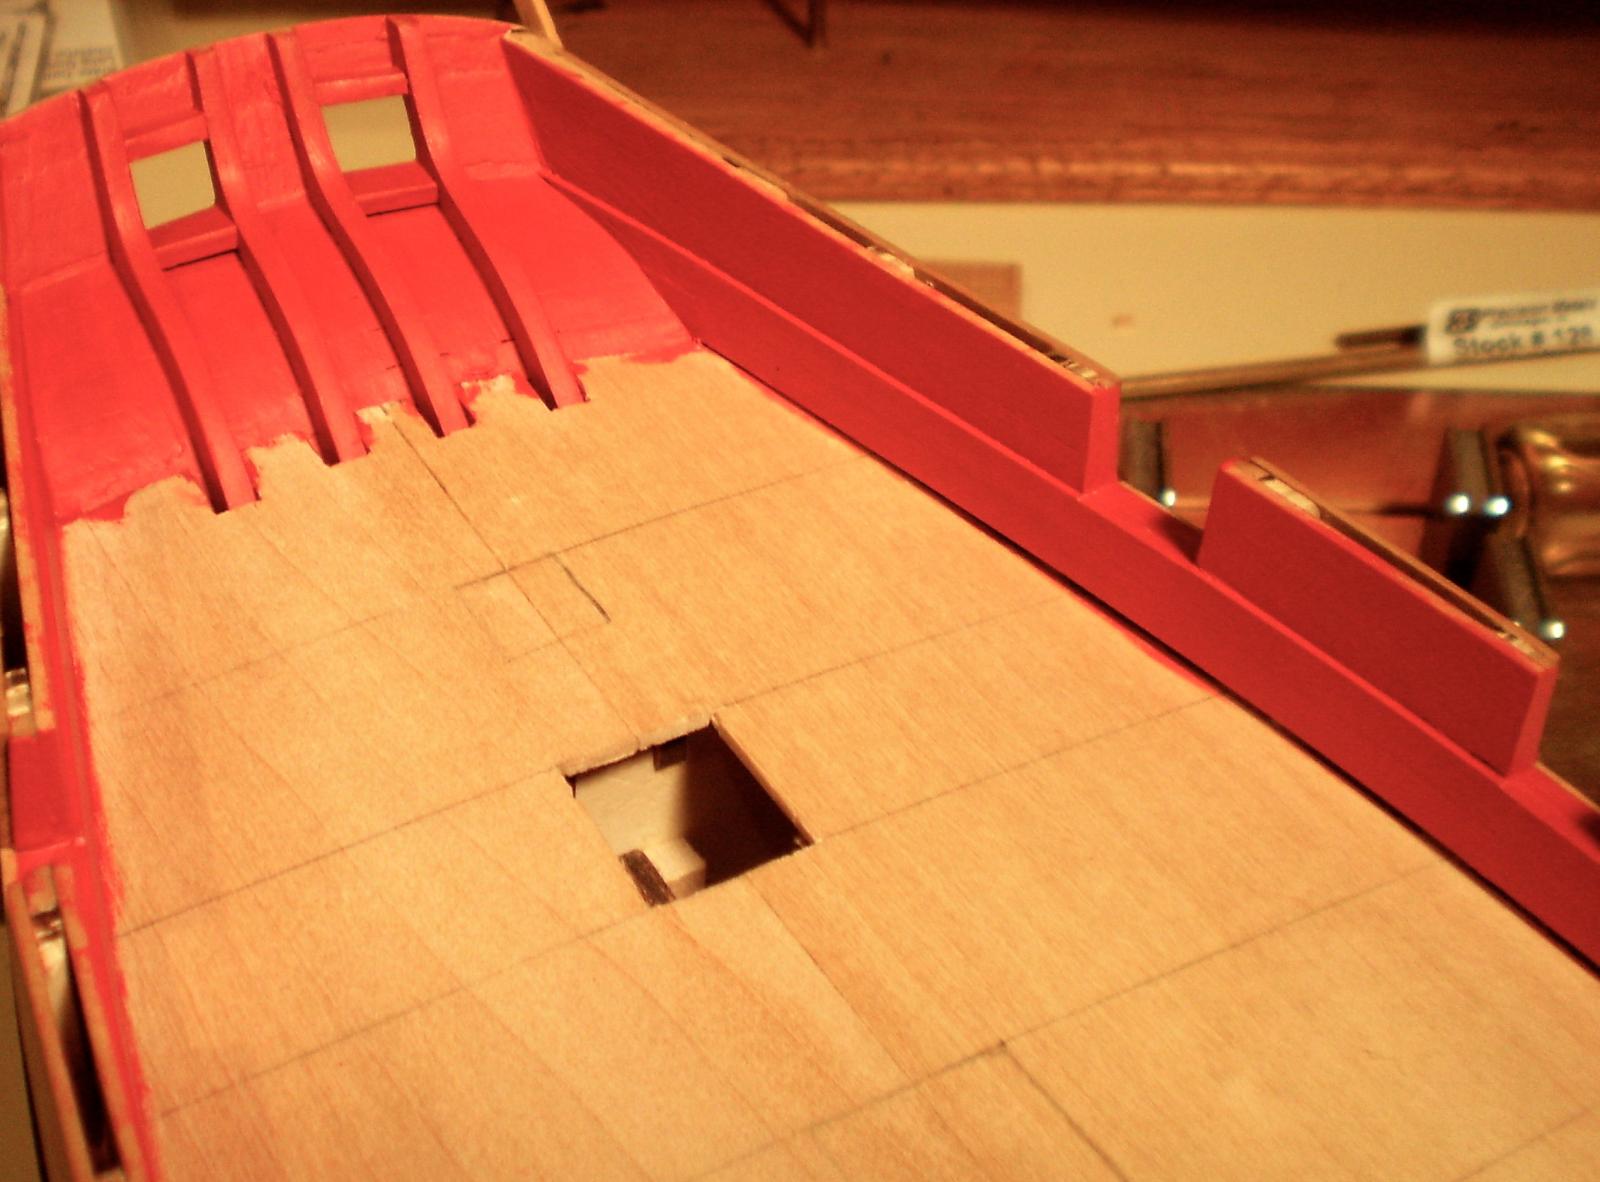
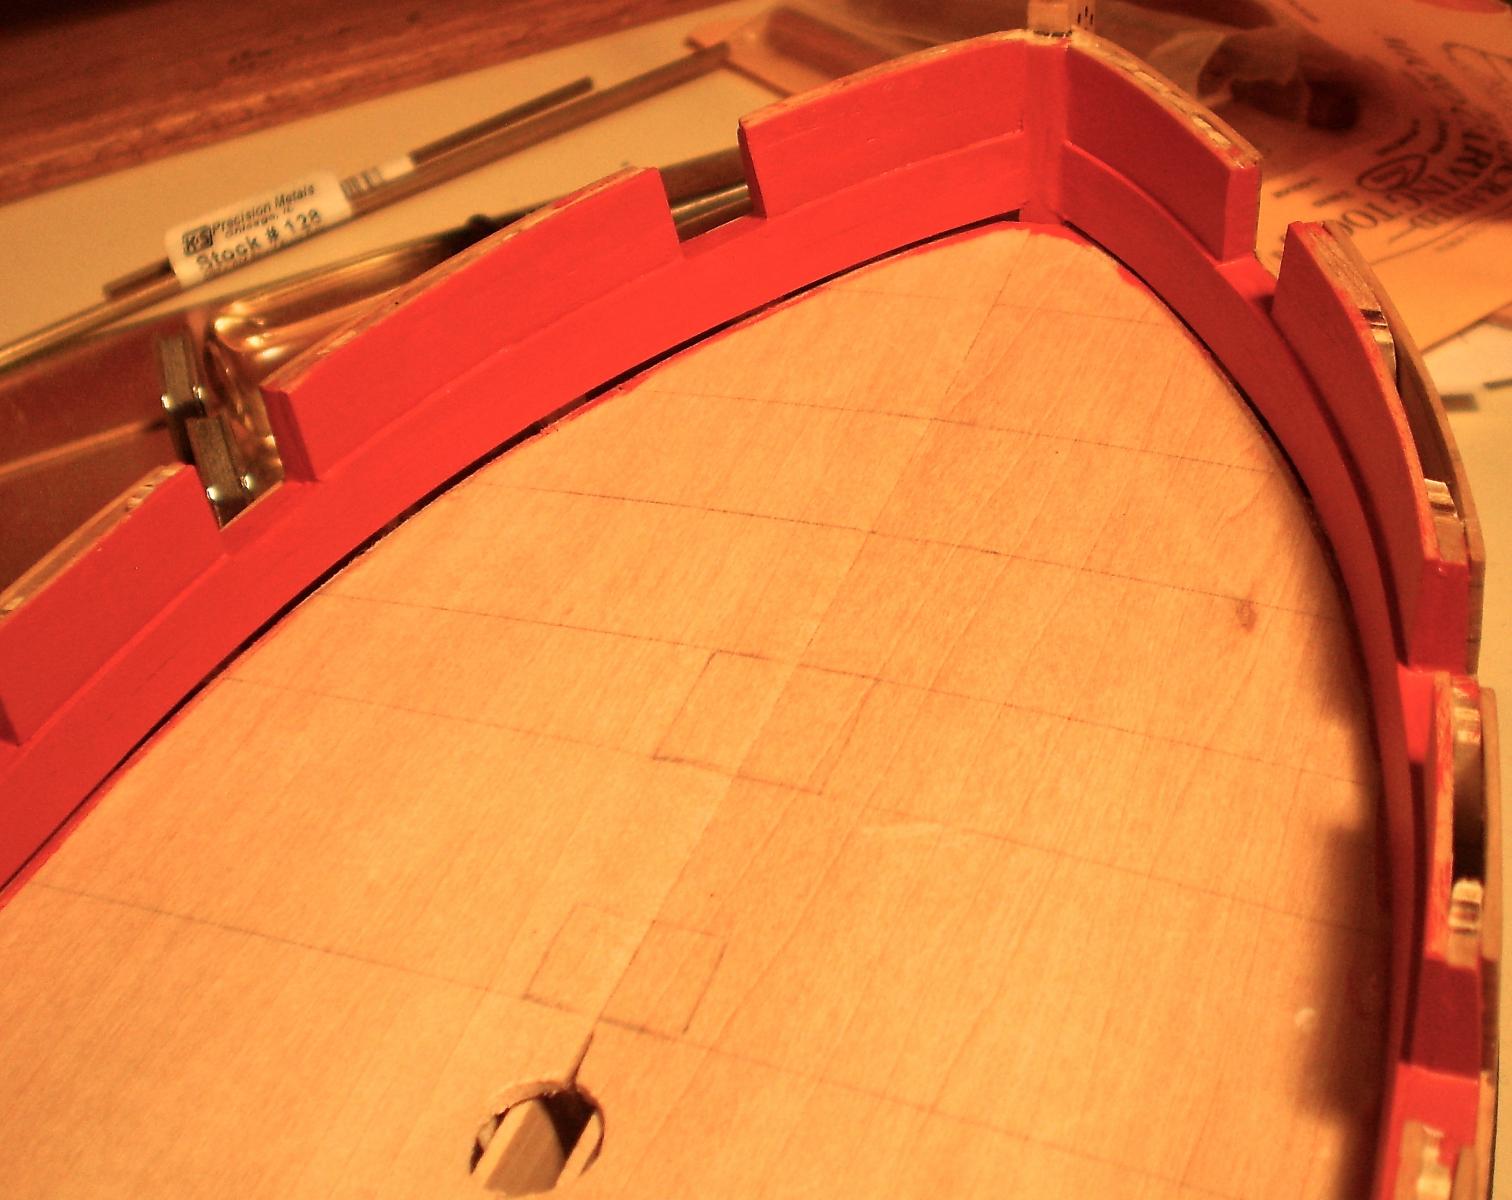
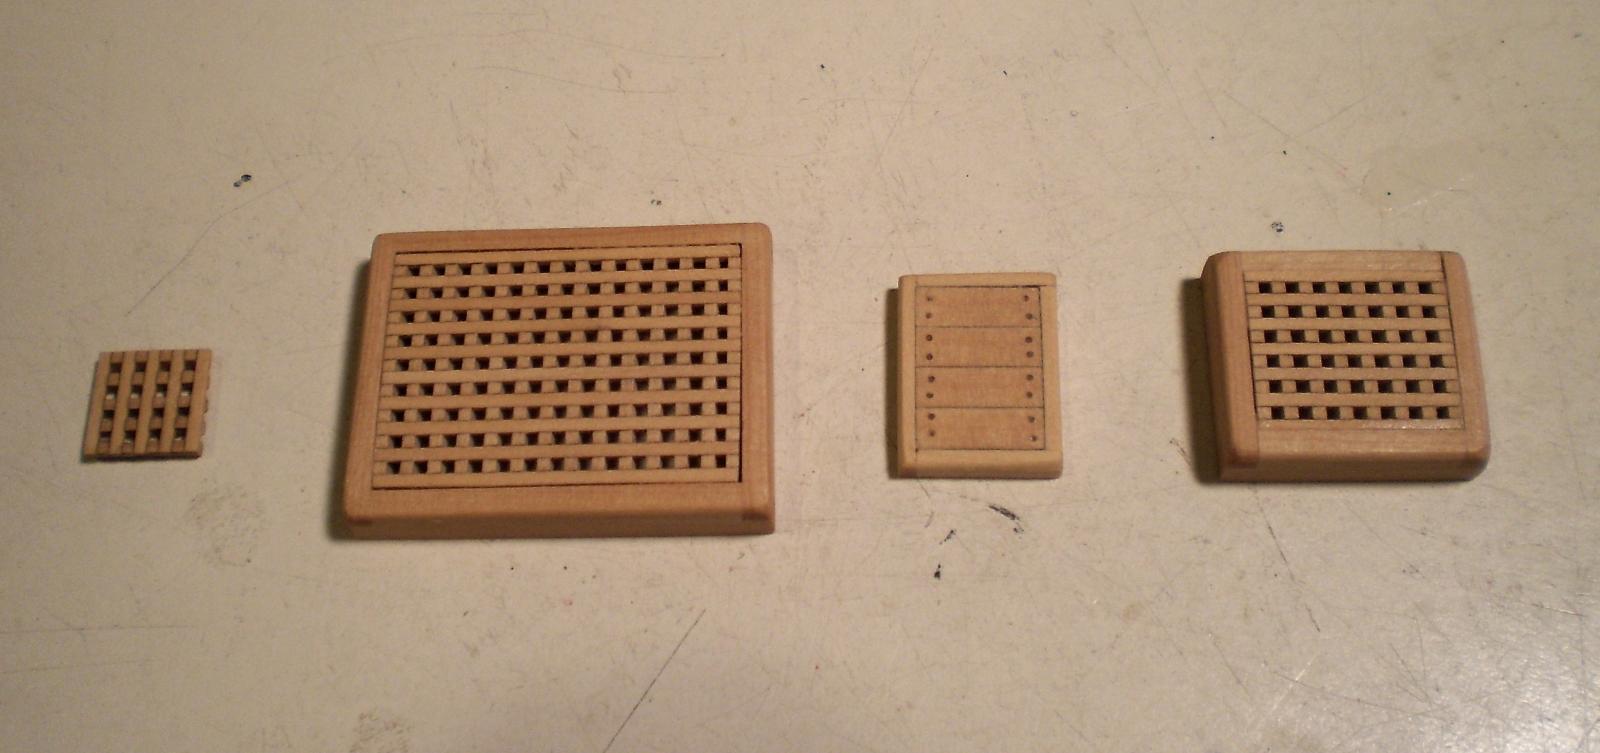
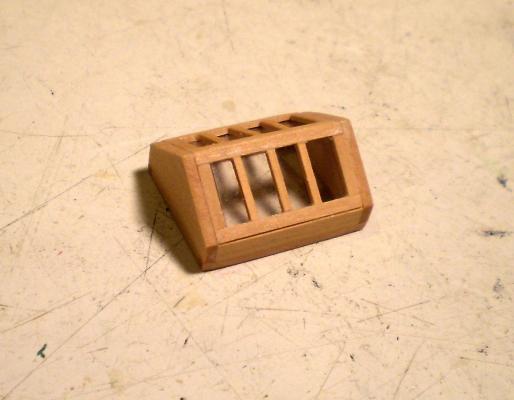
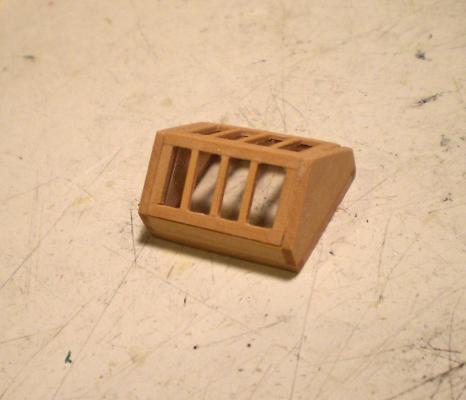
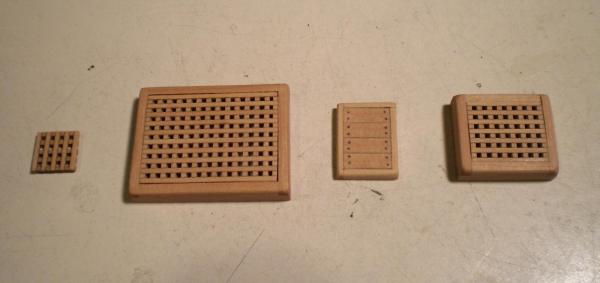
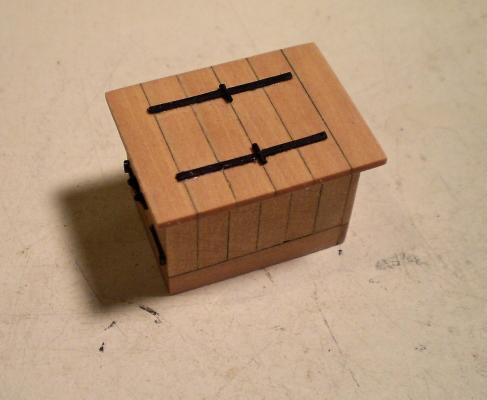
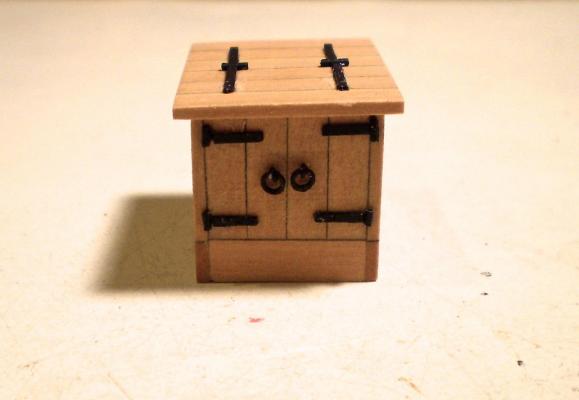
After my last update, I began work on the inboard planking, but realized that I needed more wood from Crown in order to complete it. While waiting for that order, I decided to start on some of the "fun stuff" -- the deck furniture that will be necessary to do the deck planking. To this point, I have made up the two hatches, the base for the galley stack, the small grating at the stern and the companionway. I still need to do the skylight. The gratings were done using Chuck's cambered grating material. The coamings were constructed and then shaped to match the deck camber and the curve of the gratings. The companionway was made of edge glued strip with some interior corner bracing. I used a pencil on one side of each plank. The hinges are from Chuck's little kit and the handles are made from brass rings and eyebolts. I have decided to leave all of the furniture items in natural wood with a coat of Wipe-on Poly. I prefer the look and believe that there will be sufficient contrast with the holly that I am using for the deck planking to provide some interest. Photos of the deck items are attached. Photos of the inboard planking won't be posted until it is completed. Bob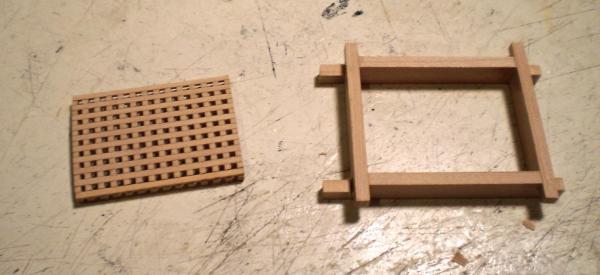

- 525 replies
-
- 30
-
-
- cheerful
- Syren Ship Model Company
- (and 1 more)
-
Cutter Cheerful 1806 by rafine - FINISHED
rafine replied to rafine's topic in - Build logs for subjects built 1801 - 1850
Thanks so much guys for all the "likes". Bob- 525 replies
-
- 4
-
-
- cheerful
- Syren Ship Model Company
- (and 1 more)