


rafine
-
Posts
2,932 -
Joined
-
Last visited
Content Type
Profiles
Forums
Gallery
Events
Posts posted by rafine
-
-
-
-
Beautifully done, as always, Rusty.
Bob
-
Apart from the yard being safer on the model, I'll bet that you really wanted to see what it would look like -- I always do. It looks great.
Bob
-
-
-
Thanks all for the nice comments and the likes. Always appreciated.
Augie, the interior planking will be left natural.
Bob
-
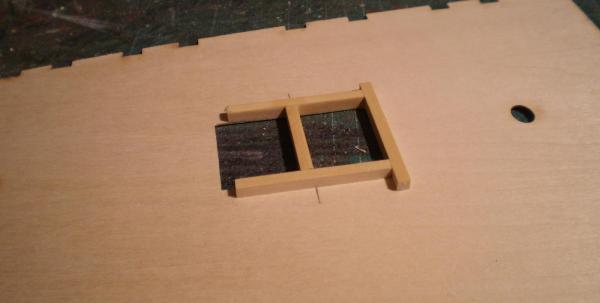
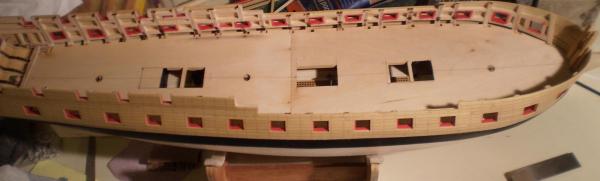
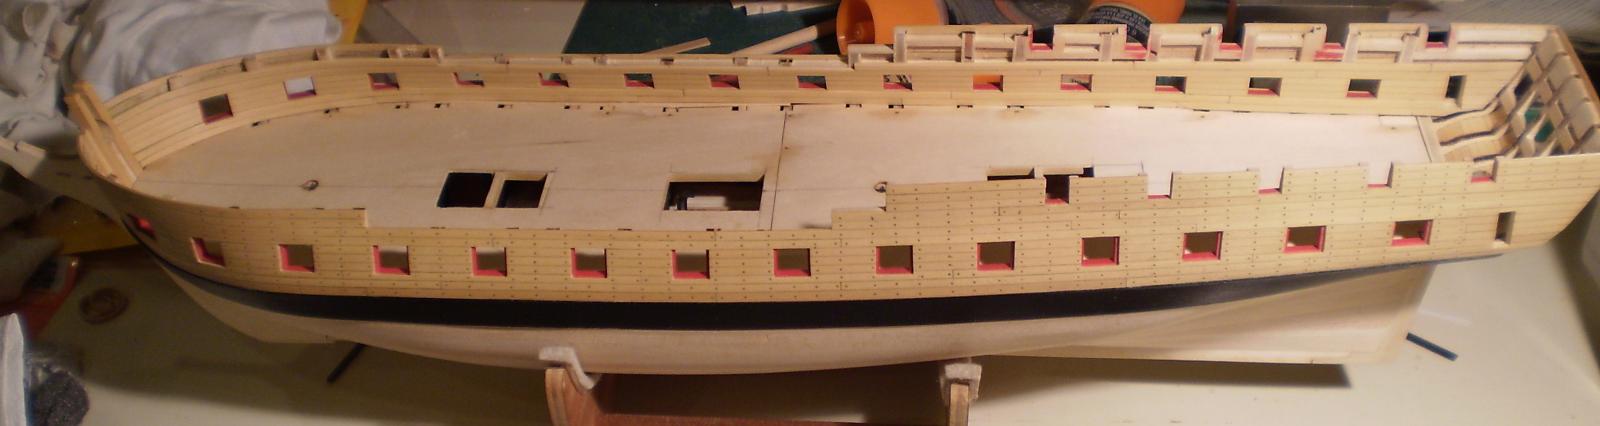
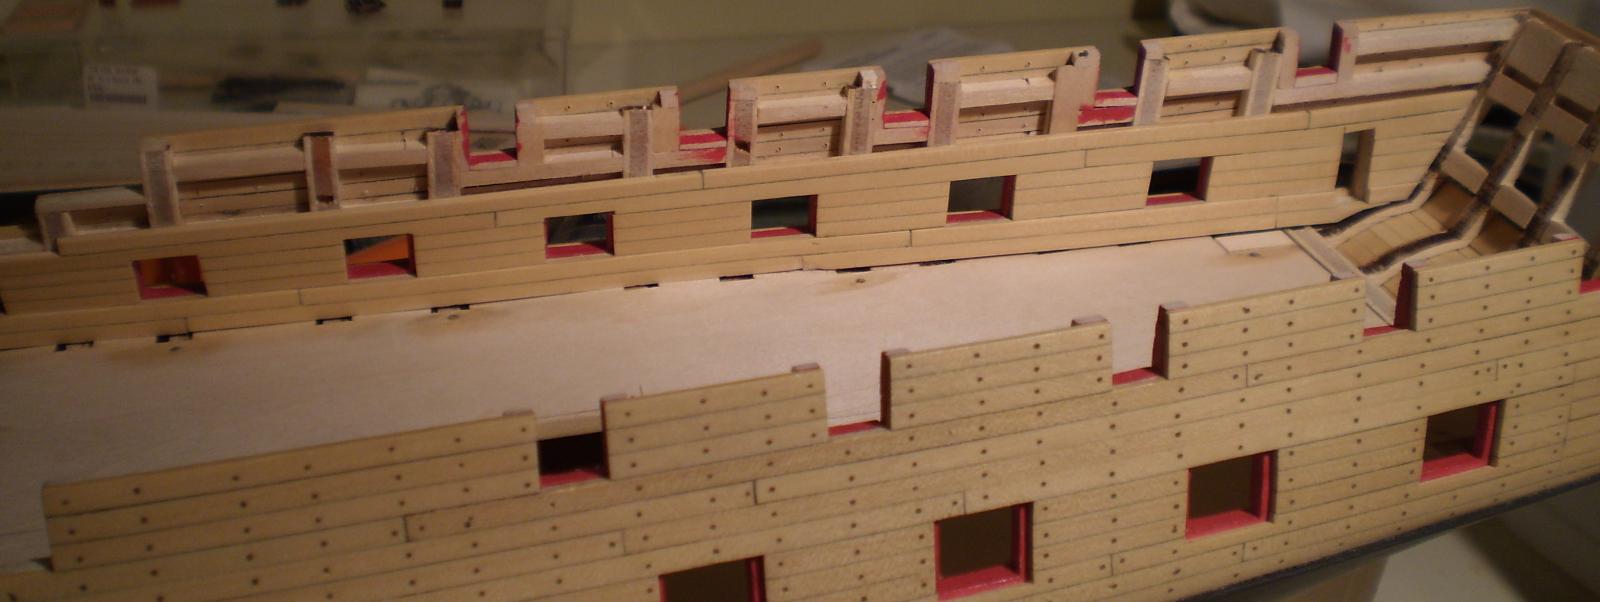
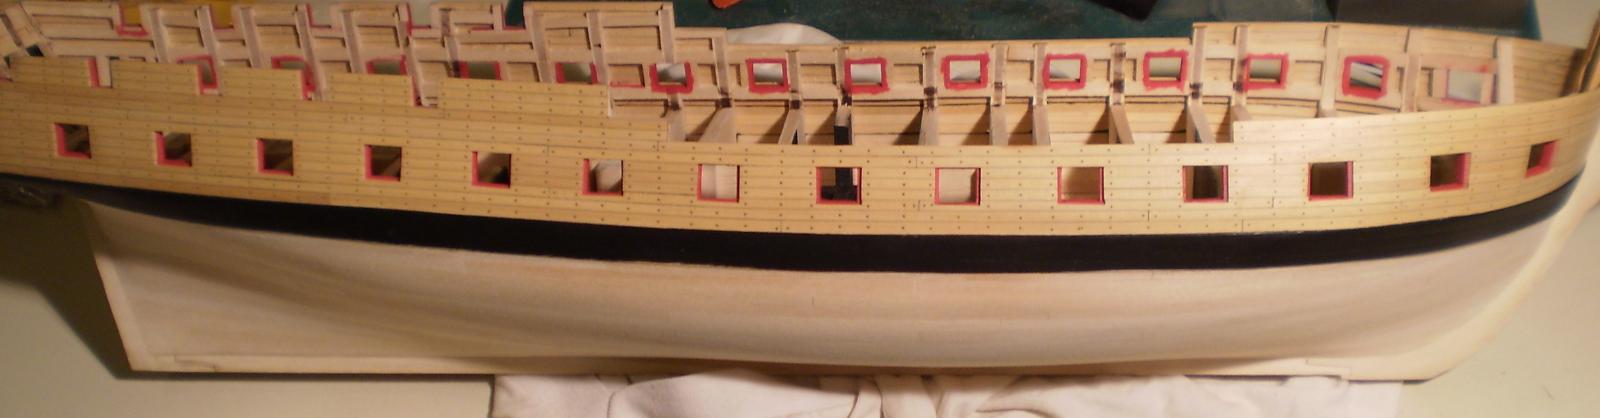
I have now completed one side of the inner bulwark planking. To begin with, I added some filler pieces to the edge of the false deck to cover up the sizing errors. I used material from the laser cut sheet from which the deck had come. After that, I cut, and bent as necessary, boxwood planks for the spirketting below the gun ports and installed them. Following that, I made up three plank units of boxwood to fit between the gun ports for the quickwork and installed them. Lastly, I did the boxwood planks for the waist, forecastle and quarterdeck clamps. Planking of the forecastle and quarterdeck bulwarks will be left until the framing for those decks is installed later.
All of the planking has caulking simulated with pencil on one edge and one end of each plank. I did not do any treenailing since I expect to plank this side of the upper decks and such work will be totally invisible. The caulking was done out of force of habit, although it too will not be seen. I finished the work with a coat of Wipe-on Poly.
I'm now starting on the other side, which will be at least partly visible after the upper deck framing and planking.
Bob


- sport29652, BETAQDAVE, Gahm and 19 others
-
 22
22
-
-
Terry, do yourself a favor and wait for corrections from ME. See my log if you want to be a glutton for punishment and go forward now.
Bob
-
-
That's a whole lot better than "so far so good", Rusty. It looks great.
Bob
-
Chuck, I did the head rails on this build by laminating pieces of strip wood that were bent to shape and the edges sanded to the molding shape before gluing together and cutting to final length. Most builders seem to cut.the rails from sheet stock and then carve or scrape the moldings in.
Bob
-
I don't really remember, but looking at the model, that appears to be what I did. It wouldn't be difficult to make the frames from 1/32" x 1/32" strip wood in any event.
Bob
-
Thanks Wes. I have a lot in mind. I'm not yet sure which will actually happen.
I used #75 on this one, Ken. Sorry to say, but I broke a few as well.
Bob
-
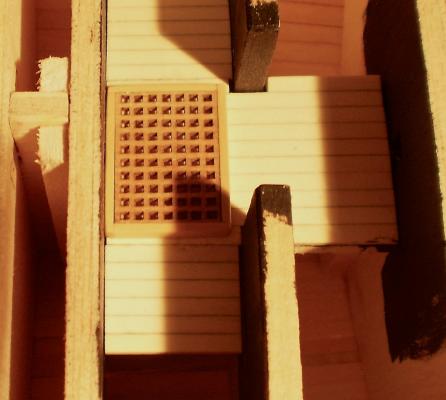
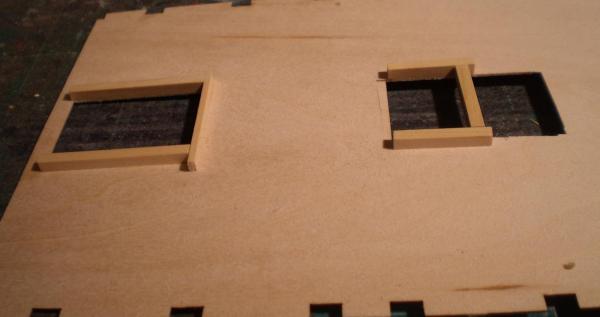
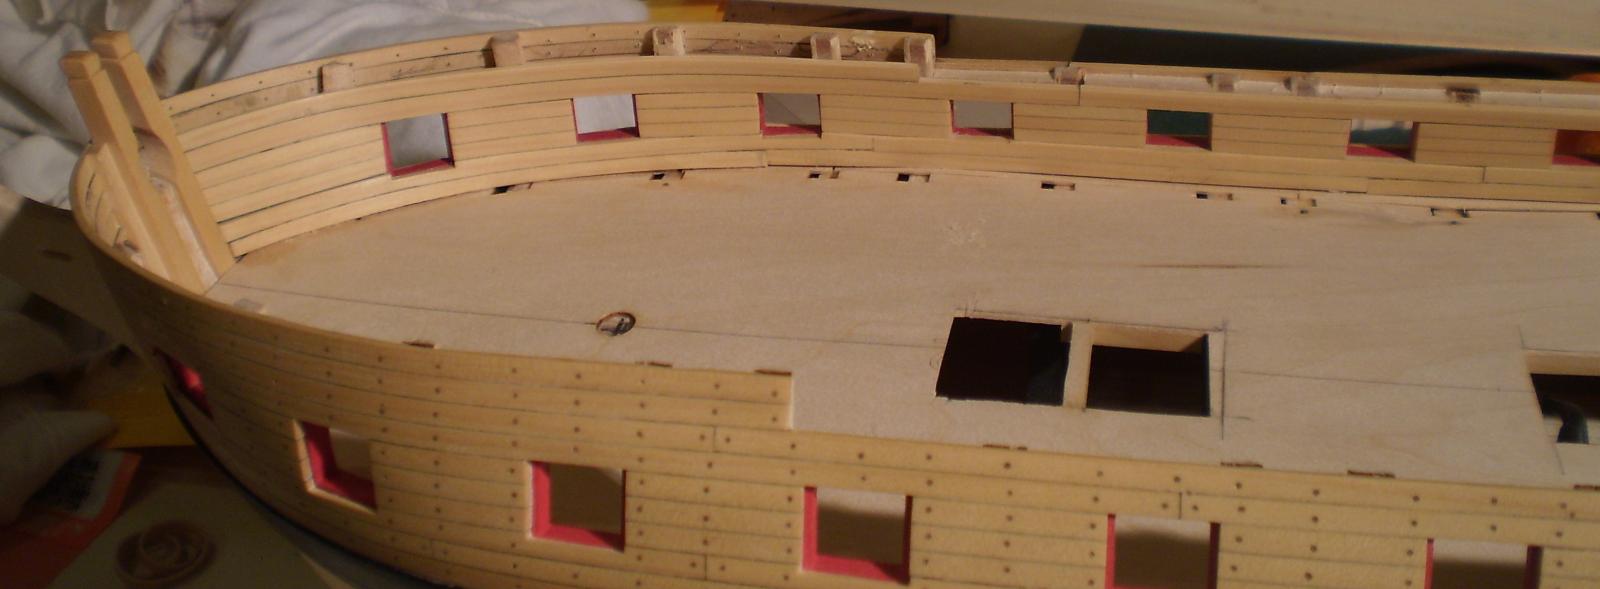
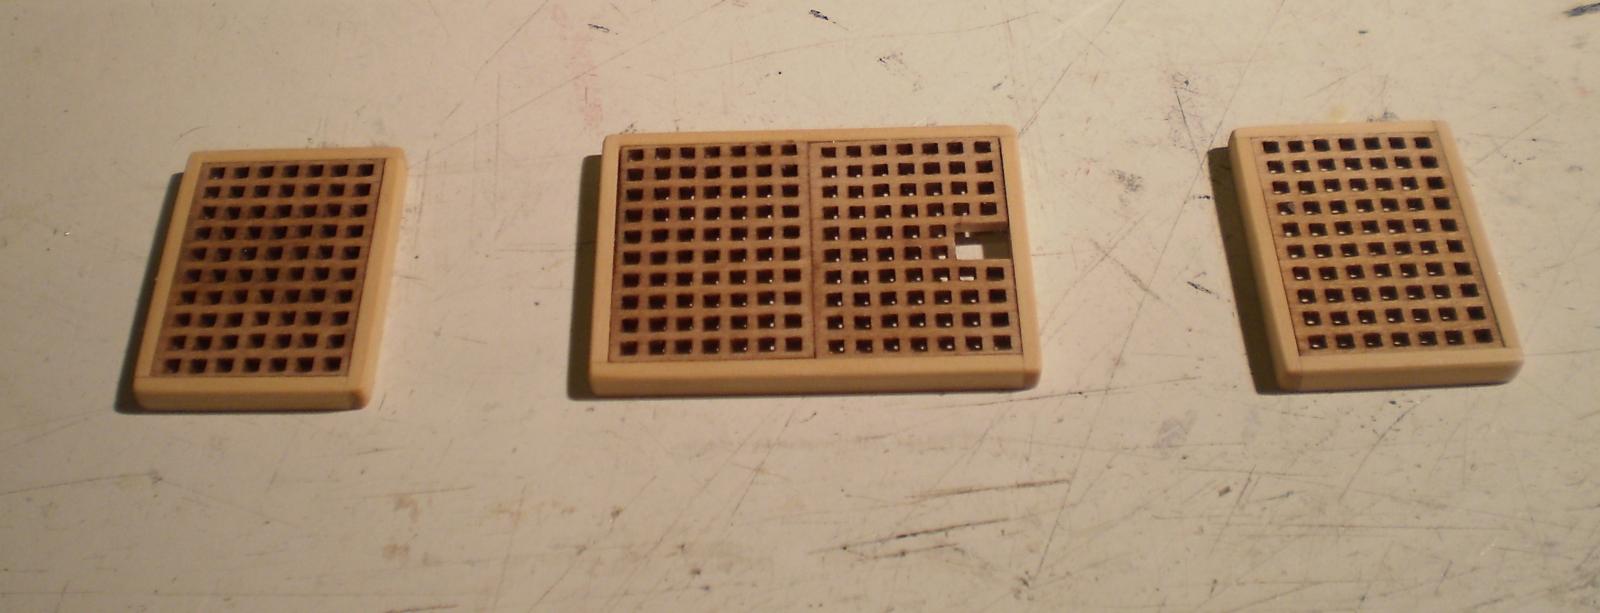
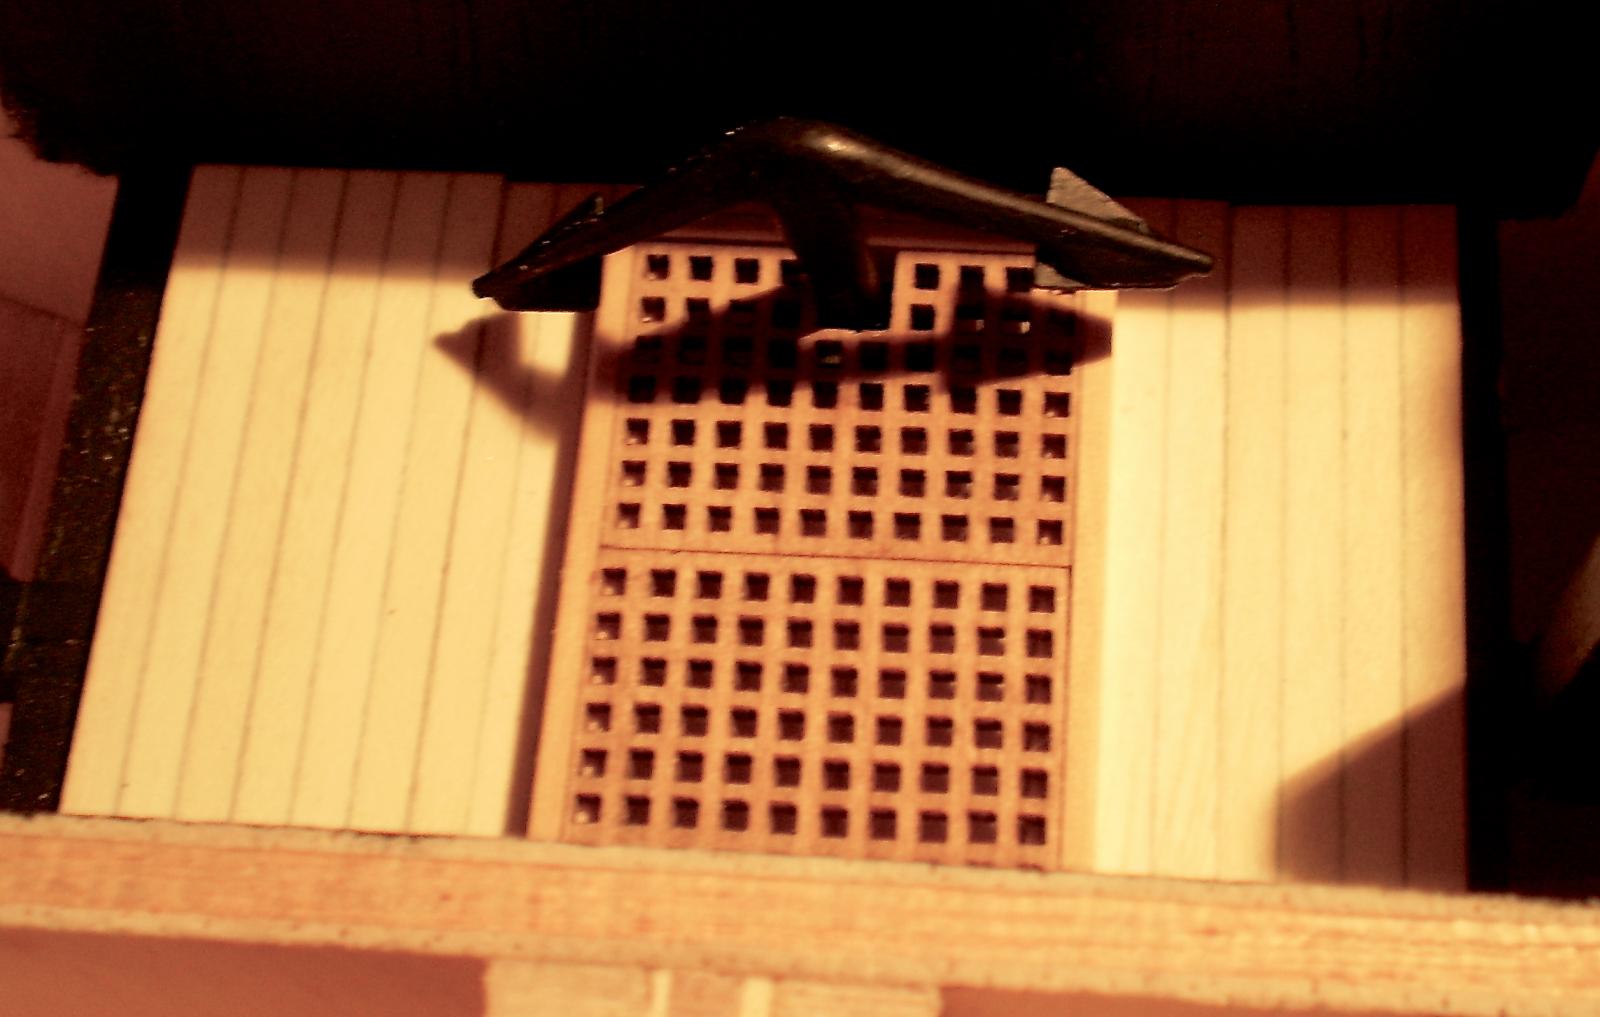
Time for a small diversion from planking. I did the false deck and the cut-out areas under the gun deck hatches. Actually, I had to do a little planking because I found that the amount of planking that I had previously done under the hatches was insufficient.
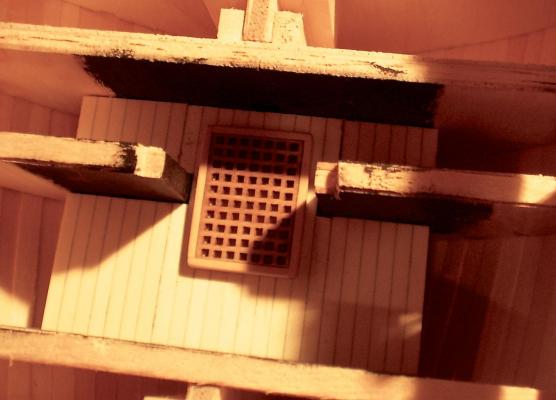
There will be three open hatches on the gun deck. Two will be ladder ways. The third displays the upper portion of a stored anchor. I made the lower deck hatches using the laser cut gratings from the kit with coamings made from boxwood. The gratings were stained Golden Oak and the whole assemblies were finished with Wipe-on Poly. The ladders will be added when the gun deck is fitted out. The anchor is a casting that I found in my parts collection.
The false deck, in keeping with everything else, didn't fit quite right. There was also a problem because the measurements for the hatch locations on the plans didn't line up properly with the lower deck cut-outs. Neither of these was any real trouble, however, and I was able to get things lined up and glued the deck down. Any problem with the deck sizing should be covered up by the deck planking. Before gluing it down, I added some boxwood strip under the false deck to simulate the gun deck beams and carlings around the hatch openings.
I'm sure that most of the work on the lower deck areas will be virtually invisible later, but I'm glad that I did it. Now, I will get started on the inner bulwark planking.
Bob


-
-
-
Lovely work, Antony.
Bob
-
Some years ago, when I was doing my model railroad, I looked at these kits, but even in their unextended version they were too large for my available space. I was always sorry that I couldn't do one and will follow your build with interest.
Bob
-
-
Thanks Alistair. I use yellow carpenters glue (Elmers) for my planking and it doesn't seem to stain and any residue can be sanded off.
When I've used CA for spot gluing on planking, it will soak the wood and leave some staining . Usually, it can be sanded to be almost unnoticeable, but in any case, I've found that a coat of Wipe-on Poly evens out the appearance and solves any problem. I've never lacquered the plank ends and have no idea what that would do.
Bob
-
Thanks very much, guys. I appreciate your continuing interest.
Augie, the planking is mostly 3/16" wide (a lot of it tapered) with some 1/8'.
Syren was the last coppered hull that I've done, Robert.
Smooth but sort of ugly, Sjors. Copper will look better.
I can't wait either Wes. It's time to be patient.
Grant, I have no doubt that the kit will continue to have problems, but I'm near the point where I was going to make changes and do a lot of scratch building anyway.
Bob
-
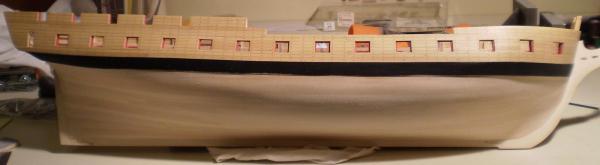
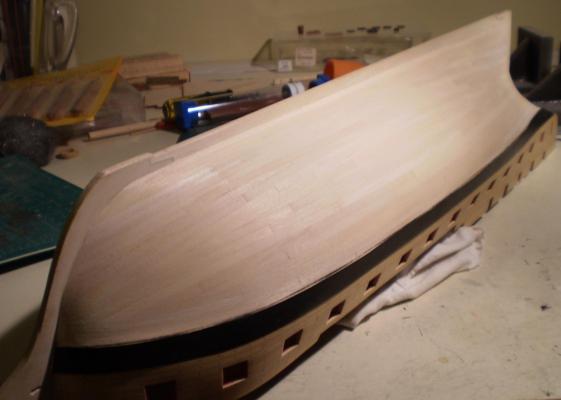
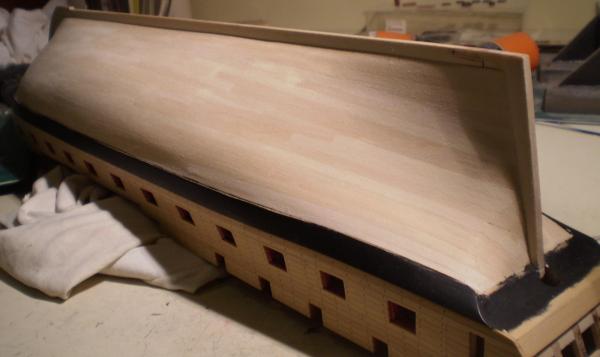
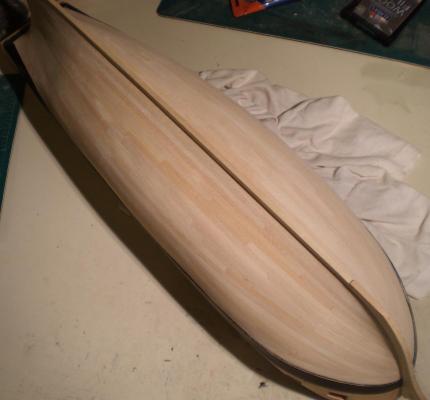
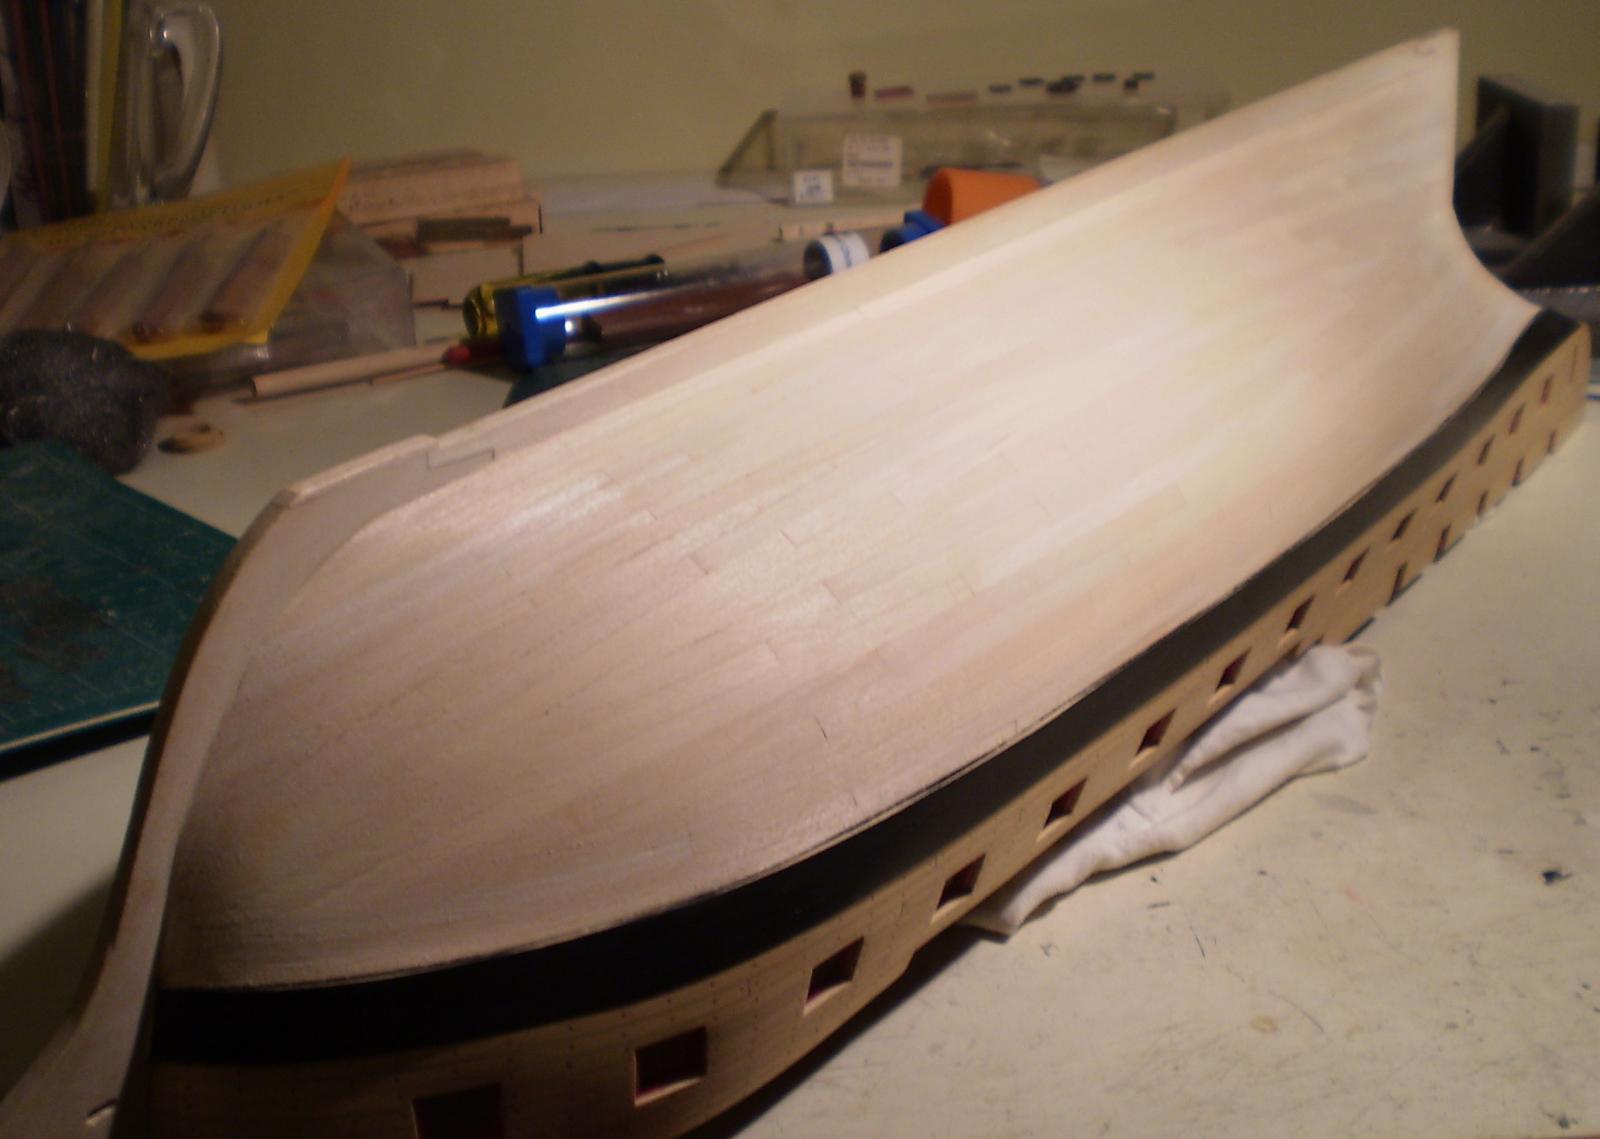
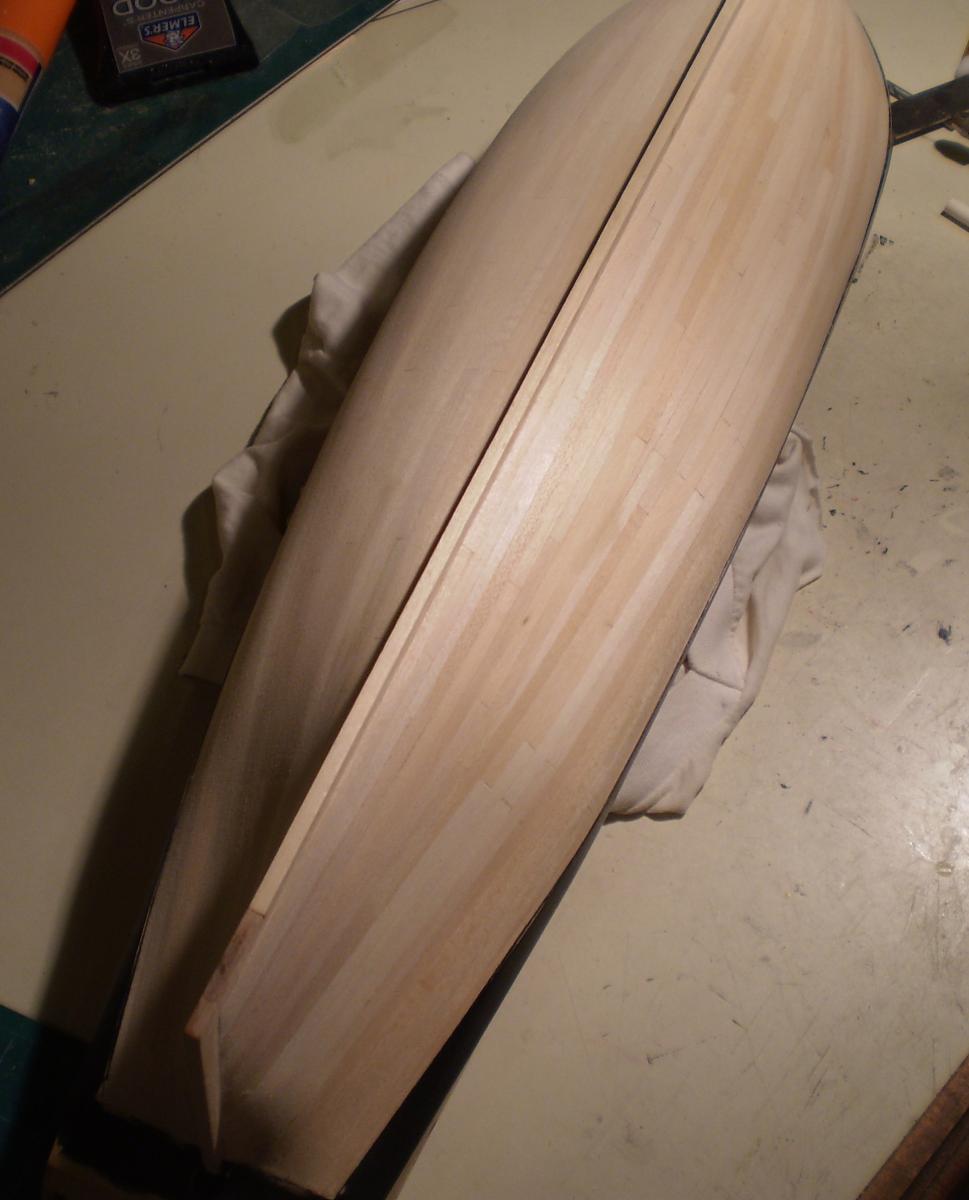
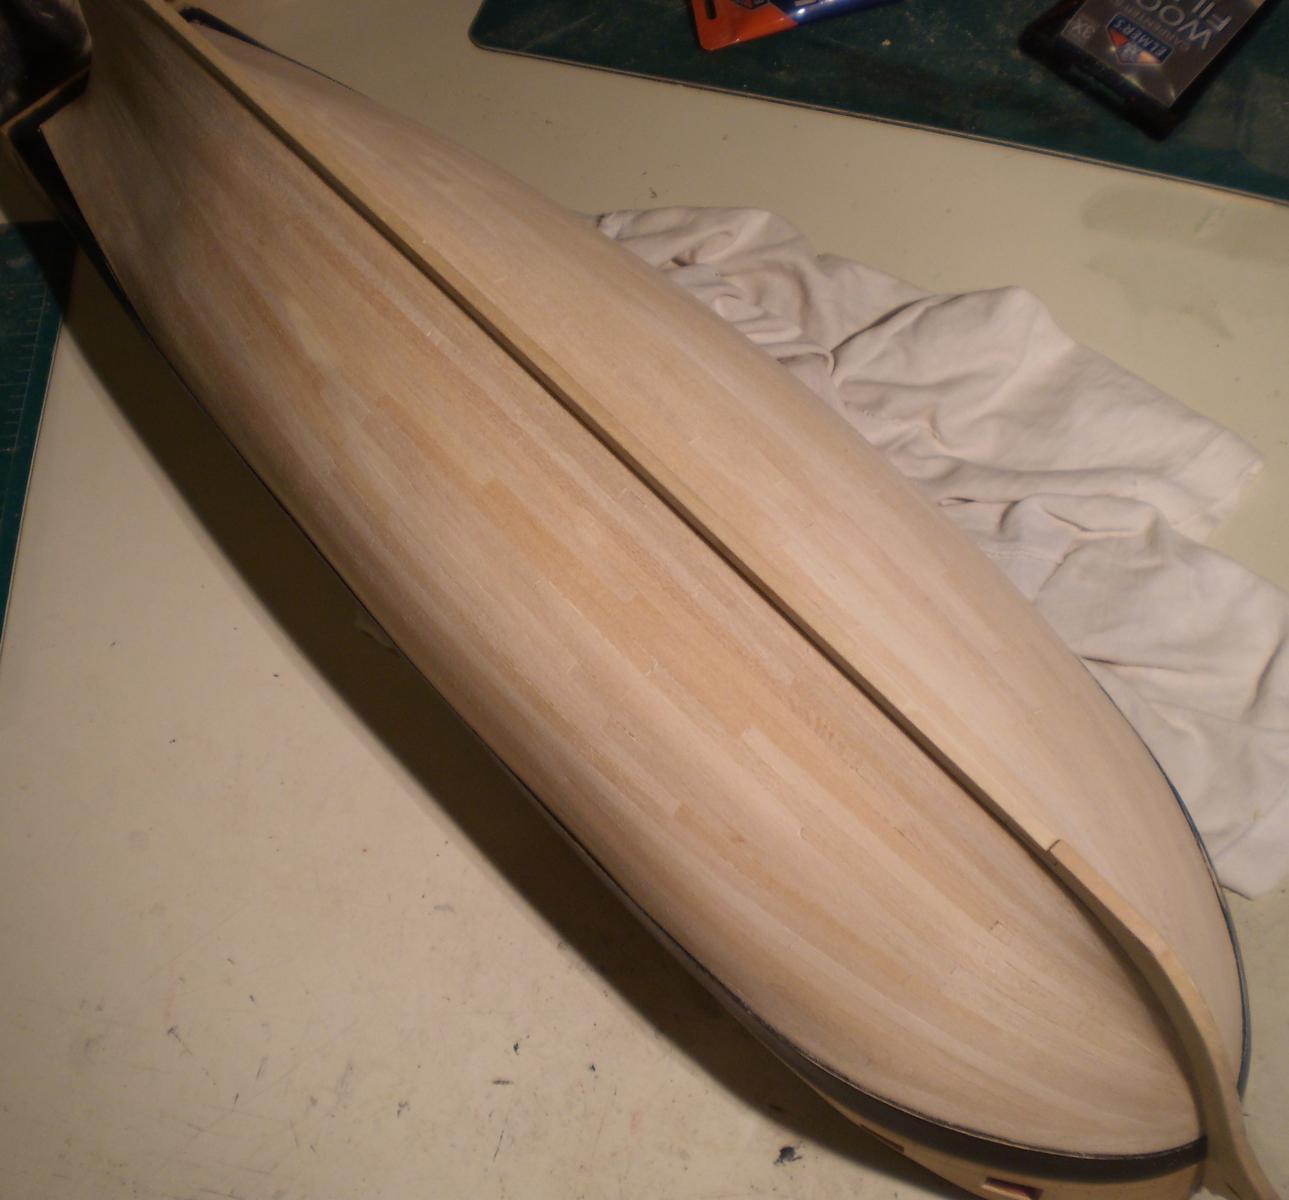
Lower hull planking is now completed. If anything, the planking pattern on the starboard side is even stranger than that on the port. Again, though, with the objective being merely to get it on fair and smooth, I'm quite satisfied with the end result. It should provide a suitable surface for the painting and coppering to follow.
There are a number of options as to how to proceed from here. Coppering would be one choice, but I'm going to leave that until interior planking and deck planking have been done to minimize risks from handling the hull. My current plan is to do the false deck and the hatches for the lower deck cutouts first, then move on to the gun deck bulwark planking and then to the deck planking for the gun deck. Even though the lower deck details will likely be invisible, or nearly so, it should be fun to do something other than plank for a while.
With the completion of the hull planking, I think that the challenges posed by the kit's problems have been largely overcome. I expect to be able to move forward now in the fashion that I originally expected. We'll see.
Bob


- fatih79, Ryland Craze, Sjors and 12 others
-
15


Frigate Essex by Rafine - FINISHED - Model Shipways - Kitbashed
in - Kit build logs for subjects built from 1751 - 1800
Posted · Edited by rafine
Thanks, Hamilton. I really had been hoping for others to do the build at the same time so that we could help push each other along. Having said that, Terry I think you made the right choice. Good luck with the Emma.
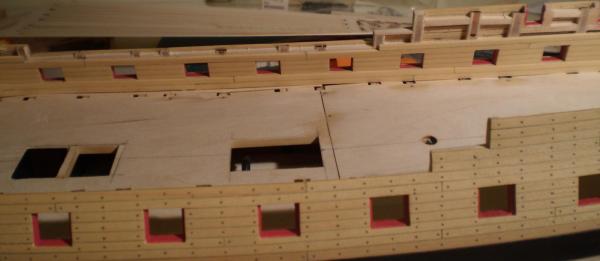
The bulwark planking on the port side is now done. Everything was done the same as on the other side. As usual, having done it once made the second effort go a little quicker and easier, though I have to admit that knowing that more of it would remain visible probably made me a bit more careful this time.
My plan is to now do the stern windows and finish the outer stern planking, and then do the inner stern planking and cabinetry. That will be followed by the gun deck planking.
Bob