HOLIDAY DONATION DRIVE - SUPPORT MSW - DO YOUR PART TO KEEP THIS GREAT FORUM GOING! (Only 20 donations so far - C'mon guys!)
×


Roger Pellett
-
Posts
4,519 -
Joined
-
Last visited
Content Type
Profiles
Forums
Gallery
Events
Everything posted by Roger Pellett
-
Joe, I am usually not a fan of the all natural wood approach to models of ships and boats from a relatively modern period. Unlike the 17th & 18th Century Dockyard Models, for these workboats, I think that a little paint looks better. This model is an exception! The beautiful Boxwood (?) hull and workmanship is just gorgeous. It’s a shame that we don’t know who built it. If you know a friendly ENT doctor it might be worthwhile checking it out with an Endoscope. Roger
-
Joe, I have seen pictures of the centerboard leads on Chesapeake Bay craft led to the cabin top then attached to a multipart block and tackle with the fall belayed to a cleat on the cabin’s aft end. This would allow the helmsman to raise and lower the board with the rest of the crew forward handling the dredge gear. Although this is not a Bay Craft, Florida has plenty of shallow waters too. It would seem that you are faced with the dilemma that occurs in restoring a model. Do you correct the original builders mistakes. Roger
-
Phil, I suggest that you build the model as two half hulls to be joined later. See: Ros Ambrisio’s Ampa Brazilian Custom Cruiser Model My Benjamin Noble Freighter Model Valeriy’s Varyag Cruiser model There are advantages to this approach: First, the flat joint between the two hulls gives you a flat datum to work from. Many model building operations benefit from the half hull segments laying flat on the table. These include squaring bulkheads. Using body plan templates to check hull contours, locating cutting out and affixing features to the hull- particularly adding the armor plating. Actually, I would add a centerline assembly incorporating the ram and propeller aperture. Since these are distinctive features that can be easily distorted by sanding, I would make them from brass. Roger
-
No, Bob I’ve had a Jim Saw for many years. I kept the Preac since “it might come in handy” and did like it for some things. My current project, The Lake Freighter Benjamin Noble requires extensive metal work not the least being 8 steam deck winches. To produce these required a major upgrade of my Sherline equipment, so I just spent $$ with them. This included a rotary table. I have now decided to add an xy Base to add to my milling column to take advantage of the larger and heavier built table. Before my wife says “Enough already” I decided to get rid of some little used gear. Roger
-
Shawn, OK I’ll send you a PM Roger
-
Stuglo, Will send you a PM later today. Roger
-
Valeriy, Wonderful work! How did you produce the gears that turn the cowl vents? Can you explain? Roger
-
Dick, Very nice work and a fascinating example of experimental archeology. Having lived with this project for a while, can you give us any insight on why this ship type developed? Did any advantages become apparent? Roger
- 186 replies
-
- 1
-

-
- keelless
- reverse clinker
- (and 4 more)
-
Making sheaves for blocks and bitt pins
Roger Pellett replied to Kevin Kenny's topic in Masting, rigging and sails
As I have posted before, I have been using shellac saturated paper to simulate steel plating on the model that I am currently building. I was inspired to try this idea by Wefalk’s use of paper and paper derived materials for his beautiful small scale models. I have been surprised at how tough paper becomes when impregnated. In my case, I have enjoyed the convenience of shellac in one of the much maligned rattle cans as a quick pass with the spray can provides a sufficient coating. The result cuts cleanly with a paper cutter and scissors. A brass tubing hole saw or punch should work equally well. Roger -
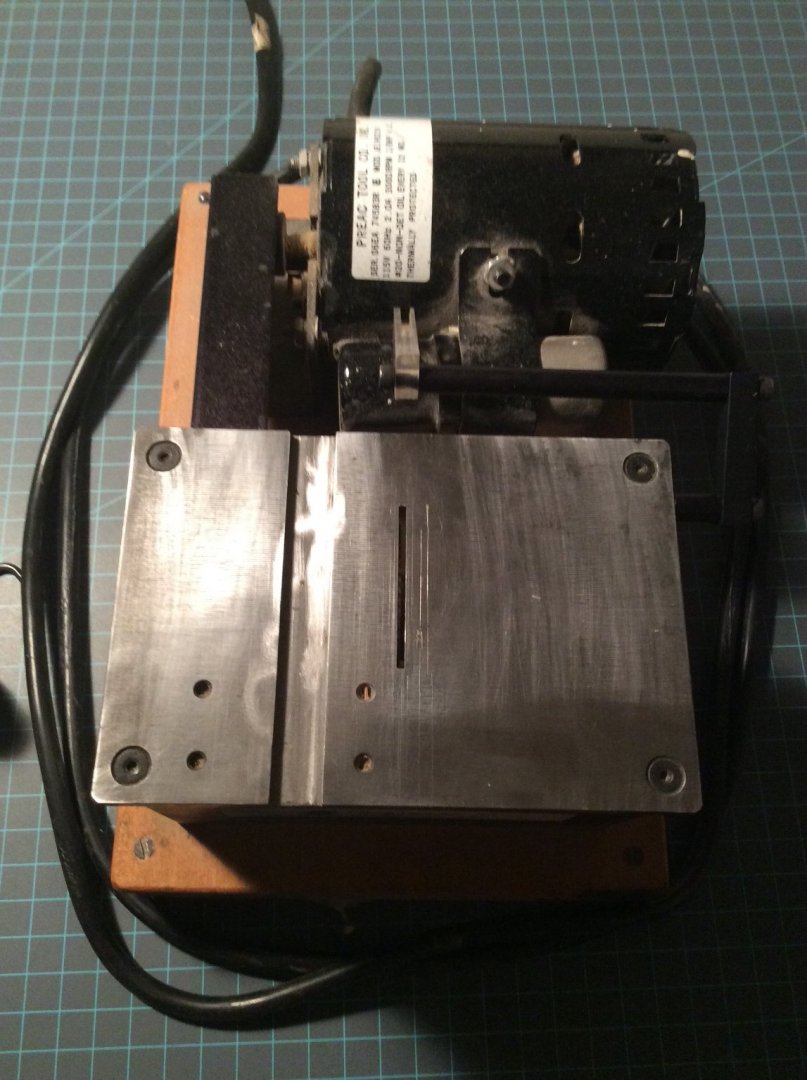
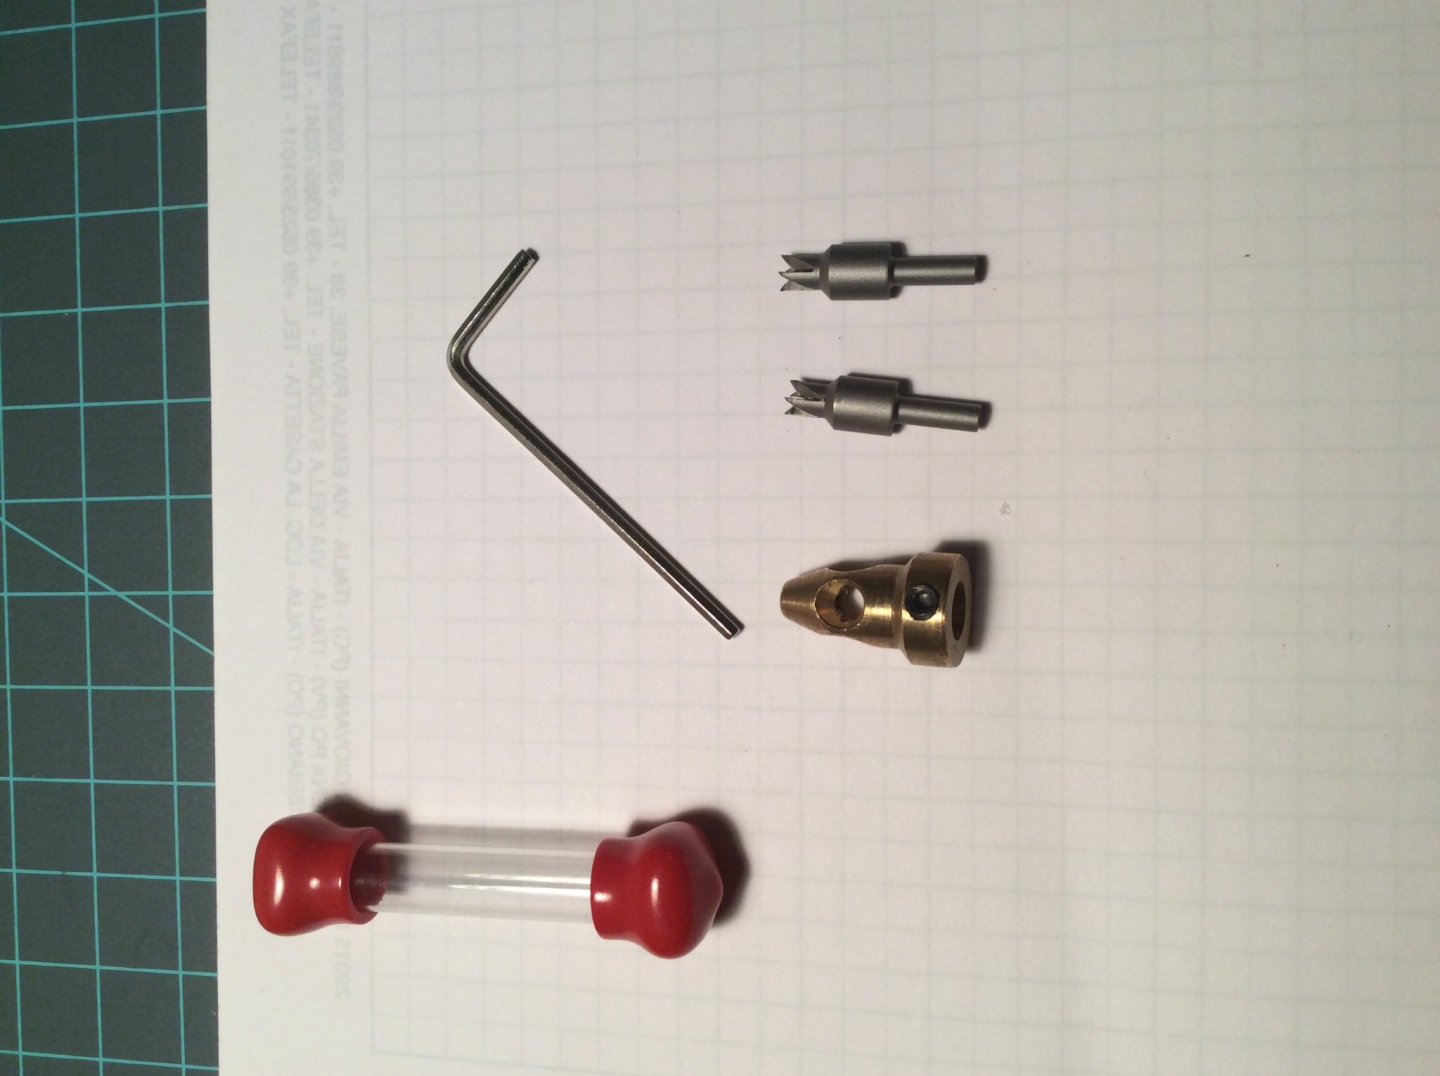
Preac Saw: Gently used, not abused. This Saw was state of the art prior to the Jim Byrnes Saw. It is still used by a number of modelers on the forum to produce spectacular models. It would be a great choice for a modeler with limited space. Upgrade kits (not included here) are available to repower the saw with a larger motor. Table size: 6in X 4in Blade size 2in- 1 blade is included Motor Rating: 1/8 hp (93 watts) @ 3000RPM The saw comes with an adaptor to allow use of any blade with a 1/2in arbor Also included is a fence, miter gage, and blade height adjustment jack PRICE: $150 US Plus shipping Van Da Lay Treenail Cutter: As shown with two sizes of cutters PRICE: $50 US Postpaid to US addresses

-
Wonderful work Rik! I have always wanted to own or make a small steam engine but as I do more machining of small brass ship model partsI have learned that my machine skills are nowhere near adequate for this kind of work. Roger
-
From reading NRJ articles over the years, attempting to determine colors from old black and white photos is difficult if not impossible. Apparently different photo emulsions result in different shades of black and grey. I don’t claim any expertise in this area- just what I have read. Roger
-
David, As my photography skills are strictly point and shoot, that possibility never occurred to me! Roger
-
I respectfully disagree with David. I like the paint job. I suggest that you leave it as is. Roger
-
By contrast for the US Navy the period from 1865 to the 1880’s was known as the Doldrums as the nation’s attentions turned inward and Naval construction all but halted. Incredibly ships that had fought in the Civil War were pulled out of the reserve fleet during International Crises well into the 1890’s. While historians generally consider this to be shameful, it seems to me that not trying to keep up with European developments, saved the US a lot of wasted money. When they finally decided that they needed a modern fleet, they had no trouble building one. Roger
-
I would build the model by hand using the same techniques being used by Steven (Louie da Fly) to build his Nef model. Carve a plug, plank it, remove from plug, and add frames. I would buy some decent hand tools and learn how to use them before CNC equipment. Roger
-
I am dimly aware that there is more than one version of the Model Shipways Flying Fish Kit (depending on the kit’s age). In the late 1970’s or early 1980’s Model Shipways completely redrew the kit’s drawings. If my memory is correct the work was done by Ben Langford. When these revised drawings were finished, an article was published in the Nautical Research Journal. It should still be available from the NRG office. This article should allow you to see the sources used and assumptions made; information rarely available to the kit builder. Roger
- 602 replies
-
- 1
-
-
- Flying Fish
- Model Shipways
- (and 2 more)
-
There is a well known drawing that you can find on the internet, of these Civil War era Picket Boats. You can find it on the (US) Navy History Website. I believe that came from Battles and Leaders of the Civil War. Unfortunately I know of no scholarship to determine its accuracy. So, is this an accurate drawing or something drawn years after the fact when memories were dim? The most striking difference between the drawing and model is that the drawing shows a boat with a square stern vs the kit model’s round stern. This leaves you with the problem faced by all kit builders: Did the kit designer know something, or is this a feature added to increase marketing appeal. Roger
-
Great job! I suspect that few people today realize the role that the Erie Canal played in the development of agriculture in the Midwest. The port of Buffalo received grain from all over the region via the Great Lakes and transferred it to barges to transit the Canal to NYC’s Harbor. Your floating elevator was the last link in this important economic system. Roger
-
Frank J H Gardiner Painting
Roger Pellett replied to michaelpsutton2's topic in Nautical/Naval History
Curiosity killed the cat! Removing it from the frame could damage it. Hang it on your wall and enjoy it! Whatever it’s origin it’s a nice painting (or print). Roger -
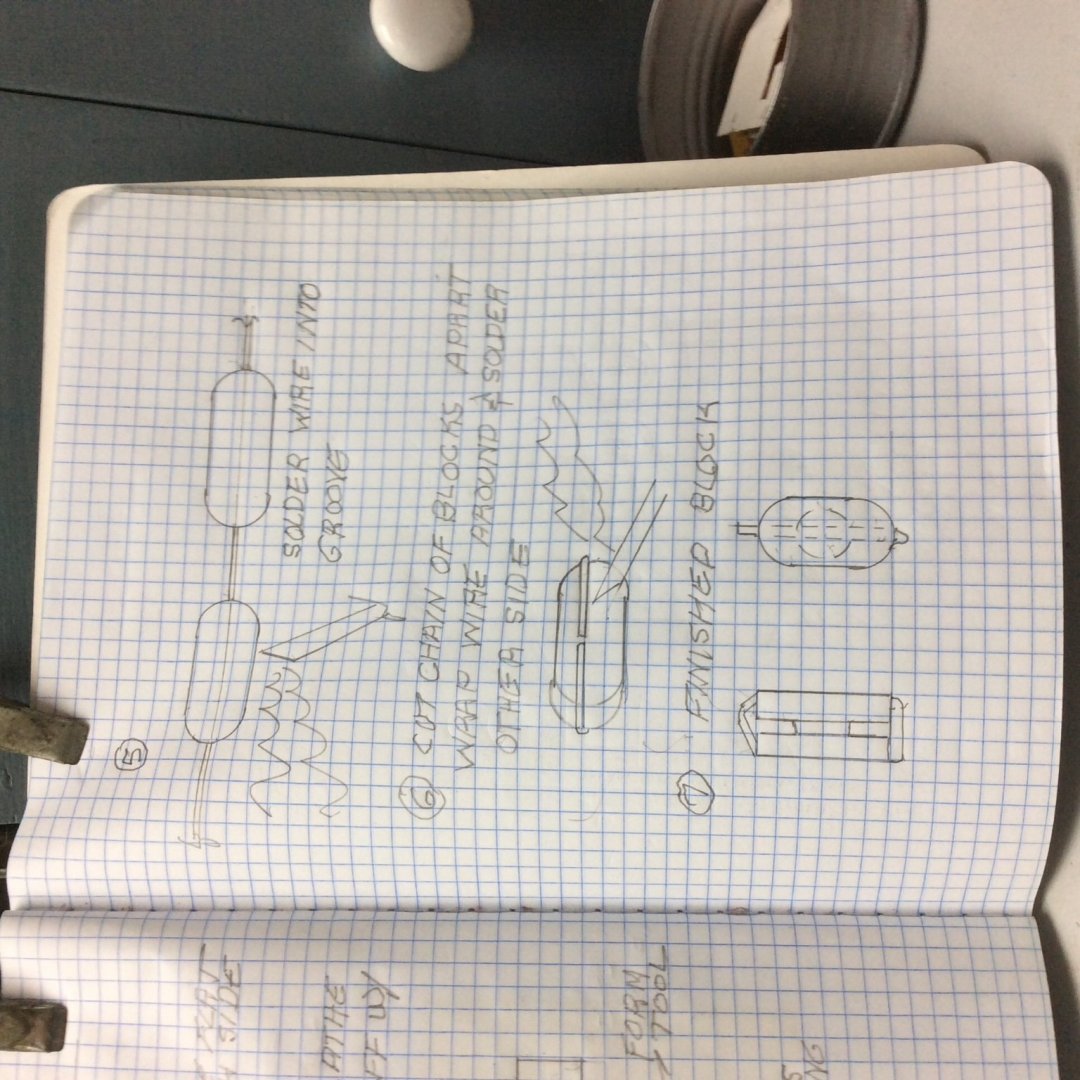
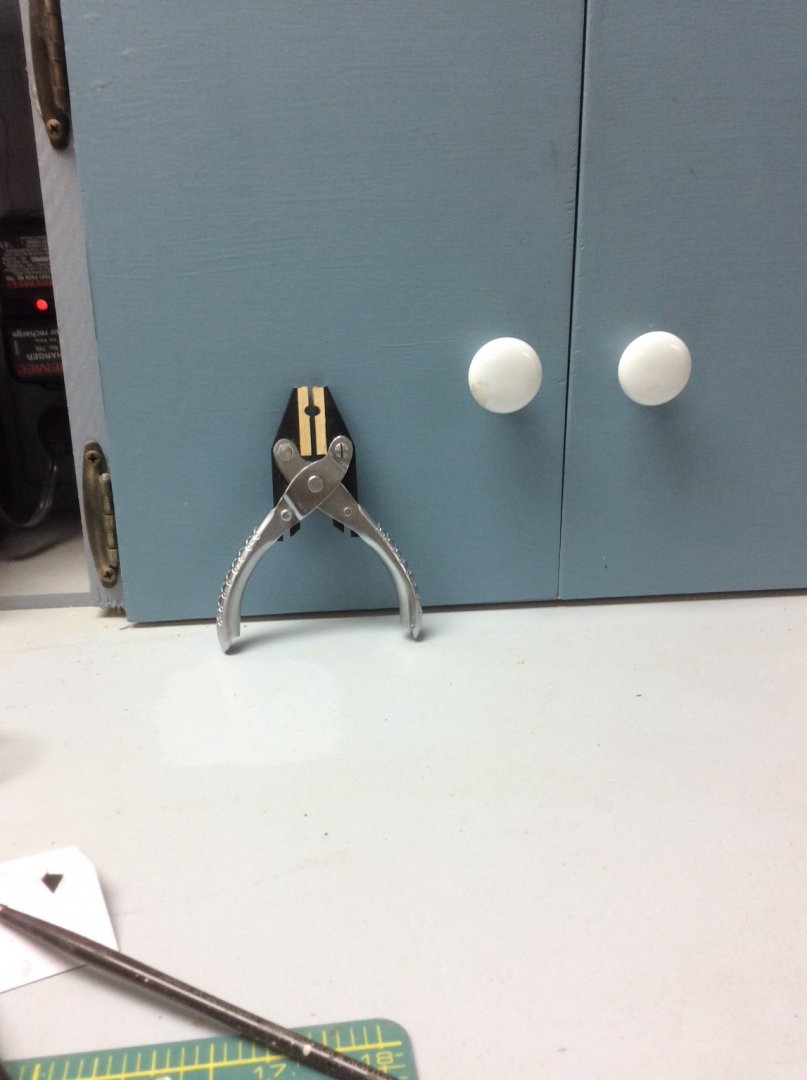
Bob, Clay shaping pliers- Something like my super dooper deadeye strop crimper.
-
I must admit that I tried this years ago to make double or triple blocks for davit blocks on a small scale model. I was able to produce the machined blocks but when it came to soldering the wire, I wound up with an unsightly blob. I have been building a resistance soldering unit. By first tinning the wire and then resistance soldering I think that I can eliminate this problem I’m looking forward to seeing how you adapt this technique. Roger
-
Second Page