Chuck
-
Posts
9,024 -
Joined
-
Last visited
Content Type
Profiles
Forums
Gallery
Events
Everything posted by Chuck
-
 They are indeed very very different models!! I will post a photo of both side by side when I get bit further along
- 421 replies
-
- 6
-

-
- medway longboat
- Syren Ship Model Company
- (and 1 more)
-
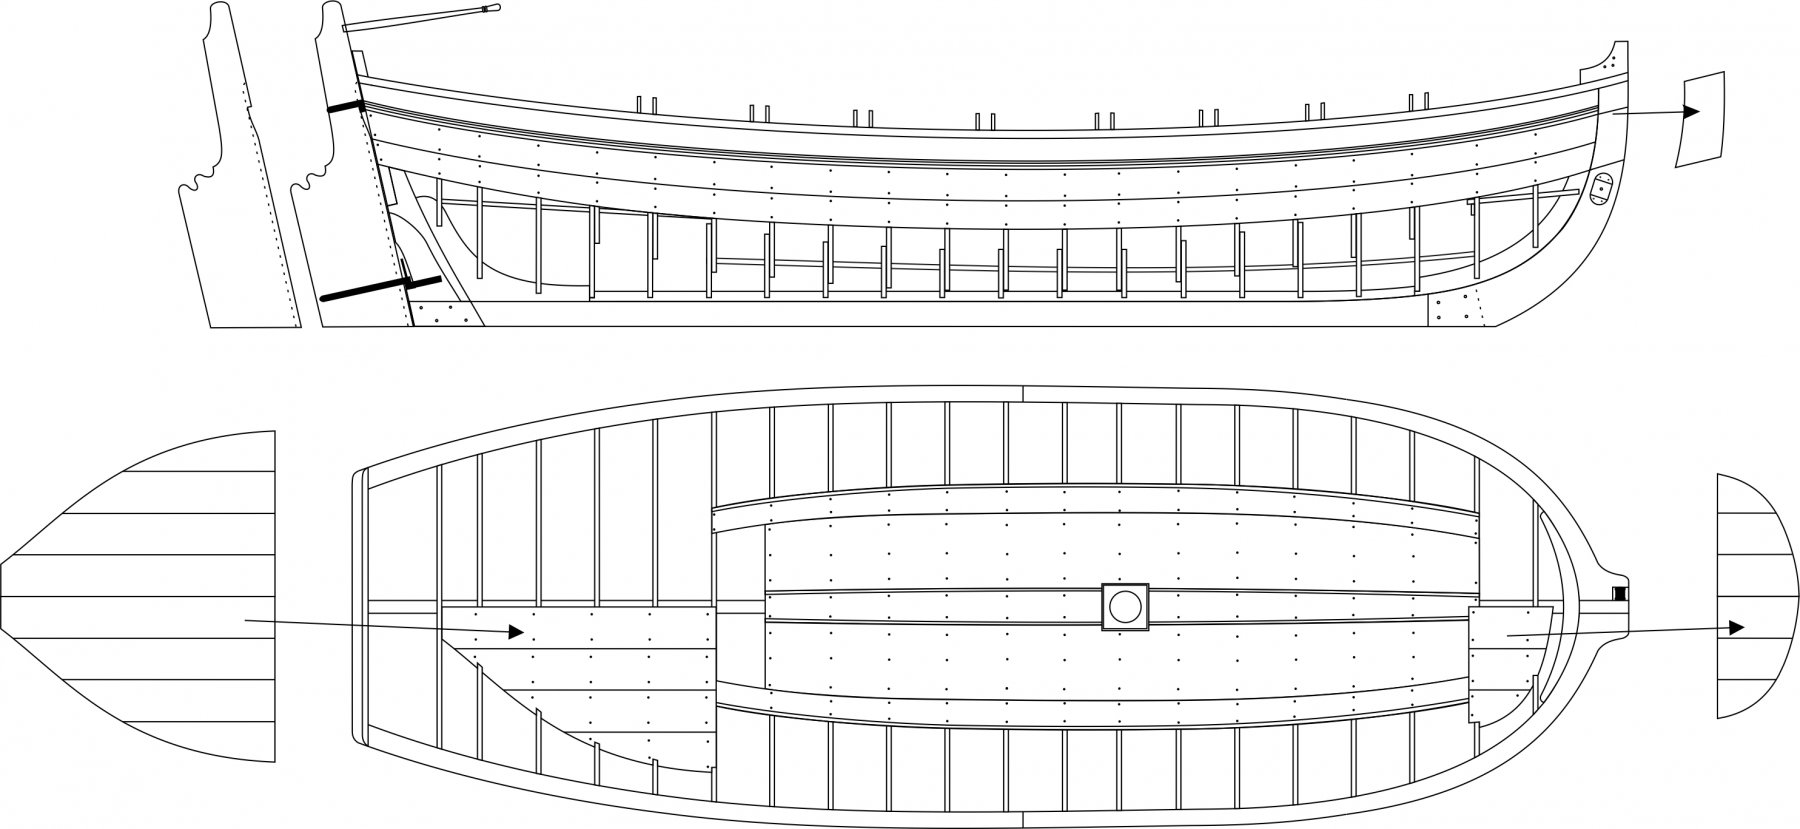
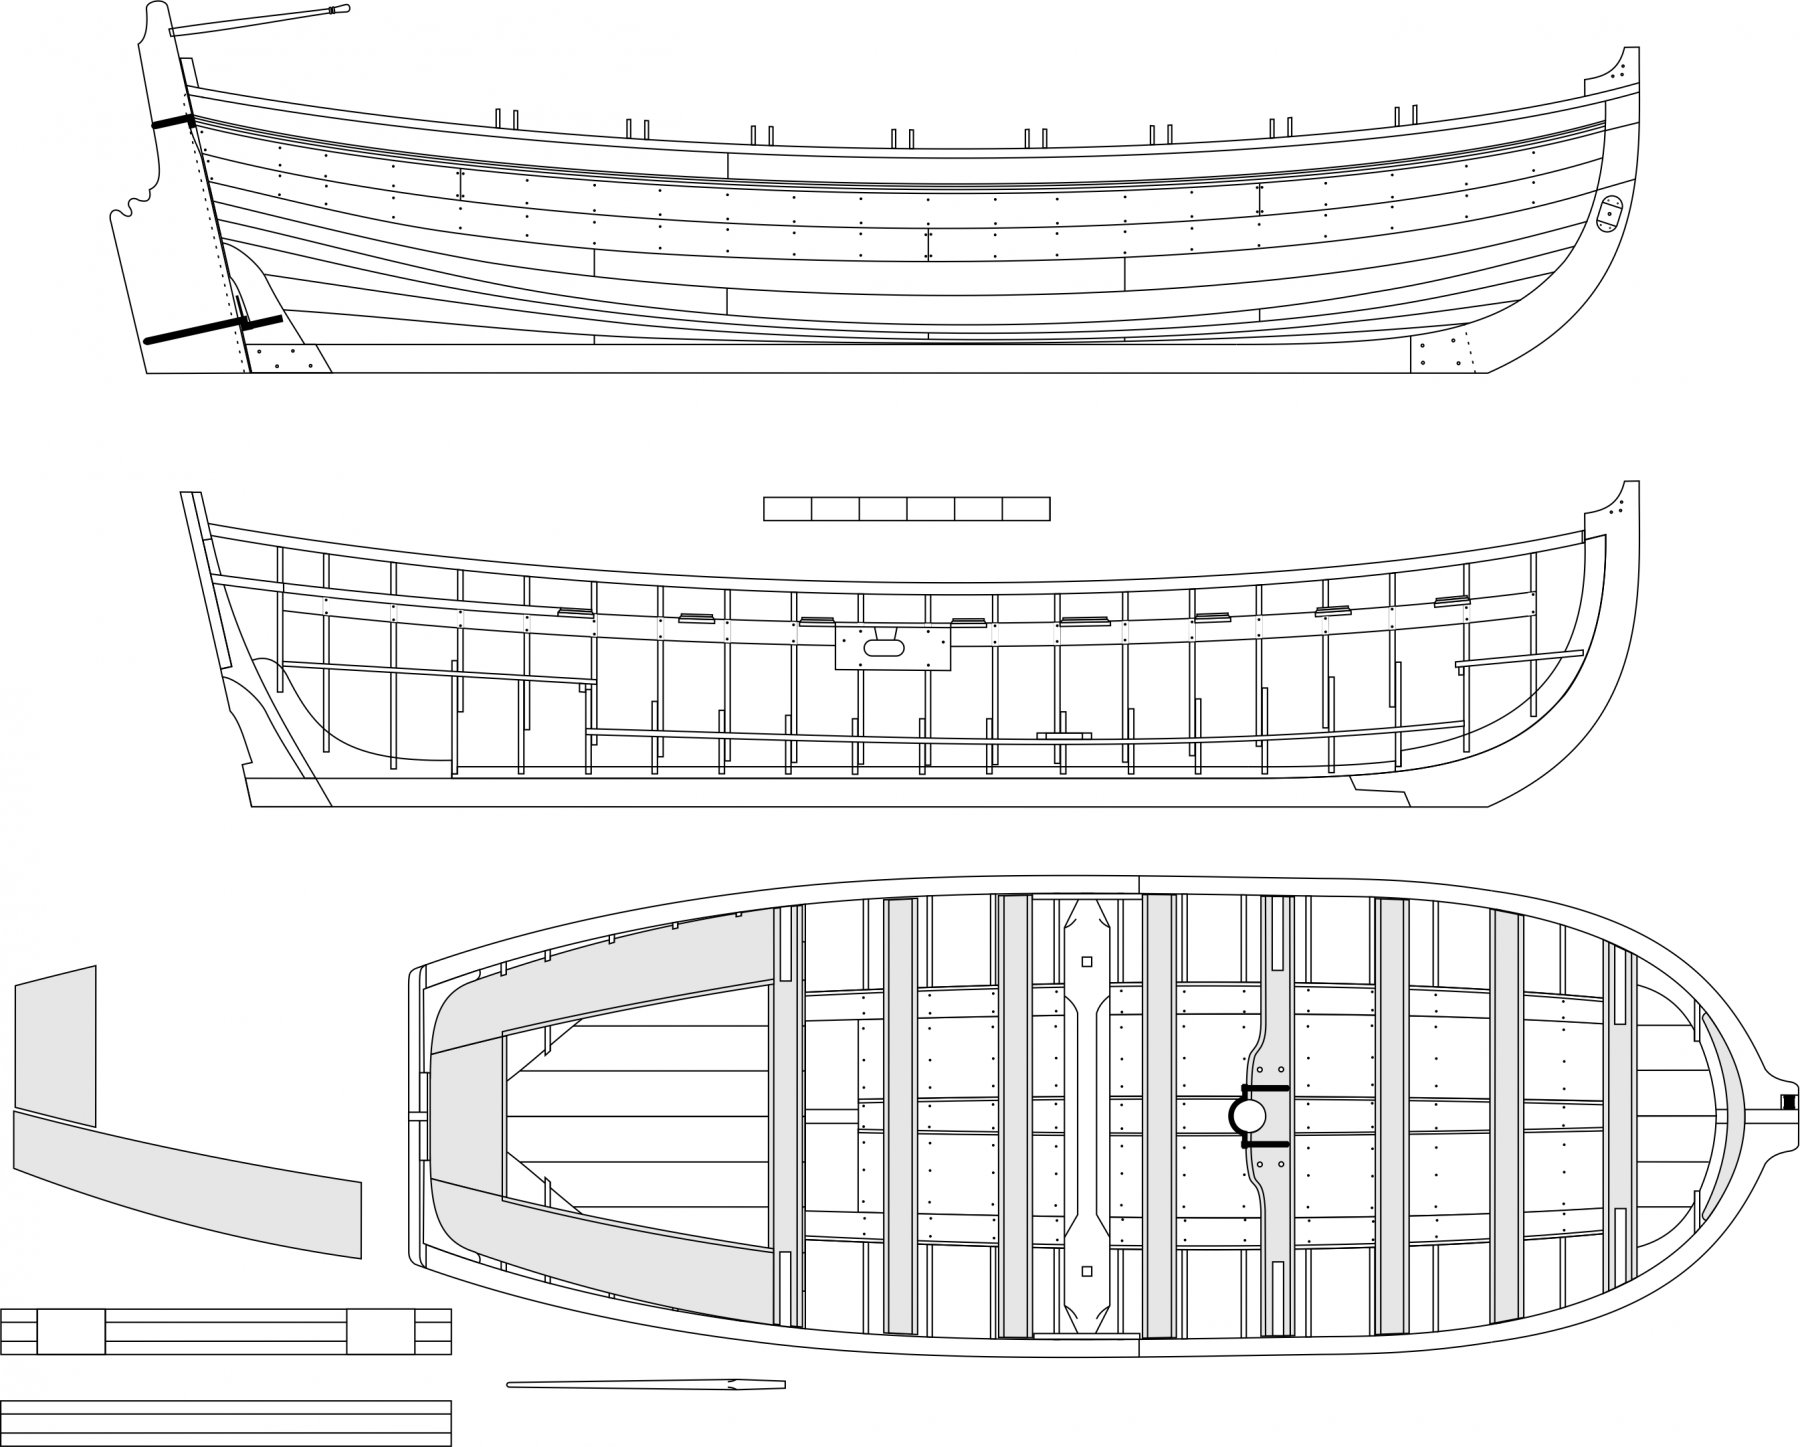
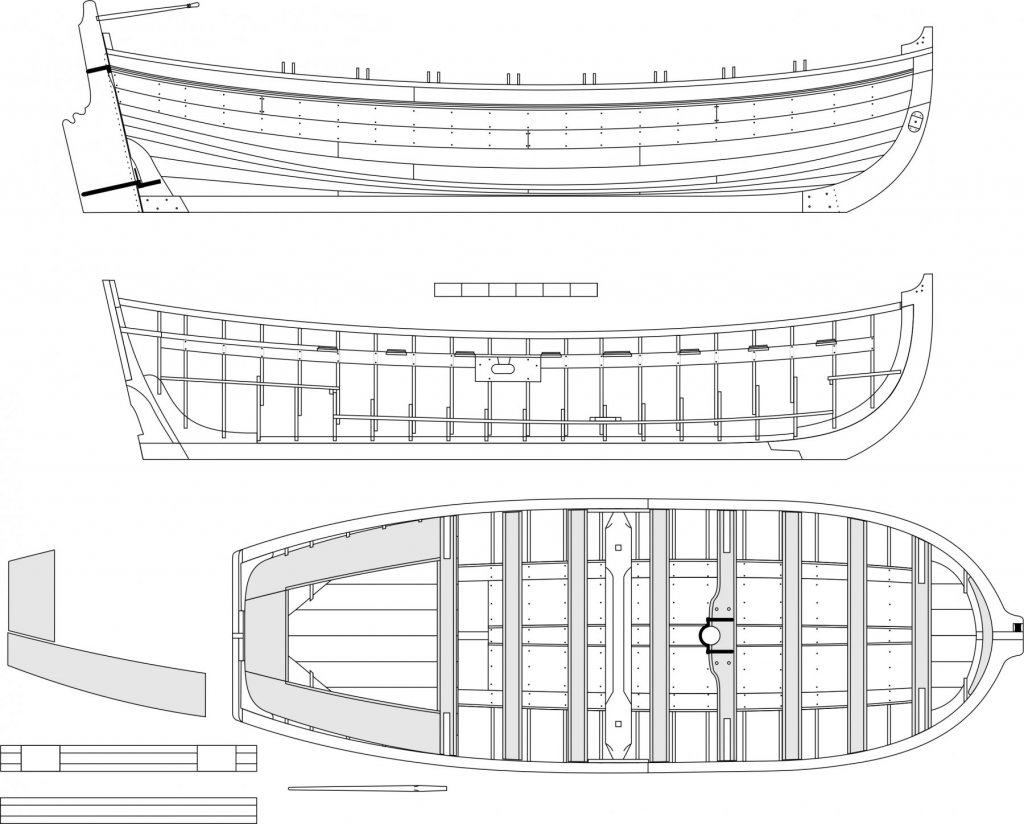
Thank You guys for kind words and support. Here is a quick look at some images of the plans as they are in development. Still lots of work to do on these but they are getting close. They wont be finalized until after I finish the hull but this will give you an idea of what this project will look like. And yes (before anyone asks) the images are altered and no parts shown will enable them to be pirated.....these are just pretty pictures at this point and all parts templates are on sep sheets.😊

- 421 replies
-
- 26
-
-
- medway longboat
- Syren Ship Model Company
- (and 1 more)
-
Thank You!!! It will be all back to normal by Tuesday if all goes well.
- 421 replies
-
- 7
-
-
- medway longboat
- Syren Ship Model Company
- (and 1 more)
-
I have no idea....I didnt stain and only used a poly finish. I am not sure how well cherry takes stain so make sure you experiment on scrap first.
- 421 replies
-
- 6
-
-
- medway longboat
- Syren Ship Model Company
- (and 1 more)
-
Thanks Joe, Fulfillment will always be an issue. I make these kits because I want to build them myself and its just the logical next step to also want to make it available to everyone else. As a one man shop it will be tough in the beginning to fill orders but that is why I am making this an NRG/MSW exclusive. This project will only be available to MSW members. In fact, to buy any part of it you must enter your MSW username in my store. This will keep orders a bit more reasonable but maybe even drive up MSW membership. If most buy the starter package and just scratch the rest it wont be that bad to make all of these. I am actually already starting to laser cut the starter kits and keep them ready. They will be ready as soon as the plans and instructions are finalized. I will then work on the rigging plans and instructions after that. But the rigging plan including templates for all the sails will be available for free as a download here. Of course everyone can buy the material from me for the masting and rigging but this also gives folks an option to get that stuff anywhere....especially across the pond. So its a bit of a unique project for me that shouldnt be as difficult to produce as the barge. That frenzy has ended though and I can easily keep barge kits on the shelf now. Its just the first six months or so that is crazy. This isnt going to be a money maker for me.....its going to be a fun maker for me and I am eager to get a group started on our forum. I am excited to build this in a group with my local club where maybe a dozen of us will get together and actually work on it a few afternoons each month. If I could find a laser cutter with enough Cedar or swiss pear on hand that I didnt have to ship to them, I would probably outsource the laser cutting to lighten the load so I can immediately start work on the cross section and Winnie again. I guy can dream cant he?
- 421 replies
-
- 19
-
-
- medway longboat
- Syren Ship Model Company
- (and 1 more)
-
I would probably use this size which is 10 lb but I wouldnt use black. I would get a brown color and experiment. I am not sure I would use this to simulate treenails though. I would only use the black stuff in various sizes to simulate bolts and nails.
- 421 replies
-
- 7
-
-
- medway longboat
- Syren Ship Model Company
- (and 1 more)
-
Looking forward to it!!!
-
Chuck...Titebond works really well for this. Remember that there is no tension on the filament. It is placed in a hole. Then after you apply Wipe on Poly it also seals the fishing line in. There is no issue at all as long as you wait for the glue to dry before you slice off the excess whiskers.
- 421 replies
-
- 8
-
-
- medway longboat
- Syren Ship Model Company
- (and 1 more)
-
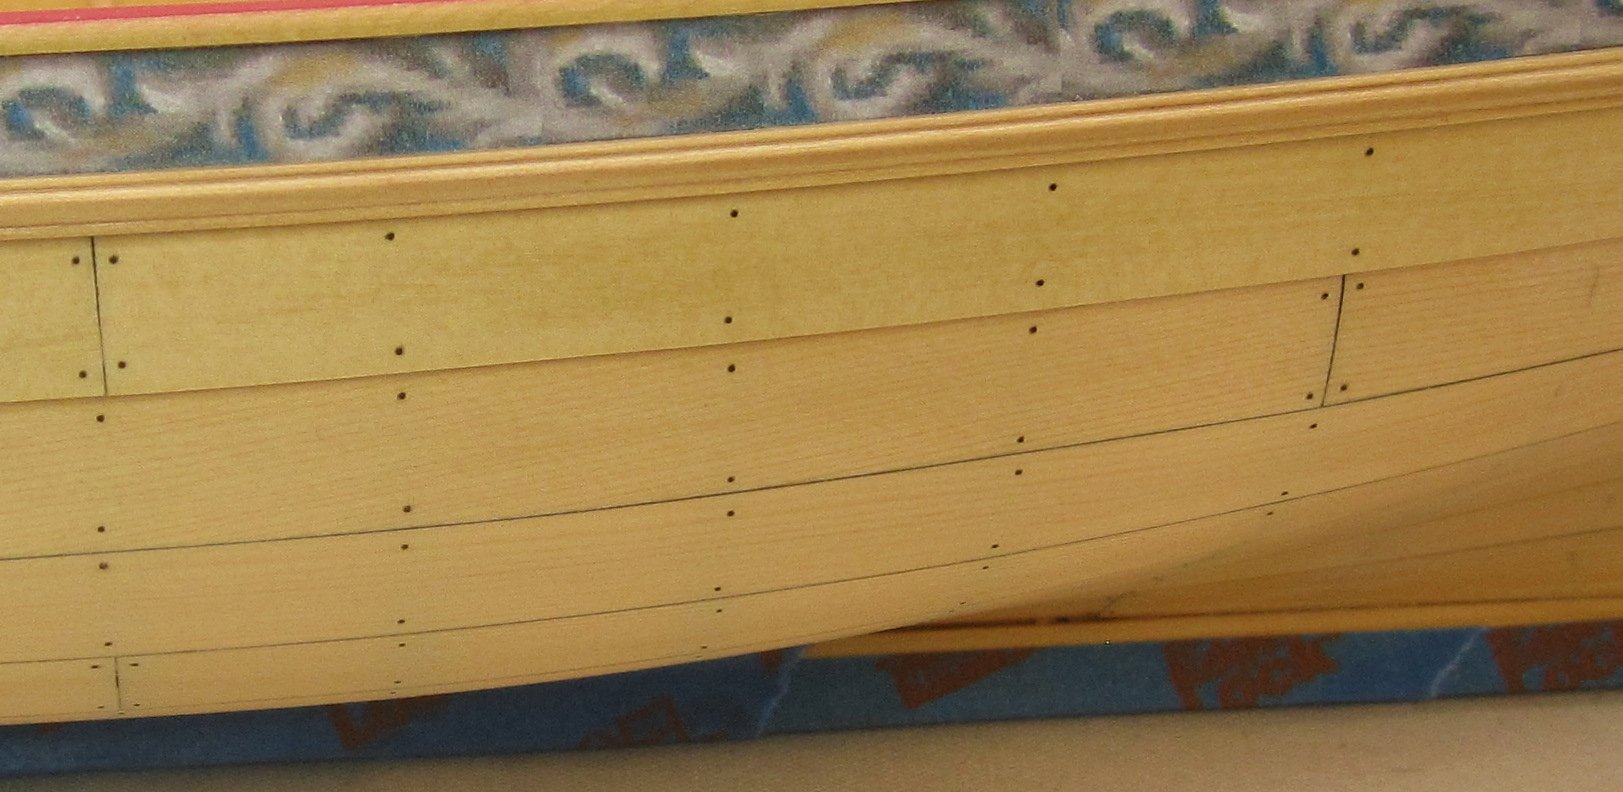
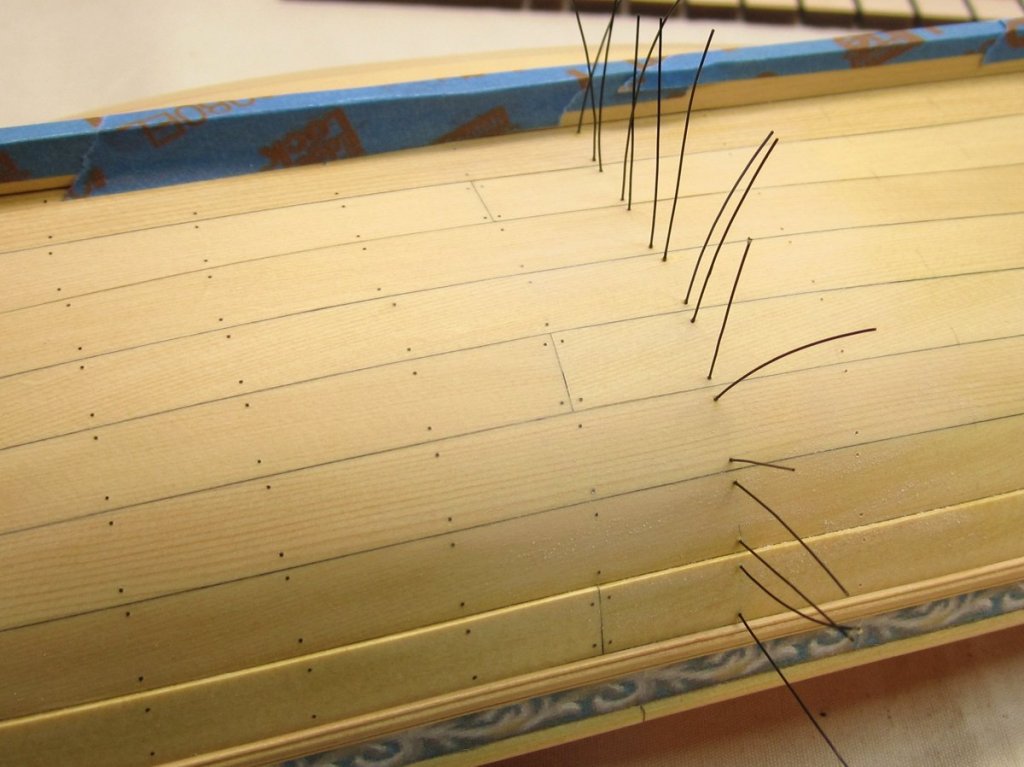
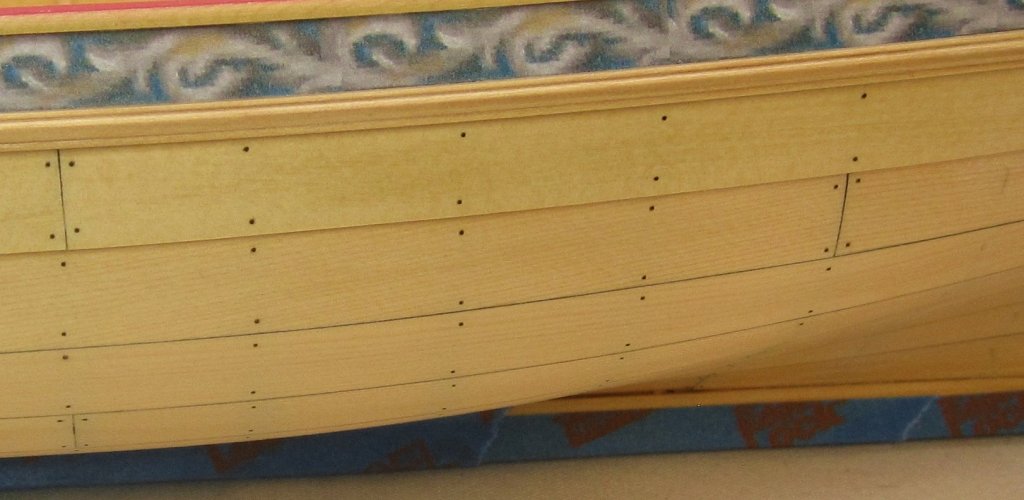
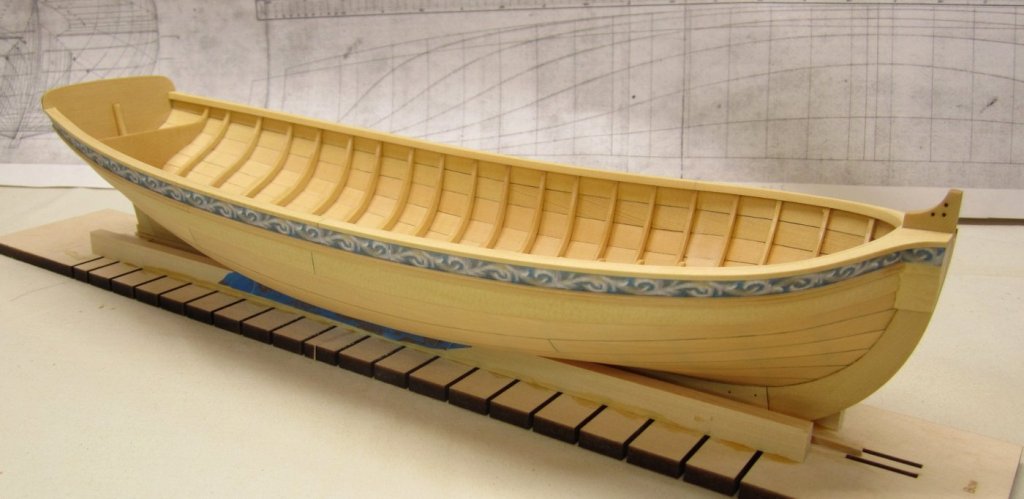
Thanks Dirk For nails I used 10lb black fishing line. Holes were drilled with a #77 drill bit. Then a sanded the holes lightly to remove any burrs from drilling. The fishing line was dipped in titebond and inserted into each hole. I worked on one frame at a time as shown. Once dry they were sliced clean away with a straight razor. Then some light sanding. Thats it. The port side is completed now and I am really hope to get the starboard side done quickly. We shall see. More pics below. Chuck

- 421 replies
-
- 48
-
-
- medway longboat
- Syren Ship Model Company
- (and 1 more)
-
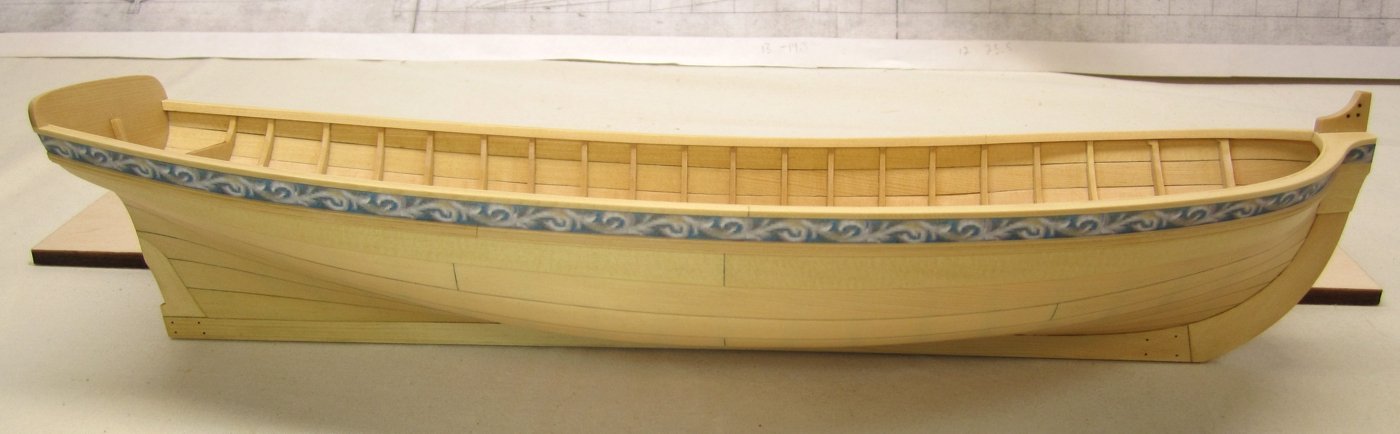
I just picked up a whole new load of Yellow Cedar. I am very happy to see that so many model builders have been trying it out and I think they will be quite surprised at how wonderful it is to work with. Especially with the price of boxwood going through the roof and so much poor quality boxwood on the market at the moment.
-
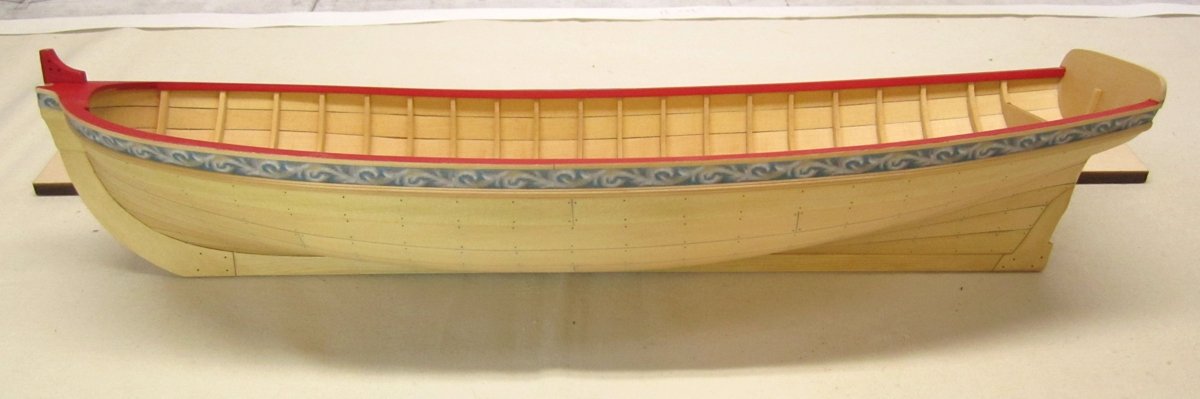
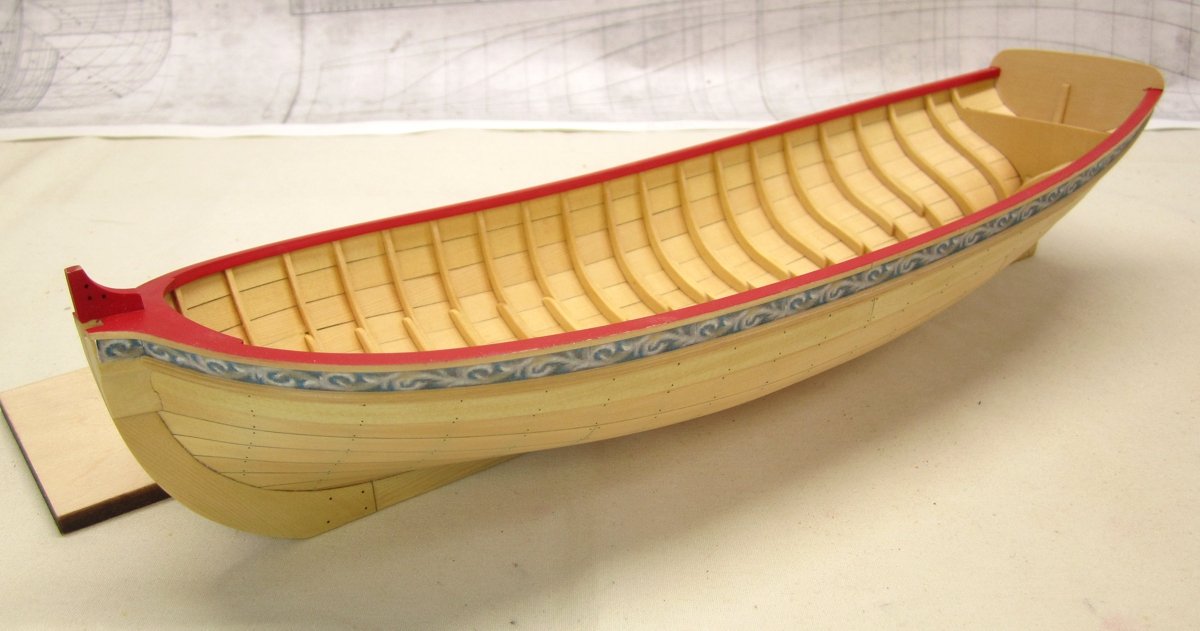
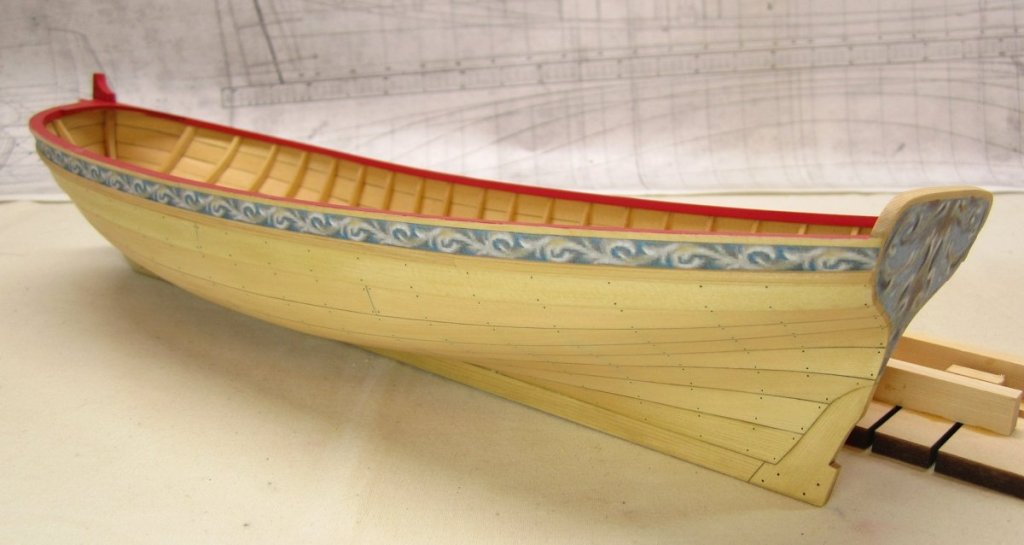
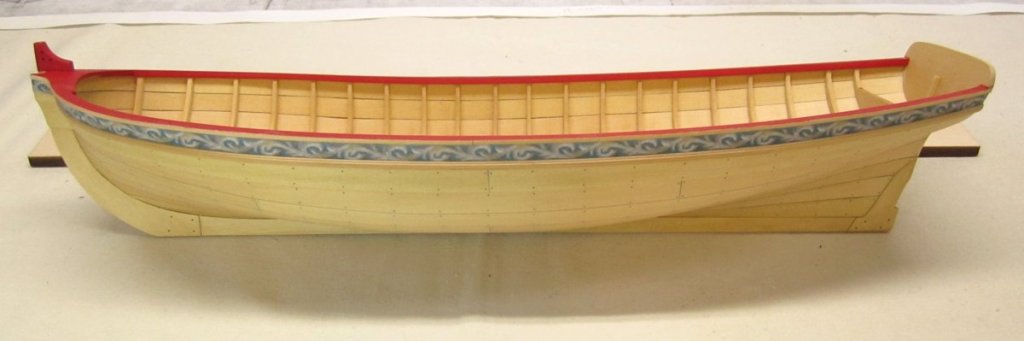
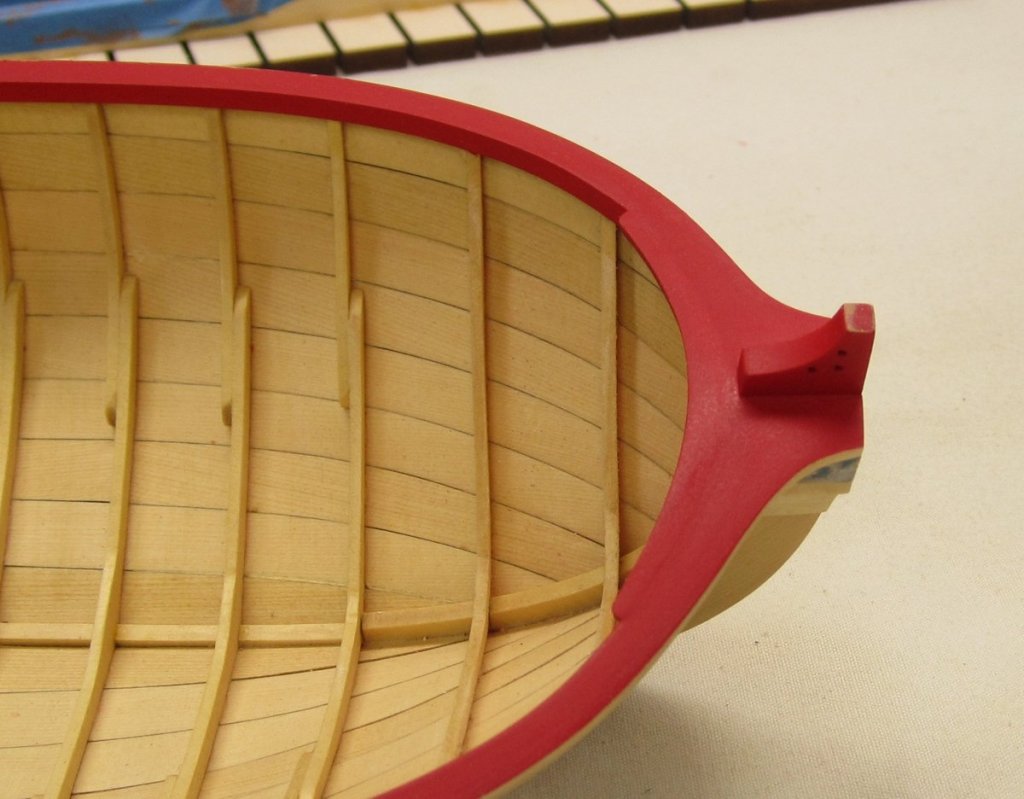
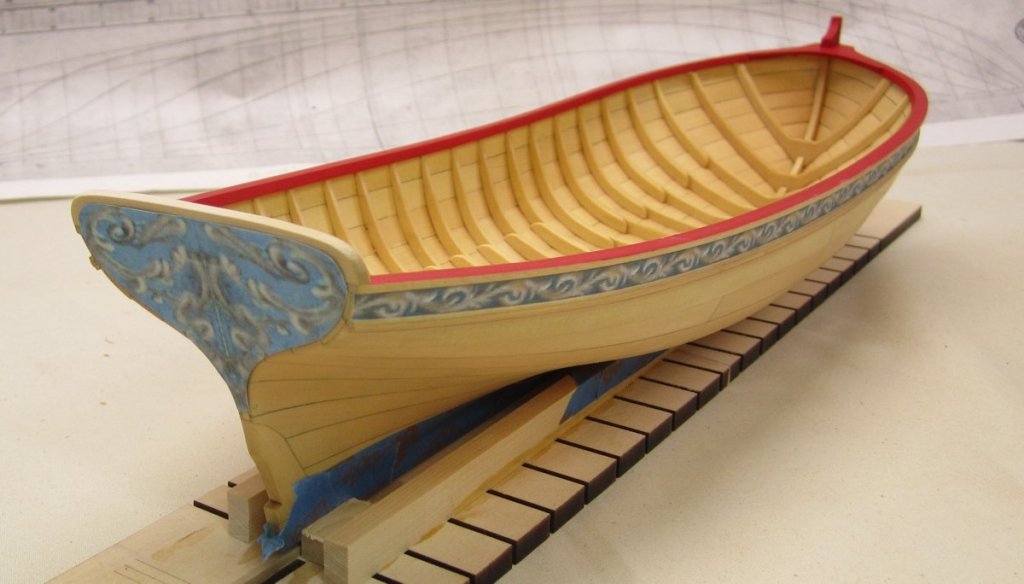
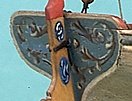
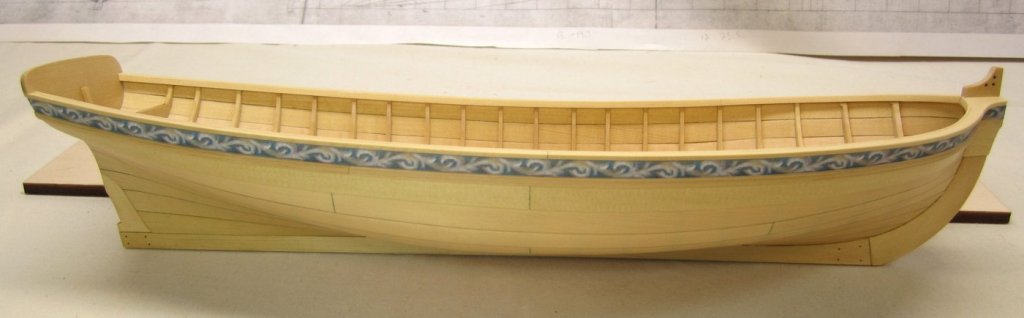
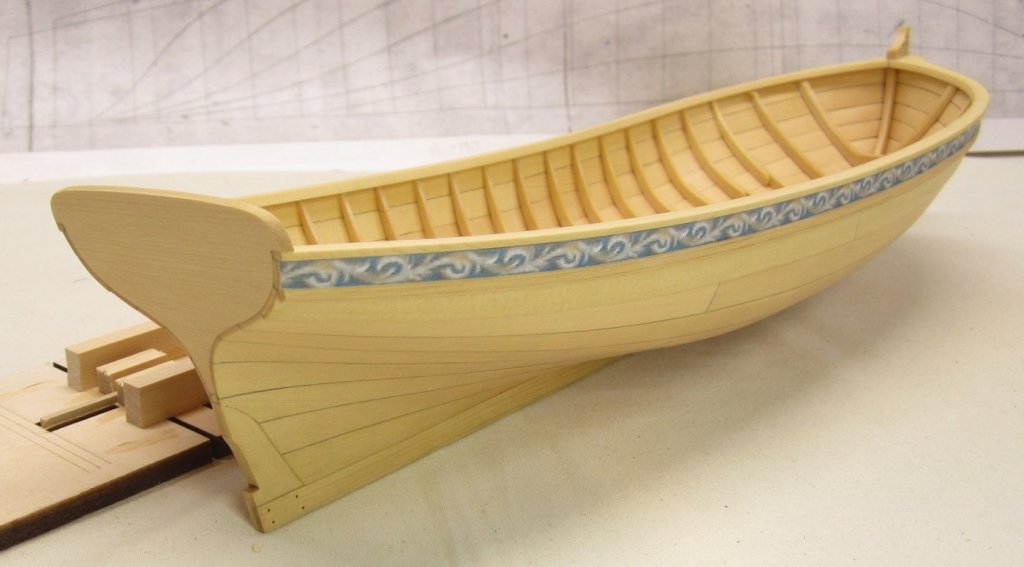
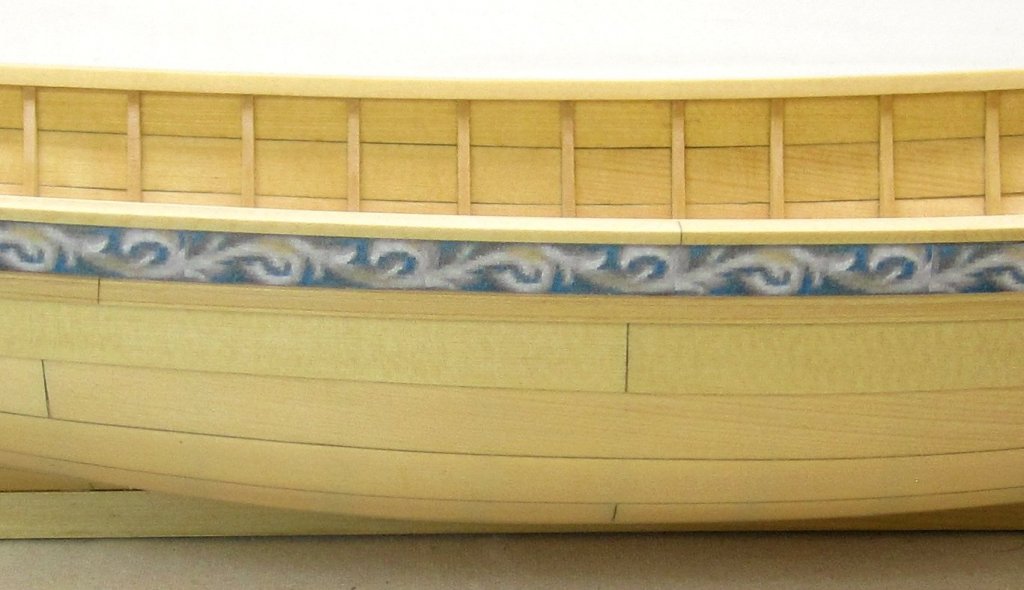
Its been a crazy two weeks. My Daughter is all set up at college and a room has opened up for my Mother In Law in assisted living. I will be moving her in this week so she is all settled by Friday....hopefully. Which one will get homesick and ask to come home first, LOL.😂 Anyway, its been a while since I had an update but I have fallen behind a bit understandably. I painted the cap rail and inboard sheer strake. I did this first before adding the knee at the bow below. I still have some touch up and repainting to do there but you can see the results so far. I have dozens of more coats of paint before I am going to be satisfied with the finish. I have also been creating and testing the frieze for the transom. Here is one such test where a sample is temporarily tacked into position. The size and shape is good and I am finalizing the color and design. Its getting close though even though this photo seems a bit washed out because of the lighting. Here is an image of the frieze on the contemporary model. I am not sure yet if I will paint the white border and the edges of the molding on this model. But we shall see as things develop. In addition i did start simulating the nails in the planking. I am using 10lb black mono filament (fishing line). Its going well but will take a good amount of time. I held the hull up to the light so I could accurately mark the locations for the frames. I couldnt start work on the interior with the floorboards and platforms until this is completed. Remember that these are nails and not wooden treenails. I wouldnt have been able to see the frames through the planking with those installed. So once this is completed I will move to the interior details. So this project is moving along even though it slowed down getting the two girls set up in their dormitories...LOL. I will post more details when I get some time to breath.....
- 421 replies
-
- 42
-
-
- medway longboat
- Syren Ship Model Company
- (and 1 more)
-
I only use it for the planking and then I switch back over to titebond.
-
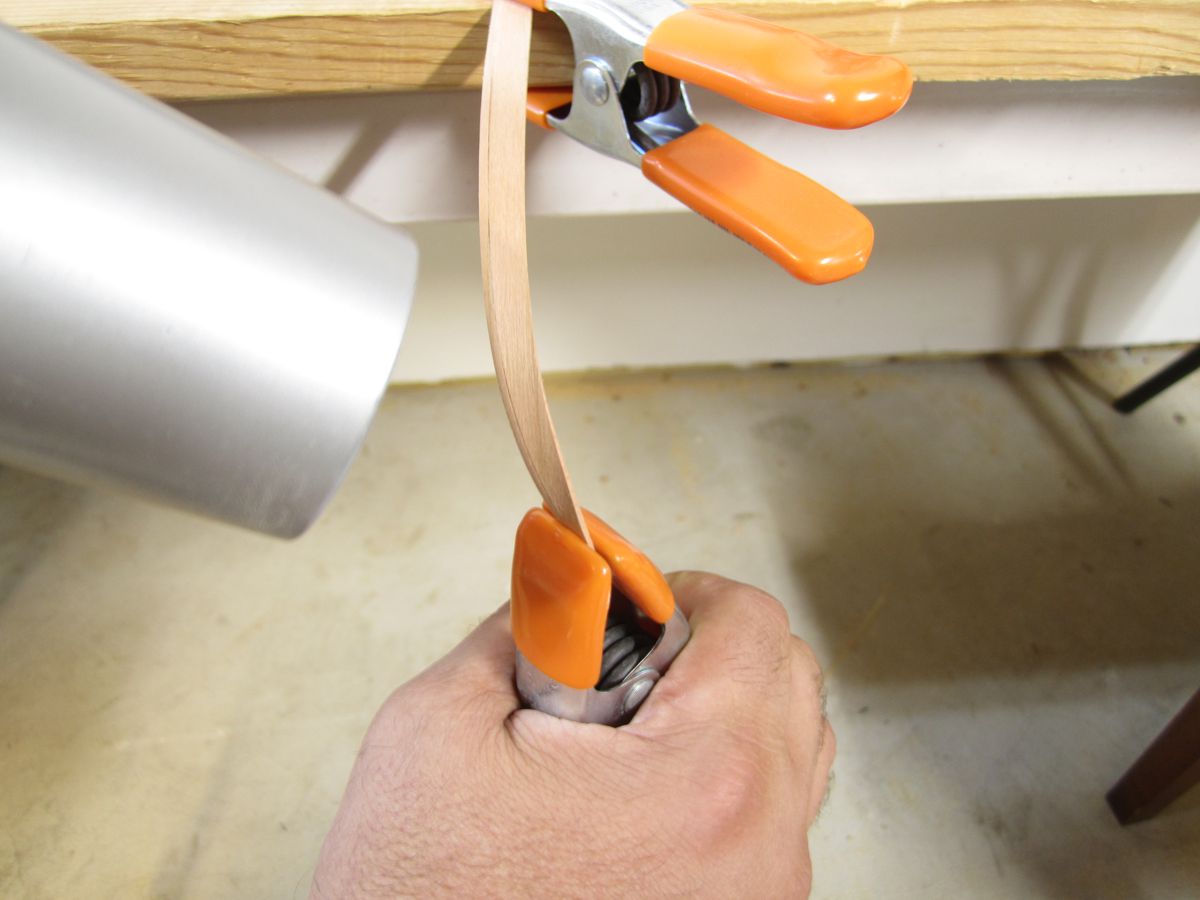
Honestly though I didnt see any reason for a need to clamp the planking at the stern at all. I pre twist off the model and then just glue the strakes on with CA. No clamping or rubber bands needed. Clamping causing more issues than it helps on a delicate model like this. Its not as sturdy as a POB or large frigate. You dont need to use a hair dryer like I do but any heat source or mold will do the trick. Chuck

-
It was very nice....bitter sweet because its always tough dropping off your only daughter at college. Having said that......she wants me to drive down and bring her back home for labor day..... Nice clamping system...very hi tech. But be careful as the frames are still quite fragile. Too much force on those and the frames will break. Chuck
-
That is looking very good. Nicely done so far!! 😊
-
Yes basically !!! same as the outside😃
-
Looking very nice. You are making some great progress. Hope you are enjoying the project. Chuck
- 574 replies
-
- 4
-
-
- cheerful
- Syren Ship Model Company
- (and 1 more)
-
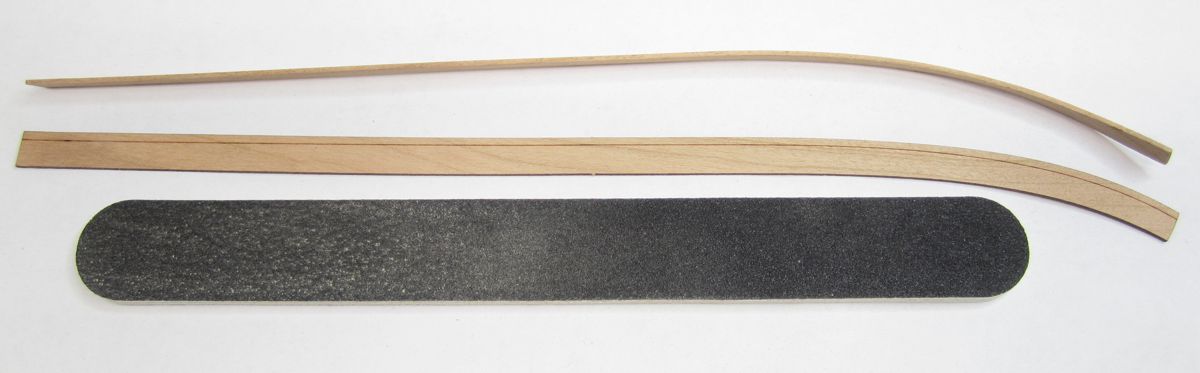
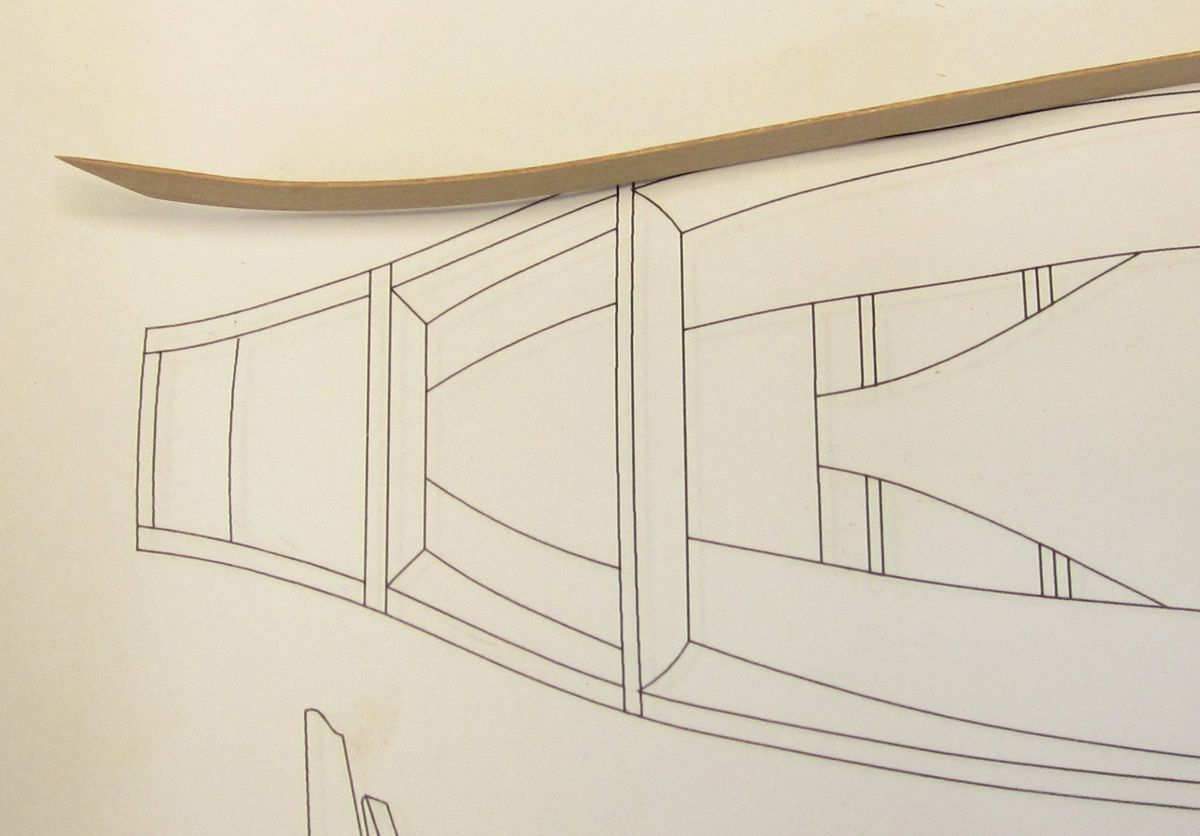
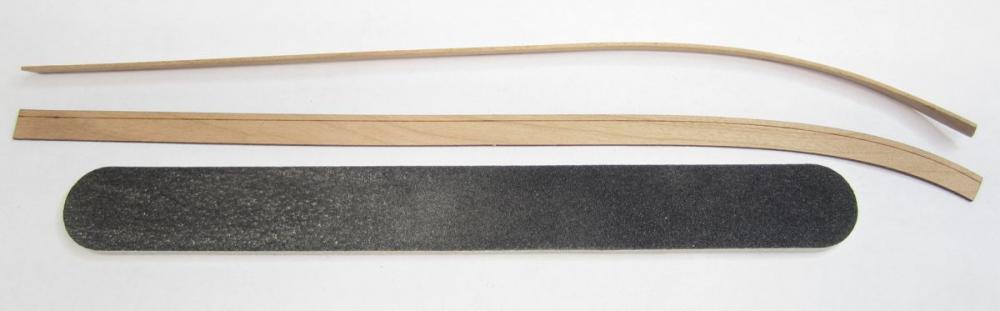
If you are using the planking material supplied which is straight you wouldnt have the shape needed to conform to the frames. You will need to make a card template to find the shape or even some tape applied to the frames. You will soon find that the shape you need is curved as shown below. A plank shaped like this and then bent and twisted ahead of time will conform and lay flat against the frames.

-
Its 1/2" scale actually so its only 1 1/2" at scale. Chuck
- 421 replies
-
- 5
-
-
- medway longboat
- Syren Ship Model Company
- (and 1 more)
-
Probably not the internally strapped blocks. They are much later and this longboat wouldnt have used those.
- 421 replies
-
- 5
-
-
- medway longboat
- Syren Ship Model Company
- (and 1 more)
-
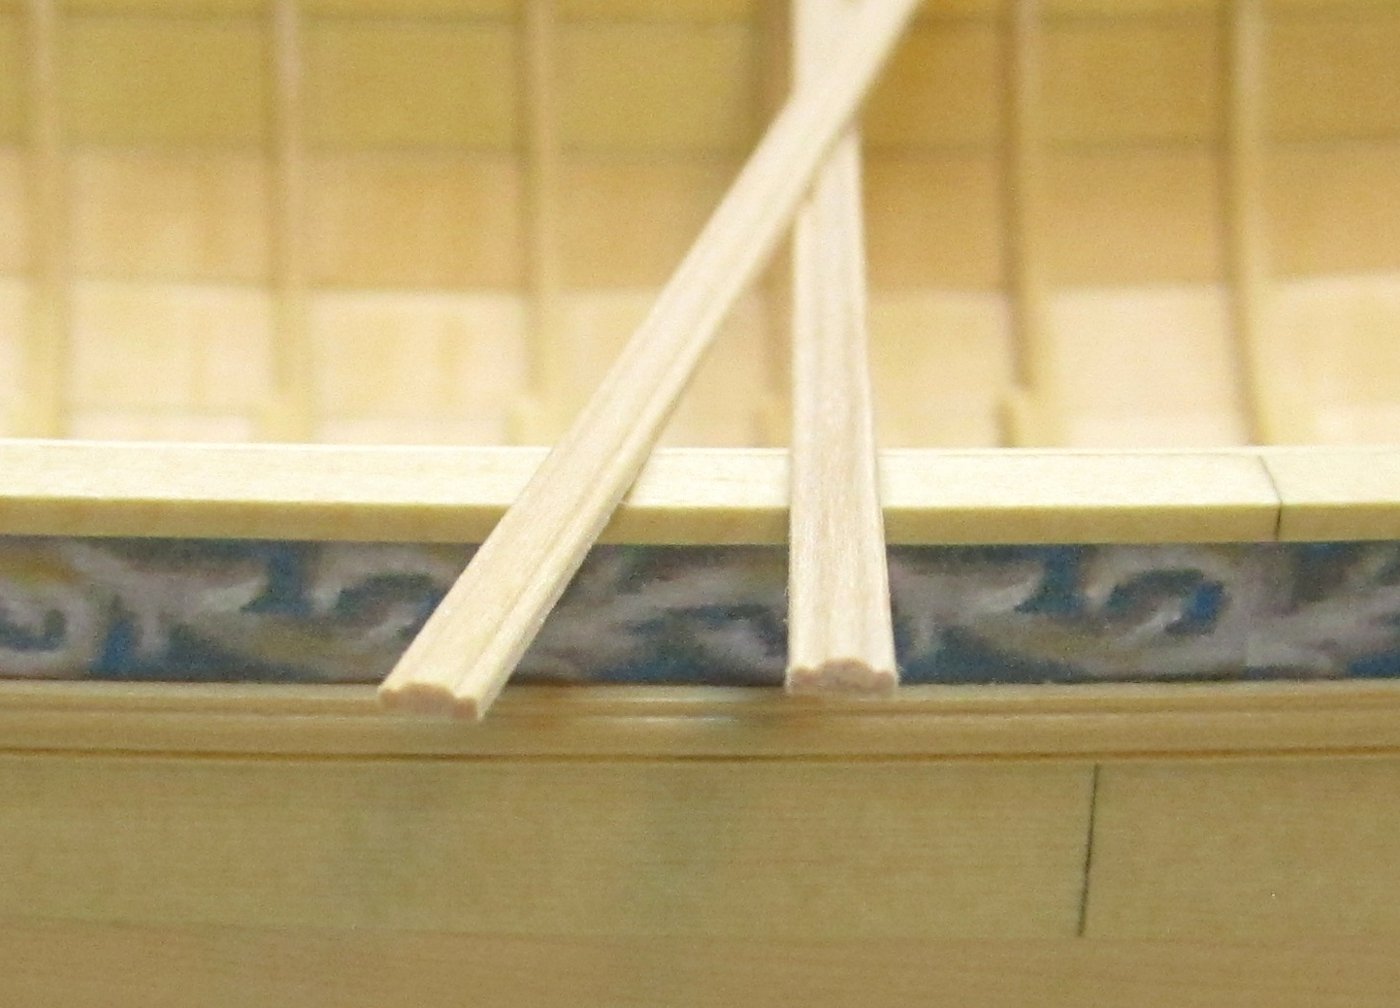
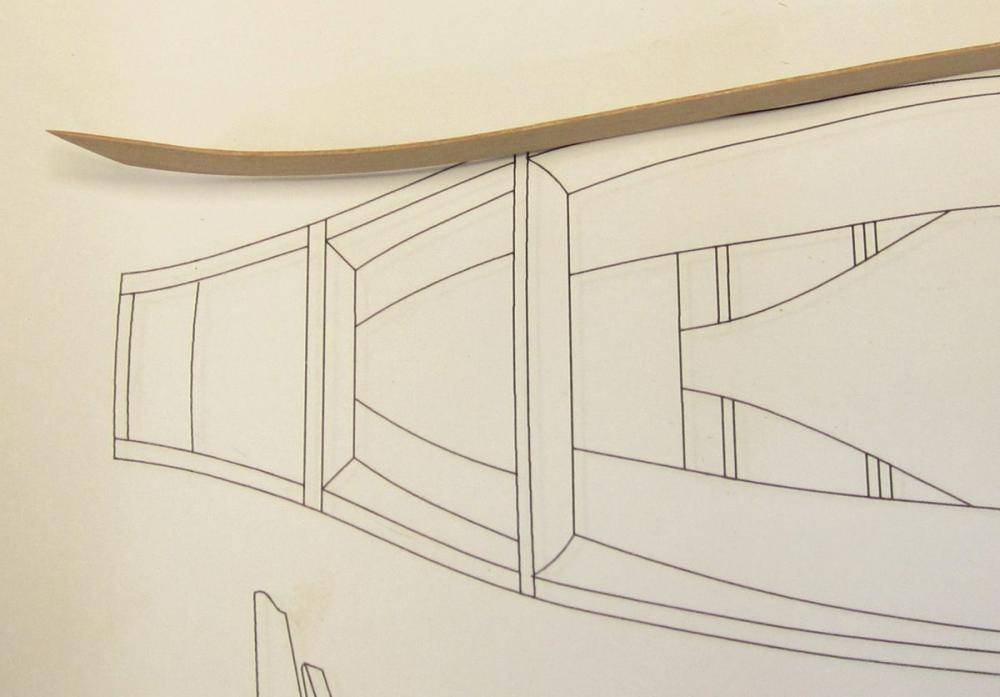
No its scraped off the model see below. You can see the profile. And some pictures with better lighting. I had the brightness up too high on the last ones.
- 421 replies
-
- 29
-
-
- medway longboat
- Syren Ship Model Company
- (and 1 more)
-
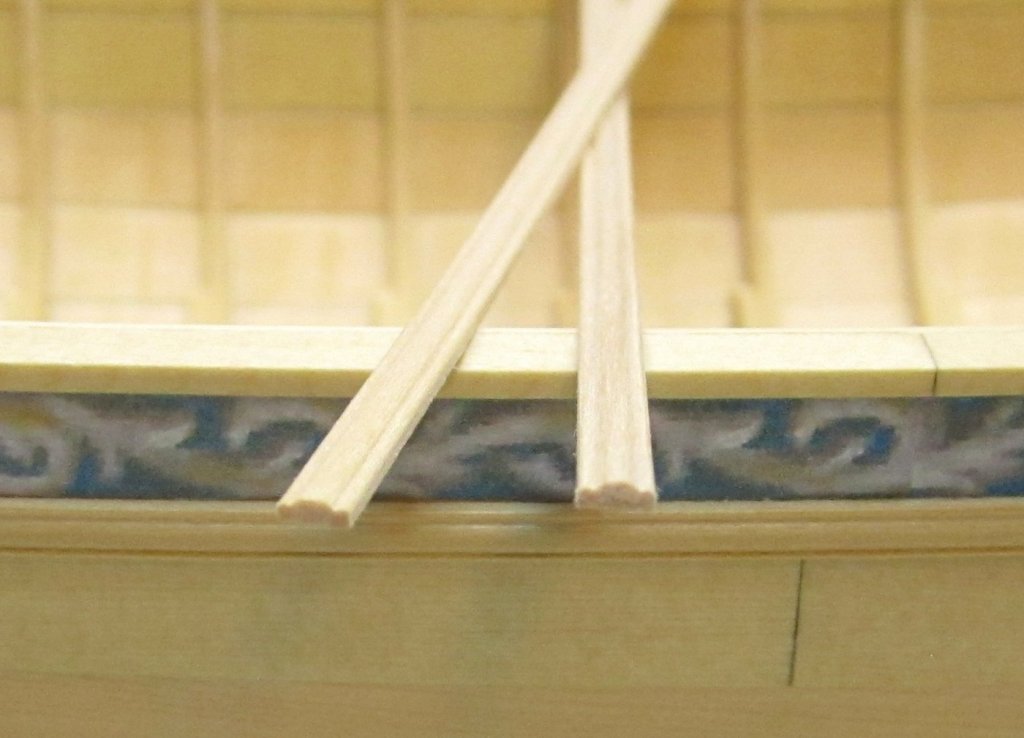
I added the inboard sheer strip which is also laser cut to shape. It is 1/8" wide and really finishes off the cap rail. Then rather than paint the top of the cap rail red which would have been smart, I decided to work more on the frieze. Once that was added I can use the bottom edge of the frieze to align the molding strip below it. The molding strip is 1/8" x 3/64" and it is scraped to a simple profile. The interesting thing you might note is that the molding strip below the frieze is NOT yellow cedar. The molding is actually boxwood. I find it is the best material for scraping moldings. I will post an illustration of the profile I chose soon. But if you look closely you wont see any real difference in color or appearance in the boxwood strip in comparison with the yellow cedar planking. They work really well together. The frieze itself is an exact copy of the one on the contemporary model. I took the image of the cont. model and cropped and sized the frieze strip from it. After printing it out I went back in and cleaned it up with some paint and color pencils and scanned it again. That was cut out and applied to the model. I am still working on the frieze for the transom.


- 421 replies
-
- 39
-
-

-
- medway longboat
- Syren Ship Model Company
- (and 1 more)