Chuck
-
Posts
9,711 -
Joined
-
Last visited
Content Type
Profiles
Forums
Gallery
Events
Everything posted by Chuck
-
 That is looking excellent!!! Just as its supposed to at this stage of the project.
 -
Yes you can.....and for the record, I used 6mm ply for my model. Its all good. You may of course have to check and tweak the slot size because all 1/4"/6mm ply is not actually 1/4" or 6mm. It doesnt matter though as long as your slots are snug.
-
Yupp....everyone is stopping MFG which is so weird. Chuck
-
Most of these guys all get K & S stuff and they are all out of stock. I need to buy 40- 50 packages. Nobody has them any more. Its more of an FYI for you guys so you can buy a few packages if you need them. The prices on the remaining stock is also going sky high so I noticed that they did have a few left of some sizes you guys should by them.... Otherwise K & S will still make the wider strips like 1/2" wide by 1/64" but you would need to cut your narrower strips from those which isnt easy unless you have a press break.
-
Just an FYI K & S has discontinued making many sizes of strip brass and other items. These are staples for us model builders. For example... They are no longer making 1/64" x 1/32" brass strips 1/64" x 1/16" strips 1/64" x 3/32" strips 1/64" x 1/8" strips ect.... Does anyone know of another source for brass strips? I just bought all of their remaining inventory of these strips in bulk....but there wasnt much left. If you know you will need them, find a hobby shop that still has them on the shelf and buy them now while you can. Chuck
-
I actually have no idea. I never used it before so I couldnt say. Try not to over think it Lou. I realize there are a lot of choices but if you deliberate every tiny tiny detail you will probablu never make any sawdust. Just go buy some and give it a try. You will know pretty quick if its not gonna work.
-
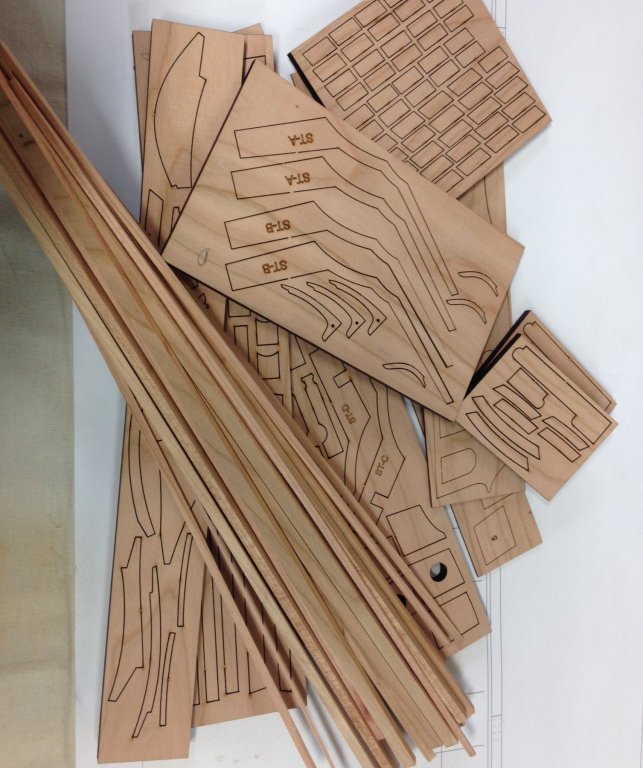
You guys are so lazy....LOL. Just cut the pieces on a scroll saw. Those pieces were cut so poorly on that laser cutter I think a blind guy could do a better job on a scroll saw than that. It would be a huge mistake to try and use my templates on a harder wood (Pear or Box) as well and have them laser cut. The parts wont fit and you will waste a lot of money and wood. Lou....the scroll saw is waiting for you!!!! Those templates and plans are made for my tight tolerances. I have never seen a laser cutter come close to replicating it. So trust me when I tell you ....you will just end up wasting your money and wood. Either use my laser cut parts or cut them with a scroll saw. Chuck
-
Indeed that is what happened. So your print outs are just fine. I mistakenly shrunk the scale bar when reducing the size of the plan sheet info or logo above it. I have fixed that up so all sheets printed will have correct sized scale bars. But your plan sheets are just fine otherwise. Sorry about that. So dont worry about reprinting them. Chuck
-
I think you guys will be just fine. If you got any laser cut parts, just place them on top of the parts on the plan and see if they match up. Or as you said....if your 8 1/2 " x 11 sheets also match the plans then you are good to go. Its the exact file i used to laser cut the parts. It could just be that i stretched the scale bar by accident as i moved them and made room for the NRG logo. I had to shrink that text above it in some cases when I decided to do this as a group build and add the Nrg logo. Then i copied it to the other sheets. I may have grouped the scale bar in with it when I did that. I will check my original file and let you know. But I am pretty sure that is what hapenned.
-
The Cherry version of Installment 1 is now available and in stock. In addition, laser cut basswood brackets to hold your false keel straight and keep it from twisting are also in stock. You get 3 pairs of basswood brackets, but the screws and washers are not included. You will have to get those on your own.
-
Really Nice Jean Paul. You are off and running!!!! Keep the progress pics coming. I actually think this one is easier to build and more fun than the barge. You will enjoy it.
-
This is the plan I used for Cheerful more or less. Its dated 1820. But more or less fits the image of those used on earlier contemporary models that showed trucked Carronade carriages.
-
Queen Anne Barge by Beckmann - 1/24
Chuck replied to Beckmann's topic in - Kit build logs for subjects built from 1501 - 1750
Simply beautiful presentation. You make my kits look so good!!! Best marketing any business could hope for. I did contemplate making some figures. But I dont want to overwhelm my casting guy. He is going nuts right now working on the castings for Winnie. Chuck -
Your moving right along Chris.....time to start that build log!!! You are hooked on the project now. There are no special jigs or techniques for most of this stuff. The final fitting as all done by hand. Its a matter of going slow and testing and tweaking and testing and tweaking, repeat.... until you are satisfied. The issue becomes when some folks for whatever reason.....skip a few testing and tweaking steps and then settle before they become satisfied. They do this for various reasons. Its not a race, take your time and throw away your missteps, and try again. Chuck
- 1,784 replies
-
- 7
-

-
- winchelsea
- Syren Ship Model Company
- (and 1 more)
-
I dont think I can at this point. There isnt anything magical to show anyway. I just measured the length by holding a strip in position and marked both ends. I cut it with a sharp blade slightly longer and sanded both sides with a sanding stick. I tested the fit....sanded some more.....retested......sanded some more.....etc. If I messed it up, I tossed it and started over. Its just a one at a time slow process. Nothing special other than making I sure I tossed the bad ones and only kept the good ones.
- 1,784 replies
-
- 4
-
-
- winchelsea
- Syren Ship Model Company
- (and 1 more)
-
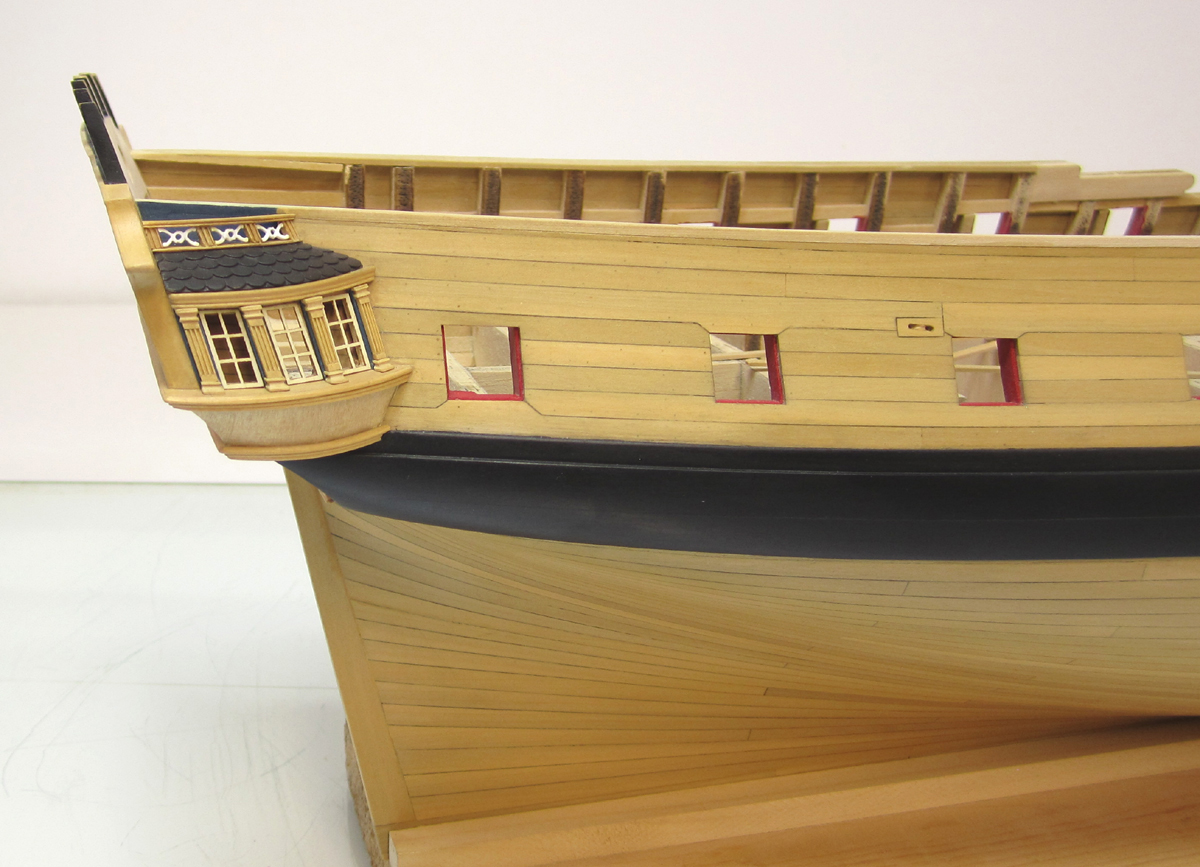
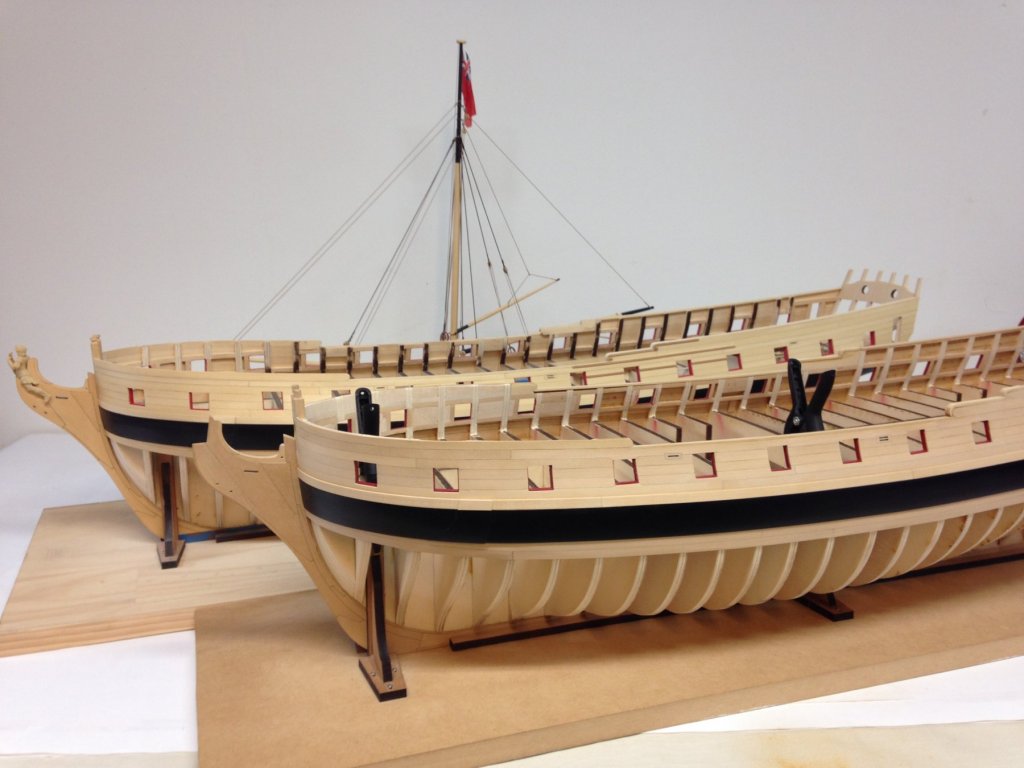
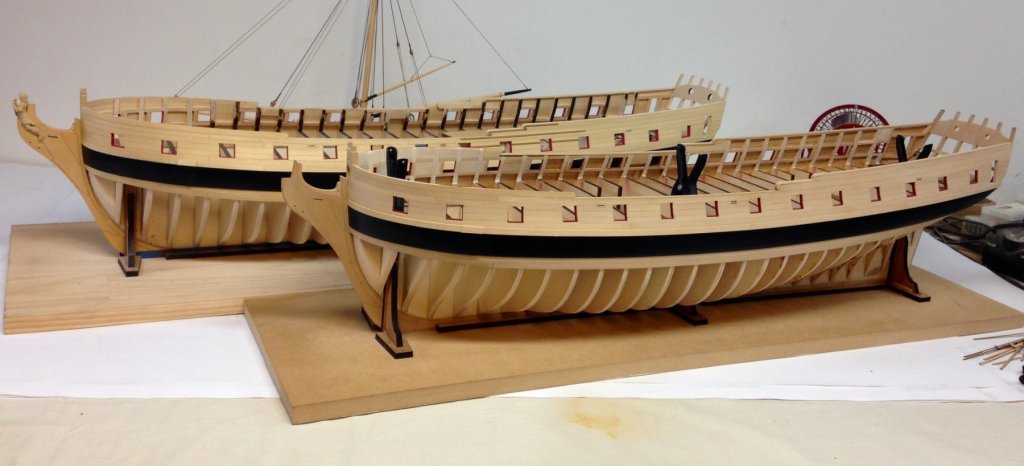
Exactly Chris....!!! Great start. The group is coming together with almost 20 build logs so far and more being added every day. I hope everyone has fun with the project. I just placed an order for the first batch of resin figureheads now that I have settled on a color and will be sending the other 20 or so pieces down for casting next week. i bought a better video camera that I am going to try and mount over my workbench as well. So once I start planking, I will try making some videos. Although....I have never edited a video before so this will be an new experiment. I am just eager to get to the stern transom and qgalleries and catch up to where I was on the 3/16" scale version. Now that it is bigger and I have more tools I think it will come out much better this time around. Seven years ago.....image below. Chuck

- 1,784 replies
-
- 16
-
-
- winchelsea
- Syren Ship Model Company
- (and 1 more)
-
Definitely NOT a good idea. Stick with one wood or it will be very noticeable. That would look awful in my opinion. Anyone opting to use the laser cut parts in Cedar or Cherry really should use the same woods for planking. Otherwise I would recommend scratching the parts rather than using the laser cut pieces. Chuck
- 1,784 replies
-
- 1
-
-
- winchelsea
- Syren Ship Model Company
- (and 1 more)
-
Yes they are very close in color actually. This is why the less expensive Yellow cedar was chosen as an alternative. I will bring it to our next meeting.

- 1,784 replies
-
- 7
-
-
- winchelsea
- Syren Ship Model Company
- (and 1 more)
-
Beautiful!!!
-
very nice!!!
-
thats good to know....whic ones. this one this one or this one....i dont like the color in this one below. But the other images above are pretty accurate to the real thing, yes?


- 1,784 replies
-
- 4
-
-
- winchelsea
- Syren Ship Model Company
- (and 1 more)
-
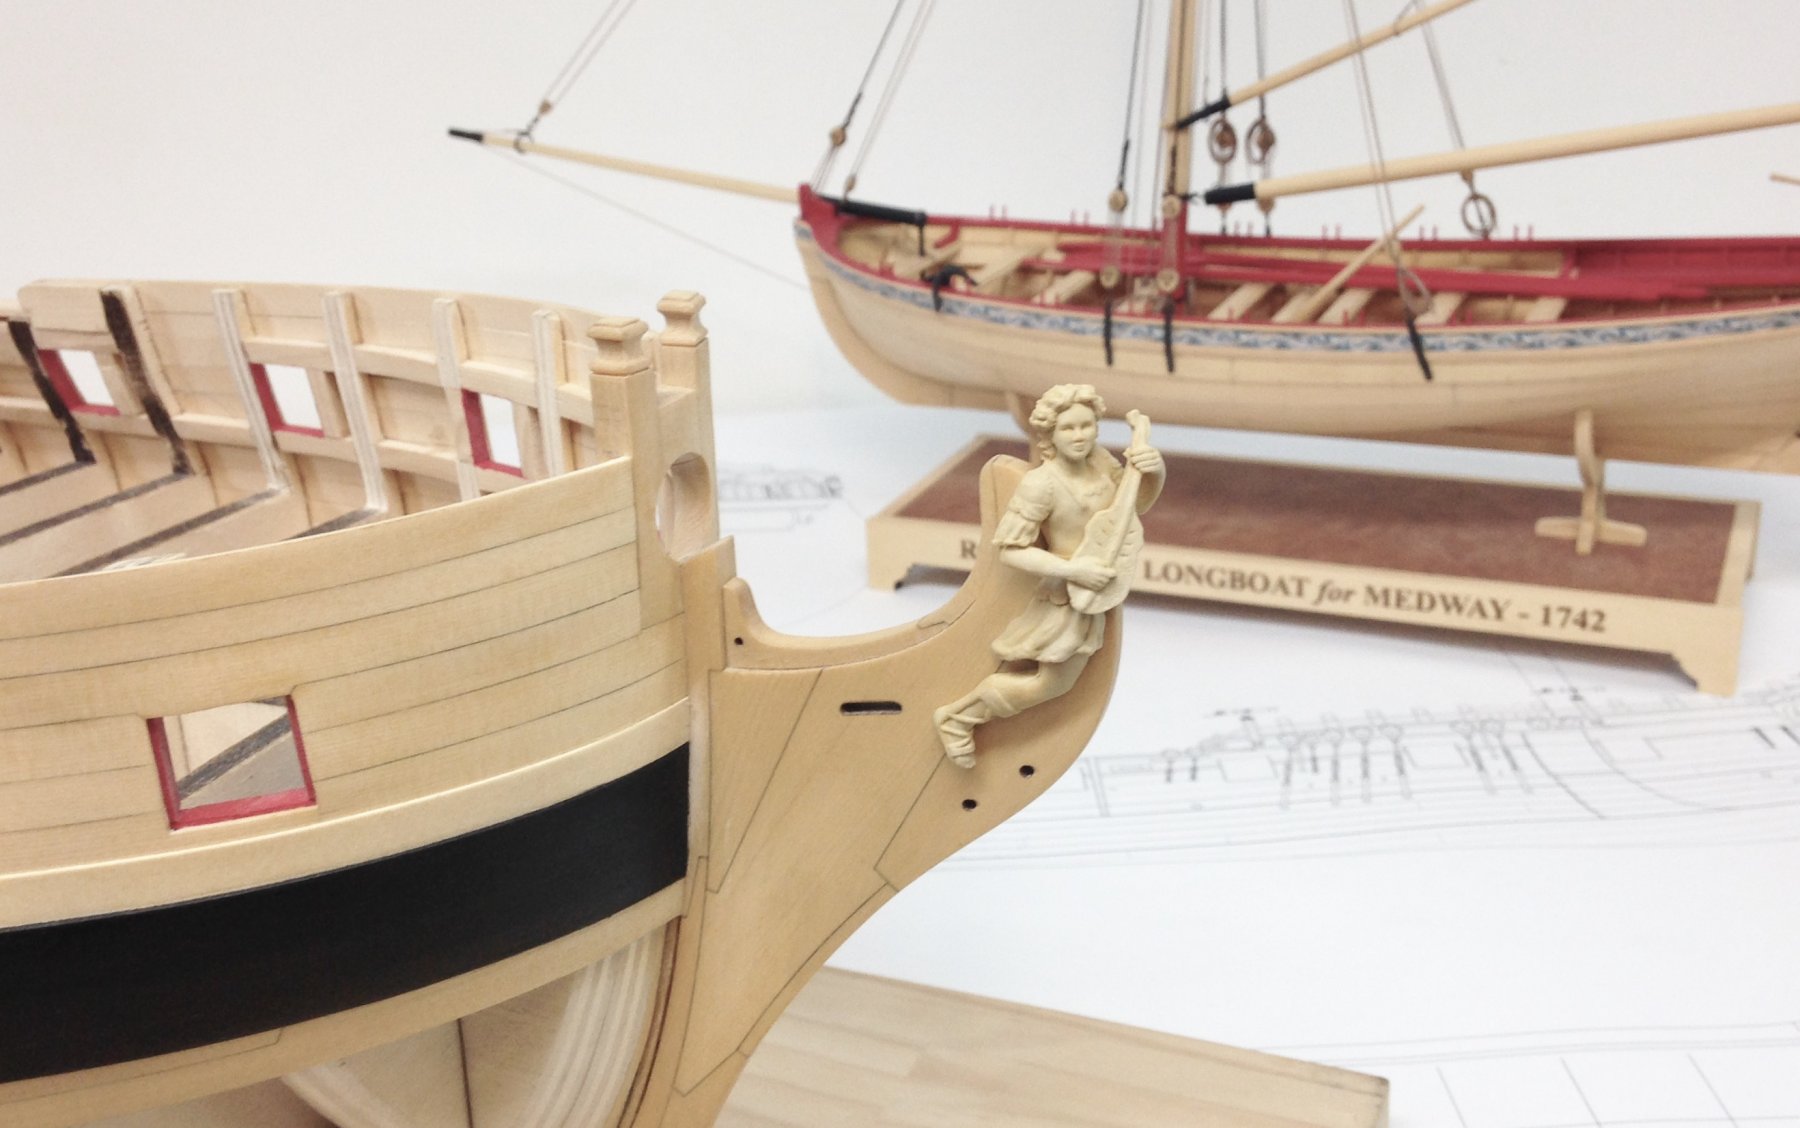
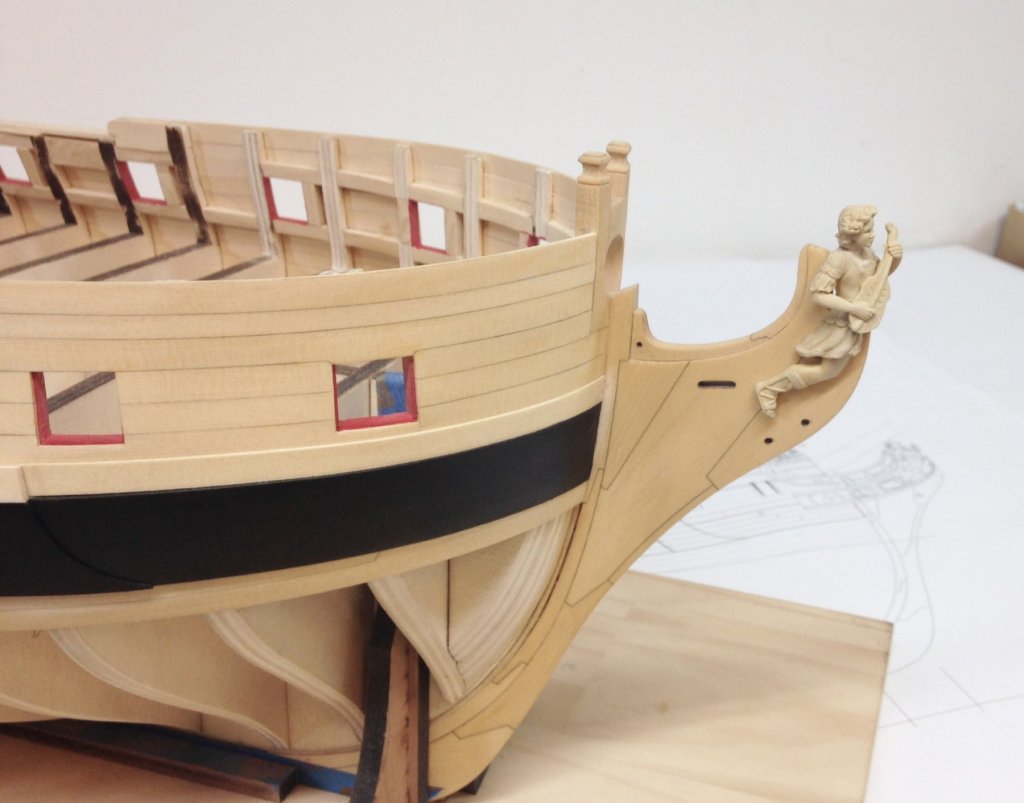
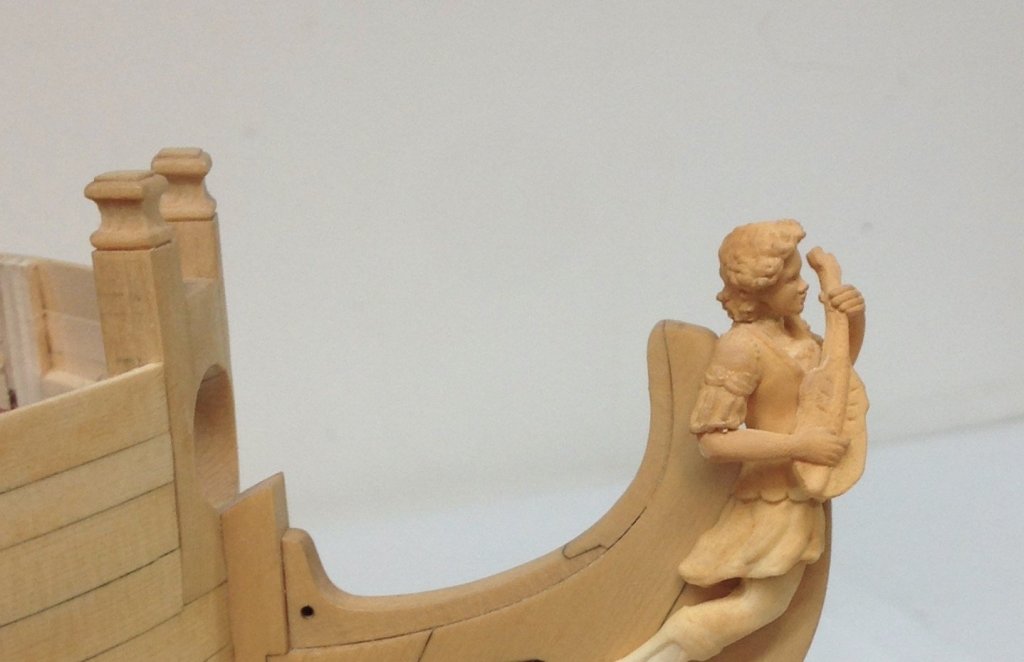
I agree 100%.....But I am not joking about changing it if in fact someone prefers it looking more forward. The resin is so forgiving to work with. And now that the resin is cast through in a tan/wood color, cleaning up the seam is a piece of cake. Literally saw off his head and glue it back on facing any direction you prefer. Ten minutes tops. Here is a better view of the new colored resin figure. I only spent 5 minutes turning his head. Excuse the Iphone photo. Just learning how to use it. Playing with the camera settings.
- 1,784 replies
-
- 7
-
-
- winchelsea
- Syren Ship Model Company
- (and 1 more)
-
I wasnt planning on it but if folks want them rather than making something similar I will do so. But you will have to get your own screws and washers. Remember the first ten sets has three pairs of these included. I will use basswood. Maybe I will cut some early next week. I tried to accommodate the "cheap" guys trying to save $12. Its hard trying to accommodate everyone.
-
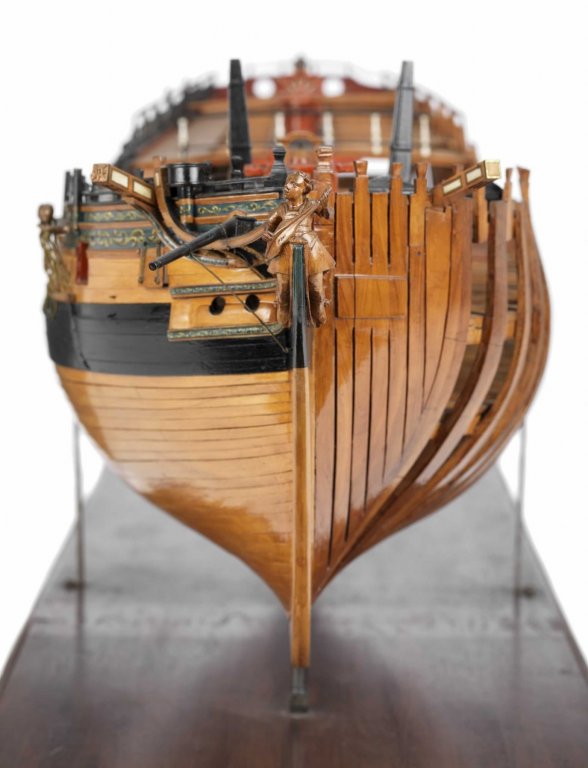
You mentioned that a few times before. Unfortunately that cant be changed now, so it is what it is. Mind you it really doesnt look to the side. The camera does seems to accentuate it and in real life it isnt as noticeable. Its actually less so than the contemporary model version below. And yes many figureheads dont look straight ahead.....this is just one example, and it was done to capture the look somewhat of the contemporary version. This model is a very important one and pains were taken to make it very accurate because it was presented to someone by the admiralty as a big deal at the time. So I am careful to capture its essence as closely as possible. I also think they do this on some contemporary models because they are most readily viewed from the side and by turning the head slightly, you can see the face detail better as models are usually displayed. On one side anyway. But the good news is that if it bothers anyone that much just decapitate the resin figure and turn slightly facing forward and glue it back on. Just a little clean-up and nobody will notice. LOL A quick decapitation on one of the other resin figurehead tests and you can see that you can easily have him look anyway you like. No fuss.....I didnt even touch it up afterwards. Took me five minutes. Chuck
- 1,784 replies
-
- 13
-
-
- winchelsea
- Syren Ship Model Company
- (and 1 more)