Chuck
-
Posts
9,722 -
Joined
-
Last visited
Content Type
Profiles
Forums
Gallery
Events
Everything posted by Chuck
-
 These people are just not bright. They must be printed with no scale......I just dont understand.....ugh. "as in document" Let us know how it goes. Chuck
- 105 replies
-
- 1
-

-
- winchelsea
- Syren Ship Model Company
- (and 1 more)
-
Looks pretty good to my eye. Nice work. Its coming together.😁
-
They are just cut from regular printer paper with a #11 blade. No adhesive needed. You can hold them against the bulkhead with one hand while you mark the tick marks with the other. I cut them around 5/16" wide. Chuck
- 1,784 replies
-
- 2
-
-
- winchelsea
- Syren Ship Model Company
- (and 1 more)
-
Not really.... i think there would be too many variables. Having said that. I could be wrong too so you have nothing to lose by trying. The issue is how fairing will affect your marks as you would be adding them before fairing.
- 1,784 replies
-
- 2
-
-
- winchelsea
- Syren Ship Model Company
- (and 1 more)
-
Really nice start. Good idea to build both stem/keel assemblies. They both look excellent. Now you just have to choose which one you want to use. chuck
-
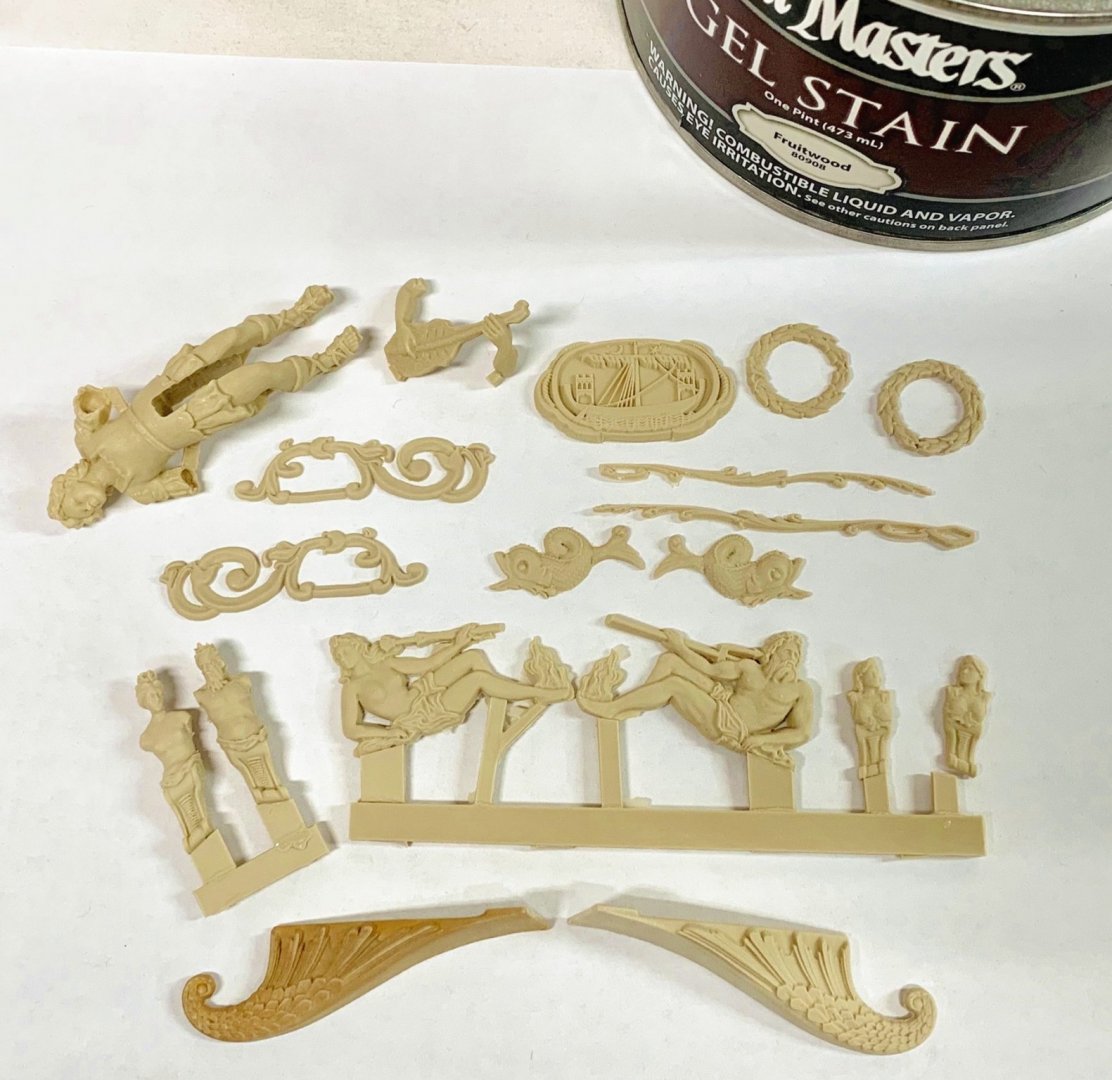
So I received the first test batch of resin castings. They look fantastic. The detail captured is well above my expectations. My casting guy is a real master at this. There is also some very good news...the overall cost per set is actually much cheaper than I expected. So what you see pictured which is the complete resin set, will cost even less than I thought. The resin set will retail for just $120. As you can see it comes in a tan color already and it could be used as is. Just clean up what little spru marks you see. I will ship them as shown above which you can see has the figures still on the sprue. They need to be removed...but the spru tab can be used as a handle so I will leave them attached for shipping. You will also notice that one of the drops looks different, If you prefer a more natural wood look then apply the Old masters gel stain (fruitwood) with a brush. Then wipe it off immediately. This really makes it pop and is what I will be doing to them all. This is something I would definitely do if you are building in Cherry or swiss pear. So this resin set is a really low cost alternative to buying the milled wood versions. AND As stated earlier, for those have have active build logs, there is a participation discount. The set will be further reduced to just $95. But I will only give that discount to folks that have an active build log and who participate within the group showing progress up to chapter two completed. If you havent started a log then dont bother requesting the code... I should have them up for sale in a couple of weeks. Also note that I just took that photo with my phone. The stained drop is actually quite a but lighter and matches my figurehead which you have seen below. The arms must be glued on a steh figure comes in two pieces. I will take some better pics later with my camera. Chuck

- 82 replies
-
- 12
-
-
Thank you guys...I appreciate the kind words.
- 1,784 replies
-
- 2
-
-
- winchelsea
- Syren Ship Model Company
- (and 1 more)
-
Thanks Greg i havent decided yet. As always, i change my mind on that every day. The contemporary model has no trunnels. It looks beautiful and as you say, the same is true of many others. I have some time to decide so I once i finish planking the other side, I will push forward with the stern and quarter gallery construction and see what is looks like after that is completed.
- 1,784 replies
-
- 6
-
-
- winchelsea
- Syren Ship Model Company
- (and 1 more)
-
Thanks Its no different than working with basswood in my opinion. Except it looks better and holds a sharp edge. You just need to be careful. If you are a rough builder then you will get some scuffs....but if you can lighten your touch then you wont have any problems.
- 1,784 replies
-
- 3
-
-
- winchelsea
- Syren Ship Model Company
- (and 1 more)
-
I did use wop from the beginning. It helps protect the wood and even hardens it a bit. Nice progress. The skeleton is coming together.
- 99 replies
-
- 2
-
-
- winchelsea
- Syren Ship Model Company
- (and 1 more)
-
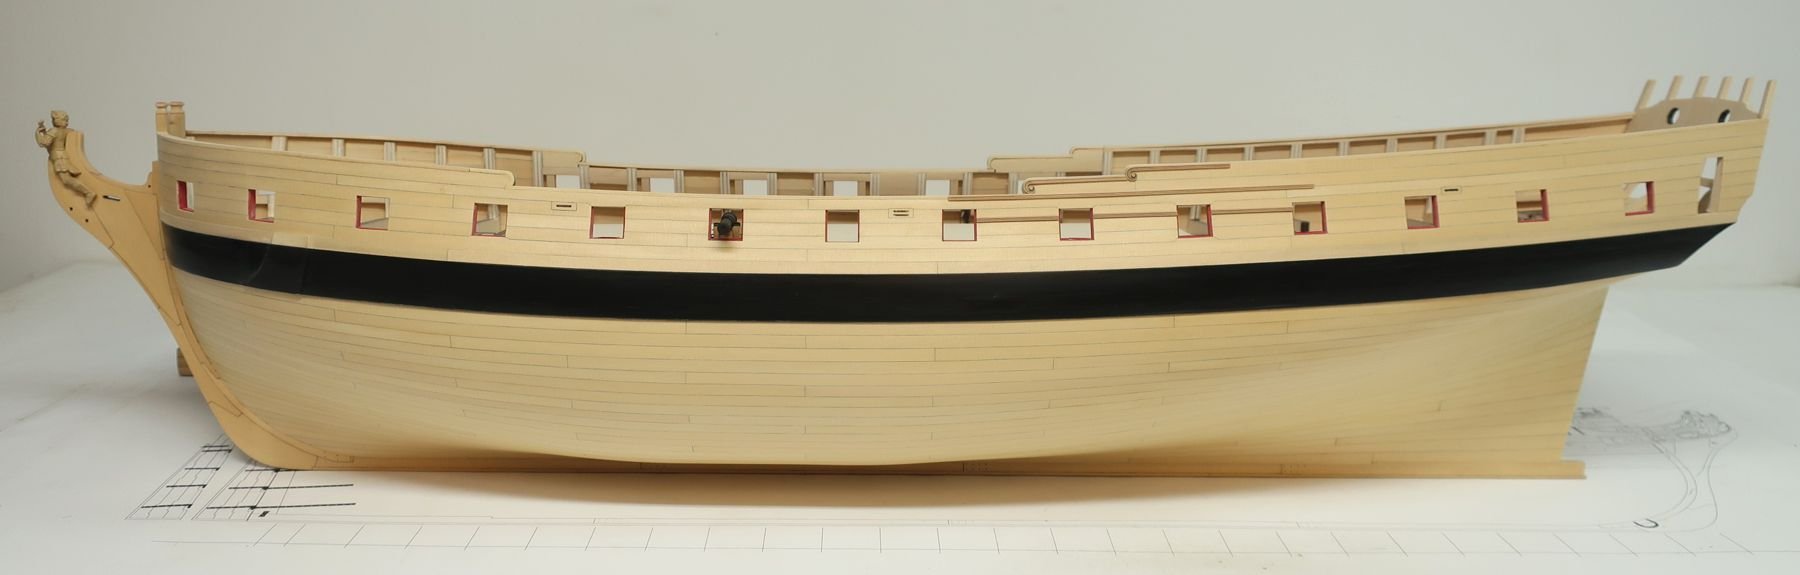
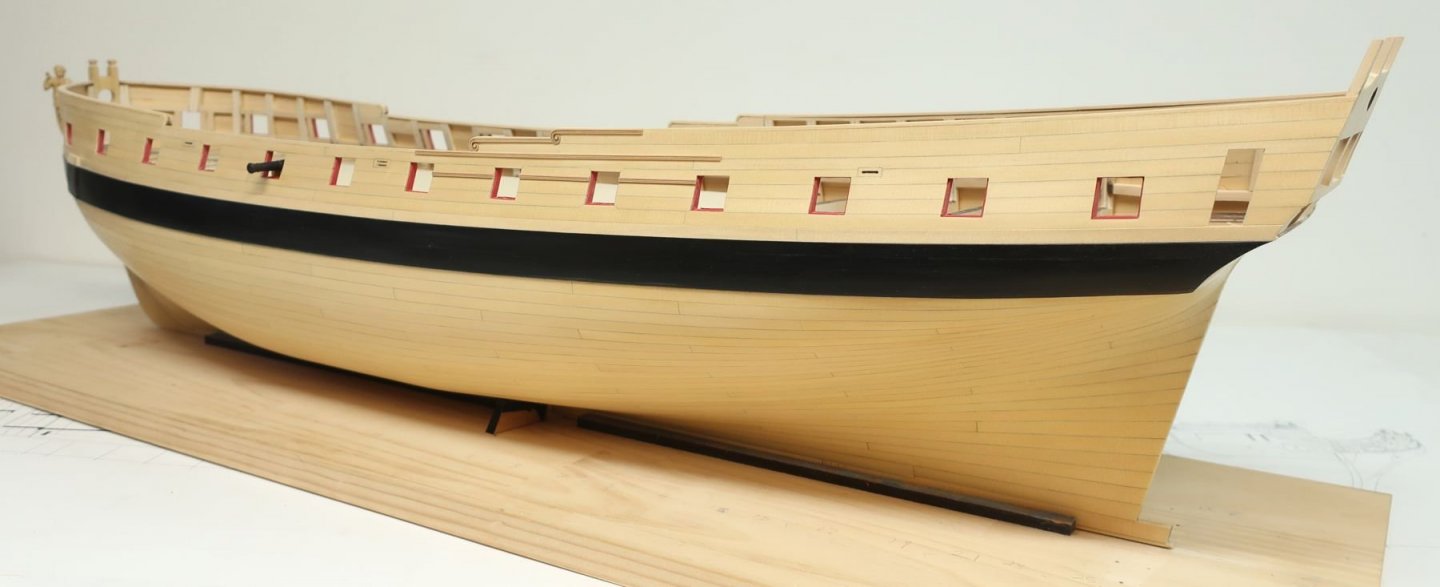
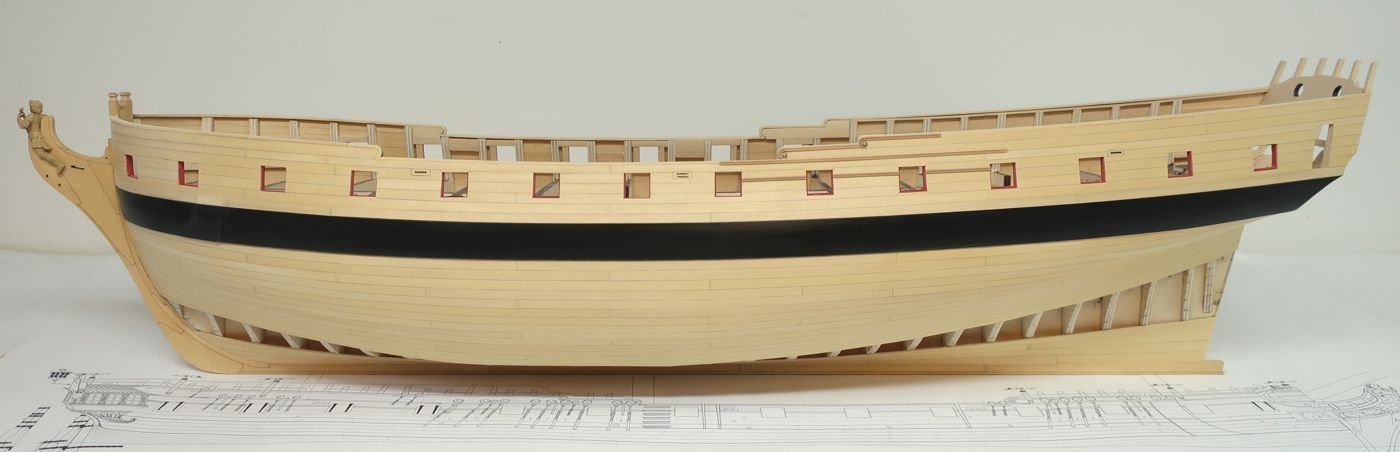
A milestone today....I finished the planking on the port side. That feels good!!! I still have 9 strakes on the starboard to go. I am happy with the results although as always you always tend to spot and focus on your mistakes. I am very happy with how the cedar looks on such a large subject. I will let you guys decide if you like it as a good wood to use on such projects. I have only used wipe on poly...I decided not to use the gel stain after seeing how the finish looks. The wales are a mess and will need to be cleaned up but I will wait until all of the planking is done. I can finally see the light at the end of the tunnel...BUT then there is the treenailing.....Ughh!! Comments and questions , dont hesitate. 😊

- 1,784 replies
-
- 39
-
-
- winchelsea
- Syren Ship Model Company
- (and 1 more)
-
Looks fantastic Jack.....I should have my resin sets in about two weeks time so it looks like we will both be ready to go. Chuck
-
Nicely done!!! Glad to see you are back on track.
-
A little of both. You must fair the outside so you get a nice curve port to starboard. Once done you should fair inboard and reduce the thickness....but you dont have to thin all the way down. Just the top of the transom pieces should be 3/32" thick and they can get gradually thicker.
-
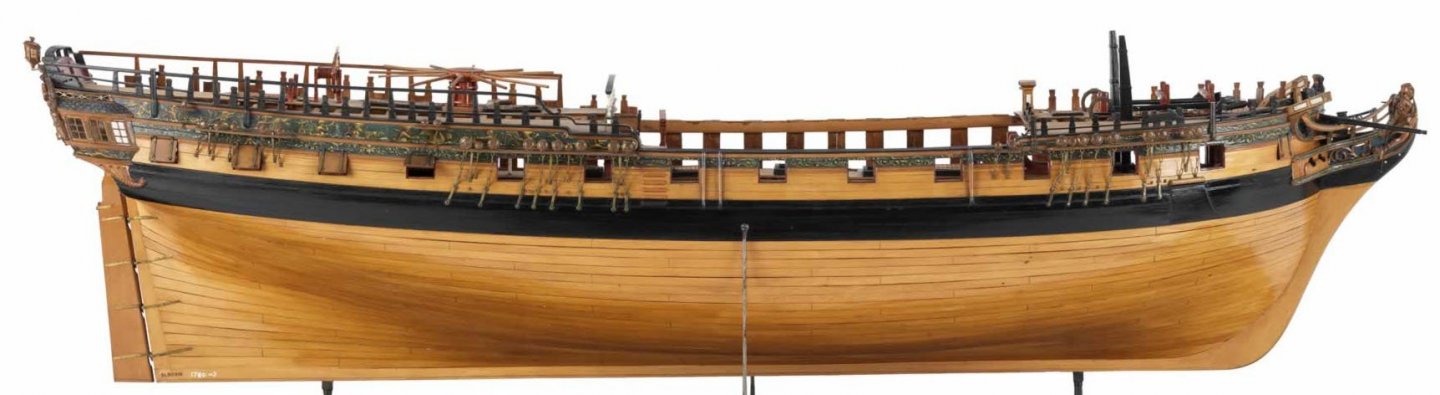
Yes the rabbet actually stops at that step. This is a common feature and is actually shown on most original drafts. The issue is that all ......and I mean all kit MFGs just ignore this feature. You can see it on the original draft where the dimension of the keel changes. It might be tough to see in this photo but its there as well on the contemporary model. Our model has the exact same number of strakes by the way. Chuck
- 1,784 replies
-
- 10
-
-
- winchelsea
- Syren Ship Model Company
- (and 1 more)
-
No you have to bevel the end of the plank to match the stem rabbet angle . That is correct. Once against the rabbet and glued in ,the plank shouldnt move. As you get closer to the keel that angle changes a lot and its the glue that keeps it tight against the stem neatly. Your bevel was probably wrong or you didnt secure it in place with enough glue. You shouldnt have to force it as your plank should be pre bent so it fits properly from the start. If it springs away then it should be pre shaped more. hope that helps
- 1,784 replies
-
- 6
-
-
- winchelsea
- Syren Ship Model Company
- (and 1 more)
-
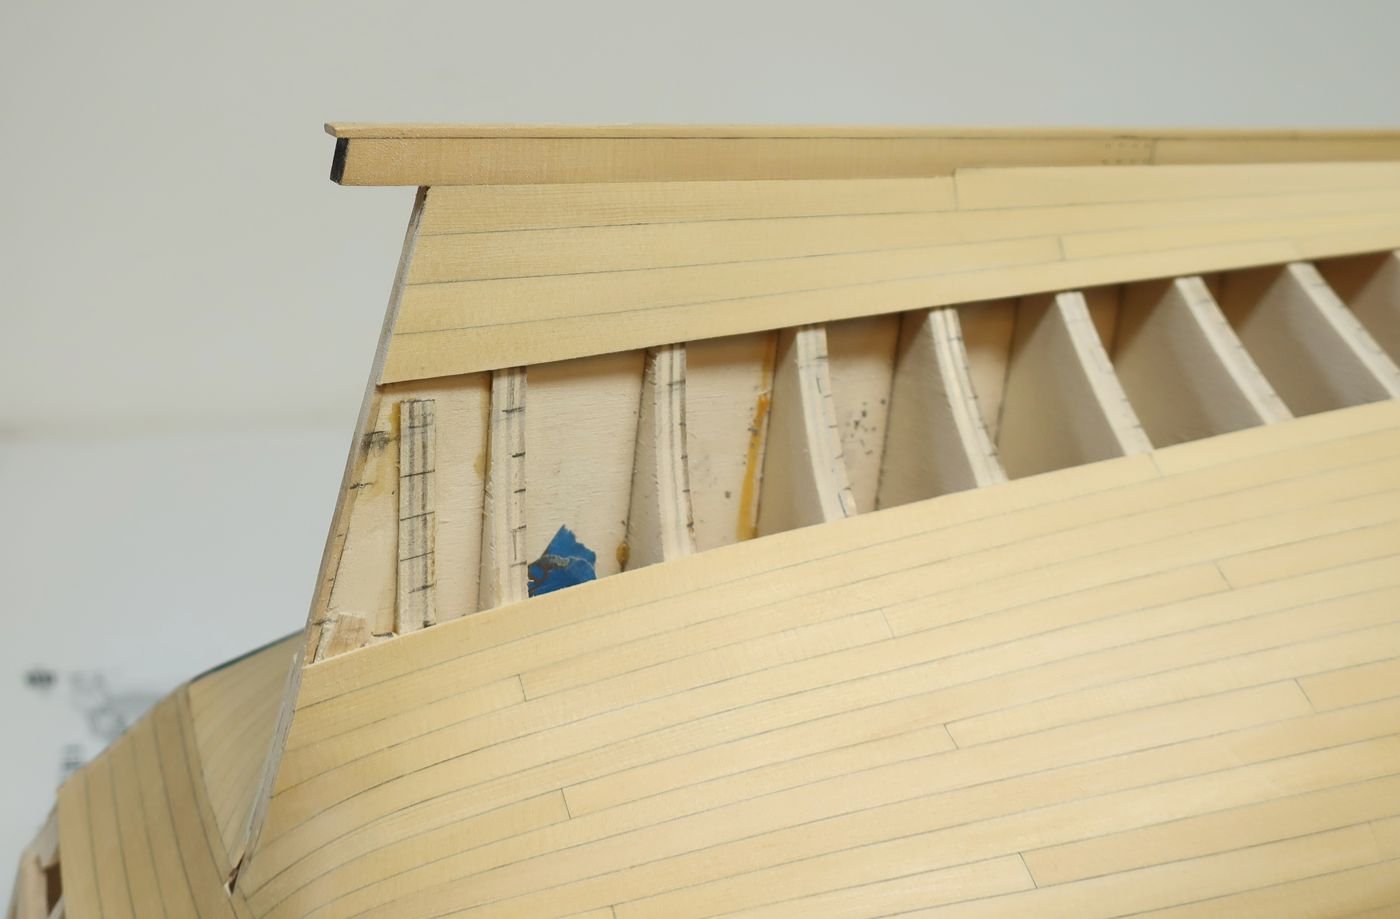
Very nice work....That looks very good and the spacers worked as they should. You should however have sanded the tops of the transom pieces before you glued them in. That will be difficult to do now but not impossible. You should use the 3/64" thick transom (clamp it in position) so you can trace the shape of the transom top and sand them to match.
-
Thanks..... No questions means that planking is going to be a piece of cake for folks....LOL. Seriously though guys...any questions or comments on how the planking up to this point? You guys are awfully quiet on the subject. Slow and steady is the best advice I can you guys. Chuck
- 1,784 replies
-
- 5
-
-
- winchelsea
- Syren Ship Model Company
- (and 1 more)
-
Why second hull plank?
Chuck replied to bigcreekdad's topic in Building, Framing, Planking and plating a ships hull and deck
Double planked hulls usually dont have a rabbet. That is problematic. Double planked hulls as said were done because the MFG usually cheaped out on the number of bulkheads..... If your kit has few bulkheads and is single planked that would be a huge problem.... If you have a lot of bulkheads or frames......Why would you plank twice if you take your time and do it right the first time. If your hull is painted or plated, why plank it twice? If it is not and you dont know how to plank, then it doesnt matter if you you plank the first layer poorly because chances are that the second layer will also be poor. Best to plank it once and plank it correctly. Single planked hulls force folks to learn proper planking techniques as well. My advice would be to start a log and post some photos.....also ask a lot of questions. Its not easy to plank a hull and it requires some practice. With lots of failures along the way.- 6 replies
-
- 10
-
-
Almost forgot to mention....at this stage you can remove the brackets on your baseboard. They did their job. You will need t make a work cradle. To do this, use the templates for the bulkheads which have the curve and shape needed. I will use three pairs just like the brackets. They will be positioned where the brackets were. You will see those on the next update.
- 1,784 replies
-
- 8
-
-
- winchelsea
- Syren Ship Model Company
- (and 1 more)
-
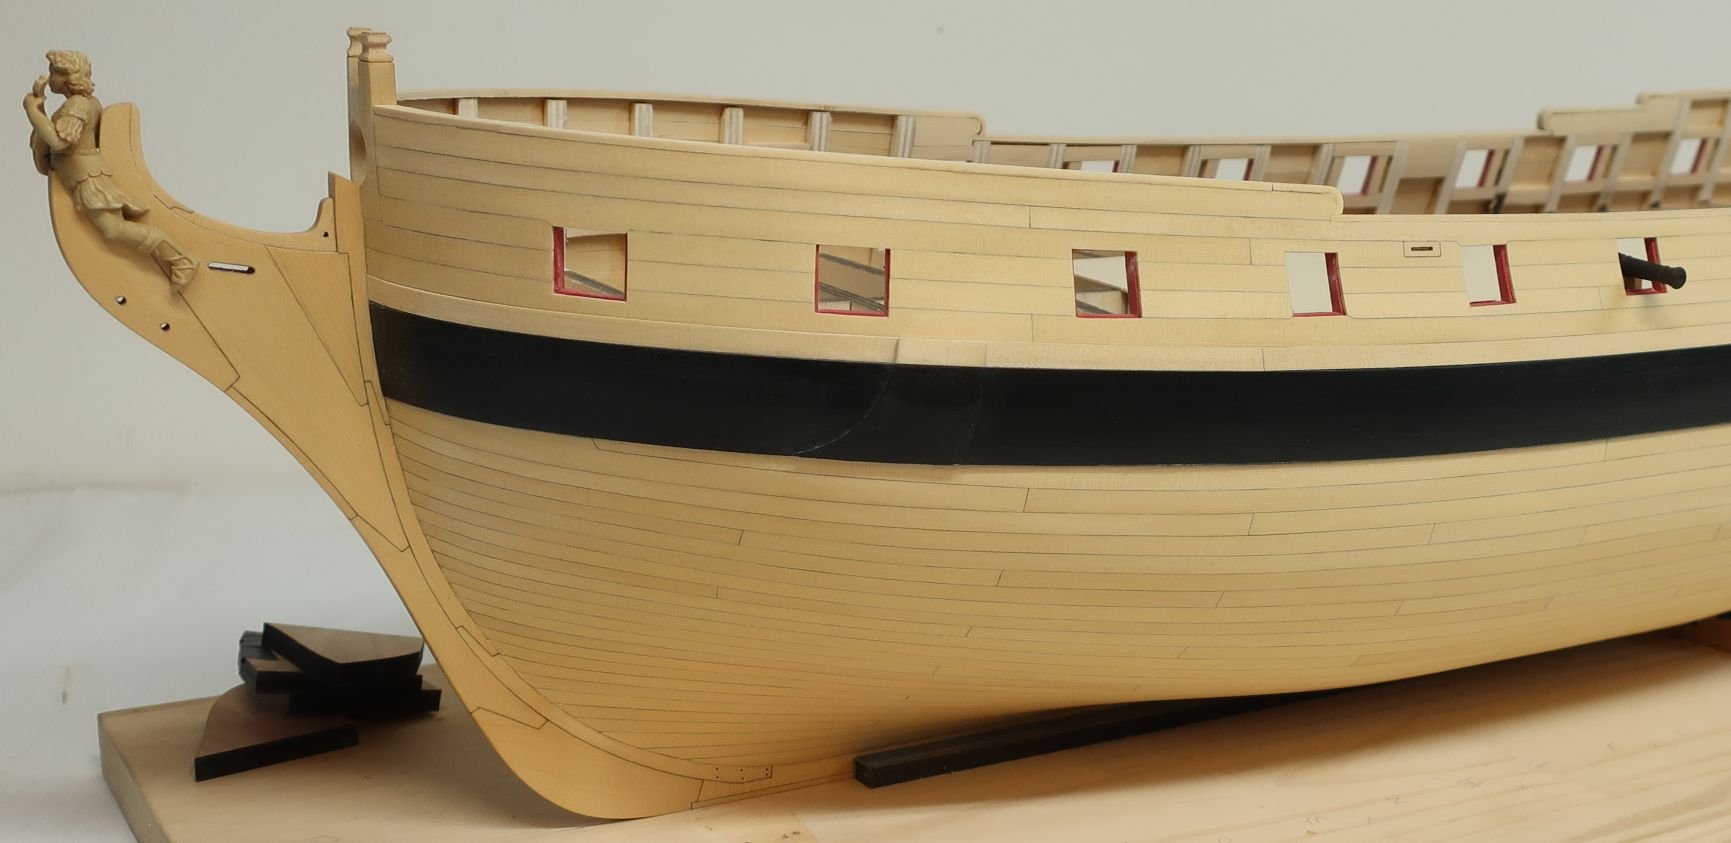
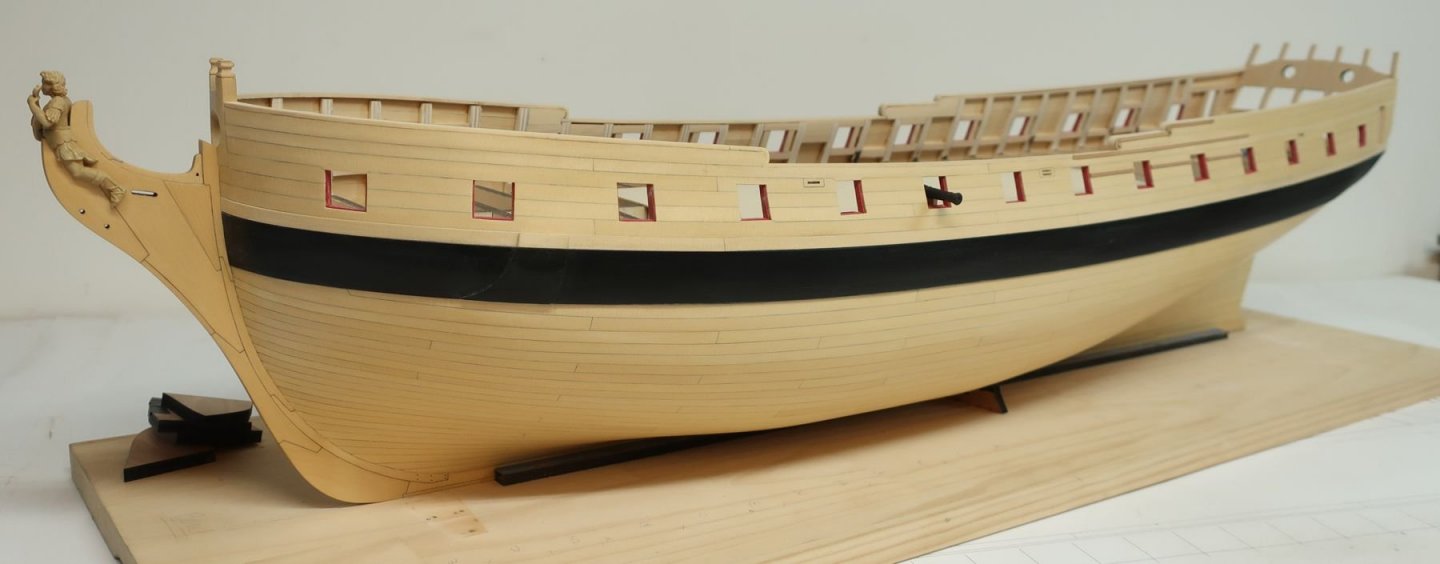
Planking continues....it is important for me to go slow and take care to make this a neat planking job. The planked hull is so visually important because of the size of this model that I am being very deliberate with each plank added. I am planking with the hull upside down and although the strakes look very good when viewed upside down, after I finish each strake I will flip the hull over so I can view it right side up. The run of the planks will look very different and this allows me the opportunity to make adjustments with the next strake if needed. I want a nice slope up of the planks at the stern.....but also at the lower bow. So even though I am following my tick marks very closely....I am still making adjustments when I see a dip or bump in the run develop. Remember that there are NO stealers at the stern. There is only that one drop plank at the bow. With these lower belts, you can run the planks off the stern post rabbet and then sand them back flush. We will add the stern post when planking is completed. Note the front of the garboard and its shape along with where it ends in relation to the scarf joint on the keel. It is not too far forward and its not too far aft. The end is about 1/16" forward of that joint on the keel. At the stern, the strakes were sanded flush to the rabbet.....and note the gentle slope upward being created. I only have six more strakes left on this side and you can see how I am following my lining out. You can see the remaining tick marks and picture the run of the remaining planking. At the stern on this lower belt, you must switch to wider 5/16" planks and shape them according to your tick marks. The planks along the stern post do get wider as one would expect. Let me know if you have any questions !!!! Comments are welcomed. No stealers at the stern which matches the contemporary model and will look very distracting. There is absolutely no need to use them.

- 1,784 replies
-
- 37
-
-

-
- winchelsea
- Syren Ship Model Company
- (and 1 more)