HOLIDAY DONATION DRIVE - SUPPORT MSW - DO YOUR PART TO KEEP THIS GREAT FORUM GOING! (Only 36 donations so far out of 49,000 members - C'mon guys!)
×


Chuck
-
Posts
9,660 -
Joined
-
Last visited
Content Type
Profiles
Forums
Gallery
Events
Everything posted by Chuck
-
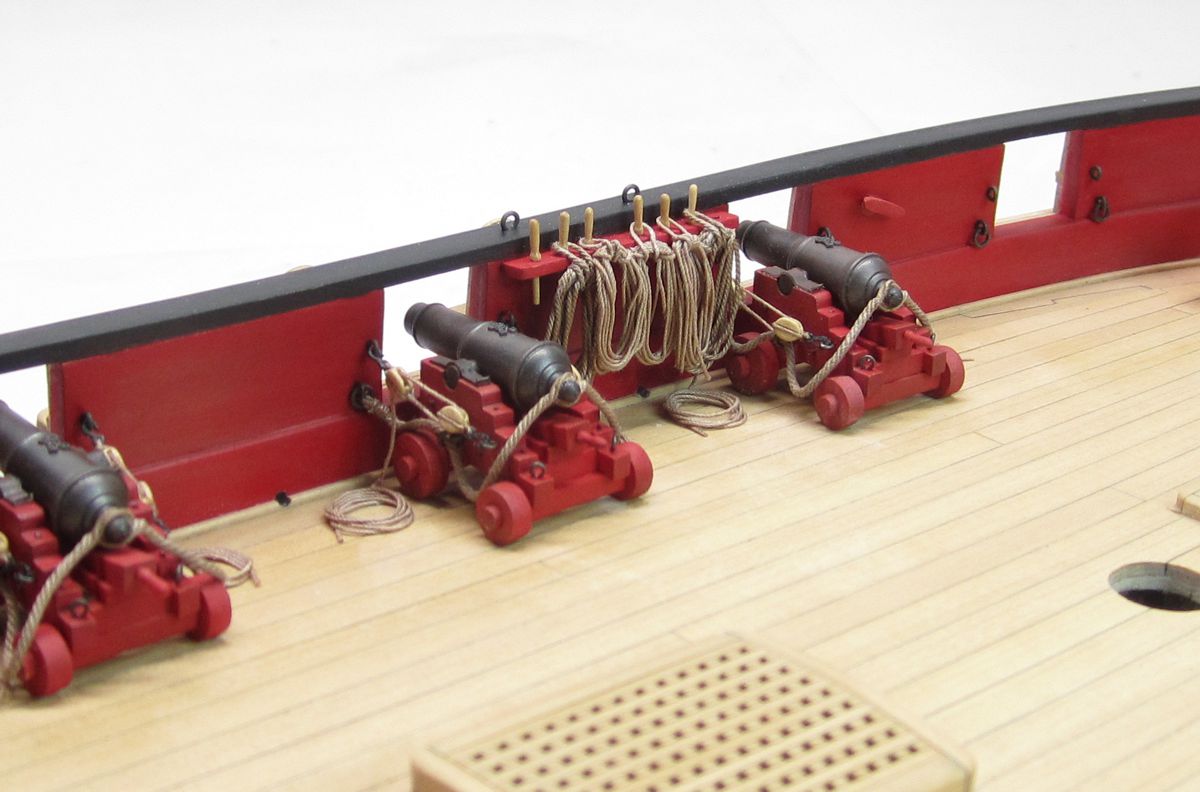
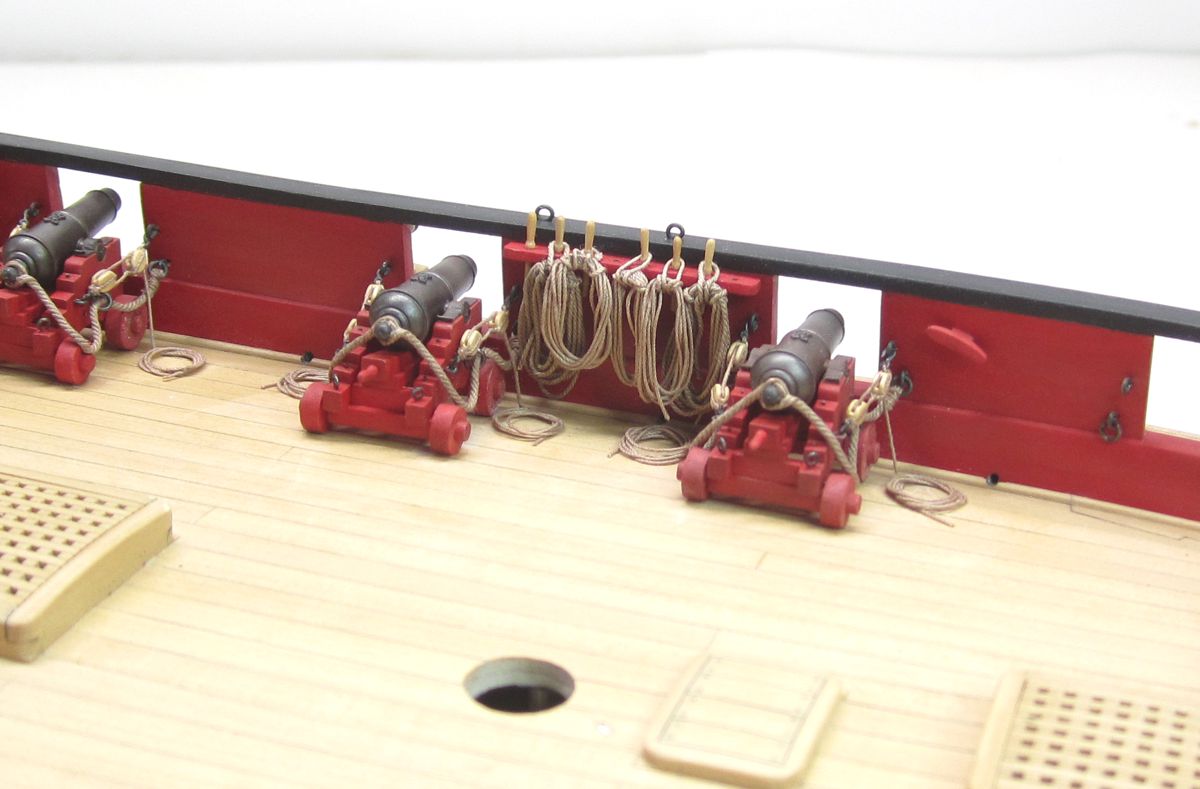
 The rope coil size isnt bad (maybe a tad smaller) but the color is way too bright and light. They dont all have to be the exact same size either. It looks almost white. The rope looks a bit heavy for those as well. See below.
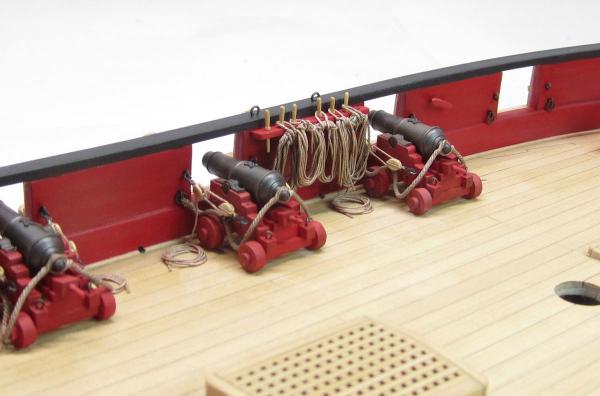

- 274 replies
-
- 7
-

-
- Cheerful
- Syren Ship Model Company
- (and 1 more)
-
I hope!!!! Not counting my chickens yet.
-
Looking great Bill. Cant wait to see it up close.
-
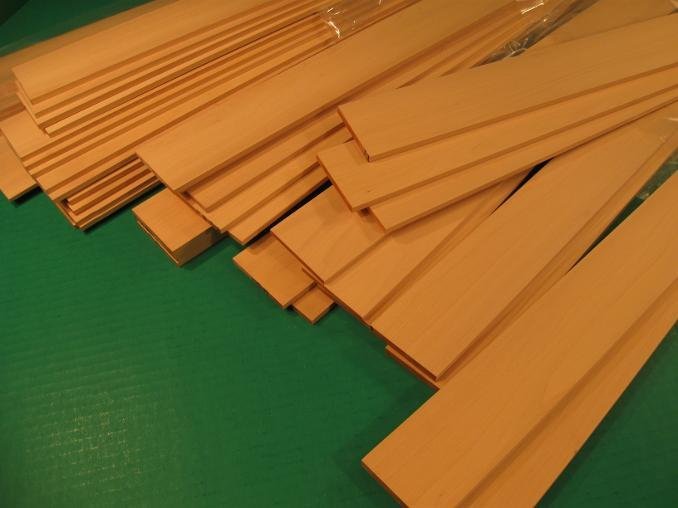
Please welcome Joe as our newest sponsor. He sells precision milled wood sheets and strips. Please visit his website and have a look. Modeler's Sawmill Boxwood...Swiss Pear....Walnut....Cherry...Alaskan Yellow Cedar etc. Welcome Joe!!!

- 17 replies
-
- 23
-
-

-
As you know I will not be rigging the prototype model. But there are some who have interest in rigging the model. If you are researching masting and rigging the model please post your findings and plans here for the benefit of the group. Chuck
- 1 reply
-
- 3
-
-
-
That looks great. Nicely done. Chuck
-
That looks OK but yes you need to fix those stern frames. The center two (when viewed from above need t be lined up. The next pair is slightly more forward but they line up with each other. The outboard-most pair is even slightly more forward....But these two also line up port to starboard. This is what creates the gentle curve to the transom when viewed from above. It shouldnt flatten out which is what happens when you use that strip across all the stern frames. That strip is not a good idea. You need to push the tops of the stern frames on the port side more aft to get each married pair in the correct spot. This will allow you to fair that nice curve of the transom when viewed from above them. A good way to do this is to take a strip of wood and butt it against the last bulkhead edge. It should be a long strip.....maybe 3/32x1/4. Then place it against the top edge of the offending frame and push the top of the frame aft a bit....then clamp it to the scrap strip. This will hold the stern frame still and in position until after you glue your window framing in position. Hope this makes sense as its tough to describe in writing. Basically brace the frame after pushing the top of it aft .
-
Probably in my Cheerful monograph. Check out the many Cheerful logs. Stuntflyer (Mike) has some excellent tutorials in his Cheerful log if I remember correctly. But its pretty simple. You just find where the template spans across your square stock. Then mark the square stock periodically down its length on all four sides. Draw lines connecting the two lines on on each side so you have two lines down the length of the stick separating it into a ratio of 7-10-7 . Then sand or shave the corners to make an equal octagon. Turn the octagon or sand it round. Now you have a round dowel made from square stock. Taper to suit. Some folks will taper the square stock before they mark it off to the 7-10-7 ratio....others taper the round dowel afterwards. Leave any square sections for masts alone....or octagon areas for spars. Only round of what is round. Drill any holes or simulate any sheaves before rounding off. Its easier to do while square. Chuck
- 3 replies
-
- 12
-
-
-

-
I know I have uploaded this in the past. But I have recently had several requests for this template and folks couldnt find it. So here it is again in its own easier to search topic. seventenseven.pdf
-
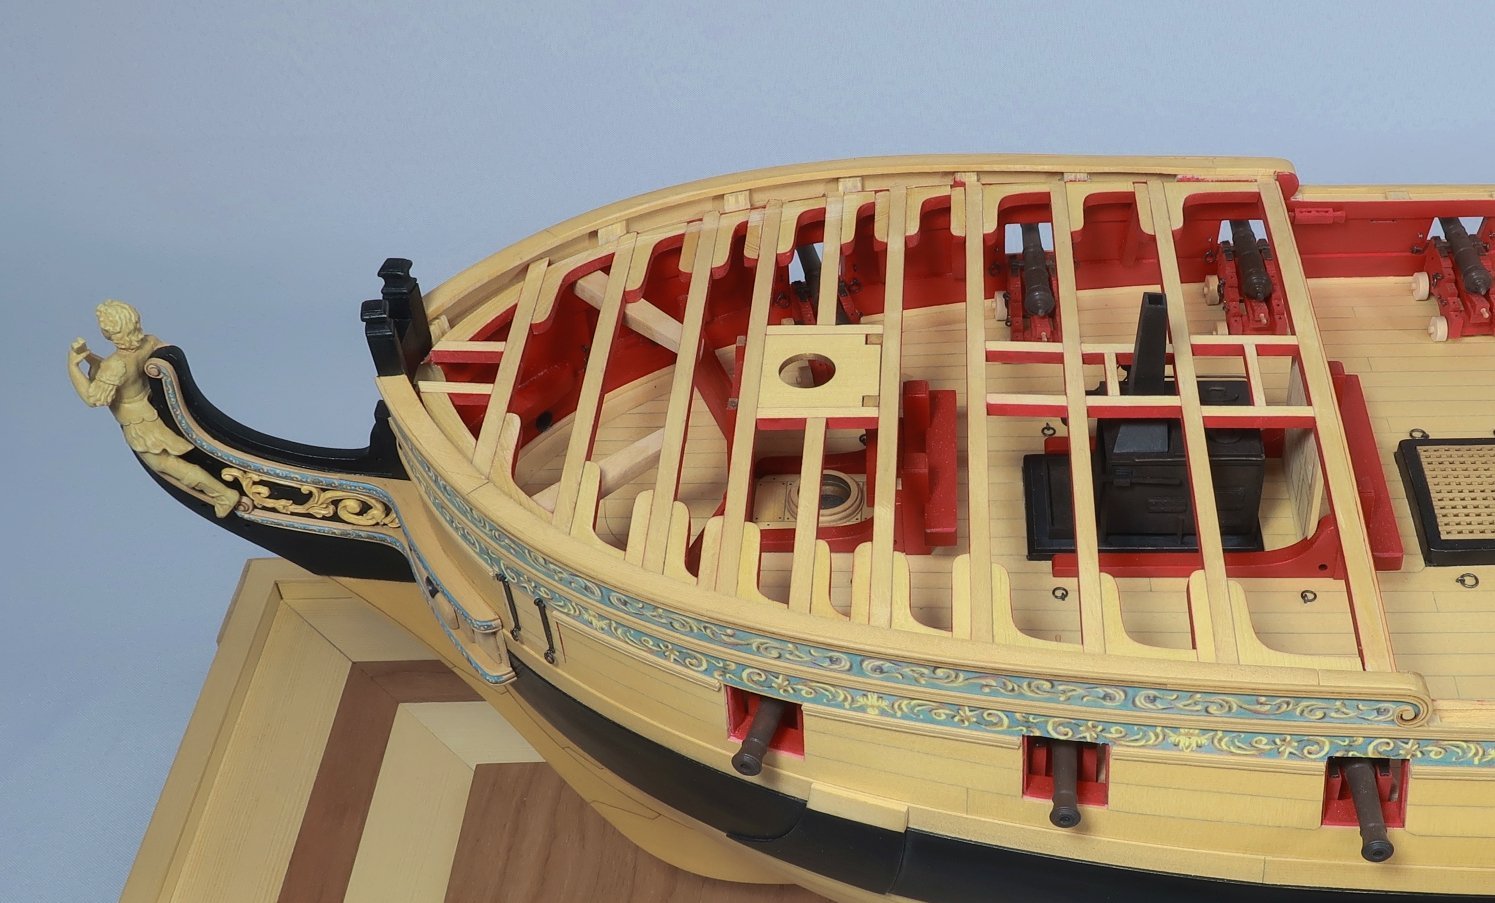
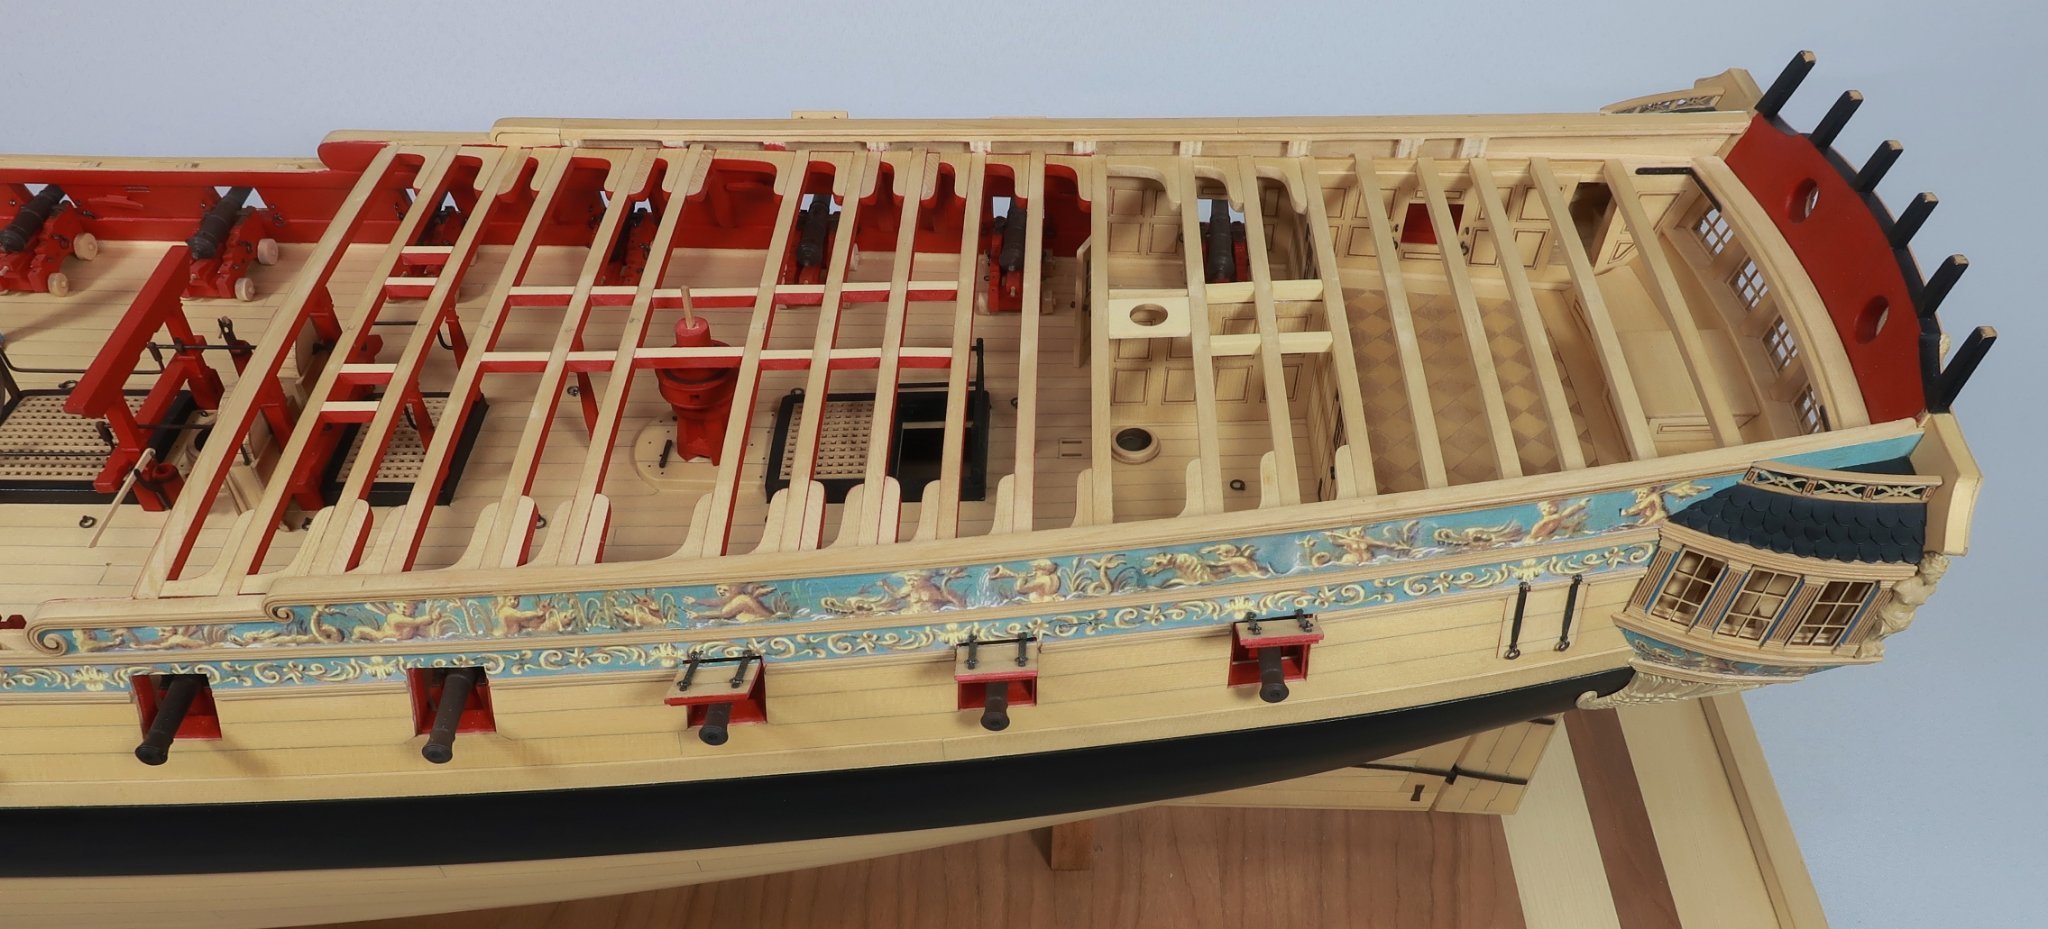
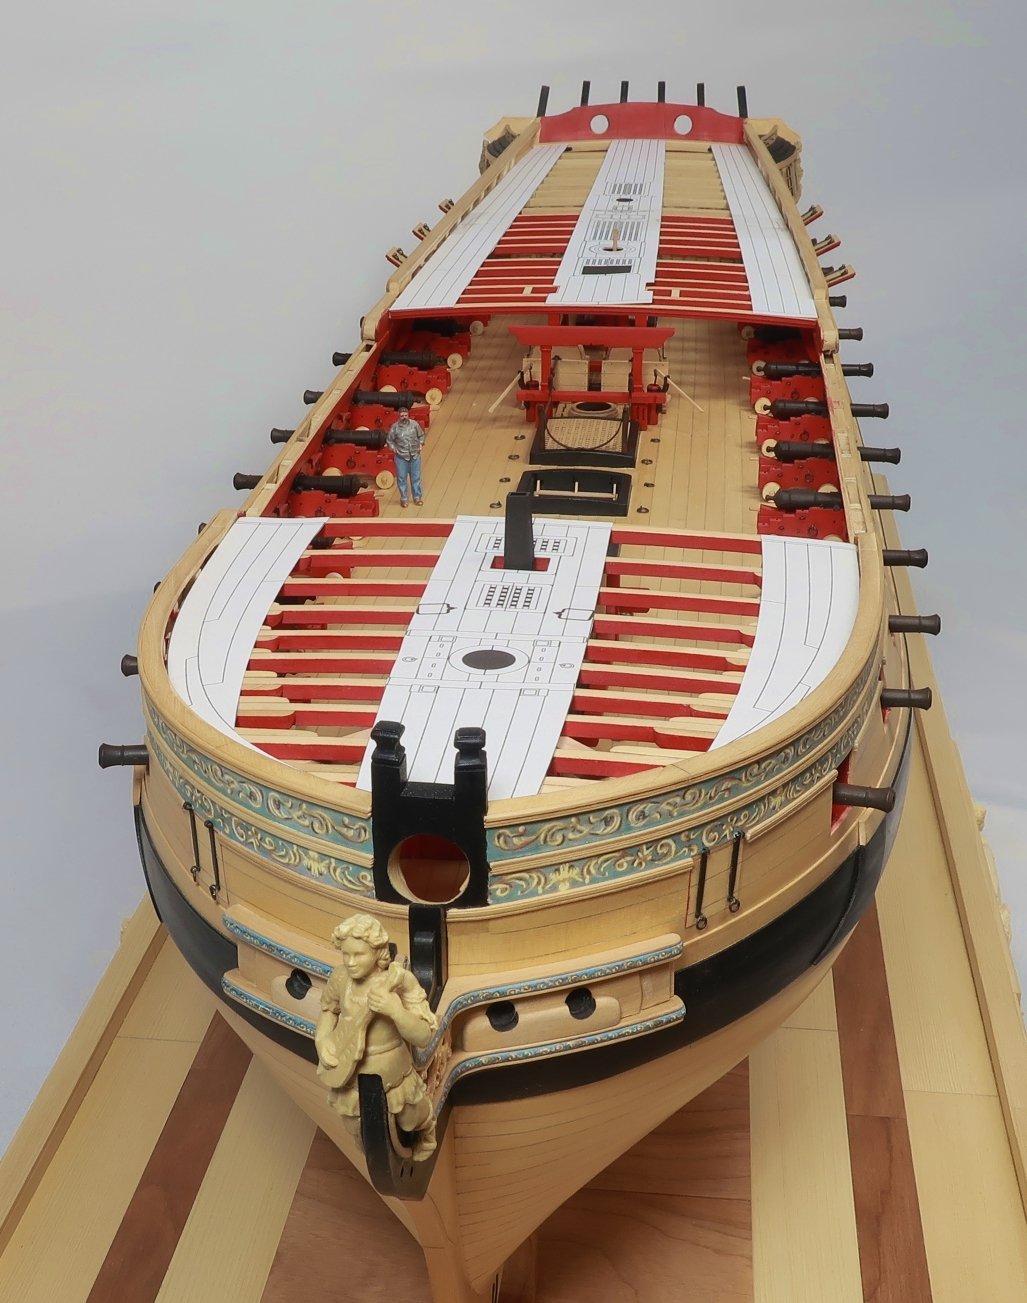
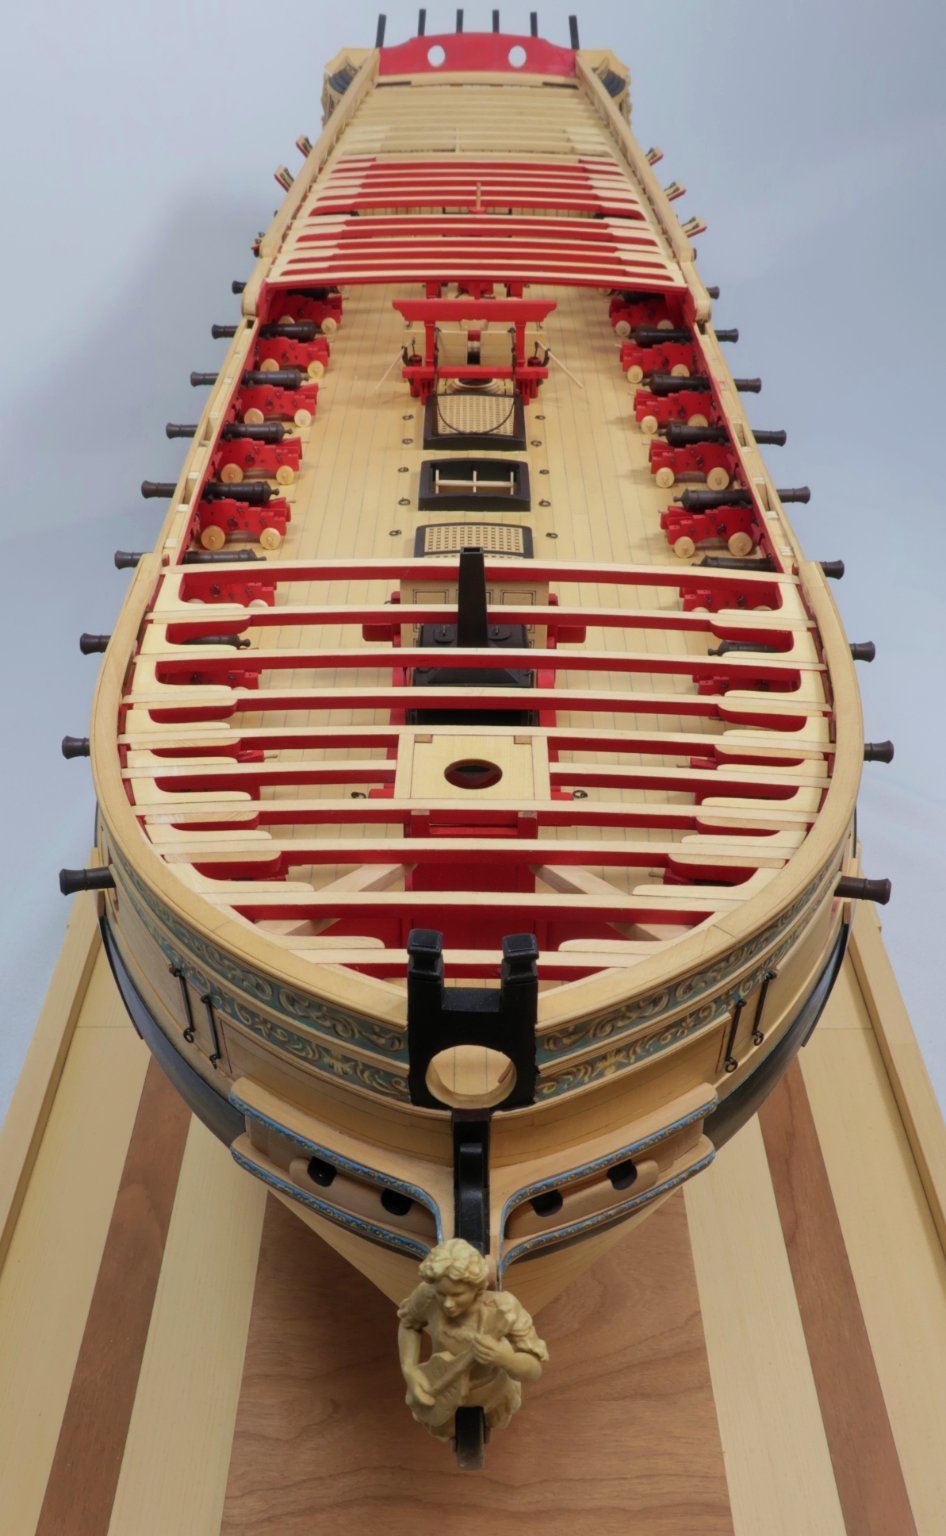
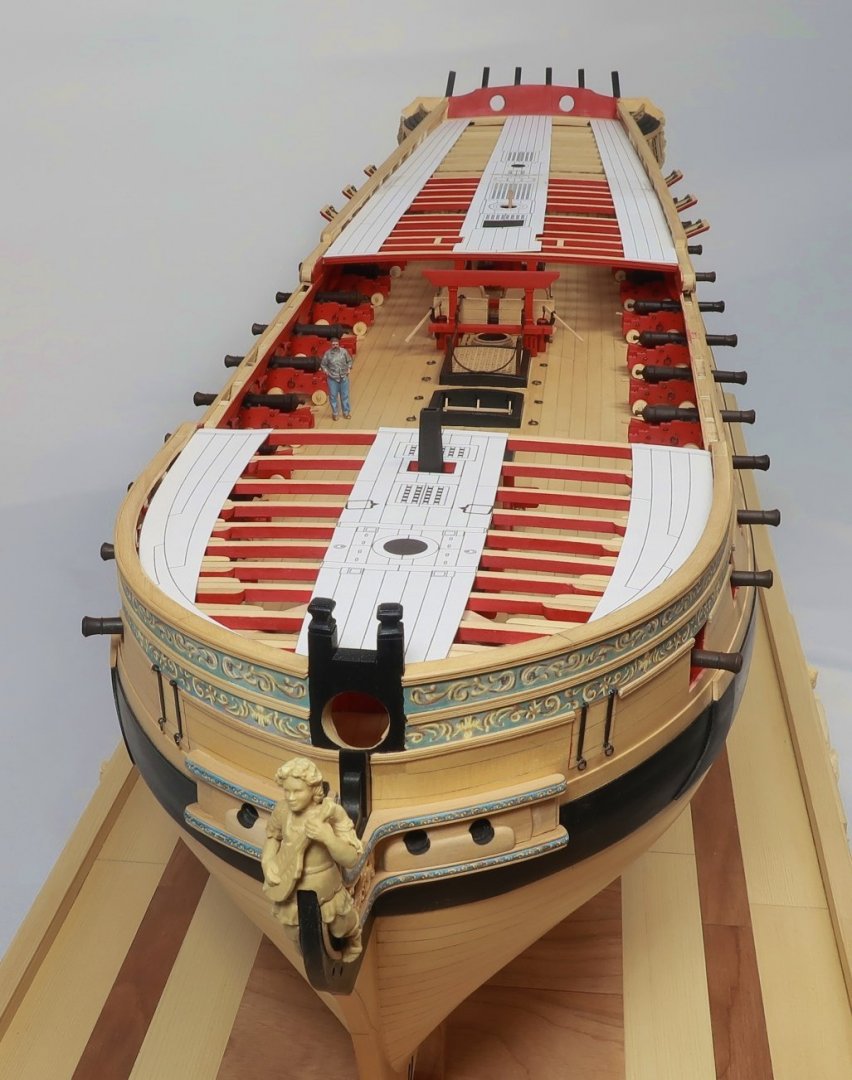
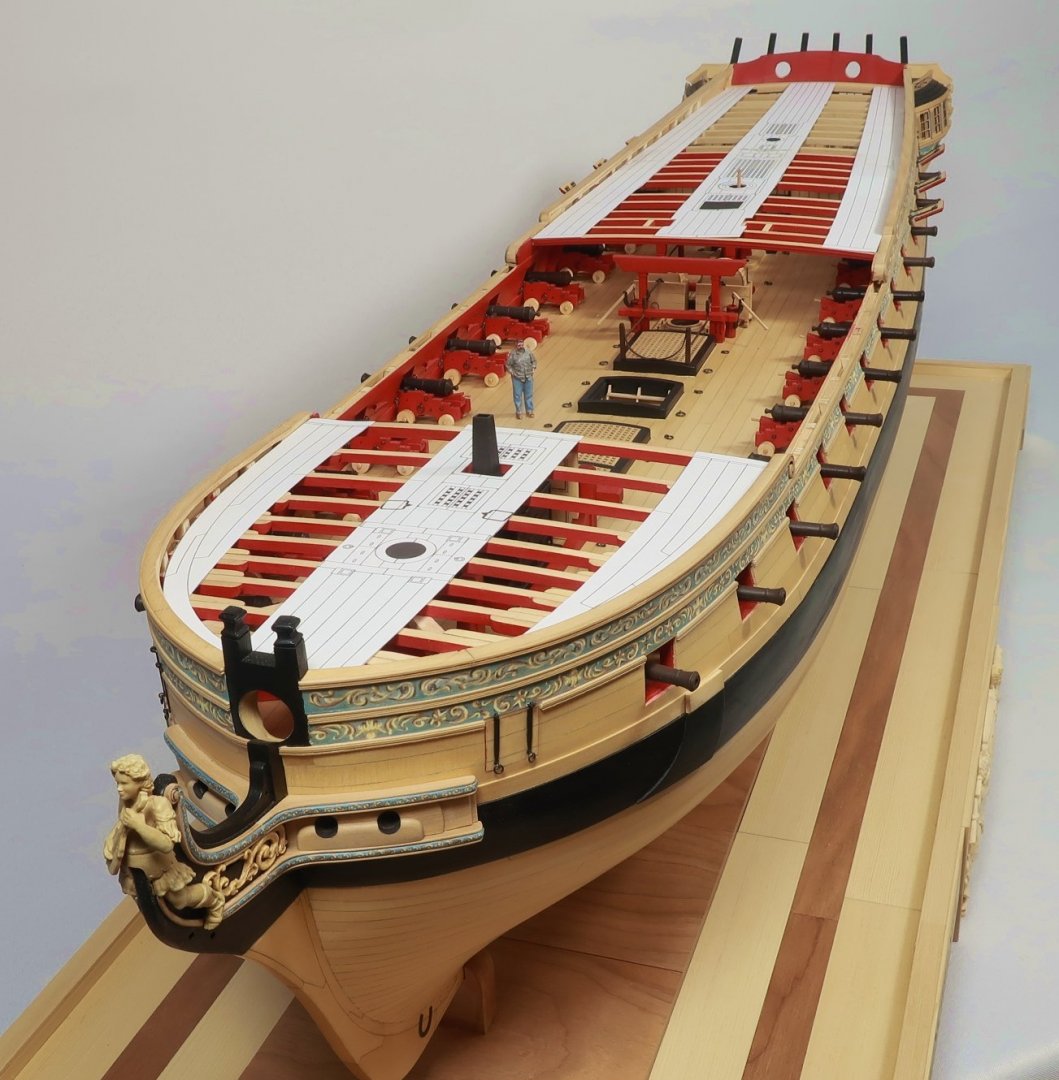
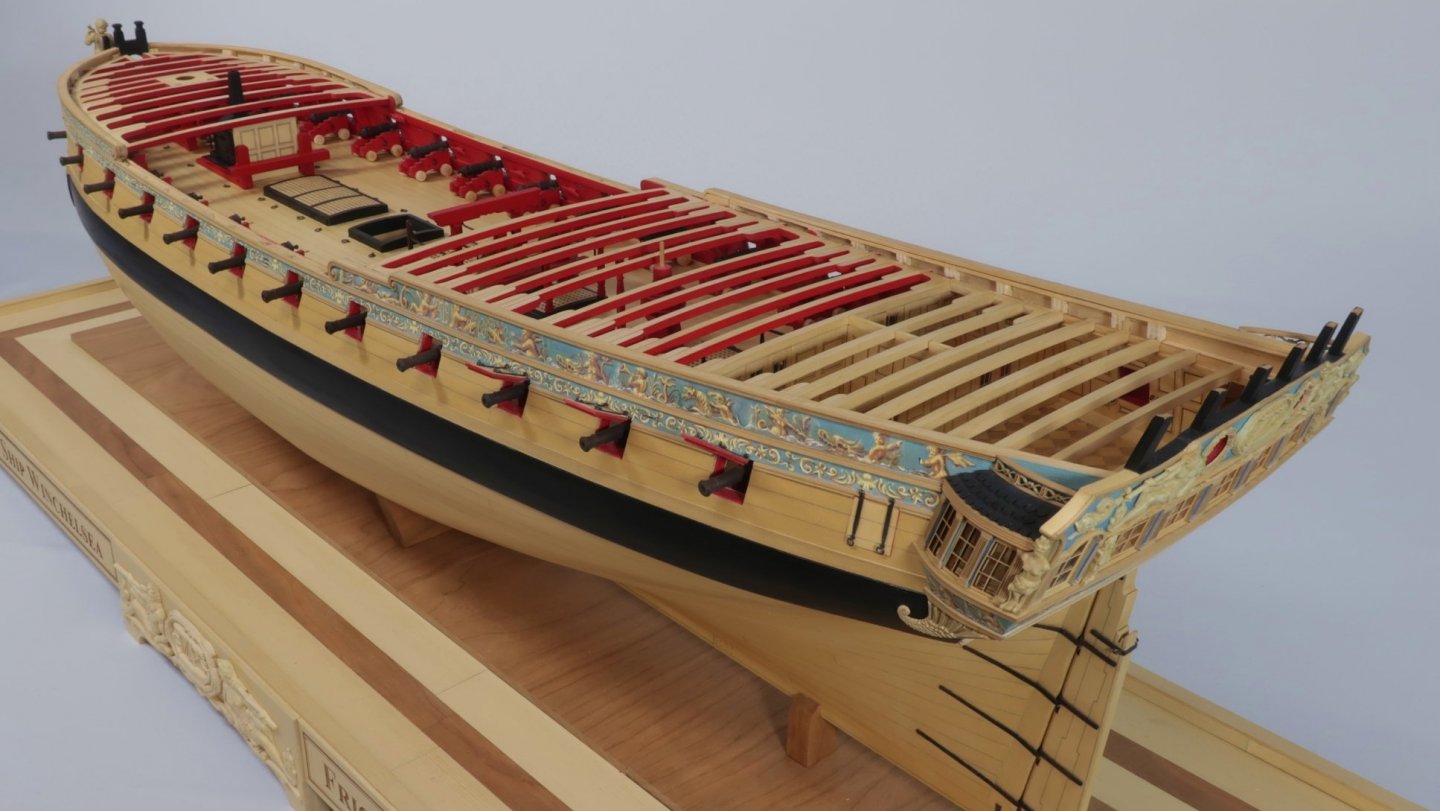
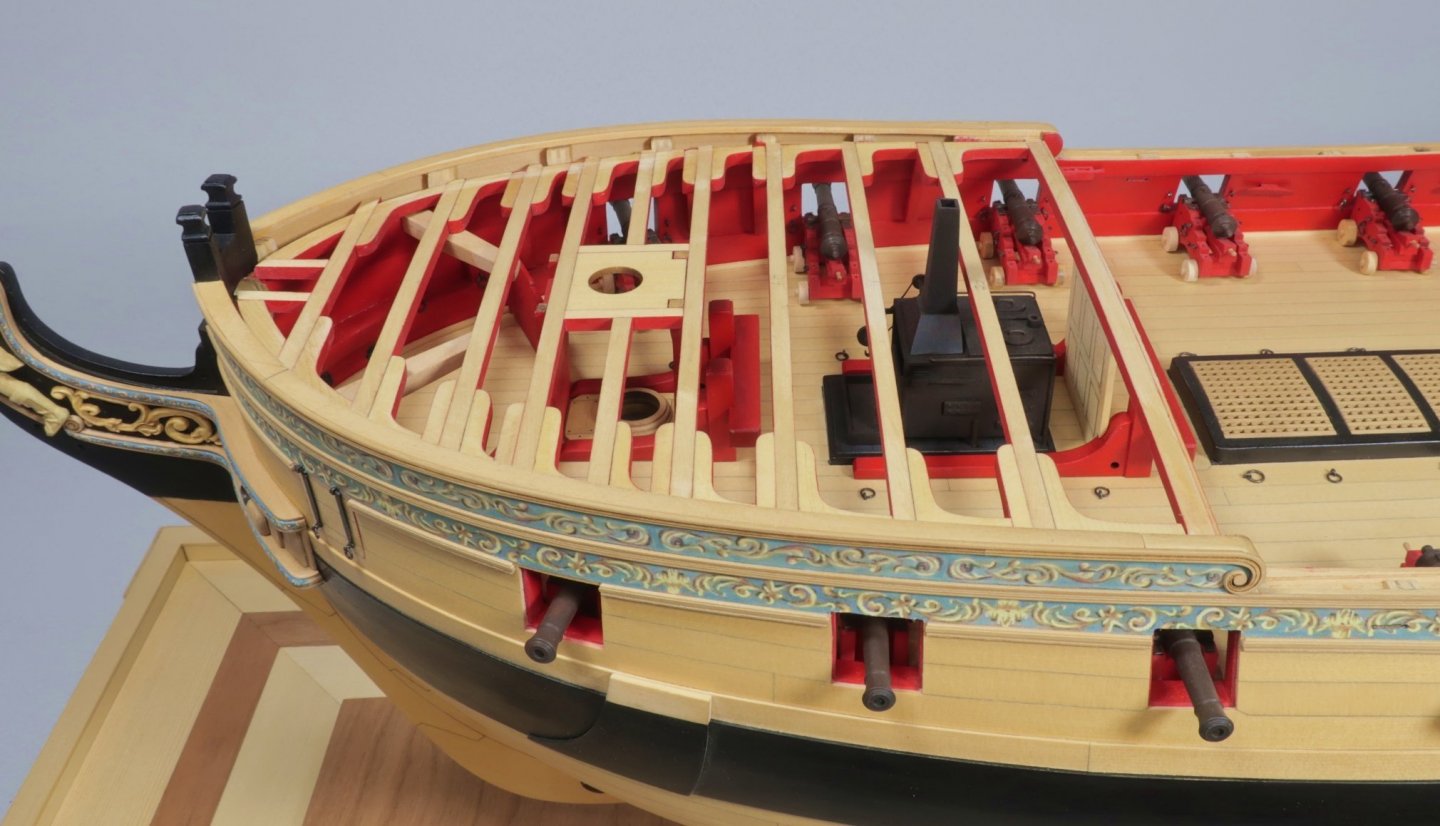
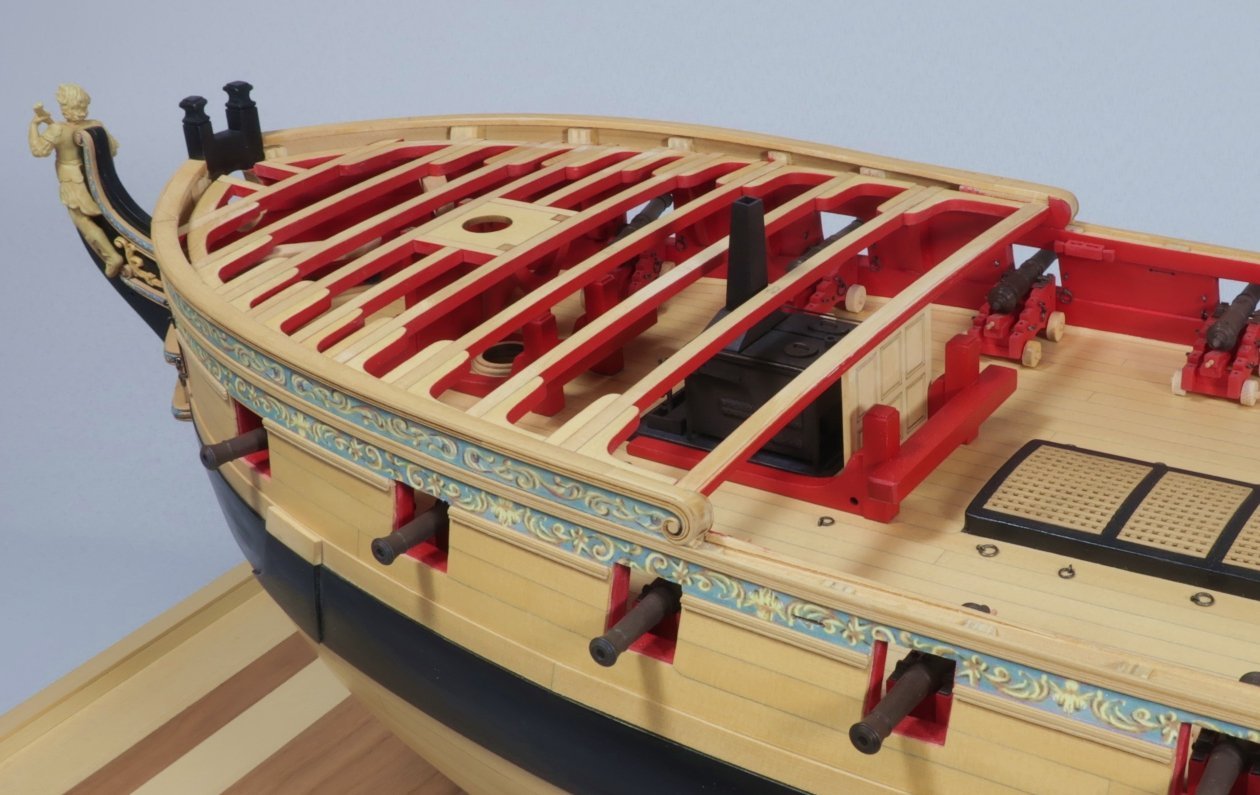
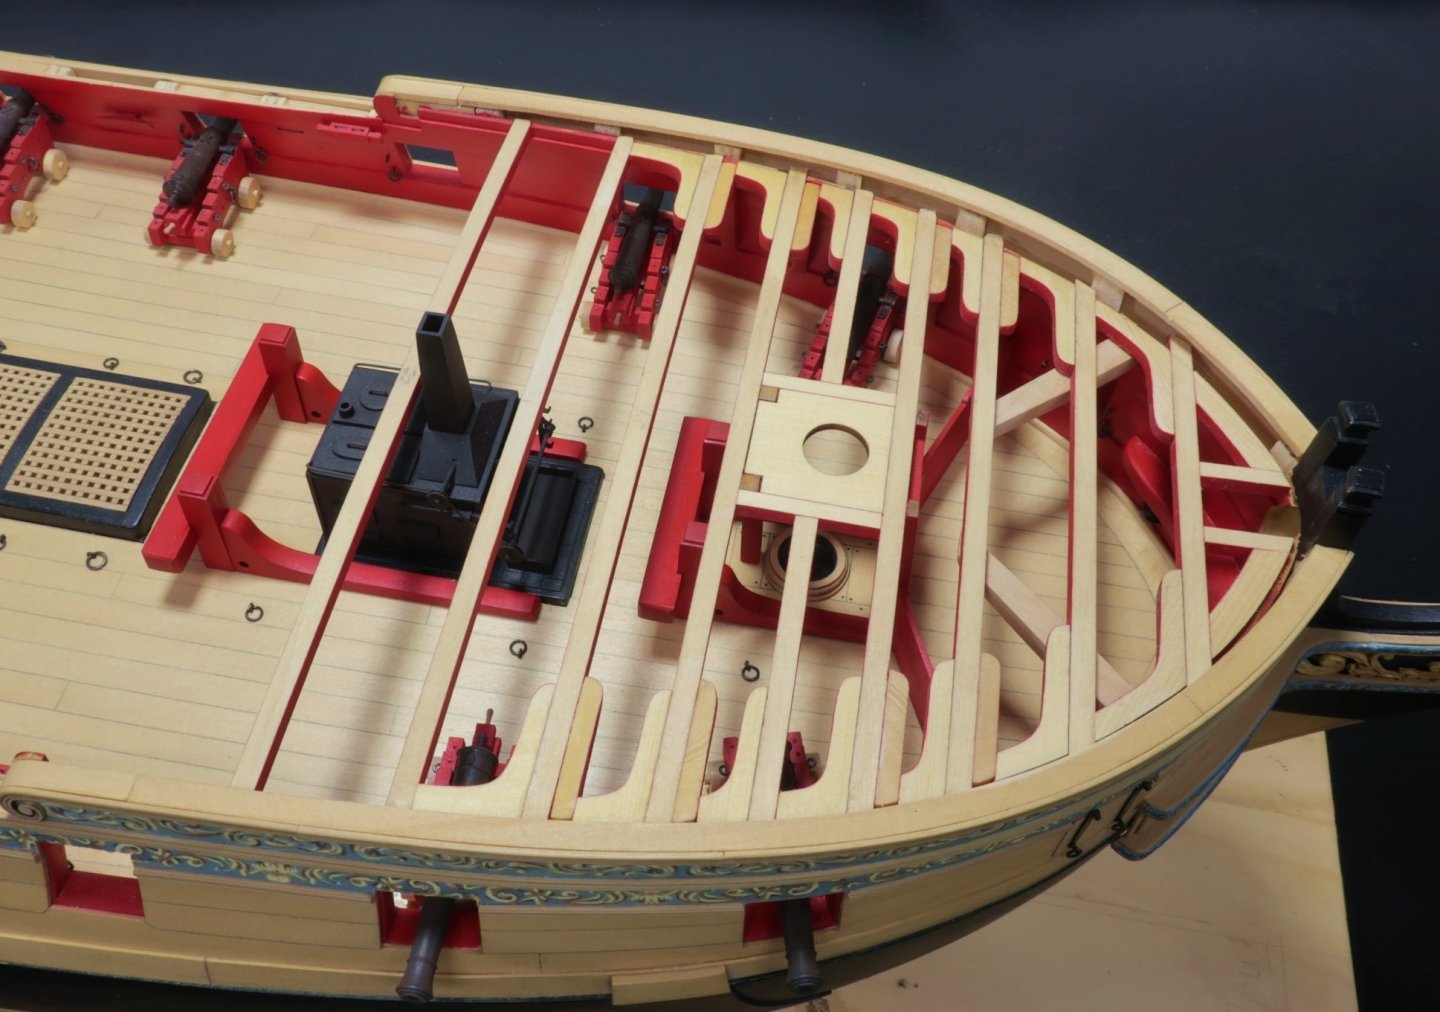
Just a quick update. This completes Chapter 8. The carlings and ledges were added to the deck framing. There are mostly carlings which run fore and aft between the beams defining the hatch coamings and companionways. 1/8" x 1/8" cedar strips were used. The long strip was painted red on the sides and bottom like the beams. Then small lengths were cut and fitted according to the provided templates. Normally you see these morticed into the beams. Yes....you can do that if you like. But as long as they are glued in well and secure that is a lot of work to only be covered completely with deck planking. I just cut them neatly to fit. The two ledges on the forecastle were done using 3/32" x 3/32" strips. In addition, the mizzen mast partner was added which is laser cut for you. We are now 2/3rds of the way through this project. There will be four more chapters in order to complete the model (not including the barge). Here is a breakdown of what those last four chapters will entail. chapt 9 - Plank the fcastle and qdeck and remaining bulwarks. Add the cap rail. All the remaining coamings and gratings. A few other minor fittings. Chap 10 - All remaining deck fittings..... The waist will be started as well with the gangways and stairs. Chap 11 - Return outboard to add the channels and deadeyes....fenders and swivel stocks. The fancy rails along the sheer of the qdeck and fcastle. Chapter 12 - Add the 8 pounder guns. The headrails. The stern lantern and other remaining fittings. That finishes the hull and then a separate barge will be made so it can be placed on spare topmasts along the waist. Here is a look at the hull with the planking templates (already uploaded here for you). I will start the next chapter with the margin planks and move on from there. Think about how much easier the planking will be this time. The templates are done for you and lining off the hull will be simple. You just have to fold the templates along the deck beams and use them as a ready-made tick strip. Easy-Peasy.


- 1,784 replies
-
- 36
-
-

-
- winchelsea
- Syren Ship Model Company
- (and 1 more)
-
Depending on where they go... 24 gauge and 28 gauge. In addition the grating for that aft scuttle needs to be sanded flush with the deck. The other gratings in the coamings should have been flush with the top of the coamings and not recessed lower as you show them. Its those little details that will elevate your model. But it is looking lovely. Chuck
- 274 replies
-
- 1
-
-
- Cheerful
- Syren Ship Model Company
- (and 1 more)
-
Its in Philadelphia....actually Camden NJ on the Battleship New Jersey. Seeing as you are in France that would be a long trip. There is an entire topic about it however. Its been there for quite some time actually.
- 1,784 replies
-
- 4
-
-
- winchelsea
- Syren Ship Model Company
- (and 1 more)
-
Forecastle beams template along with planking templates for chapter 8. plankingfcastle.pdf forecastlebeamsledgescarlings.pdf
-
That is looking beautiful. Nice work. You are making some great progress.
-
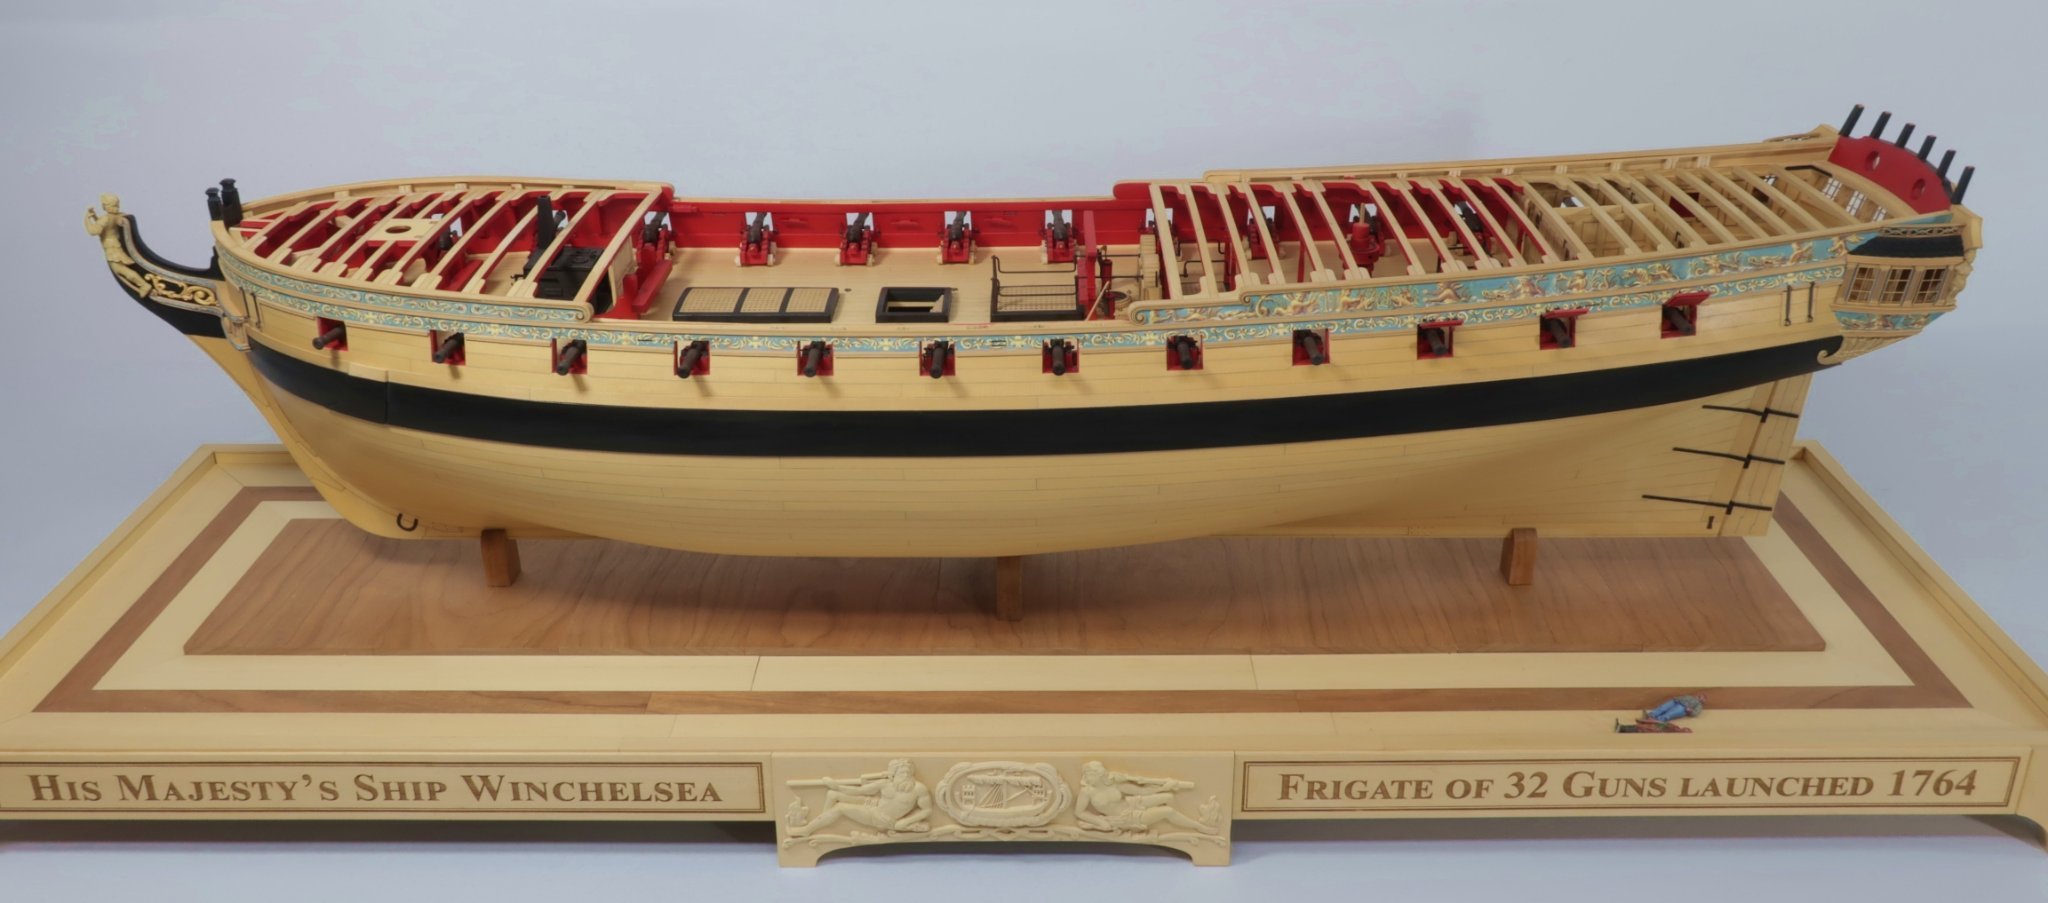
It just sits in there. Its really quite sturdy. No wiggle at all. No reason to permanently fix it now as I do remove it from the finished base to work on it. I place it in the work base when I work on her. I dont want to damage the fancy finished base.
- 1,784 replies
-
- 7
-
-
- winchelsea
- Syren Ship Model Company
- (and 1 more)
-
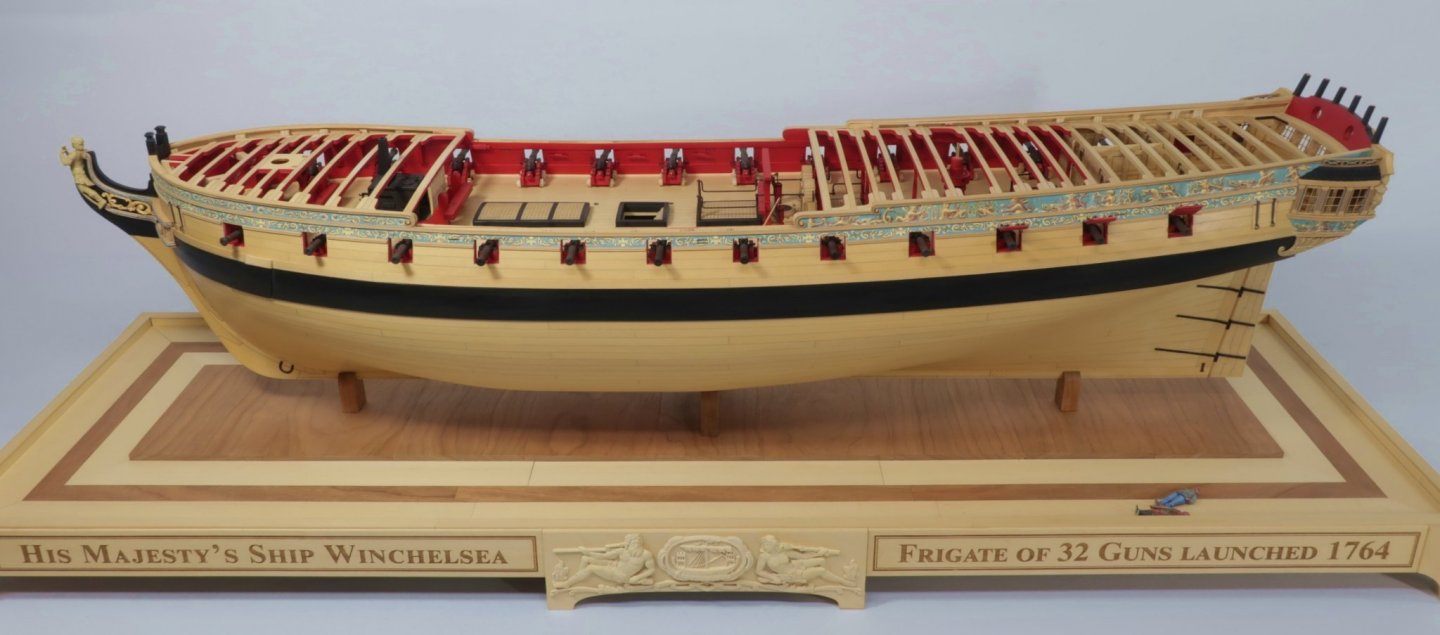
I realize I havent posted an update in a while but I am actually pretty far along. Just been swamped over the last few weeks. In fact, the store is now closed until this Sunday because this is the toughest week so far. Leaving for the Philly "ShipModelCon" on Thursday for some some rest and will resume normal daily function next week. Having said that...the Winnie is quite far along. Chapter 8 s almost finished. The only thing that remains to be done are the carlings and ledges for the deck framing. I may actually do that today and relax while working on the model. I have many many construction photos for the monograph chapter but here are some pics of how she looks today minus those carlings and ledges. Its really coming together now. Notice how the cat tails under the deck framing have inserted. The catheads will be added in two pieces to make it a bit easier. The riding bitts are painted red but you could leave them natural or paint them black as well. I will post more pics upon my return from Battle Ship New Jersey....where ModelCon will be held. I will be displaying the Winnie along with several other models I have completed. I hear there will be over 100 models displayed and the weather looks great for Saturday. Maybe I will see you there.


- 1,784 replies
-
- 32
-
-
-
- winchelsea
- Syren Ship Model Company
- (and 1 more)
-
NAIAD 1797 by Bitao - 1:60
Chuck replied to Bitao's topic in - Build logs for subjects built 1751 - 1800
Beautiful work....clean and crisp and your excellent craftsmanship is on full display. Chuck -
Glenn,, Nope, i may provide some sort of plan for a base but each person will have to make their own. This will be a great opportunity for folks to design and create something that sets the whole display apart from others.
- 1,784 replies
-
- 9
-
-
- winchelsea
- Syren Ship Model Company
- (and 1 more)
-
How to stain or dye boxwood?
Chuck replied to tkay11's topic in Painting, finishing and weathering products and techniques
I dont see the need but i imagine you could. When I use it on AYC i usually apply WOP first. Like a sanding sealer. Just a light coat. Then I use the Gel Stain. But on boxwood I didnt see the need to do so before or after. -
How to stain or dye boxwood?
Chuck replied to tkay11's topic in Painting, finishing and weathering products and techniques
Exactly like the Winnie castings. I have also used it on some areas of the AYC to more closely match Boxwood. Chuck -
That figure looks great. If ever you print any more let me know. I would love to have one. I am sure many others would as well. Chuck
-
How to stain or dye boxwood?
Chuck replied to tkay11's topic in Painting, finishing and weathering products and techniques
Old masters fruitwood gel stain works great for this. Place a small number of blocks on a paper towel or lint free cloth. Then dip another cloth in the gel stain. Simply rub the blocks with it. Get it well covered. Wait several minutes and move them to a clean cloth and use another clean cloth to buff them before the gel stain dries. Dont apply it too heavy or you will clog the holes, especially in the really tiny blocks. Although they are easy enough to ream later. Repeat again after it dries thoroughly to go darker.