HOLIDAY DONATION DRIVE - SUPPORT MSW - DO YOUR PART TO KEEP THIS GREAT FORUM GOING! (Only 13 donations so far - C'mon guys!)
×


Erik W
-
Posts
470 -
Joined
-
Last visited
Content Type
Profiles
Forums
Gallery
Events
Everything posted by Erik W
-
 Looks good Rusty! I'm glad so many of you guys are ahead of me on the planking. It gives some good visuals on where I'm headed. I have to say, it's kind of crazy you just started your build only 7 weeks ago! Erik
- 310 replies
-
- 2
-

-
- cheerful
- Syren Ship Model Company
- (and 1 more)
-
The strakes look a little high to me. I tried to get mine to be to the same height as Chuck's original, after also reading about Stuntflyer's issues in his log. I don't know if it matters or not though. Here's what mine looked like: http://modelshipworld.com/index.php/topic/10743-18th-century-longboat-by-erik-w-–-model-shipways-–-scale-148-first-wooden-ship-build-finished/?p=330687 Erik
- 64 replies
-
- 6
-
-
- 18th century longboat
- model shipways
- (and 1 more)
-
Chuck, I think red would look better than natural. And definitely not black. They'd probably look good if you left them natural, but stained them golden oak, or something similar, but since you're not staining anything else, when viewing the deck area in it's entirety, they might look out of place. Just my humble $.02. Erik
- 1,051 replies
-
- 6
-
-
- cheerful
- Syren Ship Model Company
- (and 1 more)
-
Thanks for the kind words guys! Per, The other guy's building the Cheerful have set the bar high, I'm just hoping mine turns out anywhere near as well! This thing is much more complicated than the longboat. I've turned Chuck's advice into my mantra, Be patient and take my time. Also, to all who hit "Like" on my posts, thanks! As I'm sure other's have found, it's definitely motivating when I know folks are checking my work out. Erik
-
After the last bit of tweaking on the hull, I've started planking. I attached the first layer of the wales on one side. The run came out pretty well. Not perfect, but it'll do. I lightly sanded the wale, but since it will have a second layer over it, I didn't get to crazy with the sanding. I'm hoping the other side is a match. Erik

-
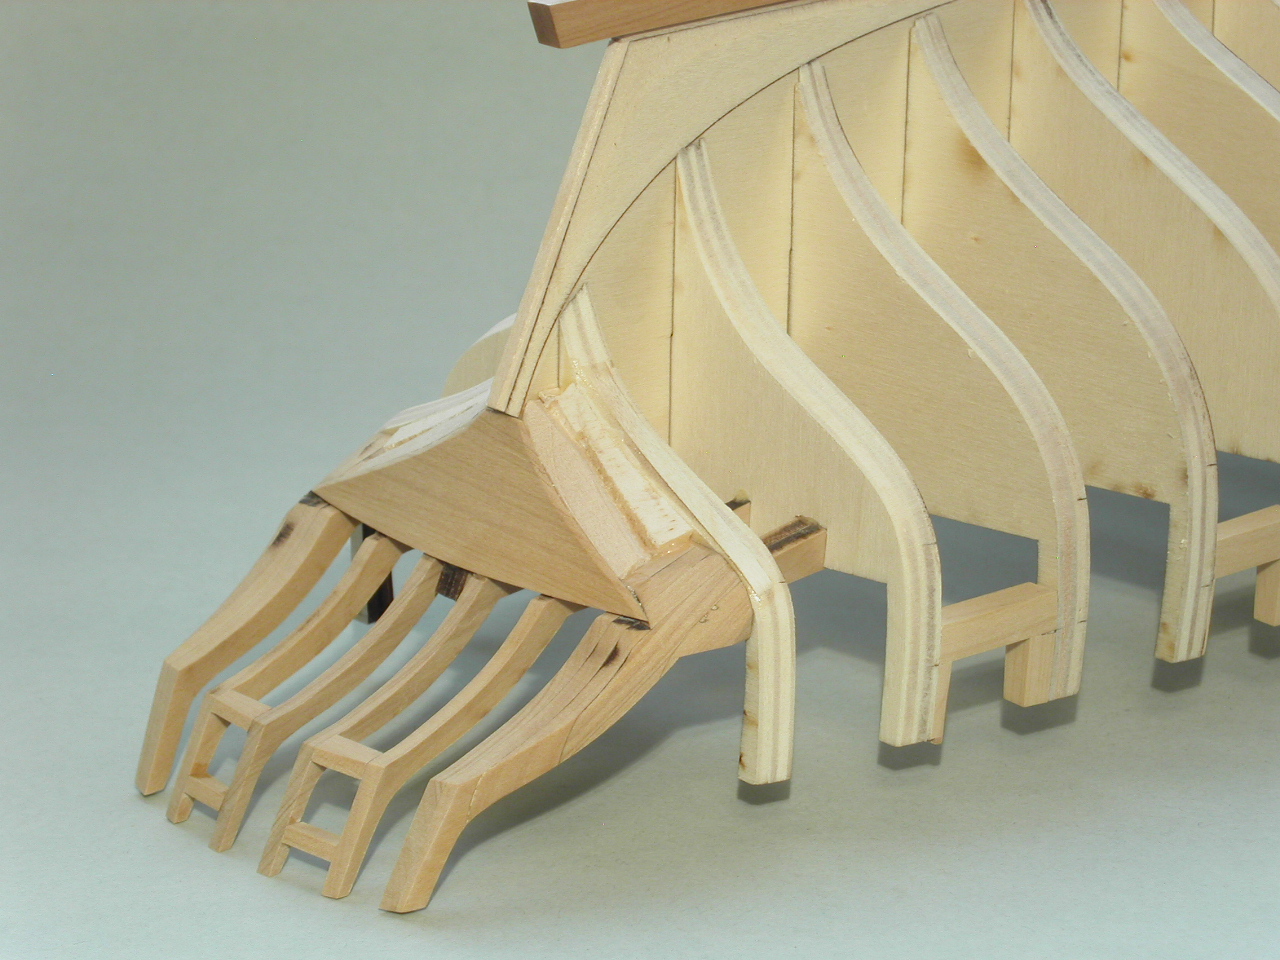
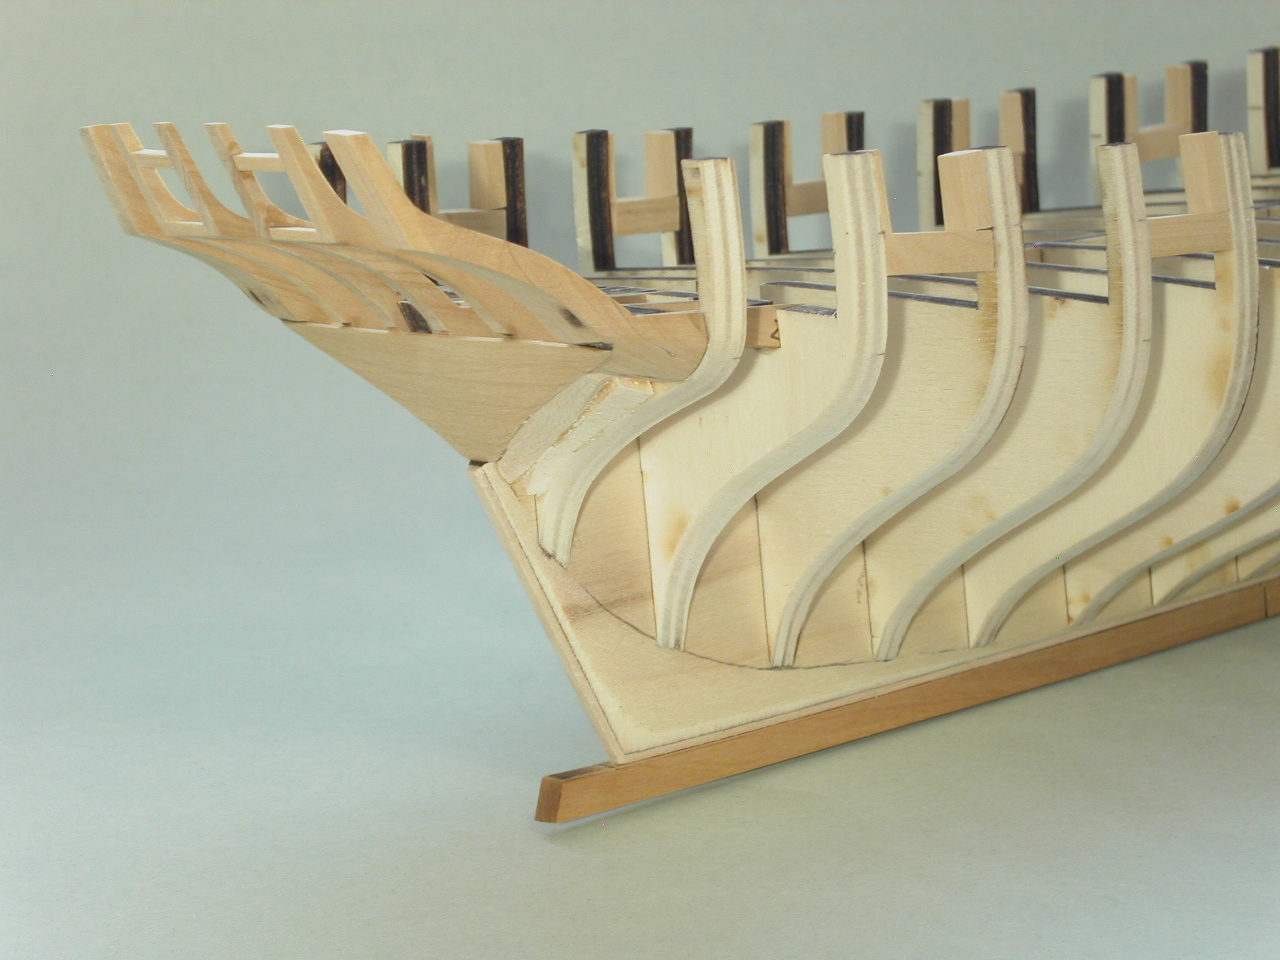
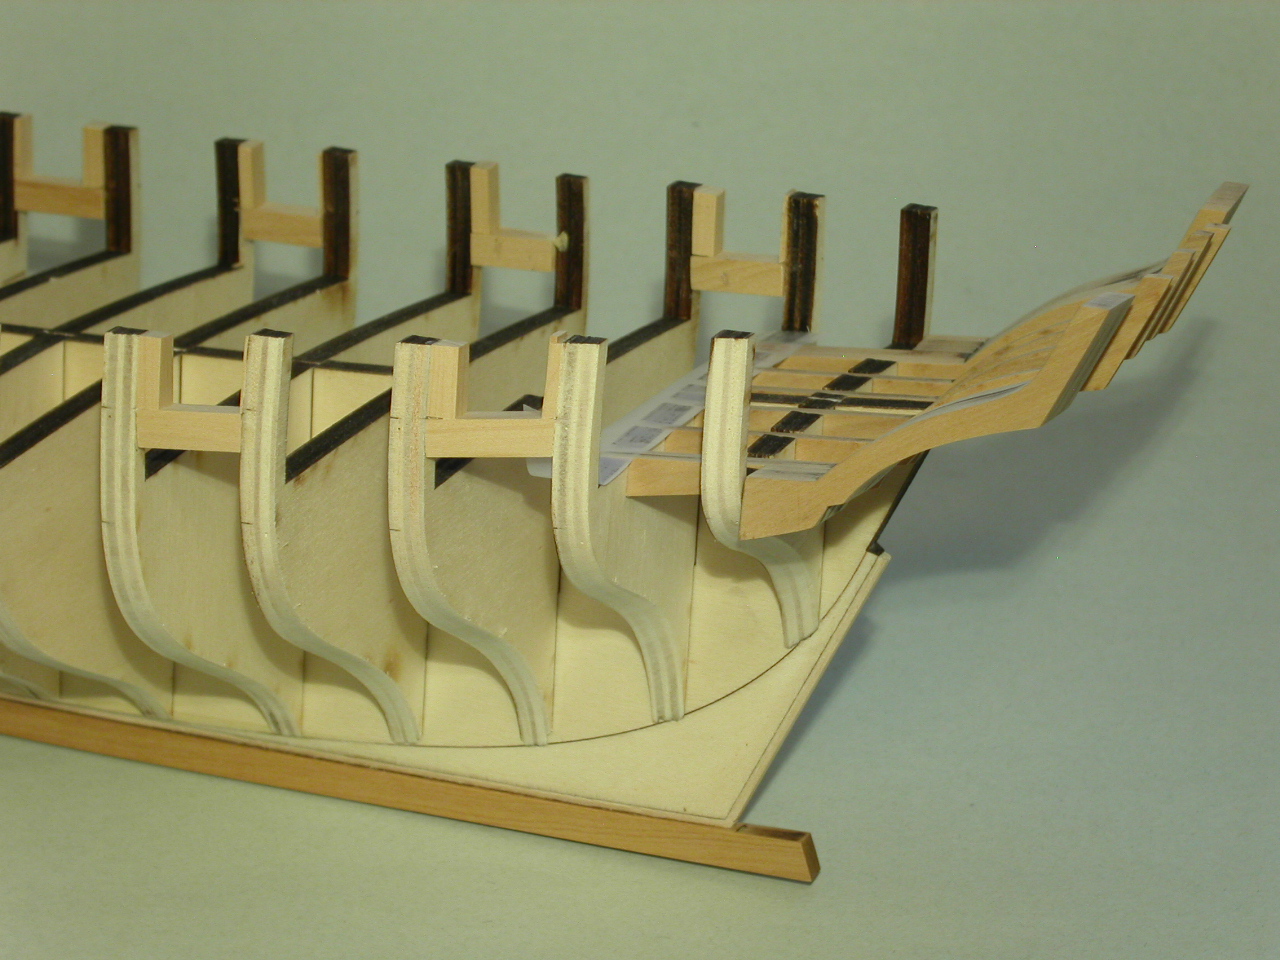
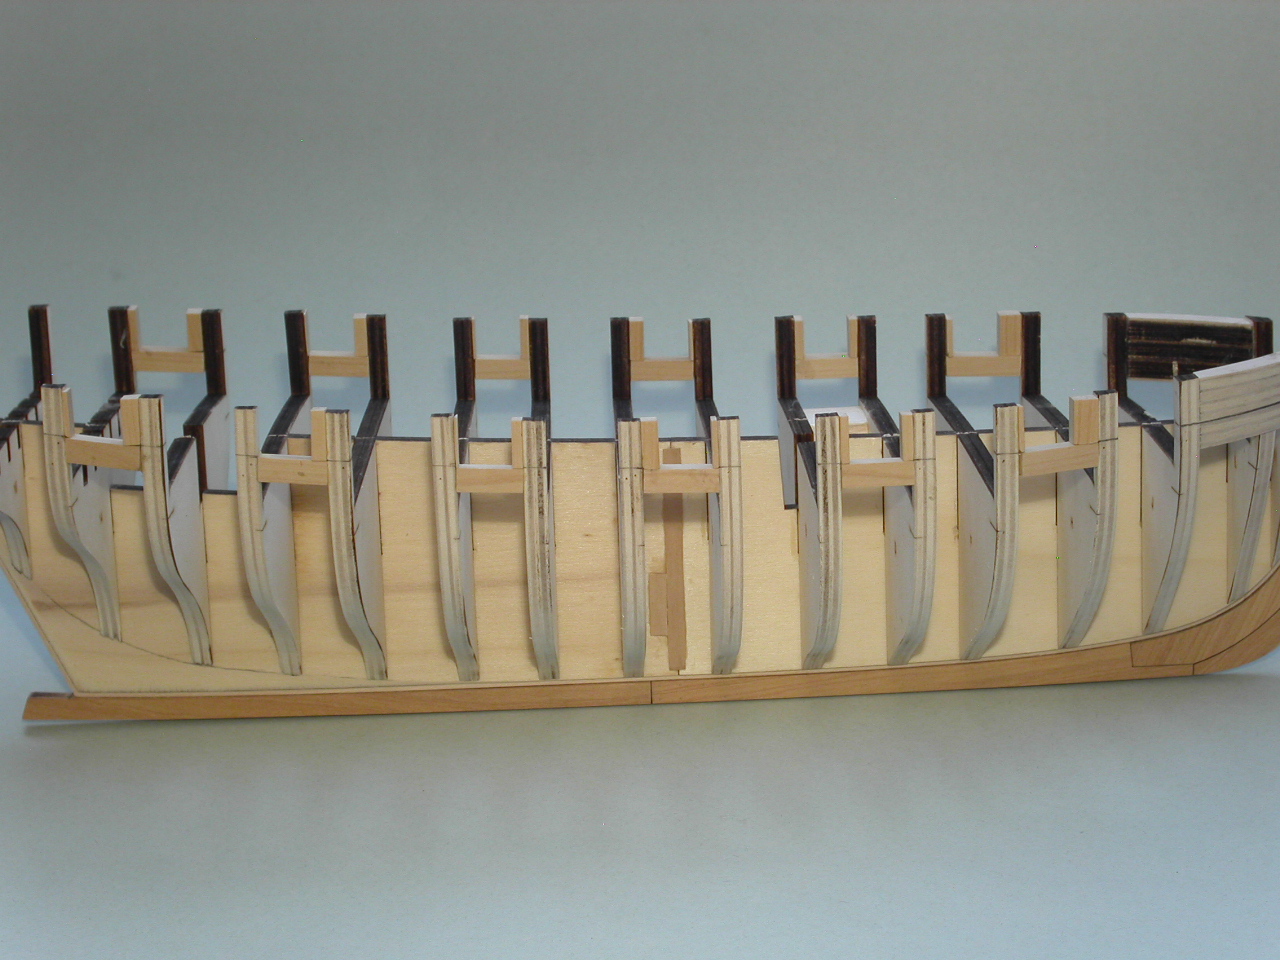
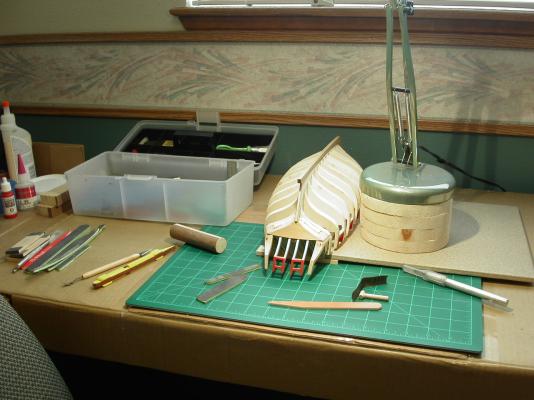
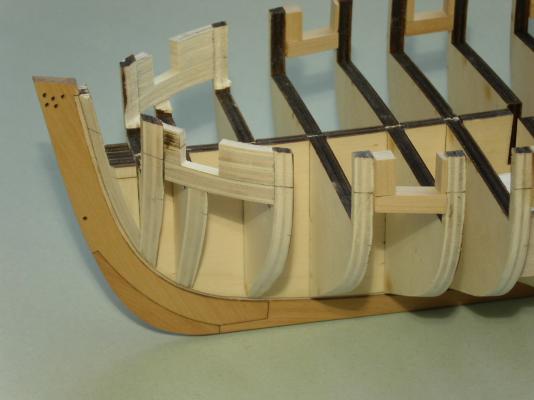
I drew the run of the wales using the tick marks on the laser cut bulkheads as a guide to pin down a batten strip. Once I was satisfied that the plank run was smooth, I drew my line. I also noticed at this point that I had made an error in over-fairing the underside of the center 4 stern frames, where the bottom of the counter meets the square tuck. So . . . I added 1/32" wood on one of the frames, 3/64" wood on the other three, and then a further .020" on the center two. Yeah, I had accidentally taken off a lot of material. I feel like I'm taking one step back with every couple steps forward sometimes. You can see the beefed up frames in the first two photos. I made sure my shims were sanded smooth and filled as necessary since these parts of the frames will be exposed on the interior. When painted they should look as if they are a single piece. Knowing modelers are fond of jury rigging. I threw in a photo of my work area showing my jig for holding the ship upside down (while addressing the stern frame issue), with a ceramic tile holding it down so it won't move . . . and the scrap wood extension I made for my lamp. This is easily the largest model I've ever worked on, so my space felt a little cramped. Erik


-
Some advice I've found that works from the model railroad world is to bake the painted brass part. I've done this simply by letting the painted brass sit about an inch under a hot light bulb for about 10 minutes. The light bulb should generate enough heat that the part is hot to the touch. Do NOT use this technique though for any brass parts that have been soldered (it may pop the solder joint), or have plastic parts attached. For Chuck's carronades, if they have the wood monograms glued on, you may want to test this technique on one before you do the whole batch. Also, as Chuck said, to avoid paint flaking off, if at all possible, avoid handling the parts once painted. Erik
- 1,051 replies
-
- 4
-
-
- cheerful
- Syren Ship Model Company
- (and 1 more)
-
Nice Chuck. I was wondering how you got the textured look on that first carronade. The weathering powder also really helps the monograms stand out. Erik
- 1,051 replies
-
- 4
-
-
- cheerful
- Syren Ship Model Company
- (and 1 more)
-
Frigate Boston by overdale - FINISHED
Erik W replied to overdale's topic in - Build logs for subjects built 1751 - 1800
Dan, Thanks for the close-ups! You definitely do great work!! Erik -
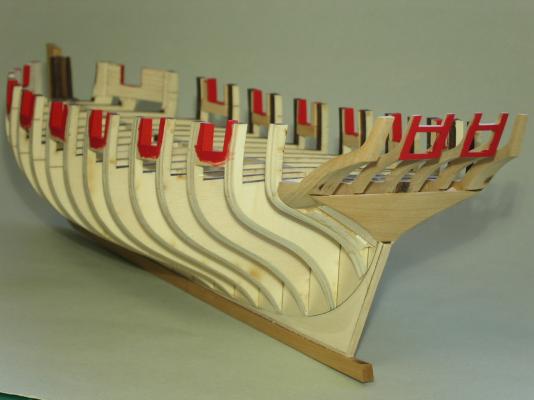
I picked up a bottle of Vallejo Flat Red # 70957. It's easier to get an even coat, without brush marks, than the Polly Scale paint I used on the longboat. So, I'll use this red for the bulwarks color. I got the gun ports painted. Erik

-
Frigate Boston by overdale - FINISHED
Erik W replied to overdale's topic in - Build logs for subjects built 1751 - 1800
Your Boston looks amazing!! I was going to ask for larger photos, but I see above that you're dealing with an older computer. Any chance when you break the camera out next time, we can get some closer close-ups? Thanks! Erik -
No new photos, but I spent the evening scrutinizing the fairing, both with my Mark 1 eyeball, and using a piece of boxwood planking material. I wound up touching up the area at the lower bow, and after test fitting planks, used a coarse sanding stick to further taper the bulkhead former at the stern from the bearding line to the rabbet strip . . . you were right Mike (Stuntflyer). On my longboat I had used Polly Scale Soo Line Red acrylic paint for the red. I have plenty of that left, but am going to experiment with Vallejo red (on scrap wood, of course). Vallejo paints from Spain are very high quality and are the best bottled acrylics I know for brushing with no brush marks or unevenness. I'll post my results here. http://www.acrylicosvallejo.com/en_US/model-color/family/15 Erik
-
Mike, Your longboat looks great! Good job!! I was wondering if you had been working on it recently. Do you have any plans to build another boat/ship? Erik
- 100 replies
-
- 2
-
-
- model shipways
- 18th century longboat
- (and 1 more)
-
Mike, I had payed close attention to your issues with the square tuck and over-fairing that area. I'm glad you documented that in your build log, otherwise I would've probably not payed close enough attention to what I was doing in that area. Erik
-
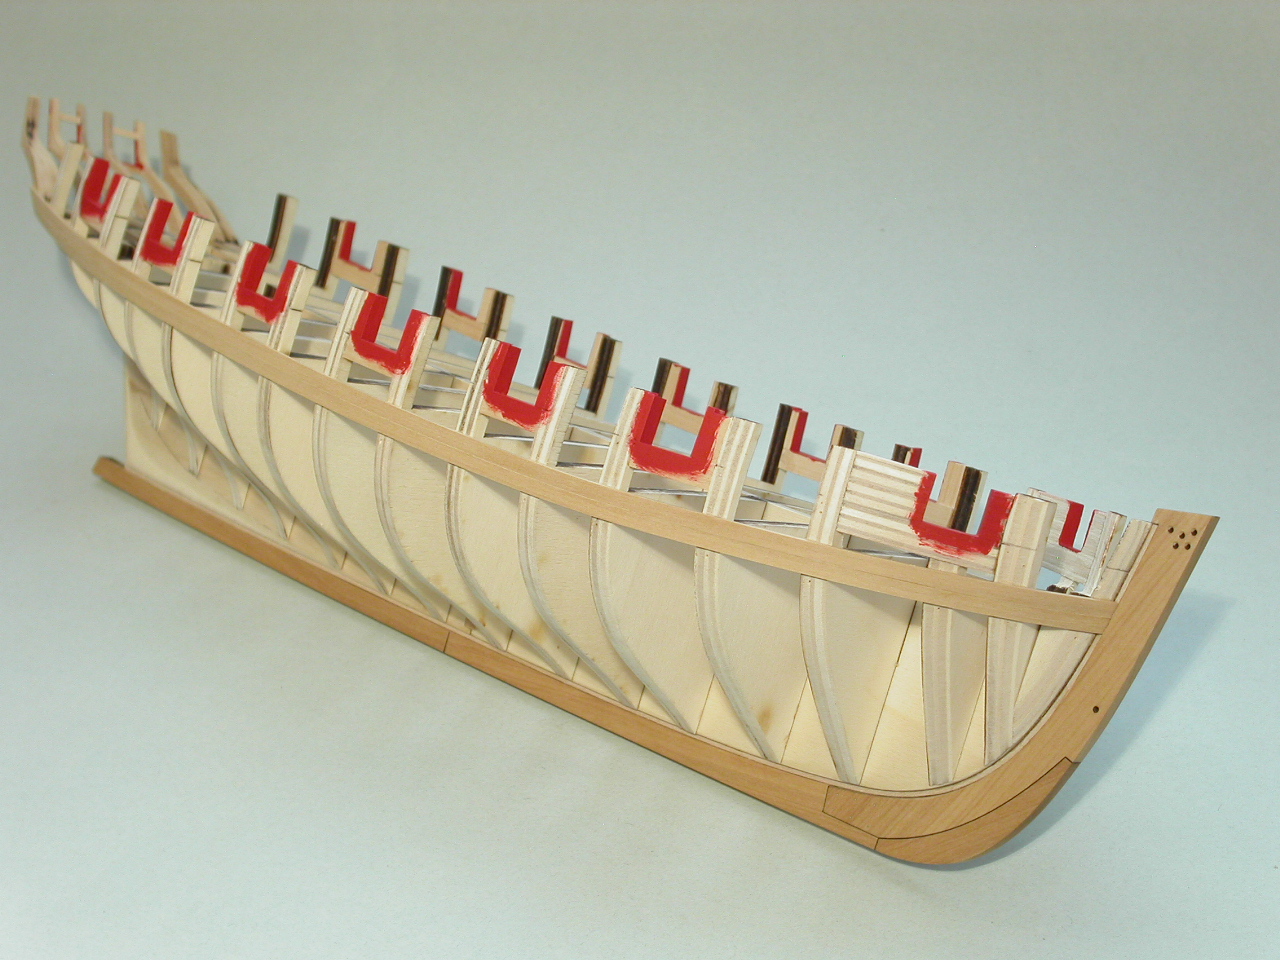
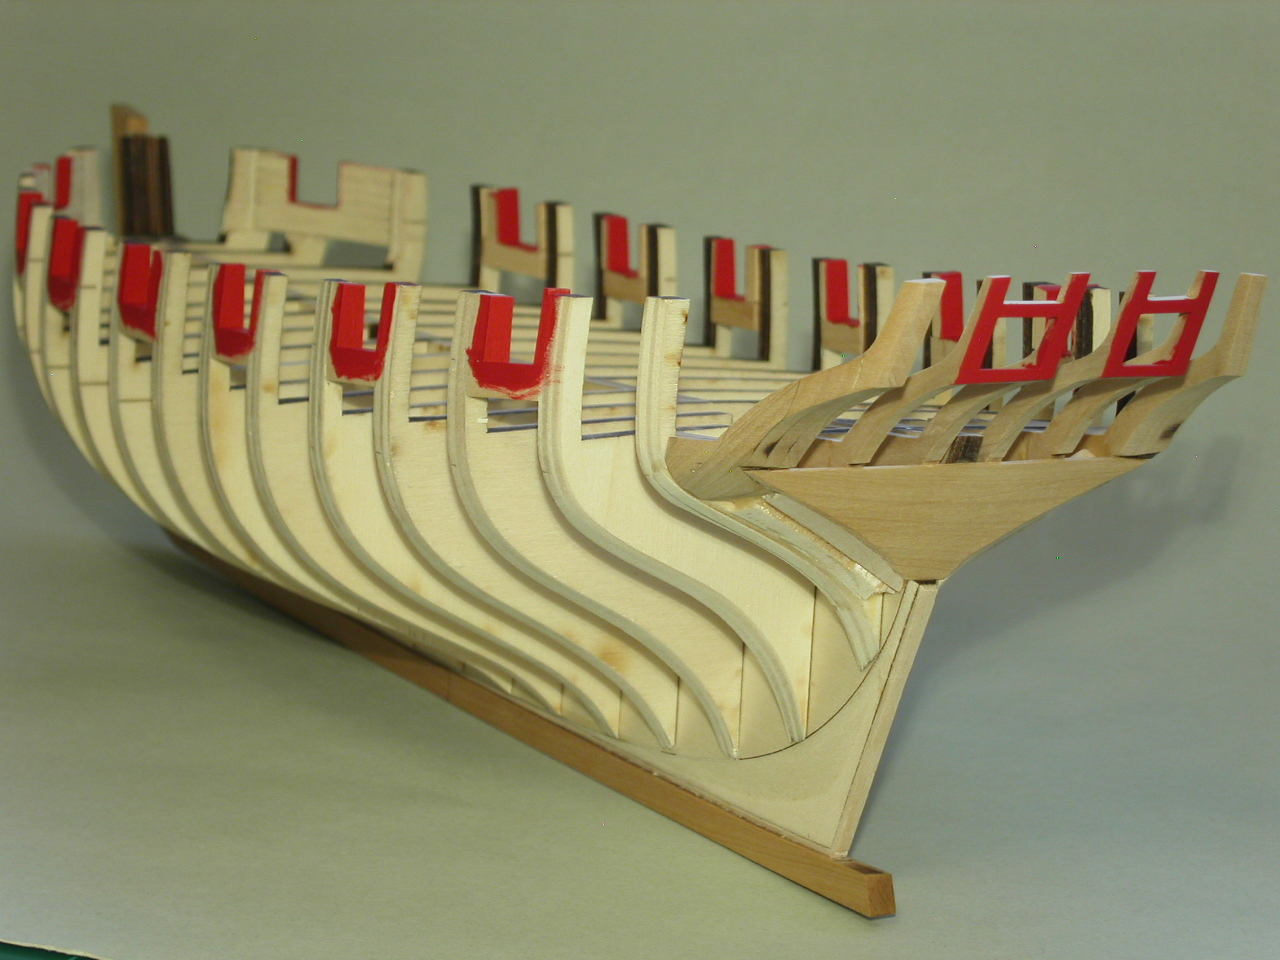
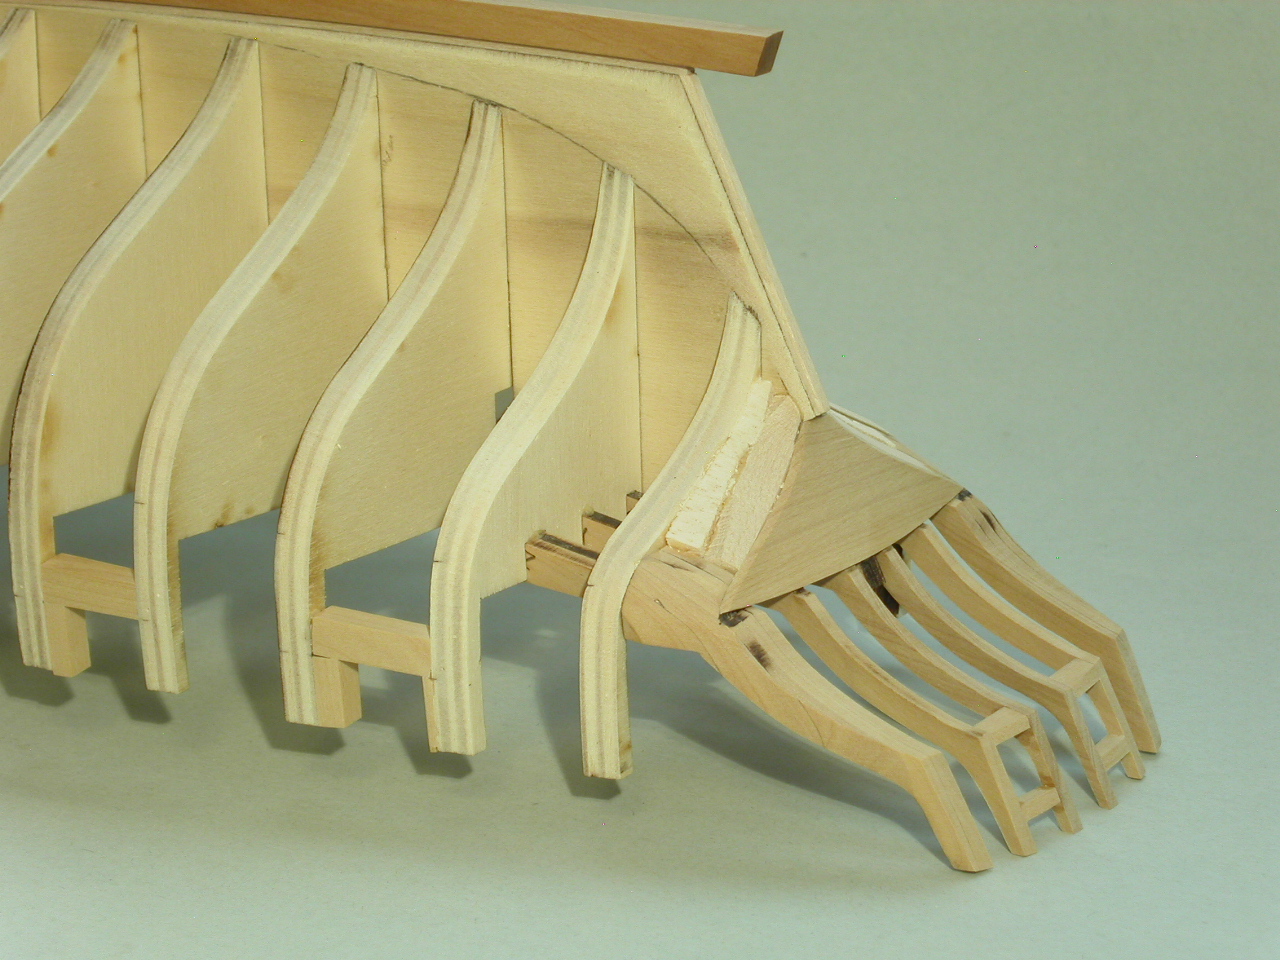
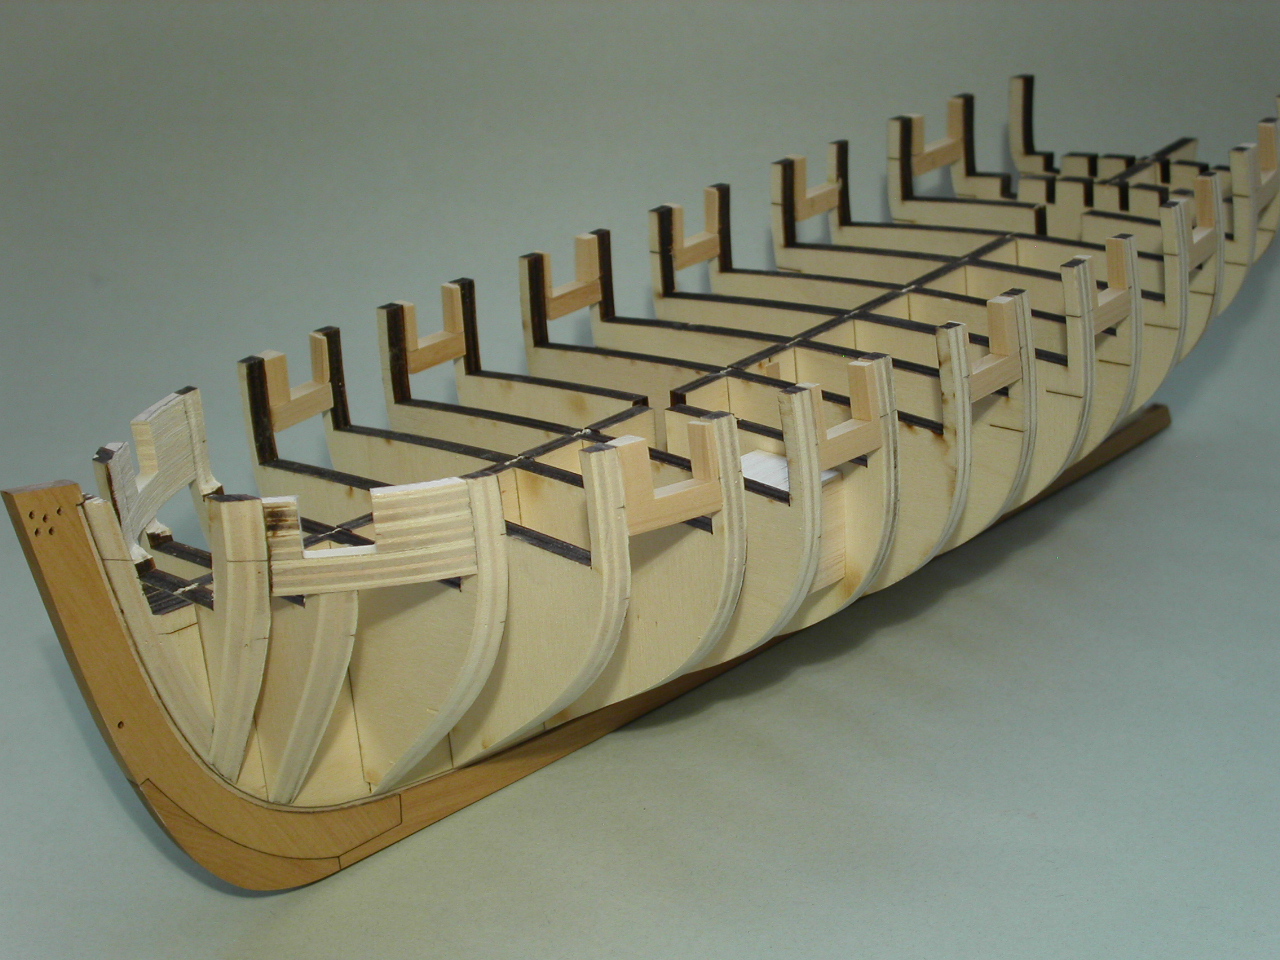
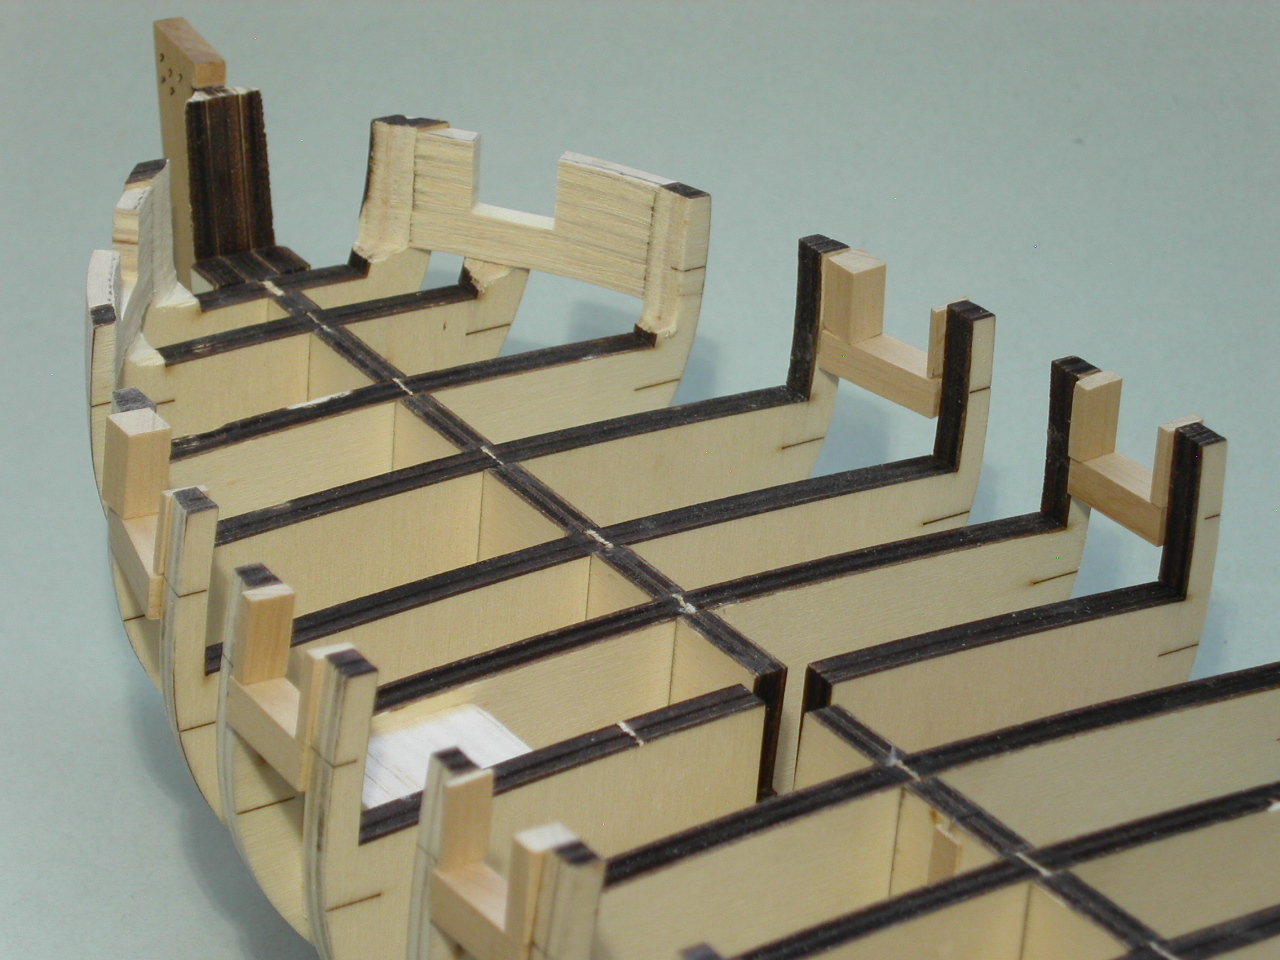
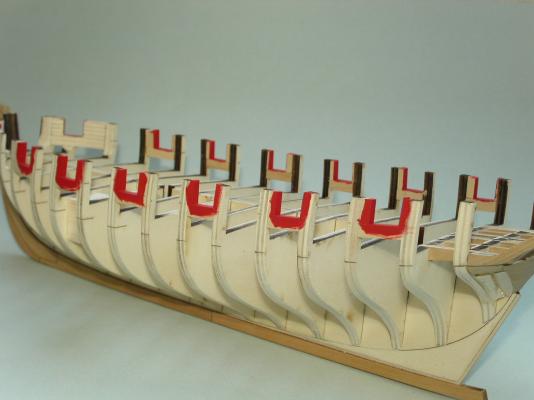
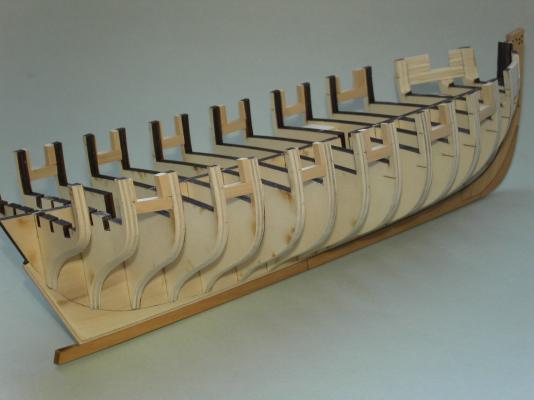
After much effort I got the stern framing finished, more or less. I still have more fairing to do, and more clean up. The stern gun ports were a real pain in the butt. I wound up doing one of them over 5 times! Luckily I know when to just walk away for a while or I would've launched the ship out the window! In addition to bass wood filler immediately behind the square tuck, I added some balsa filler material between that and the rearmost bulkhead. This area is tough to get faired correctly, so I figured having a solid mass of wood in there would help me visualize the run of the planks. I knew back when I faired the bulkheads that I over-faired one side of the rearmost bulkhead. I added .020" strip to the bulkhead to get the shape correct. You can see it in the top photo. My goal is to not have any surprises when I get to the planking stage. I extensively test fit planking material in every area of the stern to make sure the plank run looks good. This has been the most challenging part of the build so far. Though not perfect, I think things came out well enough. Erik

-
Mike, Now that you've finished sanding the deck, and applied a coat of WOP, your worries about any gaps between deck planking are definitely unfounded. Everything looks very tight and clean! Erik
- 452 replies
-
- 5
-
-
- cheerful
- Syren Ship Model Company
- (and 1 more)
-
ancre le rochefort by cabrapente
Erik W replied to cabrapente's topic in - Build logs for subjects built 1751 - 1800
It looks like you are off to a great start! Are you using Gérard Delacroix 's monograph? http://gerard.delacroix.pagesperso-orange.fr/rochefort/plaquette-e.htm Erik -
Mike, The deck looks awesome!! Can't wait to see the photos after the final sanding and WOP. Erik
- 452 replies
-
- 3
-
-
- cheerful
- Syren Ship Model Company
- (and 1 more)
-
Ed, I've been looking forward to how you'd build these boats. You're off to a good start! Erik
- 3,618 replies
-
- 6
-
-
- young america
- clipper
- (and 1 more)
-
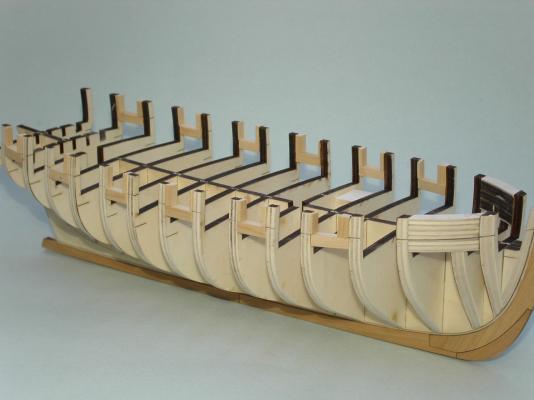
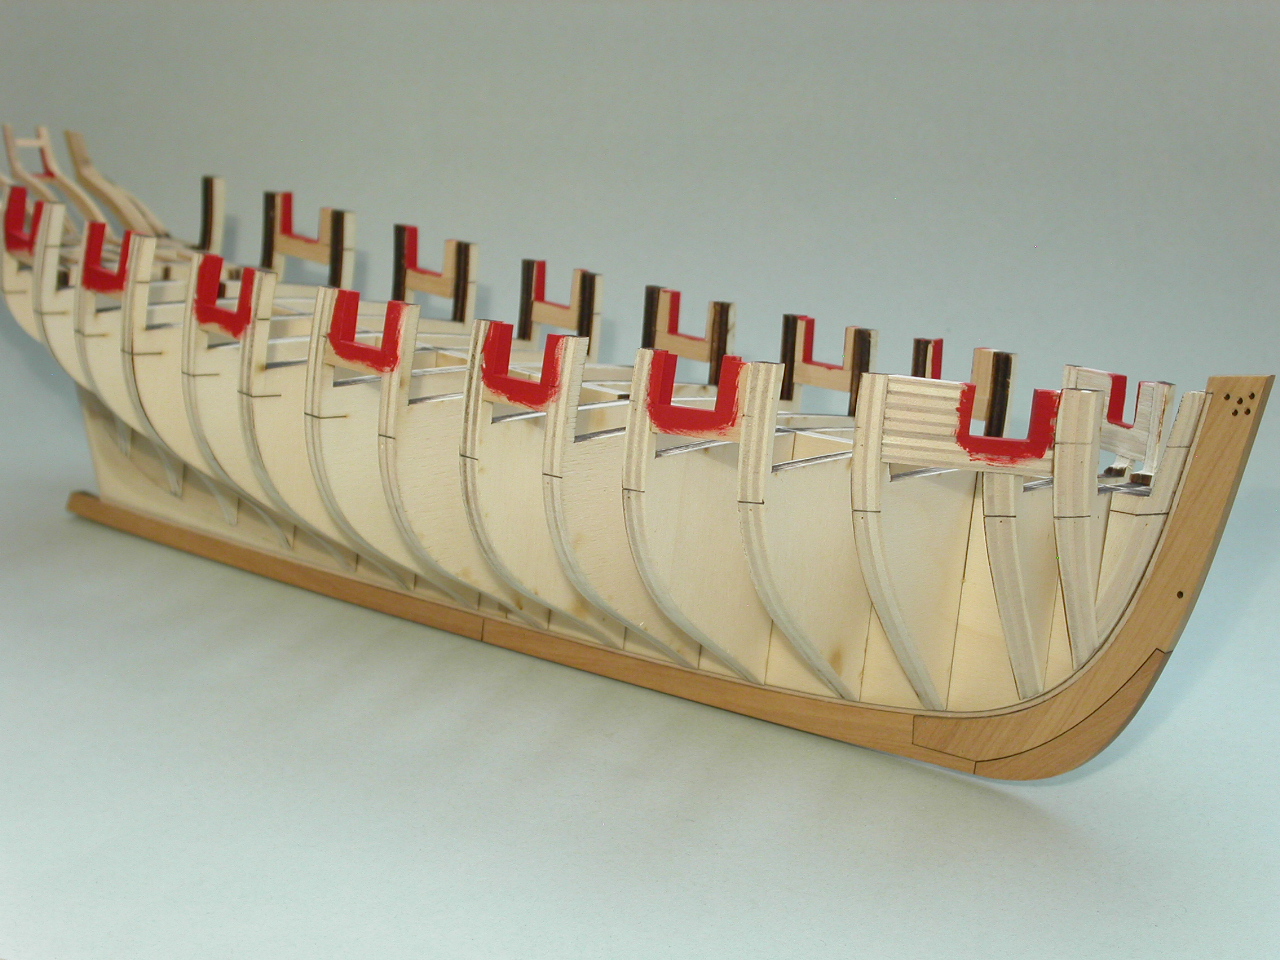
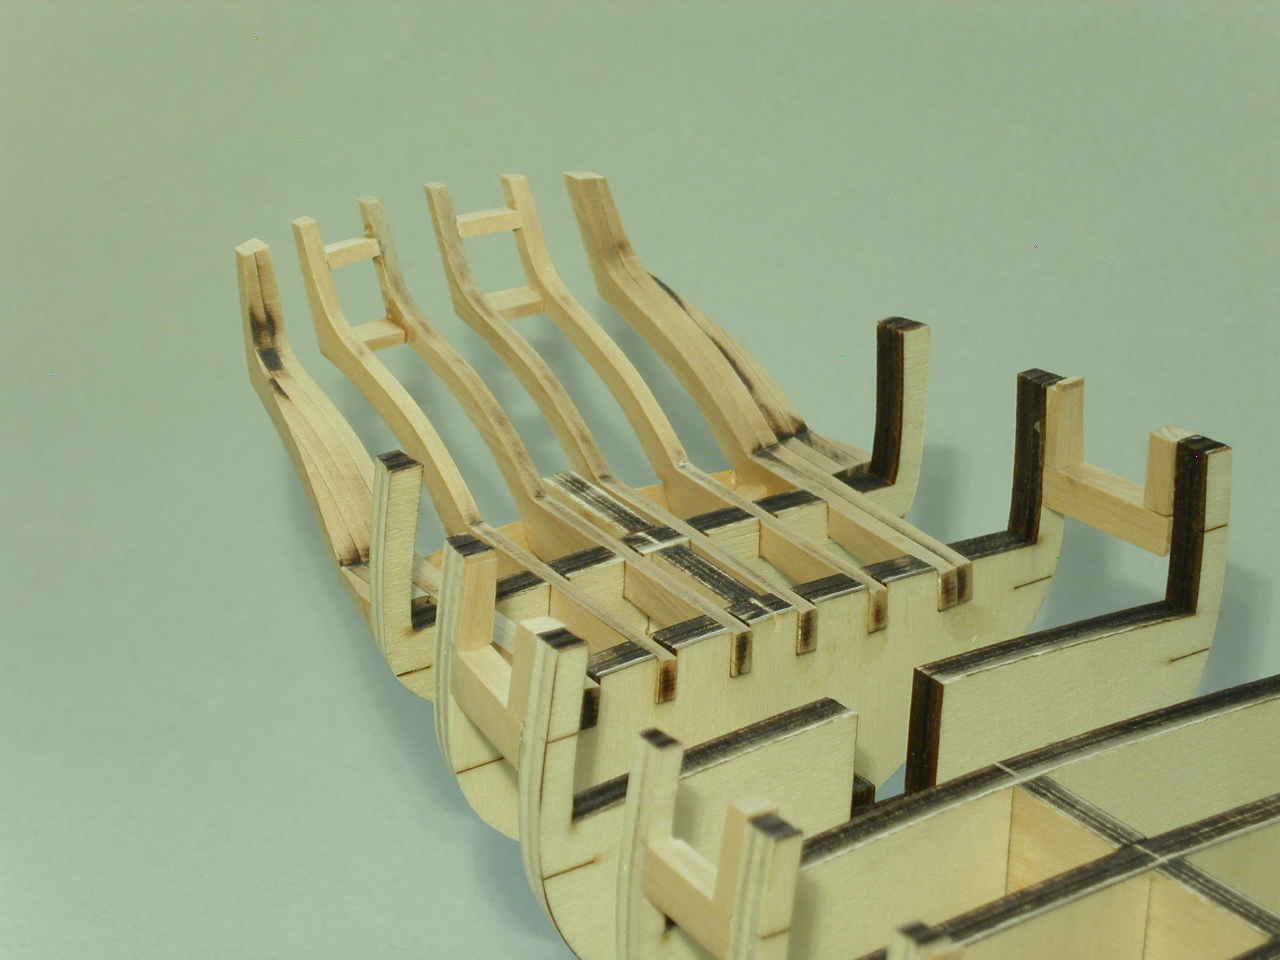
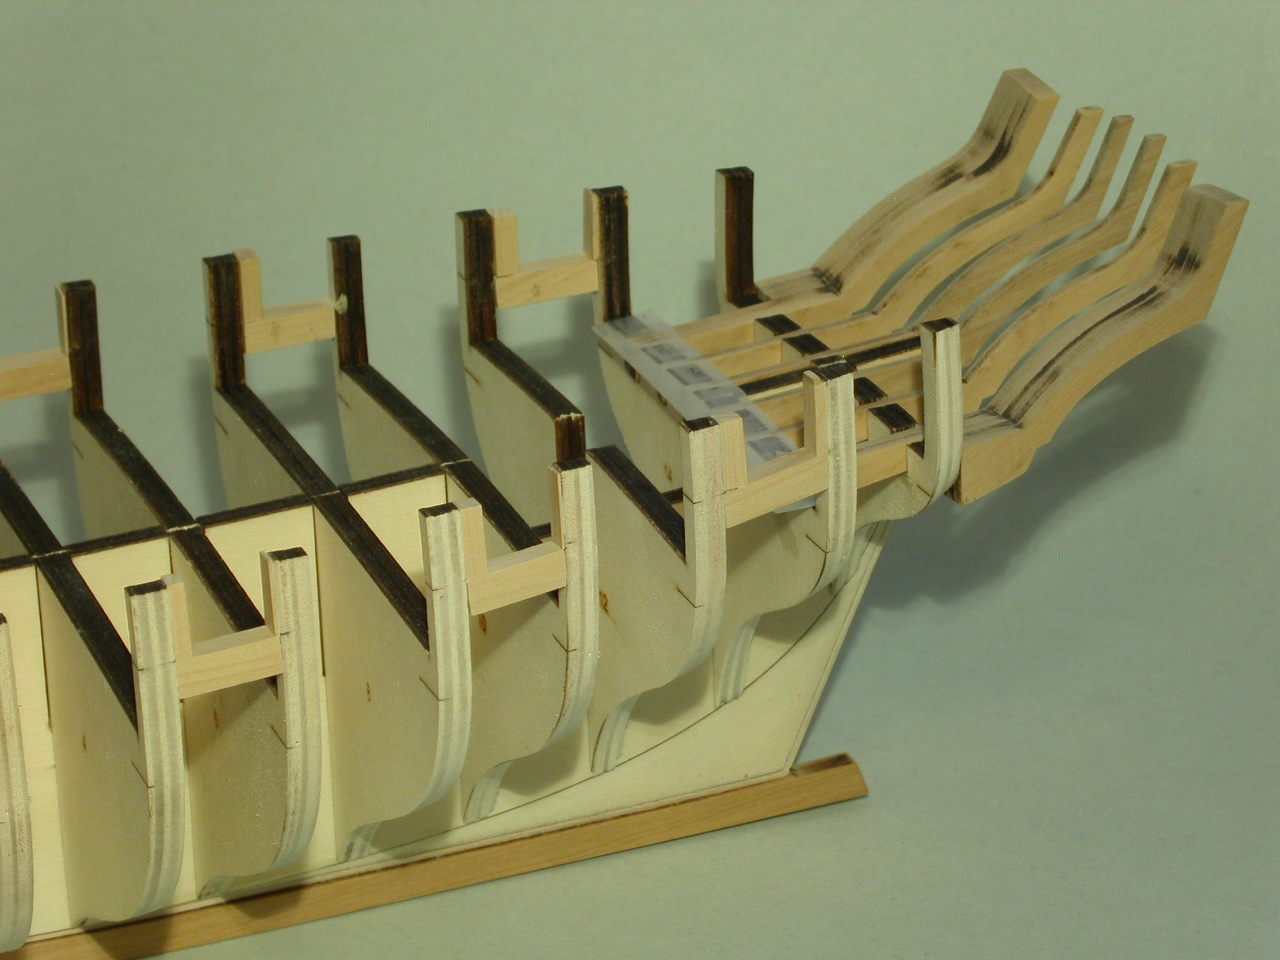
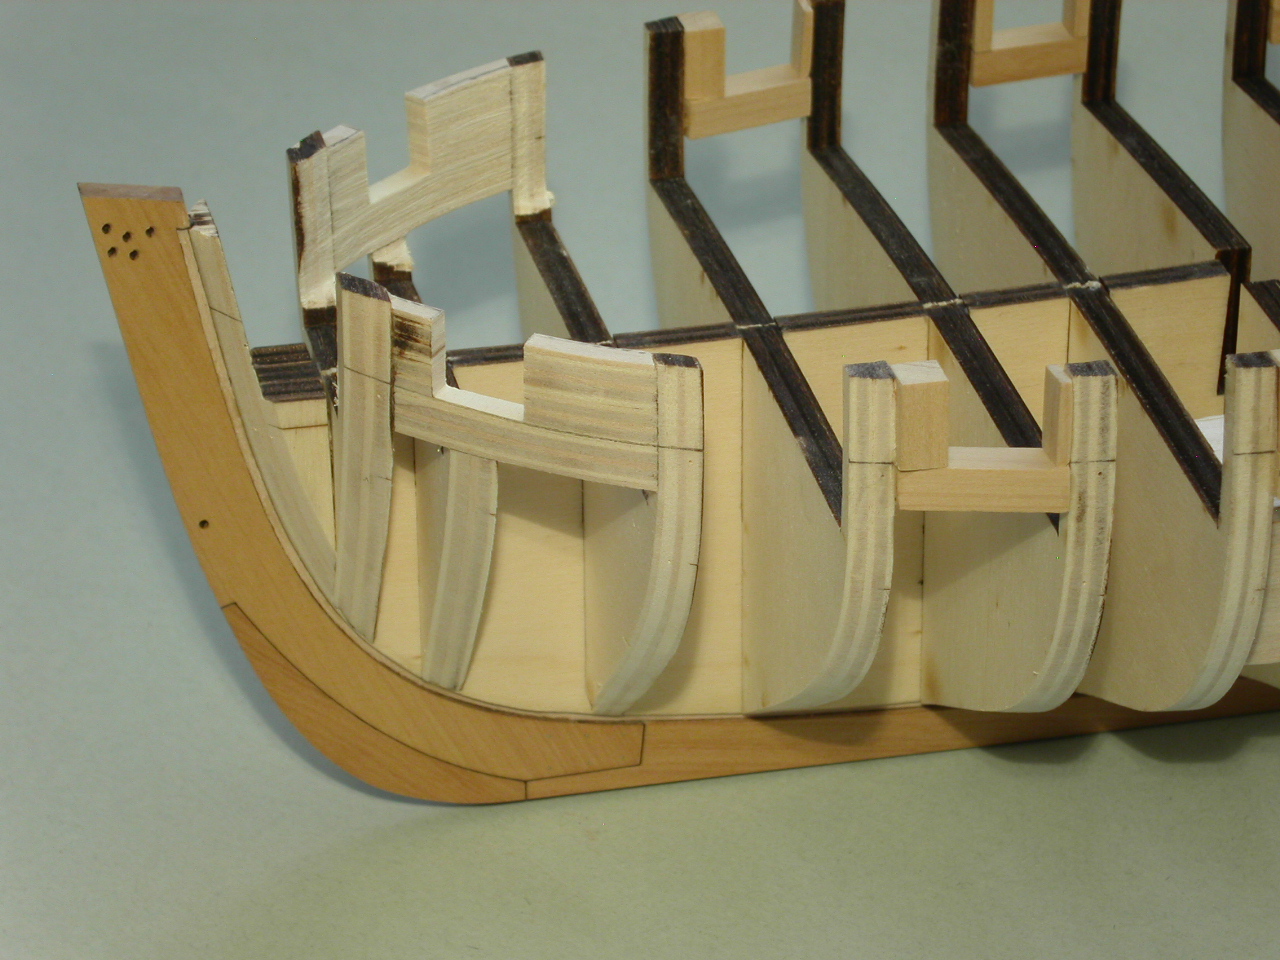
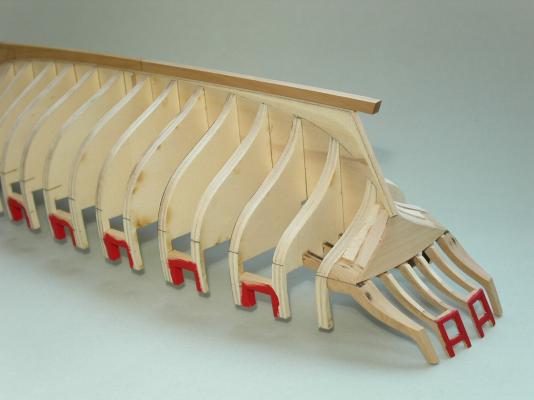
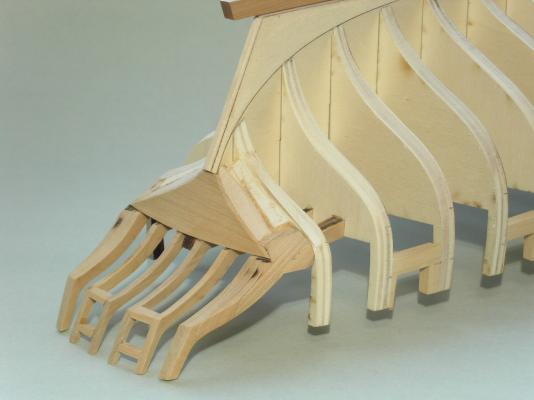
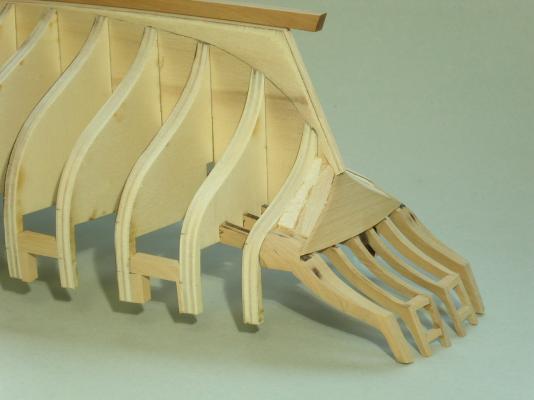
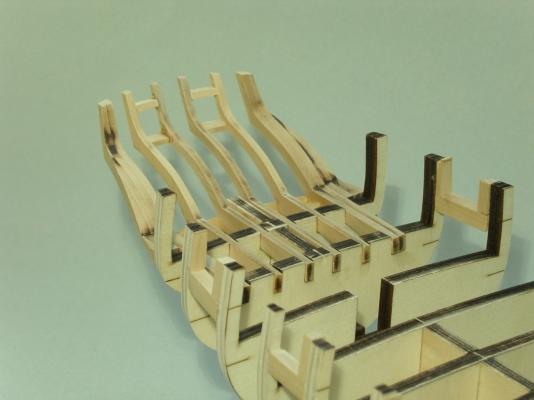
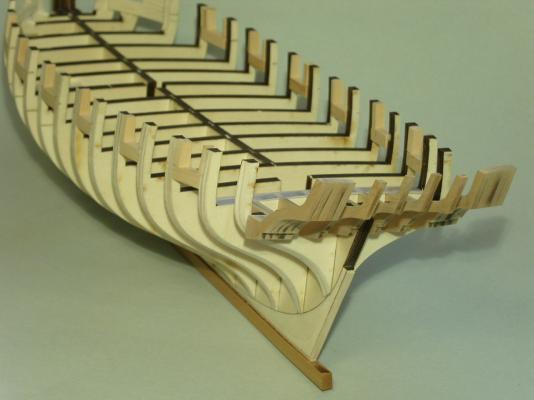
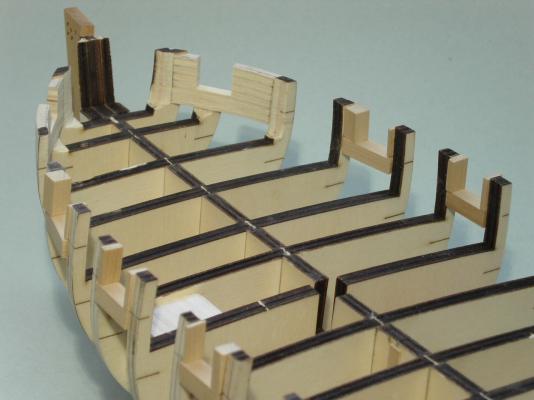
I cleaned up the stern frames and glued the outermost frames onto the ship. The inner 4 are just temporarily taped on so I could get a sense of how this will look. The next step involves breaking out the Dremel with a sanding drum to remove the bulk of the material on the outer stern frames, before I do the rest of the fairing by hand. Erik


-
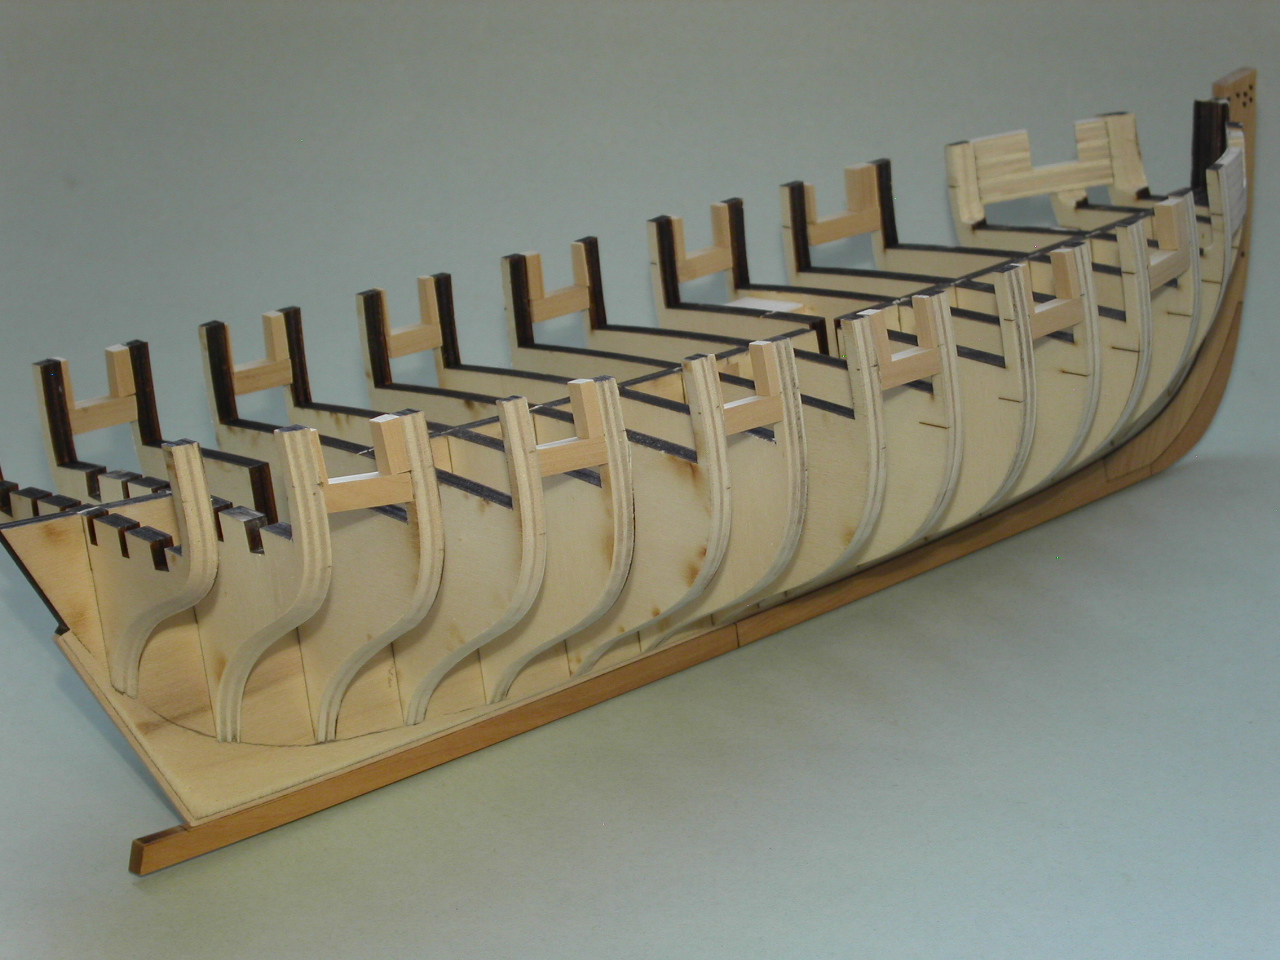
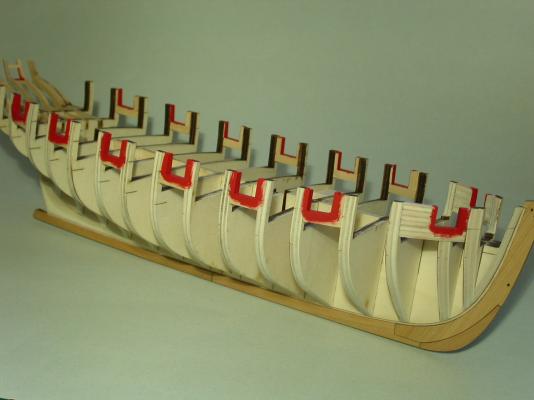
I carefully faired the gun ports. Some of the gun port framing wood pieces are too short, so I'll correct that by adding additional wood pieces to get them to the correct height. Since the frames will be painted, it should be an easy fix. Erik
-
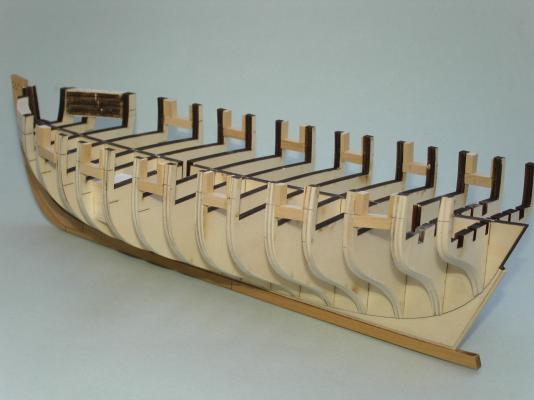
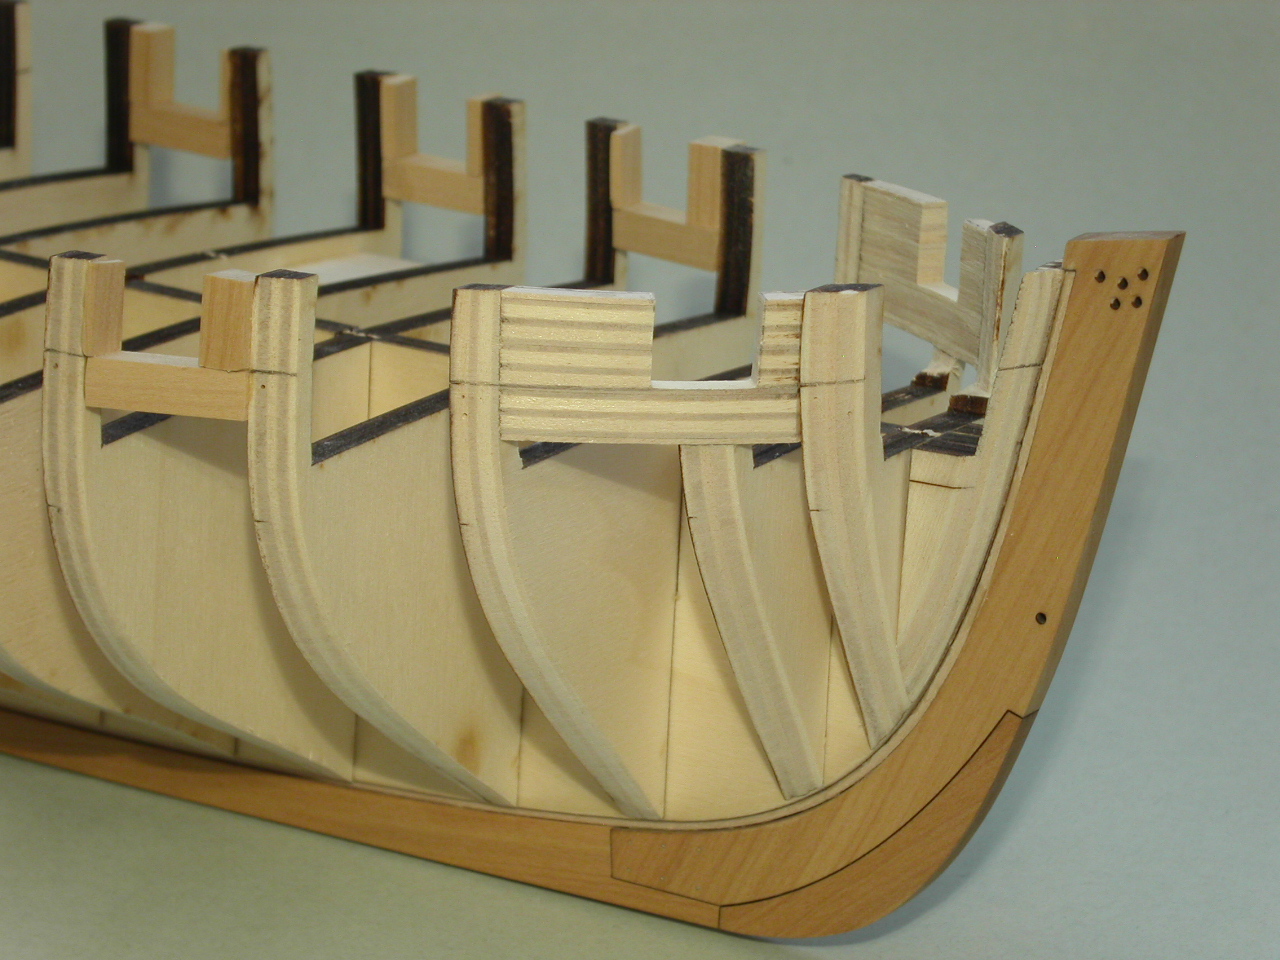
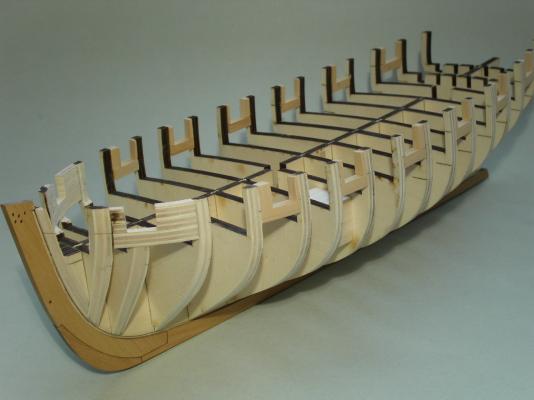
I cut out the forward gun ports for the bow chaser cannons. Before I did this, I thinned the wood material to about 3/16" using a rough sanding drum on a Dremel. This made cutting and filing the ports to shape easier since there was less material to cut through. I used a fine tooth solid Zona saw blade and some different shaped diamond files to get the gun ports cut and shaped correctly. Erik

-
Cutter Cheerful by iosto - 1/4" scale
Erik W replied to iosto's topic in - Build logs for subjects built 1801 - 1850
Excellent job! Your Cheerful looks great! Erik -
Pandora by marsalv - FINISHED - 1:52
Erik W replied to marsalv's topic in - Build logs for subjects built 1751 - 1800
Wow! Marsalv, the windows look great. Erik -
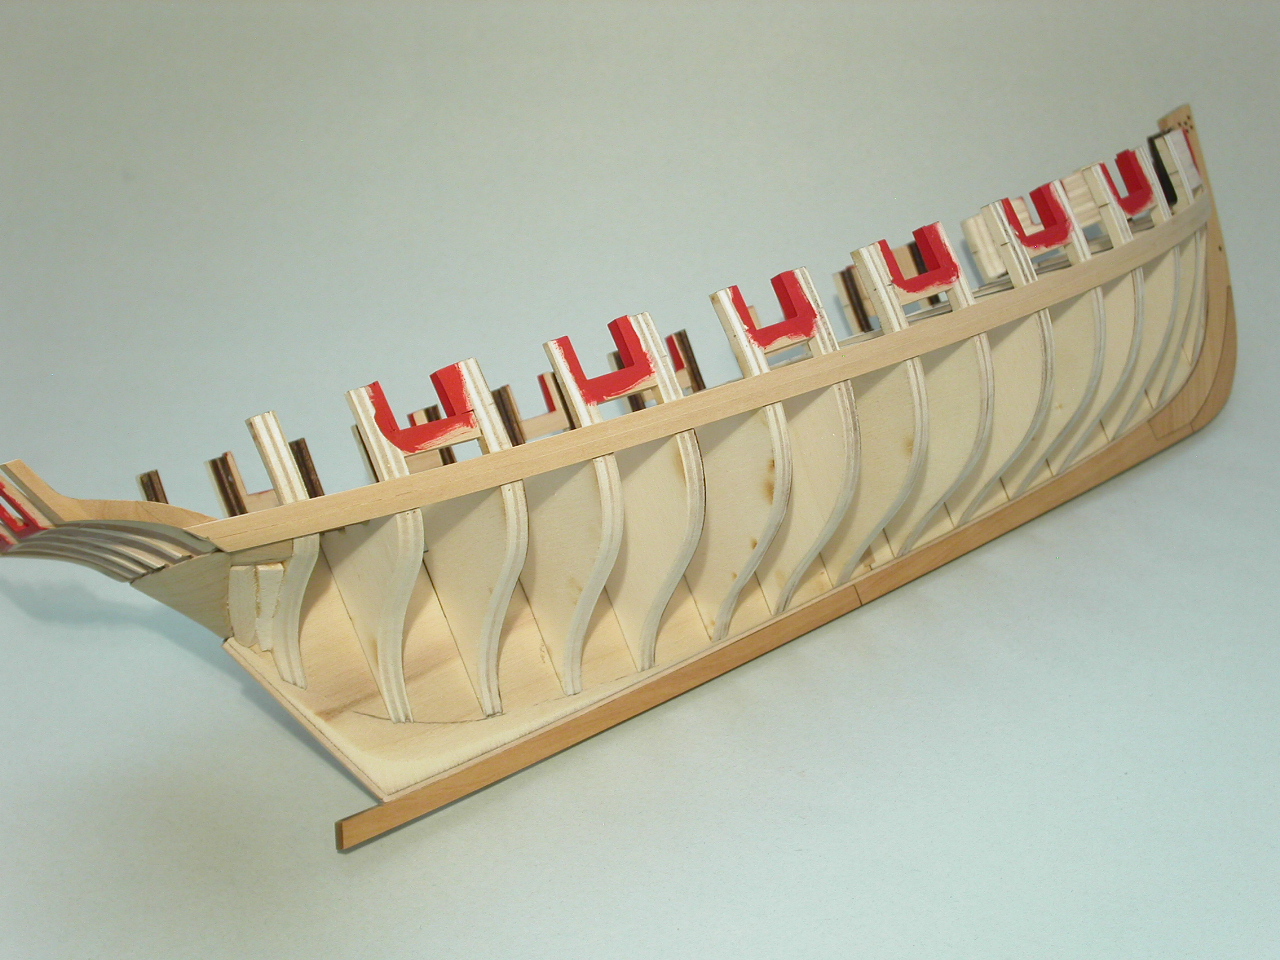
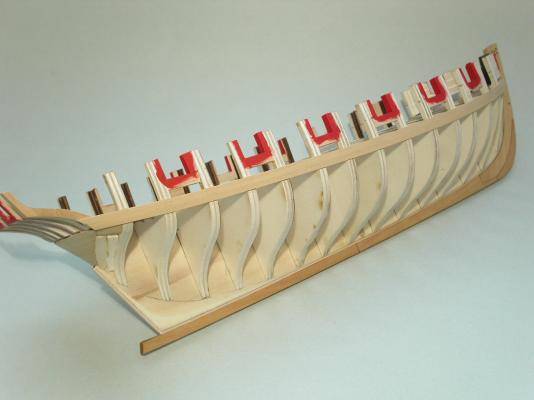
I'm back in town, and back to work on the Cheerful. in the last couple of days I framed the gun ports. They still need to be faired. This proved to be a bit of a chore since each port has different sized lumber framing it. I used 1/4" square boxwood strip and cut/sanded it to shape. My fingers need a rest! Erik