


michael mott
-
Posts
5,195 -
Joined
-
Last visited
Content Type
Profiles
Forums
Gallery
Events
Posts posted by michael mott
-
-
Very Nice metal-smithing Dan
Michael
-
Thank you all for the interesting feed back, and for all the likes.
Sailor said
The two doors you mention would access the magnets under the compass to correct the compass when swinging the ship.
Sailor I will proceed with the doors for the access to the magnets
Row said
I wasn't aware of MSW's existence until 2013 so it means all the more seeing your earlier pics - I wish there were a way to see more of them (I assure you that's not an unsubtle hint - your time & effort is infinitely better spent continuing this build!).
I have wondered a few times about slowly editing the first post to look at including a little more of the original build log information. I am not sure if it is possible to add pages at the front of the log though.
Perhaps Mark can advise.
S.os said
Mike, I cannot see any kind of scuppers to drain the cockpit. Does any photo show them ?
It is because the floor of the cockpit is not yet resolved, the original configuration did have a solid bottom. I have considered but not net figured out the cockpit drainage. The latticed floor boards that were in the old cockpit need to be reshaped to fit the new cockpit as well.
My original plan was to have the cockpit removable so as to access the RC gear for the rudder, I am now leaning toward setting the cockpit in more permanently and running some drains out through the hull this will mean I have to ensure that the floor is above the waterline of course. Now that I am not going to put a radio into her I really have no need to have the cockpit removable quickly.
The obvious challenges of building on the fly and lacking in some forethought about these things, and the continuing changes of mind regarding the design of various elements.
This entire build has become a lot more complicated in many more ways than I had originally imagined
I will definitely have better knowledge about these things on the next build though.
Michael
-
Dan excellent attention and execution of the tree nailing details. The overall effect is certainly worth the effort.
Michael
-
Bob I am guessing that yuo made the bowsprit piece from a long strip and folded it in four places wrapping it around and then soldering the closed spaces between the two side of each tab. I could be completely wrong of course.
Michael
- timo4352 and captainbob
-
 2
2
-
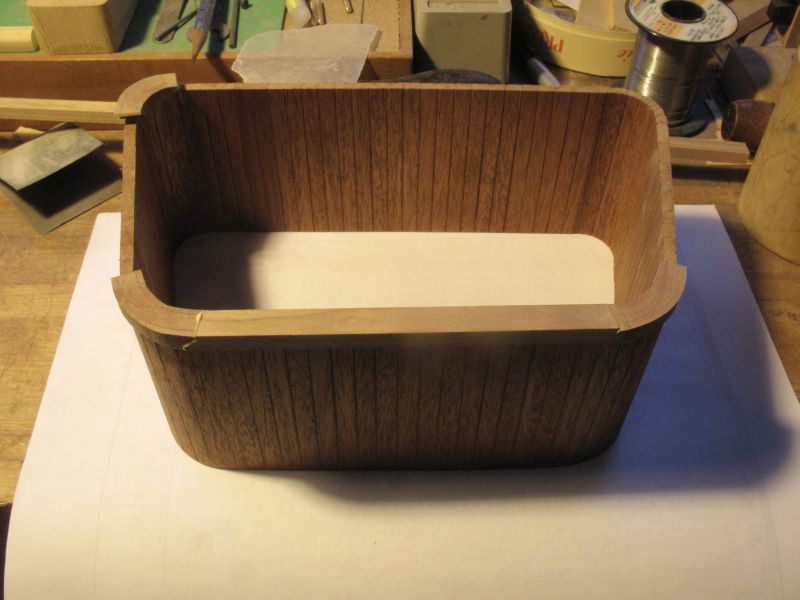
Hmmm Sailor your questions are good ones for me to contemplate, initially I was thinking that it might be a simple small cabinet for a few tools , pliers wrench sort of things, The idea of it opening into a larger space had not occurred to me.
Michael
-
-
Thank you everyone for the very kind remarks. and thank you to all of you who added the likes.
Owen Welcome and I look forward to some pictures of your build, Do you have any pictures of your grandfathers boat?
This evening I started to frame up the companionway and decided to add doors instead of hatch boards.
The stops have been glued inplace, tomorrow i will notch out for the hinges and make them as well.
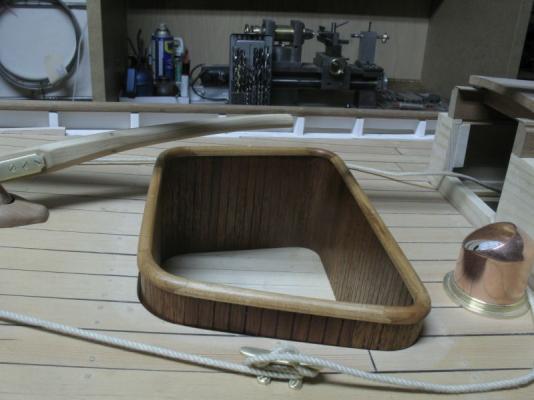
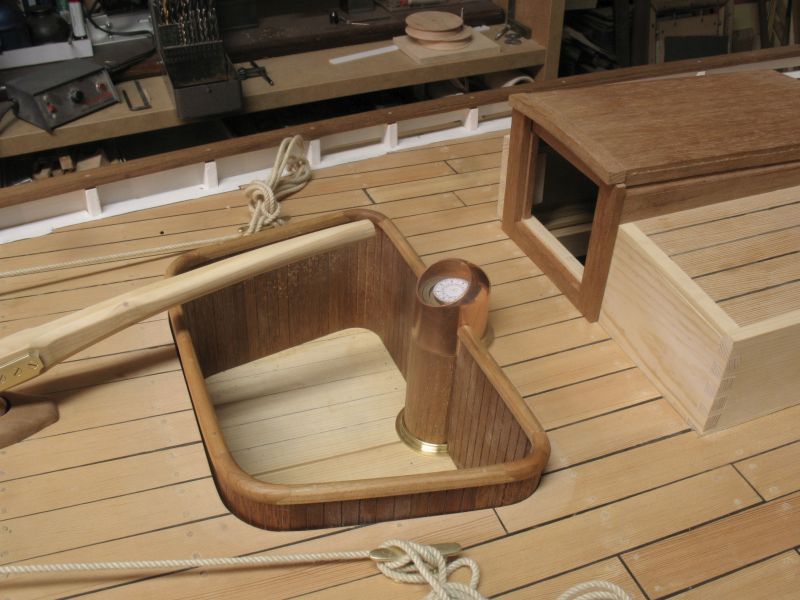
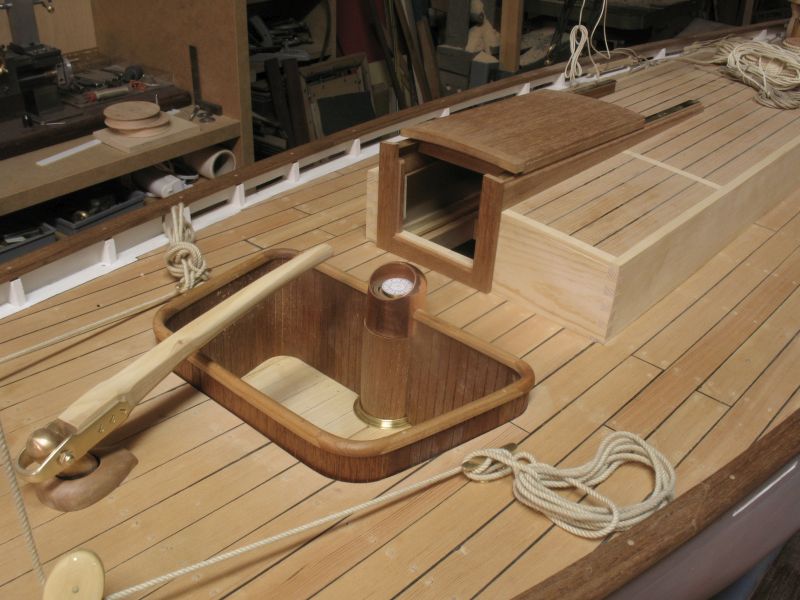
also while looking at the compass I wondered about the location and then it came to me in a flash.... a little bit of cutting both wood and metal and this is the configuration, I am much happier with the location, it just did not look right sitting on the deck.

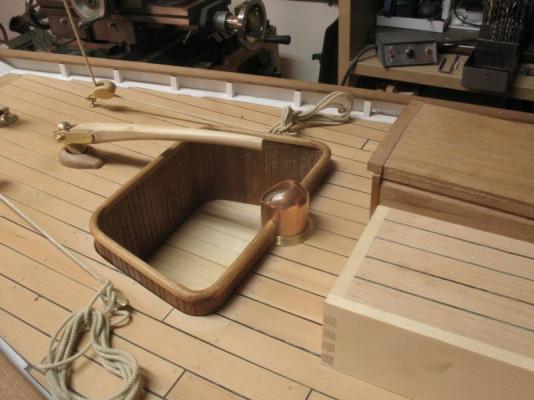

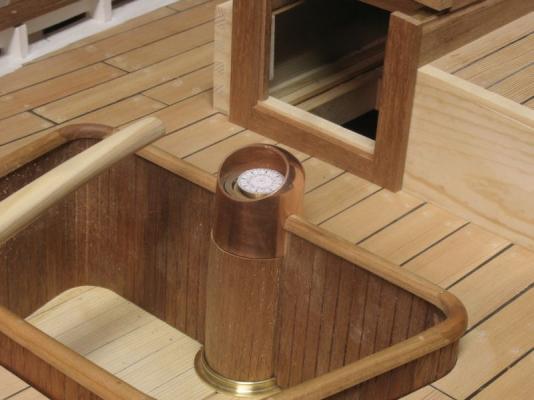
The block of mahogany is just sitting there at the moment, I am thinking that a couple of curved doors so that there is some access under the binnacle it seems logical, I will think on it while I make the companionway doors.
Michael
- PeteB, popeye the sailor, Jay 1 and 16 others
-
19
-
The planking looks good Bob, will you be adding any support at the edges where the planks but up to the cover board?
Michael
-
A fine looking vessel there Bruce, I am always surprised by how small the rudders seem on these ships.
Michael
-
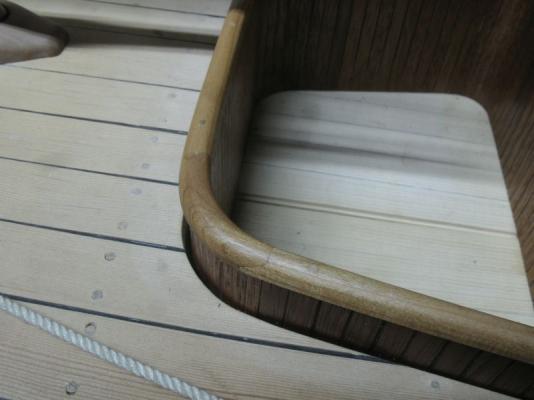
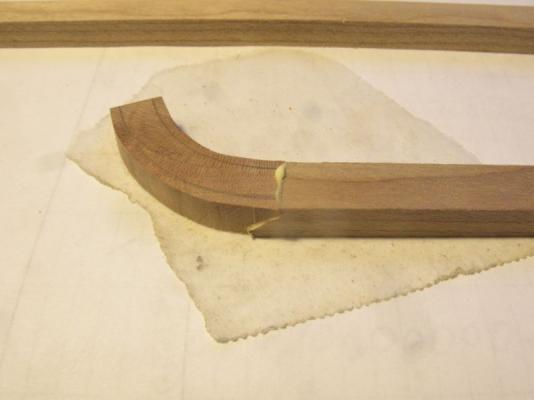
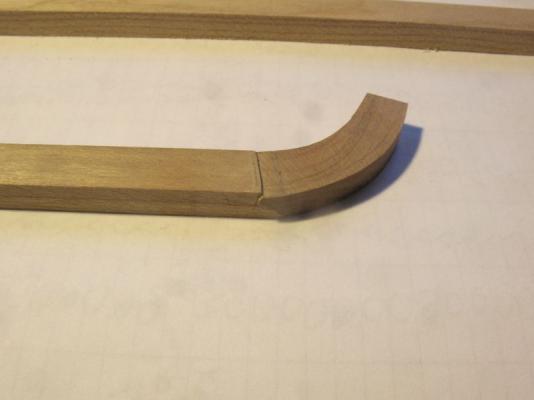
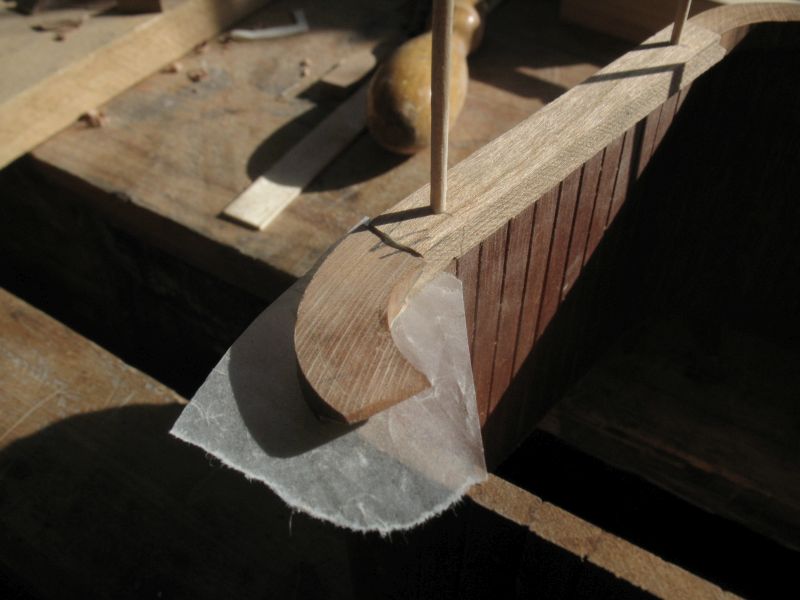
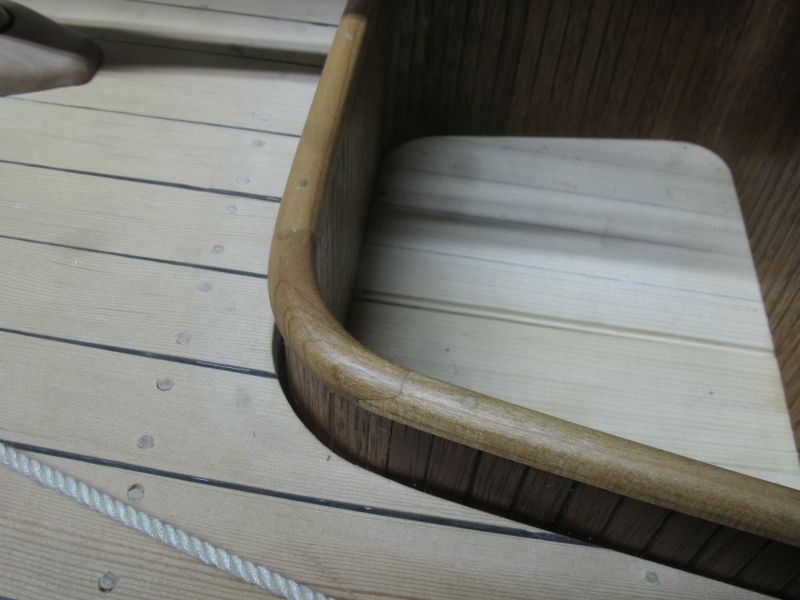
Today I finished off the cap rail and gave it a coat of Tung oil
the first picture shows the continuation of the joints at the corners.

I used the old pencil lines trick to line things up

All the pieces glued and doweled.
Placed back on the boat
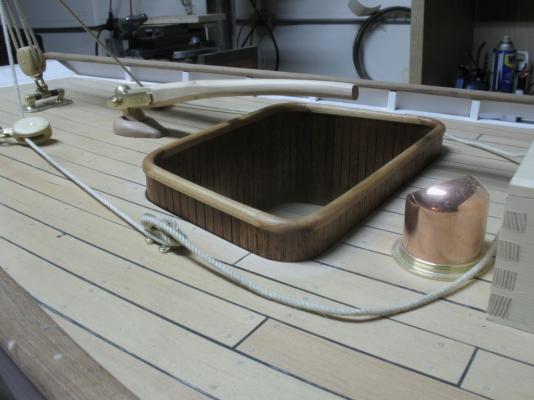
tomorrow I will get back to the cabin hatch boards.
Michael
- pete48, Omega1234, usedtosail and 17 others
-
20
-
Does the hull have to be inserted in pieces? and the top down view looks great regarding the details of the deck.
Michael
-
Dan, excellent work on the stanchions, my those are small.
Michael
-
Hi Ed tried to send you a PM, it would not work.
michael
-
Kannon, there is no such animal as a "purist" Dave and Mark of course are having fun with the term as you no doubt have realized. JB the fact that you are interested in funneling your carving ability into the hull of a ship model is perfect for inclusion on this wonderful site. You will find no end of very helpful advice from those who are skilled at the particular task you are doing.
I would reccomend you start with a build log after deciding on a boat or ship, you ask what are the best power tools and steps, there are so many examples of just about every aspect of building a model ship here.
Jump in and do not be afraid to ask a specific question about a task as you have already done.
Check out the plans and research sections and also the threads that discuss planking some over solid wood and so on.
Good luck with your new endeavour.
Michael
-
I always attached the rudder controls to the rudder shaft below deck so nothing showed above deck.
I did see that not doing this at the time was due to a complete lack of knowledge in these matters, and that the way I approached it was more complicated than it needed to be.
Ah... just need to train some little people. Gulliver probably thought the same thing!
Michael
-
Ed I do hope that you are considering a book for this type of ship model. From my limited knowledge of such things there seem to be quite a few monographs and how to's for the classic three masted battle ships but little on the clippers and merchant sailing ship models. I just thought I would add my name to the growing chorus.
Respectfully Michael
-
I mention this now as it may be possible to hide the tubing in the cockpit coaming, something that may be easier to do before the capping rail is permanently fitted.
Row I am already ahead of you there.
Before the crash of MSW 1.0 I had been documenting the build from the keel up and after I did not rebuild the log but just picked up where I had got too. I do have however hundreds of photographs of the entire build from the very begining.
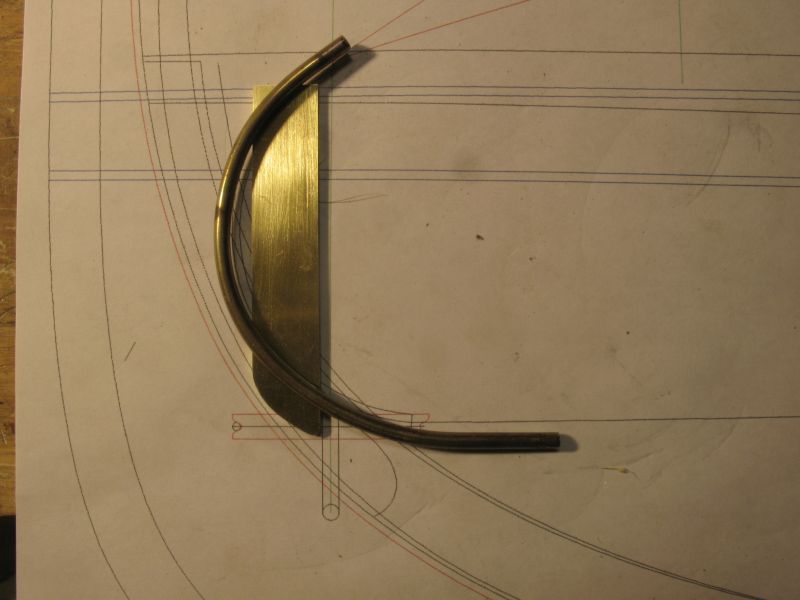
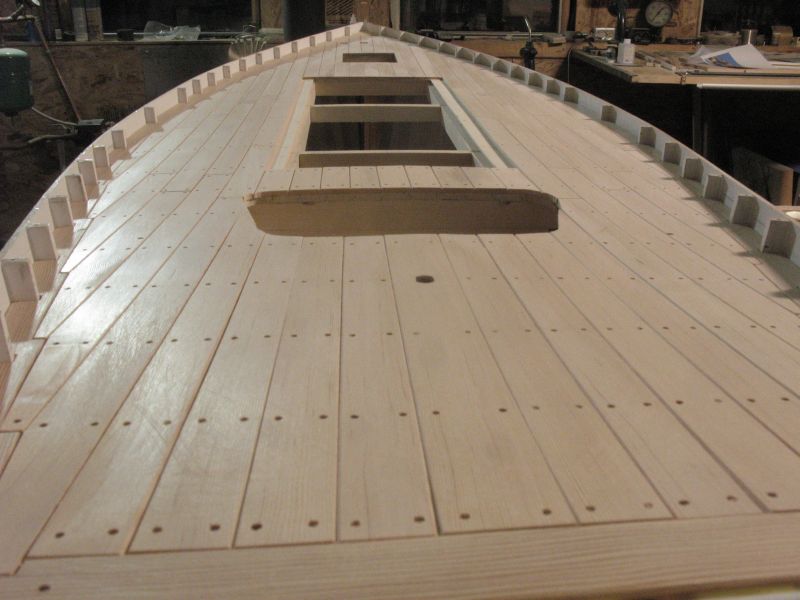
this picture shows the curved brass tube to carry the steering wire to the tiller.
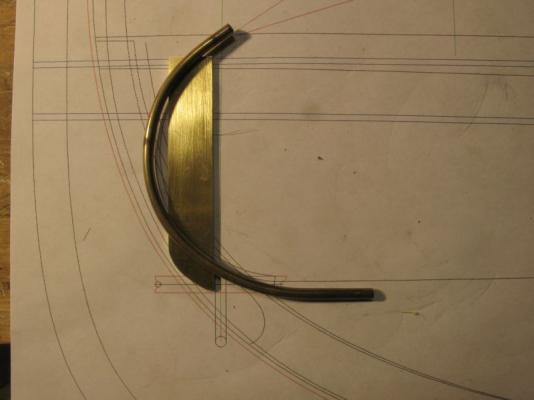
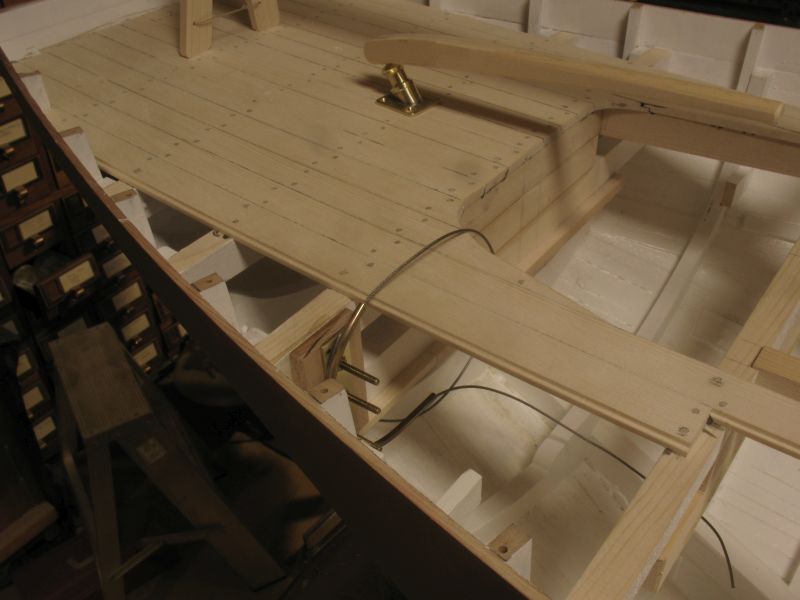
the first decking was white pine and the wires were set before the first planking was finished
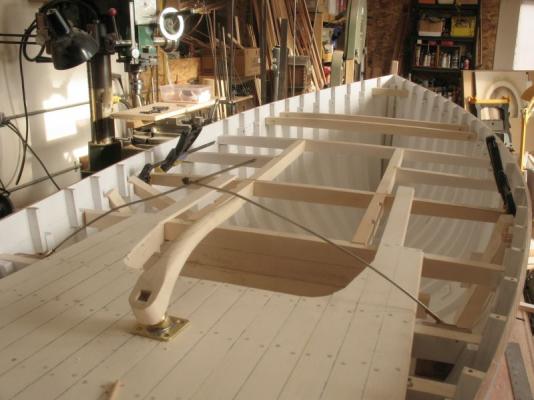
the wire was to have a stop fixed so that it would move back and forth tracking beneath the cockpit
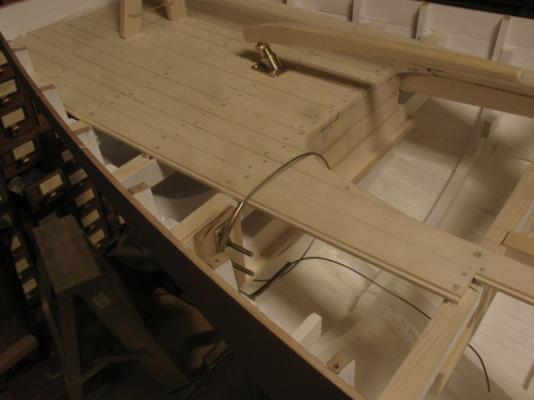
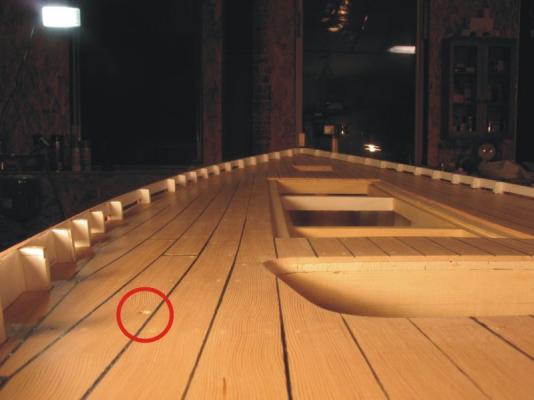
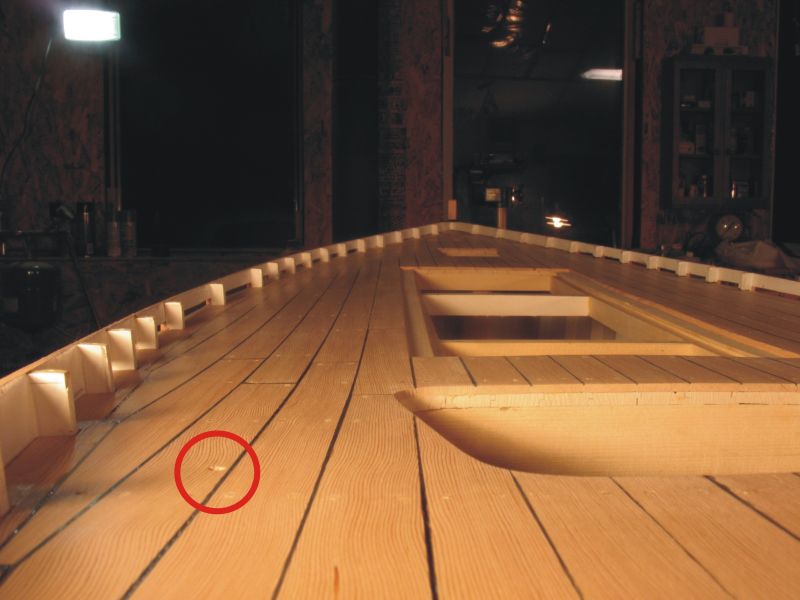
eventually I covered the first layer of planking with a layer of clear fir because I did not like the way the first layer looked plus there was the issue of the cover board and learning about the construction of the full sized practice as I was moving along.

after the fir was scraped and given a rub down with steel wool the steel exit holes are virtually invisible but they are still there as marked by the red circle in this picture.
Now this is a possibility that I am considering very seriously, and that is to not put any kind of radio in her at all but to sail it with the rigging set and cleated as if she was a classic pond yacht. the reason being, that the build is more important than the sailing of this model, My sailing will happen in Maria. the boat is set so that if I wanted to add the radio and other gear later I could do it.
I would rather spend my time though building the next boat than sailing a model, as long as I know it will sail that is all that matters at this point, so it will get to the water and it will be documented for sure.
And to answer you question about glue , I am using lepages carpenters glue and the cap will be varnished or oiled when finished.
michael
-
Nils, Bob, John, thanks for stopping by and your thoughts. Thanks for the likes.
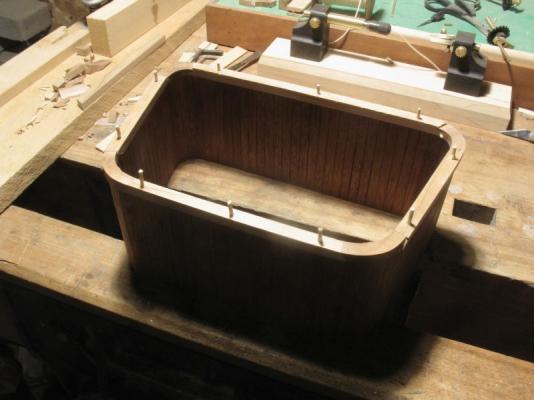
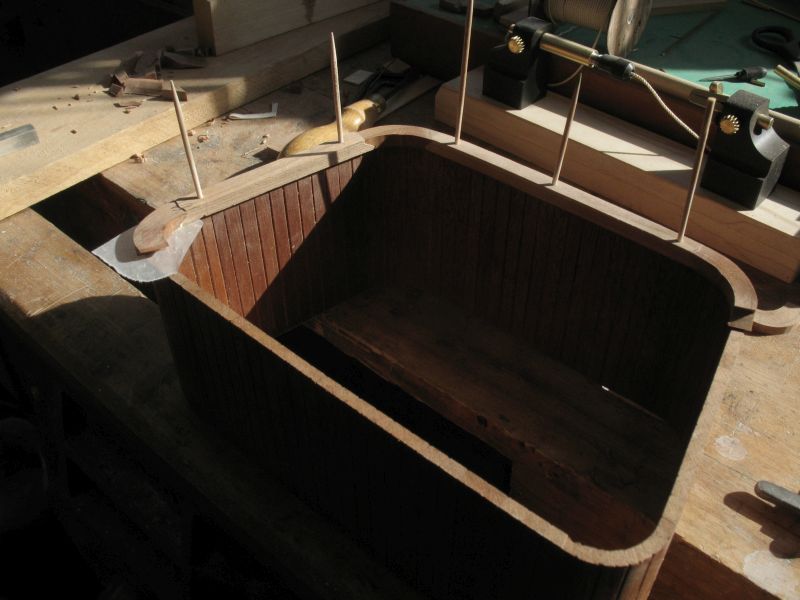
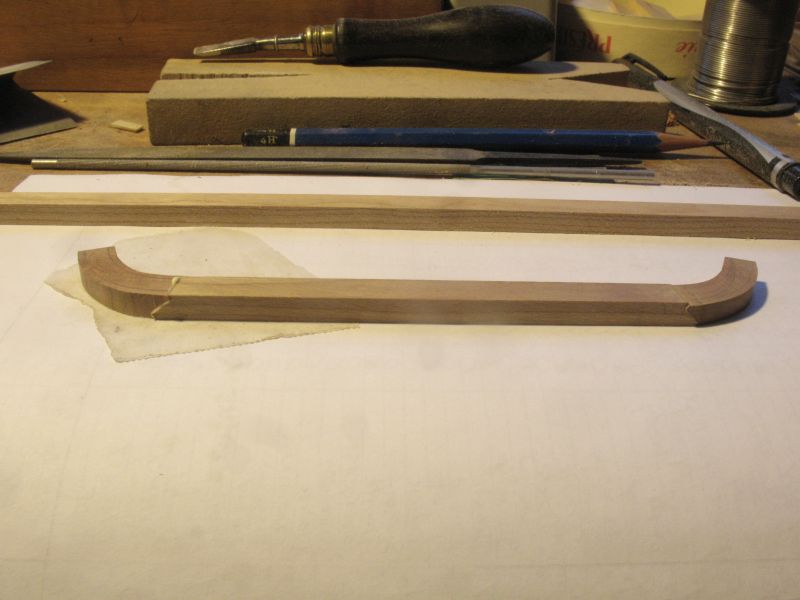
Today I took a little time out from computer transfer to work on the cockpit cap rail.
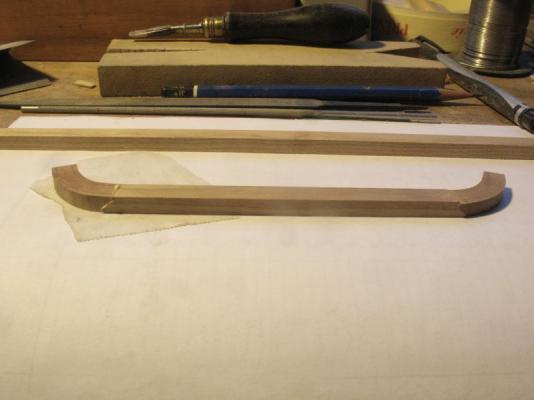
The joints are small and a bit fiddly.
I have the corners all made now and the stern pieces glued together
Before finalizing I will add some dowel pins to locate the rails to the vertical boards.
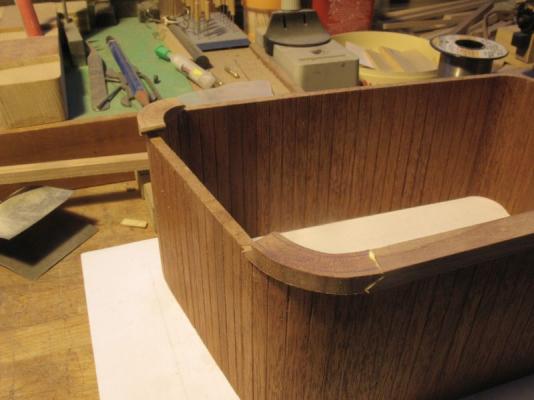

hopefully I can finish the shaping tomorrow.
Michael
-
-
I ask because when I look at the write up at hobby mill, he is set up for the cut off piece (thin piece) to be on the side with the fence and it seems to work for him.
Hi Richard, not a dumb question at all, and if you read the whole of the information on the Hobby mill site you will also notice that Jeff said that he was not endorsing his method or recommending it as a preferred method but that it worked for him.
I might suggest that like all things there are a number of different ways to acheive the same results, what is comfortable for some is not for others, that said having a larger "vocabulary" enables one to be able to use more than just one word.
Some times the particular piece of wood is more easily cut using one or the other methods or even types of saw.
This has been my experience.
michael
-
Ed on the contrary not confusing at all. I find that your explanations to be most educational. great pictures as well, and the finished work speaks for itself.
Michael
- gjdale, Elia, harvey1847 and 1 other
-
4
-
Ditto, what Bindy and Bob Said.
Michael
-
If the small piece kicks back, a strip 1/32" x 1/8" can't do a lot of harm.
Dan true, however I do prefer to have the lager piece next to the fence it is much easier to push and control, I think that setting up to avoid the pinching at the rear of the blade is better, but that is just my experience.
I'm thinking that a small mod to the tall fence to give some clearance at the rear of the blade (it's an add-on) might do the trick.
Mark I think that this is a good thing to do, as you say this is an add on perhaps a small shim at the end towards the operator would cause a slight rake or anlge from the front to the rear of the blade.
I would also be tempted to set up a solid indexing block forward of the start of the blade, like the one in that thread. I am not a huge fan of feather boards. that said I do use them occasionally.
Michael
- themadchemist and mtaylor
-
2
-
Mark, Steve thanks. and for the likes
I just finished replacing the broken picture links from the December 2013 posts that were lost during the recent server hiccup. so all should be back now if there are still any that anyone finds missing let me know.
Michael


San Felipe by newbuilder101 (Sherry) – Scale 1:96
in - Build logs for subjects built 1501 - 1750
Posted
Sherry your small detail work is exquisite, I have to agree with denis the blue does look very sharp.
Michael