michael mott
-
Posts
5,200 -
Joined
-
Last visited
Content Type
Profiles
Forums
Gallery
Events
Everything posted by michael mott
-
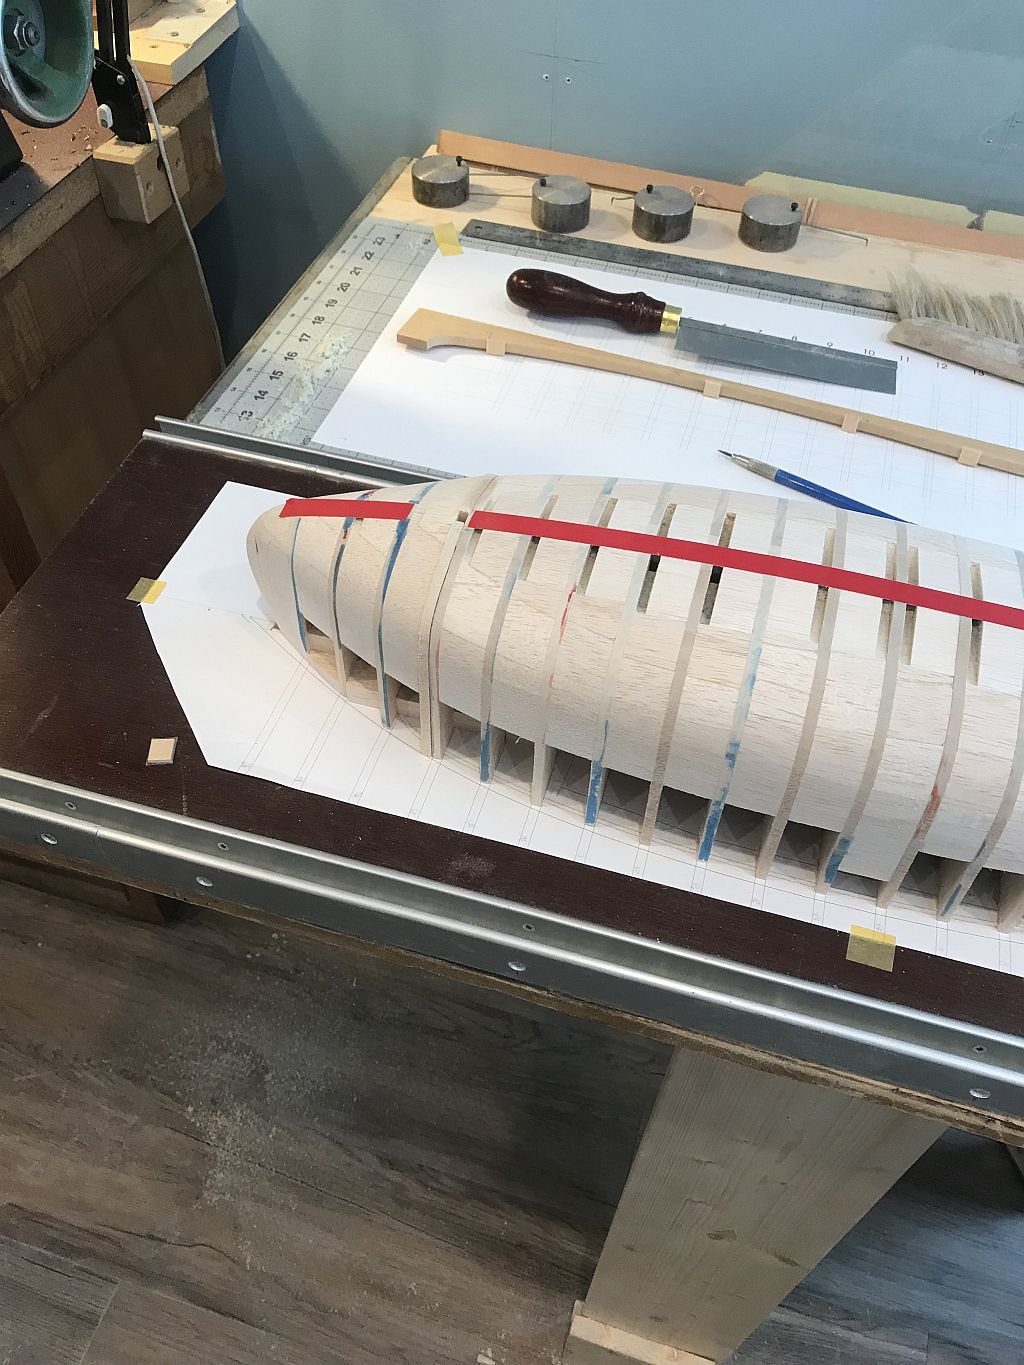
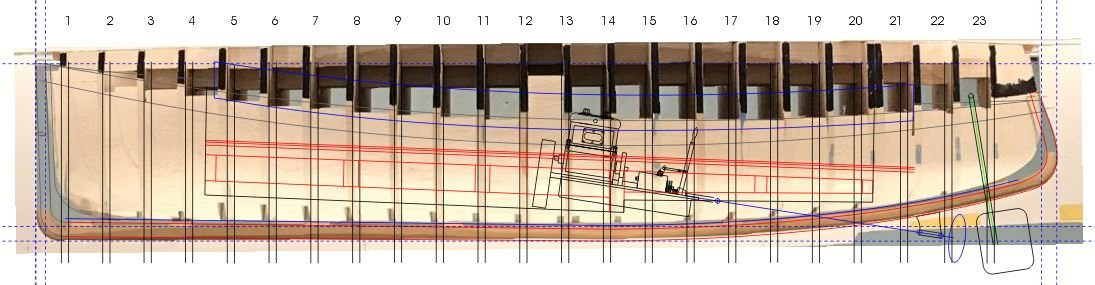
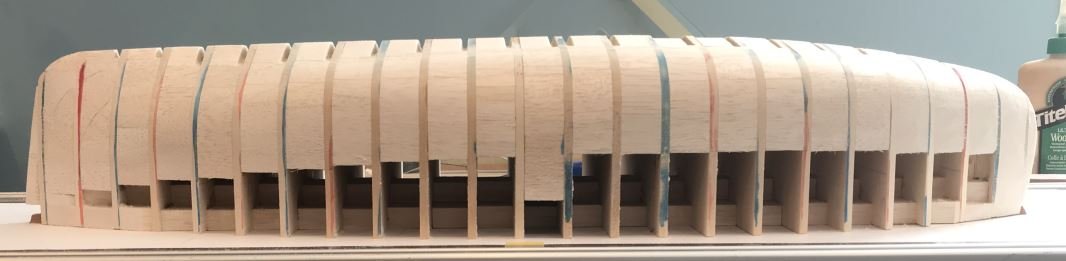
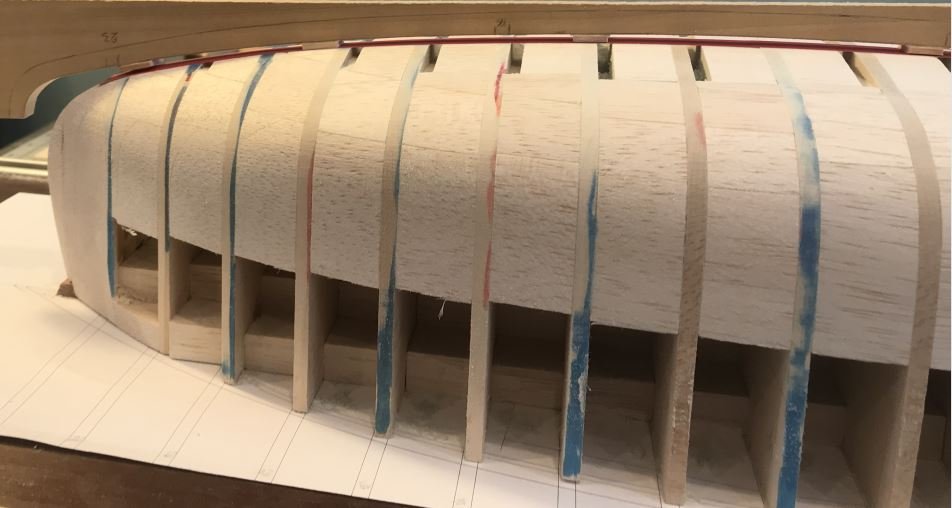
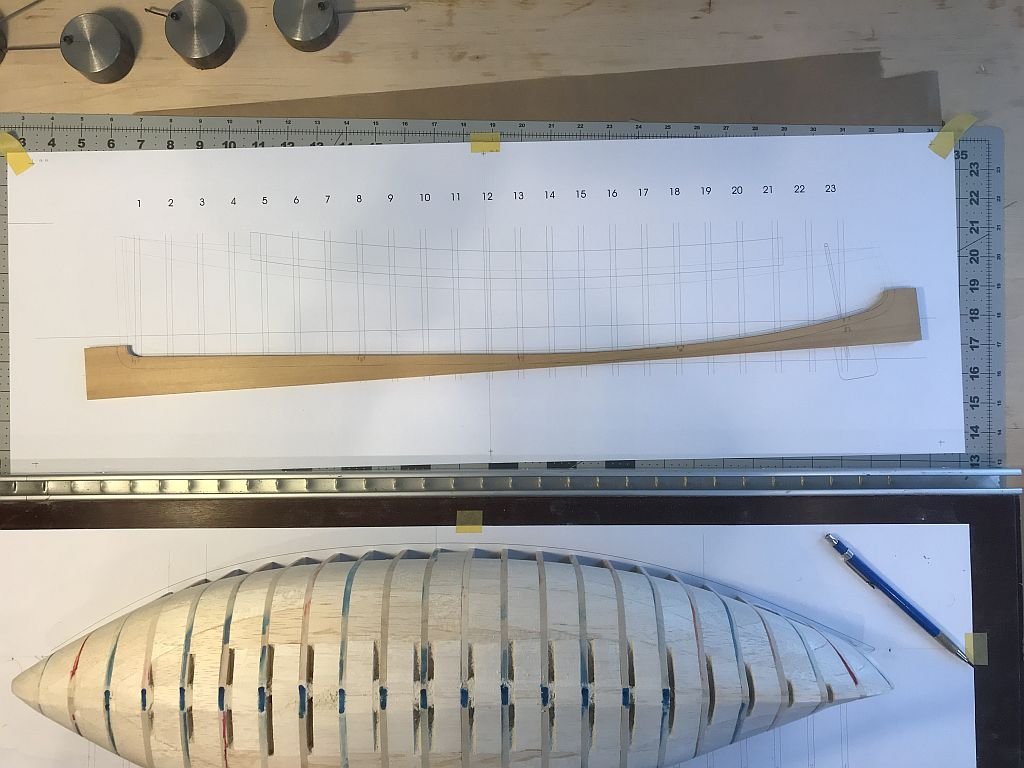
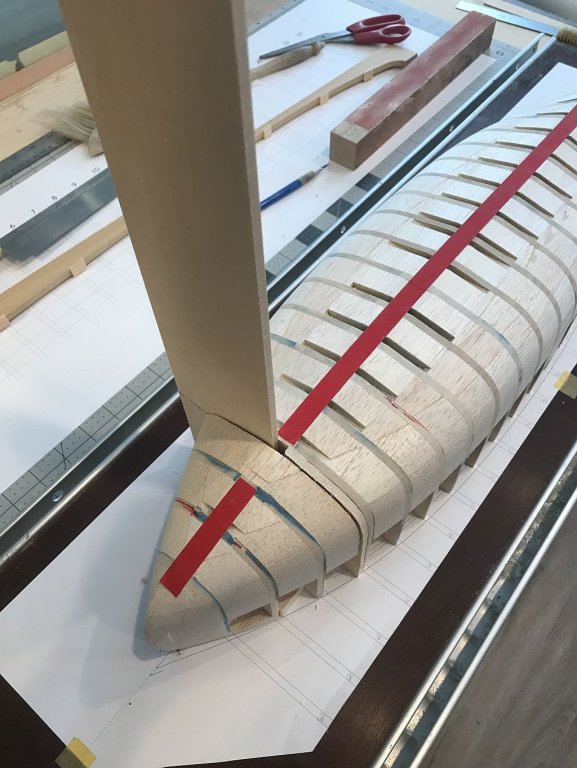
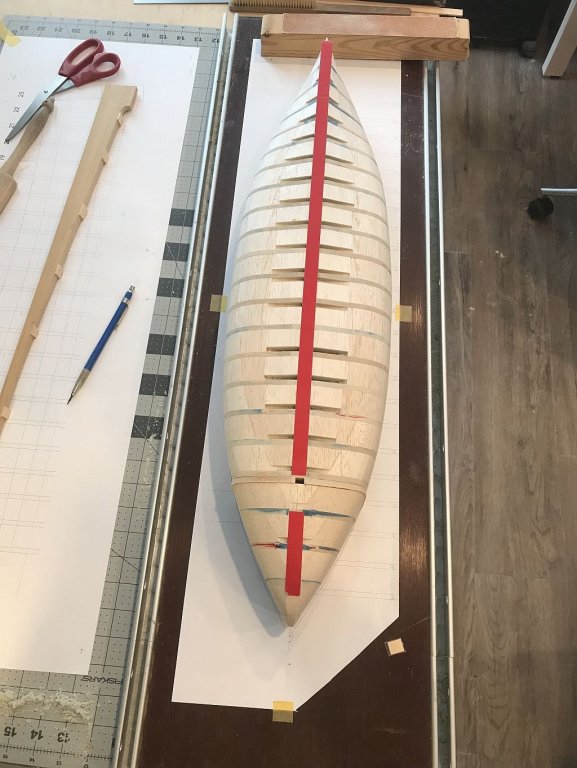
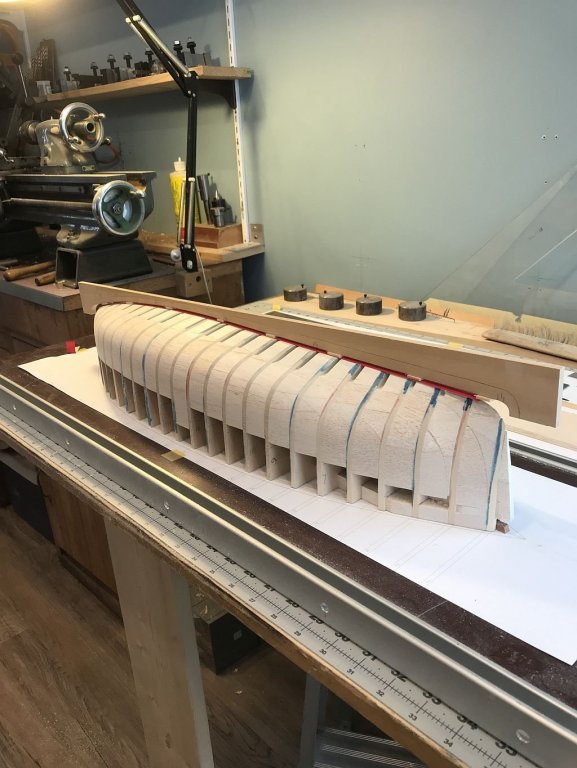
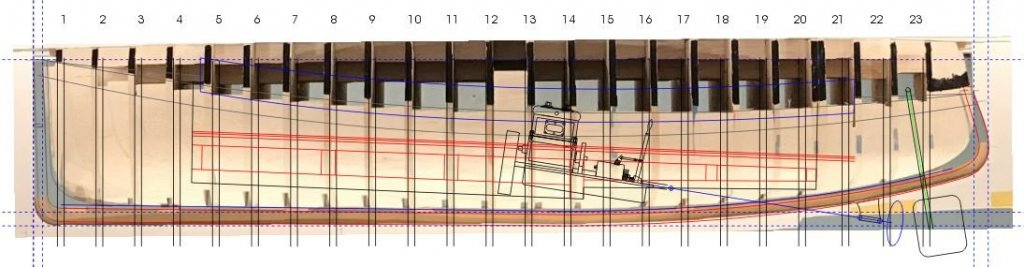
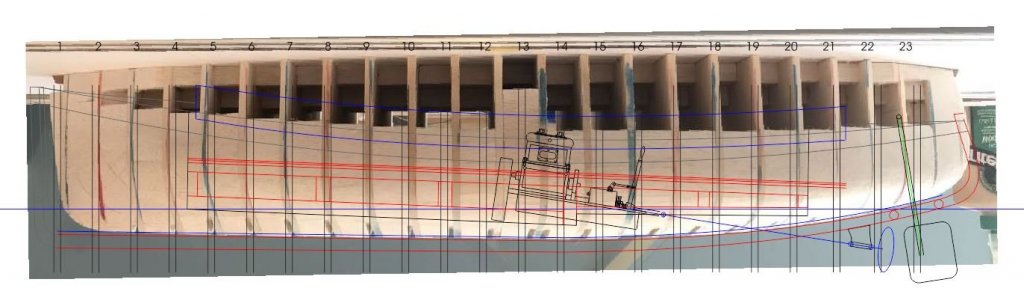
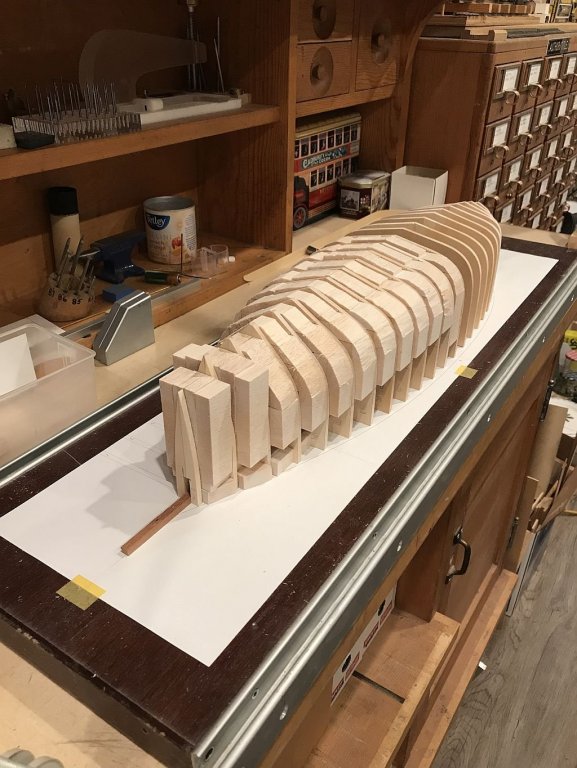
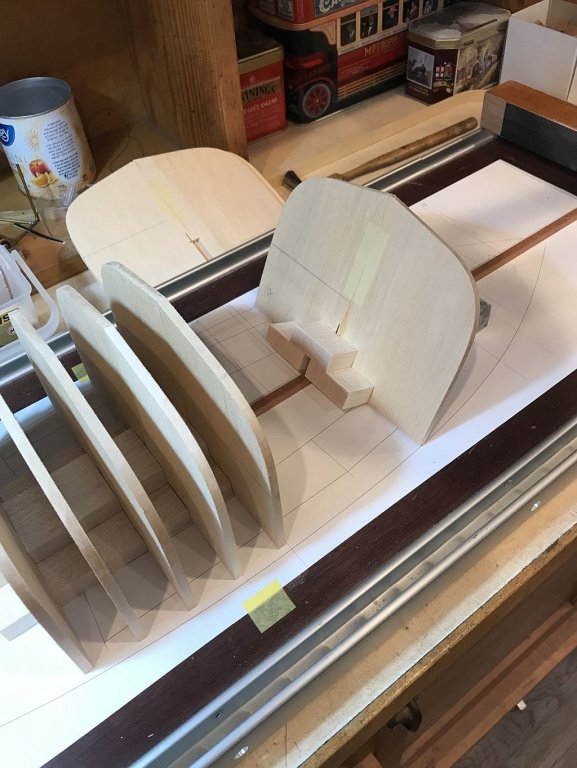
 Thanks for all the visits and likes. Discovered a flaw today! When I changed the length in the elevation I did not change the length in the plan view. Don't ask me why because I have no idea why I didn't. I cut the inside shape of the keel but left the outside so that I could use it as a gauge. It was when I stuck the profile of the hull onto this and put it onto the form that I discovered the issues. yes a combination of them. The bulkhead stations were the same on both the elevation and the plan, and there was some spacing error at the stern at station 20 and the plan view of the edge of the deck was too long and needed to be shortened. it was very confusing. Once the errors had been corrected and the edge of the profile changed it left a couple of things to fix the hull form. First I had to add 3/16 aft of station 20. Then the other issue needed to be fixed with a load more sanding because now the bulkheads were wrong at the bow and stern. Onward and upwards. The stern after some extra sanding The red tape represents the 4 inch wide plate that is fixed to the top of the keel and is tapered at the bow and stern. indicated with the blue pen. The next shot shows the re-sanded form with the profile resting on it. I will be adding some deadwood at the bow and stern. This looks better Before I go any further I will set the stem and sternpost with the deadwoods. and fix the top plate after placing the ribs on the bulkheads. Michael
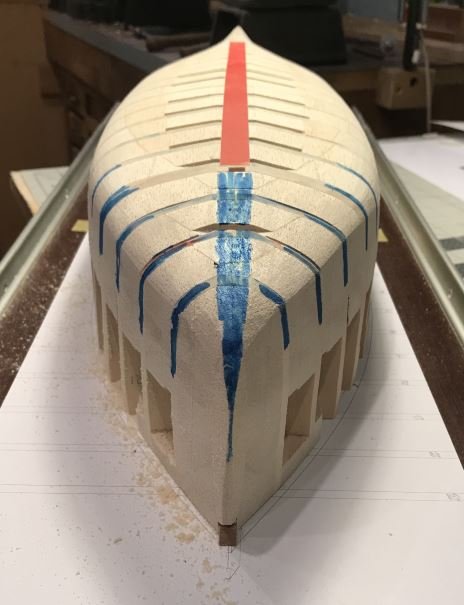

-
Now that is thinking outside of the box....amazing, thank you Kortes, I would never have thought of doing it that way. Your hand is a steady one for sure. Michael
-
MONTAÑES by Amalio
michael mott replied to Amalio's topic in - Build logs for subjects built 1751 - 1800
Finally I see that he is human did you all see the blobs of glue. Phew! and sanding dust too. now my question is how do you clean up the glue with the clamps in the way, or do you do that later? As always superb model making. Michael -
Very nice site Alex, I was curious that of all the links there was no link for Model Ship World. Michael
-
Wow! I can see that you are able to accomplish a great deal of detail at this tiny scale ant chance of some close ups of the blocks and the rigging at the tops of the sails? Michael
-
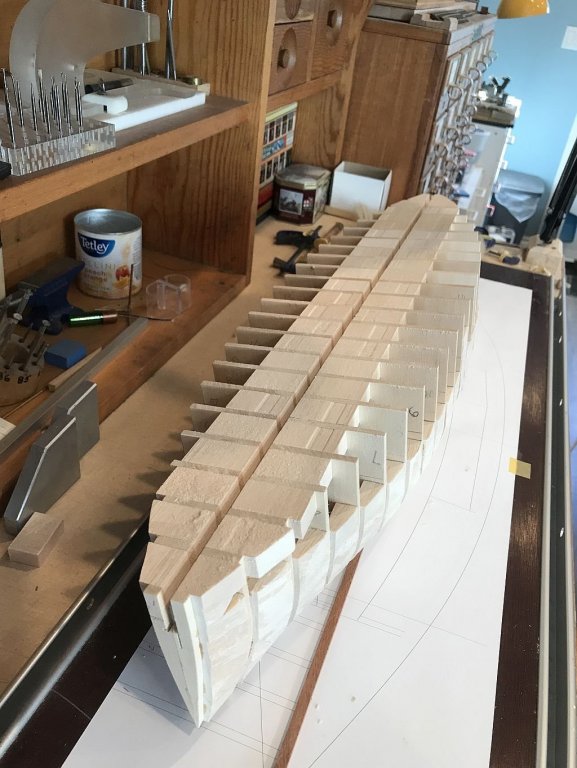
Well all this talk of garages I happen to really enjoy my single car garage converted to a workplace. There was a fair bit O' sandin' today Now I'm getting nervous. Now the serious stuff needs to begin with fine tuning the form I am going to need to be very careful going forward from this point, no cavalier sanding now. I am thinking that the new keel needs to be made before going any further. And because Mark Taylor did this some time ago I thought that it was worth a look. I am in the general ballpark the photo is a bit distorted, I can see that it is going to be alright though. Michael

-
No but I do set up a negative charge to the table and the dust is immediately attracted to it and not me, so no problem I already clean as I leave the shop.
-
Kortes, very nice work on the rigging elements. How did you make the thimbles in the second picture? Michael
-
Keith this is not possible, because my shop in independent of the house systems. and if it is sunny today as it was yesterday it will end up being "A Sunny Sanday" thanks for that Druxey. The Balsa dust is certainly like flour though! Michael
-
Looks like a fair chop in the last pic while the water looks like it is flattening in the top one. Michael
-
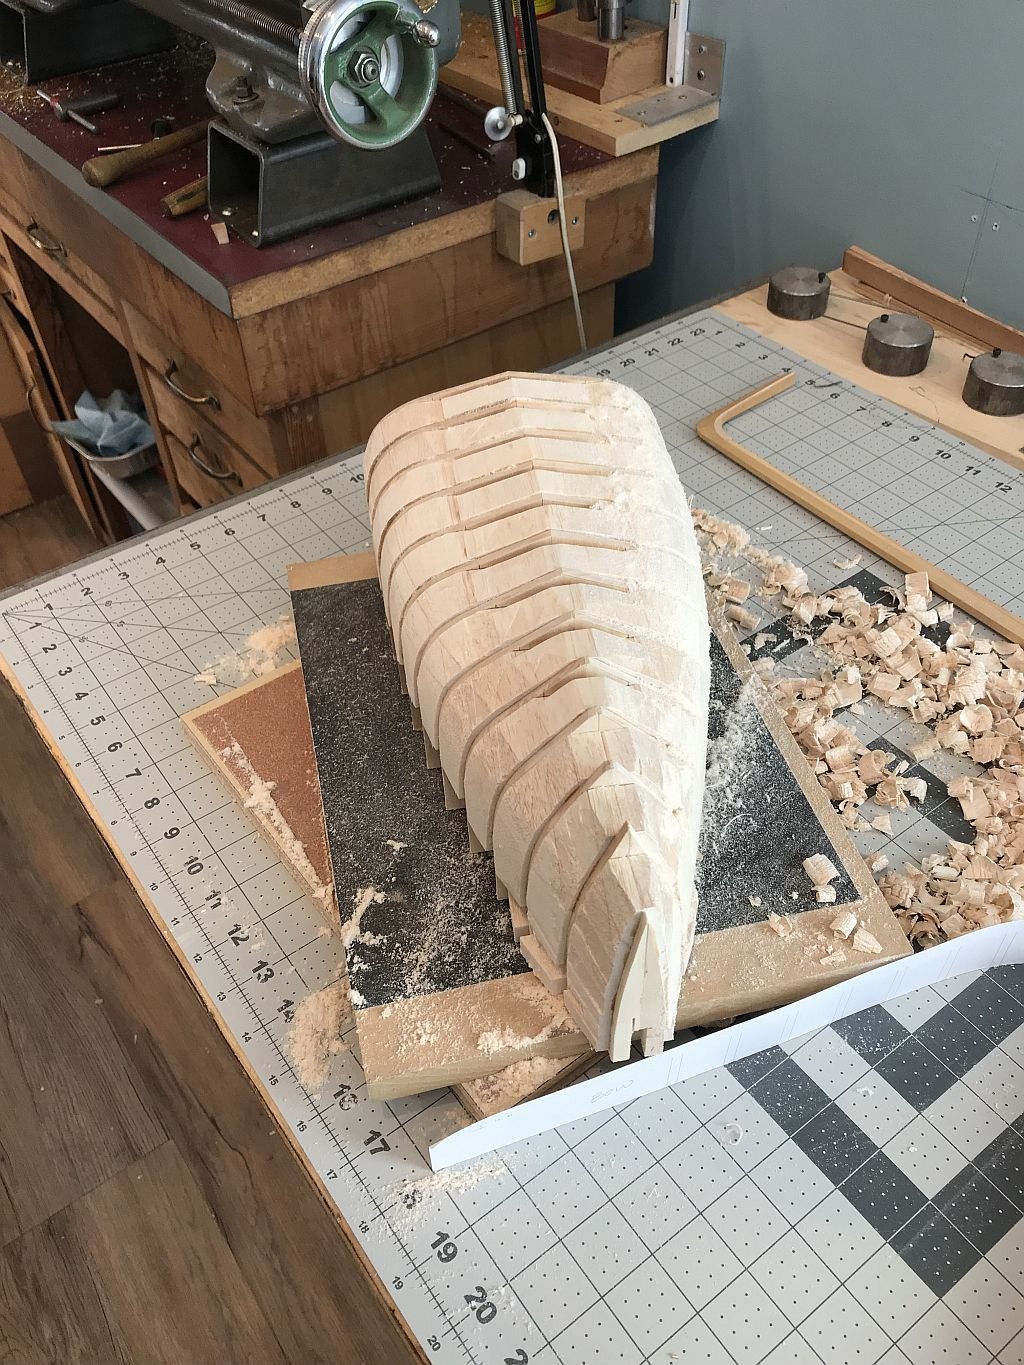
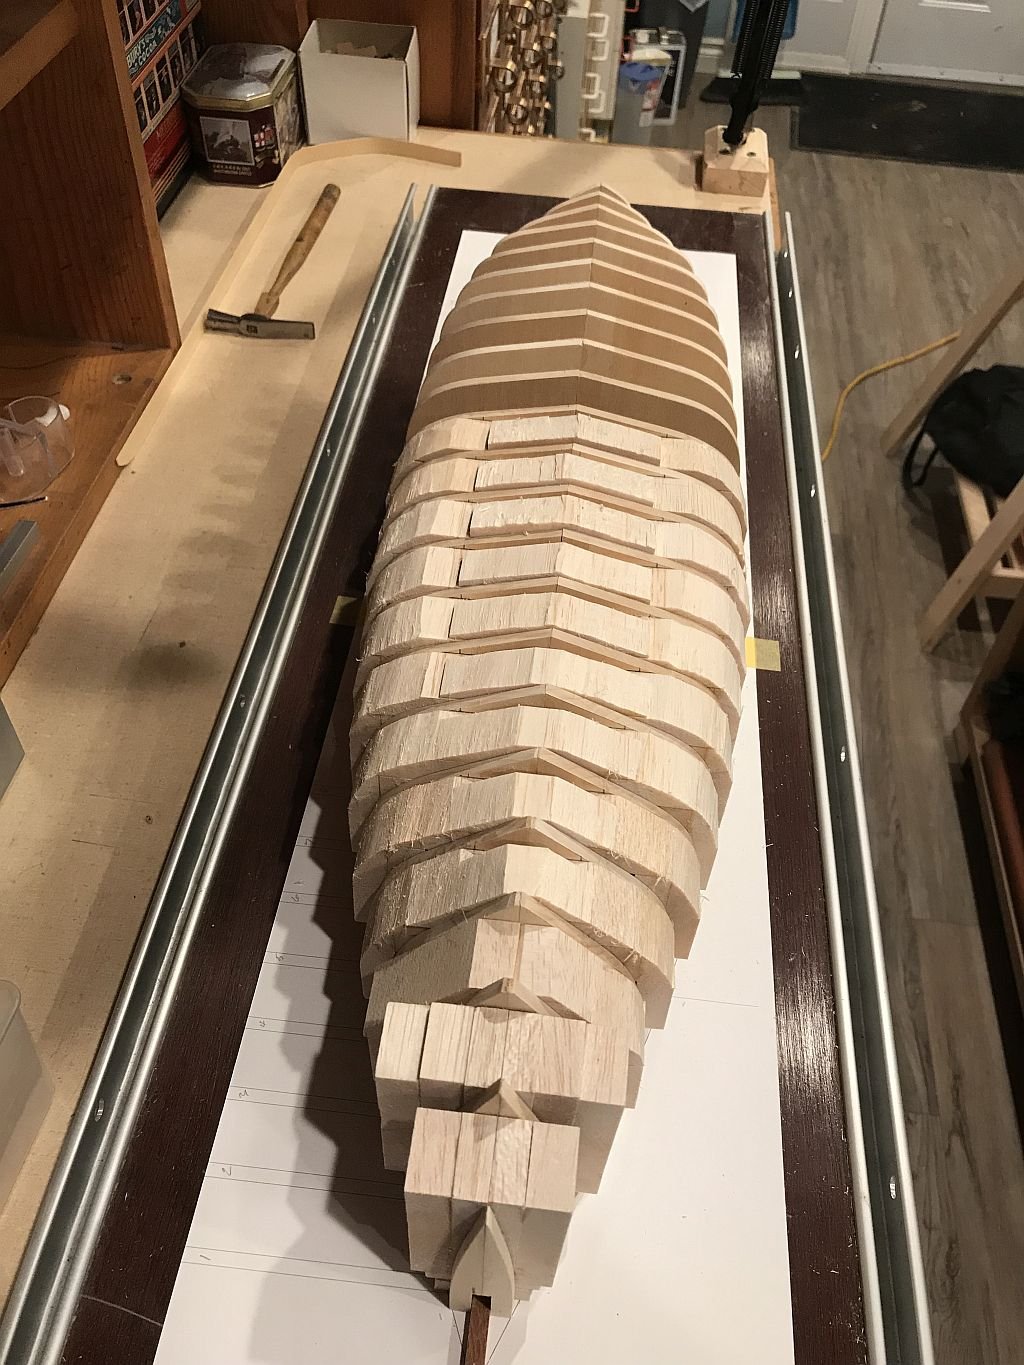
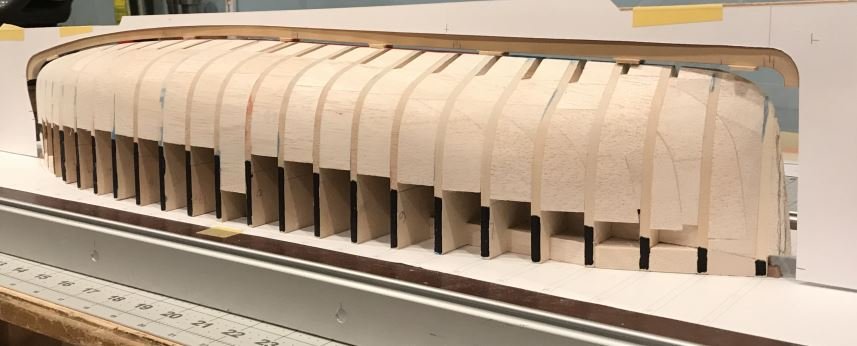
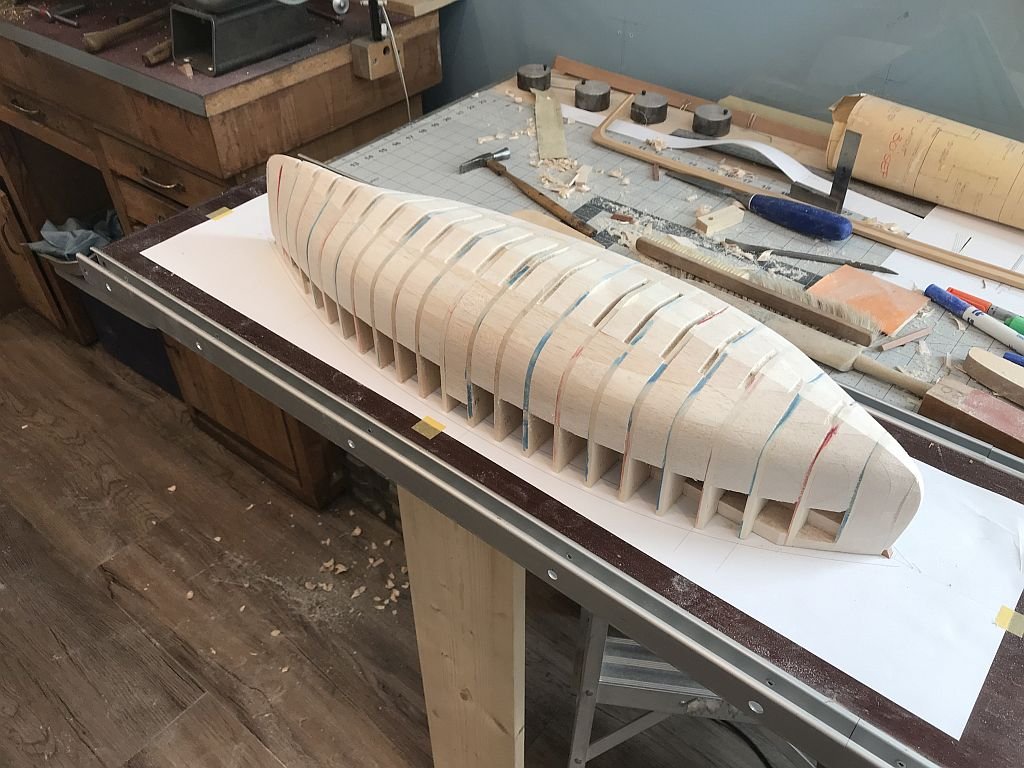
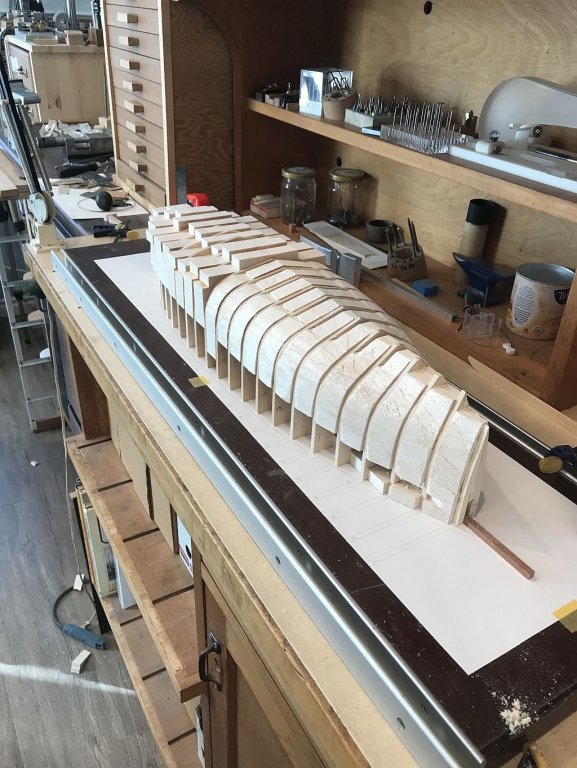
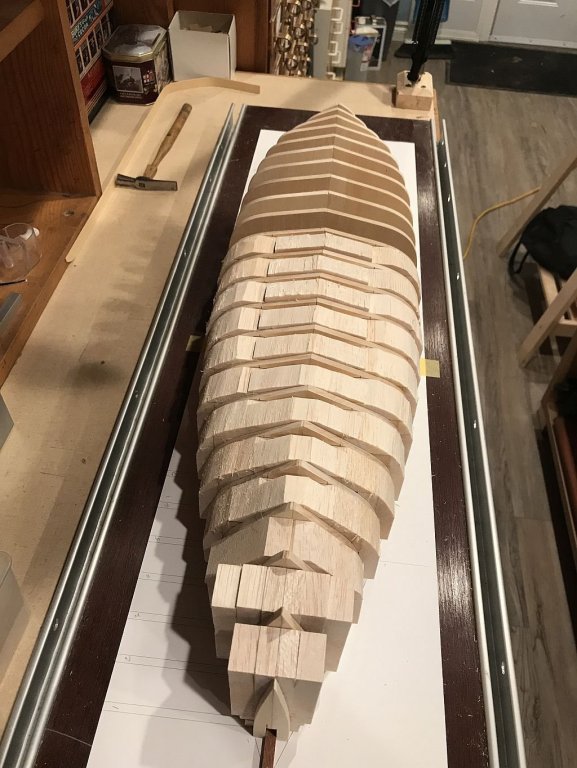
Further gluing and shaping. The forward section roughed out, waiting for the aft section glue to set up. The rough shaping done to the whole hull with the exception of the area at the bow and stern which will be sorted once the new keel is made. It slips on and off the spline nicely with enough friction to to hold if I tip the board upside down. Tomorrow will be a sanding day. Michael

-
Loading that coal looks like it was back breaking work. Michael
- 238 replies
-
- 2
-

-
- leviathan
- troop ship
- (and 2 more)
-
Personally I would soften the edges away from the mast end. The softer edges will be much easier on the haliards and any other lines. Just keep enough squared to do the clamping at the bracket. Michael
-
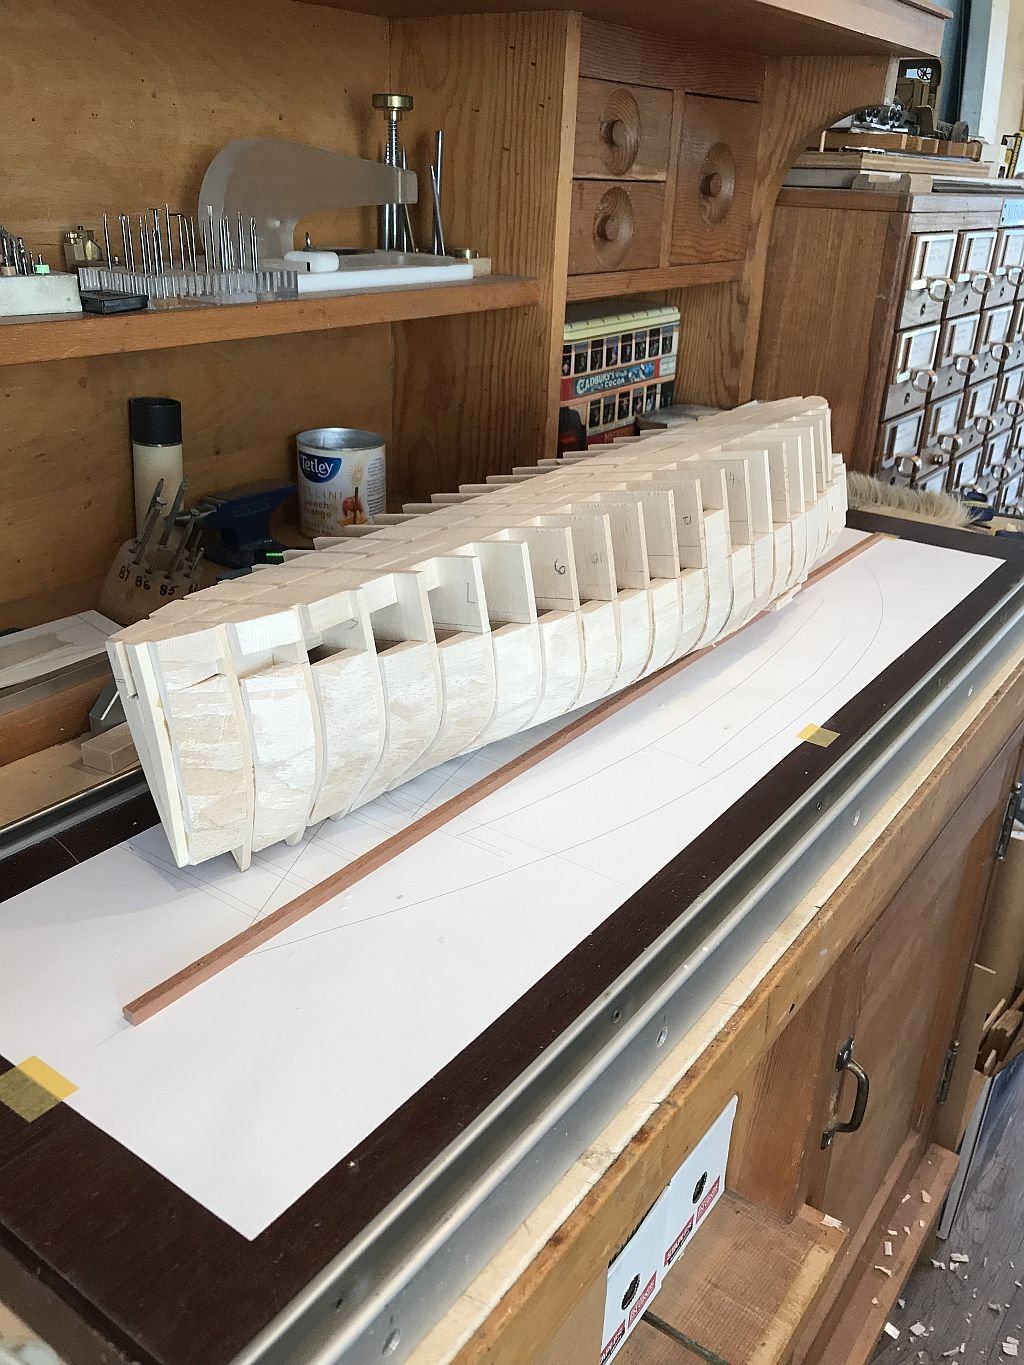
Mark 2 Thanks The blocking is moving along quite nicely. Today i will work the aft section. It was very easy being able to glue up the blocking while each bulkhead was flat on the bench after the rest are glued up I will do the sanding to ensure that they match the drawing and eliminate the accumulated error caused by the tiny thickness overage. Michael
-
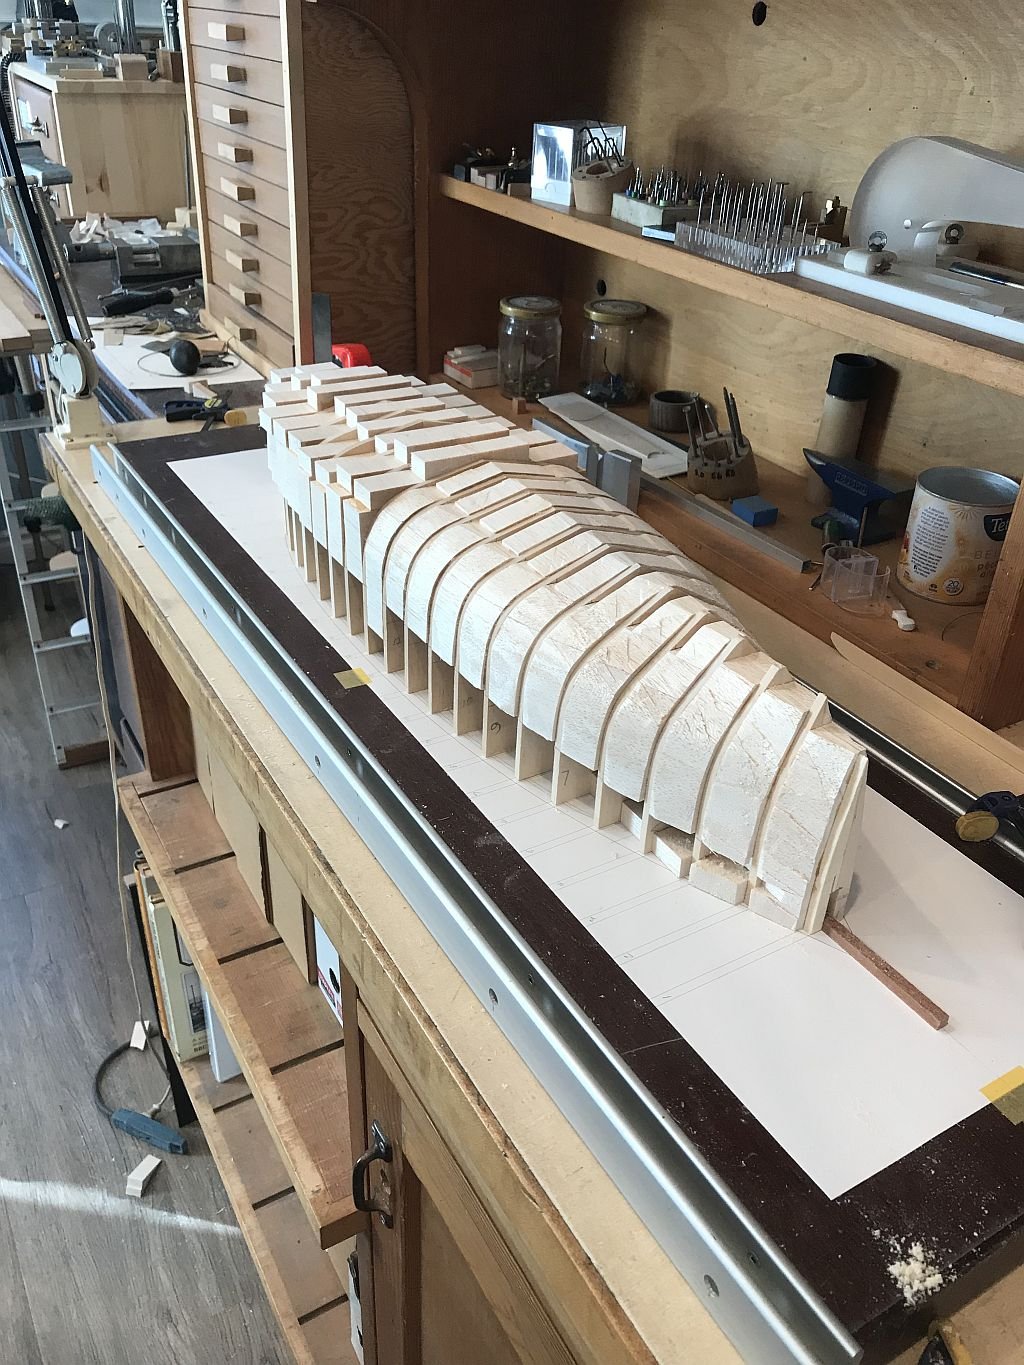
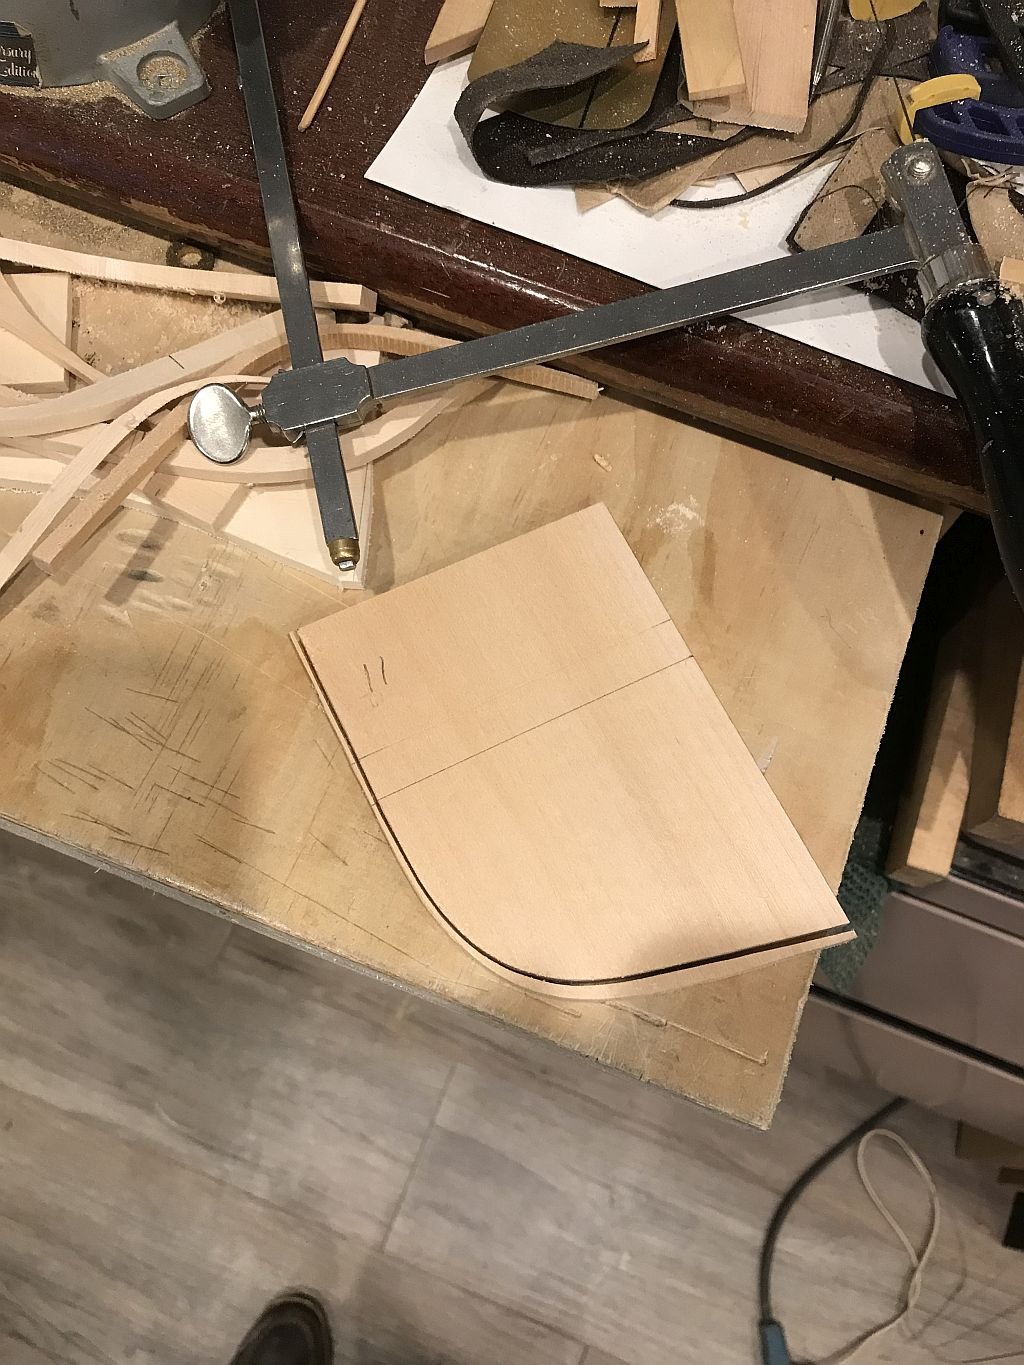
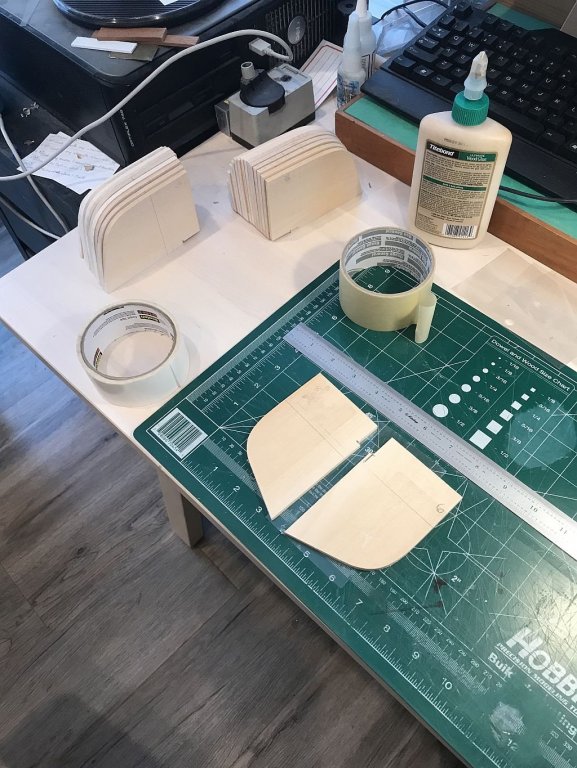
I have started to add the filler blocks and will rough shape them before final sanding to thickness and glue up. I am using a chisel to remove the square edges, no point in sanding more than I need. The next picture shows the relief slots for the floors which will tie the ribs together. Michael


-
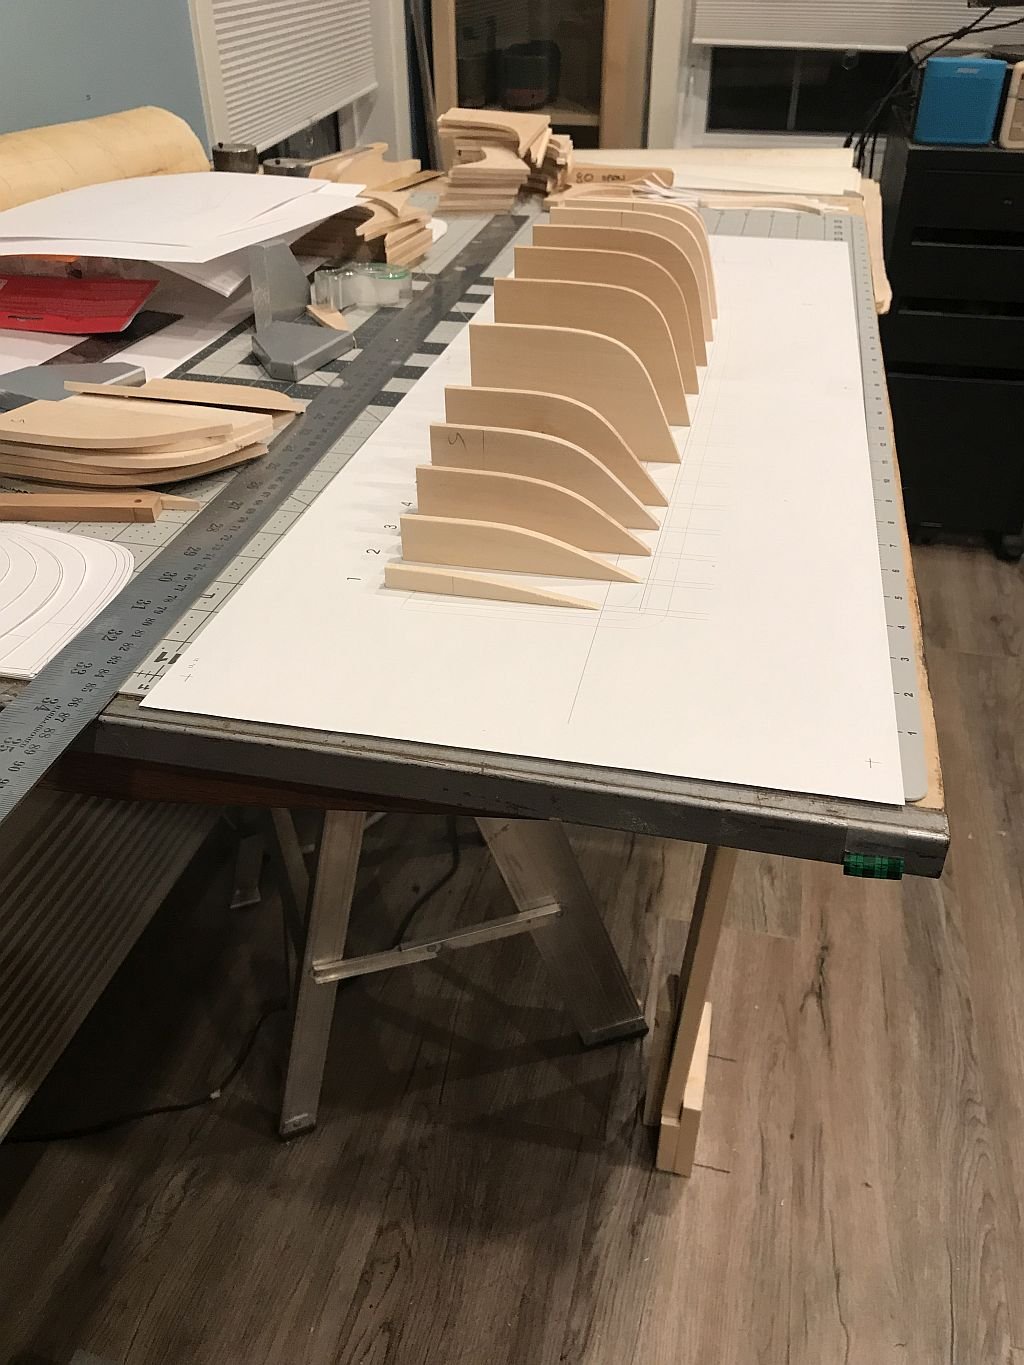
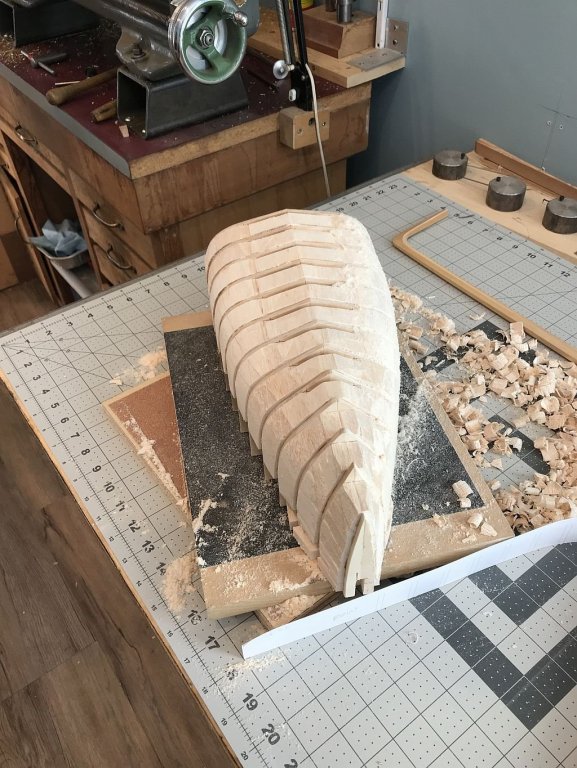
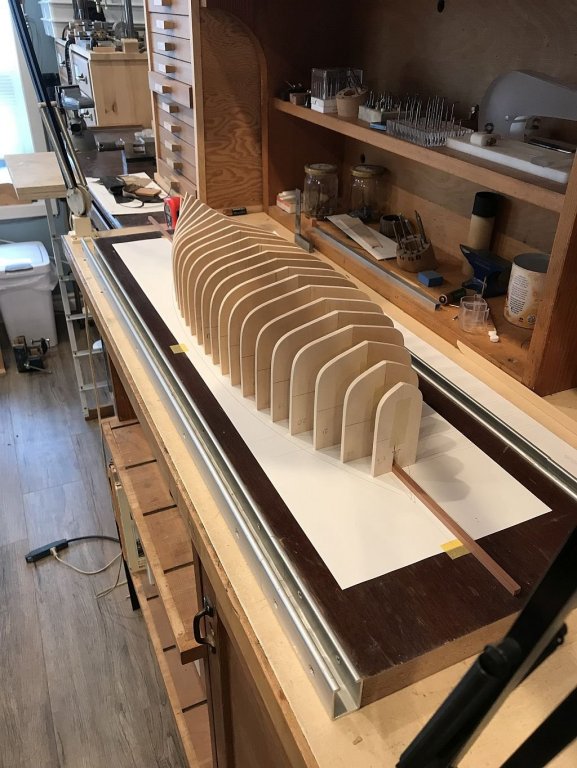
Well the skilled builder is still on a long learning curve. today I began adding some spacer filler blocks of Balsa (not my favourite wood I think I had a traumatic experience with balsa airplane imploding on me after winding up the rubber band driven propeller), the Idea is that the bulkheads will get most of the filler blocks added to only one side at first this will allow me to set the position of the floors. and also I can make any minor adjustments in the thickness of the space. I attached the 1/4 x 1/4 spline to the building base with a few 1/2 inch pins and it will be left on the board the bulkheads slide on easily and the balsa spacers are snugged up to the spline but only attached to the upside bulkhead. Once all the bulkheads are built up they will get glued together and then the whole thing will be able to be lifted off the spline register. This is the plan. I I am being very conservative with the glueing and just adding a few "buttons" of glue to hold the first bits, I do not want to stick any of them to the spline or base. Michael

-
Nice work with the mold jackets Mark, and this of course applies to all the mold jackets that we want for production runs, not just cannons. Michael
-
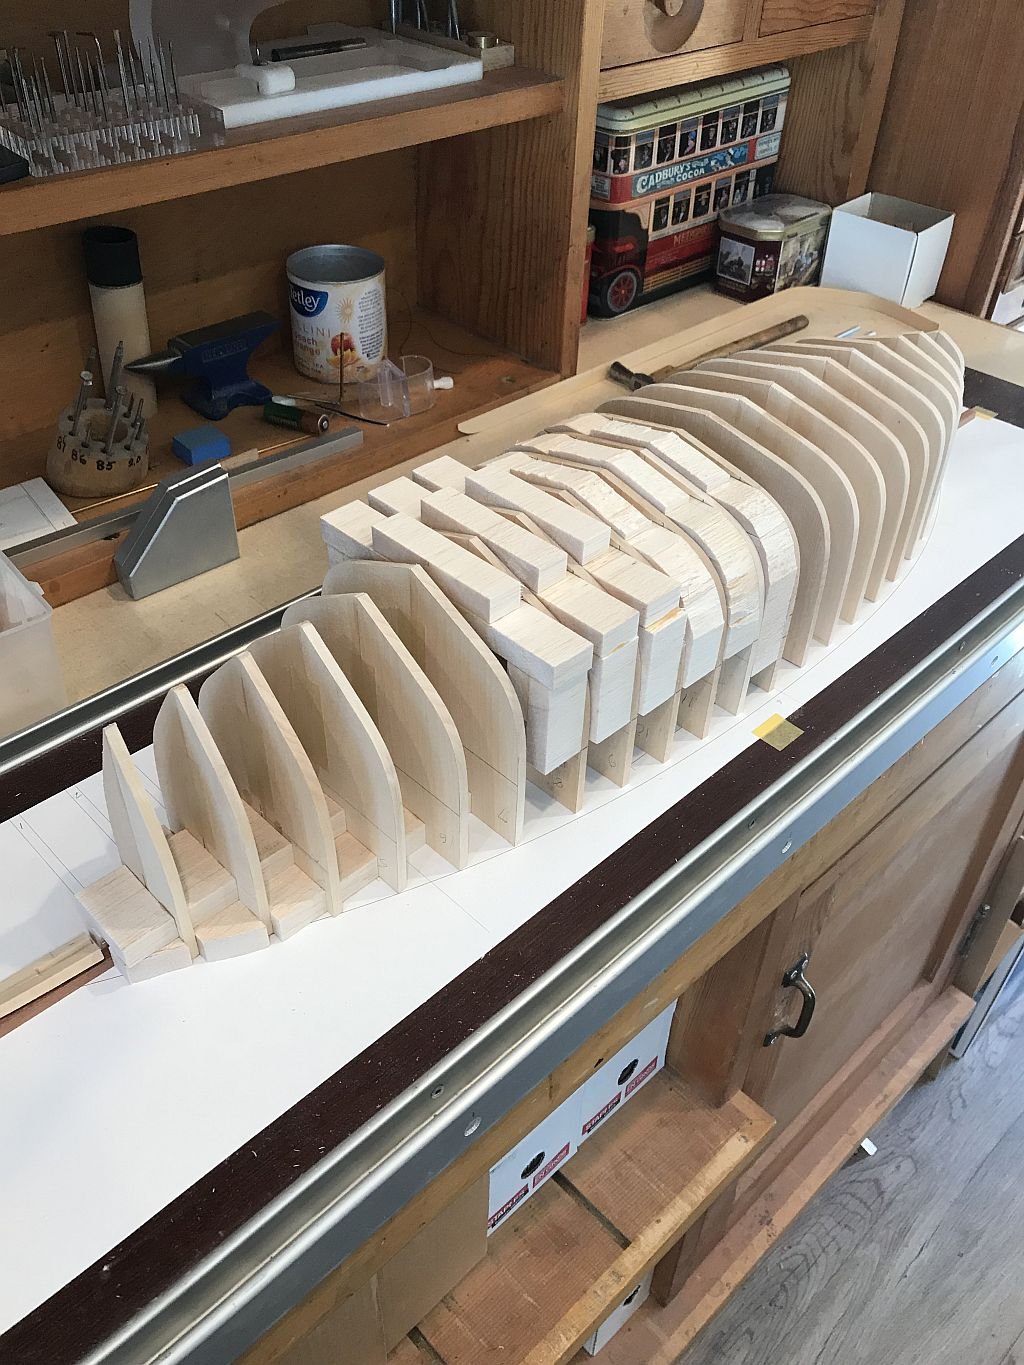
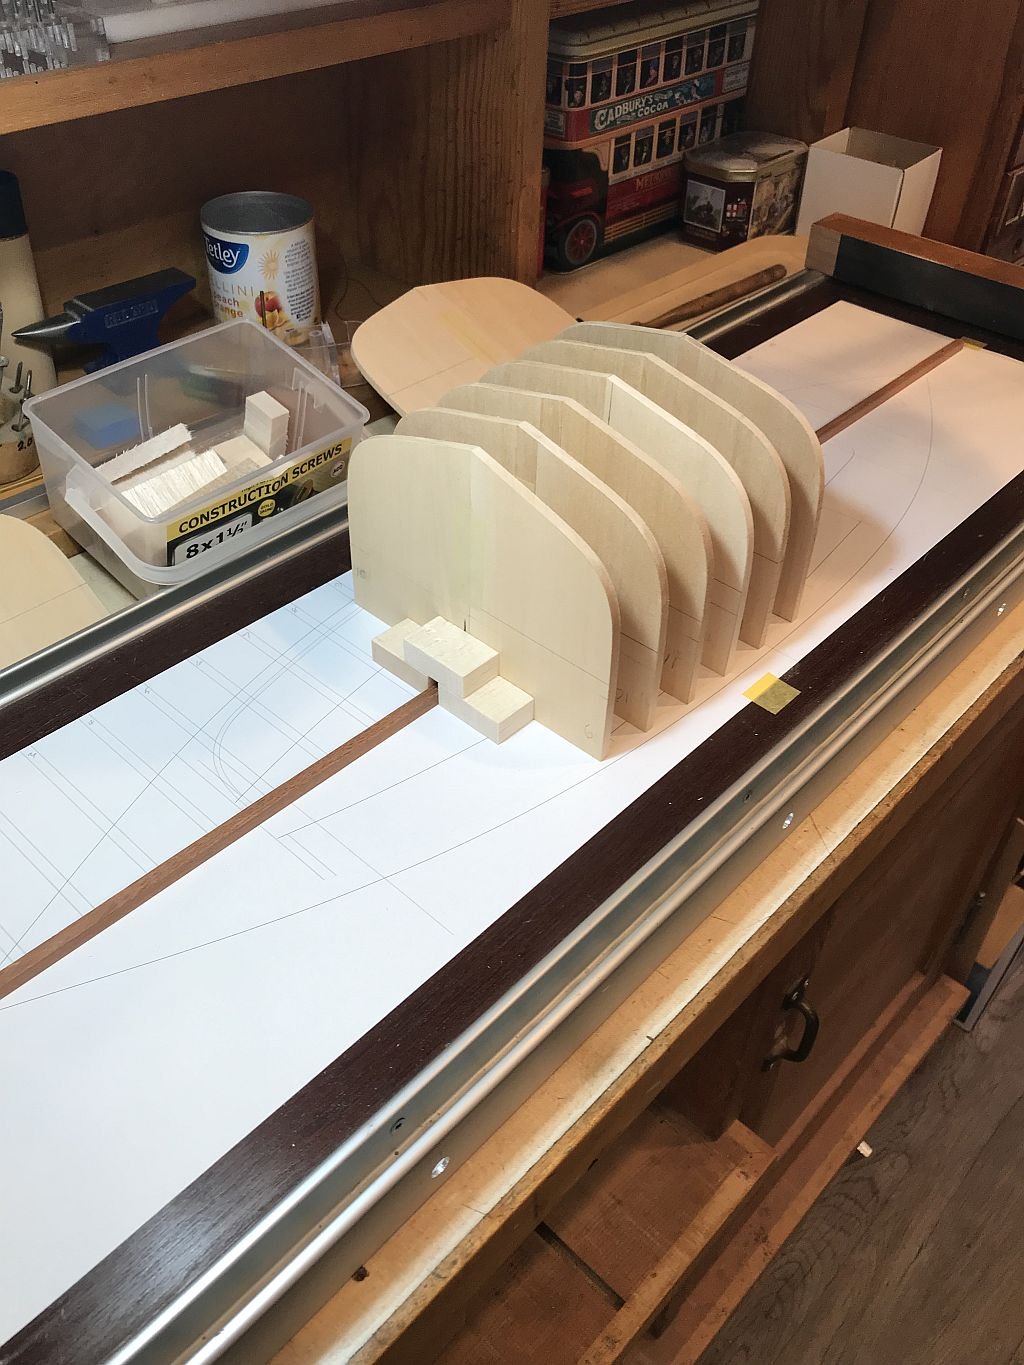
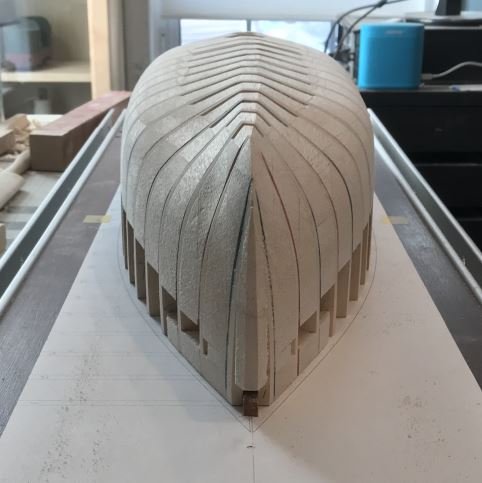
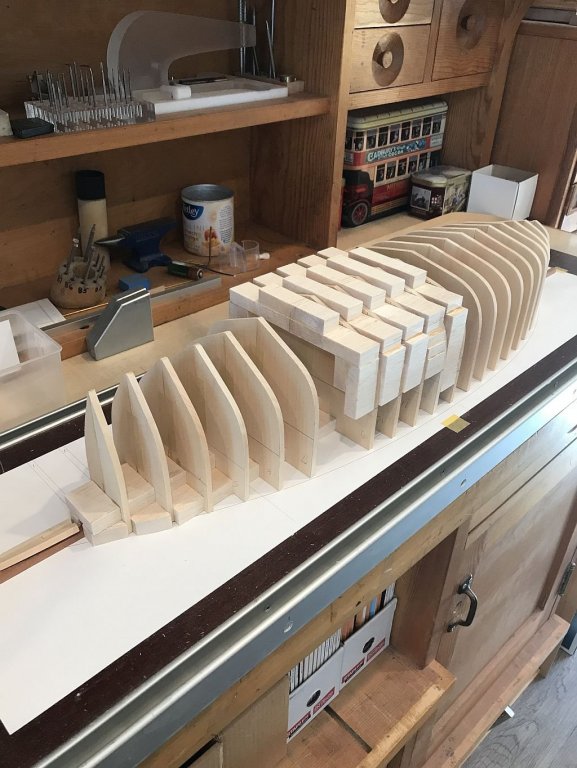
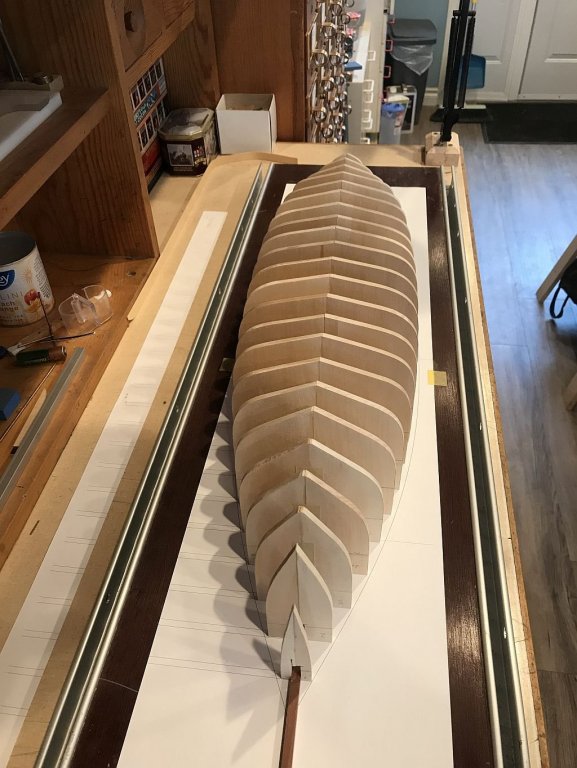
Hi Dan not all the bulkheads were place yet. I have now glued them all together after cutting a 1/8th notch in each to give a 1/4 inch by 3/4 inch slot I have dry stacked them to see how it all looks later today I will cut a piece 1/2 x 1/4 and fix it to a board then assemble the bulkheads with balsa filling between to shape them to the final before making the ribs. after the shaping I am going to make the floors and set them in slots next to the ribs. The top plate for the keel will sit onto the floors then the keel will sit onto it. the ribs are short of the top plate by 1/2 inch according to Roger to create a limber gap running the length of the hull. so the garboard strake will be a key one tying the lot together. Brunch is calling Michael
-
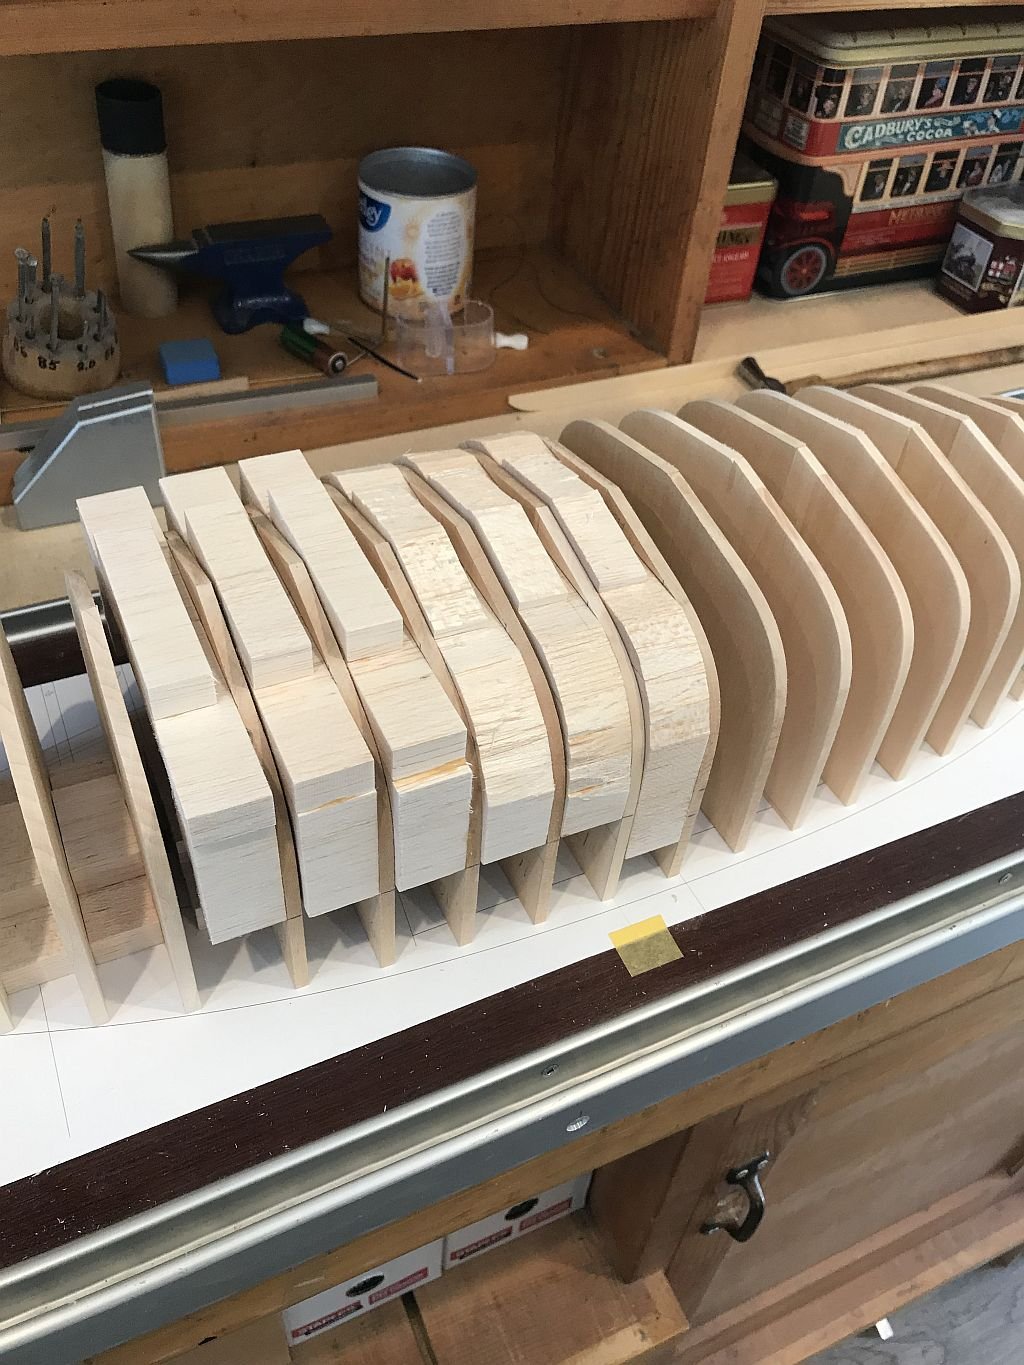
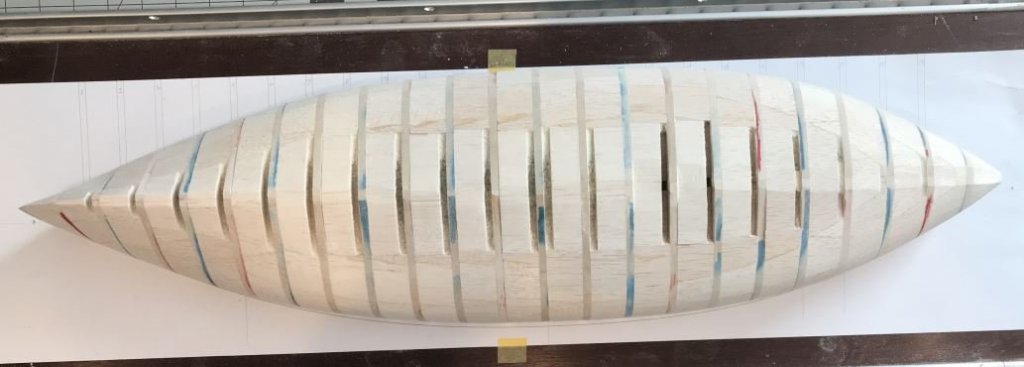
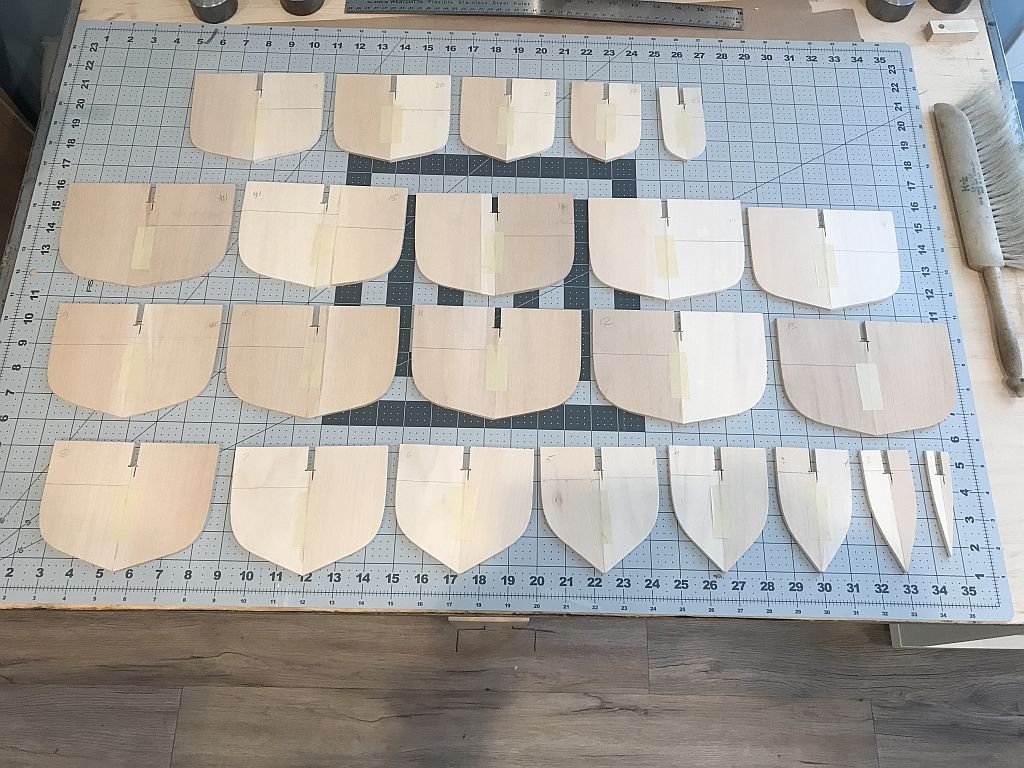
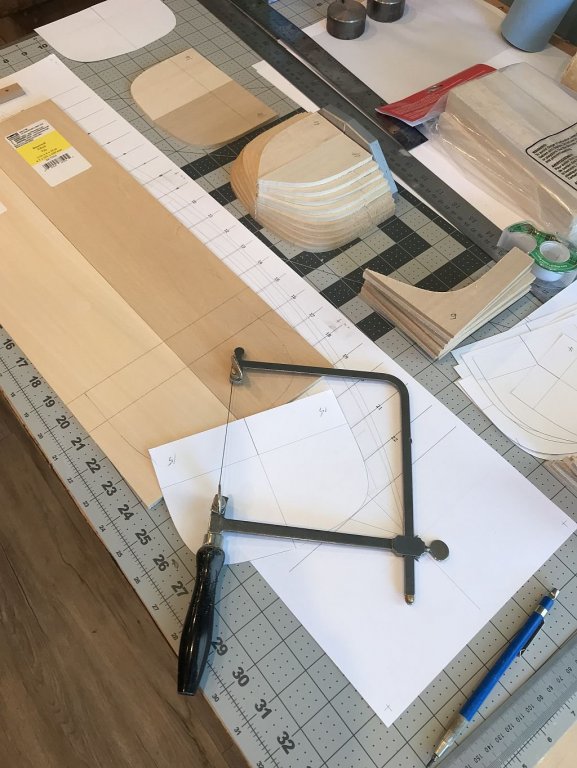
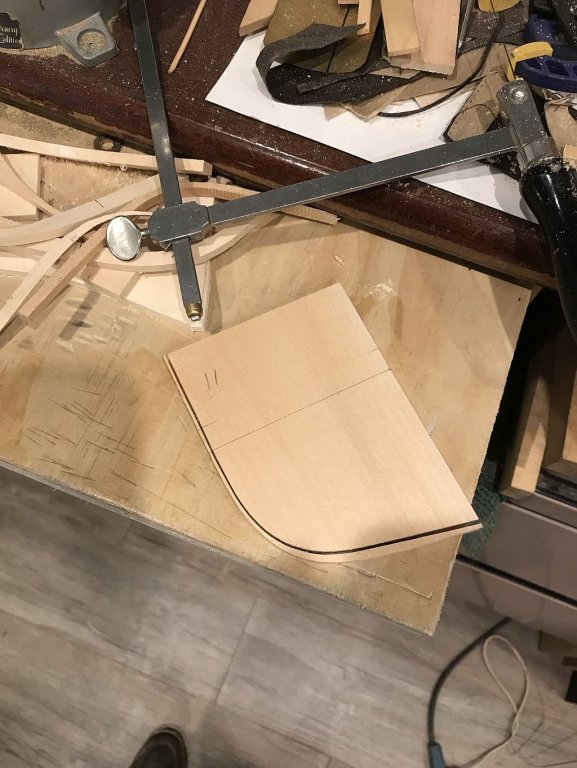
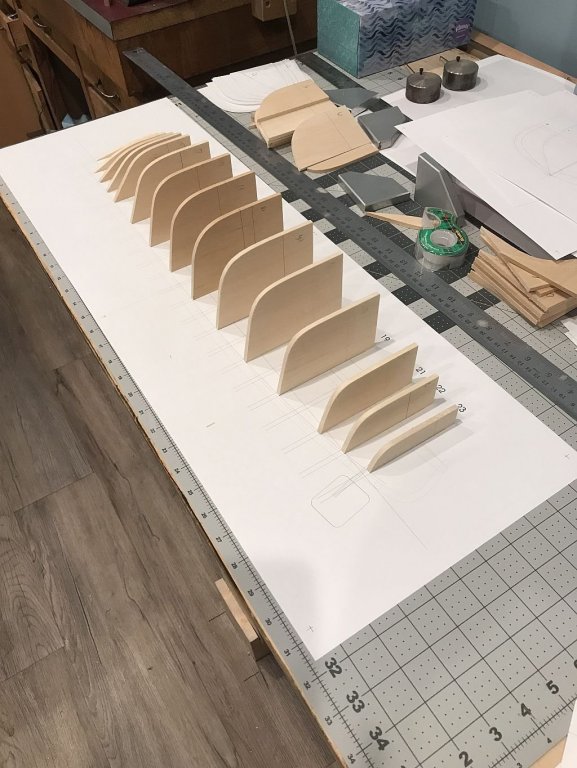
Thanks for the visits. Making sawdust. The first set of bulkheads these are cut to the inside of the ribs. These are the set for the port side and I have been reworking them, most needed to be jumped to give enough wood to allow for the new shape. The #11 was trimmed from the #12 and so it goes. I will use the port set as templates for the starboard set. Work continues. Michael

-
Good to hear from you Jeff, once it warms up a bit perhaps we can get together for a coffee. Michael
-
Nice work on the mast hoops Vaddoc, I chickened out and used gummed paper for mine. Maybe i shall have a go at some wood ones down the road, looking at how well yours turned out. Michael