

CDW
-
Posts
7,719 -
Joined
-
Last visited
Content Type
Profiles
Forums
Gallery
Events
Posts posted by CDW
-
-
Wow, so glad that I saw this thread. Beautiful and inspiring work.
- Piet, BETAQDAVE, FrankWouts and 3 others
-
 6
6
-
When I used to enter model shows/contests, it was always a challenge to get the models to the show without damage. Supplies to make emergency repairs upon arrival was always a must.
You always hope you don't need to make any sudden stops or changes of direction that might upset the model, and anything could happen but probably won't. Good luck!
- lmagna, Canute, popeye the sailor and 5 others
-
8
-
Check out this video of a GE 3D printed jet engine:
- fnkershner, thibaultron and Canute
-
3
-
9 minutes ago, fnkershner said:
CDW - This is not true. Shapeways will print any design in 4 different materials - PLA, A different Plastic, Gold, & Silver. of course the Gold & Silver will cost more. The intended Market for the gold & silver is jewelry design. I am not going to tell you this is cheap but it is doable.
PS 3D printing is moving in the direction of printing almost any material. Including Drugs.
Well, it IS true...that GE was the only ones I had seen do it. That is what I said. But you taught me something I didn't know - that Shapeways can 3D print in gold or silver.
- Canute, thibaultron, mtaylor and 1 other
-
4
-
Wow, it would take some advanced technology to 3D print in metal. General Electric are the only ones I've seen do it, and that was to prove the concept of 3D printing jet engine parts. They actually 3D printed a functional jet engine using advanced layered alloys. But the cost is astronomical for a modeler.
- Canute, mtaylor and thibaultron
-
3
-
-
-
Many moons ago, airbrushes and compressors were way out of the price range most modelers could afford (me included) and most all of us did all our paint work by brush or either did no paint at all. Today I am spoiled with airbrush finishes but still resort to the brush from time to time.
-
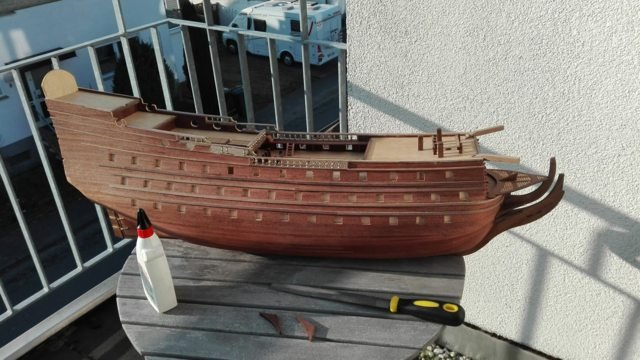
I love this model. If they offered the series here in the USA, would subscribe in a heartbeat. The planking looks great.
- ChadB, Canute and popeye the sailor
-
3
-
Where I worked, we were encouraged to save our sick time by them promising to pay us in full for the first 1040 hours of accumulated sick leave when we retired (30 years service). The second 1040 hours went back to the employer, but anything over 2080 hours total, they paid us half rate. I ended up with close to a year in pay as a severance from the sick leave accumulation.
- mtaylor, popeye the sailor and Canute
-
3
-
Great looking job you did when drilling and filing the blast bags.
Not sure if you are aware, but a modeler should take precautions with appropriate respirator/filter when sanding or filing resin. Resin dust can cause severe problems with the lungs. Lots of people actually wet sand/file resin, just to avoid the resin dust.
- mtaylor, popeye the sailor and Canute
-
3
-
34 minutes ago, mtaylor said:
Could you make your own blast bags? Maybe a clay? The Bismarck is really coming together well and you're doing a great job.
That's a good idea Mark, and might be fairly simple to do using the resin ones as a guide to shape them. I would try using some Milliput and see how it comes out.
- lmagna, semorebutts, mtaylor and 2 others
-
5
-
Wow, that sucks. It would probably be easier to cut the barrels shorter and glue them to the blast bags rather than drill out each blast bag. Then again, easier than that is as you said, just toss the blast bags.
- popeye the sailor, mtaylor and Canute
-
3
-
I remember these late season snow scenes well when I look at yours.
Will never forget bringing my Mother from Florida to my house on top of a mountain in West Virginia. It was in April, and she was shocked as we drove up the steep mountain path to my home through what seemed like a tunnel as the tree canopy was covered with snow as seen in your picture. It was her first visit to my home there.
- mtaylor, semorebutts, Canute and 3 others
-
6
-
-
59 minutes ago, mtaylor said:
Sweet work, Danny. I in awe of this build.
Me too!
(Am I now part of the me too movement?)

-
Outstanding.
It's work like this that reminds me of my dear Mother and how when I was young and lived at home, she always thought it necessary and proper to come along and "dust" my models for me when I wasn't looking. Would always find little pieces broken off and laying beside my models.
")
If you breathe too hard around parts this tedious, they will fall off.
- Canute, semorebutts, mtaylor and 4 others
-
7
-
27 minutes ago, Everest said:
For a wealth of information on the SCHARNHORST go to www.maritimequest and click on links on the title page.Some good stuff there.
Thanks for a great resource link.
- mtaylor, popeye the sailor and Canute
-
3
-
8 minutes ago, greyhawk said:
Strange. Let's try this again
 4 hours ago, greyhawk said:
Most of my time is going into this beauty actually
I see both pictures quite nicely.
- mtaylor, popeye the sailor and Canute
-
3
-
-
10 hours ago, semorebutts said:
Any Ideas on how the hell I'm suposed to glue that donut shaped piece to the end of the other piece?? The only way I can think of is just to not do it!

What gets attached to the donut hole later on in the construction? Seems odd that piece would be glued to the tip of the mast.
- popeye the sailor and Canute
-
2
-
That's a nice job of gluing those parts together, the leaks notwithstanding.
Just as an fyi...you can use a single edge razor blade to clean those stray glue tracks right off that black sheet of plastic. It will smooth out any scratches in it as well.
-
Carpet monsters are for real, not fake news.
-


Scharnhorst by greyhawk - Hachette - 1:200 - parts work
in - Kit build logs for subjects built from 1901 - Present Day
Posted
How much work will be required to make the hull planking match the bow and stern pieces? I can't see how well they match up in the photos.
Overall, I love this model...one of my all time favorite modern war ships.