

CDW
-
Posts
7,719 -
Joined
-
Last visited
Content Type
Profiles
Forums
Gallery
Events
Posts posted by CDW
-
-
When I ordered the 1:200 Halinski Scharnhorst from GPM, bought all the extras including the barrels. As soon as I receive them, will take some photos and post. I have no idea what they look like at this juncture. But I think you are right, with a good clean up and primer, your barrels are going to look fine.
-
That's a well thought out and beautifully executed railing. Threading those stanchions is a real eye test for me. Even with an optivisor, it's hard to get correct angle for focus sometimes.
I remember how I used to laugh when my mother would hand me a needle to thread for her, or when my dad might assign me a task that required eagle vision. But now that I'm older, not laughing any more.

- CaptainSteve, Captain Slog, src and 2 others
-
 5
5
-
After this tropical cyclone passes, I have to order a precision hole punch set to begin my journey building my first card model.
Your model has helped in a big way to provide inspiration to do that.
Beautiful work. Until recently, I would have never guessed that card models could look so great.
-
-
-
1 hour ago, Dan Vad said:
Thanks very much CDW, Pat, Carl and Jan.
Jan, it's a little bit smaller than a Tic-Tac
") . If I had one I'd put it up against it, but I keep eating them - I can't stop at one
. If I had one I'd put it up against it, but I keep eating them - I can't stop at one  .
.
 Danny
Danny
Besides being a great modeler, your wife must think you have the sweetest breath in town.
-
-
Capt Slog
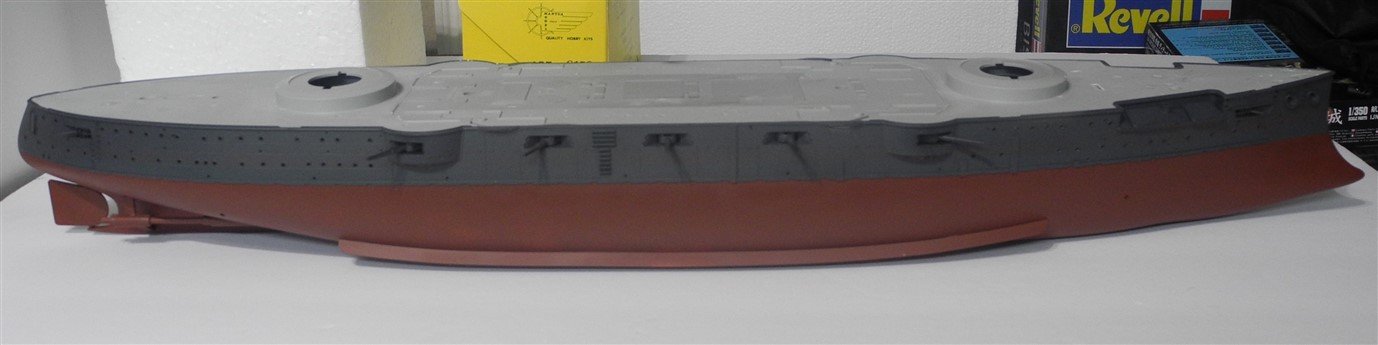
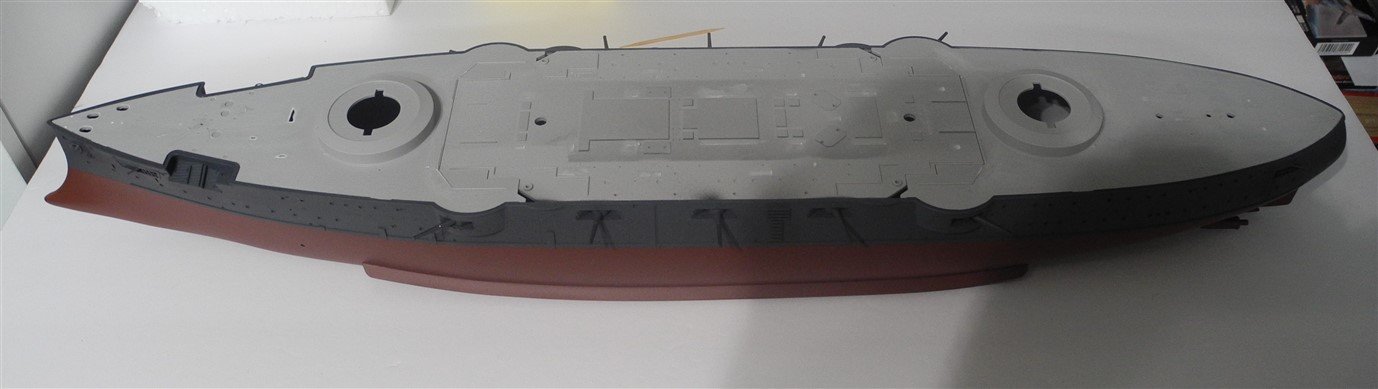
I was out of luck for the color call outs because the Wave Models version of the Mikasa was produced for the Asian market and has all the written material in Chinese. I have no idea what color they call for and just went by sight. After my clear cote goes on, (and even now without it) it will look satin rather than flat. The red is hull red from Vallejo and the "black" is black-gray from Vallejo.
-
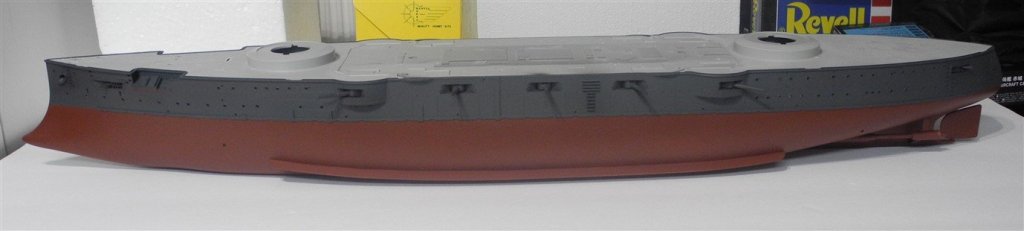
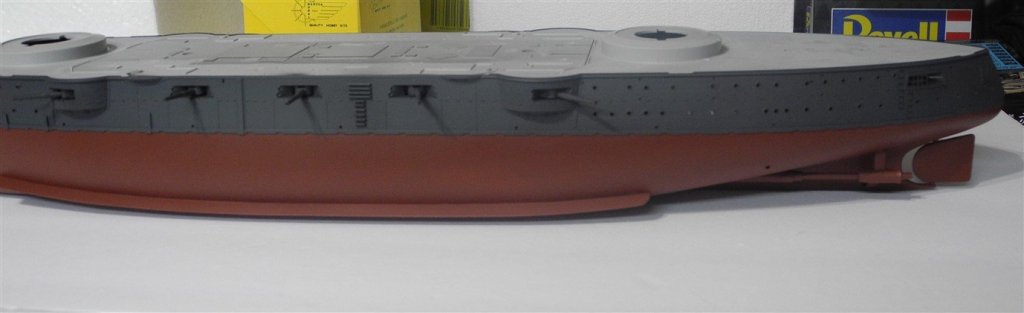
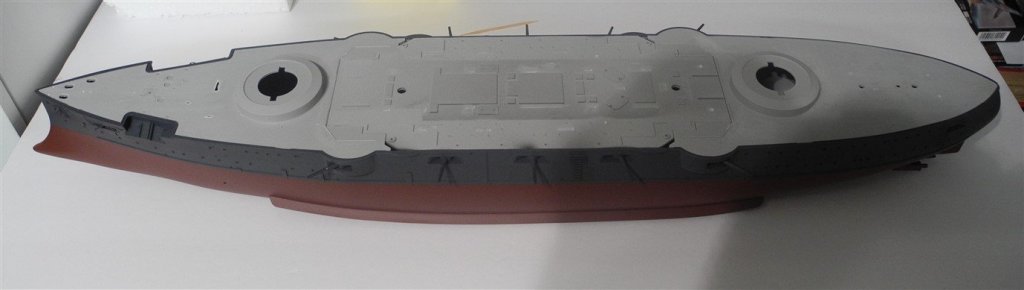
6 inch and 3 inch guns have been installed below the main deck. Main deck pieces have been installed. The hull has received some initial painting and awaits the addition of many details yet to be built.

- Canute, mtaylor, popeye the sailor and 9 others
-
12
-
Our baby girl is now 20 years of age and in college. I take her to school every morning and pick her up in the afternoon. The commute back and forth is through some very extreme traffic conditions, and she is just not confident enough to make that drive herself. Plus, the campus has far more students than they do spaces for them to park. In the meantime, yard work has been high up on the admiral's agenda (when it's not raining). Between all these things, I work on the Mikasa now and then. Am going to try and pick up the pace a bit, soon.
Thanks for dropping by to have a look.
- Old Collingwood, mtaylor, Piet and 2 others
-
5
-
Gotta love that. Looks very authentic.
- Canute, popeye the sailor, mtaylor and 2 others
-
5
-
Being mesmerized by your 1:200 Scharnhorst part works kit (which I cannot buy in the USA), I am looking closely at buying the 1:200 Scharnhorst card model along with all the extras. It's probably way over my head as a card model, but I am bitten by the desire for one.
-
-
Very impressive work. Brave of you to start with such a complex model as your first build. Look forward to seeing more as you finish it.
-
Robin was bitten by the Photo Bucket ransom that requires a huge fee to be able to share your photos to a 3rd party (MSW).
He hasn't posted in a while. Hope he is okay and everything.
")
- EJ_L and Robin Lous
-
2
-
-
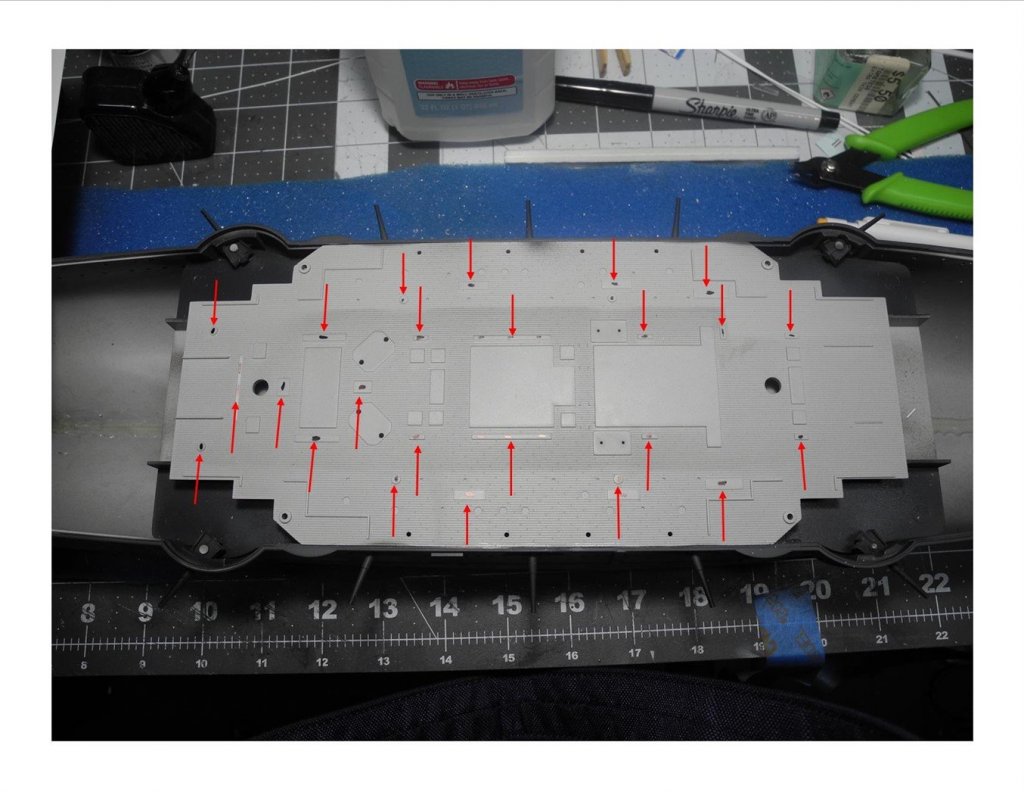
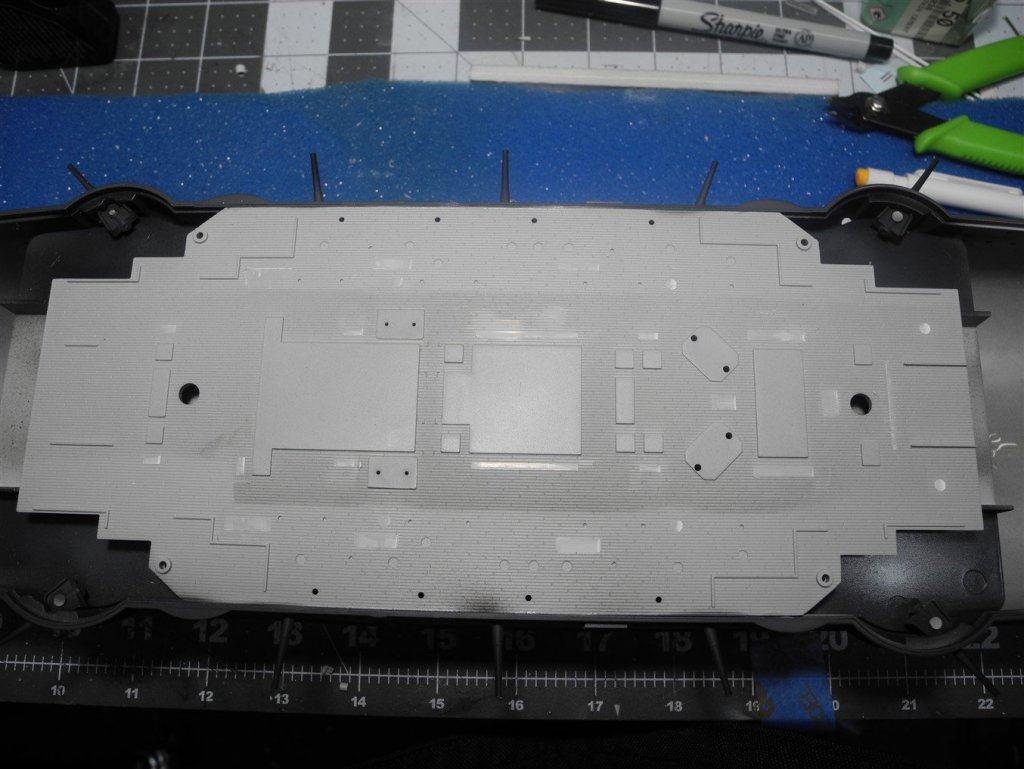
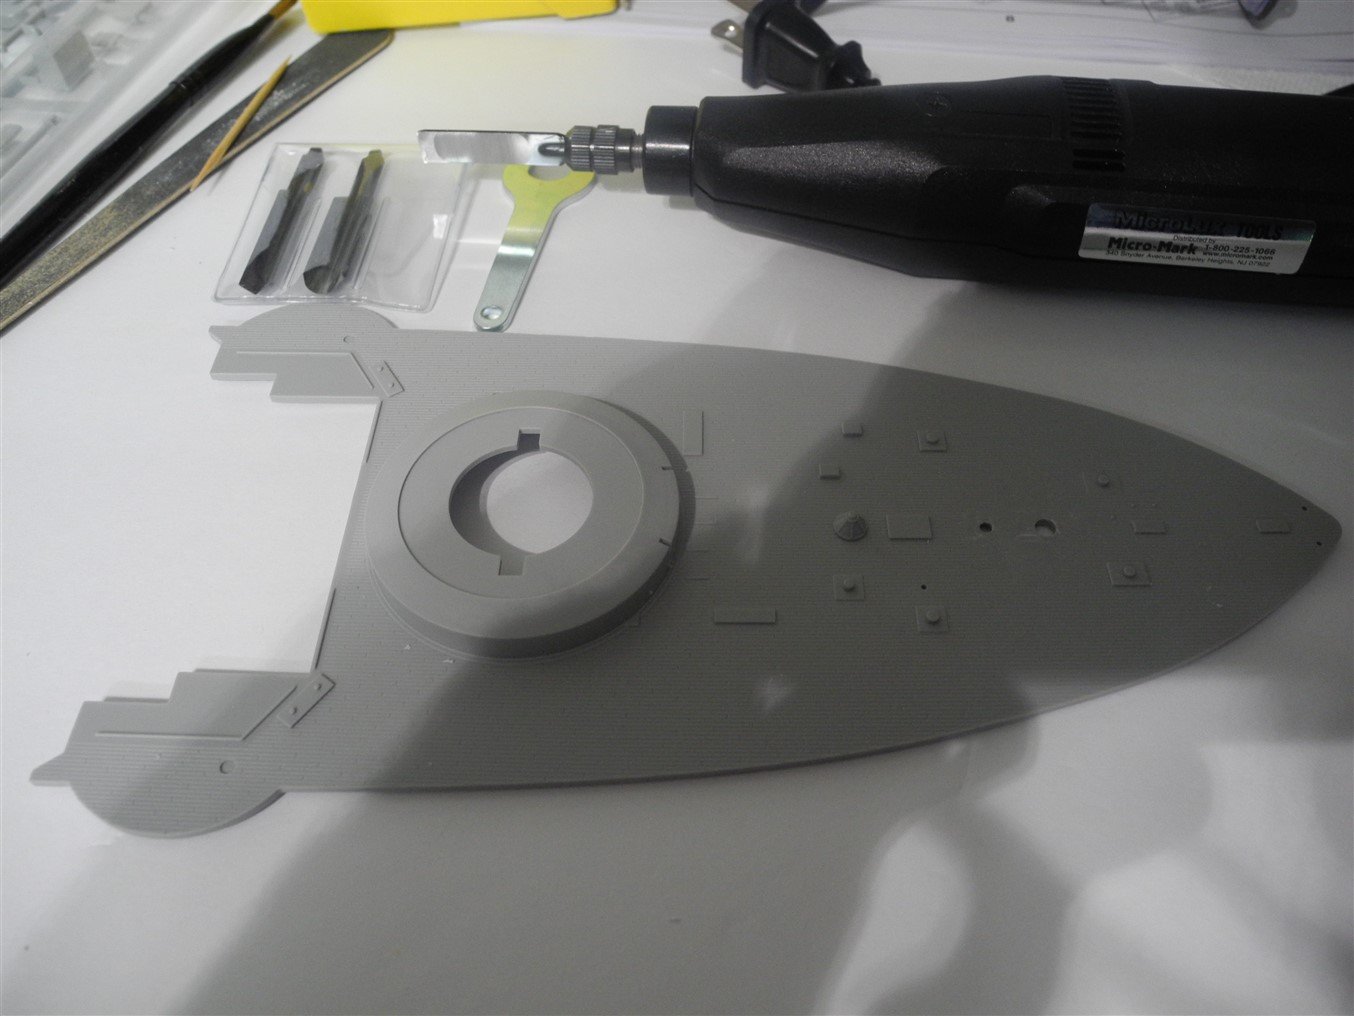
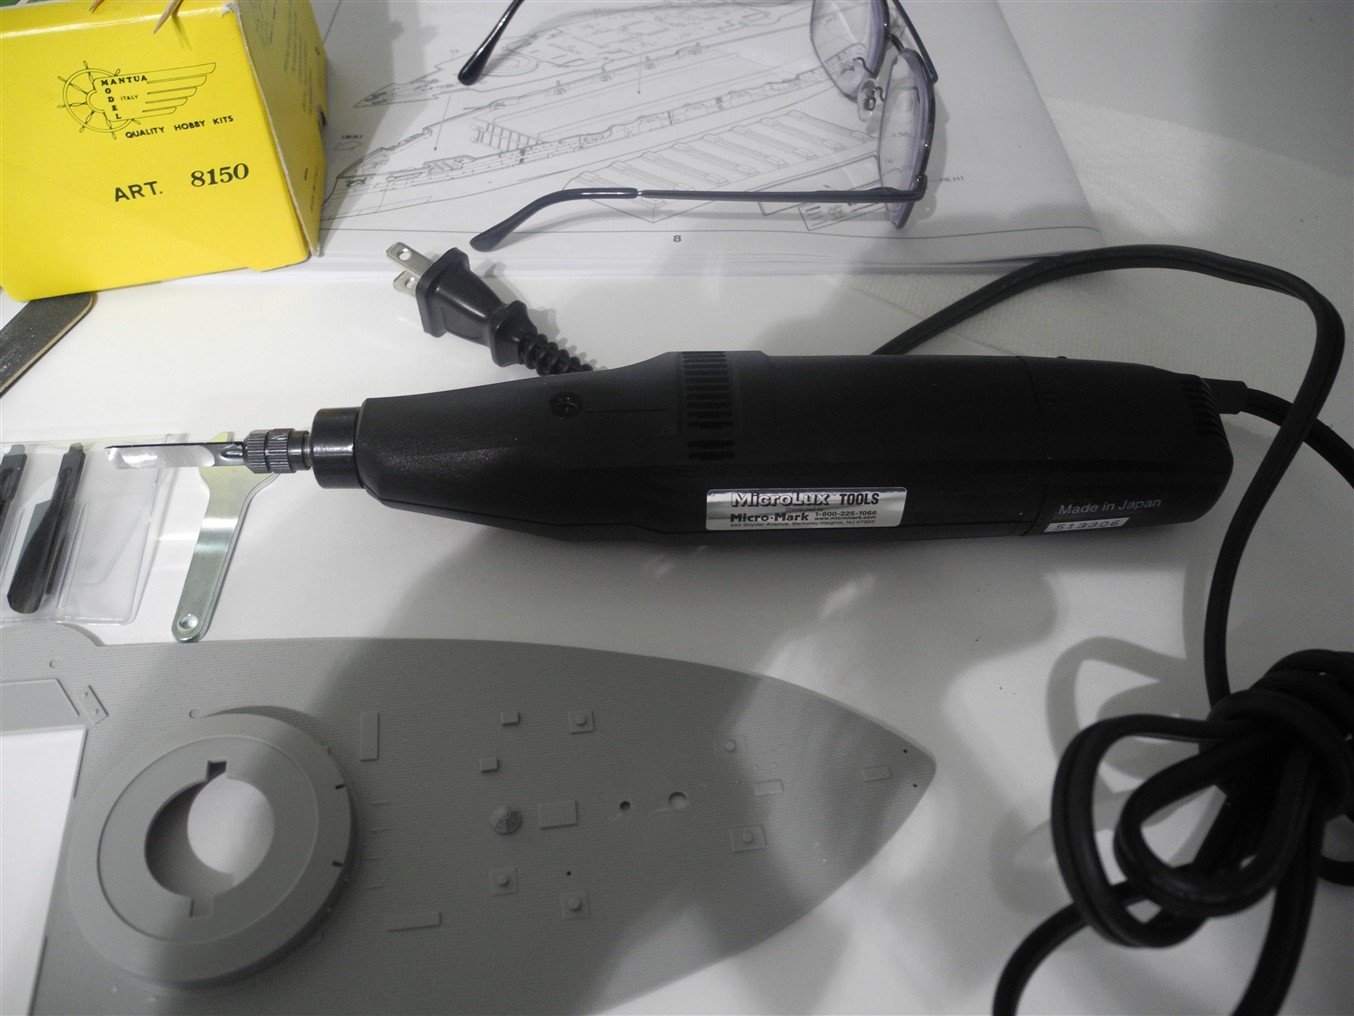
All the raised detail (marked with arrows) had to be removed from the Mikasa main deck to accommodate the wooden deck and details provided in the Pontos detail set.
With the new electric chisel, it took literally 10 minutes to complete the task. Doing this with a conventional X-Acto with chisel blade would have taken much, much longer. An hour or more.
- Ryland Craze, yvesvidal, hexnut and 8 others
-
11
-
-
Kevin
What shade of "yellow" did you use on your Victory? Looks very nice and authentic. I want to do mine the same, but haven't figured out the right color, yet.
- Old Collingwood, Piet and mtaylor
-
3
-
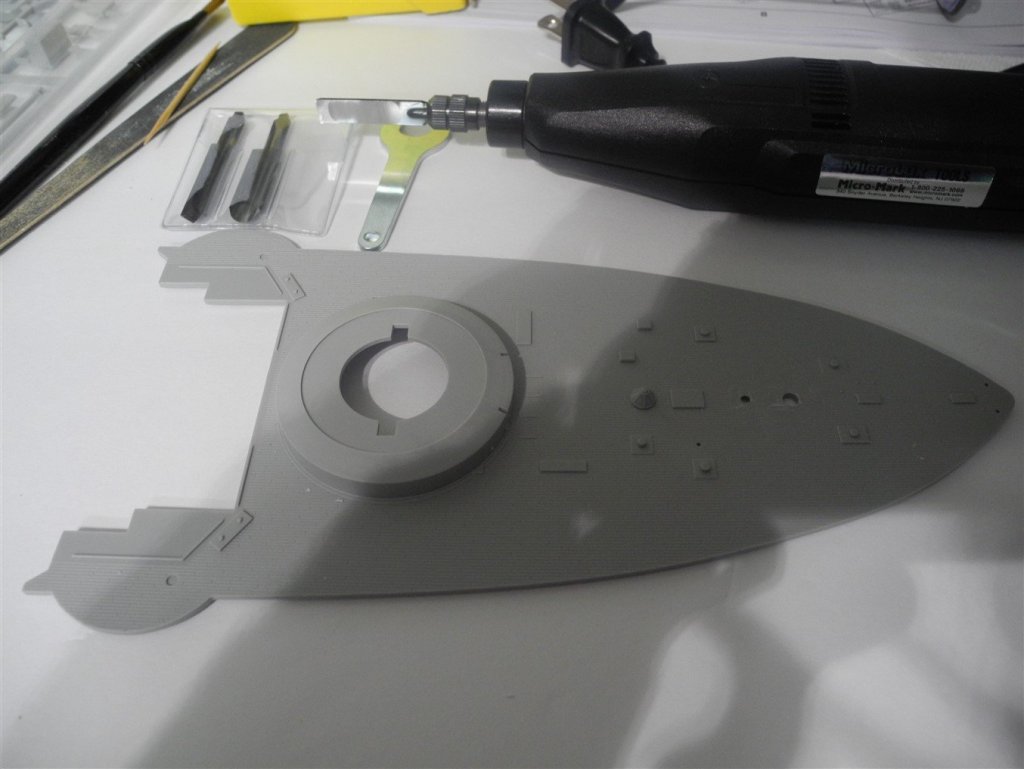
One of the tasks I least liked to do, was removing raised details from decks and other surfaces on models I'm building.
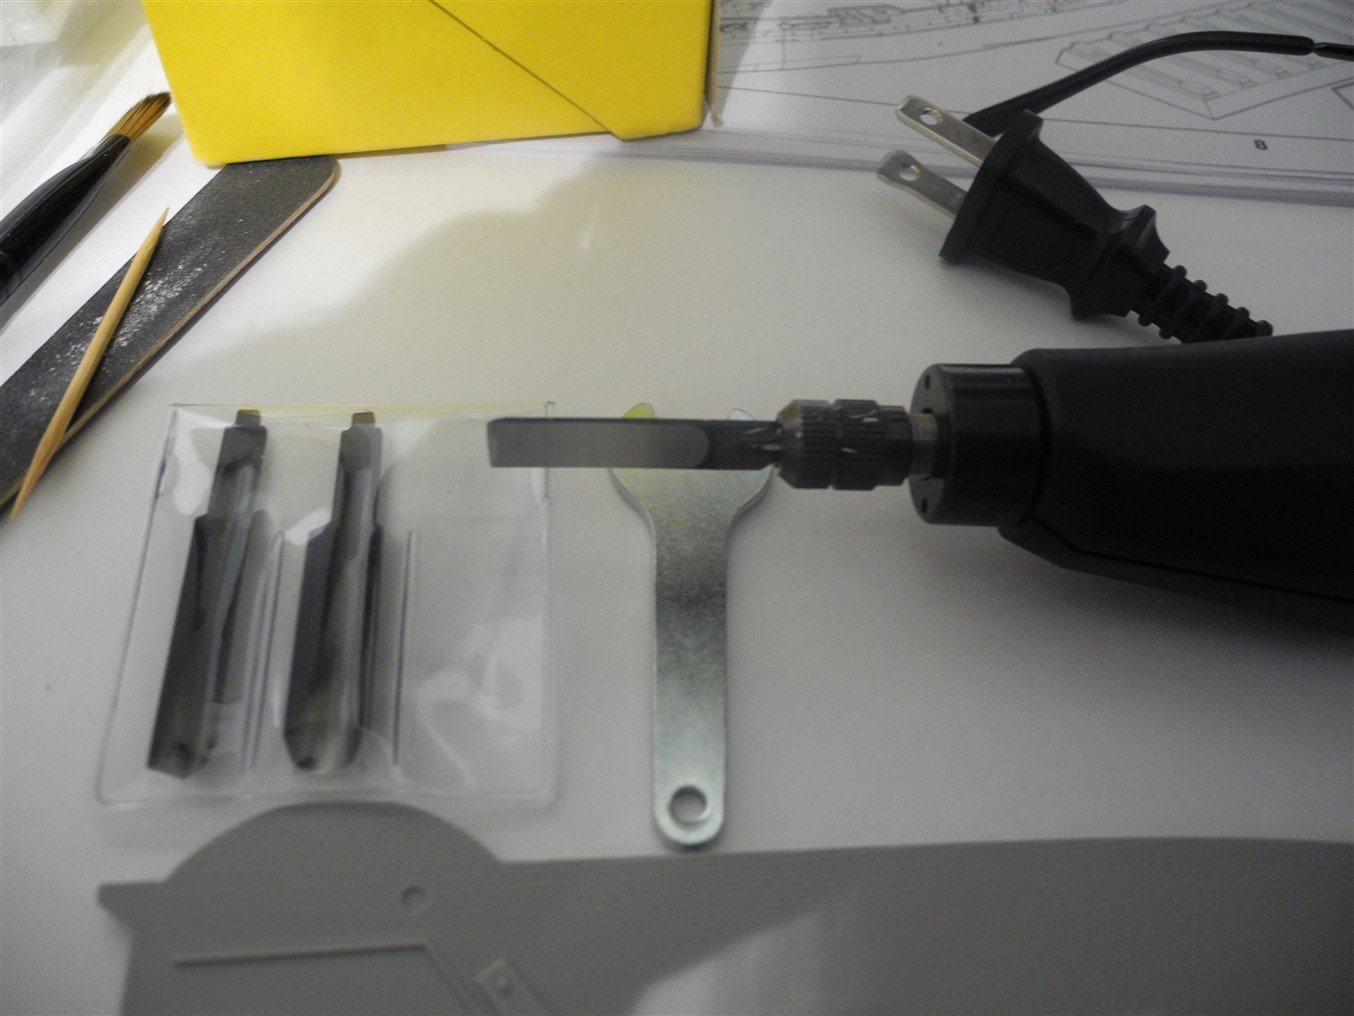
When I saw that Micro Mark was having a summer sale on certain tools in their catalog, and noticed this electric powered chisel was one of them, I had to acquire one and try it out. I'm not sure how long Micro Mark has been carrying this tool in their inventory, but it was the first time I had seen it advertised. It seems to be a high quality tool, made in Japan. When you turn it on, a rotary motor begins to turn inside the tool. Once the blade comes in contact with an object to be cut, a vibratory action begins and the razor sharp blade cuts through the plastic like a hot knife through butter. Once you remove pressure from the blade, the vibratory action stops.
As the blade is very sharp, it will be important to make sure to keep the free hand and other objects clear of the potential path of the blade.
I tried the tool one one area of the Mikasa deck, and it made short work of a job that would have taken much much longer to do with just an X-Acto w/chisel blade.
Now, maybe I won't dread removing those raised details so much as before.


-
I need to try that dutchman trick of sharpening the tips of my broken bits. Never even tried to do it before. It must take a very fine file for that work, or maybe a fine sanding stick. What do you use?
- mtaylor, Canute, popeye the sailor and 3 others
-
6
-
11 minutes ago, Canute said:
Carl, saw an anime Yamato that might be up your alley. https://www.cybermodeler.com/hobby/builds/ban/build_ban_146749.shtml
Don't laugh, that version of the Yamato is probably the biggest seller in the Asian market, maybe in the Western market as well. The young crowd are crazy about that stuff.
-
Ha - three different labels selling the same model. That's funny.
A good friend of mine does a lot of business in China. He takes his designs to their factories and they produce what he wants. It's not uncommon at all for the same factory to produce the same or very similar product for a number of different sellers.
Many years ago here in the USA, I worked in a factory where we made car and industrial acid, wet cell batteries. We produced a huge number of batteries for different brand names, such as Sears Die Hard, Shell premium batteries, Caterpillar batteries, etc. All these were produced to their own exacting standards and had their own quality control standards.
With plastic models, it just seems weird because there seems to be no difference except for maybe what language the instructions are printed. All the plastic and photo etch is the same.
- mtaylor, popeye the sailor, Canute and 1 other
-
4
-


IJN Amatsukaze by Dan Vadas - FINISHED - Halinski - 1:200 scale - CARD and Brass - WW2 Japanese Destroyer -
in - Kit build logs for subjects built from 1901 - Present Day
Posted
I wonder what the commercial application is for that elastic thread. If we knew that, it might be more easily obtained than buying it from GPM. GPM's price for it is reasonable enough, but it seems like it takes forever to receive it. Ez line is readily available by mail order in the USA, cost is between 10 and 15 usd for a 100' roll.