HOLIDAY DONATION DRIVE - SUPPORT MSW - DO YOUR PART TO KEEP THIS GREAT FORUM GOING! (Only 13 donations so far - C'mon guys!)
×

CDW
-
Posts
7,745 -
Joined
-
Last visited
Content Type
Profiles
Forums
Gallery
Events
Everything posted by CDW
-
 Ha - three different labels selling the same model. That's funny. A good friend of mine does a lot of business in China. He takes his designs to their factories and they produce what he wants. It's not uncommon at all for the same factory to produce the same or very similar product for a number of different sellers. Many years ago here in the USA, I worked in a factory where we made car and industrial acid, wet cell batteries. We produced a huge number of batteries for different brand names, such as Sears Die Hard, Shell premium batteries, Caterpillar batteries, etc. All these were produced to their own exacting standards and had their own quality control standards. With plastic models, it just seems weird because there seems to be no difference except for maybe what language the instructions are printed. All the plastic and photo etch is the same.
- 467 replies
-
- 4
-

-
- mikasa
- wave models
- (and 1 more)
-
Beautiful work on the buckets and sails. I particularly like the sails, your wife did a wonderful job stitching them.
- 174 replies
-
- 1
-
-
- gaeta falcata
- marisstella
- (and 1 more)
-
As you may know, this 1:200 Mikasa kit is produced and sold under at least two labels, Merit, and Wave Models. Today, I was talking to a hobby shop owner, asking if he could acquire a couple of different items for me. One of those items is the 1:200 Merit USS Hornet aircraft carrier kit. Sad to say, but he advised his sources tell him that Merit is discontinuing all their warship line, all scales. As you may know, Merit, Wave, and Trumpeter are all the same thing, just in different boxes. But most ships are sold exclusively under one label. This Mikasa is the only exception I know, being boxed and sold both under the Wave Models label as well as the Merit label. I'm only saying all this to give you a heads-up just in case you've been contemplating buying the 1:200 Mikasa model. Better get off the fence and do it now, or perhaps it won't be available later. Maybe it will come out (as the rest of the line) under a different label, I don't know. Sometimes better to be safe than sorry. Been there and done that.
- 467 replies
-
- 7
-
-
- mikasa
- wave models
- (and 1 more)
-
Fokker Dr.I by Torbogdan - FINISHED - Model Airways
CDW replied to Torbogdan's topic in Non-ship/categorised builds
She's coming along beautifully. Take your time and keep doing things the way you're doing it. -
Scott I've never tried it myself, but my guess is that most all the Warspite photo etch sets will work with the Trumpeter kit. There may be certain pieces included with the various sets that won't work without some modification, but most parts are generic enough you should not have a problem, like ladders, armament, railings, etc. If you buy a wooden deck, make sure that it is specific to your Trumpeter kit as those are designed specifically for the particular kit.
-
Very nice. I really like this model, and it will fit very well in a display alongside the Mikasa.
- 244 replies
-
- 4
-
-
- borodino
- dom bumagi
- (and 1 more)
-
Popeye's analogy is an saying I used to hear my old boss, a US Army Major General, say all the time when we had big, complicated tasks to take on - "just eat this elephant one bite at a time."
-
Who or what company actually produces the Scharnhorst model? It looks like a Woody Joe kit to me. The 1:250 Yamato and Akagi kits sold by DeAgostini, which sells in installments, are actually Woody Joe kits. But I have not seen the 1:200 Scharnhorst model in any other form except Partsworks. Maybe it's an exclusive done for Partsworks?
-
Yes, the gray scheme just wouldn't do justice to the Mikasa, even though it is authentic for the major combat actions the Mikasa participated.
- 467 replies
-
- 5
-
-
- mikasa
- wave models
- (and 1 more)
-
I thought I would use the Tamiya color, NATO Black, to paint the hull. I like it because it has a hint of white in it that tones it down. However, once I tested the paint on some scrap, found it dries looking very "chalky" and I don't like it. I guess I will end up using Tamiya gloss black and mix in some white to get the tone I want. Everything will end up getting dull coat clear once all hull painting is done.
- 467 replies
-
- 5
-
-
- mikasa
- wave models
- (and 1 more)
-
Wow, that tower takes the cake. Never seen anything else like it on any warship model I've built. Almost a skyscraper of sorts. The sailors must have gotten a good workout climbing all the steps and ladders to go from top to bottom.
-
Wow, 140 issues. Those must be more frequent than monthly, right?
-
How many issues are required to complete a model like this? I'm guessing these are much like the DeAgostini kits offered here in the USA, only there are more issues required to finish a model.
-
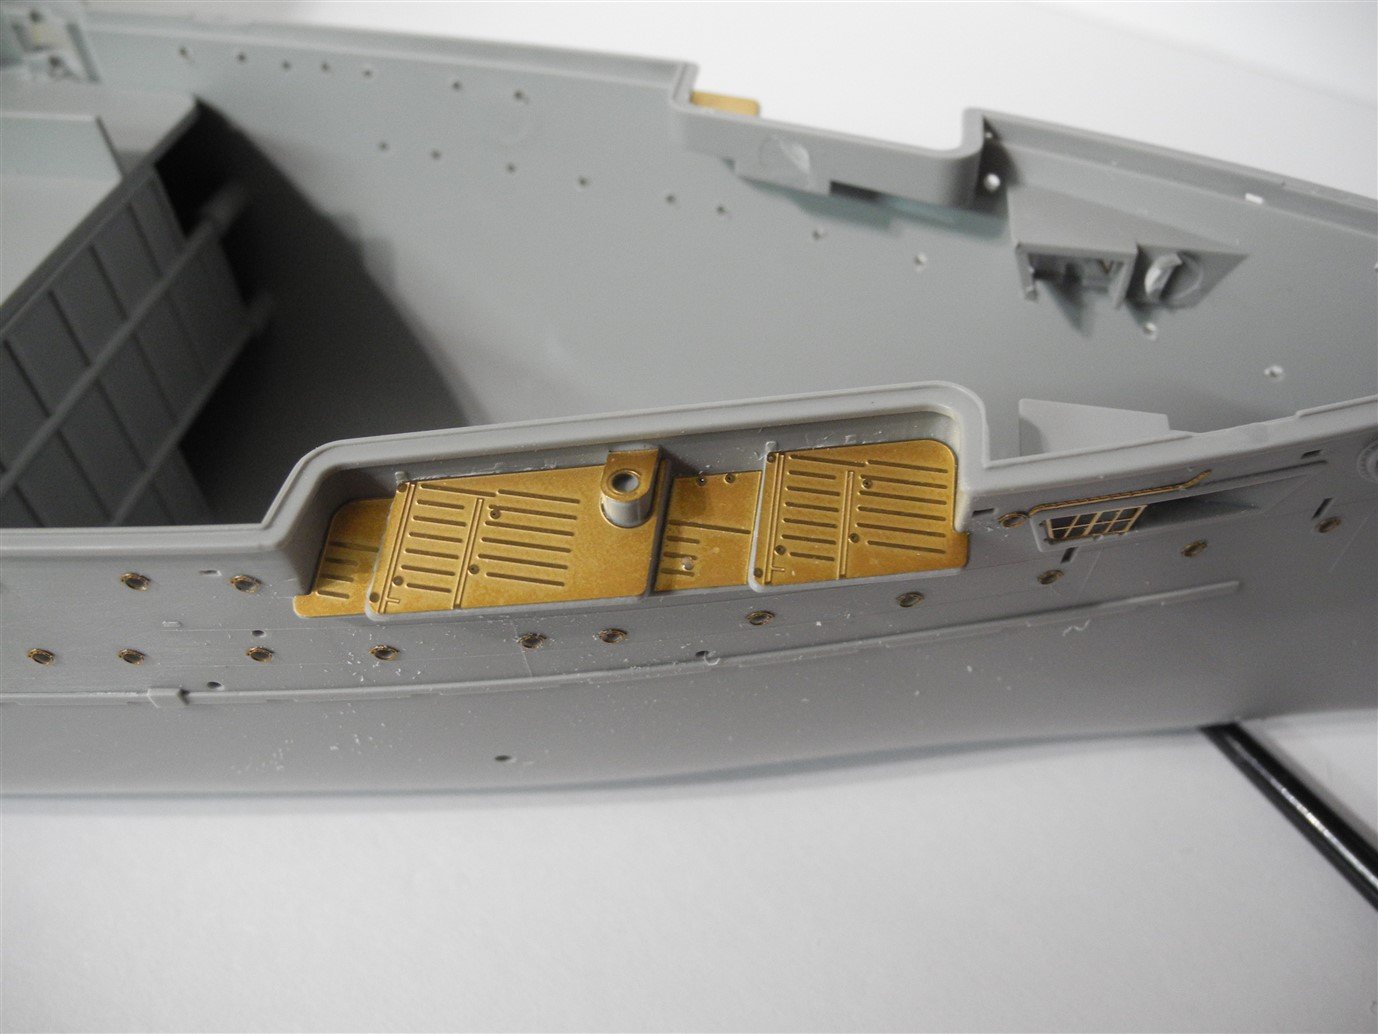
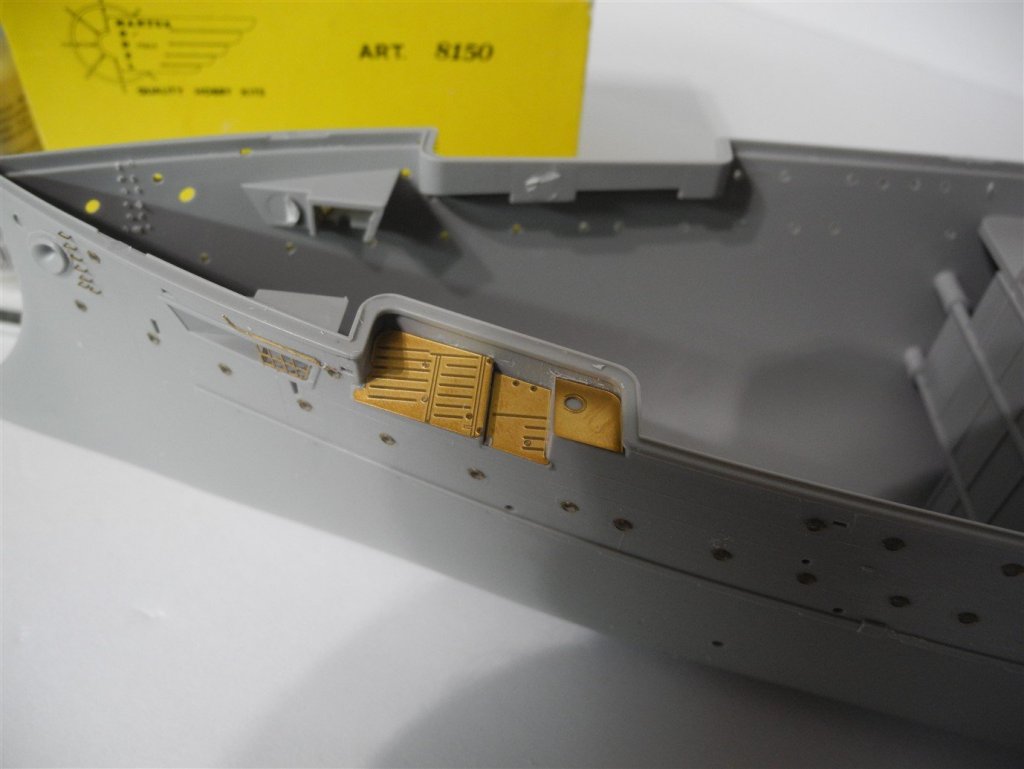
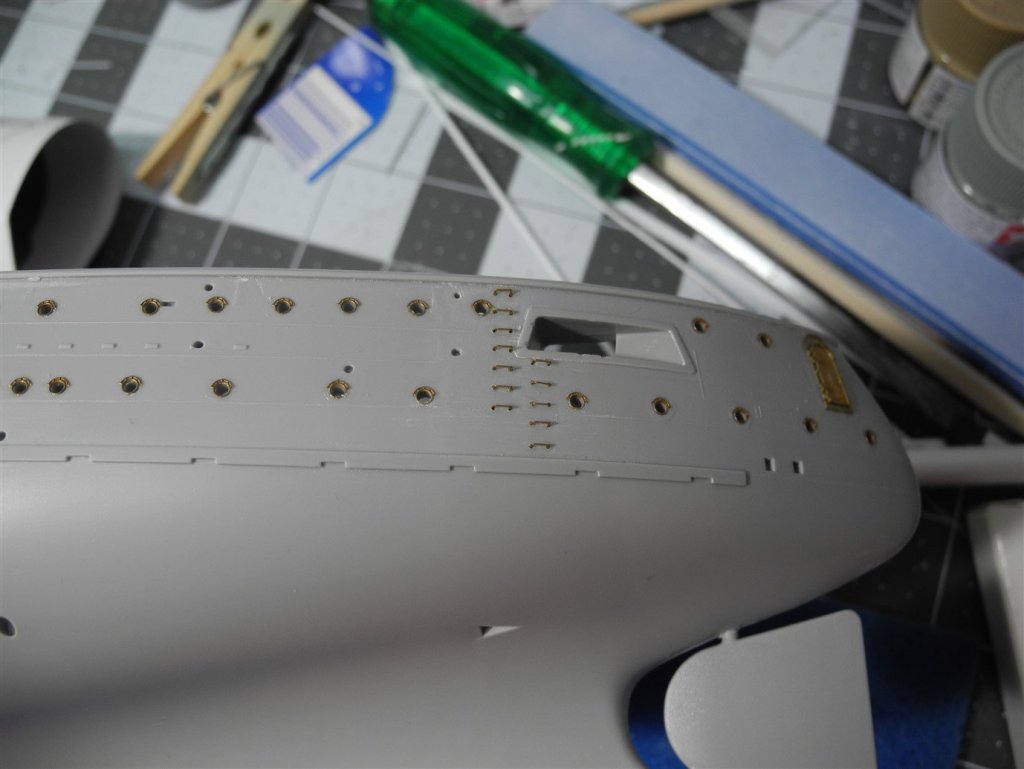
The Pontos photo etch is quite remarkable and arguably the best in the business. If there is anything else out there (photo etch) that's better, I would like to know what it is and where to buy it so I can get me some. Here, the otherwise barren stock plastic pieces are transformed by the Pontos photo etch magic.

- 467 replies
-
- 14
-
-
- mikasa
- wave models
- (and 1 more)
-
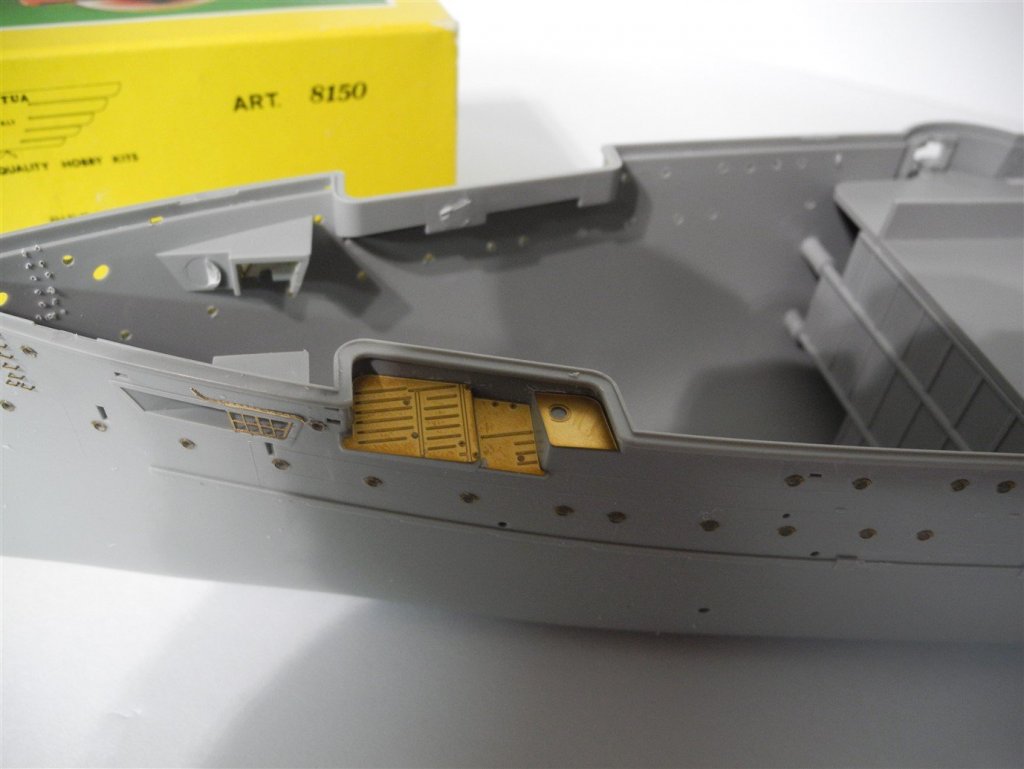
A little more photo etch to add after raised details are removed and sanded smooth.

- 467 replies
-
- 11
-
-
- mikasa
- wave models
- (and 1 more)
-
I had an almost identical problem as RMC described using Opera, just after the recent site update. I could not add any text to a post. In Opera settings, I found a box unchecked that was evidently the cause of the problem. Once I "checked" that box, everything went back to normal. How or why the box got unchecked after the site update, I cannot explain. Everything was working fine, then all of a sudden it wasn't. Anyway, in Opera, the box that needs to be checked is: "Enable auto-filling of webpages". If that box is not checked (in Opera), you will not be able to add text.
-
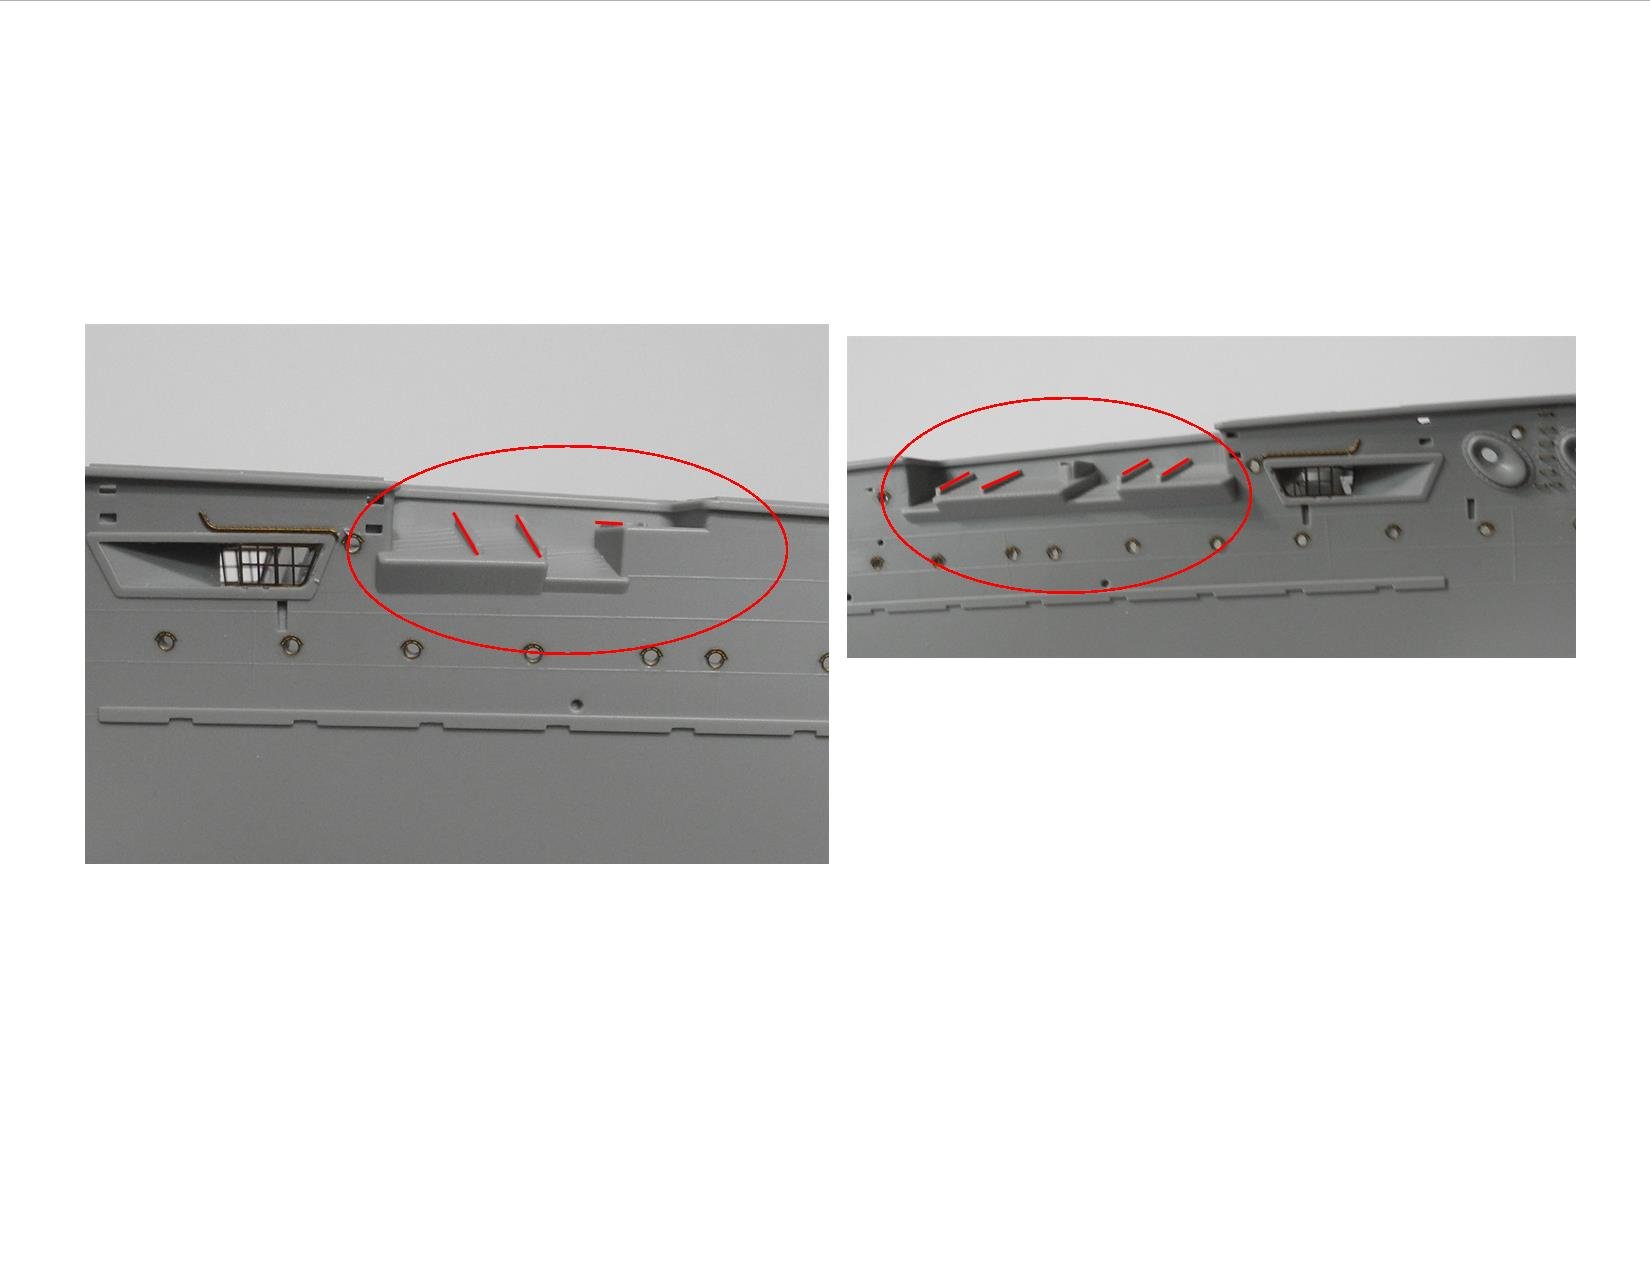
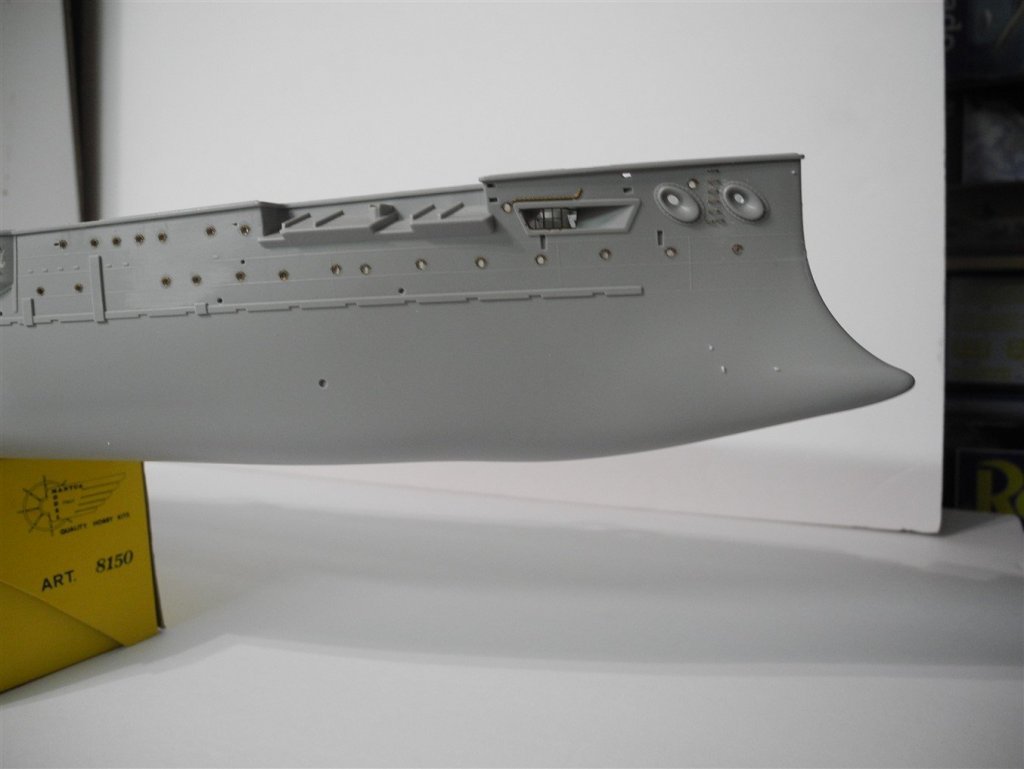
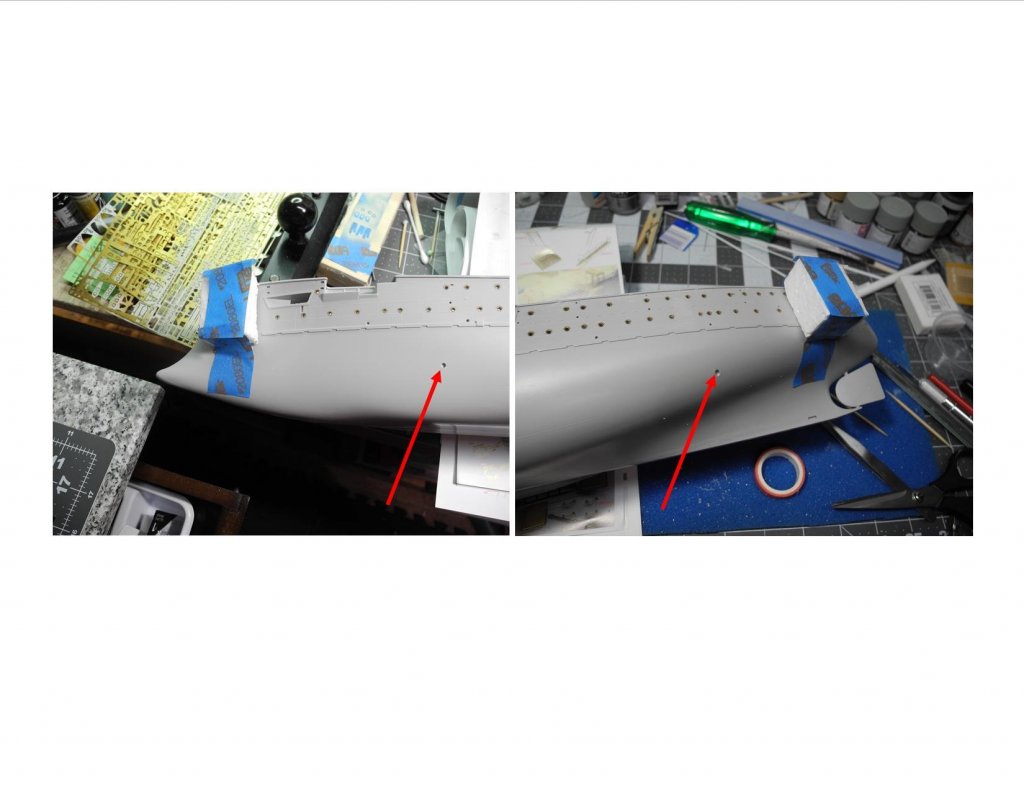
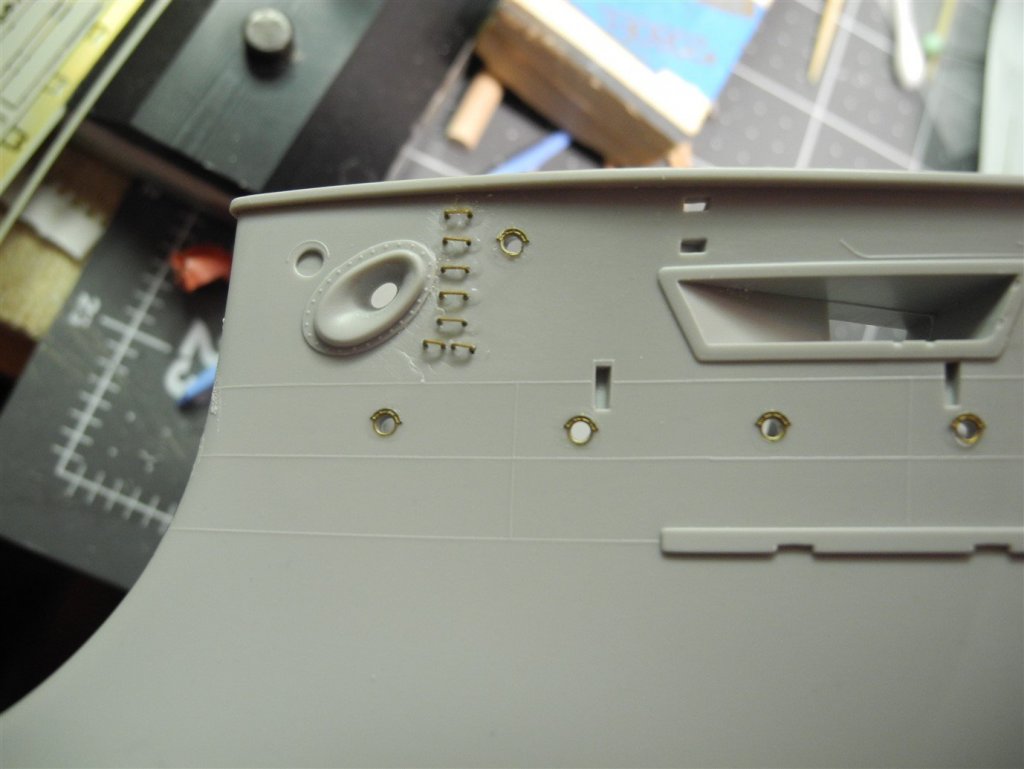
Just as an FYI... The red arrows point to fore and aft 18" torpedo tubes in the hull of the Mikasa. Not sure how practical those would be in a combat situation, but I suppose they could discourage another ship lining up along side for a broadside shot.
- 467 replies
-
- 10
-
-
- mikasa
- wave models
- (and 1 more)
-
I mis spoke saying, all gray. It's (the alternative color) actually as you said, gray topside and oxide red below WL. There is a lot of detail that must be attached to the hull. I am thinking it may be easier and more practical to paint a lot of those details before attaching to the hull, such as the doors on the gun ports.
- 467 replies
-
- 6
-
-
- mikasa
- wave models
- (and 1 more)
-
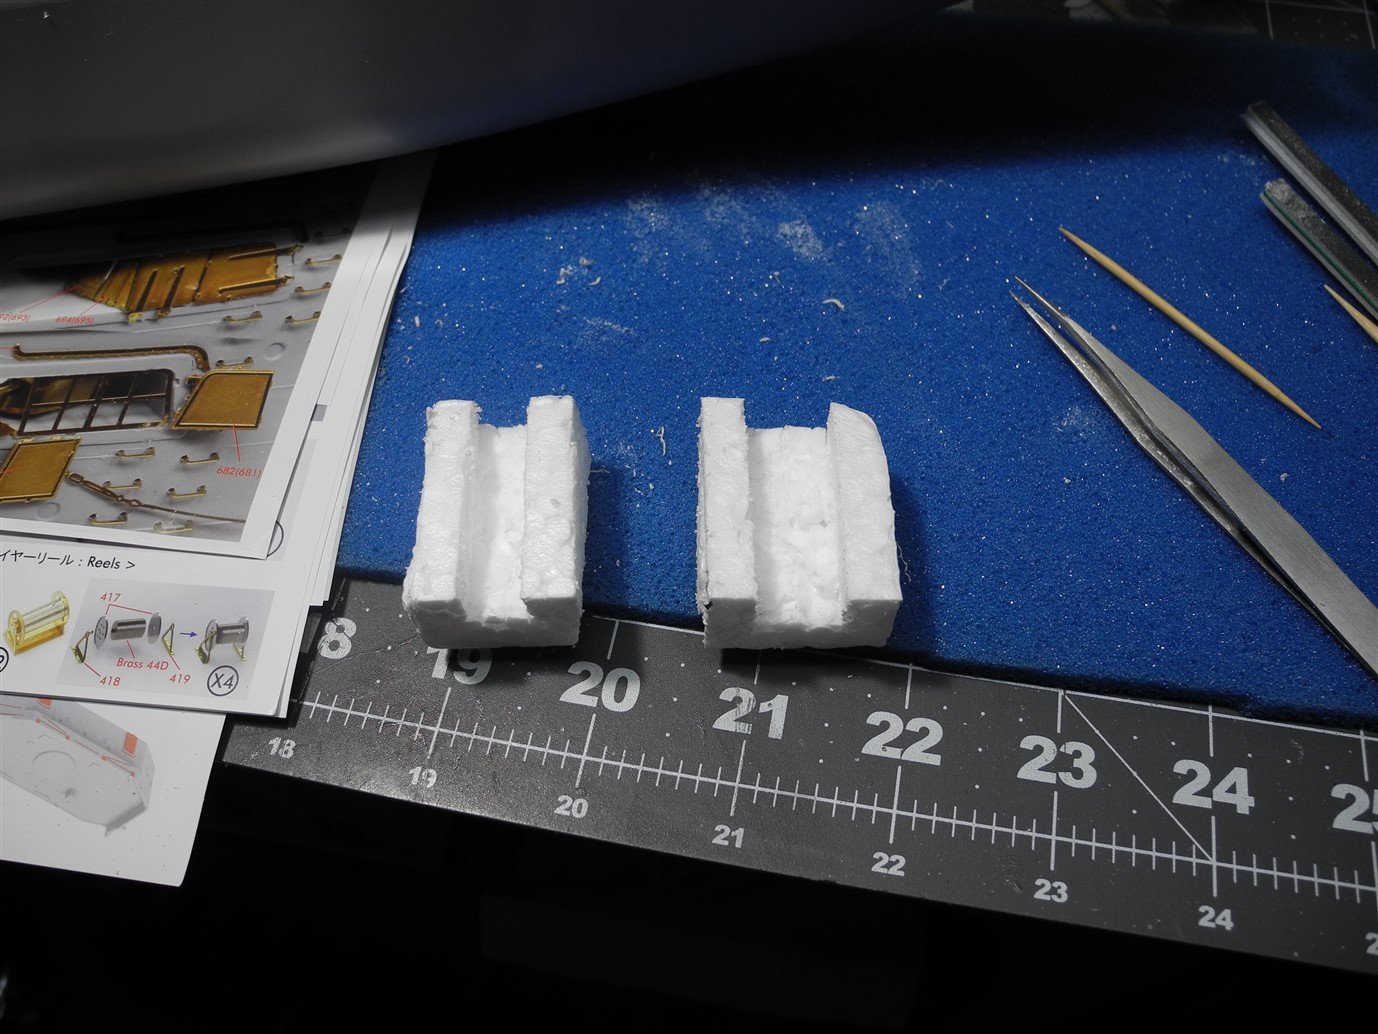
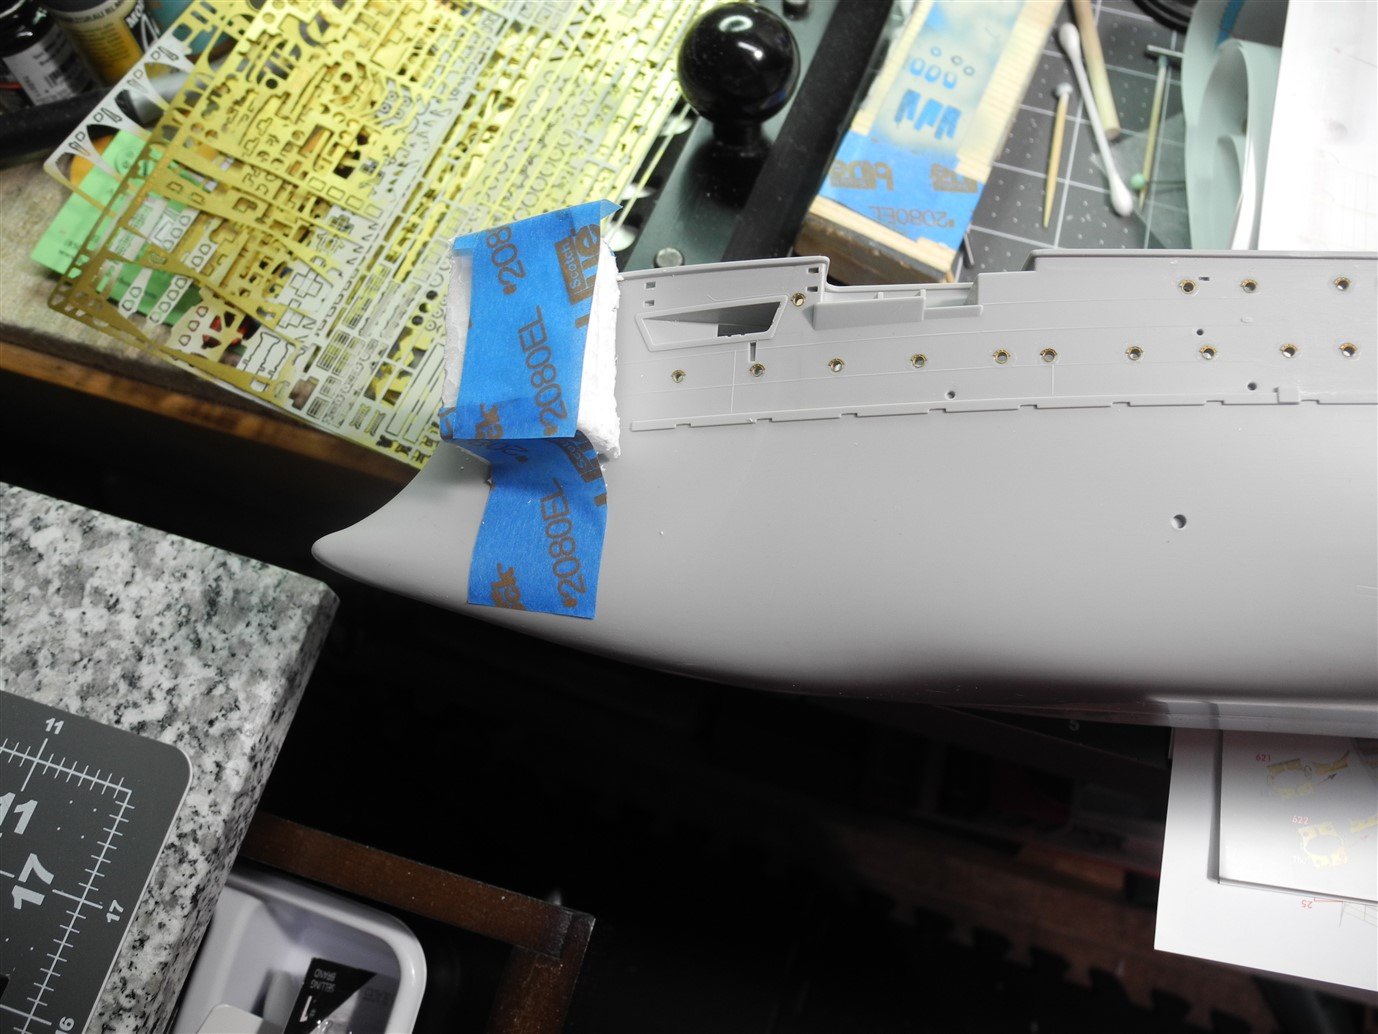
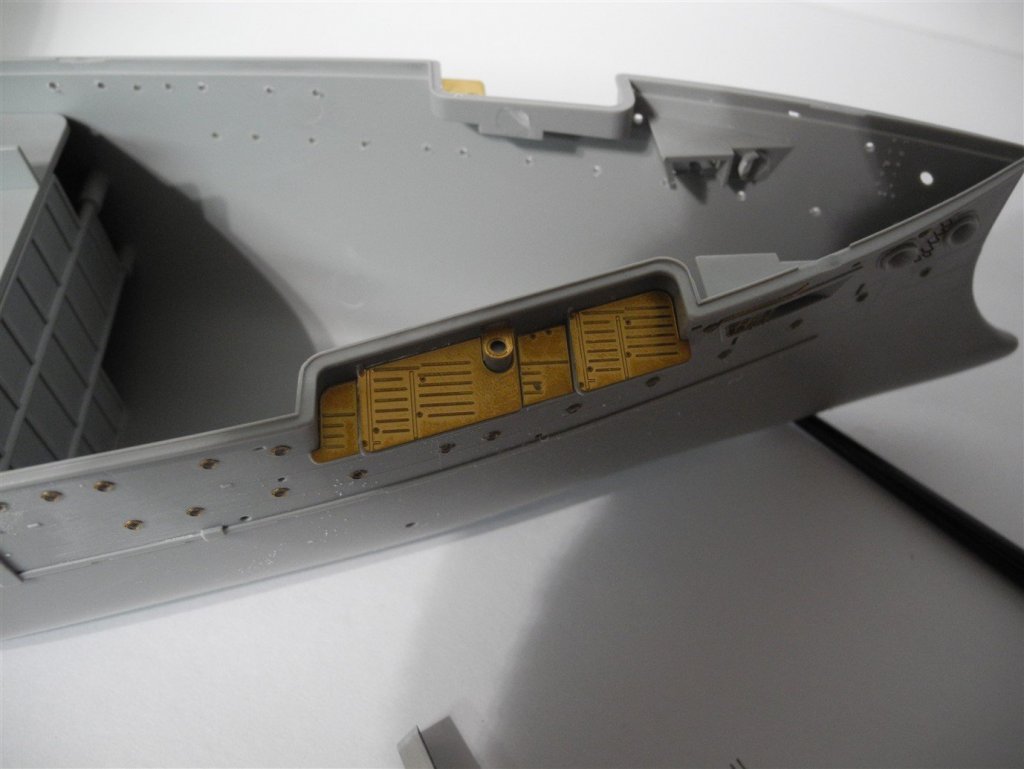
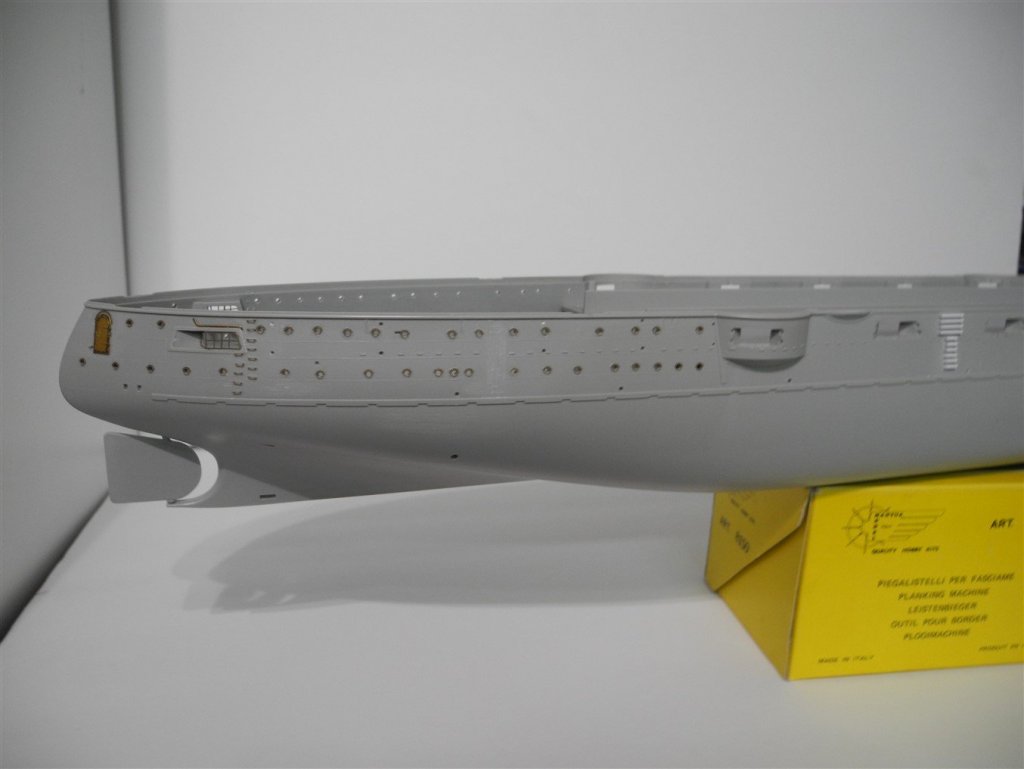
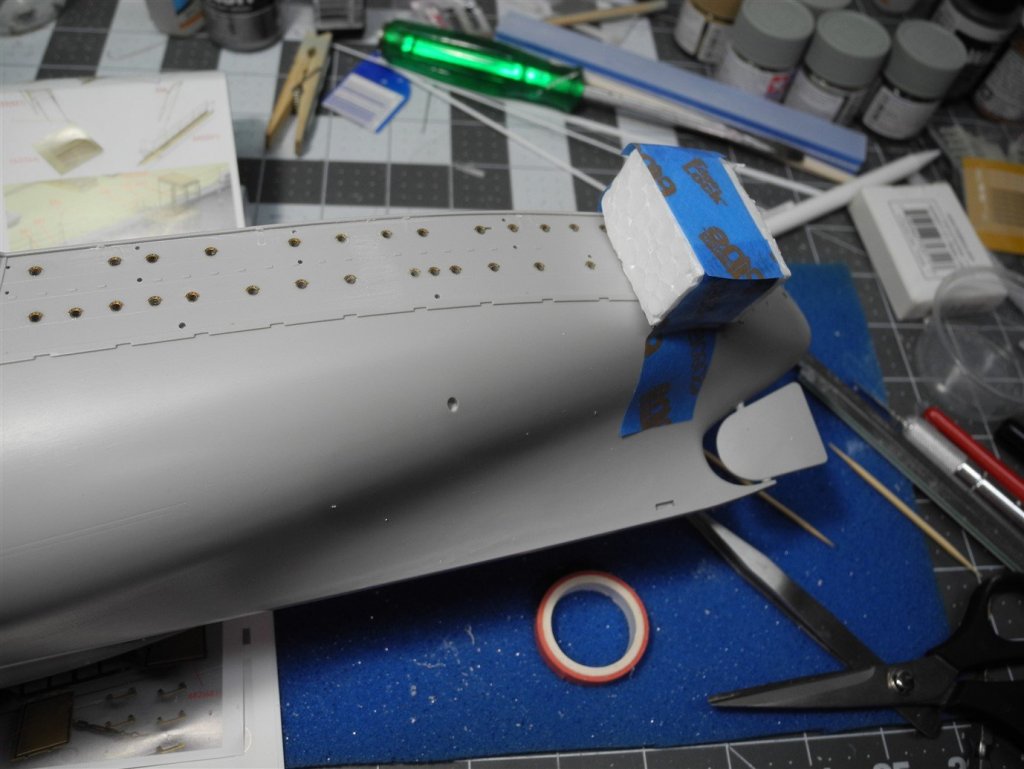
These little hand hold pieces could easily be knocked off and lost during the construction, painting, and detailing of the hull. To help prevent that, used some scrap styrofoam and cut a small channel in it, then taped it in place over the small details. That should keep everything in place while the rest of the photo etch details are added before painting. Then, I need to decide how I am going to paint this model. It seems the Mikasa hull was originally painted black above the water line, red oxide below the WL, light gray superstructure, black funnels with light gray stripes. In other renditions of the model, I have seen it painted all gray. My only reference book states the colors formerly mentioned, so I think I will go with that VS the all gray. All gray seems rather dull to me and as long as there is a more colorful option that's authentic, I would rather go with that.


- 467 replies
-
- 13
-
-
- mikasa
- wave models
- (and 1 more)
-
1/16" sounds like such a small strip of leather for the straps. But once those finished straps are attached to the boat davits, it's just right. Beautiful work.
-
To an old Marine, "adapt and overcome", comes to mind as well.
- 467 replies
-
- 5
-
-
- mikasa
- wave models
- (and 1 more)
-
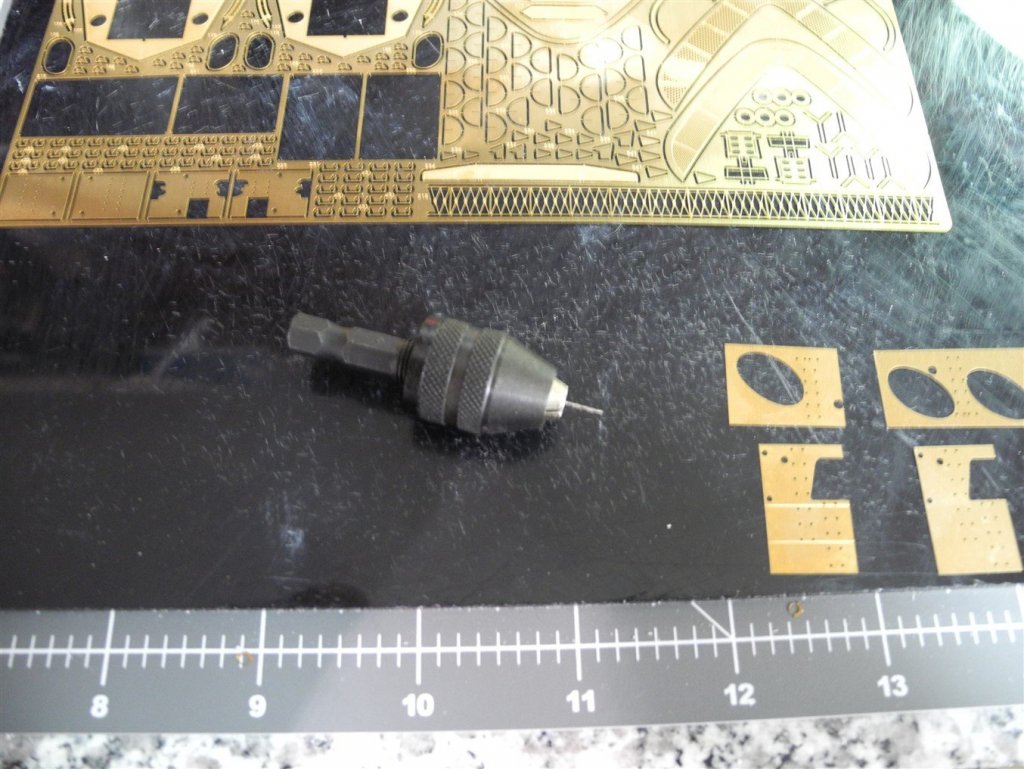
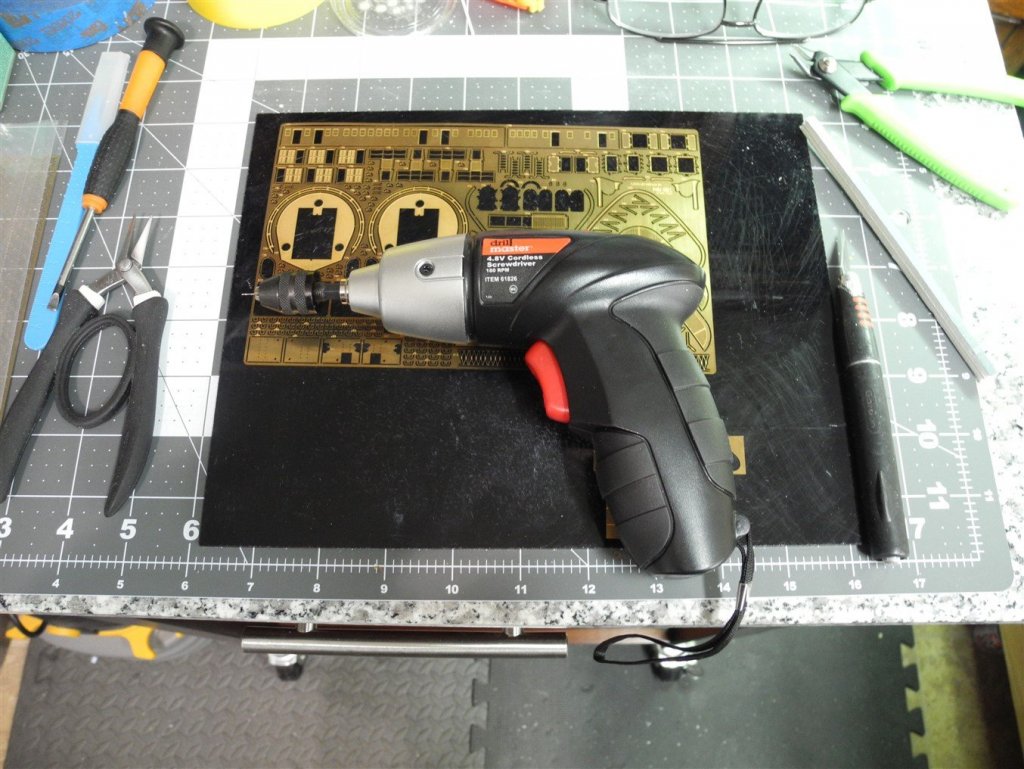
I might have solved my problems of breaking micro drill bits so often while using my pin vise. It's my belief that half the problem comes from unwanted lateral movement caused by hand drilling and that ends up breaking the bits. The other half (at least half) is caused by using cheap, hobby grade bits. While I haven't yet locally sourced industrial grade bits, I have found a solution for keeping a steady, straight drill bit while drilling. I am now using a little hand held cordless screw driver that accepts 1/4" quick change bits. Then, I found a micro drill chuck with a 1/4" quick change shank. Found mine at Amazon. Now, I am breaking bits far less often, drilling small holes with much less effort, and far faster.
- 467 replies
-
- 10
-
-
- mikasa
- wave models
- (and 1 more)
-
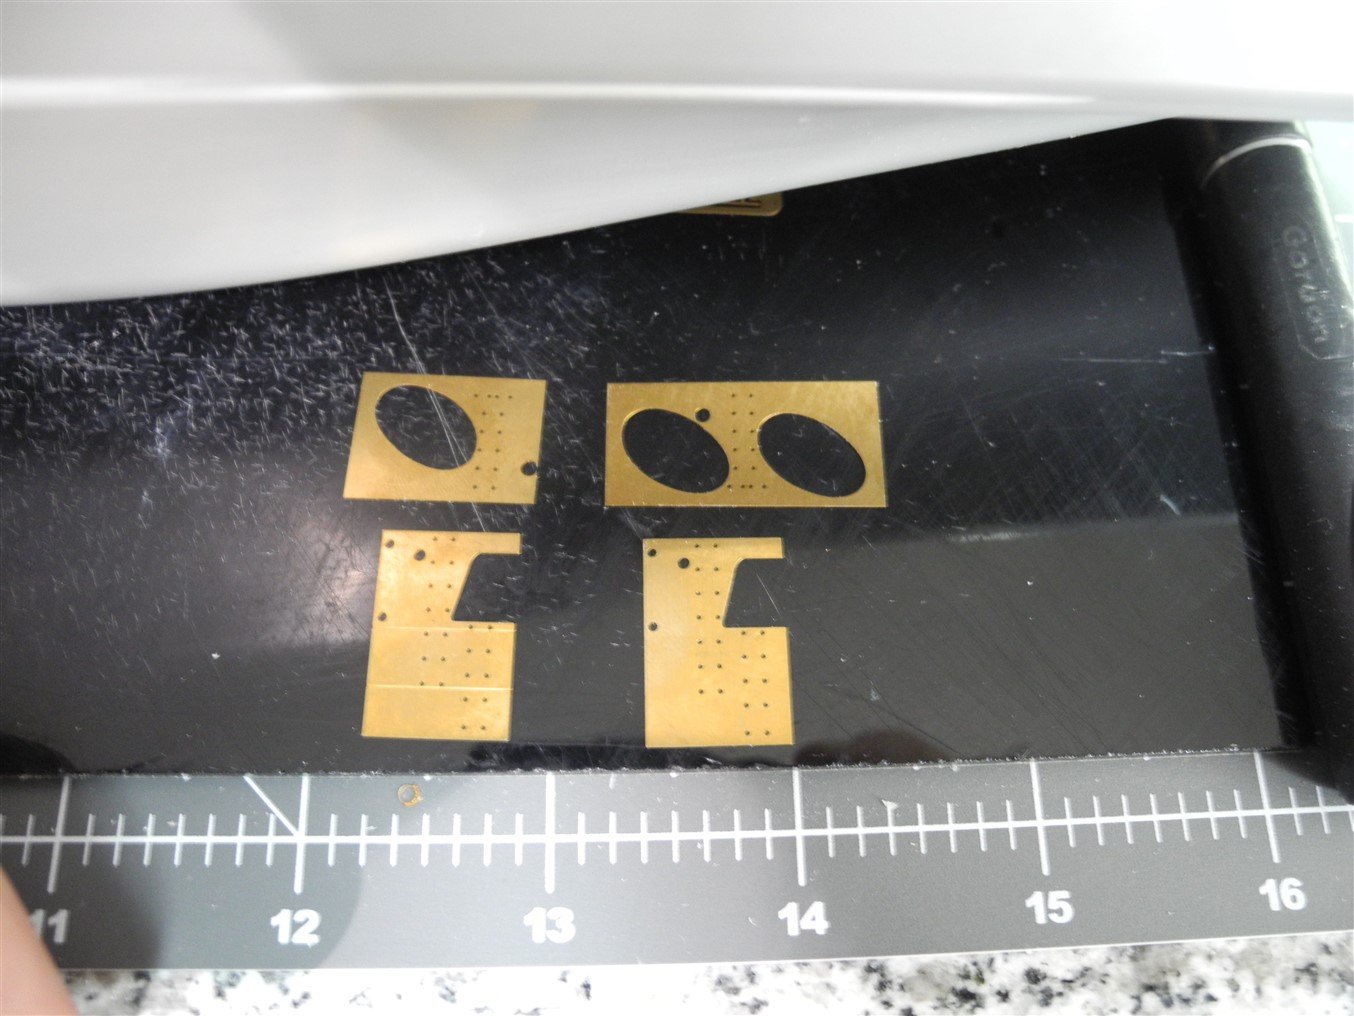
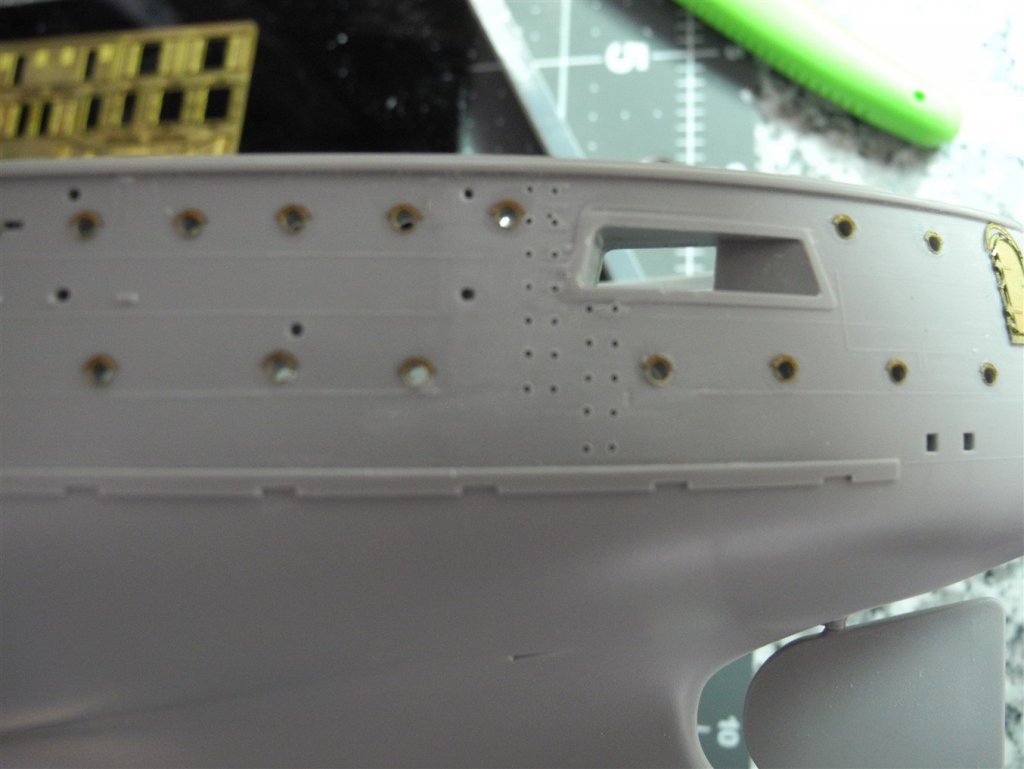
There are quite a few hand hold locations to drill out on the Mikasa hull.The Pontos set includes some nifty little templates for getting all the holes lined up properly for drilling. I'm glad this feature is included as I find it a real pain to get all the holes marked out evenly using just a pencil and ruler.

- 467 replies
-
- 9
-
-
- mikasa
- wave models
- (and 1 more)
-
Yes, much easier on the eyes at 1:200 scale. And with this ship, the larger scale does not create a model too large to fit on display being approximately 27" in length.
- 467 replies
-
- 4
-
-
- mikasa
- wave models
- (and 1 more)