

Slowhand
-
Posts
236 -
Joined
-
Last visited
Content Type
Profiles
Forums
Gallery
Events
Posts posted by Slowhand
-
-
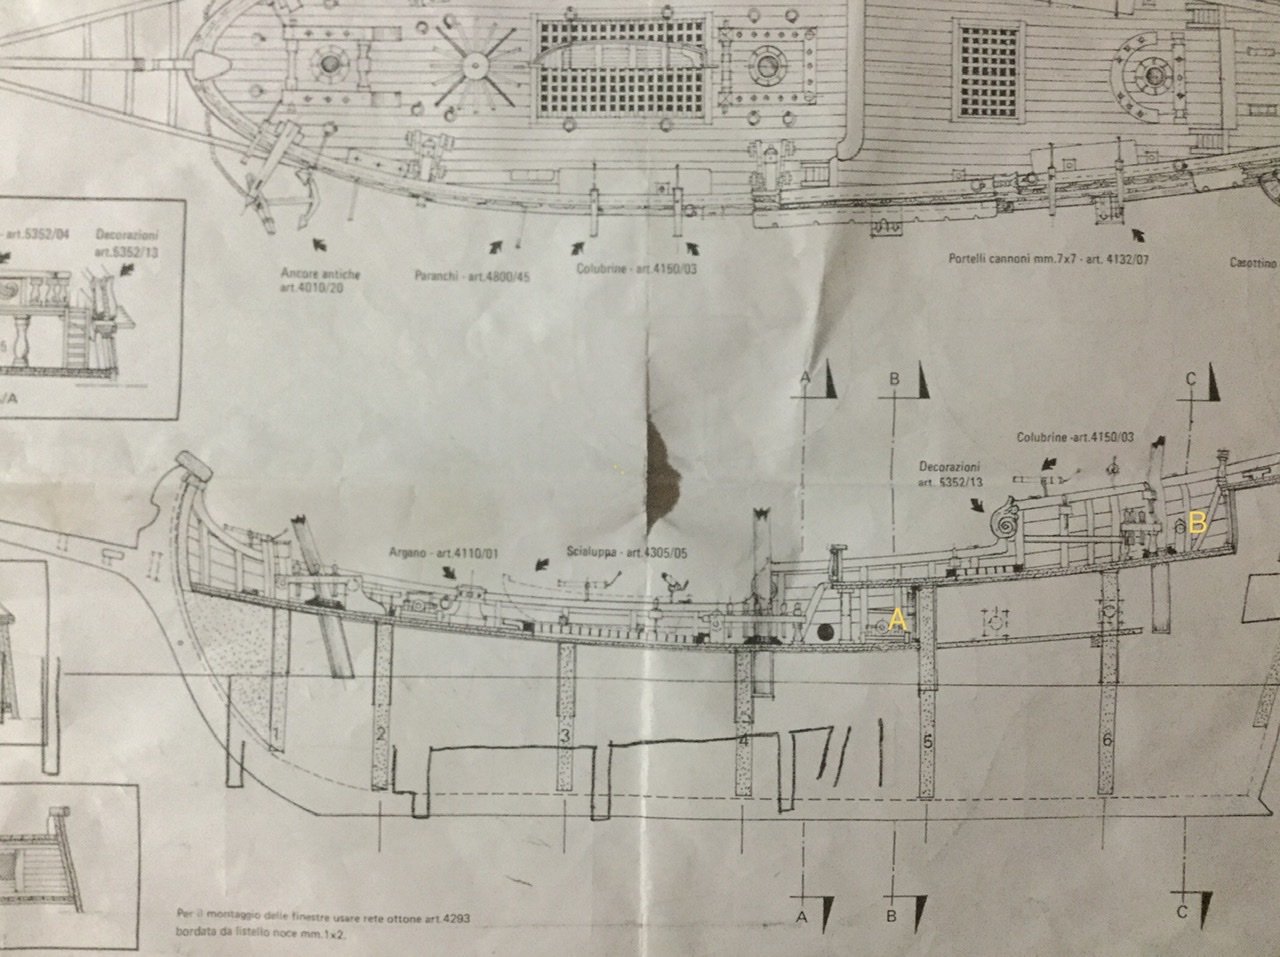
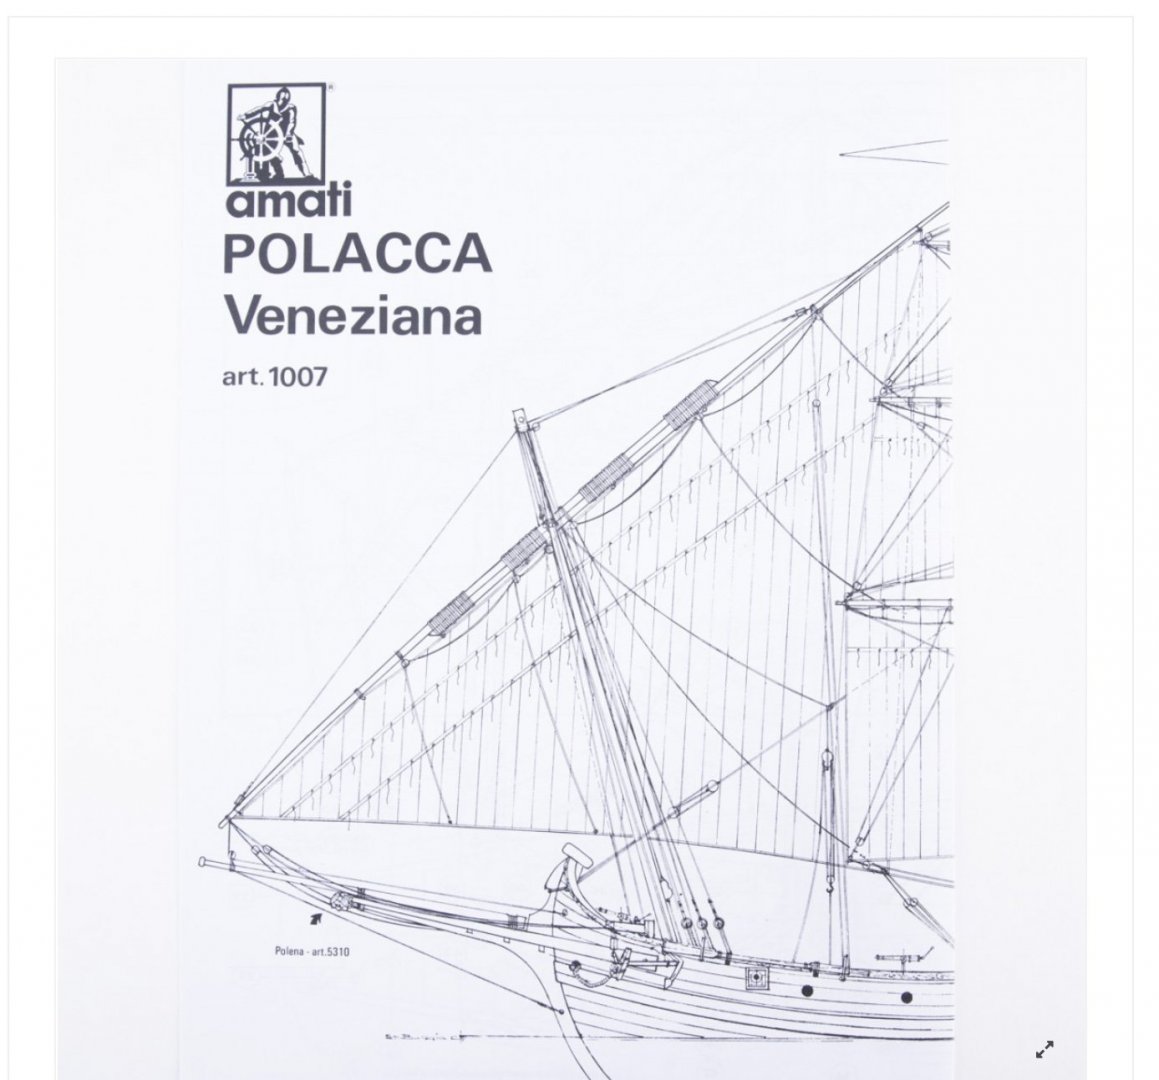
Hello Sceatha, you know I think you right. When I purchased the plans they were definitely advertised as 50/1 and it says so on the building instructions but not on the main plan, part of which I’ve shown above. Perhaps they missed a 1 out. Looks like they’ve relaunched the packaging. Wonder if they spotted my build log and thought the scale on my build log is all wrong, fame of a kind at last! First thing to do tomorrow is to take some measurements on the plan and calculate actual sizes with different scales. A 150/1 scale would make it quite a long ship. Anyway thanks for your help. 😊
-
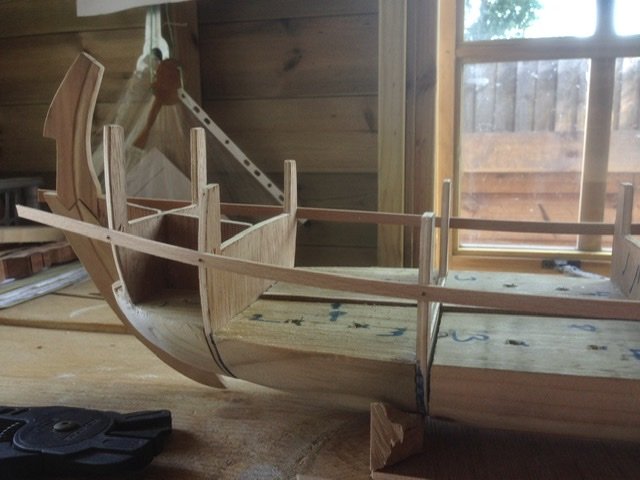
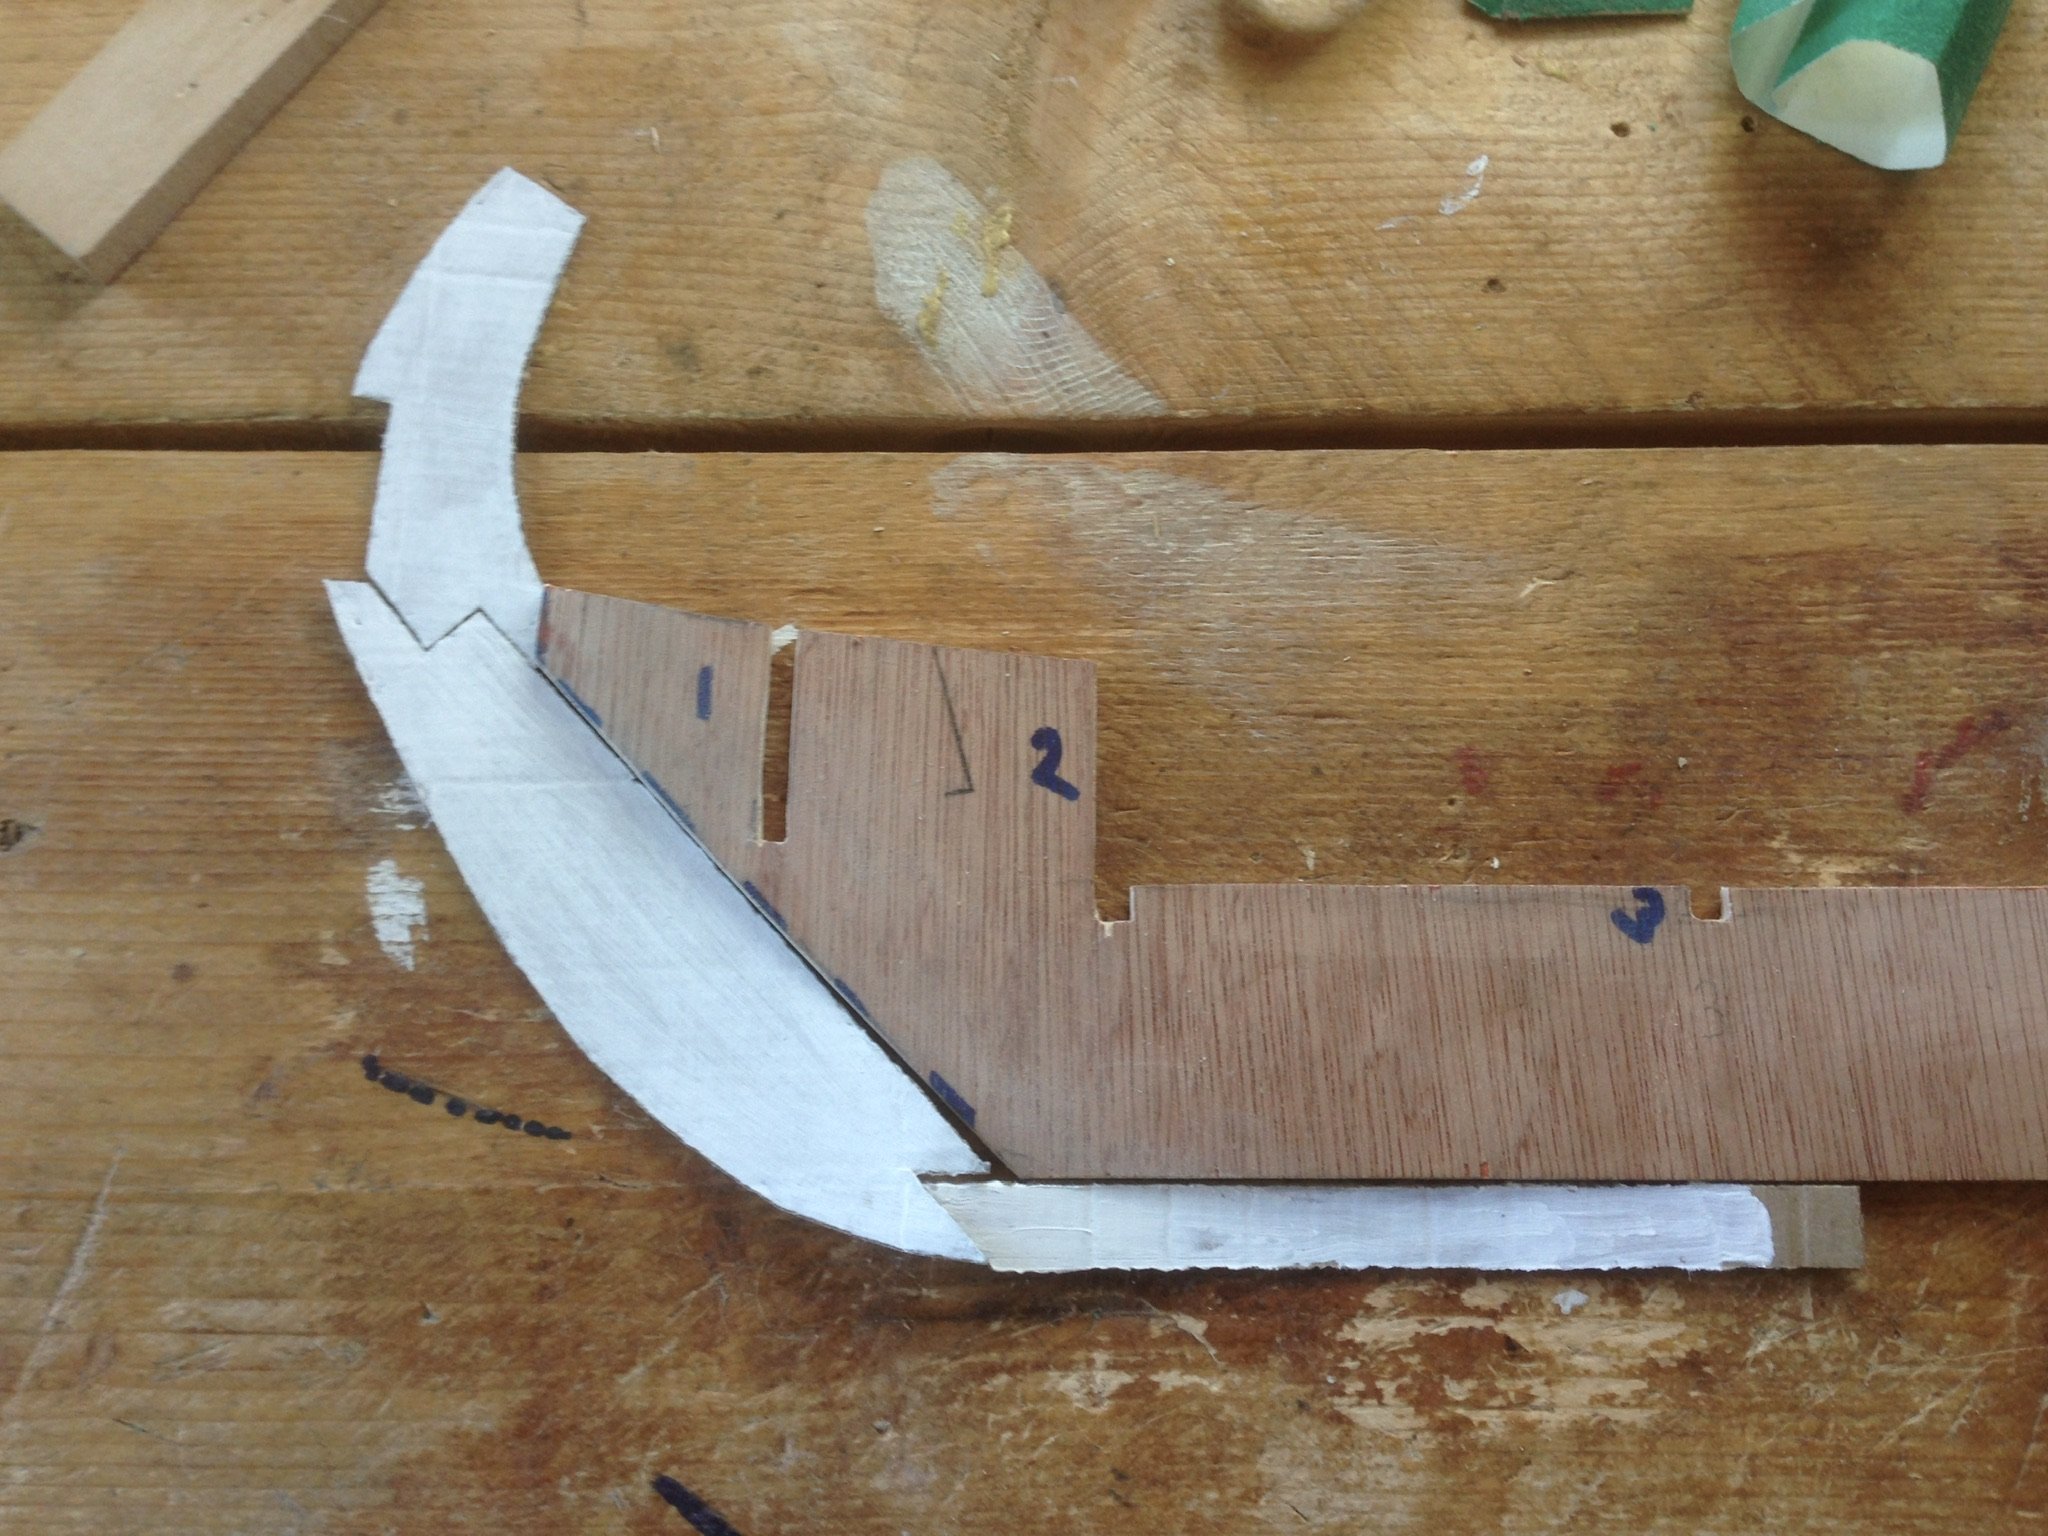
Well I’ve been starting to put cross members on the bulkheads to lay the decks on and starting to get a little confused. The main deck was obvious and once I realised the bulwarks should go past the 2 upper decks everything looked clearer. The single plank in my previous posting above was removed and replaced by a longer one nearly reaching the next left bulkhead. But the height between the decks looked all wrong for the scale much too low.
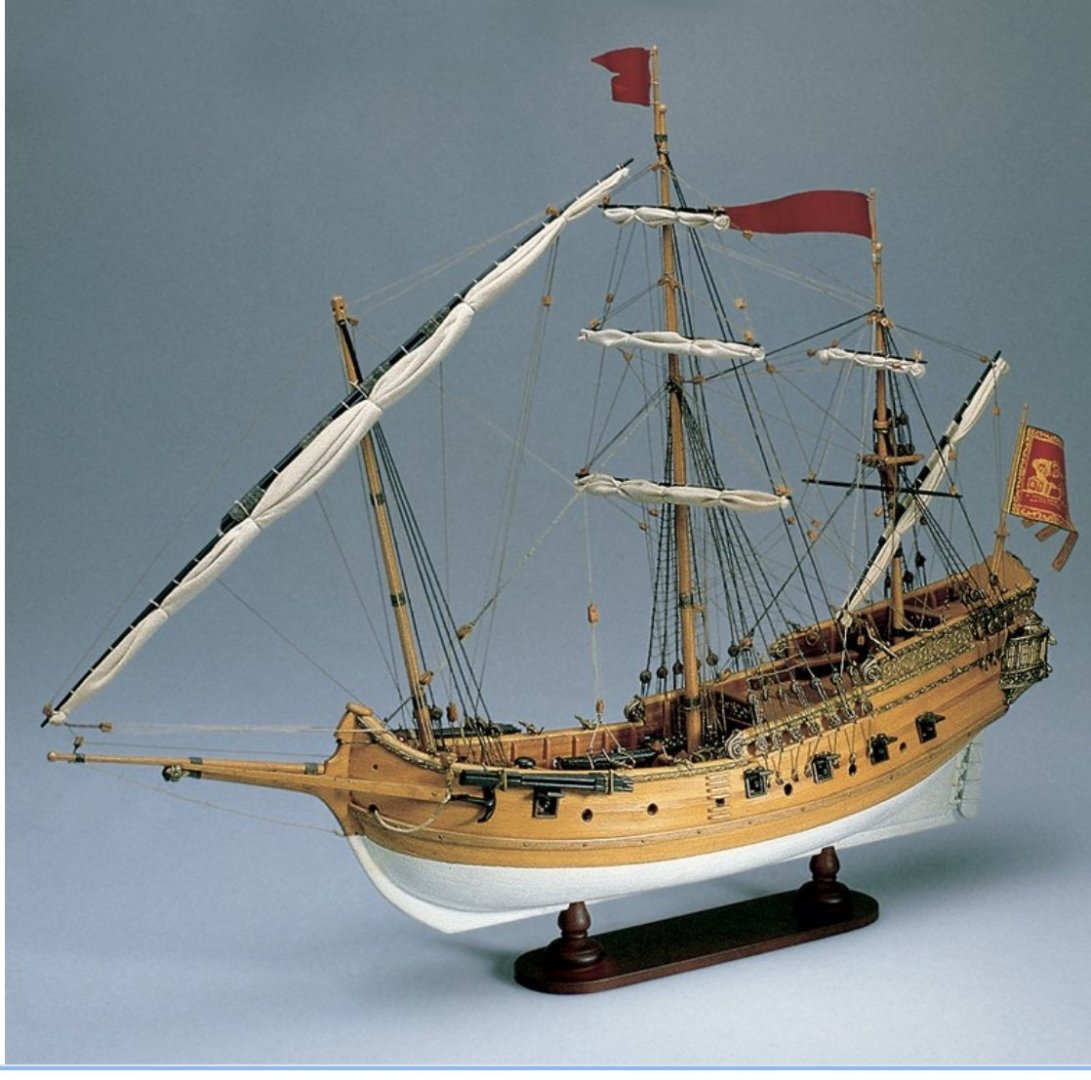
So I looked at the Amati plan and the heights marked A and B in yellow for between decks are approx 2cm and 3cm so on a 50:1 plan 1 and 1.5 m high. The overall length of the ship not including bowsprit based on the 50:1 plan is ~ 20m which doesn’t sound too unreasonable.
Any advice much welcome, is it likely the Amati scale is wrong?
- Louie da fly, bruce d, mtaylor and 2 others
-
 5
5
-
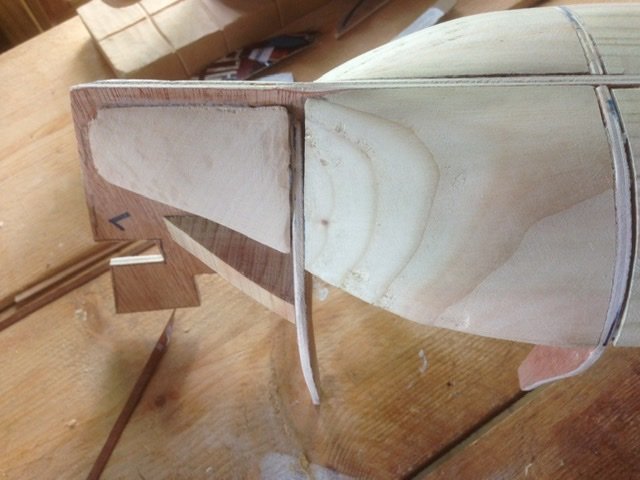
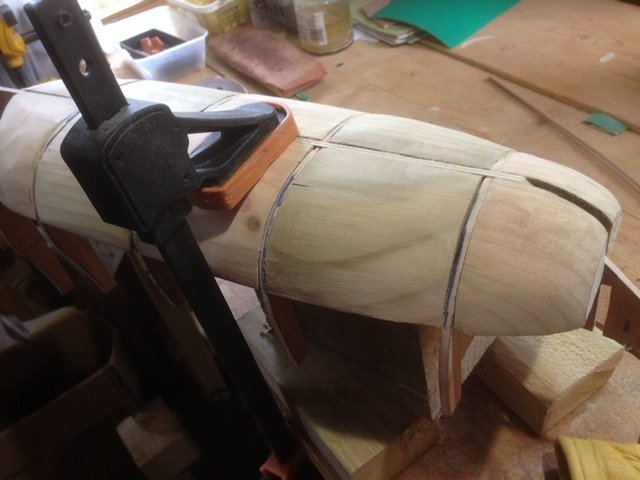
Stern transom fixed and first two bits of lime attached to start planking and confirming where the decks lie. Planking 2 x 6 mm lime as first layer. With distance between bulkheads gonna need the strength of two layers. Really having to think where decks, stern balcony’s go . So different to building from a kit.
-
Long awaited wood arrived, pear for stem, keel and stern post. Lime, beech for planking etc. The plan was to cut the pieces with my bandsaw, Just don’t know whats wrong With it. The rubber tyre flew off the upper wheel twice despite checking position and tension of the blade very carefully before running. So it’s back to manual work, my trusty Stanley knife and Hacksaw gave by far the best cleanest cuts. What does everyone else use, table saws.
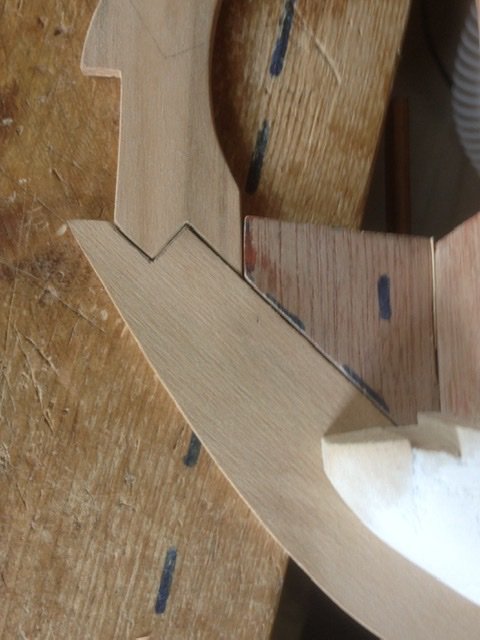
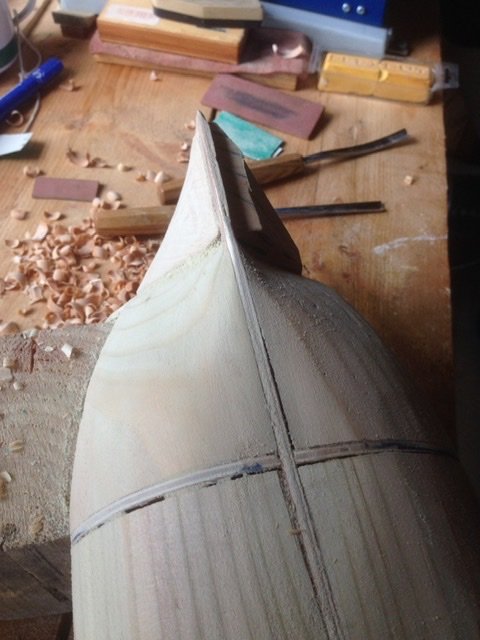
Used gouges to carve a bearding line in the stem. Pinned the wales in place to check curves. Bulkhead 4 on far right needs building up other than that OK, oh and the bow blocks might need more sanding - that’s been the hardest part so far and still not quite right.
- GrandpaPhil, bruce d, SkerryAmp and 3 others
-
6
-
Thanks Steven, Lots of interesting details in the build, the shape of the hull in the link looks quite different to plans I have, much fuller with cannon ports all along the main deck. The link to the Jean Jouve Polacre in Christiano’s build shows that vessel is more akin to the one I’am making.
- bruce d, mtaylor and Louie da fly
-
3
-
Quite pleased with what I’ve done so far got a solid base for the hull, straight keel and in fill blocks in profile with bulkheads.
Decision point, spent ~ £5 on ply, pine infill blocks nil, only cost so far Is my time. If I’d made a dogs dinner would have cut my losses. Happy to go ahead and buy lime strips for Wales, 1st planking layer, and pear or cherry for stem, keel and stern post. Now for the fun laying the decks, planking the hull.
- yvesvidal, GrandpaPhil, grsjax and 6 others
-
9
-
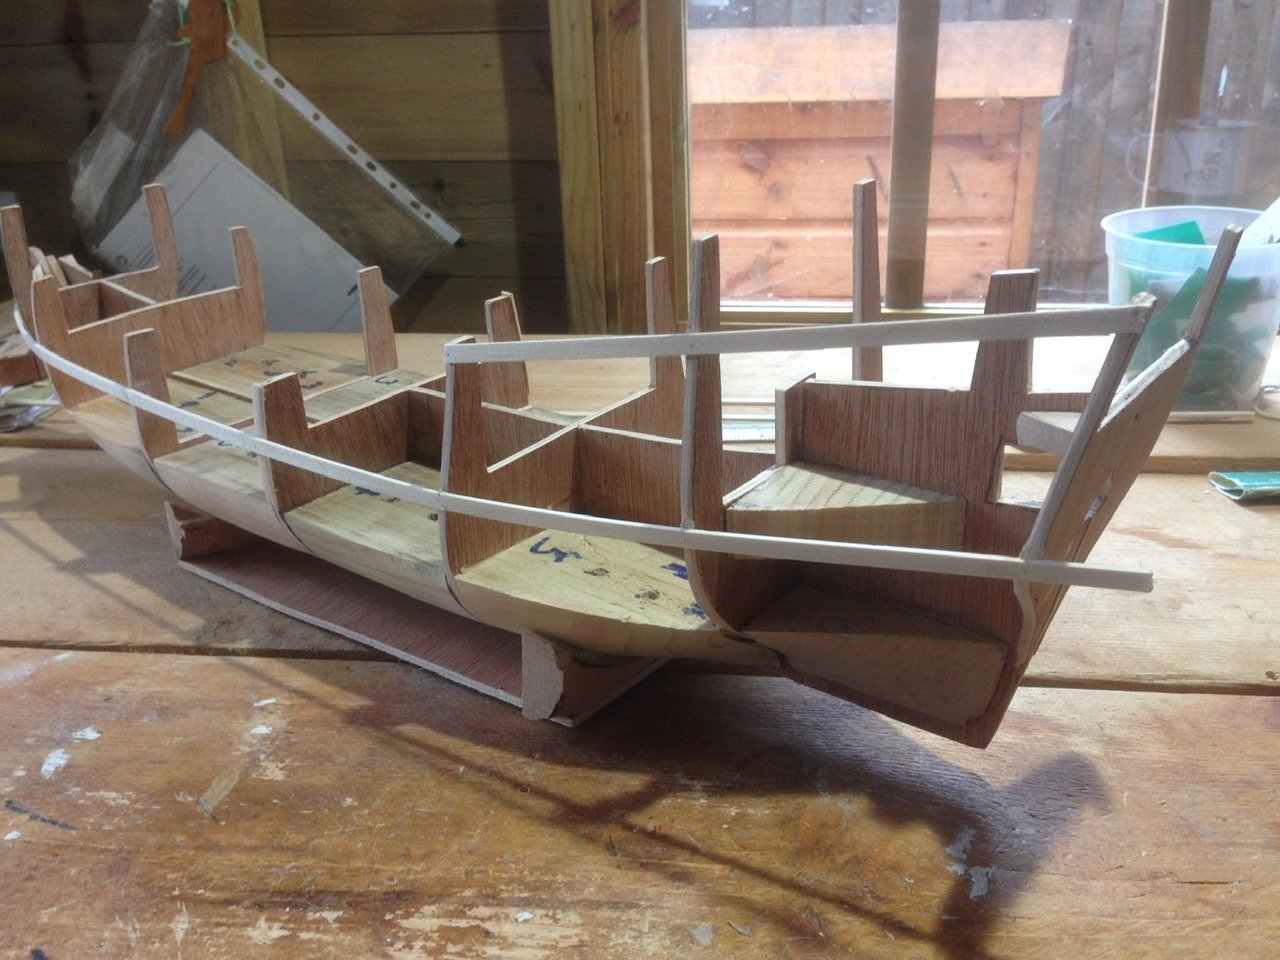
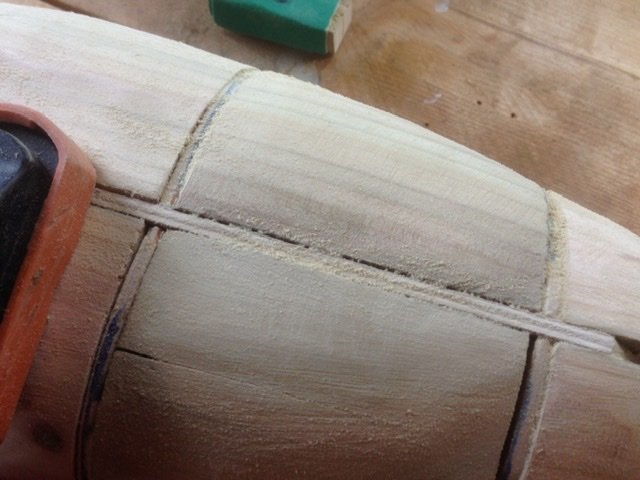
Lots of sanding by hand the fill ins and tapering adjusting bulkheads, still to add final in fills at stern.
Loosely pinned a stringer to check curve of hull. Then noted rear part of false keel had warped so added to two wedges either side between bulkhead and keel. Fingers crossed.Added two blocks of lime and carved sanded them to fill in between last bulkhead and stern

-
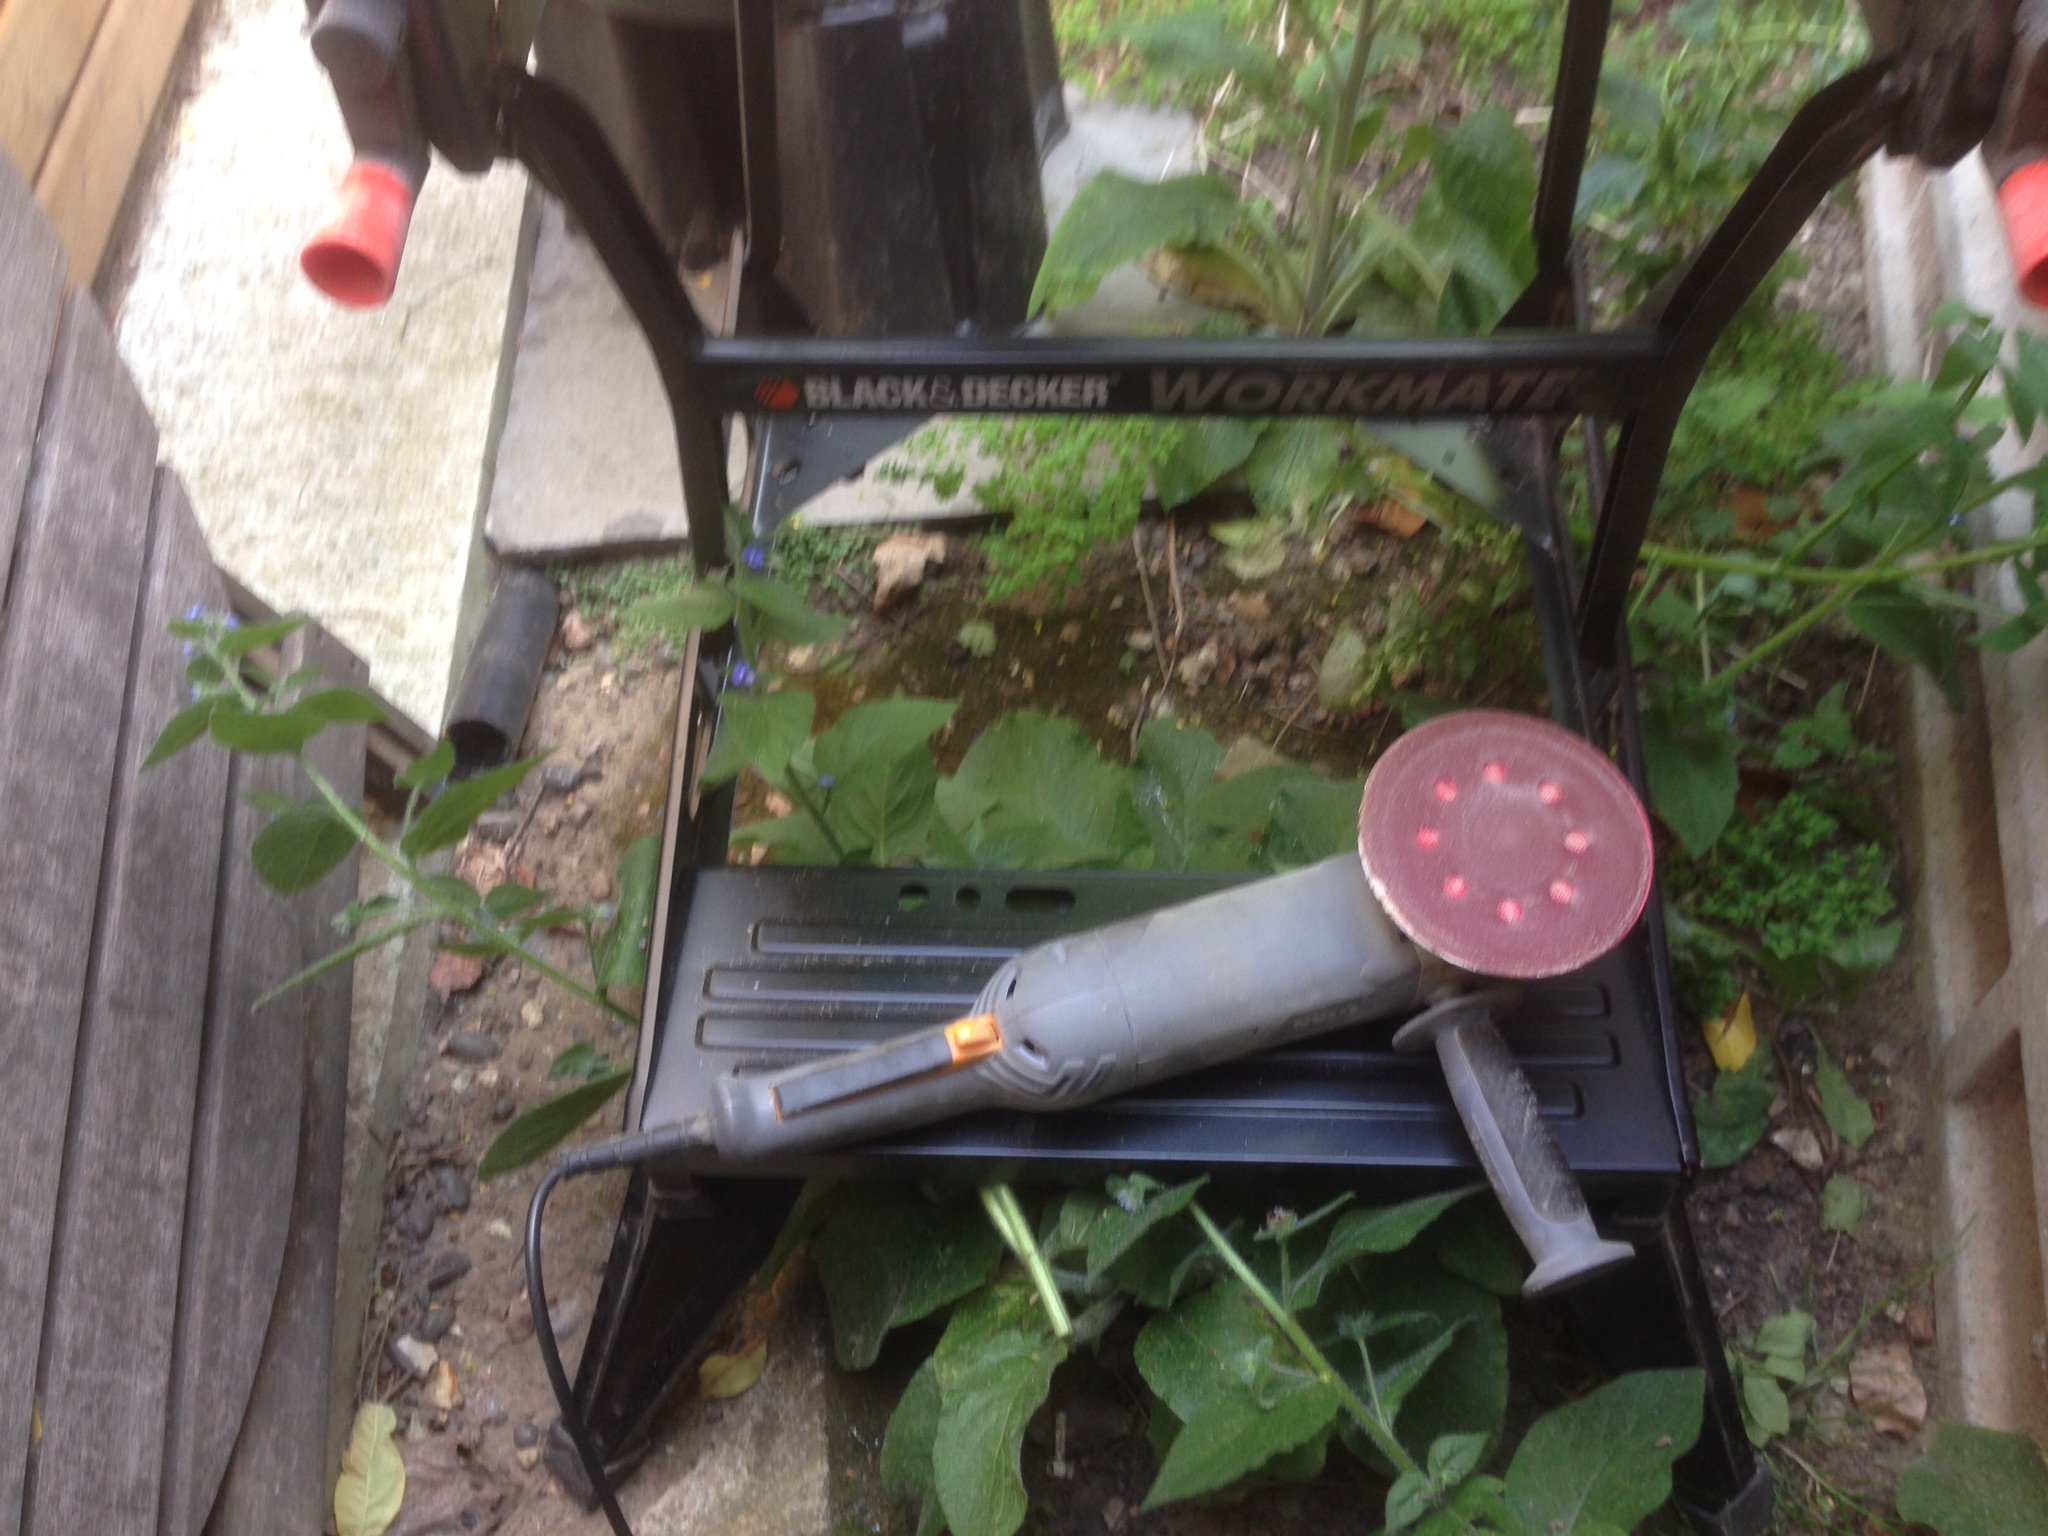
Everything glued together and rough sanding done using my sanding pad /grinder.
Can’t risk doing anymore using this tool so it’s slow and careful by hand now.


- Archi, mtaylor, GrandpaPhil and 2 others
-
5
-
Thanks Tony, the hardest part of cutting the bulkheads was getting the slots which fit into the false keel perpendicular, had to redo one bulkhead. Bandsaw blade had a tendency to wander.
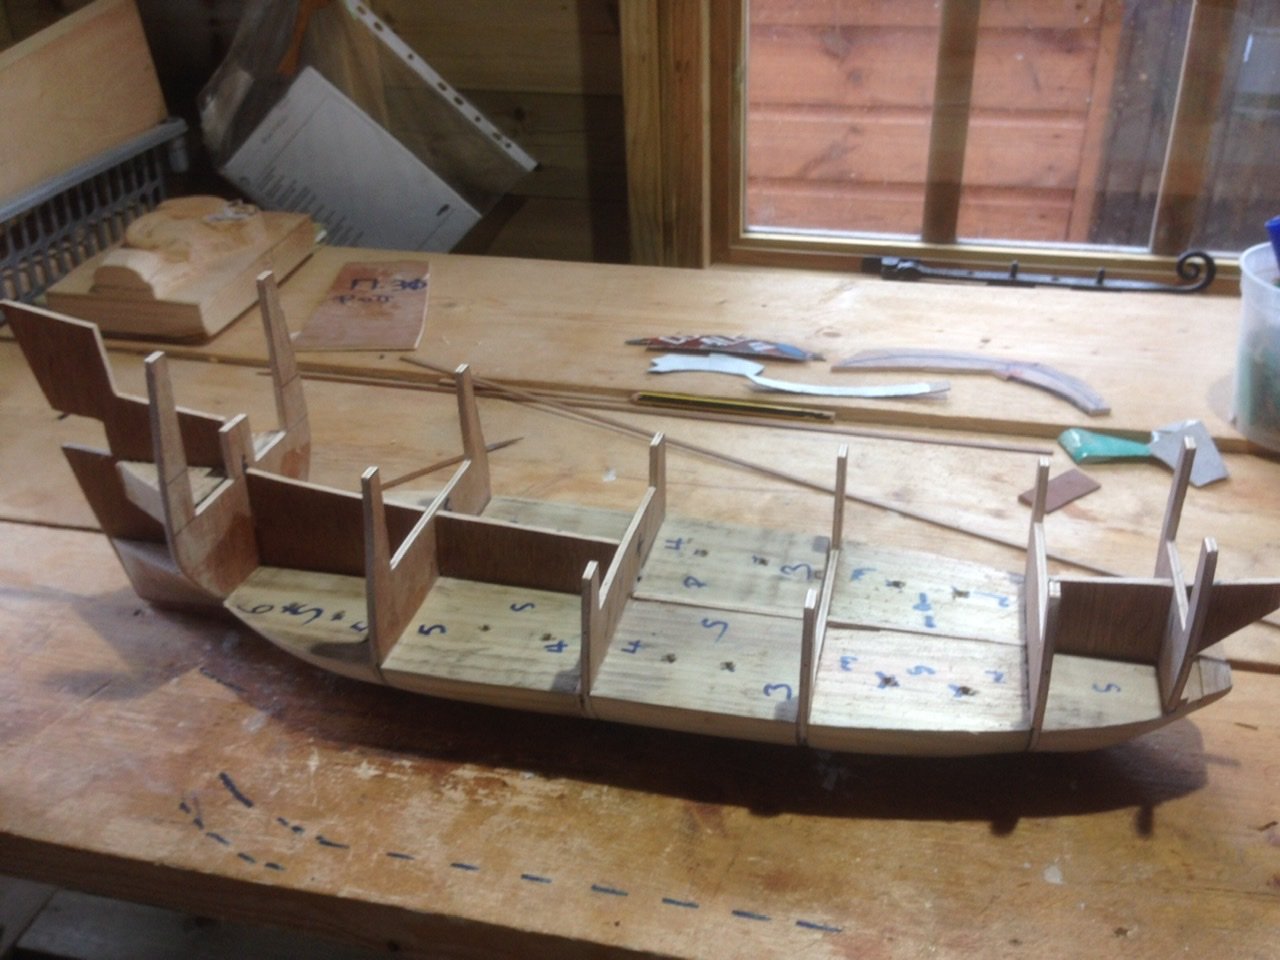
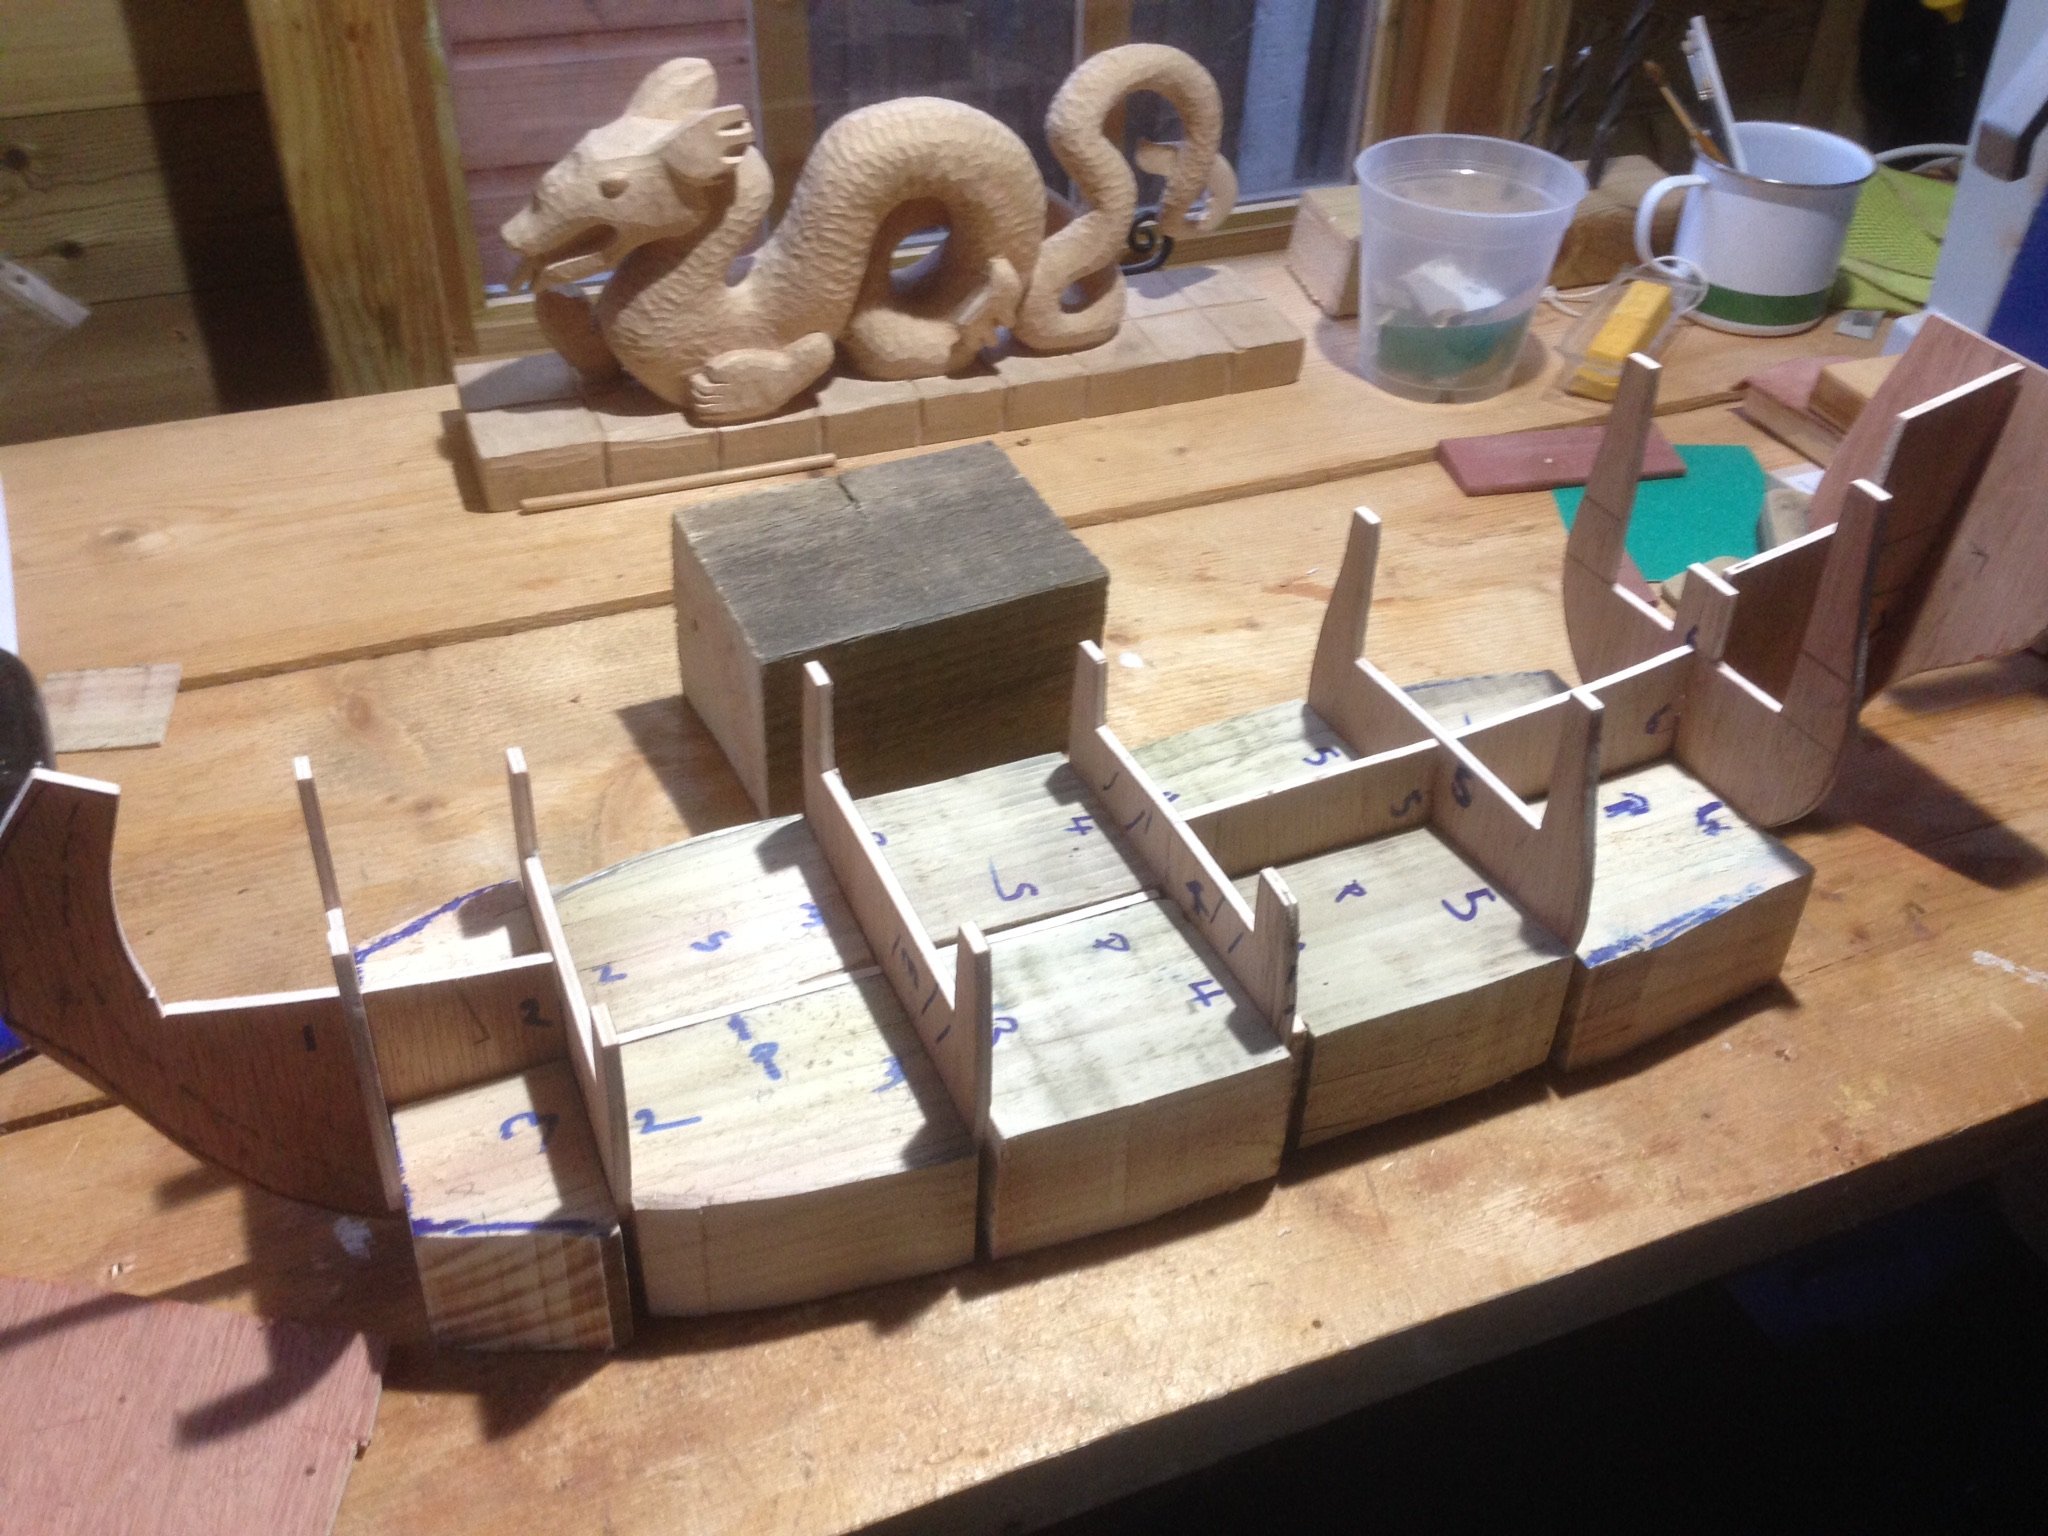
Because of the length of the hull and relatively few bulkheads decided to infill the spaces with blocks to give strength and stop the keel warping.
Pine 6 x 4“ left over from a raised garden bed cut into lengths with a bow saw then shaped with the bandsaw. Everything’s just loose at this stage. Cut out the stem to replace with some nice wood. Any similarity with Backer’s wonderful build of the Golden Hind merely coincidental.


- mtaylor, GrandpaPhil, SkerryAmp and 6 others
-
9
-
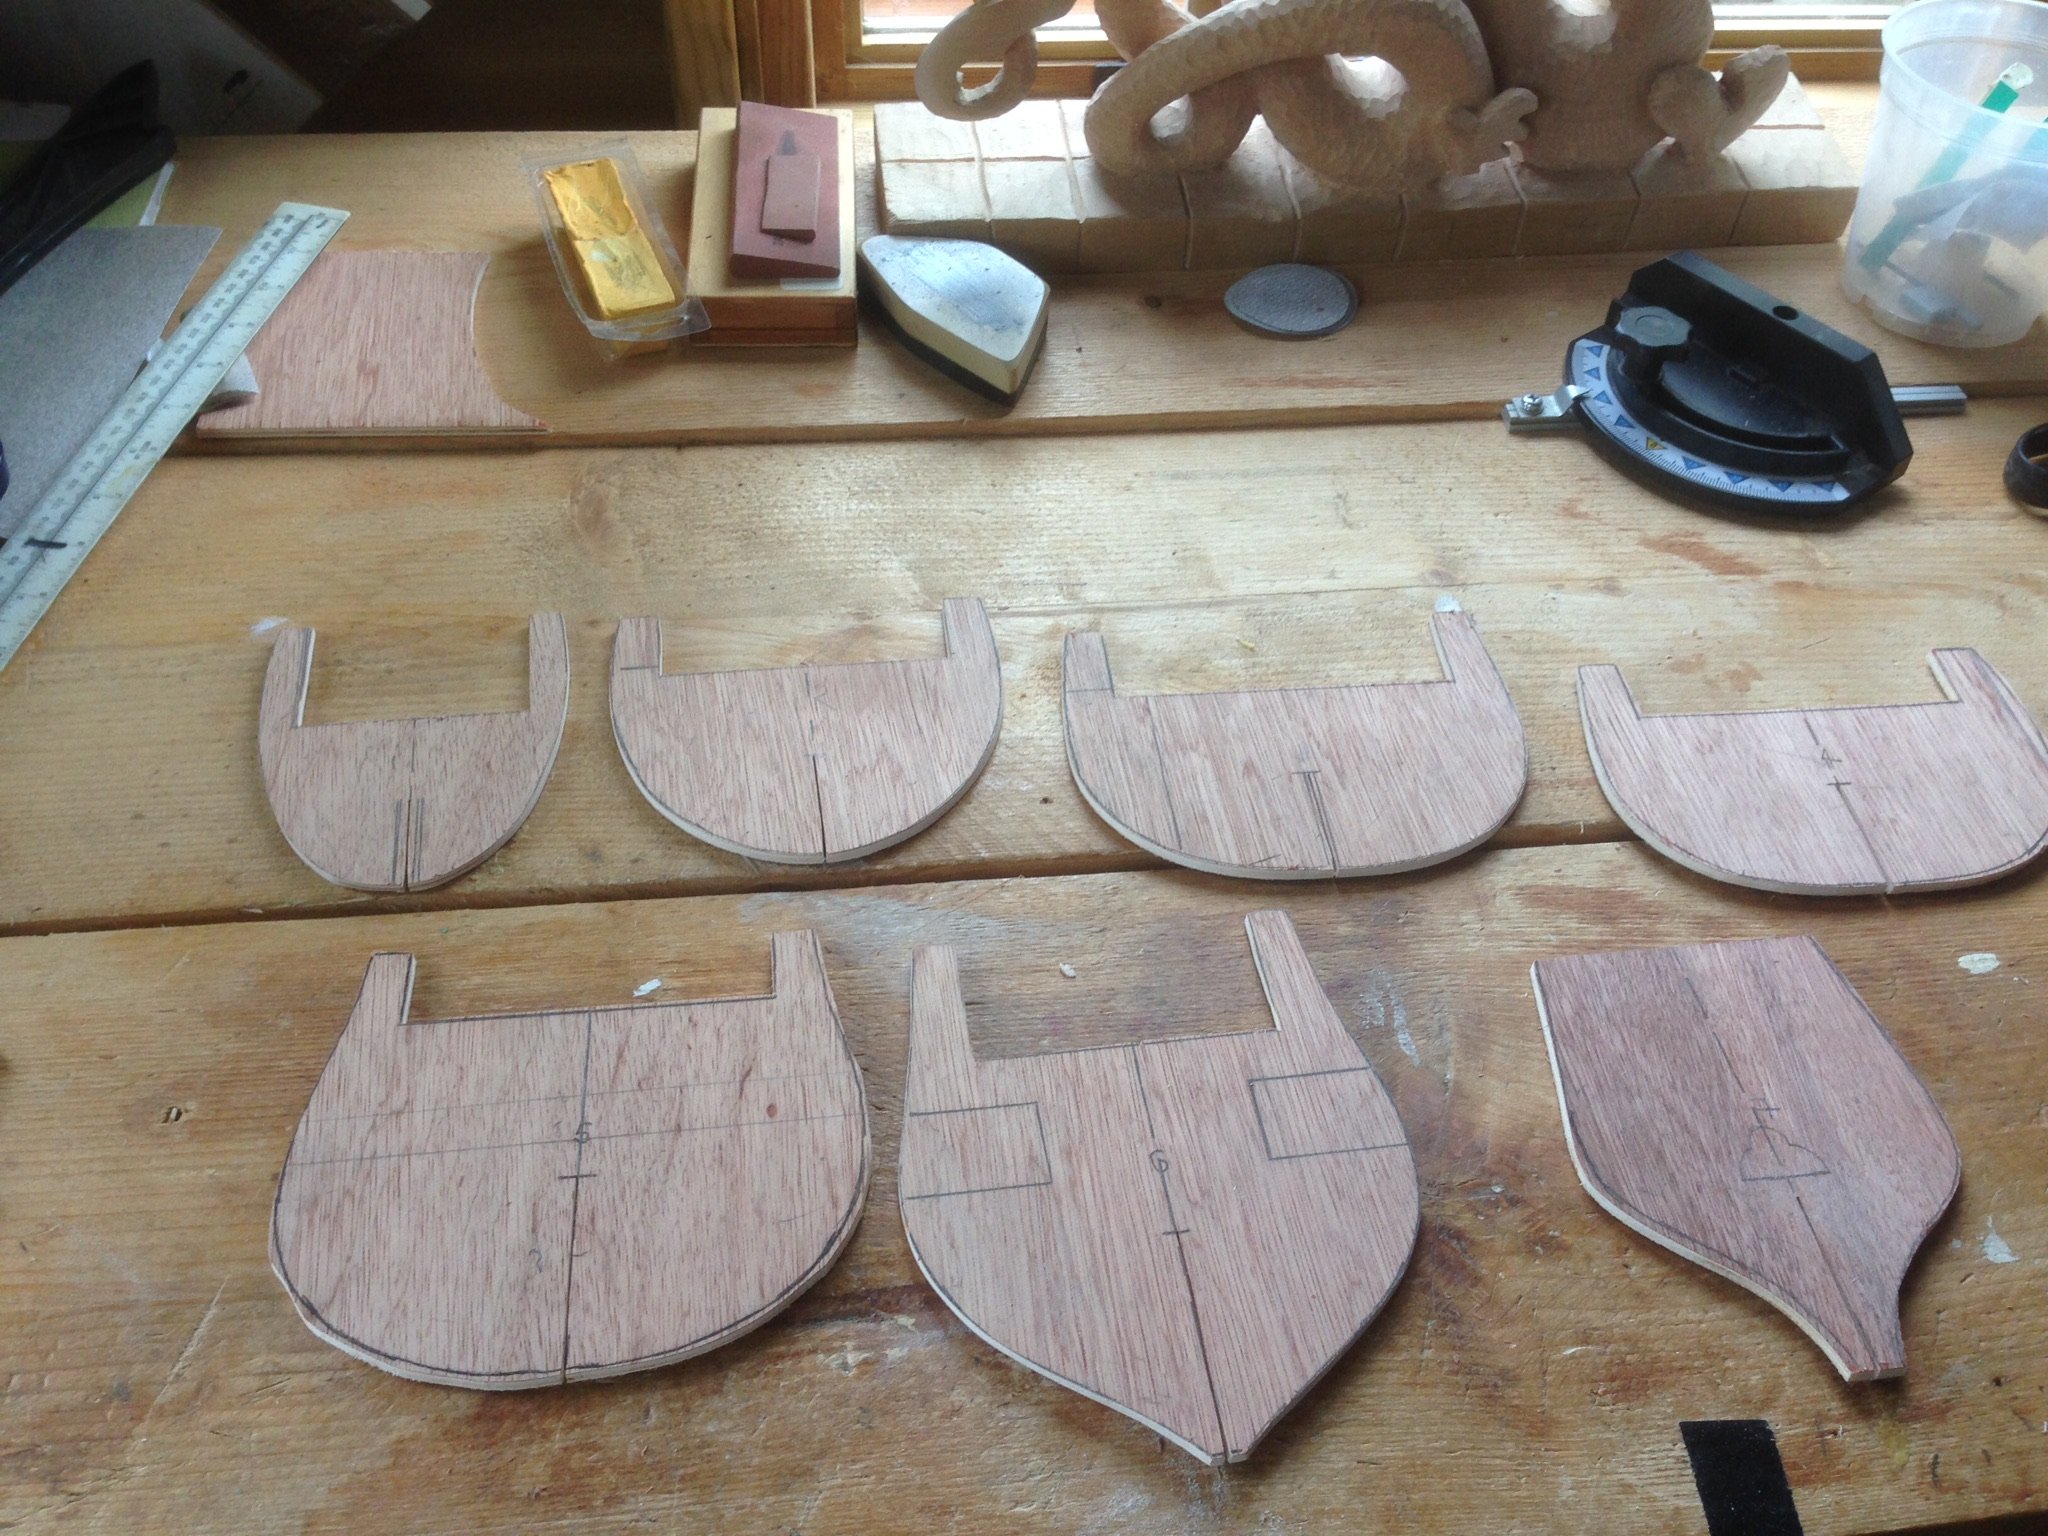
First steps scaling up the plans before copying across onto the plywood. No expense spared here mind, this 5mm 3 ply from B&Q a few months ago cost all of £ 3/4.
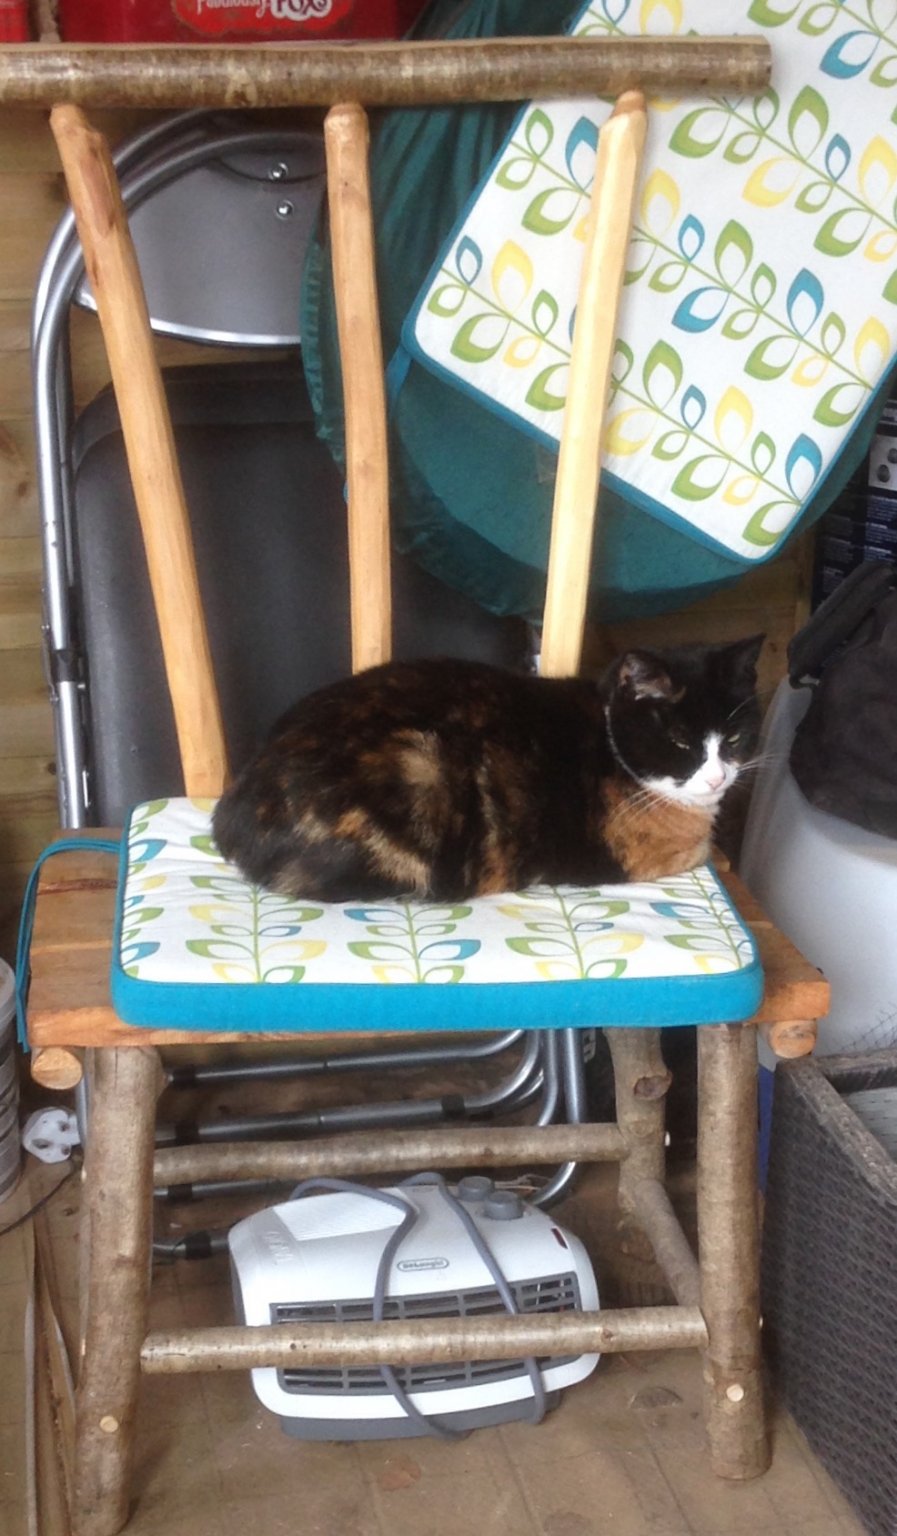
Did a dummy run with a coping saw but as it happened got much better results with my Scheppach bandsaw which I finally seemed to have mastered. The dummy keel was laid on the 11th May. The mouse police looked typically distainful.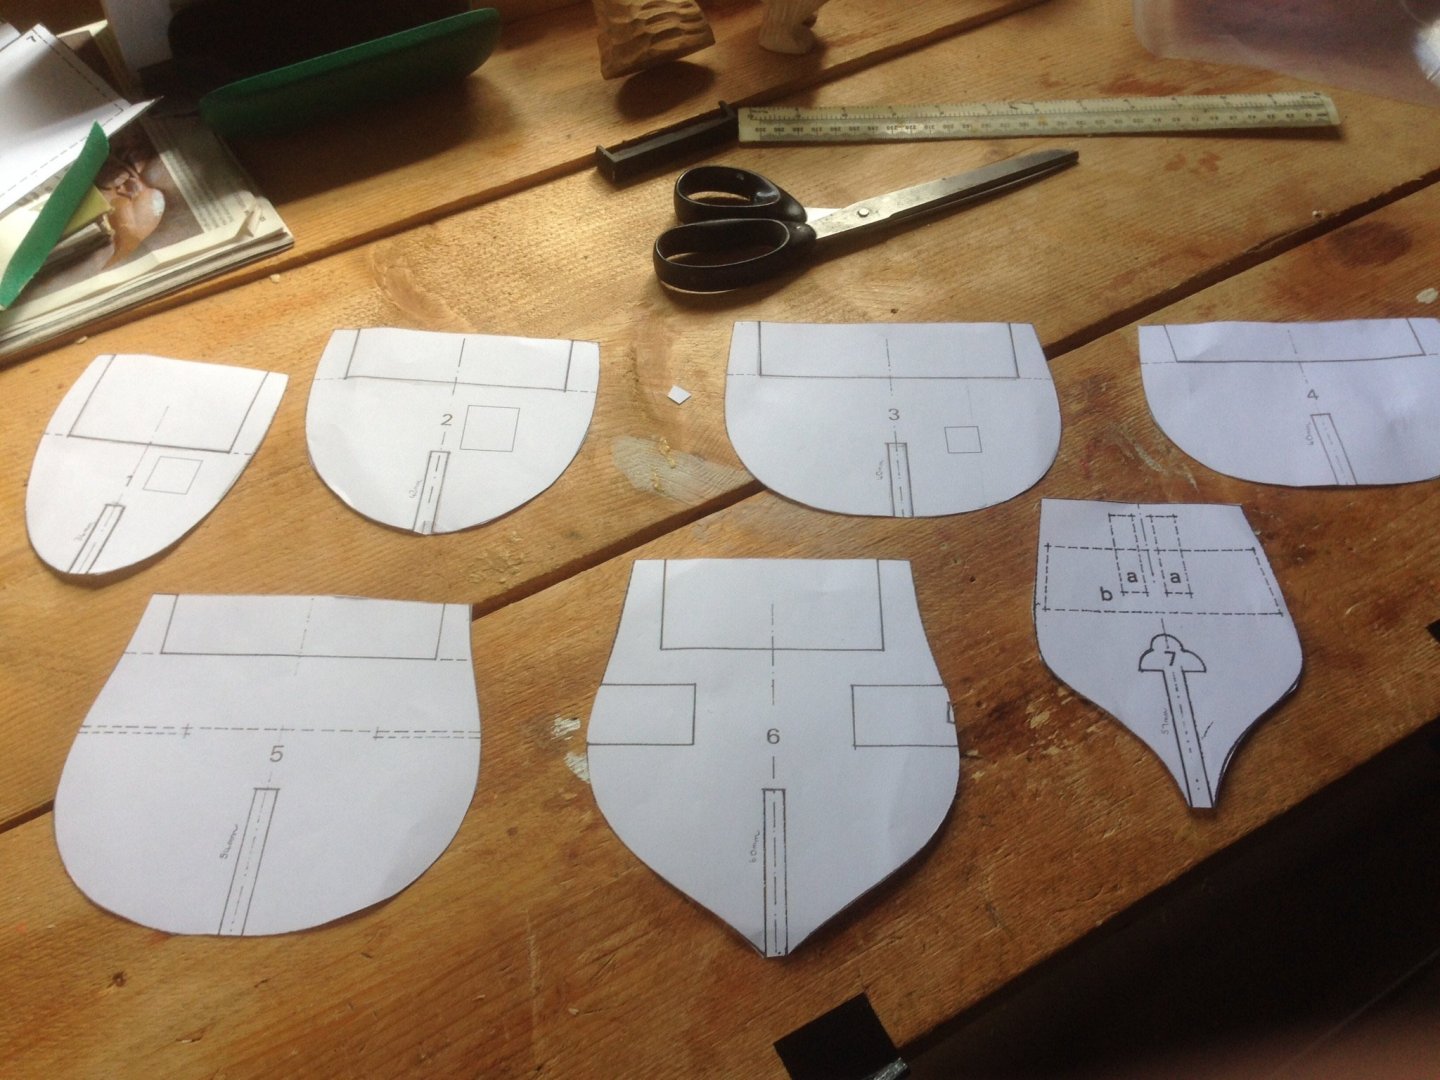


- catopower, mtaylor, Louie da fly and 9 others
-
12
-
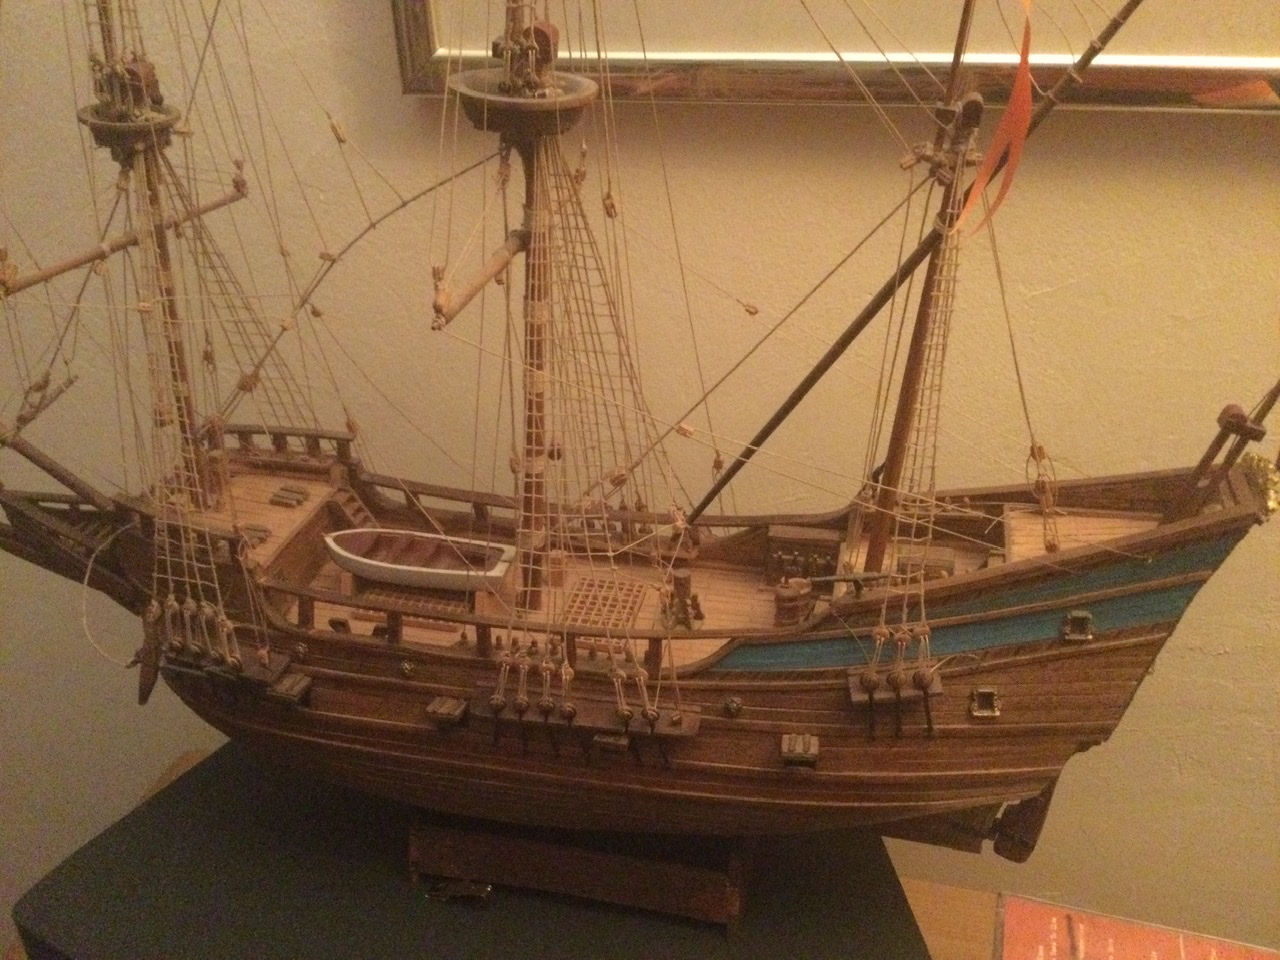
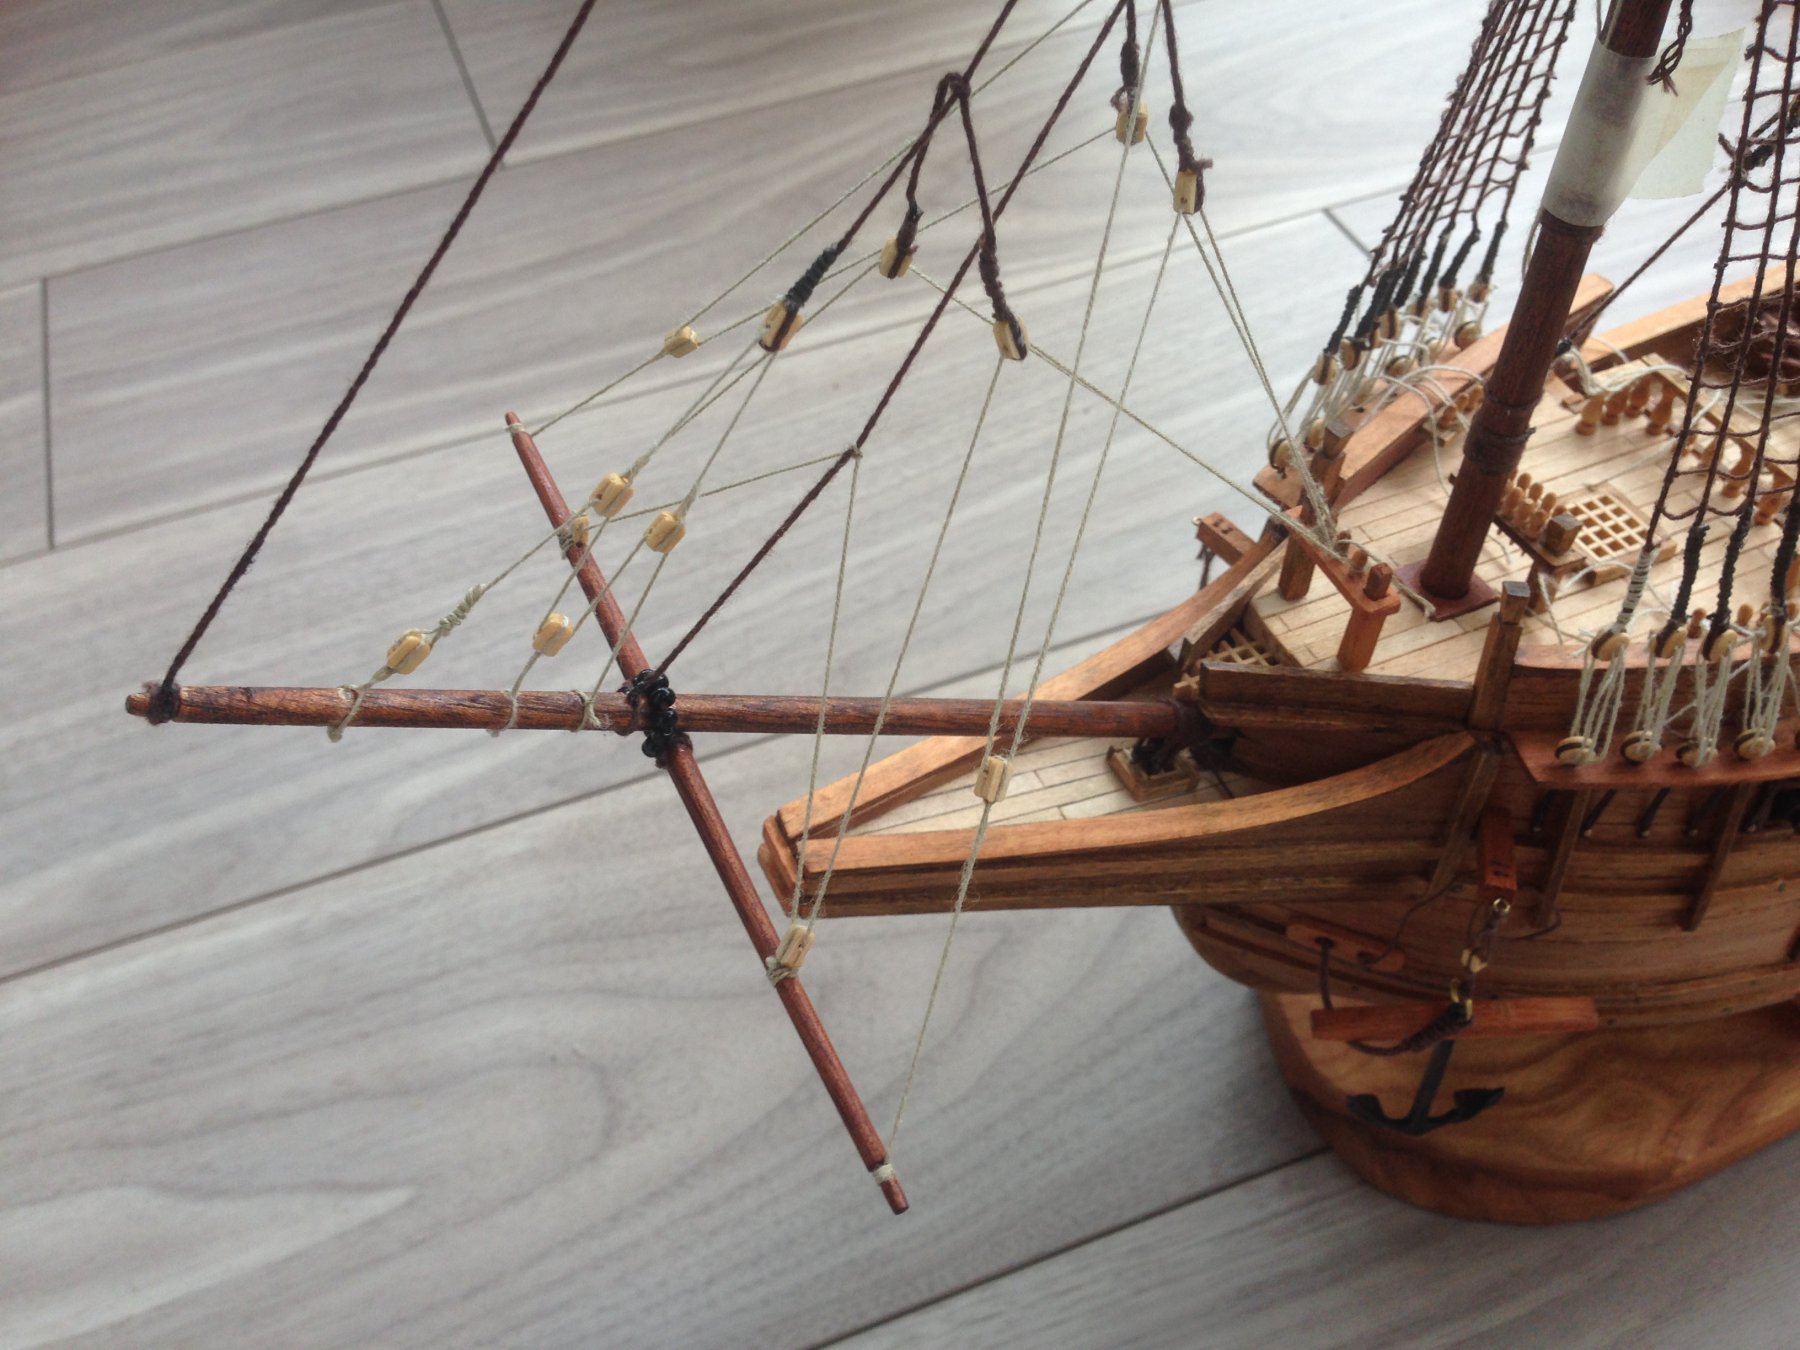
I finally decided to start my first scratch build project after lots and lots of deliberation, I didn’t want something too complex/ ambitious so the starting point was the Amati plans of a kit which is quite small hence the scaling up from 1:50 to 1:25. The Polacca was used by Venetian Fleet to protect the shipping routes of Venice from the Dalmatian, Greek and Turkish Pirates. That lateen sail at the front must have been useful for sailing to windward and perhaps downwind as a primitive gennaker or spinnaker! Expect I’ve a lot to learn but guess I’ll have plenty of time with this Corona virus thing. My version will be over 24” not including the bowsprit so the original would be about 50’ which looks about right. Intend to open up the rear cabin for lights and put a lower deck midships partly visible through the grating.

- mtaylor, Louie da fly, GrandpaPhil and 4 others
-
7
-
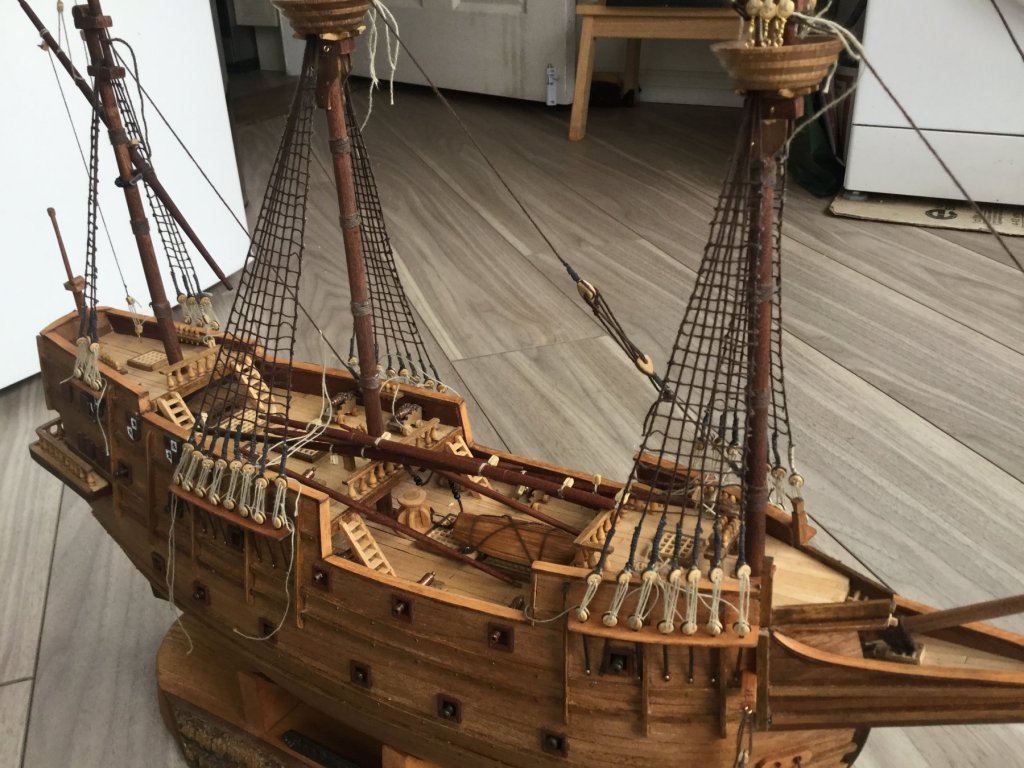
Hi this is an interesting model never come across a build of the Portsmouth. Progressing well.
-
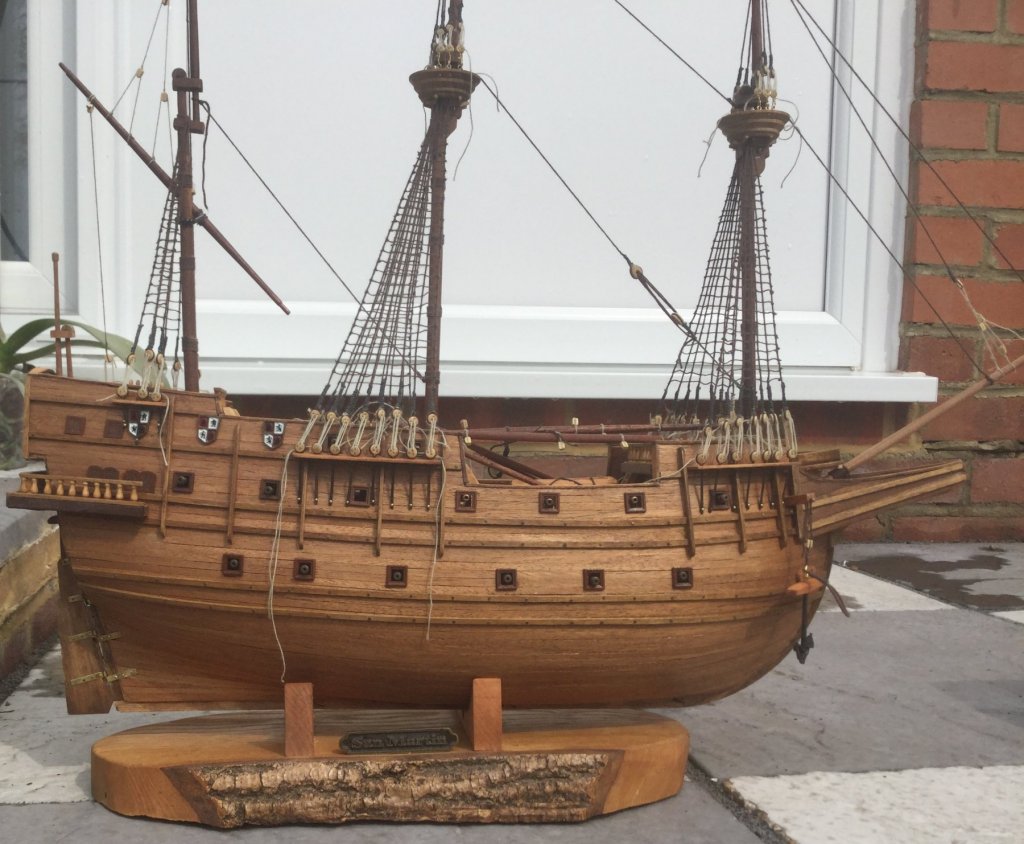
All the yards added with some of the upper rigging. Not going to do all the rigging as I’am still in a mind to redo the ratlines and need access, although at 1:90 scale not sure how much better I would get them. As they say a man has to know his limitations.
- GrandpaPhil and bartejo
-
2
-
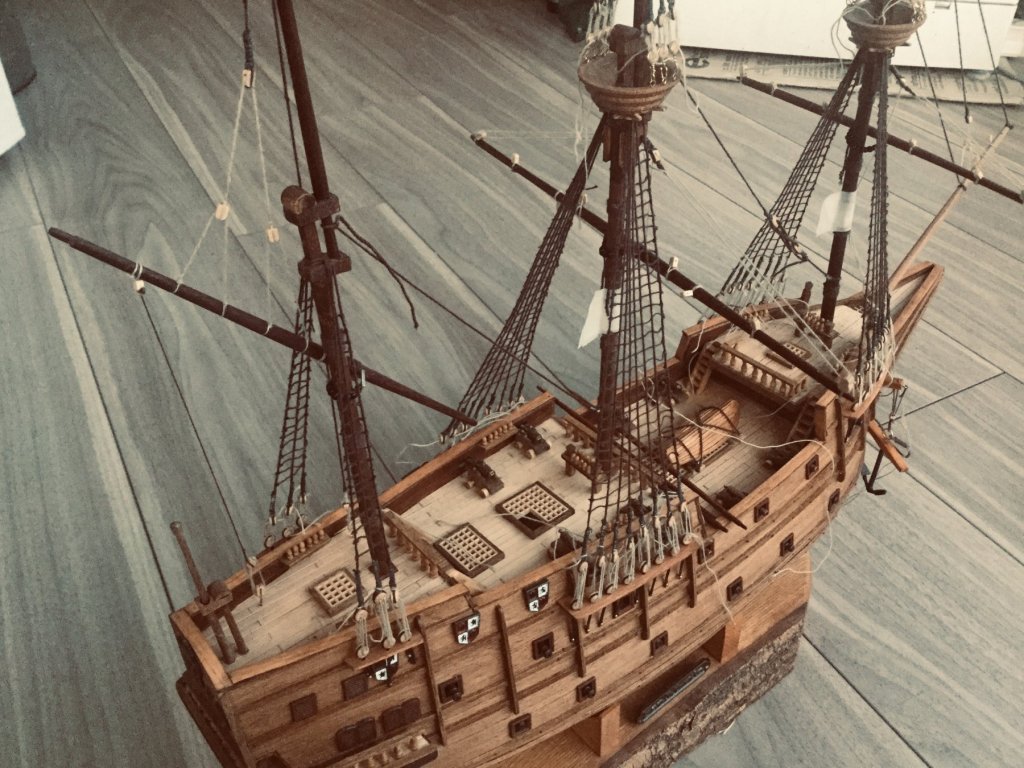
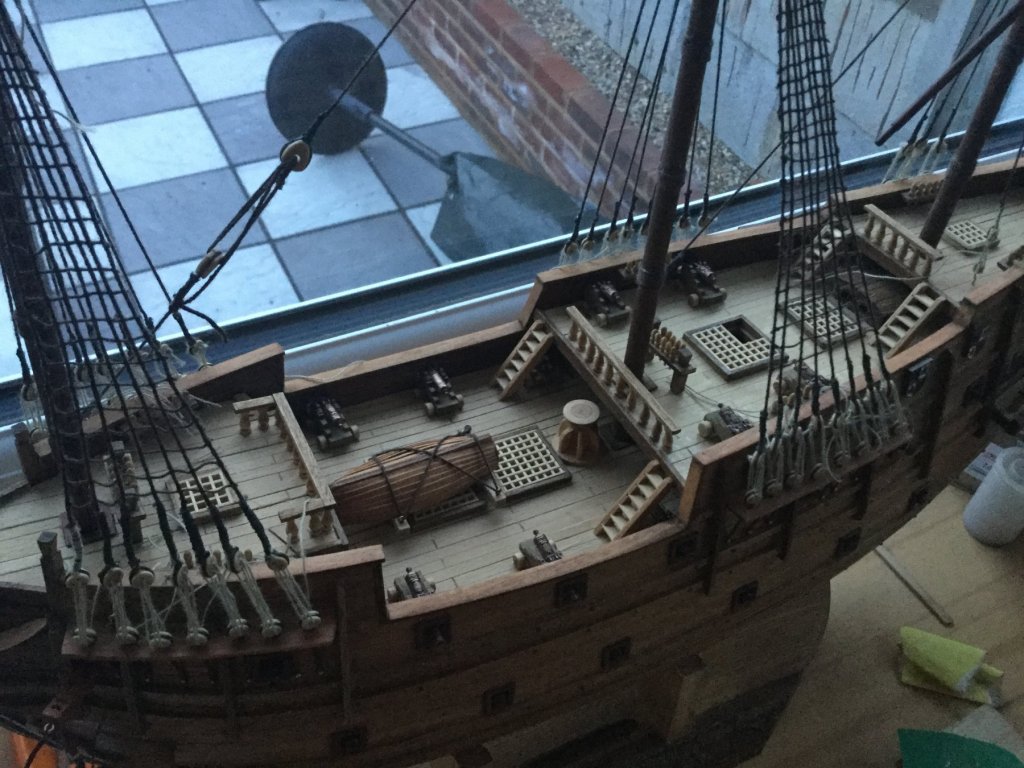
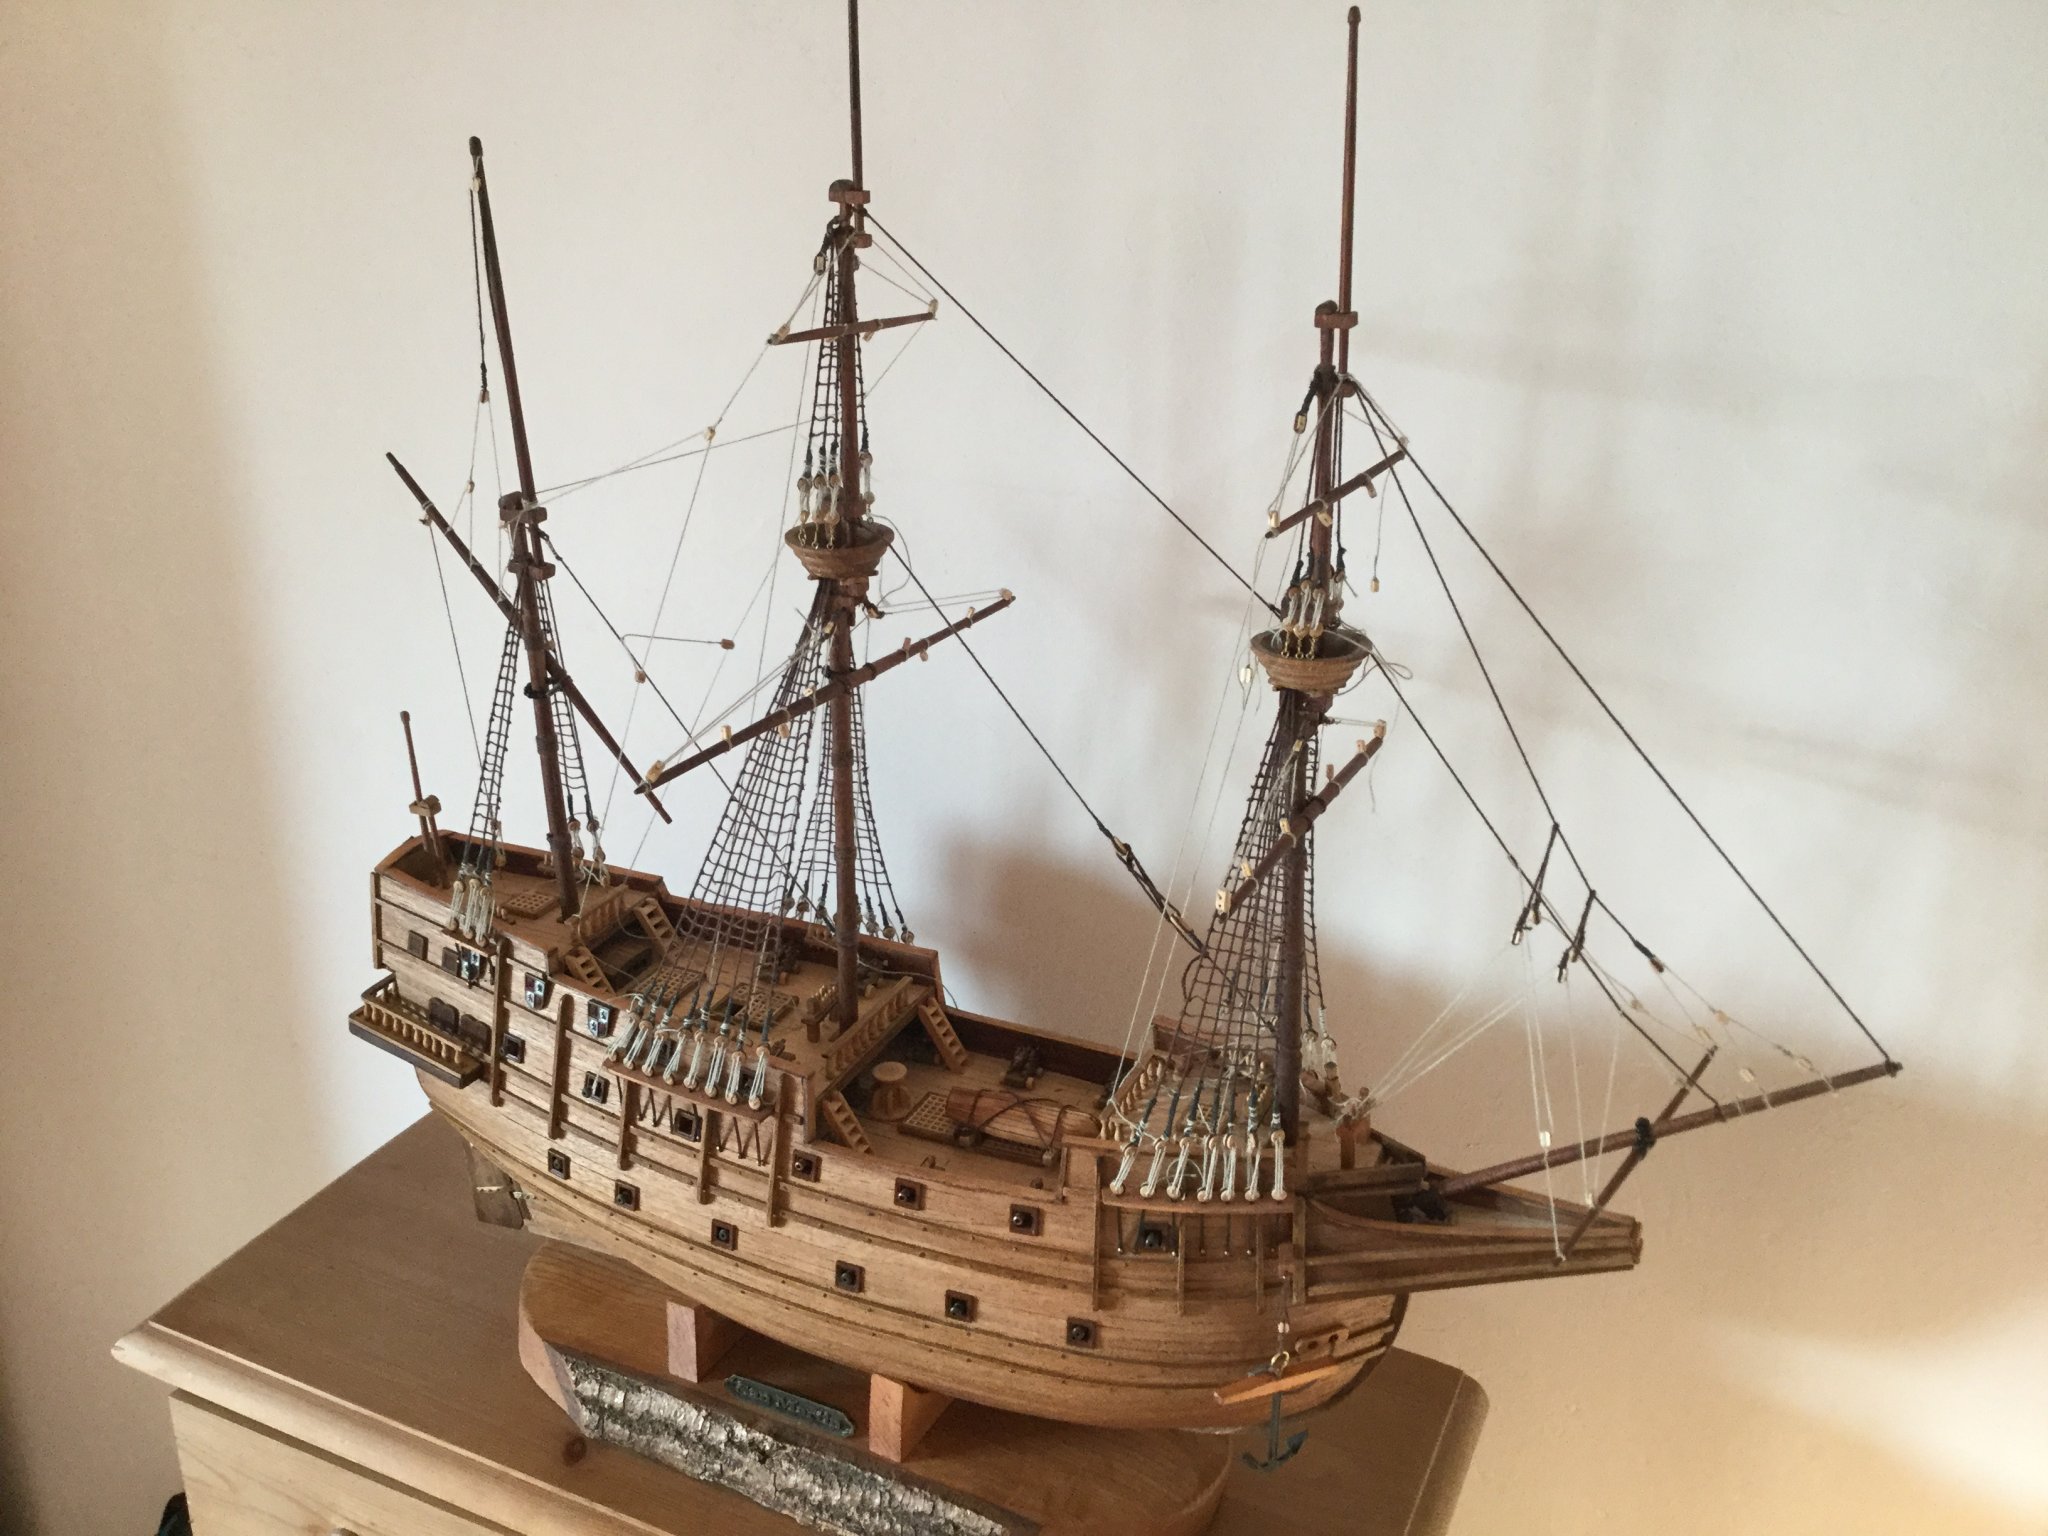
Hi Afonso, just spotted this thread. Have to say I wouldn’t choose the Occre San Martin again, simply because of the lack of historical accuracy and I do like galleons with stacked up forecastles and sterns. I spent quite a lot on stub cannons, a wooden ships boat, more realistic cannons for the deck and extra timber all mentioned in the log. To be fair to Occre it is a budget model and you get what you pay for. With hindsight would have chosen the San Marcos as it looks more like a 16th galleon based on the paintings of Armada vessels I’ve seen. My next model will be semi scratch at a larger scale once I’ve finished the San Martin hopefully this winter and more historically accurate. Hope this helps.
-
Didn’t it used to be called duck egg grey or blue always thought it was a funny name
-
Well that’s the bowsprit yard added

- Seventynet and GrandpaPhil
-
2
-
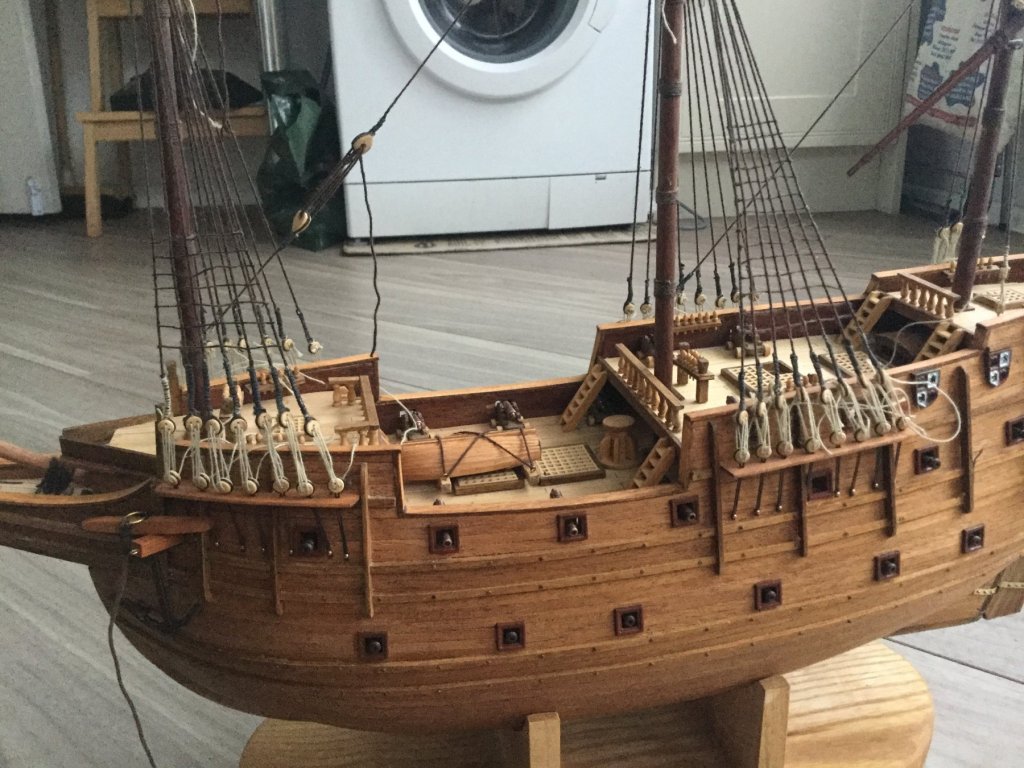
Upper ratlines and yards attached. Occre rigging instruction need much to be desired IMHO so using previously completed Half Moon as guide.
-
Lower yards attached. Finding working on rigging at 1/ 90 scale difficult to say the least
- Seventynet and GrandpaPhil
-
2
-
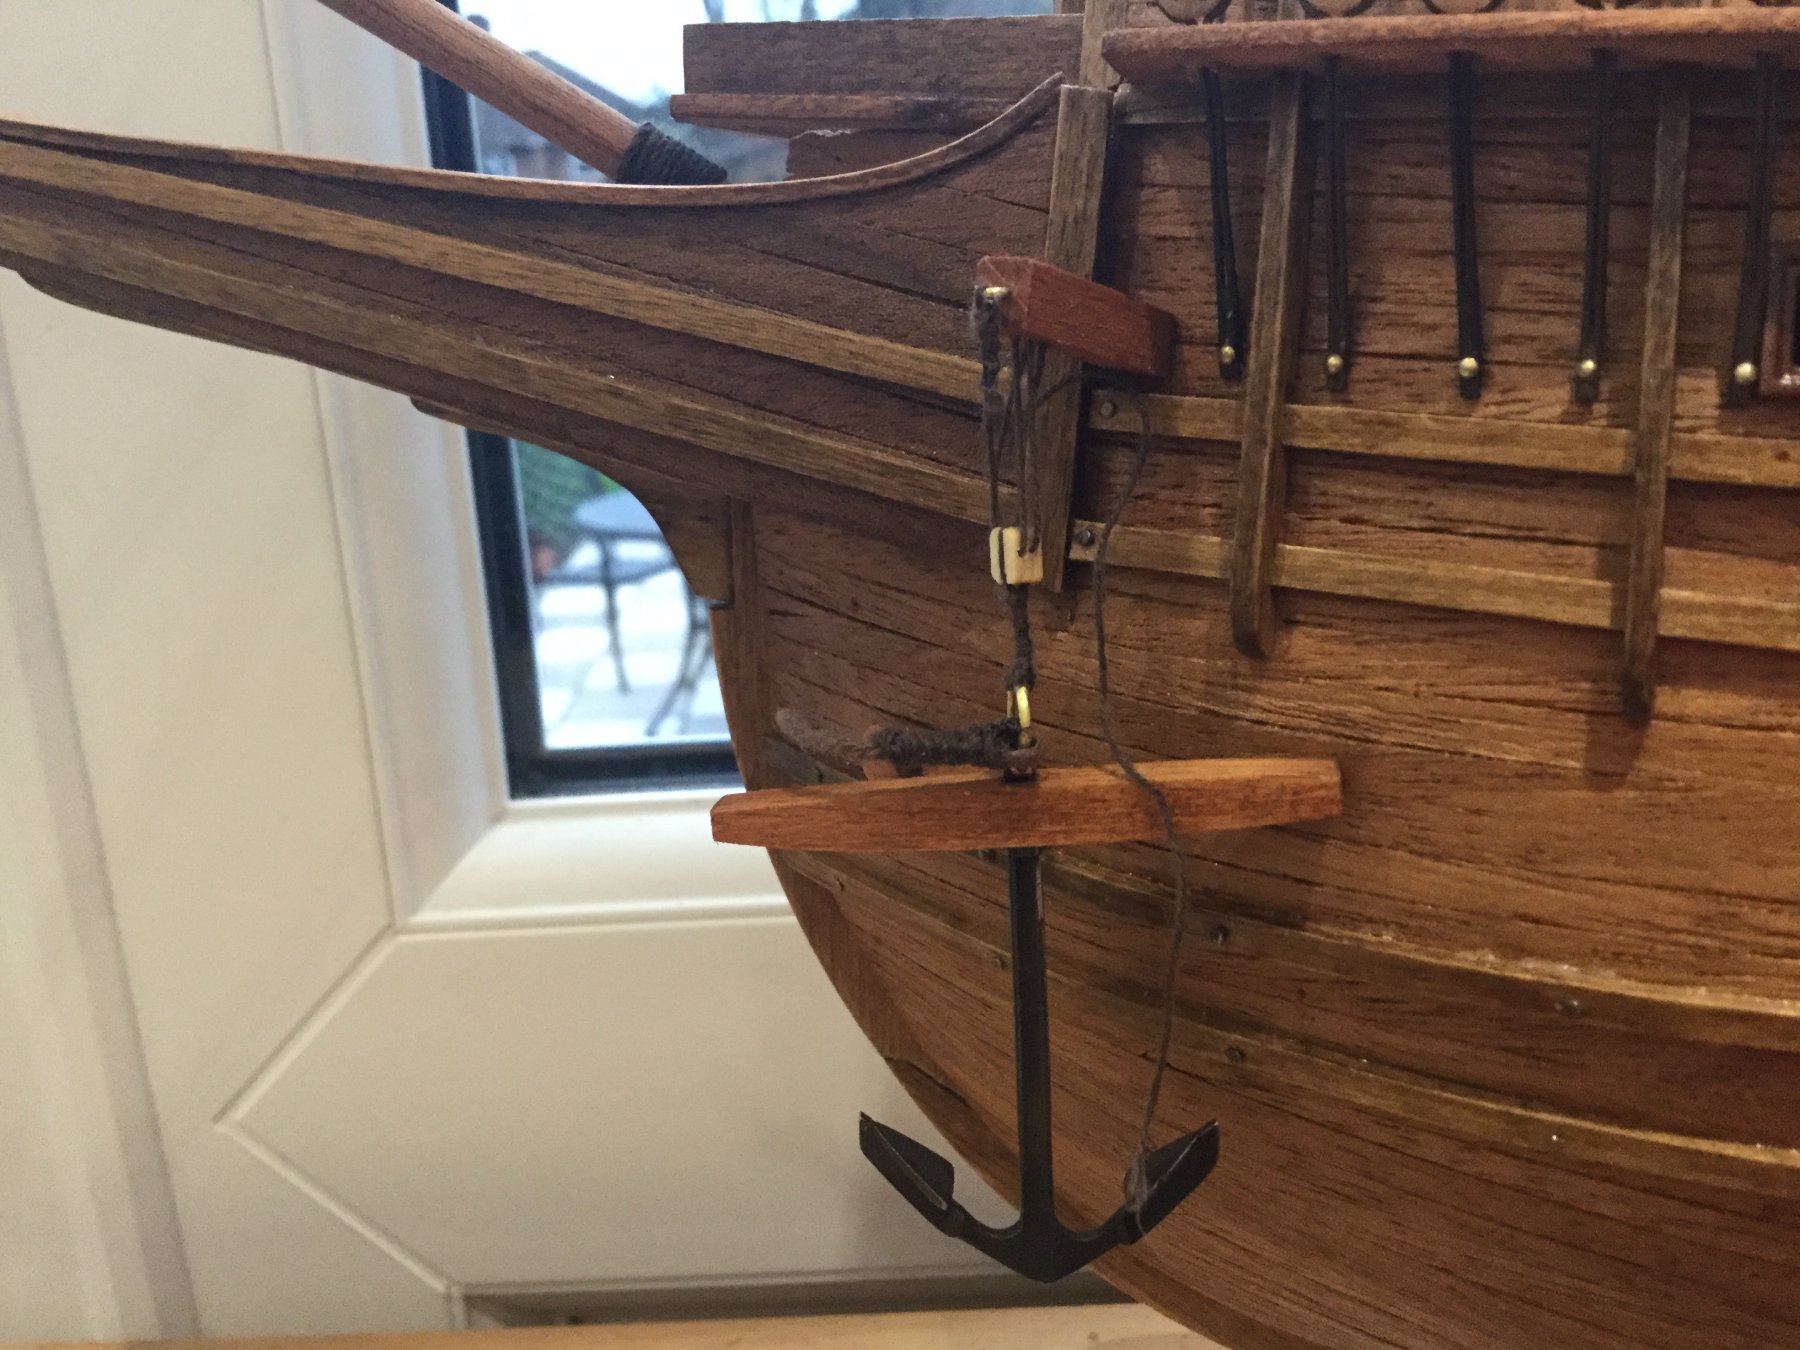
Better view. When I originally added the rubbing strakes using the walnut supplied I coated them with dark oak Danish oil which conveniently has faded over time to match the hull
- GrandpaPhil and Seventynet
-
2
-
-
Thanks for the complements, happy with the hull, less so with the rigging -
-
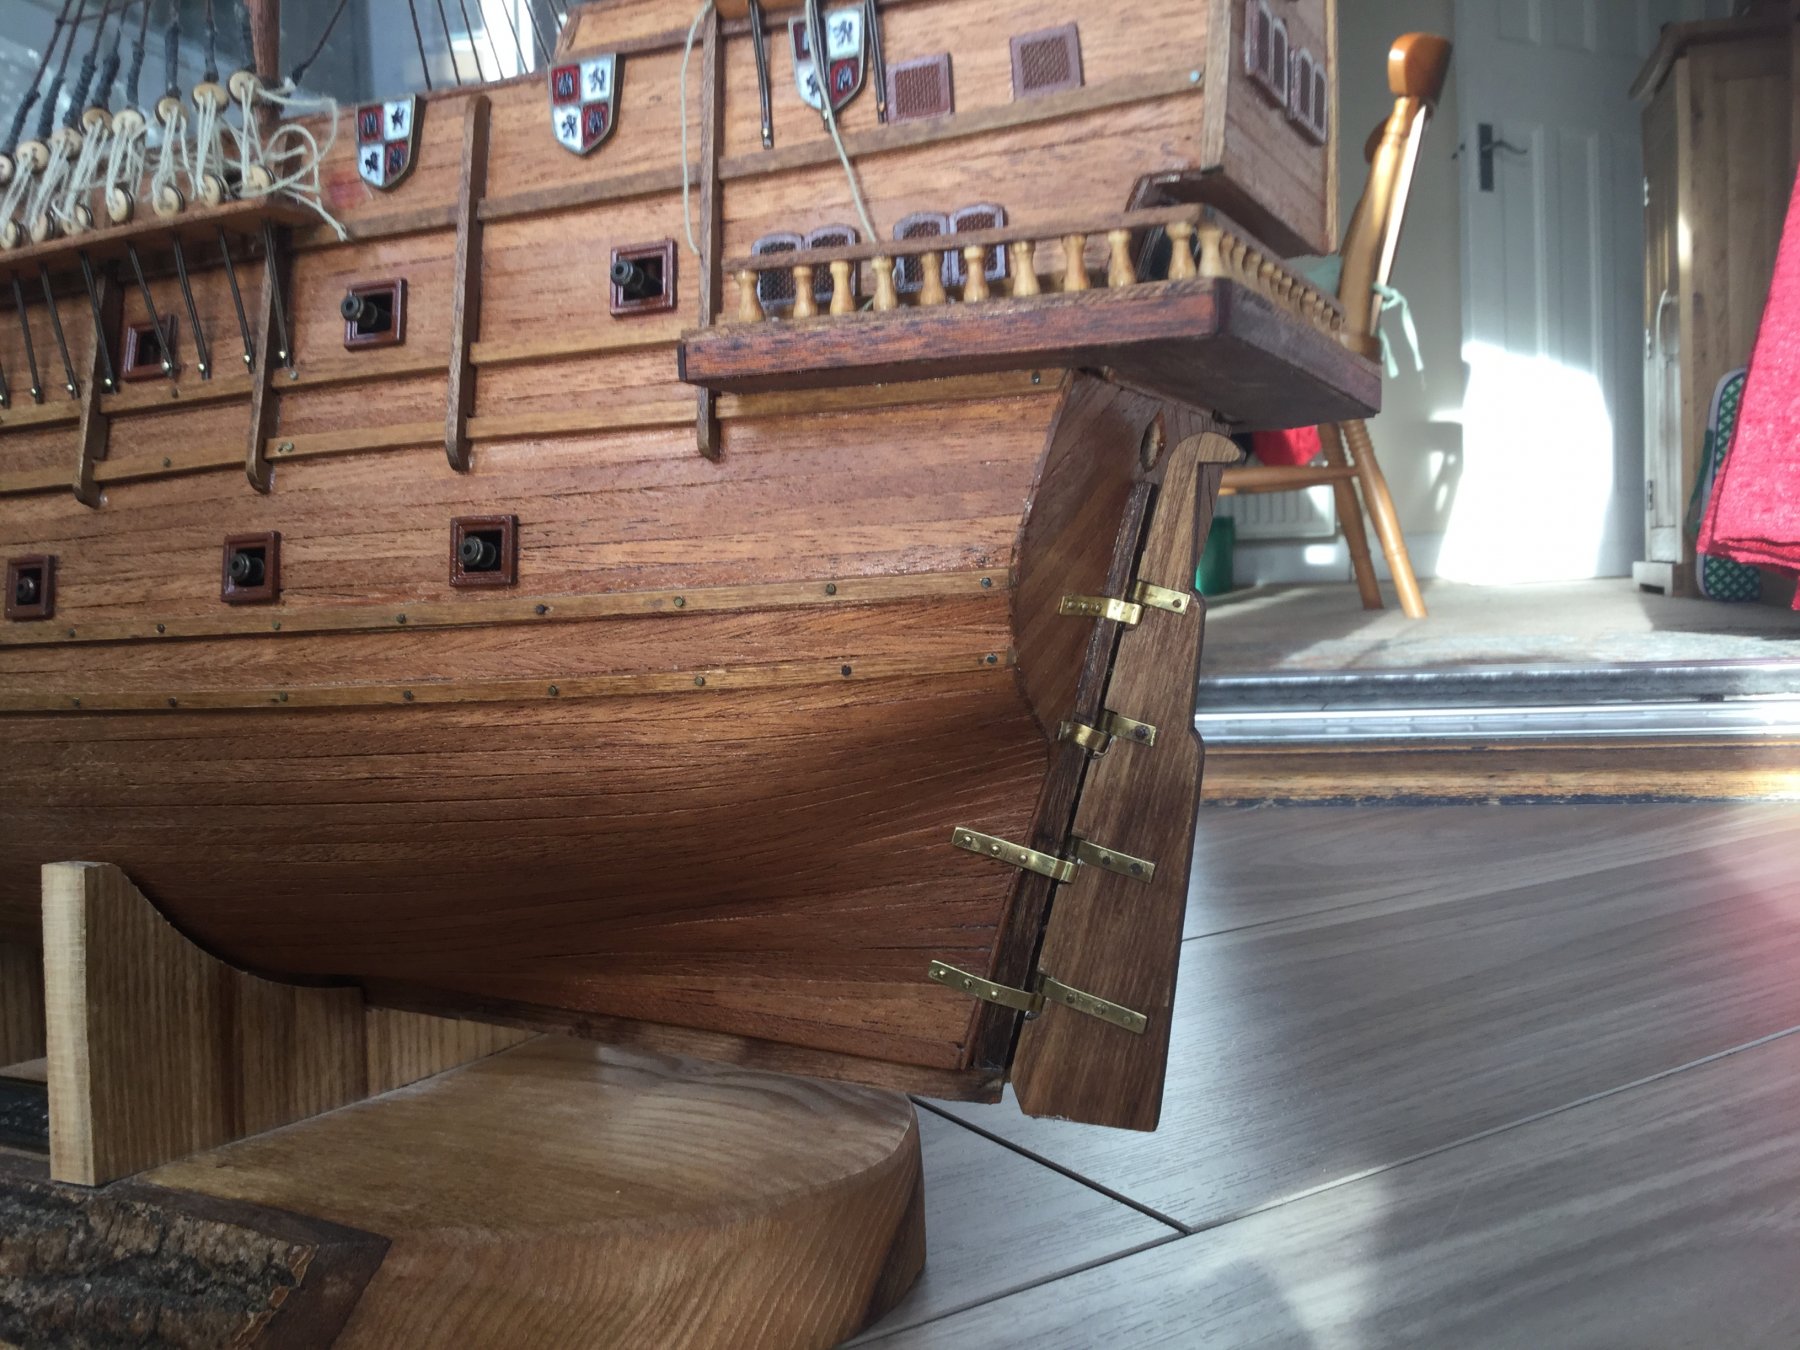
Oh I do hate doing ratlines, going to let the brass hinges etc naturally age. Ratlines as good as I can do as have already redone them once, just going to continue with spars and finish the build and make a decision on whether there good enough.

- Louie da fly, kier and GrandpaPhil
-
3
-
-
Hi, if you’re in the UK look at Timberline’s at Tonbridge website and look at the Decorative and Specialist hardwoods there are some geometric patterns on wood which might suit your needs, expensive but when you consider how long it takes to make a model Not too bad IMO


Polacca by Slowhand - Scale 1:32 - 18th century ship of Venetian Fleet
in - Build logs for subjects built 1501 - 1750
Posted
Did some quick calculations, cannot be 150/1 scale that would be a large vessel 45 metres, and the cabin / deck heights way too high. A 50/1 scale the cabin deck heights way too low. 100/1 still gives quite a long ship deck heights bit too high.
Looks to a scale 75/1 or 64/1 is feasible what does anyone think?