

Slowhand
-
Posts
236 -
Joined
-
Last visited
Content Type
Profiles
Forums
Gallery
Events
Posts posted by Slowhand
-
-
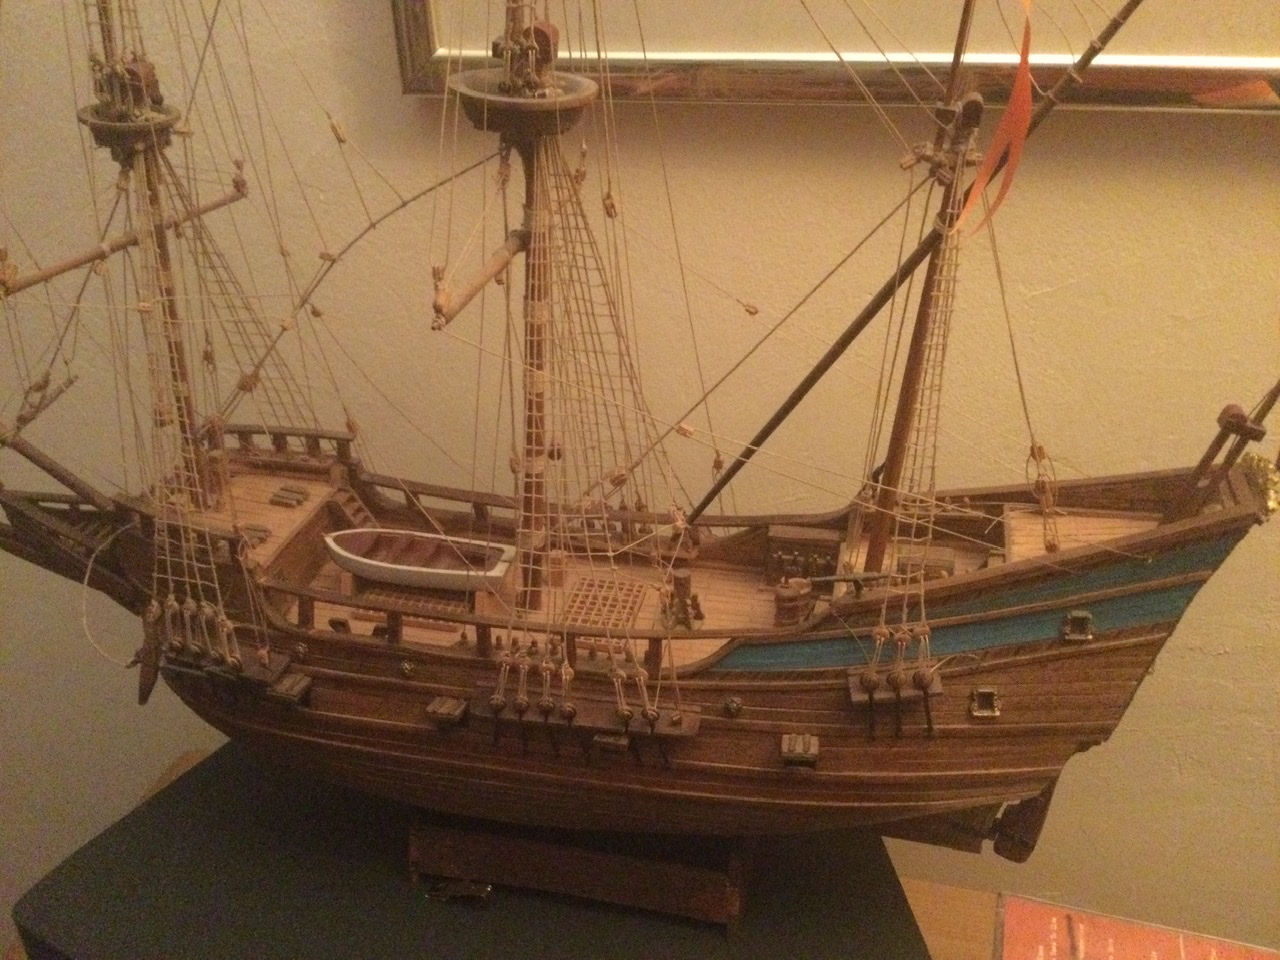
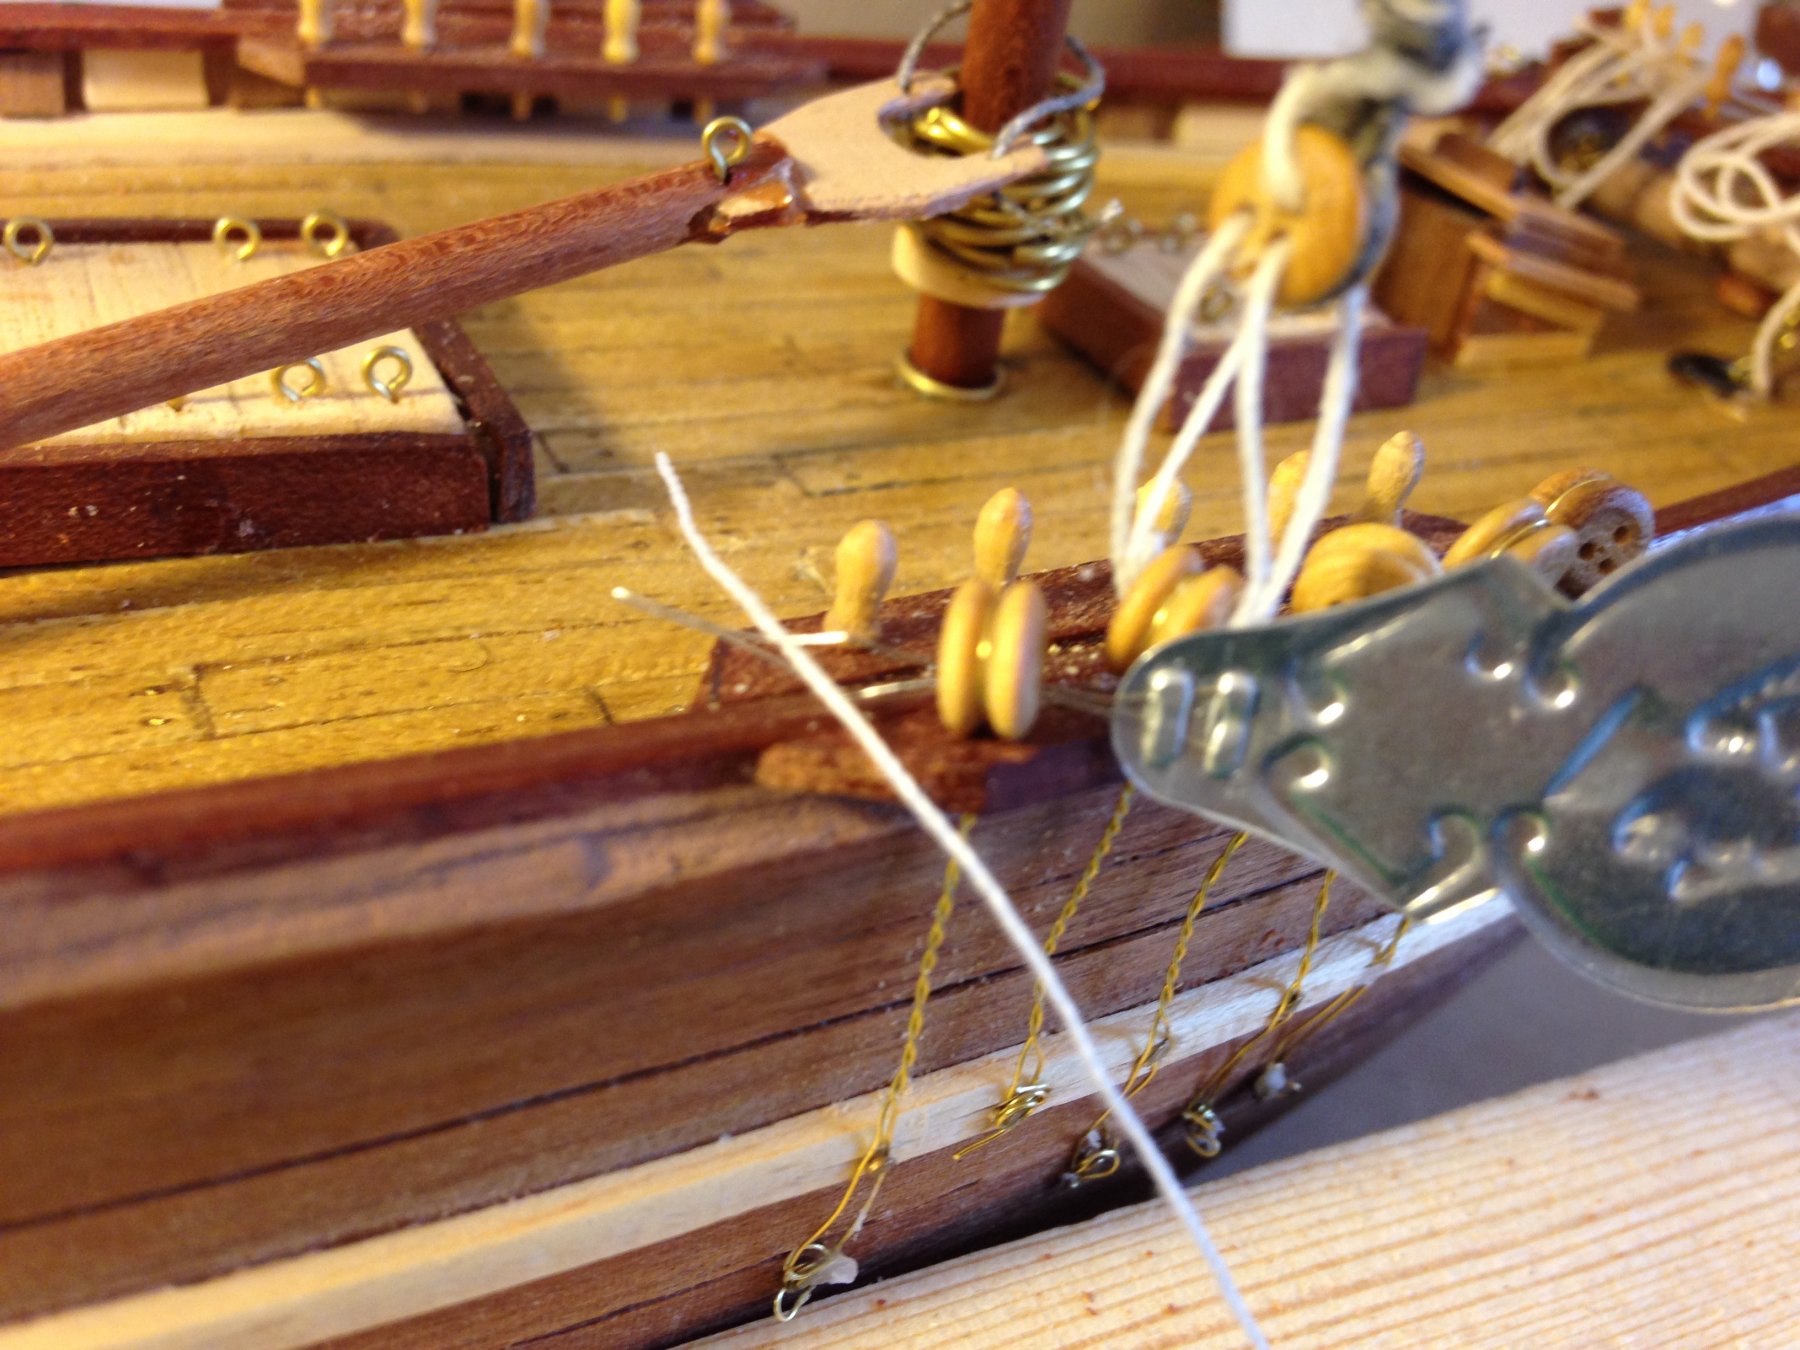
Working through the rigging, shrouds done and the stays, ratlines next
- GrandpaPhil, kier and Seventynet
-
 3
3
-
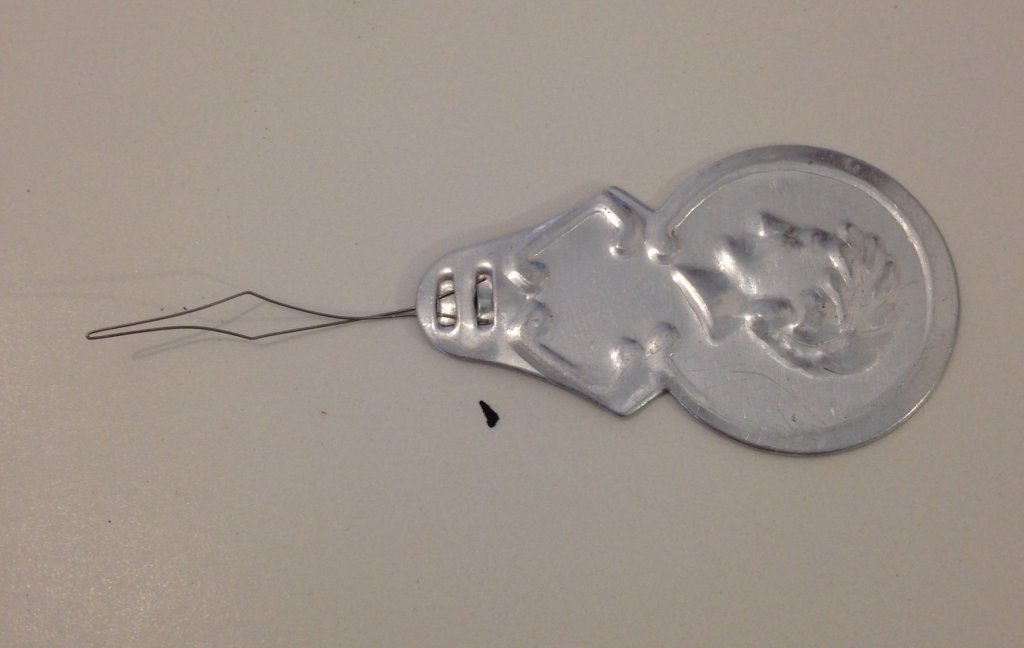
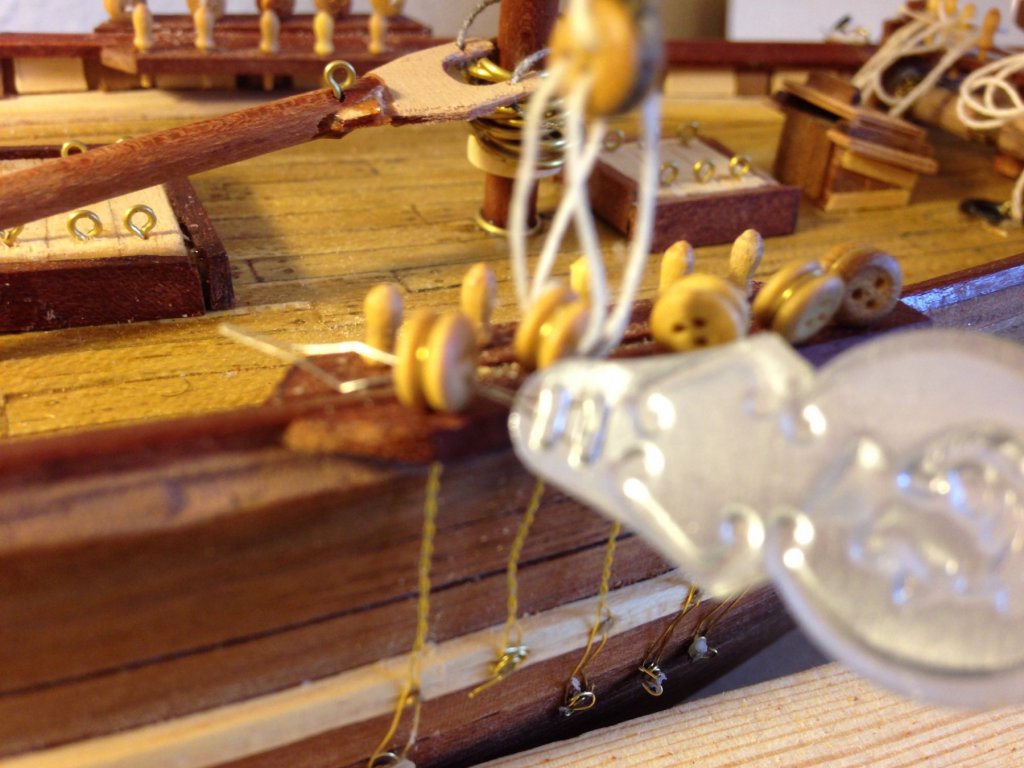
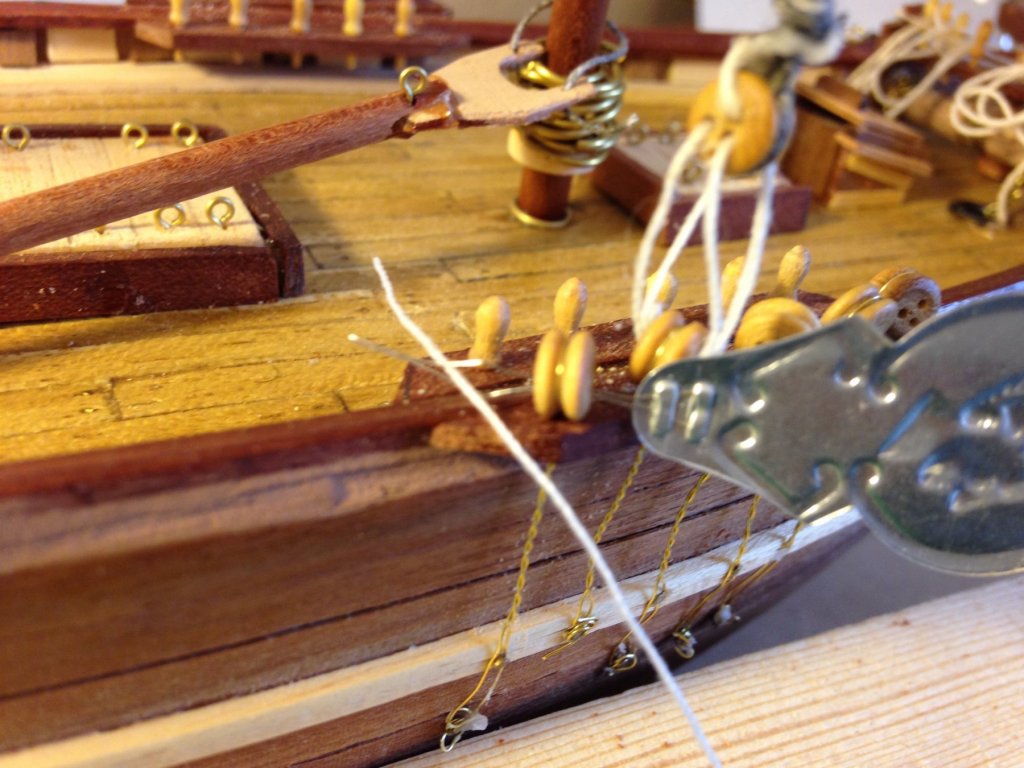
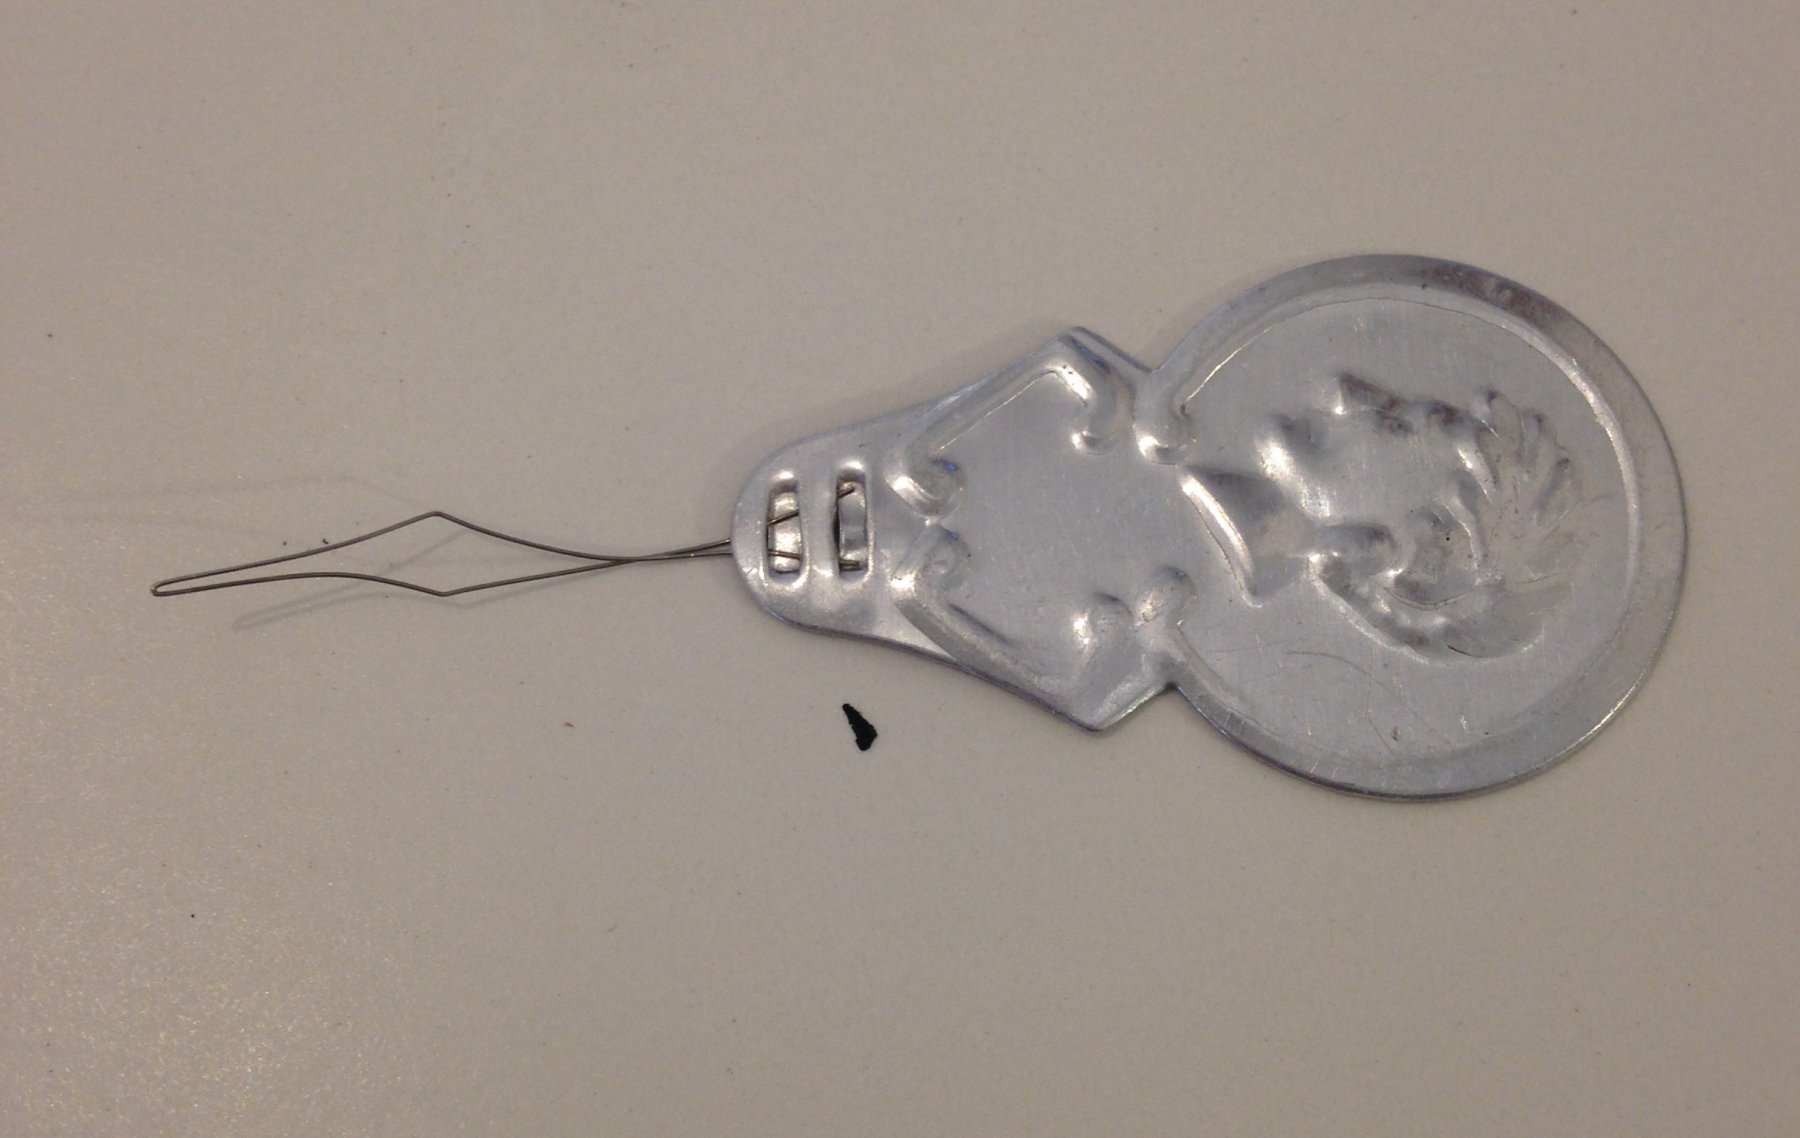
Have been following your thread, no pun intended and used your advice to buy a pack of needle hole threaders from Hobby-craft to thread the deadeye things, thanks.
-
On 1/2/2019 at 1:33 PM, mispeltyoof said:
A simple needle threader has changed my life after spending a couple of hours attempting to thread a deadeye with aged eyes and fingers.

") The threader can be inserted through the tiniest hole ,thread passed through the wire and simply pulled back through. Perfect every time....brilliant
The threader can be inserted through the tiniest hole ,thread passed through the wire and simply pulled back through. Perfect every time....brilliant

-
Zappto, Just spotted your excellent log. How did you do you ratlines, they look really net and tidy.
-
Thanks for the kind words guys, there are so many fantastic builds on this site it’s so easy to get lost in the weeds
-
-
-
-
Shame there’s no further updates, cardboard as a building material has a certain je ne sais pas.
- popeye the sailor and Canute
-
2
-
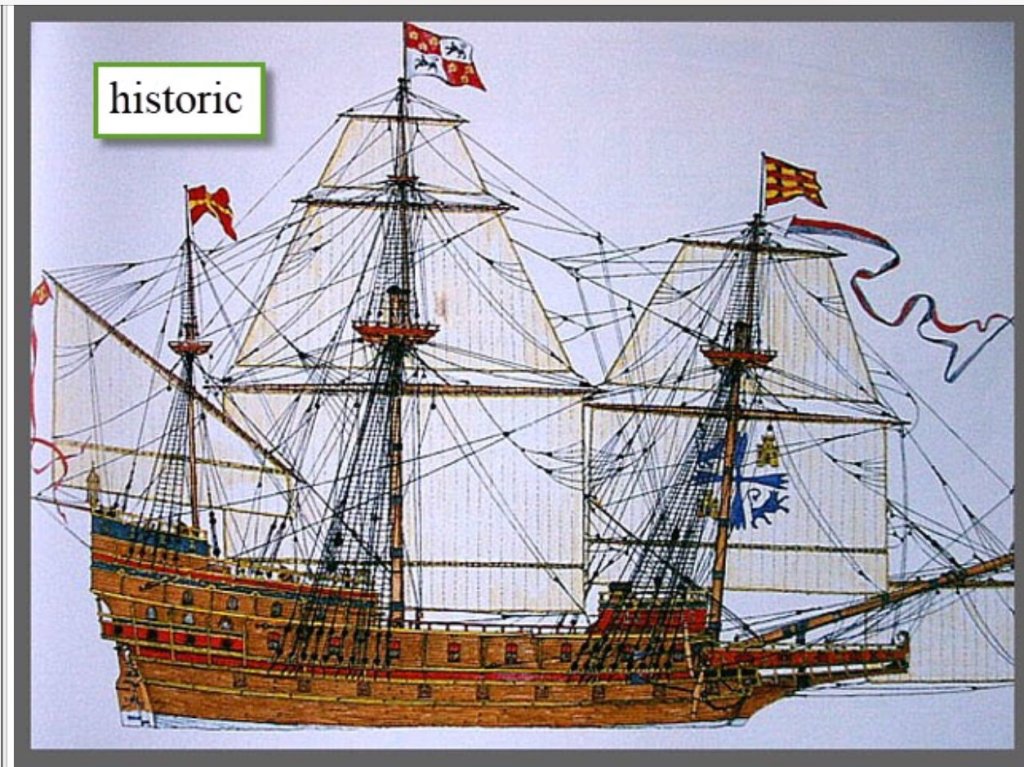
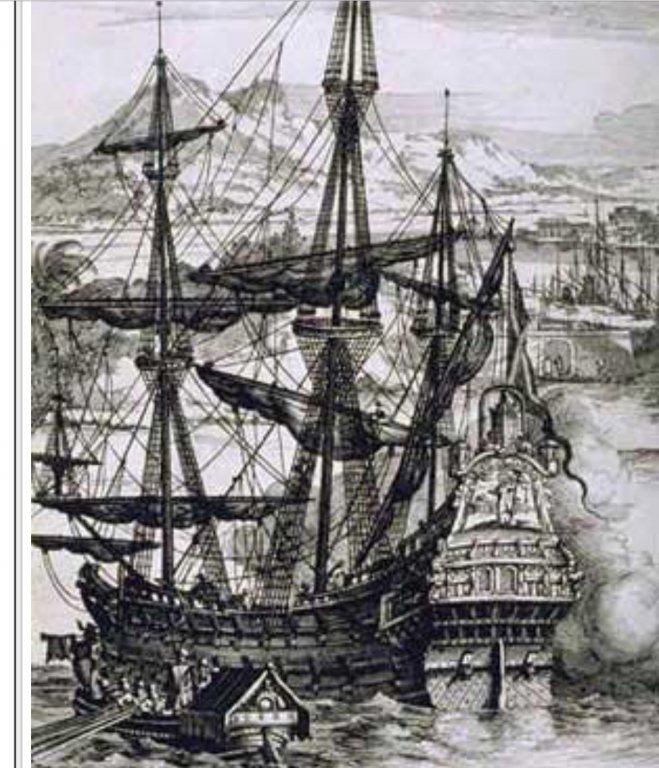
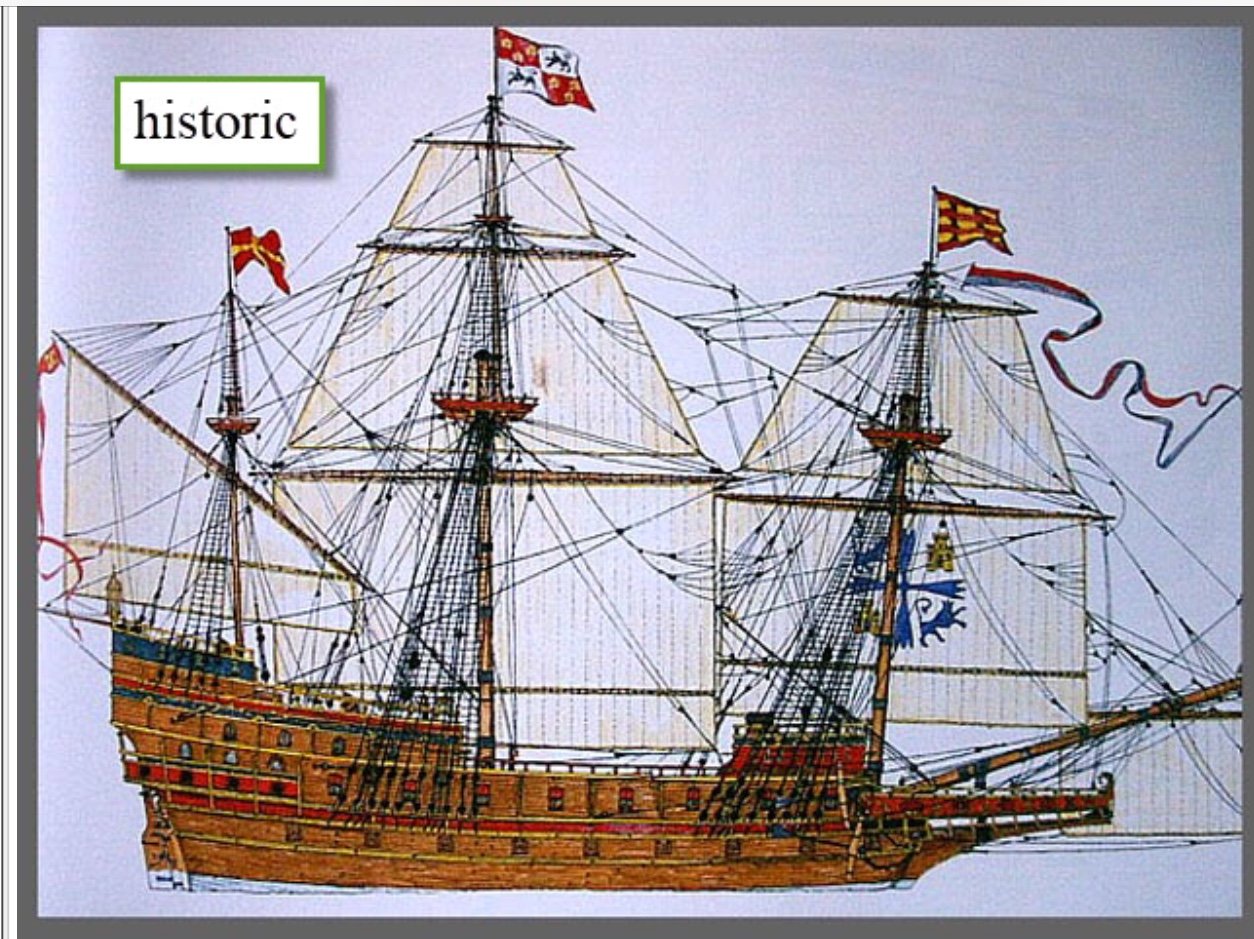
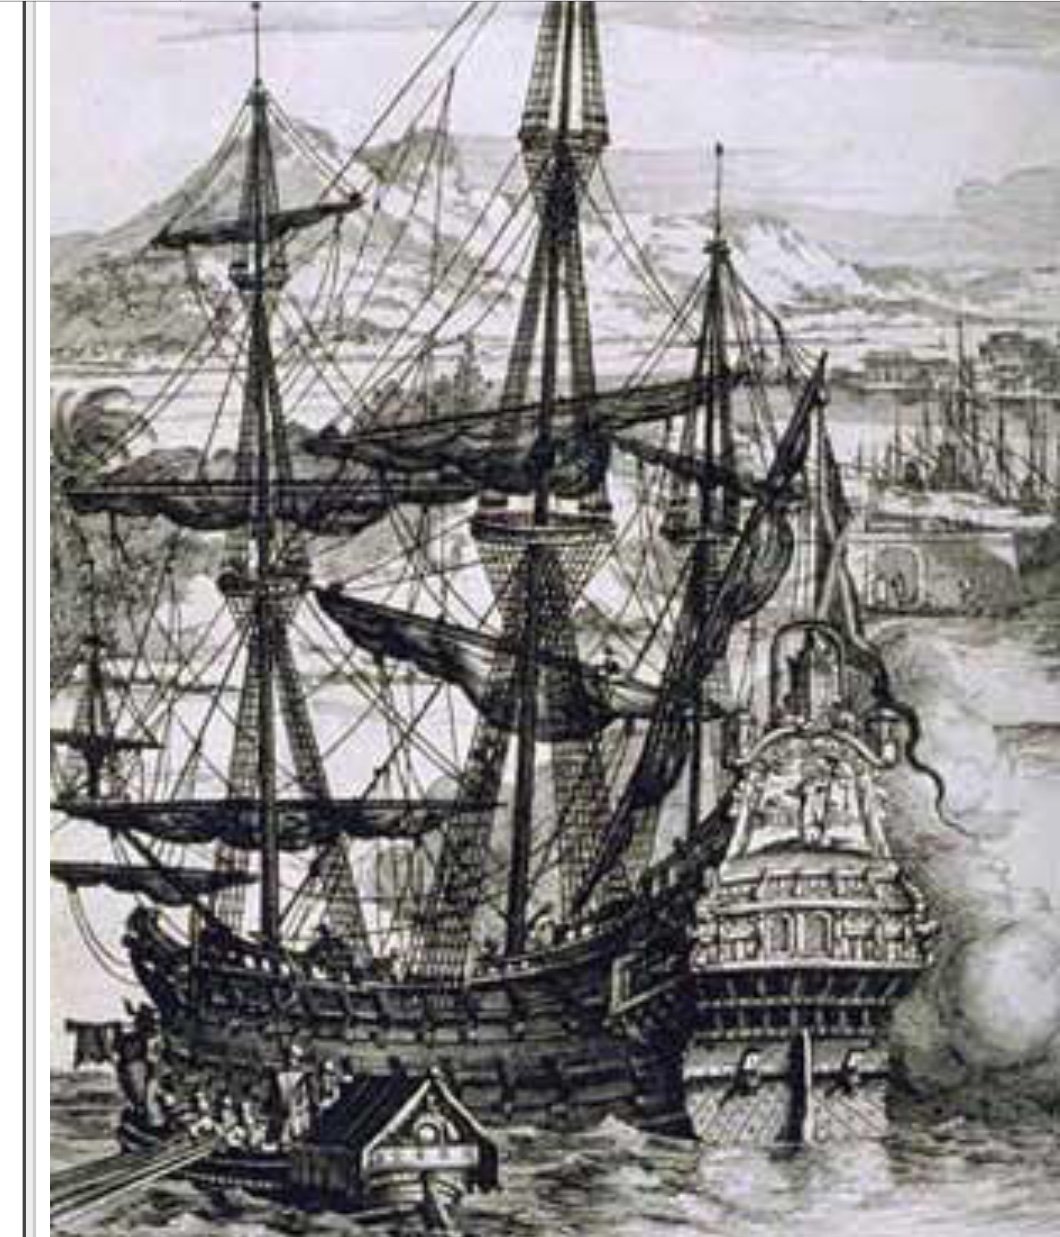
It’s been a long time since my last post, afraid became a bit apathetic about the model as it bears so little resemblance to what the original San Martin must have looked like. On another ship forum website found images of painted glass image of the SM and a lithograph of a major Spanish Galleon of similar period. Concentrated on my traditional wood carving with gouges. Anyway update of progress, shaped all the spars using 18v drill as a mini lathe. Used chuck to hold wood and a piece of sandpaper to taper the spars as powered up the drill. Attached chain plates to new boards and put in place ready for staining before gluing.
- Seventynet and kier
-
2
-
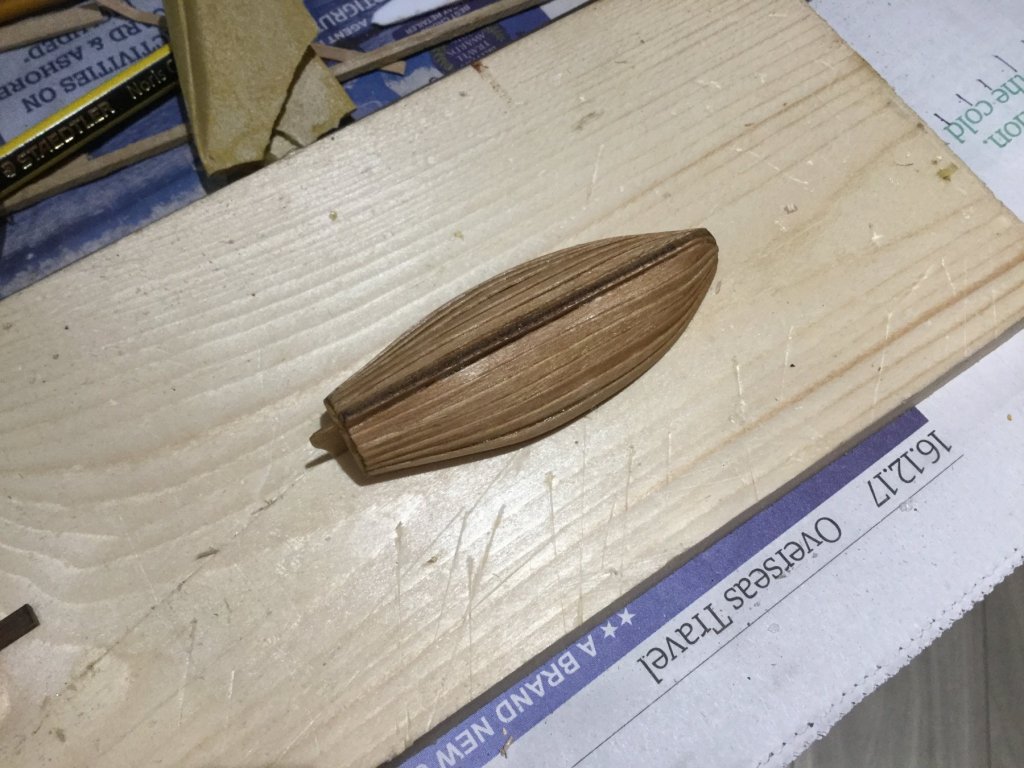
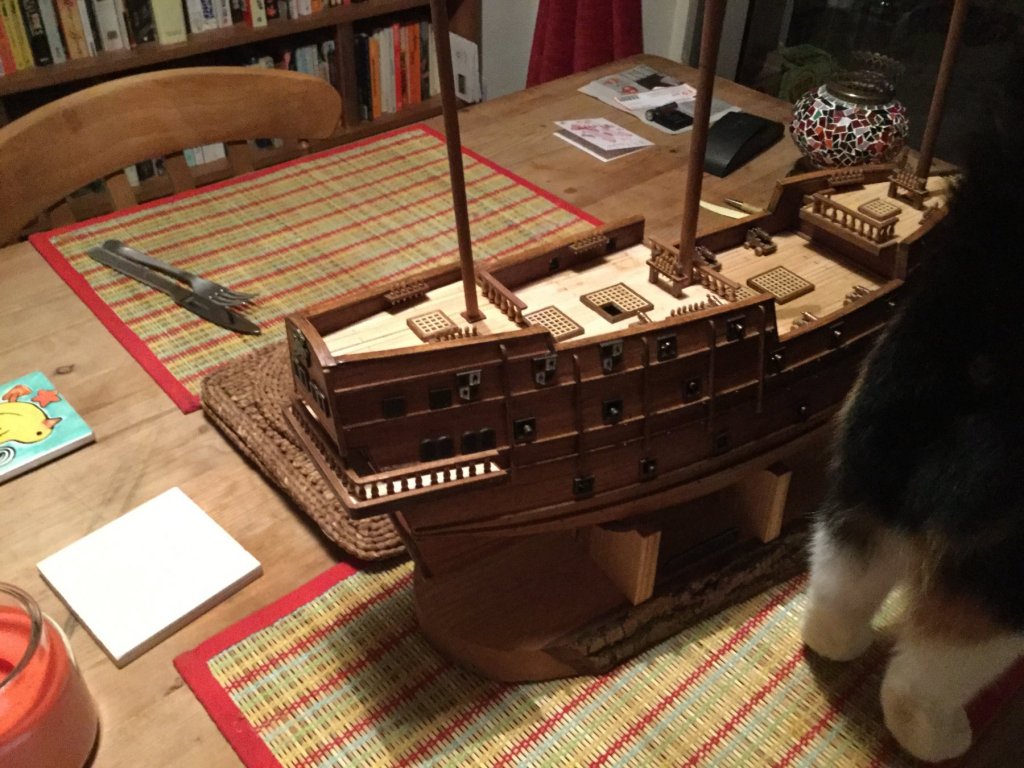
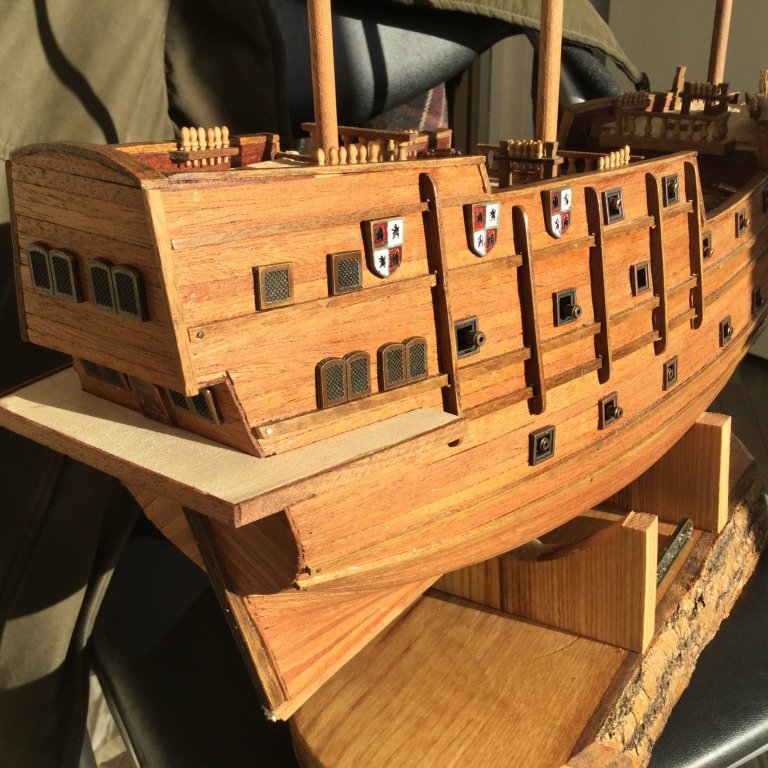
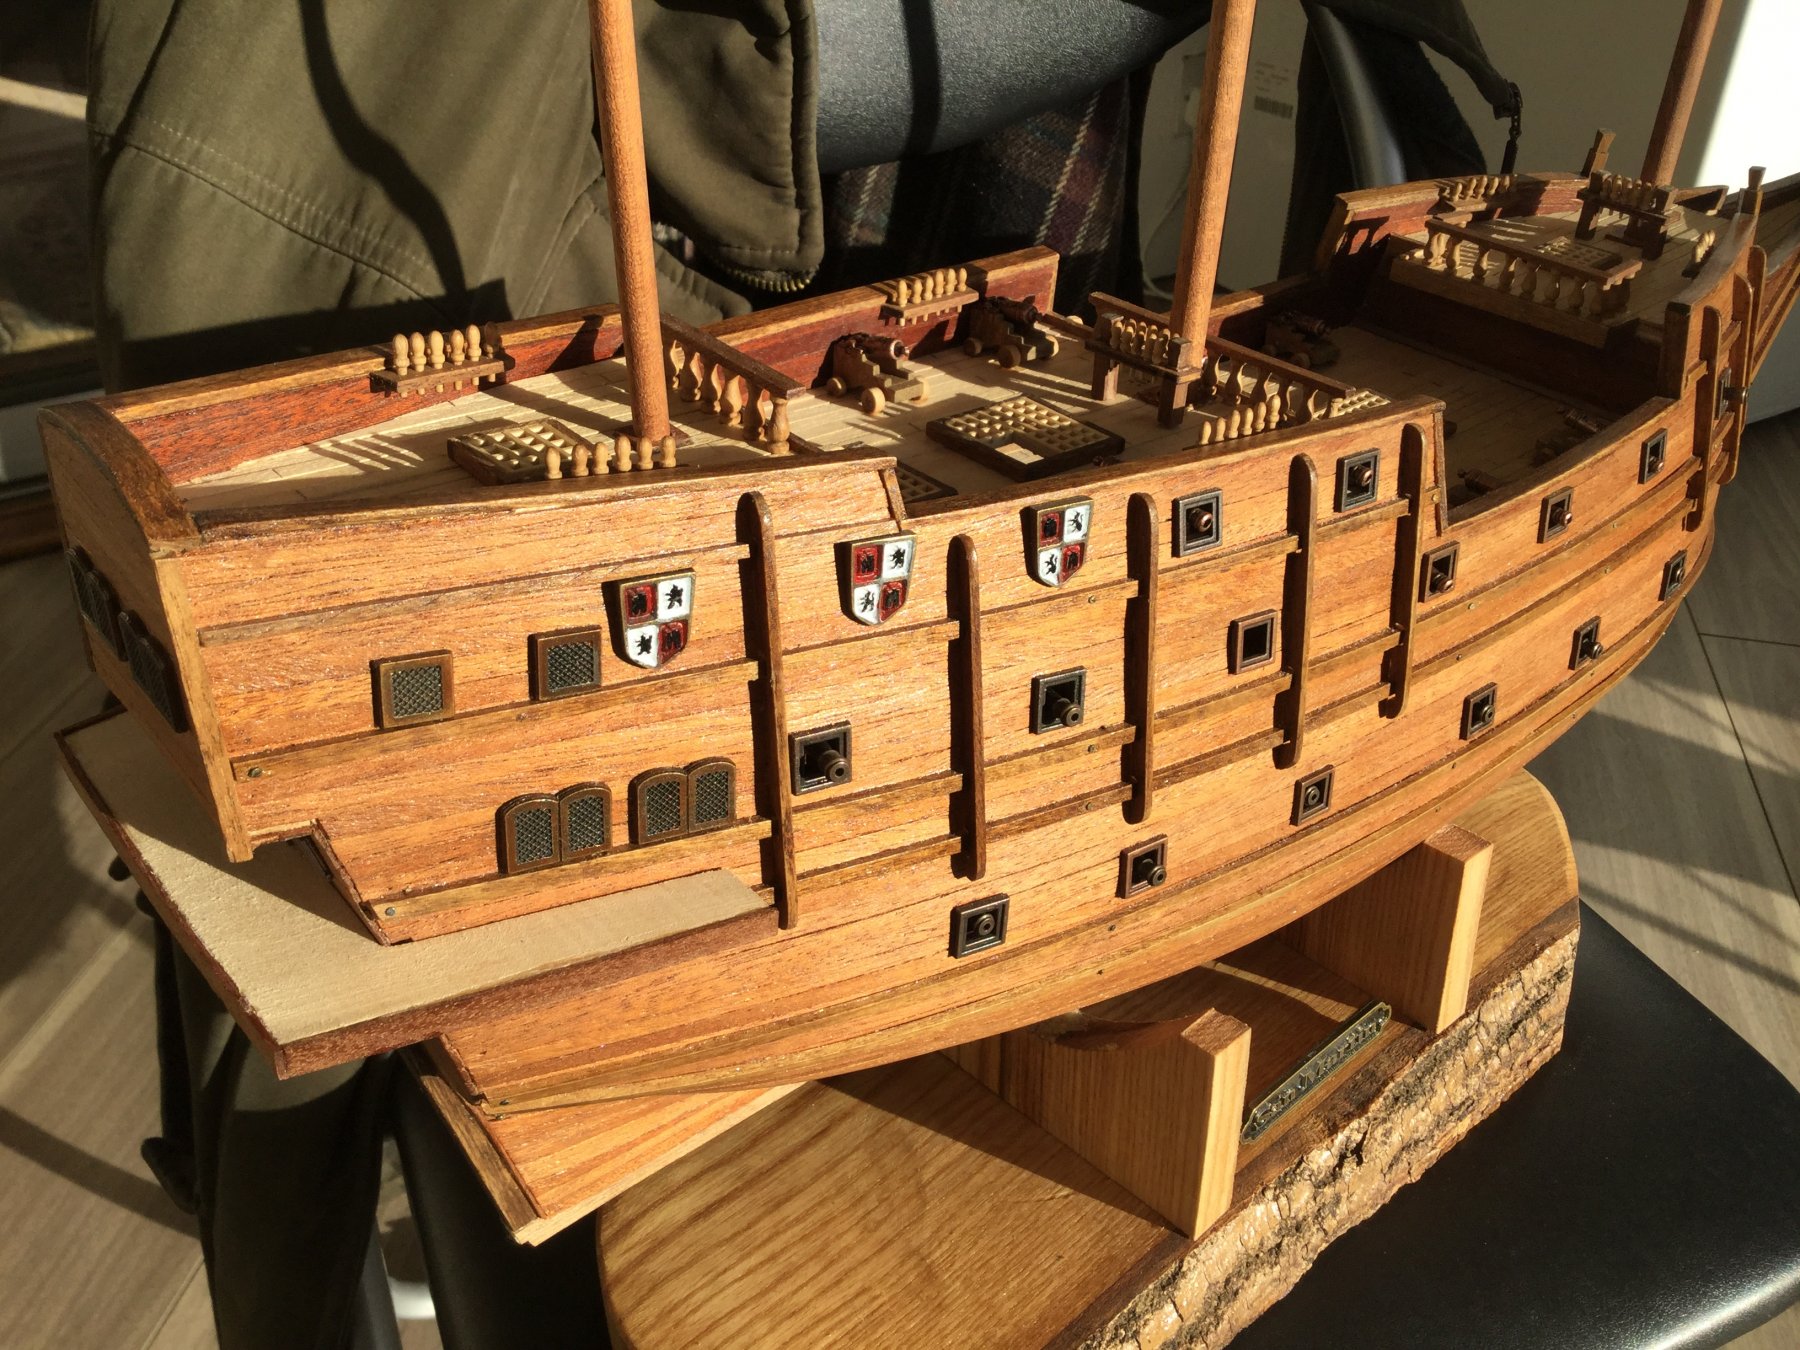
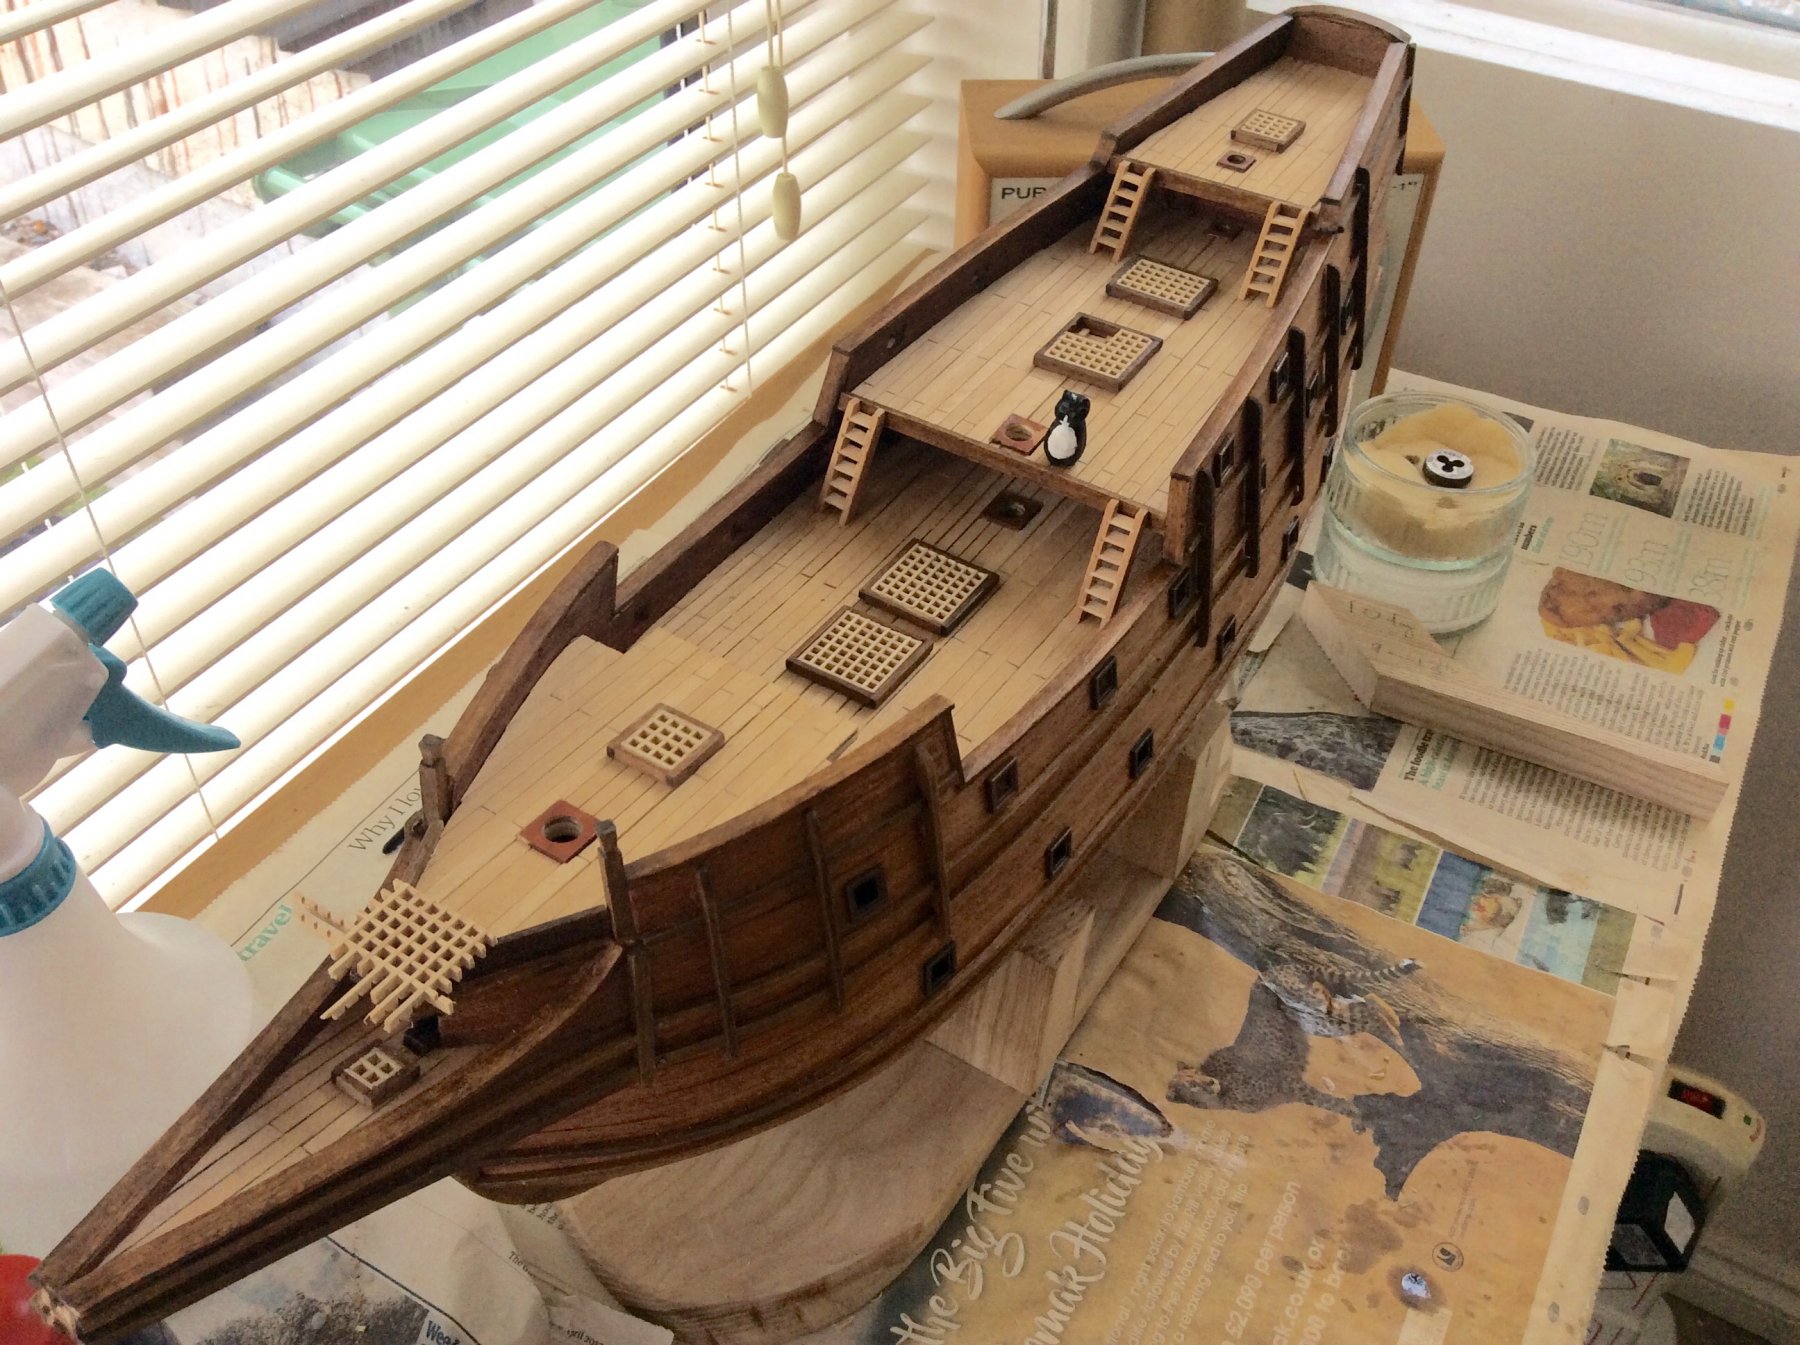
The mice completed the ship’s boat over Xmas and I added the railings to the stern balcony. That’s the stern of our cat on the prowl for more Turkey and giblets.
-
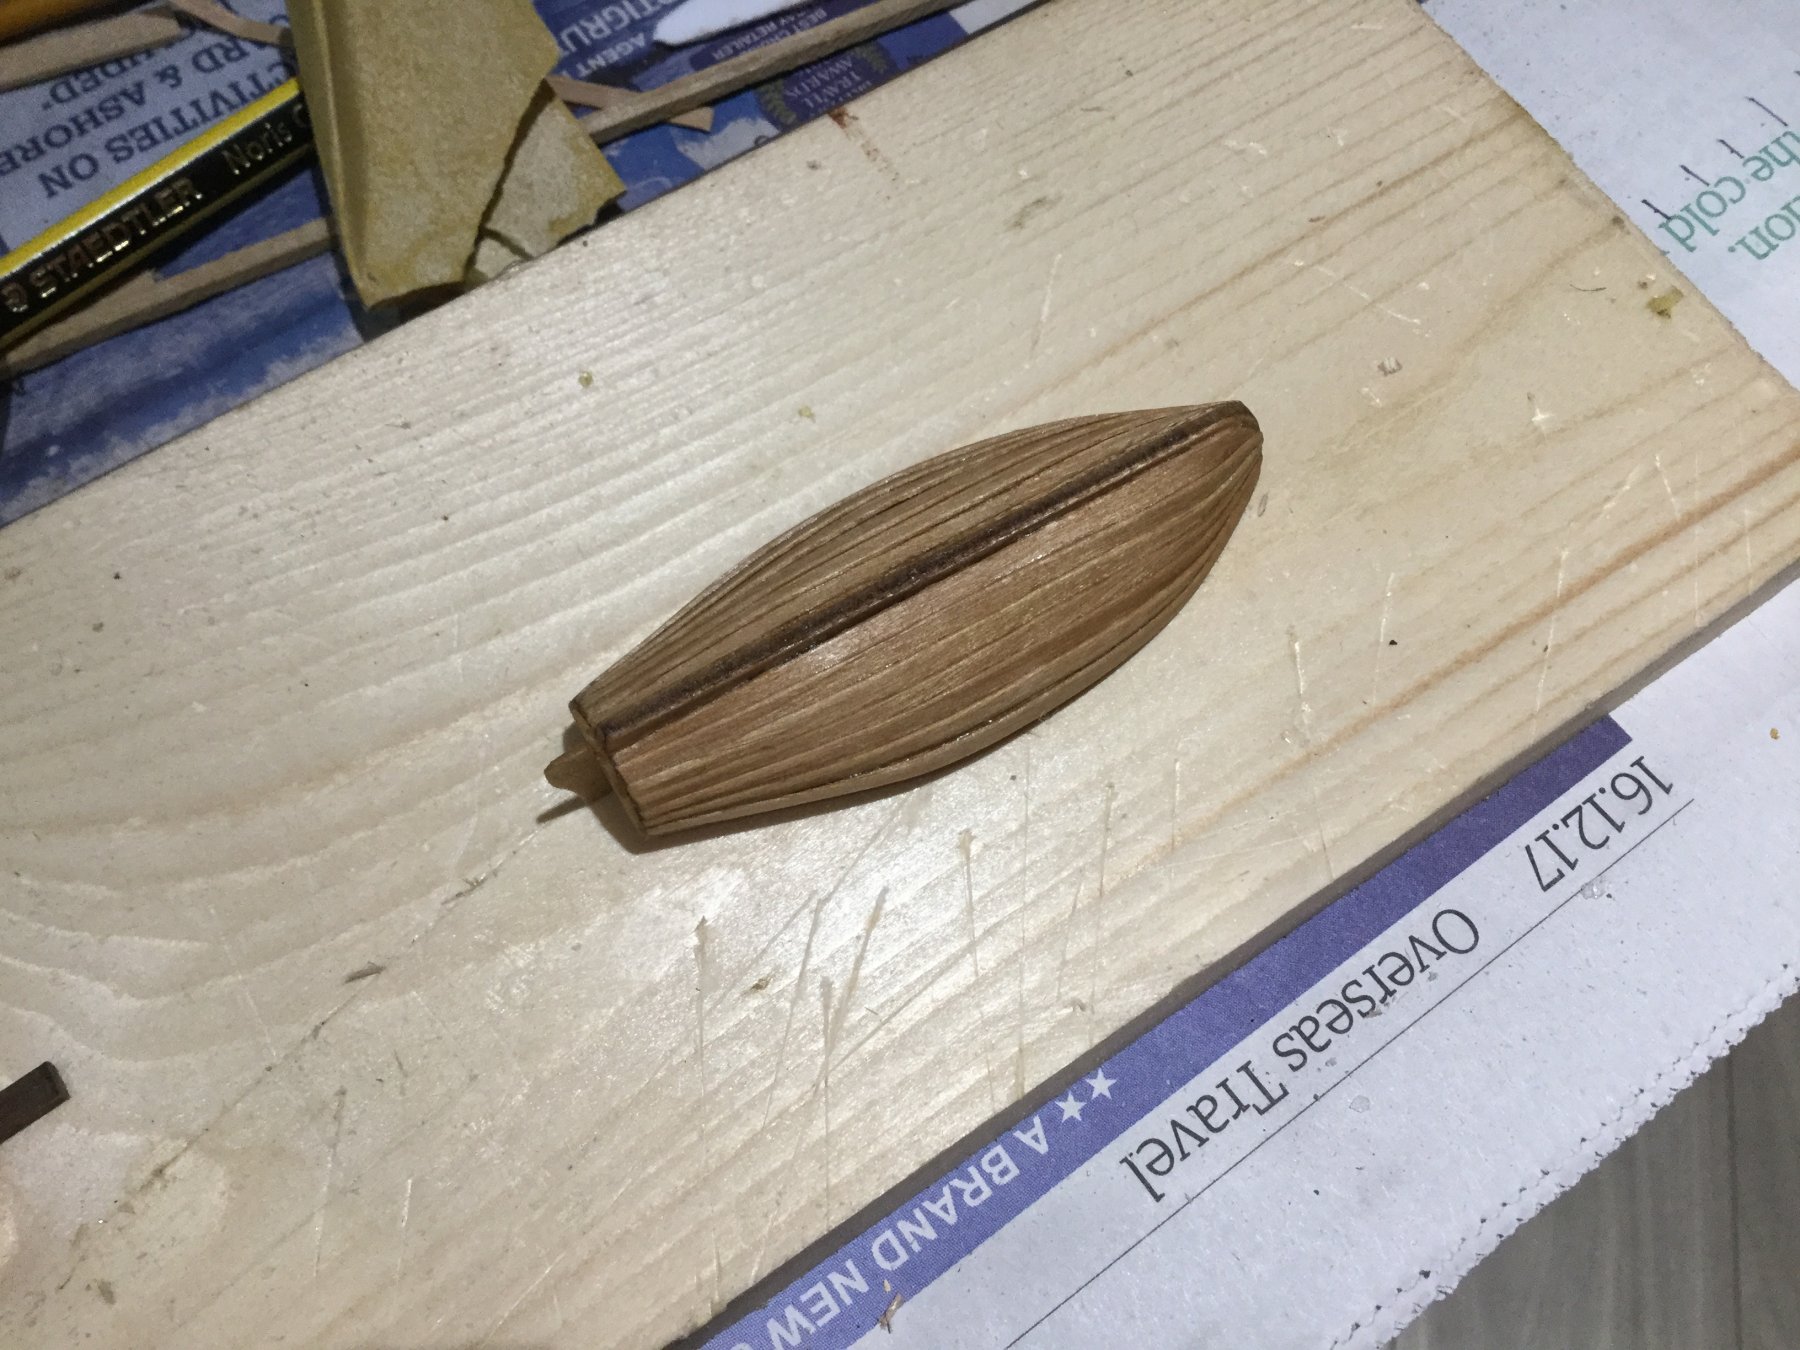
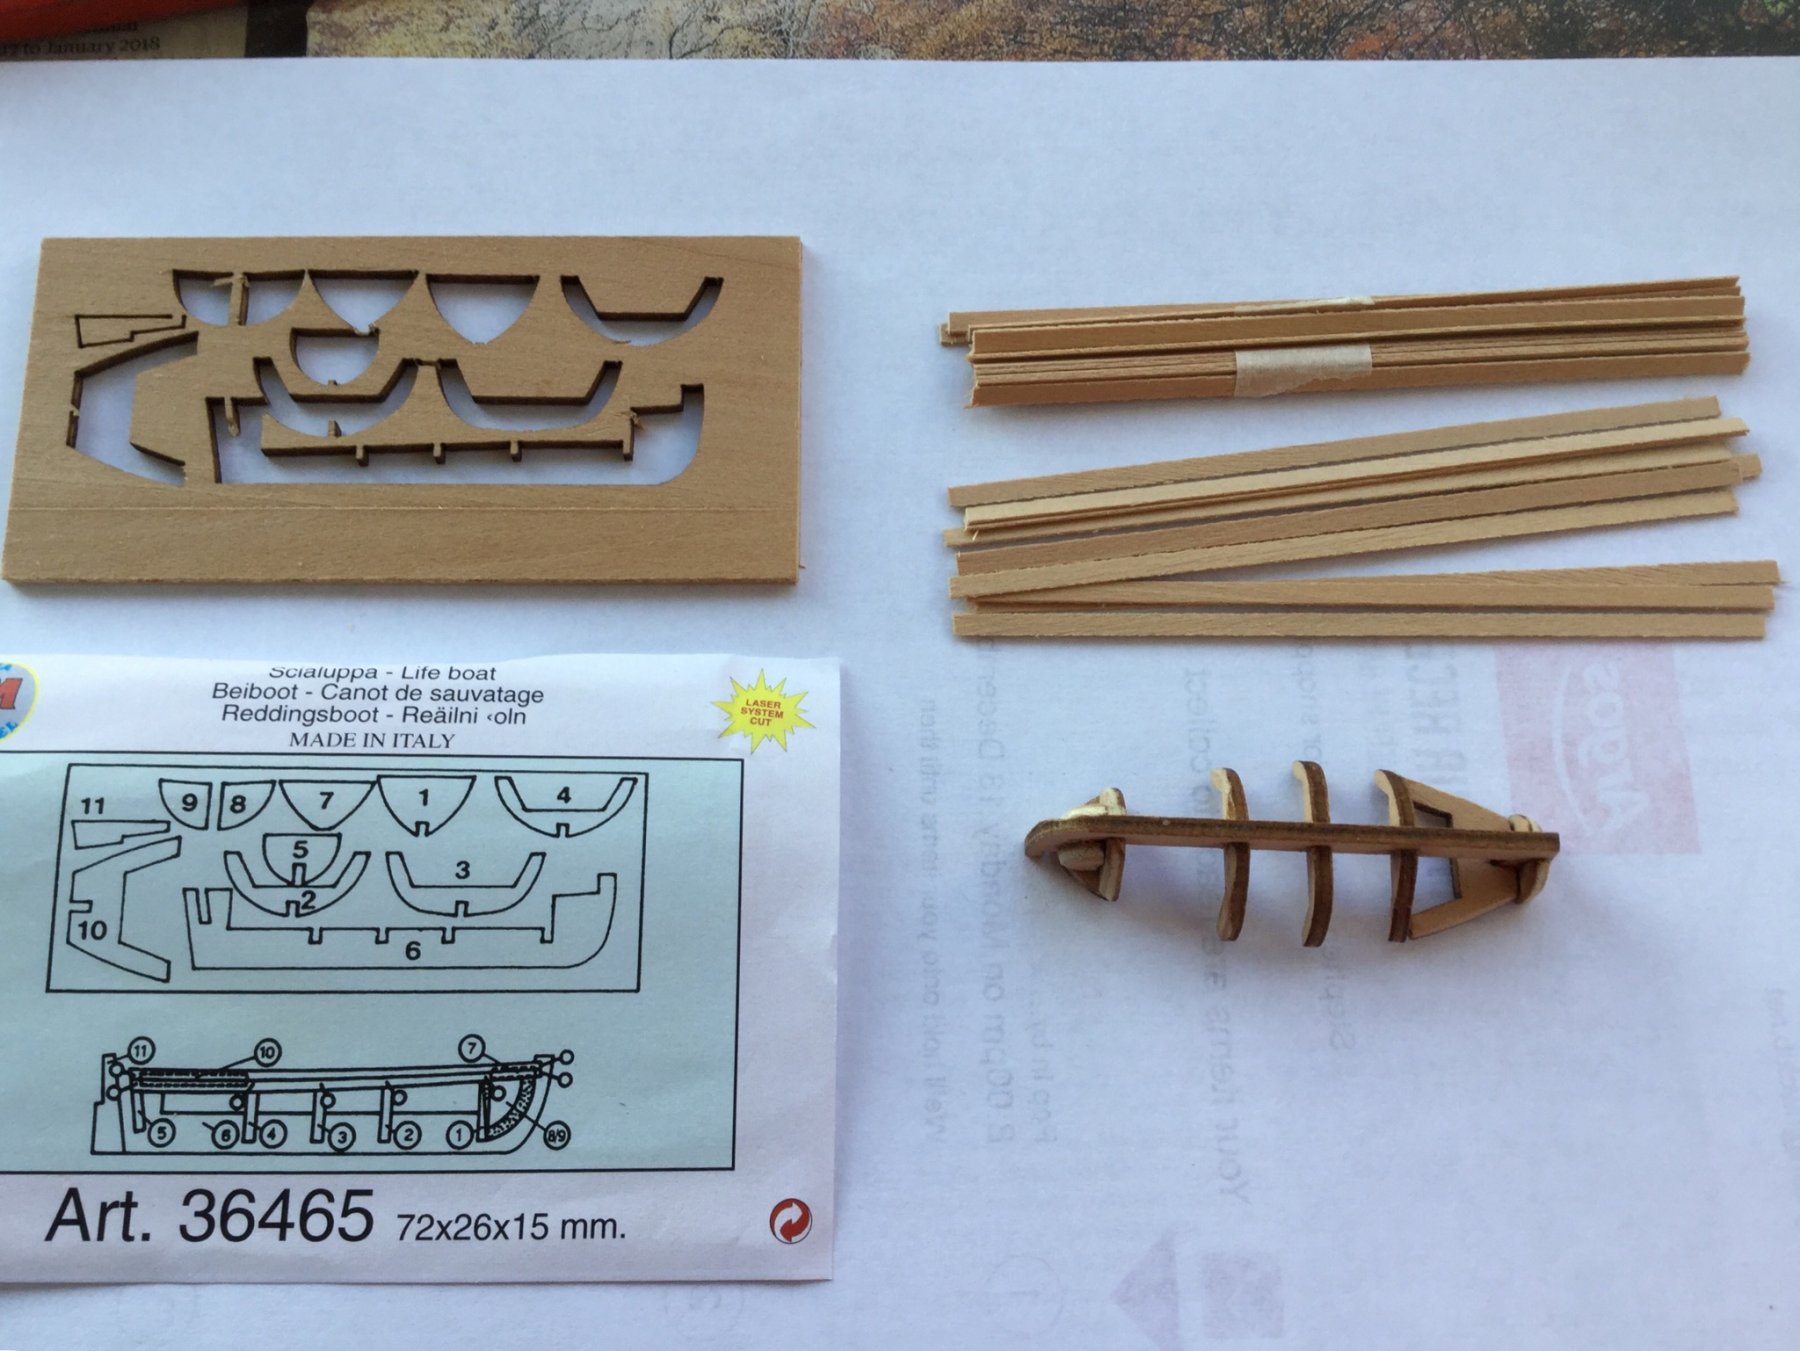
Waiting for timber to plank balcony so decided to work on ships boat. Replaced horrible lead one supplied with a kit. No instructions available, already had to repair two bulkheads with super glue. Will I have to taper the planks, wonder how many needed.A mouse sized hands would be great.

-
-
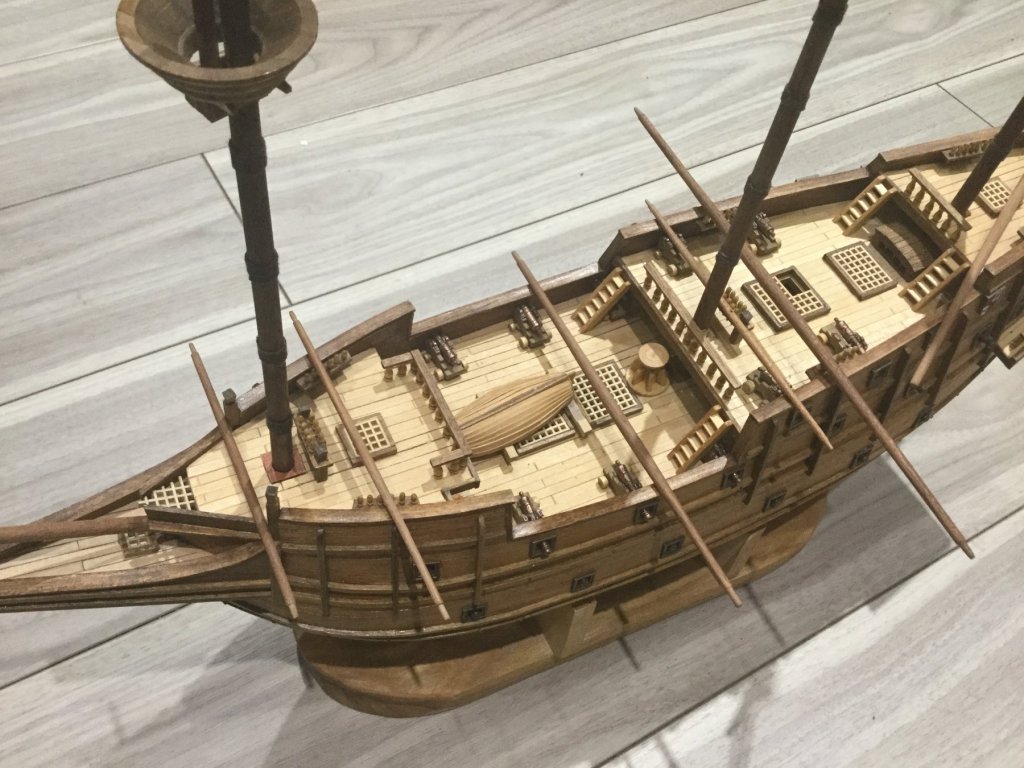
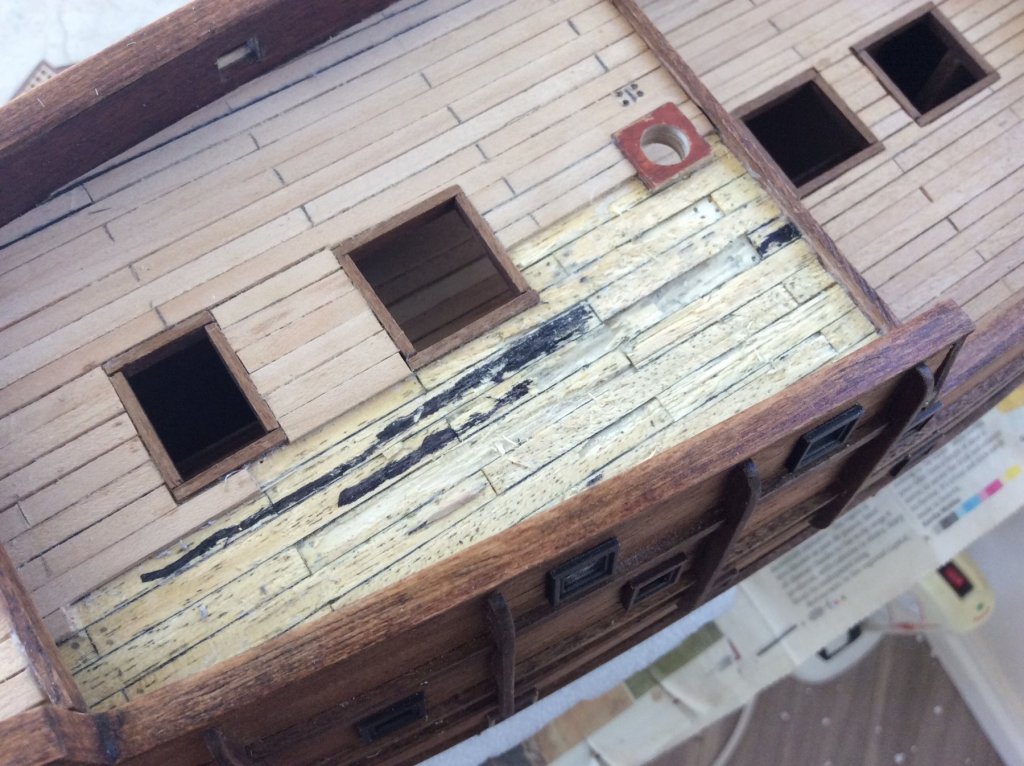
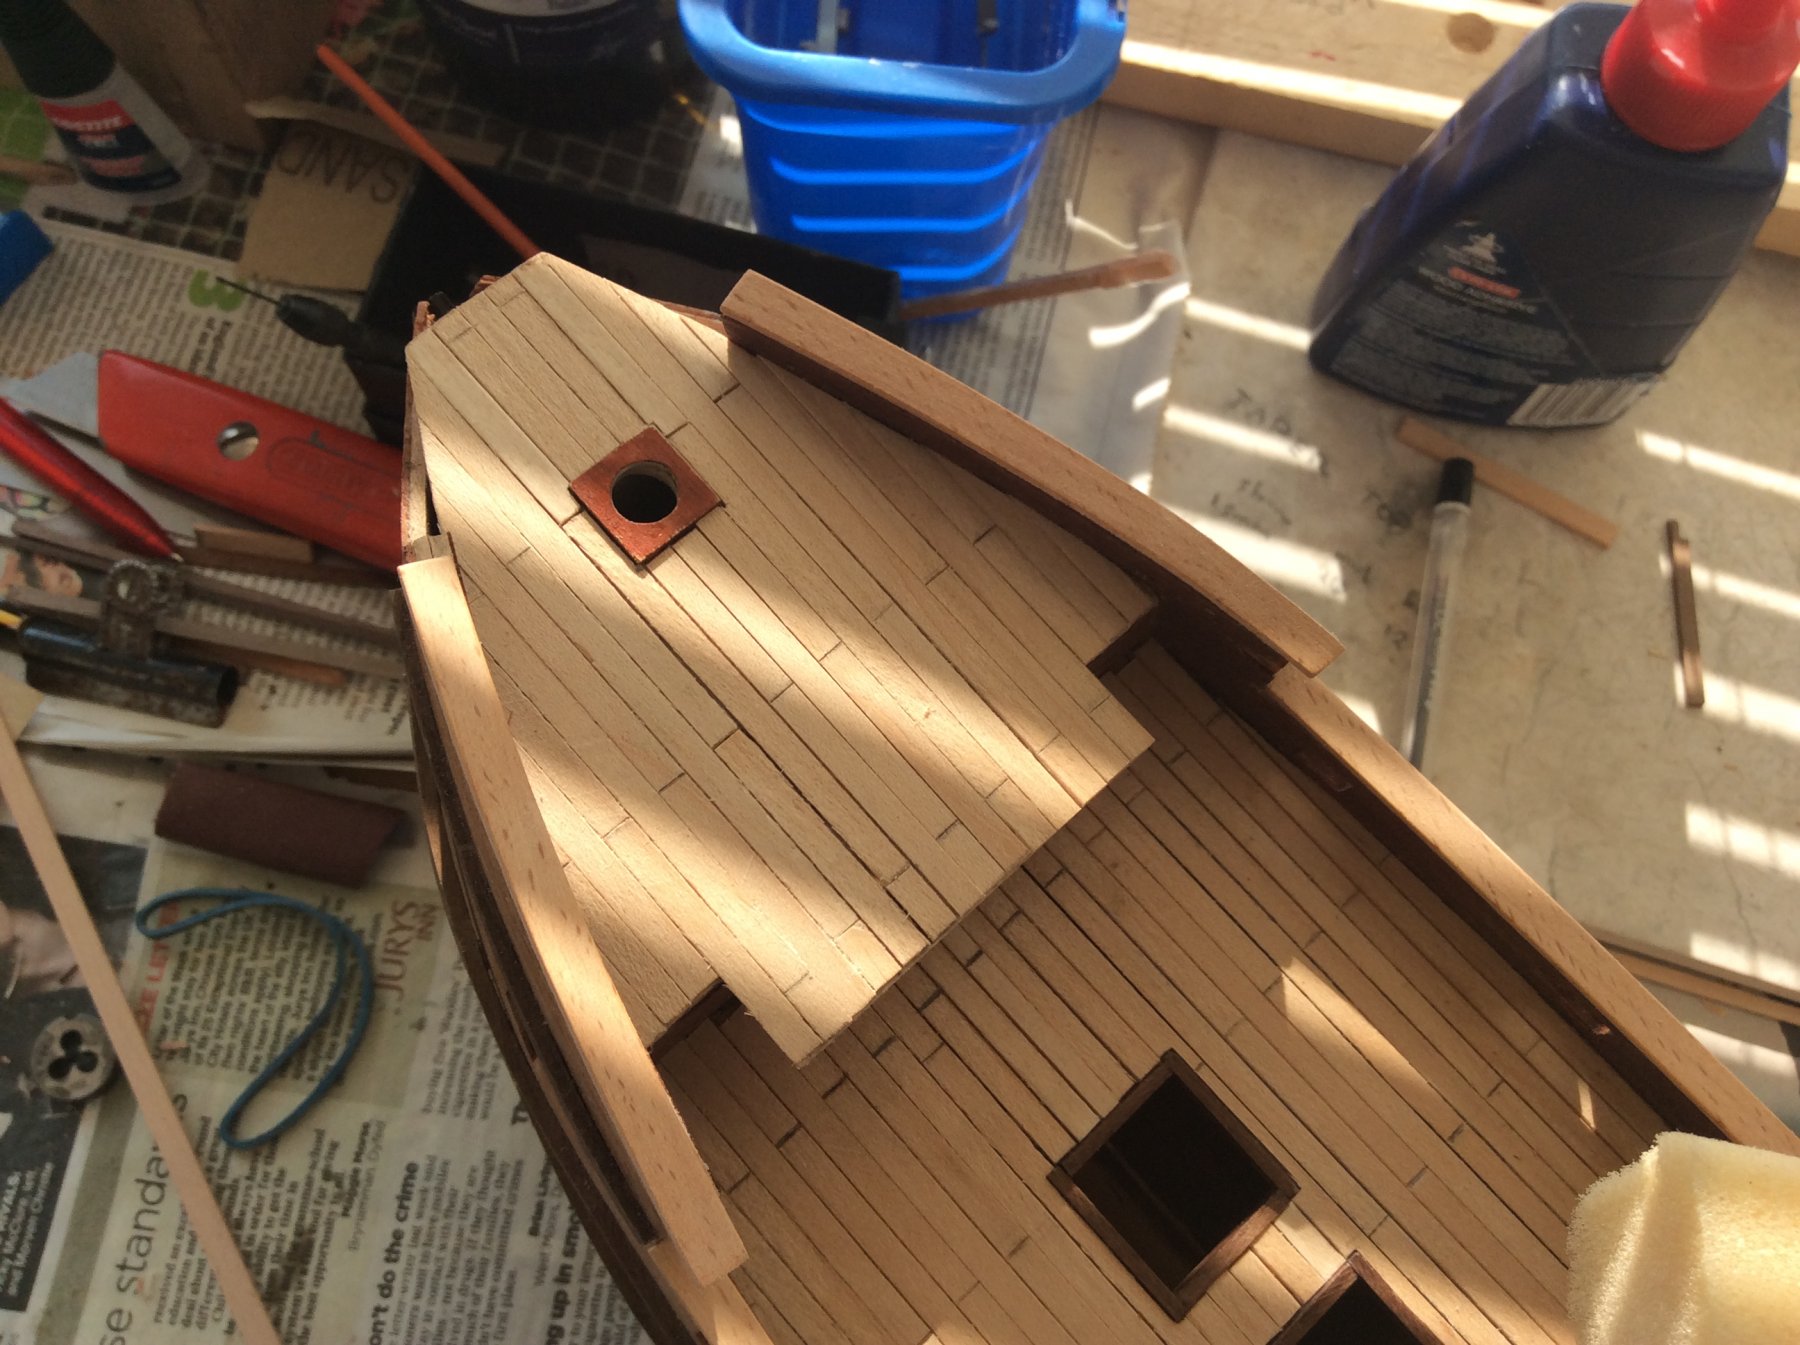
Update on the deck fittings I have done and the windows added. Decided not to use Romanov upgrades as windows had not been cut out. Camera highlightened some of the bittens need more sanding to fit into the racks properly. Waiting from timber from Cornwall Models to plank the rear balcony.

- Robin Lous, Altduck and Seventynet
-
3
-
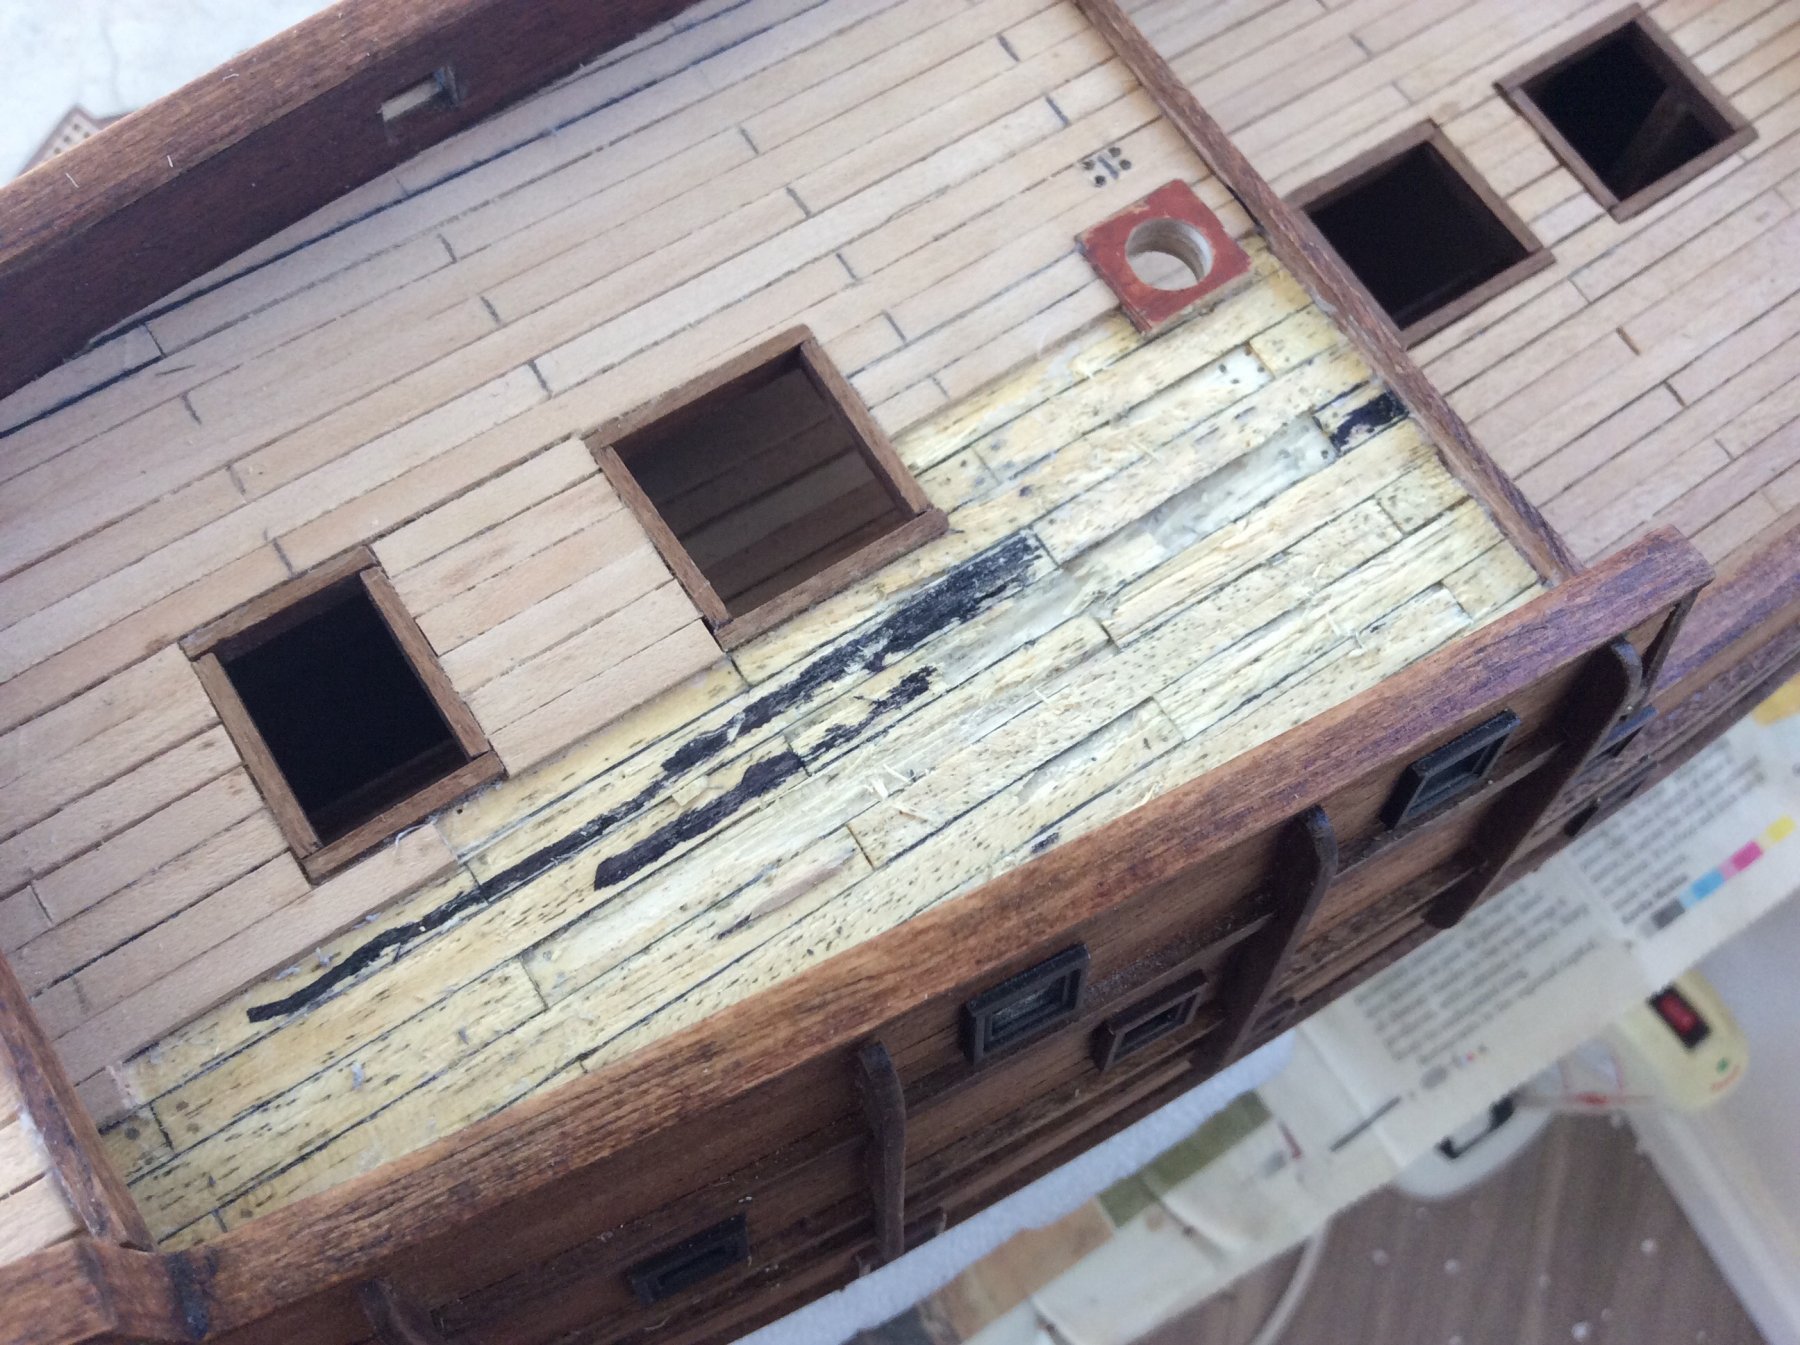
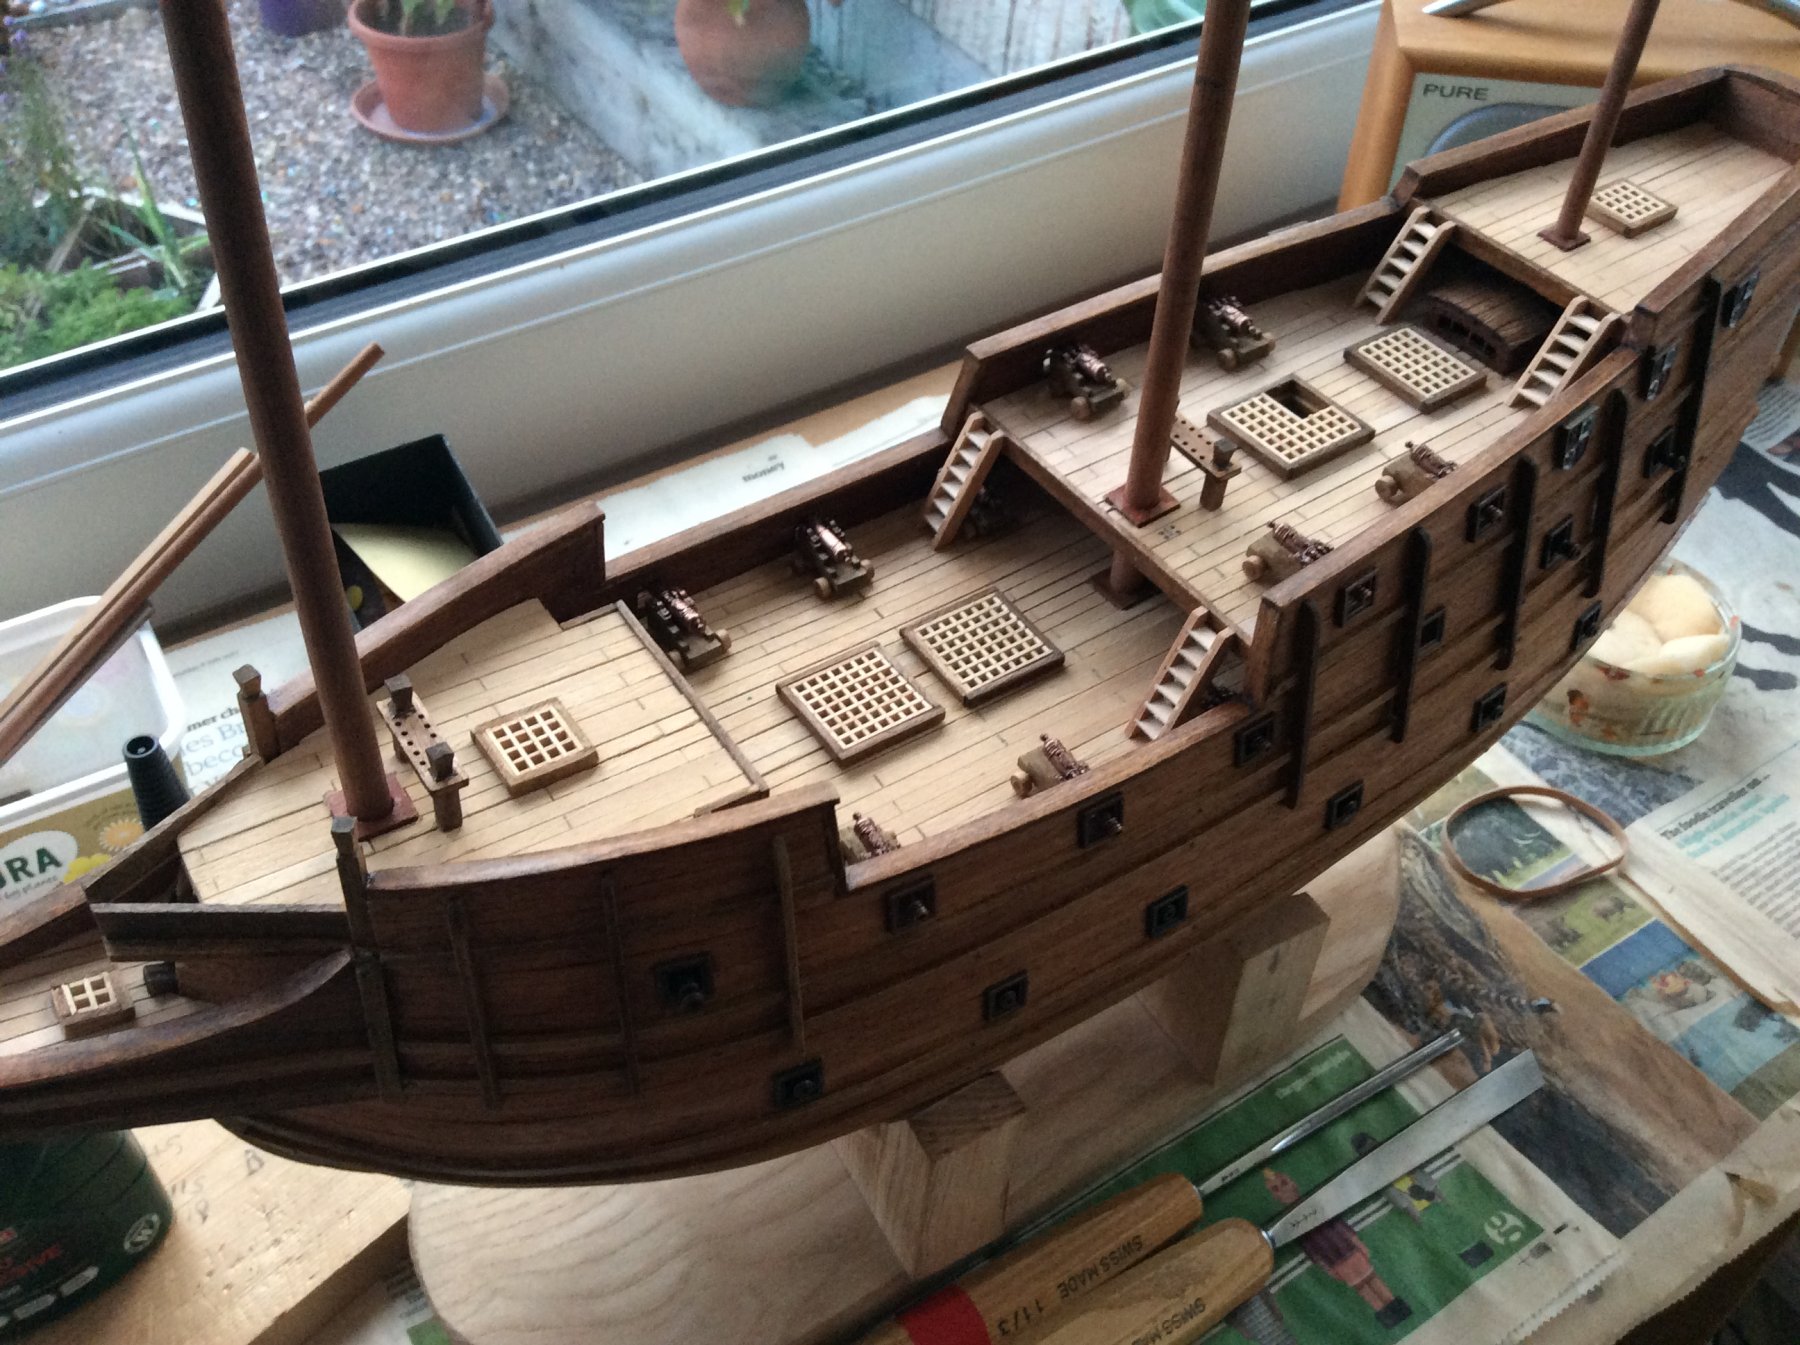
After a large glass of wine tried some tree nailing lightly drilling holes into planks and marking with a pencil an absolute disaster. Ripped existing planking on part of the quarter deck using flexicut detail knife and relaying planks, including a couple of others on port side. Phew, got away with it. Ship's cat now hides the only remaining evidence of trenailing attempts. A rather large cat about the height of a polar bear according to the scaling of this kit. Assembled ladders, but not glued in position. I mean they're identical to those on the Corel Half Moon which is 1/50 scale. This build is 1/90 scale so they can't both be correct. Getting a bit fed up with Occre so many parts are not right including the massive cannons for the main deck and all the metal parts. Bought some canons from my usual supplier, 30mm long wooden carriages.


- Seventynet, BLACK VIKING and Waitoa
-
3
-
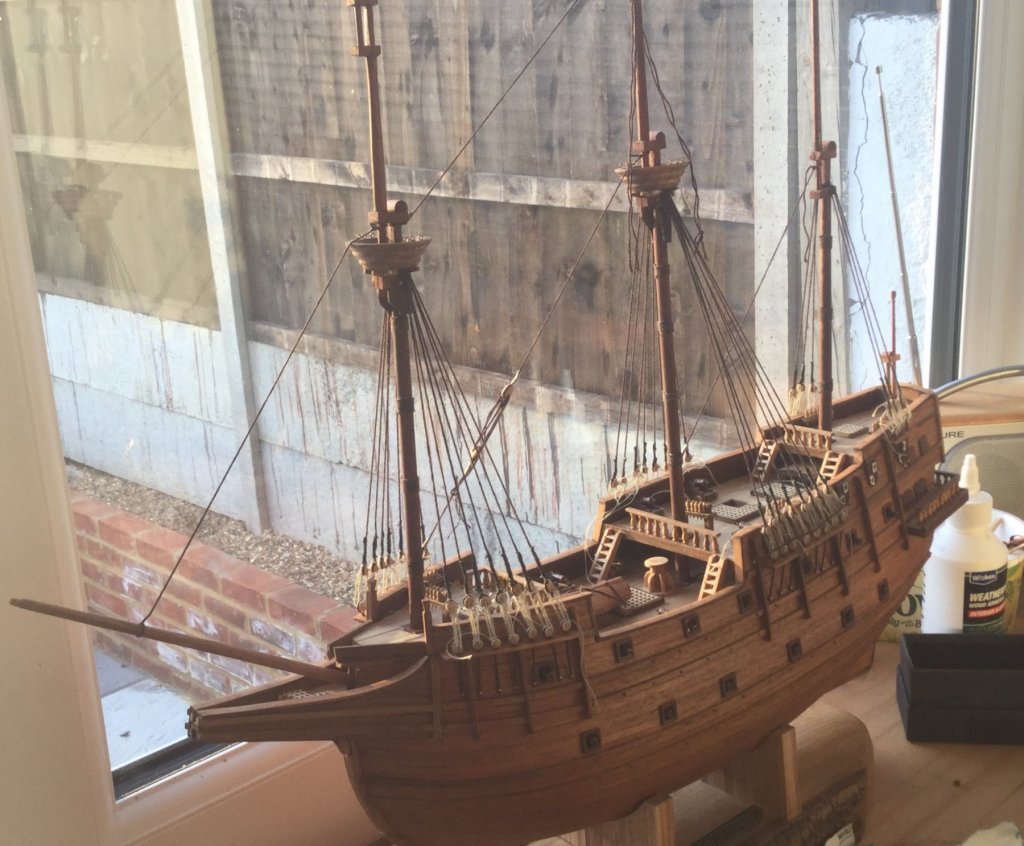
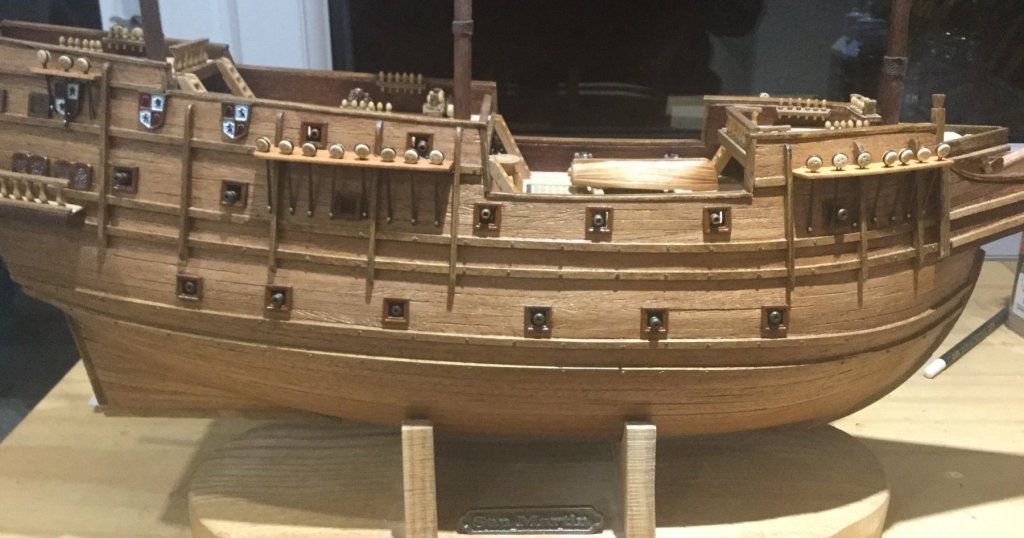
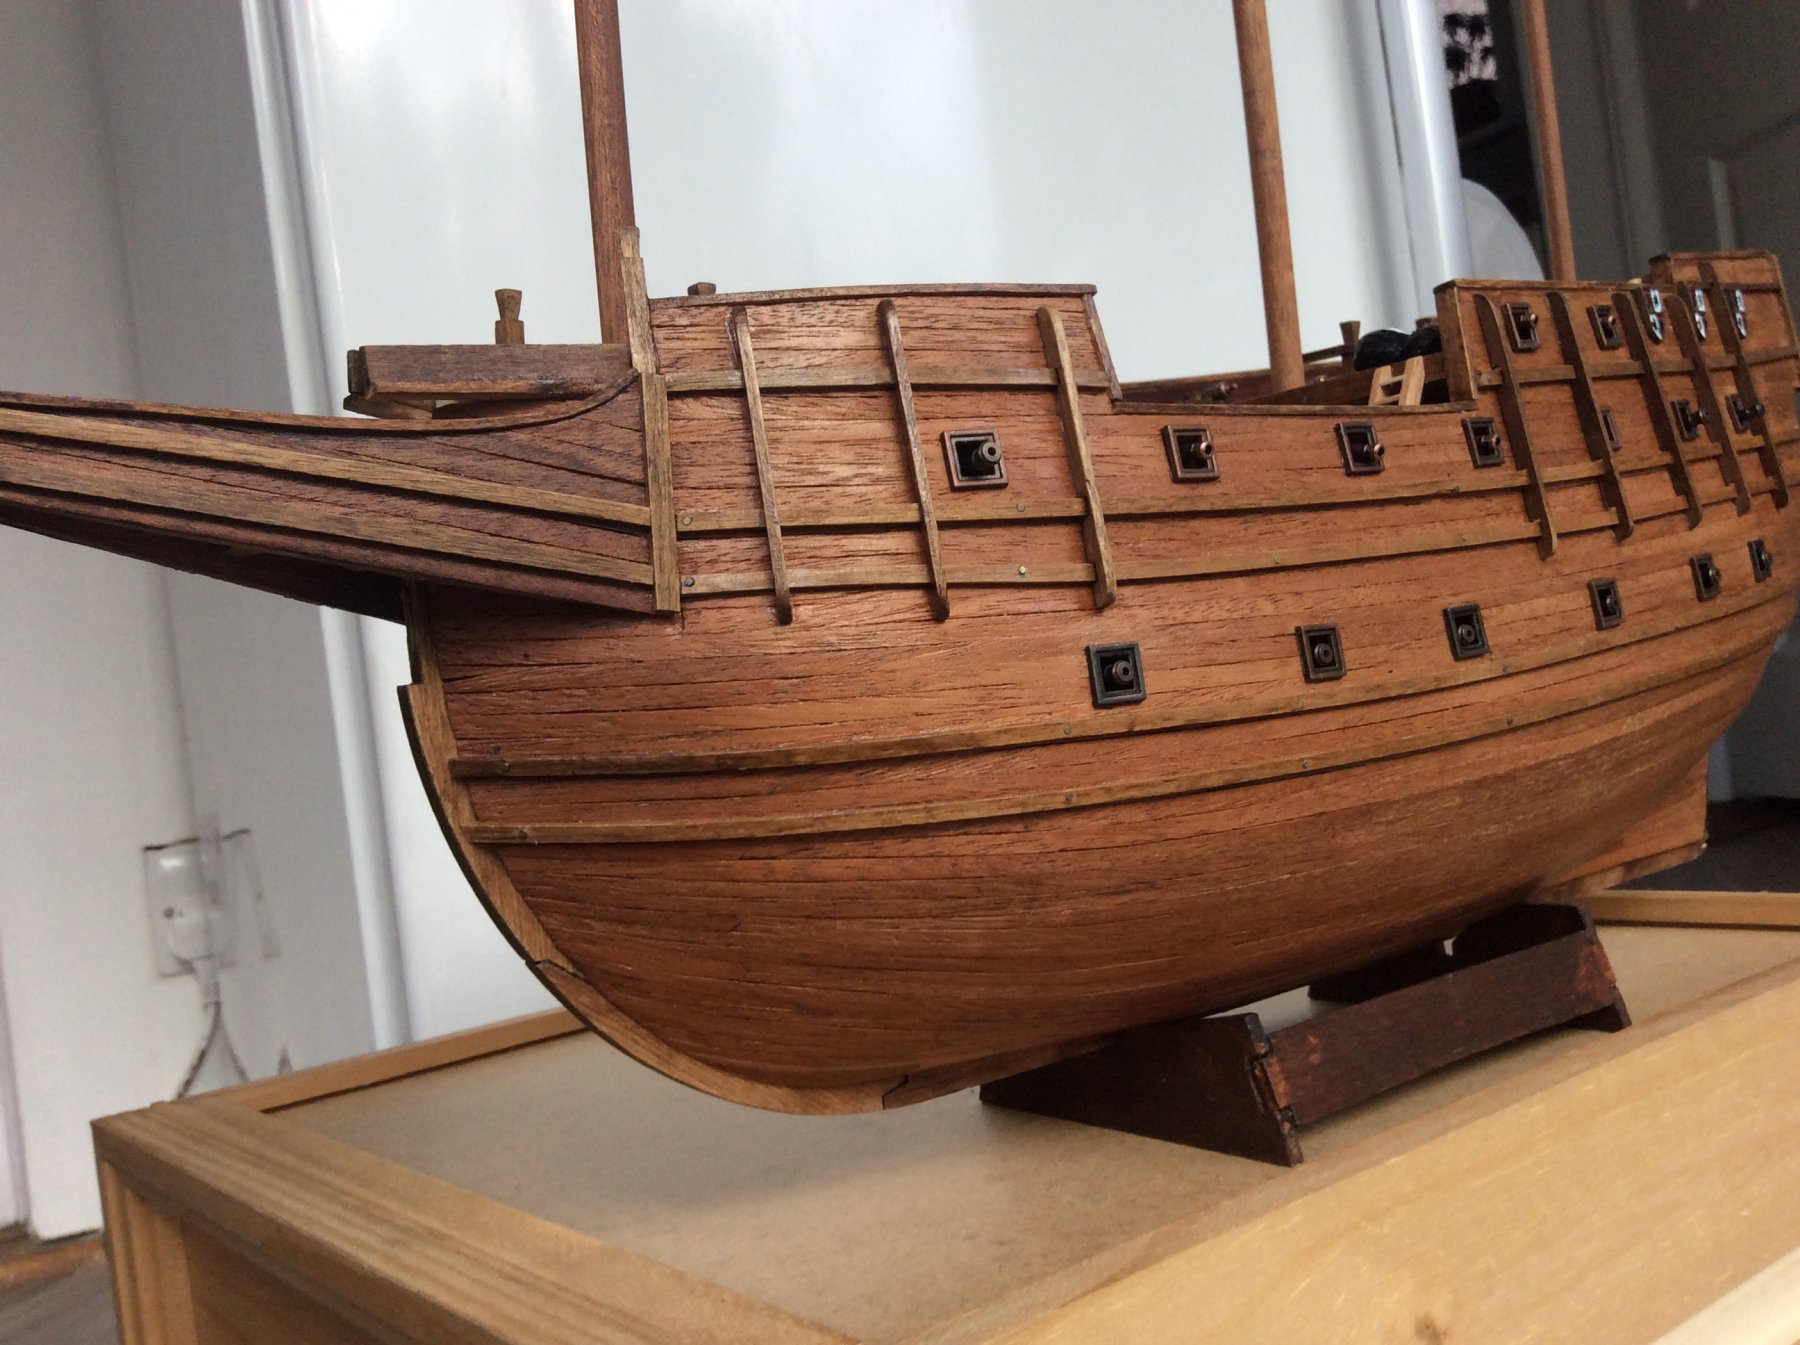
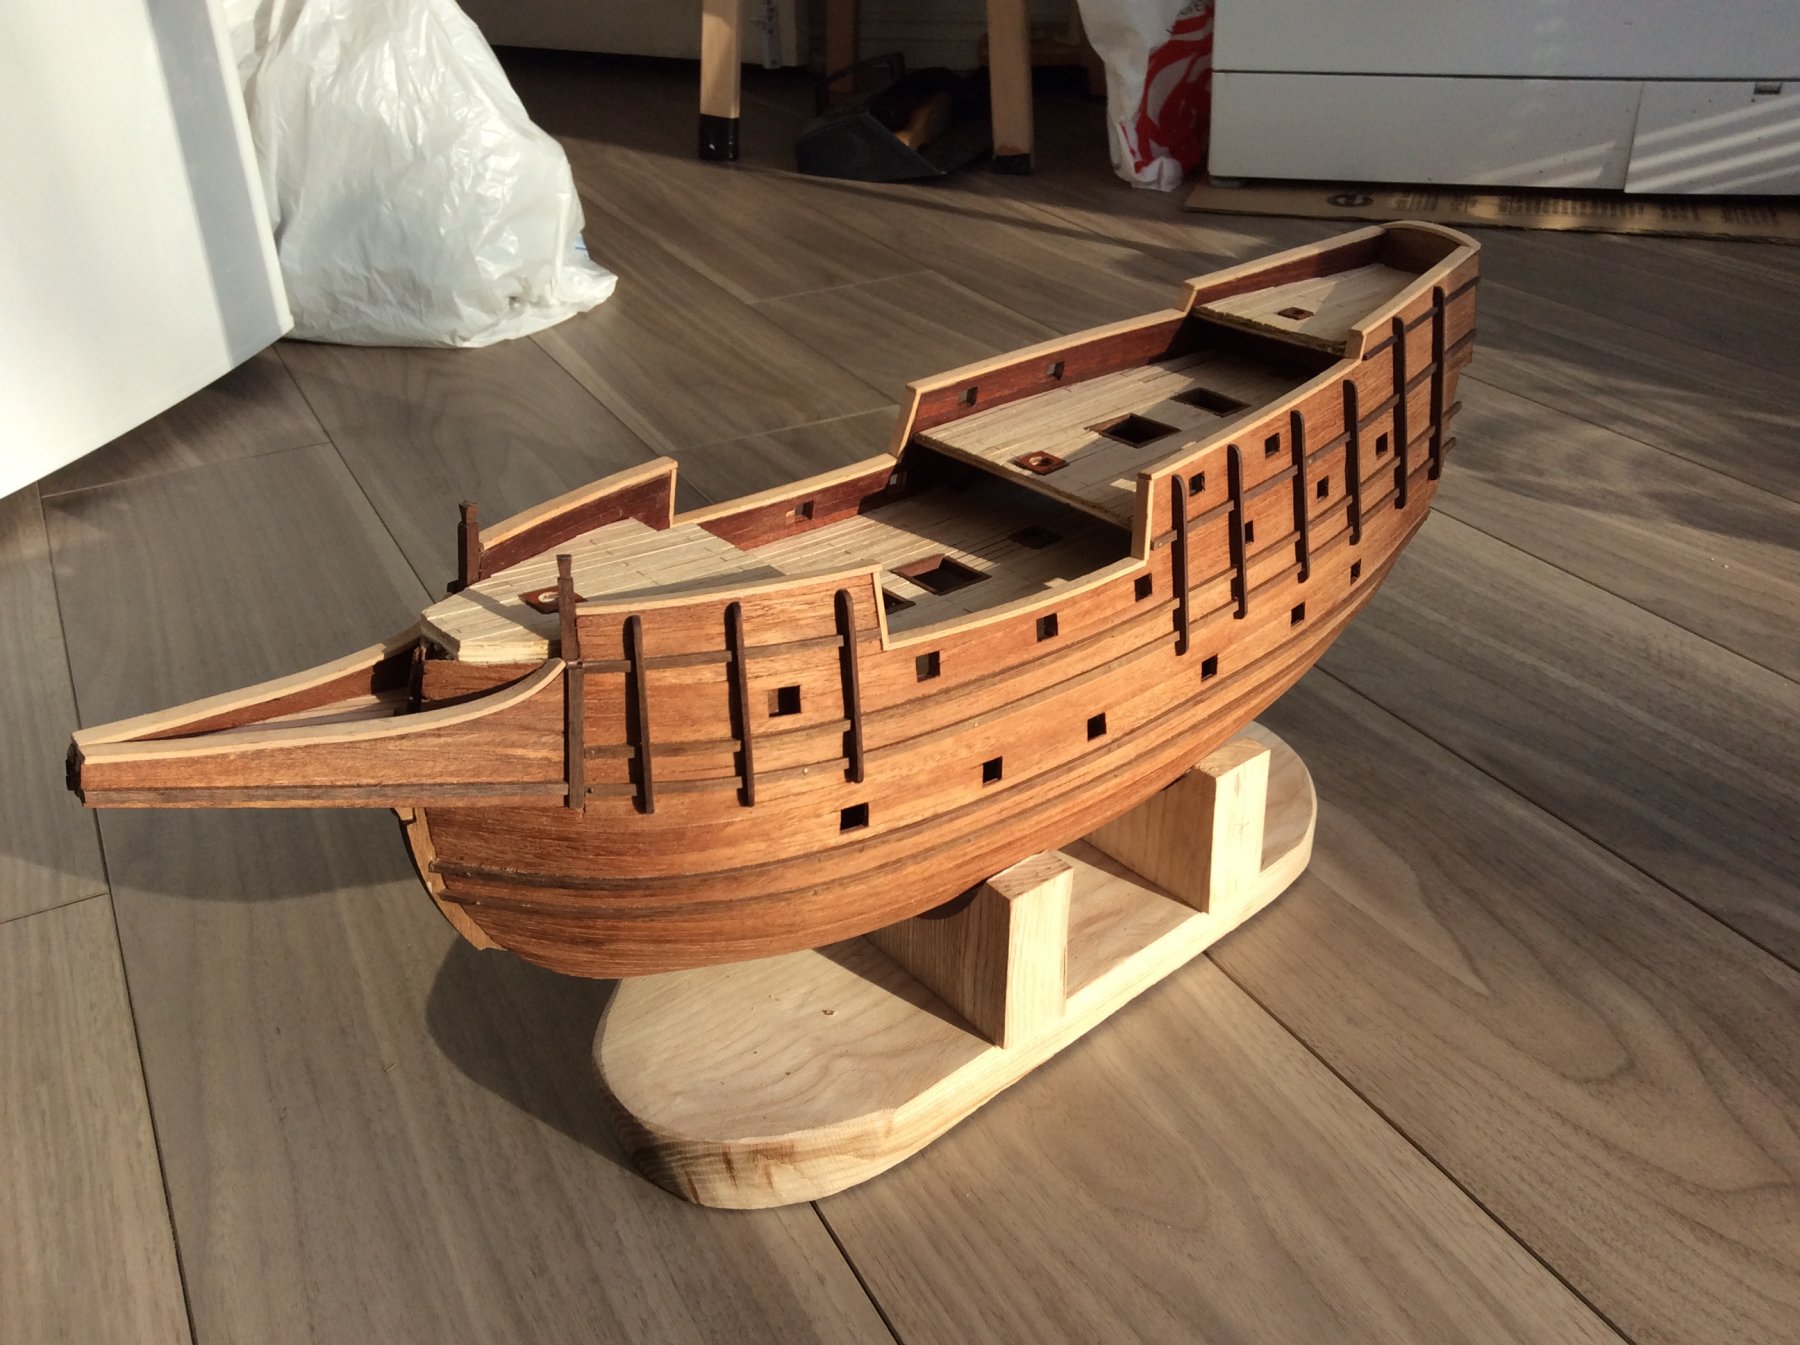
First coat of thinned down polyurethane satin varnish on the hull. Not sure about second coat in case it becomes gloss. Any advice welcome. Took the easy option and used the bronze Occre fittings for the gun ports instead of the making wooden ones.

-
-
Ian, This is all I could find but it's not a wipe on. Because I've already stained the strakes with coloured Danish need to be sure that any further coats don't make them gloss whilst hull is matte or even satin.
http://www.homedepot.com/p/Varathane-1-qt-Matte-Soft-Touch-Polyurethane-266233/203331997
Sent from my iPad- Seventynet, Canute and mtaylor
-
3
-
Just about ready to apply a finish to my mahogany planked hull. Current candidates teak oil, tung oil or wipe on matte poly urethane varnish. Wipe on poly not commonly available in U.K. Shops, although can get a tin on Amazon. Bit loathe to spend £14 to use as a test coat. Do you think a poly urethane varnish diluted with white spirits would give a good approximation for the real stuff. Should say the strakes have lightened quite a bit since the photo. As an ex chemist not too bothered about the odours although the dockyard failed a recent safety inspection by the Rear Admiral.
- Canute, Seventynet and mtaylor
-
3
-
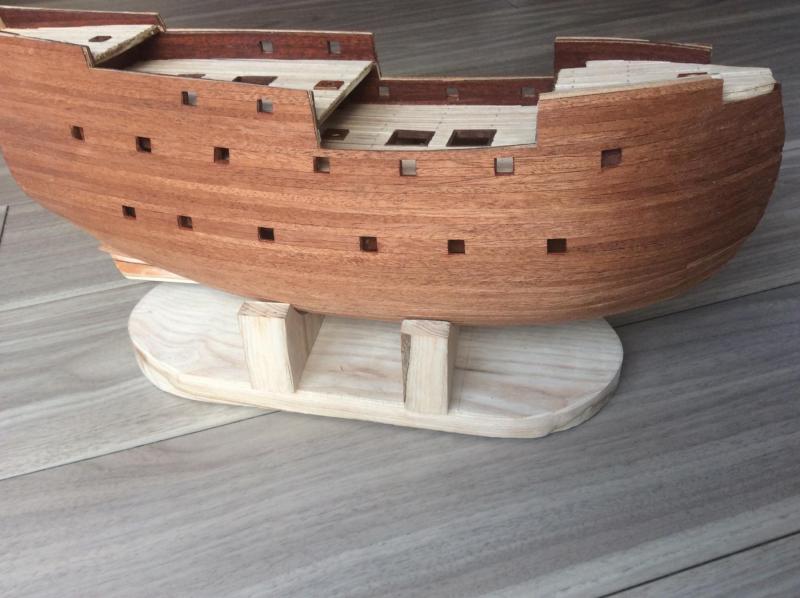
Got the strakes on without too much white glue smearing the planking. Had to stain them as supplied in greyish walnut and hull planks were mahogany didn't look right. Beginning to realise why people scratch build. Having said that walnut is a pig to work with so hard. Flexible beech for the bulwark tops instead of supplied walnut, bends really easily. Discovered another SM build log on a Russian forum,

- coxswain, zoly99sask and augustus
-
3
-
Hi Newbee. That planking method looks familiar. I had a similar dilemma with the Occre San Martin. Didn't fancy using the timber supplied with the kit for the second layer (.5 x 5mm). It looked far too fragile to survive without chipping the possibly 2 years or so doing the masts and rigging etc once the hull was turned over. I bought some Mahogany timber online (1 x 4 mm) and decided I might as well plank the way of Dirk De Bakker and Booker described below rather than the wrap up way used on many AL and Occre kits.
http://modelshipworldforum.com/ship-model-framing-and-planking-articles.php
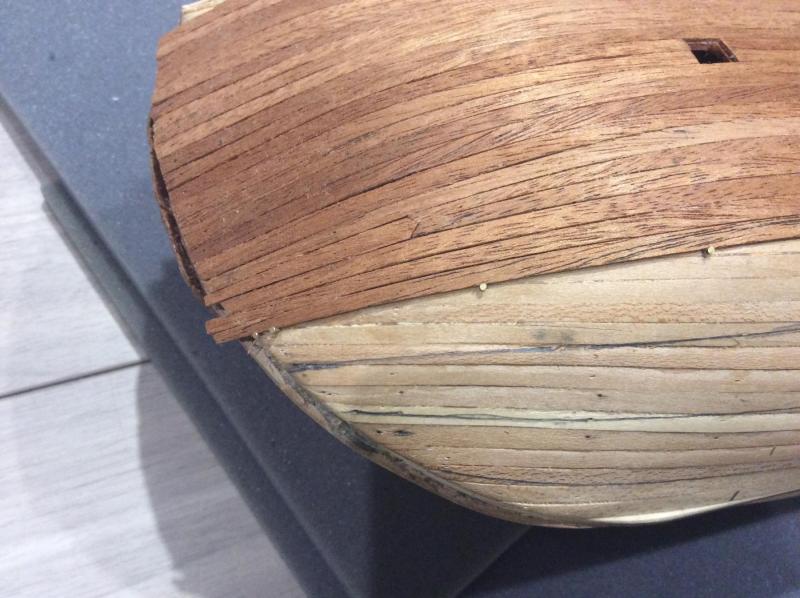
It was far easier than expected. The planking above the wales needed virtually no tapering and for the planking below I divided the hull into zones and measured the width of the zone at the centre and two or three other points toward the bow and winged it towards stern as measurements showed very tapering was needed. Was pleased with the results, and used 4 drop planks per side, just about the best hull I have done, not up to the standards of the best on this website of course. My build log is below
Good luck, thought it was a shame you abandoned your second attempt at the 50 gun ship it looked as if it was going well.
-
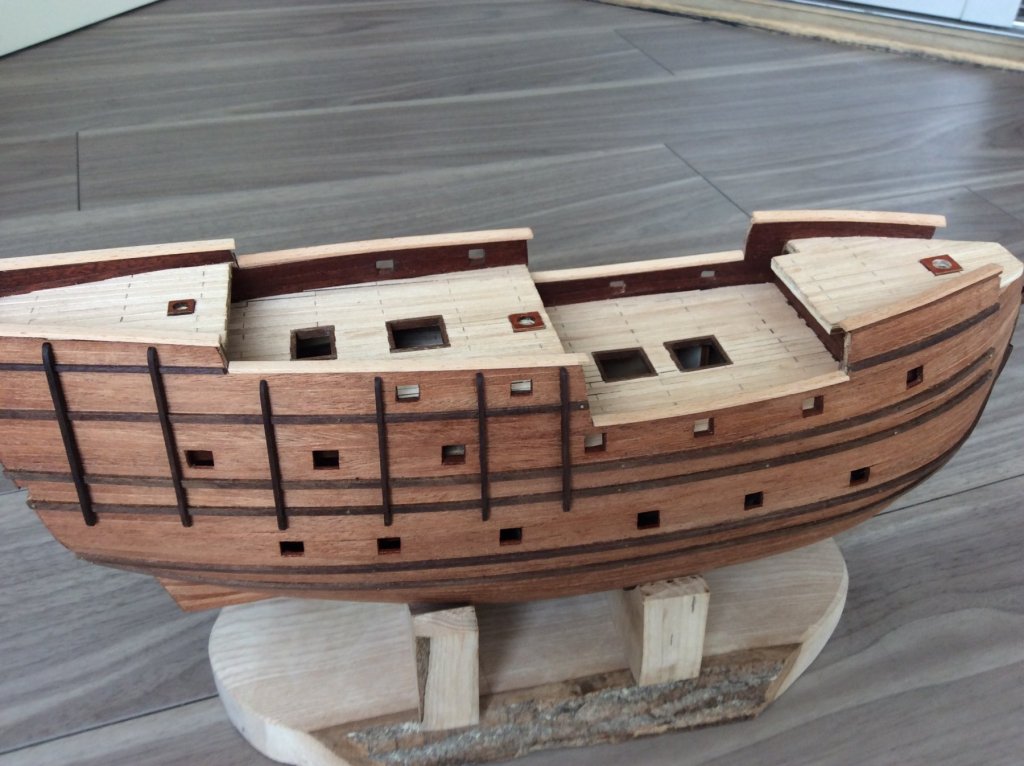
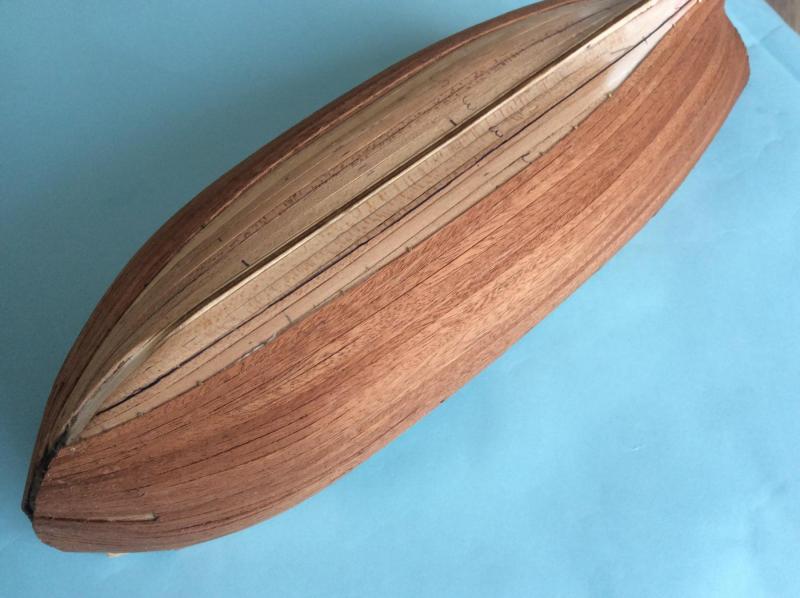
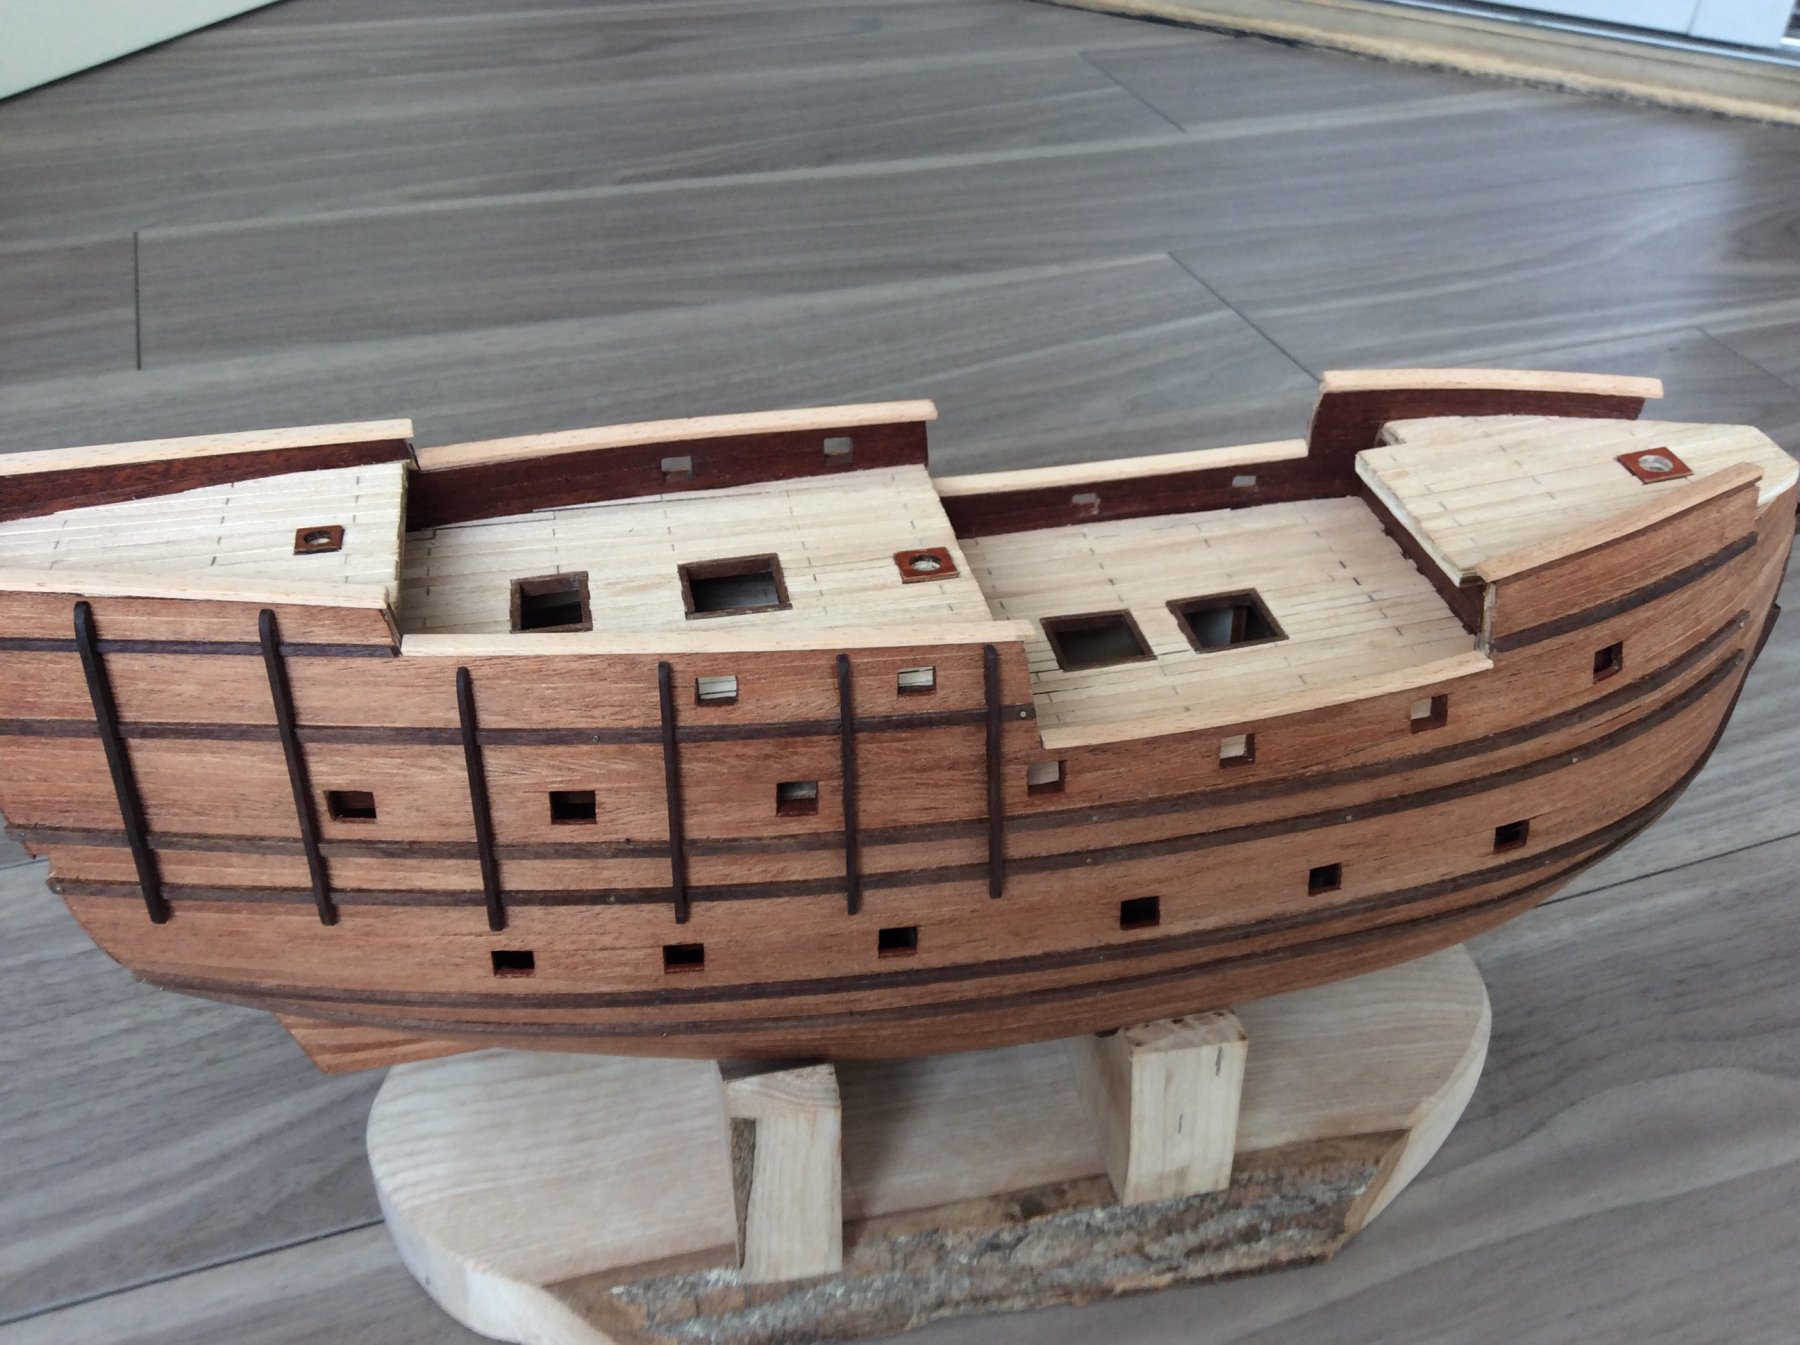
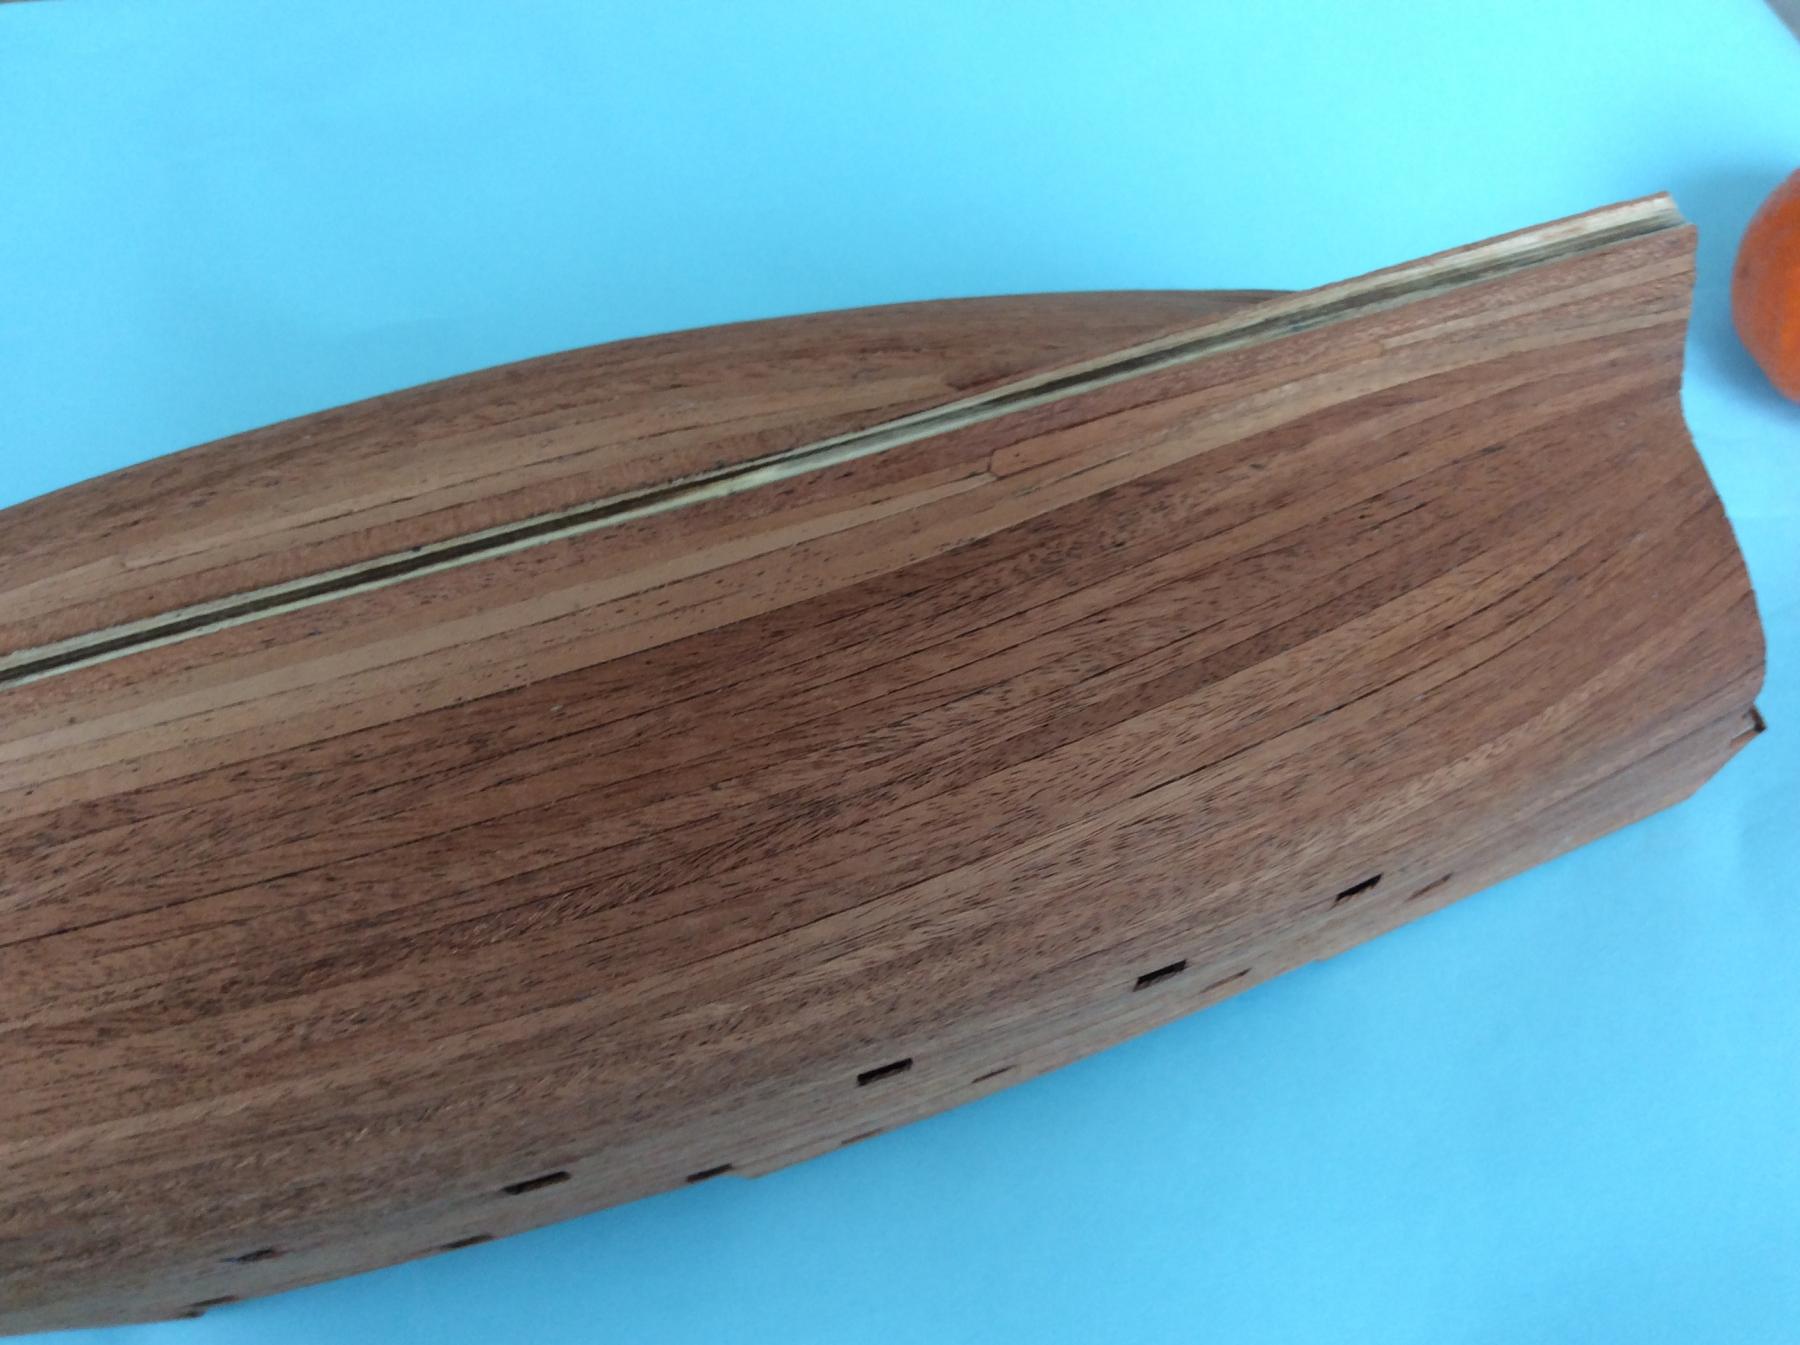
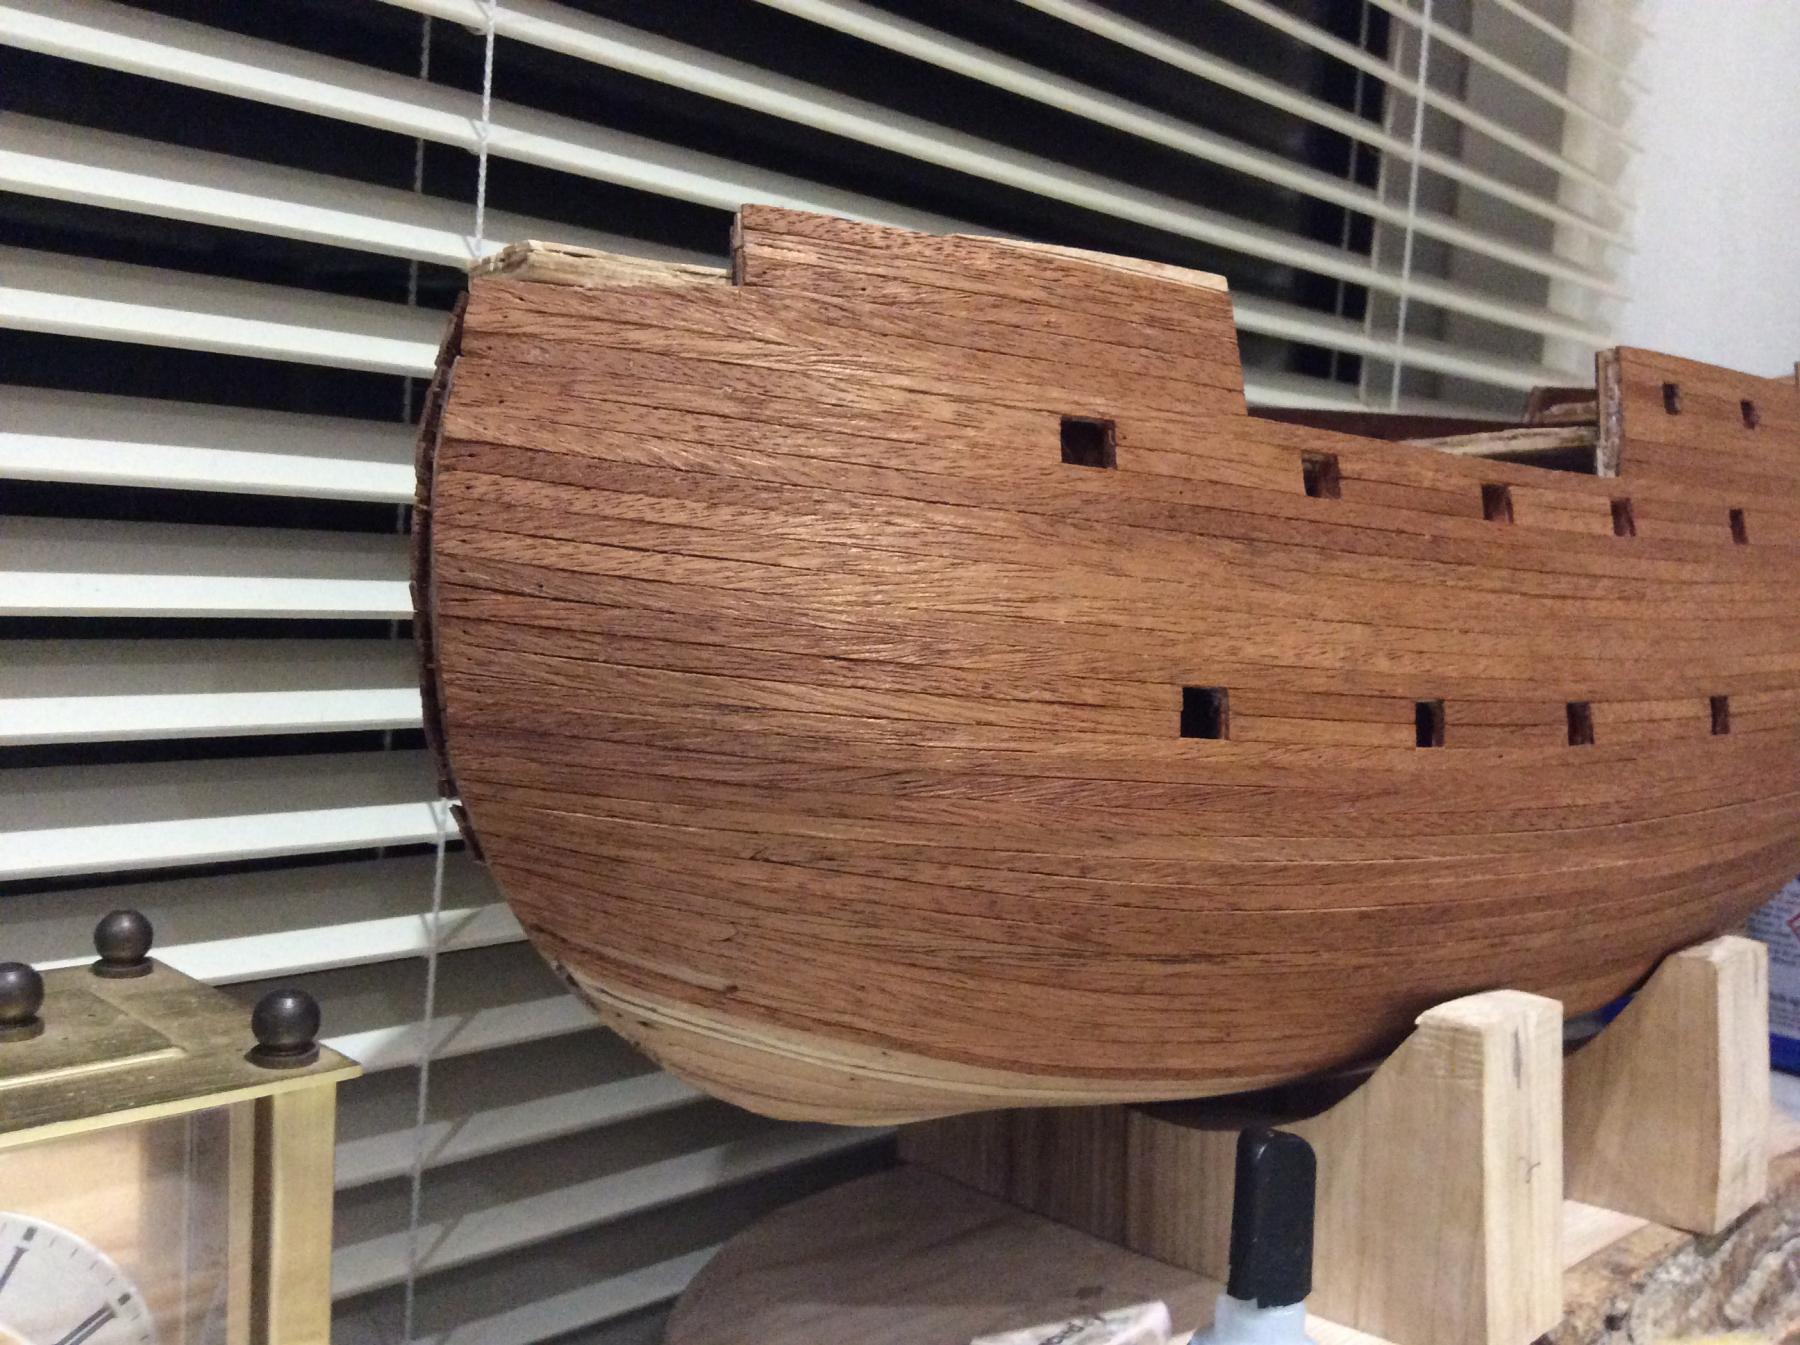
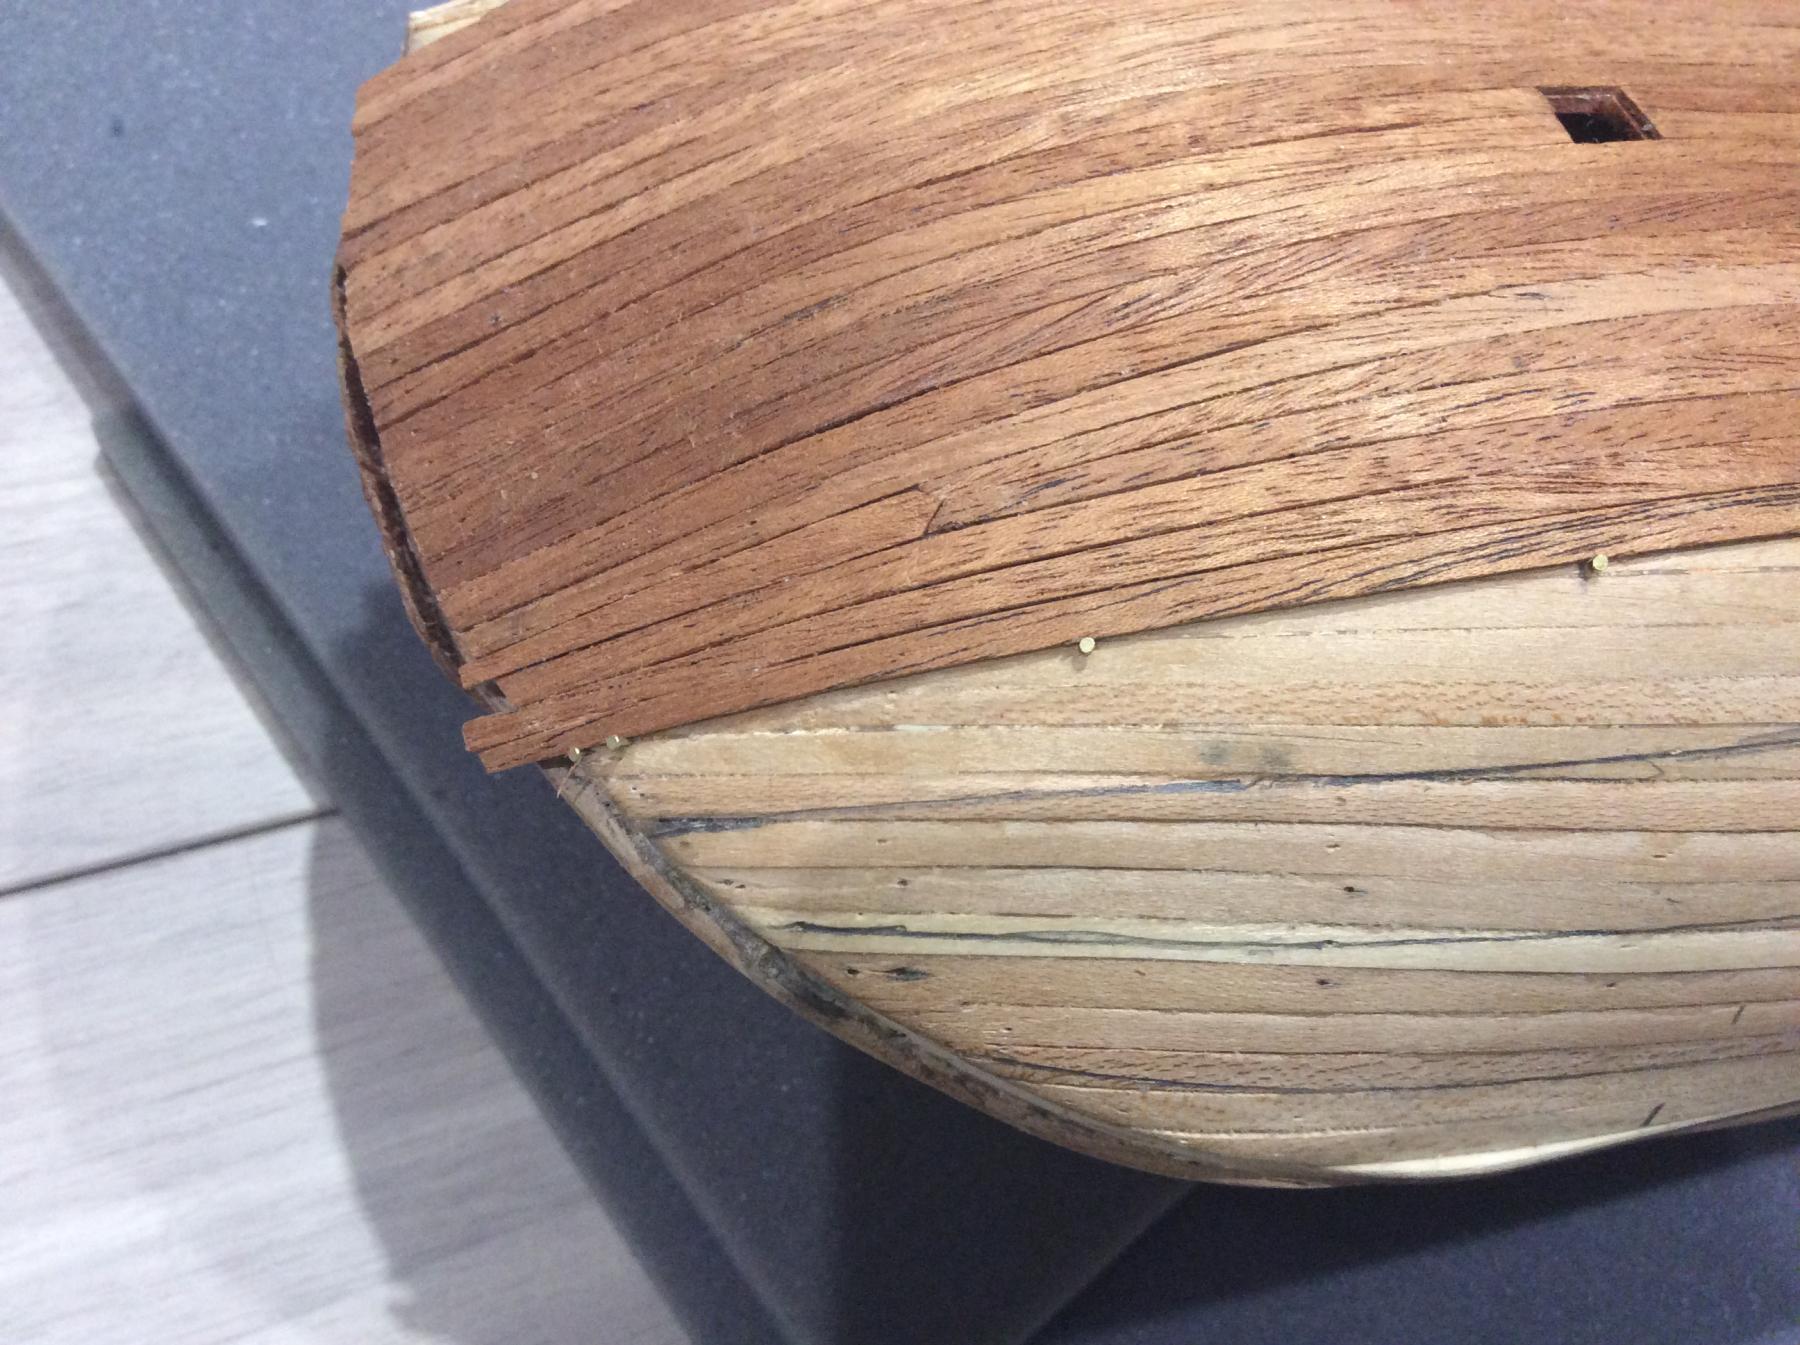
That's it finished the second layer of planking. Used drop planks on the planking nearest the keel as the space for the remaining strips was a bit out. Quite happy with overal result. who looks at ships bottoms anyway?


- coxswain, zoly99sask and hof00
-
3
-
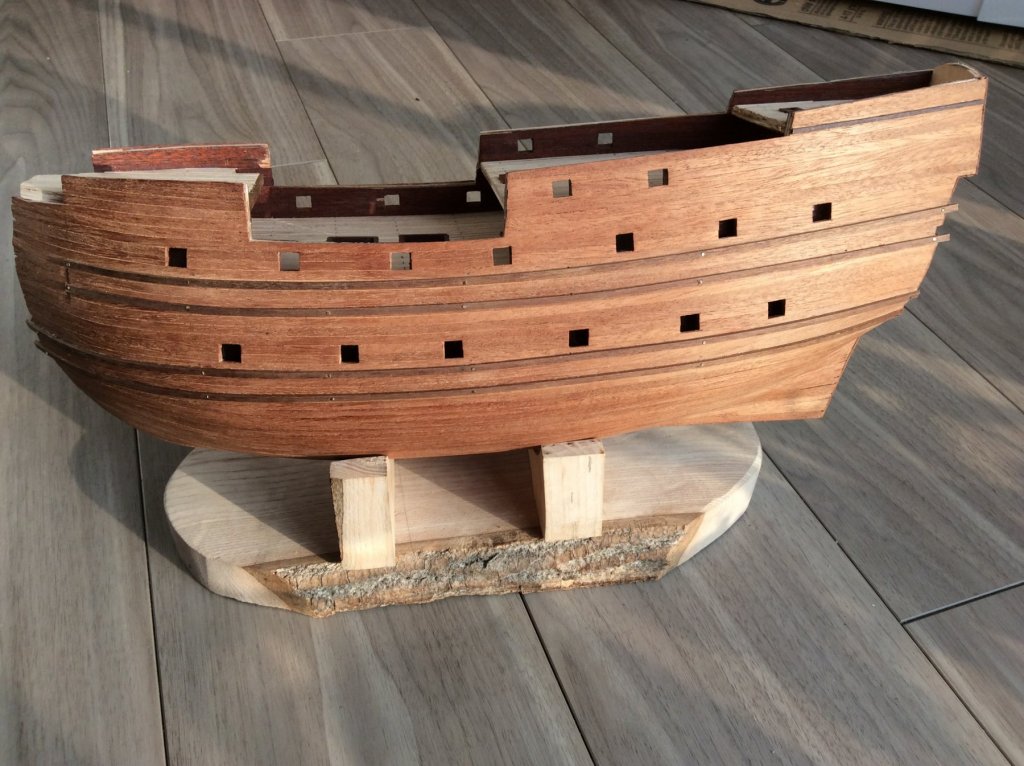
Just about finished 2nd planking layer waiting for a bit more wood supply from the South West. Replaced the 0.5 x 5mm Sapelli supplied with kit with 1 x 4mm Mahogany. Reckon the thin layer would have taken a bashing in the couple of years I expect to need to do the rest of the build and used the guide provided on NRG by Dirk de Bakker and Greg Brooker, split the hull into bands to help tapering, drop planks at the bow to stop crowding only using new blades to cut the timber. Glad I didn't follow the instructions which came with the kit, where you sweep the wood up to the wales.


- zoly99sask and coxswain
-
2
-
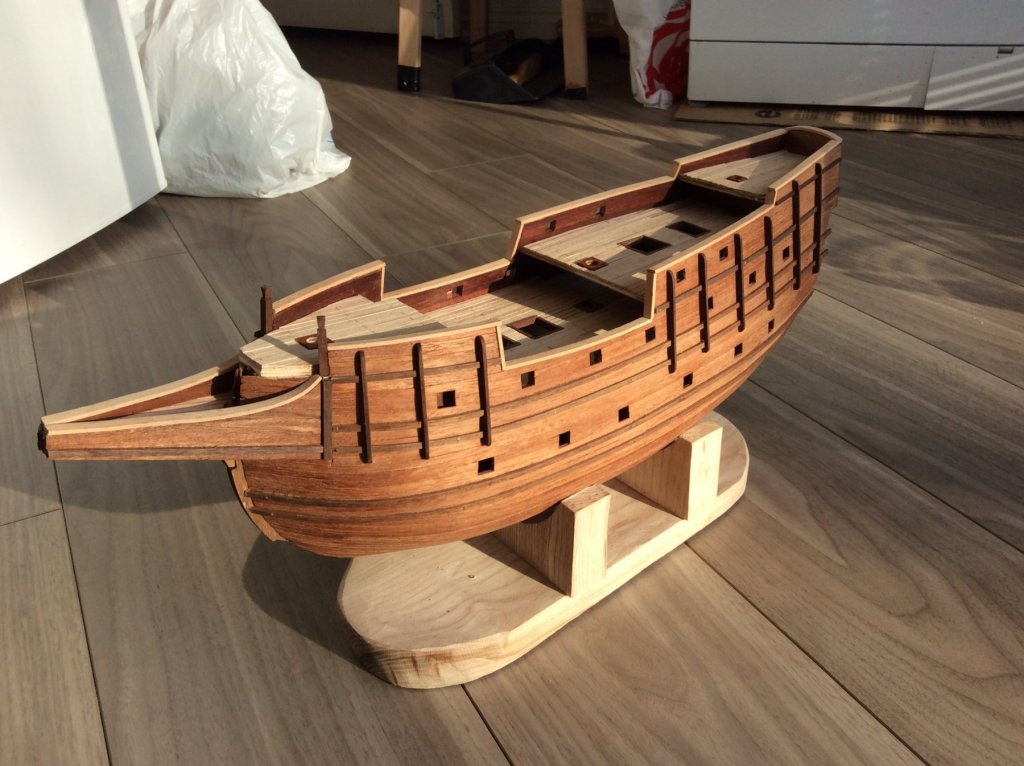
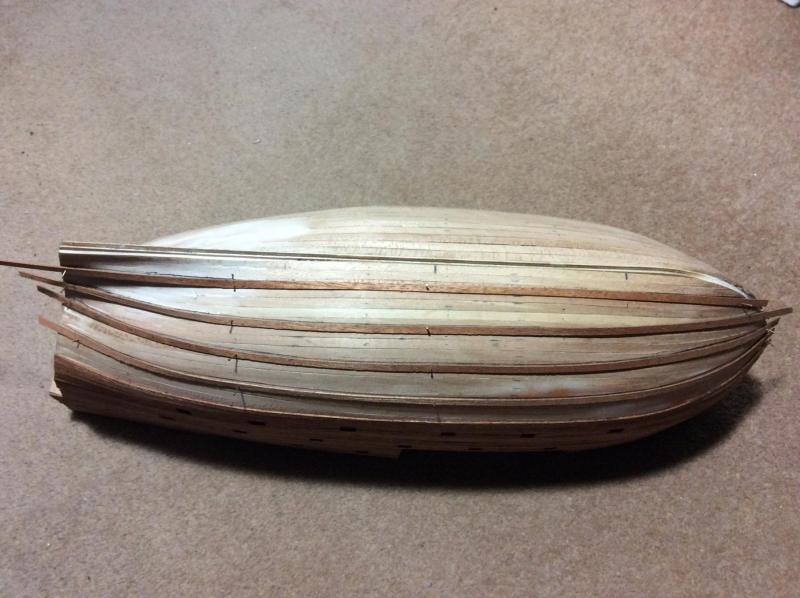
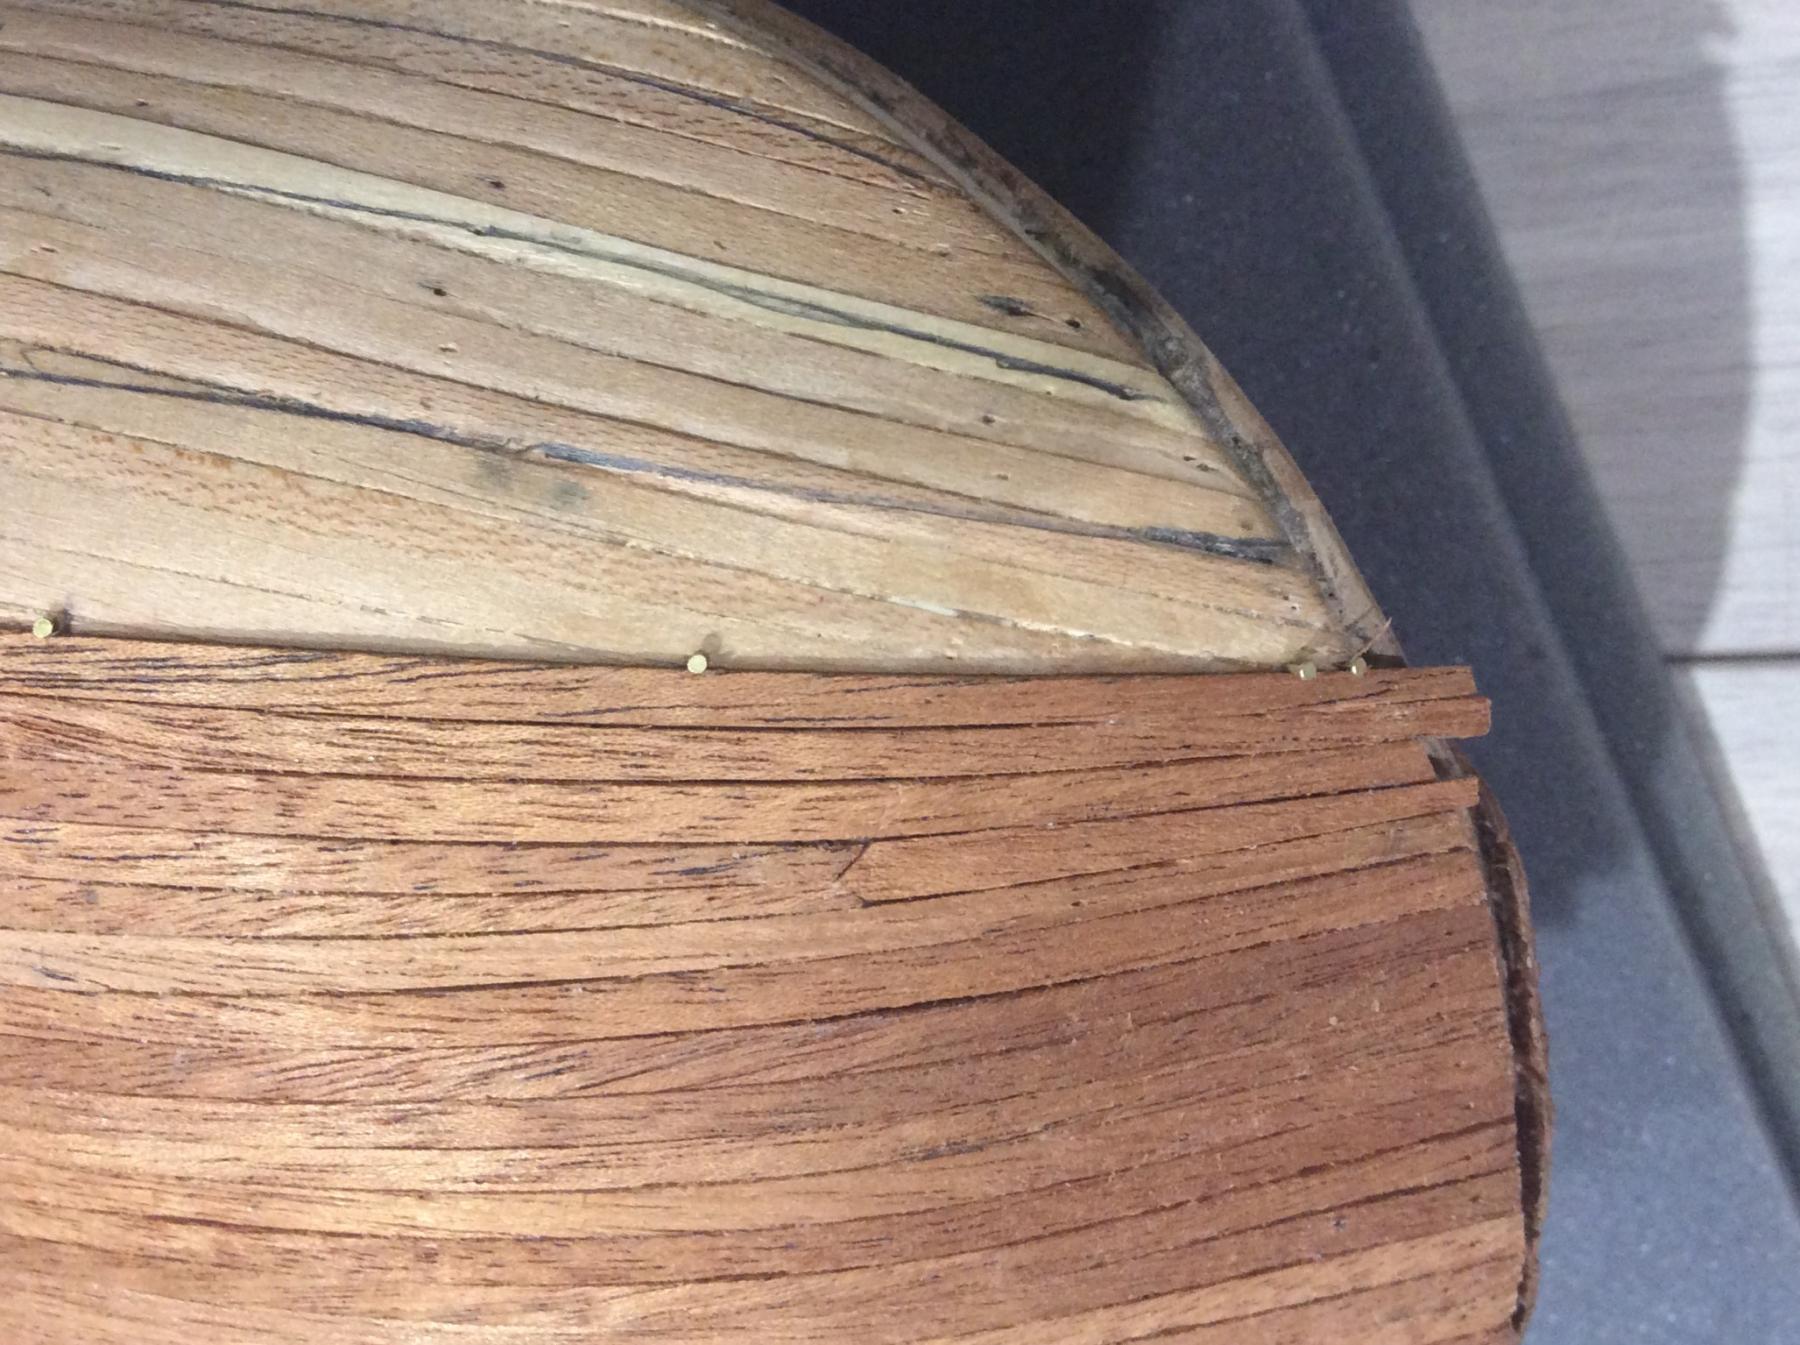
As I started this post I wanted to show what I have done as it turned out using a drop plank was the best option for me on this build. Was surprised at the diversity of replies although in the end my planking was based on the linked guide msw framing and planking.
The 5 planks could have been tapered to fit by reducing from 4 to 2 mm (theoretically) but as it turned out I just managed to squeeze in 4 planks tapered to 3 mm.The last plank closest to keel is for the next band.
Slowhand
(although some people call me Maurice)
- mtaylor, Canute and Seventynet
-
3


San Martin by Slowhand - FINISHED - OcCre - Scale 1:90
in - Kit build logs for subjects built from 1501 - 1750
Posted · Edited by Slowhand
Typo
Think it passed Dockyard QC. Need to buy in some brown rope for the ratlines from Cornwall Models as the beige hemp supplied would look very odd IMO. Also some parrels needed as no where near enough in the kit. Best get them in before Brex**** could be a problem for the non scratch builders. PS why are those funny blocks used to hold the anchors called cat heads.