
Jsk
-
Posts
279 -
Joined
-
Last visited
Content Type
Profiles
Forums
Gallery
Events
Posts posted by Jsk
-
-
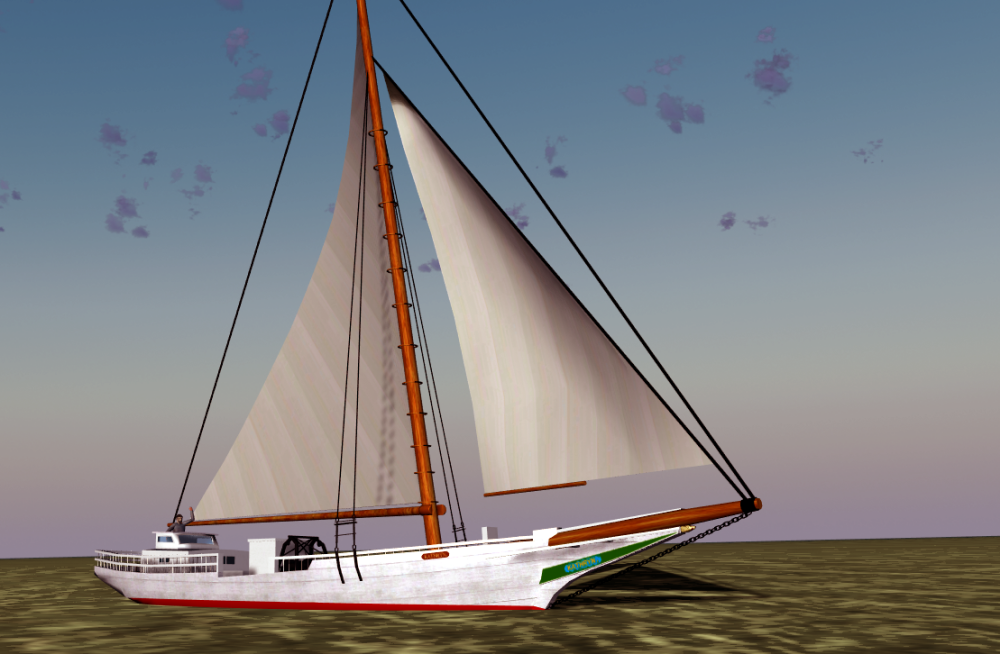
Oooo, something nice from Poland arrived at my house today. Anyone else receive theirs?
- catopower, mtaylor, thibaultron and 2 others
-
 5
5
-
Huh. That wing root cutout seems to be a rather obvious flaw. Still the plane is coming together well.
- ccoyle, Keith Black, Canute and 3 others
-
6
-
-
-
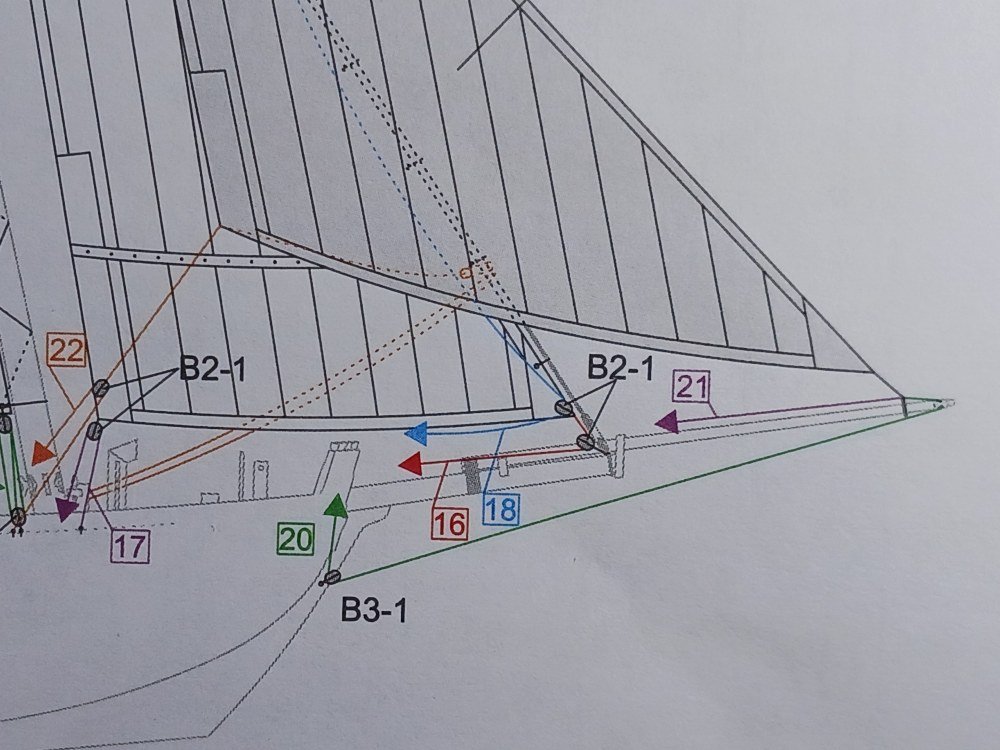
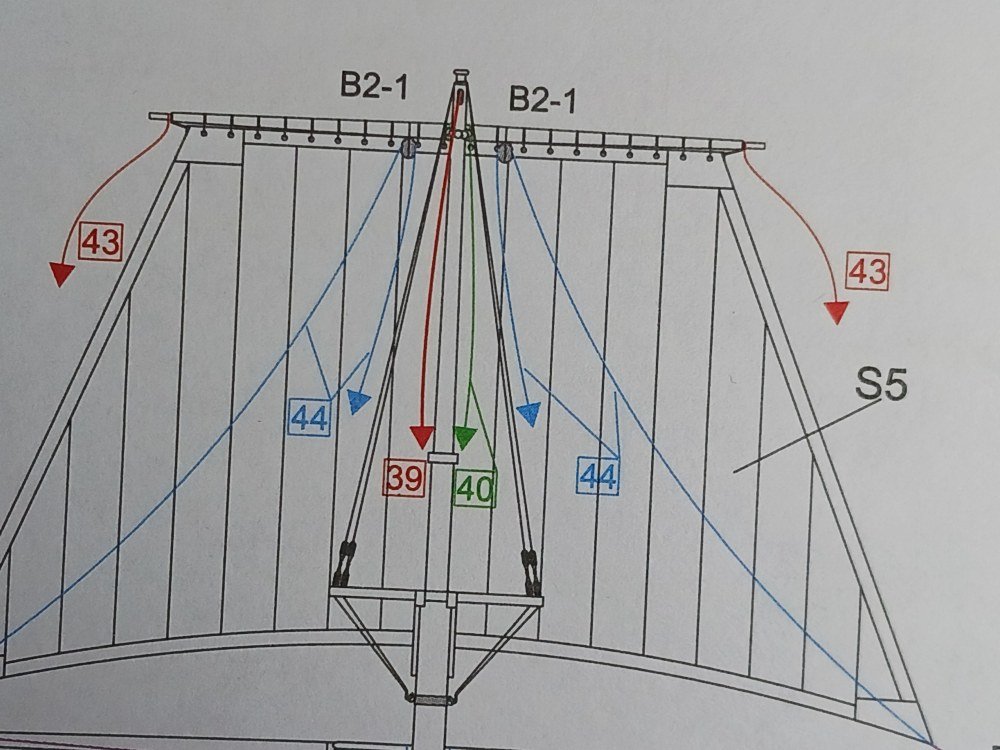
I'm trying to put names to the various lines in the plan's rigging diagrams. Can anyone identify lines 16, 20 and 40 in the diagrams below?
Seahorse United States Revenue Cutter Sail and Rigging Key
Sails
S1
Jib
S2
Fore Stay Sail
S3
Fore Sail
S4
Main Sail
S5
Fore Topsail
S6
Main Gaff Topsail
S7
Flag
1a
Gammoning
1b
Crupper
2
Bobstay
3
Bowsprit Shroud
4
Jib Boom Guy
5
Fore Shroud
6
Jib Stay
7
Fore Topmast Shroud
8
Fore Back Stay
9
Flying Jib Stay
10
Main Shroud
11
Mainstay
12
Main Topmast Shroud
13
Main Back Stay
14
Main Topmast Stay
15
Fore Stay Sail Halliard
16
17
Fore Stay Sail Sheet
18
Fore Stay Sail Inhaul
19
Jib Halliard
20
21
Jib Inhaul
22
Jib Sheet
23
Fore Throat Halliard
24
Fore Peak Halliard
25
Fore Gaff Vang
26
Fore Sail Brail (?)
27
Fore Sail Tack
28
Fore Sail Sheet
29
Main Throat Halliard
30
Main Peak Halliard
31
Main Boom Topping Lift
32
Main Boom Sheet
33
Main Outhaul
34
Main Gaff Topsail Halliard
35
Main Gaff Topsail Sheet
36
Main Gaff Topsail Tack
37 (Green)
Fore Course Sling
37 (black)
Fore Course Yard Lift ?
38
Fore Course Yard Halliard
39
Fore Topsail Yard Halliard
40
41
Fore Topsail Sheet
42
Fore Course Brace
43
Fore Topsail Brace
44
Fore Topsail Clueline
45
Flag Halliard
- GrandpaPhil and Canute
-
2
-
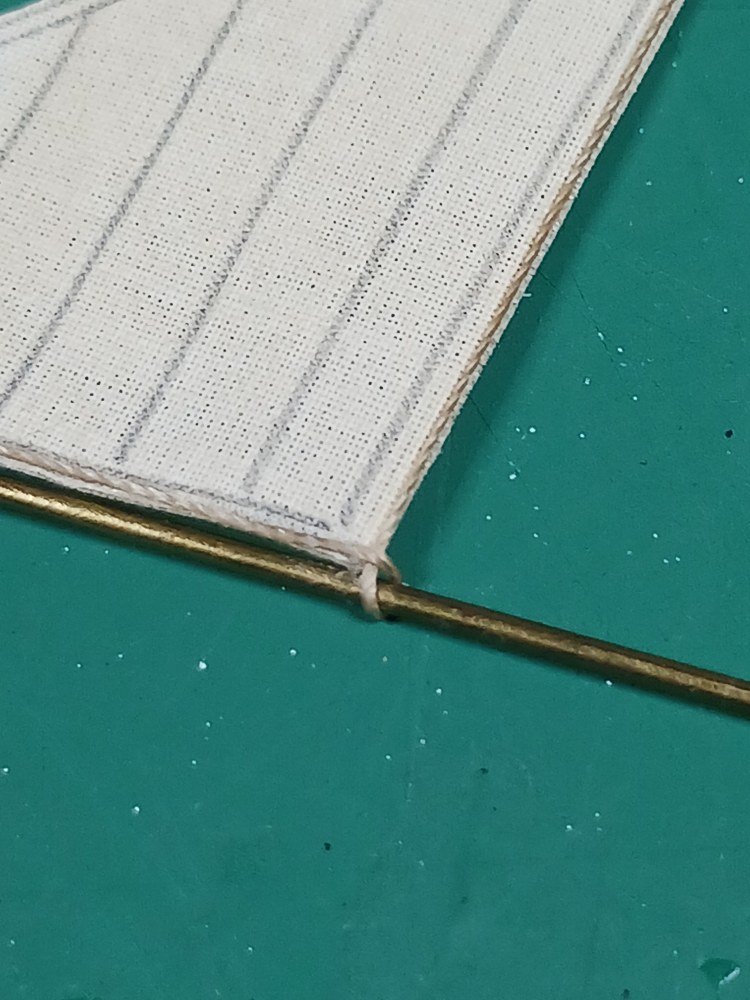
Finished the bolt-ropes on all the sails. Not much to say, really.

On to the rigging!
- GrandpaPhil, modeller_masa, ccoyle and 1 other
-
4
-
-
Your work is always so clean and precise. A rare talent!
- Egilman, Keith Black, Canute and 3 others
-
6
-
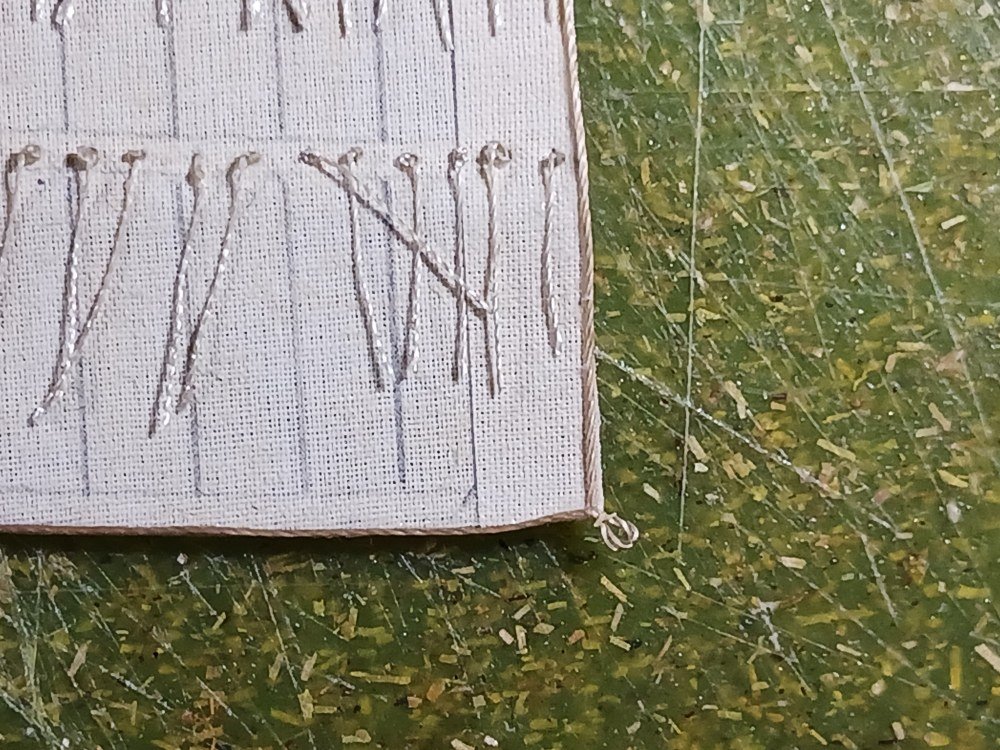
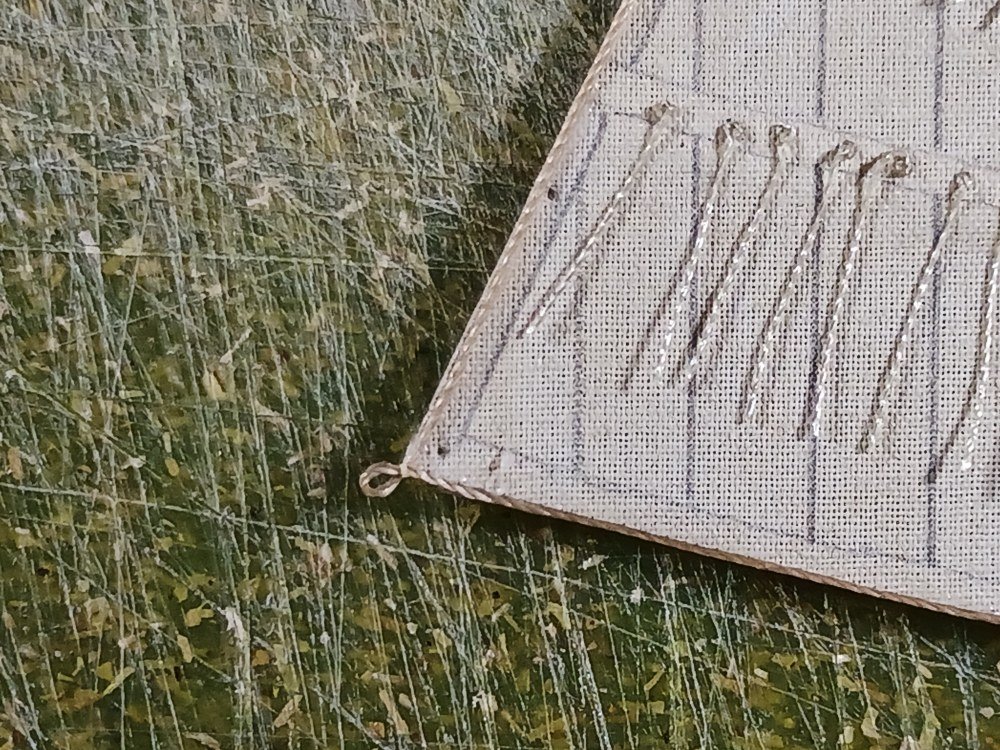
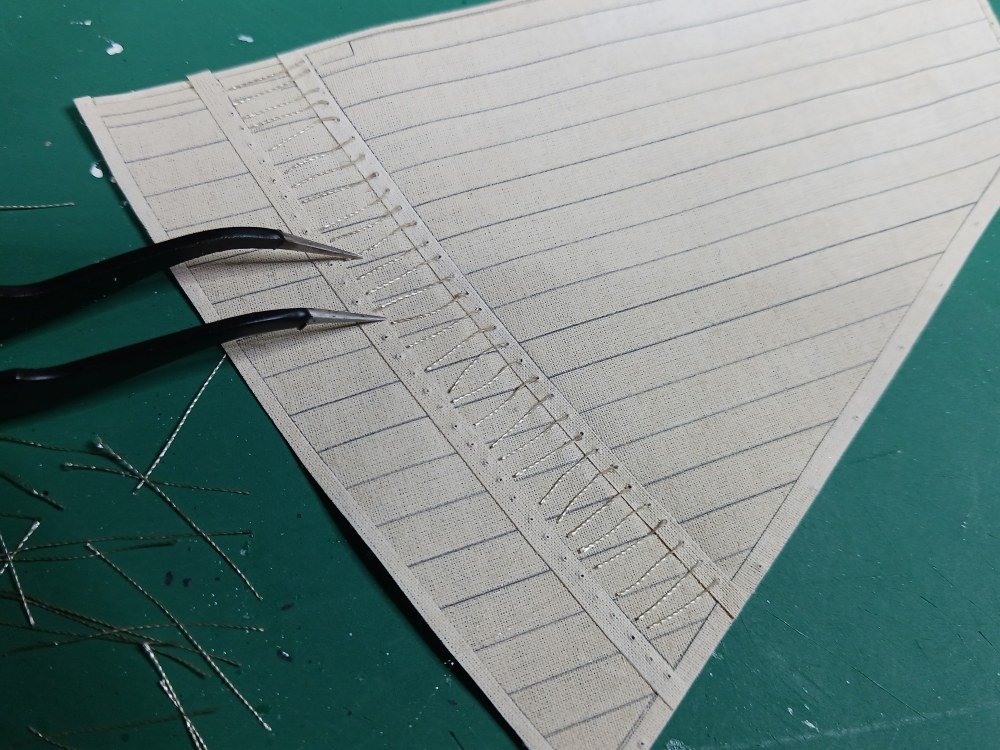
Well, reef points are done. Now that I look at them it seems like a lot of reef points!
This was a tedious process. I opened all the holes with a pin and then took a piece of thread several feet long and stiffened one end with CA. On the other end I tied a double knot about 1.5 inches from the end and then fed the stiffened end through the first hole. Once the knot hit snagged on the hole I back the thread out about 1/4 inch, applied a small dab of CA to the knot and then pulled the thread through again until the knot snugged up against fabric of the sail. I had intended on putting a second knot on the other side but quickly gave up on that idea. There's simply no way I was able to get the second knot snug against the sail.
I then cut the thread leaving about 1.5 inches on the back side. So I ended up with about 1.5 inches of thread on each side. Then tied a new knot and started with the next hole.
Taming the whole row of reef points got to be really tricky so I developed a rhythm of threading and tacking about a dozen lines at a time. I used little pieces of painter's tape to hold the lines in position. Then draped the sail over the corner of a box to ensure the points were against the fabric of the sail and used Aleene's to glue the top portion of the lines to the sail. Finally, I trimmed them short. I did have problems keeping them all the same length
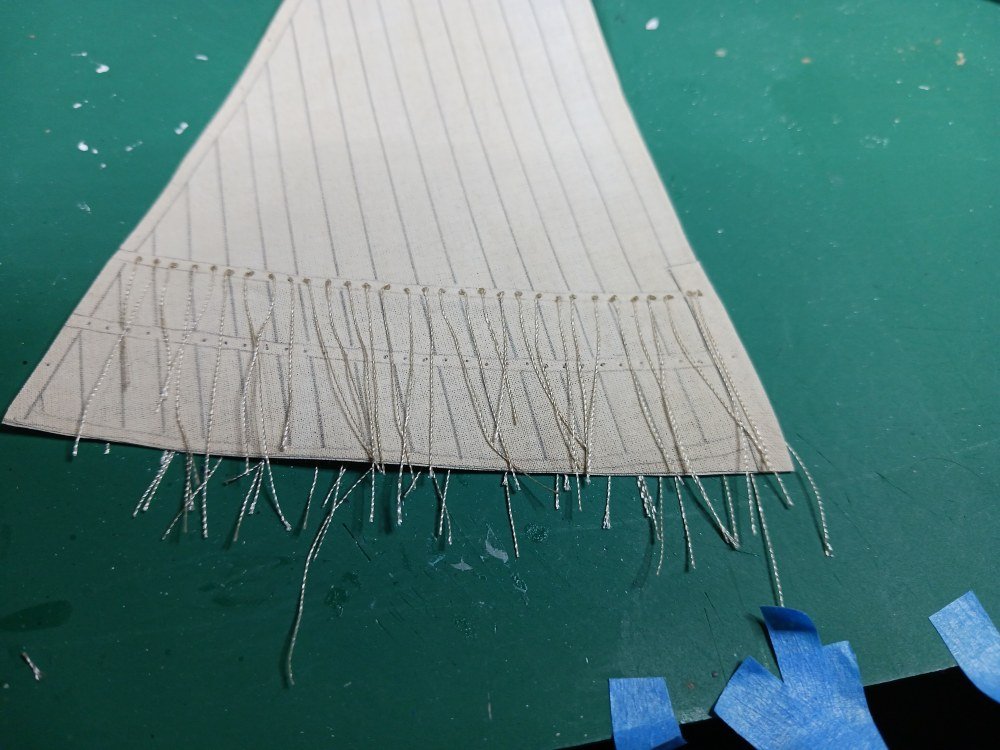
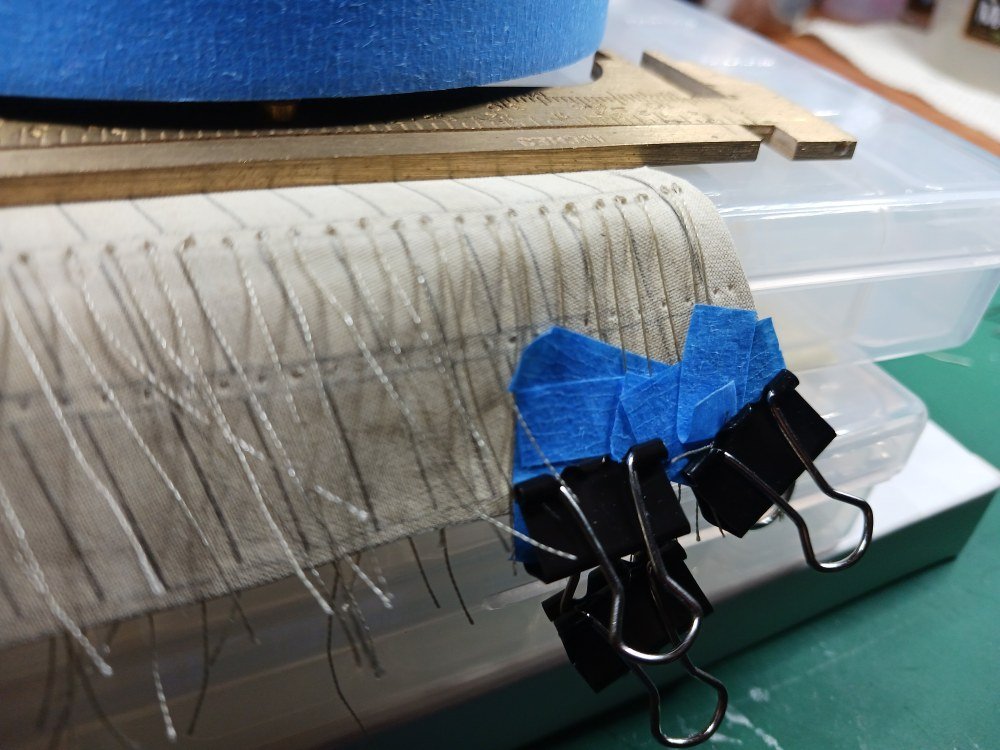
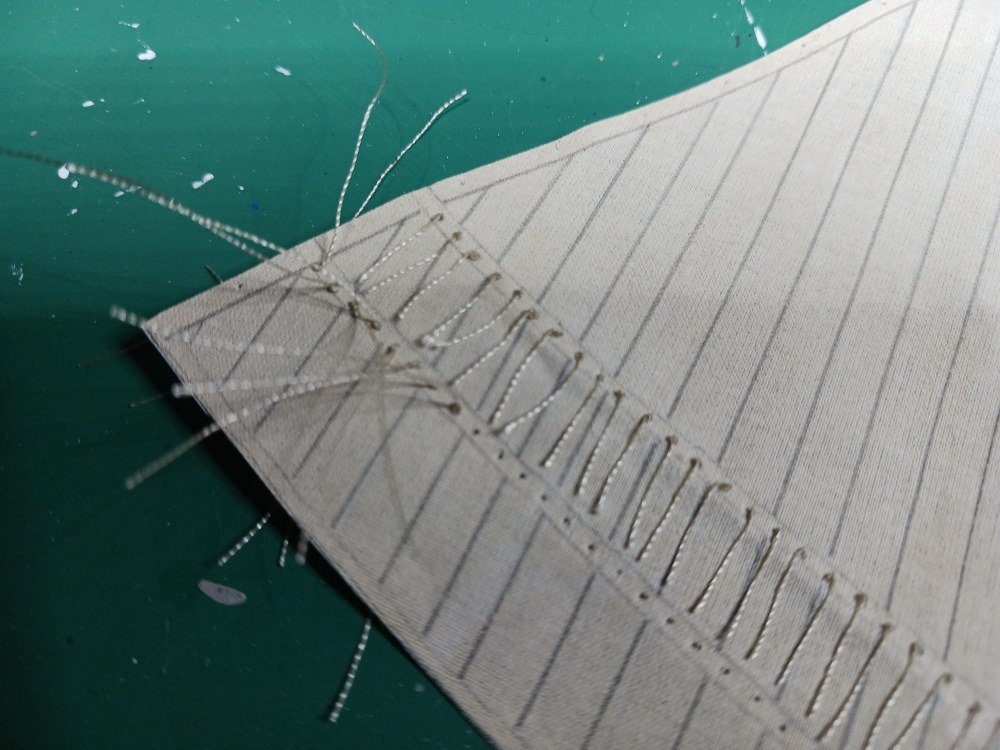
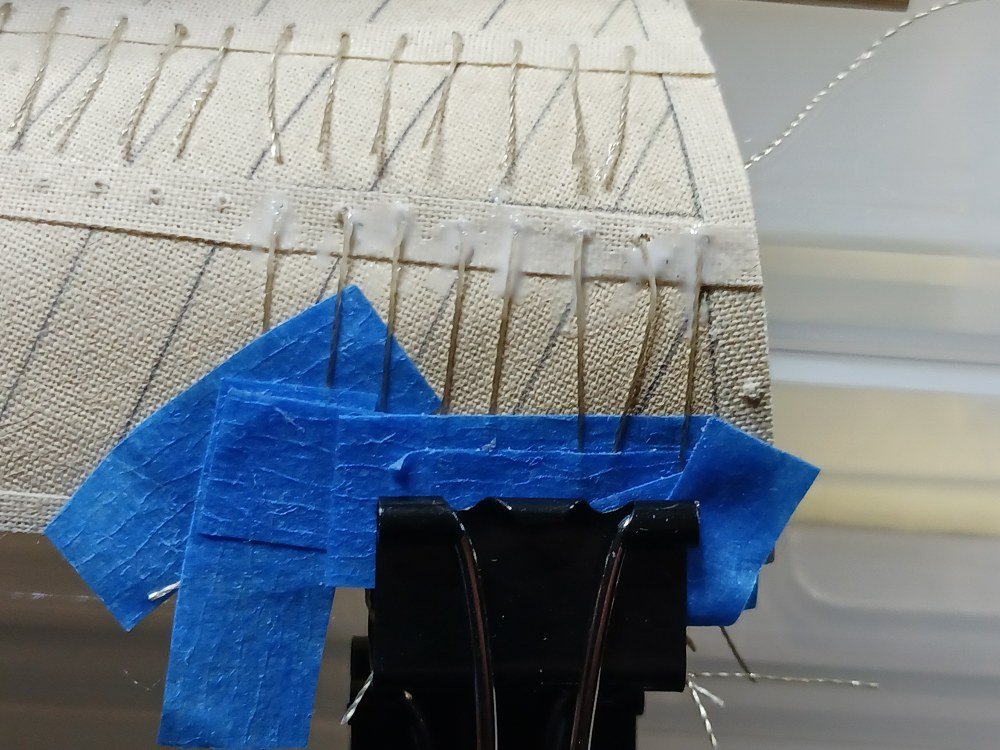
 . I suppose that comes with practice.
All in all I'm satisfied with the reef points. But... yeah, tedious.
I'm now working on the bolt ropes. That shouldn't take as long--I hope!
- GrandpaPhil, modeller_masa, ccoyle and 2 others
-
5
-
Welcome, Marcel!
Seems like there are quite a few card modelers here. Not too many card build logs active at any one time but the builders are here, watching and willing to help.
I'm not sure I'll go back to developing my wood working modeling skills. That's how much I'm enjoying building in card. There's not a lot of investment in tools needed (not to mention the space for a decent wood shop). I think there's a greater variety of kits available in card than in wood. Certainly card modeling has a lower cost of entry. If I spend 30 dollars on a card kit and never build it, no great loss. If I spend 300 on a wooden kit and never build it (or attempt and fail), well, the expense would just make me feel the failure even more.
And you can't ever regret trying a Seahorse kit!
- catopower, Marcel1981, ccoyle and 6 others
-
9
-
She's looking suitably mysterious and somewhat menacing!
So... a couple questions:
1) is the mottled appearance part of the design or is it an artifact of your printer's coverage?
2) Did you print it out on US Letter sized paper, and if so did you find have an issue with margins since it's (presumably) designed for A4 size sheets?
The reason I ask is because I have the USS Baltimore by Heinkel but I just realized that it's designed for A4. I've not printed anything yet so I don't know if I'll have margin problems on the top and bottom of the page. I don't know how US Letter friendly Heinkel's designs are.
TIA
-
I'm looking forward to seeing you build this. I'm still plugging away on the Revenue Cutter but, like you, I ordered it today, too. It's too nice of a thing to pass up!
- Canute, tmj, thibaultron and 2 others
-
5
-
Permission to come aboard?
I recently found that Heinkel models are available on Wargame Vault. I usually have a credit there for rules I sell and I've been wondering what I can do to bring down the balance. Problem solved! I've added the USS Baltimore to my stash but I've been seriously thinking about the Turtle as a 'between other projects' project.
I'm looking forward to watching your experience with the Nautilus.
P.S., Who's Ron Miller?
-
-
Thanks, Bob.
I suspect there is no term in the entire maritime lexicon that has a single, simple meaning. I think I'll forego actually pointing the reef points since I'm working at 1/72 scale.
On 4/24/2024 at 4:40 AM, Bob Cleek said:(Note the term "reef points" references the pointed shape of these lines. It does not have anything to do with the gromets worked into the sail through which reef points are passed, as is modernly a commonly heard misuse of the term.)
Thank you for this^^ I was confused about this because most of what I've seen on-line do indeed misuse the term.
--jeff
- mtaylor, Bob Cleek and Scottish Guy
-
3
-
Perfect. Thank you!
- mtaylor and Scottish Guy
-
2
-
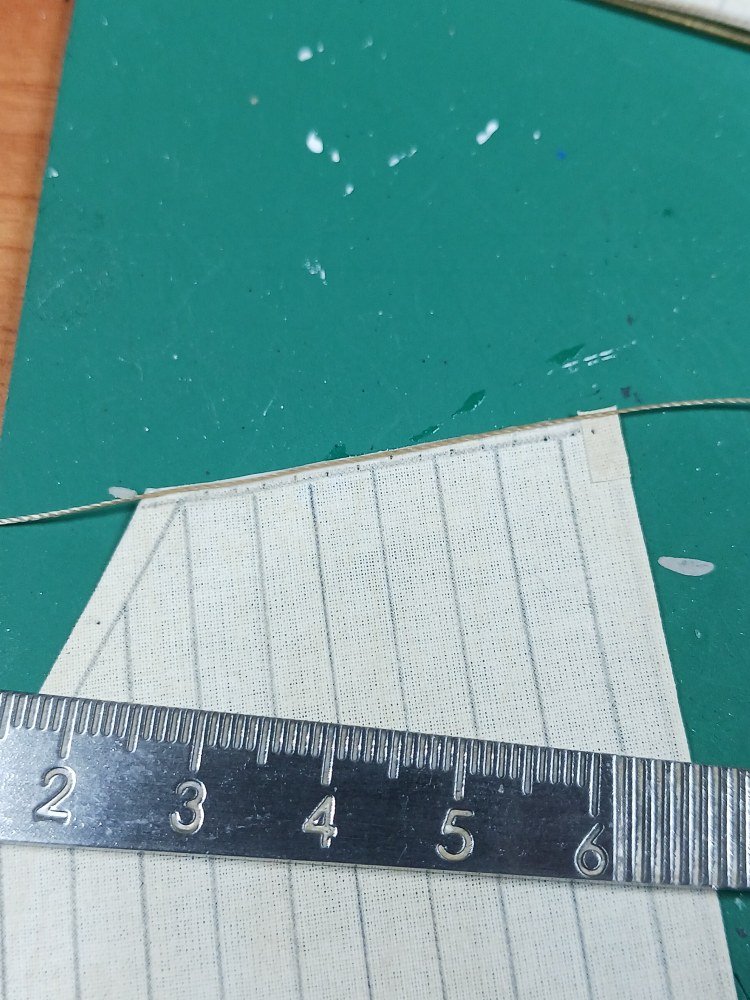
Was there any sort of standard length for reef lines? Frankly, I don't have a good feel for how long they should be. I understand that the lines further up the sail would be longer than those lower down because they needed to encompass a greater amount of reefed sail. But having never reefed a sail I really don't know how long the lines should be.
If all else fails I'll just go with what looks right according to other models I've seen.
TIA
--jeff
- mtaylor, Scottish Guy and Keith Black
-
3
-
-
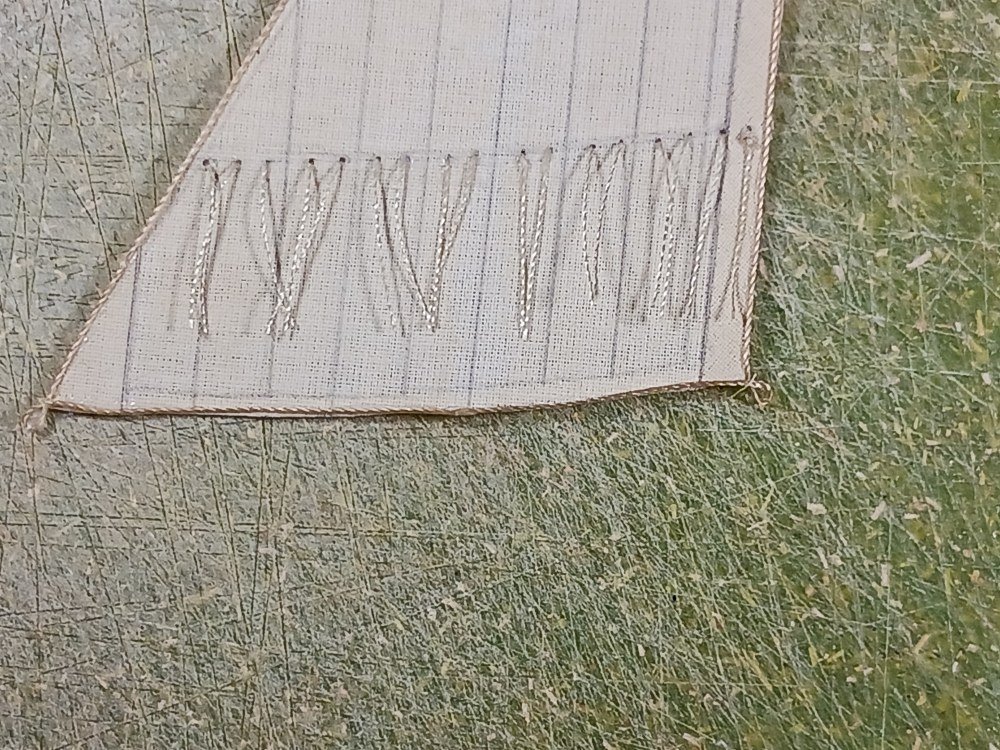
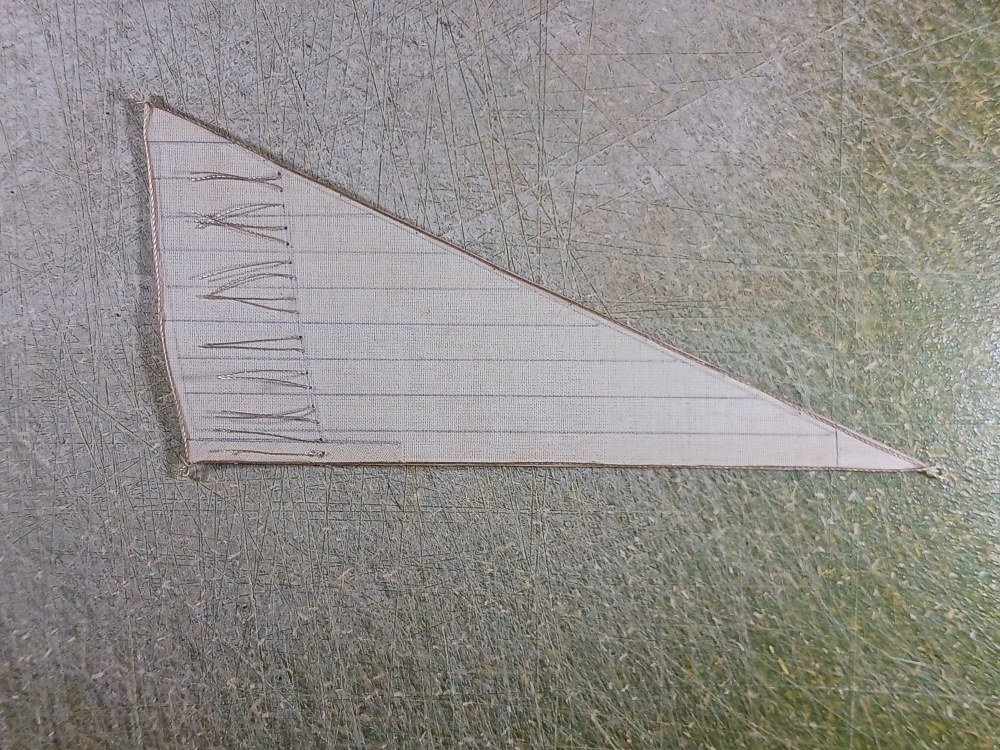
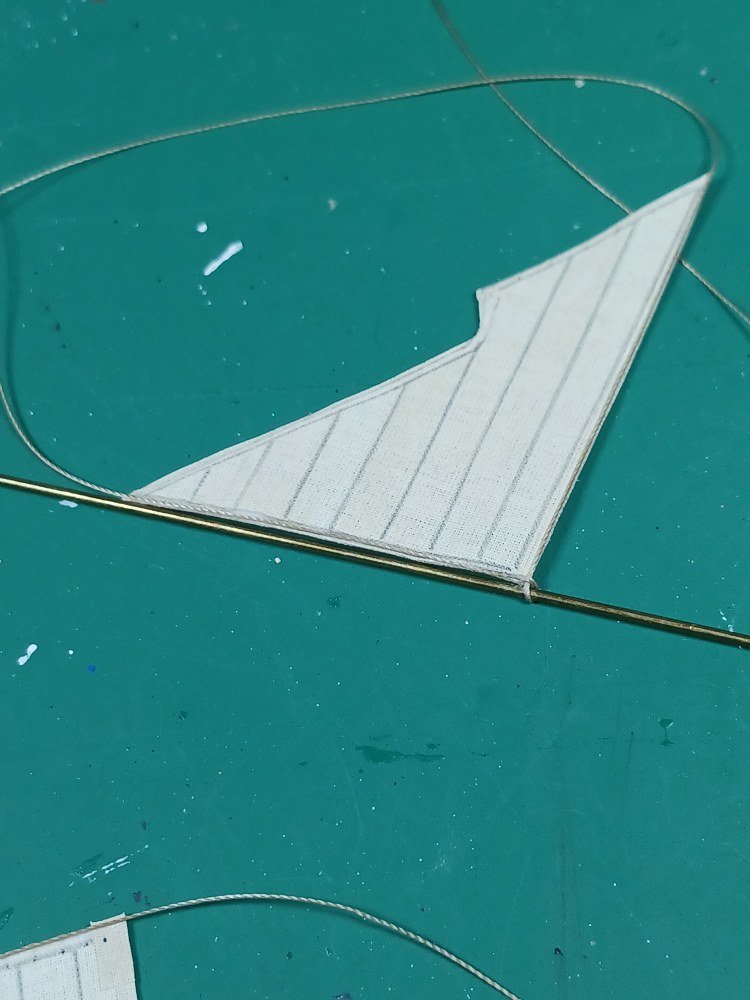
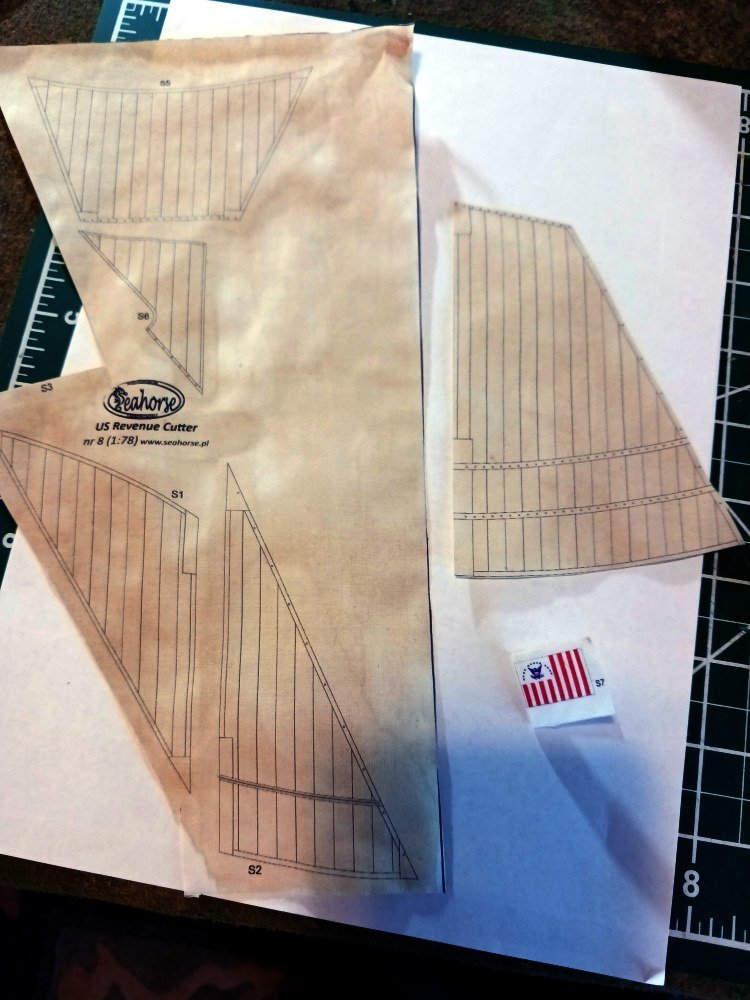
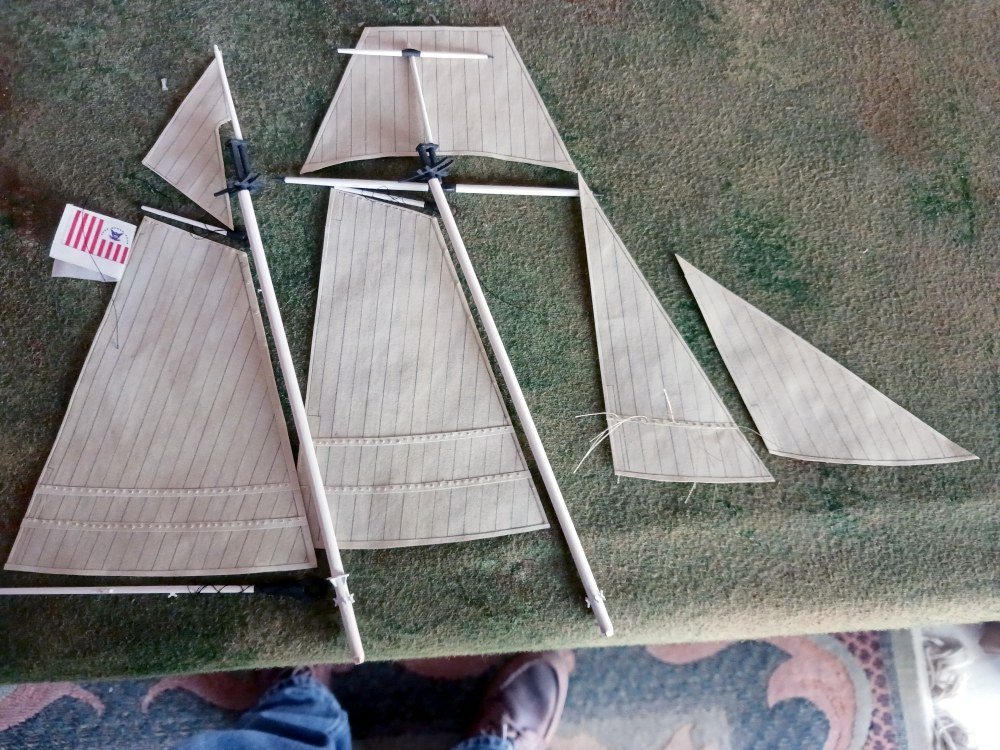
After working on the boom and gaffs I worked on the sails. I used a watered down acrylic paint (about 50/50) of a 'sandstone' color to color the white fabric. I hung the fabric like so much laundry on a line and let it dry for a good 24 hours. The fabric had a nice stiffness to it after the paint treatment. Since the sails are printed on one side only I used a thin lead mechanical pencil to draw the seams on the reverse side and then applied a thinned coat of watered down white glue to seal them. (I've happily used Aleene's Tacky glue for the entire project.) I simply used an knife to cut the sails apart and glued thin strips of the same painted fabric for the tablings and reefing bands. I've not yet glued on the bolt ropes but decided to try the reefing points first.
So... were there standard lengths for the reef lines? And what's the best way to tame them?
The painted fabric:
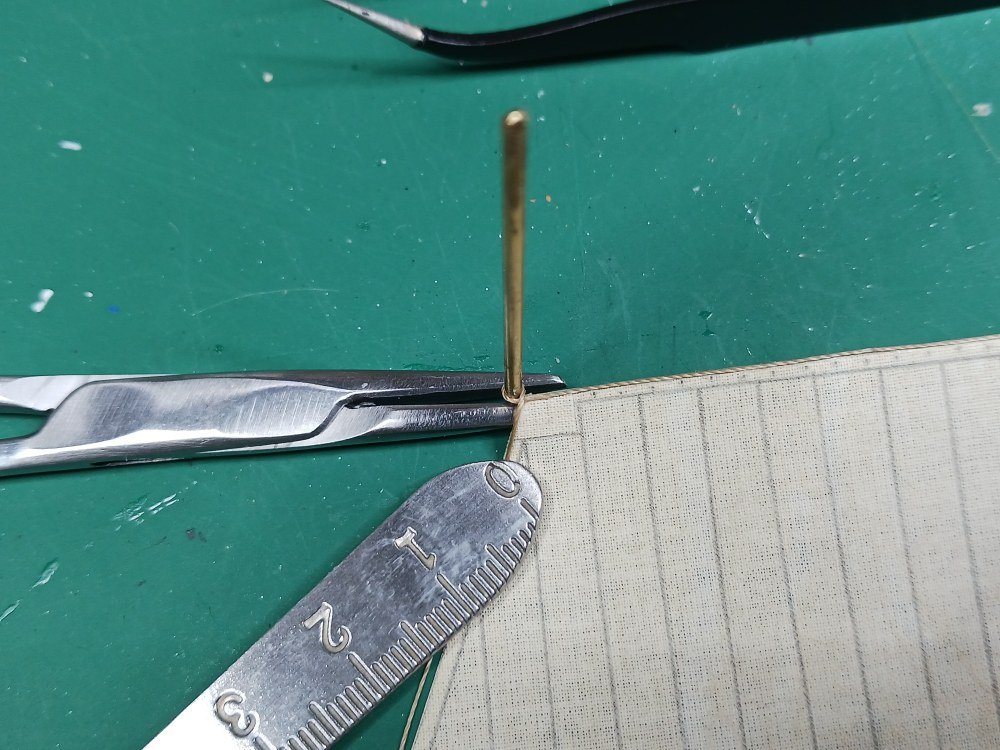
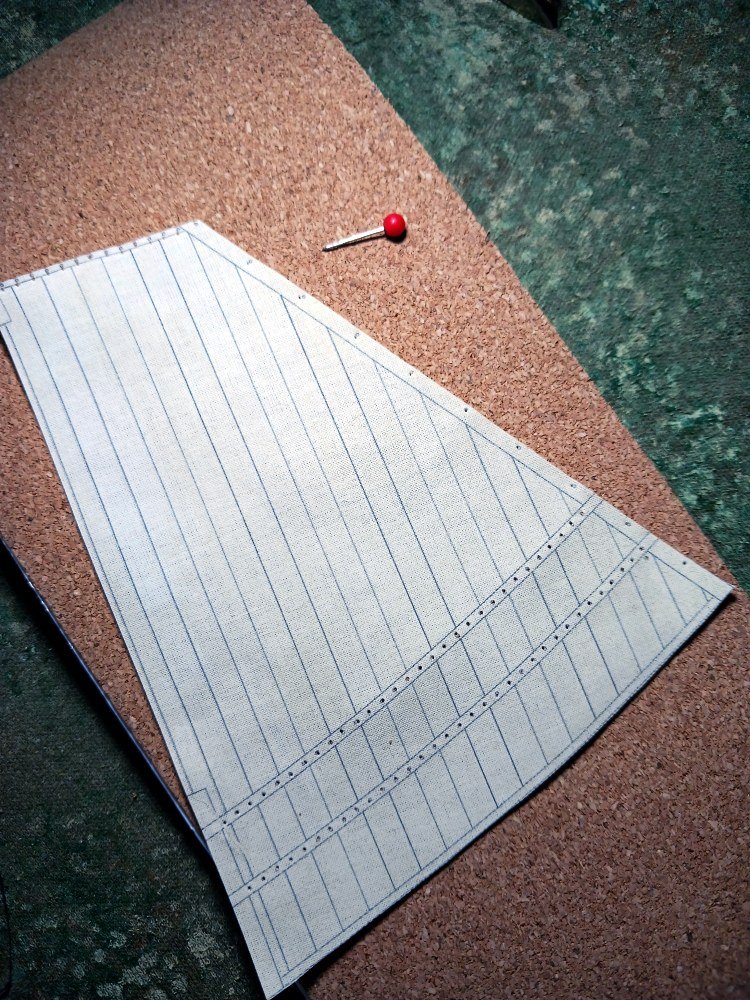
I used a pin and some cork backing to open the reefing points:
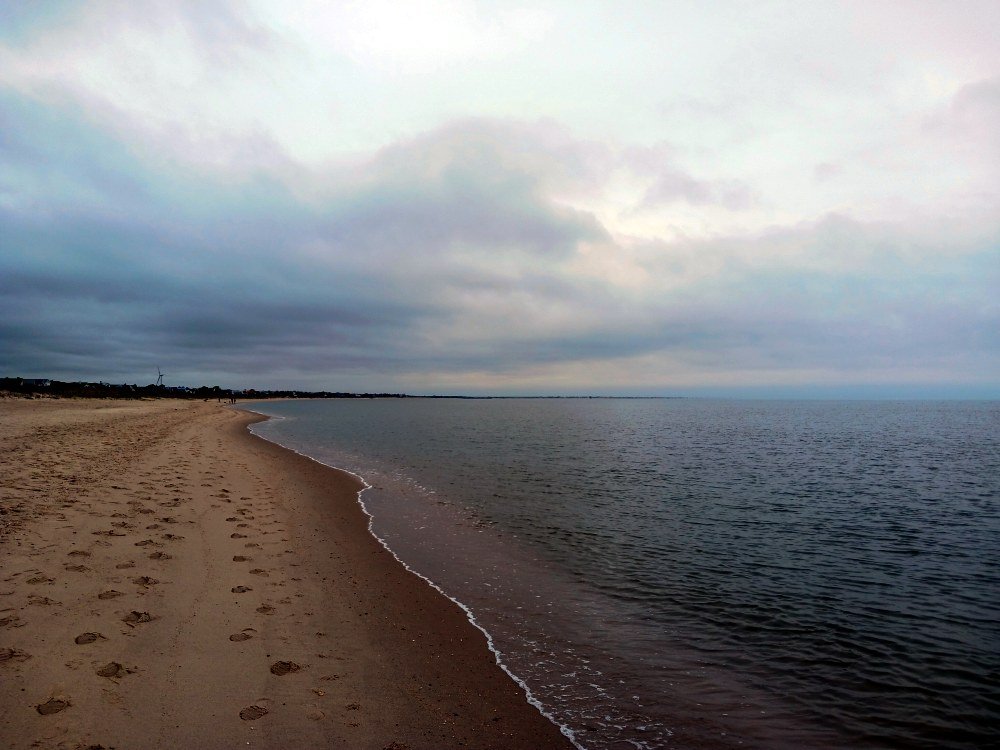
Went away to Lewes, Delaware, for the weekend searching for some inspiration. Found some looking north:
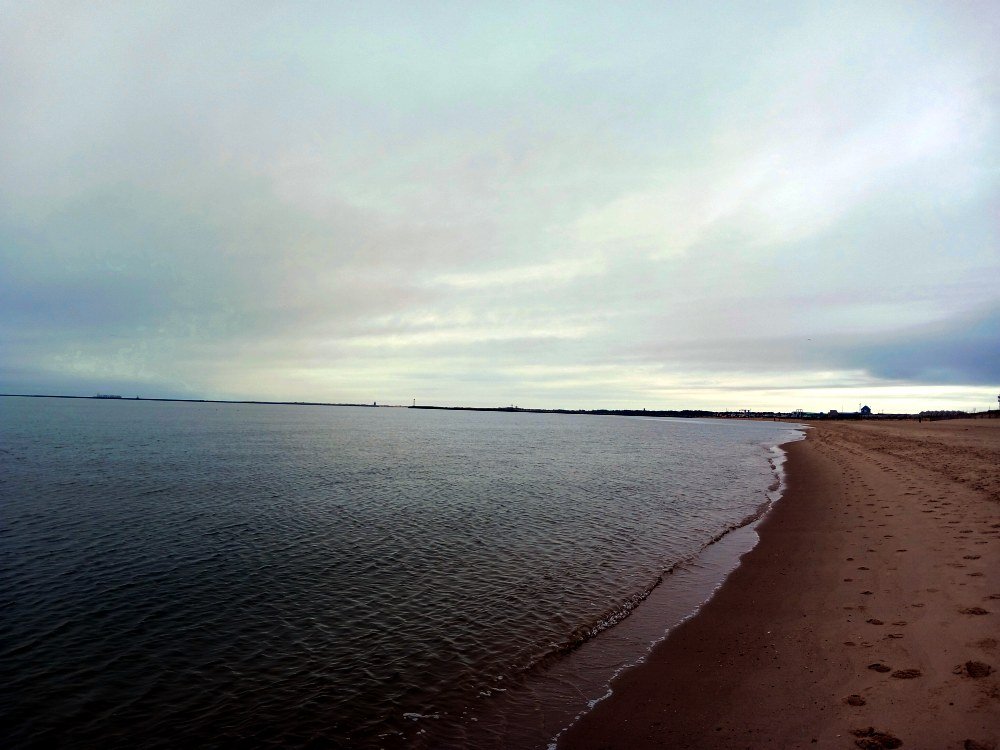
Found some more looking south:
Returned home and added unruly reef lines to the fore sail:
- Canute, GrandpaPhil, modeller_masa and 1 other
-
4
-
-
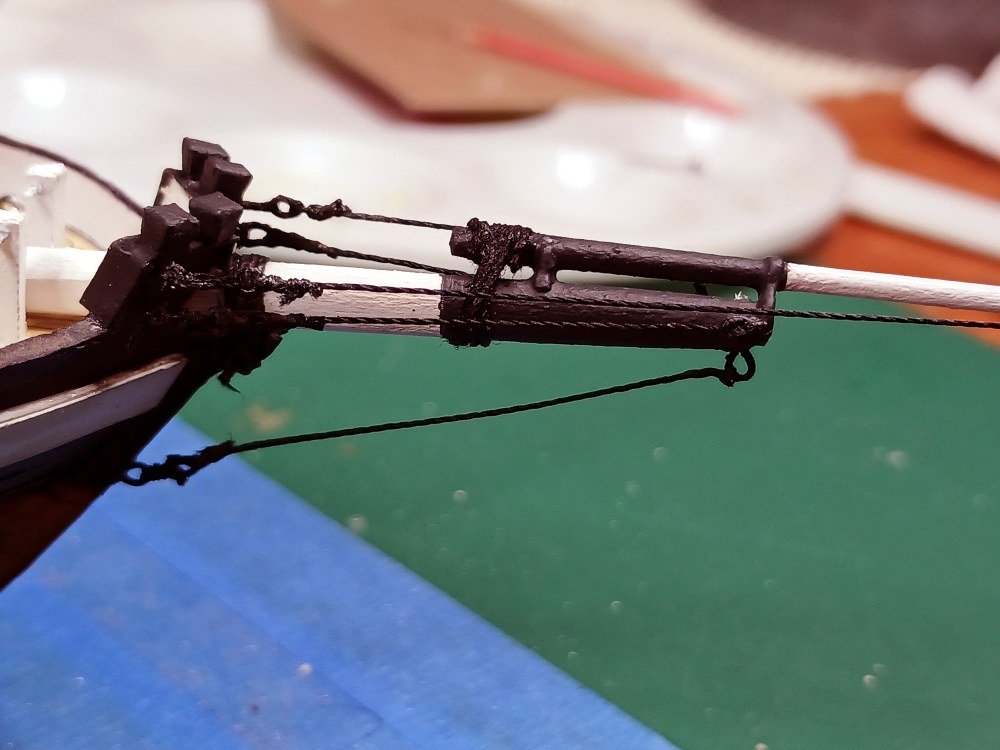
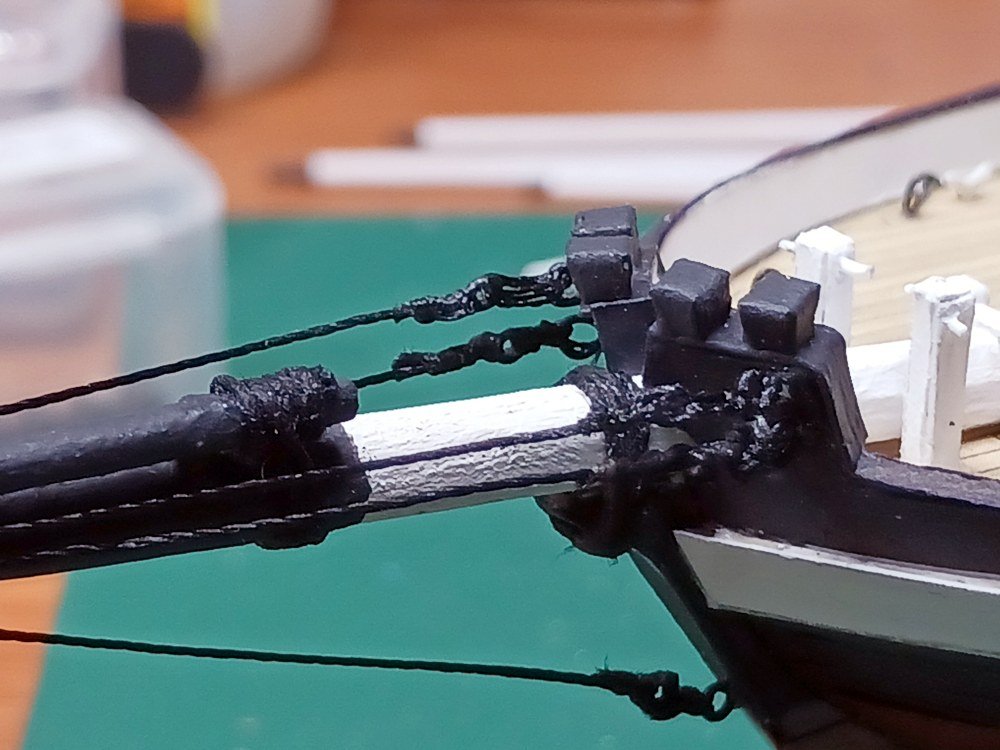
Thanks all. I've definitely been working slowly here. Feeling my way, so to speak.
I do have the bow sprit mostly rigged. I wish it was a bit neater but I suppose that will come with experience. I struggled a lot with the thimbles and finally gave up on them. I think if I simply tied the lines to the thimbles rather than try and seize the line around them I'd have been more successful. Looking at @modeller_masa and @0Seahorse builds I see that's how they did it. What I ended up doing was to create a loop around a brass wire and seize the line as if the wire was a deadeye. Then I slid the line off the wire and coated the loop with CA to harden it so I essentially had a line attached to a thimble. It worked, mostly.
I've started working on the parrels for the gaffs and boom but I have a question here. The instructions show short lengths of wire insulation to use for the parrels. But I notice the 3d printed parts include 'trucks'. According to my glossary, a truck is the cap at the top of a mast. That doesn't make sense for these spherical beads. Are these actually to be use for the parrels? I don't know what else they would be used for.
I certainly want to place the gaffs and booms (and hoops) before attaching the topmasts. I haven't decided if I want to try bending the fore and aft sails to the masts after rigging or construct the masts with sails before and then rigging around them. I think it might be easier to do the standing rigging around the sails rather than try attaching the sails after the standing rigging is in place. Hmmmm....
-
-
I'm late to the party (as normal) but I don't think you need to be concerned that Sketchup doesn't do curves. I don't believe *.stl format does either and any model intended to be 3d printed need to be triangulated when exported to a format the printer will accept. I think the resolution of the printer determines how small (and hence how smooth) the triangles can be. I could be very wrong on this as I have intentionally avoided getting a 3d printer. (I simply don't need another hobby!) But that box of blocks is very tempting!
If you're looking for other modeling software you might give Wings3d a look. The learning curve is much less than something like Blender and it would probably speed up you modeling pipeline quite a bit. I've modified *.stl files in Wings and had them printed so I know it's capable of producing printable files.
- modeller_masa and mtaylor
-
2
-
I think I've met my match. Now that I've collected the rigging supplies I decided to start with the bow sprit. From what I can tell it looks like the bob stay and guys are seized to thimbles. The thimbles provided in the kit are 2mm, outside diameter and seem to be beyond my hand/eye coordination. So what are my options?
I notice @Dr PR used blocks (here). I think I'd be able to manage that (since the blocks I have are bigger than the thimbles) but his ship is a bigger vessel (and scale!) than I'm working on. Would a 31 tonne cutter be rigged that way? I know that period rigging could vary a lot depending on the captain's preferences but I don't want to veer too far from normal. But I'm also facing the conundrum of desiring details that are probably beyond my abilities. Hmmm. 😡

New to say Hello
in New member Introductions
Posted
Welcome back, Chuck. I had an account for years before ever posting. Actually, I even forgot I had the account!
Anyway... My wife and I had a 20th anniversary cruise on the Stephen Tabor 10 years ago. Good wine, good food, good people. I've often considered doing a virtual model of ST. Just haven't got a round tuit.
Ship modeling is an acquired skill best taken slow (I think, I'm not there yet). Good luck with your newest project!