


Torbogdan
-
Posts
252 -
Joined
-
Last visited
Content Type
Profiles
Forums
Gallery
Events
Posts posted by Torbogdan
-
-

All frames are done. Each had to be modified as I had not mounted all the planks 100% correct. It was not one plank that was grossly incorrect, more 1/5 of a mm here, another 1/5 mm there and it adds up. But in the end it was not a serious problem, just a bit more work

One might think that errors this small would not matter but as the errors can only go "one way" they add up.
If I were to build this model again, I would be very careful when mounting the hull planks. I guess the overlap should be maybe 1mm per plank. I could not find this in the instructions and it would be helpful if this was included. That way a lot of unnecessary extra work would be avoided in the step where the frames are glued in place.
As always work slow and be careful and patient.

-
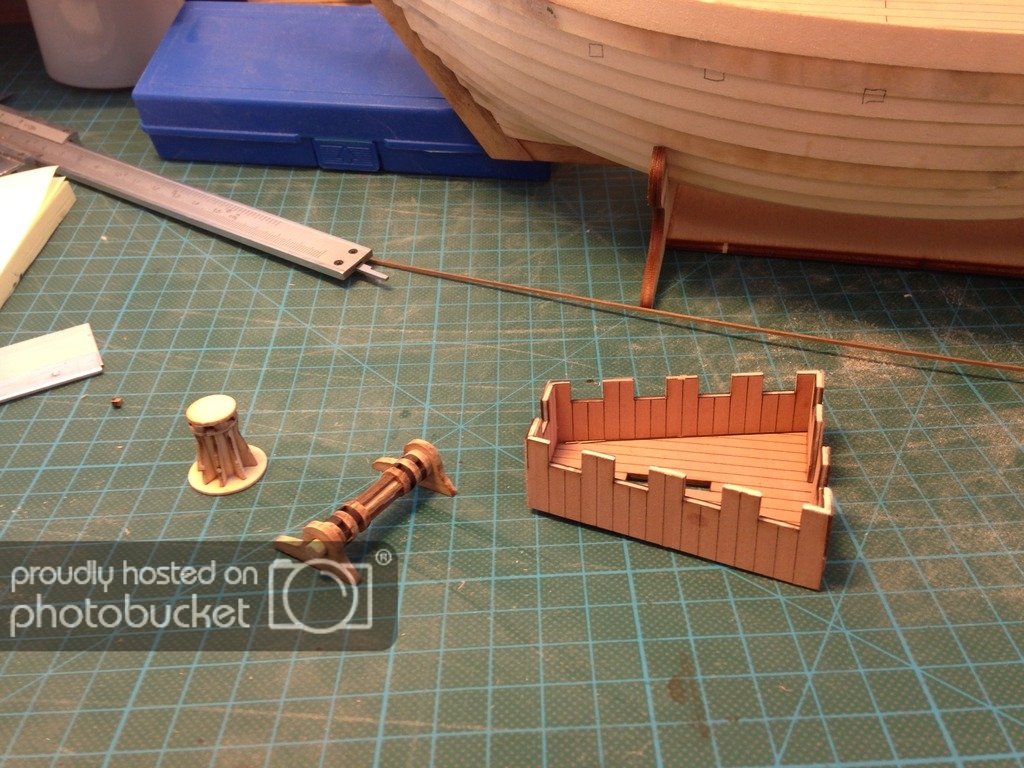
The seat piece, blue, I guess rests on the beam, black part. Are the purple parts, support pieces really necessary to shore up the green part, footrests?
Could the foot rests only rest against the black beam? that way you cut down quite a lot of the extra number of scratch built parts.
- WackoWolf, Robin Lous, Nikiforos and 2 others
-
 5
5
-
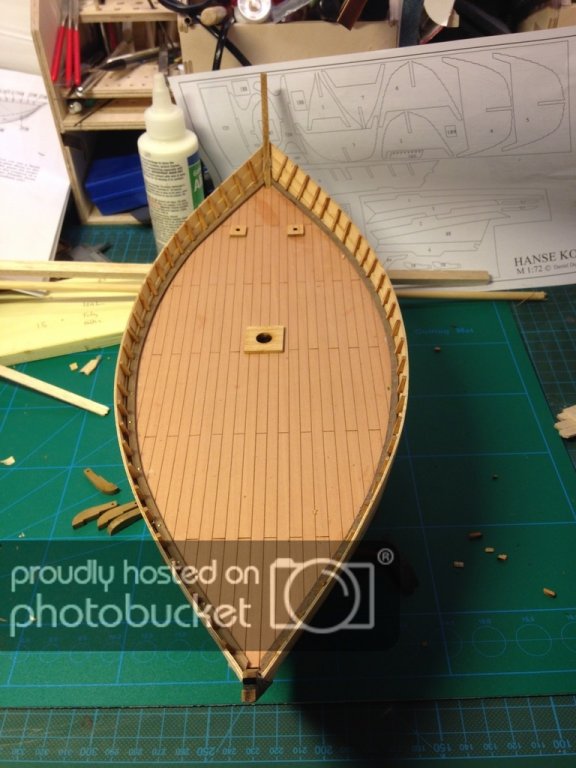
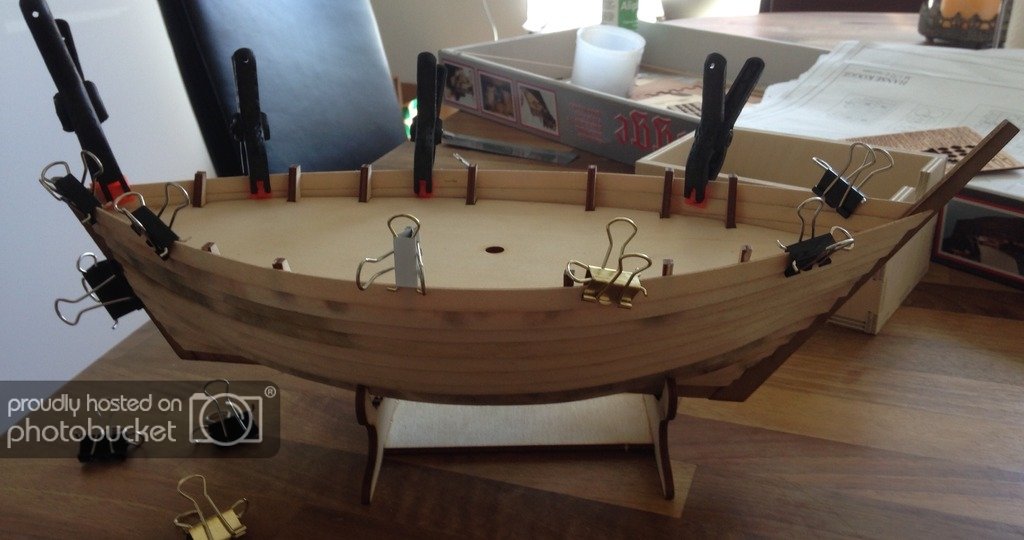
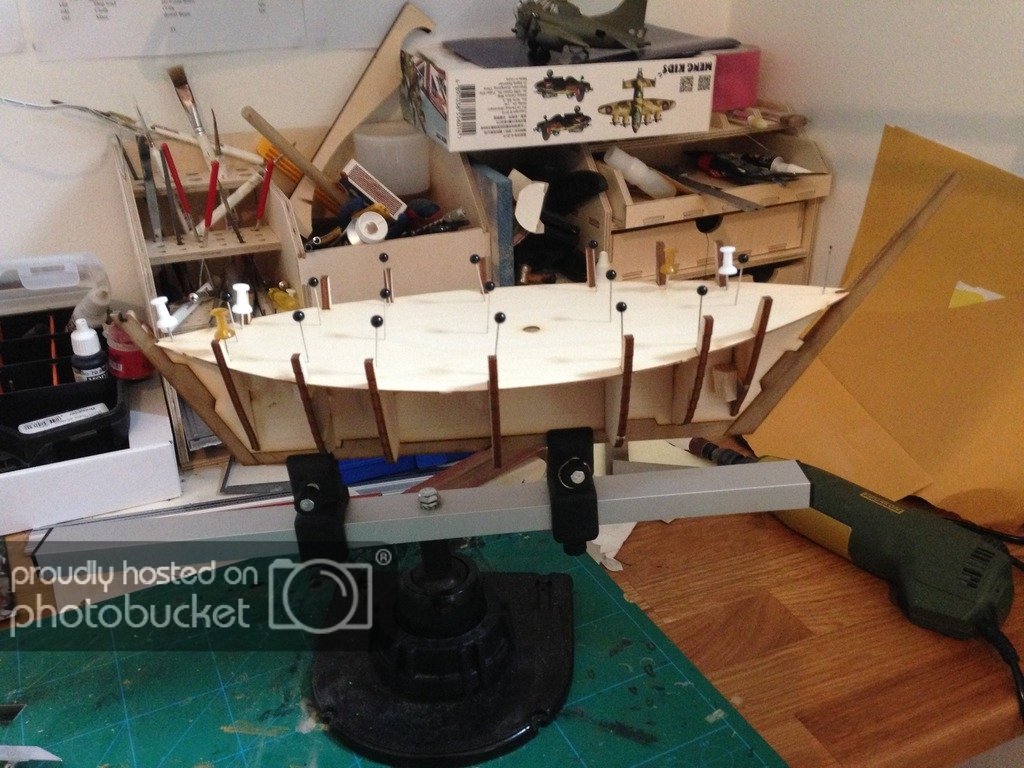
I have started to add the frames to the inside of the hull. I guess these are the "ribs" of the ship.
I counted the number of frames and measured the inside of the hull and divided to get the correct distance between the frames. So far so good. Unfortunately the frames are precut with a very high degree of accuracy and, I guess, any small mistake in planking the hull will mean that the frames won´t fit perfectly.
At least this happened to me… I have to modify each frame quite a lot
. But this is also the beauty of wood models I think. If the pieces do not fit perfectly just modify them and it will turn out nice. In plastic models everything just "falls into place" without thought. With wood one needs to work a bit more. But this also means that one has to build very carefully or things will deviate a bit from how they are supposed to fit.Oh well, "scratch building" parts with wood is fun so no problem and in the end it will look quite nice and no one will notice the difference
- Elijah, GuntherMT, Daniel Dusek and 2 others
-
5
-
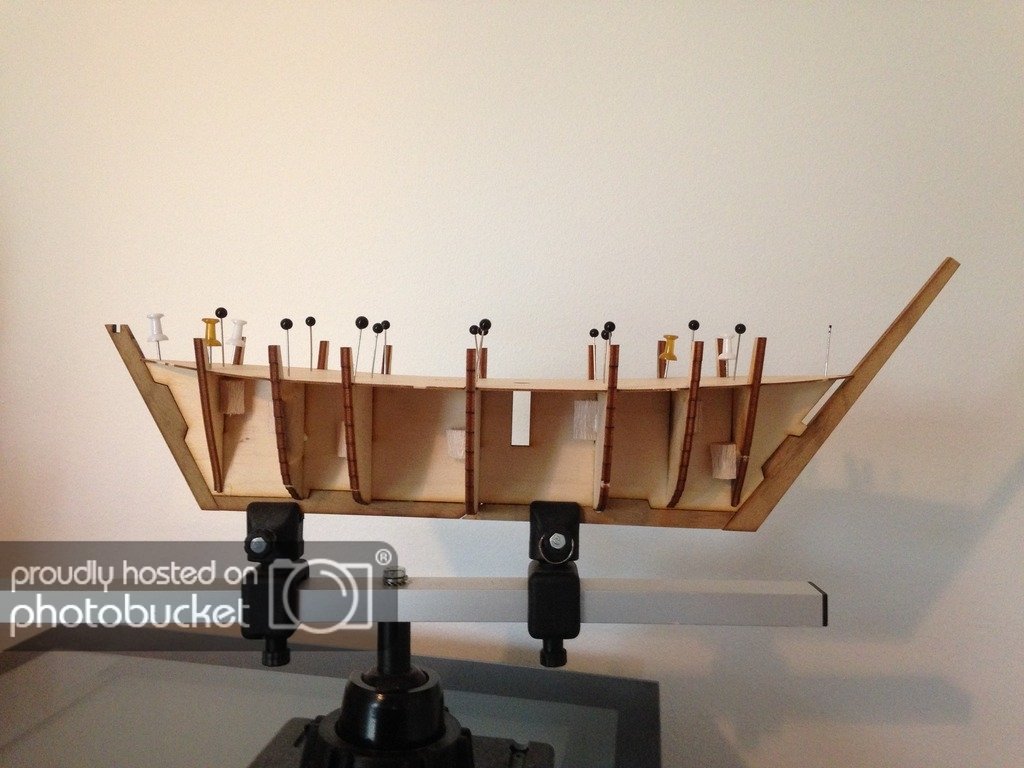
Some progress but also some trouble. I decided to add the 2x3mm sticks that goes along side the hull. The trouble is that they need to bend "sideways". That is, they lie flat on the 3mm wide side and bend towards the 2mm thick side. This was a challenge. The first one I added did not behave properly despite being soaked in hot water some time. It wanted to twist and I finally had to nail it in place, as can be seen in the picture.
For the second one I decide to alter my approach a bit. I yet again soaked it, the with my trusty X acto blade i cut into the 2mm thick side of the stick. I made cuts every 10mm approx on both sides. Not deep cuts just maybe .2 mm deep or so. Then back to the bathroom sink with hot tap water in it.
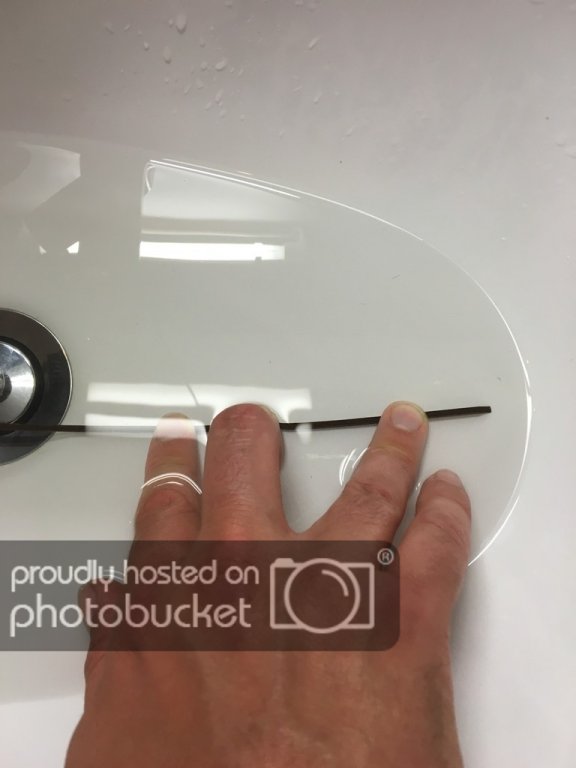
After a soak i bent it against the side of the wash basin which had a nice curvature. Working carefully I got a nice bend. The cuts really helped.
Finally I got a nice bent stick which I could "force into place"
Now I leave it to dry and will glue it in place tomorrow. Hopefully it will look better than the first one ( which doesn't look bad except a few brass heads but still…)
- AntonyUK, popeye the sailor, Elijah and 2 others
-
5
-
I don't you will make a fool of yourself. Take your time and work slowly and it will turn out well. The bireme is my next model so I will follow your blog. In my opinion Dusek makes good models with excellent instructions so I don't think you can do much wrong if you follow the instructions. A small hint is to let the pieces soak in water quite some time. They are fairly thick and need to be thourghly wet to bend and not break. A plank bender can be helpful.
Good luck!
-
-
A meager update!
Some of the items to be glued to the deck. I have roughly marked on the hull where some details are to be added. I thought I was really smart with the blue tac to keep the deck piece tight to the hull when I glued it in place. It was, and still is, a good idea I think but be careful with the glue. Some glue "crept" up between the lower deck and the piece I glued in place and the hull planks. This "glued" some of the blue tac to the hull and deck. A minor nuisance and annoyance as I could peel, scrape, grind and sand it away very carefully but still… So I you use blue tac take care not to let it "be glued to the ship"!

Otherwise the build is going very smoothly. Parts are crisp and "tight", everything so far fits very well.
- JanV, docidle, popeye the sailor and 2 others
-
5
-
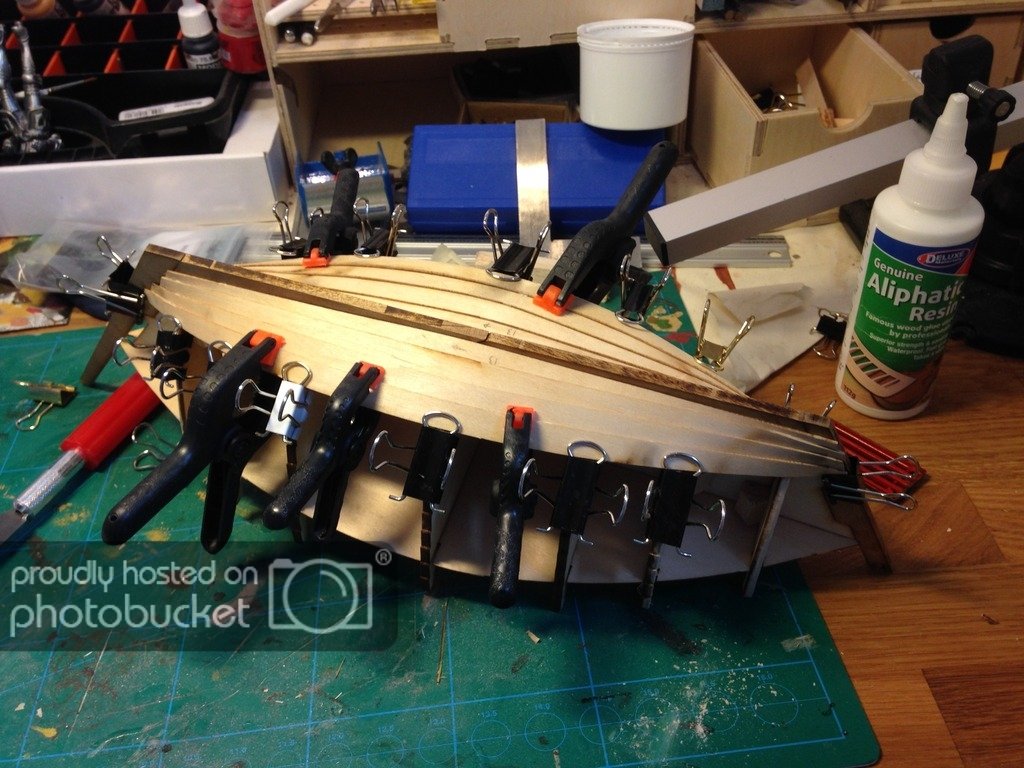
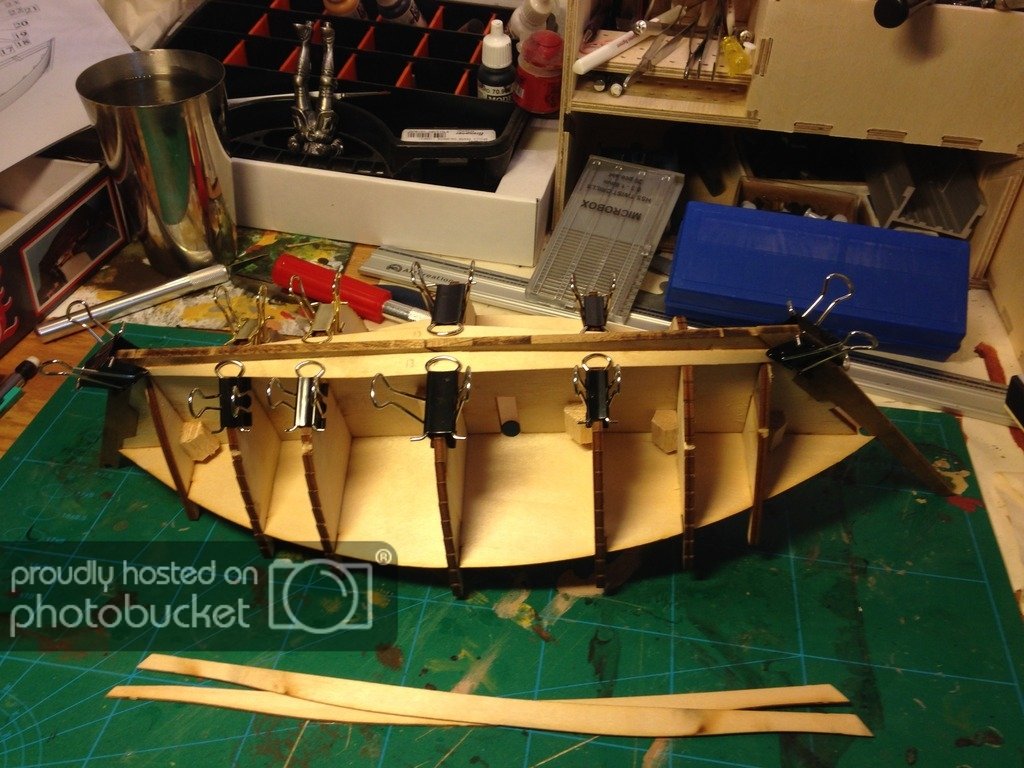
Some progress. I shamelessly endorse the glue "Aliphatic resin", it is great. it has a short clamp time but still some time to slide things around, if you are fast
. For super quick clamp time a tip I picked up here on the forum and forward is to add some glue to both pieces that are going to be joined, smear it very very thin. Let it rest for a maybe 20-30 seconds, put a little extra glue (not much) on one of the surfaces and push them together. Hold for 10-15 seconds or so and it has set! Almost like superglue (ok that can be faster but still… )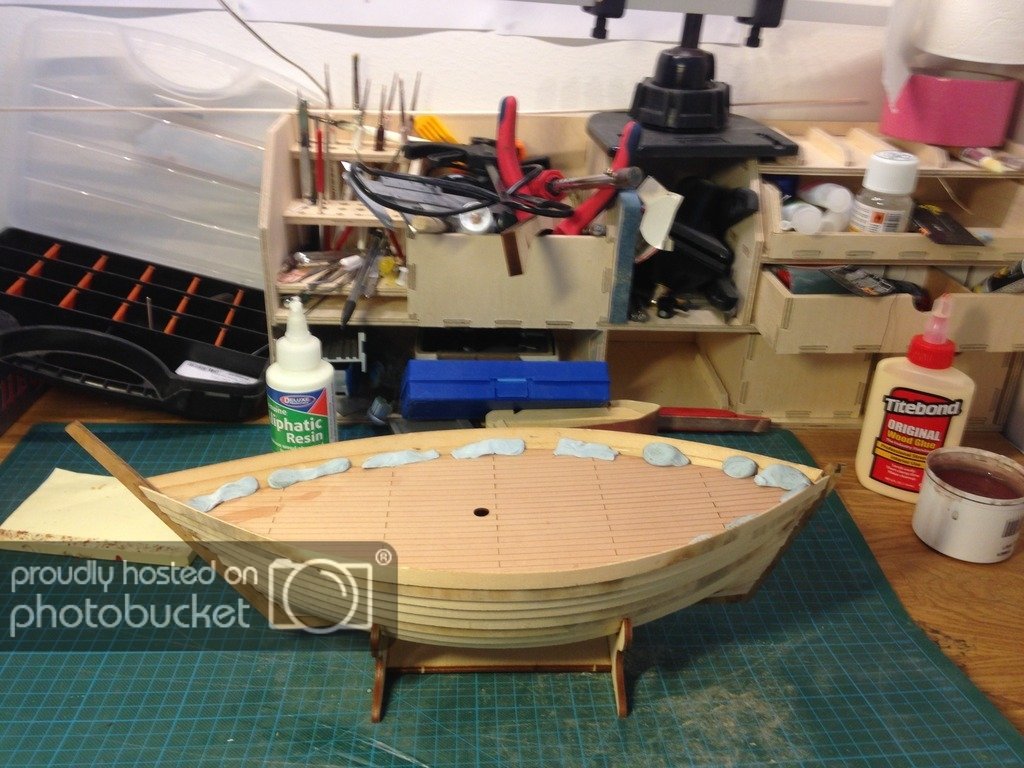
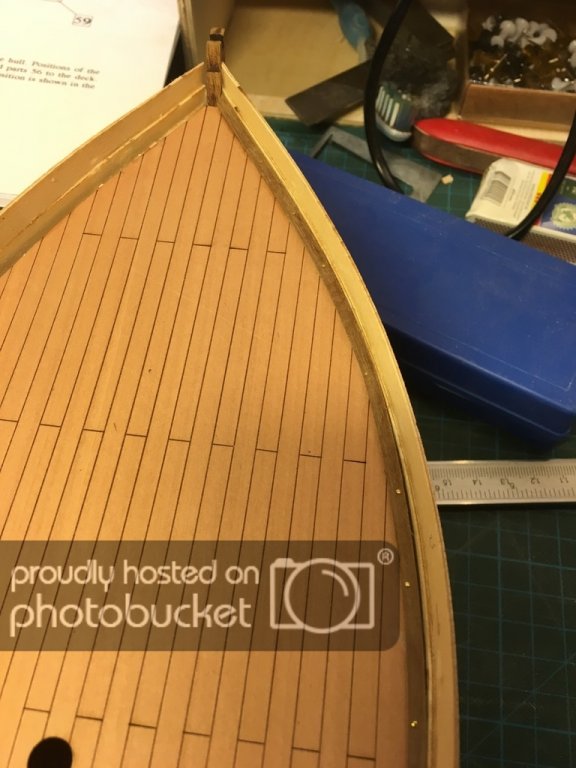
The large floor piece is very thin. When glue is added to its back it curls up, bends lite a "U". To stop that I have lined the edges with blue tac to keep it down. Otherwise the edges will curl up and it will look a complete mess.
Being not careful, I smeared the floor piece with the glue in the bow. I wiped it off but it can still be seen. But, all is not lost! I will stain the model dark brown and the glue takes a stain!. So it will be covered up. Just to make sure though I will give it a careful rub with fine grain sand paper first.
-
I chose the Pinta from Dusek. It is described as an "advanced beginner". There is a "beginner" model, the Bireme. That is actually my next (third) project.
The Pinta was an excellent model with good instructions. The instructions can be downloaded from Duseks website so you can check in advance if you think it would suit you.
Whichever kit you choose good luck and take your time.
-
Thanks for the advice! I used Aliphatic Resin. I will try it on a few pieces of scrap wood for further building. This time I will let it be on this model. The reason I used a large clamp was that the "point of contact" between the board and bow was so small. Next time I will att a piece of balsa wood to the bow and sand it down so that the planks have a larger contact area so to speak. this will also guarantee that the shape is correct.
But thanks again, I did not think of trying to dissolve the glue. I thought of sawing it loose but that then I would loose a couple of millimeters and the plank would be too short. So I decided to leave it.
- mtaylor, Elijah and Brucealanevans
-
3
-
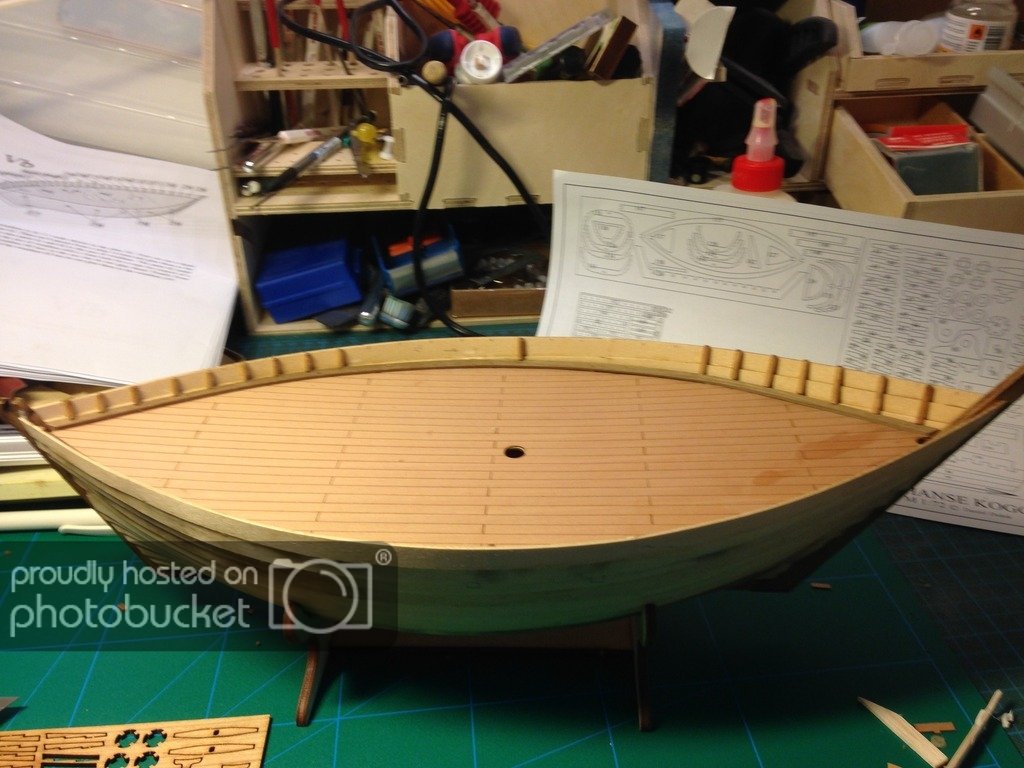
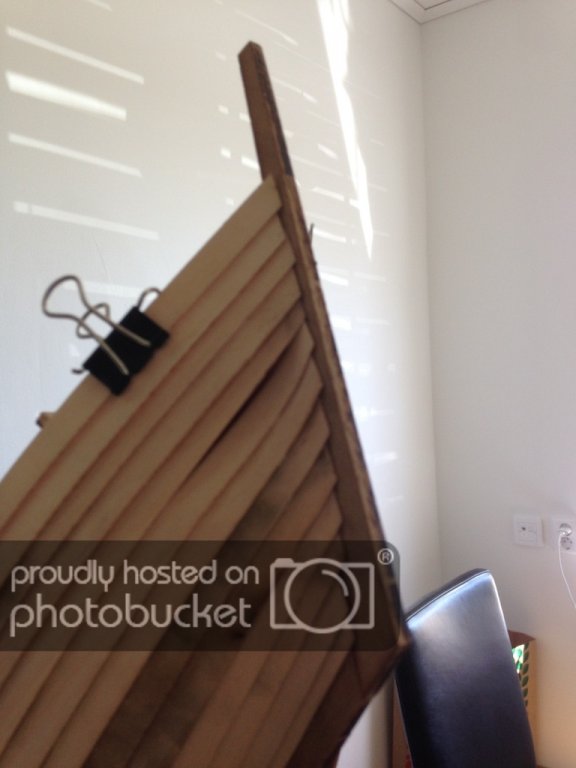
Planking is done! Last one glued in place. I even remembered to avoid gluing the two top most planks to the "bulkheads". They are to be sawed off in the next stage.
Here are two pictures of my mistake… I used a too large clamp to hold the planks in place in the bow. The clamp bended the planks in the wrong direction. I did not notice this until I had glued one plank above them. I did not know how to correct it so I just ignored it. Stupid mistake but seen normal viewing it is hardly noticeably.
-
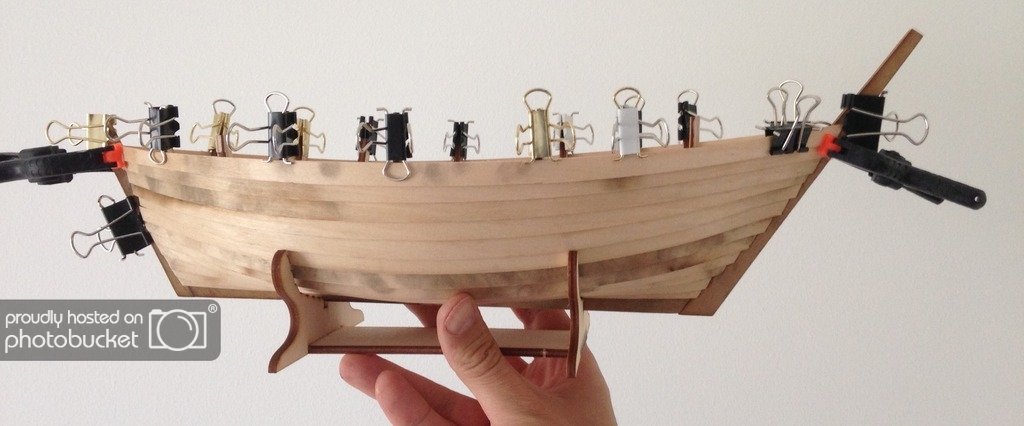
A little update. Three planks have been added. Now only one plank per side is left!
As "promised" the updates have been a bit slow and will continue to be so during the summer. I´ll get a few hours of work in this week though. The build is going smoothly, I noticed a mistake in the planking earlier and will take a picture of of. There was not much to do but to ignore it and keep working, It would not have been possible to fix it. Overall I´m very satisfied with the planking. It has gone very smooth and the quality of the planks and their "exactness" is very very good.
-
Today I visited the Vasa museum and I got really tempted to buy DeAgs model of it and build. Fortunately I can control myself and not buy it now. But rest assured, I will
First I will finish the Hanse Kogge and Bireme which is "next in line". After that I will se what I choose. But I believe I need another ship under my belt before I try out Vasa.
And, maybe it will be easier to buy more installments faster so to speak.
-
I´m continuing adding planks. It is going well but there was a mishap in the bow. I do not have time to take a picture of it but will try to soon. Work, vacation, family and some commission work is taking precedence over my hobby for the moment.
But I´m in no hurry, all in all it is going smoothly and the kit is very satisfying to build.
-
-
-
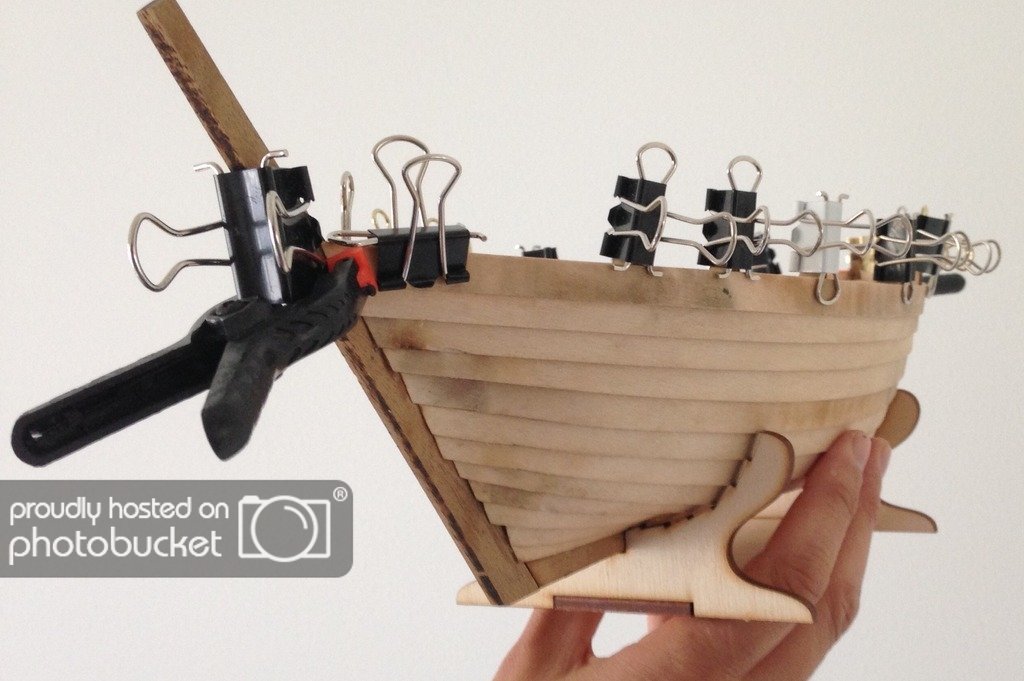
Adding planks. It is going very smoothly. Actually so good I´m getting suspicious… I must be doing something wrong. It is more or less just "falling into place"...
I can manage about 1-2 planks per side per day. Actually building it does not take that long, it is all the drying times that makes it slow.
Test fit
some sanding
wet the plank, and fix it into place and allow to dry
remove and glue into place, allow to dry.
When this plank is secure I can start on the next plank. So slow progress.
-
My second model. I´m staying with Dusek ( my third sometime in the future will also be a Dusek as I have already bought it)
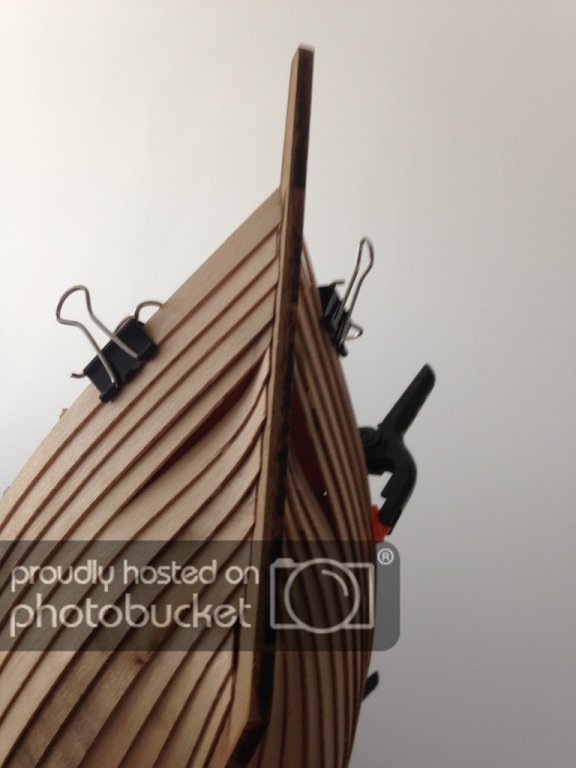
This time it is the Hanse Kogge. It is also rated as a "advance beginner" so it should suit me fine. It is a clinker built ship, it will be fun to try that building style so to speak. Looking through the kit everything looked fine.
I started to build a few days ago and here is the first update. Note that this build will proceed fairly slowly as it is summer and other things will take precedence but I will try to update every now and then.
There was one hitch. There was a discrepancy between the instructions and how the parts were numbered. No big deal as it was possible to figure out which bulkhead went where but still. For someone not paying attention or so it could spell trouble as the bulkheads could be put in the wrong slots.
I emailed Daniel and described the problem, he replied immediately and said he would look into the problem. Great customer service.
All parts have so far gone together without a hitch. What bothers me bit is that the keel parts do not meet up after sanding. There is a small gap which can be seen in the pictures. That will have to be filled with a small sliver of wood.
Dryfitting the first plank. Fits perfectly. Second plank laying below. First I fit the plank to check if it fits ( of course) sanding if necessary. I then soak each piece in water, then "dry fit" the wet plank
and fix it into place. After it has dried in place I loosen it and glue it in place permanently. Works well so far.
-
I use a wash that is more like colored water. That way it only runs into the recesses and does not need to be wiped off. i add a little dishwasing detergent to break the surface tension and make it more "runny" so to speak. Games Workshop or Vallejo have premade washes that are easy to use.
-
Nice paint job. Do you plan to use a wash on it? A slightly darker color that is very runny to create the effect of "depth" and shadow?
-
A short add on.
The material in the box was enough for building the model (of course, as it should be) But, i would have liked a bit more of the basic wooden sticks. The 3mm times 2 mm. they were enough but I would have liked a few more spares. I did not "waste" any but still had to "ration them" a bit at the end. A few more sticks would have been nice. At the end I had to be a bit careful to use small pieces of scrap wood and keep the last long ones for the hull.
Same with the rope that line the sails. It was enough but not enough if I had made a mistake or would have to "redo" a sail. Same here, a bit more to allow the builder to make a mistake and still have some extra without having to order more from Dusek.
But, it is still a very good kit,
- Elijah, Daniel Dusek, mtaylor and 1 other
-
4
-
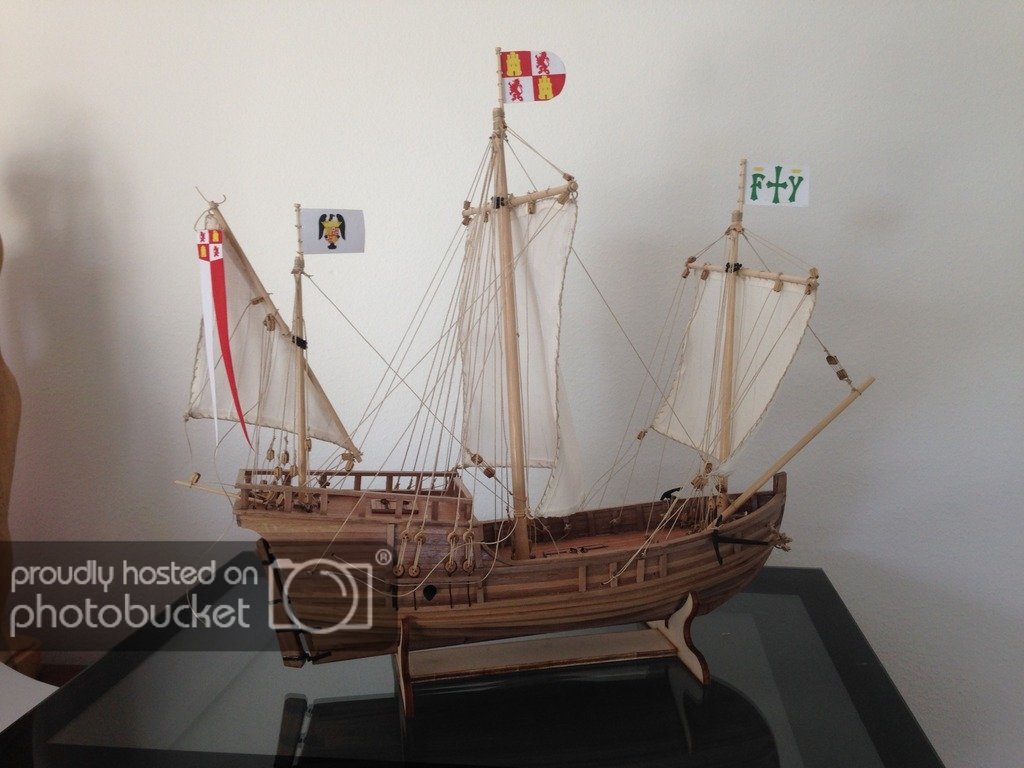
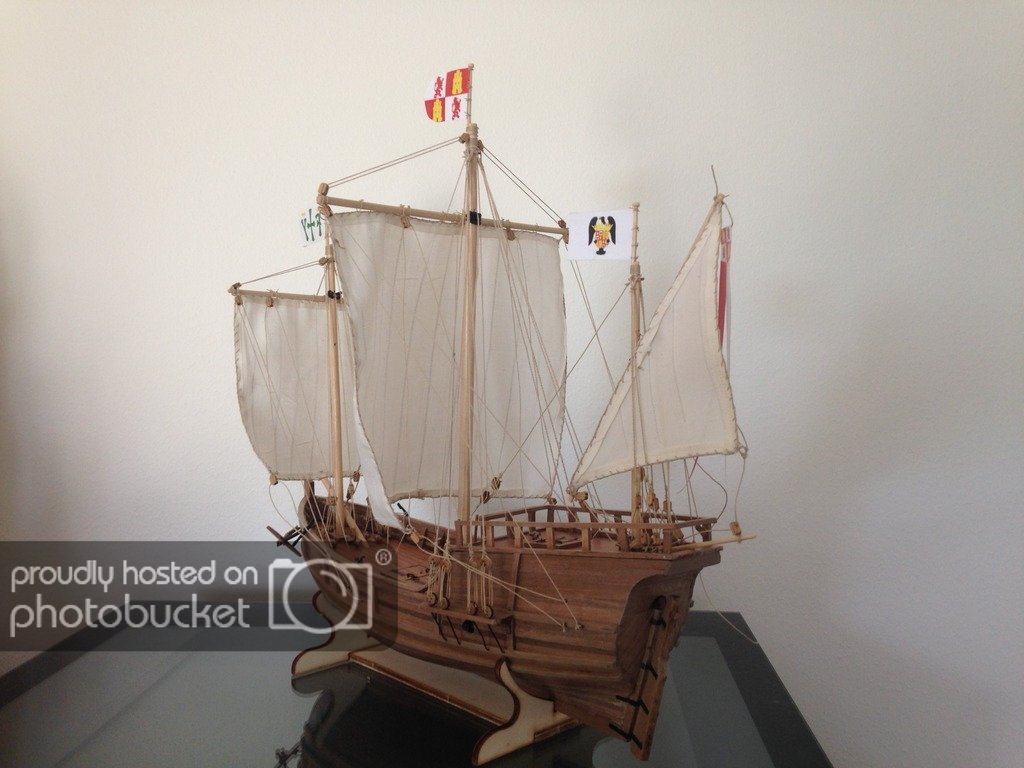
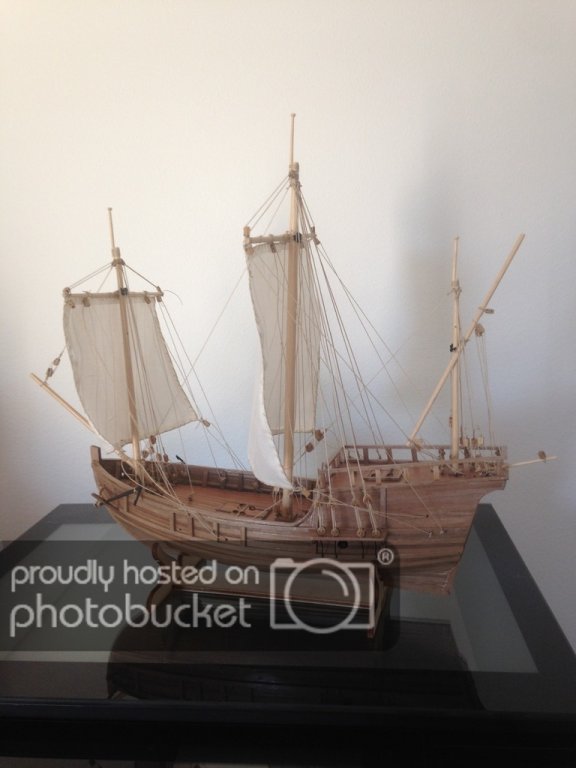
Save one line/thread and snipping off some excess, DONE! So remaining working time approx 4 minutes.
I´m pretty proud, It ended up quite nice. I´m satisfied with it as it is my first wooden model ship. Planking was difficult and there was a few snags but in the end it went ok.
As this is my first model I have no comparison but I´m very very satisfied with this Dusek kit. "advanced beginner" was a very correct description. I consider myself a veteran plastic model builder but a beginner with wood so "advanced beginner" would suit me well I thought and it was right.
Instructions was clear and easy to follow. Taking some time and reading and understanding the instructions was easy and there was basically nothing to worry about. One major thing I was worried about before starting out was that the instructions would be unclear or ambiguous. But that was not the case.
On tuesday I start on my new project. Duseks "Hansa Kogge". I picked this on purpose as it is "clinker style" hull. I want to learn that technique. Well not "learn" after one model but at least have some knowledge about it.
I know this sounds like I´m paid by Dusek (which I´m most certainly not.) But having such a good experience with this model I found no reason to not buy a Dusek as my second project.
One thing that could be improved is the flags. With the printers available the detailing on the flags could be a bit better and more "crisp".
In the end I want to build a huge ship (like everyone else I believe…
Here is a "building log" for the model with a few advice (maybe) or things I noticed.
After a while I stopped updating this as it was not really needed. The instructions was so good I don´t think I can really add something. Read the instructions, understand them and you are good to go.
Building log the pinta
Punched out all hull parts and sanded all the edges where the laser had cut.
I read that you do not get a good glue bond if you do not sand as some. Also not that lasers do not cut a precise 90 degree angle. This has to be corrected with some sanding.
Also punched out and sanded the keel parts. Same here, sand away the ”burnt” and black from the wood. Using an engineers square you will notice that the laser does not cut at 90 degrees.
It is close to 90 degrees but not perfect, putting several pieces together and you will get a warped look.
I glued pieces 1, 2, 3, 4 and 5 in place. Try to avoid laying the hull on the table and just glue the piceces in place. These five pieces are slightly wider than piece 0 so if you lay all the pieces flat on the table all the excess will be on one side. Try to get an equal amount of wood on each side of piece 0 when viewed from the front.
Then I glued pieces 6-12 in place. Note that these pieces can ”slide back and forth” a bit as the cuts in piece 0 is slightly wider than the thickness of piece 6-12. ”Dry fit” ( using no glue) pieces 17 and 18 so that these two pieces can be put in place without unnecessary tension. I had to make a few of the cuts in pieces 17 and 18 wider as the cuts and the ”horns” on pieces 6-12 did not match up perfectly.
Also be very careful that all pieces are in 90 degree angles towards each other! Make very sure pieces 6-12 are not at crooked angles.
Pieces 13-16 are easy to fit.
Make sure that before you fit pieces 17-18 the area which these pieces will cover is flat, no bumps, glue blobs or such.
As you fit pieces 17 and 18 (and testfit see above) make sure the oval opening is to the right on the ship model. This opening must match with the opening in piece 20.
Planking the stern. Nothing to mention, work carefully. I made each plank slightly too long to be sanded to perfect shape later. Maybe 2 mm extra on each side.
Starting to plank the hull. I followed instructions and have seen and read quite a few planking tutorials. This is not a tutorial for planking so read and watch other tutorials.
Finished the planking, it went fairly well.
I glued the deck in step IVb in place. Had a little trouble with it curling up at the edges. So I hade to keep it pressed down until the glue had dried. The hatches went together fine. Anchors and rudder presented no problem, just followed the instructions.
Drilling the holes for the gunbarrels were straightforward but check carefully where the holes are drilled so that the gunports are not behind wires for the dead eye blocks. So check step Ve before drilling the gunholes/ports in step Vd.
Also I had a slight problem with the drilling the holes in bulkhead no 15 to fix the end of the gunbarrels. I do not know if I drilled in the wrong position or so but the bulkhead nr 15 was too ”deep” into the ship for the gunbarrels to stick out. So what I did wa sto cut of a about 15mm long piece of round wood and drilll a hole in it and put the gunbarrel in that piece of wood. This wood piece was the glued to bulkhead no 15. Make sure the piece of wood is of a smaller diameter than the gunport hole…
Glueing piece 41 and making the dead eye blocks went without a hitch. Same with everything else in step Ve and Vf.
So far so good.
-
-
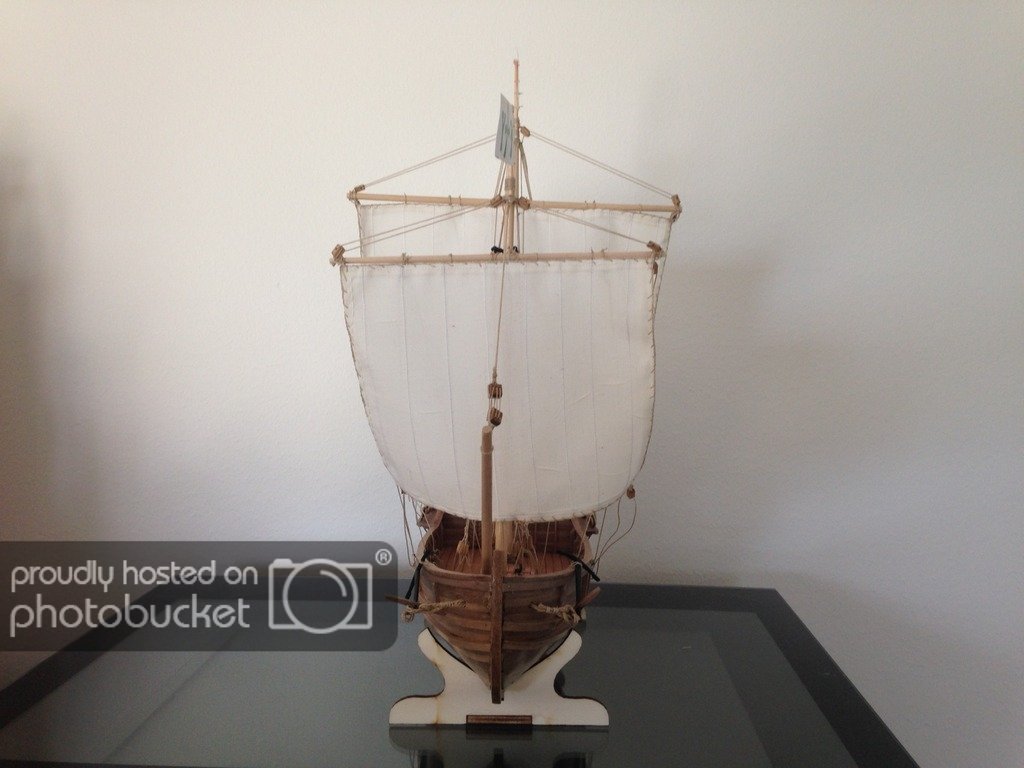
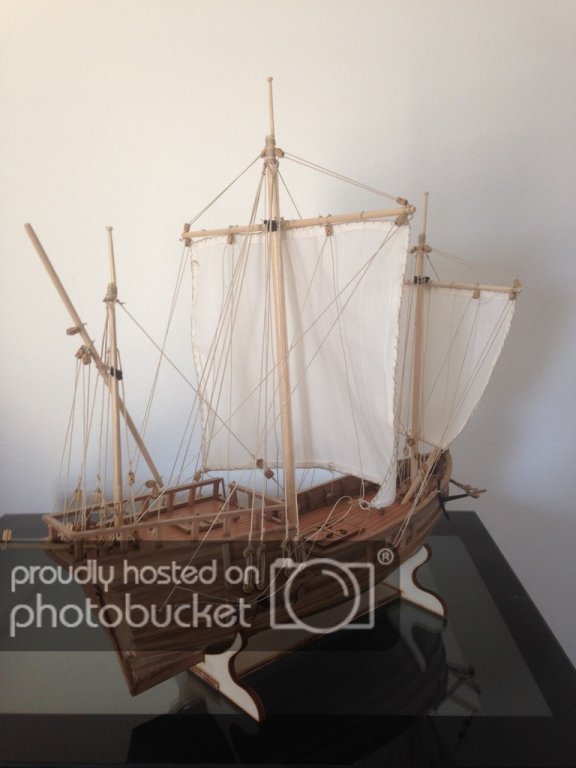
Almost done! I´m working on the rudder. I skipped that as I wanted to start on the rigging and then rigging was so fun I just postponed doing the rudder. But now there is no more postponing...
The last sail is almost done but I need to finish the last of the stitching. Flags are done and just waiting to be added.
So, to do is: rudder, the last sail and its rigging, add flags.
I´m actually pretty proud as this is my first wooden ship model, and it is almost finished.I´m satisfied with it and have learned a lot building it. I have already my next model lined up, just waiting to start on it. Which ship it is I will keep to myself for a while.
- Elijah, Daniel Dusek and mtaylor
-
3


Ghost sails
in Masting, rigging and sails
Posted
Interesting but not for me. I get a bit confused, what is rigging and what are sails. But to each his own, and the workmanship is great!