HOLIDAY DONATION DRIVE - SUPPORT MSW - DO YOUR PART TO KEEP THIS GREAT FORUM GOING! (Only 13 donations so far - C'mon guys!)
×


AntonyUK
-
Posts
1,190 -
Joined
-
Last visited
Content Type
Profiles
Forums
Gallery
Events
Everything posted by AntonyUK
-
 Hi Chuck. WOW that's one nice Windlass. That's one of my things I have yet to overcome with my cutter. Taking the girls out to the cinema . It's what a dad does Regards Antony.
- 1,051 replies
-
- 1
-

-
- cheerful
- Syren Ship Model Company
- (and 1 more)
-
Hi Mike. Yea door sales people .. I will not answer the door to them. This is a very nice build. How long has it taken you up to this stage ? Regards Antony.
-
The Byrnes Saw "inside and around"
AntonyUK replied to nobotch's topic in Modeling tools and Workshop Equipment
Hi Markus. Very intresing mods. I have done the splitter mode on my saw. For use on the TCT blade only. But I find this very useful when cutting very thin strips The Splitter should only be the same thickness as the blade Kerf.. But even this is not needed if you feed in the timber straight. I can see that this topic might be usefull to Jim. Regards Antony. -
Mary Rose by Chidokan - cross-section
AntonyUK replied to Chidokan's topic in - Build logs for subjects built 1501 - 1750
Hi. Will be nice to see another cross section on MSW. The Mary Rose will a very nice model. Got to see this one being built. Regards Antony. -
Hi Chuck. Making some real progress with this build. I must start my build log on my Cutter. Regards Antony.
-
Hi Chuck. That's a tidy workshop that's full of interesting bits ... Not Crap. I wish I has access to a large work area like yours. I bet more than 80% of the modellers here would like the space Regards Antony.
- 1,051 replies
-
- 2
-
-
- cheerful
- Syren Ship Model Company
- (and 1 more)
-
Hi Christian. Is this what you are referring to ?. http://www.craftsmanshipmuseum.com/BuildingAlert.pdf This is a link that is already posted on your build. Looking forward to you continuing this build.. Regards Antony.
-
Can i live without a BYRNES TABLE SAW
AntonyUK replied to shihawk's topic in Modeling tools and Workshop Equipment
Hi Boyd. We can all live without luxury things.. But it's the best out there.. So much so I am considering in investing in a Thickness sander from Jim. I use a much larger saw to rip my timber into manageable bits then into the Byrnes saw to finished size. Most of the time I need only very light sanding as the finish is soooo good. Regards Antony. -
Hi. My story of a solid hull. Me at the time was at the tender age of 10.. Doing my normal thing in the morning befor school I would look around our local coves for any driftwood that might have come in during the night. In doing this one day I found a hull of a ship made out of solid wood. I picked it up as it was the only thing that got washed in that night. One of the locals was a model ship builder and spotted me walking through the village with it and called me over. This turned out to be a very good carving that he insisted that I should continue building it. With his help this model was completed and is now on display in the local pob. Solid hulls are not easy and are used by masters for model ship building. The hull was just over 27 inches long and had all the decks shaped ready. This was my start into this hobby. Regards Antony.
-
Hi Chuck. Been waiting for this one Will follow this build with great interest. All the best. Regards Antony.
- 1,051 replies
-
- 2
-
-
- cheerful
- Syren Ship Model Company
- (and 1 more)
-
Hello Magnus. This is just amazing .. Never thought that something could be nicely done. YOU are just Amazing. Regards Antony.
-
Hi GTM. Found this in The Arming and fitting of English Ships of Ware 1600 - 1815 Looks like they just end on a ring bolt. Regards Antony.
-
Hi. Was shown a book on lofting today. It's the best I have seen and it's got a lot of diagrams in throughout. LOFTING By Jack Reeman. Published by Normanston Publishing, Lowestoft, Suffolk, 1988 ISBN 10: 0952527804 / ISBN 13: 9780952527800 It's intended at introducing shipwrights into lofting. Regards Antony.
-
Hi Decoyman. That is some very interesting news. The Museum here in Exmouth will really interested as this is where the ship was built. Regards Antony.
- 346 replies
-
- 1
-
-
- terror
- polar exploration
- (and 2 more)
-
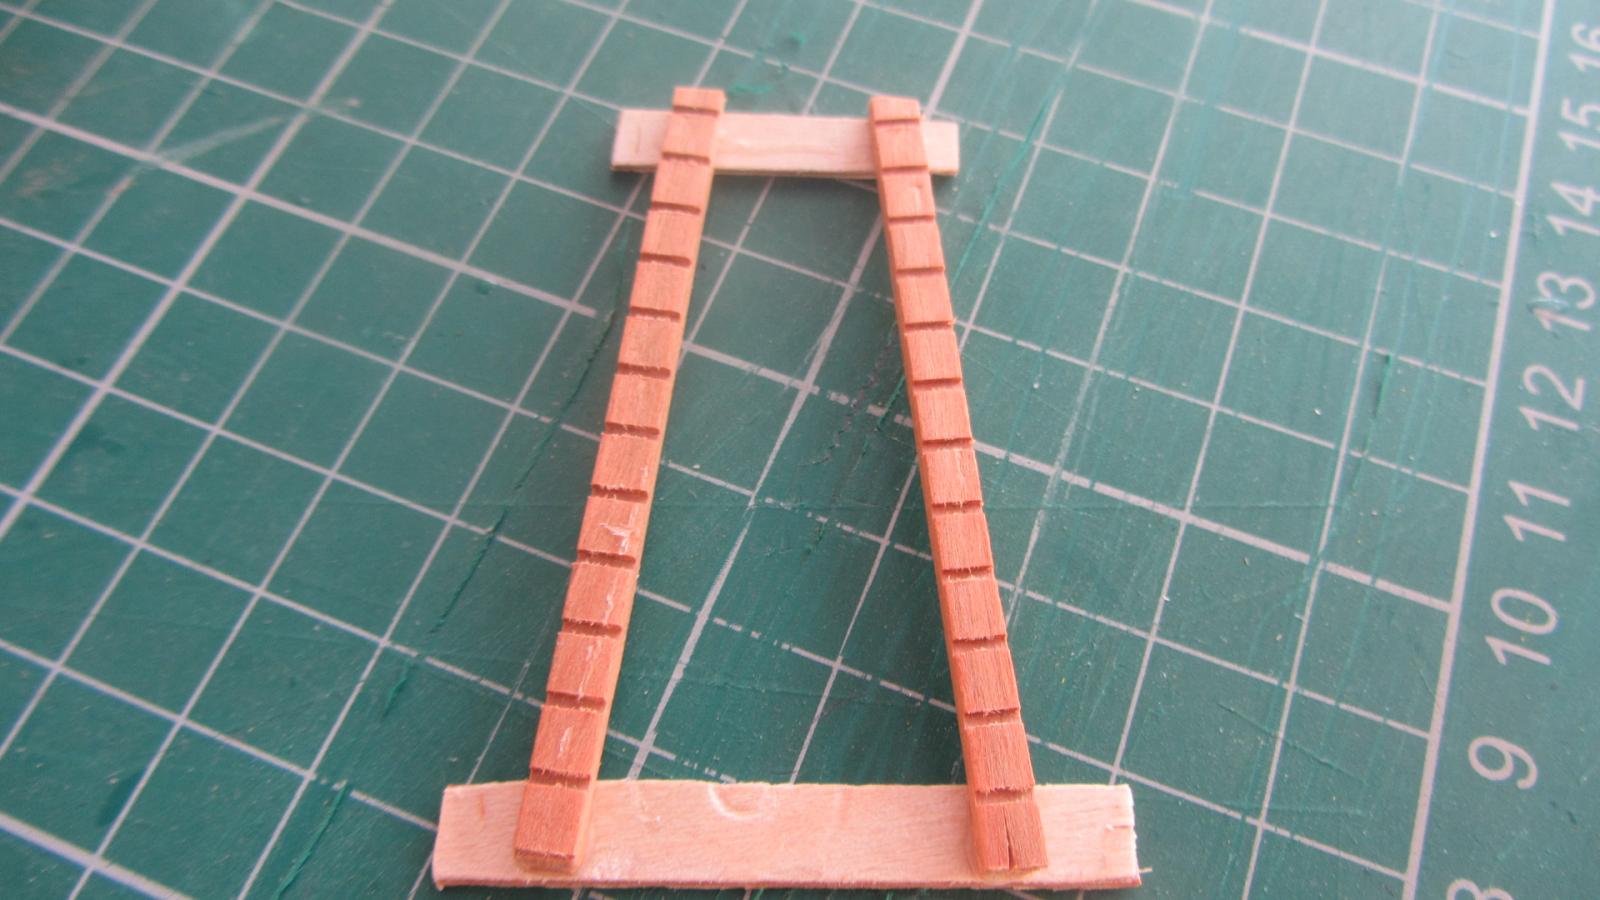
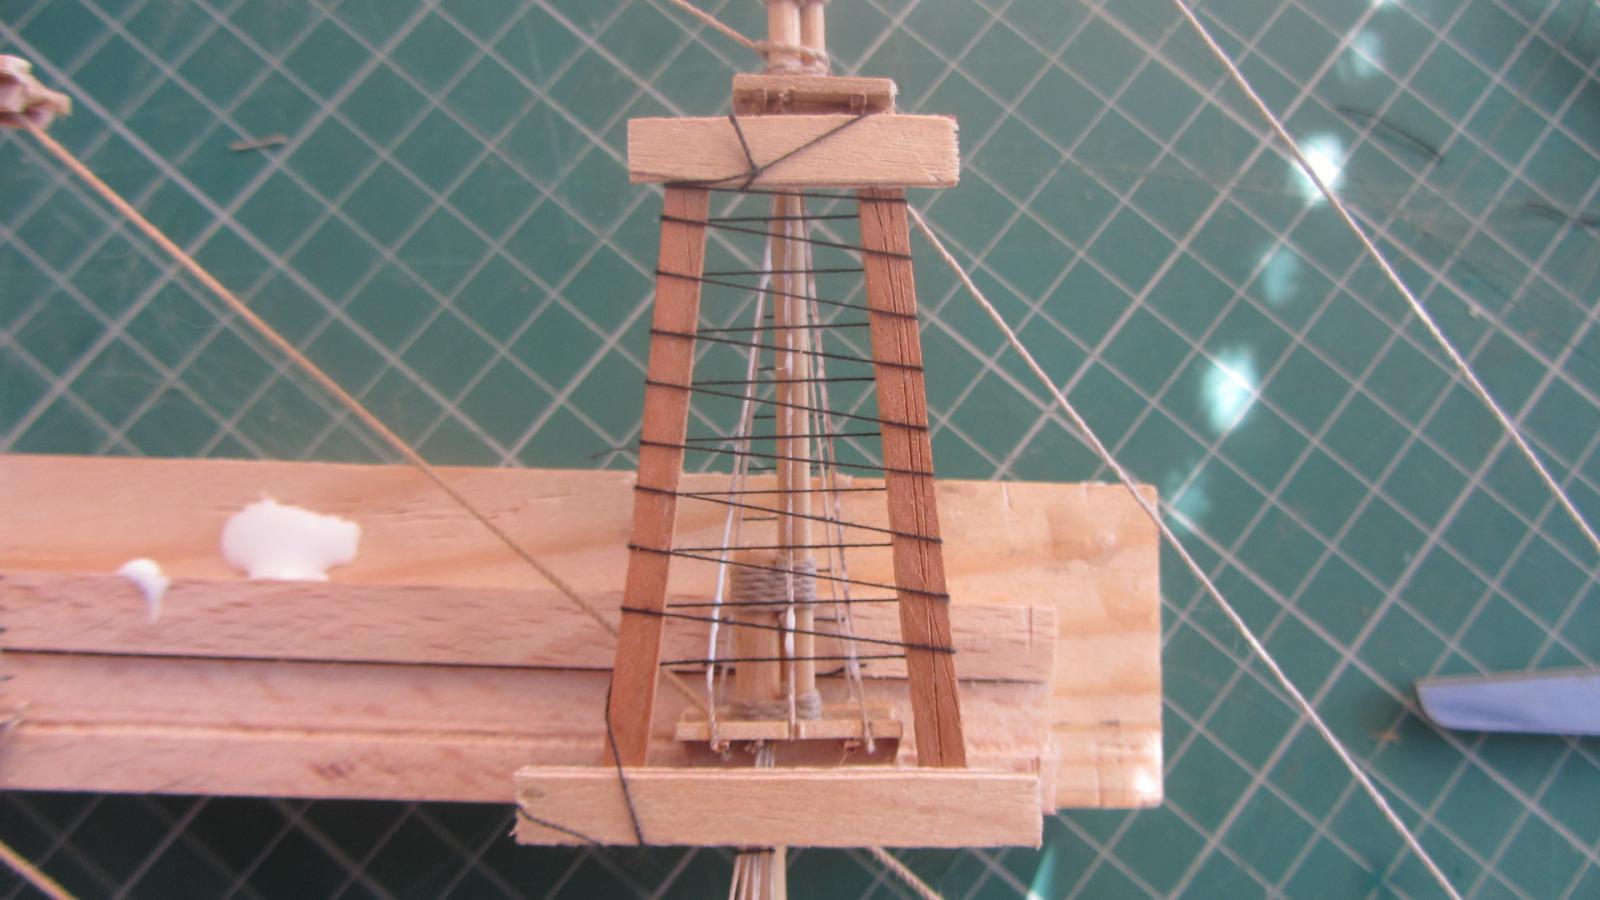
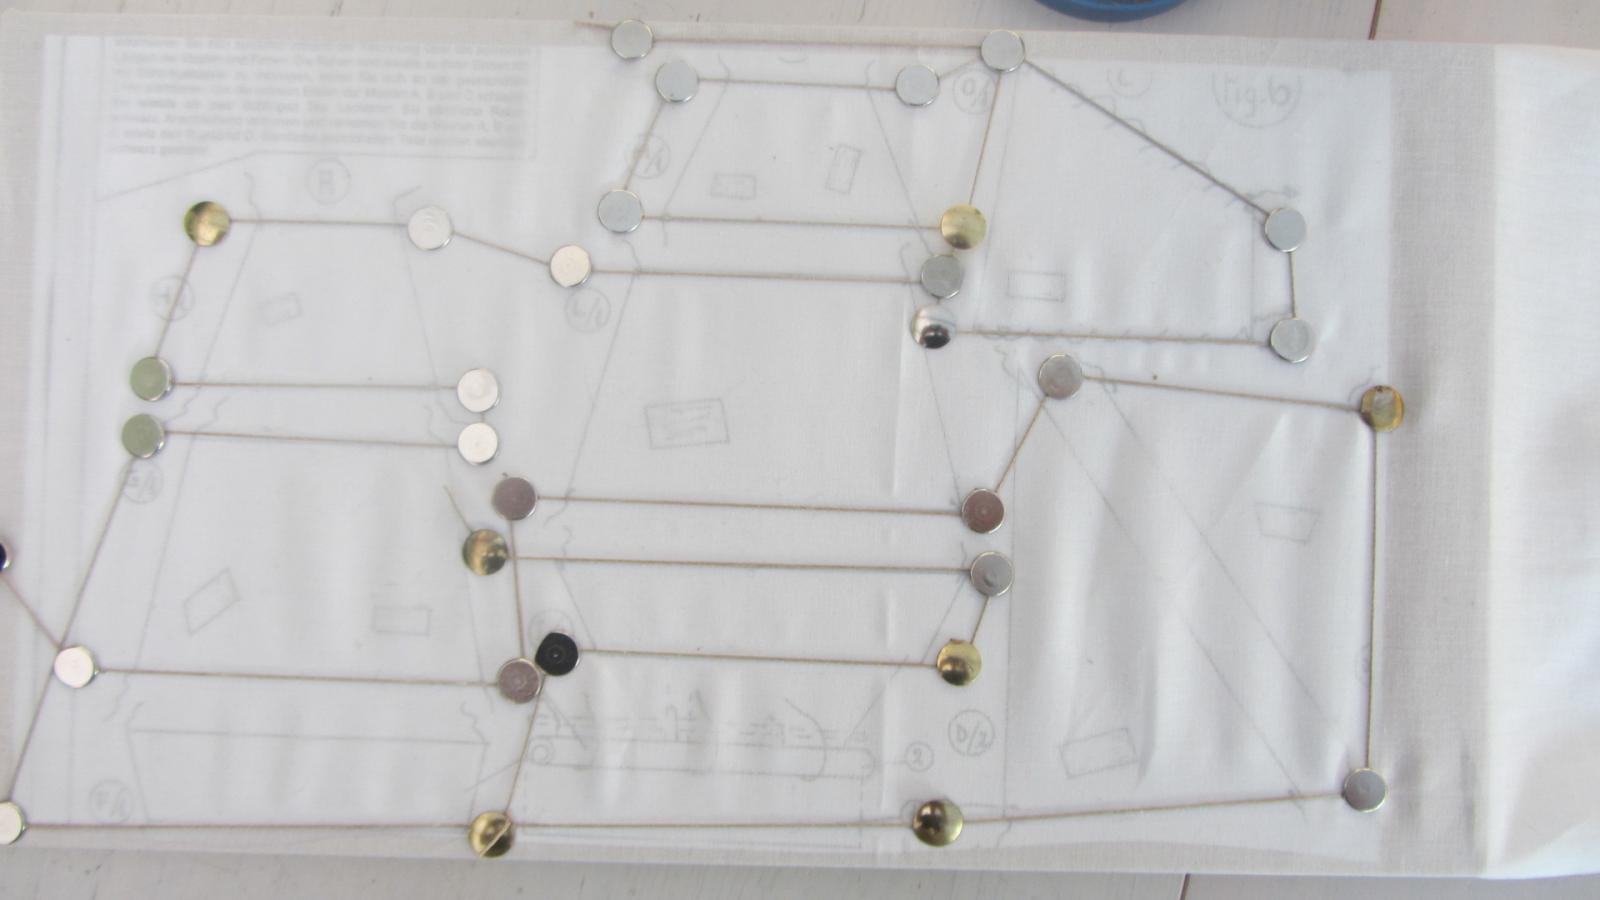
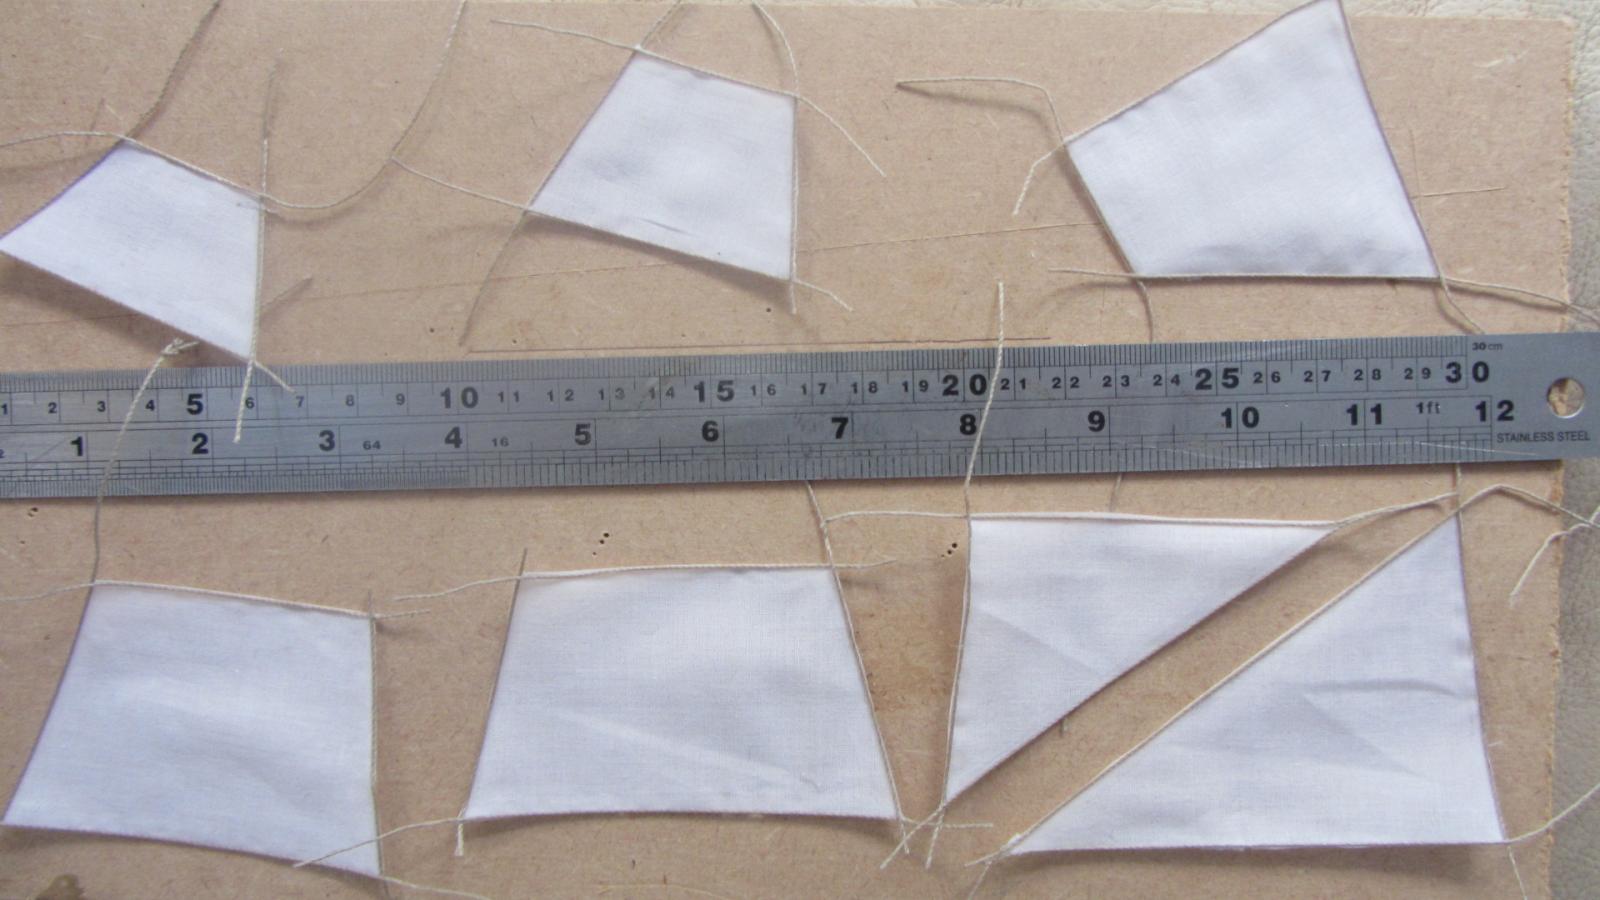
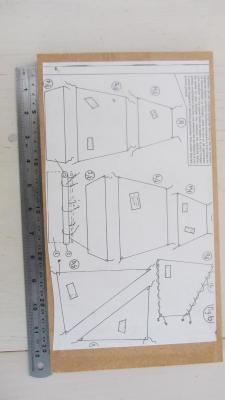
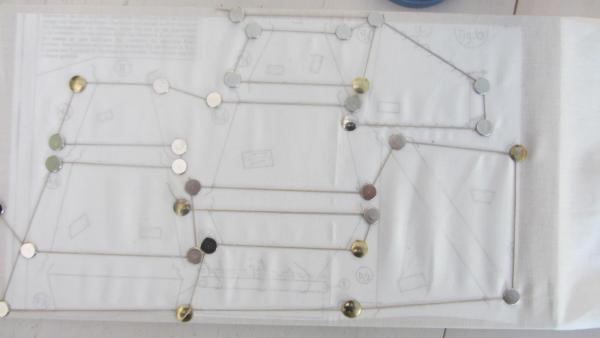
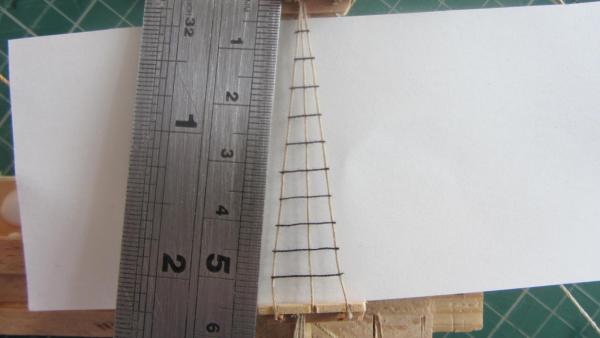
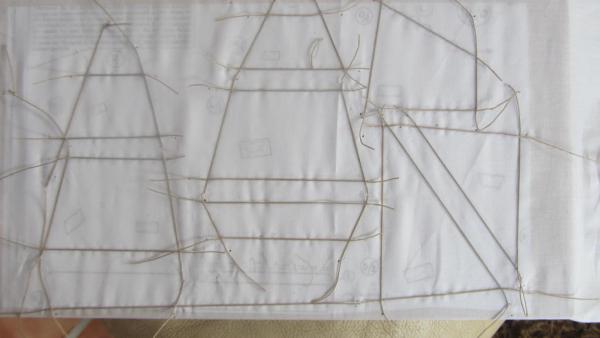
Hi. Many thanks for your encouraging Sometimes I need it. As you can see we have started the rigging. We started by adding the standing rigging then we added the rat lines. This is the test run I made a jig for the spacing of the art lines. Then we painted pva glue onto the lines and placed the jig with the ropes spaced out. This is what they looked like after removing the jig. Then we started on making the sails. We used a piece of scrap MDF board and placed a copy of the plans onto it. Then we covered it in Cling Film (Cooking Film). Then the cloth was stretched evenly over the plans. Then drawing pins were used to hold the cord taunt while pva glue was brushed onto the cord and the outer edge of the sail. This is how it looked after removing the drawing pins. Just cut out rough then trimmed with sharp scissors. Will add the sails to the ship after marking the stitching and attaching them to the yards. Thanks for following my build. Alex S. Posted using Antony's Computer...


- 33 replies
-
- 10
-
-
- Black Queen
- Mamoli
- (and 2 more)
-
Hi E&T. As always I am astonished on your research and interpretation of the subject. I think you should do a white paper on this (book) All the best Regards Antony.
- 346 replies
-
- 2
-
-
- terror
- polar exploration
- (and 2 more)
-
Hi. From what I have read.. During the second world war the British Navy had to paint ALL brass and shiny objects . This was done to stop reflection and the ship being spotted. All the paintwork was supposed to be non reflective paint... Regards Antony.
-
Hi Mark. Have a look here. http://nautarch.tamu.edu/model/report2/ http://knightdreamers.com/HomePage/Ships/21A.htm Regards Antony.
-
Hi. I think you may have it A couple of links below http://www.modelshipmaster.com/products/tall_ships/greatharry1987c.jpg http://collections.rmg.co.uk/collections/objects/66185.html Regards Antony.
-
Hi. A close up of the Front and back areas might help. Far eastern mabe.. Regards Antony.
-
Shipyard H.M.S. Alert, 1777, 1:96-scale Paper Model kit
AntonyUK replied to catopower's topic in Card and Paper Models
Hi Clare. Nice set of sails. Looks to be well made. Another build of this fine kit is starting here on MSW. http://modelshipworld.com/index.php/topic/7911-hms-alert-1777-by-janet-b-shipyard/ Might be able to share expearance's and any issues from building this kit. Regards Antony. -
Hi Kenneth. Thanks for that Regards Antony.
-
3D Printer Software
AntonyUK replied to AntonyUK's topic in CAD and 3D Modelling/Drafting Plans with Software
Hi Bob. Thanks very much for your offer. Give me a little time and I will draw it in Adobe Illustrater. Bob what software are you using ? Many thanks Antony. -
Hi. I brought a set fro cornwallmodelboats 2 months ago. They are the same as in your photo. Same packaging. Regards Antony.
-
Hi. Use a very sharp knife and cut a small piece at a time or cut close to the base with downward slices. Then use fine sandpaper with downward strokes onto the base only. You can use a file if it's sharp with downward strokes onto the base. LOL reading my own text I like my downward strokes Take your time. Regards Antony.