HOLIDAY DONATION DRIVE - SUPPORT MSW - DO YOUR PART TO KEEP THIS GREAT FORUM GOING! (Only 20 donations so far - C'mon guys!)
×


AntonyUK
-
Posts
1,190 -
Joined
-
Last visited
Content Type
Profiles
Forums
Gallery
Events
Everything posted by AntonyUK
-
 Hi. This time its a question on the opening mechanism for the gun ports. Drawing attached is what I think it is.. Can anyone confirm or show me the correct Method. The photo below comes from :- http://modelshipworld.com/index.php?/topic/985-amati-and-chris-watton/page-3 Thanks in advance. regards Antony.

-
Hi Alexandru. Totally outstanding workmanship and use of your machine tools Top notch. Regards Antony.
-
Drilling Sheave Holes For Masts
AntonyUK replied to Stuntflyer's topic in Modeling tools and Workshop Equipment
Hi Or another method http://www.ebay.co.uk/itm/proops-centre-finder-for-round-bar-lathes-milling-drilling-3-8-or-8mm-spindle-/291067294848?pt=UK_BOI_Metalworking_Milling_Welding_Metalworking_Supplies_ET&hash=item43c4f67480 This item you put into the drill and centre your work and clamp. Raise drill and remove this centre jig. Insert drill bit and drill. Regards Antony. -
Hi Nigel. Looks a fine ship and with your quality of bashing it well turn out to be an exptional build. Got my chair..IPad fully charged.. GO. You got my interest and attention. Regards Antony.
-
Drilling Sheave Holes For Masts
AntonyUK replied to Stuntflyer's topic in Modeling tools and Workshop Equipment
Hi. One on EBay ATM . http://www.ebay.co.uk/itm/300996989919?ssPageName=STRK:MEWAX:IT&_trksid=p3984.m1438.l2649 Item number 300996989919 Regards Antony. -
Hi Islabert. Translated into english -: What should I do to finalize if I understand your sentence? I not sure how you did the carvings . More detail please. Regards Antony.
-
Hi. WoW amazing stuff. Excellent carvings. Regards Antony.
-
Hi Isalbert. Had a look at your build and in preticular the entrance's. Very nicely done. A little more detail on how you acheaved this would be very helpfull. Regards Antony.
-
HMS VICTORY 1759 by isalbert
AntonyUK replied to isalbert's topic in - Build logs for subjects built 1751 - 1800
Hello Isalbert. A very nice build with excellent quality throughout. Your attention to details is superb Regards Antony. -
Hi Nigel. Yes I am aware that some will not withstand pewter. But the type I have is ok for 20 to 30 casting before mould starts to degrade. I chose this one because it's a harder silicon rubber and more stable. Regards Antony.
-
Hi Nigel. I have used this for my resin casting RTV Silicone rubber with a shore hardness of A40. Have ordered some pewter from EBay . I will have a go at casting them next week if everything goes to plan. Regards Antony.
-
Xebec by mij - FINISHED - 1:60 scale
AntonyUK replied to mij's topic in - Build logs for subjects built 1751 - 1800
Hi Mij. Looking good. Question -: are the pear top timbers just glued to the ply bulkheads ? Still in the conservatory I see Regards Antony. -
Hi Nigel. It was cast in while making the mould. Thinking after seeing someone else's cannons I am seriously considering casting then in pewter. I have found buttons on with the cypher GvR and crown. Only 10 mm across. Might remake my master with the cypher in and other small details added. Thanks for looking in. Regards Antony.
-
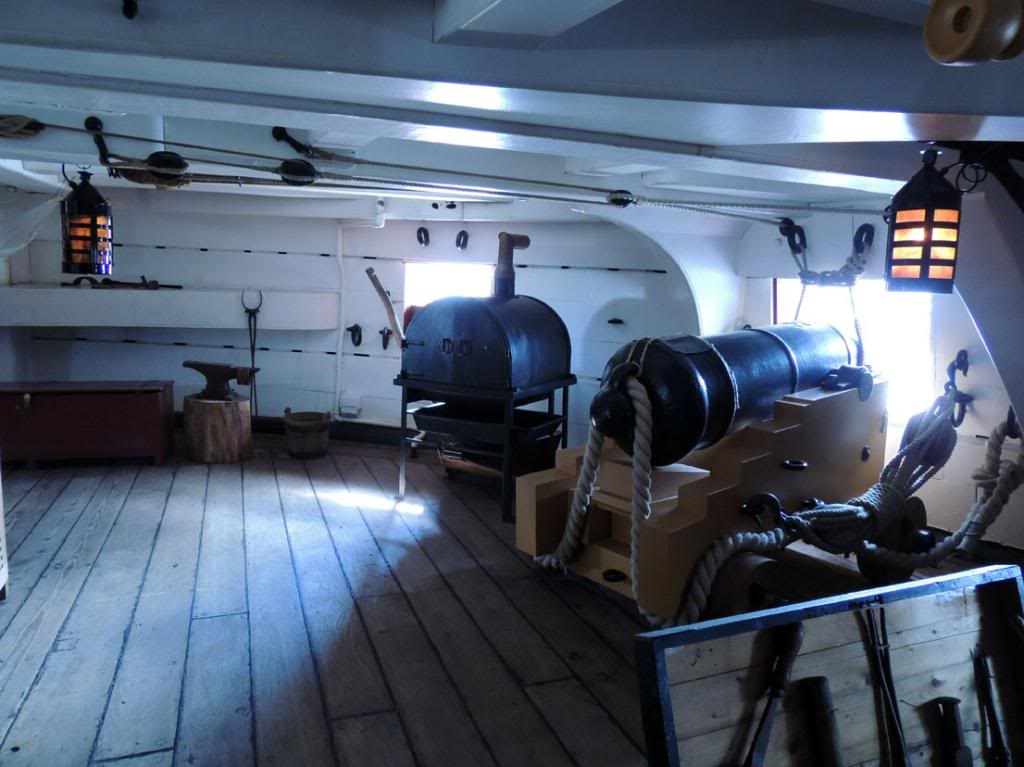
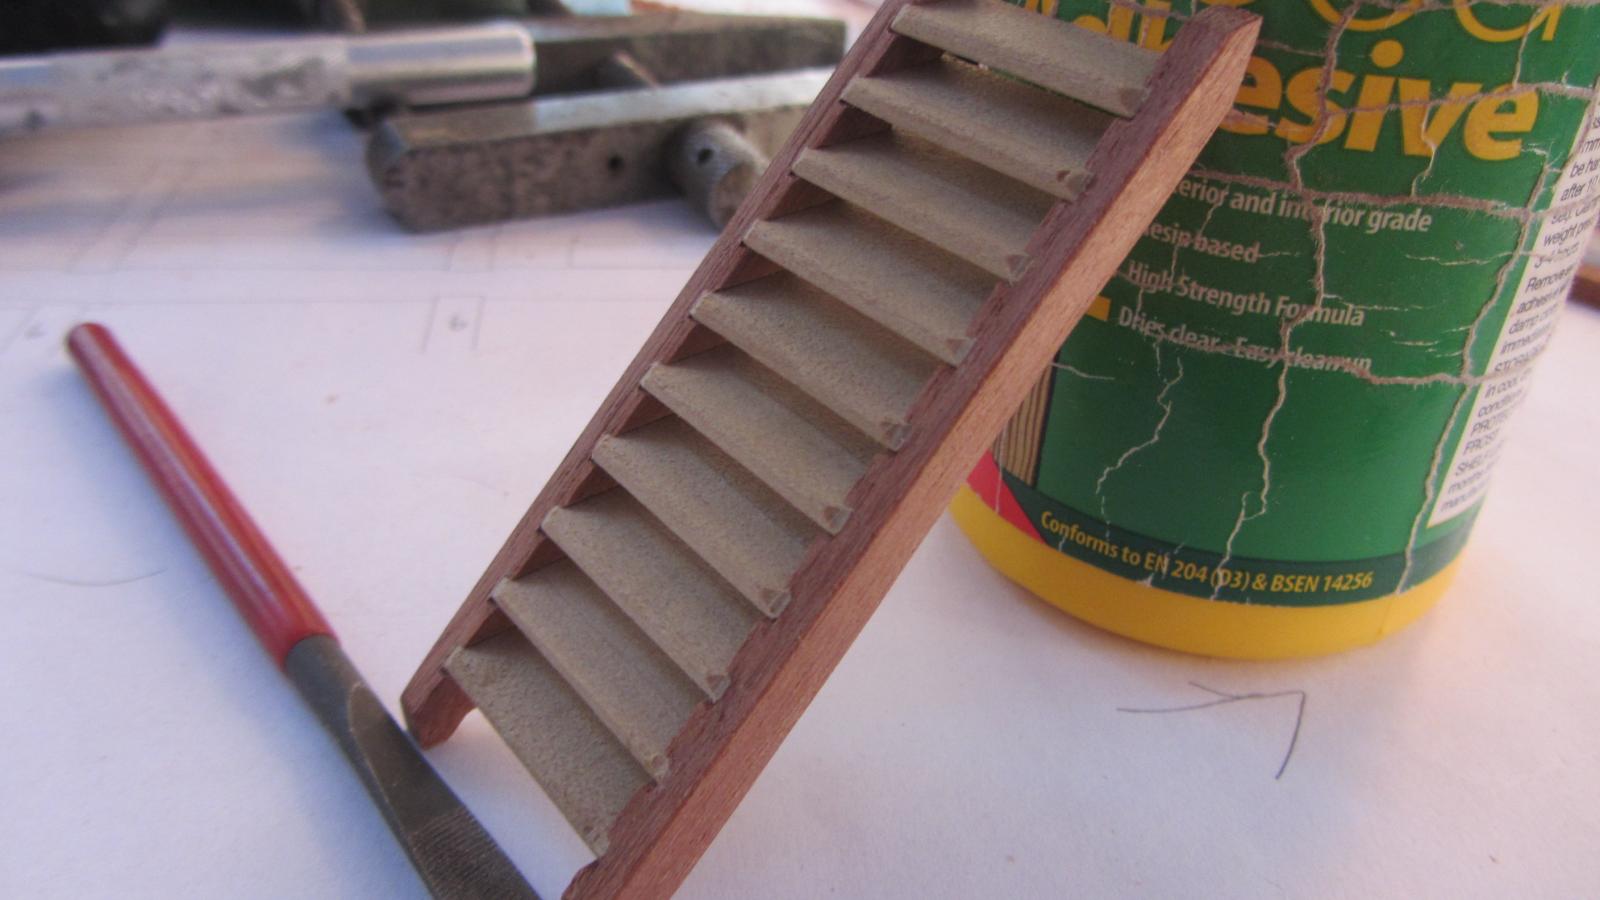
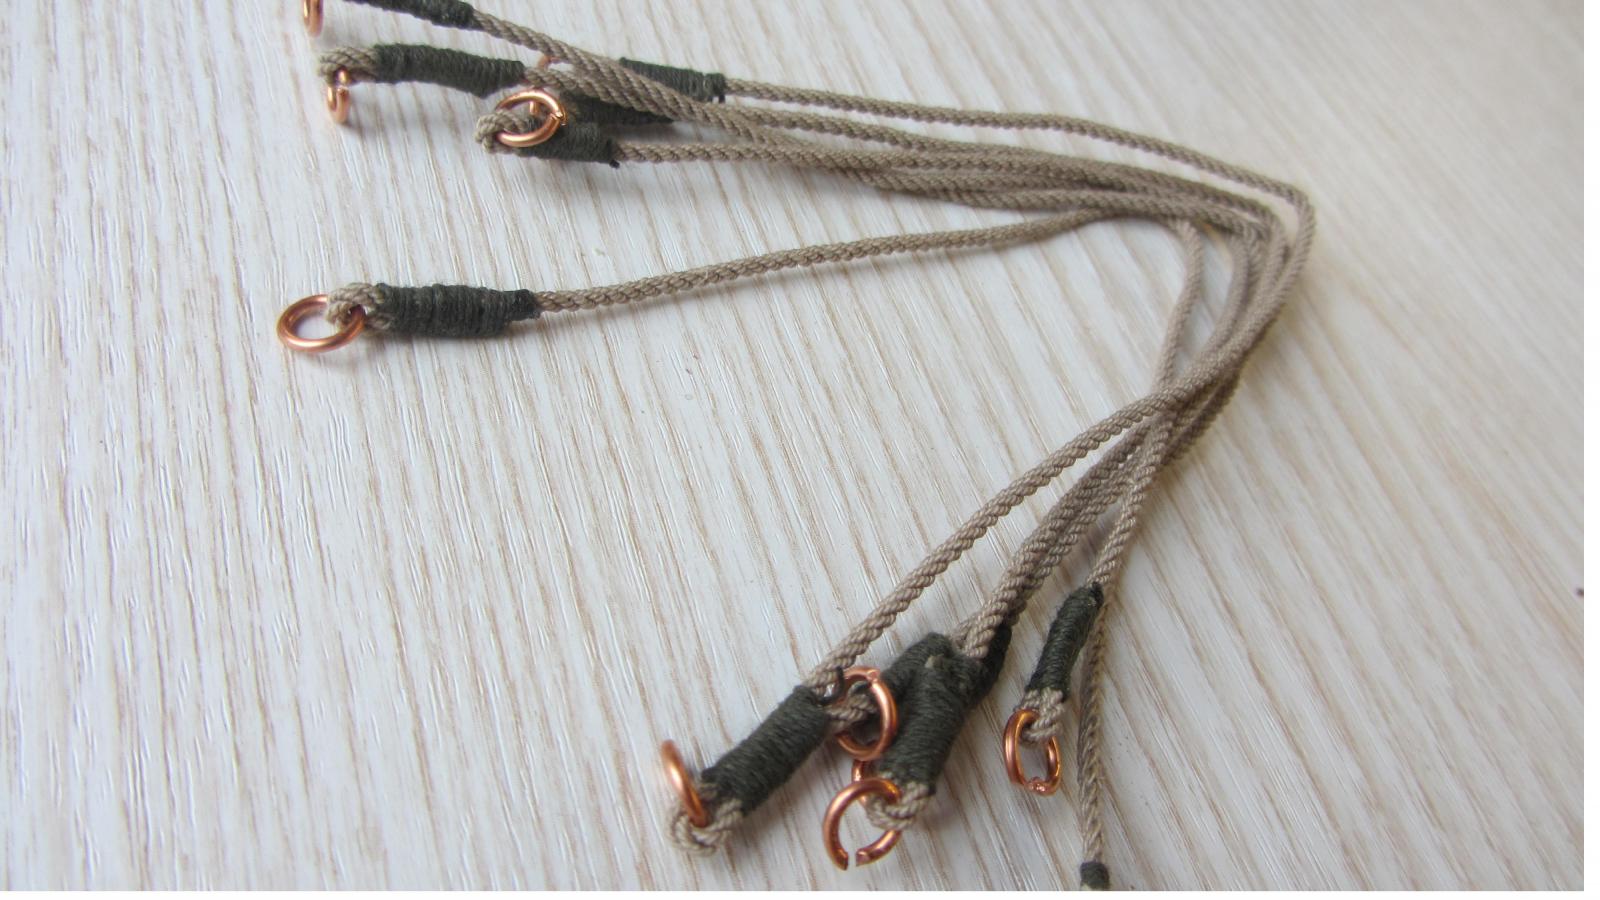
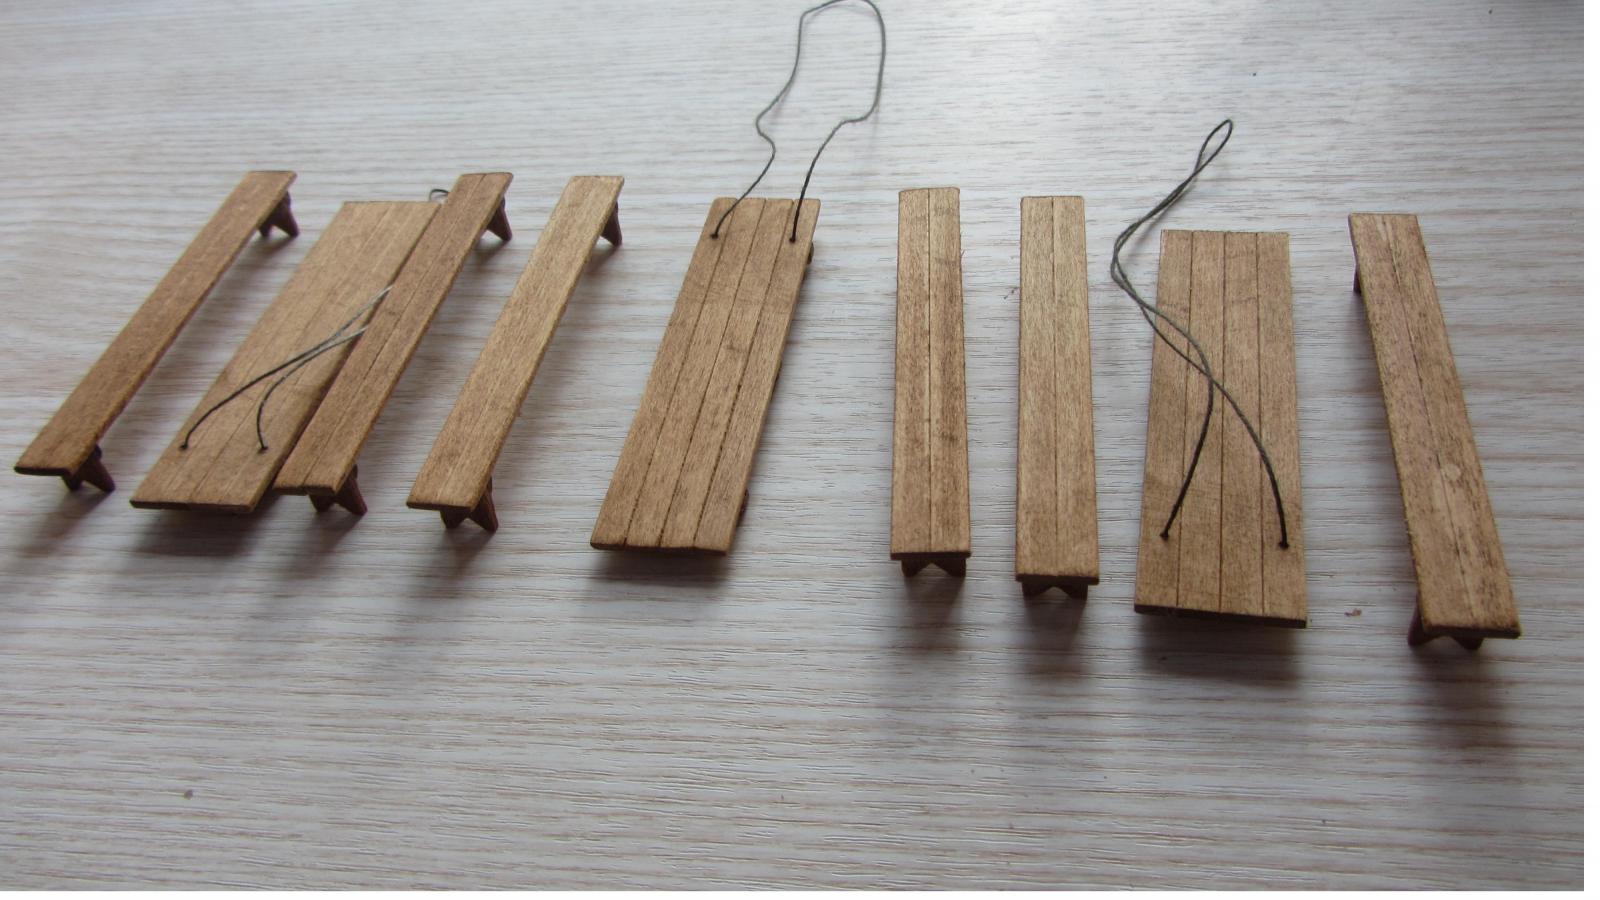
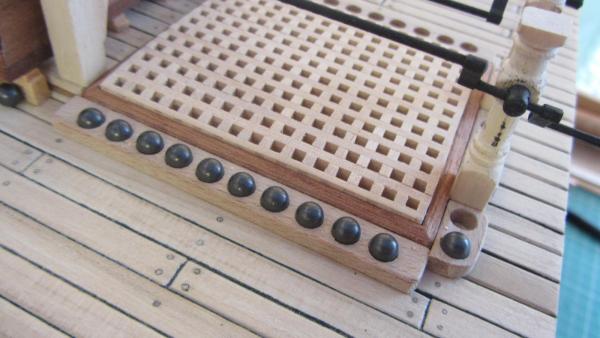
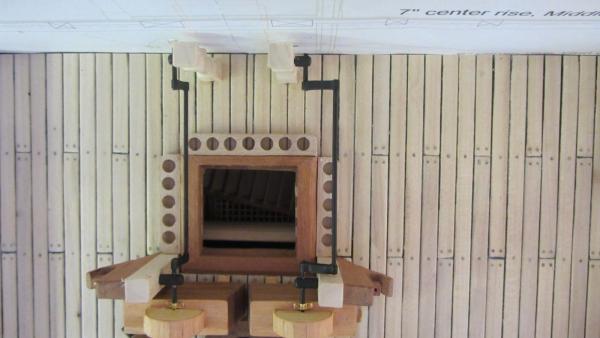
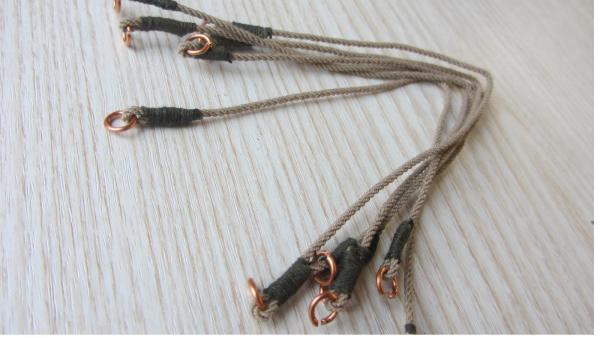
Hello Shipmates. Another update for you. My first attempt at a companion way. Starting the deck fittings. Opps.. the dam companionway slipped.. Tables and benches ready to go. Another on of the benches. Cannon carriages and tools made up. cannon carriages close up. Home made rope is a little stiff for my liking. More deck fittings Middle deck taking shape. Another view of middle deck. Carving wood for the entrances. Core timber is Lime with 2 types of veneer laminated on top. Pear being the top one. Image put onto carving surface. Used Acetone on paper printed with a laser printer. Found out that the surface timber has to be really smooth to do this. This is my sixth attempt at carving this piece of door... That’s about it for now. Thanks for looking in. Regards Antony.


- 209 replies
-
- 10
-

-
Hi Jeronimo. Excellent work on the cannons and carriages. Casting looks so much better than turning What metal did you use on the cannon barrels ? I also made up my carriages using the same method. So much easer. Wonderful work and outstanding modeling to the highest standard Regards Antony.
- 662 replies
-
- 1
-
-
- bonhomme richard
- frigate
- (and 1 more)
-
Xebec by mij - FINISHED - 1:60 scale
AntonyUK replied to mij's topic in - Build logs for subjects built 1751 - 1800
Hi Mij. I also do all my building in my conservatoy and all my cutting and metal work is done in the shed. I would like a room just for our hobbys but the boss paints in watercolours. And likes the quite and space. Regards Antony. -
Xebec by mij - FINISHED - 1:60 scale
AntonyUK replied to mij's topic in - Build logs for subjects built 1751 - 1800
HI Mij. Deck is looking real good. Regards Antony. -
Xebec by mij - FINISHED - 1:60 scale
AntonyUK replied to mij's topic in - Build logs for subjects built 1751 - 1800
Hi Mij. A nice set of plans for the price Regards Antony -
Hi.. Today I had a delivery of new drill bits. And a letter stating that there was a mix up with me and custamer services.. LOL. ALL the drill bits were excellent and had a good tip. Thats a good outcome as far as I am concerned. Regards Antony.
-
Hi. The mould needs to have a very rigid base to hold the shape. Something that long will twist out of shape very quickly when laminating. Because you will seal the mould you can use most materials as long the sealer you use does not destroy the mould.IE foam. And every little imperfection you build into the mould will show. Really every little hairline will show. The method would be -: You build a timber hull with as much details as you require. Then I would cast a plug out of the hull you just built. Then you can cast your working piece. But I would make a plywood on bulkhead model as the main parts of the ship you could use plywood as there no compound curves on the Titanic. Why RC it... Sit in it and enjoy That's my thoughts on such a large model. Regards Antony. Edit spelling...
-
Hi. I have purchased from a UK company some drill bits of various sizes. This morning I went to use a 1.1mm drill bit on annealed brass. I did not check the bit as it was new out of its container. Put it in the drill and rubbish. Thought no more of it and replaced it with another new one. Same not cutting at all. Just skidding. I had a look under a X400 microscope. There was no tip. Had been ground but totally wrong. Checked all the drill bits one by one and all were sharpened differently. Only one had a correct edge Contacted the company and talked to custamer services and just not interested telling me it's me. LOL. Being a Toolmaker and engineer most of my life I know what's right and wrong. They did not even want me to return the bits... And no replacement or refund. No I am not going to name the company but I have made a complant to trading standards UK. So... Buying drill bits beware. Regards Antony. .... I feel better already for voicing it
-
Hi Rusty. Everyone has said it already... just to add another word about your build MAGIC. Regards Antony
-
Hi. For the people in the UK there is a very good resin for casting. Black Fast Cast Polyurethane Liquid Plastic Casting Resin. Made by DWR Plastics. They also sell on E-Bay. This is a very thin resin and you do not get any air bubbles like other resins that are thicker. Also it is a 2 part 50 50 mix . that is hard to get it wrong. I used two syringes to measure the resins and they were reusable. Setting time is 90 minutes. Regards Antony.
-
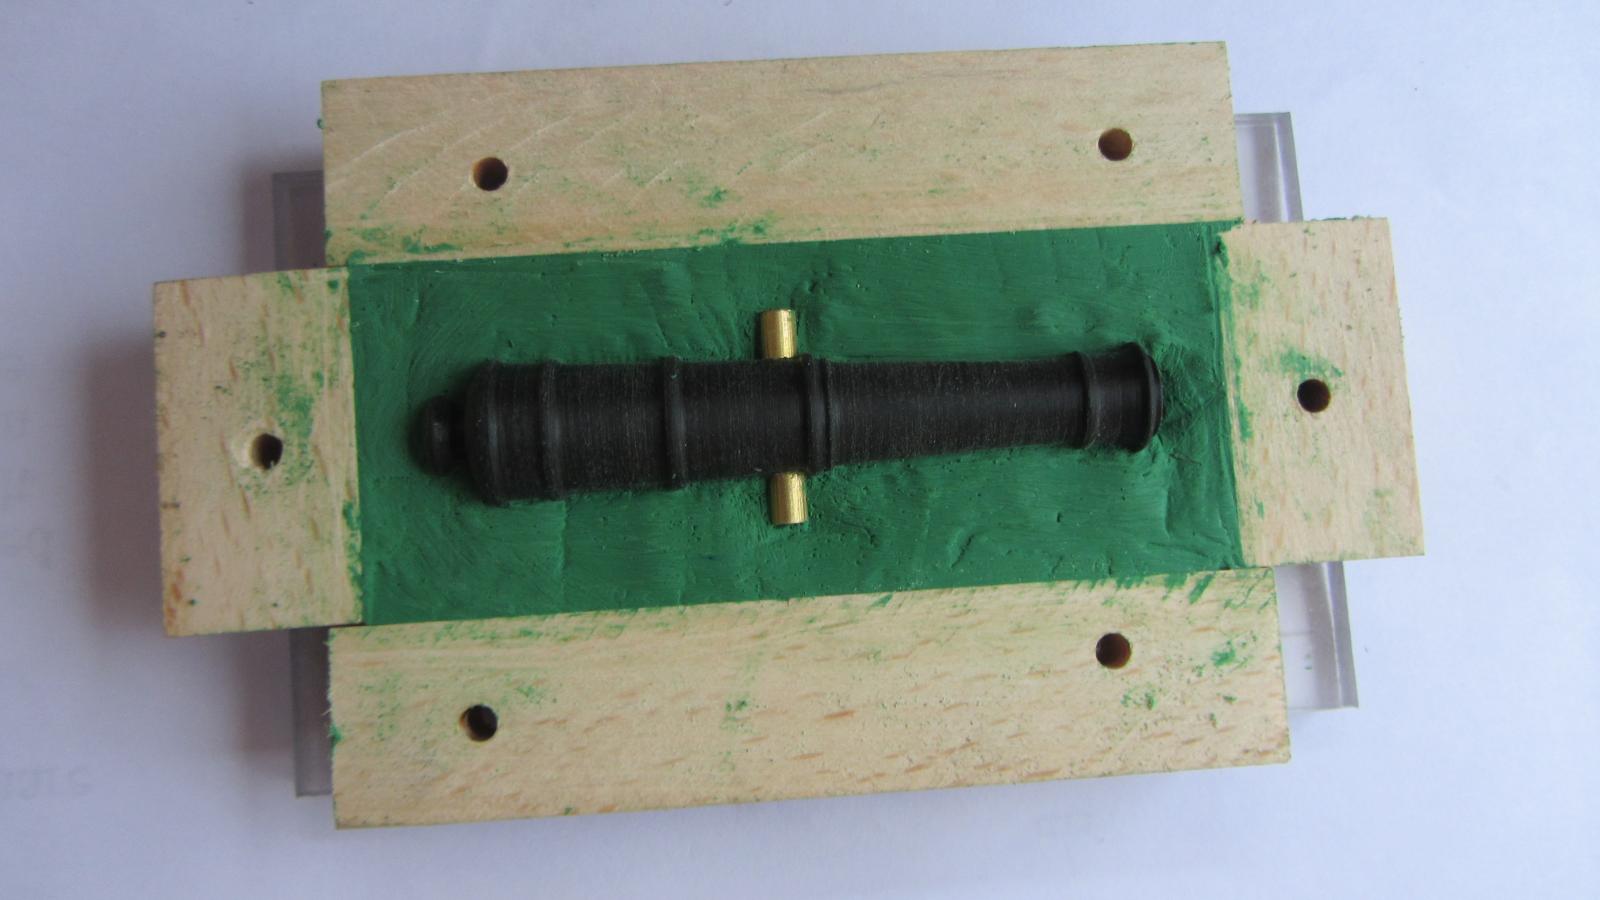
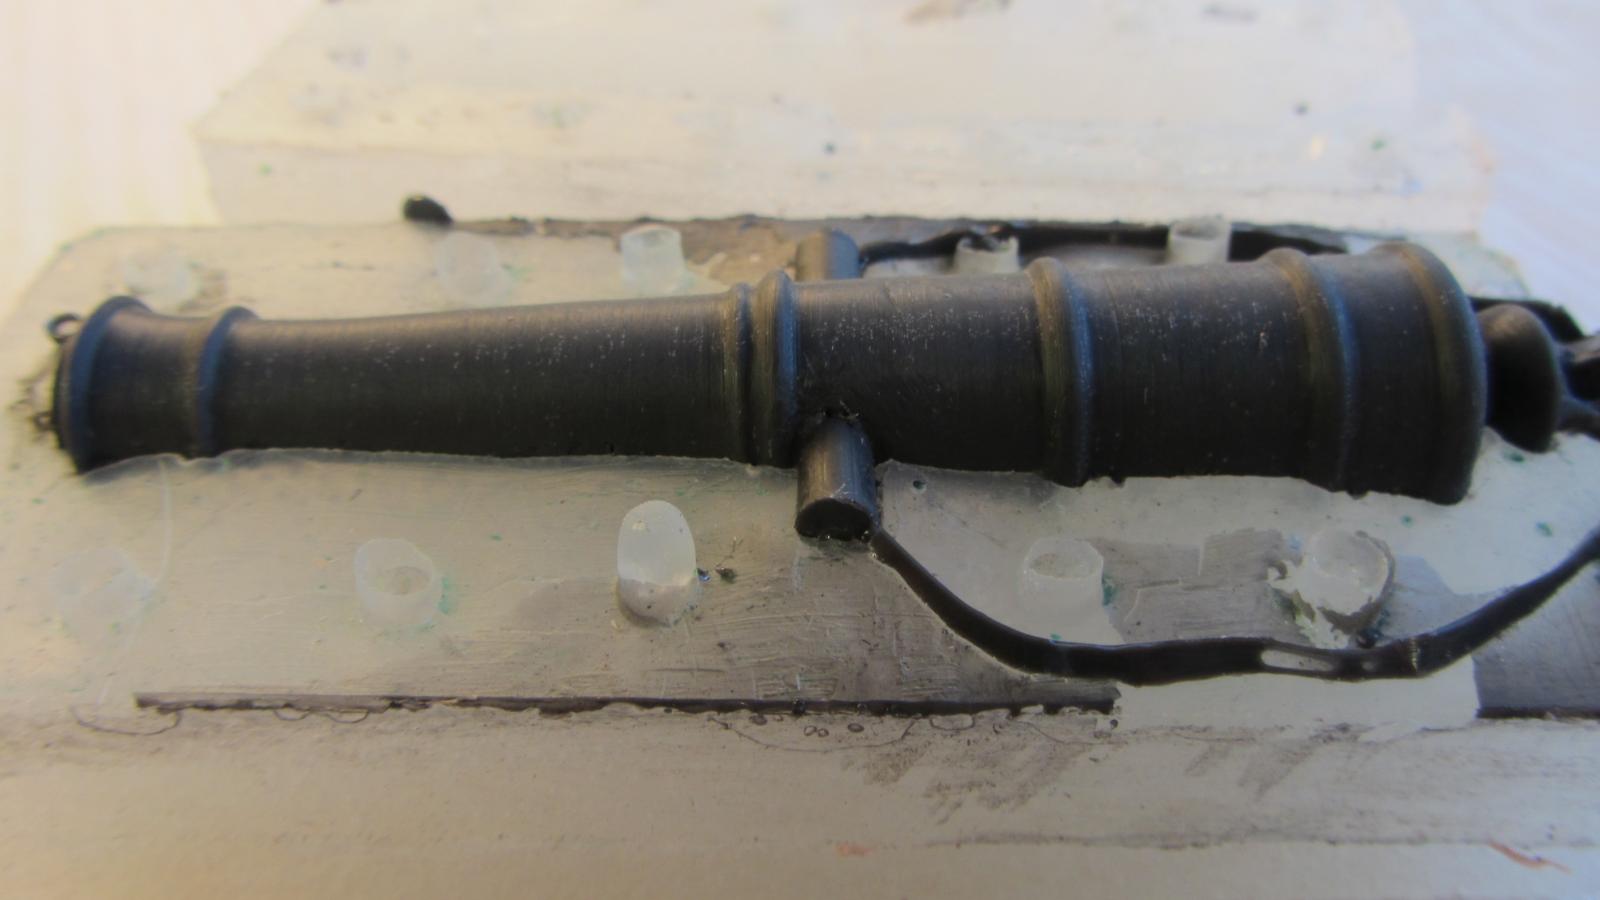
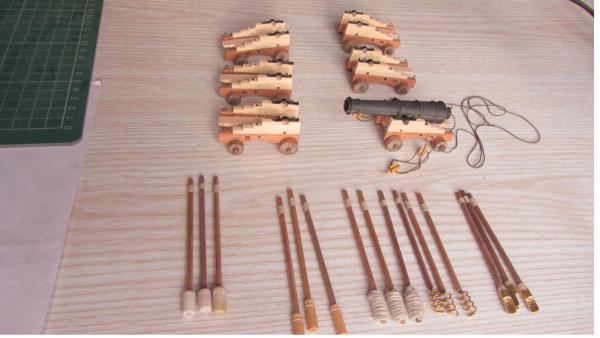
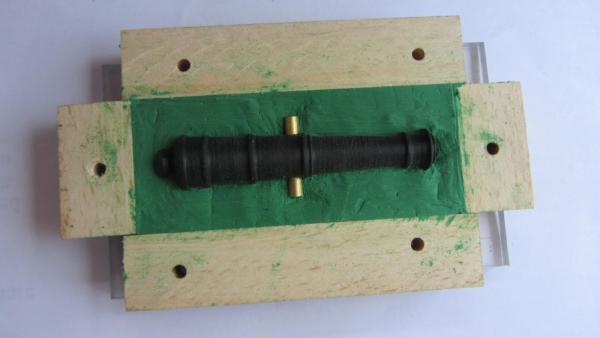
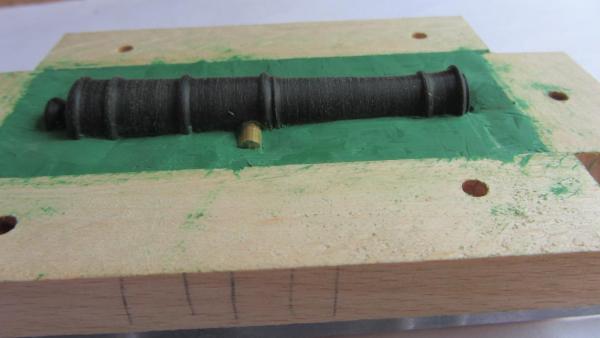
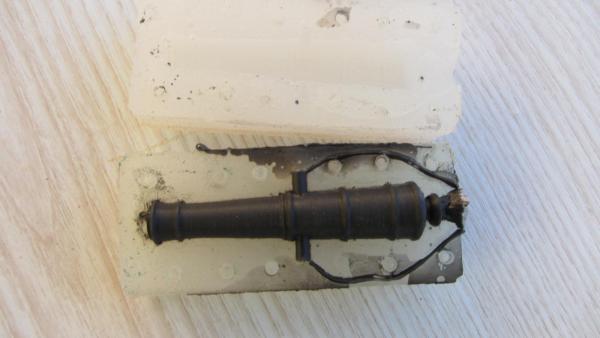
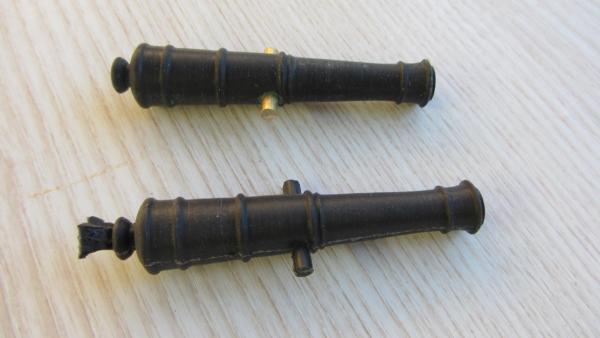
Hi shipmates. Floyd. The plug or original is Acetel bar turned using a lathe to get the correct profile. The trunnions hole is then drilled and a brass rod inserted. Paddy. The cannon barrels are cast using black resin. I made a two part mould out of silicon and added the vents after by cutting a small "V" in the mould. Found lots of examples on Utube I have been experimenting with the excess resin on casting very small bits. Turns out to be very easy. Regards Antony.
-
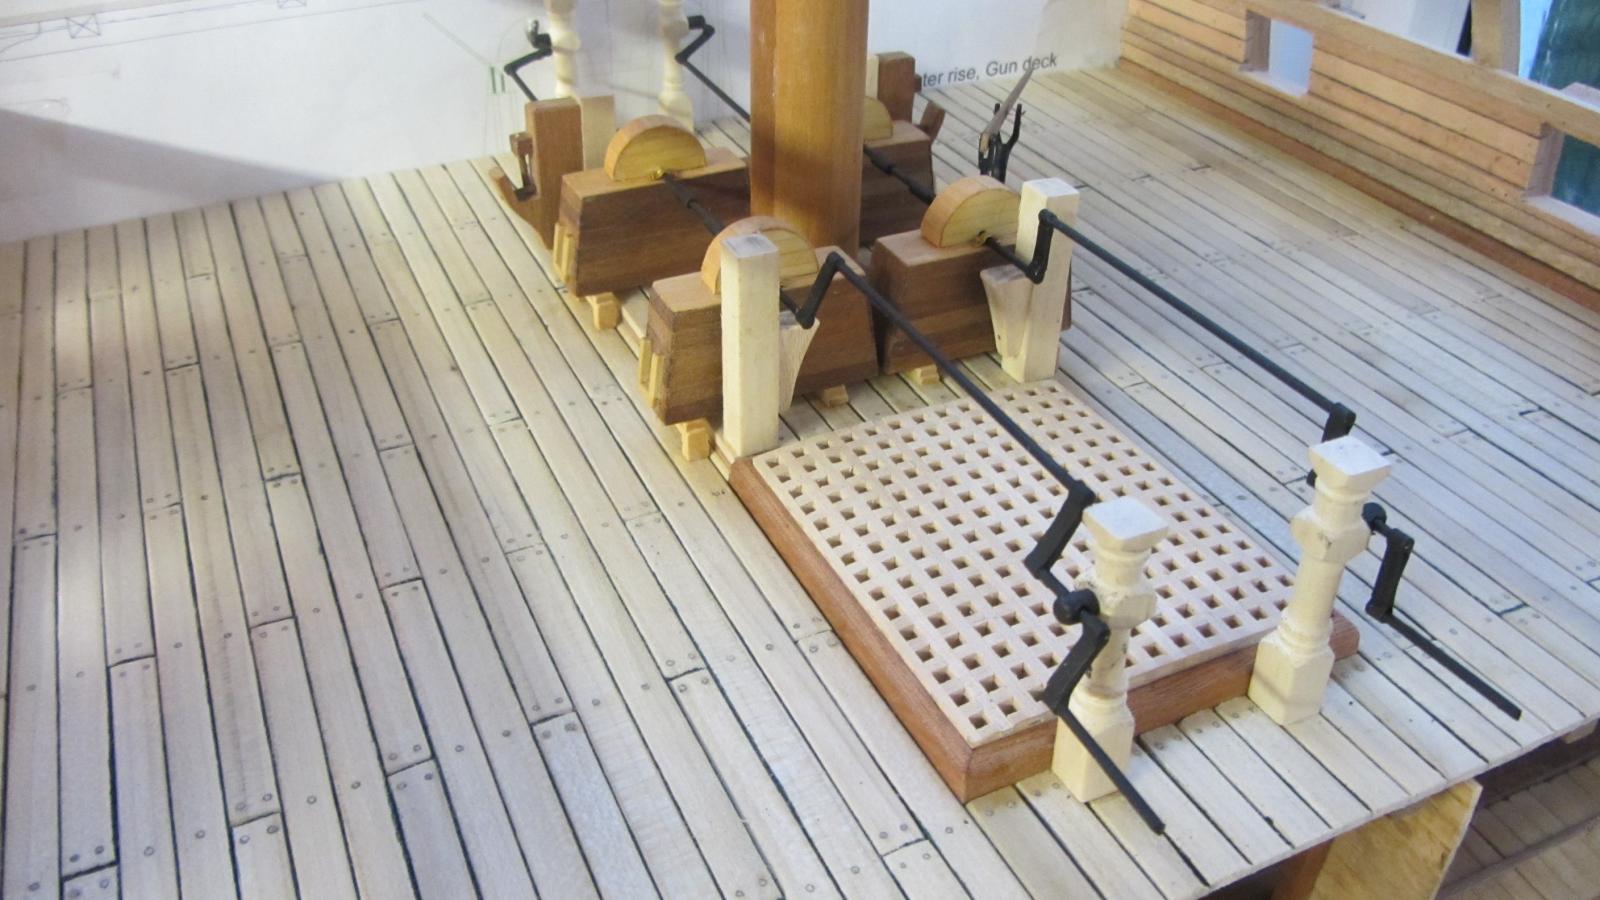
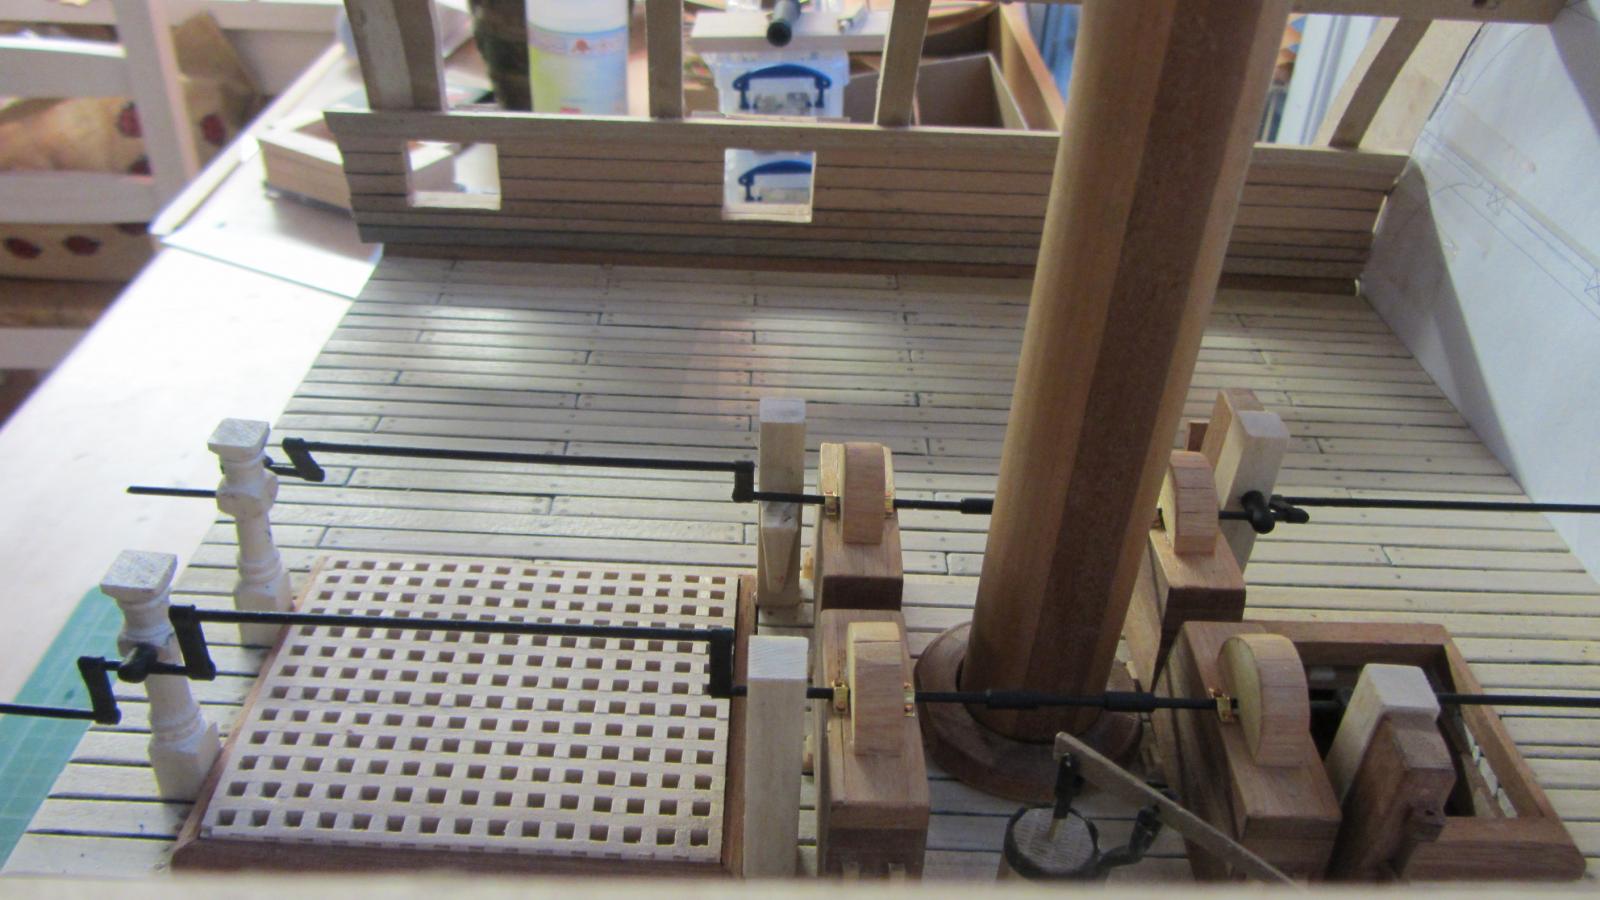
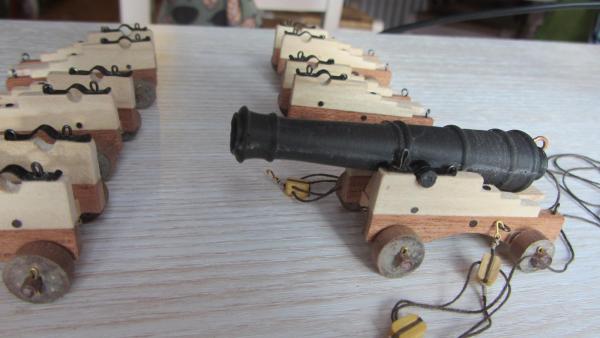
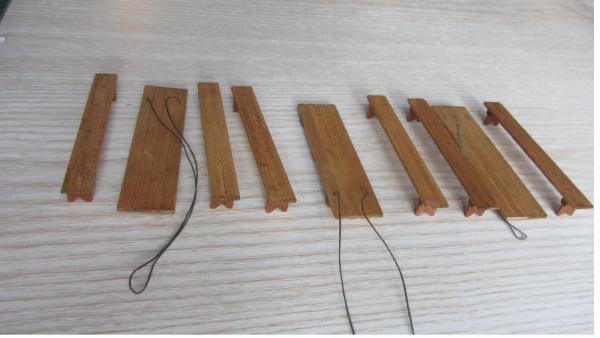
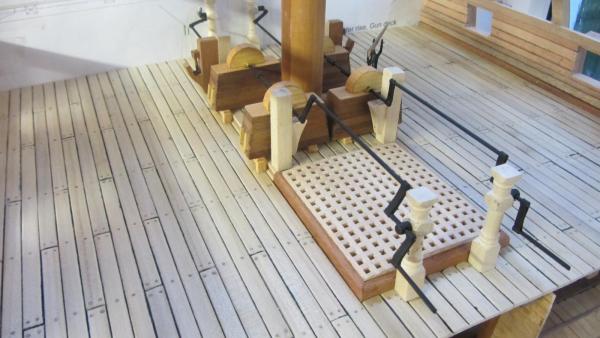
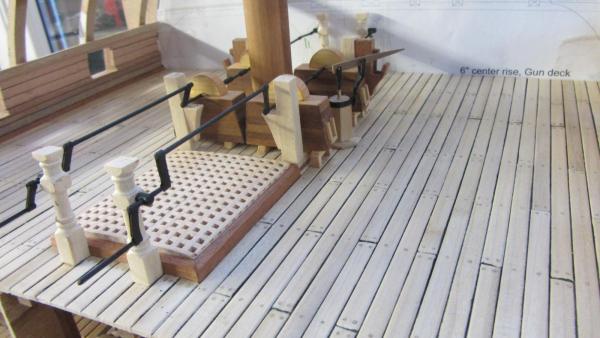
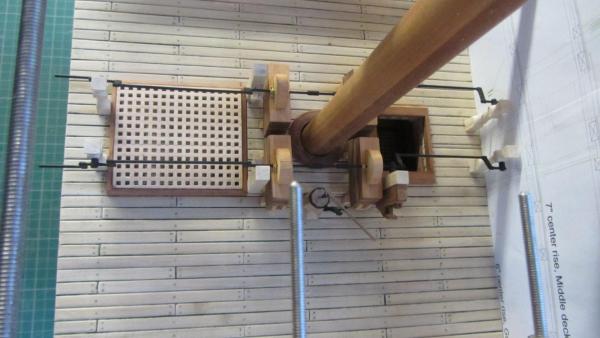
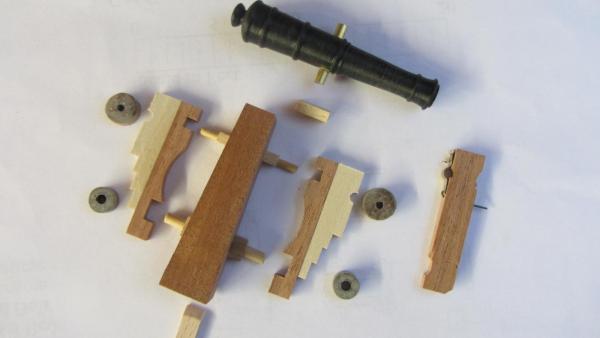
Hello Shipmates. A long due update on progress. Have completed the pumps. Photos from many different angles. Have spent some time looking at the cannons and how too produce 16 of them. The cannon barrels.. I decided to cast my own using black resin. A silicon mould was made first using the master. First part (not yet finished.) First part (not yet finished.) Second cast. note the vents . had air bubbles in so carved vents in to release air bubble. Cast with the master/Plug. Carriages are made. I used 2 types of timber for this as they will look pretty. The large piece in the middle is the jig that will hold all the parts together while drying. Should hold then at the correct angles. This will be my next job assembling the carriages. Thanks for looking in. Regards Antony.


- 209 replies
-
- 17
-