Supplies of the Ship Modeler's Handbook are running out. Get your copy NOW before they are gone! Click here to order
×
MORE HANDBOOKS ARE ON THEIR WAY! We will let you know when they get here.
×


AntonyUK
-
Posts
1,182 -
Joined
-
Last visited
Content Type
Profiles
Forums
Gallery
Events
Everything posted by AntonyUK
-
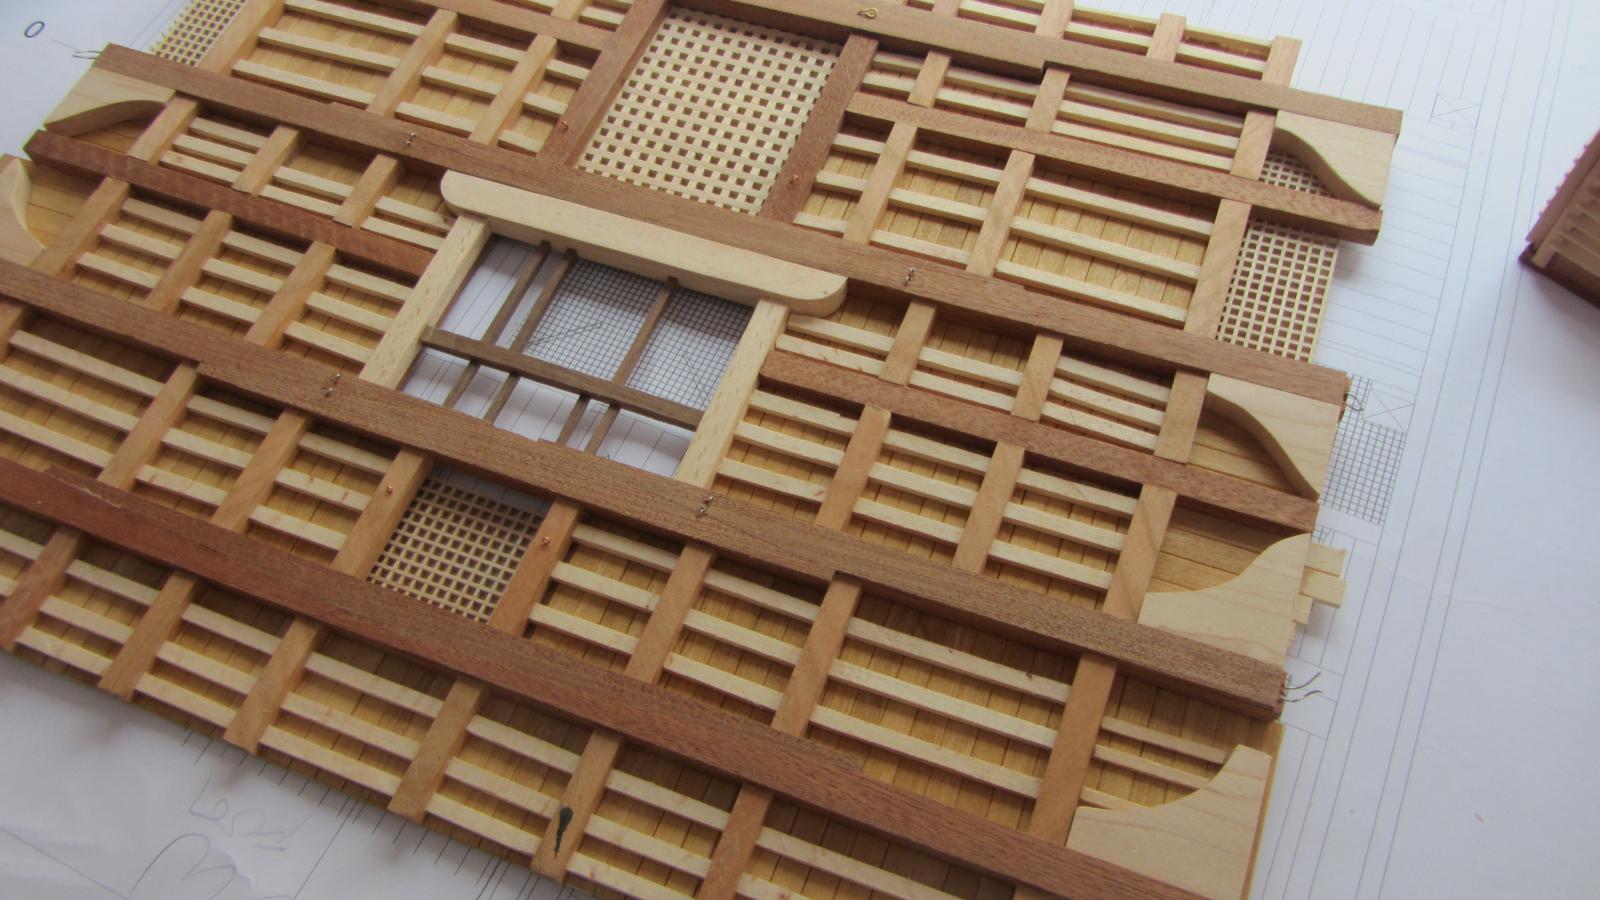
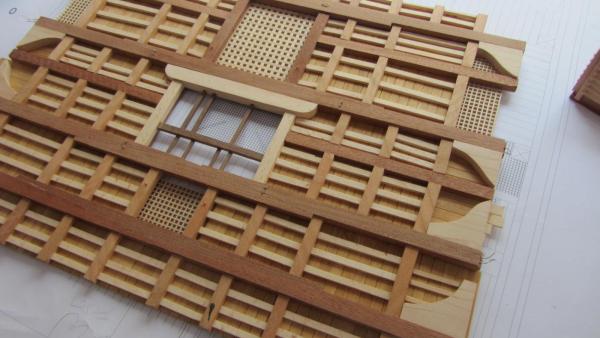
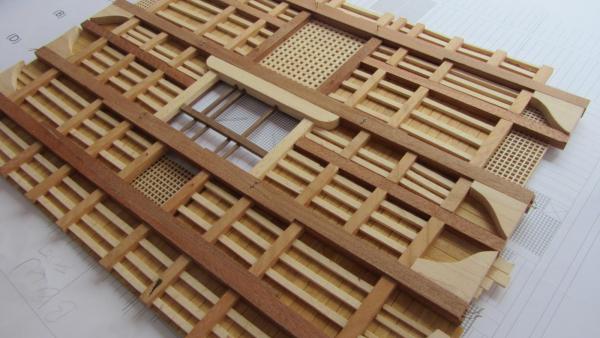
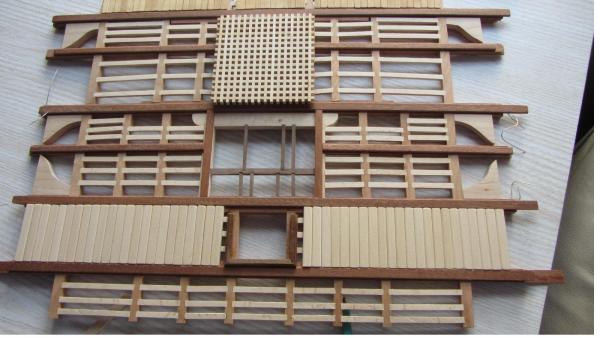
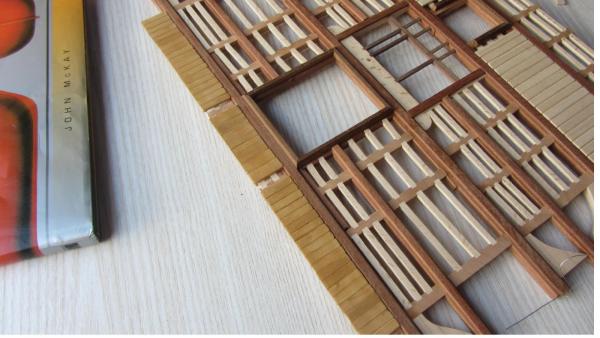
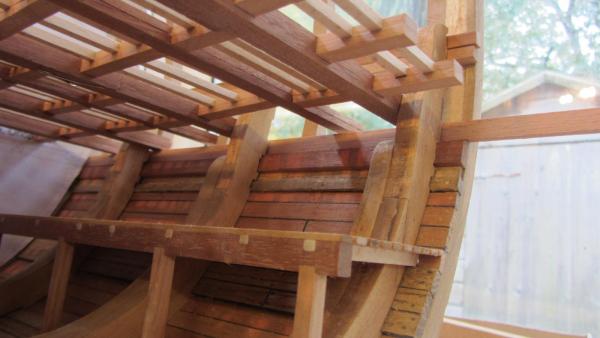
 Hello Shipmates. Thanks Rusty and Bob for you comments. Orlop is now complete and ready for final adjustments before fixing into place in the void. Gratings and planks that adjoin the Headers are not glued as they will be cut to fit after fixing the deck. View from top. Another angle of the Deck. A different angle. View of the underside of the Orlop deck. Another angle From the other side. That’s it for now. Will take a few photos when deck is fixed into place. Regards Antony.
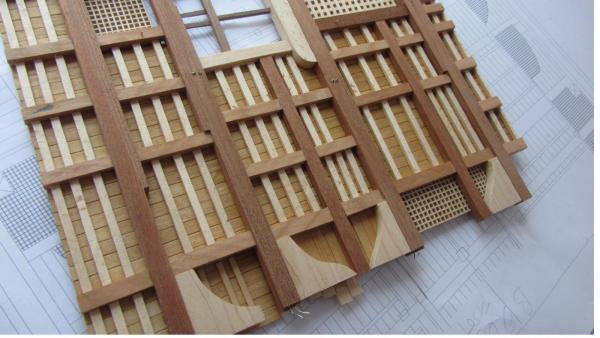


- 209 replies
-
- 13
-

-
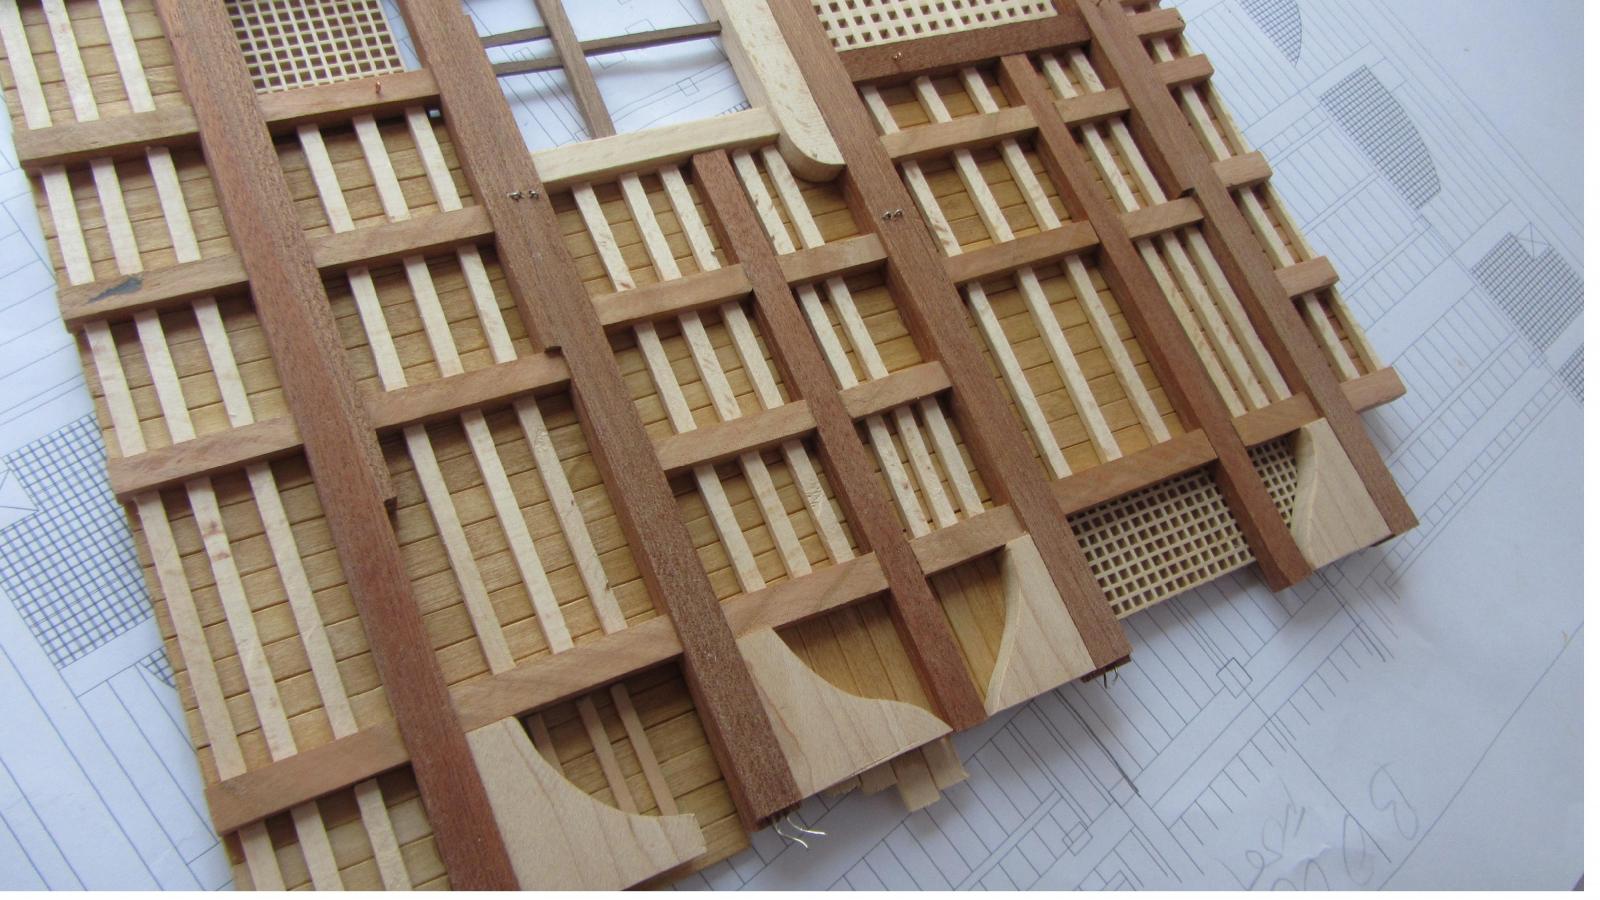
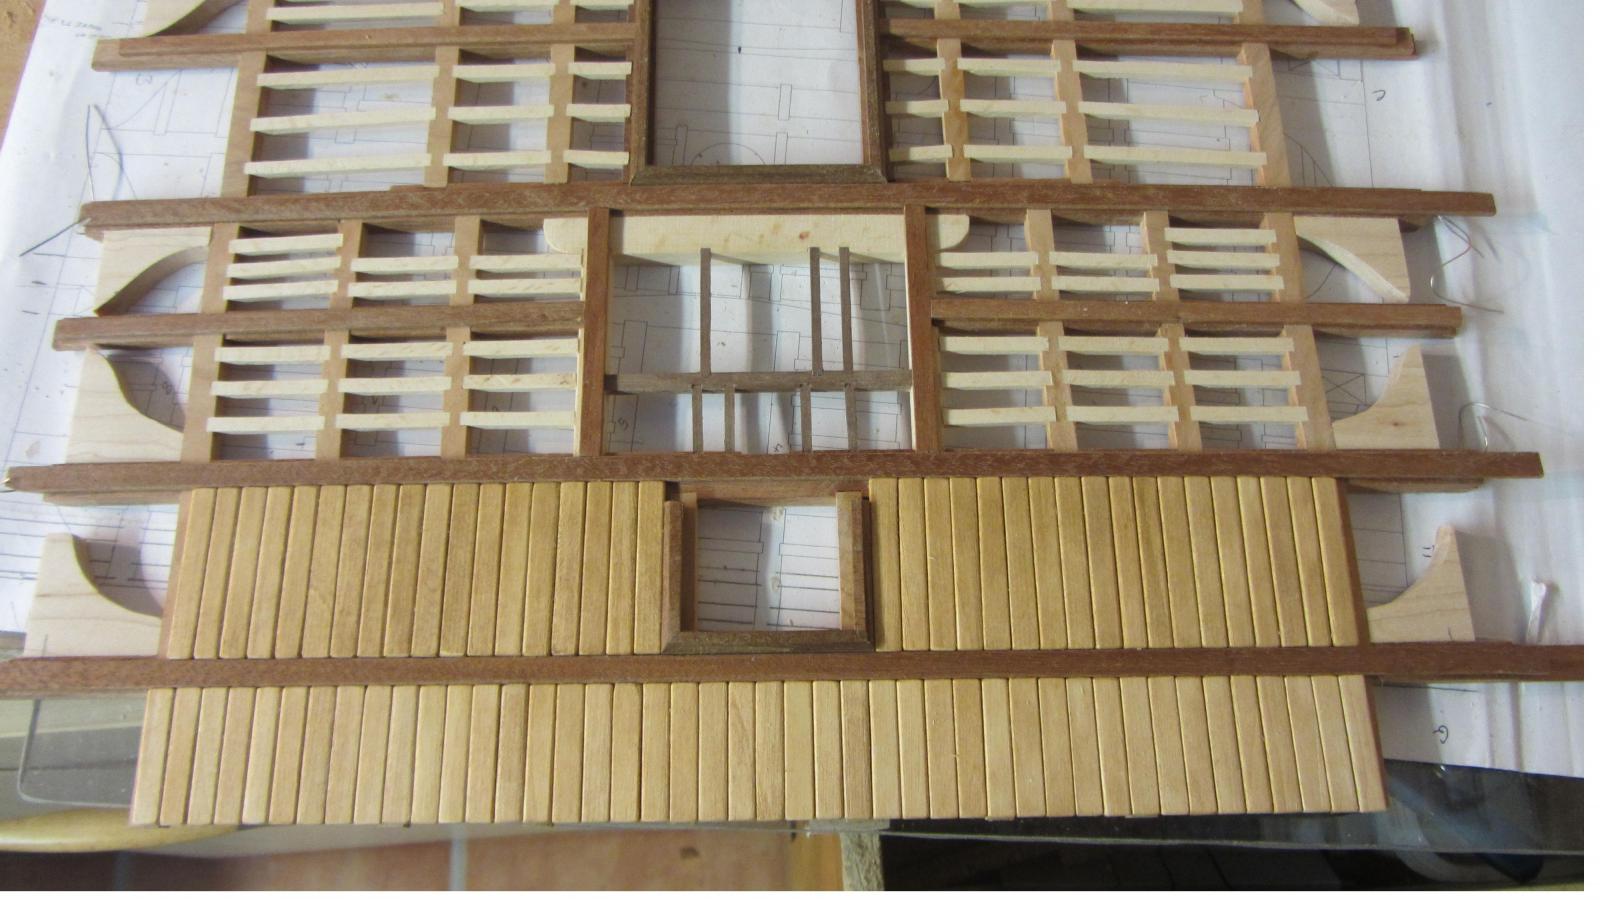
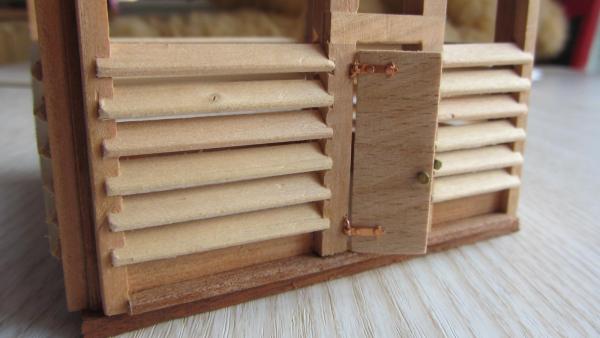
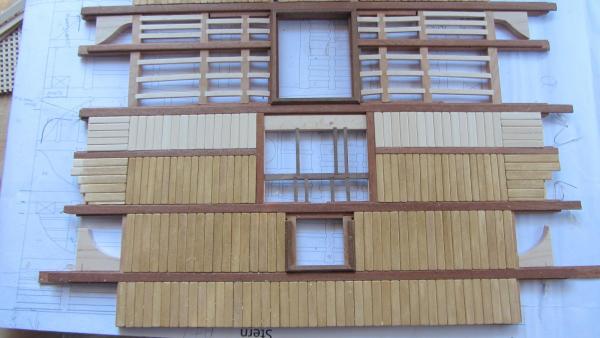
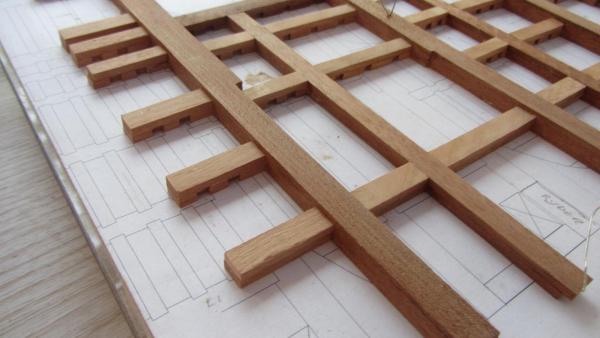
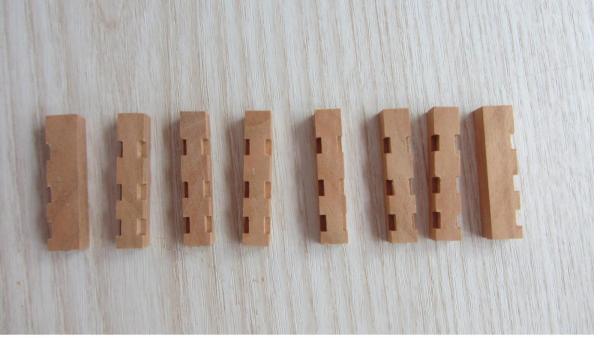
Hello Shipmates. Thanks for your comments... Na .. I just make things look good . Another update :- Filling in all the planking on the Orlop deck at the moment and built the enclosure on the Orlop deck. Not yet cleaned up to remove the dust and lose fibers. Not sure that the walls are ventilated but they look nice. Door is built up with planks and the lock is a bolt through. No idea what’s on the real one The plank's are rounded as they are removable. The row at the back are as yet not stained or fixed. Need to stain before fixing. Three rows done. Progress is good and the Grating is made. But not cut to size yet. First row of the Planking. That’s it for Now. Thanks for looking in Regards Antony.


- 209 replies
-
- 10
-
-
Hello Rusty. Like the other guys have said great detail to the joinery and fine work. I like the cross section as its some thing you can build a lot of detail into. And you are doing just that Regards Antony.
-
Hello Lextin. That's one very nice project. Well done on such fine work Regards Antony.
-
Hello Alexandru and Kester. Thanks for the feed back. That's was my thinking. Thanks again Antony.
-
Hello shipmates. Thank you for your kind words Mark, Floyd and Michael. Starting to plank the Orlop deck But I have a question.. For the victory buffs. Are the decks in the Orlop deck removable ??. The drawings in both books look as if they are and any photographs I have found do not show any treenails. Also the planks are short and held in position by the deck beams. Also have turned the 36 pounders out of Acetel / Delrin. Will cast enough for the cross section when I get the casting kit. Thanks for looking in. Regards Antony.
-
Hi all. Just jumping in here with my comments and expearance with the Proxxon mill. Being a ex toolmaker I spent most of my life with mills/lathes and all sorts of machines. When buying you must look at the hardest and the biggist object you are going to machine. I have a Proxxon mill and it's well built for Small jobs. The gib's will need tightening before use as mine when I received it were quite lose. Very easy job to adjust. For me it's a very valuable tool to model ship making. Regards Antony.
-
Hello Alexandru. Top notch workmanship on the entire model. As usual you are raising the standard and it will challenge me to acheave a better quality of build. Very Very nice. Regards Antony.
-
Hi Jzwel. Happy birthday and have a good one Looking forward to your next post on the Triton. Regards Antony.
-
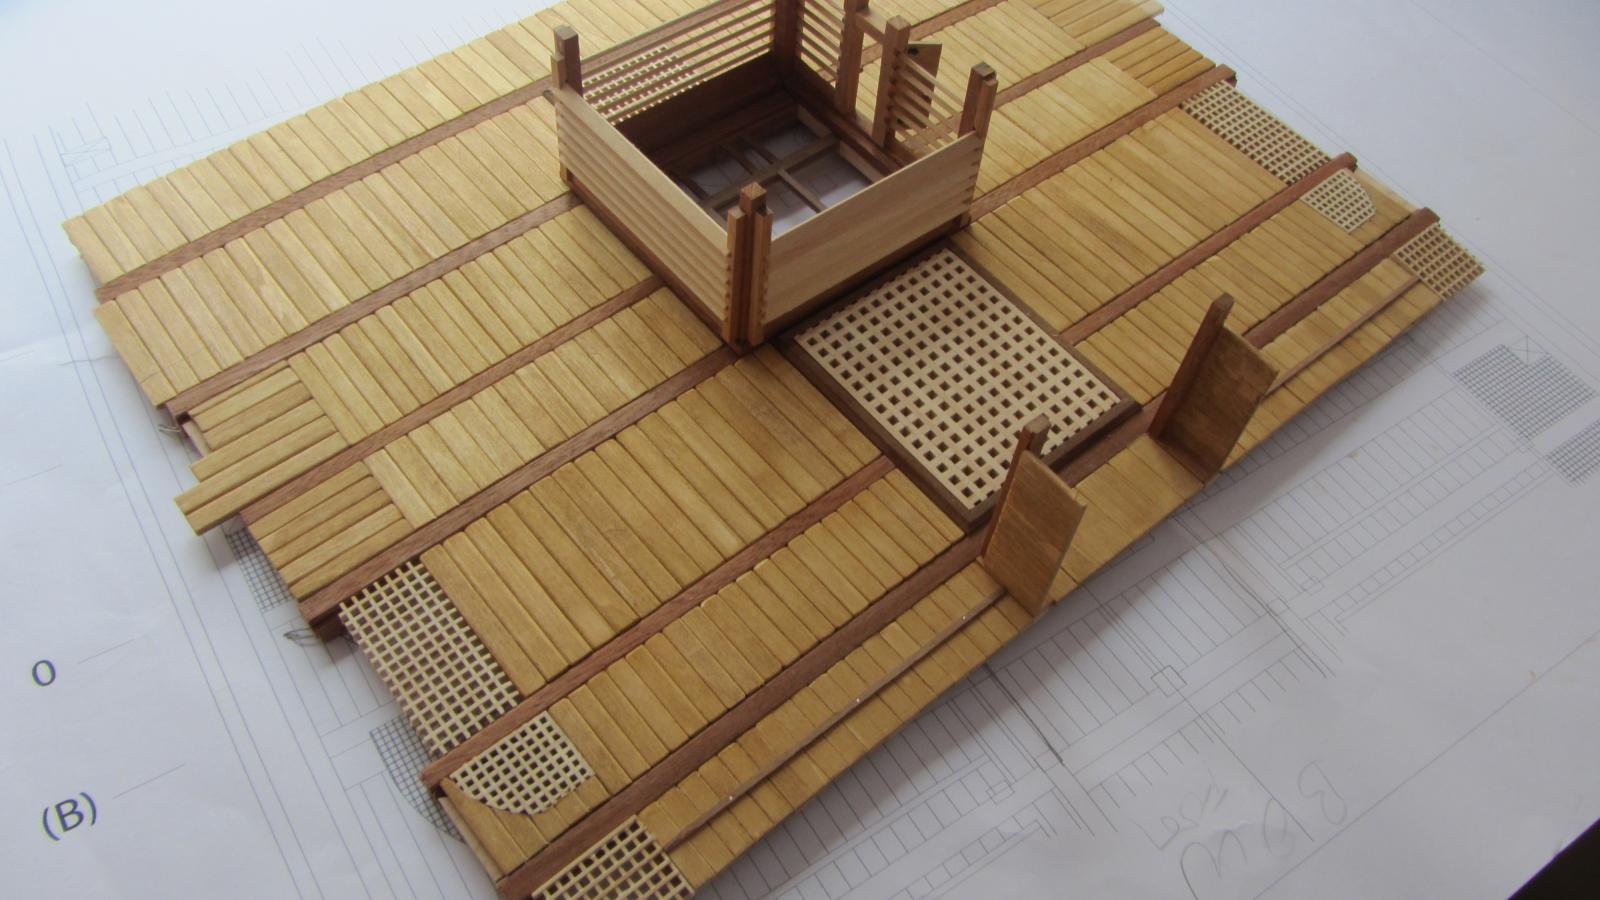
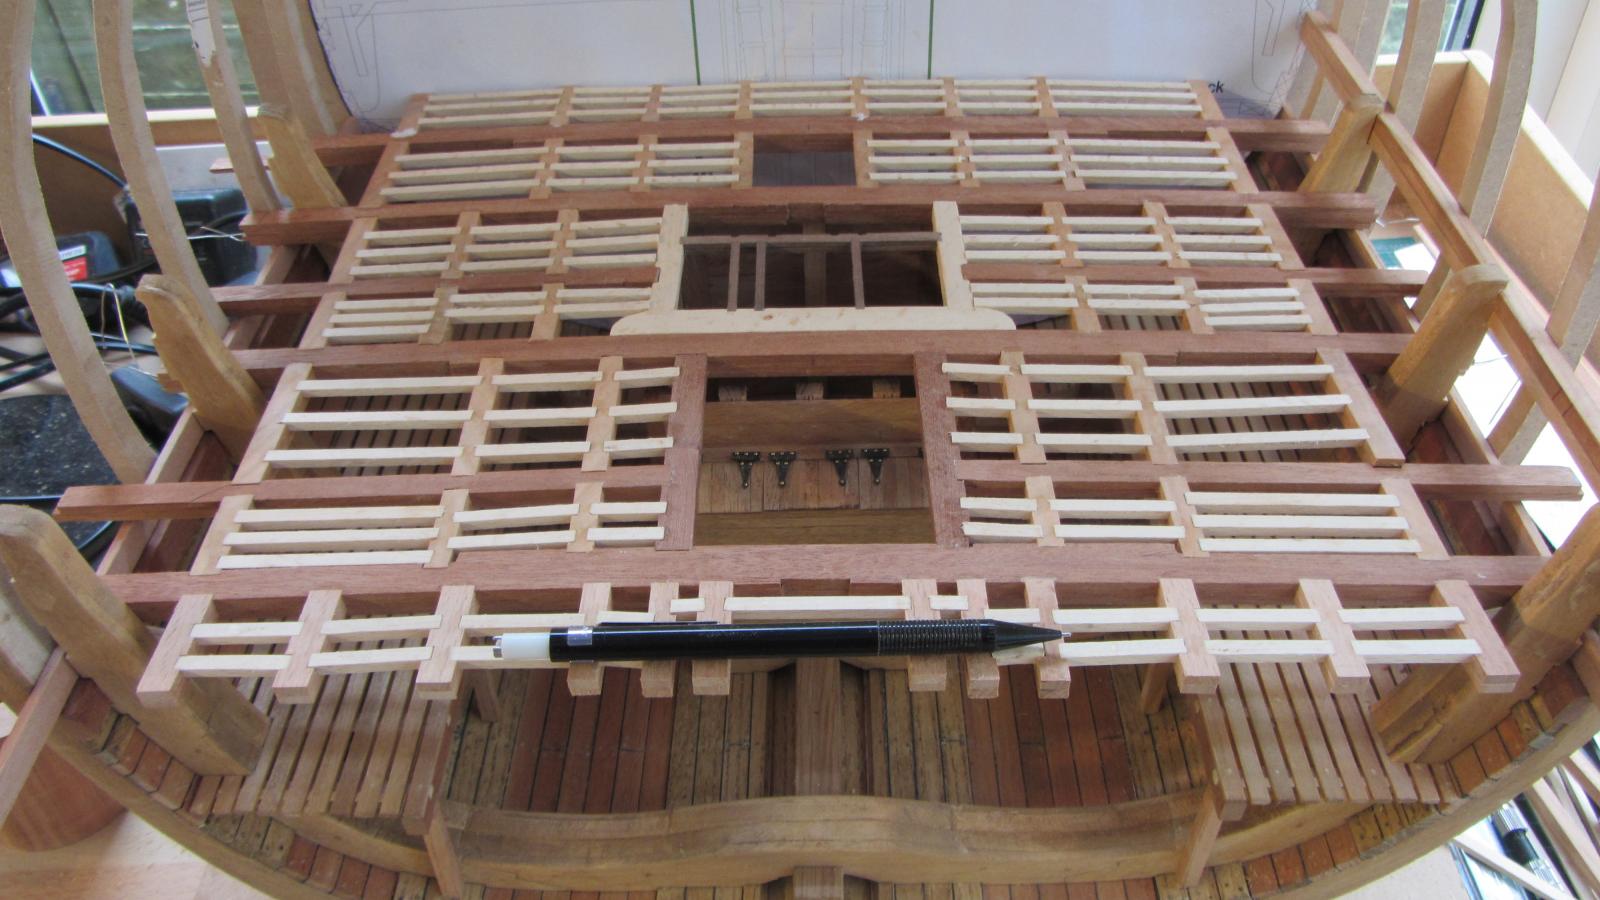
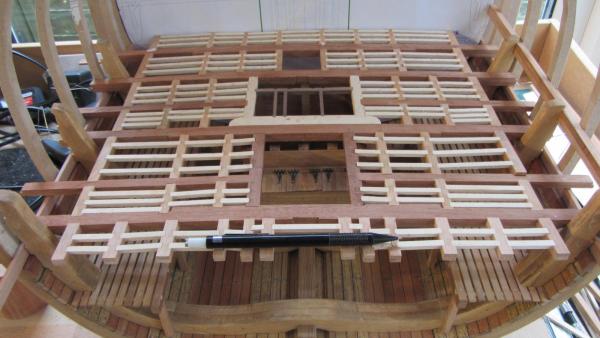
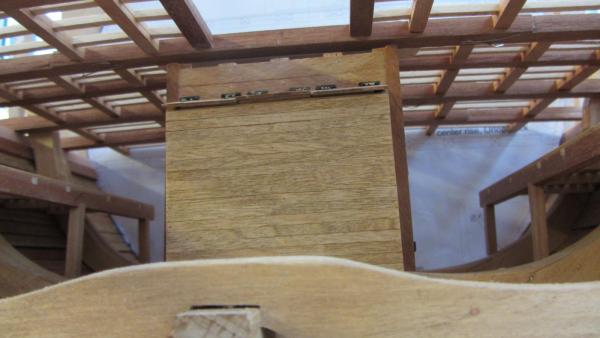
Hello Shipmates. Thanks for your kind words Jeff Another few photos with the Orlop deck fitted into its position. Not yet glued as I have the top surface to sand and clean up. Approx 5mm to trim off the pump house. Temporary spacer plank to mark the amount I need to remove from pump house height. View looking down onto deck. Thanks for looking in Regards Antony.

- 209 replies
-
- 18
-
-
Hello. I have just read your build log. And I am very impressed with you skill and the model. That is a very nice looking forum/shape of the hull. Well done on such a fine ship. Regards Antony.
-
Hi Trevor. There are many ways to hide the wireing. As the wire needs very little voltage and current you can use very small single core wire. I have just built the Orlop deck on my Victory and here I lammanated the wires into the beams. This will have a very small loop at the end of the wire. And the LED's have a small hook. And they just hang in place. Another way would be to use foil tape along the beams before planking the decks ( Another member's clever idea ) Another method is to score the timber with a sharp knife then press the wire into the timber with the back of a spoon. Does not work well with cross grain If you are good with knots ... Get two pieces of wire and loop them to make chain. (for the drop to the lantern.) Please add any ideas. Hope this helps. Regards Antony.
-
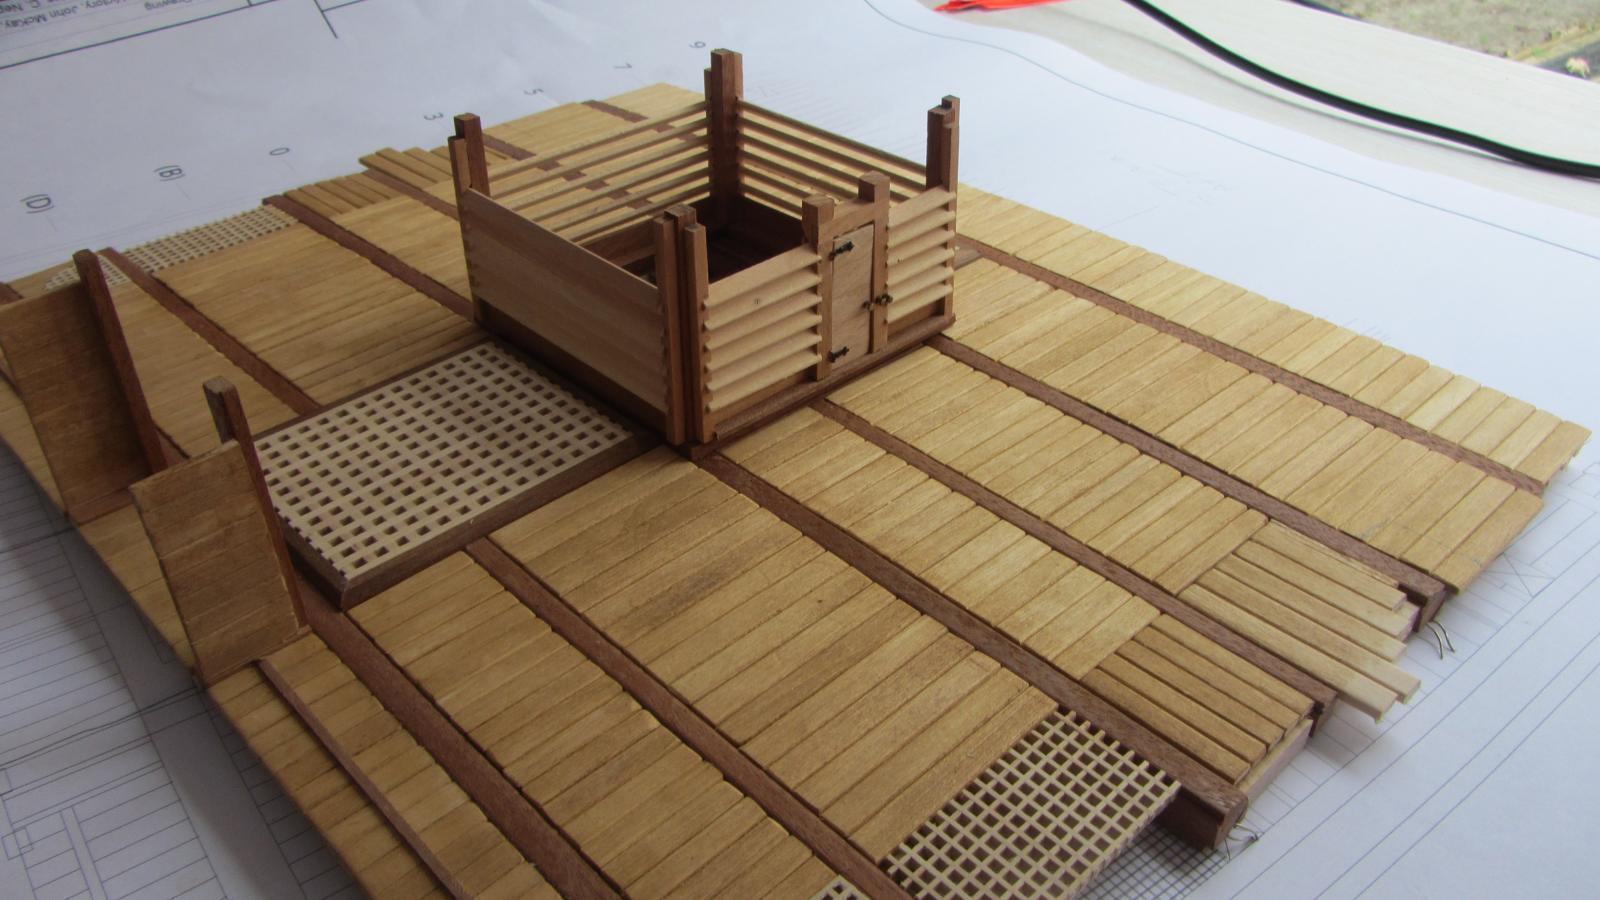
Hello Shipmates. Another update. The photos says it all Not yet finished yet Now have the thin Deck timbers to add. View fron the top. Close up. This is a view from the underside. The Wires are for the LED lighting. The last set on the Orlop Deck. Regards Antony

- 209 replies
-
- 14
-
-
Hi Rowan? This project is very easy and you only need basic soldering expearance. If you solder the wires direct into the Arduino Nano board it is real easy. The resisters are very easy along with the LED's. If you are using surface mount then you need a steady hand as the 1205 size LED's are very small. Regards Antony.
-
Hi Trevor. Do you have a build log ? Might consider a battle station of similar size in the future. Regards Antony.
-
Hi Trevor. I made a error when copying.. My Bad. int ledPin[] = { 3,5, 6, 9, 10, 11}; // pwm pins only int ledState[6]; // last state of each led long randNumber; void setup() { pinMode(ledPin[0], OUTPUT); // Just tells the Arduino that this is a output pinMode(ledPin[1], OUTPUT); pinMode(ledPin[2], OUTPUT); pinMode(ledPin[3], OUTPUT); pinMode(ledPin[4], OUTPUT); pinMode(ledPin[5], OUTPUT); randomSeed(analogRead(0)); // seed the random generator with noise from unused pin ledState[0] = random(20, 201); ledState[1] = random(20, 201); ledState[2] = random(20, 201); ledState[3] = random(20, 201); ledState[4] = random(20, 201); ledState[5] = random(20, 201); } void loop(){ for (int i=0; i<=5; i++){ // for each led:// counts from 0 to 5 =6 analogWrite(ledPin, ledState); // set the pwm value of that pin determined previously randNumber = random(-70, 71); // generate new random number and add that to the current value-40,41 ledState += randNumber; // that range can be tweaked to change the intensity of the flickering if (ledState > 200) { // clamp the limits of the pwm values so it remains within ledState = 200; // a pleasing range as well as the pwm range } if (ledState < 10) { ledState = 10; } } delay(100); // the delay between changes } There Just tested it and its fine. Regards Antony.
-
Hi Ron. I use a band saw and a table saw to cut the wedges. I choose the number of segments I require in the cask. Example 10 degrees gives me 36 segments. 10 degrees gives me 36 segments. 15 degrees gives me 24 segments. 10 degrees gives me 18 segments. 20 degrees gives me 15 segments. 24 degrees gives me 12 segments. The drawing is better than a hundred words :- Wedge cutting.bmp Hope this helps. Regards Antony.
-
Hello Jzwel. Your English is good by me Nice to have you aboard. The work so far looks brilliant. Regards Antony.
-
Hello Vorons. Pear should look very nice. The frames are a pain BUT it's worth the hard work and time. Regards Antony.
-
Hello Daniel. I had a old piece of kitchen work surface which had MDF on the bottom. I turned this over to show the MDF which I can drive screws into. Then I have a sheet of Poleycarbonate 10mm thick. This is pulled into the camber by putting the correct packaging at the edges and using countersunk screws to pull the centre down. Plans can be held in place tith the edge packing. As each deck has a different camber all I need to do is reduce or increase the edge packing for less or more camber. And of course if you lammanate timber it will hold its shape with little or no spring back. I hope this is the information you wanted Regards Antony.
-
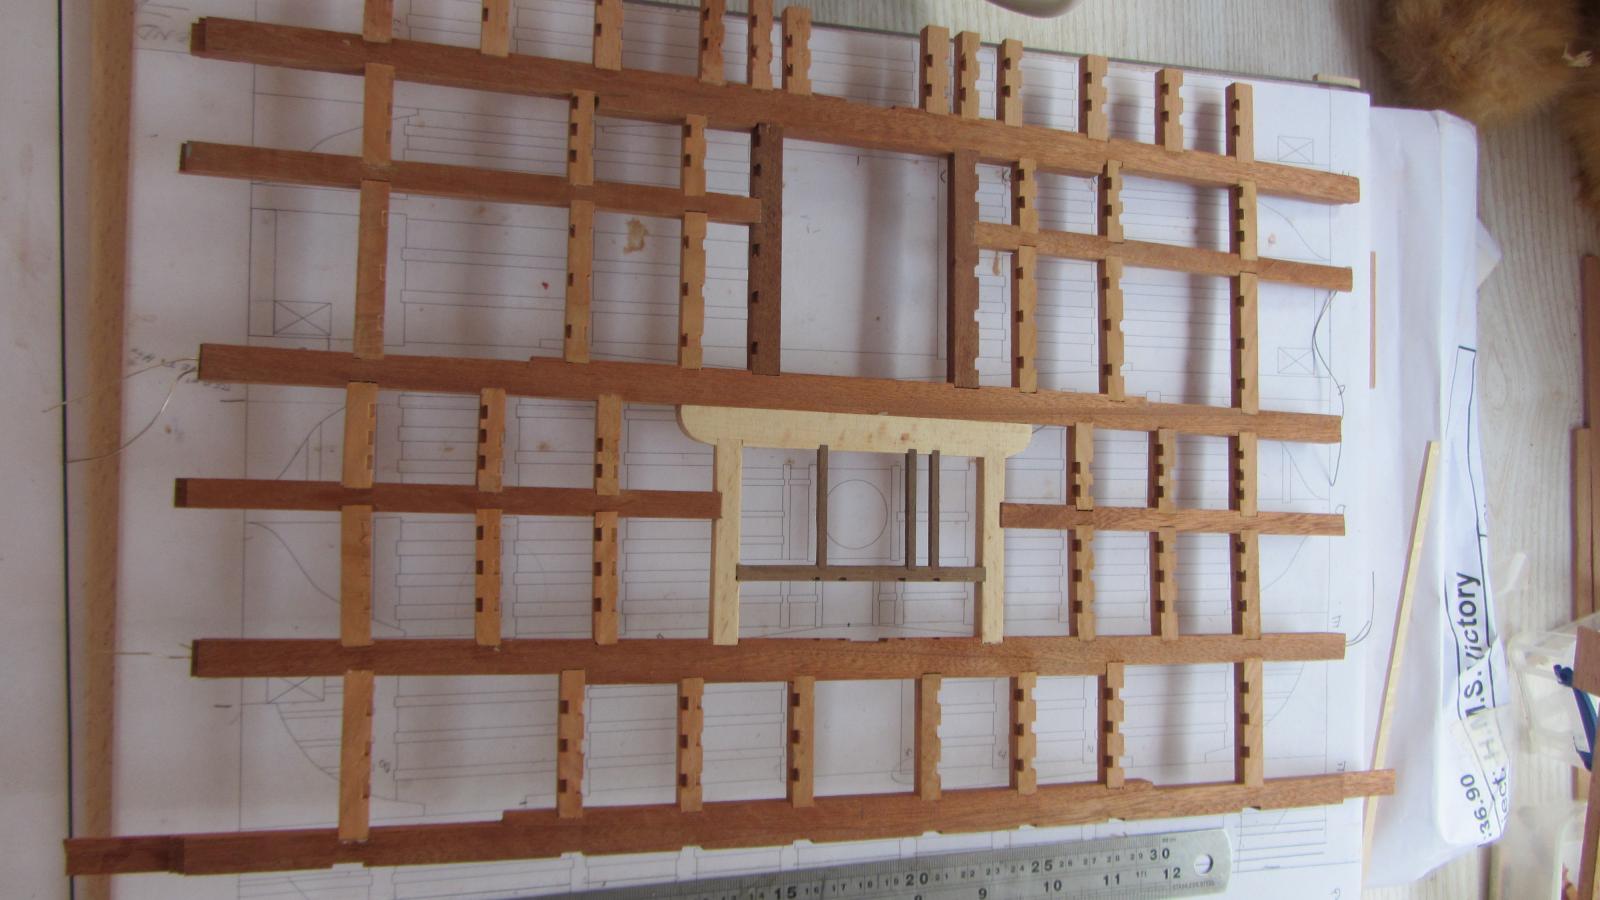
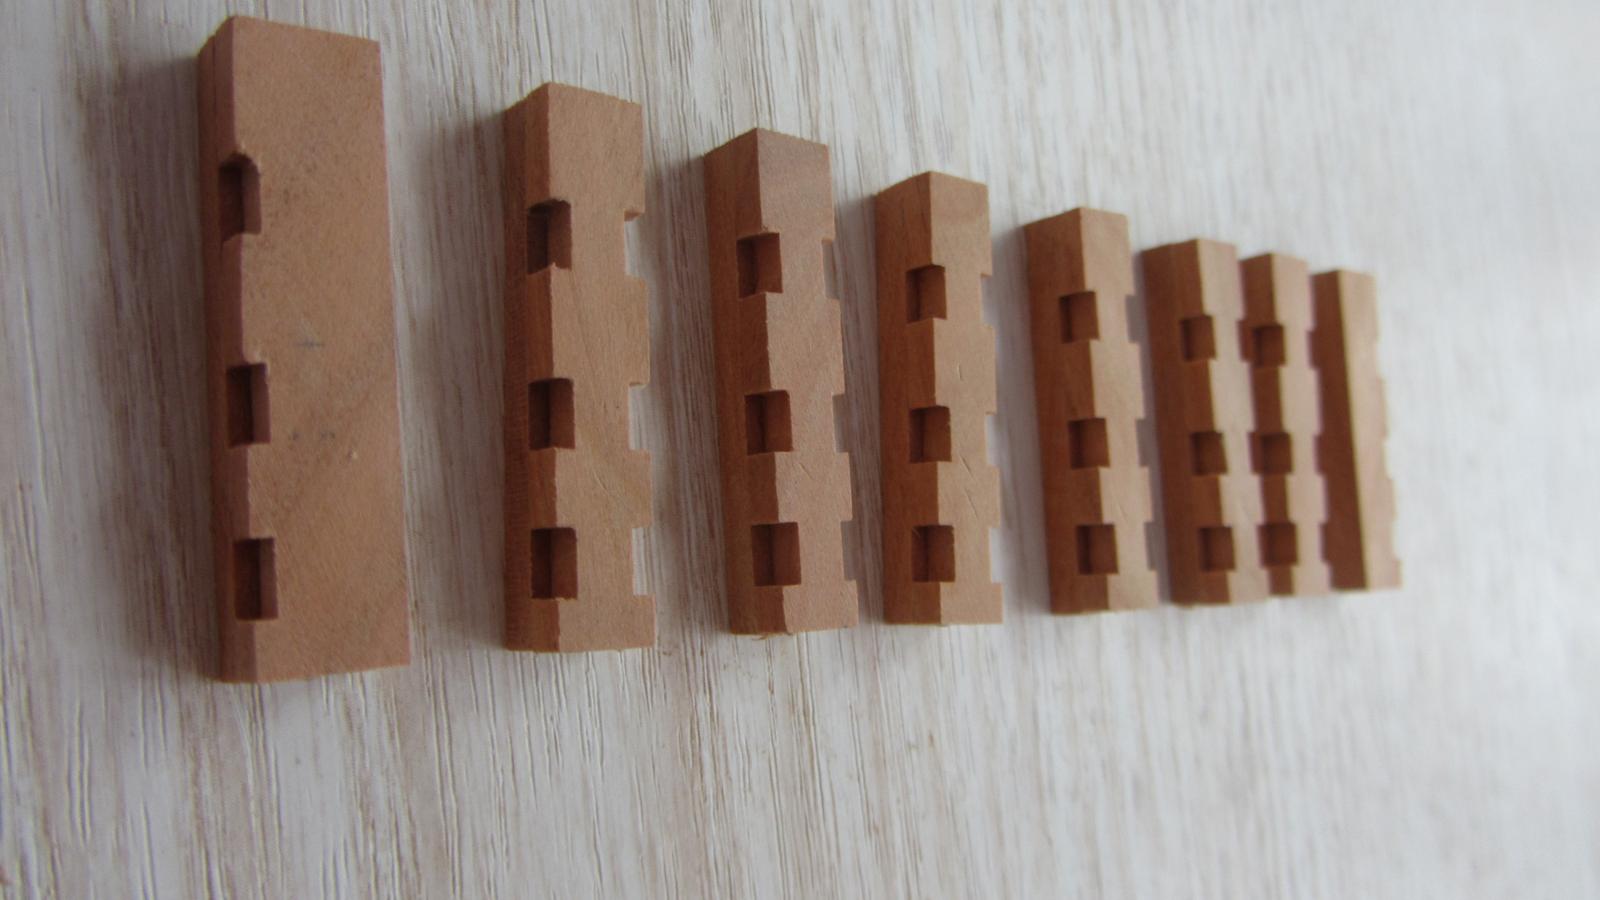
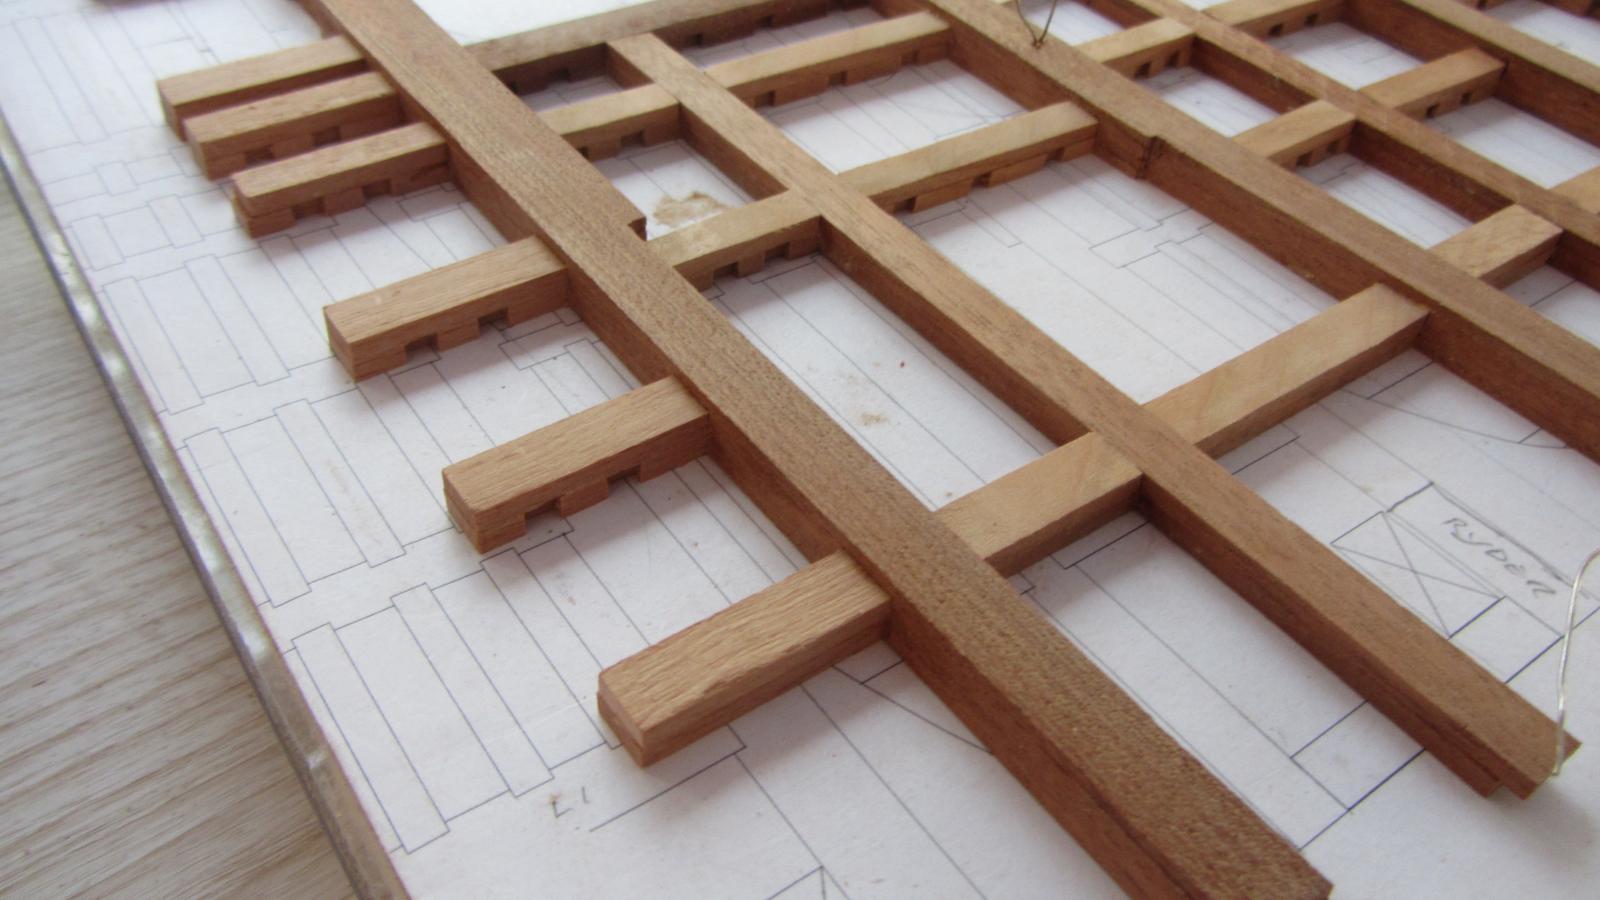
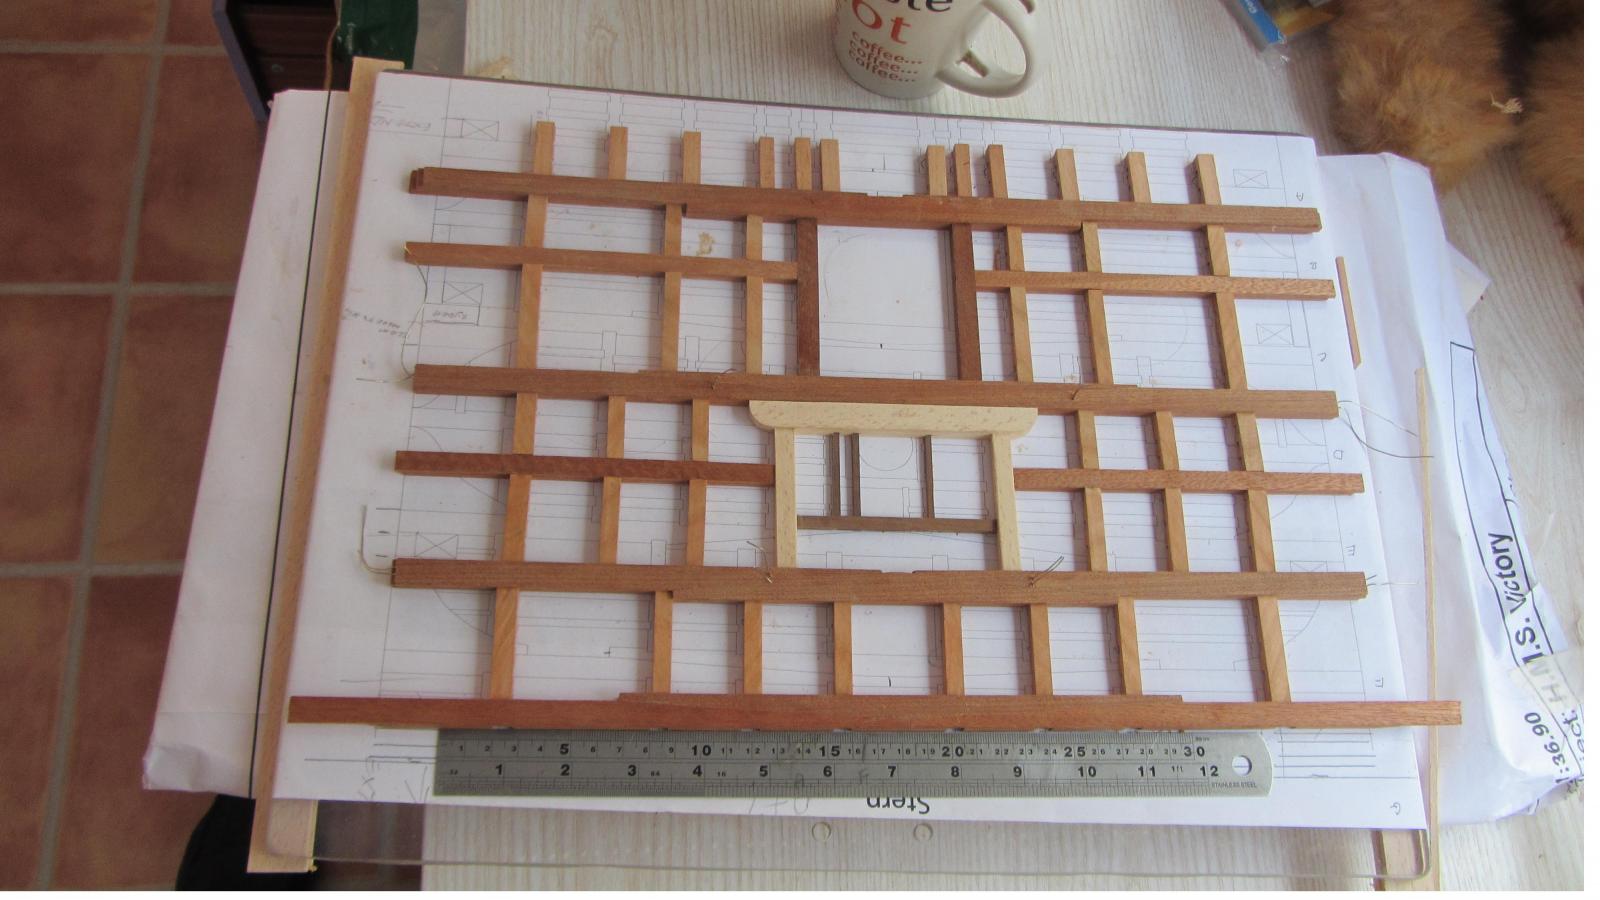
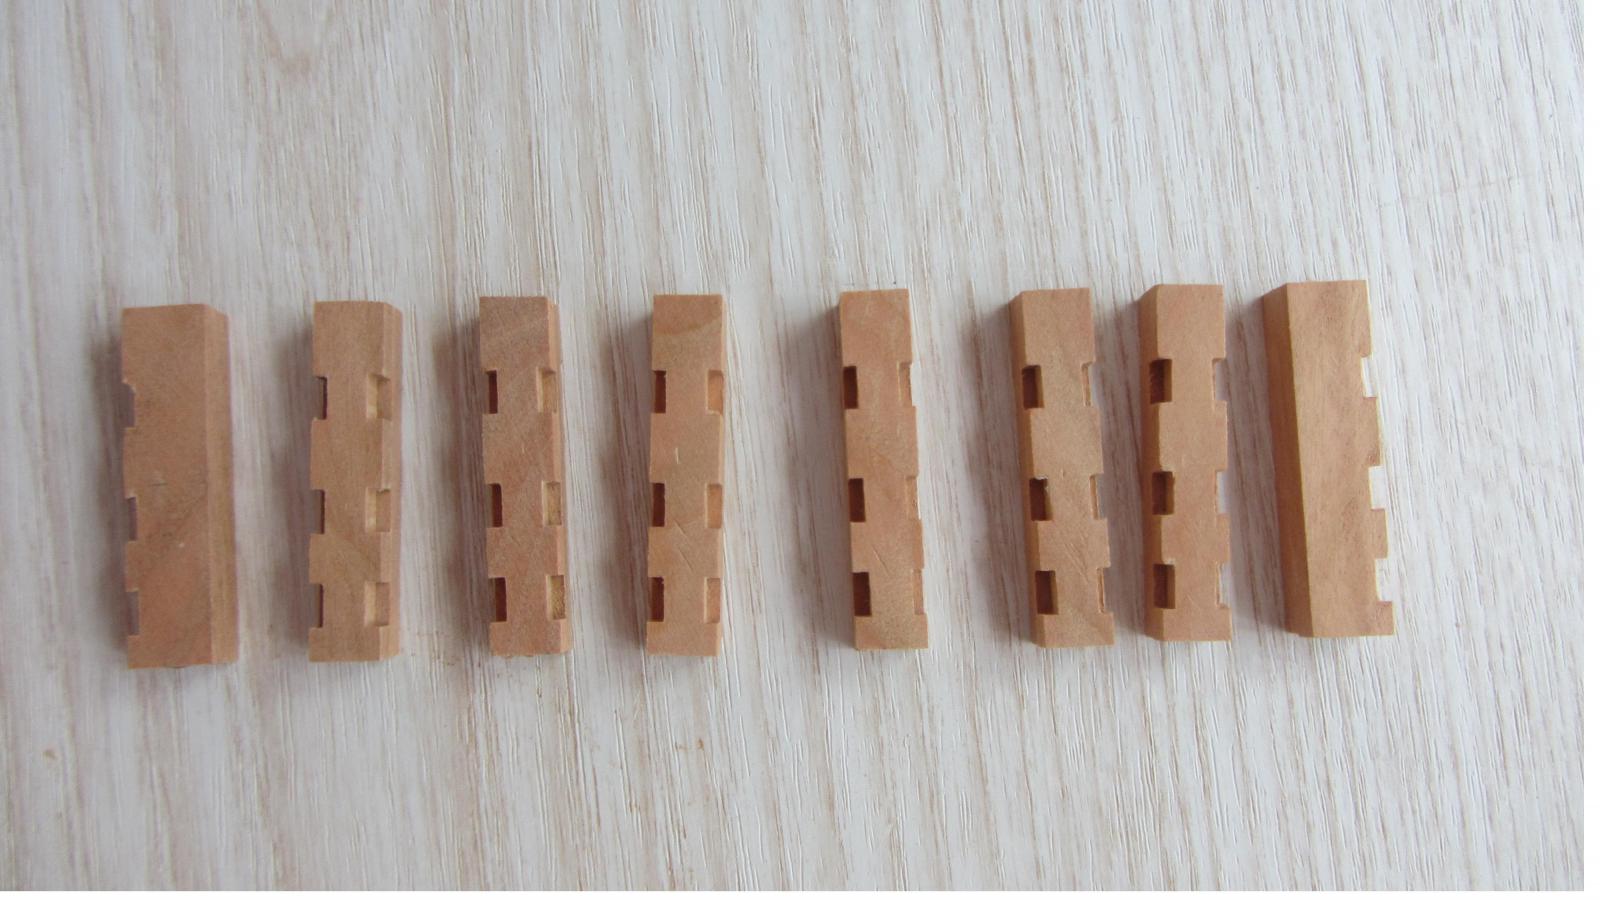
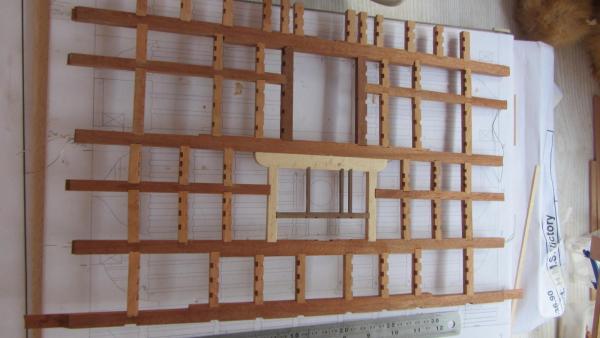
Hello Shipmates. Finished making the main beams for the Orlop Deck. The beams were made up by laminating 2mm thick pieces of timber and assembled on the plan which is curved for the camber. Close up of the joint (not yet cleaned up ) And before anyone with a sharp eye spots it I am building the Deck upside down. (It’s my method) Regards Antony.
-
Hi. A photo shows what a painted joint looks like Every other Joint is Painted. Close up photo. Regards Antony.
-
Hello shipmates. I painted the top edges of the wedge before assembling with Matt Black paint to show the joints a little more. Worked for me Regards Antony.
-
Hello shipmates. Thanks for showing me that. The only issue I had was the cutting of the wedges to the correct angle. But I have that sorted now Produced one today and it turned out spot on. Just need to adjust the size a little and I have my barrels/cask/kegs. Thanks again. Regards Antony.
-
Jim Byrnes Model Machines
AntonyUK replied to Mahuna's topic in Modeling tools and Workshop Equipment
Hi Jim. HAPPY BIRTHDAY. And again thank you for everything. My Brynes saw is producing excellent quality timber and I hope you have a Quality birthday. Regards Antony.