HOLIDAY DONATION DRIVE - SUPPORT MSW - DO YOUR PART TO KEEP THIS GREAT FORUM GOING! (Only 13 donations so far - C'mon guys!)
×


AntonyUK
-
Posts
1,190 -
Joined
-
Last visited
Content Type
Profiles
Forums
Gallery
Events
Everything posted by AntonyUK
-
 Hi. In the U.K. we have a register that’s called COSH. Control Of Substances Hazardous to Health. Most things sold in the UK have a link printed on them pointing you the instructions and hazards. I do think that all modelers should be aware of what you are using and its hazards if any. Including timber dust. Thanks for posting a real important subject Regards Antony.
 -
Hi Jeff. Nice progress with plates. Yes that's a very nice idea on making small hooks and eyes. All the best Antony.
-
Plank on frame ship cross section kit.
AntonyUK replied to mikeaidanh's topic in Wood ship model kits
Hi. Could it be this one. http://shop.deagostini.co.uk/hms-victory-subscription.html There are a couple of build logs on the forum. And there is a build log on there forum :- http://forum.model-space.co.uk/default.aspx?g=topics&f=93 Comes in weekly parts that they mail order you once a Mounth *4 Builds into a nice model. The only extras you need are some veneer to cover the plywood parts that are visible Regards Antony. -
Hello shipmates. No update on this post ... I have decided to have a go at carving the Captain's entrance to the victory. I have watched numerous video's on Utube on how to do wood carvings. Janos's page of carvings are a real inspiration to me. http://modelshipworld.com/index.php?/topic/501-carved-figure-heads-and-decorations/ I just need to find some close up photos of the entrance to start. Basswood is my choice of timber being a novice. May I wish you all a very happy Christmas and a very good new year. Regards Antony.
-
Hello Jeff. A very happy Christmas to you and your family. Regards Antony.
-
Hi Jeff. Looking good :0 Cutting the plates on a soft surface will not be good. On hardboard will work but dont use wood as it will follow the grain. or a very good pair of scissors. IE sharp and quality. Never tried the score and bend method but its only copper and should work Could also use a paper guillitine. Not the roller type. All the best. Regards Antony.
-
Hi Brett. I have kept mine in the keel clamp which is on a ball and socket joint.( Small boat ) Do the hull planking before adding any detail to the deck's including deck planking. Mount the upturned hull onto a board tempeary while planking. You could use some false masts fixed to a board. I am sure ther will be many more good suggestions come forward Regards Antony.
-
Hi. Yes a nice setup. Axminister is a OK brand and I have used there equipment in a professional mode. Nice to see you wearing wraparound safety glasses. I have all my machines except the Proxxon mill in my shed. Have insulated the walls and have a heater to keep out the English damp weather. I have got to agree with Nigel.. The mill should be bolted down. Regards Antony.
-
Hi Mark. A very nice build. I concur with "what's the hardest part" it's so easy to miss or skip a minor detail and your screwed later. Looks like everything in order(no skipping or missed parts) Have a happy Christmas and a constructive new year. Regards Antony.
-
Hello Alexandru. Stunning , Brilliant , Gorgeous ..I can go on and on with the comments that come into my head after looking at your build. Wonderful use of the lathe and mill. Must have been a machinist in your past life What more can I say... Stuck for word's that do your build justice. Regards Antony.
-
Hello shipmates. Thank you all for your kind words of encouragement Jeff -: I used the dark stained ones as they look as if they were more predominant to see. Half the deck is done just got to do the other end. Remade the pumps as I was not happy with the look. Regards Antony.
-
Hi Jeff. You are making very progress with the Bow section Your attention to detail is brilliant. Are you going to DIY copper plate the bottom ? Or does the kit come with the plates ? Have a happy Christmas and a good new year. Regards Antony.
-
Hello Rusty. I was looking around the house last week for some lint free cloth and could not find any anywhere. Until I came across my wife's clean old underwear. Thinking she won't miss one pair I cut it into little pieces that was ideal for applying stain. Worked a treat U won't tell will u ?? Antony.
- 421 replies
-
- 3
-

-
- granado
- bomb ketch
- (and 2 more)
-
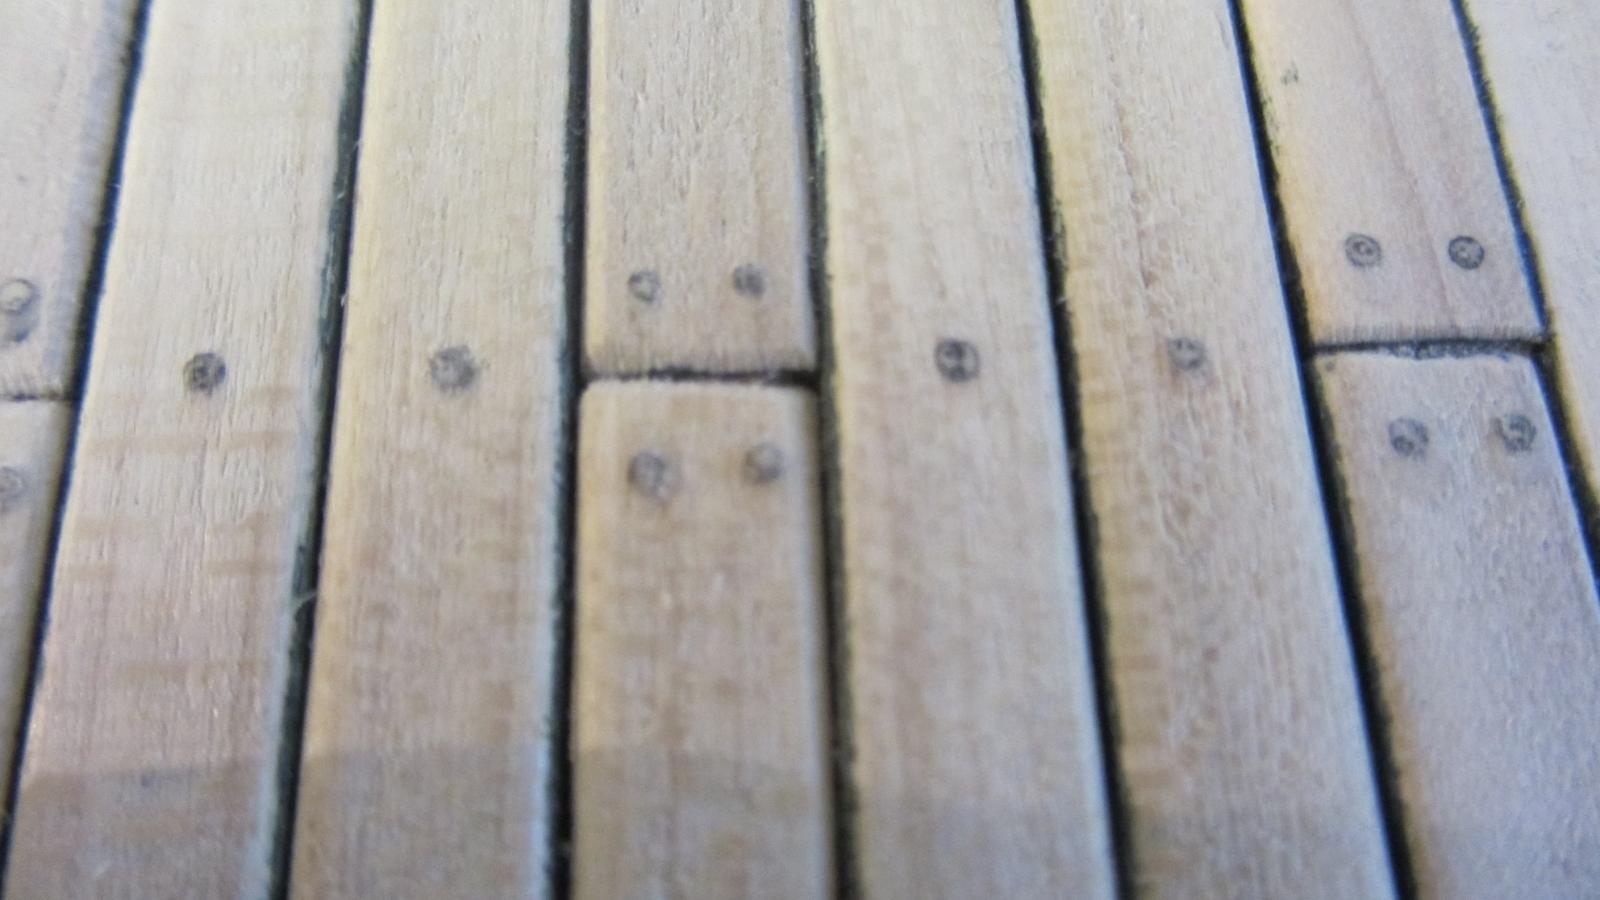
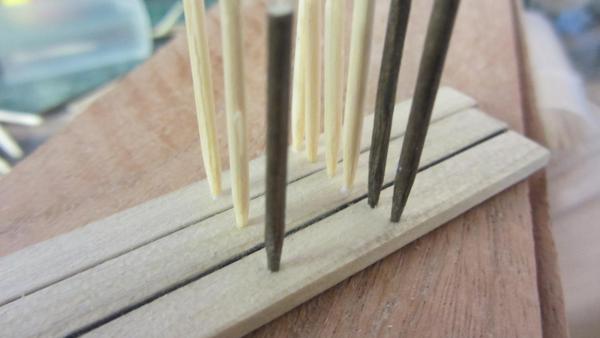
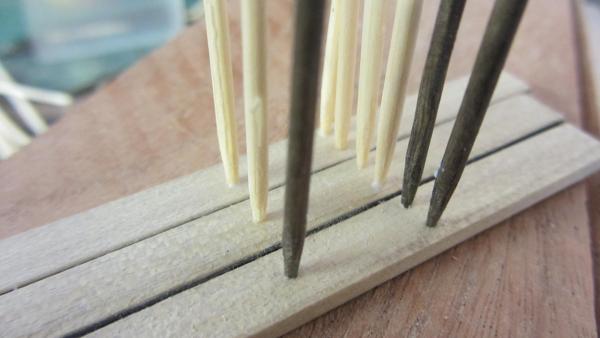
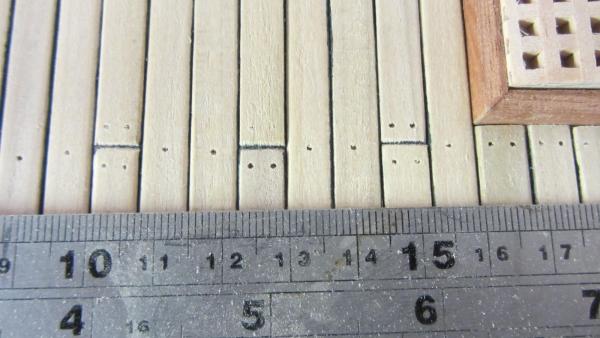
Hello Shipmates. Thank you for all the very nice comments and likes. Yves. .. Its a possibility I will have one gun crew of figures. I will use Warhammer Empire Gun crew Figures. Another Update. Test the tree nails in the Tulipwood. The Deck drilled and ready to Tree nail. Tree nails in and cut but not yet cleaned up Very close up of the Holes ready to treenail. Another close up. Quite happy with the result Will finish the other side and sand the deck then I will post the completed Deck. Regards Antony.

- 209 replies
-
- 14
-
-
Another type of clamp
AntonyUK replied to michael mott's topic in Modeling tools and Workshop Equipment
Hi Michael. Well done and thanks for sharing. I will make a few of these myself Regards Antony. -
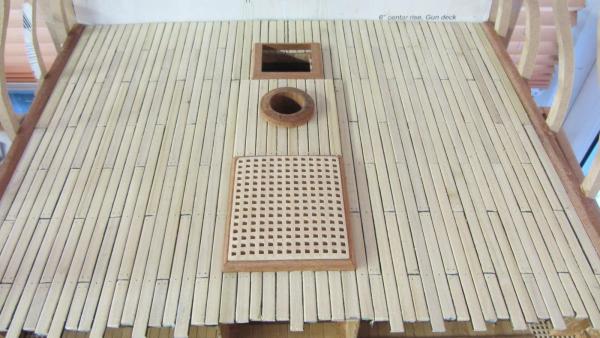
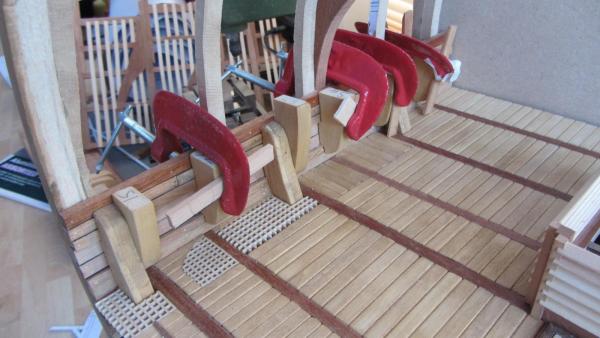
Hello Shipmates. Another update on my progress. Main Gun Deck is now fixed into place with no errors Started to plank the Deck with Tulip wood. Very nice looking wood. Deck now fixed onto the bulwarks with knees fitted. Photo looking up at the deck from the underside. All the planks cut to length and drilled at ends only for treenails. Waterways in and now ready to plank.. First planks laid. Will post another update when Gun Deck is complete. Thanks for looking in. Regards Antony.

-
Hi Krut. There is a lot of information on this site. http://www.otteblom.nl/tekeningen/ Mabe of some help to you Regards Antony.
-
crooked keel
AntonyUK replied to ed stein's topic in Building, Framing, Planking and plating a ships hull and deck
Hi Shipmates. Now this is what MSW is all about. Someone in need of help with ther model ship. And asks for advice. Lots of good and valid suggestions come forward from members with expearance and thought. A fix is found And a happy modeller. Well done MSW and to all it's members. Regards Antony. -
Budget Lathes in UK; Advice please!
AntonyUK replied to Phoenix_63's topic in Modeling tools and Workshop Equipment
Hi. I also have this lathe. Work's well and I use it for turning metal mostly and occasionally hardwood. Replaced the bearings and the Hi-Lo gears that are on the inside. Due to shear constant usage. Don't scrimp on the tooling and please read up on using the lathe safely. Marks advice is also Very good. All the best. Regards Antony. -
Hello Shipmates. Thank you all for your kind words Jeff :- No I will not be making the chain pumps operational .. The model area will not be visible when in its display case. Just made the deck support piller's for the Orlop deck. Will fit then with the deck tomorow and post a update of the main gun deck in place. Then it's the planking of the main gun deck. Looking forward to using the Tulip wood planks. Thanks for looking in. Regards Antony.
-
Hi Jeff. Nice way to finish the bow area. Planking is spot on Regards Antony.
-
Hi. I own a Linisher as you call it It's similar to Marks and Yambo's Workers very well and is small enough to place on a shelf when not in use. Saying that I did a few mods to get a better sand on the disc. Disc was faced to make it paradel to the shaft ( it had a 1.5mm out of square wobble). Then had it balanced. Now runs a thousands times better. Also made a new angle slot and new angle setting system. ( slot in original was cast in and rubbish to use ) I do not use the velcro disks .. I use the self adhesive ones. Saying that -: its a Very usefull machine to have around. Regards Antony.
-
Hi Jeff. WOW thar looks impressive and the timber selection is spot on Is there a reason you started planking from the side to the centre ? Just curious. Nice workmanship Rusty. Regards Antony.
-
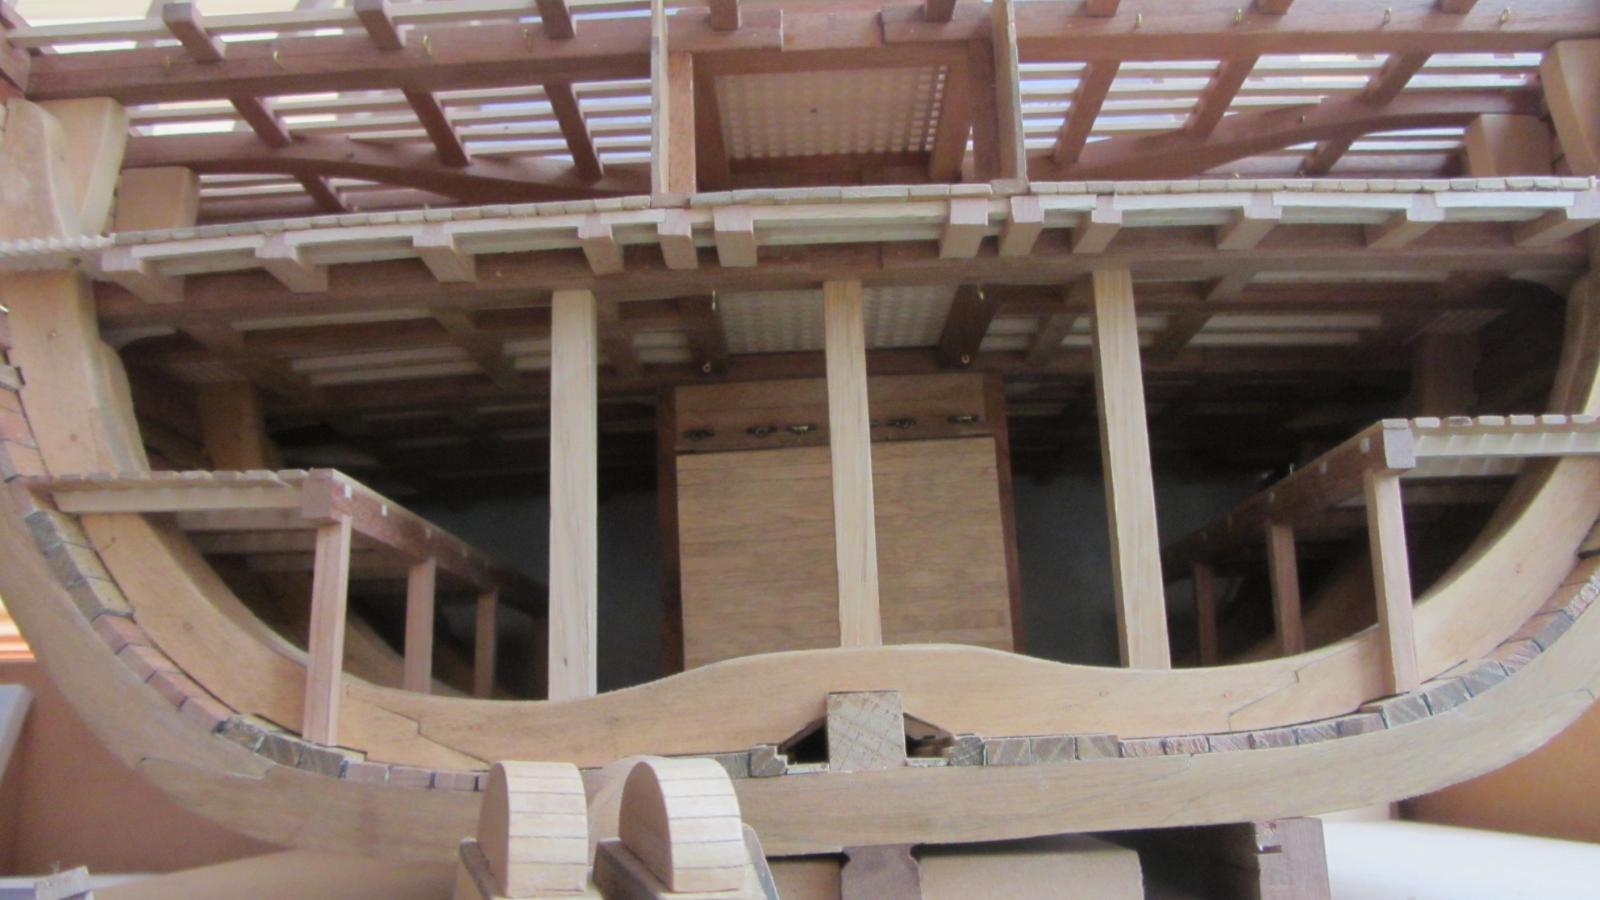
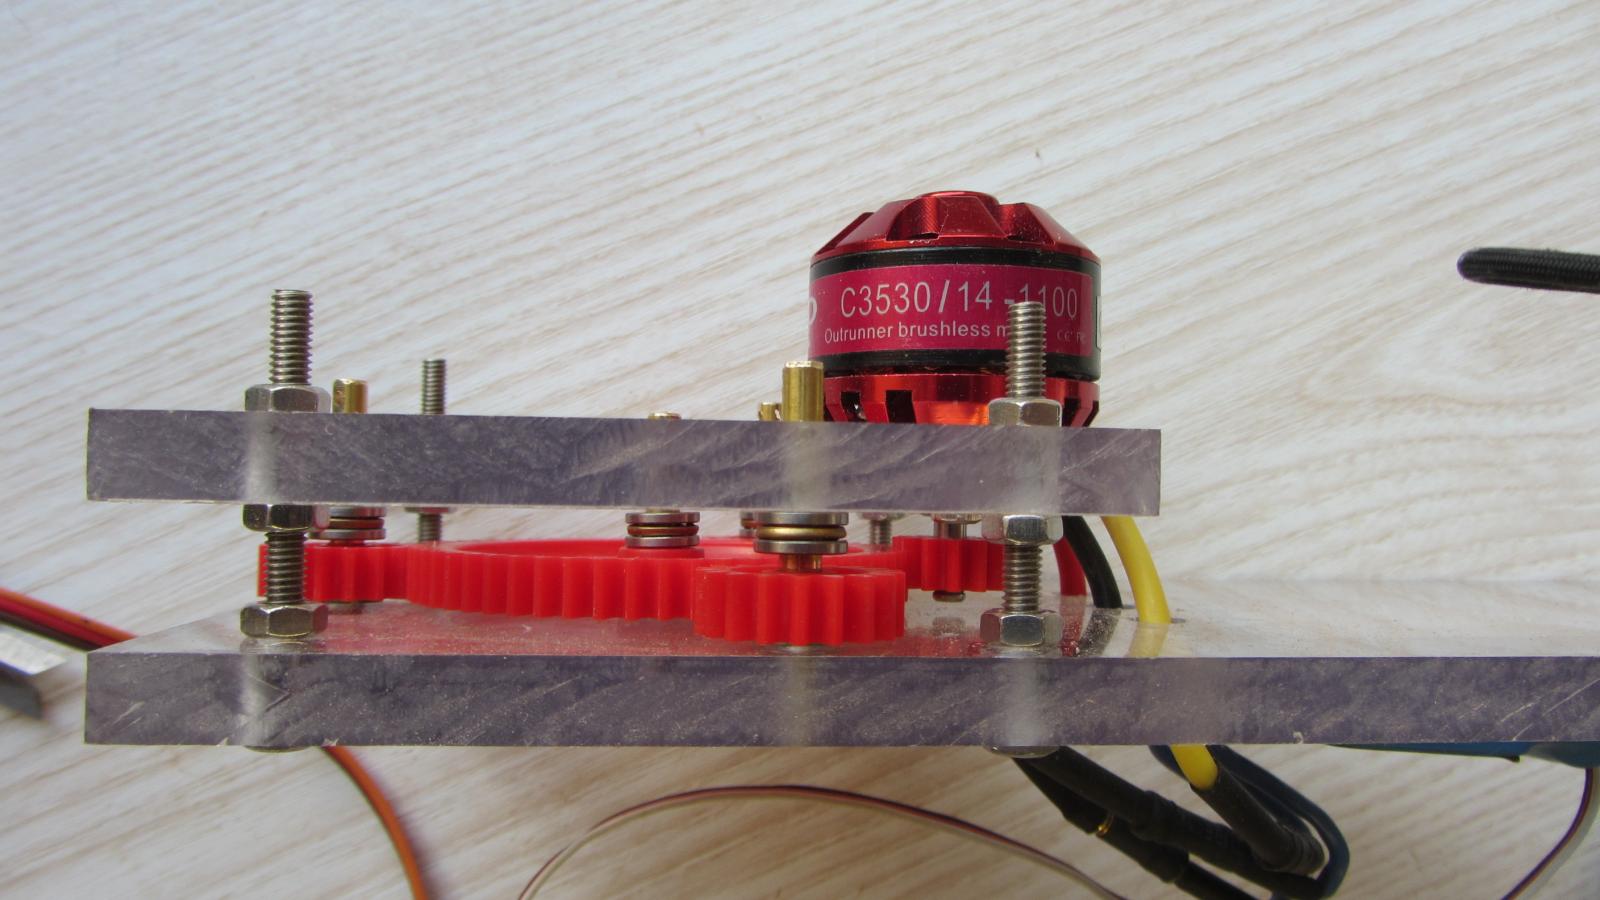
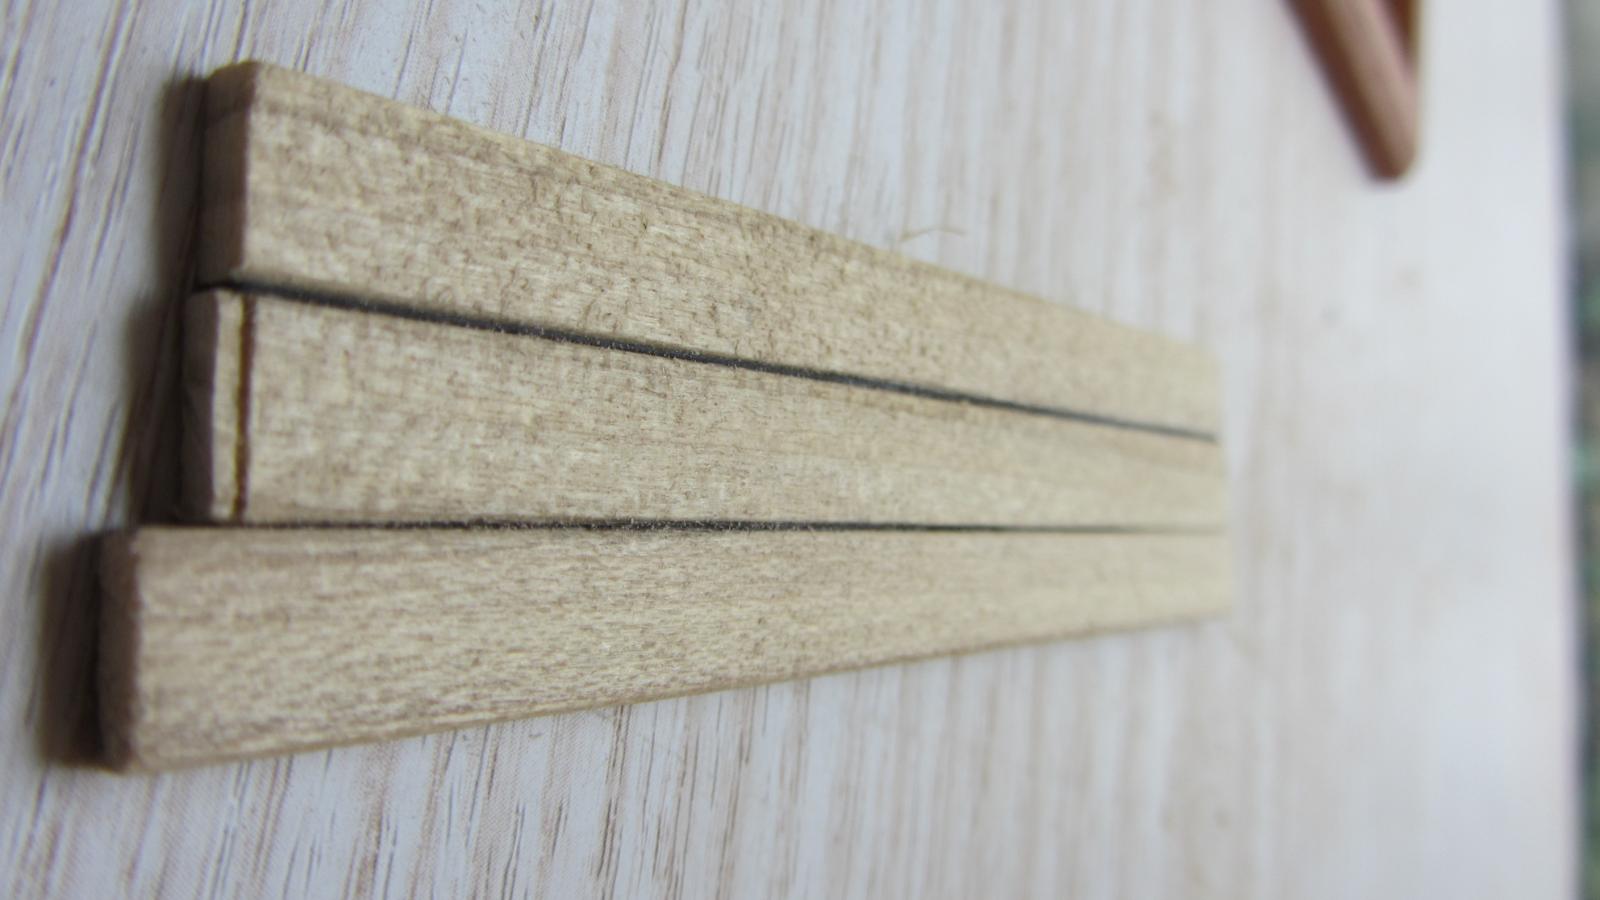
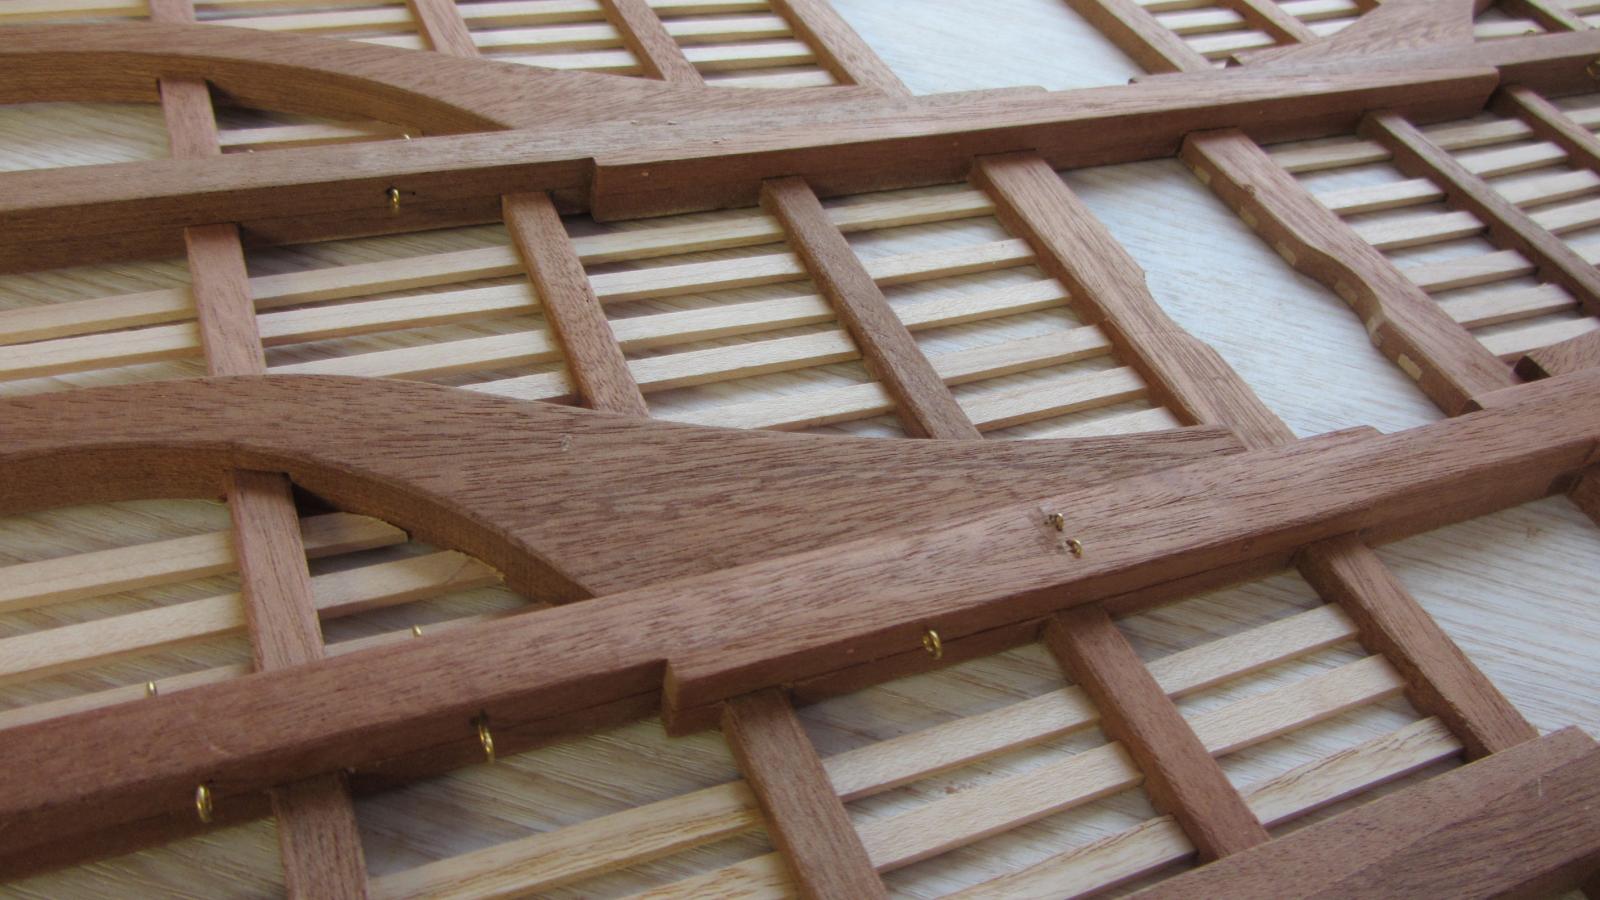
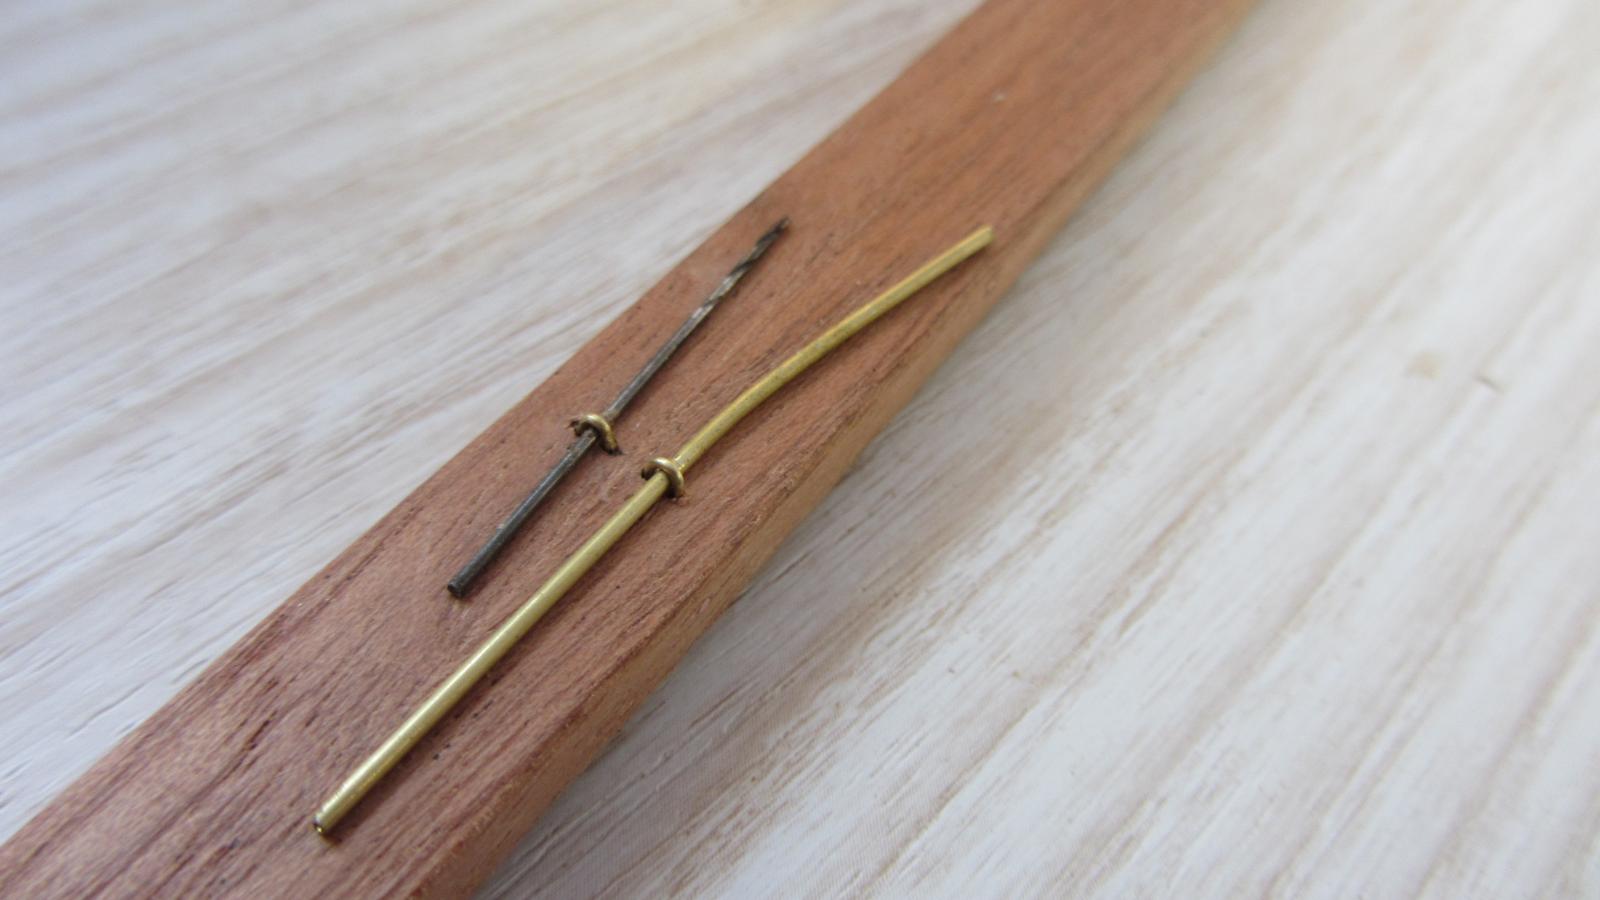
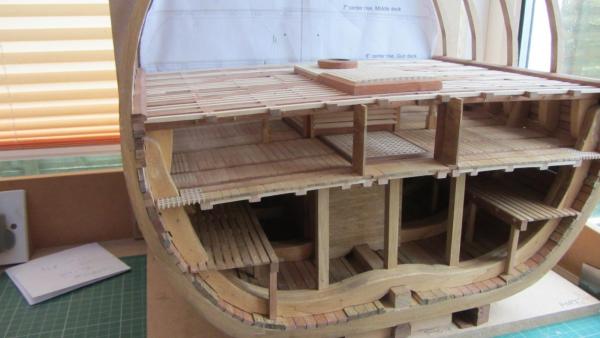
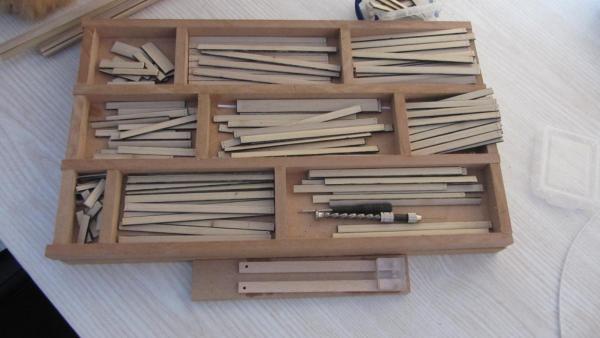
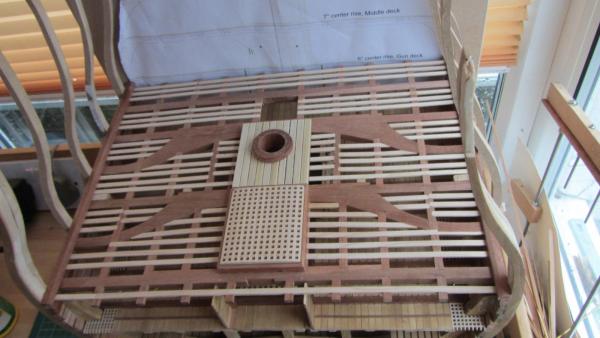
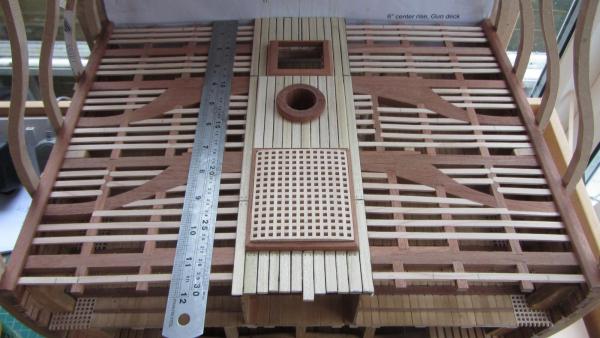
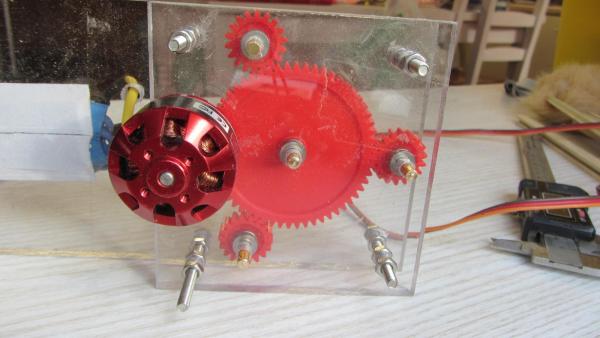
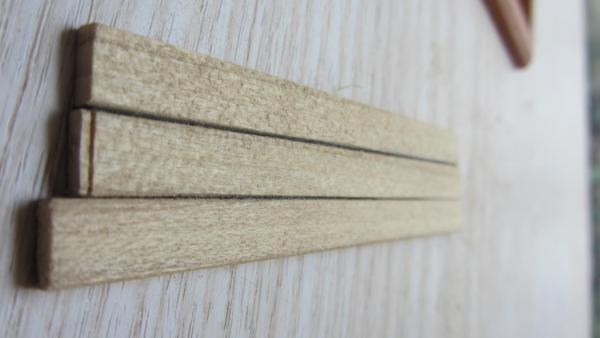
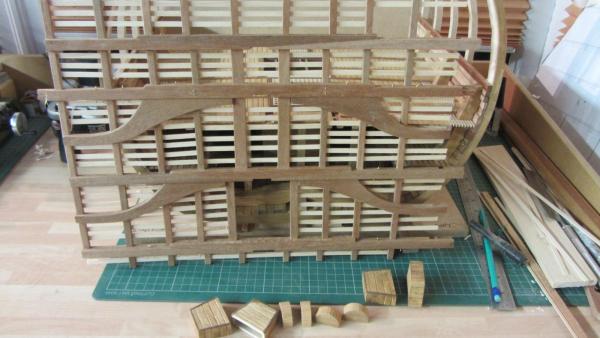
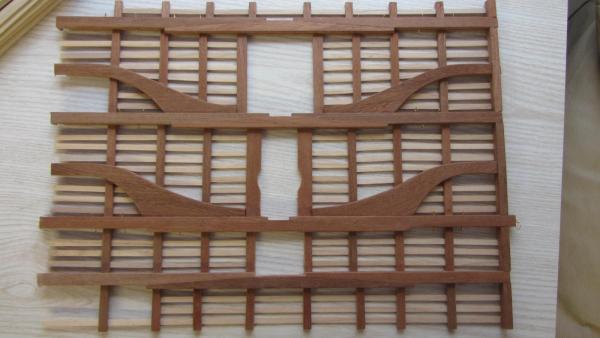
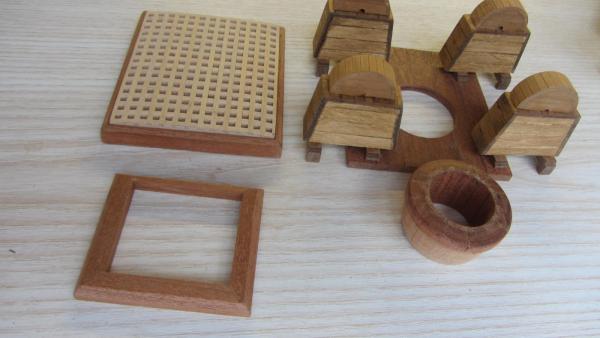
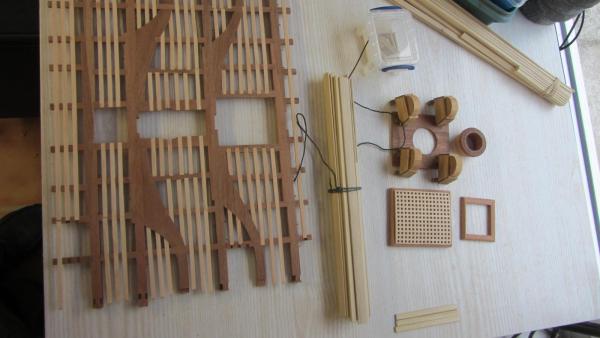
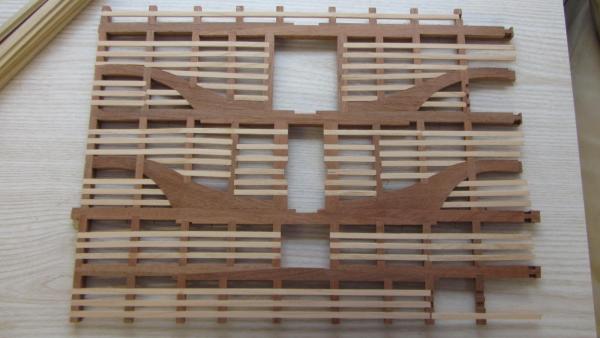
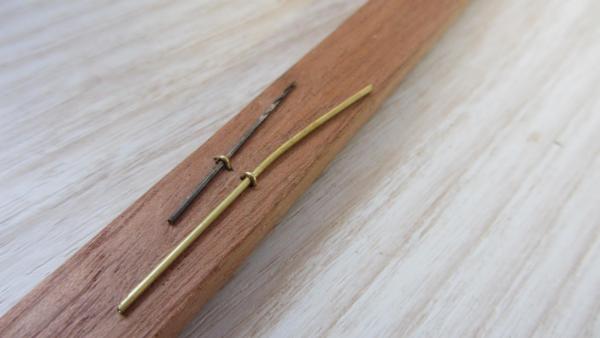
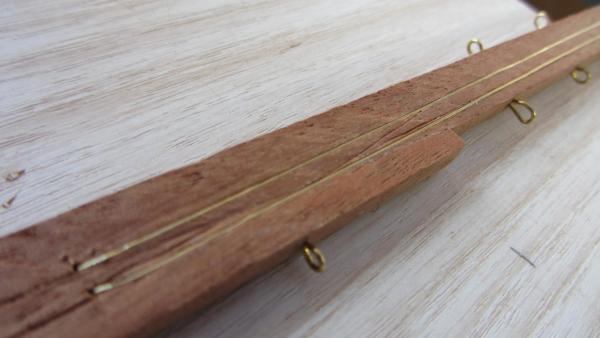
Hello shipmates. Another long update :- Spent a little time making a ropewalk. but this one is a little larger than the Philips shaver on I have used before. The shaver would not stand twisting the heaver ropes that I wanted for this model. The parts are from Ebay. Approx 2 hours to build. A simple servo tester, A cheep brushless speed controller, And a brushless motor. Gears used ..1 off 60mm dia 58 teeth, 3 off 20mm dia 18 teeth, 1 off 14mm Dia 12 teeth. Yes I have used miniature thrust bearings as I has them in my storage box. That’s about it for the Ropewalk. Now for the Build A test of the Tulip wood and the different types of caulking that I am using for the deck planking little loop on the wire ends for the Led lanterns to hang from. Wire hidden in the wood. Cut a line with the razor saw then push the brass wire into the slot. Main Gundeck in place But not glued. Bits missing are left out to enable deck to fit between the frames. View from the bottom. Completed Deck with out planking.(bottom view) Completed Deck with out planking.(top view) some of the furniture ready for assembly. close up of Joinery. Odd photo Completed Deck with out glue That’s it for now Enjoy. Thanks for looking in Antony.


- 209 replies
-
- 13
-
-
Chain pumps
AntonyUK replied to dvm27's topic in Discussion for a Ship's Deck Furniture, Guns, boats and other Fittings
Hi. Thanks for this post. I am doing resurch at the moment on chain pumps and this helps a lot Also found a page in PDF format.. It's quite large but it's worth a read if at all interested in chain pumps. http://nautarch.tamu.edu/pdf-files/Oertling-MA%201984.pdf Regards Antony.