Trussben
-
Posts
2,008 -
Joined
-
Last visited
Content Type
Profiles
Forums
Gallery
Events
Everything posted by Trussben
-
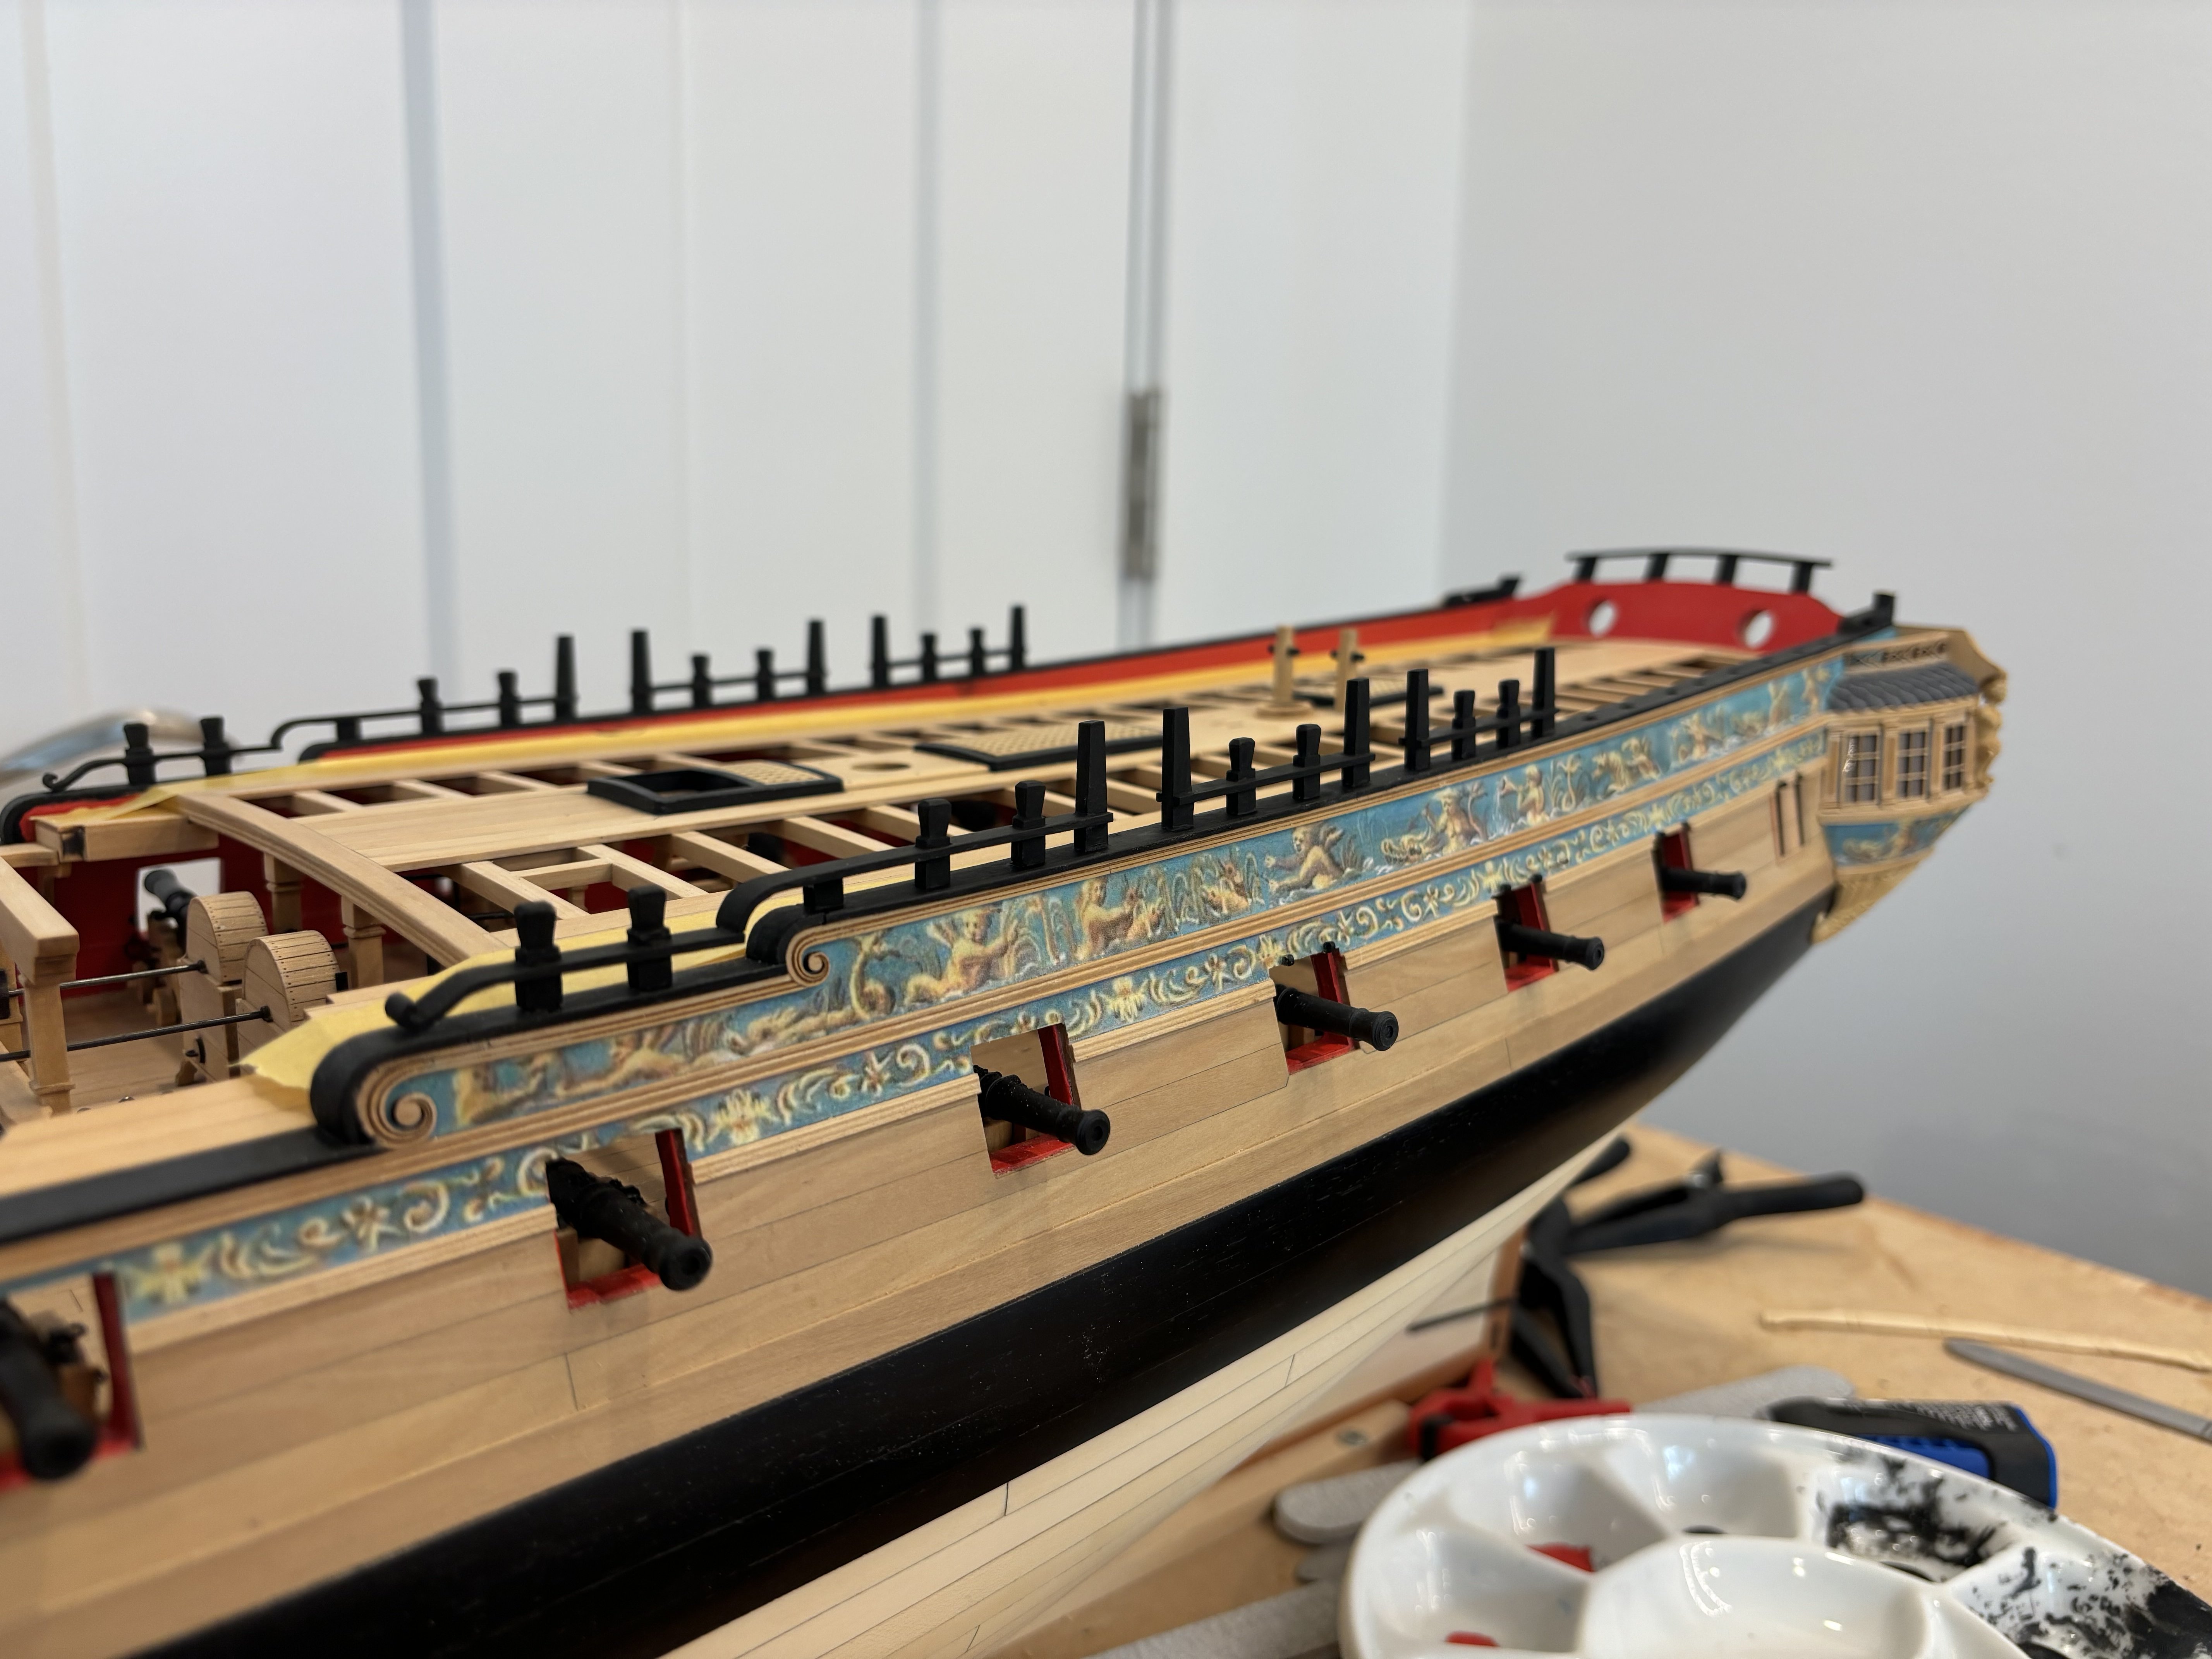
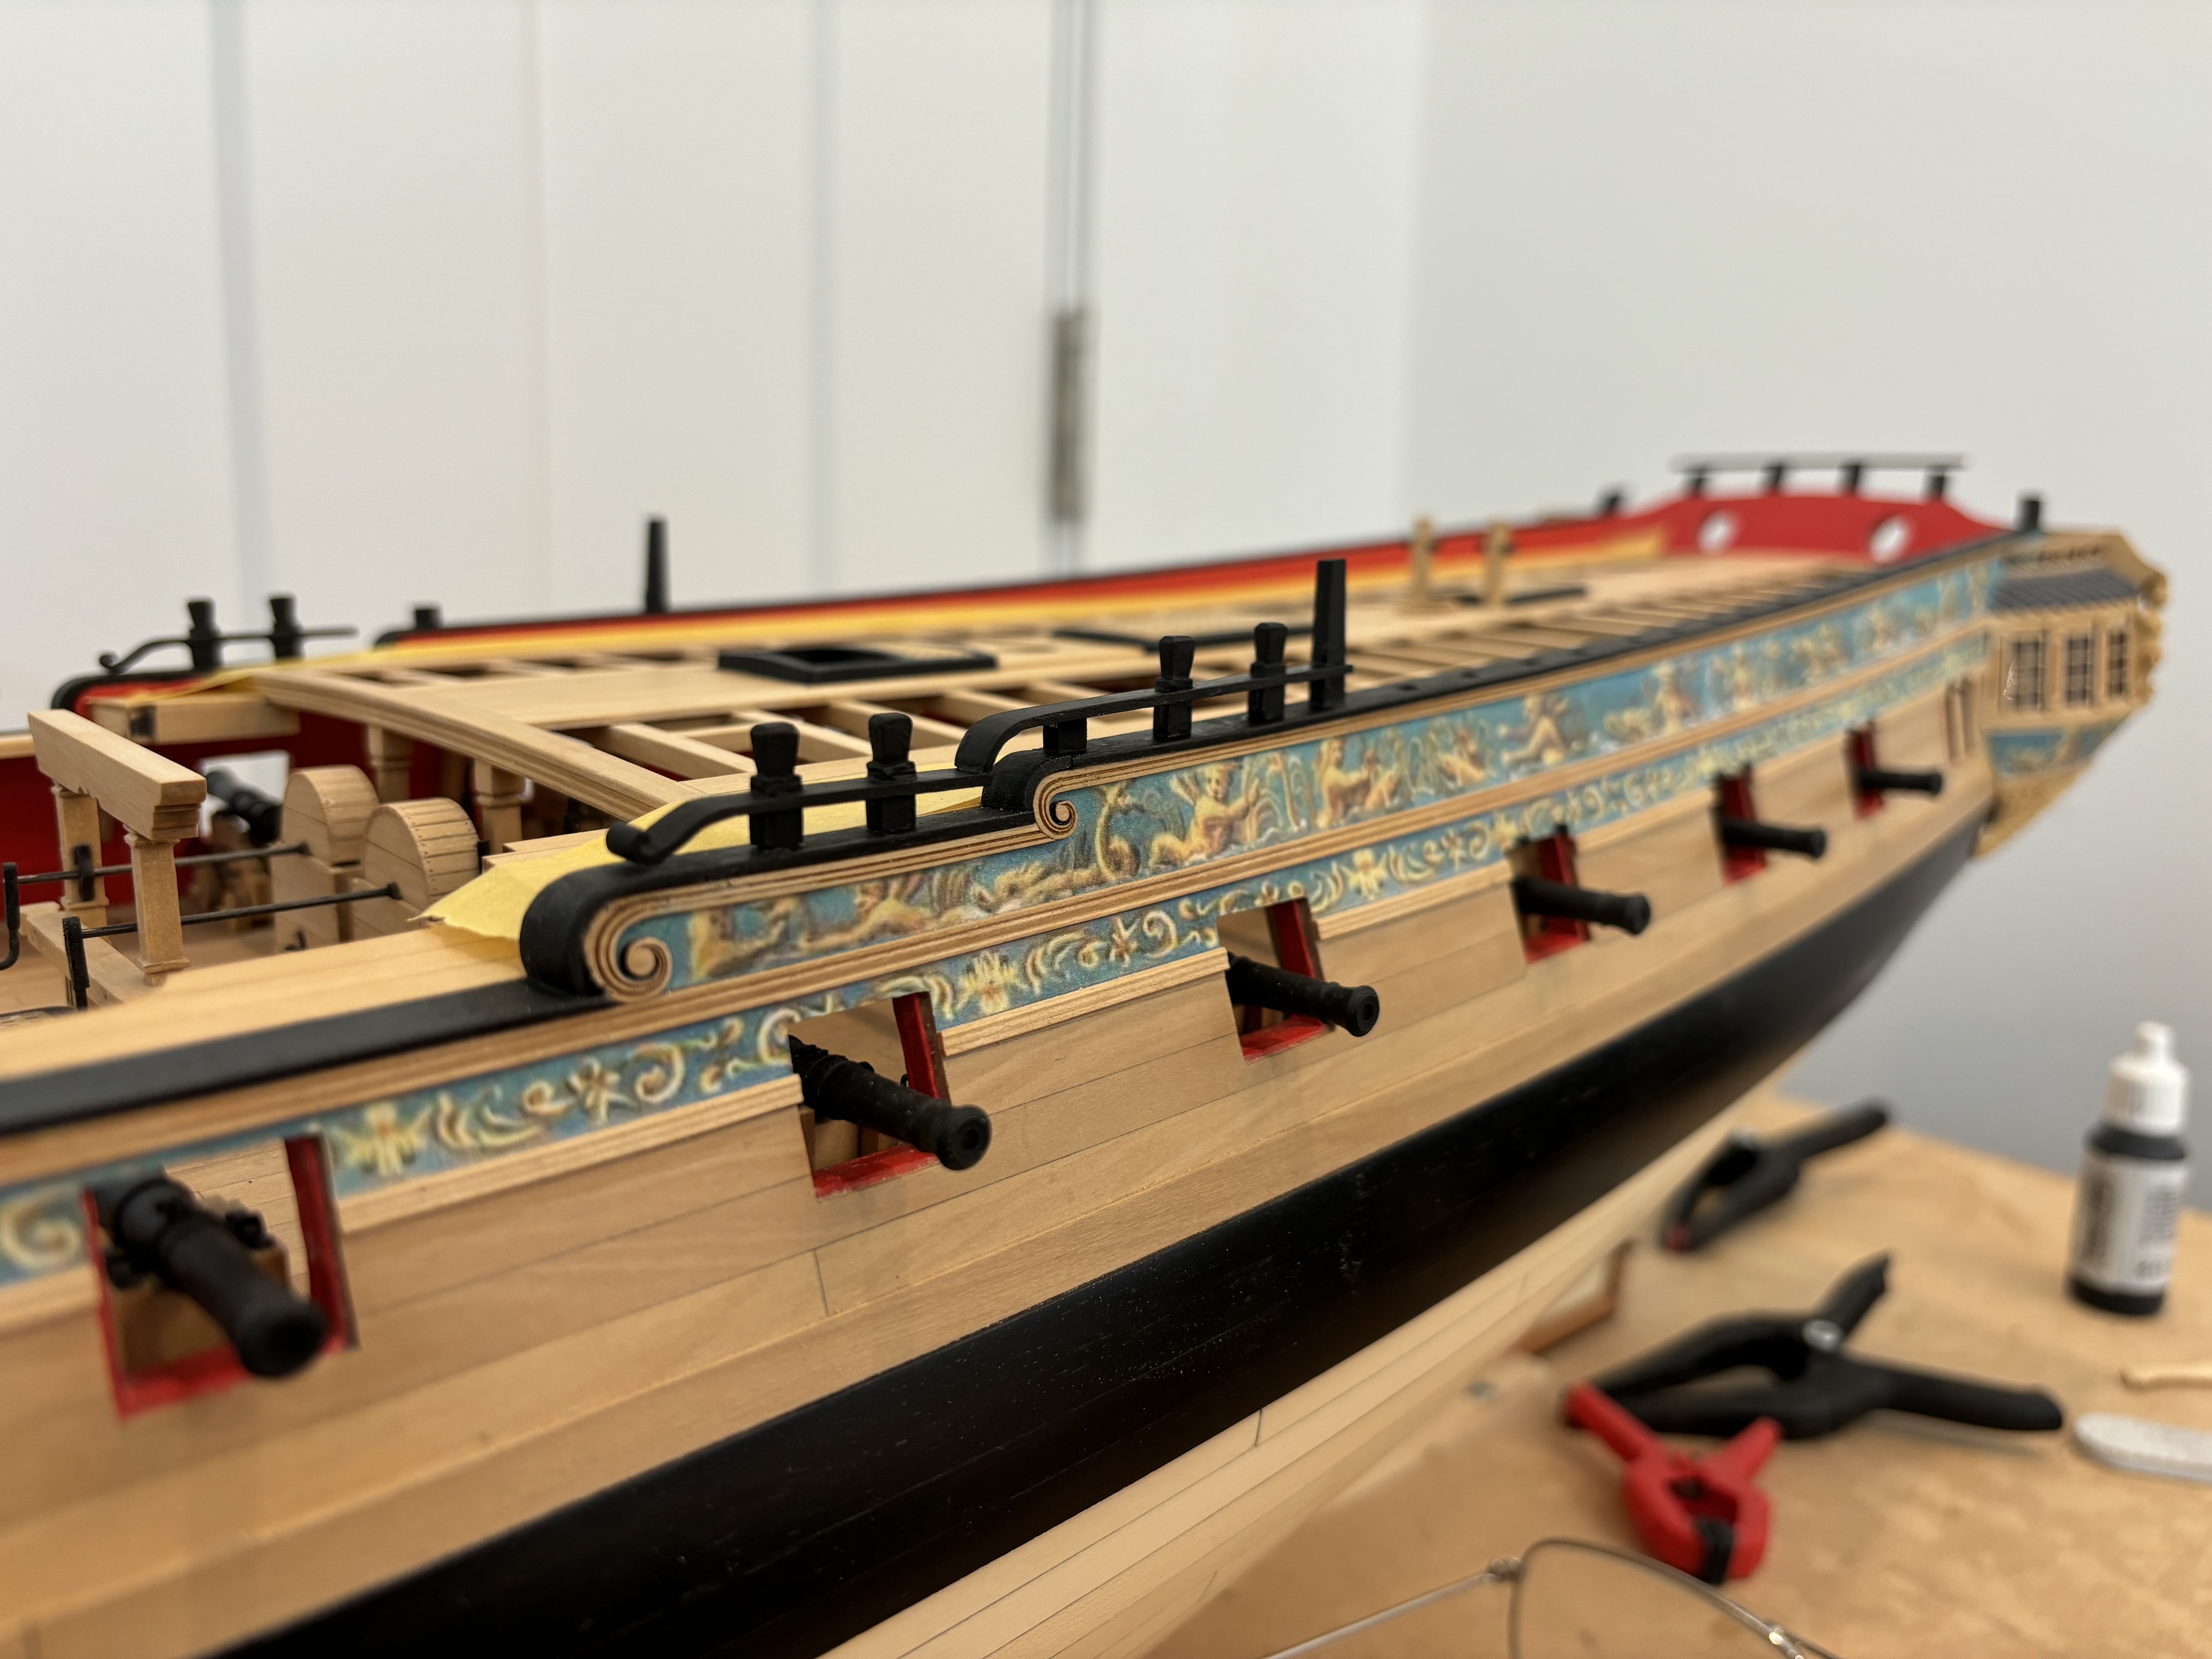
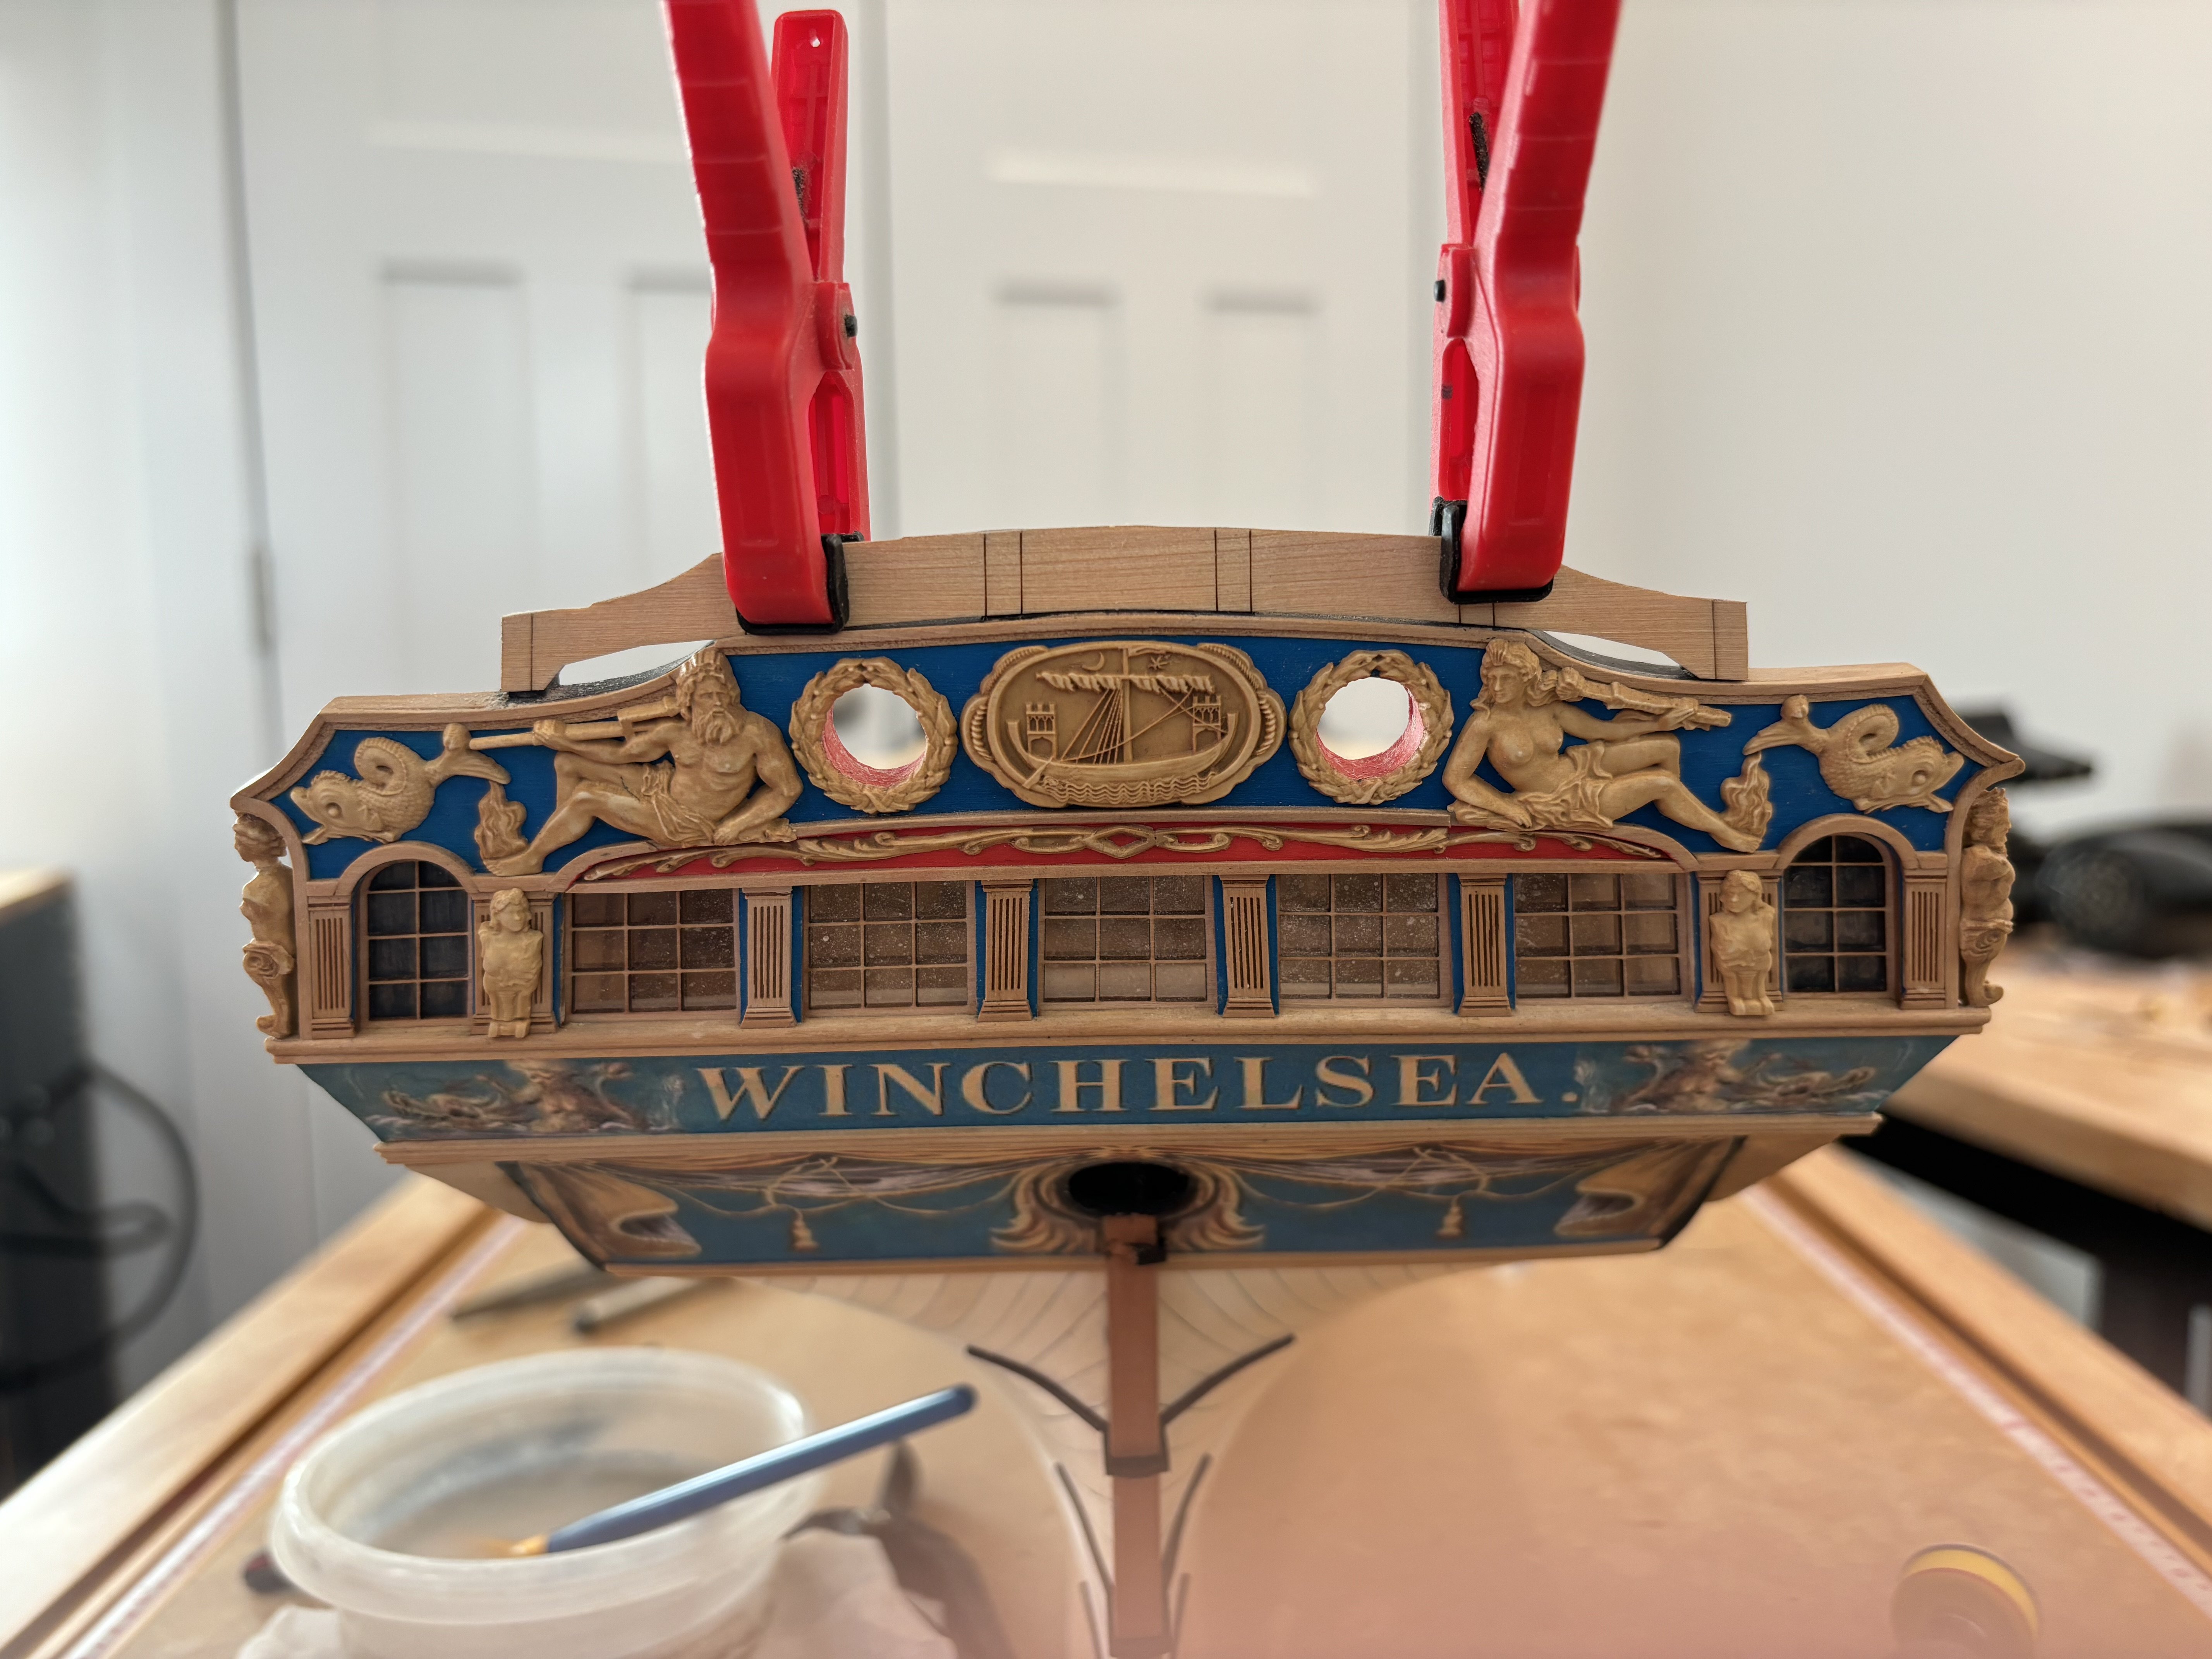
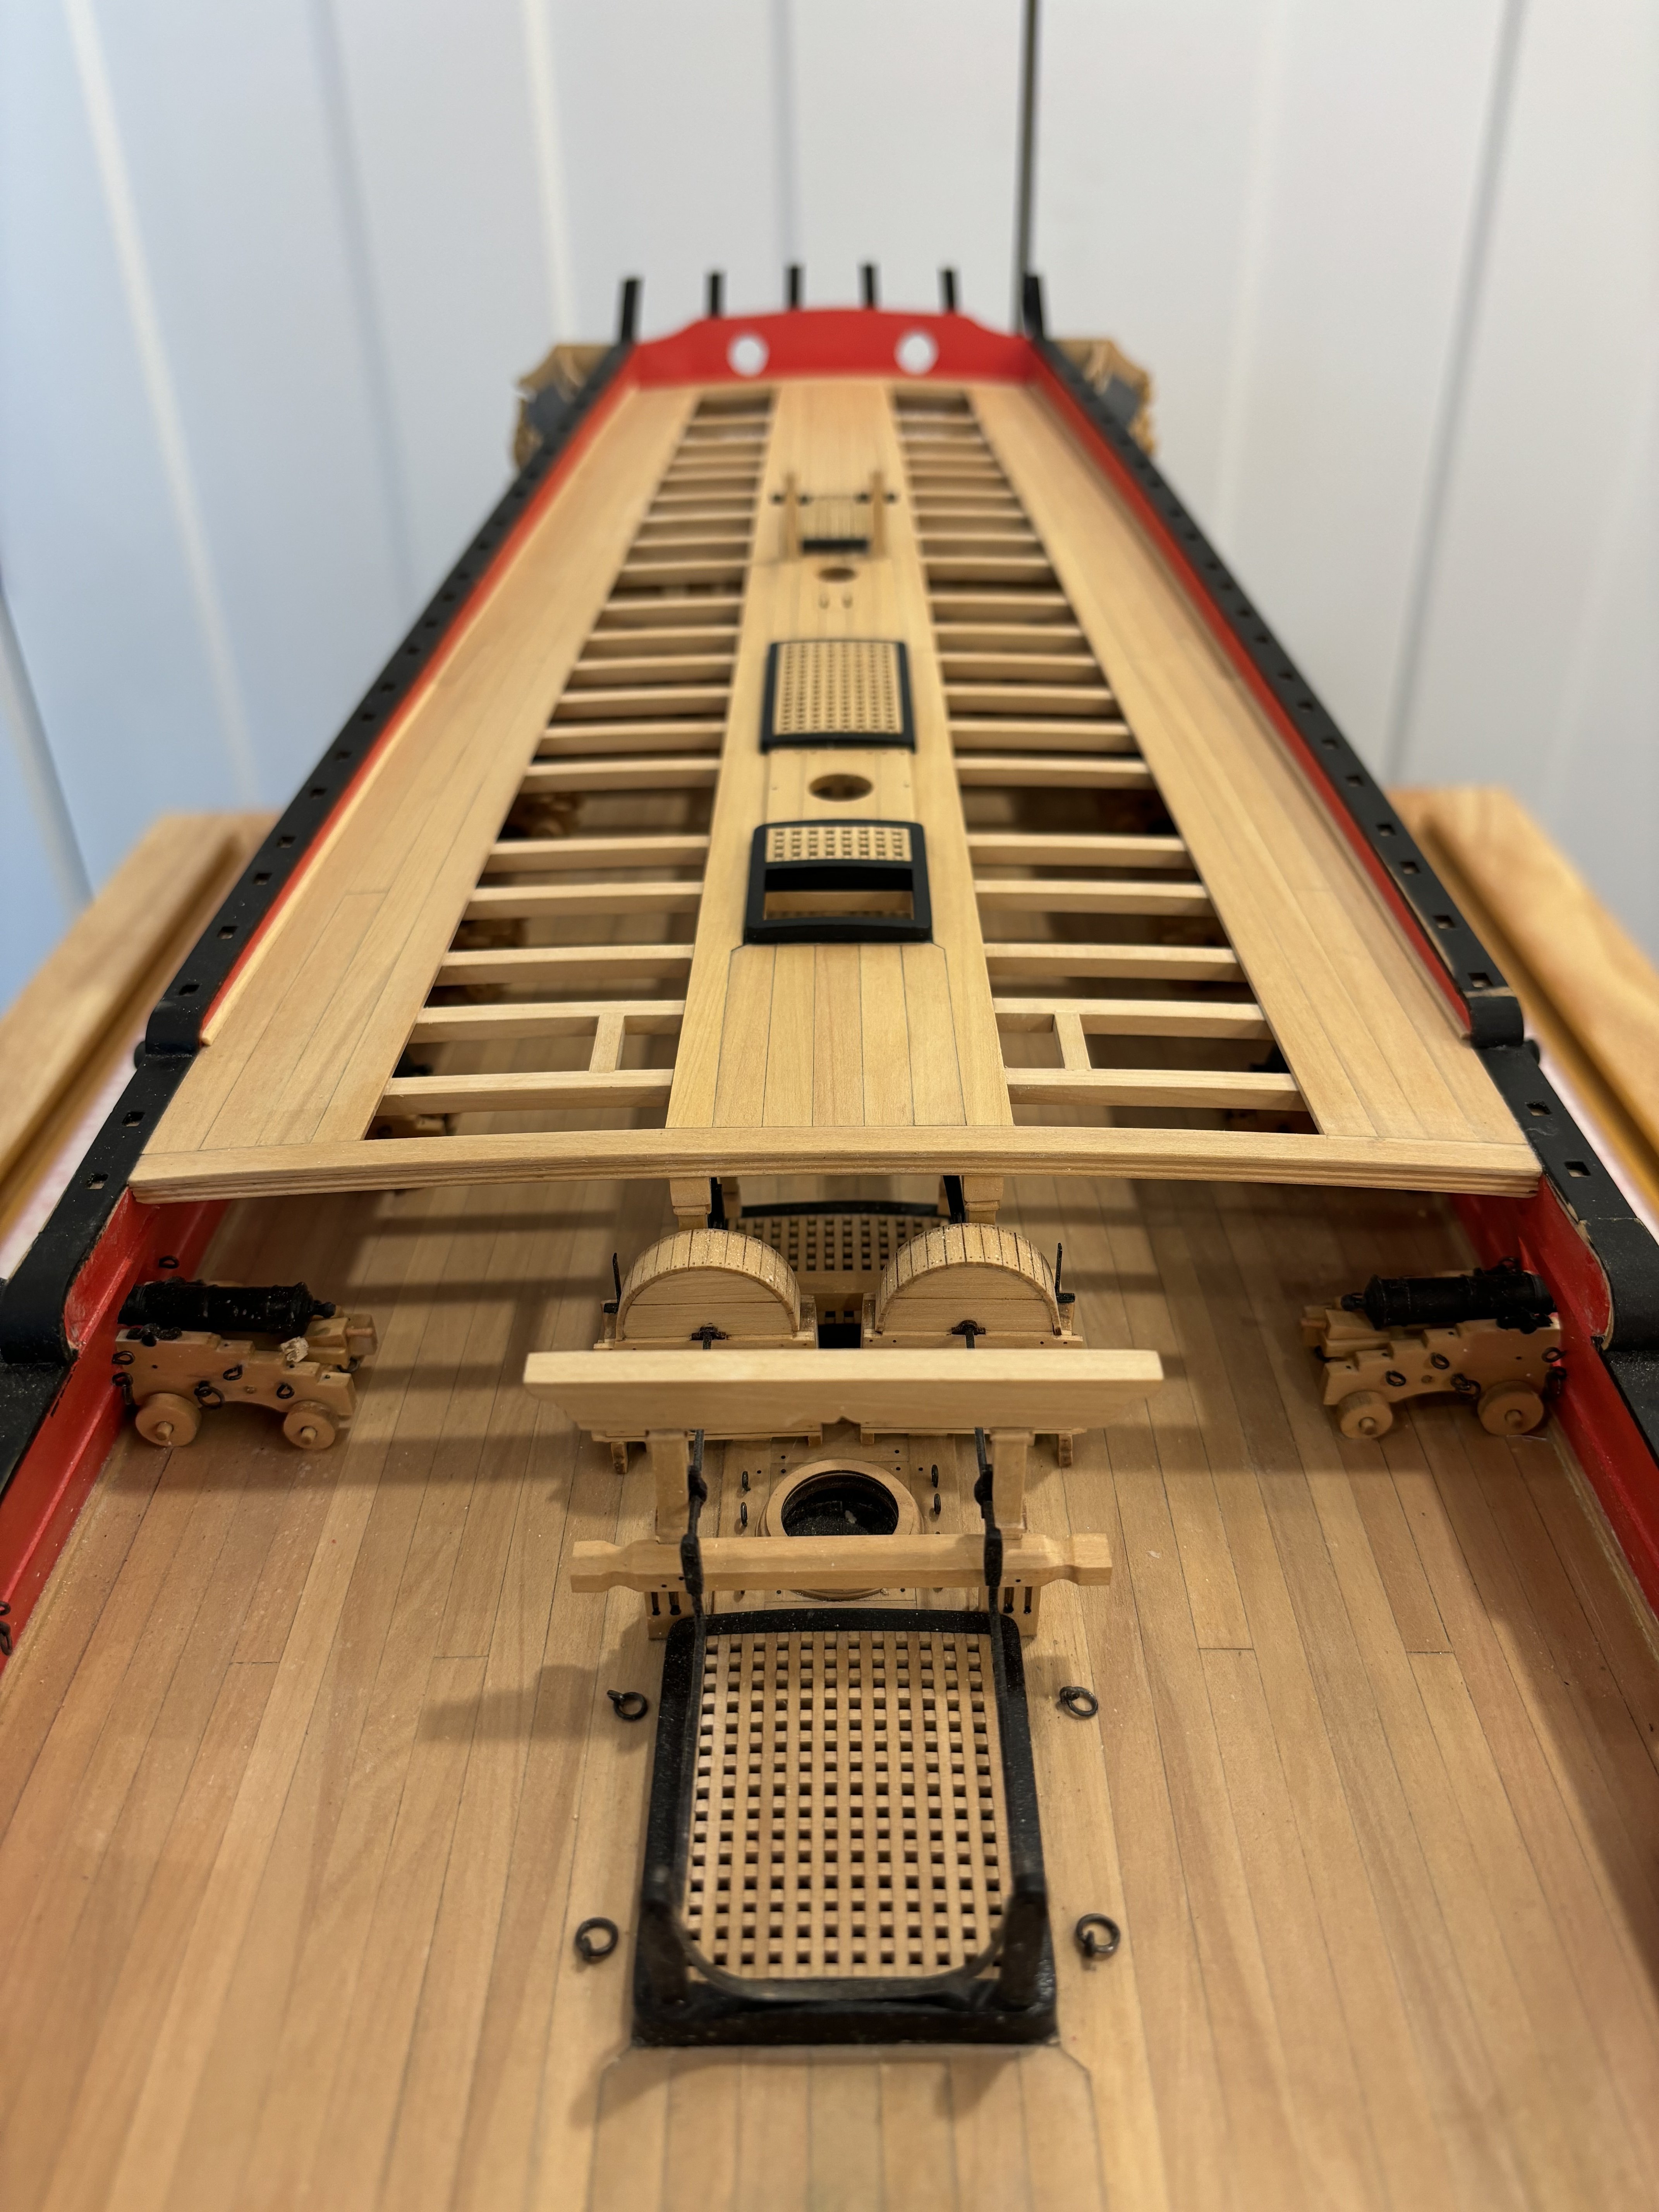
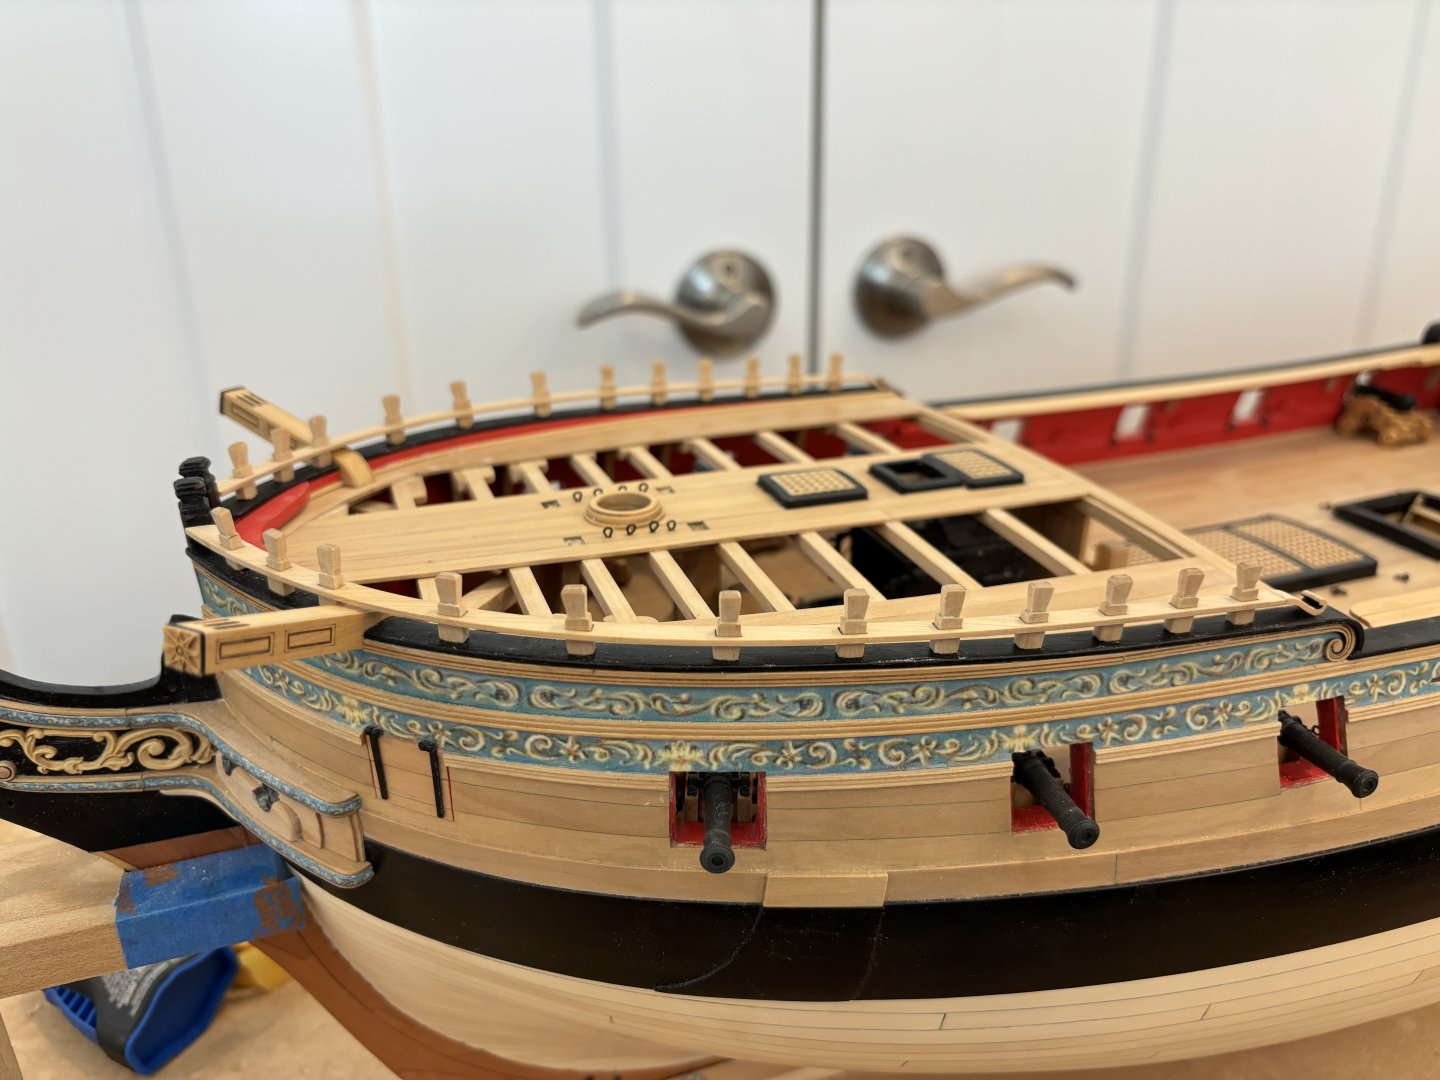
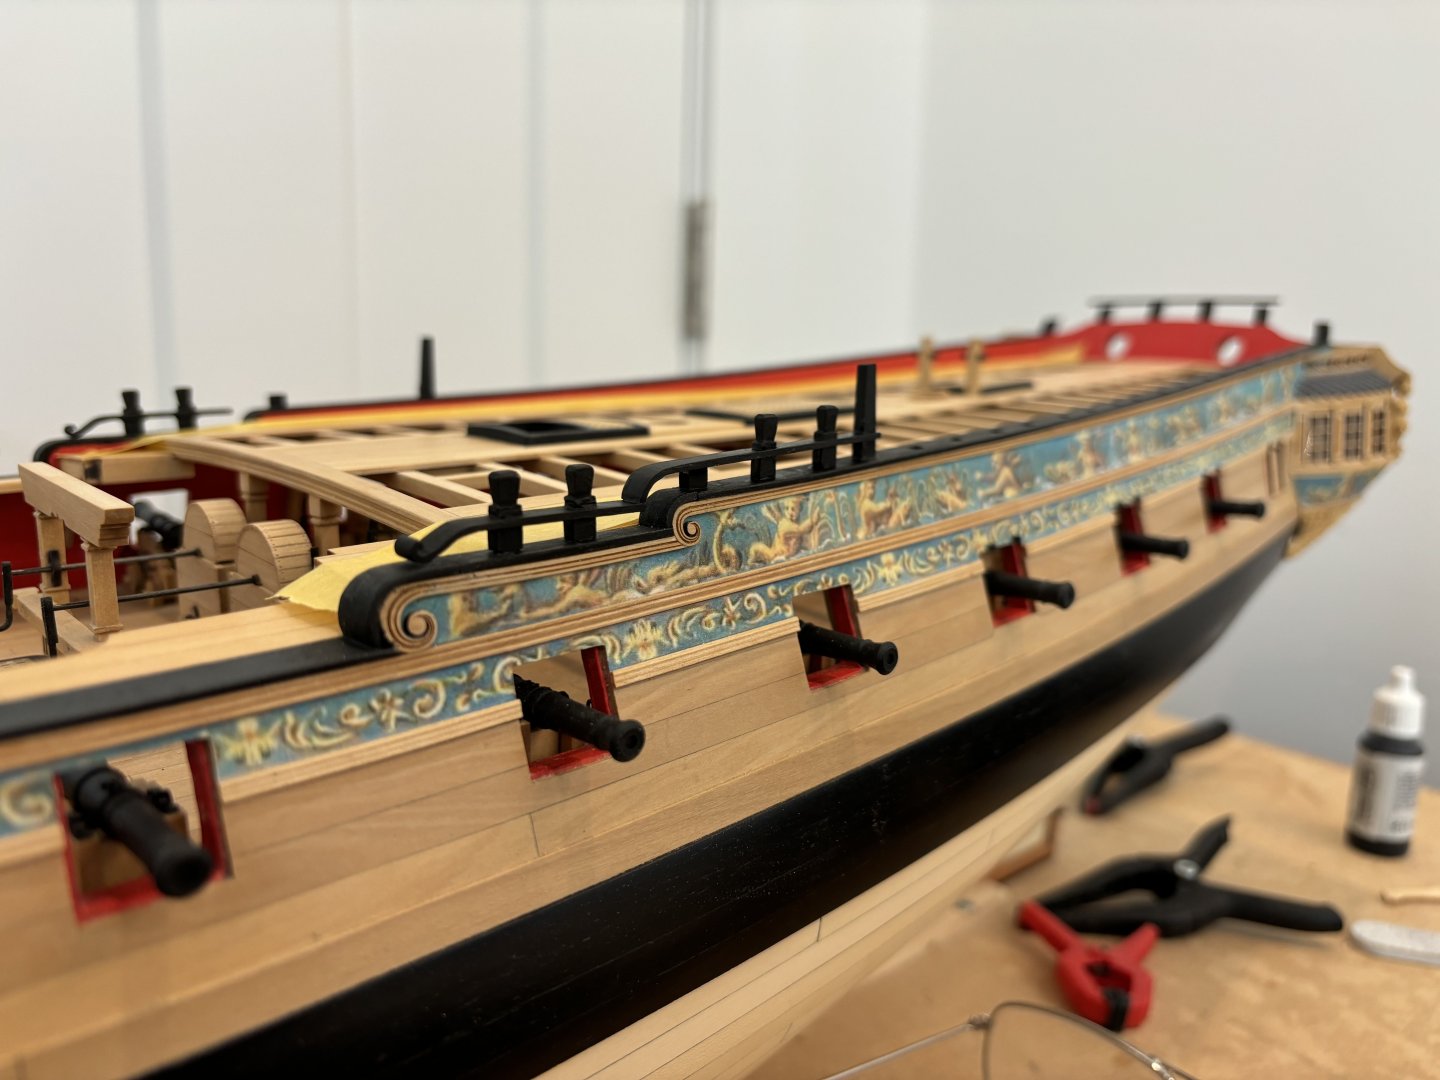
 QD Breastrail pinned and installed to the breastbeam, lots of fun cleaning the laser char from the uprights.
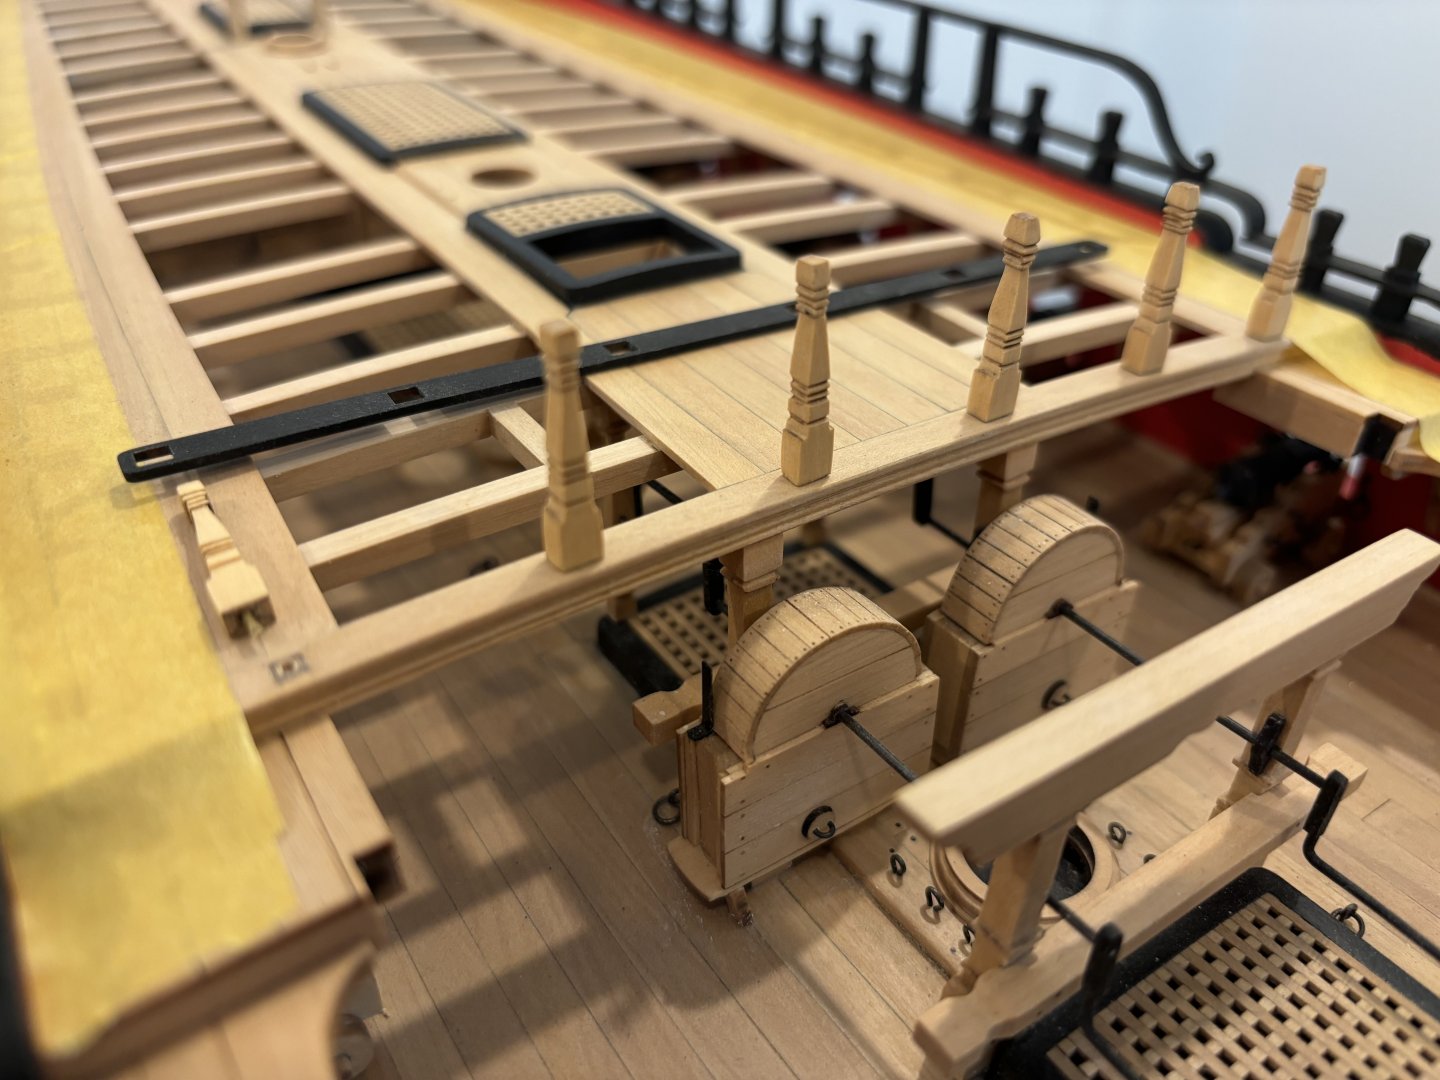

- 399 replies
-
- 11
-

-

-
- winchelsea
- Syren Ship Model Company
- (and 1 more)
-
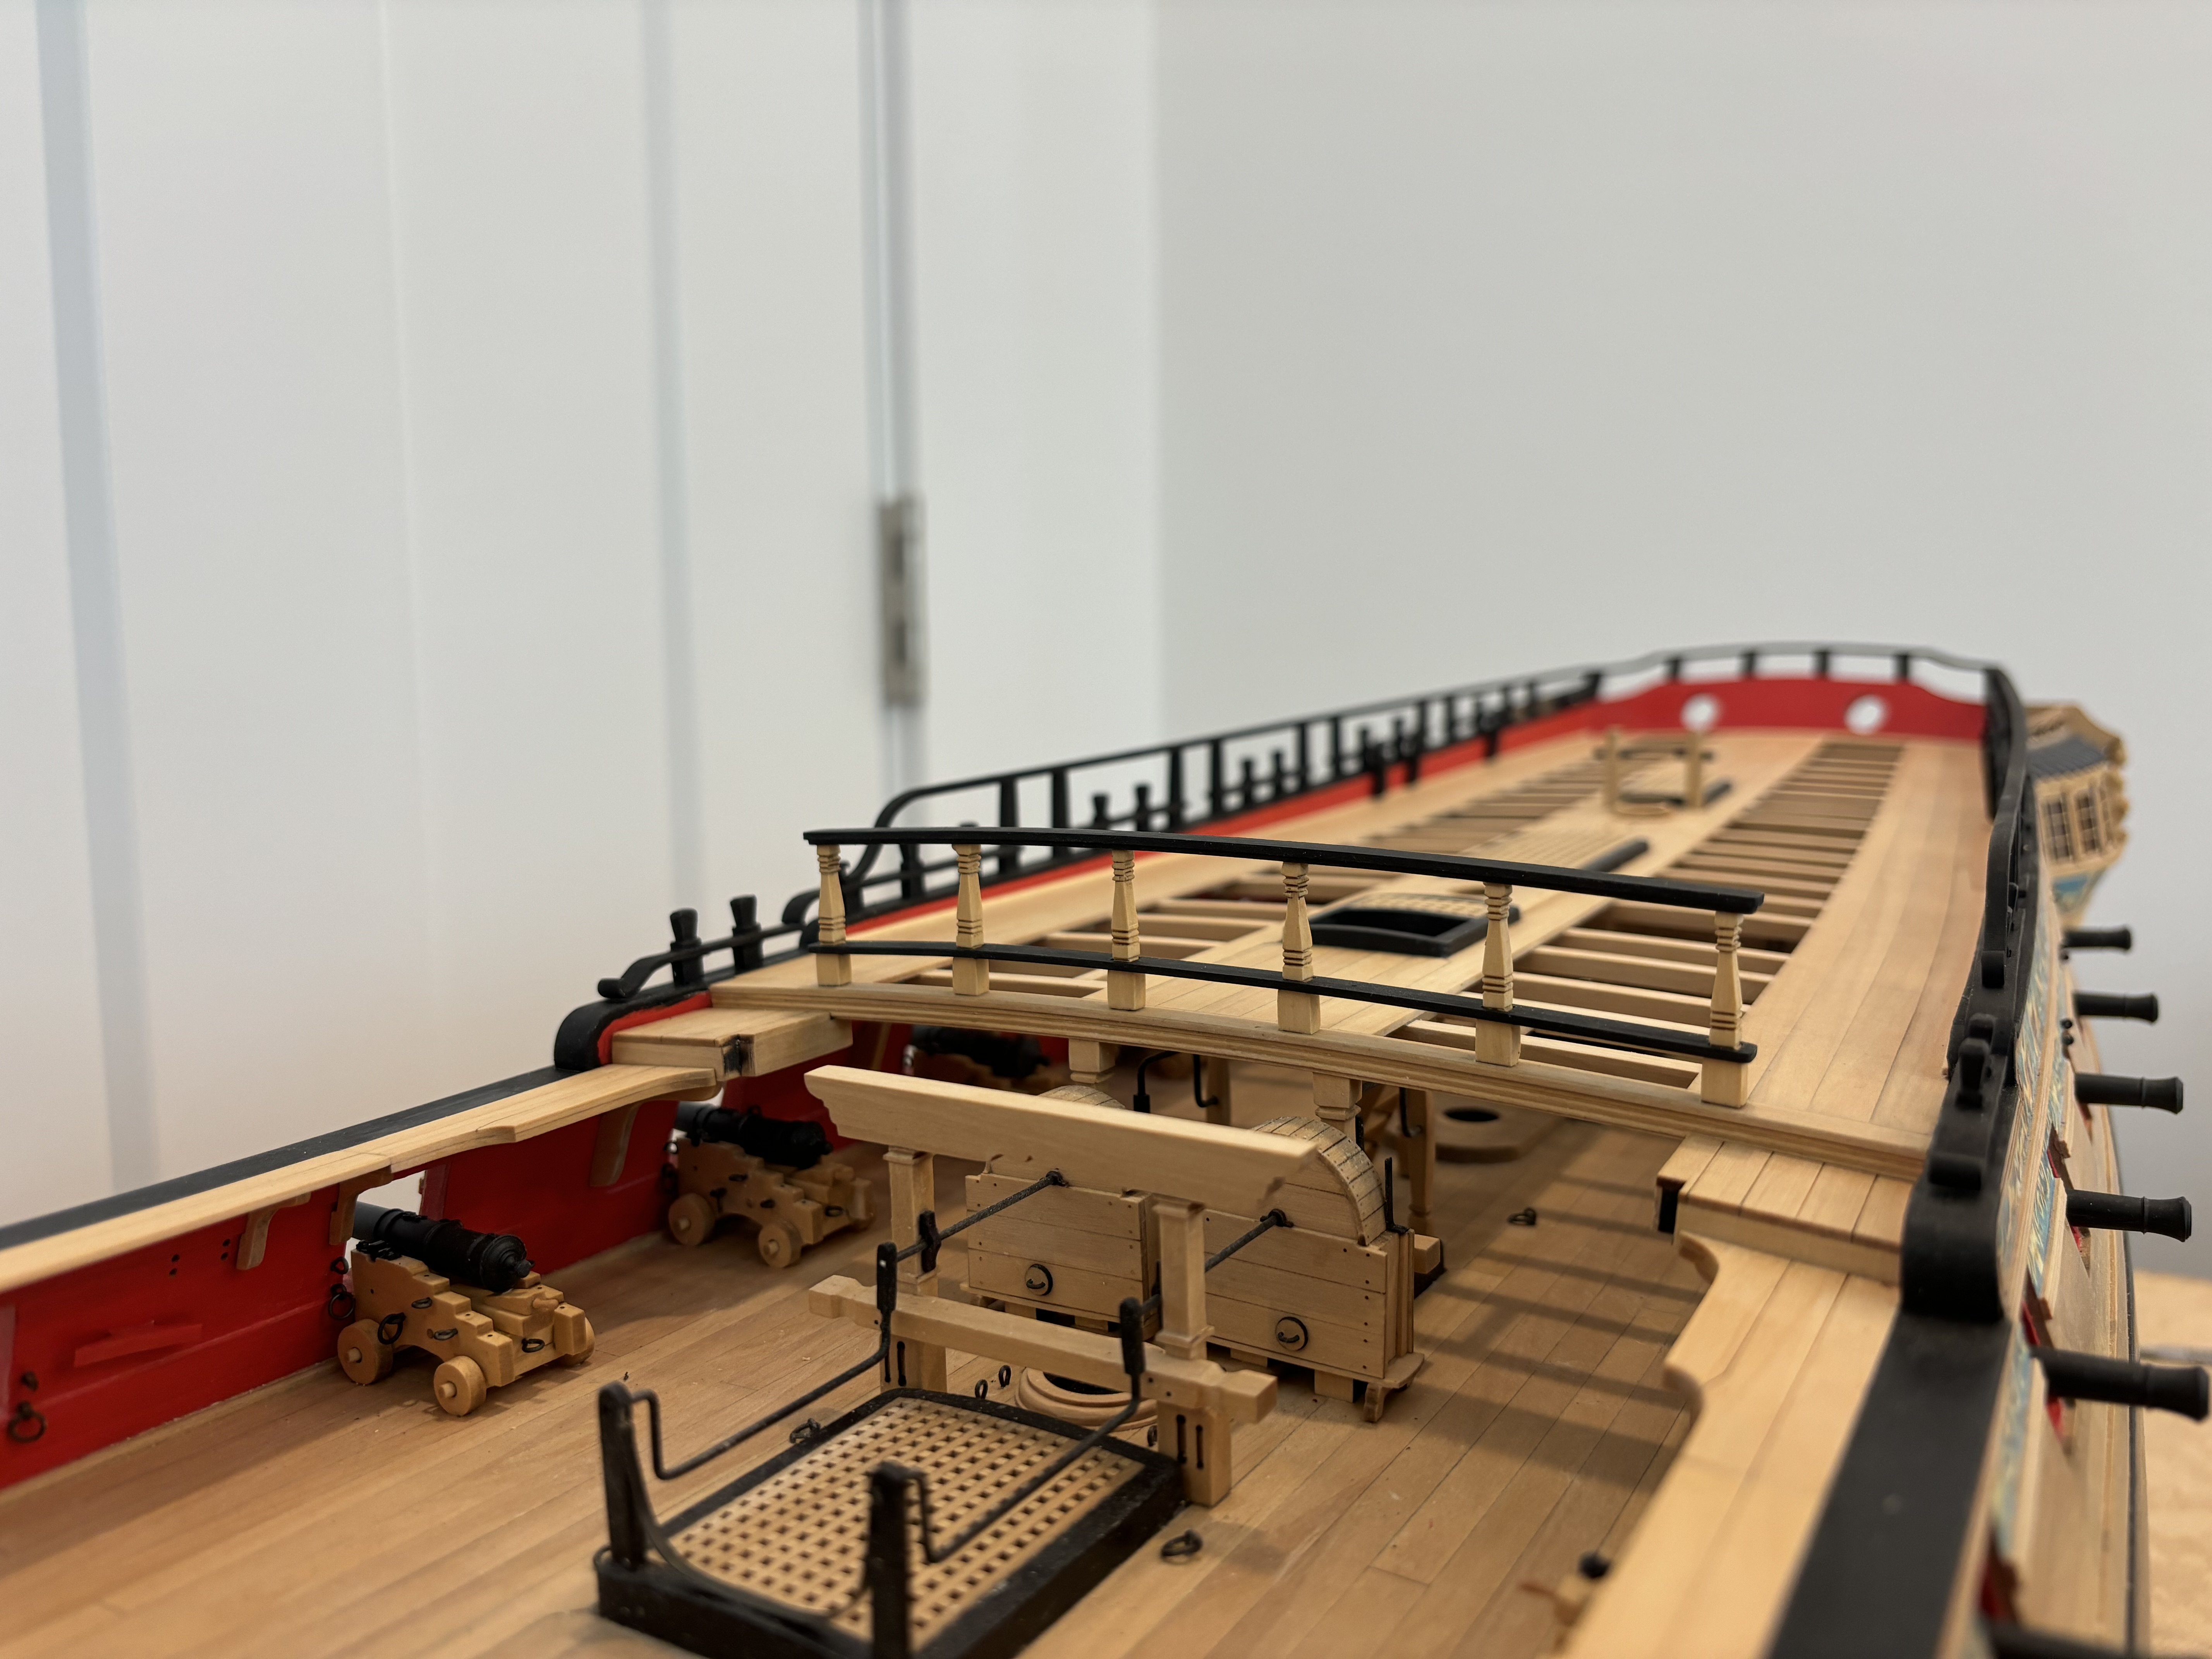
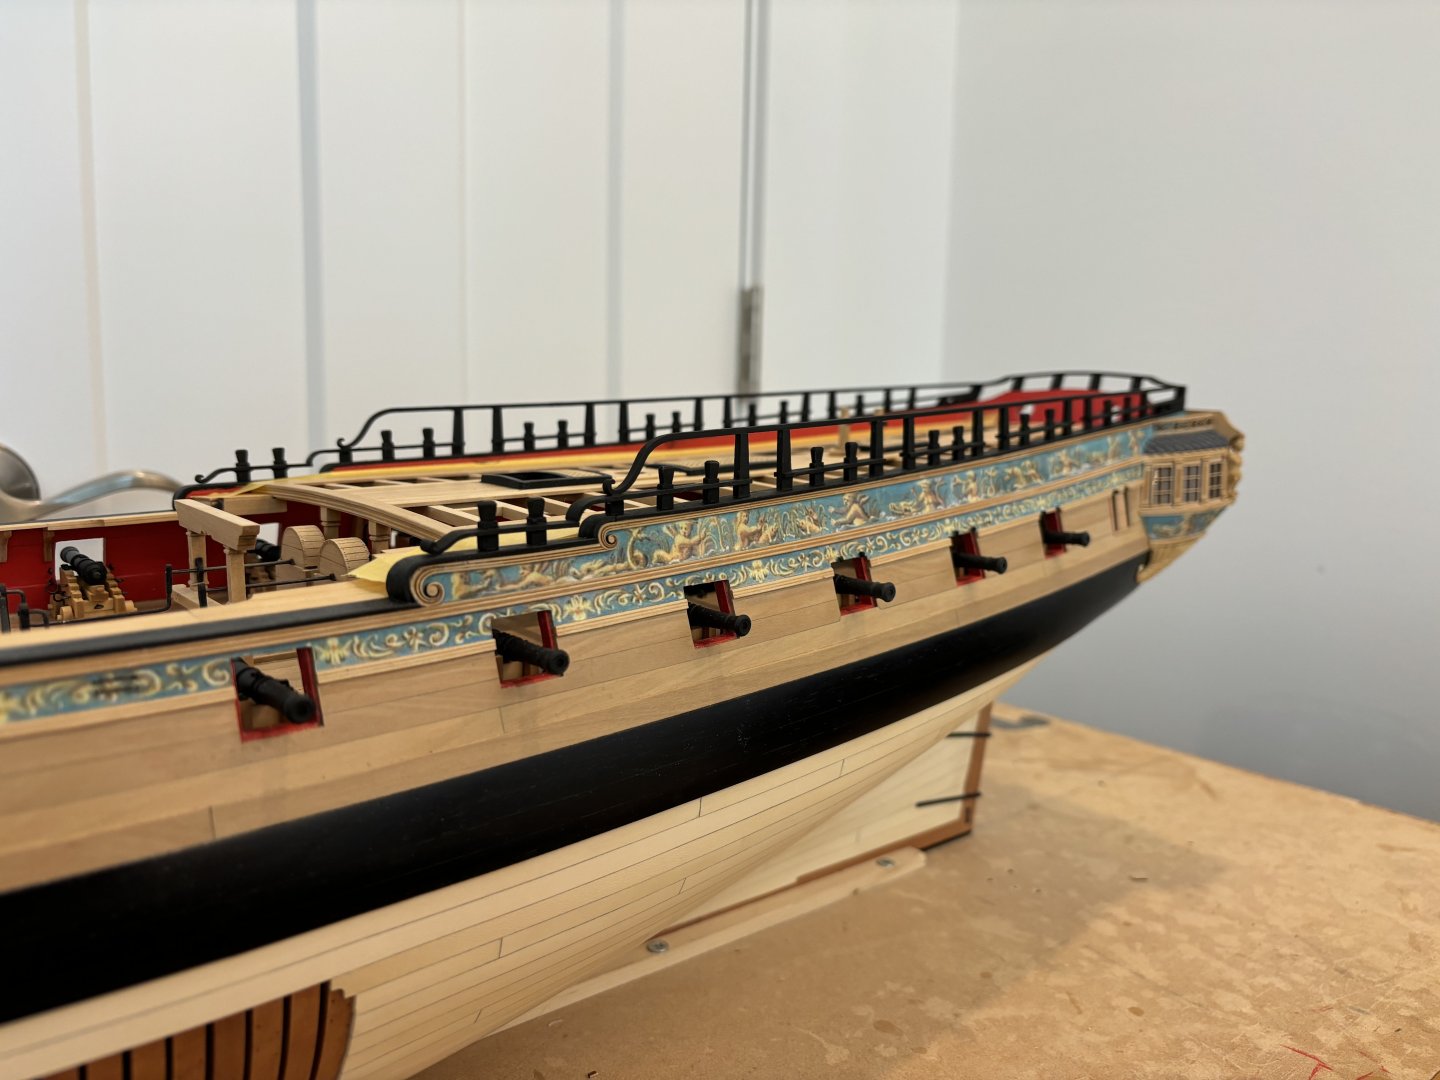
QD side and taffrail railings completed, will work on QD Breastrail next and then move back to FC rails.
- 399 replies
-
- 12
-
-
- winchelsea
- Syren Ship Model Company
- (and 1 more)
-
Looking really good Rusty but I have a question, the frames seem to have an awful lot of difference height wise in places so you need to do lots of fairing - but do the joint lines have a nice curve fore and aft? Just wondering if some of the frames are too high/low compared to their neighbours? ben
-
FC timberheads and railings all cleaned up and shaped. Started installation of QD railings.
- 399 replies
-
- 12
-
-
- winchelsea
- Syren Ship Model Company
- (and 1 more)
-
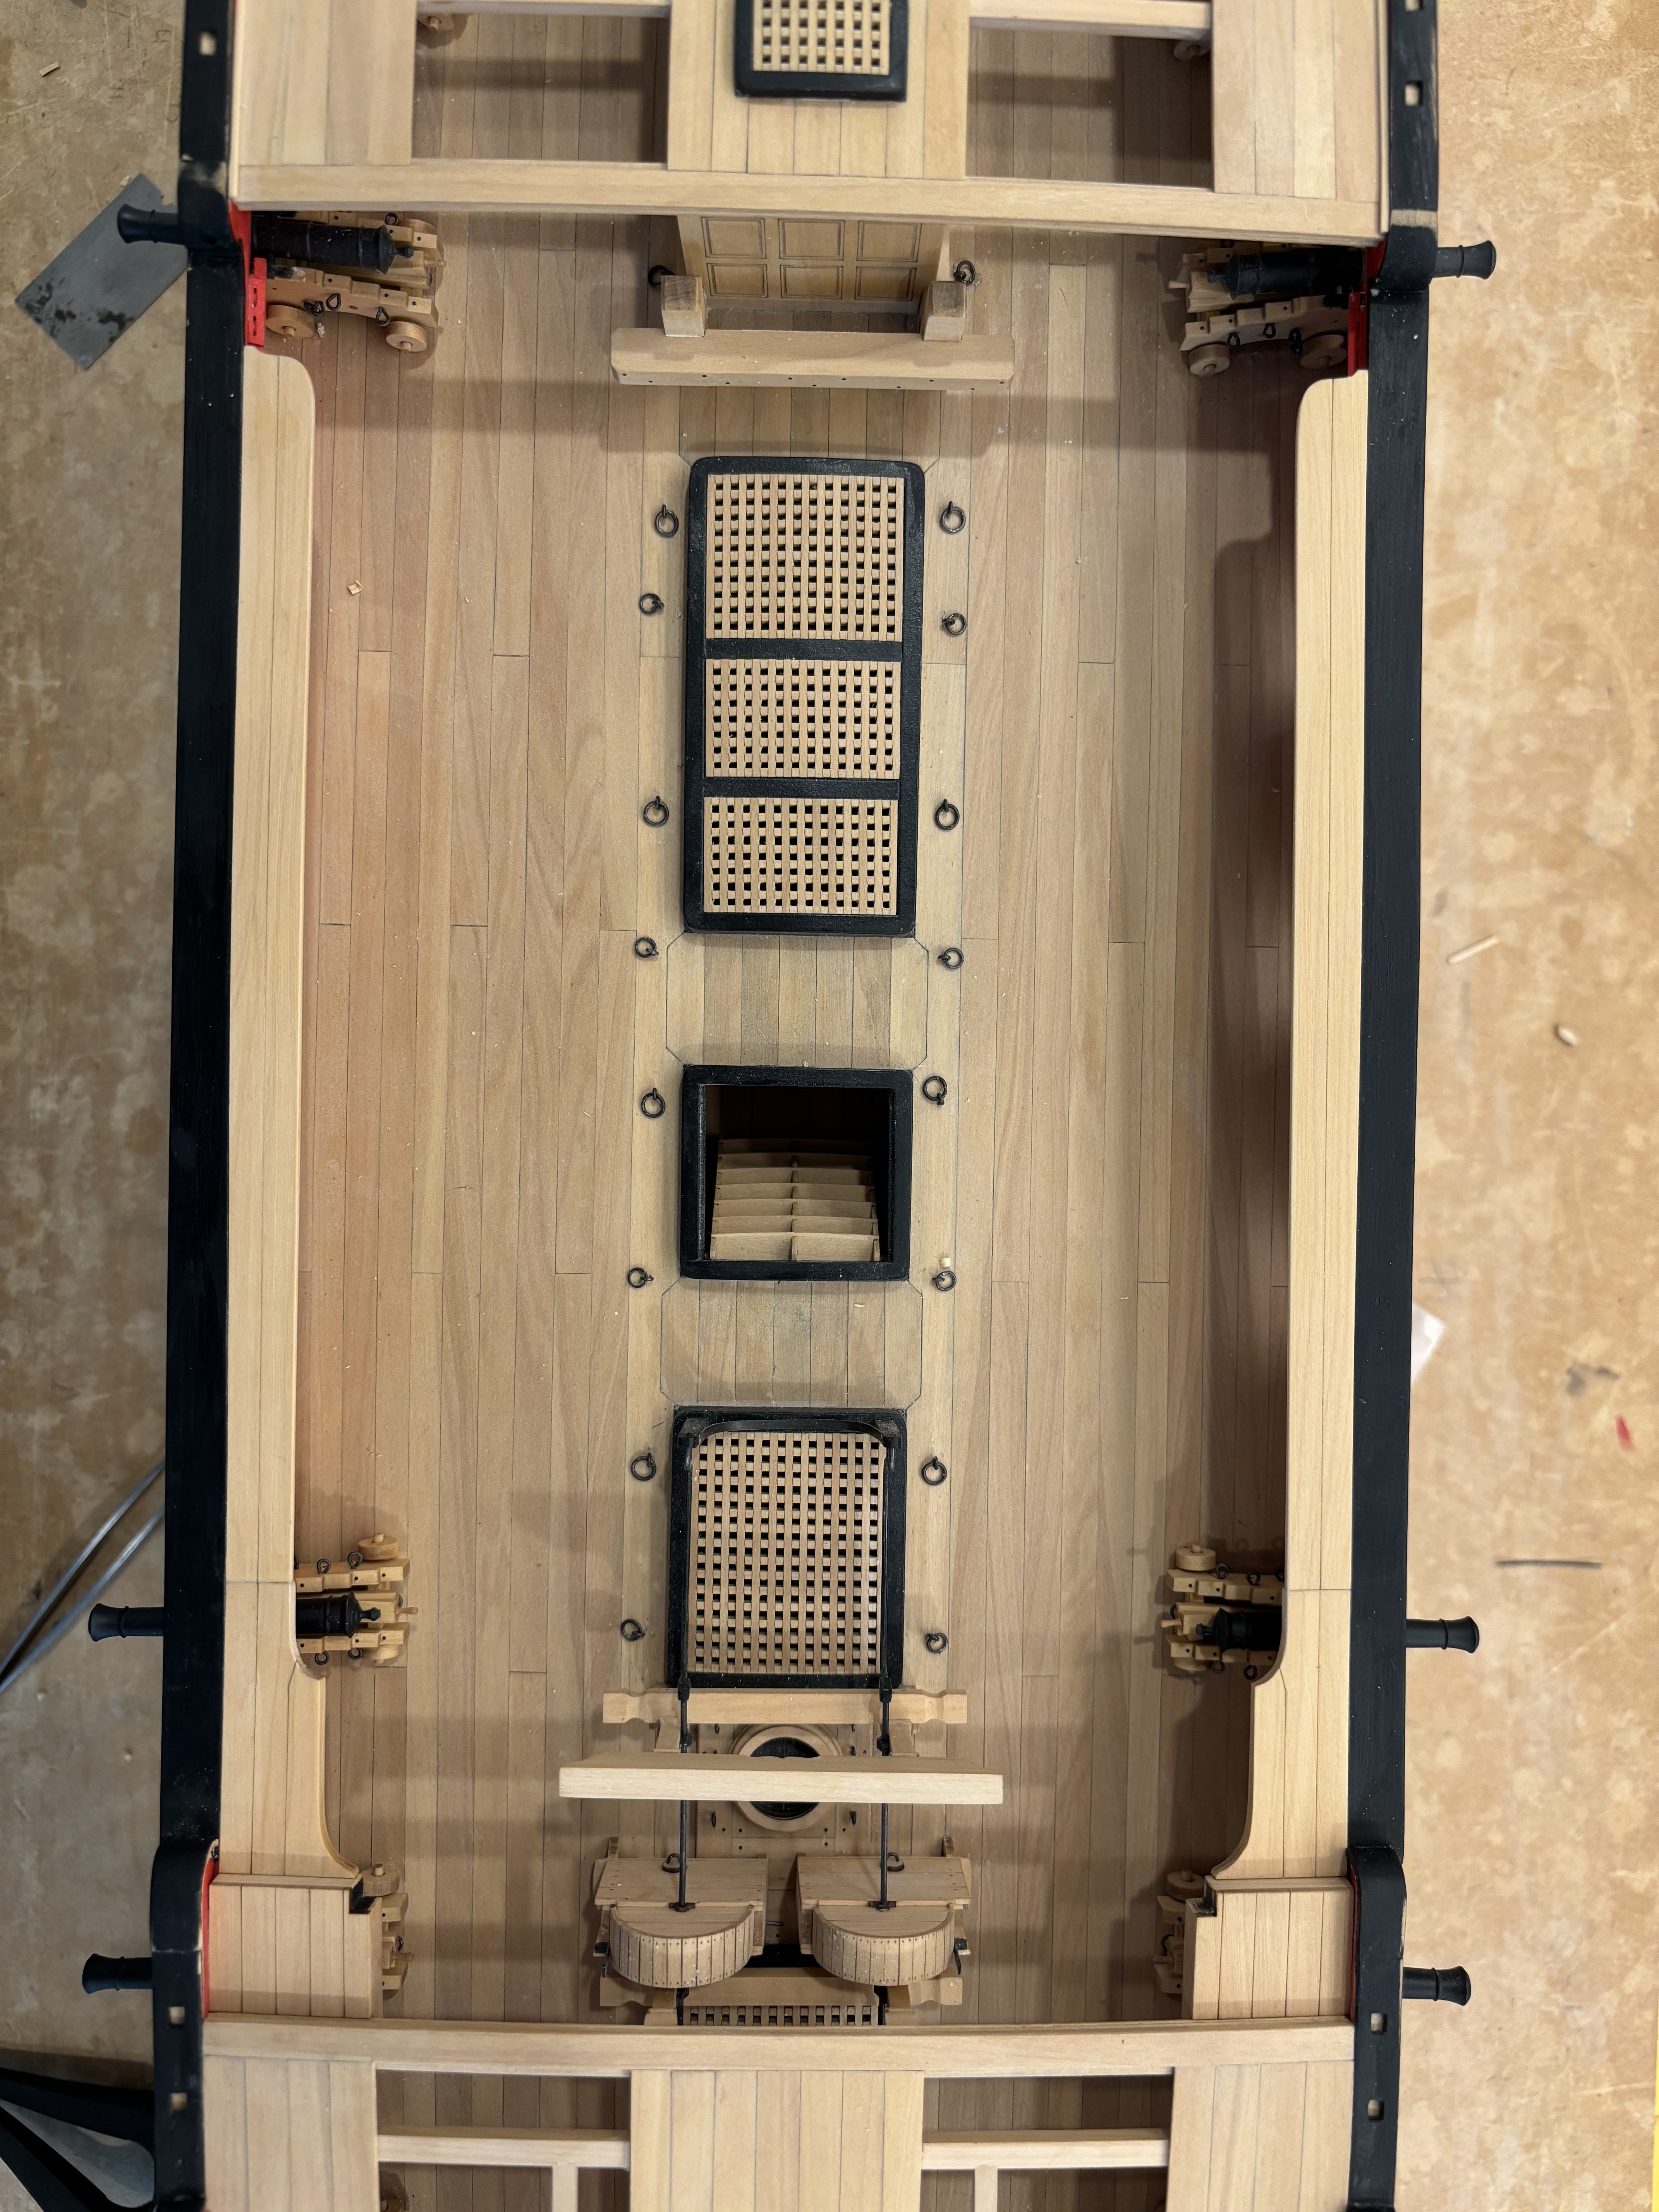
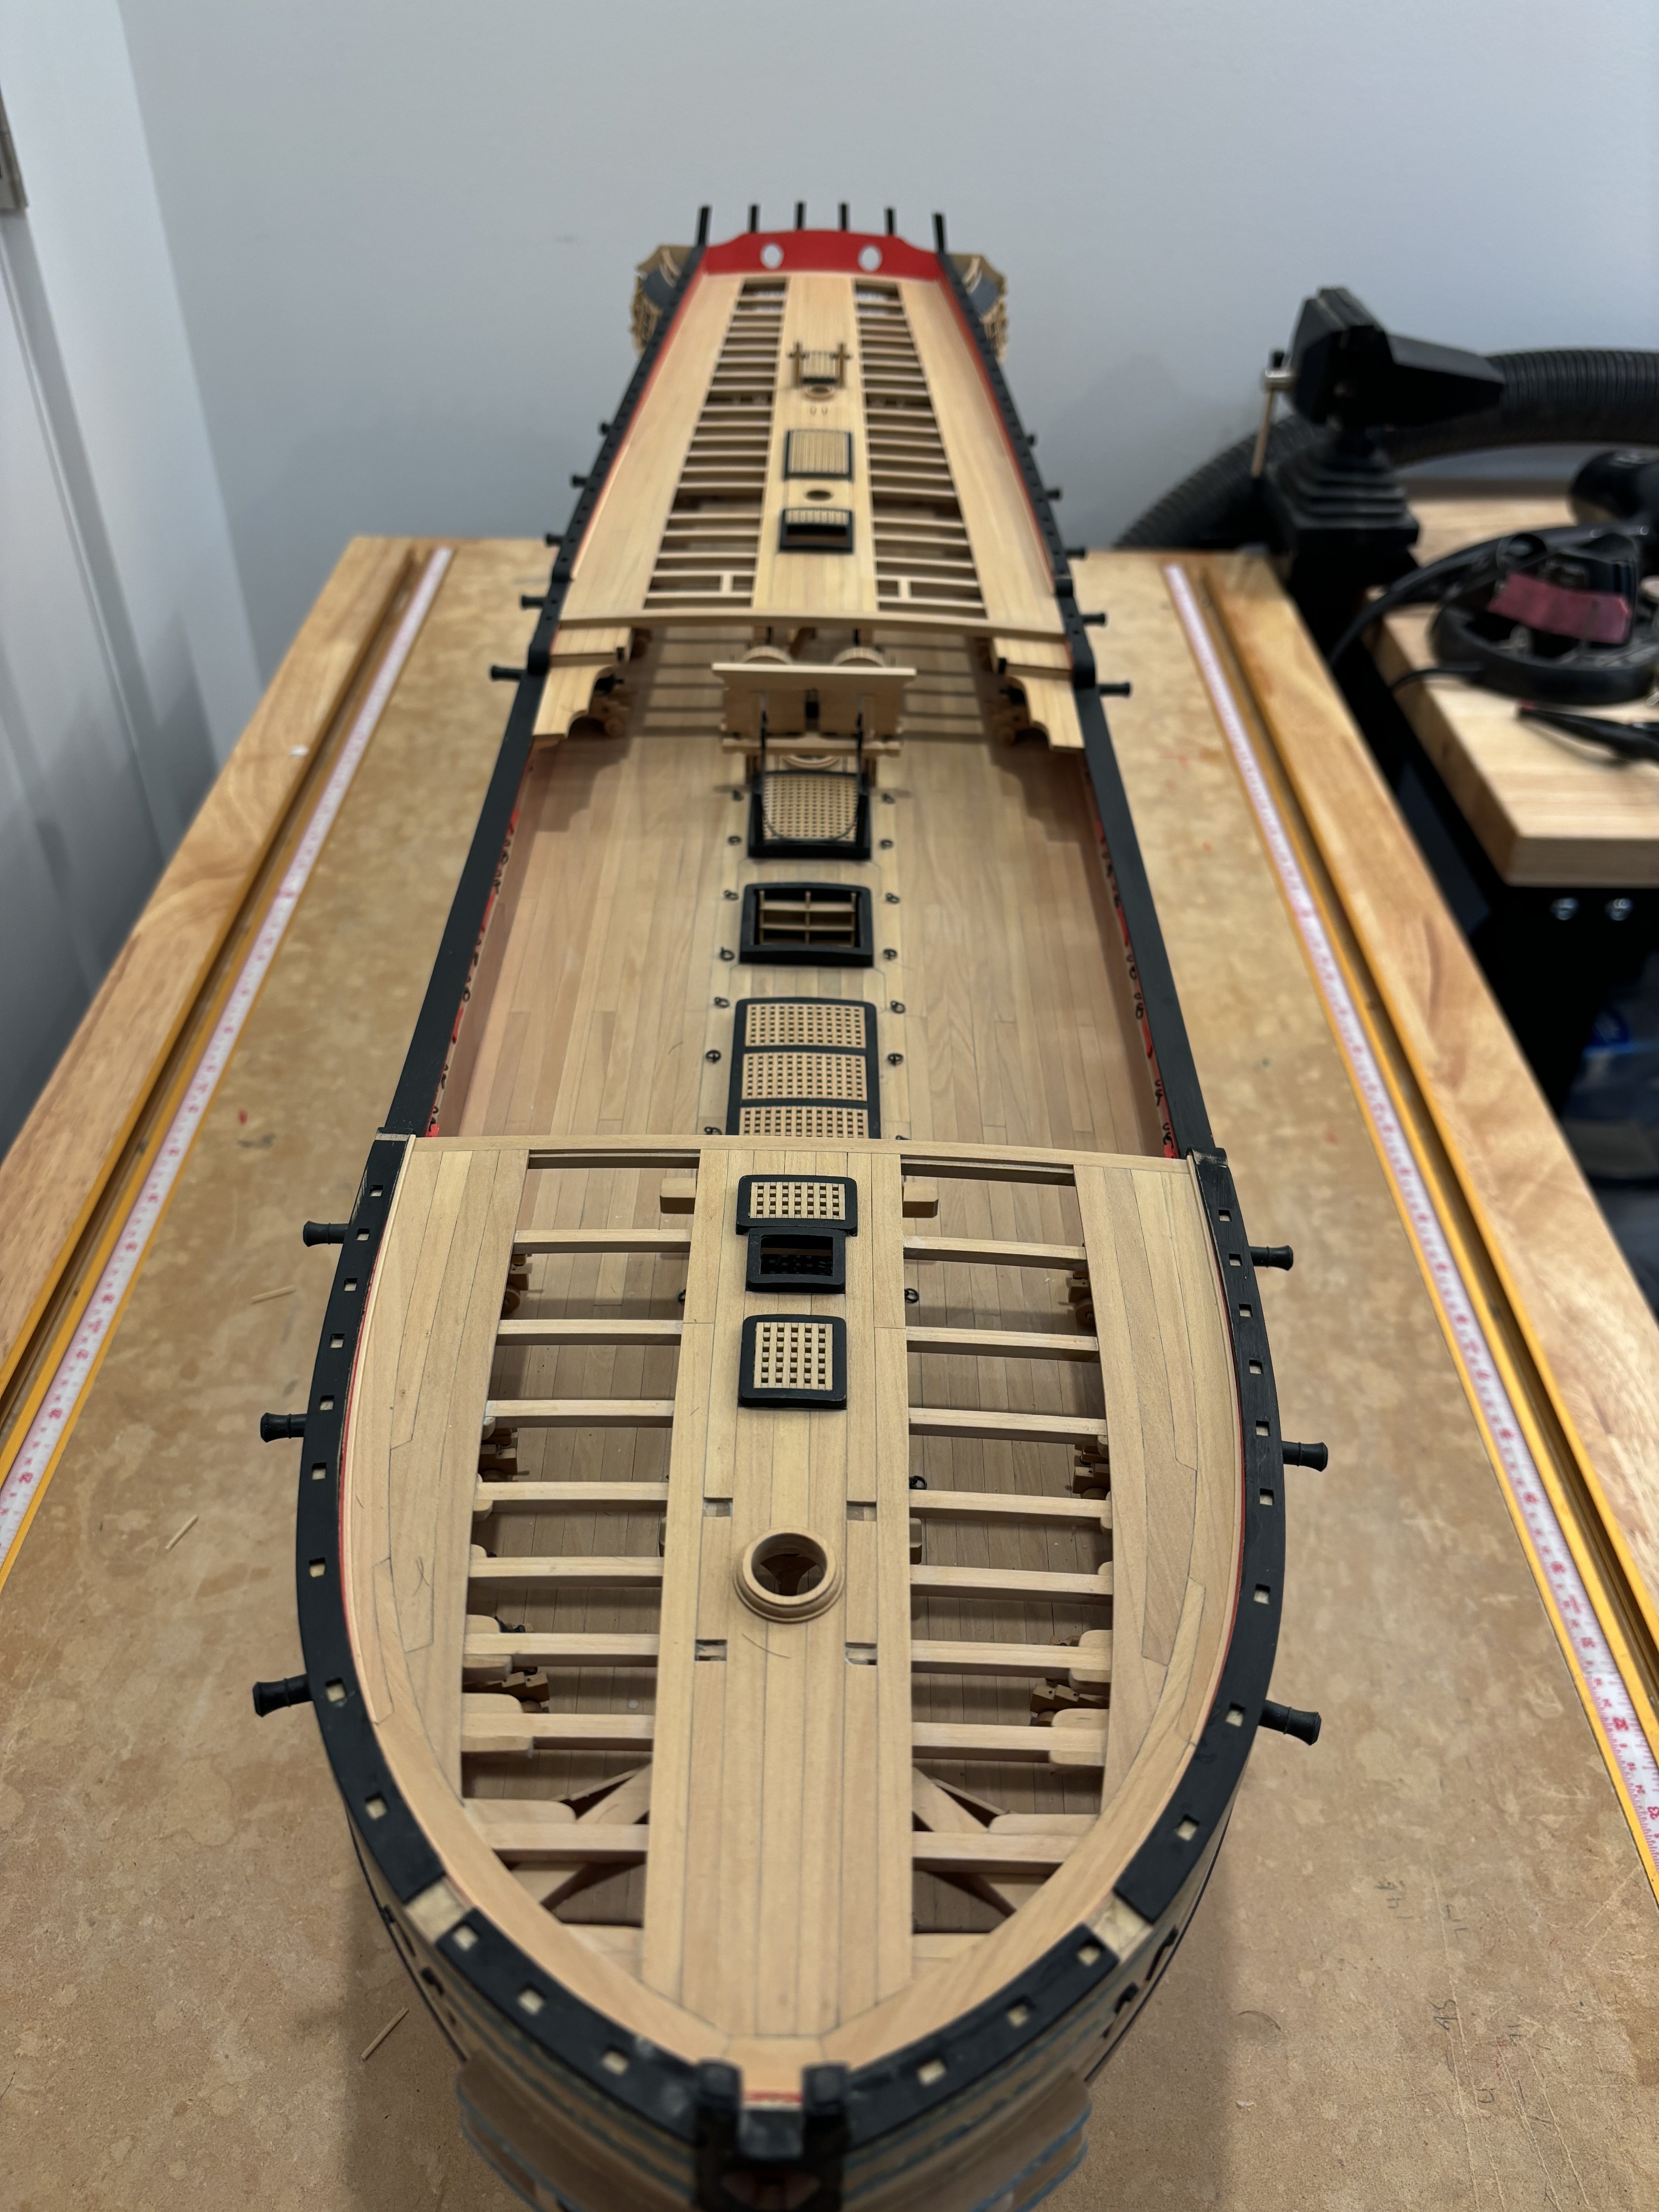
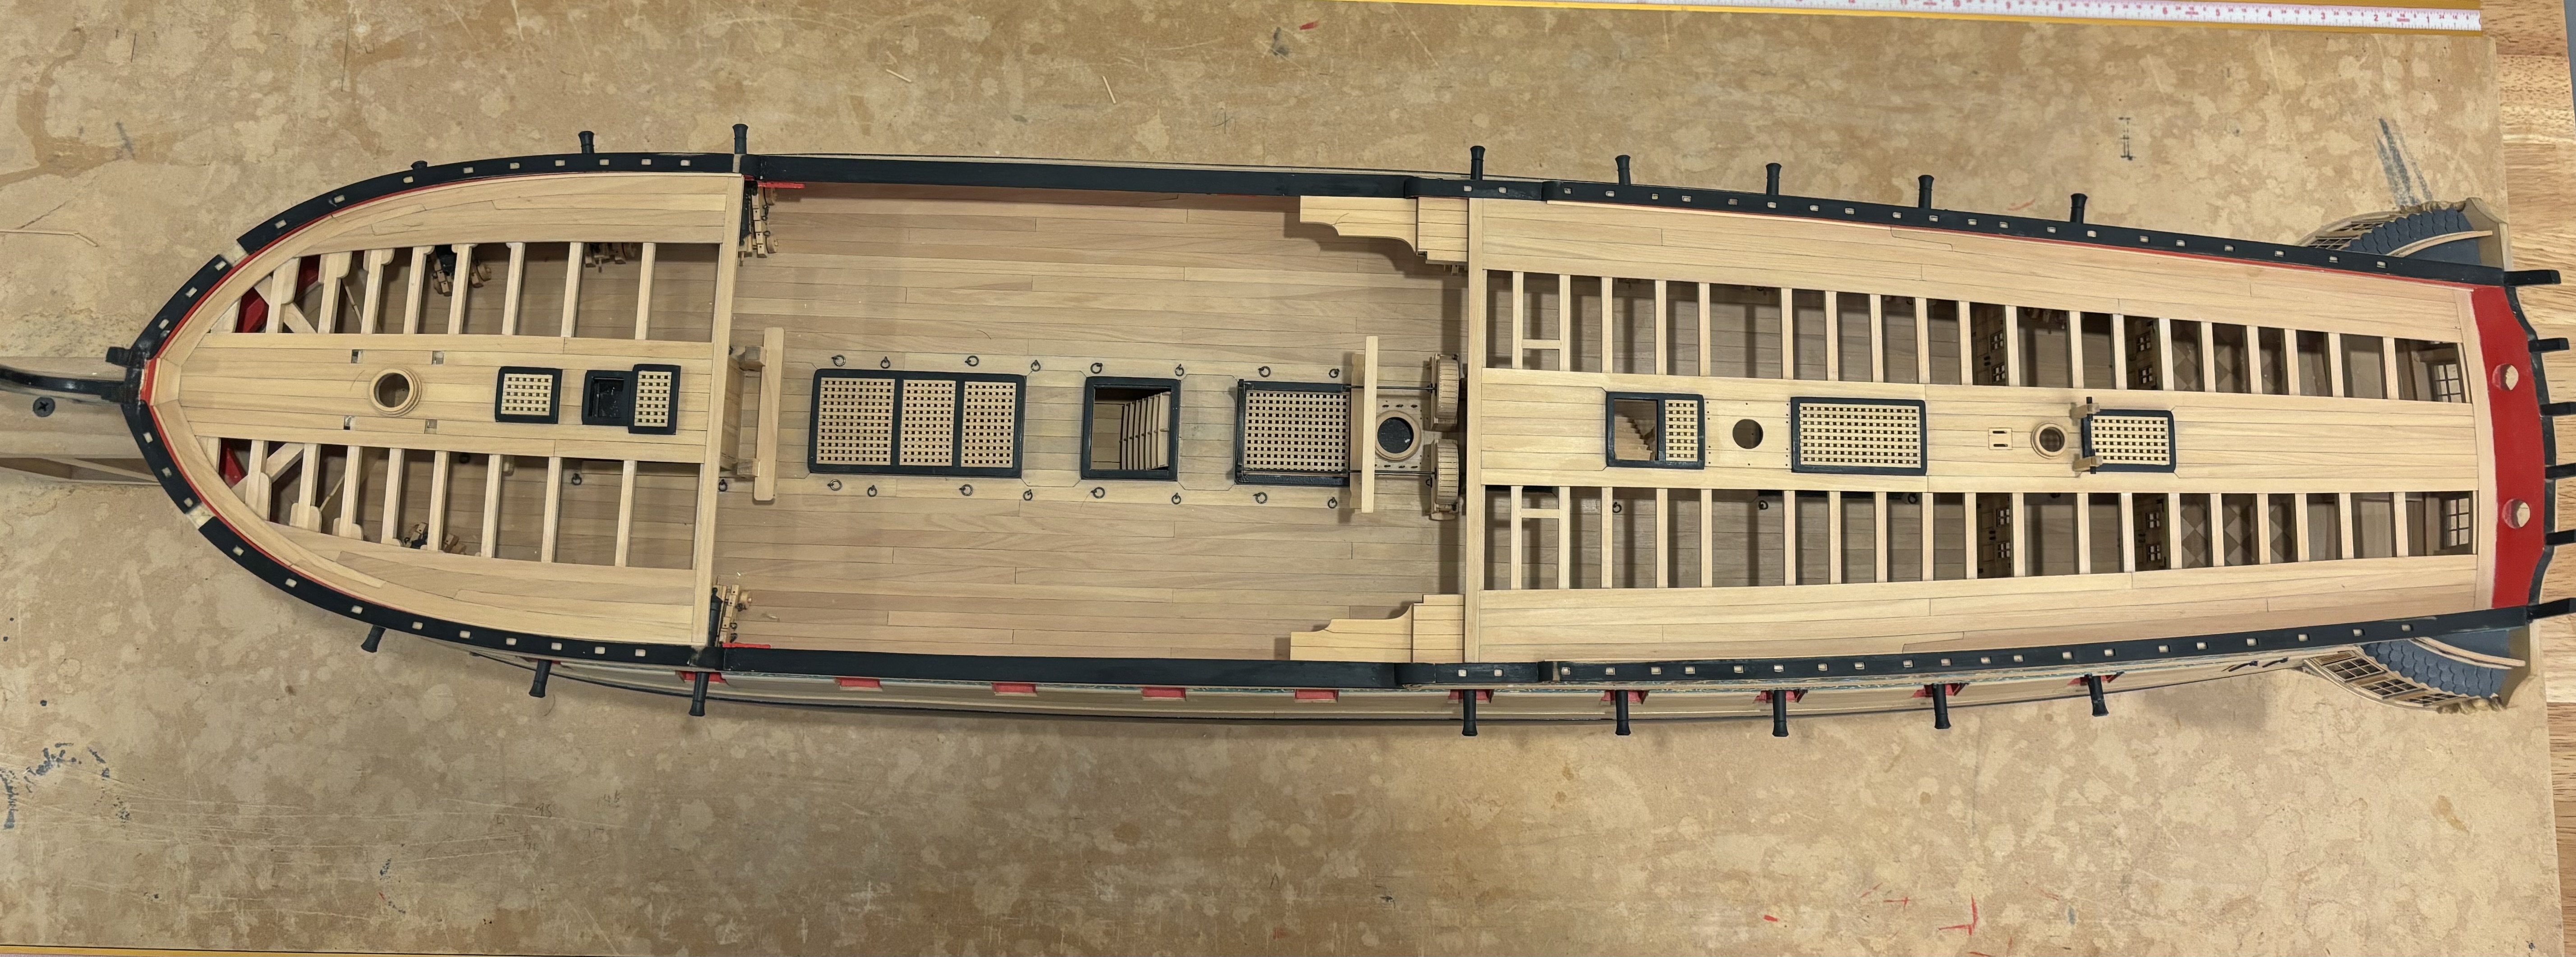
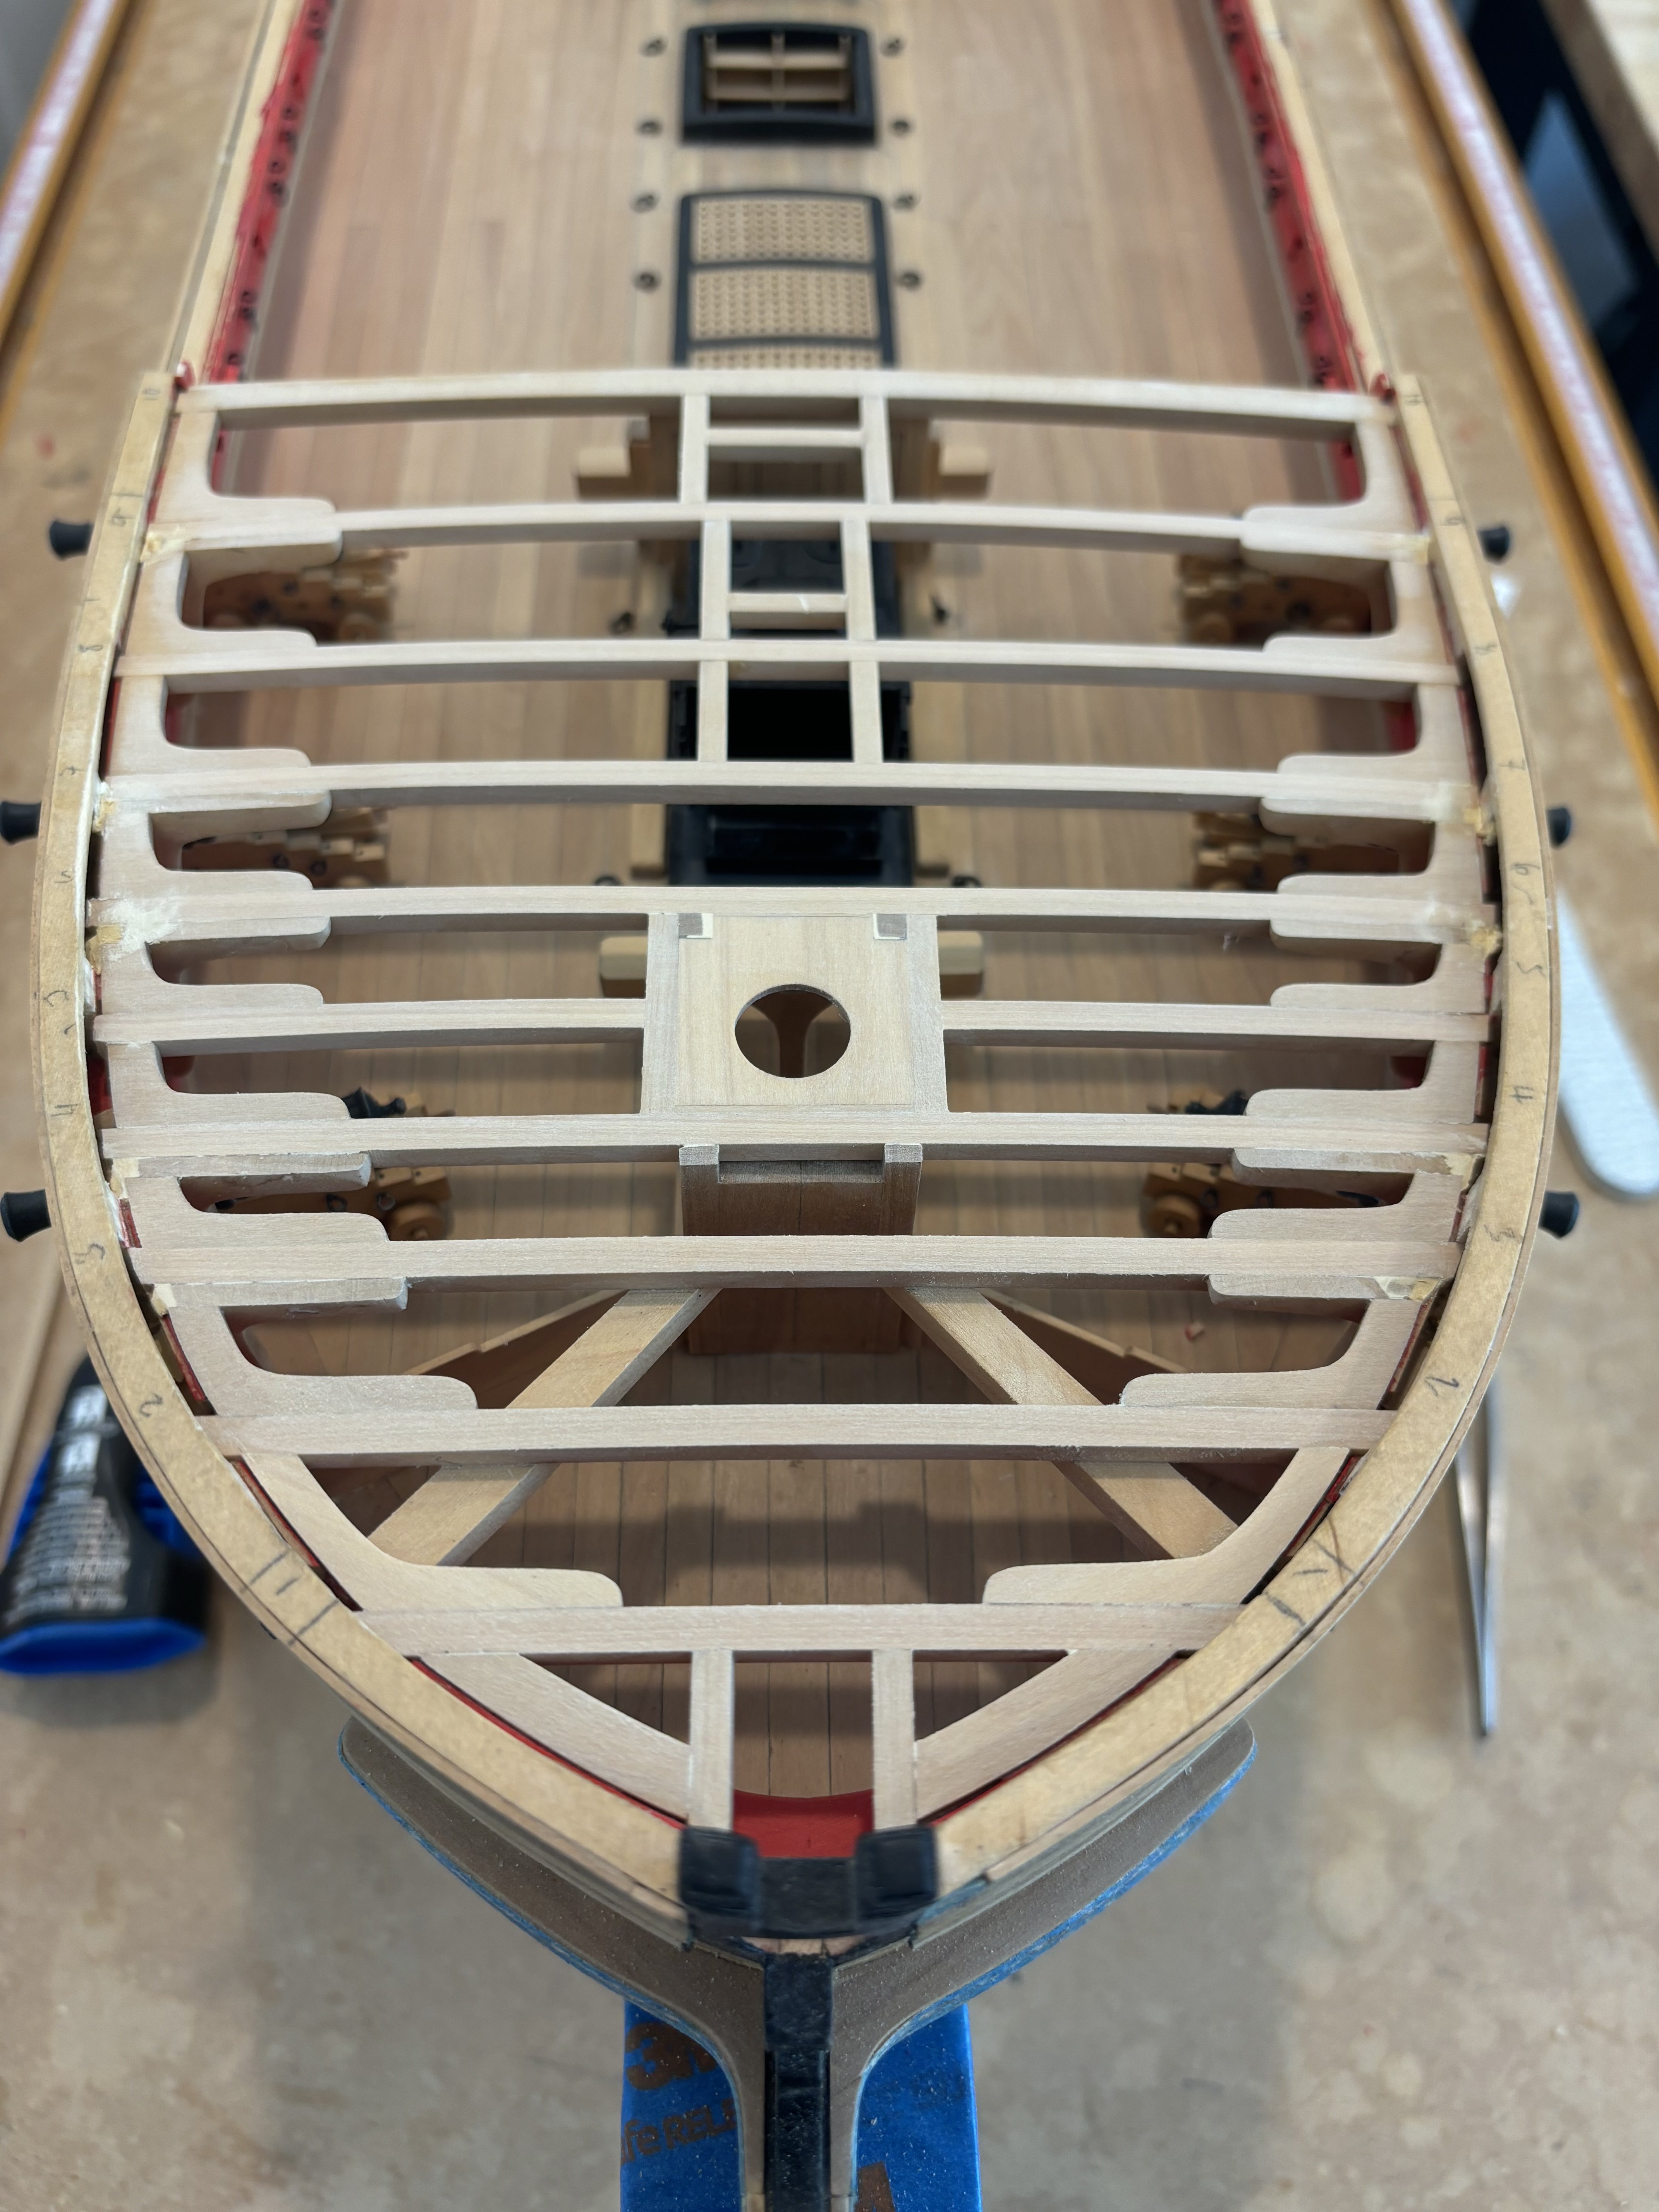
Gangways and their knees completed, Breasthook installed, Cathead slots were cut and then they were installed and the Transom frames were cut down using the supplied template. All ready to start making all of the railings.


- 399 replies
-
- 14
-
-
-
- winchelsea
- Syren Ship Model Company
- (and 1 more)
-
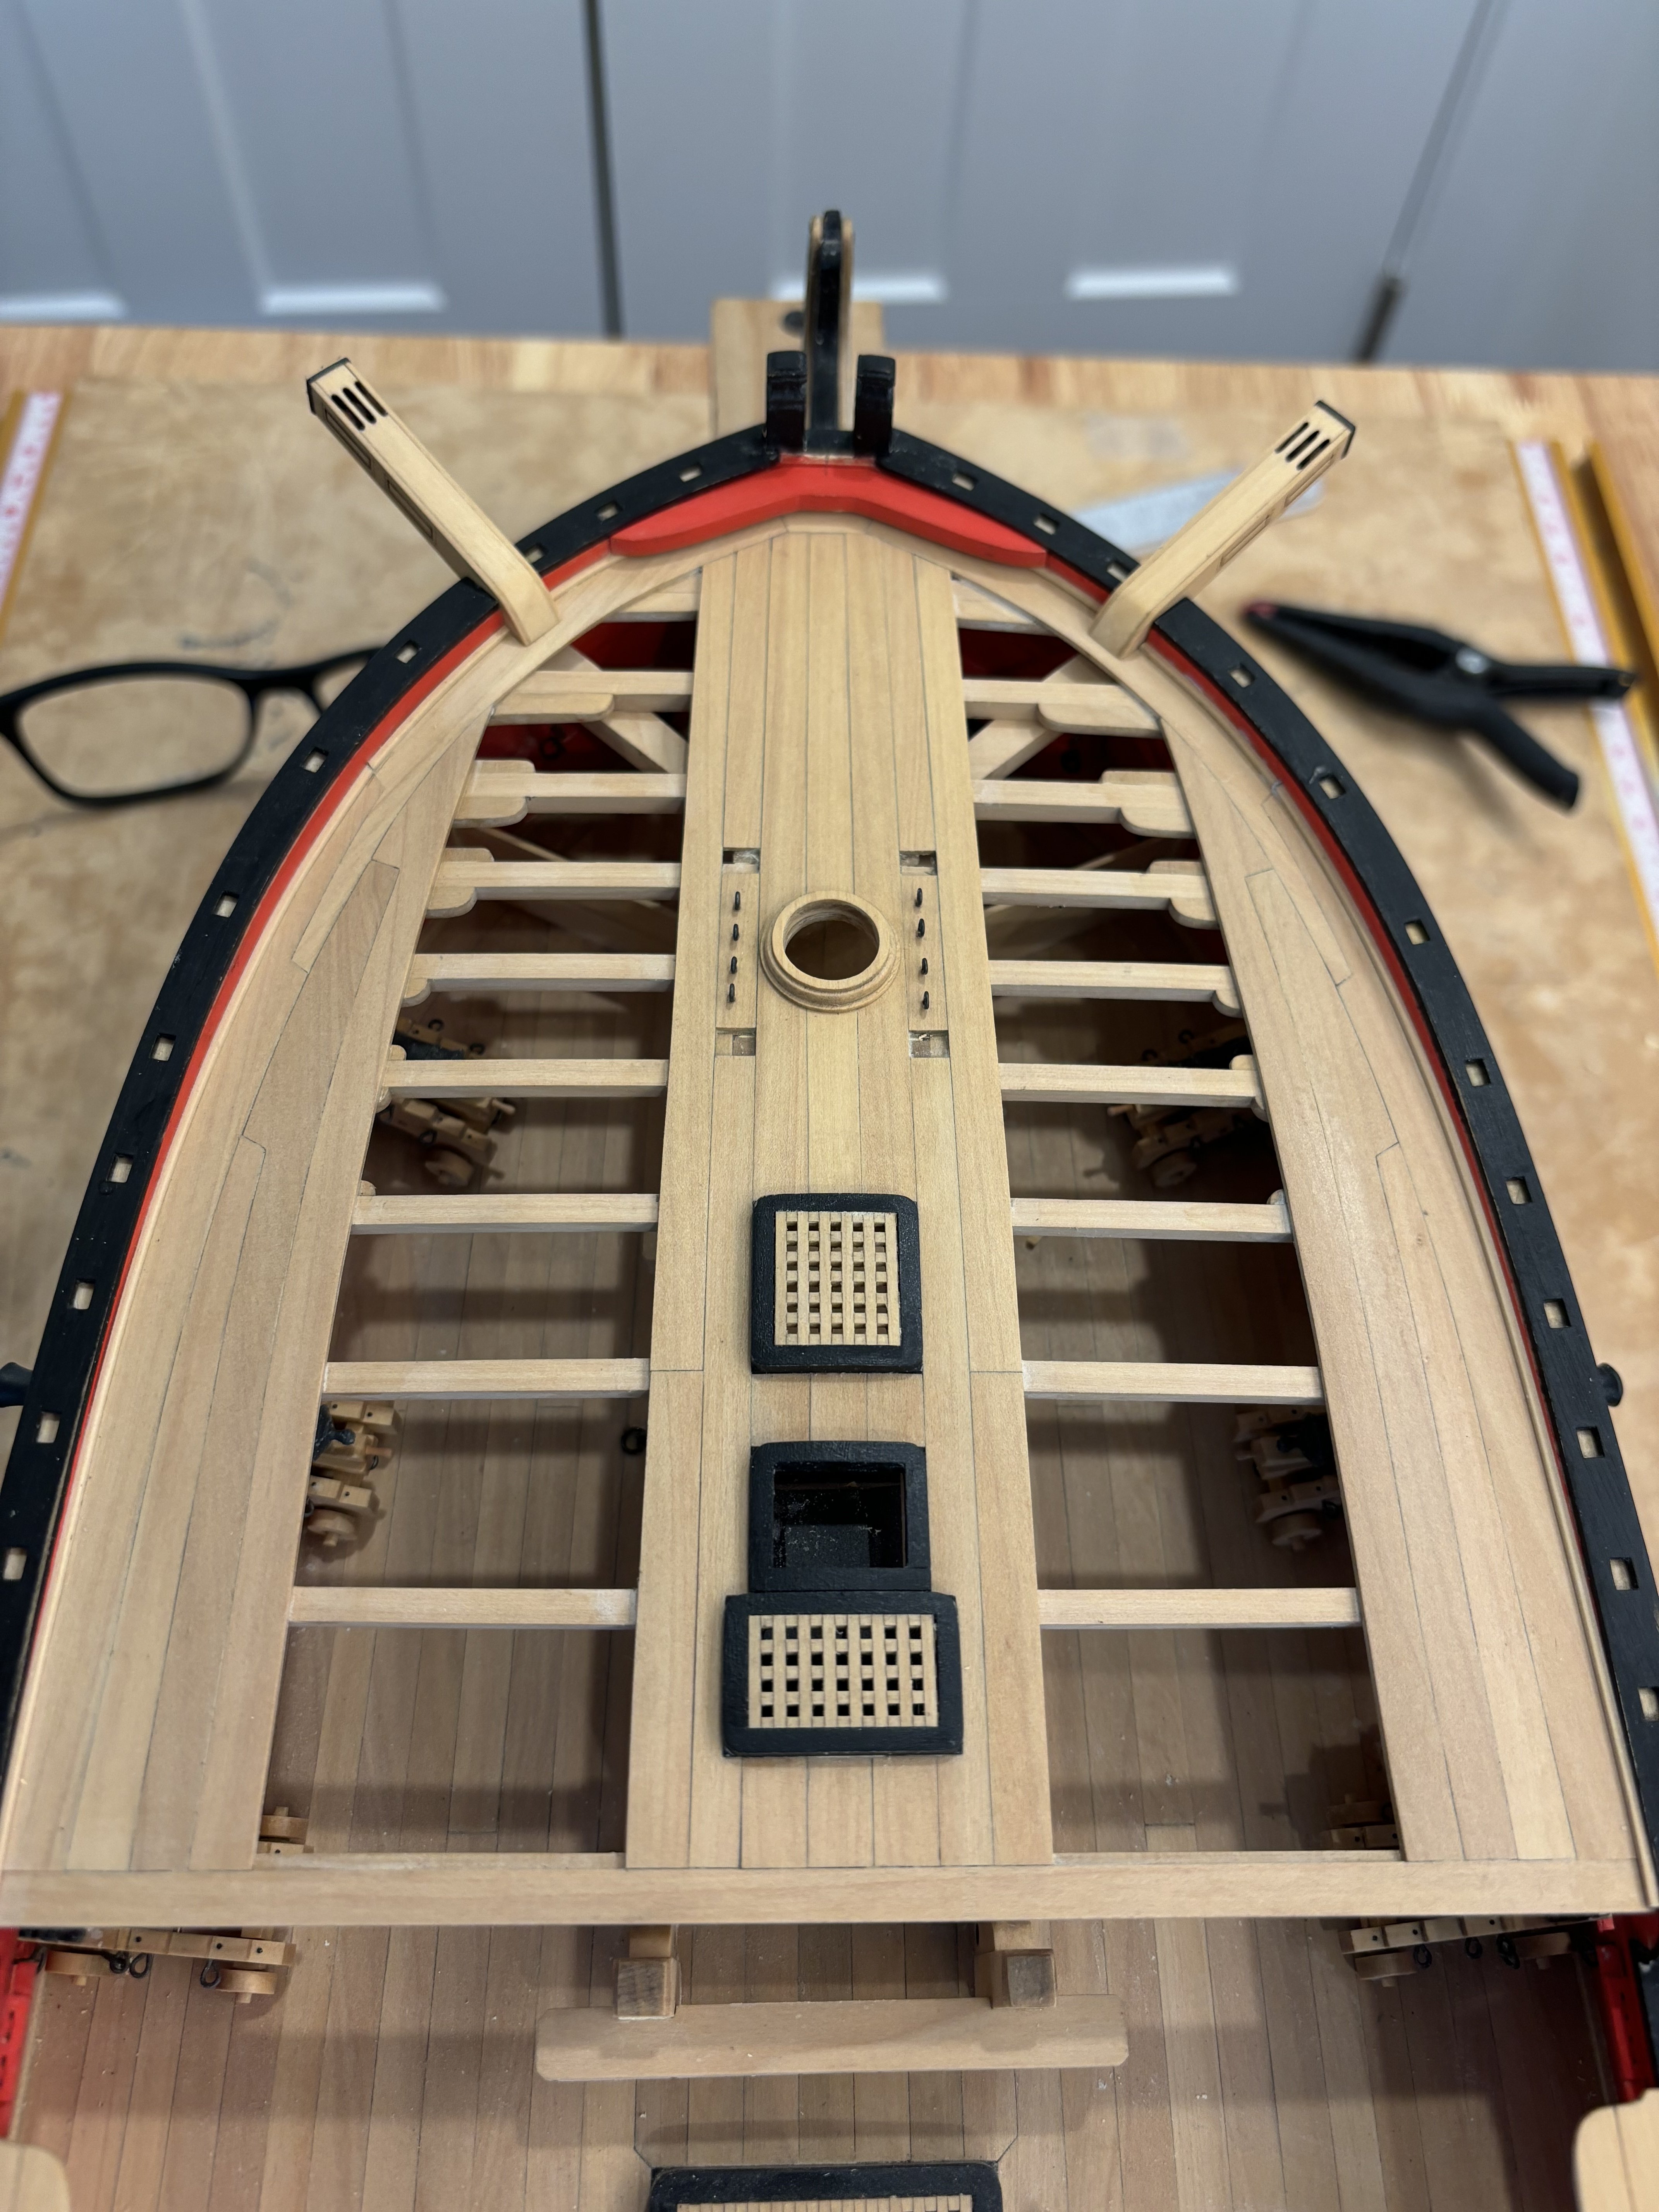
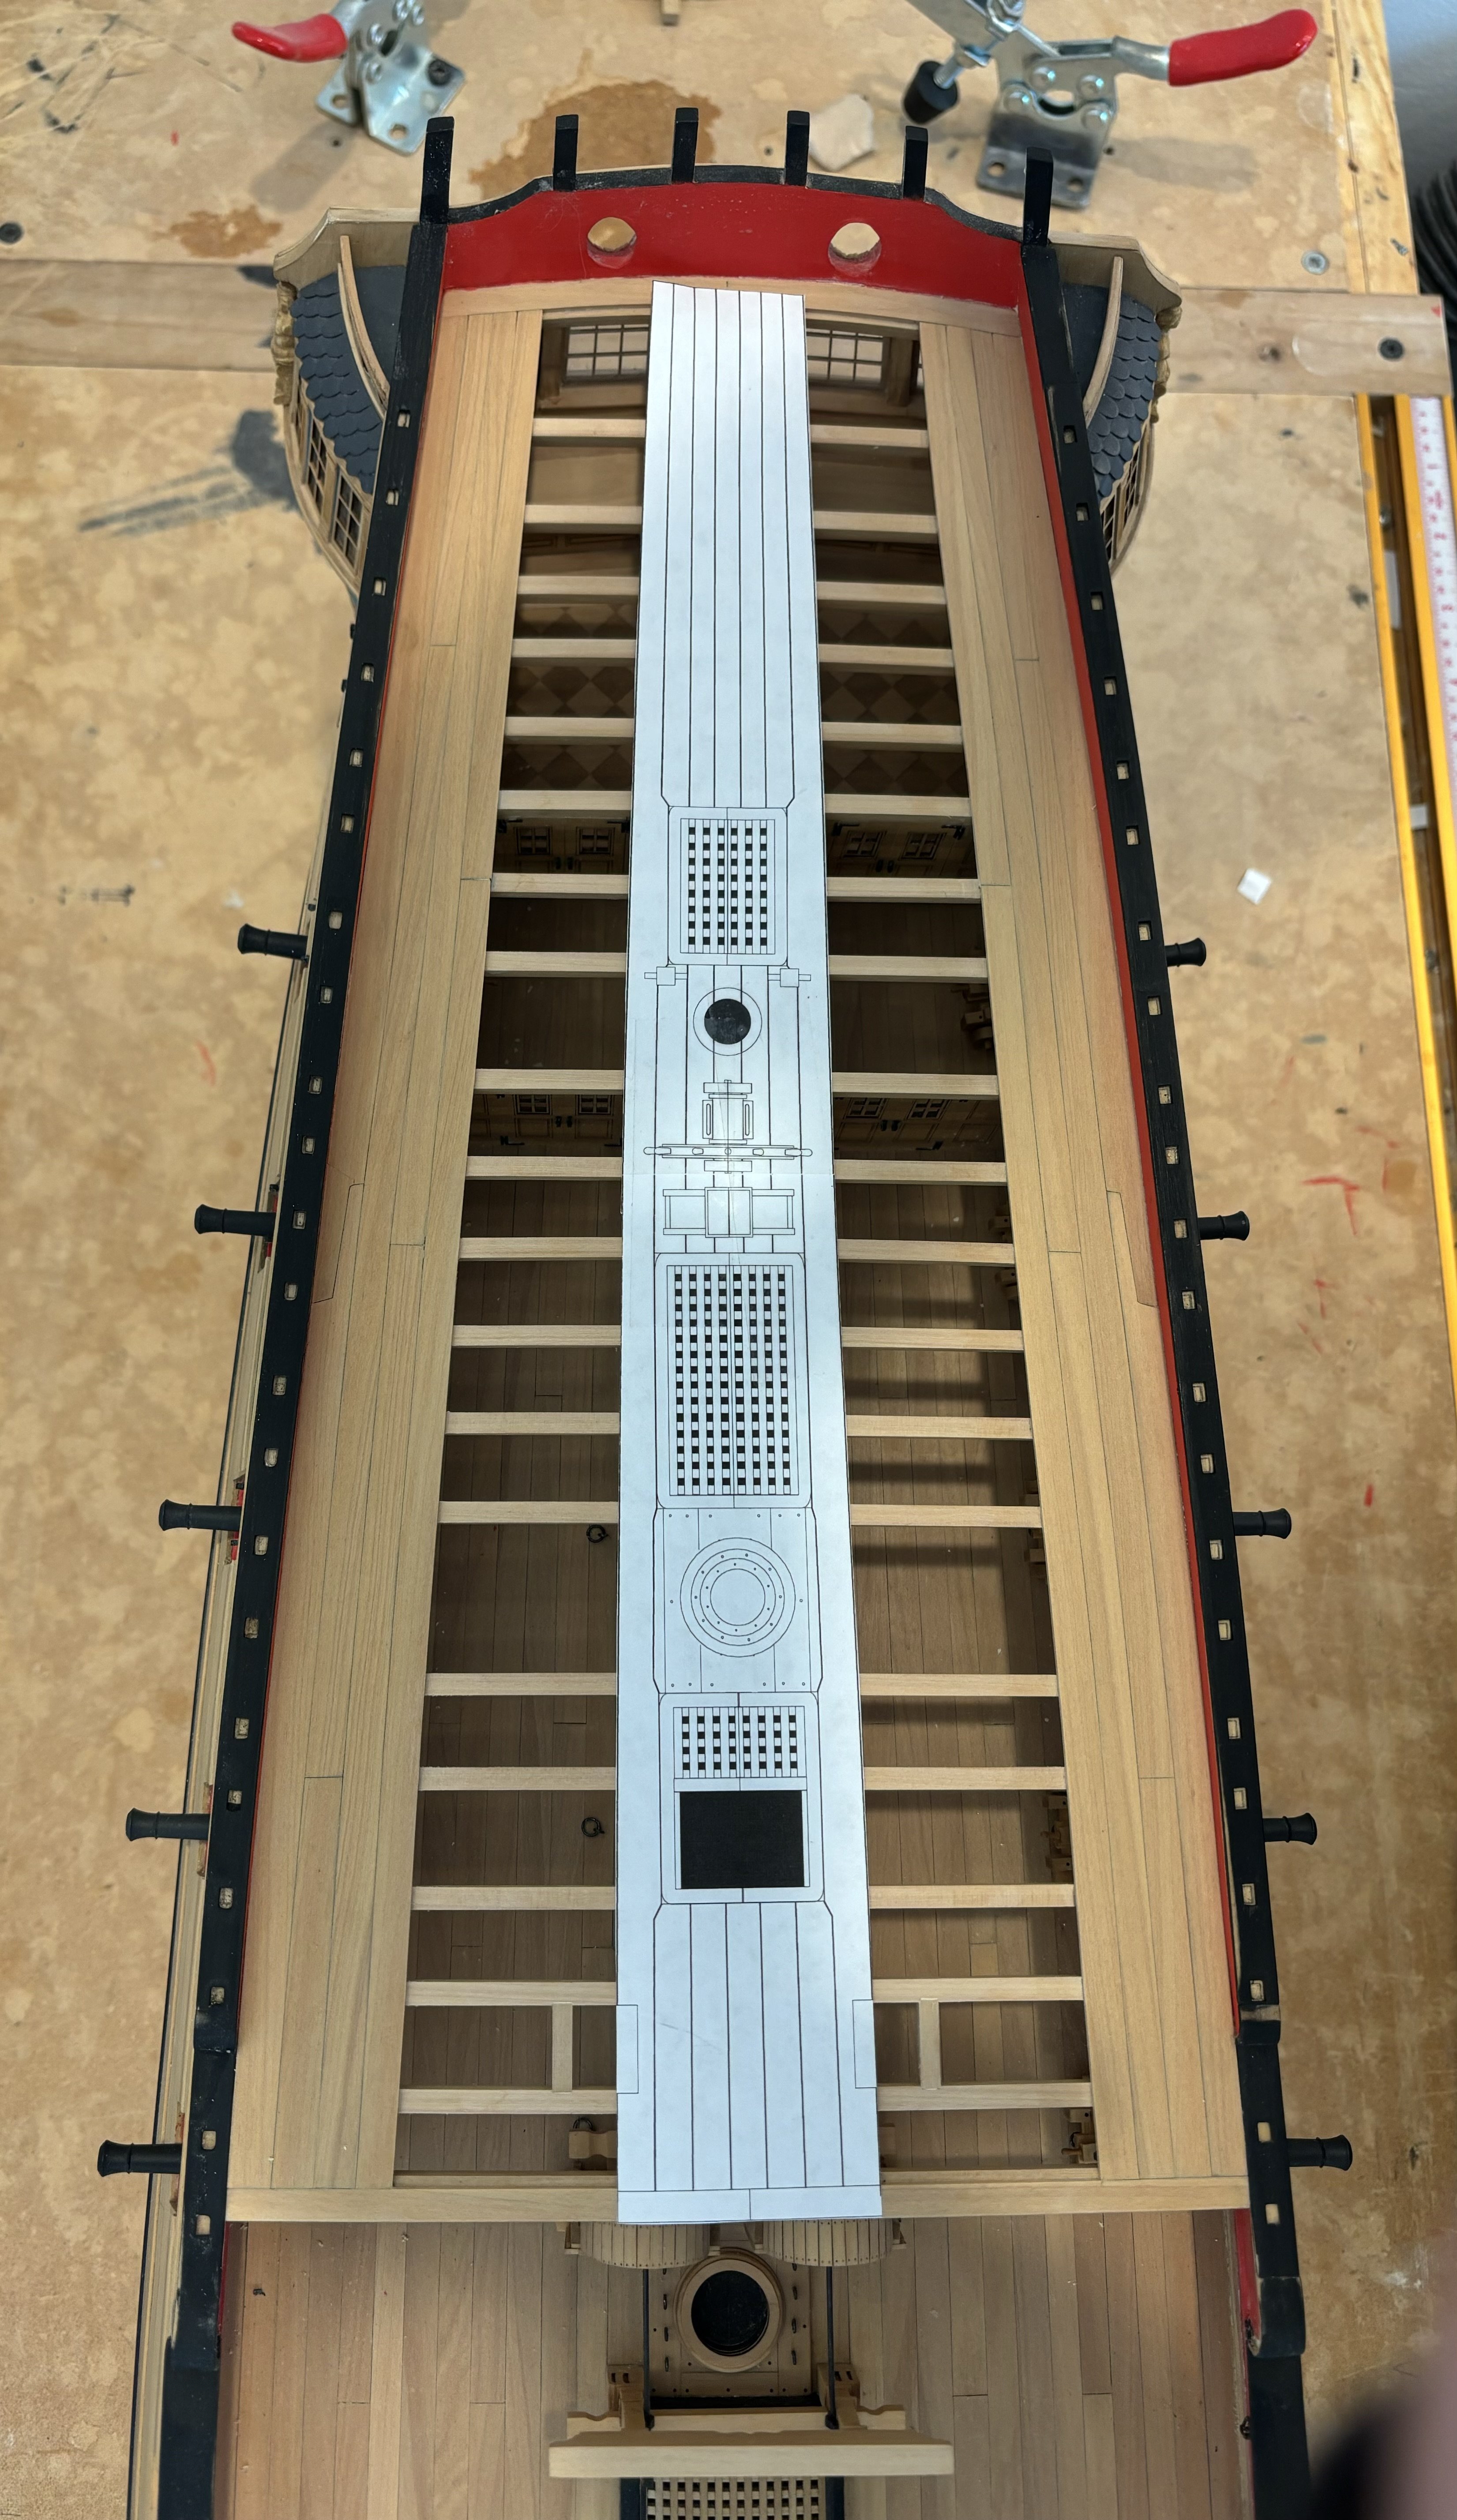
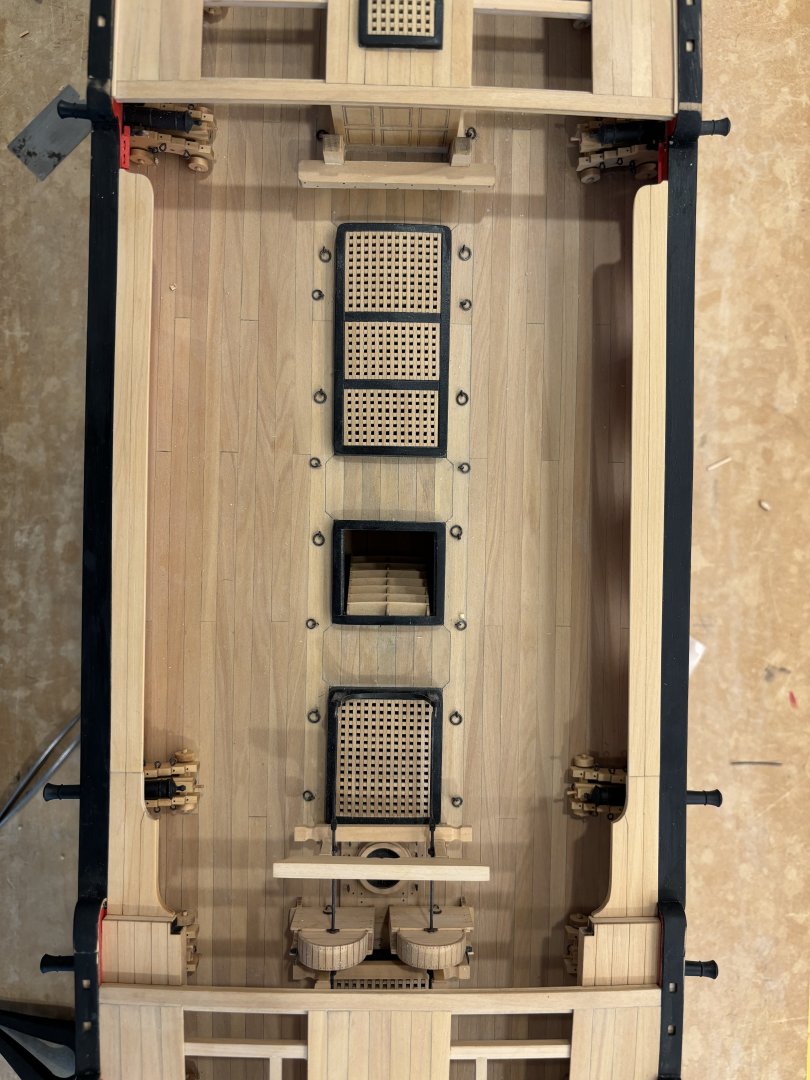
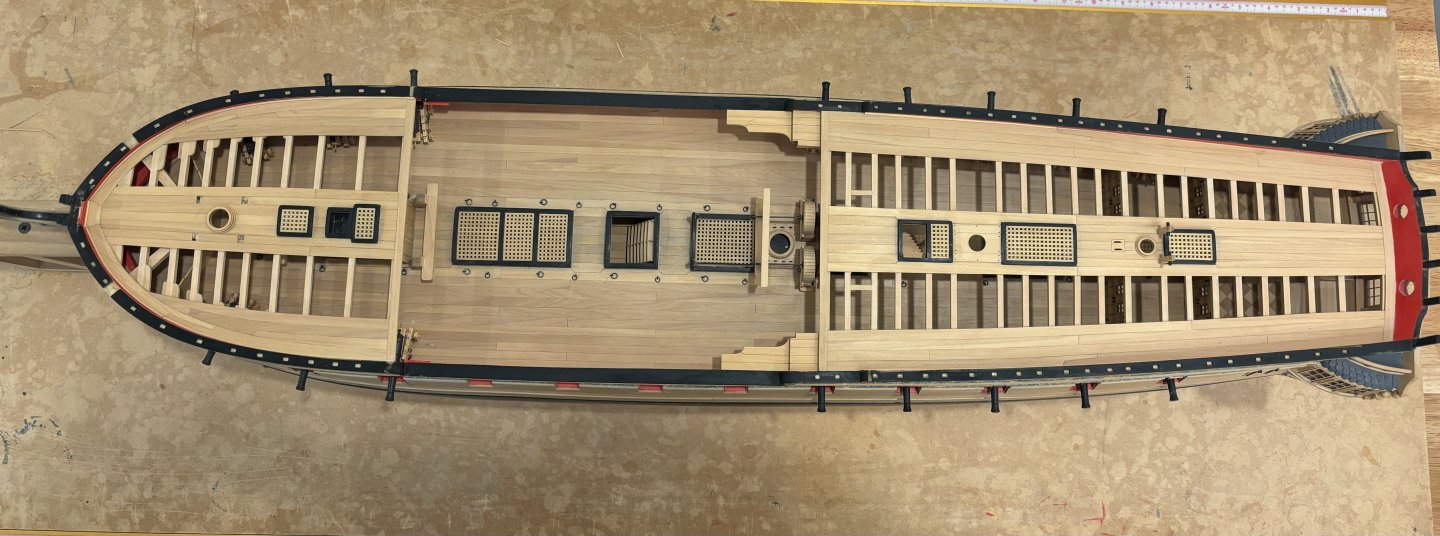
Center planking on both QD and FC completed ( did not put the notches around the scuttles on the QD - prefer the look ) and I started the gangways, I want to finish most of the inboard details before I begin the railings to avoid damaging them.


- 399 replies
-
- 9
-
-
-
- winchelsea
- Syren Ship Model Company
- (and 1 more)
-
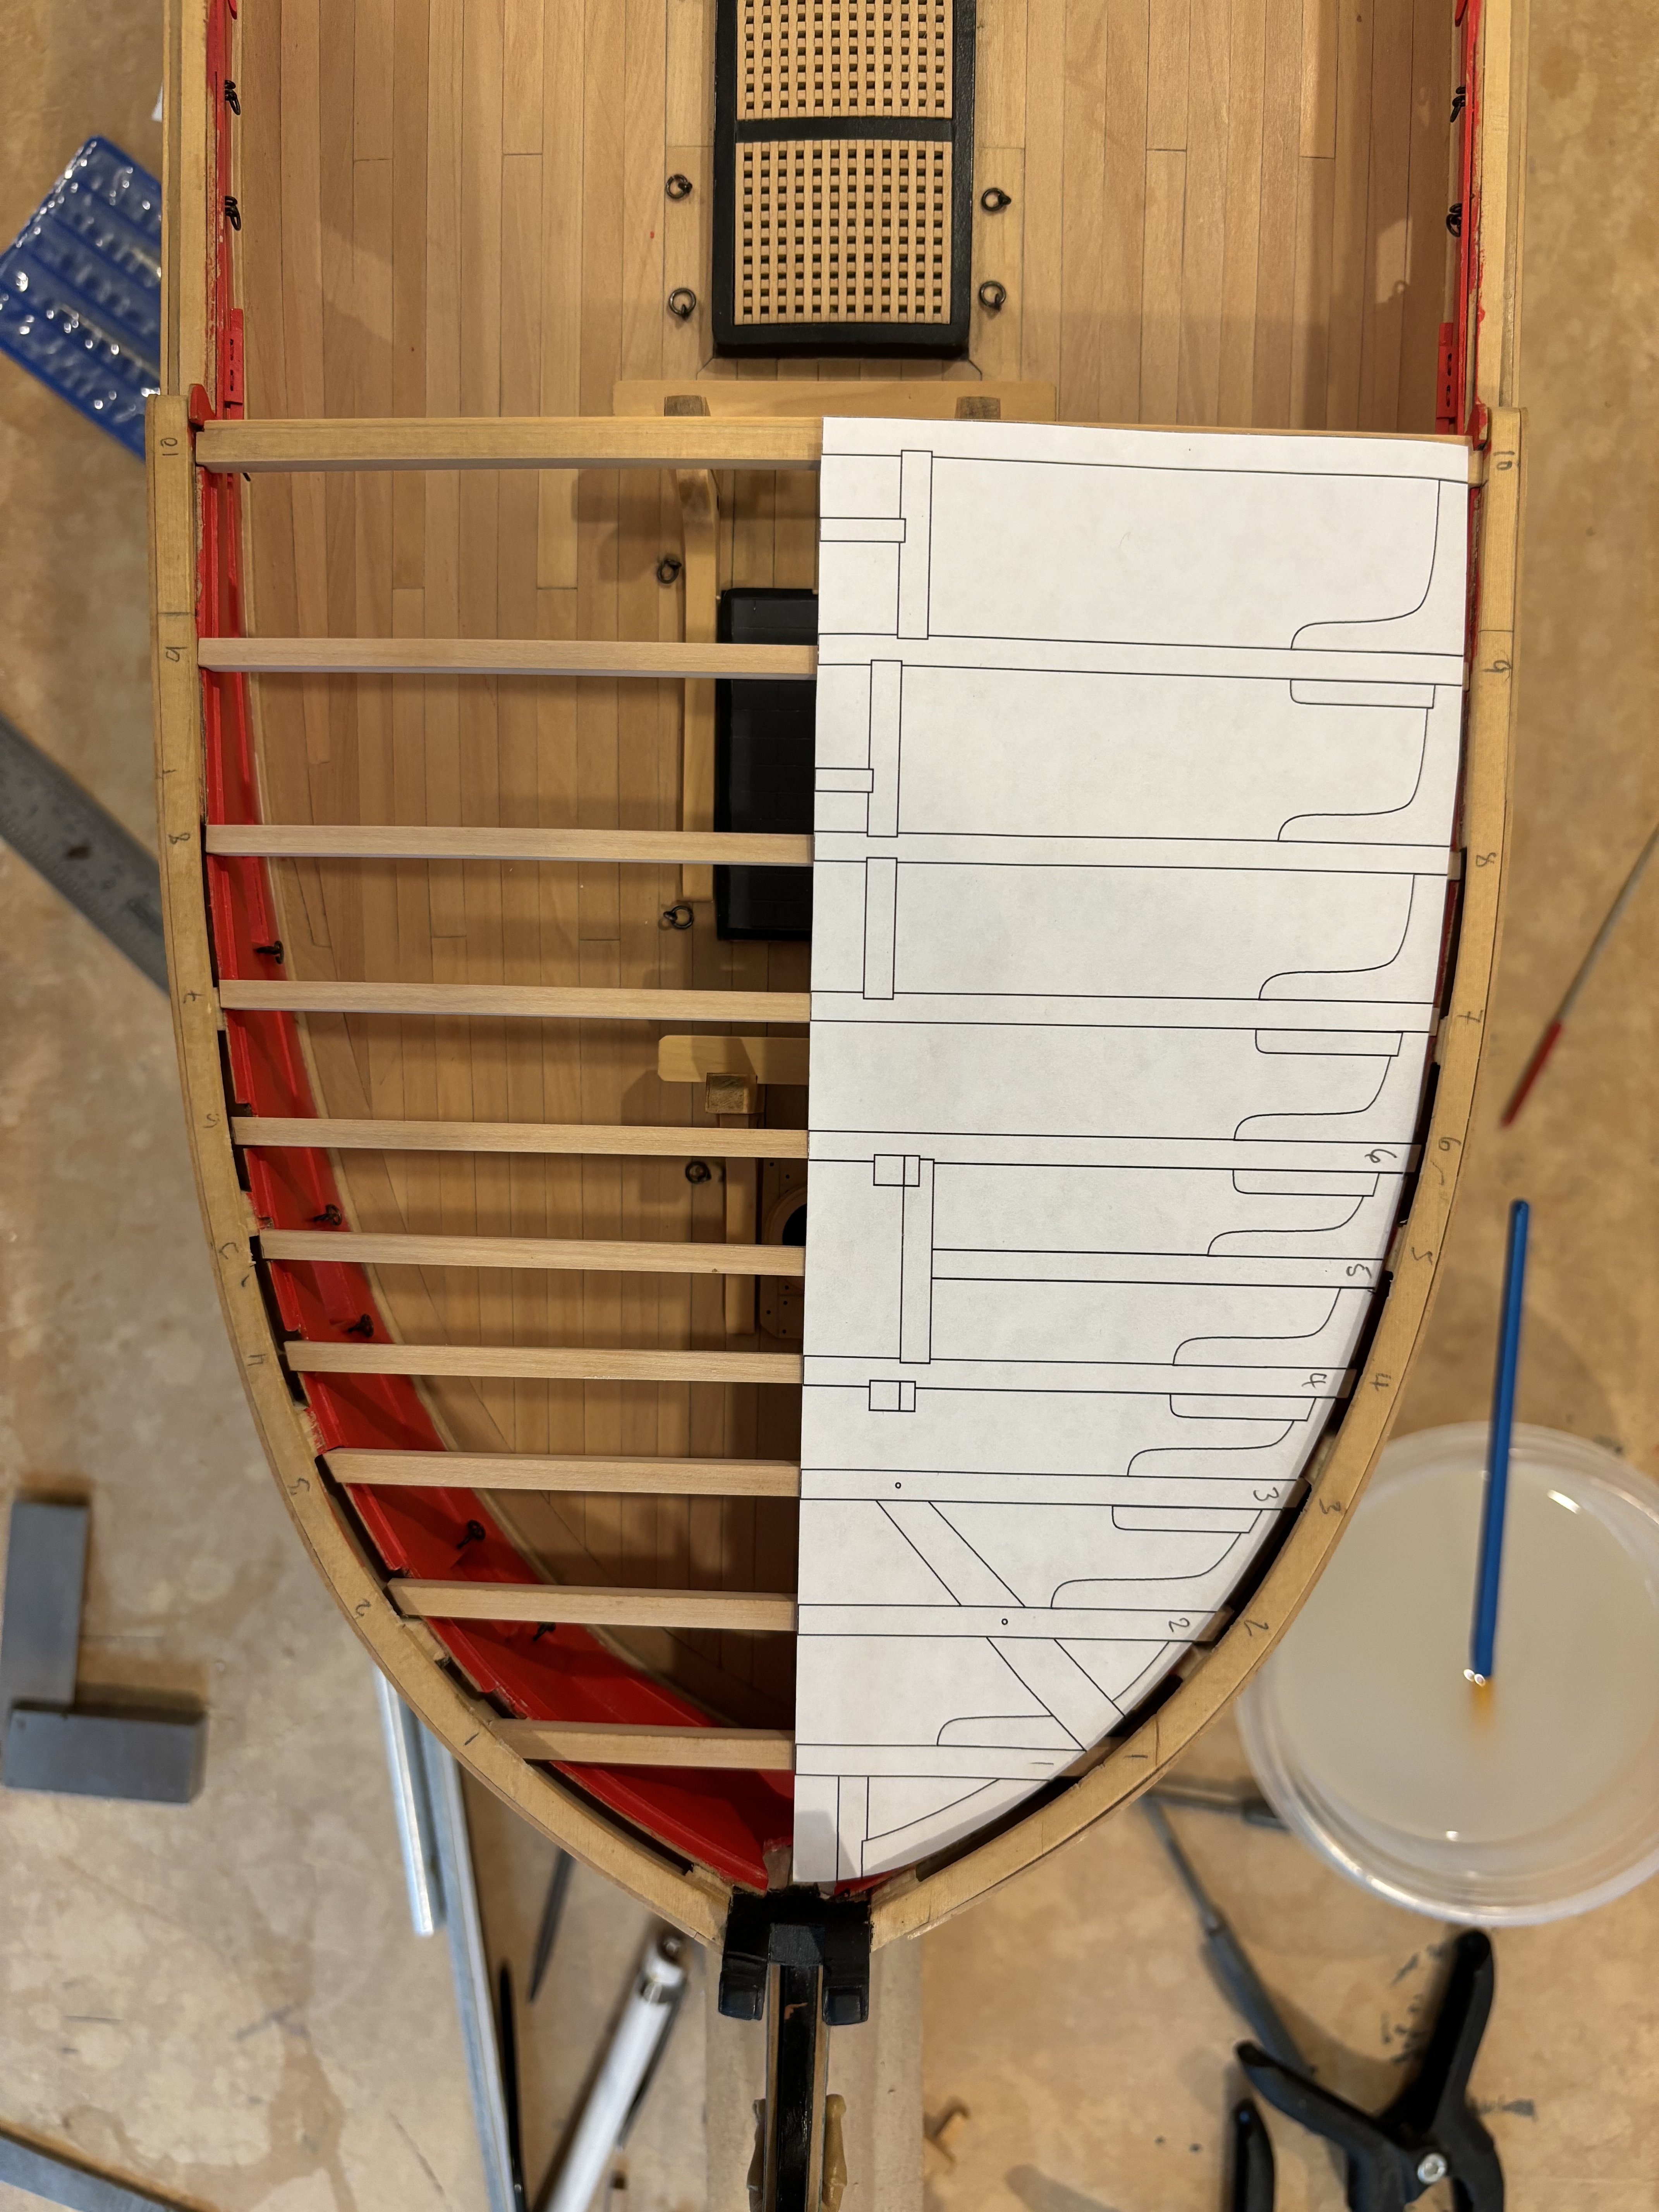
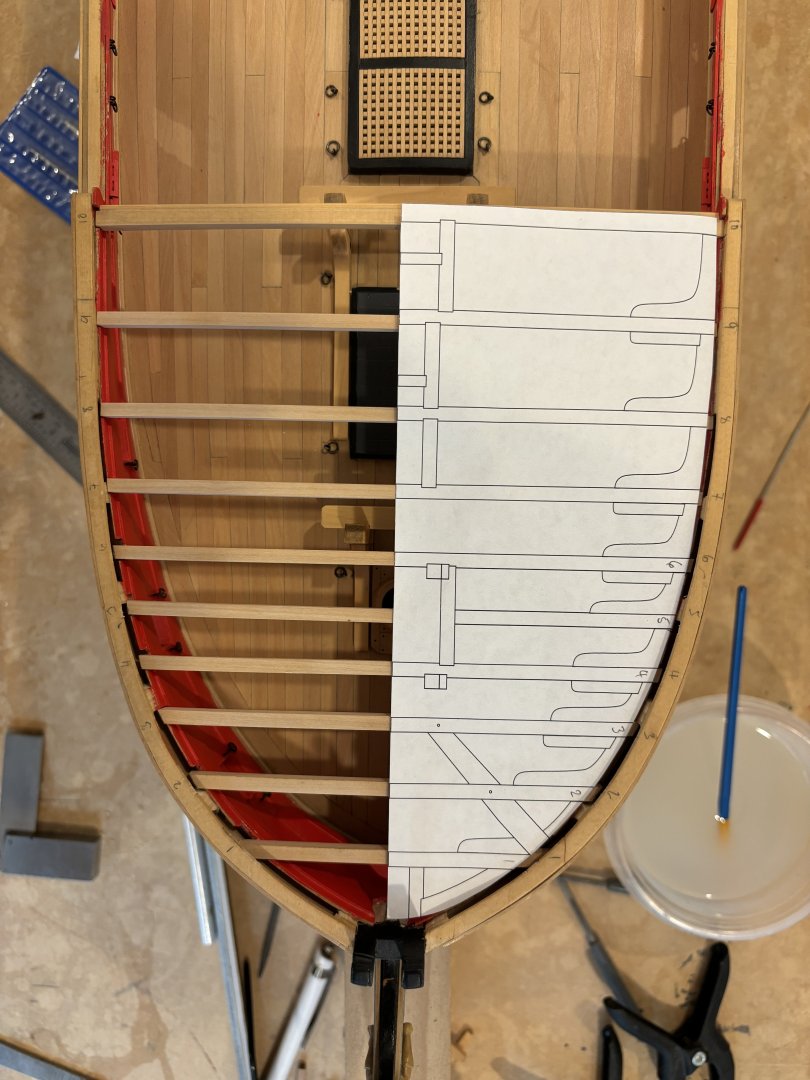
Print out the stern frame plans and use as a template to get correct athwartships orientation, to hold the frames while you adjust, if they are too loose in the slots - use some scotch tape to make them a touch thicker or just a very small dab of white glue will do the trick, spend A LOT of time getting this right as if you don’t your quarter galleries will be wrong and stern light spacing which throws off the entire build and look! Print out the side plans and use them for correct orientation fore/aft of the framing. Again - spend weeks not hours getting this right. Im sure Chuck and others will offer plenty of advice if you ask for it. seems it’s just you and me making regular updates on our Winnies lately! ben
-
Margin planks on FC done, catails installed and work on Comings and gratings underway in preparation for planking down the middle of both decks.

- 399 replies
-
- 11
-
-
- winchelsea
- Syren Ship Model Company
- (and 1 more)
-
Congrats on getting through one of the hardest parts to pull off!
- 840 replies
-
- 2
-
-
- winchelsea
- Syren Ship Model Company
- (and 1 more)
-
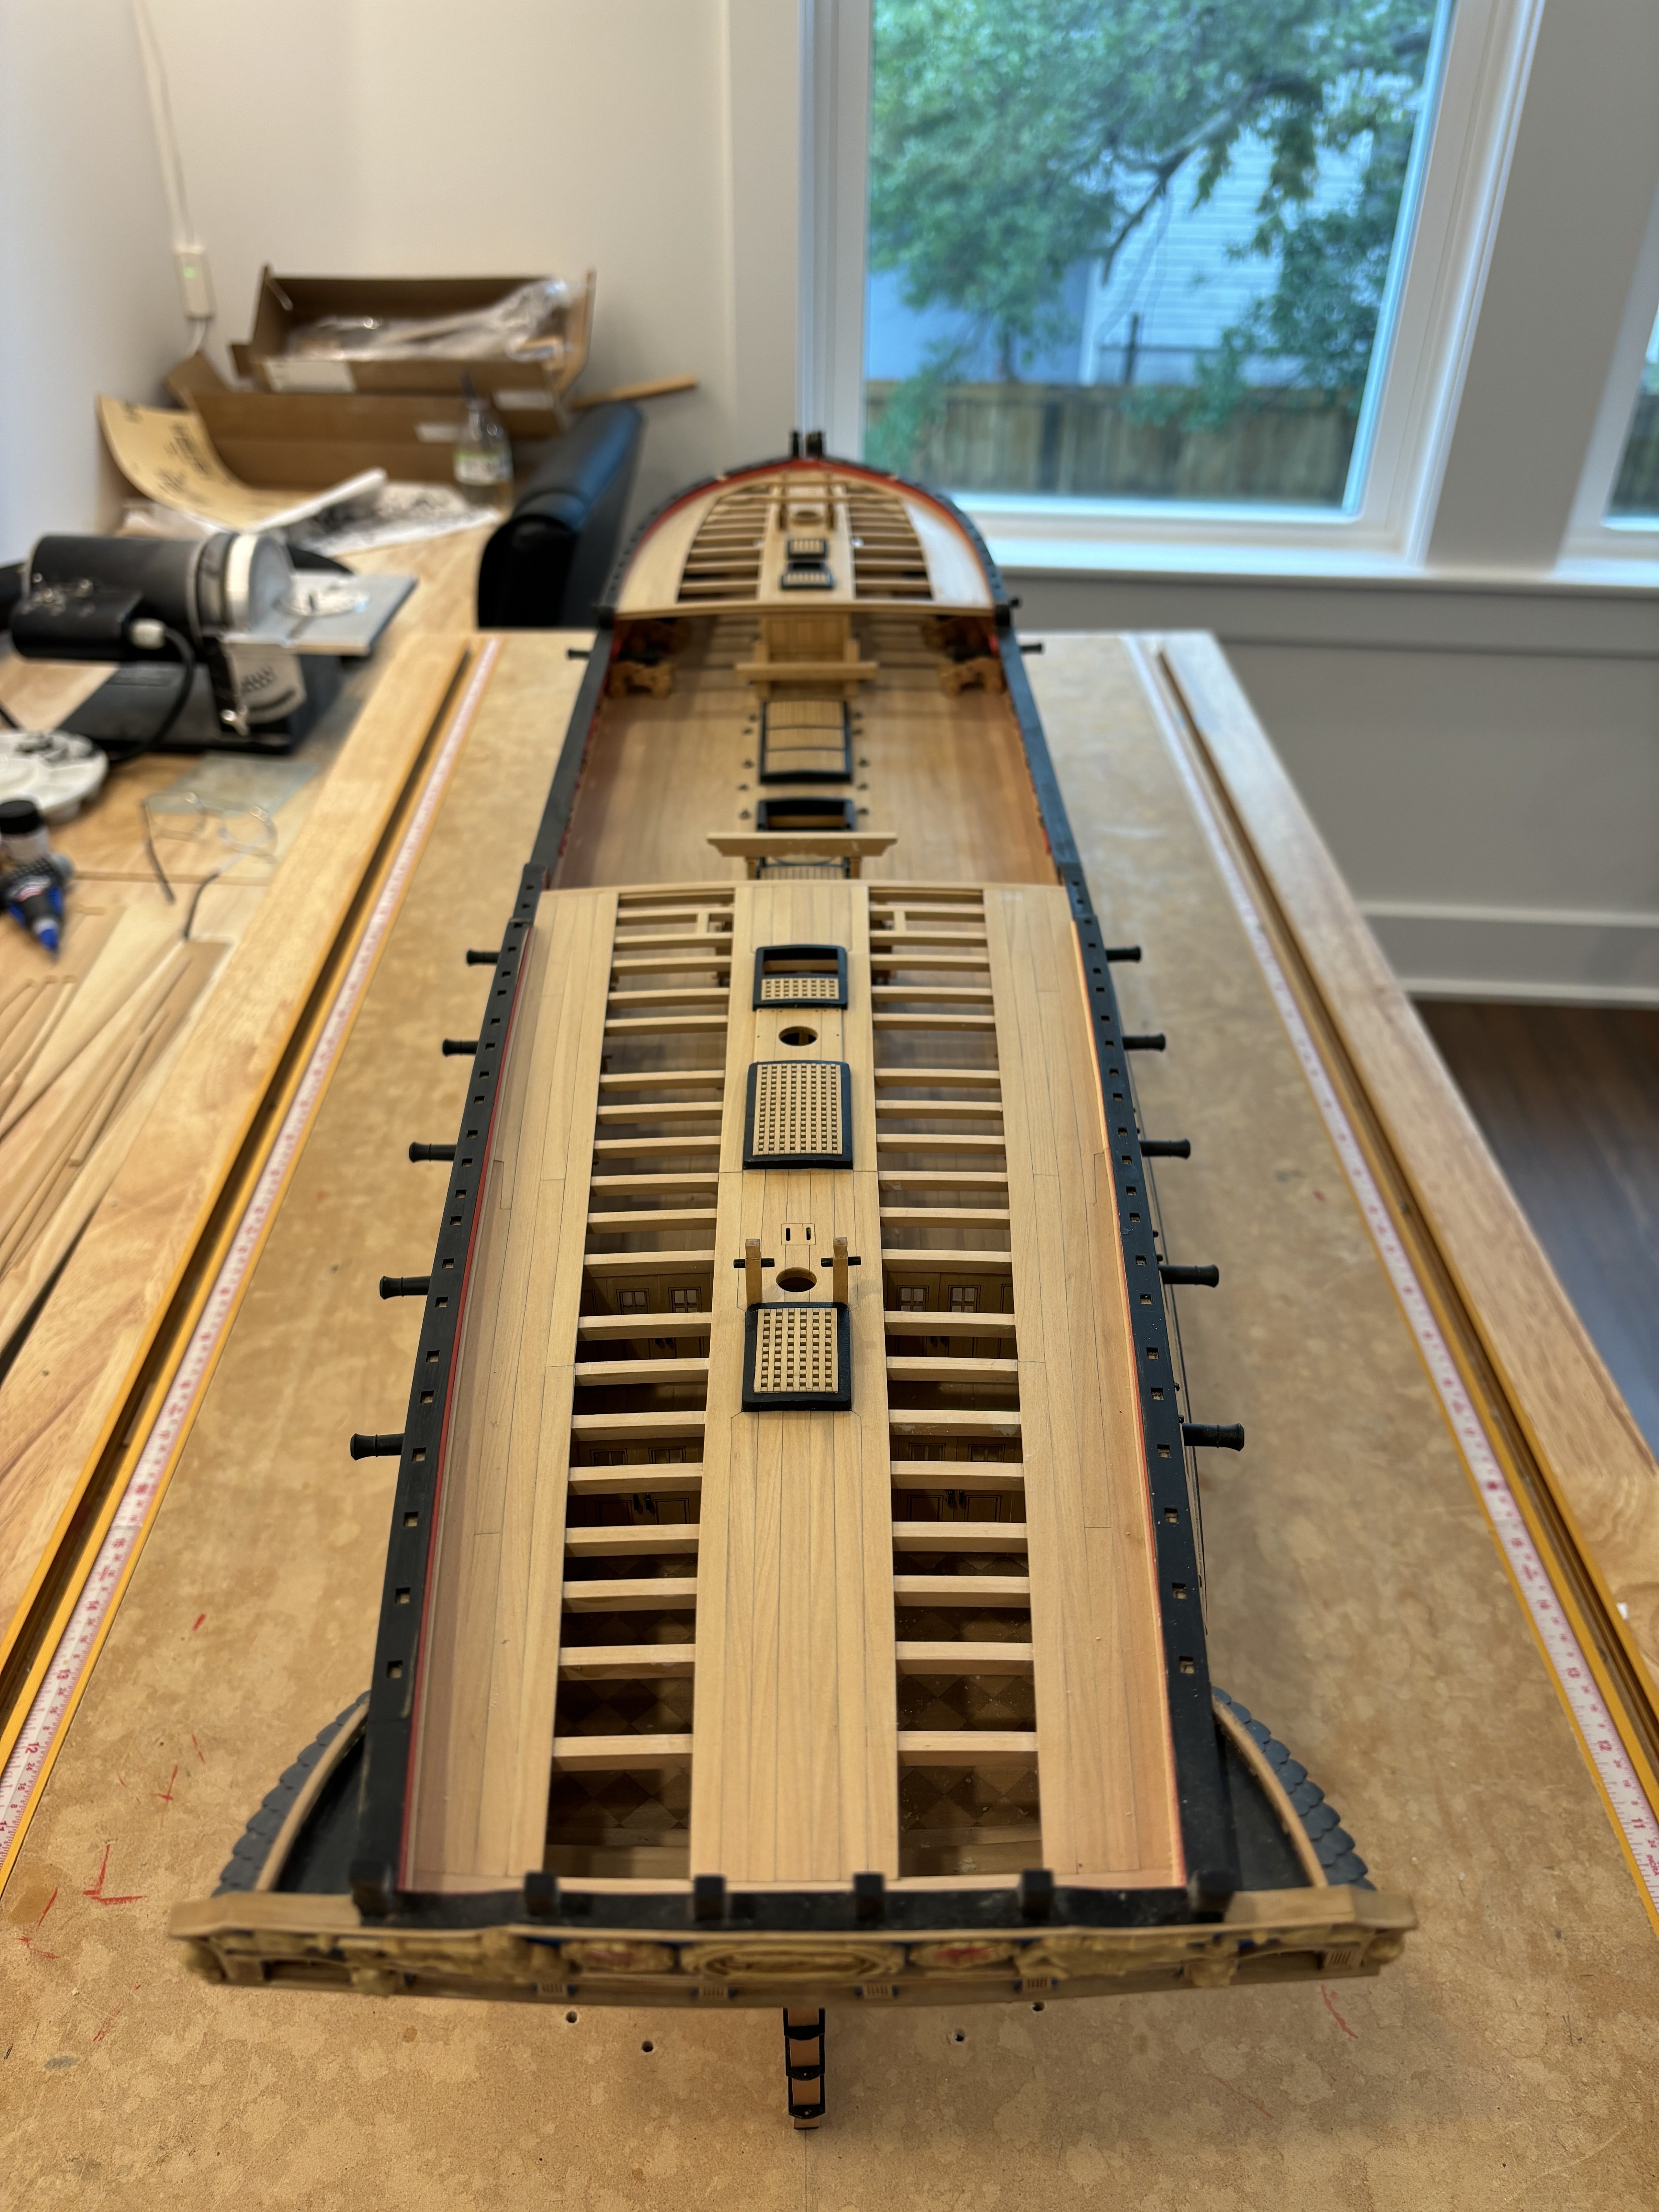
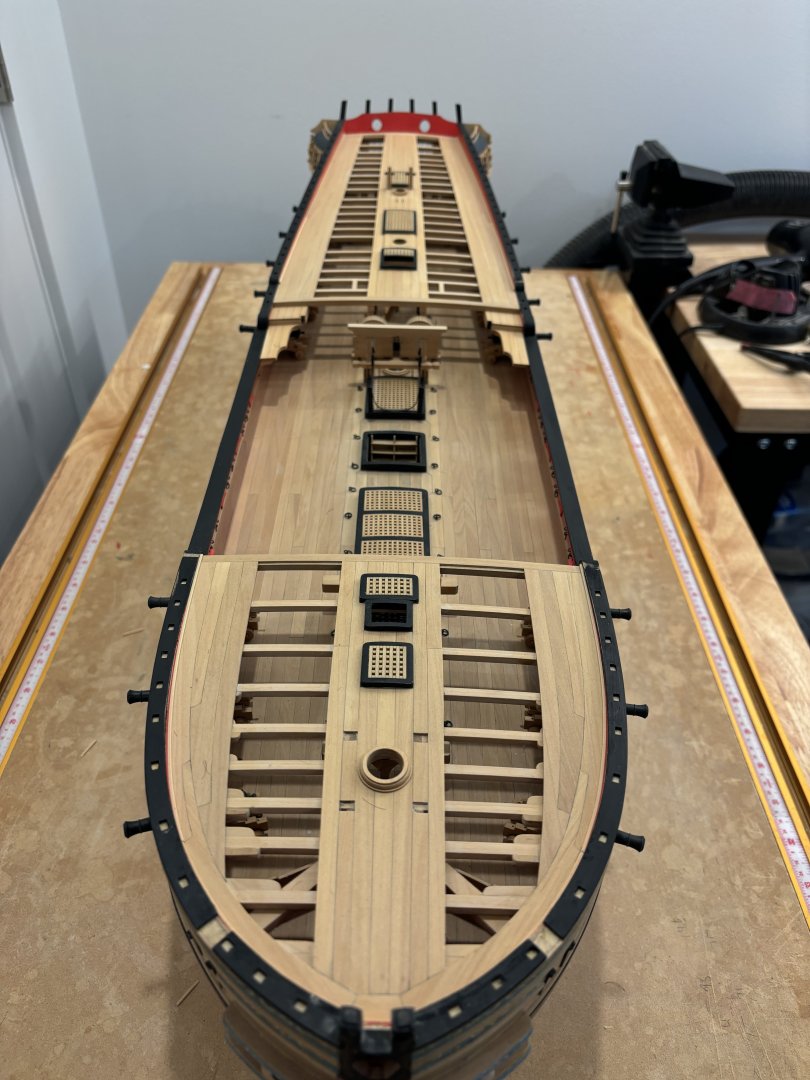
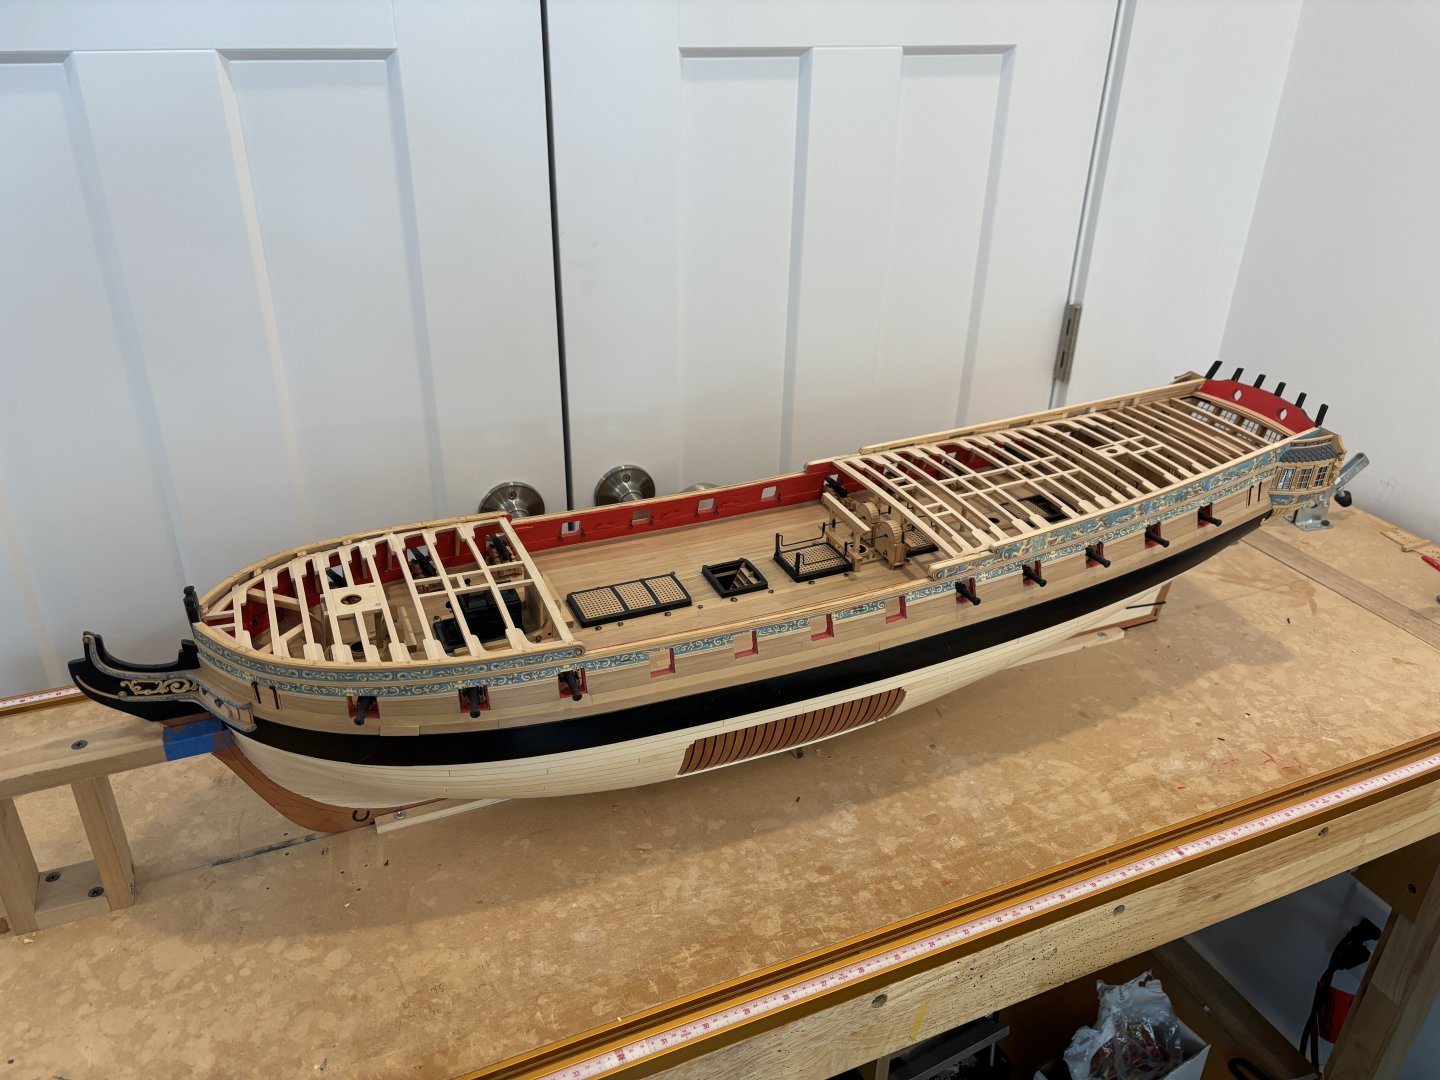
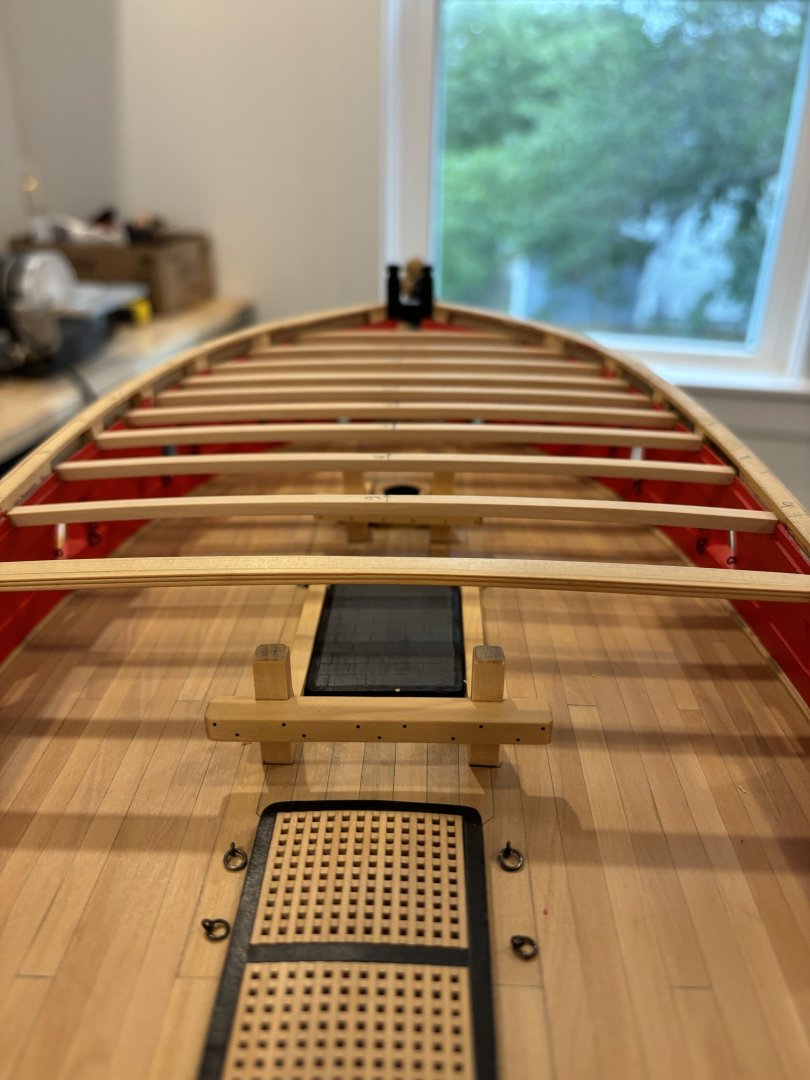
Chapter 9 is well under way with the QD and FC side plates to cover the last of the framing done, Caprails installed and the QD planking half completed. There will be lots of paint touchups that will need to be done and small gaps filled when the planking is completed.


- 399 replies
-
- 15
-
-
-
- winchelsea
- Syren Ship Model Company
- (and 1 more)
-
I agree with Glenn, you are not removing char, you are fairing the hull shape! take your time with this and do not use power tools as it’s far too easy to take too much off. Use a flexible battern regularly to check for smooth transitions and fairness.
-
Looking great Mike, and good to know that Chucks height/depth gauge works well.
-
I’ll get back to Pegasus when I have completed Winchelsea, on a roll with her right now!
-
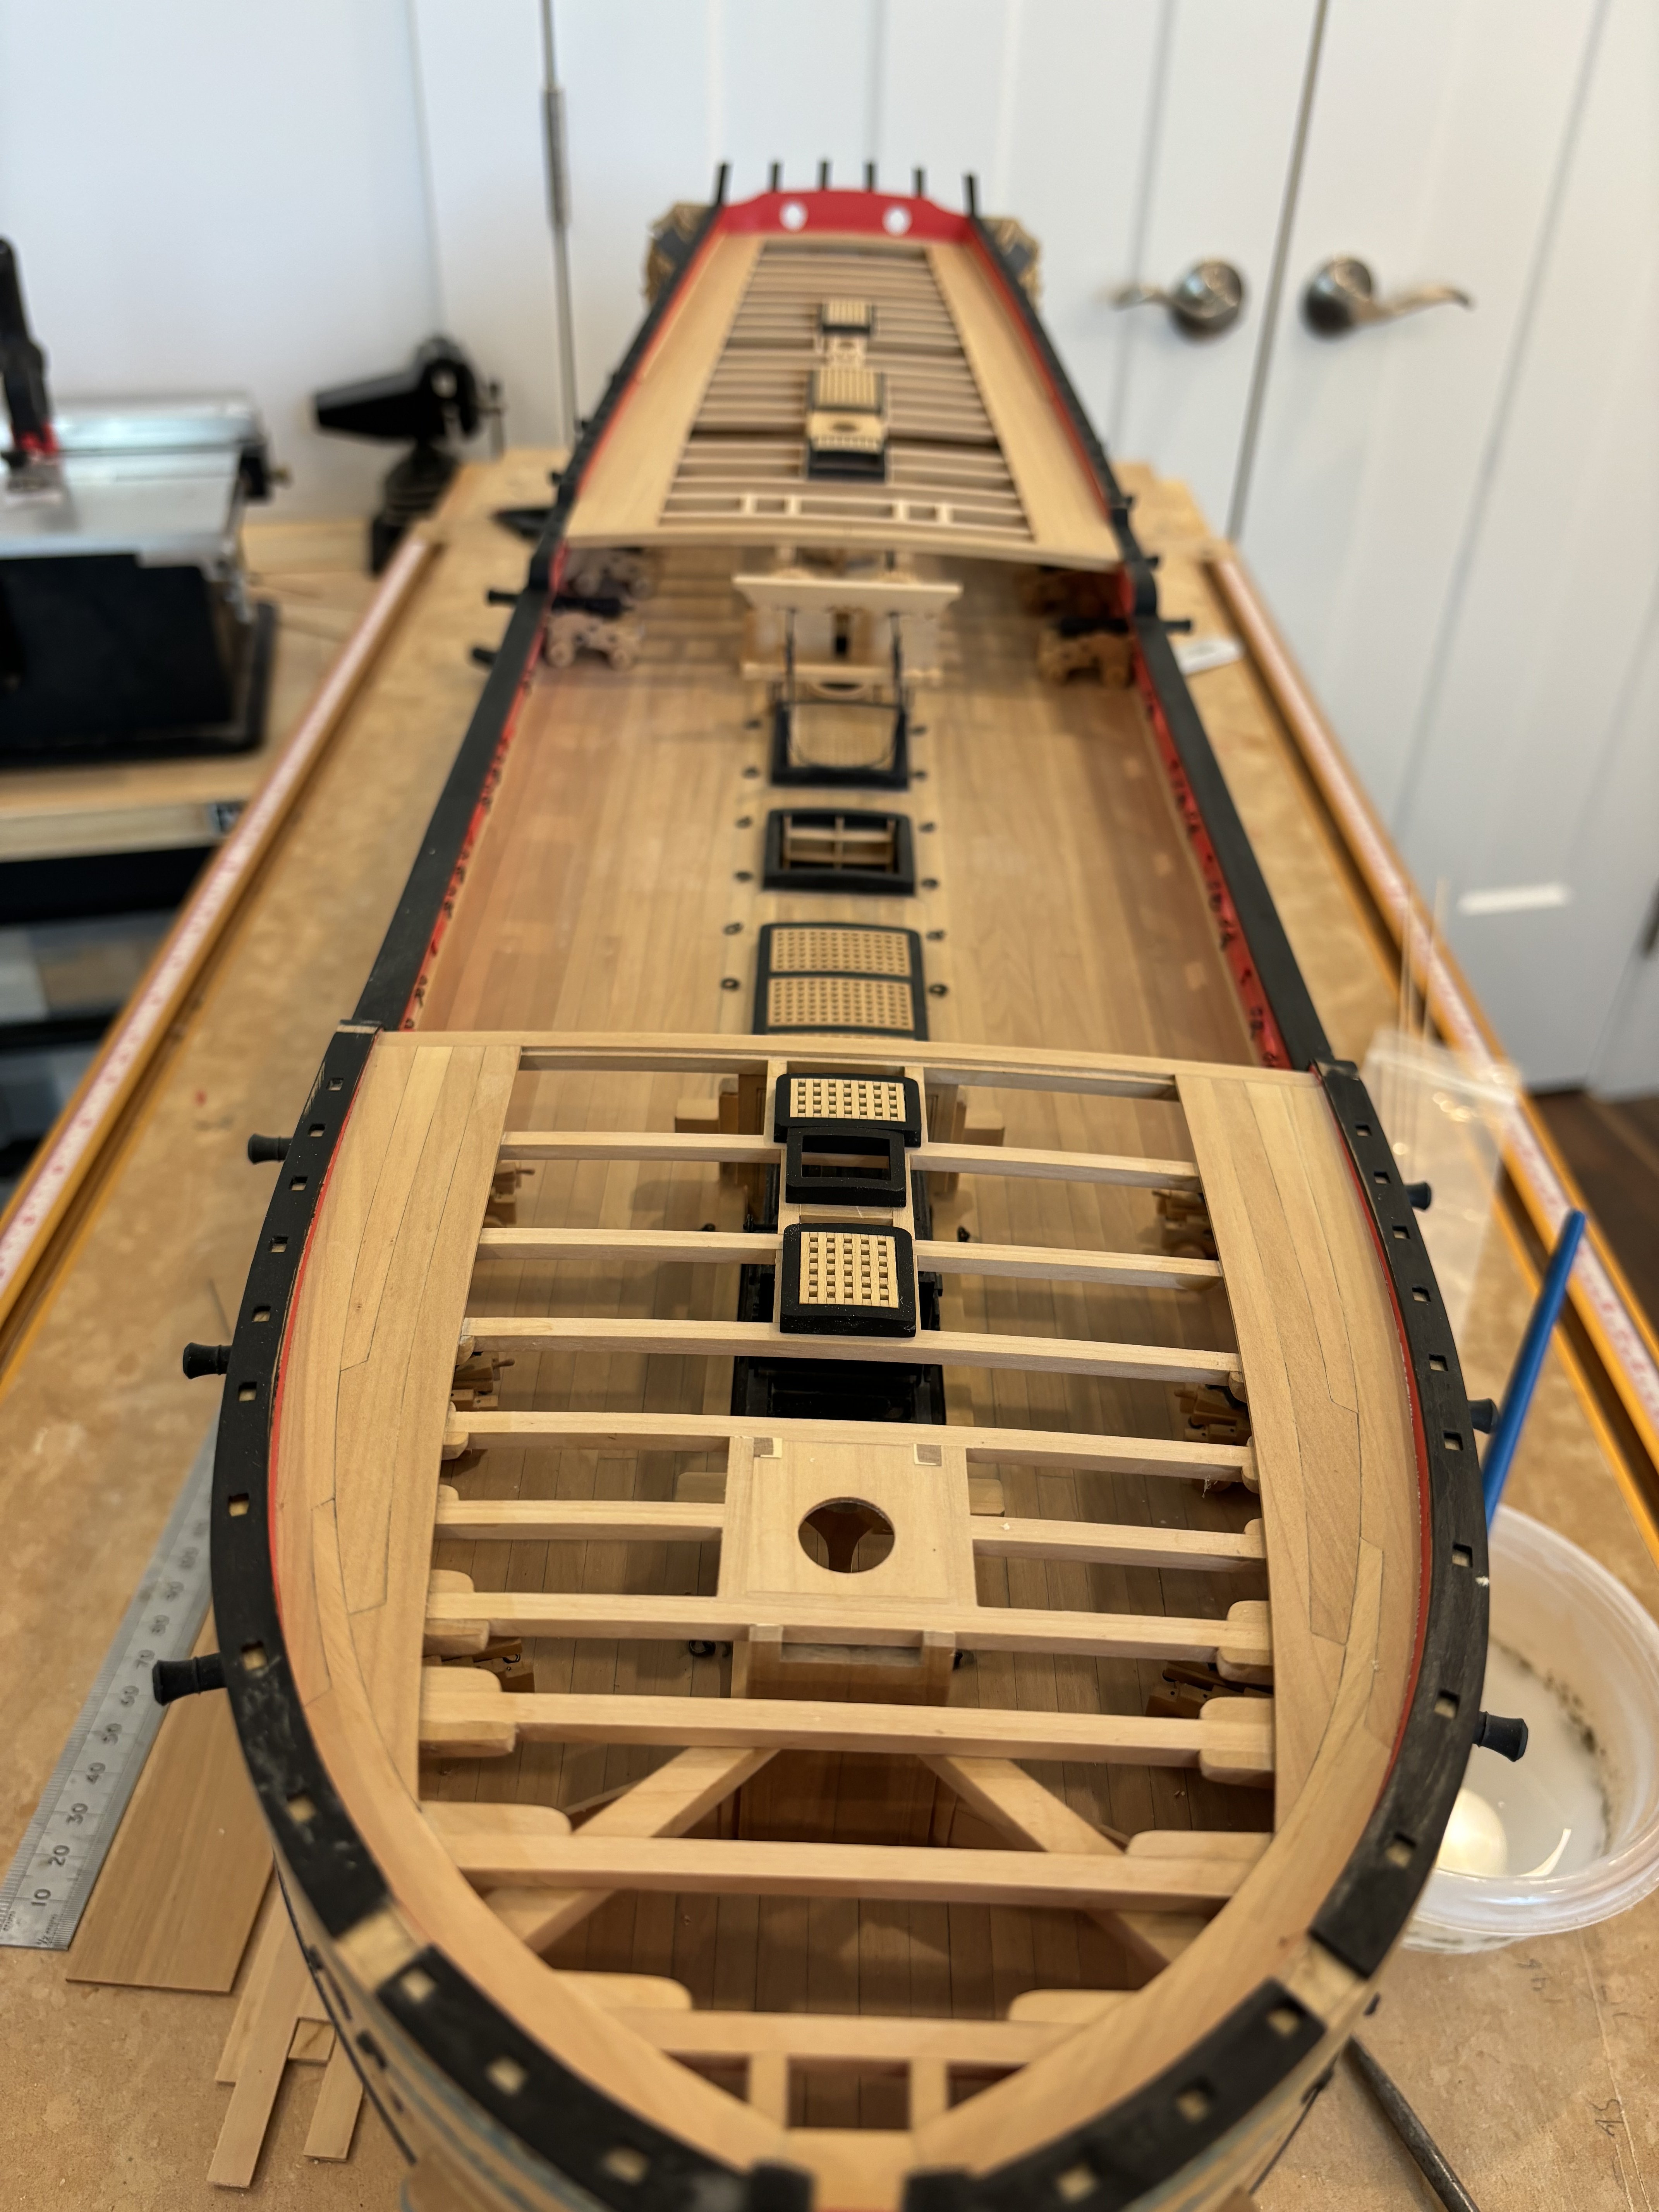
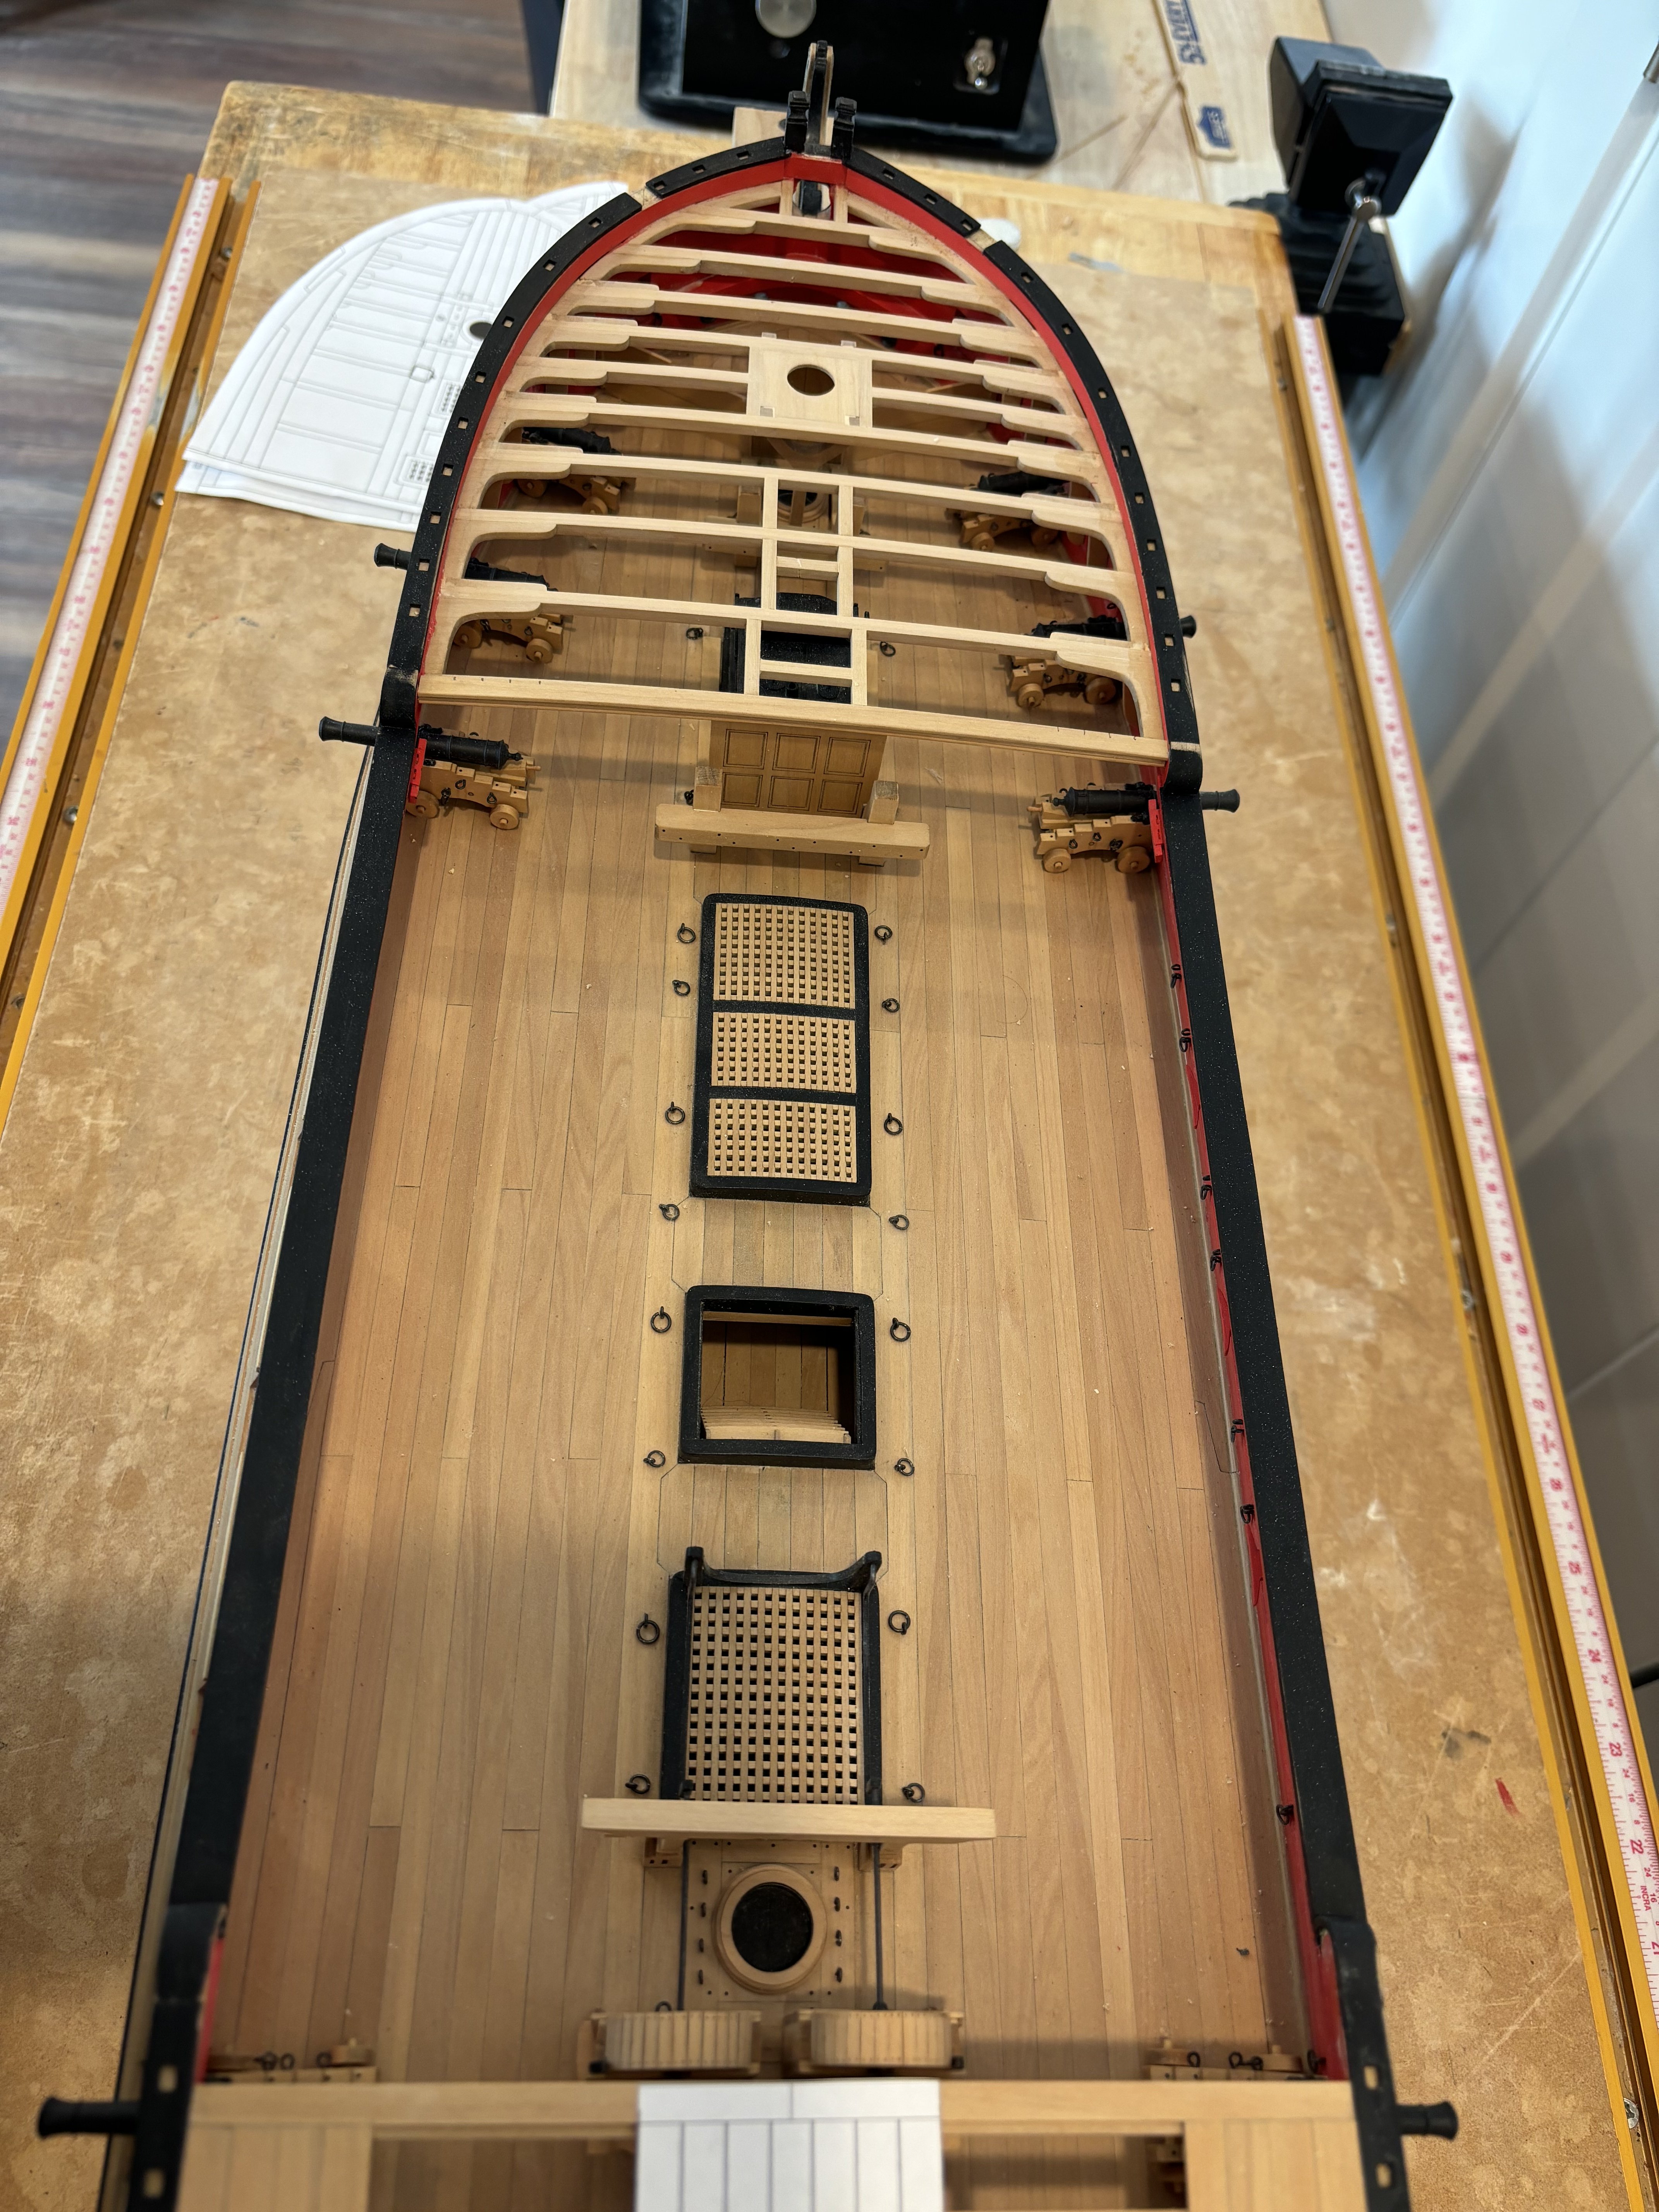
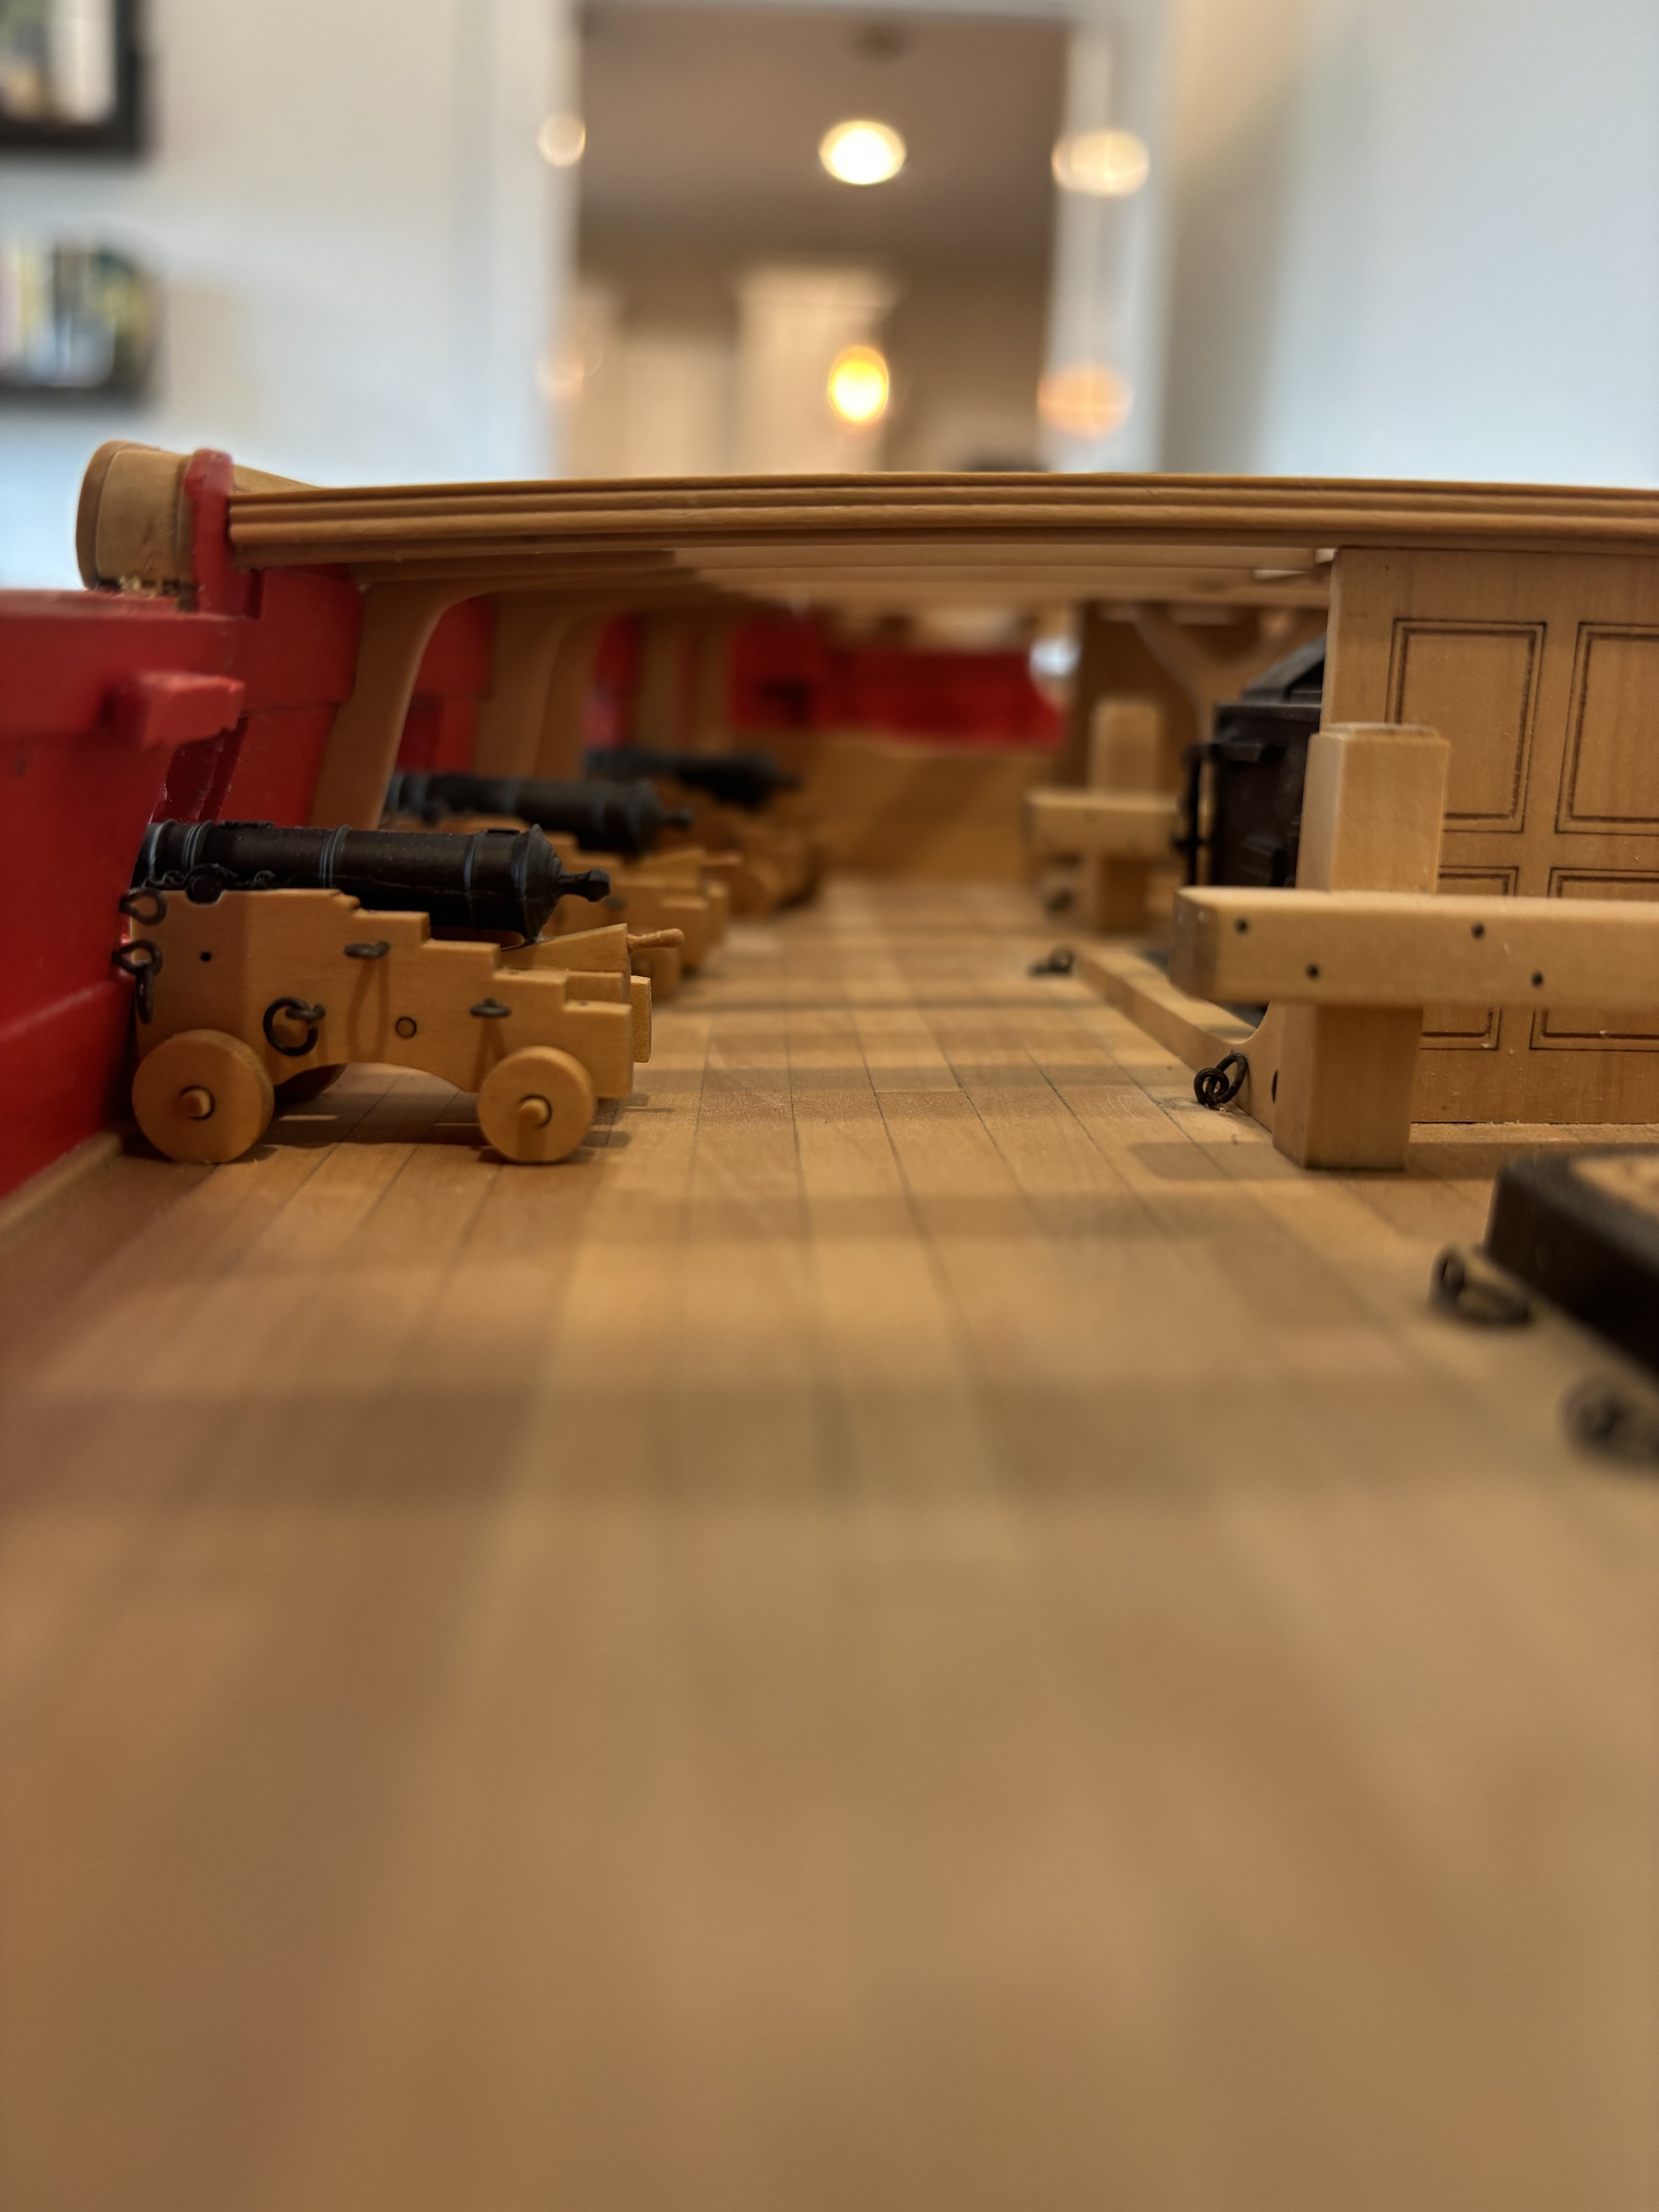
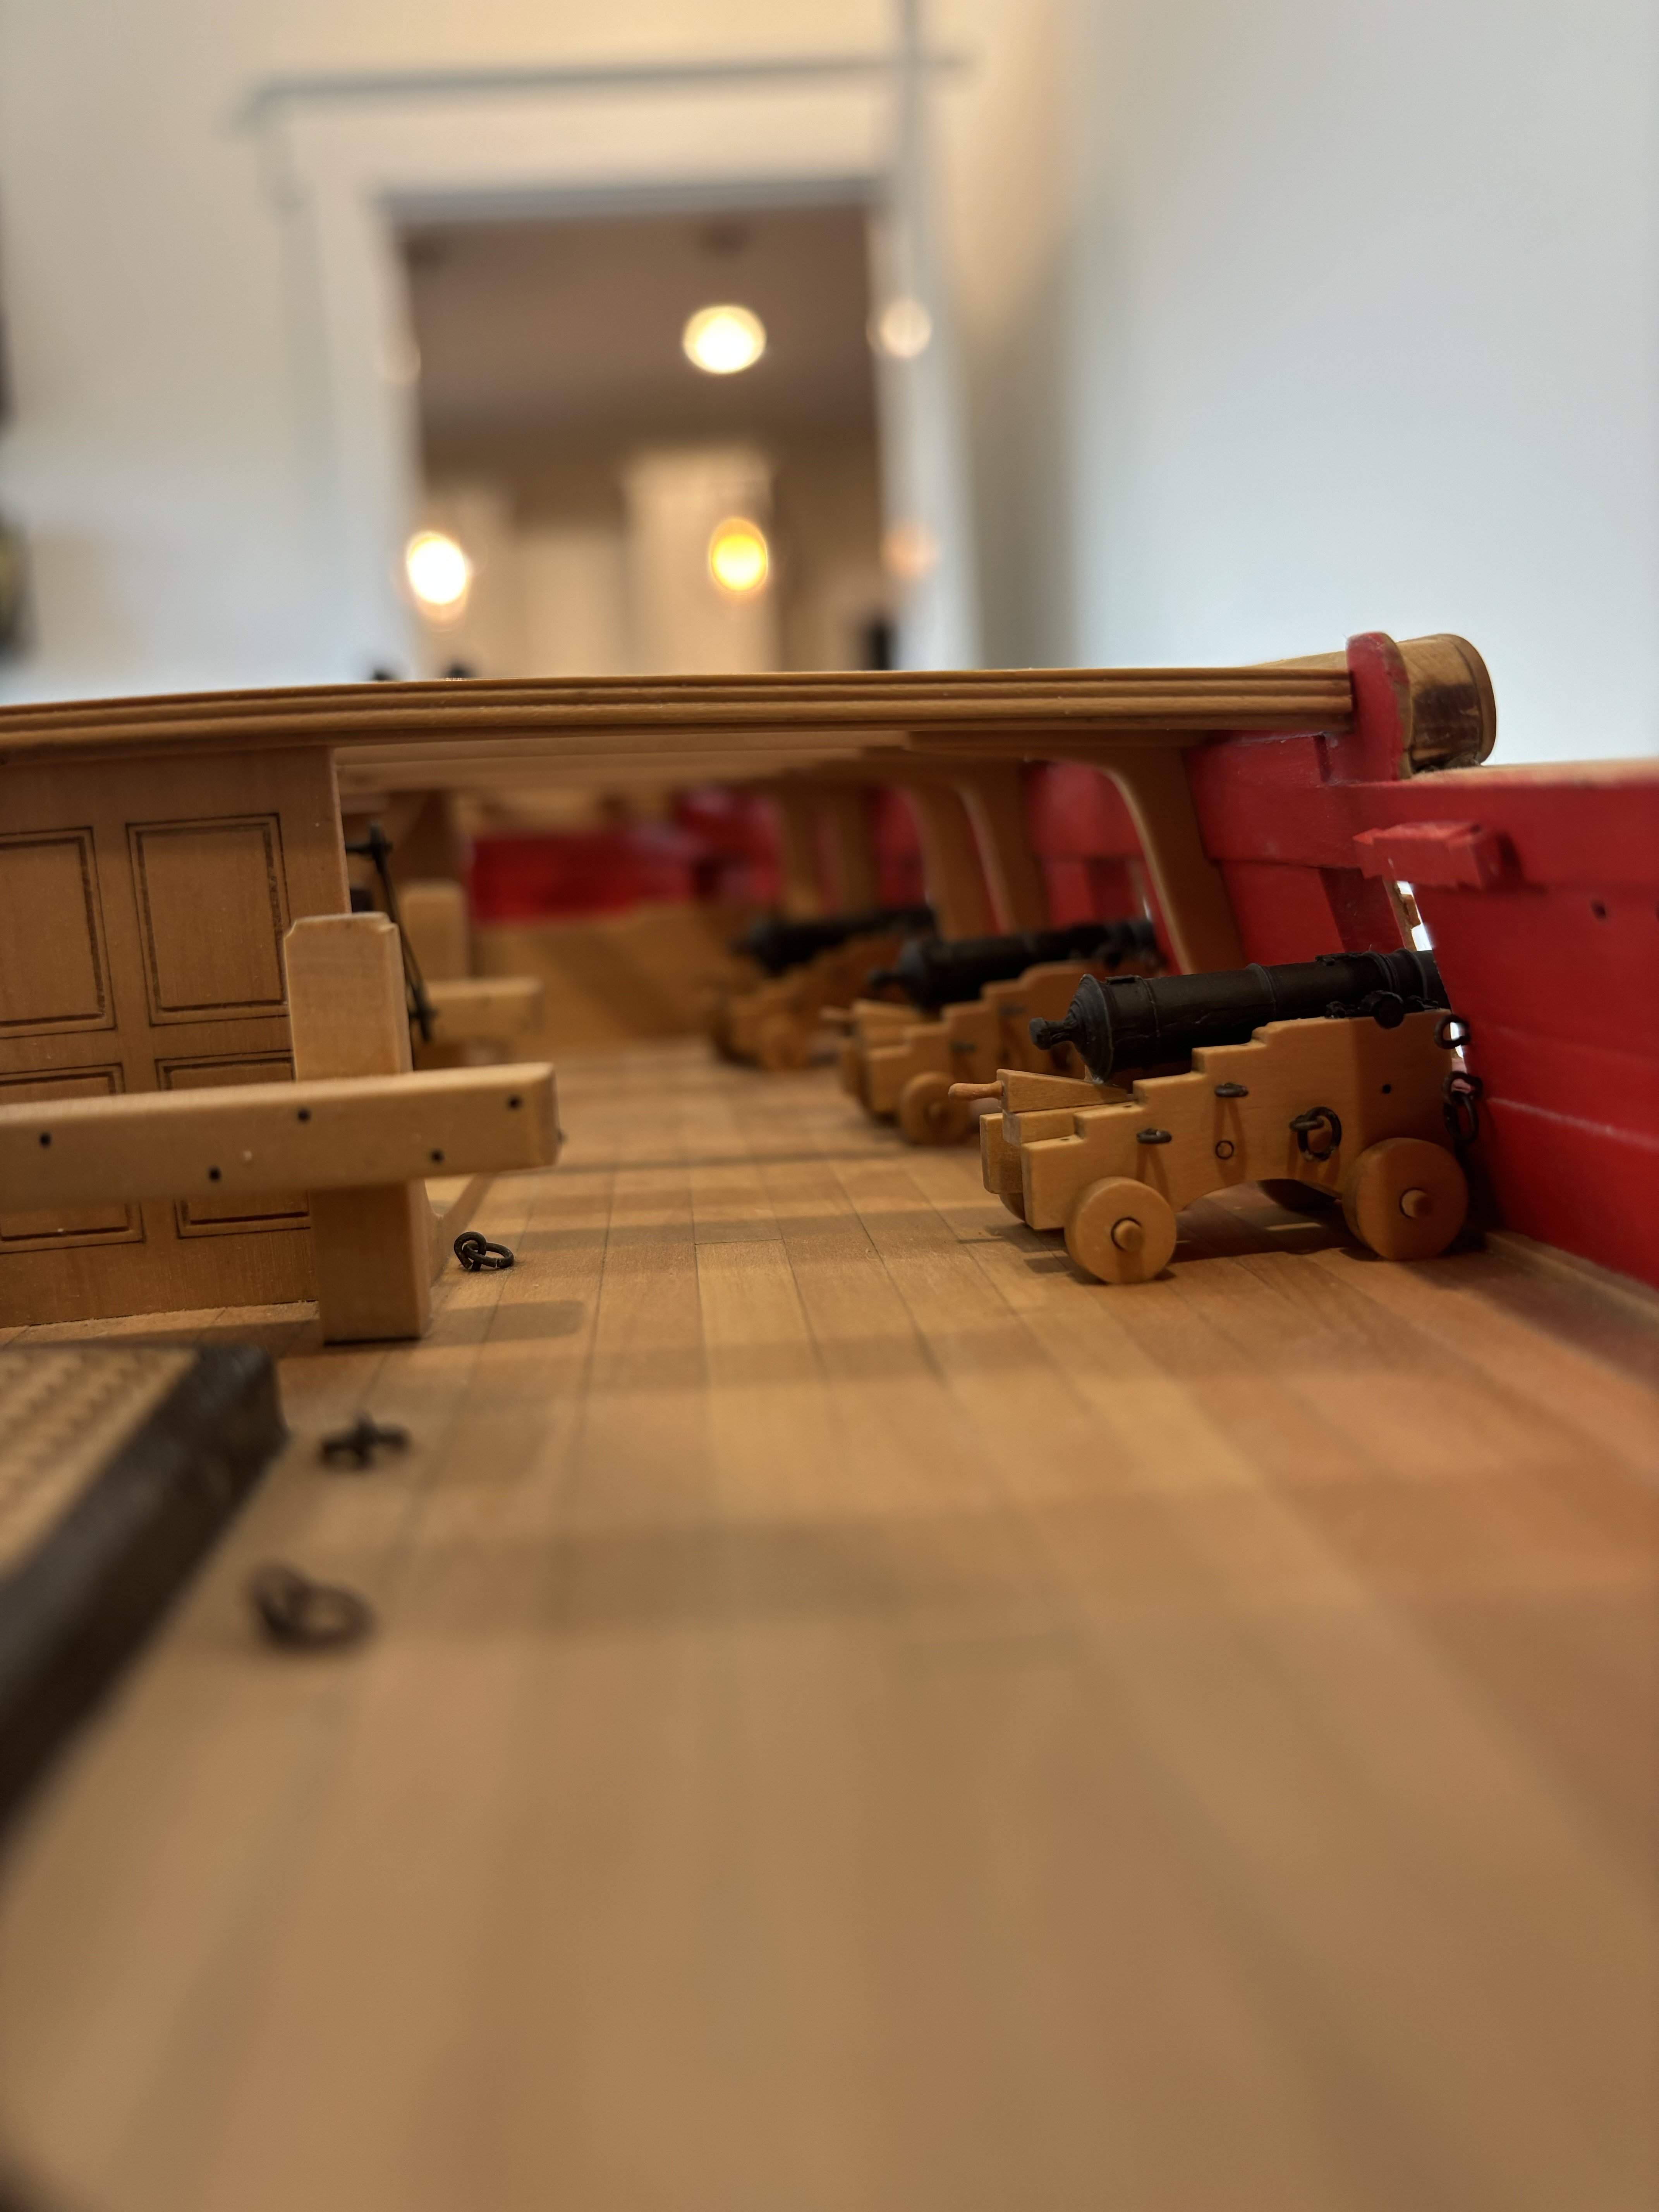
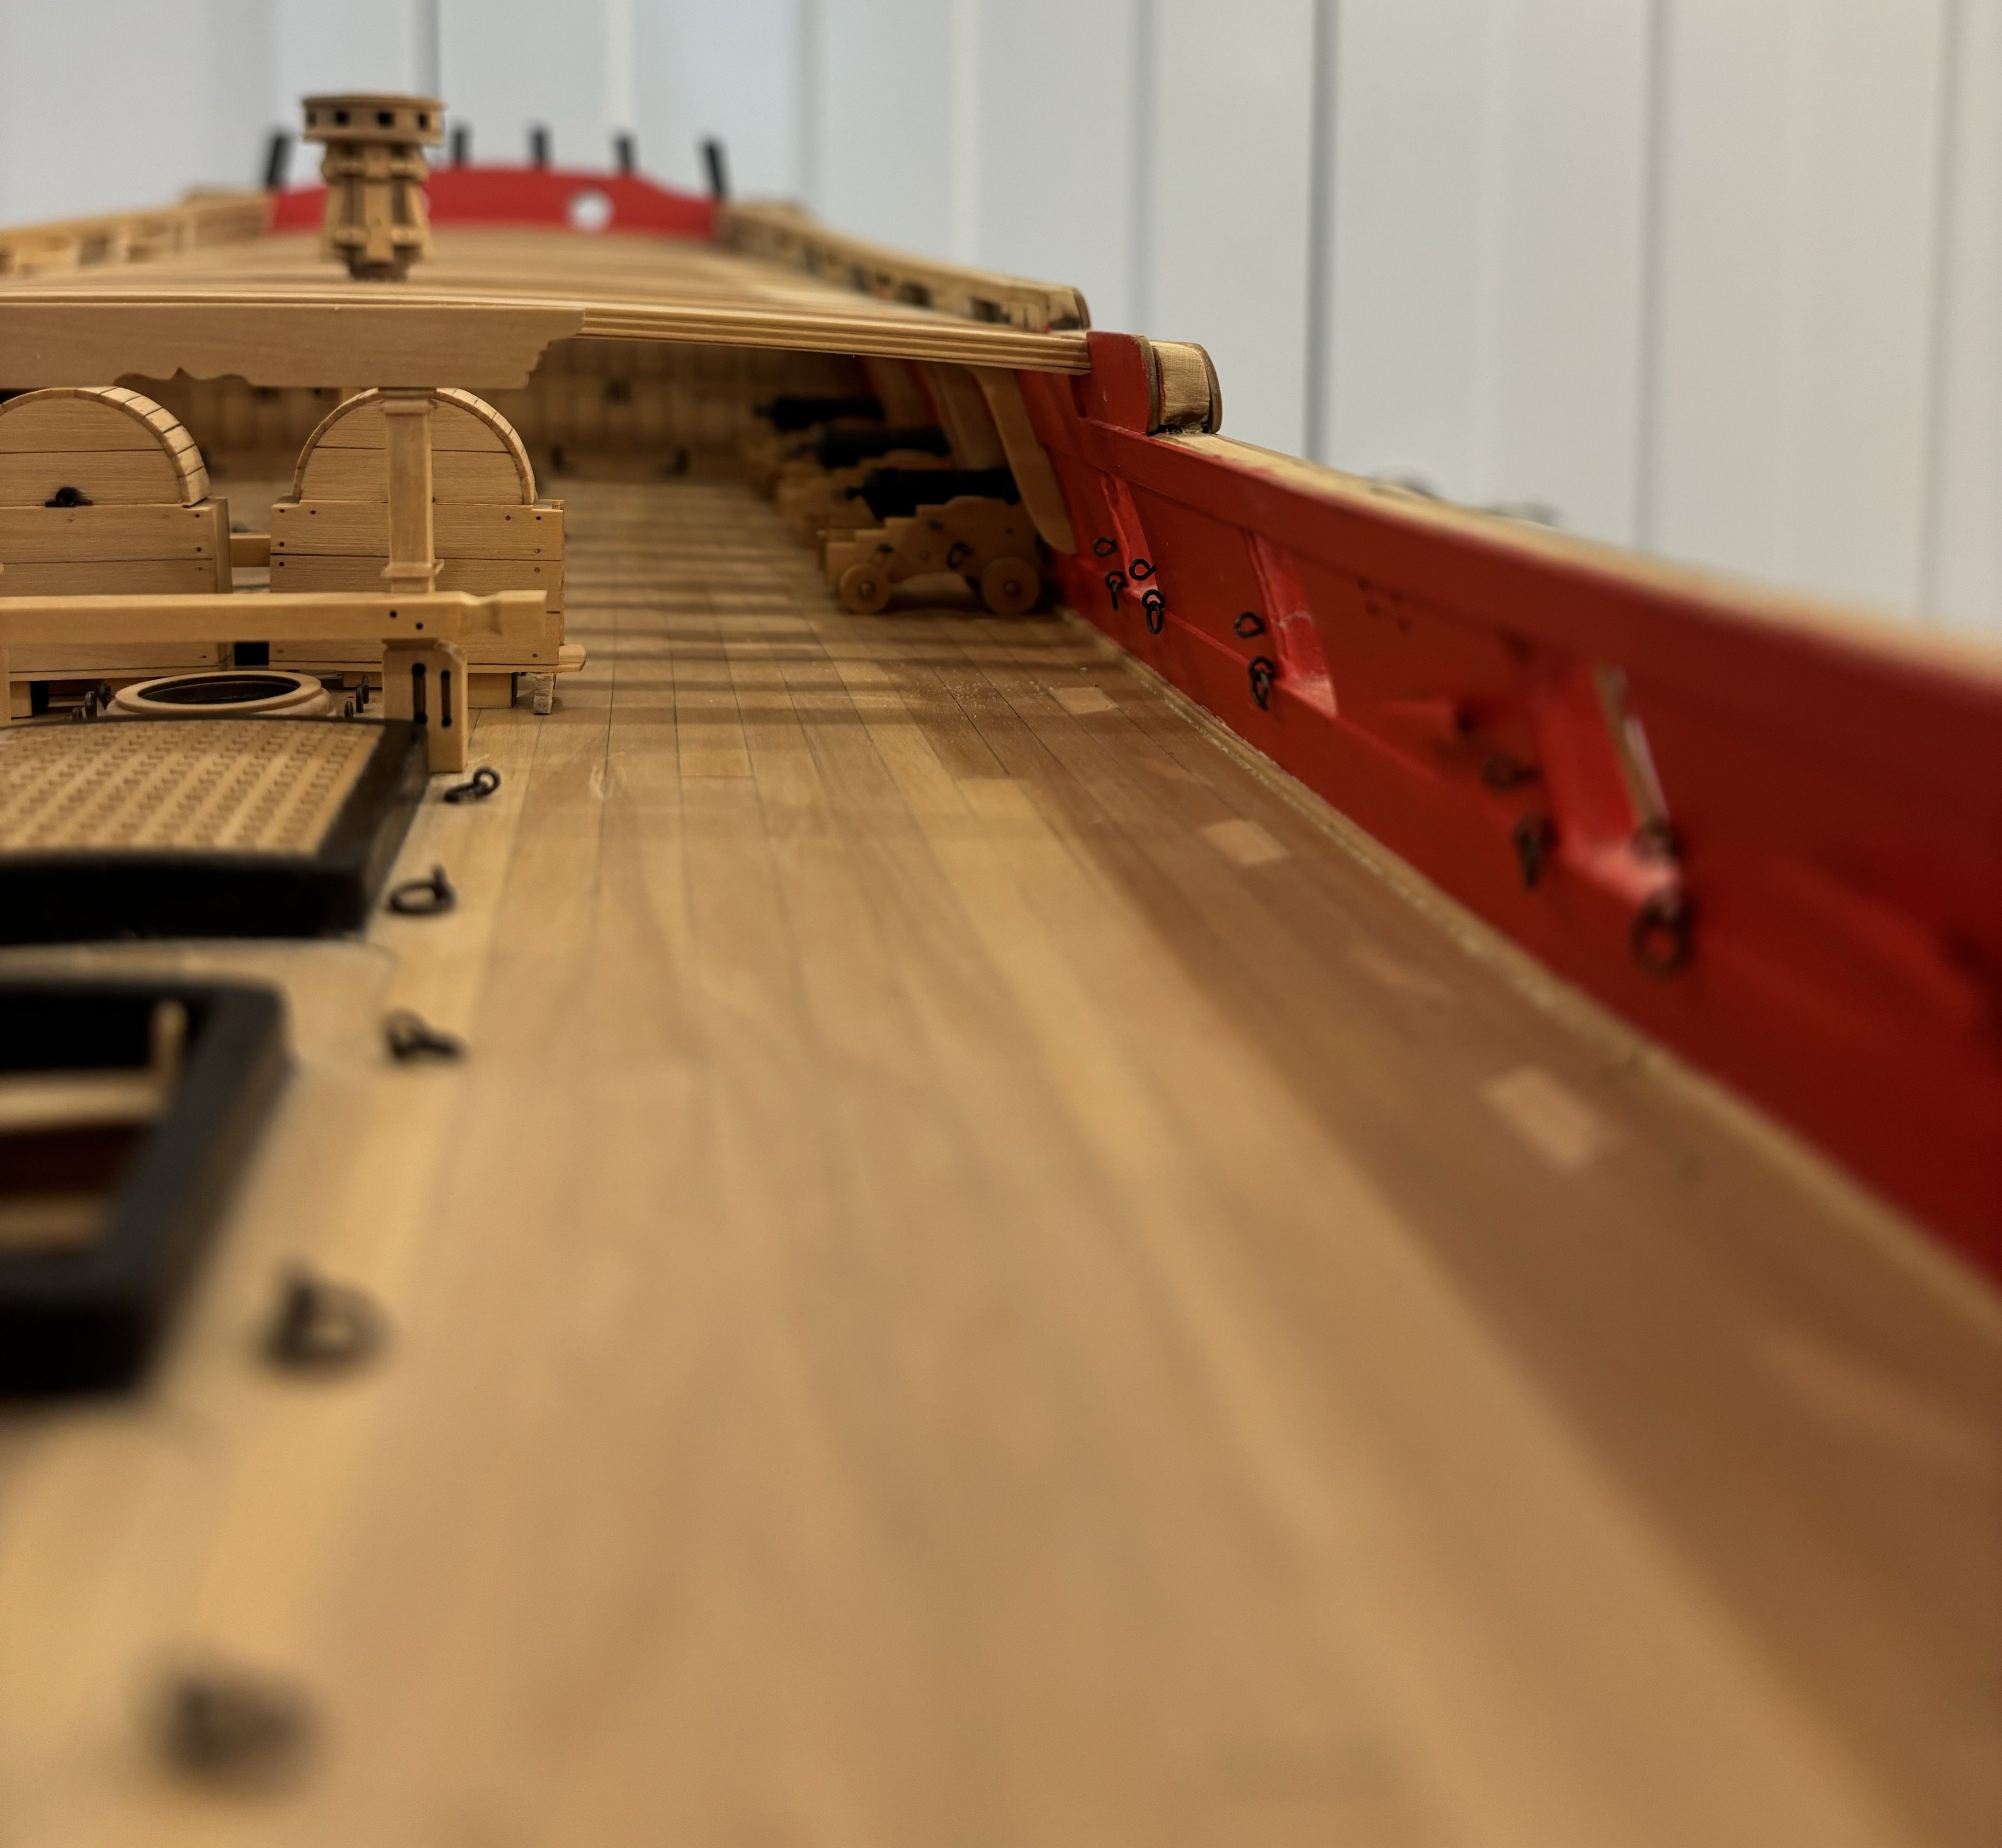
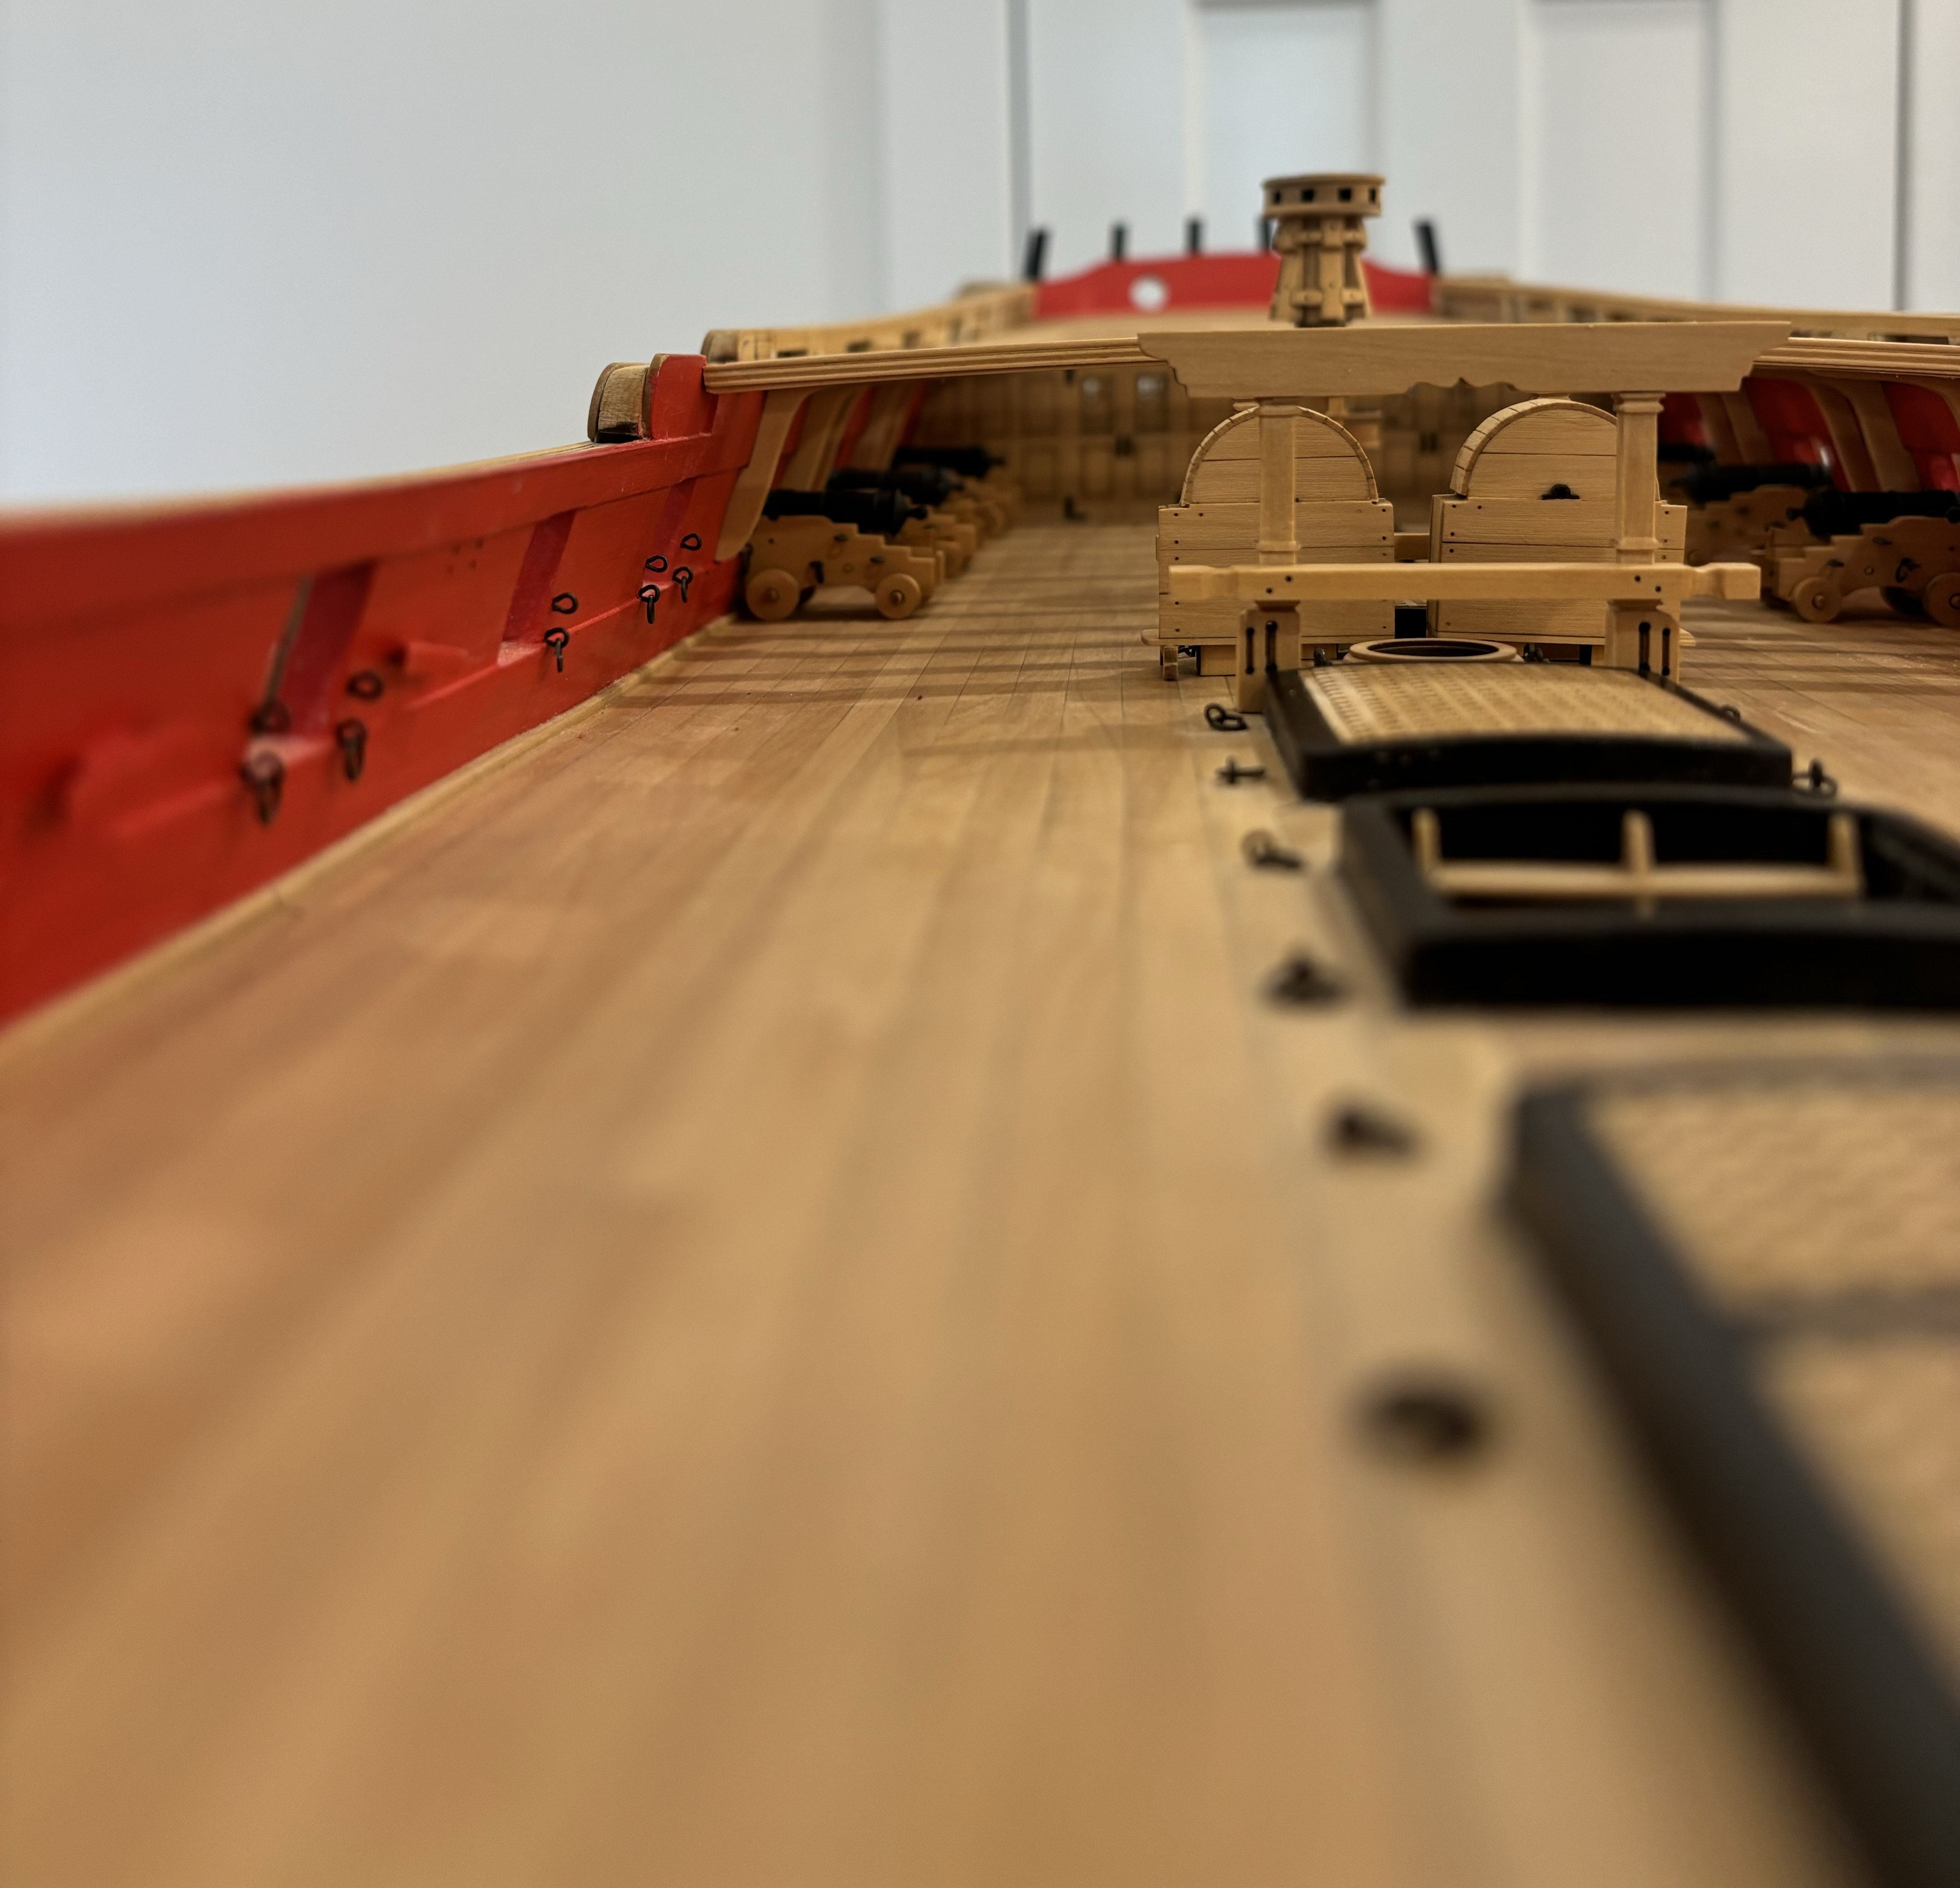
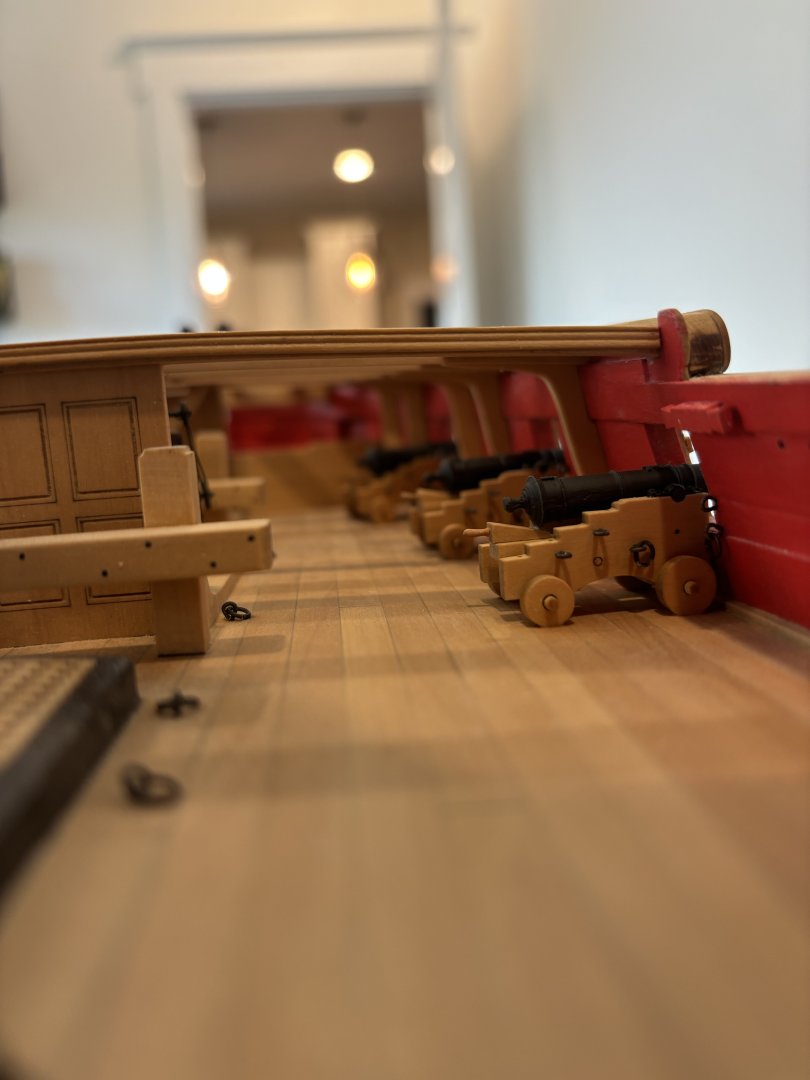
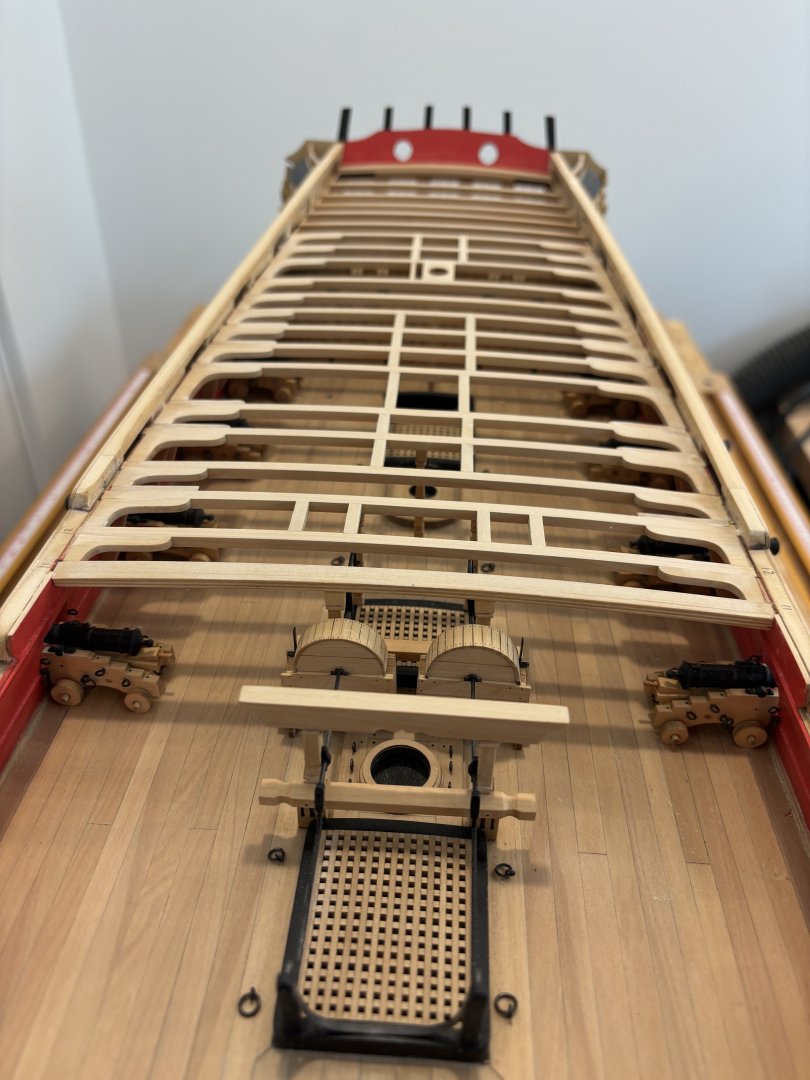
Chapter 8 has been completed, just a little sanding of the deck beams and knees when I start planking to get a nice run. I still haven’t added the cannons in the waist yet as want to keep them out of the way as long as possible so I don’t knock them loose with an errant elbow.


- 399 replies
-
- 16
-
-
-
- winchelsea
- Syren Ship Model Company
- (and 1 more)
-
Thanks JP, good to know your still around!
- 399 replies
-
- 2
-
-
- winchelsea
- Syren Ship Model Company
- (and 1 more)
-
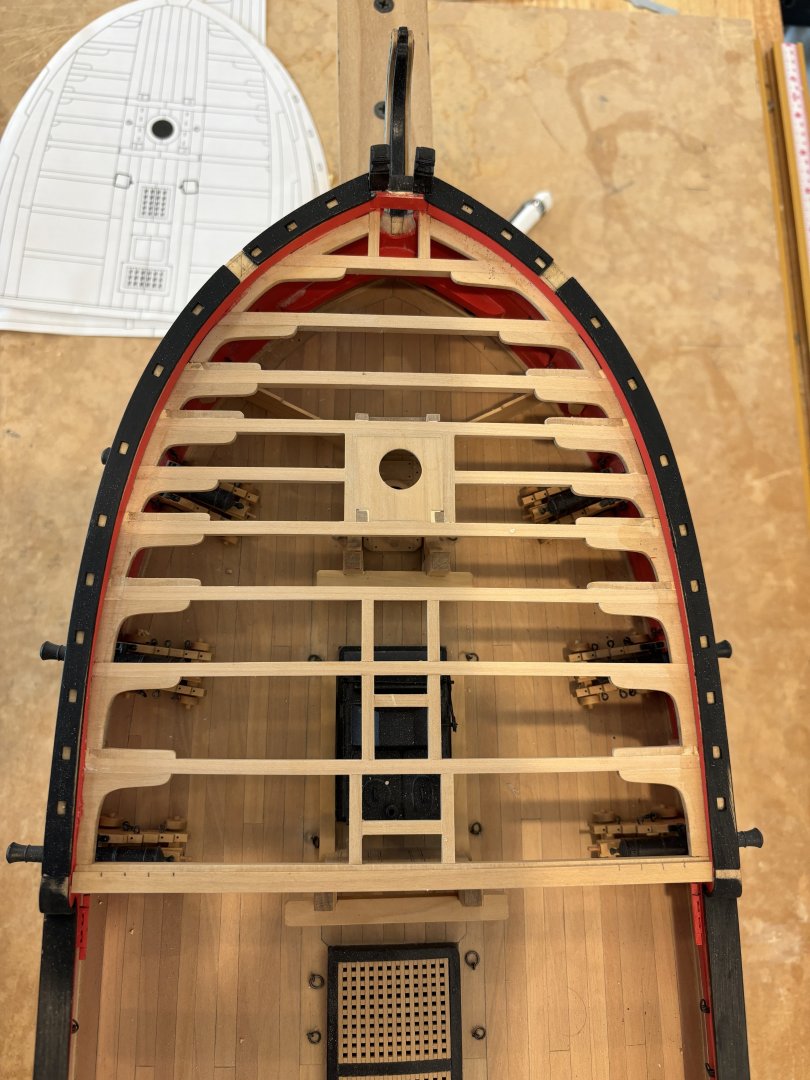
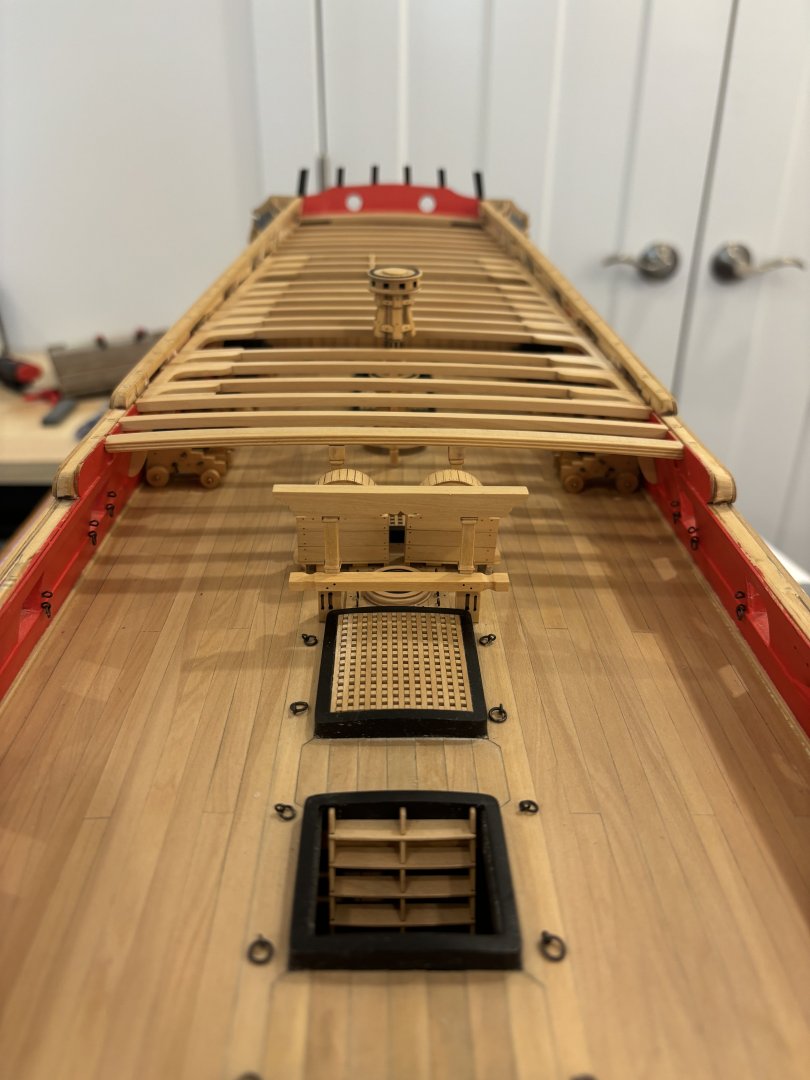
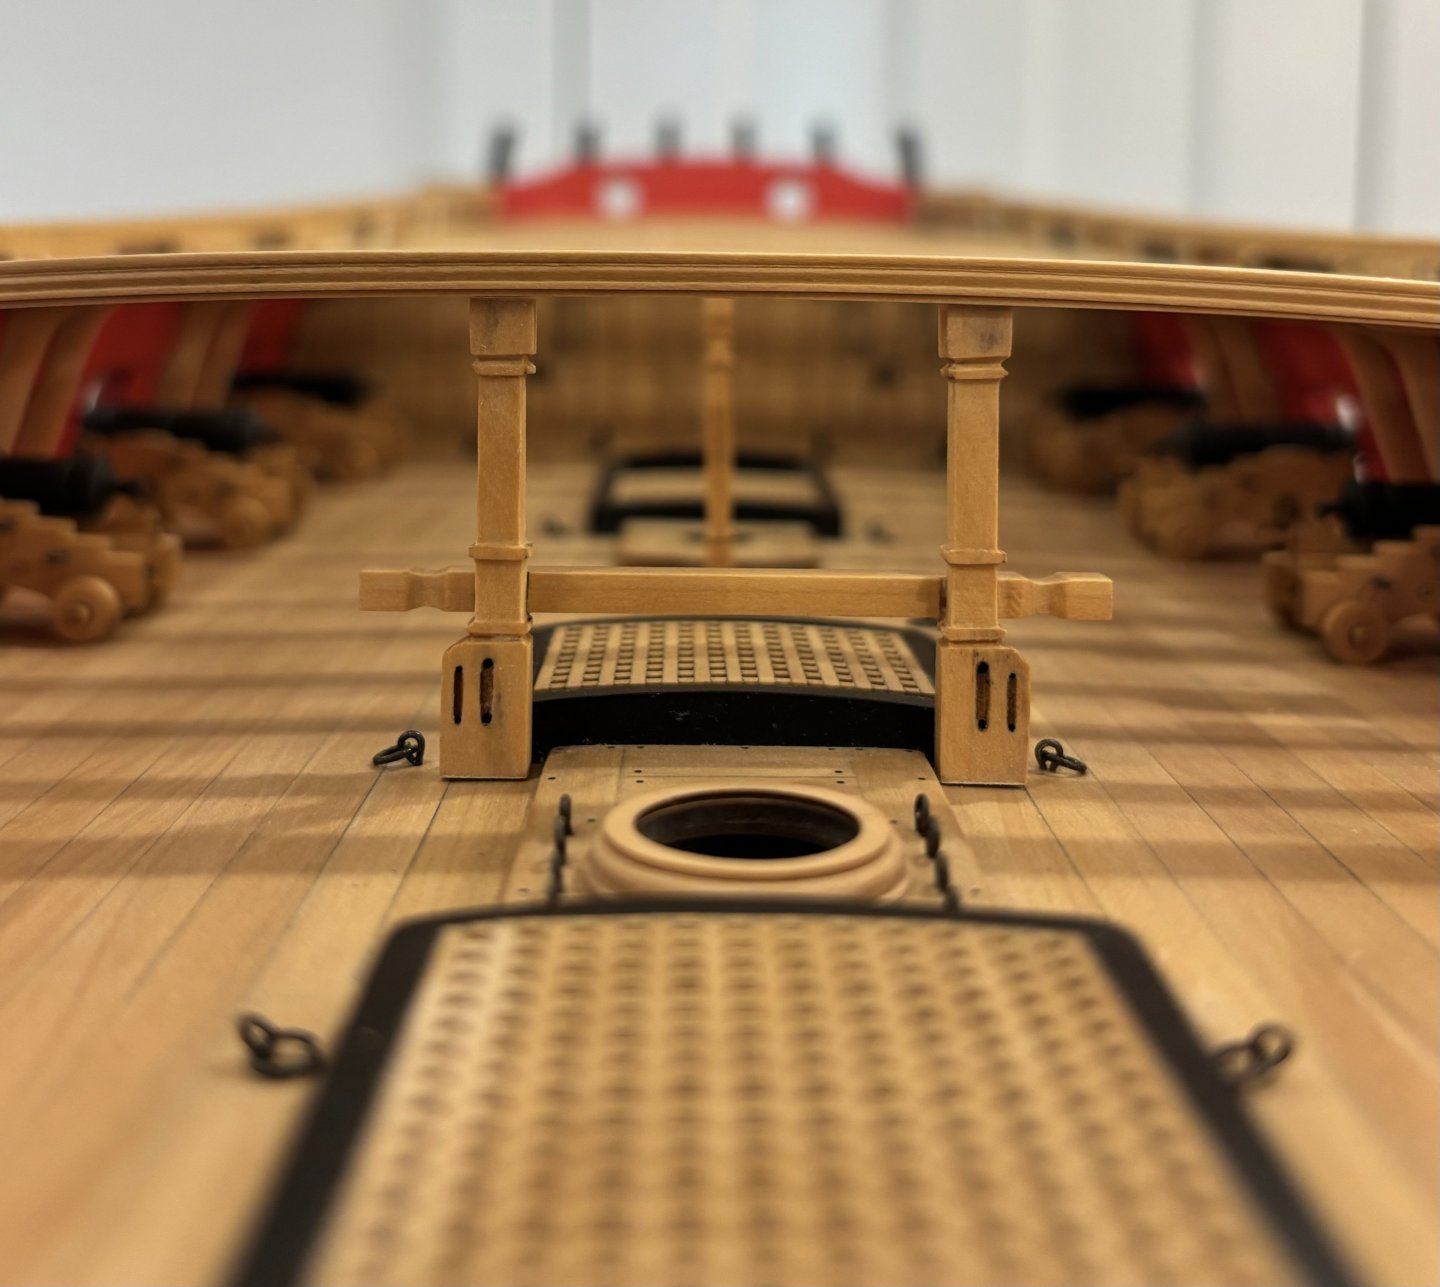
The manger barriers were installed and the wind break panel/bulkhead for the stove too.

- 399 replies
-
- 13
-
-
-
- winchelsea
- Syren Ship Model Company
- (and 1 more)
-
Chapter 8 has begun by adjusting the positions of the Forward six FC deck beams as per the layout plan, they all needed to be moved forward to some degree. Also both sets of the riding bitts were built and installed.
- 399 replies
-
- 12
-
-
-
- winchelsea
- Syren Ship Model Company
- (and 1 more)
-
I see your from Sequim woodartist? its been a several years since I was last over that way, We almost bought a house on Bell Hill at the time, The Oasis bar still open?
-
Yes I certainly did, glue the bulkheads and maybe spacers between them all in place before going near it with sandpaper, you will do that when you "fair" them roughly before adding the gunport cills.
- 399 replies
-
- 1
-
-
- winchelsea
- Syren Ship Model Company
- (and 1 more)
-
Completed Chapter 7 with the completion of the Chain pumps and their associated cranks. I won’t install the elm tree pumps until much later as I’m bound to knock them off. Just a little bit of sanding to do on the QD beams and knees to flatten them down for their margin planks and then to install the QD carlings.

- 399 replies
-
- 16
-
-
-
- winchelsea
- Syren Ship Model Company
- (and 1 more)
-
Nice Progress.
-
Thanks for all the likes and nice comments. I’m making good progress on the QD beams and knees, all the way down to where I now have to start fitting the chain pumps in place. The pumps were built as per the instructions without much issue along with the Capstans, columns, Main Jeer Bitts and Gallows. Lets see how this final part of chapter 7 goes!


- 399 replies
-
- 15
-
-
-
- winchelsea
- Syren Ship Model Company
- (and 1 more)