Trussben
-
Posts
1,995 -
Joined
-
Last visited
Content Type
Profiles
Forums
Gallery
Events
Everything posted by Trussben
-
 Are you going to add stump masts Chuck?
- 1,784 replies
-
- 2
-

-
- winchelsea
- Syren Ship Model Company
- (and 1 more)
-
Hi Gary the only place that I know that sells really good quality “ WHITE” Holly is Domex, but it’s not cheap! Expect to pay $100 for a piece 1x6x20”. http://www.domexhardwoods.com/catalog/holly-lumber
- 399 replies
-
- 1
-
-
- winchelsea
- Syren Ship Model Company
- (and 1 more)
-
Hey Gary, Go for it! I like the look, but to purchase really nice Holly that has no grey striations is quite expensive, some of my planking shows a little bit of it even though it was good quality! But when you see it in natural light it really looks great IMO.
- 399 replies
-
- 1
-
-
- winchelsea
- Syren Ship Model Company
- (and 1 more)
-
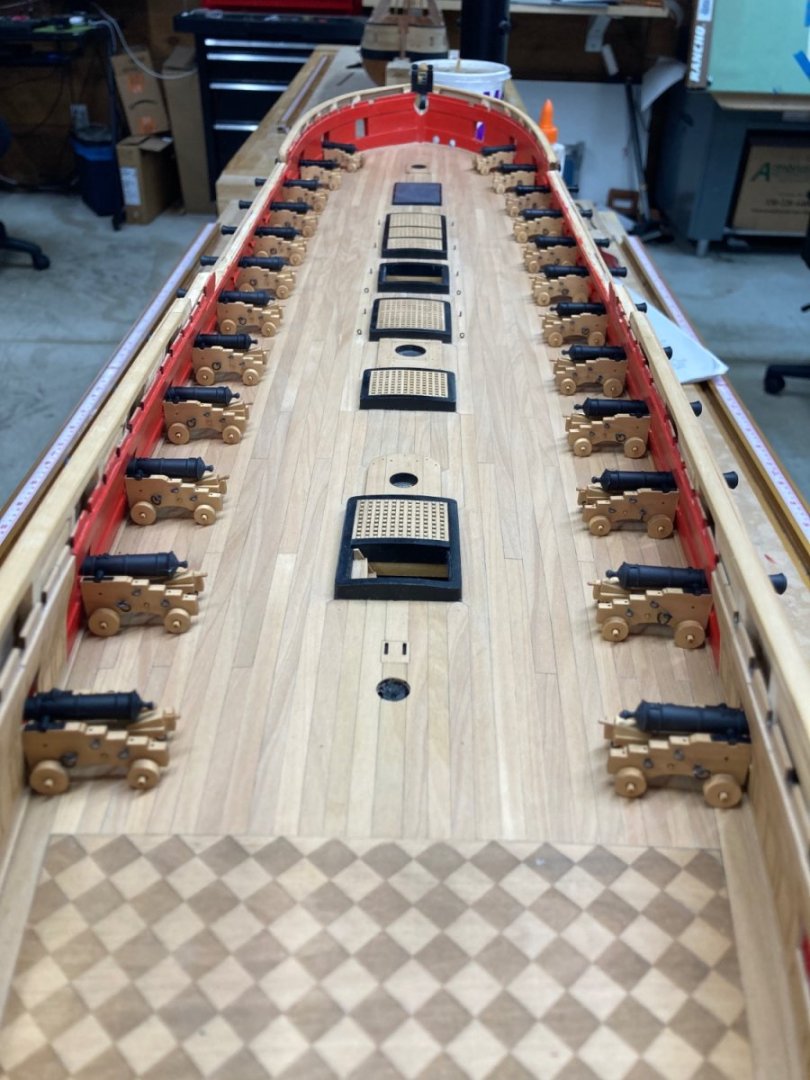
Phew - all the cannons finally completed.
- 399 replies
-
- 25
-
-

-
- winchelsea
- Syren Ship Model Company
- (and 1 more)
-
Nice progress Gary.
-
ancre Le Gros Ventre by ChrisLBren - 1/36
Trussben replied to ChrisLBren's topic in - Build logs for subjects built 1751 - 1800
Nice progress Chris! -
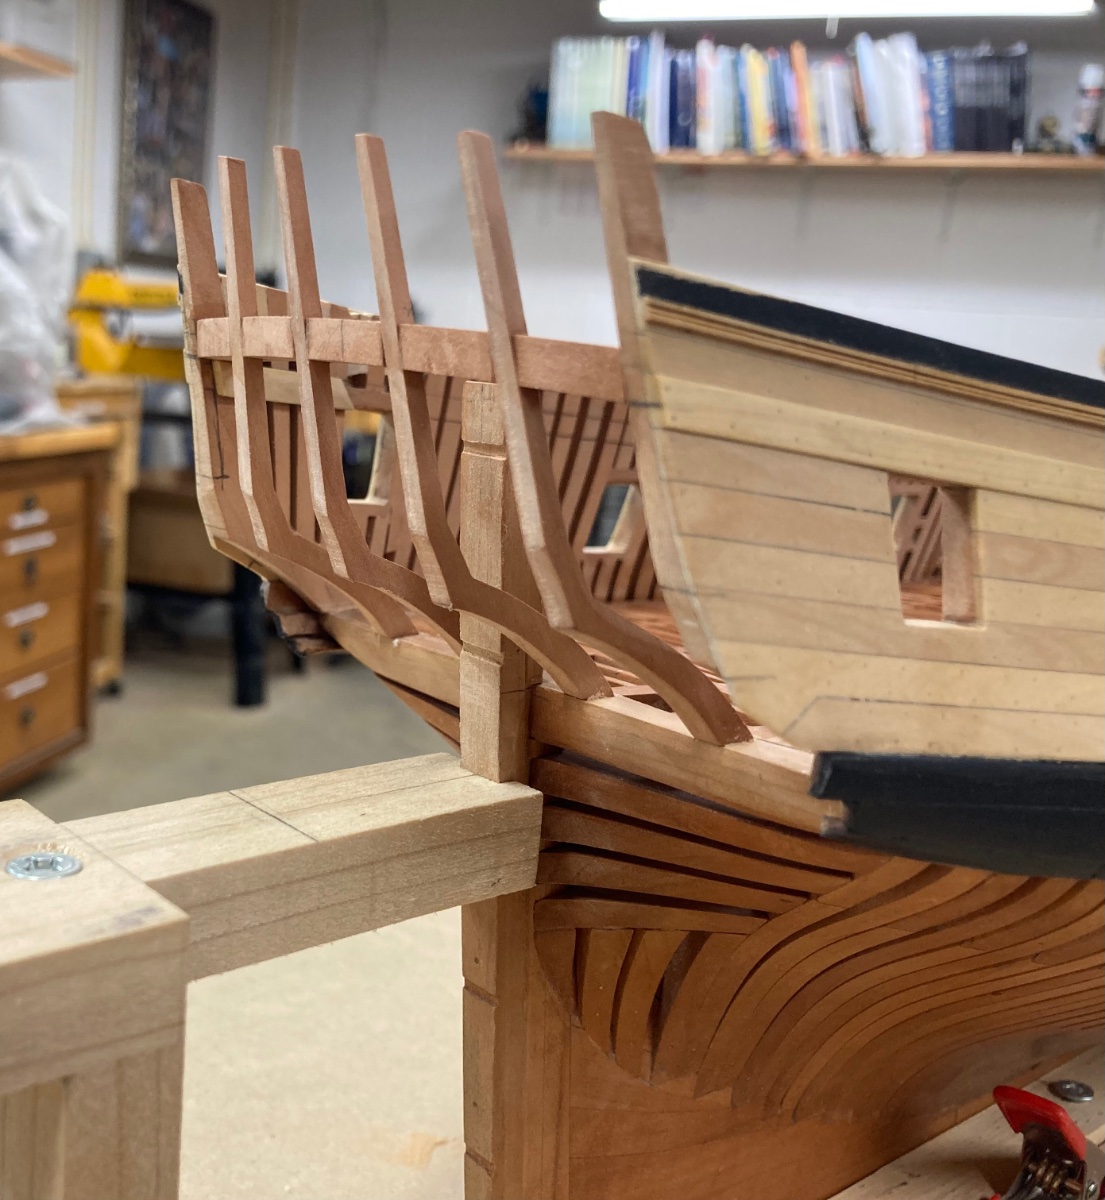
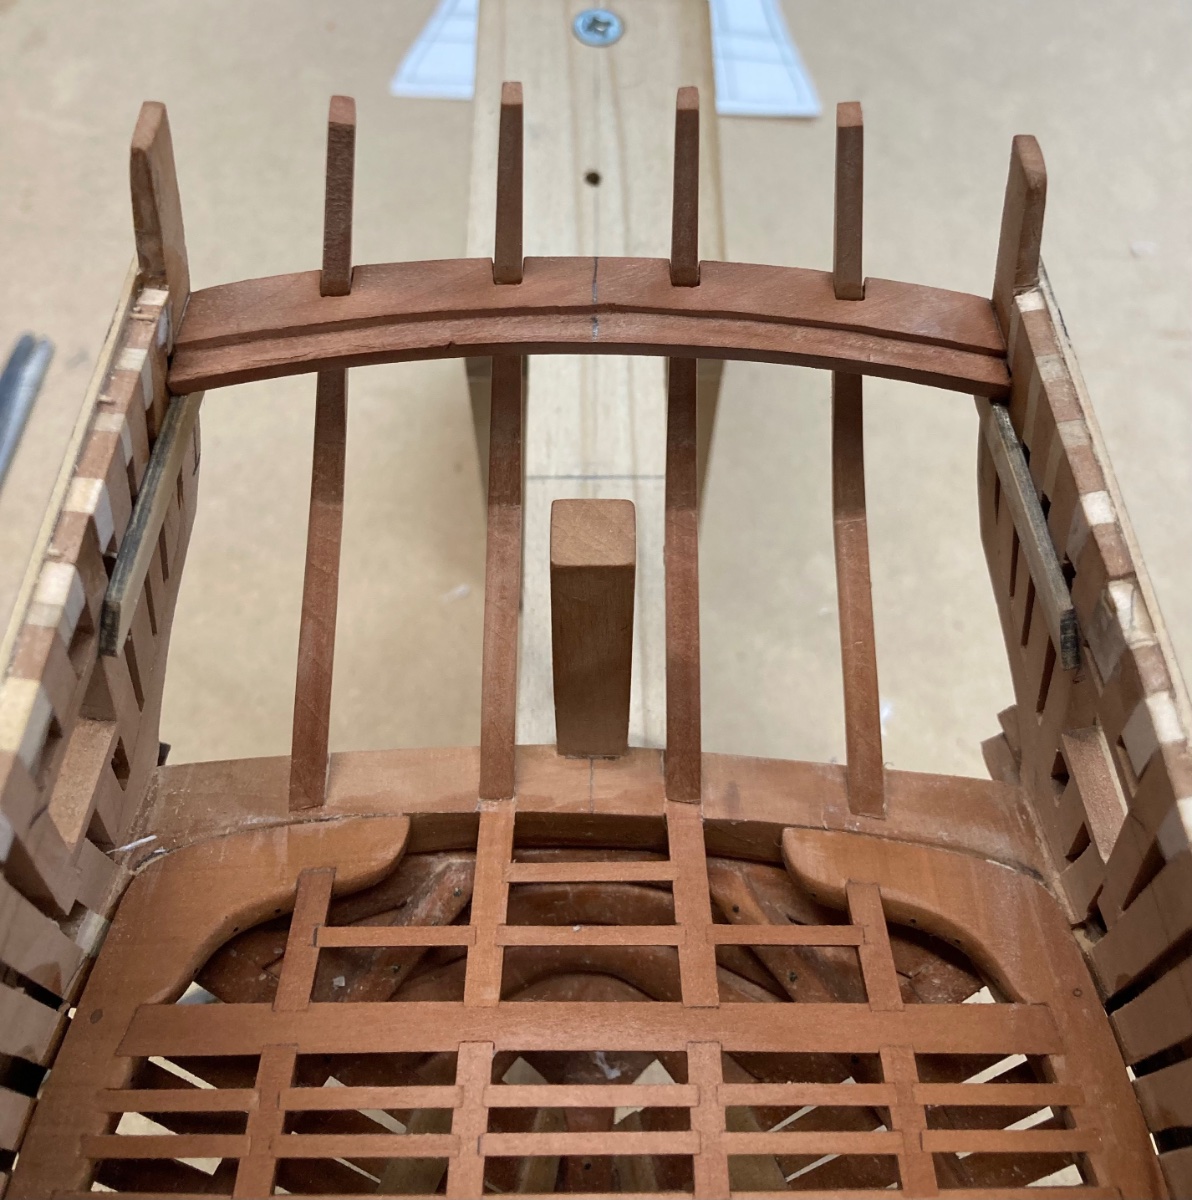
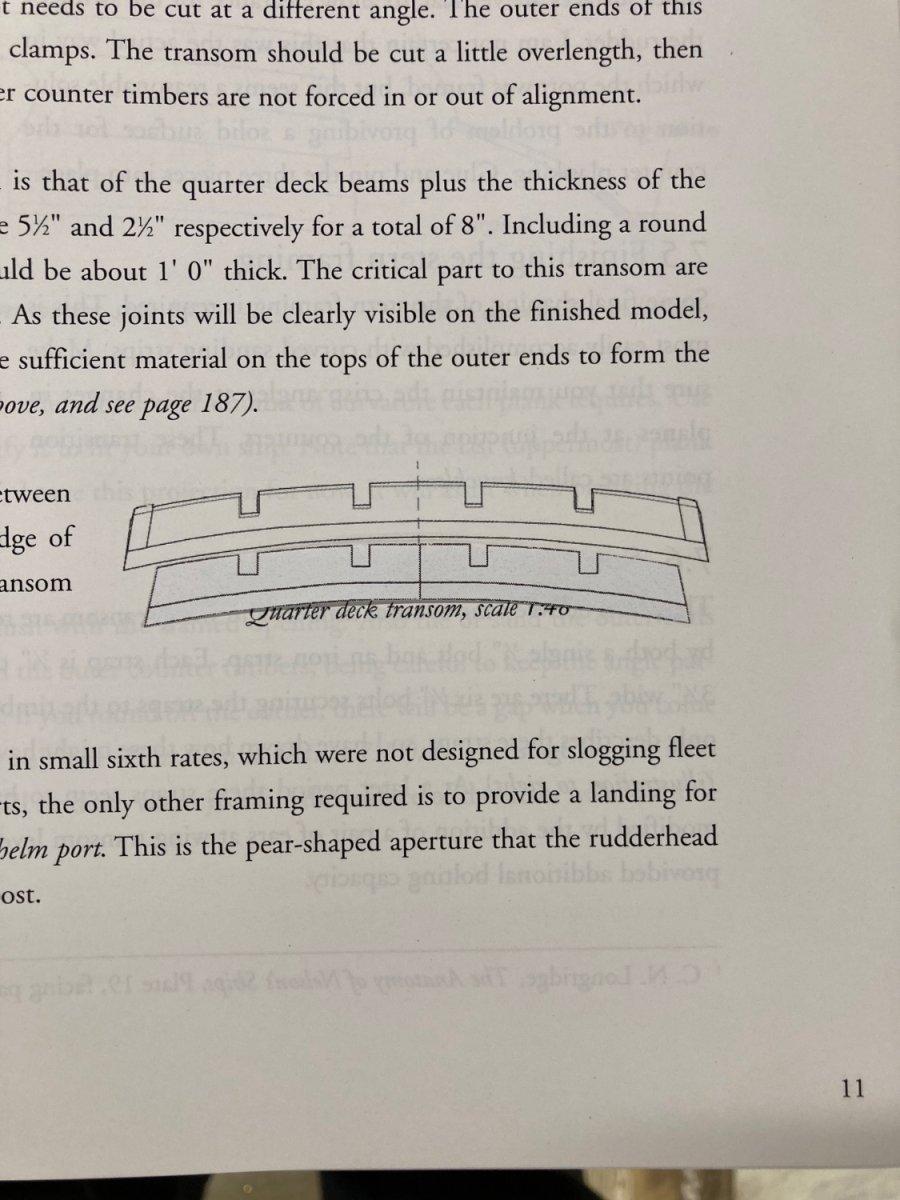
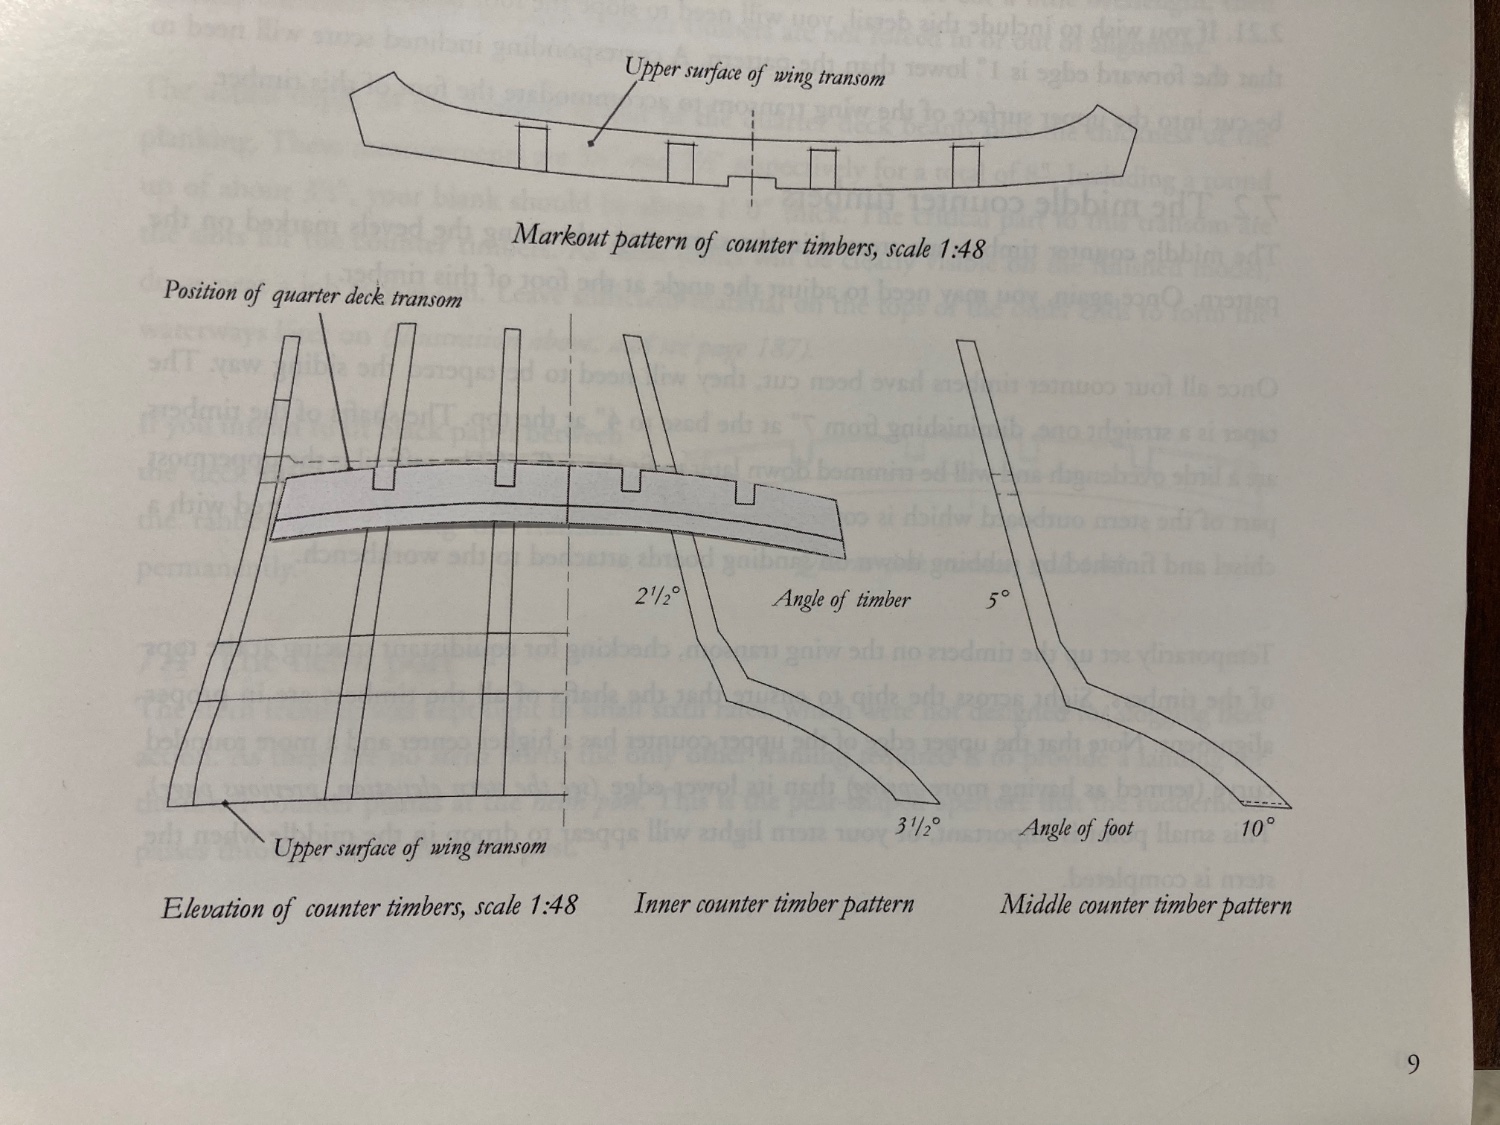
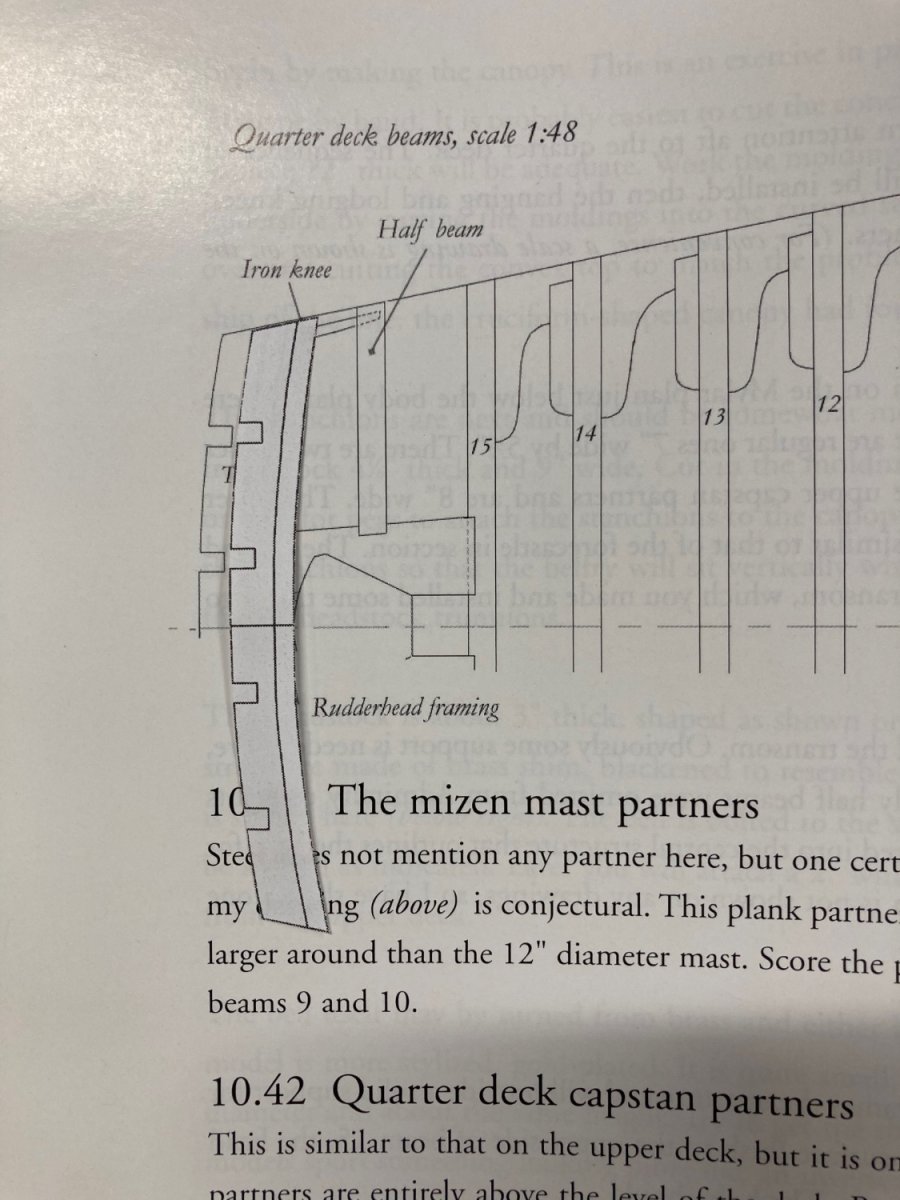
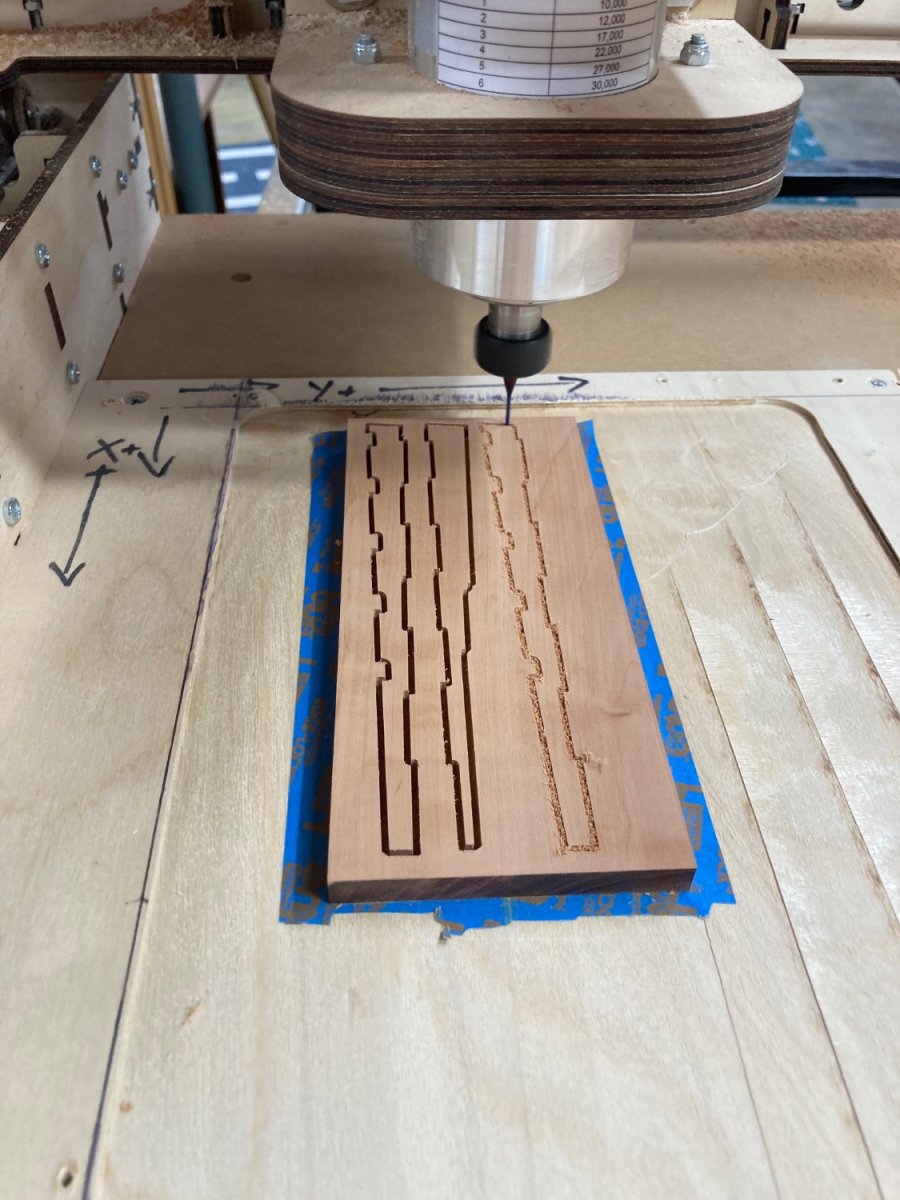
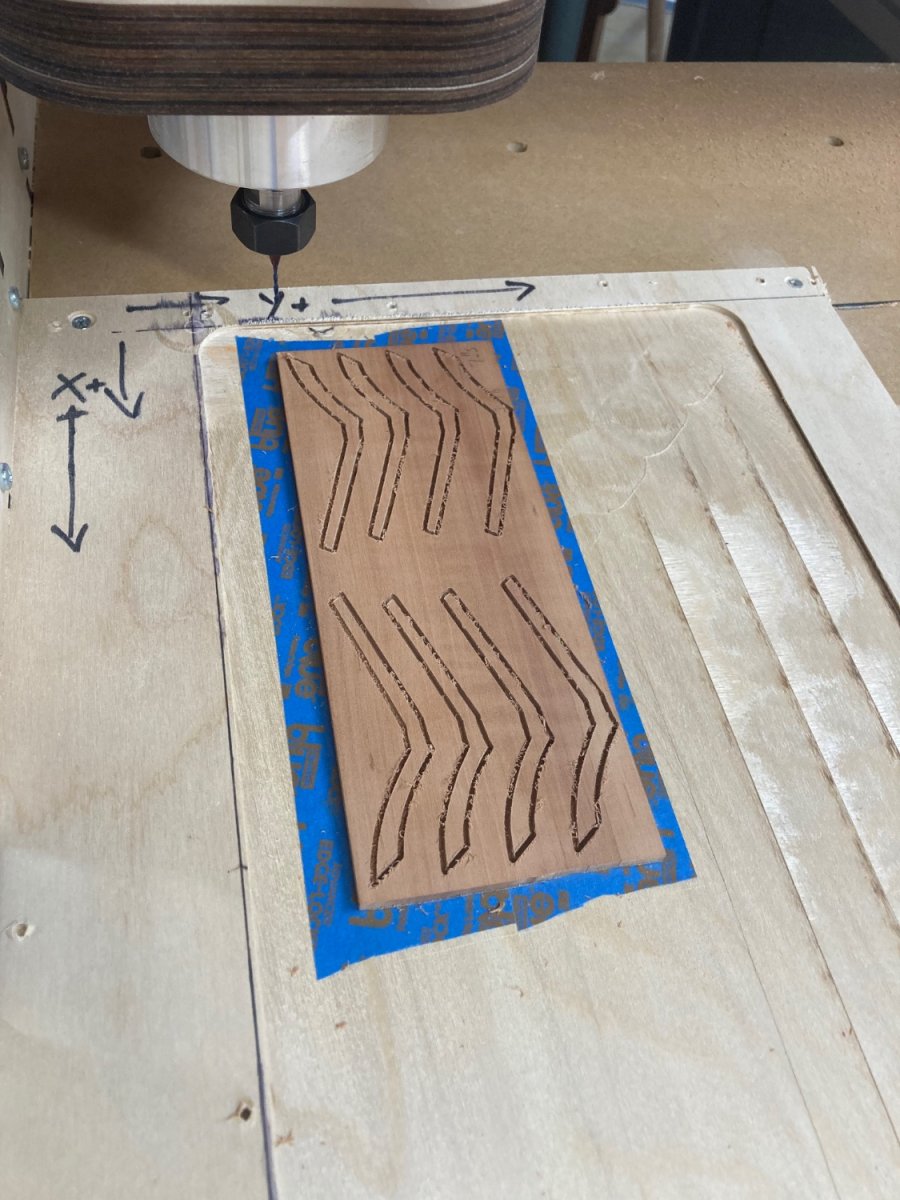
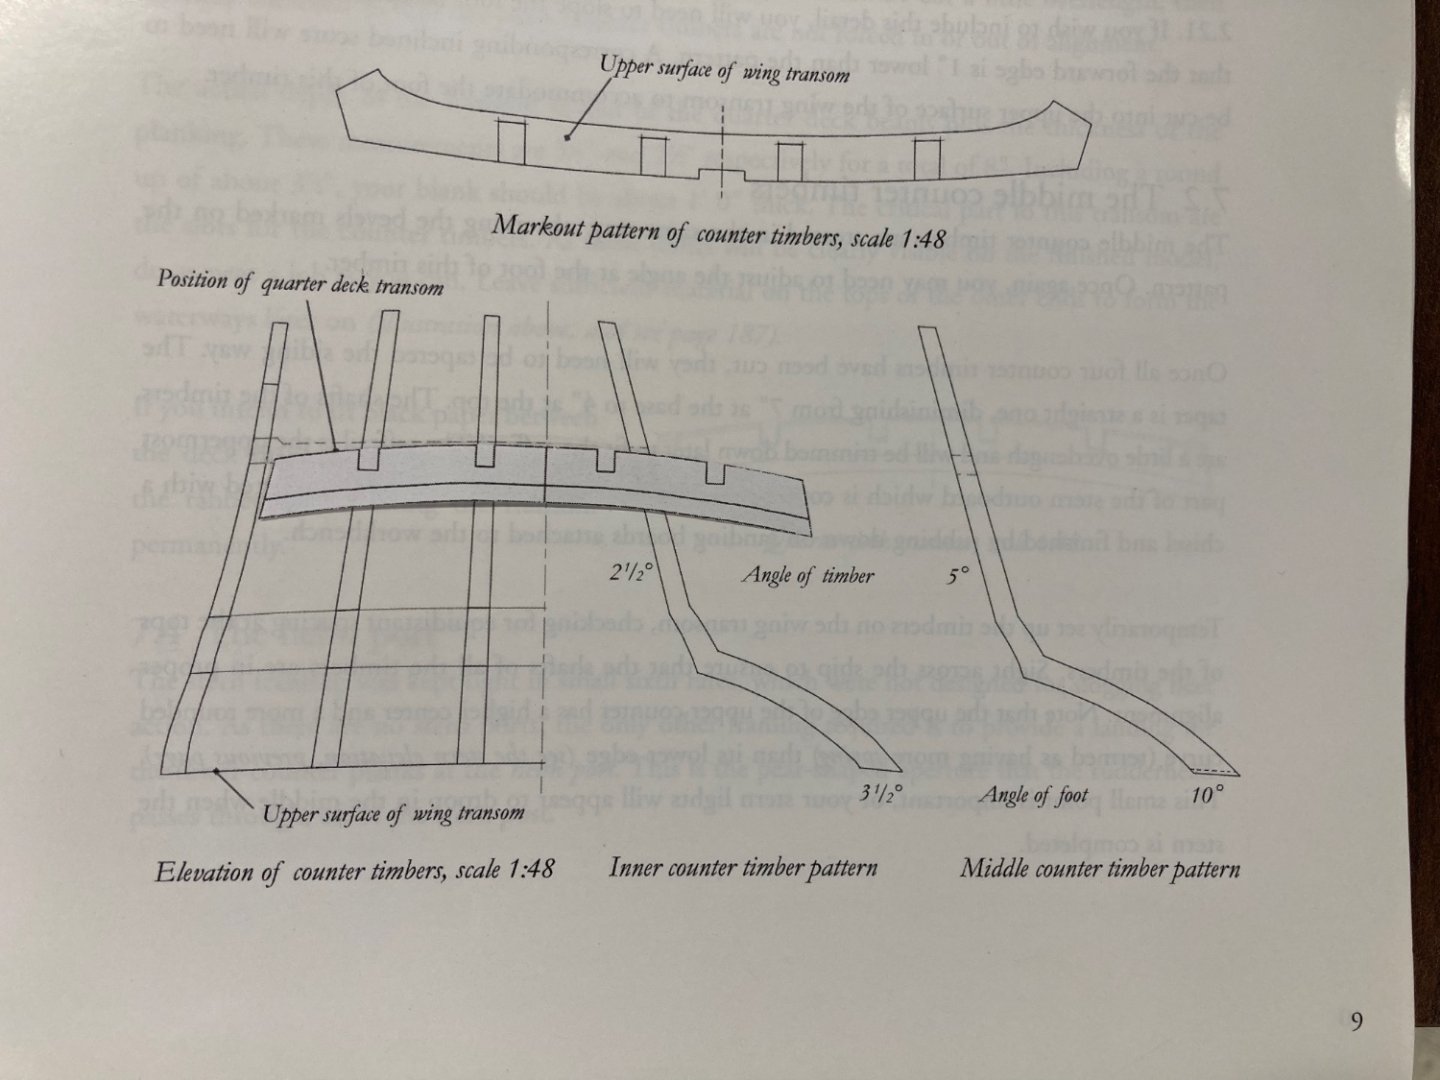
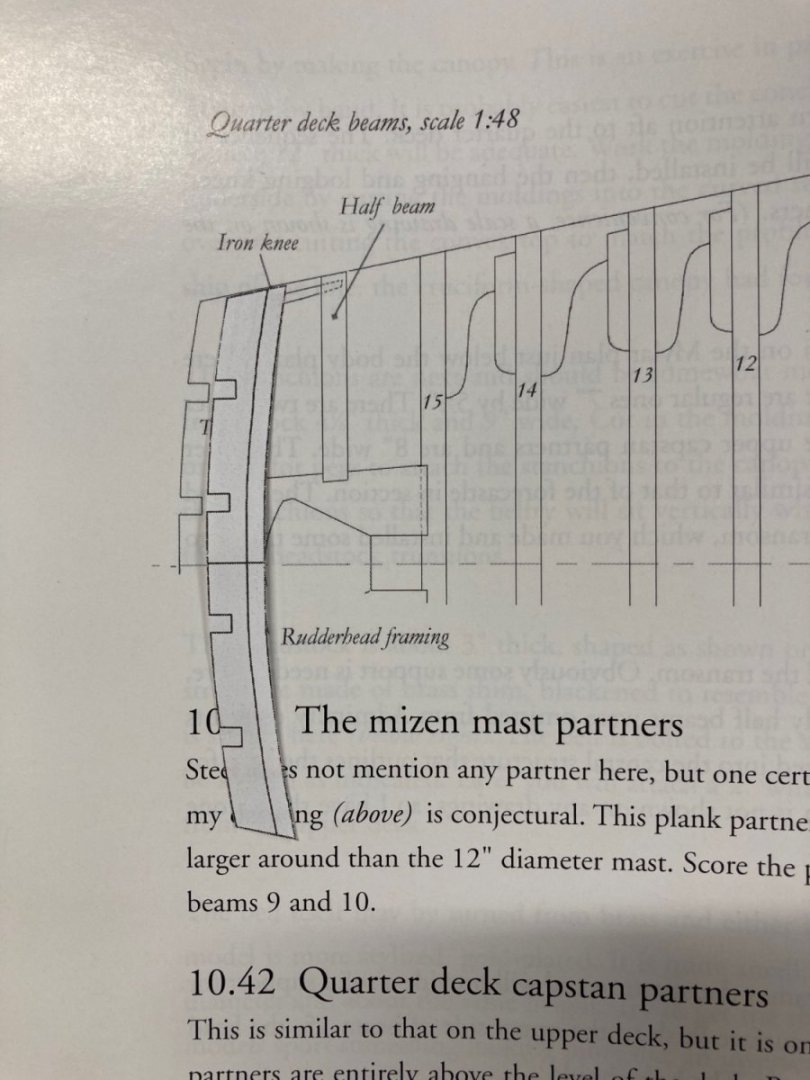
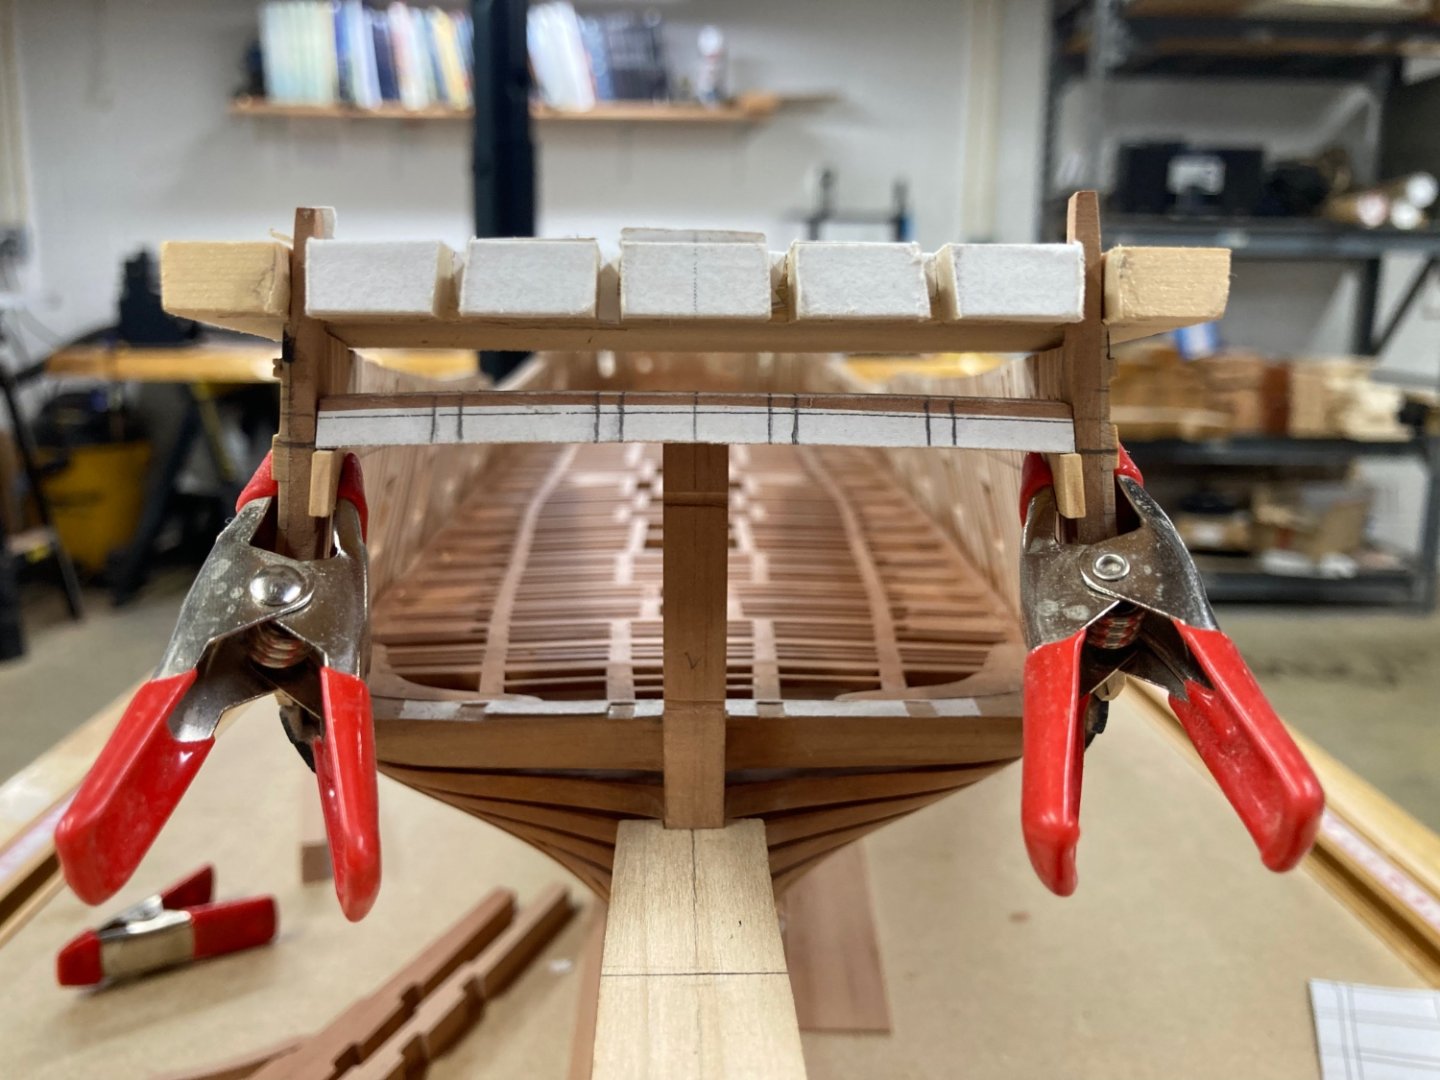
Hi All, I was having a lot of issues revolving around the QD Transom piece that I have now figured out and thought I would share with other SWAN-TFFM builders, not knowing if this has been recognized before. On page 11 of TFFM-Vol #2, there is a pattern supplied in 1:48 scale for you to use to cut out your blank with, however it appears it is not the correct size!! Let me explain that I tried using this pattern and kept finding it far to wide compared to my own Pegasus aft framing and I was starting to worry until I decided to check the pattern's width as compared to other drawings in TFFM. If you compare it VS the "elevation of counter timbers" drawing on Page #9 TFFM-Vol #2 you will find the pattern is approx 3 11/32" at its widest point but the drawing is just about 3 3/32" I decided to test it against another drawing on page #182 of TFFM-Vol #2, this shows the Quarter deck beam layouts but it also shows the QD transom on it, and this as well makes the Transom 3 3/32" wide. SO - I copied and made a template using the page #182 transom and this fit almost perfectly to my model. See some pictures below showing the difference in size and what my new one using page #182 looks like.

- 889 replies
-
- 12
-
-
-
Hey Greg, Using a 1/16" router bit just leaves a slight round that just needs a quick swipe with a square file to remove. I would of used a 1/32" bit, but its cutting depth capabilities were not long enough to cut deep enough into 16" stock ( 15" + 1" for onion-skinning ). Ben
-
ancre Le Gros Ventre by ChrisLBren - 1/36
Trussben replied to ChrisLBren's topic in - Build logs for subjects built 1751 - 1800
Nice to see you back building Chris! Looks like you have a good head of steam up now. I think we all know about trying to get free time for modelling. -
Very Very nice clean work there Steve.
- 99 replies
-
- 2
-
-
- winchelsea
- Syren Ship Model Company
- (and 1 more)
-
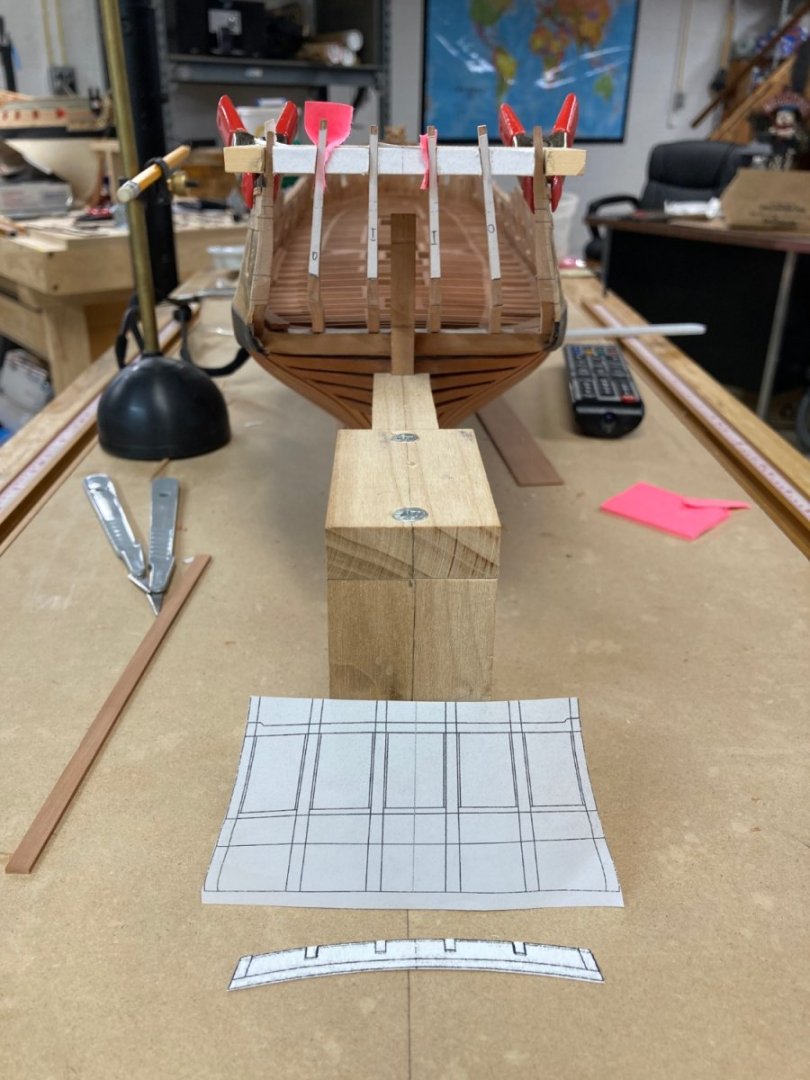
Now I’m trying to figure out the layout for the stern, I see that I do need to do a bit of fairing to the outer counter Timbers to make them and the inner framing a little thinner.
- 889 replies
-
- 17
-
-
Looking really good, I enjoyed this part of the build.
- 840 replies
-
- 3
-
-
- winchelsea
- Syren Ship Model Company
- (and 1 more)
-
Nice Bob.
-
No Greg, The frieze prints are in two parts, but I believe I can do a much better job second time around trying to make it as seamless as possible, and I still have the portside to start.
- 399 replies
-
- 1
-
-
- winchelsea
- Syren Ship Model Company
- (and 1 more)
-
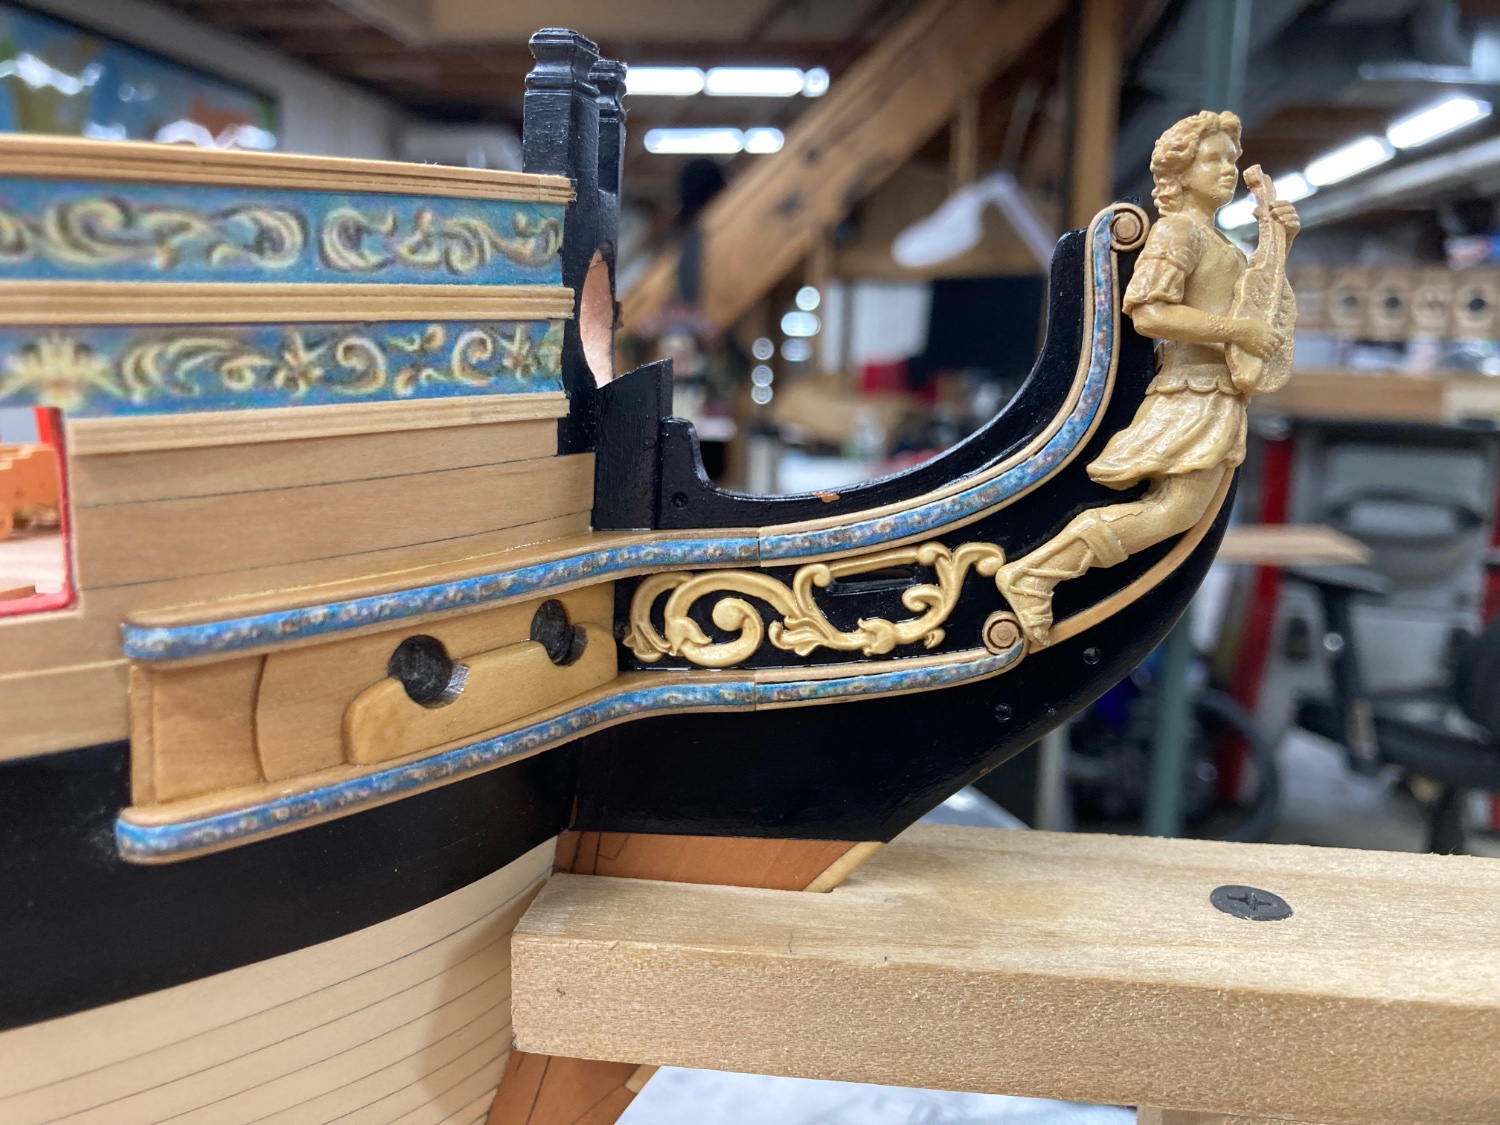
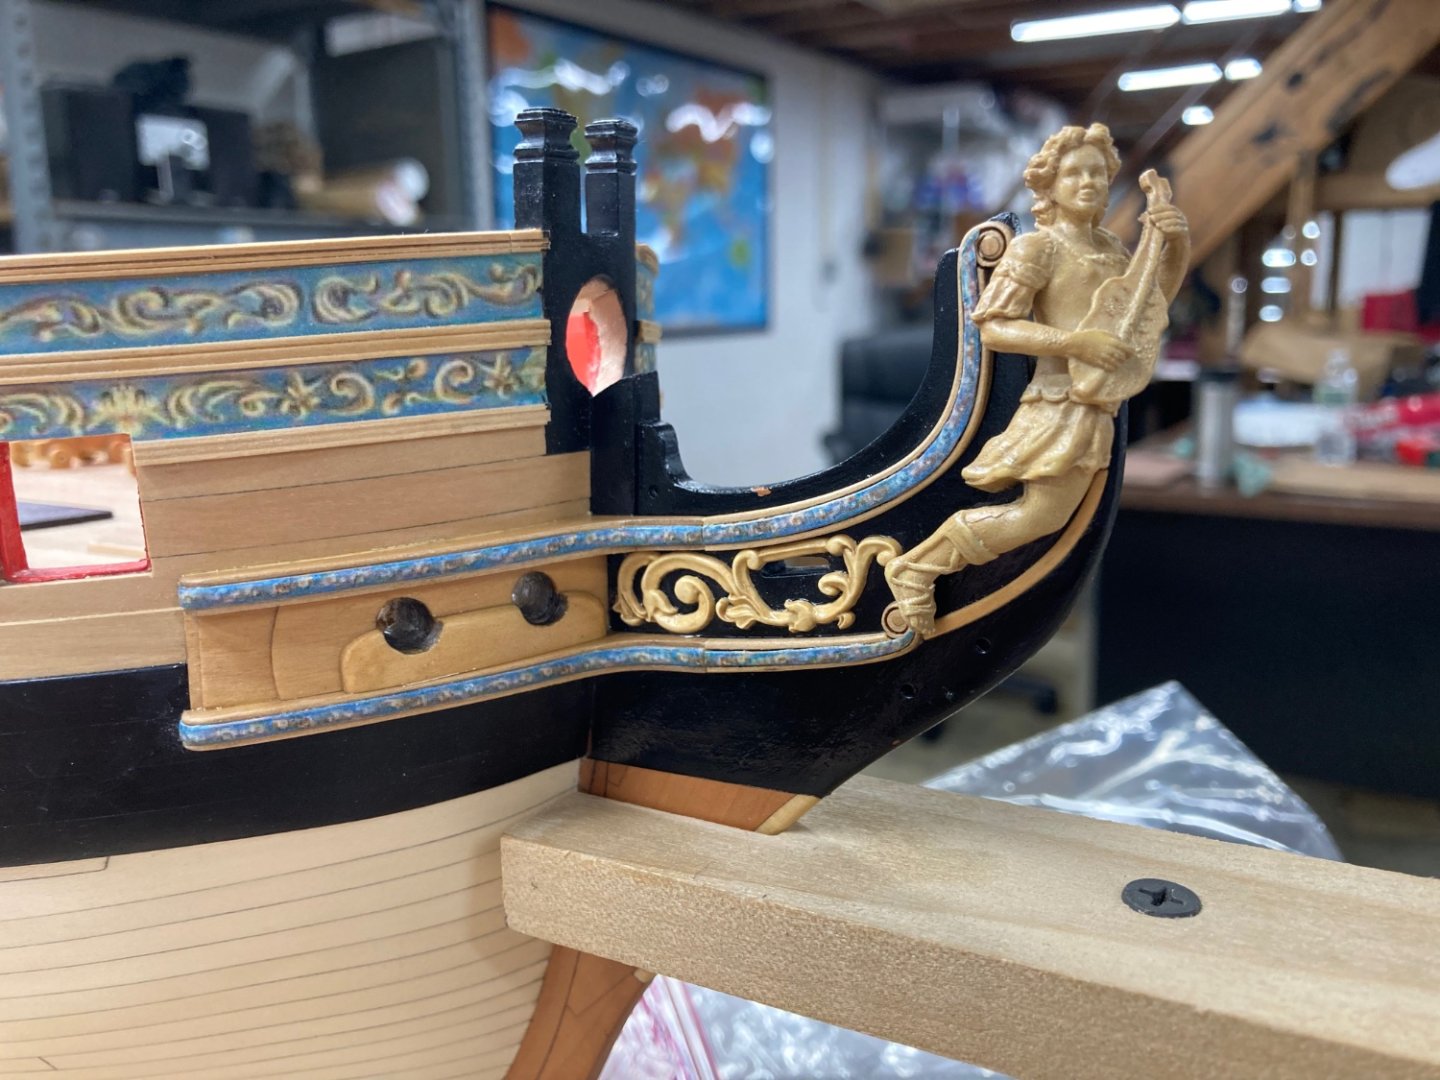
Headworks on the starboard side almost complete, I think i will remove the hair bracket friezes and replace them to try to better match it all together so the seams are less visible.

- 399 replies
-
- 17
-
-
-
- winchelsea
- Syren Ship Model Company
- (and 1 more)
-
I’m sure your model will be as excellent as your scratch work is. Yes - Holly lower planking.
- 399 replies
-
- 1
-
-
- winchelsea
- Syren Ship Model Company
- (and 1 more)
-
Thanks Rusty! Glenn - no secret, just many hours sanding it off using 120/220 sanding sticks and a few small diamond files.
- 399 replies
-
- 4
-
-
- winchelsea
- Syren Ship Model Company
- (and 1 more)