


Overworked724
-
Posts
1,263 -
Joined
-
Last visited
Content Type
Profiles
Forums
Gallery
Events
Everything posted by Overworked724
-
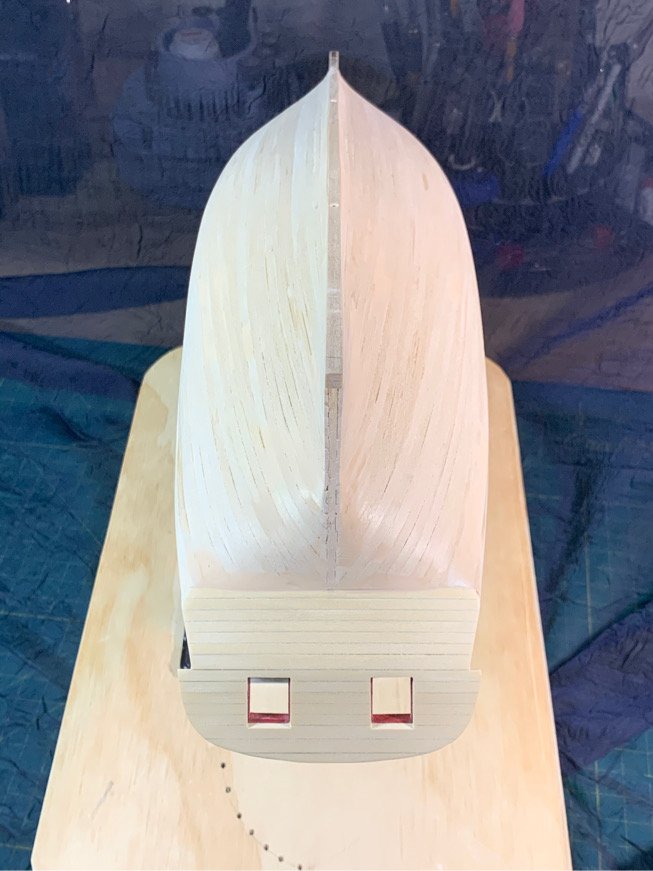
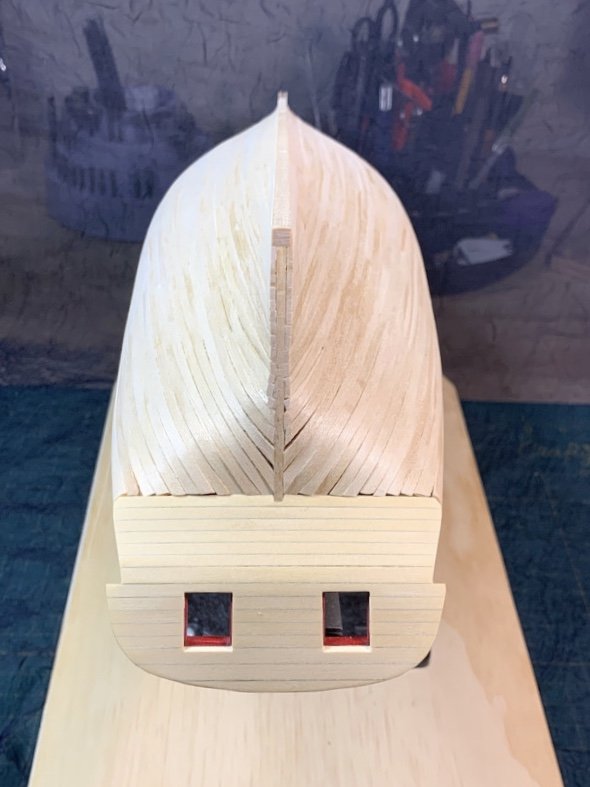
 After a day of meetings...was almost too tired to mess with the Syren. But I simply couldn’t resist a bit of minor progress. The keel piece that’s been hanging out beyond the end of the stern has been driving me crazy. It’s like a mini bowsprit...just waiting to get snapped off!!! But, the time had finally come to add a the stern piece. I can’t tell you how much of a relief it was to saw off that keel piece extension. Oh yeah!!! Moving on....
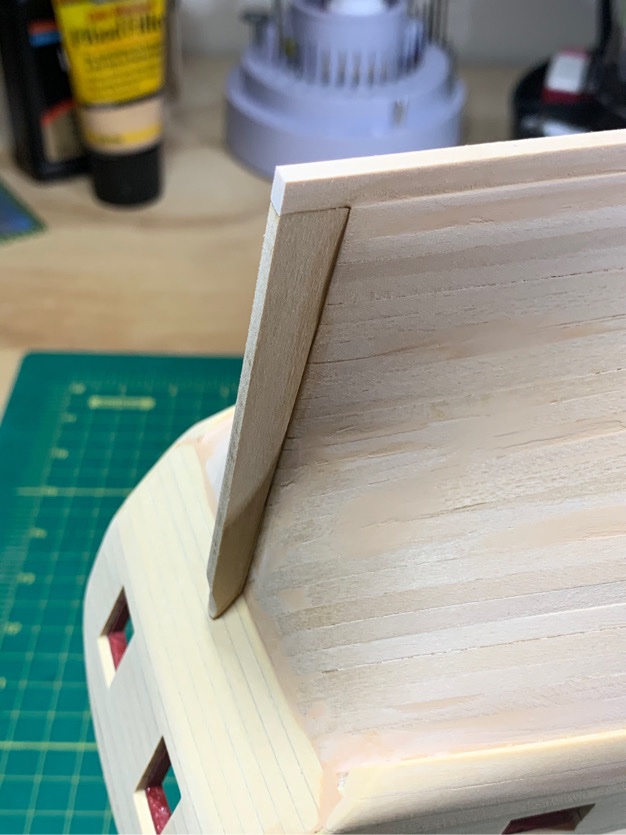
-
Decided to get my fashion pieces in now. I still need to put in my fixed blocks and trunnels, so getting the fashion pieces in now helps clarify where the stern double blocks will be located in each side of the hull. Moving on!......

-
I invested in the ropewalk....but not the serving machine! (Was waiting for my birthday) Next thing on my list!!!! Syren blocks looks wonderful....
- 950 replies
-
- 1
-

-
- syren
- model shipways
- (and 1 more)
-
Fantastic, Robin. I also purchased Chuck's rope - having experience with it from the Syren, I simply couldn't fathom using the nylon stuff. It really does make a huge difference. Looking beautiful!
-
Thanks! But Not sure I can visualize this...you seem to end up with the foil plate now stuck to another paper backing...you are just exchanging sides. Not sure how you get the foil off the tape used to separate it from its original paper backing. Seems to me the copper plate still has risk of getting links. Looking for pics!
-
Love your build!!! Such clean work!
-
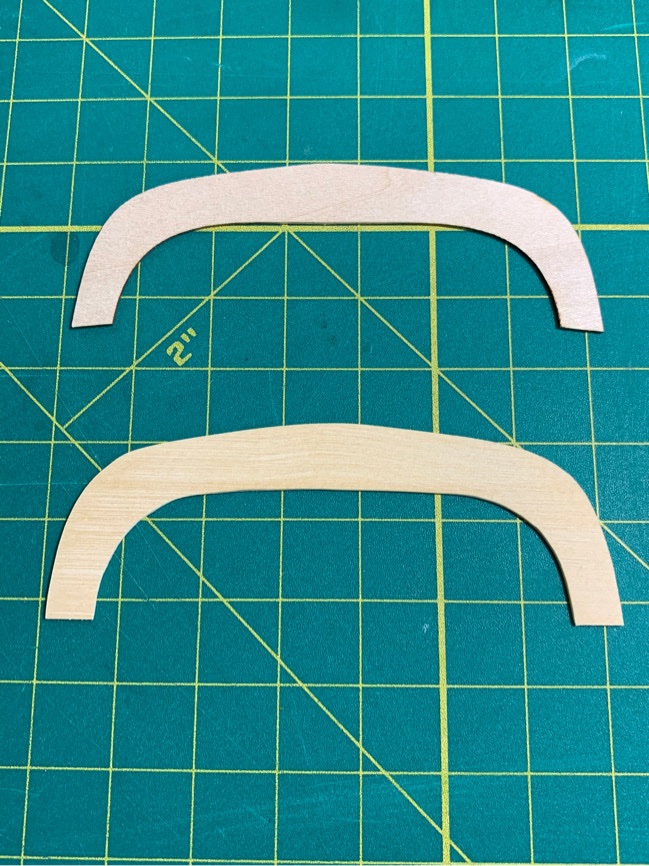
Just putzed a bit with the trim pieces and upper transom section. My little molding scraper jig worked great. Used 1/16” square cedar piece which I cut fresh. Also used a section of 1/32” sheet to make a new upper transom section as I didn’t want to mess with the basswood piece...it had obvious graining (which doesn’t show up in the pic). Nice tip in cutting out the transom section was putting some scotch tap on the back of the piece as I used a razor to slowly carve it out. Made it much easier! Moving on....
-
Short vid was perfect! Excellent clarification on peeling the plates. Thank you!! Gives me ideas!!!
-
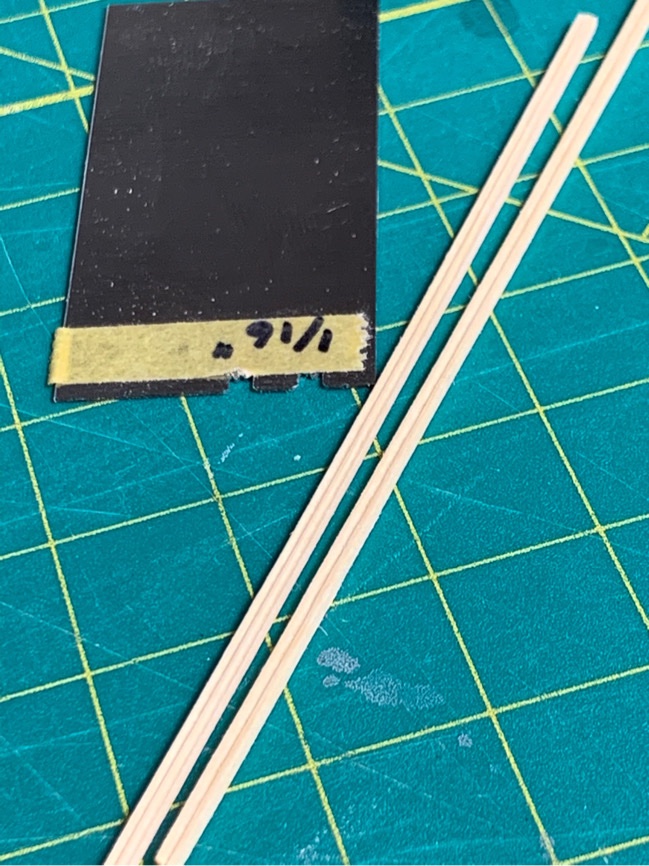
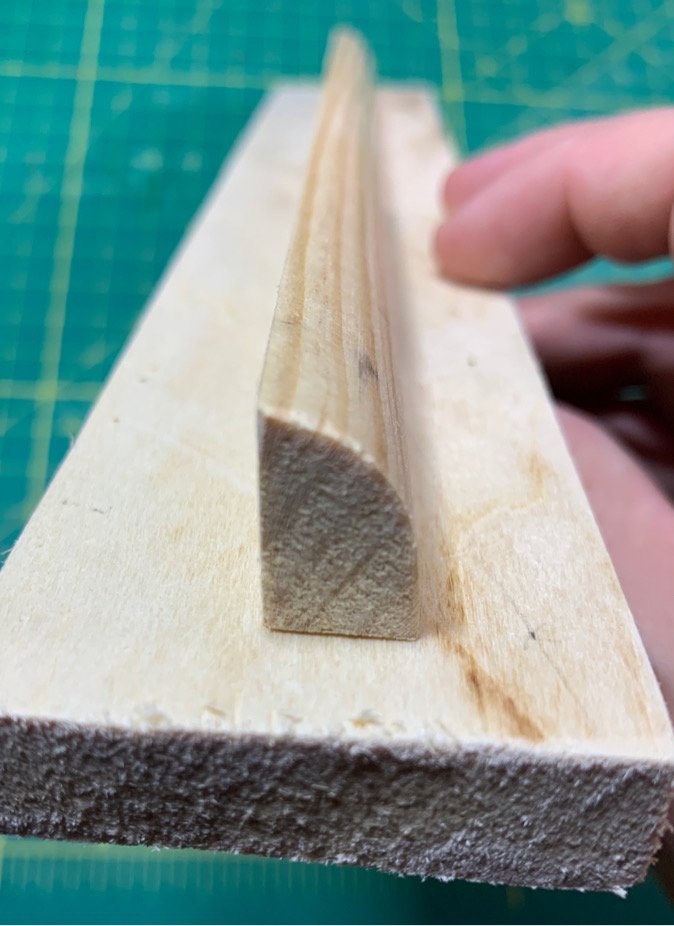
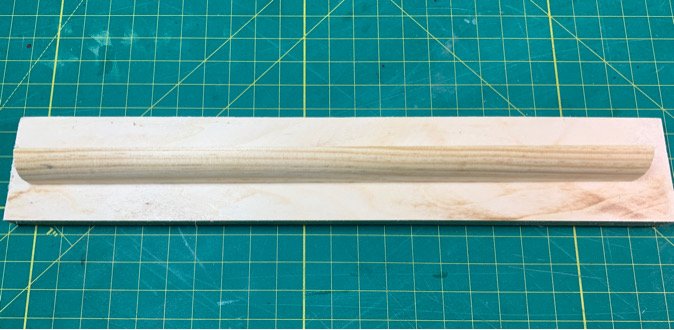
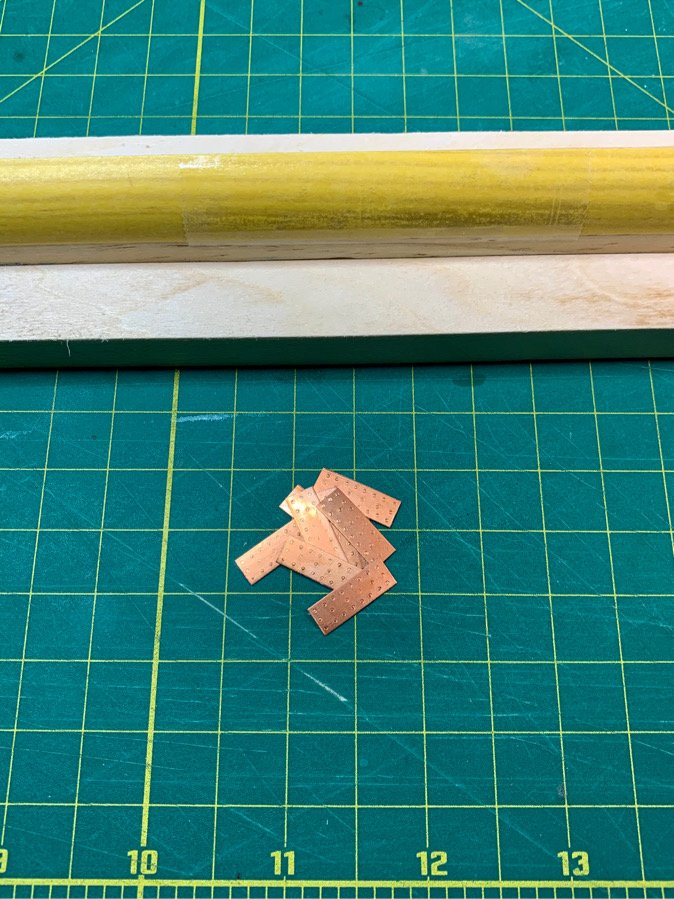
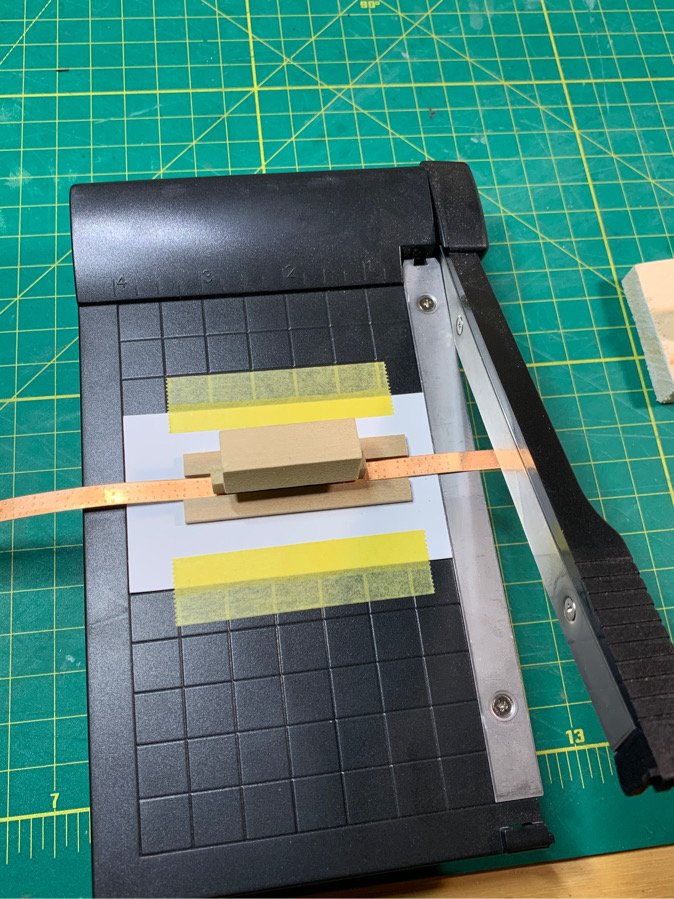
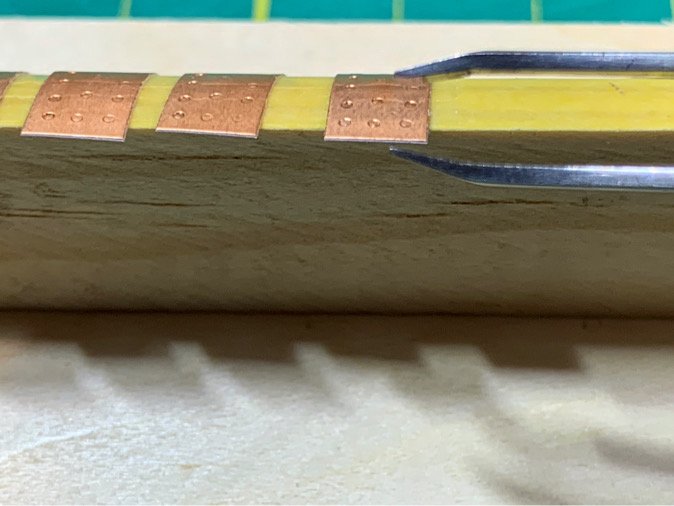
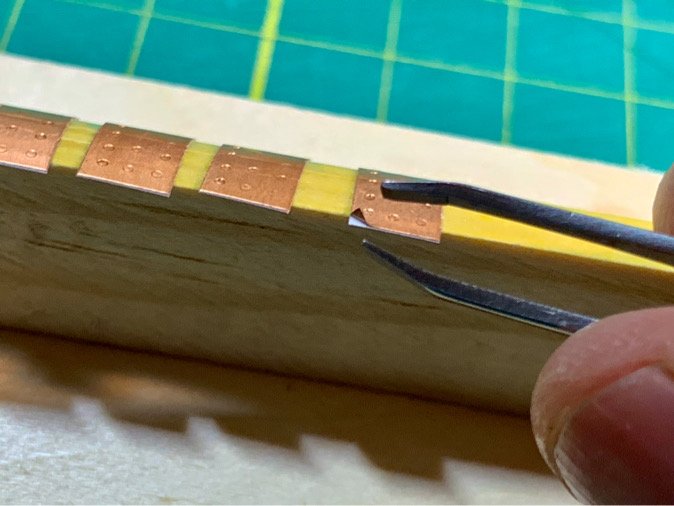
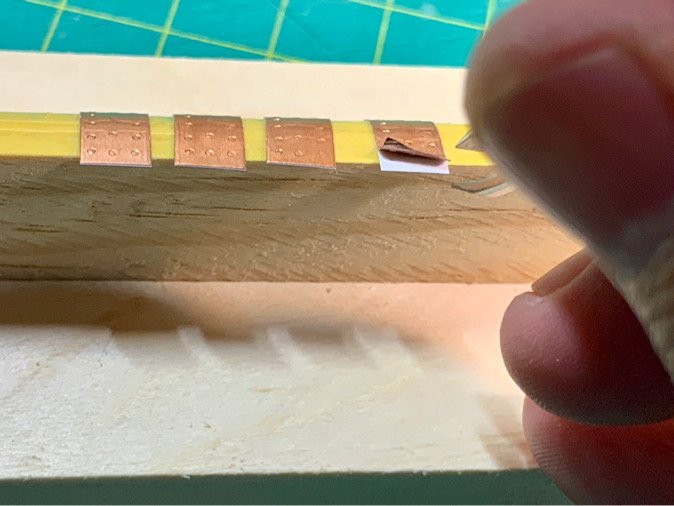
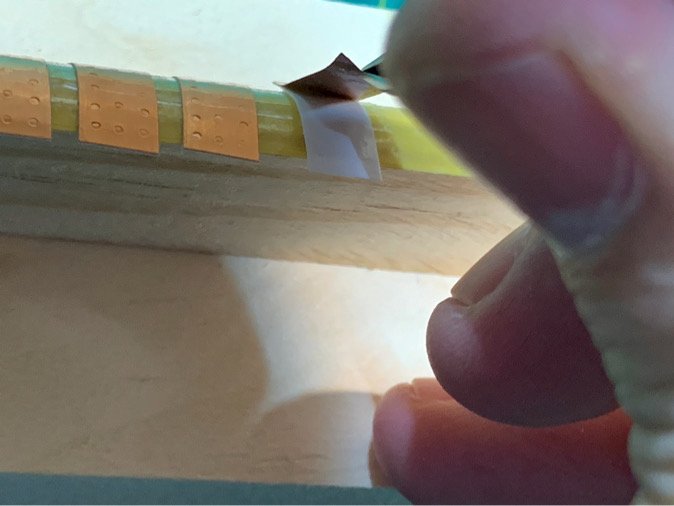
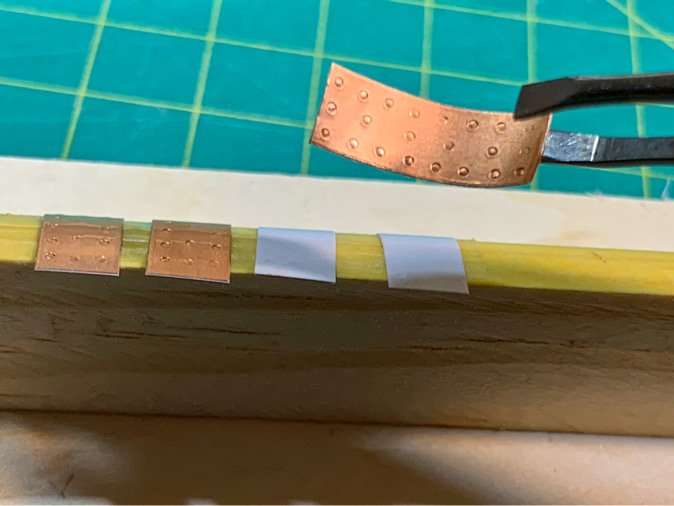
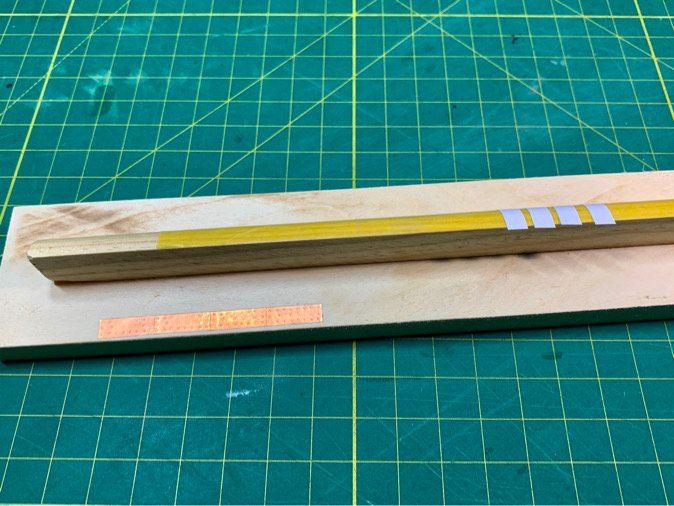
So...this is where I am hoping folks can give me some feedback. Like - real feedback (with pictures). Many of the build logs for copper plated ships don't really go into detail on how the step by step process of actually 'applying' the plates to the hull is done. Sure...I think we all get that the plates are applied to the hull using a self-adhesive copper foil which has been pre-stamped using an imprinting technique to simulate the bolts. But I'm curious what previous builders used to get the pre-stamped copper foil plates off the adhesive backing and on the ship without crimping/kinking the thin foil? So...I made my own method...with is not perfect...it is cumbersome...it is probably idiotic...but I haven't seen anyone else post a step by step (this includes Chuck's practicum) on how to do this without going crazy. So...here is my solution. I would really appreciate it if folks would post their own methods as a counterpoint this this...the sanity you save may be my own. So...Step 1: Take a piece of 3/4" quarter round and glue it to a scrap piece of wood. (To be explained later...the quarter round helps a bit) Step 2: Put some painters or masking tape (3/4") and cover the 1/4 round. Then place a strip of 2-sided adhesive scotch tape on top of the masking tape. (This way you can rip off the tape (double sided and masking tape) easily without mess and start over when you need to refresh the tape Step 3: Cut some plates (pre-stamped using your bolt templates) - I cut the stamped tape using a little mini-paper cutter. Works like a charm and it's reproducible/quick. Step 4: Apply the plate (foil side up) to the 2-sided tape leaving a slight overhang on the top edge. Step 5: 'Flick' the edge pf the plate with the tweezers (use surgical tweezers or use an exacto to lift up the edge of the foil). This is where you can get crappy results...if you 'bend' the foil, as I did on this first of my four trial plate, you can 'crimp' the foil. You need to avoid excessive bends to get a 'straight' or unbent foil plate. Note that using the "1/4" round as a base results in a less 'curly' plate ('straighter) once removed from the adhesive. Step 6: Once you have lifted a small portion of the foil (I like using a razor blade to avoid bending an edge (which is exactly what I did n the photo above) gently lift up enough to use a tweezers to grasp the edge of the foil plate. Step 7: Grasp just enough of the edge of the foil as possible with a square tweezers to get good purchase (the edge you grasp will be covered by the subsequent plates, but try not to bruise the foil). Do NOT lift straight up...you should slowly pull upward as well as away from the foil plate...think of it as trying to gently stretch the plate while slowly lifting it off the paper backing. Step 8: Marvel at your anal retentive nature and shake your head that you are one of the few people on the planet that build model ships. Then inspect the copper plate to ensure it is seamless and un-crimped. Using this method, I can line up a whole series of plates and get them 'ready' for removal and application during the coppering stage (when and if I ever get there). The 8" jig I made should hold 20 or so plates comfortably. By the way, you can peel off the paper backing left over after removing the foil plates and reuse the tape on the jig - probably works a few times before needing to replace all the tape. The results for the 4 plates I used to show this process are below. You can see the minor crimp in the first (far left) copper plate. The rest were fine - no bends or crimps. I am sticking the plates on the jig itself...which is unsanded basswood. So the plates aren’t as ‘smooth’ as they ought to be. Thus end'eth the lesson. I have not yet begun my coppering...but that's the method I have thought up to keep sane and relatively focused on a consistent process. I would REALLY love to hear how other folks did their coppering. (And not some vague response of what you used...I'd like to know how you did it.). Have a good one! Moving on....


-
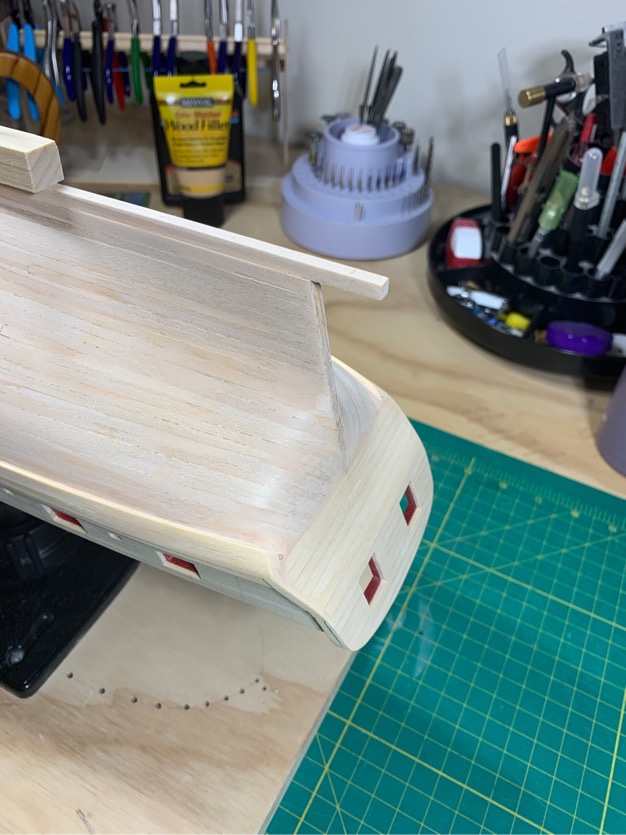
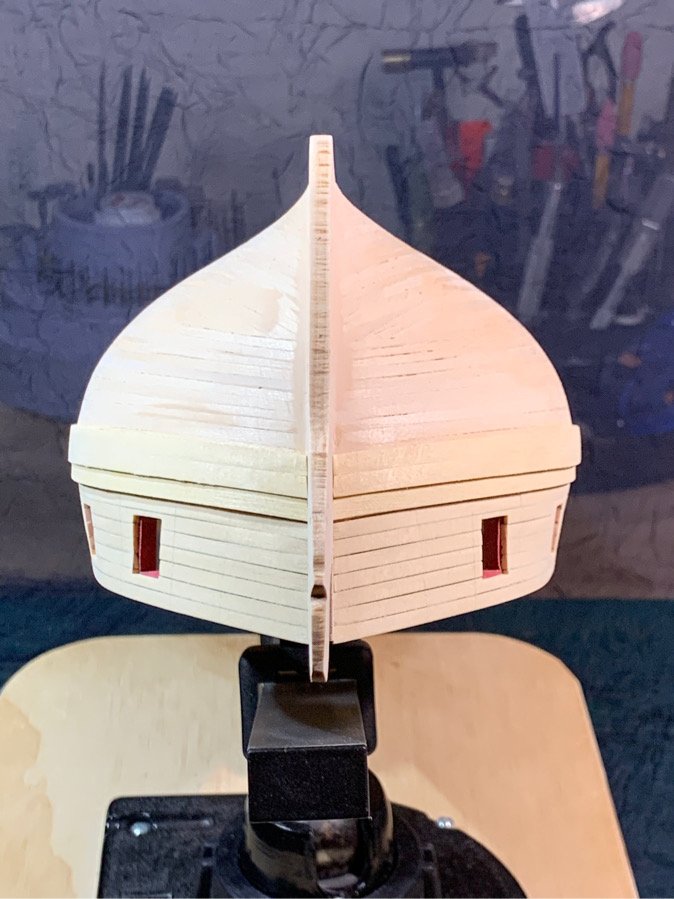
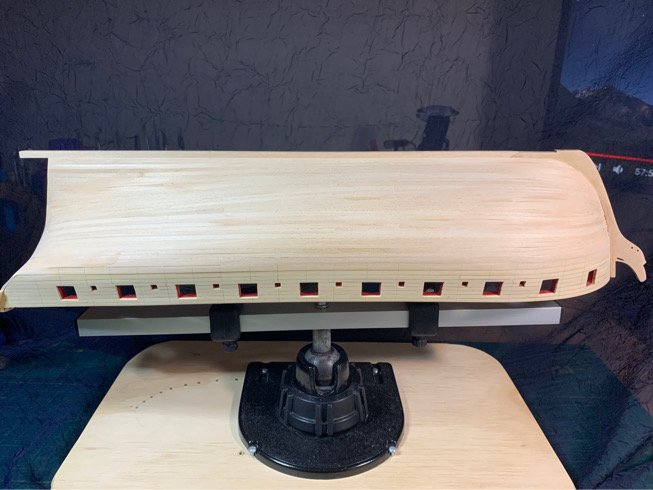
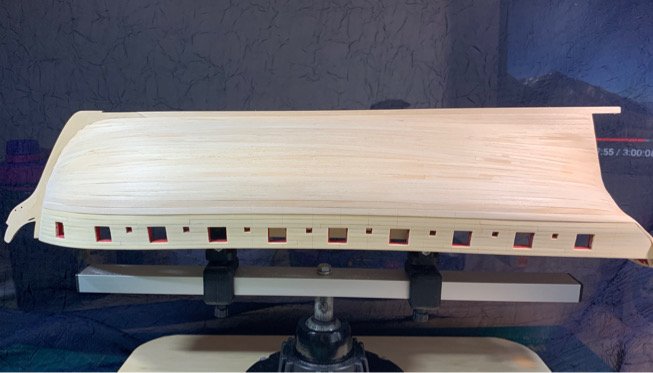
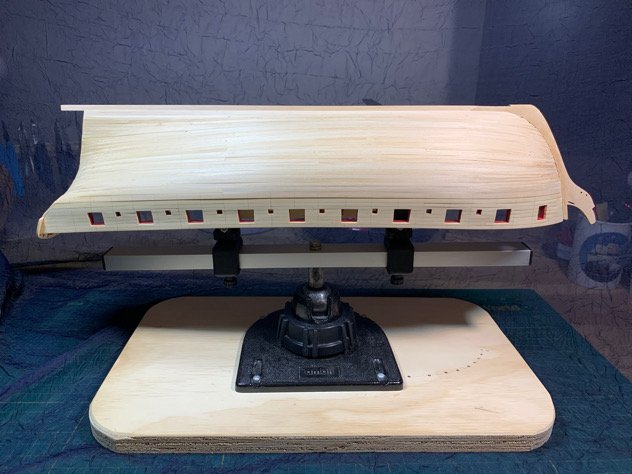
Well, I actually got some progress in this weekend. Got the wales installed. I cut my own using Chuck's Alaskan cedar. Not only is the wood much more homogenous and easier to handle than the kit's crappy basswood, I simply love the smell of cedar!!! The two lower 1/16" thick wales were not as difficult to align and bend as I had expected, and after some sanding, they trimmed up pretty nicely. And again - gratuitous photos of my hull which folks are probably getting sick of at this point (but I can't help myself).... I decided to put the wales on unpainted as I knew that especially the two lower thicker wales would probably need some evening out with sanding. Besides, I'll be doing a lot of painting anyway, so it gives me the opportunity to practice. I also remember how much of a pain it was with my Sultana to put on the wales pre-painted...I still don't know what I was thinking...!!! Moving on...
-
Thanks so much! The words of encouragement really help!
-
Got the starboard wales on...rough but pretty nice result. Used cedar and glad I did. Now working on the port side. Also made a simple jig to help me remove the copper plates from the adhesive backing without driving myself crazy. Pics to follow. Moving on...
-
@WalrusGuyActually, the entire hull is basswood. I’m just done ever using basswood again. 😊 I’ll try to find some sealer.
-
@RichardGWas there any particular type of paint or brand you used?
-
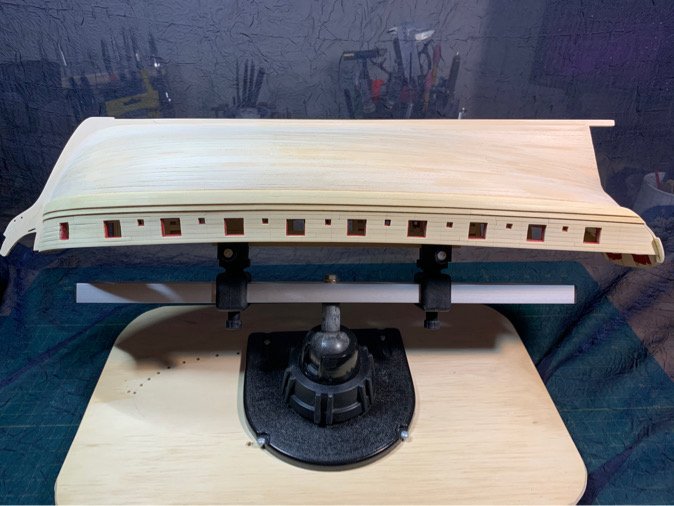
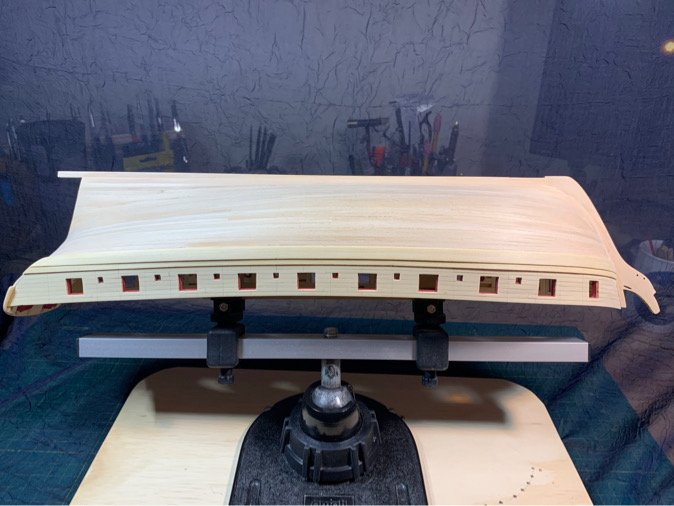
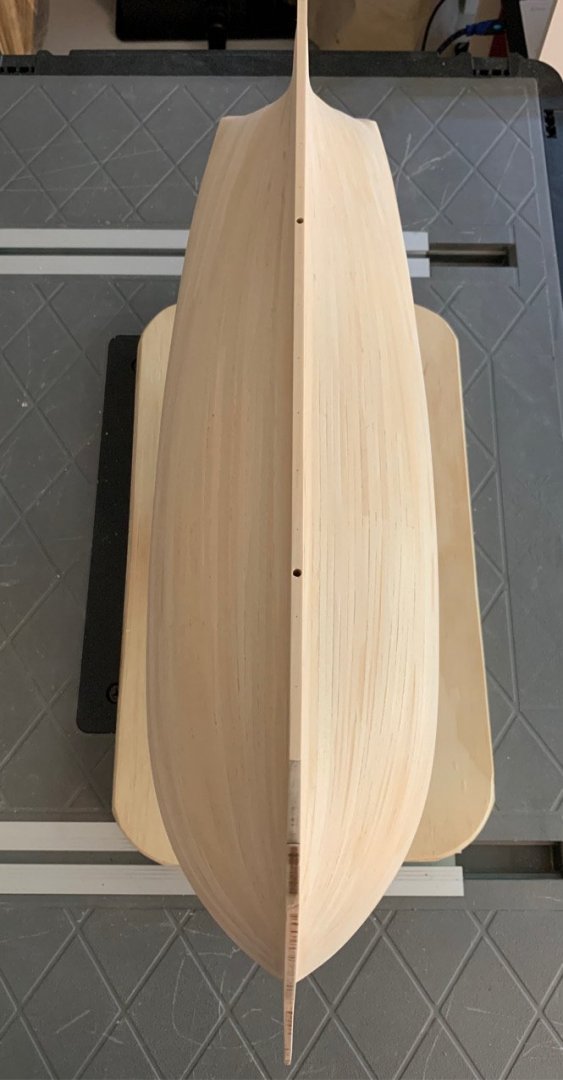
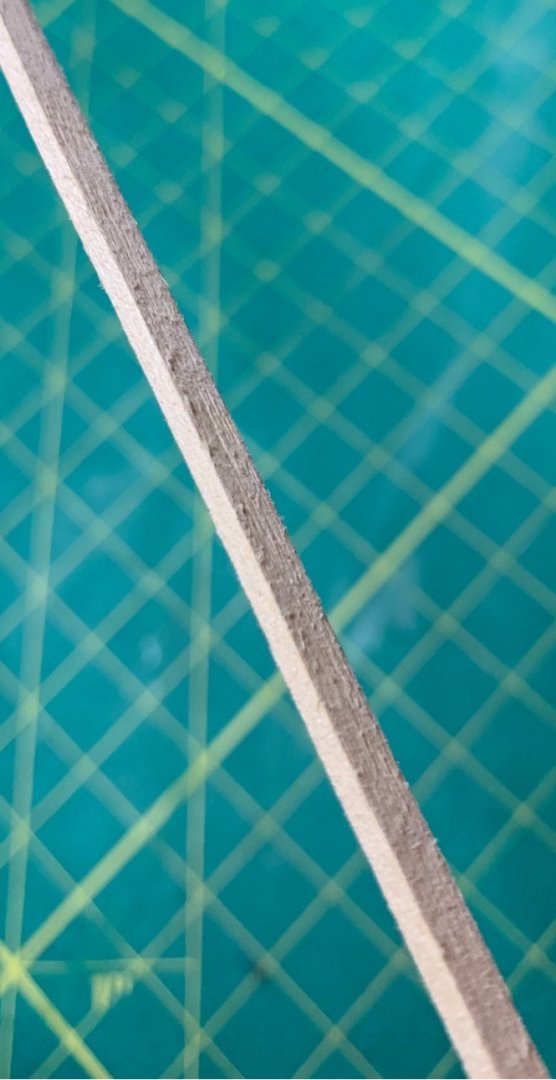
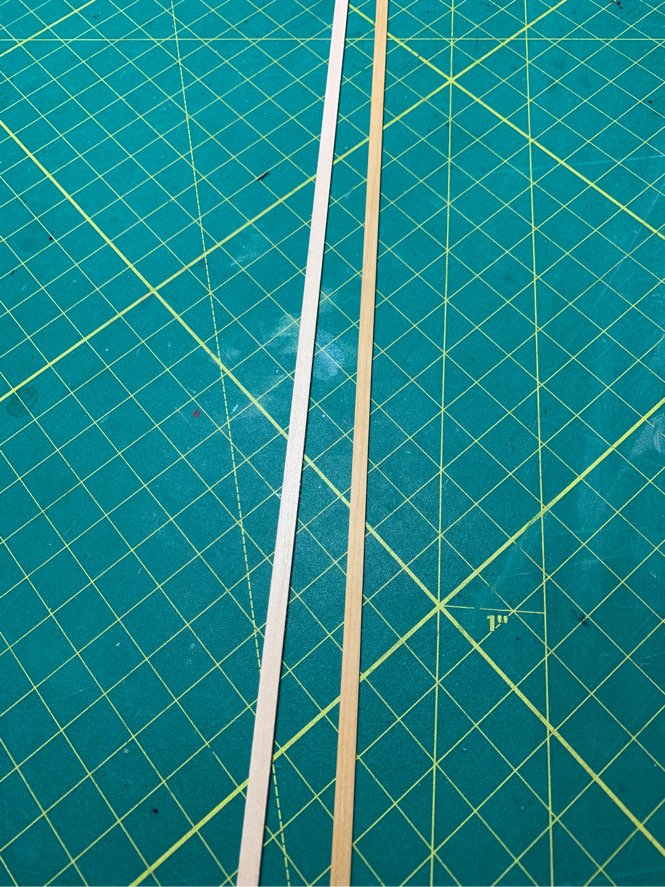
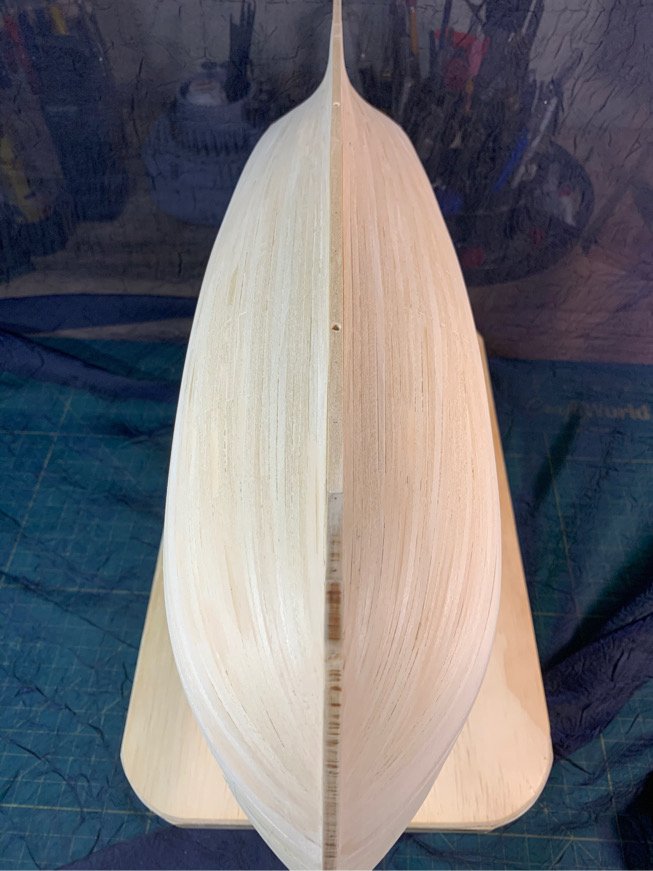
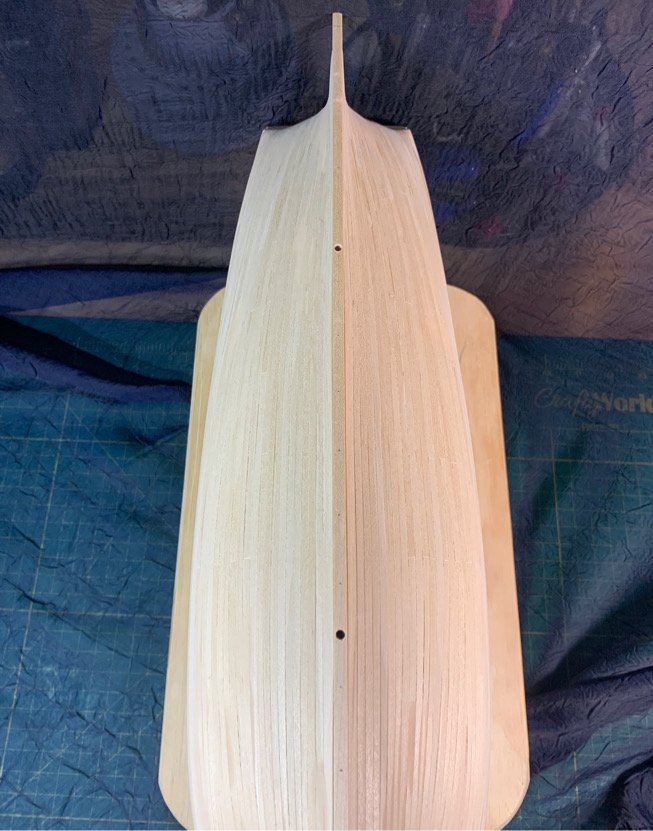
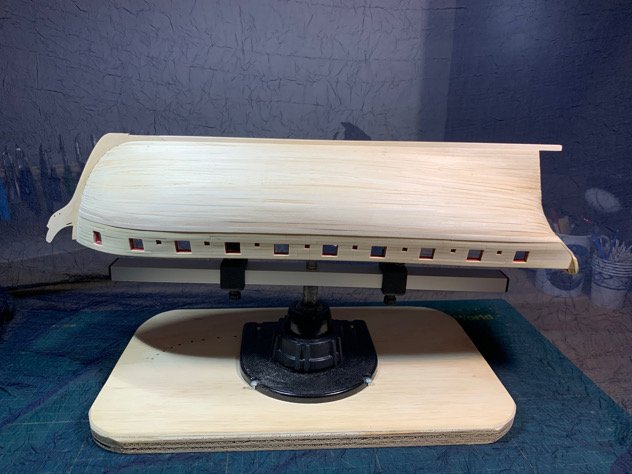
More ‘sanding/filling/sanding’. I keep scrutinizing the hull and finding areas I could smooth out a bit more. Kind of hitting the point of diminishing returns so will stop here. I keep rubbing the hull like it’s some erotic fetish...but seriously, I’m amazed at how smooth and solid it feels. 👍🏽 Time to move on. I guess the only question is whether I should coat the hull with a wipe on poly or base coat of primer to help adhesion of the copper plates. Not sure. Anyone got some advice? On a different tack...I really hate basswood. I’ve come to the point in this model where I won’t tolerate it unless it’s part of the premade laser cut pieces. So, I decided to cut up my stock of 24” boxwood blocks to make a false keel piece (5/16”). I figured that would be easy to make. And frankly, I can’t say enough about how tight and silky boxwood feels. It’s amazingly tight grained wood. I cut a 1/16” x 5/16” section of boxwood to compare to the basswood strip...and let’s just say I’m sold. Basswood... Boxwood... And comparing them, feeling them, etc. I can get a better understanding why basswood (very thready and won’t hold an edge) is not preferable. Cheap, yes... but you get what you pay for. My false keel is prepped...and my boxwood stash is ready when needed. Moving on...

-
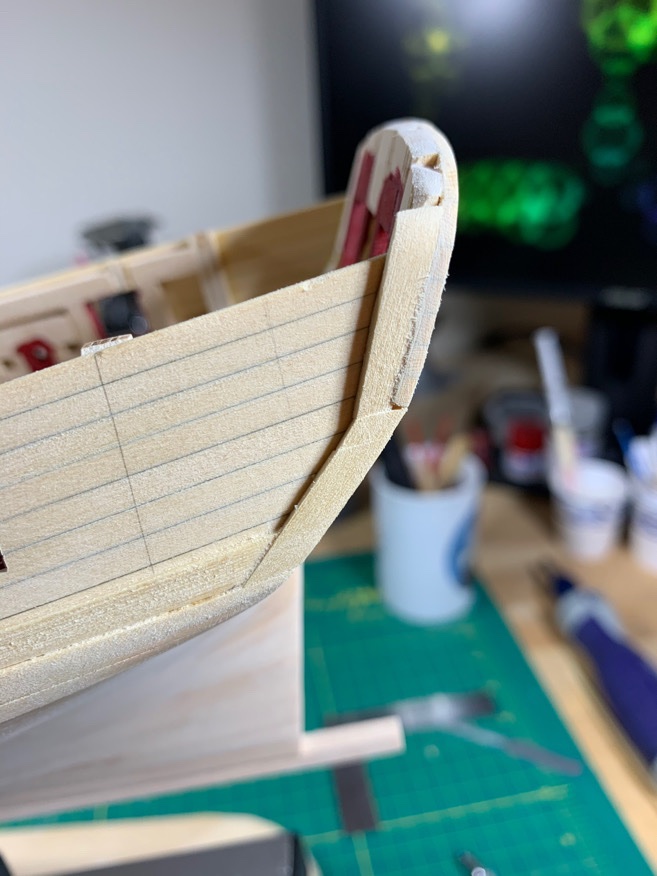
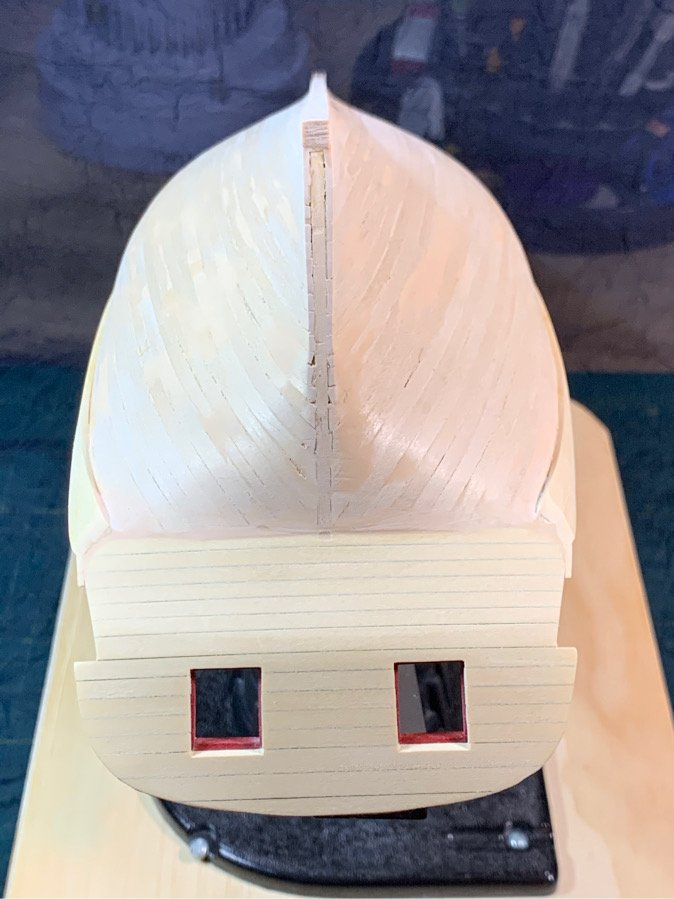
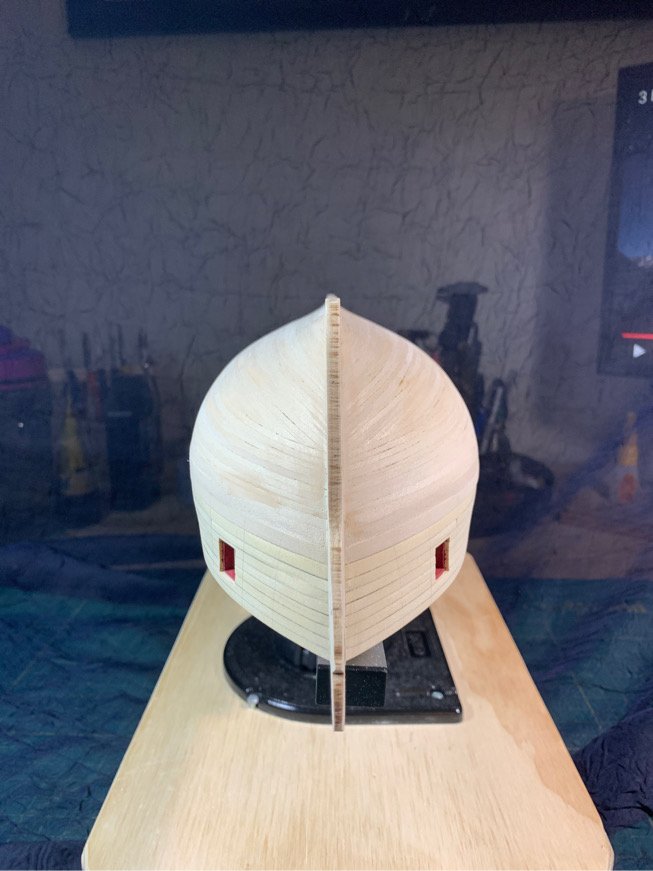
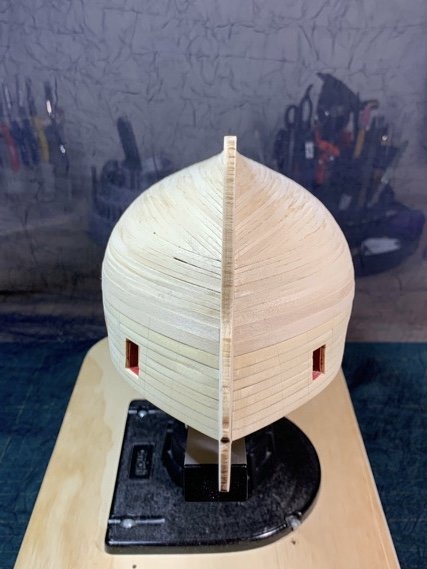
After some sanding and more sanding...then wood filler and some sanding...and more sanding...and wood filler...you get the idea. Hull is now smoother than a baby’s butt. 👶 Had to pay attention to the stern, but after filler and sanding it turned out ok... It’s not perfect, but it should turn out pretty decent after painting and coppering (fingers crossed). What the hell...moving on!!
-
A bit more slow progress. At least I can say the hull planking is on (such as it is). My greatest respect to folks who can pull if seamless planking. It’s a skill which I still need to develop. But I’m gladly moving on...to sanding and more sanding and wood filler. The stern was rough...but I take heart in the fact I’ve never done planking before, so I’ll give myself a small pat on the back and move on. 🍺
-
Thanks, Dave. I needed the kind word. 🙏🏻
-
I think she looks marvelous and gives me more motivation to continue with my own build! Nice progress!!!!
- 950 replies
-
- 1
-
-
- syren
- model shipways
- (and 1 more)
-
By the way, Bill. If you look at my build log you see I was not too happy with golden oak either. Made some comparisons on some faux deck mock ups. I think it’s a combination of basswood and the golden oak stain...too hard to gauge...like a crap shoot.
-
Hey Bill The paper template is a guide...not the rule. Also. When you bend it around the frame near the front it won’t align as the plans are printed in 2D while your frame is 3D. I used push pins to hold my batten and mark the frame. You are doing a marvelous job so far!
-
Nice idea using the laser cut piece, Wally! Wonderful work!,,
- 950 replies
-
- 1
-
-
- syren
- model shipways
- (and 1 more)
-
Beautiful work!
-
Now I know why admiralty models are so popular!!! 🤣


