


Overworked724
-
Posts
1,263 -
Joined
-
Last visited
Content Type
Profiles
Forums
Gallery
Events
Everything posted by Overworked724
-
 Yeah...this is a difficult part. Fairing the hull (bulwark angles) is key to getting decent planking runs. If you have one badly faired frame, you can run into problems. I did use a dremel at this point to trim some bulk of the wood. The dashed lines on the frames are a guide....not the rule. Dremel drum sanders take off a LOT in a short time. So just be careful. Filler blocks between the frames once they are glued in and true (square with the bulk head former) will stabilize the model. I think a lot of the builds gloss of this part as it is both labor intensive and boring. 😃 But very very important to get right. Looking good!!!
- 436 replies
-
- 1
-

-
- Syren
- Model Shipways
- (and 1 more)
-
Howdy Keith. I make them myself and describe the process on pg 4 of this build. Hope it helps you!
-
Got my trunnel holes drilled. Decided to put some trunnels in the transom as well. Figured I would start there to see how they turned out. I have to say, dipping the cedar nails in the 50:50 glue and sliding the ends into the holes is not as challenging as I was thinking it would be...thank God. It will take time and I’ll need to make more nails (quick job), but I’m glad I approached them this way rather than using toothpicks. This is much easier! Moving on....
-
My advice - do yourself a favor and don't leave the overage from the keel section longer than an inch beyond the edge of the stern post. I left mine a bit long and during planking feel like I got away with one of two catastrophes when I accidentally hooked the extended section of the keel. By the way - love your stand! Lazy susan was a great idea!!
- 436 replies
-
- 1
-
-
- Syren
- Model Shipways
- (and 1 more)
-
Hey Red...that's the great thing...there's always a 'next' model! Carry on!
-
Just a thought - alternatively, you can carve the bearding line/rabbet curvature into the bulkhead former without the rabbet piece glued on...then glue on later. This is what I did and it made the carving a bit less stressful. Alternatively, you can glue on the piece using PVA glue (spot glue at certain points to keep it on) then carve the keel. Afterwards, remove the rabbet piece (a bit of water at the points used to glue it on) and add a new rabbet piece (nice a clean). You did a great job carving! I used also chisel (mini chisel I got from Micromark). Fun stuff!
-
Yep...those drilling events always make me nervous too. I’m putting in the trunnels holes in the side of my Syren now and that’s nerve wracking enough. Drilling the holes on the interior is cringeworthy...I’m afraid I’ll puncture the wall. How are you drilling your holes? Pin vise?
- 950 replies
-
- 1
-
-
- syren
- model shipways
- (and 1 more)
-
Many people approach this differently ... I actually rough carved the bearding line and the lower edge of the bulkhead former (big center piece which holds the frames) before I put the small section of wood which actually 'creates' the rabbet. It might be a bit risky, but for me it was a bit easier as I am horrible at sanding. The intent of the rabbet is to give the garboard strake (that first plank that sits against the rabbet and runs along the frames) a slot to sit in, as well as the terminating ends of your planks at the bow and stern. It makes planking a bit easier. I'm still a novice...but the rabbet definitely helps!
- 436 replies
-
- 1
-
-
- Syren
- Model Shipways
- (and 1 more)
-
I've been there...done that...and I still keep doing that!! So don't feel bad. Steady on...
- 436 replies
-
- 1
-
-
- Syren
- Model Shipways
- (and 1 more)
-
Awesome! Pulling up a chair. I’m slow, so you’ll probably pass me by next week. 🤣
-
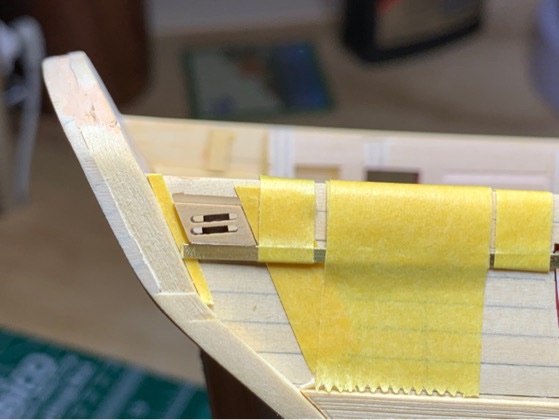
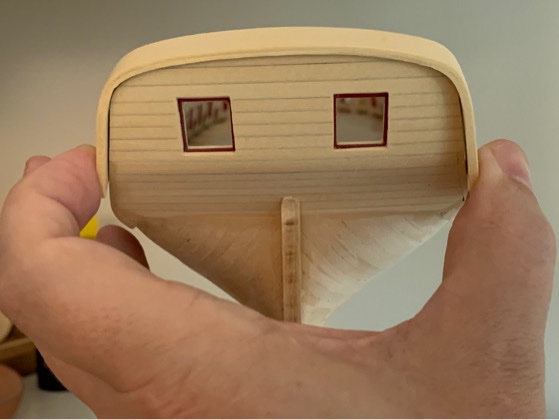
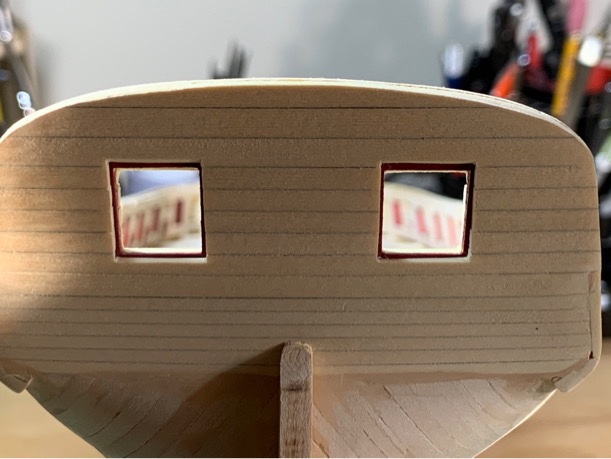
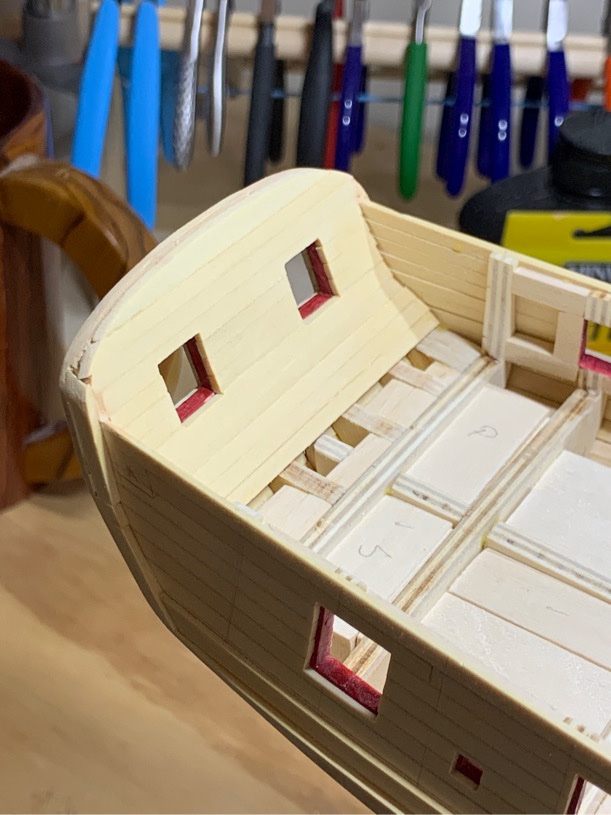
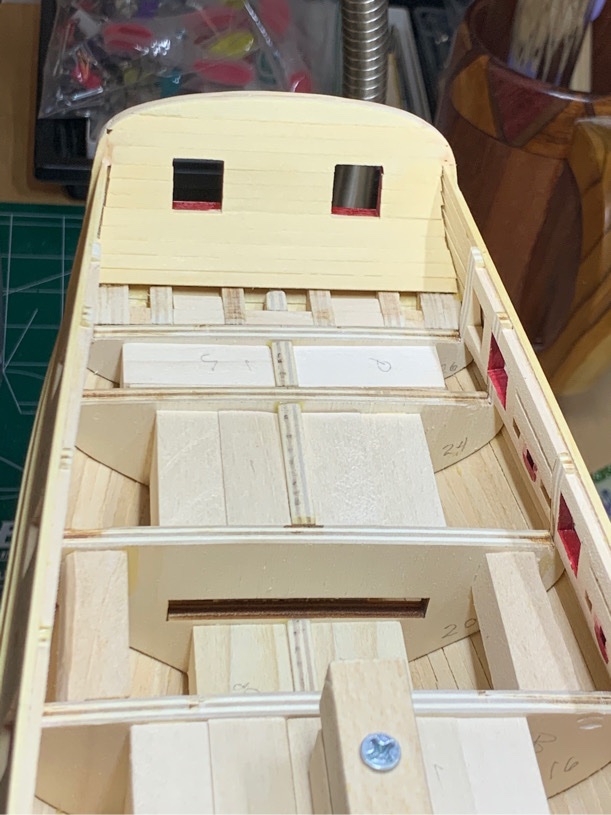
Finally got the stern fixed sheave block holes carved out. Sweating bullets during ‘bulkhead surgery’. Again it was tape and using a brass bar on the lower edge to keep me honest and carving within the lines. I’m glad I got them carved in. 👍🏽 Been fretting over the stern holes for a long while...😅 Moving on...
-
You could try to dilute the glue a bit more. That may help.
- 950 replies
-
- 1
-
-
- syren
- model shipways
- (and 1 more)
-
Well...the shaping of the transom cap rail is not the problem...the thickness is. It does look a bit blocky. I’ve decided I’m going to redo it by precutting the 1/32” cap rail to shape and adding to the transom to see how it looks. Then I’ll add the second layer after.
-
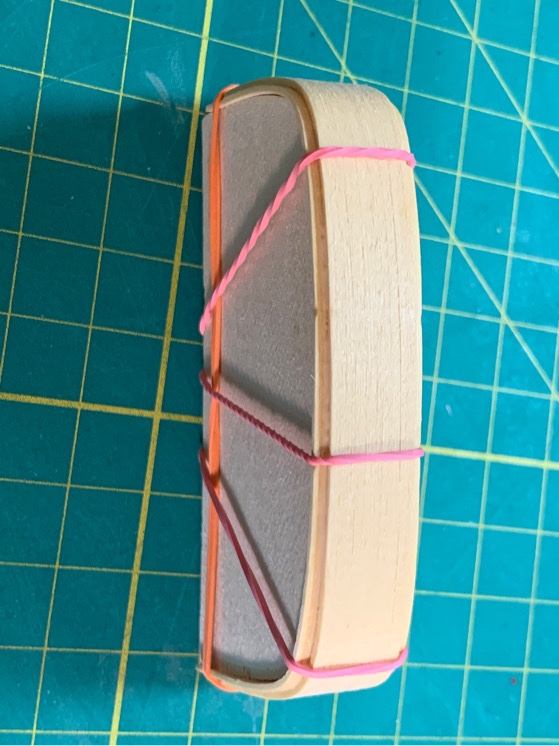
Rewetting the piece and microwaving on the forming block for 45sec (think I did twice...rewetting before second time) really helped keep the shape. I added a second strip of 1/32” cedar after I bent/shaped it...then glued it to the first one using PVA glue. I trimmed down the edge a bit and it seems it held its overall shape. It should be plenty wide to carve out the proper width for the transom cap rail. We will see...!!! Moving on...
-
For scratch I would totally avoid basswood. 😎
-
Dave, it sands down like glass and it cuts very easily. Bending around sharp corners when the wood is wet is not as difficult as with basswood. The cedar wood tends to hold it’s shape better and the tightness of the grain is obvious because the wood doesn’t splinter as easily when bending around those sharp corners. The stain takes into the wood much better and more evenly for Cedar then for basswood. I think the big sell for me is that it doesn’t get hairy and thready like like basswood does after sanding. After you prepare the wood it’s ready to work. Of course you can take this with a grain of salt because my experience with wood is pretty limited. I think the big sell for me is that it doesn’t get hairy and thready like like basswood does and cuts like butter. I have a little bit of boxwood and the stuff is like gold to me for those same reasons I like cedar. The only drawback of cedar (which I actually like) is the yellowish hue. But I love the smell as well. I got some from Syren and the stuff Chuck sells is worth trying. 👍🏽
-
I tried rewetting and microwaving. It did help shape the piece tremendously! Might experiment a bit with the microwave. Interesting...piece came out very hot as well as almost dry.
-
BY the way...I only use Tamiya paint...it's awesome and you can thin with water. But Tamiya also sells a thinner. The paint is solvent based, so it dries very fast and also evaporates a bit quickly. The sheen on using flat black may just be from your finger oil spreading on the paint base.
-
Great idea for the gold paint...really saves overusing a paint pot too. I'll remember this useful tip for future! Your build looks great so far!
-
Actually, I do soak the wood. And keep it very wet as I slowly wrap it around the wooden forming block. I have NOT tried microwaving. Do you do this while it's wet or after it dries? Also, do you leave the rubber bands on?
-
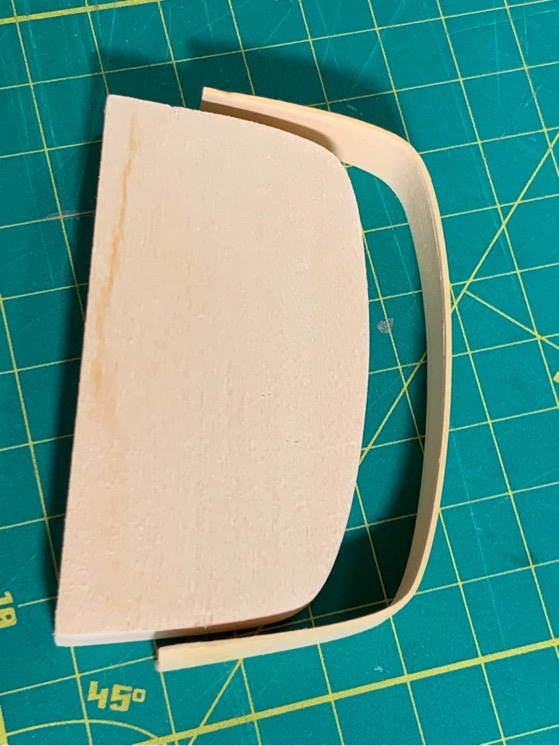
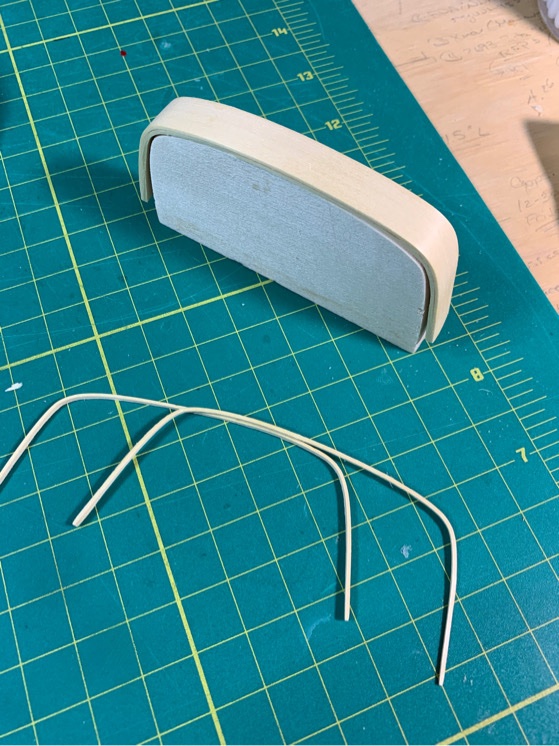
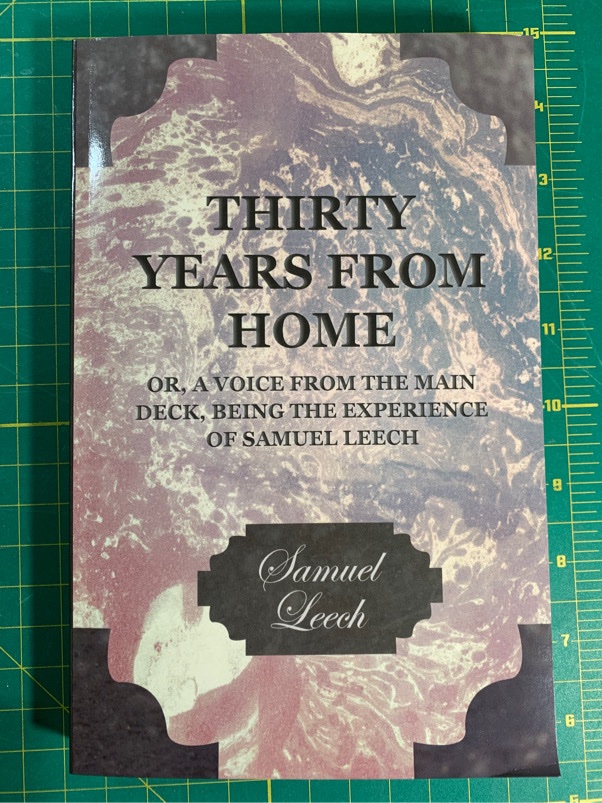
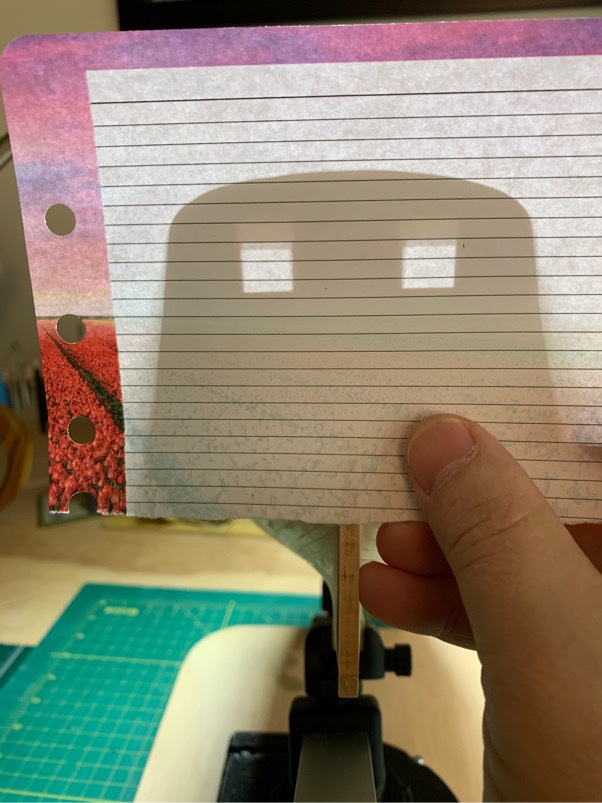
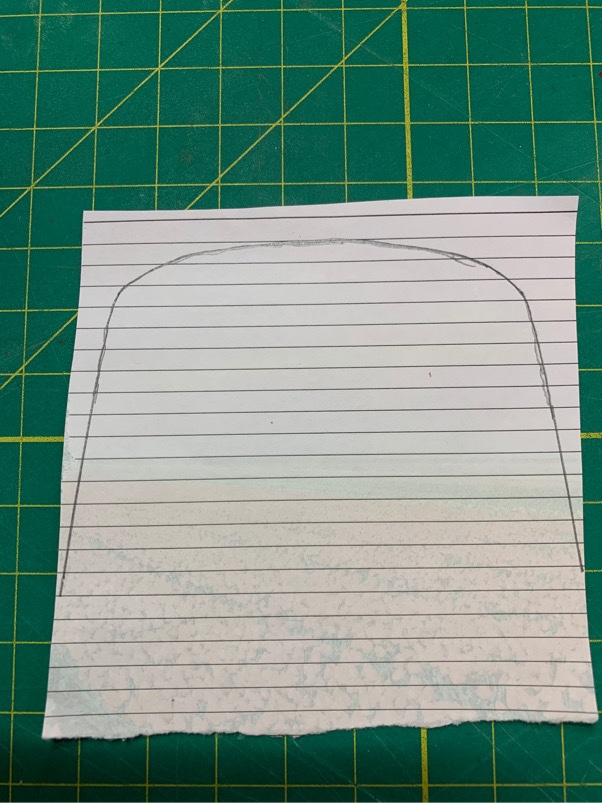
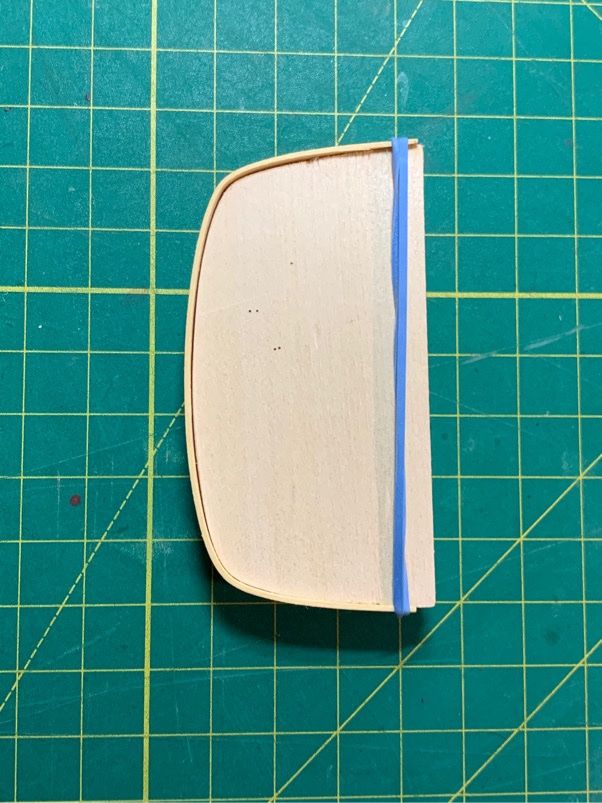
And now for something completely different. Made a cap rail forming block with some spare wood. Traced the shape on a piece of paper and transferred it...nothing unusual. Not certain if 1/16” thick section can bend around those tight corners...so wasn’t sure if I needed to round out the top of the transom a bit more. Decided to give it a go...using 1/32” thick cedar. This stuff bends cleanly when wet and I was able to bend around the block no problem. Wanted to try using 2 sections of 1/32” wood...rather than one thick piece. But we’ll see...I’m still dinking around with this idea. Also got the diary of Sam Leech on Amazon! This seaman served in both US and British navies, and was serving on board Syren when it was captured by the British during the War of 1812 and renamed Siren...(because the English have to spell things weird!). Very excellent read so far! Moving on....

-
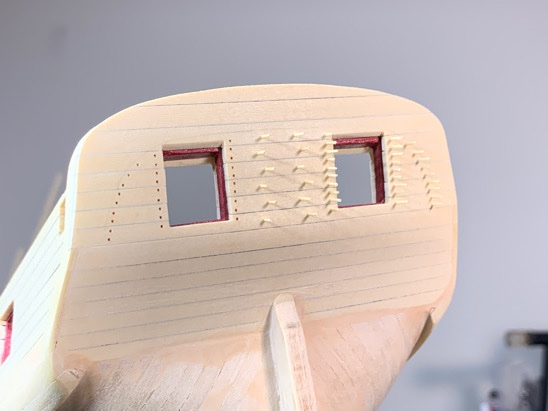
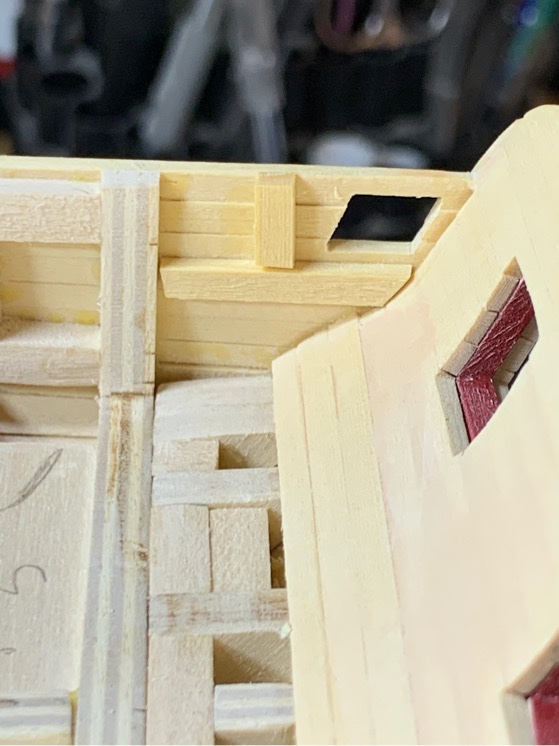
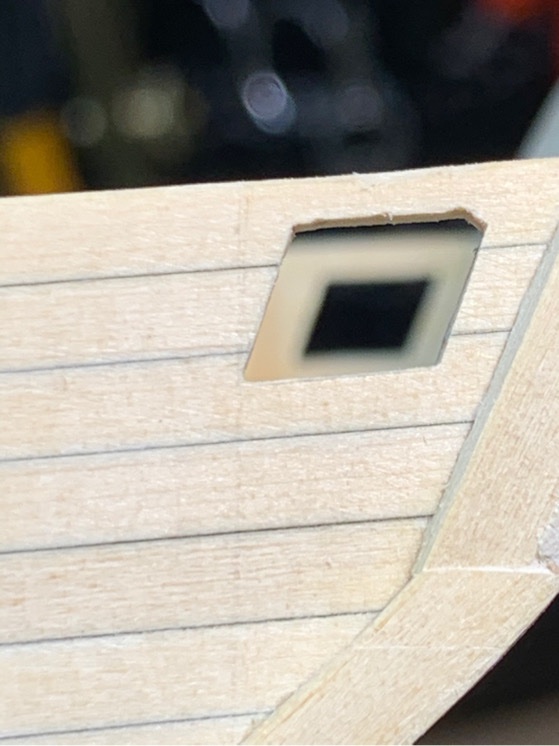
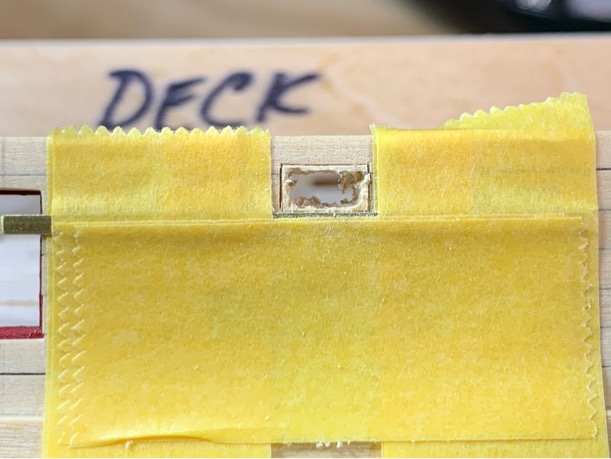
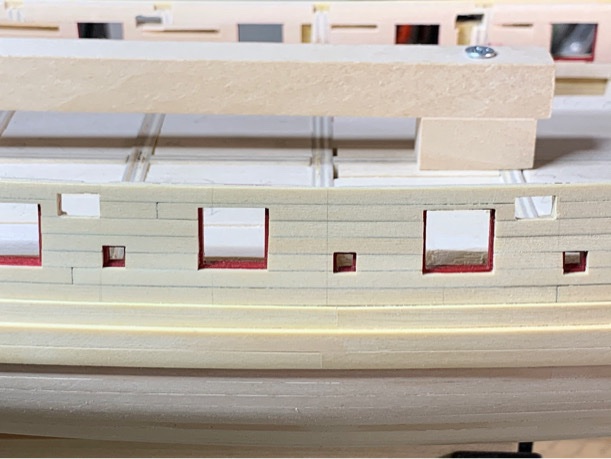
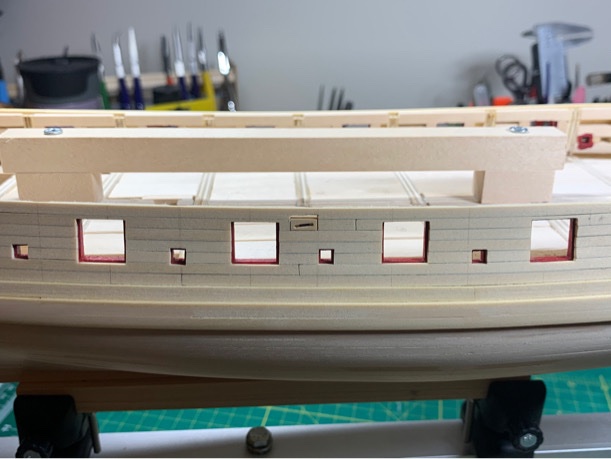
Got the square fixed block holes at midships (sp?) drilled out. Used a 0.1mm brass bar to act as a ‘razor’ barrier to catch my exacto as I was scoring the vertical lines. SO glad I did...I would have seriously etched the surrounding wood without a good ‘backstop’. Drilled out the dead wood carefully and sanded. Best I could do...will make the hole for the double sheave blocks at the stern a bit later. I gave me a bit of room above the block to give me some wiggle room. The gap will be covered by the shear strake. But the resultant edges of the holes for the rectangular blocks ended up pretty straight...may need to touch up...but not horrible. Also got the transom planked. Still needs sanding. He’ll...everything needs sanding. LOL Angle of the sills was the biggest challenge. Careful careful...!!!! Moving on!

-
Awesome job. Looks beautiful! I’ll be asking for technique help whenever I get to this point!
- 950 replies
-
- 1
-
-
- syren
- model shipways
- (and 1 more)