gjdale
-
Posts
4,894 -
Joined
-
Last visited
Content Type
Profiles
Forums
Gallery
Events
Everything posted by gjdale
-
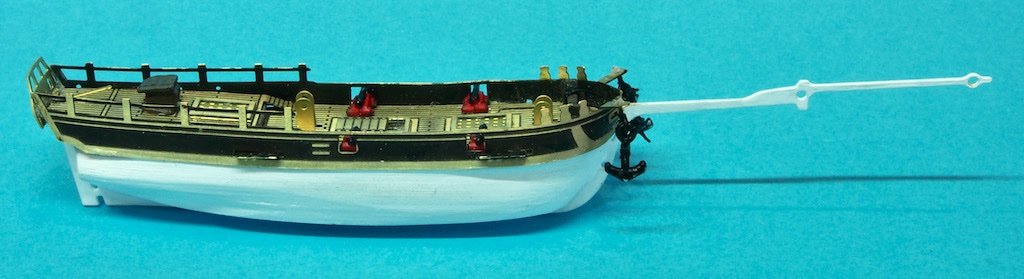
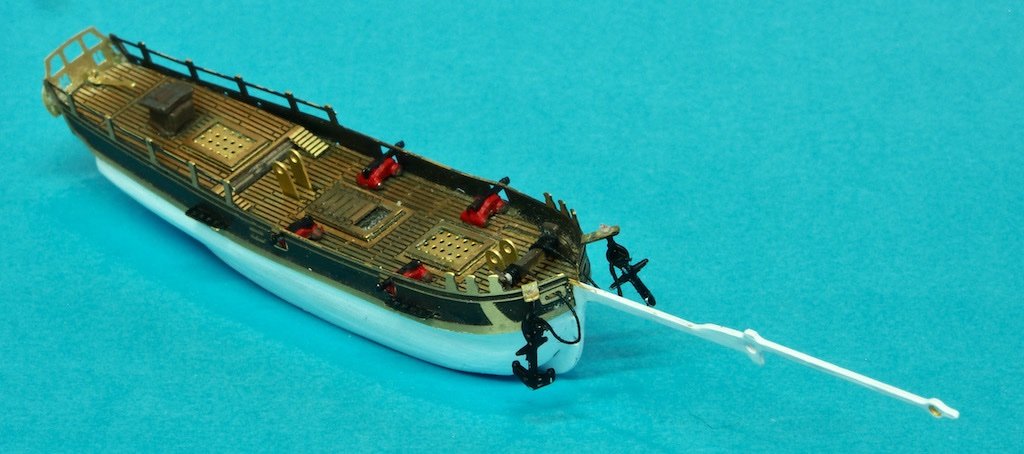
 Another minor update. I completed the rigging today. I chose not to install the large square sail on the foremast as I think it makes it look a little too crowded. The box art also shows the model without this sail installed – good enough for me! I opted not to use any of the kit supplied rigging thread, choosing instead some from my own collection. I used a dark brown for the standing rigging and a light tan for the running rigging. The kit instructions suggest melting the ends of the lines instead of tying knots. I wasn’t convinced that this would hold, so used knots reinforced with a dab of CA glue. The pegs on the bowsprit are holding the outhaul lines in place. Once ready for the “smash and stuff” with the bottle, these will be released and the mast and rigging folded down. Had to get a photo at this point in case it all goes horribly wrong from here! I’m now working on the display base. I’ve found a nice piece of walnut in my furniture timber stash and have made some boxwood dowels as well. The plan is to produce something similar, but not identical, to the display that Glen McGuire used in his excellent rendition of this model.
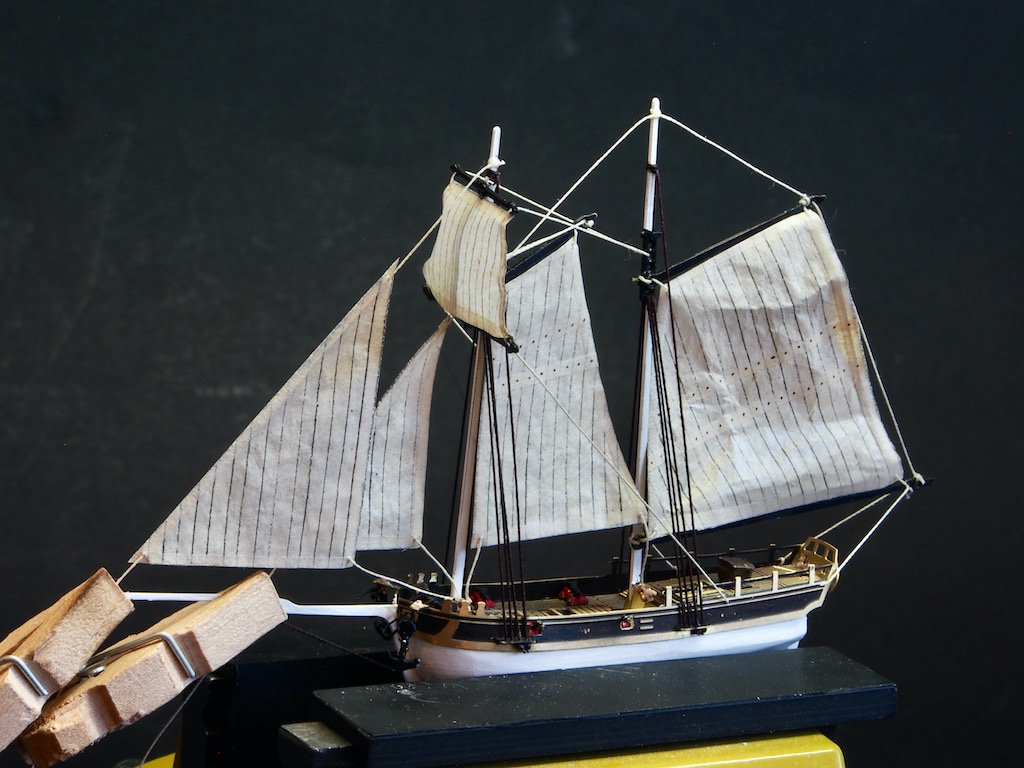
- 61 replies
-
- 10
-

-

-
Nice work Greg. Thanks for the machining tip - something that has always left me scratching my head for a solution.
-
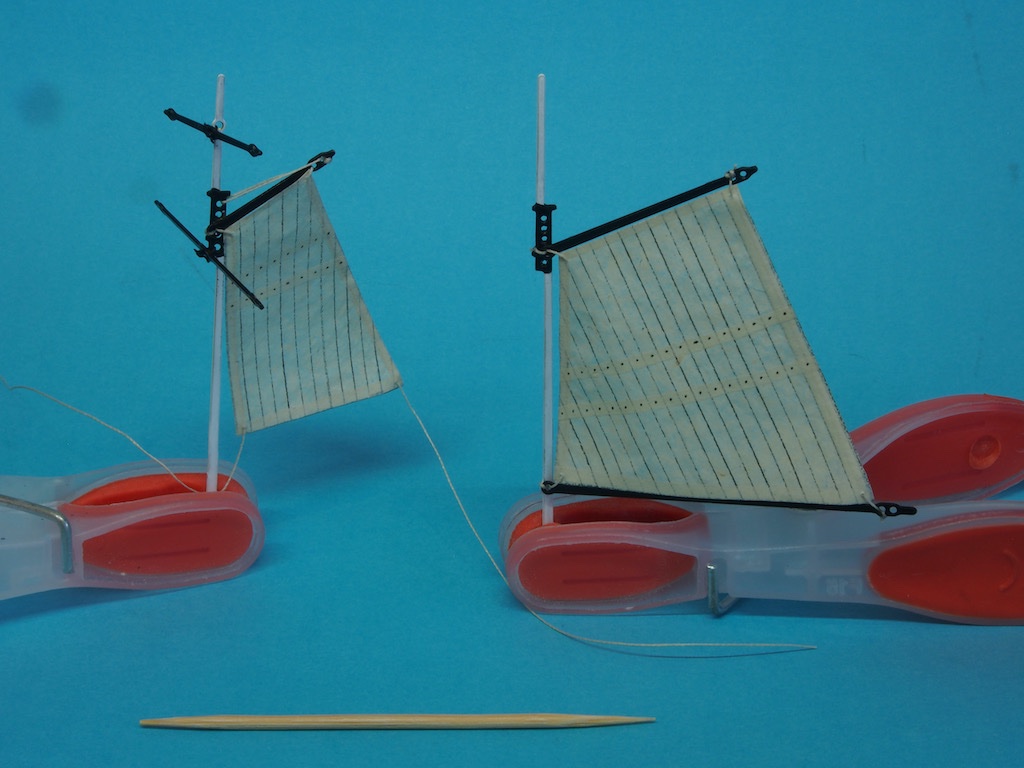
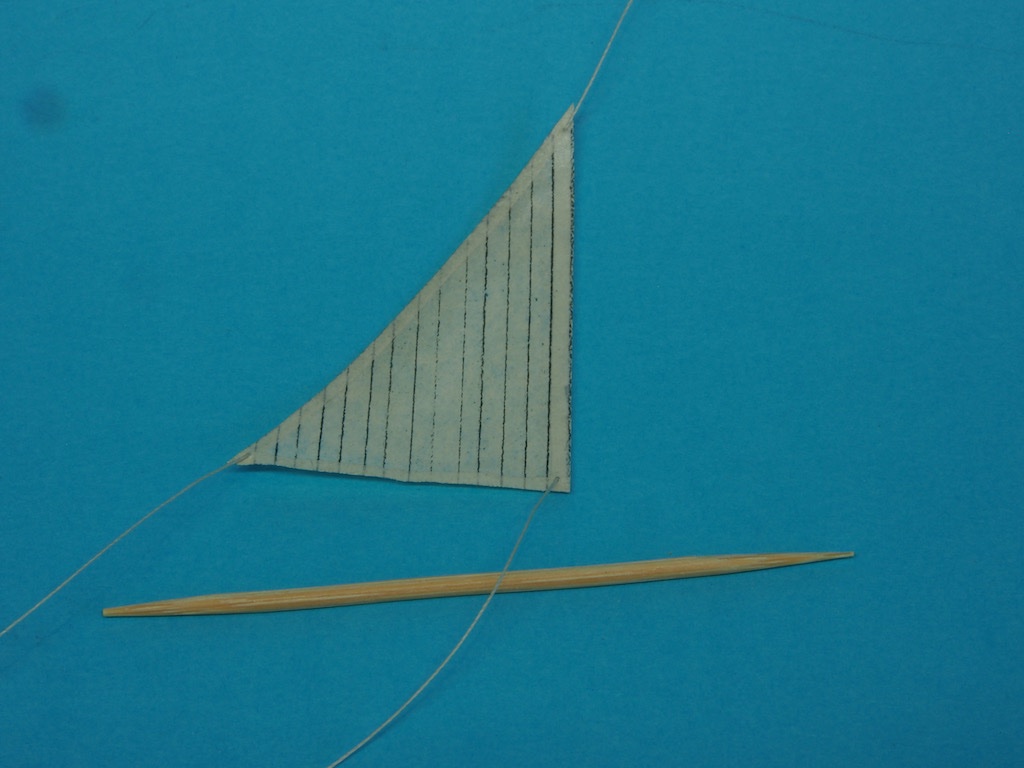
A minor progress update. The fore/aft sails are connected to their respective gaffs and the gaffs as well as the yards are connected to the masts prior to installation on the ship. Rather than using the kit-provided line, I have used some quilting thread in lieu. The line is attached to the sails using diluted acrylic matt medium. In the picture below, the masts are held in an ordinary plastic clothes peg for stability, and I have inserted a toothpick into the photos as a scale reference. And here is a picture of one of the jib sails, complete with boltrope (which will also become part of the rigging process, and ultimately the means by which one of the masts is raised. Not far from "bottle smash time" now.....
-
I see your work has been cat scanned and seems to have passed that test! 🤣
- 460 replies
-
- 6
-
-

-
- Finished
- Flower-class
- (and 1 more)
-
That’s quite a feat on the #80 drill bit Glen - no wonder you needed the adult beverages! Even greater feat to achieve the batten making after said adult beverages! 😊 Looking good.
- 194 replies
-
- 5
-
-
-
- Bottle
- Treasure Fleet
- (and 3 more)
-
Thanks Glen, I’m a little anxious about that too. Guess we’ll find out soon! By the way, it’s not “my” method - it’s David Antscherl’s (and he goes into a lot more detail for adding details to sails at a larger scale). Gotta give credit where it is due. 😊
-
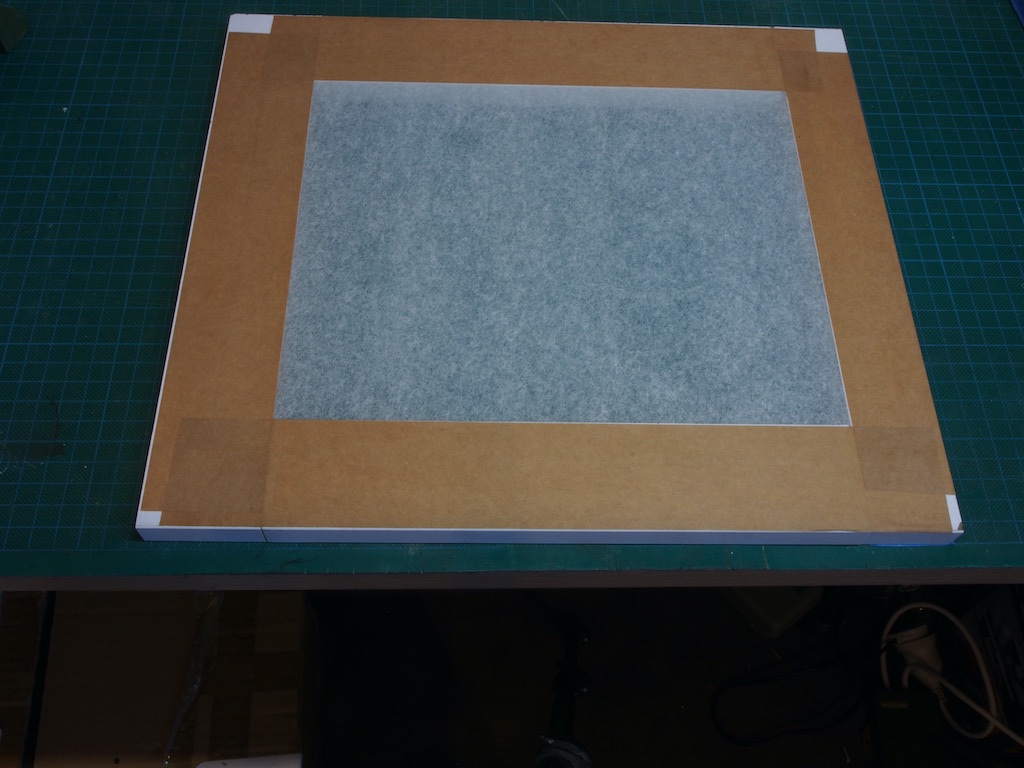
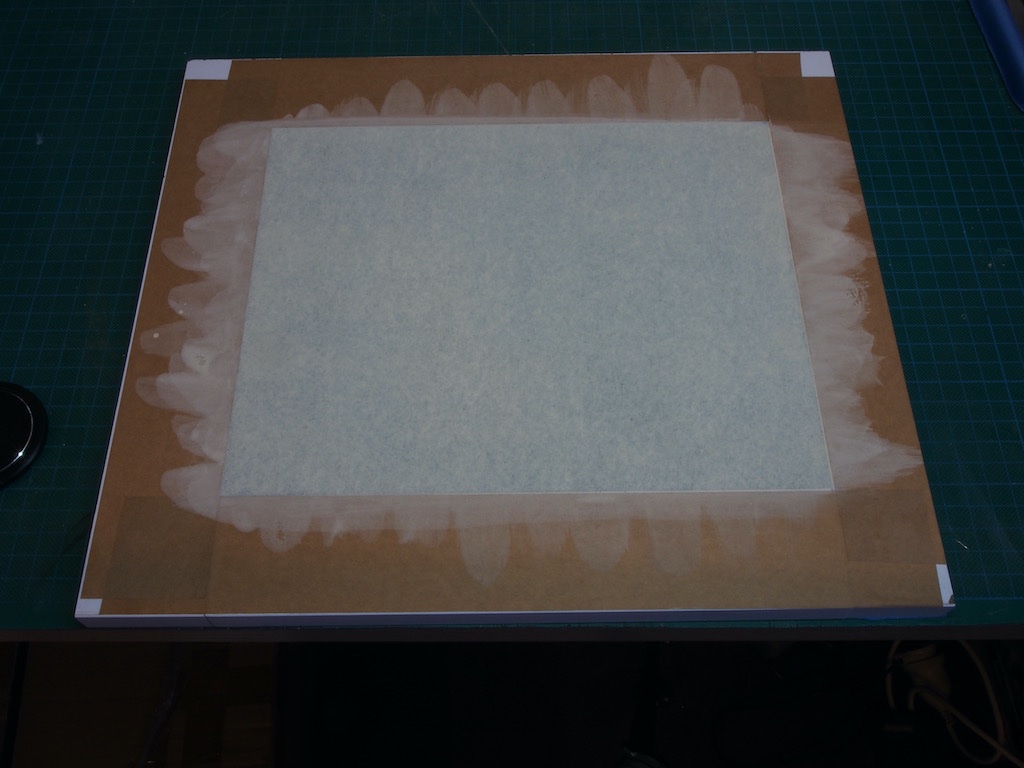
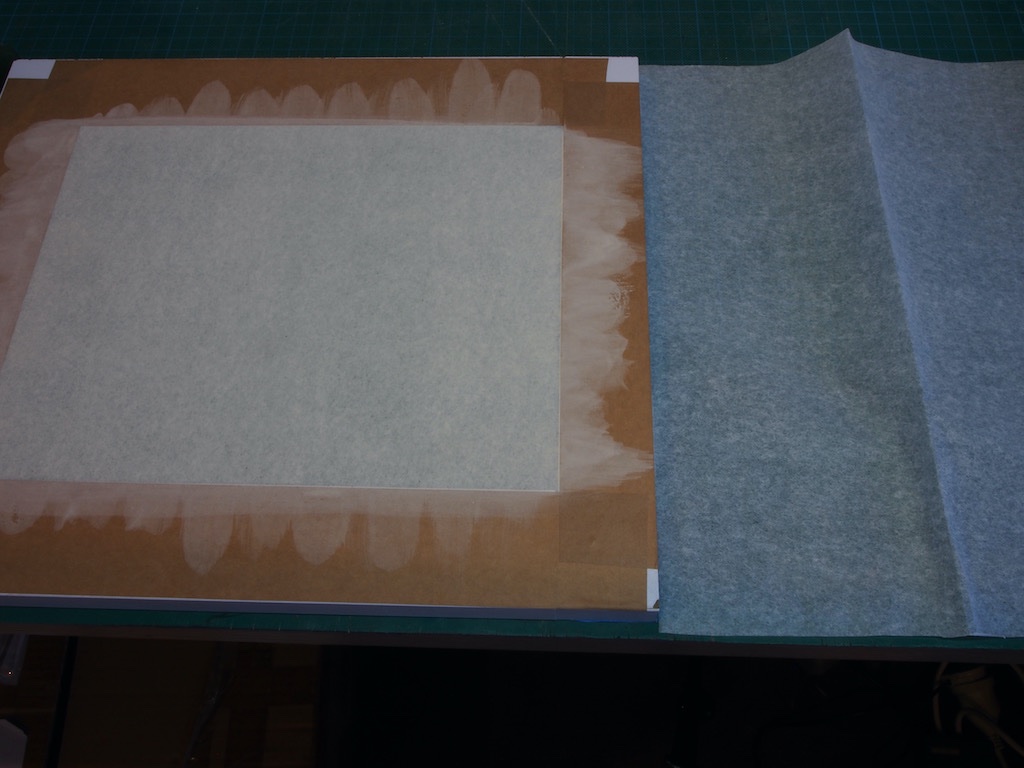
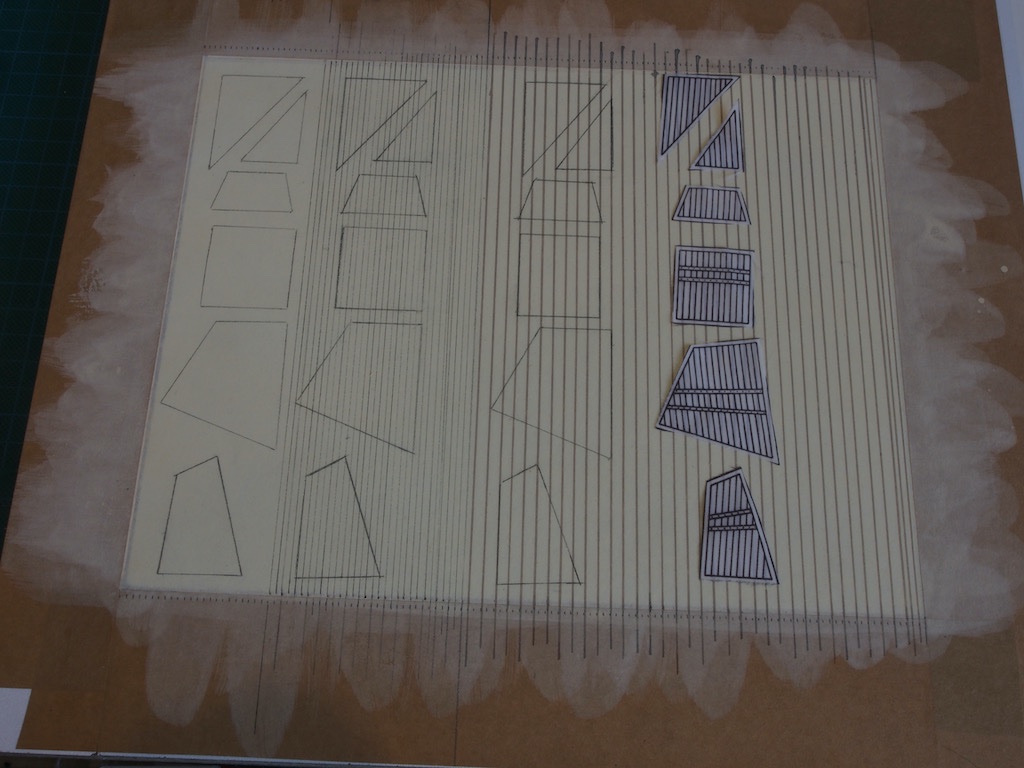
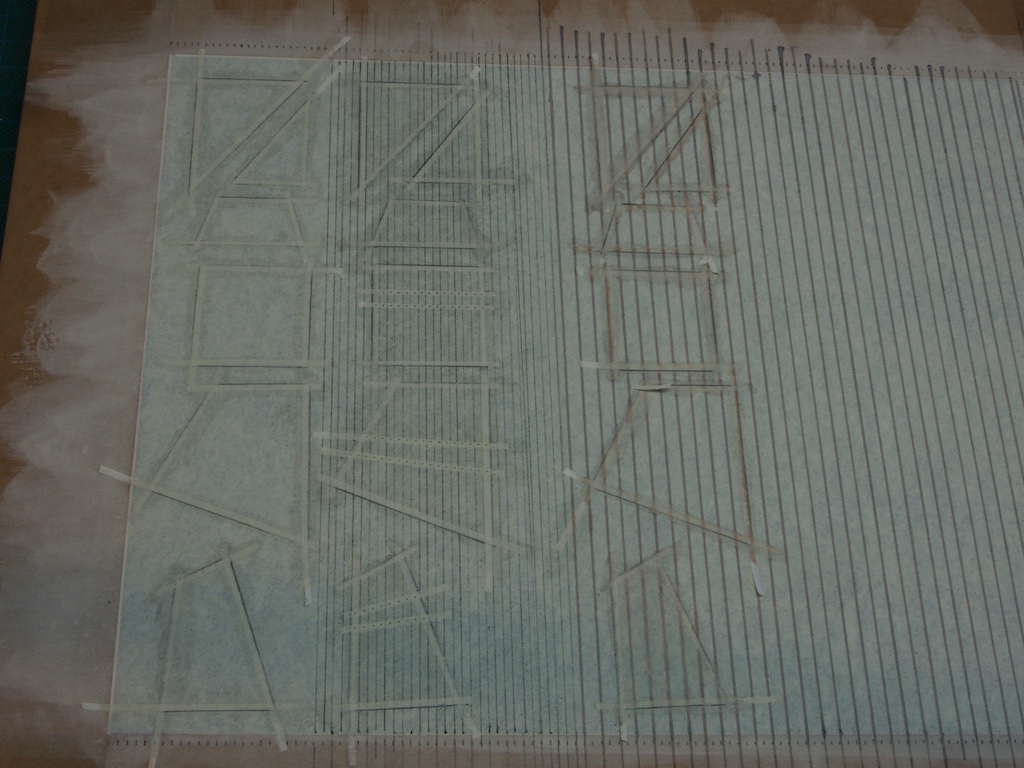
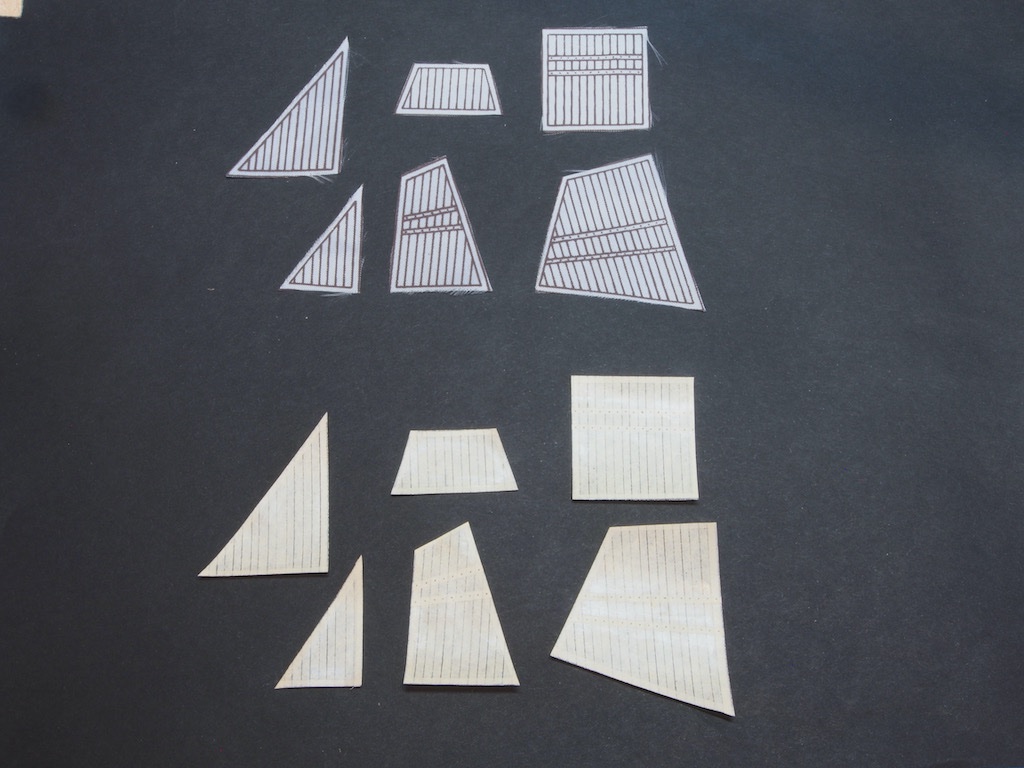
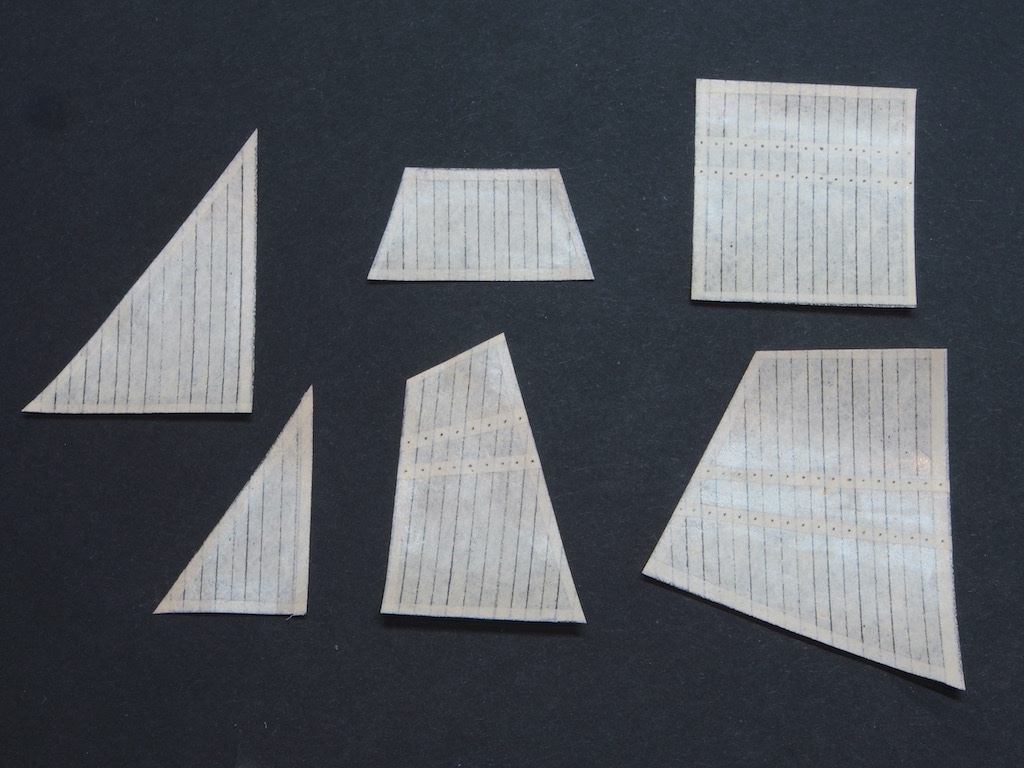
After deciding that the cloth from the Admiral’s stash would not do the job, I decided to have a go at making the sails from silkspan, following the tutorial by David Antscherl in his Sail Making Supplement to Vol IV of TFFM. It took a while to obtain the various supplies needed, but in the end proved to be a lot easier to do than I had anticipated. It all starts with making a frame with a removable centre or “plug”. I knocked one up from some scraps of melamine I had lying around. Nothing fancy here, just held together with pocket screws. Here’s the back, showing the construction method: A piece of Silkspan is then cut a little wider than the opening. The Silkspan is then soaked in water for a couple of minutes and then laid over the frame (with plug inserted for suppot). Gummed brown tape (as used by artists) is then applied to secure the edges of the Silkspan. The frame is then lifted clear of the plug and the Silkspan allowed to dry. As it does so, it tightens like a drum skin. A wash is then applied using very dilute unbleached titanium white acrylic paint. I found that three applications were required to give the desired colour. The photos don’t show the colour very well, but here is a side-by-side of with some untreated Silkspan for comparison. The next step is to draw some parallel lines to represent the cloths of the sail and their seams. Antscherl recommends using a Bow Pen (known as a Ruling Pen here in Australia) with a mix of unbleached titanium white and yellow oxide paint. Instead, I tried using some Sepia ink. Unfortunately, while the Bow Pen may work well at 1:48 scale, it is not so useful at 1:300 scale. The width of the sail cloths is 21” full size, which translates to a little under 2mm at 1:300 scale, while the seam width of 1 ½” full size translates to less than 0.2mm at 1:300 scale. Using the Bow Pen at its narrowest setting I doubled the sail cloth width to leave more space between seams, but the Bow Pen line still looked too large to my eye. Having looked for alternatives, I managed to find a Copic liner pen at 0.03mm. The only catch was that the only colour this comes in is black. I drew these lines on my sail cloth, at the correct 2mm spacing and decided that these looked okay. I then made some carboard templates using the kit-provided sails as pre-templates, and drew the sail outlines onto my prepared cloth. In the picture below, you can see how I’ve tested these against the Bow Pen/Sepia Ink, the Copic Liner, and no lines. For reference, I’ve placed the kit-provided sails on the right in the picture. The next stage was to add reinforcing seams around the edges of the sails. For this I cut 1/16” wide strips from a previously prepared piece of sail cloth and added them around the edges of all sails and then also across the reef bands, attaching them with diluted acrylic matt medium. I used my “non-preferred” areas as practice for this part, as shown in this photo. Grommets for the reefing points were then added by placing a small dot using the 0.03mm Copic liner pen. And finally, the sails were cut free from the frame using a scalpel with a fresh blade. Here is a shot of the completed sail set, with the kit-provided sails above them for reference. And here is a slightly closer shot of just my made sails. I’m quite happy with the way they turned out. I thought they might be very stiff, but they appear to be quite flexible, yet strong. It remains to be seen what happens when they get mashed up to squeeze into the bottle neck!


-
Can’t wait to see what you’ll do next with this one Glen.
- 194 replies
-
- 3
-
-

-
- Bottle
- Treasure Fleet
- (and 3 more)
-
I wasn’t happy with the replacement sail material from the Admiral’s stash, so I’ve decided to have a go at using silk span. I have the “tutorial” addendum from David Antshcerl’s TFFM series and have ordered some silk span. So, there will be a brief hiatus while I await the material and do some testing. Stay tuned….
-
Now that is curious Glen. Even the photo in my instructions shows the backwards ‘N’. I wonder how/when that changed in the production process? B.E. - I’ll try to remember to take some photos during the bottling process, but I’m a bit slack with the photos sometimes when I get absorbed in what I’m doing. It’s the one part of this build that scares me more than any other.
-
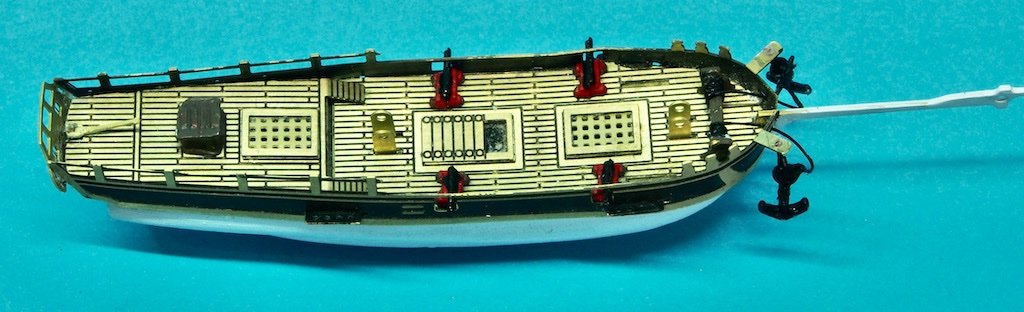
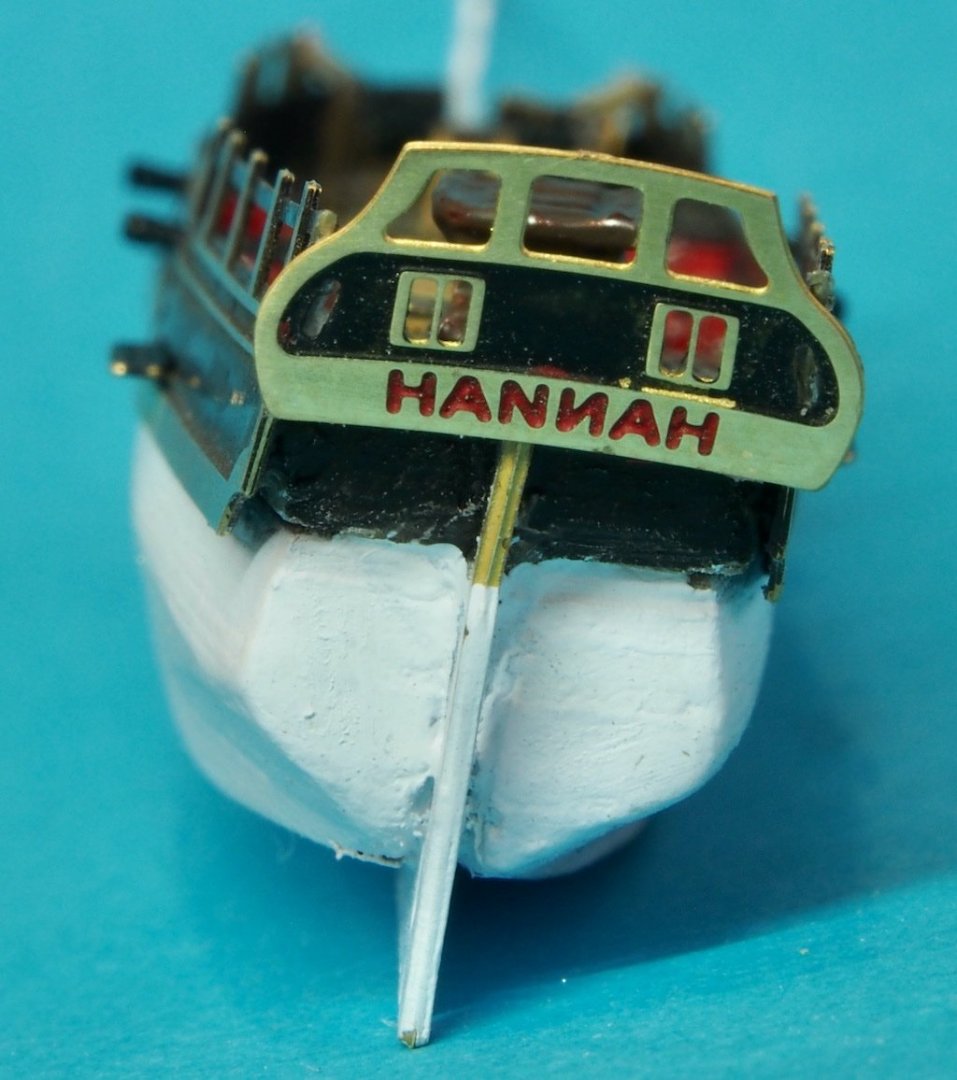
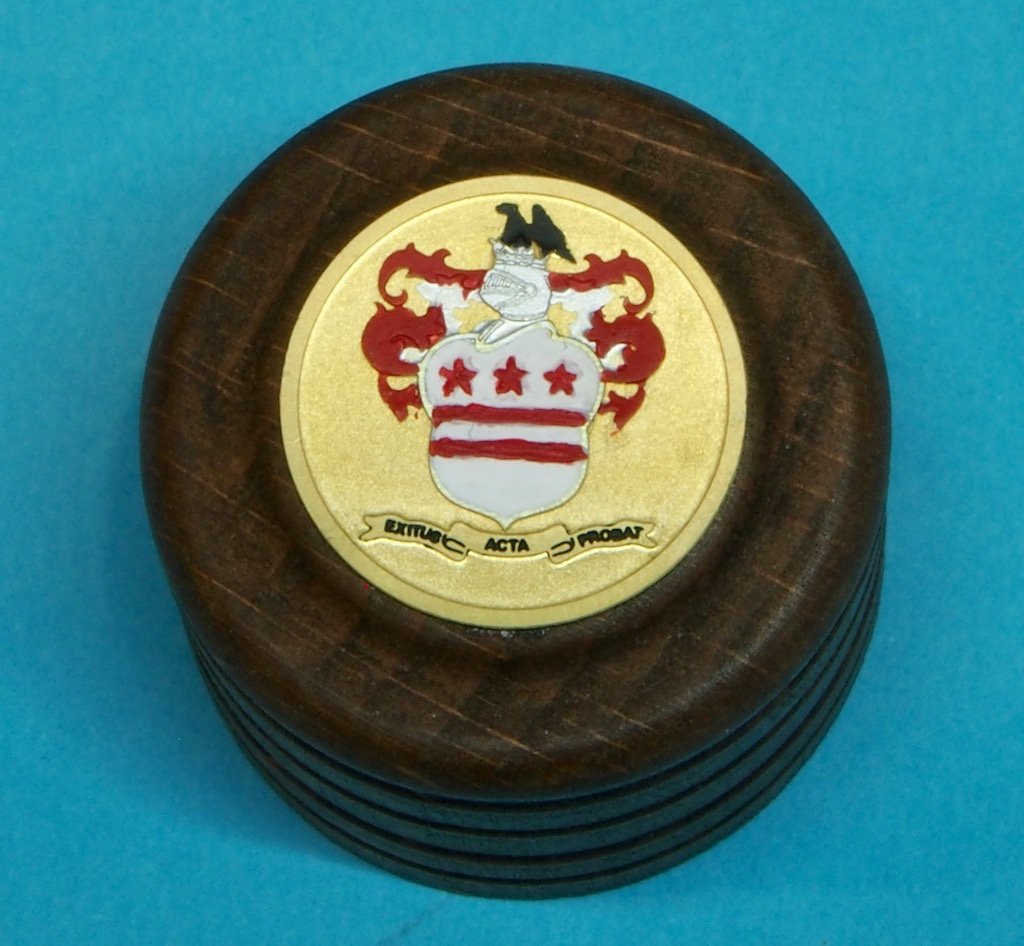
Thanks for the kind comments and the likes. Some more progress over the last couple of days. The hull is now complete, barring some additional touch-up painting. Not much to say about adding the deck furniture, other than it is tiny! I needed to file the bottoms of the gun carriages slightly to enable a good fit of the gun barrels through the ports. The anchors appear to be grossly over-size for the scale, but they are still tiny. Here are some overview photos of the current state of play. And here’s a close-up of the transom. The macro lens is brutal, but notice that one of the “N”s is backwards. I have no idea if that is how it was done on the real ship. I also painted the coat of arms for the bottle top today. The photo is not particularly flattering, but it looks fine from normal viewing distance. Onto the rigging next. The first job will be to re-make the sails. I’ll be following the excellent example of Glen McGuire when I tackle this. I’ve already sourced some replacement material form the Admiral’s sewing stash, so am ready to go.
-
She’s looking beautiful Bob. Great to see you back at it again.
-
Thanks Glen. I tip my hat to you once again for your outstanding work on your miniature Chinese fleet.
-
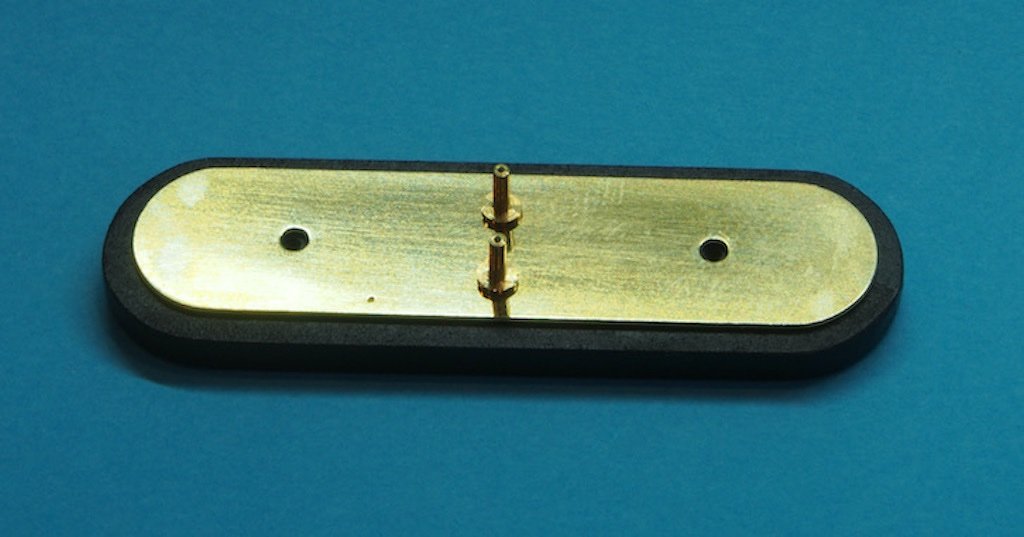
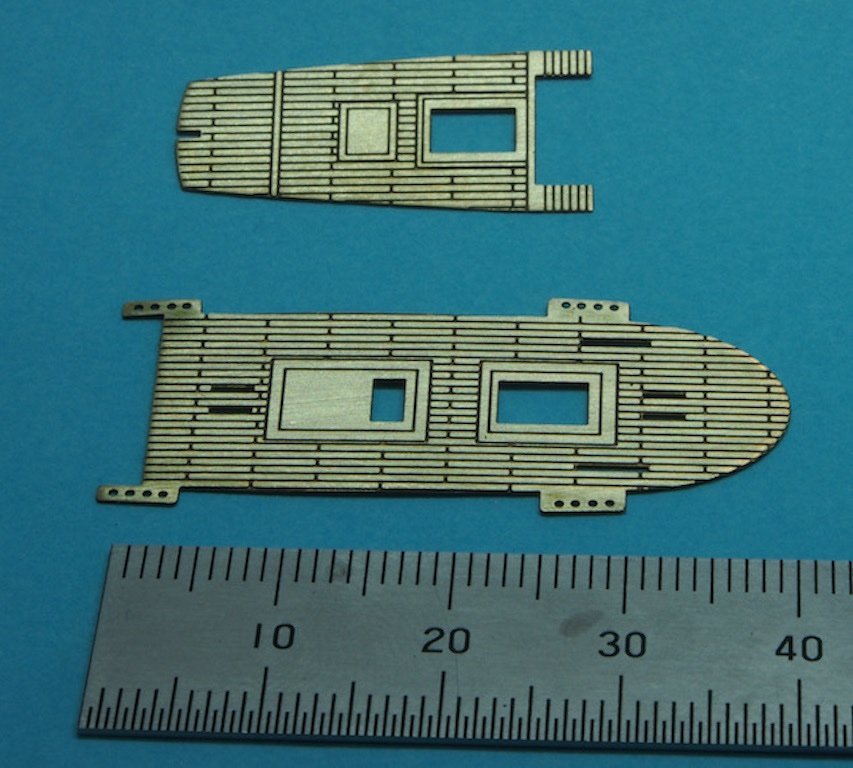
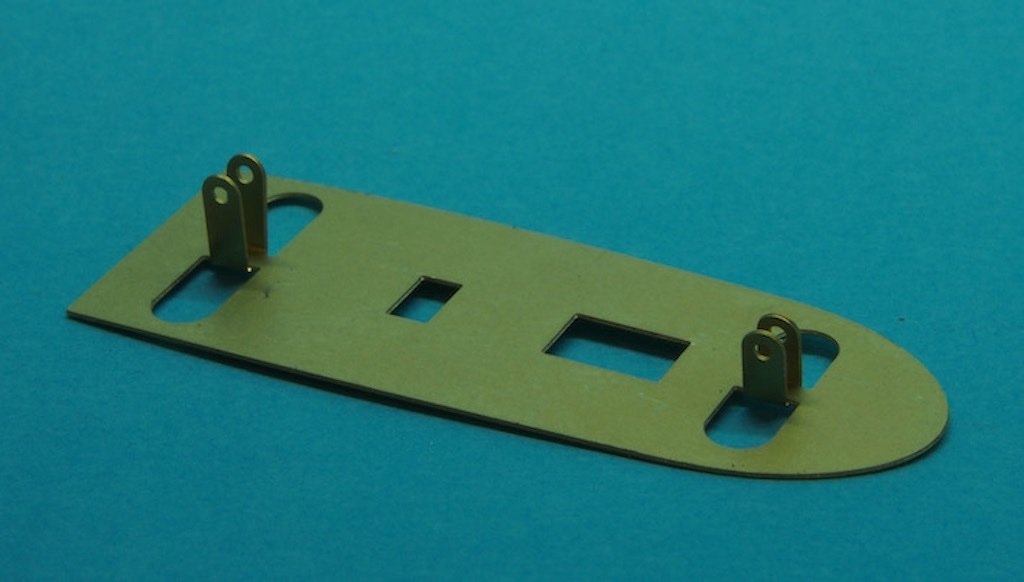
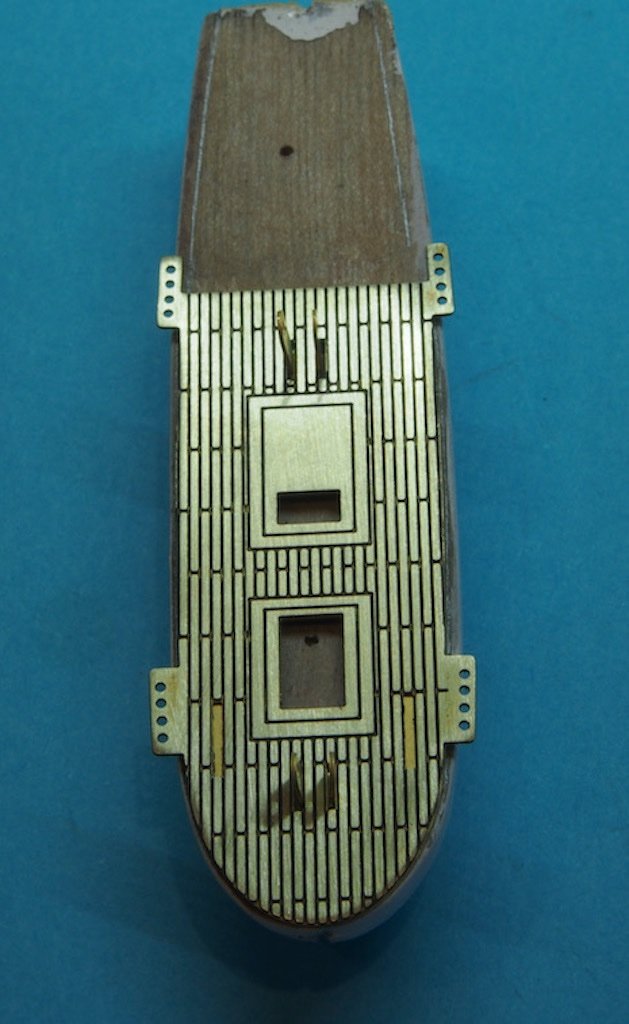
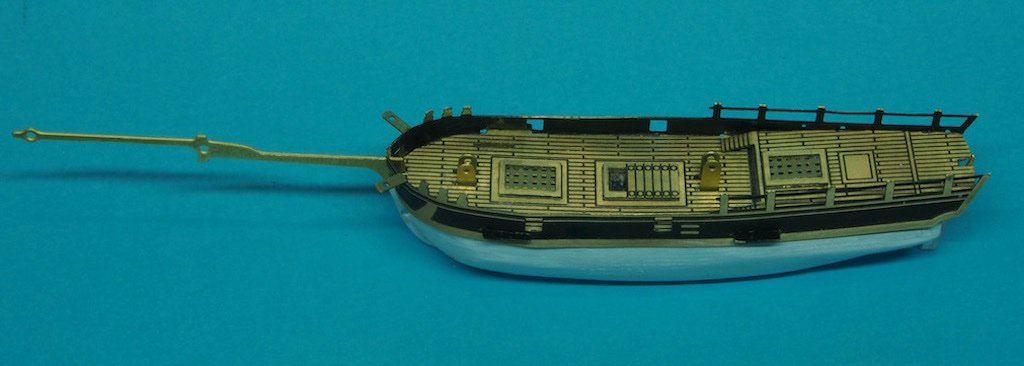
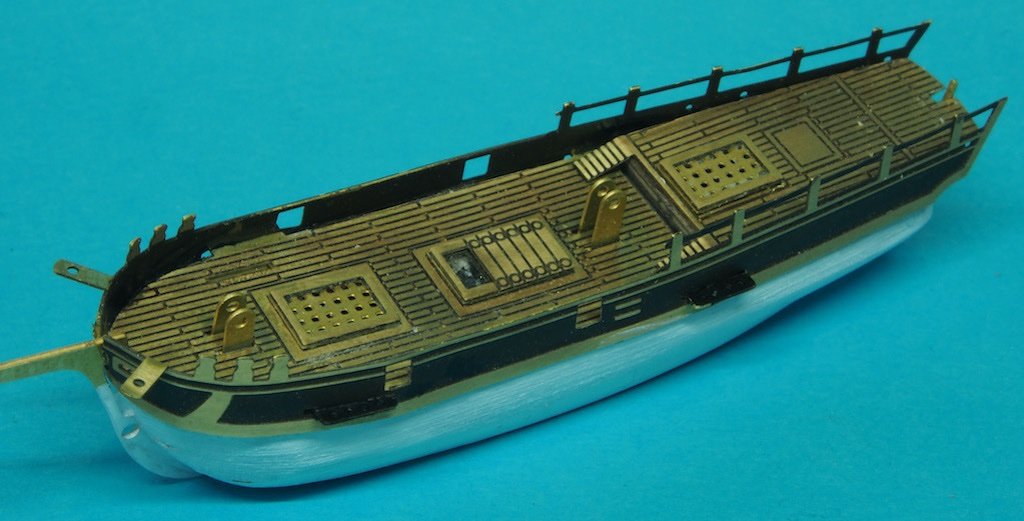
After a couple of months of no progress, I finally got back to this over the last couple of days. The usual excuses of life getting in the way, coupled with a focus on a new furniture project (building a display cabinet for some of my models). That project is ongoing, but hopefully I’ll be able to progress this little one at the same time now. The stand is comprised of a timber base with a brass top plate and four ‘columns’ that will support the ship. After painting the timber base, the top plate was glued down and the two lateral columns added. The longitudinal columns get added a little later. The decks are photo-etched brass. These are painted a dark brown and once dry they are sanded with a very fine sandpaper (1200 grit) to remove most of the paint, leaving only the caulking joints with paint. This is a quite effective method. (Note the metric ruler for scale). The main deck is attached to a photo-etched sub-deck that has two sets of ‘ears’ that will become the mast steps/pivots. These two components are then held in place while the position of the quarterdeck is checked. The bulwarks are a single piece of photo-etched brass that is first prepared by painting in a similar fashion to the decks. Here you see the outside face of the bulwarks after sanding off the excess paint. The inner face is painted in a solid coat of dark brown. The bulwarks are then bent to shape, initially forming around a piece of dowel of roughly the right diameter, and then on the actual hull. Slots in the bulwarks go over the channels. This is temporarily held in place (with fingers) while checking for clearance at the quarterdeck. There are three holes on each side that rigging will later pass through and these need to be clear of the quarterdeck. More by good luck than skill, my quarterdeck needed no adjustment. The quarterdeck and quarterdeck planking are then permanently attached, and then the fun begins. The bulwarks are then once again held temporarily in place while the keel/bowsprit (a single photo-etched piece) are test fit. The keel/bowsprit hooks over the forward end of the bulwarks and then should sit in a slot in the bottom of the hull (carved by you) all the way along and up the transom. Let me just say this was a lot trickier than the instructions would have you believe. It took me a couple of days of head scratching to figure out how to make mine fit. In fact, I walked away from the model for two days while I thought about it. Eventually, I decided that the only solution was to deepen the slot on the bulwark where the keel/bowsprit hooked over it. The only tool I had that would fit this narrow slot was a cutting disc for my rotary tool. Some very careful and delicate touches were required, but eventually I was able to get a reasonable fit. Here is another overview shot. You can see in this and the previous shot that the deck hatches and gratings have also been added. I still need to touch-up / re-do some of the paintwork – particularly the white paint on the lower hull – before moving on to the deck furniture. Hopefully, it won't be another two months before the next update!

- 61 replies
-
- 10
-
-
-
Fascinating project Glen - “ambitious” is the understatement of the year, but if anyone can pull it off, you can. Now, about those penguins……
- 194 replies
-
- 4
-
-
-
- Bottle
- Treasure Fleet
- (and 3 more)
-
Sorry to hear you’ve been unwell Bob. Hope to see you back at the bench again soon.
-
SIB (Skier in Bottle) by Glen McGuire - 1/80
gjdale replied to Glen McGuire's topic in Completed non-ship models
What a lovely thing to do for your friend - I’m sure it will be a prized possession. -
Congratulations Glen on another excellent build. I love your choice of display stand as much as the ship/bottle. Of course, the obvious question is, “what’s next?”
- 177 replies
-
- 3
-
-
- Independence
- bottle
- (and 1 more)
-
WOOHOO!!!! Congratulations Glen. I know you’ll work out how to solve those remaining minor issues. I’ll get the champagne on ice in anticipation.
- 177 replies
-
- 3
-
-
-
- Independence
- bottle
- (and 1 more)