


gjdale
-
Posts
4,896 -
Joined
-
Last visited
Content Type
Profiles
Forums
Gallery
Events
Everything posted by gjdale
-
 I’m late to the party again Glen, but sign me on for what should be a fascinating journey. Can’t wait to see what Jack Penguin gets up to!
- 185 replies
-
- 6
-

-
- Flying Dutchman
- Black pearl
- (and 2 more)
-
Well done on sparring with all those yards Glen. You should treat yourself to a spa(r) bath!
- 301 replies
-
- 7
-

-
- Constitution
- Bluejacket Shipcrafters
- (and 1 more)
-
Just as an aside, this model was awarded the “Members Choice” award at the recent Canberra Model Shipwrights Society Annual Expo. It is one of two awards given each year, the other being the “People’s Choice” (as voted by members of the public). A bright spot in an otherwise difficult year.
-
I’m late to the party (again!) Glen, but just getting caught up. What a wonderful thing you are doing and what a fantastic job you are making of it! I’m here for the rest of the journey, though have had to settle for a seat in the back row.
- 301 replies
-
- 6
-
-
- Constitution
- Bluejacket Shipcrafters
- (and 1 more)
-
Congratulations on yet another fine build B.E. I hope for our sake that your break from ship modelling isn’t too long!
- 131 replies
-
- 3
-
-

-
- Medway Longboat
- Syren Ship Model Company
- (and 1 more)
-
I recall having similar problems getting the PVC (or Sinatra) panels to conform. It was only late in the piece that someone suggested to me that a heat gun might help - just wish I’d thought of that sooner. You might want to consider any internal routing of wires etc before you go too much further - it’s much easier to make allowance for them at this stage than further down the track.
- 8 replies
-
- 1
-
-
- Dumas
- Chris-Craft
- (and 1 more)
-
A quick note as it’s been some time since the last update. It has been a tumultuos year thus far for me. Breakdown of a 40+ year marriage that I did not see coming, separation (and all the legal stuff that goes with it), and now preparation for house sale and subsequent move have meant not a lot of time in the workshop. In preparation for sale of the house, all of my modelling equipment/workshop has now been packed up ready to go into temporary storage. My “big” workshop is also almost completely packed up. At least I’m able to keep cycling to maintain my sanity and social engagement - cycling up to six days per week gets me out of the house, into some fresh air and headspace, some gentle exercise, and the chance to engage with others. The house goes on the market in four weeks time and it’s possible that I will be settled in a new place by Xmas or shortly thereafter, at which time I’ll be able to resume progress on the African Queen. In the meantime, I will continue to live vicariously through all of the great builds here on MSW.
- 57 replies
-
- 9
-

-

-
- live steam
- radio
- (and 2 more)
-
Welcome to MSW Tim - nice to another build of this lovely model. I just checked my build log and I followed what the instructions said on this point. There is a link to my log in my signature below if that is useful for you. You might also want to get a hold of a copy of the book “Mahogany in Scale” by Patrick Matthews - it uses this specific model to explain building processes and I found it to be extremely useful. Grant
- 8 replies
-
- 1
-
-
- Dumas
- Chris-Craft
- (and 1 more)
-
That has to be the understatement of the year Keith! 🤣 I’d love to see something you are completely satisfied with then…….🙂 Outstanding work, Sir!
-
Congratulations on yet another superb example of the SIB art Glen. I look forward to the next one (and continuing your bi-lingual education).
- 235 replies
-
- 4
-
-
- Banshee II
- Bottle
- (and 1 more)
-
Looking good Jeff. I like the way you are tying the two dioramas together into one cohesive whole.
-
Allow me to translate the above for you Glen: “Air conditioner, No stone unturned, Let’s talk Australian” Glad to see that your board weathering is working out well for you. I can’t take any credit for the process - just followed the bouncing ball on that one. Your diorama is shaping up to be another excellent one - glad to see that the penguins got involved!
- 235 replies
-
- 6
-
-
-
- Banshee II
- Bottle
- (and 1 more)
-
Peter is right Glen. In far north Queensland, it seems to be obligatory to end every sentence with “hey?” or “eh?” (without the “h”). In South Australia and some parts of Western Australia, the accent will be more to the English side of things - especially noticeable with words like “castle” or “dance” (or even my name) where the “a” vowel is pronounced with a long “ah” sound, while in most of the eastern states, the default is a the shorter, harsher sound (as in “at”). Anyway, if all this is making you a bit hot under the collar, then I suggest you go and stand under the egg nishner for a while.
- 235 replies
-
- 6
-
-
- Banshee II
- Bottle
- (and 1 more)
-
What you really need Glen, is the book “Let Stalk Strine”, by Afferbeck Lauder. It will help you to understand the accent in a whole new way - you might even get to know what an “egg nishner” is! As a further clue, the author’s name is a pseudonym which itself is a “strine-ised” version of “Alphabetical Order”. "Let Stalk Strine" is the first and only clear, straighforward exposition of the Strine language. "Let Stalk Strine" has been compiled for stewnce, overseas vistas and New Strines, and also for the jell public. This book is as Strine as Ned Kelly and Waltzing Matilda.” Then of course there is the sequel, “Nose Tone Unturned”…….. By the way, your base is is looking great mate - can’t wait to see the overall finished project.
- 235 replies
-
- 8
-

-
-
-
- Banshee II
- Bottle
- (and 1 more)
-
I think if one were to choose the windward side, that would be known as “getting your own back”! 🤣
-
Another fantastic result Glen - congratulations and well done!
- 235 replies
-
- 5
-
-
-
- Banshee II
- Bottle
- (and 1 more)
-
This looks to be an unusual and very interesting build Keith. I’ll grab a seat in the second row to follow along.
-
Nice take on the saw table Jeff - as well as the rest of the shed!
-
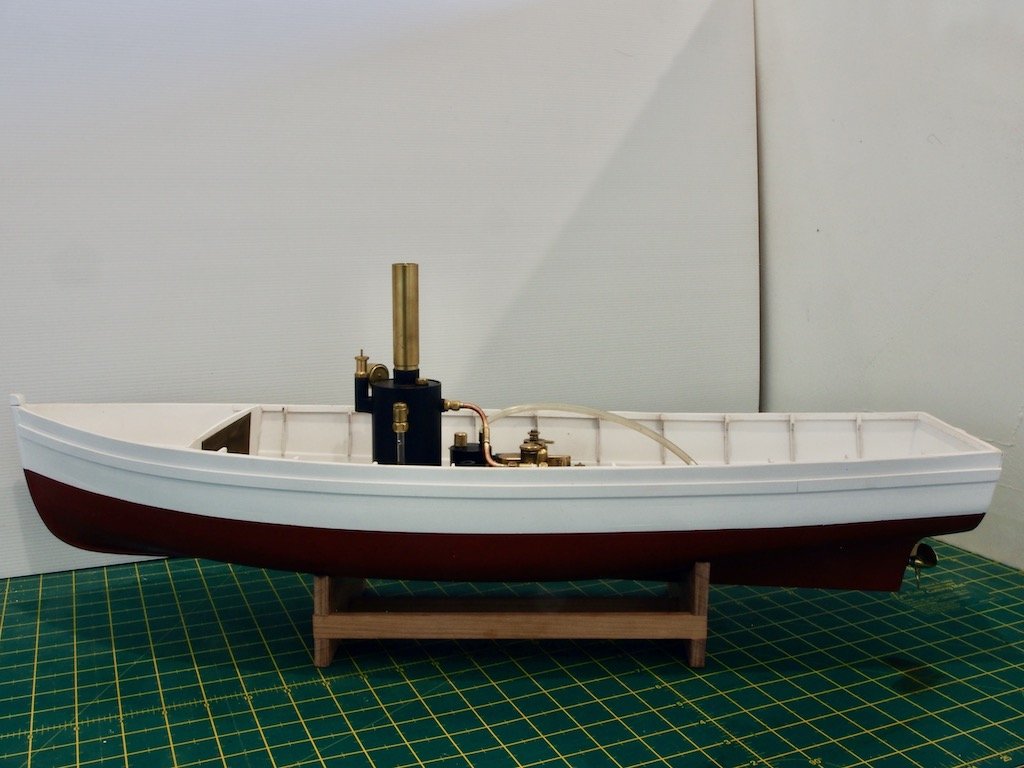
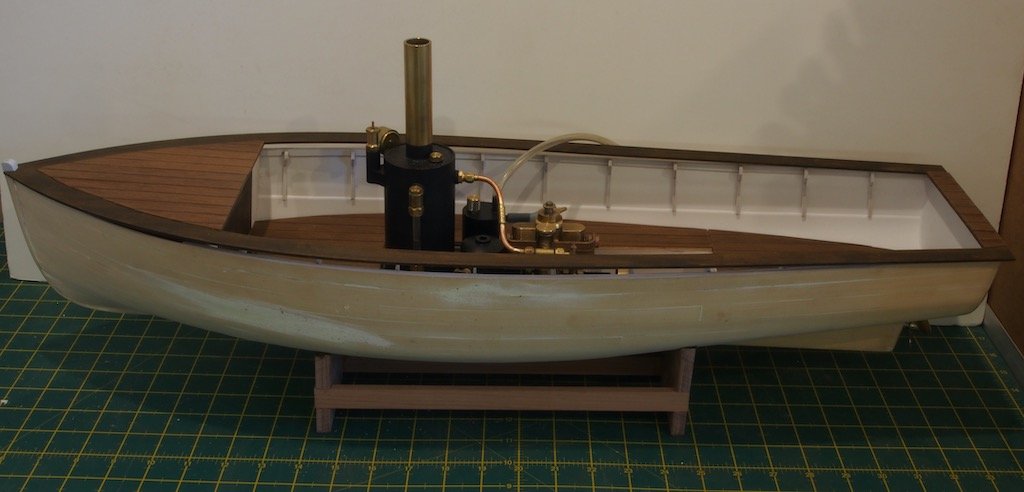
It’s been some time since the last progress update, mainly because a lot of the time has been devoted to trouble shooting and the manufacture of new/additional parts. The problem began when I noticed a real “stiffness” in turning over the propellor shaft by hand – way more than could be expected for normal “running in”. Problem-solving began by debonding the front end of the stuffing tube from the hull. With that end free to move, we could see a considerable “wobble” in the drive train as the free end of the stuffing tube traced quite an ellipse. At the same time, we noticed a bit of movement in the thrust block between the engine and the fly wheel. In an attempt to resolve the issues, we manufactured an extra thrust block with tighter tolerance, re-made the flywheel, made a new propellor shaft (discovered the supplied after-market part was slightly warped), re-made all the connector parts, and eventually tried another universal joint (of similar design). After all of these mods, we still had an unacceptable amount of play. After checking each component in the line, from the engine output shaft right through to the propellor shaft trying to find something out of whack, the only thing that could possibly be wrong was the universal joint. In desperation, we replaced the nice looking universal with a less attractive brass and plastic one from Float-a-Boat and just like that, our problem disappeared. Here is a photo showing some of the additional/replacement parts: In between the trials and tribulations of the drive shaft, I did manage to paint the exterior of the hull. Here is an overview shot – I haven’t decided yet if I’ll stay with the more pristine look, or go for an old and grungy weathered look. The next step will be to return to problem solving the steam plant issues…

- 57 replies
-
- 13
-
-
-
- live steam
- radio
- (and 2 more)
-
Whew! Just made it in time to nab a front row seat for this one Glen and, as it turns out, right next to the bar too. Gotta be lucky sometimes! 😊 This looks to be another fascinating build project and I’m intrigued to see how you display this one - you always come up with such interesting ideas.
- 235 replies
-
- 4
-
-
-
- Banshee II
- Bottle
- (and 1 more)
-
Thx Keith. No, the burner issue has not yet been resolved. I’m pushing on with the rest of the build while we cogitate on that one. We have a club meeting this week and there is another steam guru there who may be able to offer some further advice. If all else fails, I’ll have a very expensive static model……
- 57 replies
-
- 7
-
-
- live steam
- radio
- (and 2 more)
-
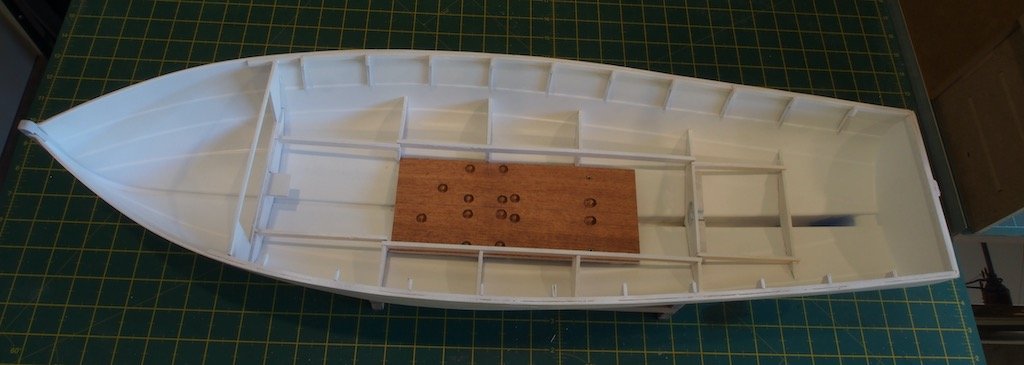
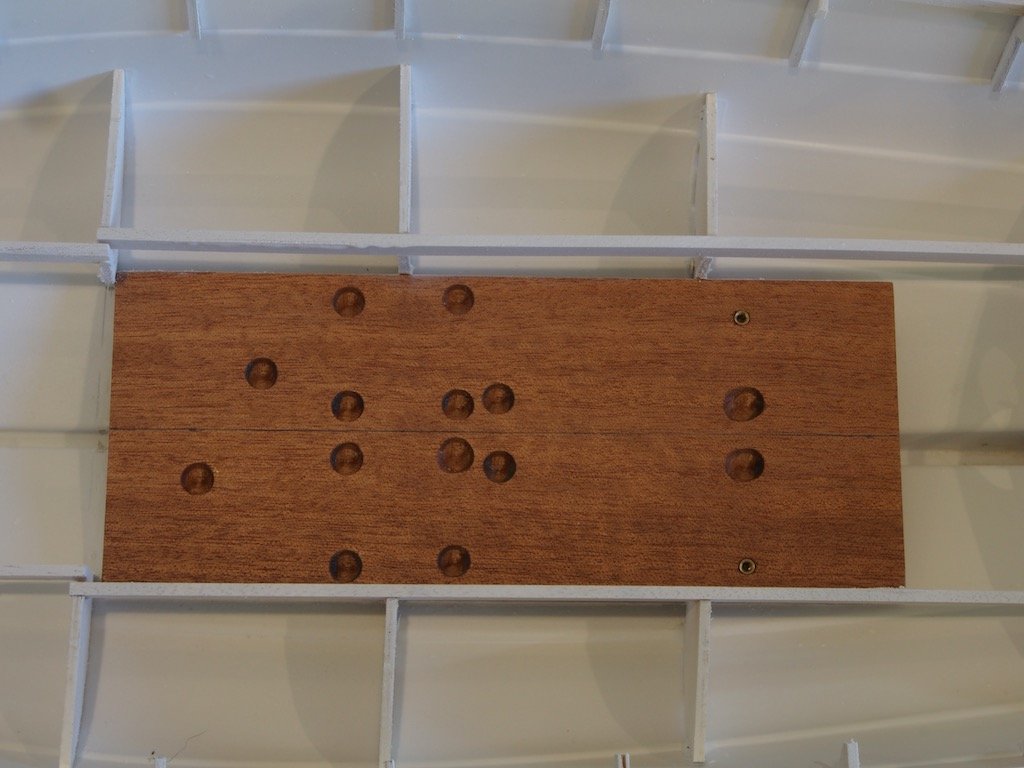
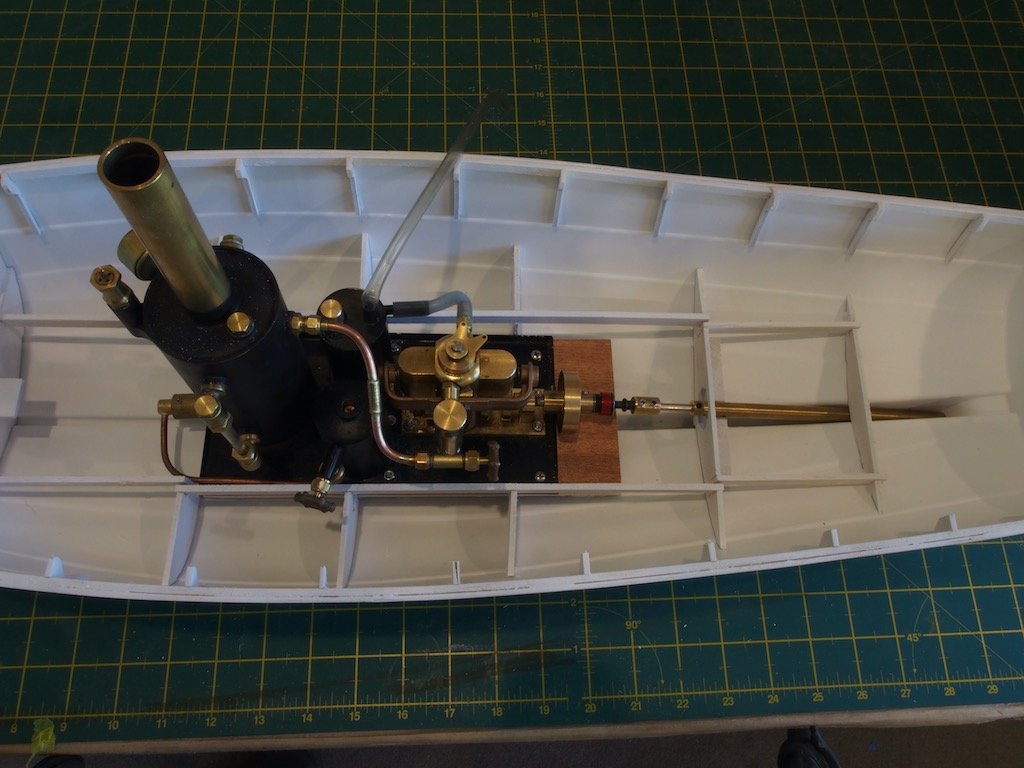
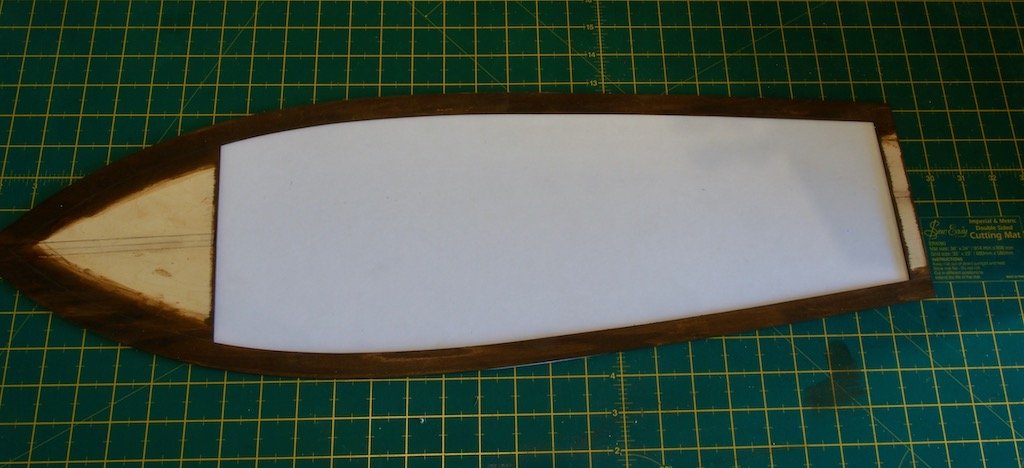
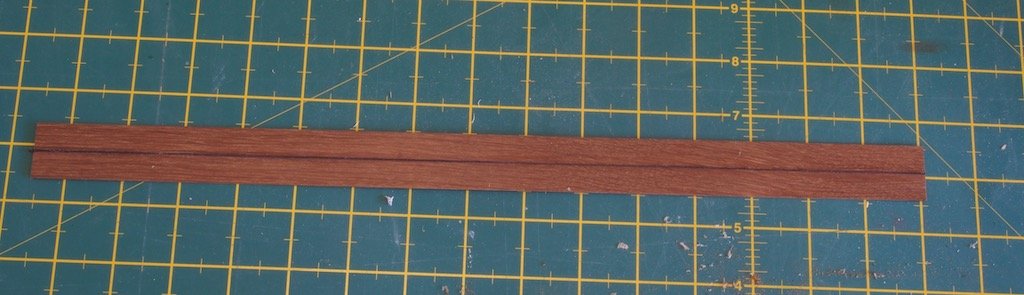
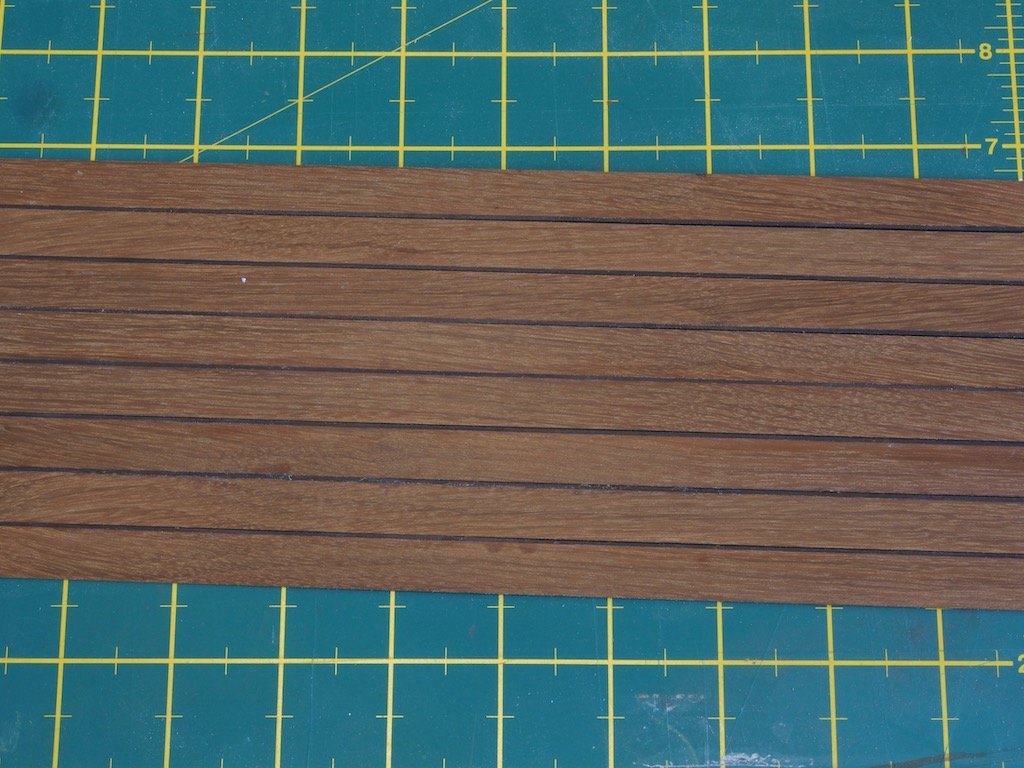
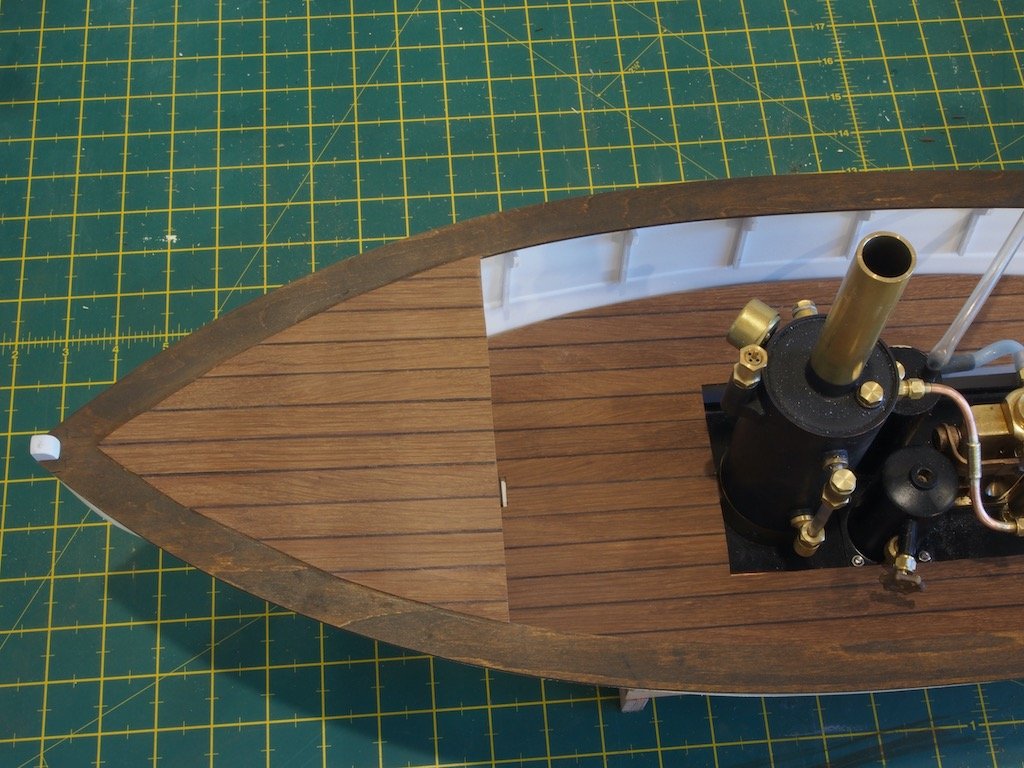
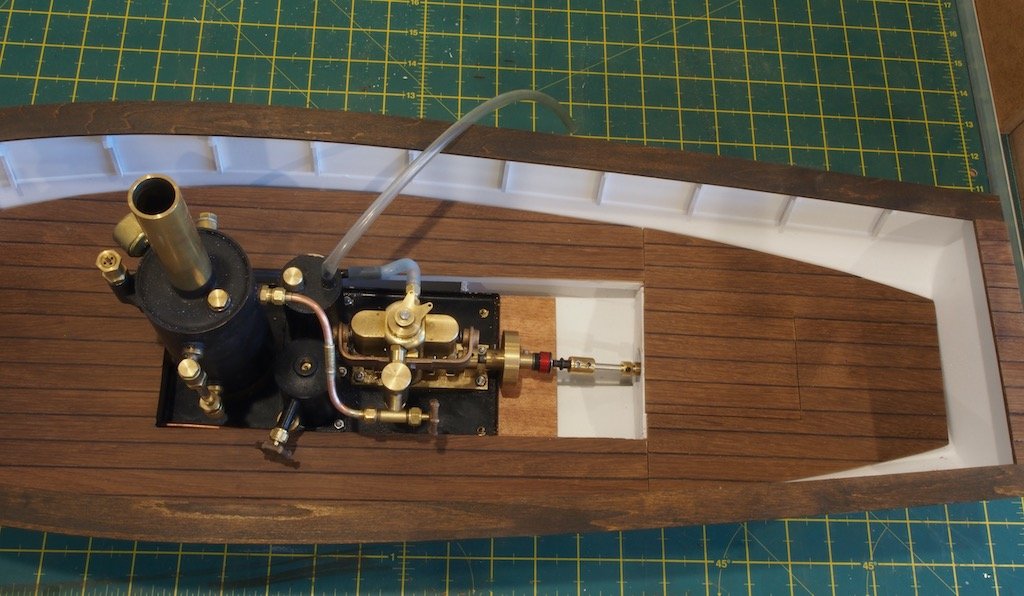
It’s been a little while since the last progress update, but work has continued apace. The first job was to finalise the placement of the steam plant and build a mounting for it, along with a support block for the stern stuffing tube. I used a piece of 7mm thick Queensland Maple for the support base and another to create the support block for the stuffing tube. As the plant is held to its own metal base by screws inserted from underneath, it was necessary to make allowance for the screw heads. With that temporarily in place, the engine drive shaft and the propellor could be aligned, allowing the support block for the stuffing tube to me made and fitted. Once these had both been double checked for fit and alignment, they were fixed in place and the internal surfaces painted using my large airbrush / mini spray gun and Stynylrez White Primer – despite it being a primer, this will be the final colour for the internals. In the next photo, you can see that two M3 threaded inserts have been incorporated into the aft end of the mounting plate. These align with two corresponding holes in the metal base plate to secure the plant in the boat. Here is an overhead shot showing the steam plant in place along with the complete propellor shaft. Also shown in this photo is the large brass flywheel that my friend made for me, as well as the universal joint (the red piece in the photo). The next task was to begin addressing the decking. Having adjusted the plywood sheet as previously described, I decided to stain the plywood to act as the margin plank while additional planking was added for the deck. Here is the plywood after staining. To create the decking, I have used a combination of 12mm x 1mm Brown Hornbeam and 1mm x 1mm Black Hornbeam to simulate the caulking. The first task was to create the centreline plank by sandwiching a piece of the Black caulking between two Brown planks. The remaining planking was created by gluing one piece of Brown plank to one piece of Black caulking. Once dry, the resultant pair was scraped to remove any excess glue. Rinse and repeat for all remaining planks. Here is what they look like when put together. Once all the plank pairs had been prepared, they were applied to the decks starting with the centreline sandwich and working outwards from there. The planks were shaped to fit the outline of the margin plank as I went. Here are some shots of the planking in place – not yet given a coat of finish (which should make it pop a little), and not yet glued down. Finally, an overview shot of progress to date. Note that the upper deck is not yet glued down – it will sit down on the gunwale around the centre once glued. I think the next task will be to paint the external of the hull before proceeding to permanently fix the decks. I will also need to address the small matter of Radio Control in the not-too-distant future. I have a cunning plan………..
- 57 replies
-
- 15
-
-
-
- live steam
- radio
- (and 2 more)
-
Very nicely done Bruce. I share your concerns about the dangers of this area of the site - that’s exactly how I came to acquire this one myself!