-
Posts
4,894 -
Joined
-
Last visited
Content Type
Profiles
Forums
Gallery
Events
Everything posted by gjdale
-
Could be Keith, but I don’t understand how or why as yet.
- 57 replies
-
- live steam
- radio
-
(and 2 more)
Tagged with:
-
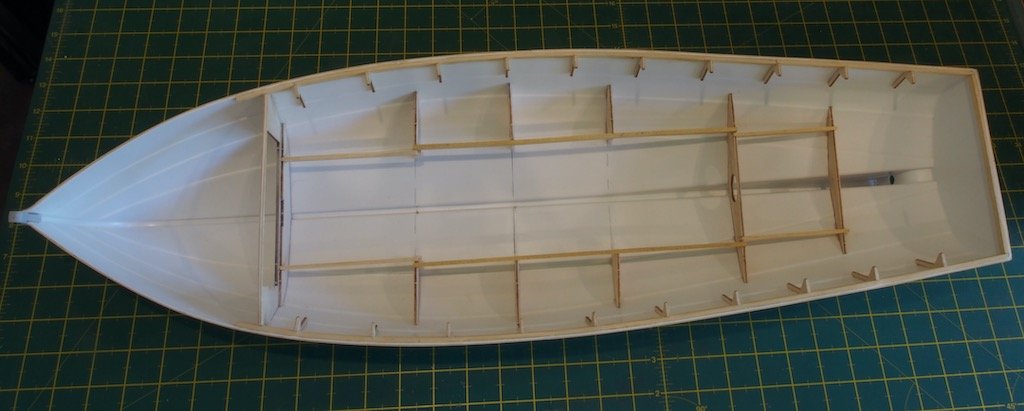
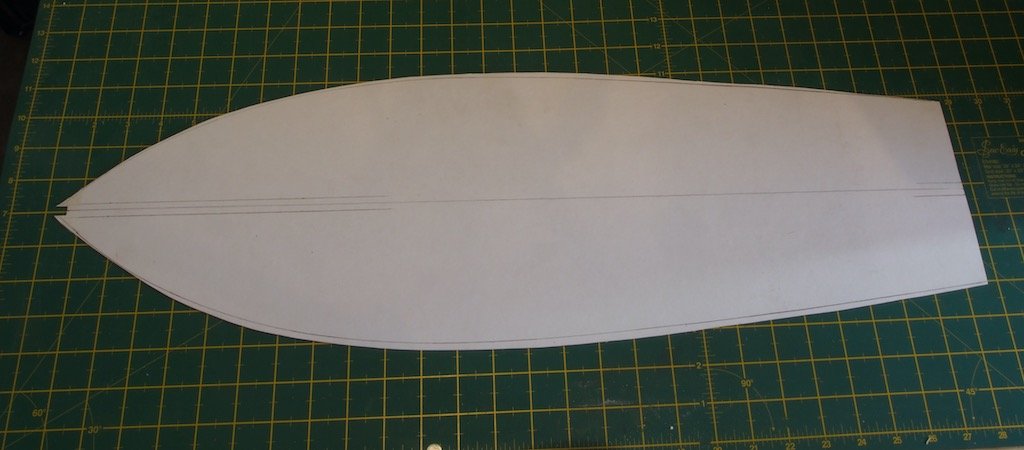
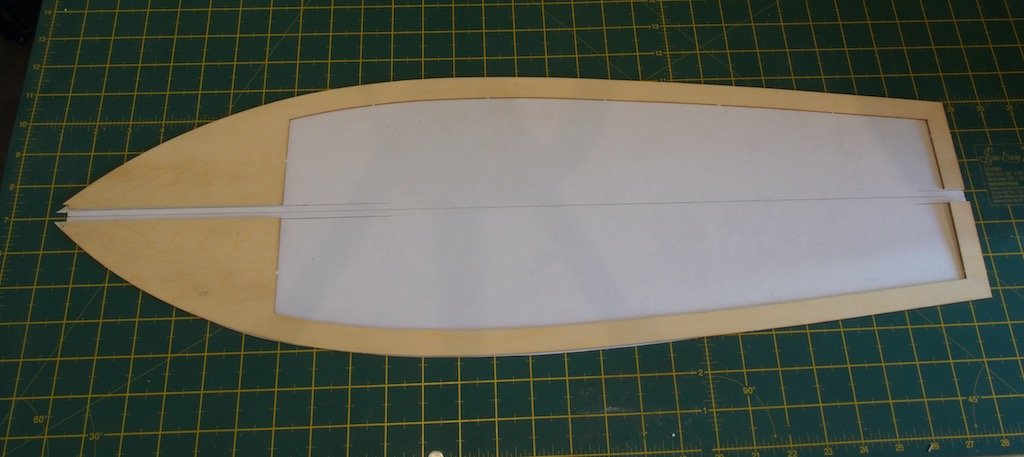
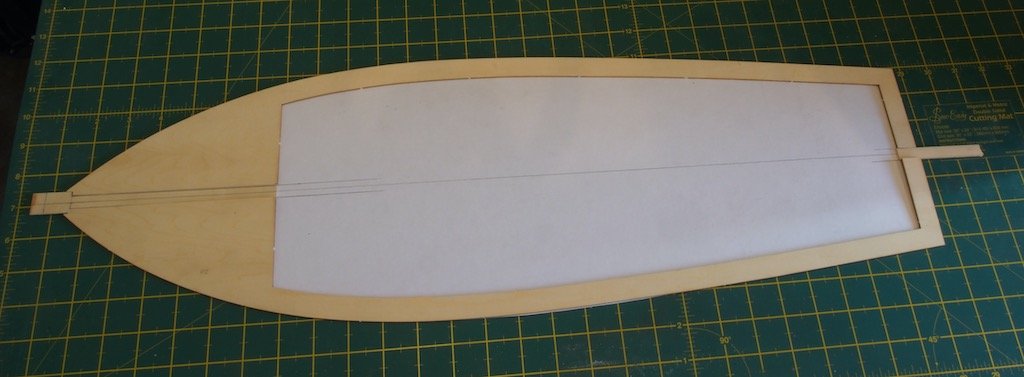
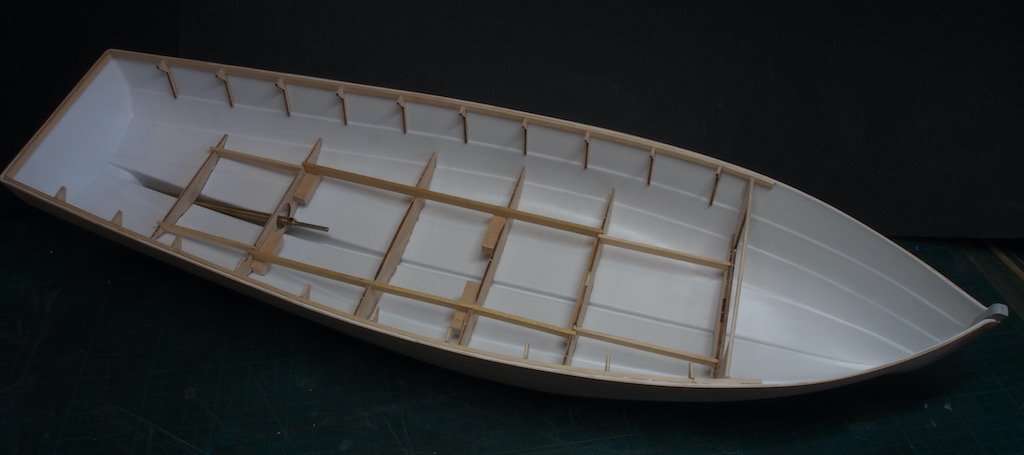
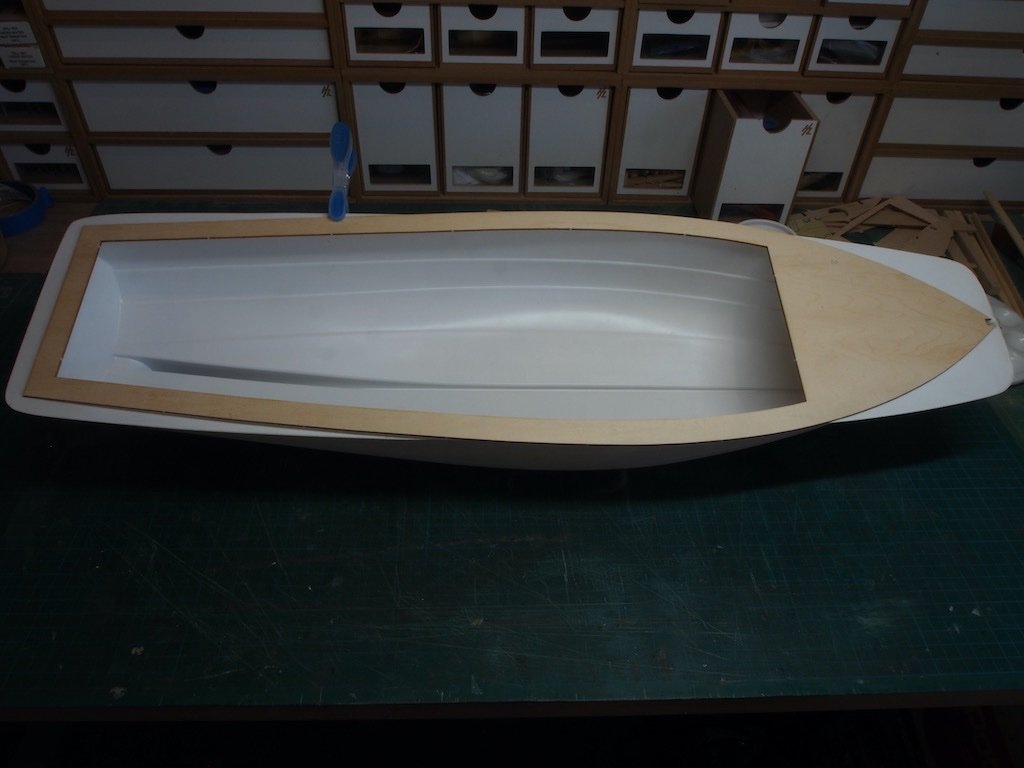
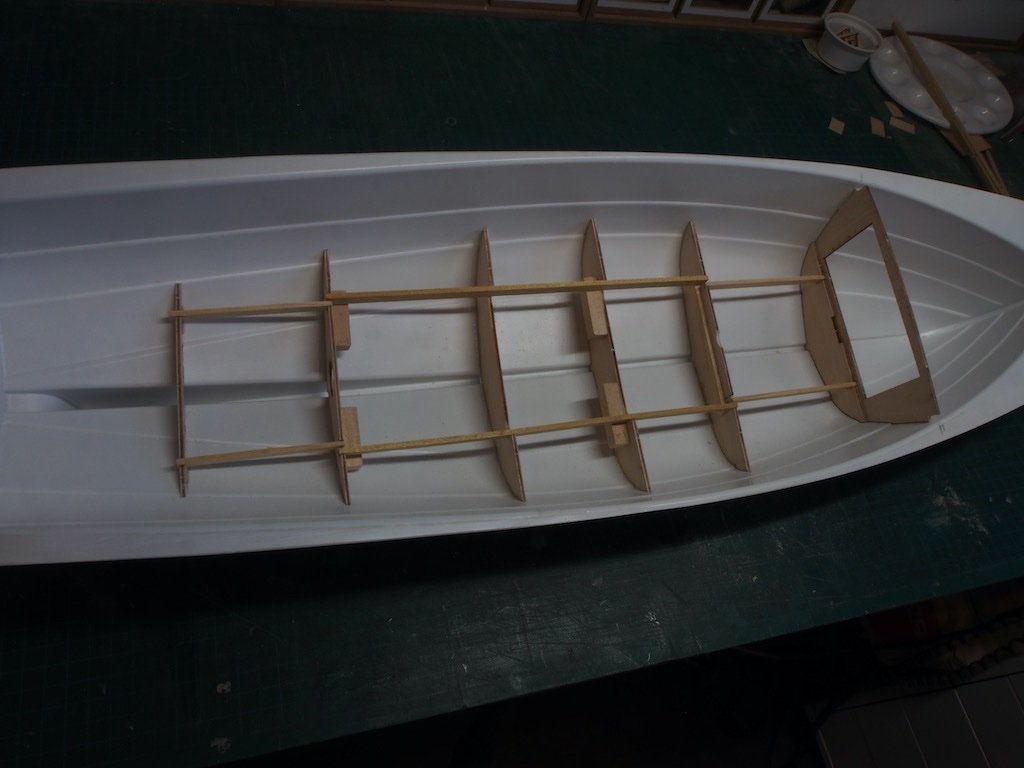
Well, it’s been an interesting and frustrating week working on setting the steam plant to work. Additional issues I have encountered to date (but have successfully resolved with the assistance of my “guru”) are: The upper flange on the boiler sight glass tube had not been soldered correctly, leaving a small hole in the joint through which a large quantity of steam escaped. This was resolved by carefully re-fluxing the joint and allowing the existing solder to close the gap. Successful after test run with no further leakage through this joint. The flange joint between the engine side of the displacement lubricator had not been soldered correctly and again, a large quantity of steam escaped through this fault. This was resolved in a similar way to the boiler sight glass tube flange described above. Successful after test run with no further leakage through this joint. The mating surfaces between the flat rotating valve (forward/reverse) on top of the engine and the engine body were not machined particularly well (they were quite rough) and a significant steam leakage resulted. This was addressed by carefully polishing both faces to facilitate a smoother action. When running, the engine now appears to be quite smooth in its operation, with very little steam escaping though this interface. I am somewhat surprised that the boiler was able to pass testing given the fault described at the first point above, and indeed that the other faults were not picked up through a quality control process. Nevertheless, I have managed to resolve all of the manufacturing faults thus far. There is one further issue that has me flummoxed at the moment and that is to do with the gas burner. The issue is this. Although all set-up routines have been followed, including calibration of the burner flame, once the boiler gets to operating pressure and the engine starts running, very shortly thereafter the boiler flame goes out although there is still plenty of gas in the tank. The flame can be relit, but initially burns at the top of the stack and only goes back to the burner when the gas is turned down a little. It then burns correctly for a few seconds and goes out again. Rinse and repeat ad infinitum. My initial thought after re-reading all of the material on manufacturer’s website, was that perhaps the gas being used was of insufficient quality and was then clogging up the jets in the burner. Yesterday, I purchased some so-called premium quality Butane. The blurb on the can alleges that it has been purified 11 times and claims to burn hotter and longer than cheaper products. Its gas mix content is stated to be 60% butane, 36% isobutane, and 2% propane. Alas, on testing the same problem returned. What I don’t understand is why the burner seems to work correctly initially, but after a few minutes develops this fault. I have written to the supplier/manufacturer but am yet to hear back from them (and may not – they have been problematic with communications in the past). In the meantime, after lengthy discussion of alternatives with the guru, I decided to make a modification to how the engine sits in the hull. Basically, this involves removing some of the frames from under where the engine sits and inserting a hardwood plate, epoxied into the bottom of the hull to hold the engine assembly. This will get the engine a lot lower in the hull and greatly reduce the height difference/angle to the prop shaft. Here is a picture after the preliminary surgery on the frames. My guru also found among his odds and ends a very nice universal joint that comes out of the model car world. It is a lot less bulky than the standard universals and should work a treat in the AQ. He has also made for me a flywheel to go on the end of the engine shaft - he says this is essential to smooth the operation of the engine. I know nothing of these matters, so defer to his expertise here. I am also going to change the rudder support (skeg) and will instead use a piece of brass bar for this purpose. I will epoxy a small wooden block in the base of the hull on the inside, and will then be able to screw the brass skeg into that. This will make the skeg level with the base of the keel and in doing so, will overcome my propellor clearance issue so that I can still use the 40mm prop. The other issue I’m now working on is to address the poor fit of the upper deck. As I’m going to plank over this, the provided deck will be the substrate for my planking. I made up a cardboard template for the required shape by tracing around the inverted hull to help with the process. The pencil line inside the outer edge of the template shows where the existing deck lies – it’s only out a small amount, but enough to cause headaches. I then cut the deck substrate down the centreline and placed the two halves so that they just covered the outer edge of the template and marked their positiong relative to the centreline of the template. This showed an overall gap of 10mm (or 5mm per side). It was then a fairly simple matter to add some filler pieces to achieve the correct shape. The picture below shows that I needed to make a T-shaped piece to fit at the bow to close the gap previously cut for the stem post. I will now need to re-shape the bow and re-cut that slot. The picture below shows the filler pieces in place but not yet glued. They have since been glued in place awaiting final trimming. More to follow once I have news on the steam plant and/or further surgery modifications have been completed.
- 57 replies
-
- live steam
- radio
-
(and 2 more)
Tagged with:
-
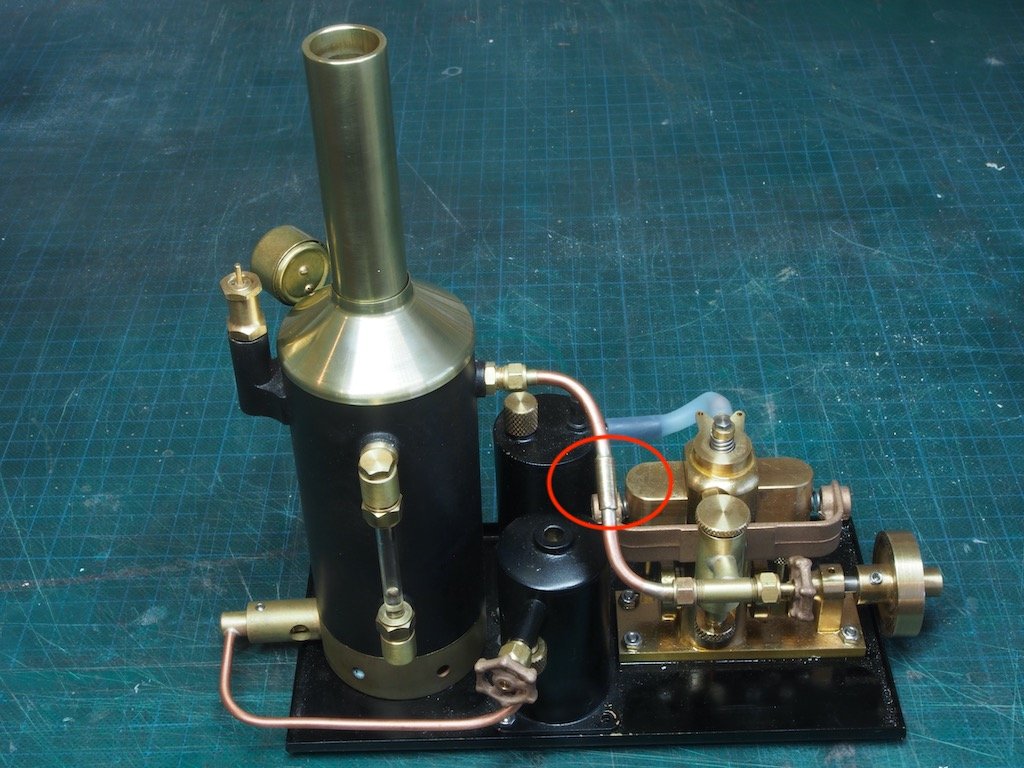
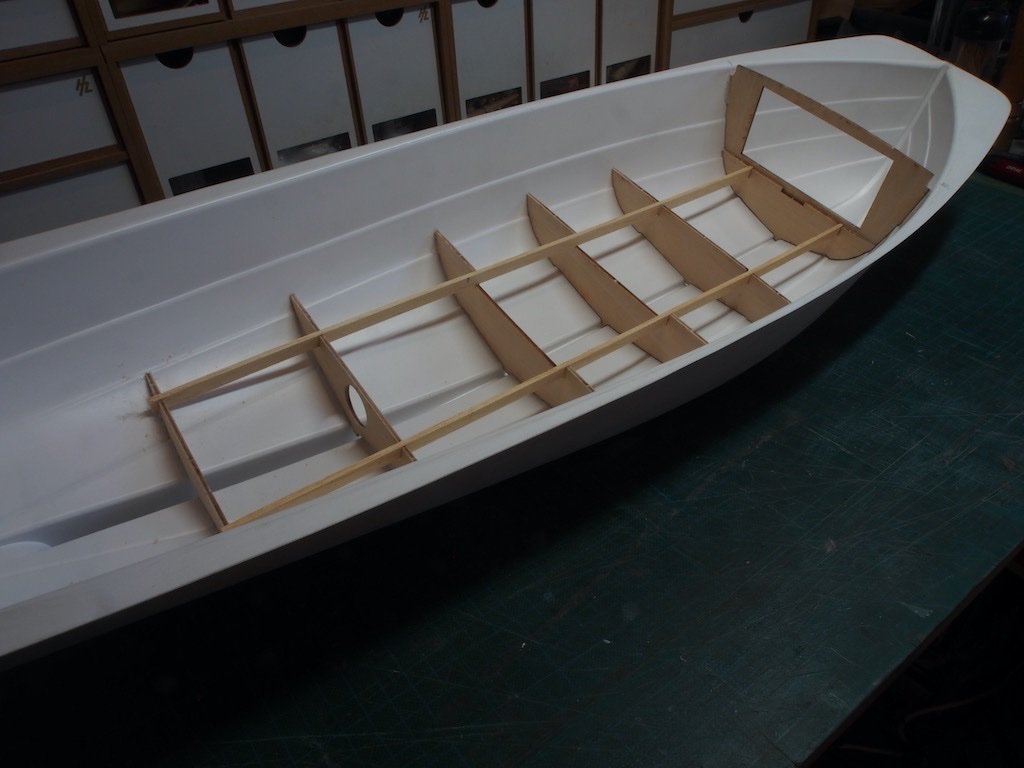
It's been a while since my last update but work has progressed, albeit very slowly. I changed my mind (again) about removing the excess ABS, mainly because it would have been impossible to hold the internal stringer/gunwhale(?) in place with it sill there. So I went ahead and removed the excess ABS, and then positioned the stringer/gunwhale and the internal (fake) ribs. I also drilled out the hole for the propellor shaft and cut the access hole for the rudder support strip that extends from the keel. I decided to replace the kit-provided stuffing tube and propellor shaft with some after-market parts from Float-a-Boat in Melbourne (following the lead of Wayne (@a49kid)). At the same time, I ordered some universal joints and a brass propellor to replace the kit-provided plastic one. Unfortunately, with the additional thickness added by planking the entire hull, a propellor of the same size (40mm) will not fit. I’m still deciding as to the exact size that I will use, but it will be either 35mm or, more likely, 30mm. The picture below shows the internal ribs in place along with the stuffing tube and propellor shaft temporarily positioned. I may well need to adjust the length of the stuffing tube/propellor shaft once I’ve got the steam plant sorted. Before proceeding further with the hull, I needed to sort out the steam plant and its positioning/securing in the hull. That meant doing a trial run of the plant. I bought this plant from Miniature Steam Models (MSM) over 18 months ago and had not done any final assembly and testing to date. It comes almost fully assembled, requiring only the attachment of the steam line (from boiler to engine) and the gas line from gas tank to boiler. Unfortunately, for some reason the steam line was a few mm too short to be connected. This was very surprising as MSM have a very good reputation for quality. Anyway, I enlisted the assistance of a fellow Canberra modeler who is something of a guru on all things steam engines. He advised cutting the existing pipe and inserting a short joining section to make up the length required. He also very kindly machined up the required part and silver soldered it in place for me. The result can be seen in the picture below, highlighted by the red circle. We did a short test that proved the join was secure and together we are now conducting some “set-to-work” trials. There are still a few other issues to deal with before proceeding with the hull, but I hope to resolve those in the next few days.
- 57 replies
-
- live steam
- radio
-
(and 2 more)
Tagged with:
-
Thank you Wayne. And thank you Bob. I can’t really answer your question Bob as I don’t record hours spent on the model. But looking at my start and finish posts it was about 3 months from start to finish - noting of course, that I am one of the slower builders goin’ around!
-
That is possibly your best yet Glen, although you set such a high standard it’s a difficult call. Love the lone penguin too - just the right touch.
- 109 replies
-
- Ghost Ship
- Jenny
-
(and 2 more)
Tagged with:
-
I can’t believe I missed the start of yet another of your magnificent SIB projects Glen. Just got caught up and all I can say is WOW! Love what you’ve done so far and looking forward to the insertion of penguins. 🤣
- 109 replies
-
- Ghost Ship
- Jenny
-
(and 2 more)
Tagged with:
-
That’s very useful info thanks Wayne.
- 31 replies
-
- African Queen
- Billing Boats
-
(and 2 more)
Tagged with:
-
Great to see you back at this build Mike.
- 969 replies
-
- hahn
- oliver cromwell
-
(and 1 more)
Tagged with:
-
More good progress there Wayne, and thanks for the heads-up about further tweaks needed to make everything fit properly. My build is having a little break while I’m away on a cycling trip over Easter - four days cycling through the Lachlan Valley area (Koorawatha, Cowra, Canowindra, Eugowra, Goolagong, Grenfell and back to Cowra). Yesterday was a long but enjoyable 85km - we were pretty tired by the time we rolled into town. Beautiful countryside and fabulous weather for it. Getting ready for an even tougher 80km today. Don’t be too disappointed by a lack of responses on your log. There will be fewer people interested in this type of build, but also some people only log on every once in a while to catch up. They will generally only comment if they have something to add to the conversation. A “like” tells you that they are interested in what you are doing even if they have nothing to add. That is a good thing really as it means that your log doesn’t get filled up with a lot of superfluous content. Rest assured that I for one am certainly enjoying following along seeing how you tackle the various problems that inevitably arise. As you have already discovered, the Billings instructions are next to useless, so a degree of difficulty is added from the outset. I look forward to your next instalment.
- 31 replies
-
- African Queen
- Billing Boats
-
(and 2 more)
Tagged with:
-
No, I haven’t had the engine running yet Wayne. I had assumed that the gas tank would be filled from a butane bottle as used to be used for filling cigarette lighters. A piece of the black silicon tube would be great - thank you!
- 57 replies
-
- live steam
- radio
-
(and 2 more)
Tagged with:
-
To answer your questions Wayne, I did some testing with various viscosity super glue (see my post #19). In the end I settled on Extra Thick Maxi Cure (Bob Smith Industries brand) and that has worked well. My planks are 1mm thick and I cut them from sheets of Alaskan Yellow Cedar. I made my planks approx 14mm wide so that at maximum width, there would be three planks per “band” on the hull for the most part, with one “band” requiring four planks. Then I planked up to the ridges and after sanding it all blended into one smooth surface. My planks were a maximum of about two thirds the length of the hull. I didn’t worry too much about “scale length” as the planking won’t really be seen in the final outcome (remembering that the original hull was steel). What I haven’t shown in the build log is that I took the time to mark some “station lines” (ie vertical lines) on the hull - arbitrarily spaced - and then divided the remaining gap of the planking band by the number of planks to be fitted and made marks on the station lines. A pair of proportional dividers makes this easier, but they are not essential. These marks then became reference points once the sticky tape was placed over them. The white ABS hull gives a nice surface for drawing pencil lines, or even fine permanent marker. Once the tape was in place, one edge was traced along the previous adjacent plank and the opposite edge marked at the reference points. The tape was then removed and applied to a piece of card (Manila folder) and the reference points (dots really) were joined with a ruler to give the rough shape of the plank. The card was then cut out and tested against the hull to see if it was a close enough fit and if it was, it was then traced around on the plank and the plank cut/planed/sanded to final shape. A little bending/twisting with a steam iron to help the plank conform to the shape of the hull and the plank was then glued in place. I generally applied glue for a few inches at a time and worked my way along the plank. Sounds a lot more complicated than it really is! One other tip is to apply a slight bevel to one edge of each plank as this will help achieve a tighter fit. I hope the above rambling helps you with your planking….
- 57 replies
-
- live steam
- radio
-
(and 2 more)
Tagged with:
-
Thanks for the heads-up on the deck fitting Wayne.
- 57 replies
-
- live steam
- radio
-
(and 2 more)
Tagged with:
-
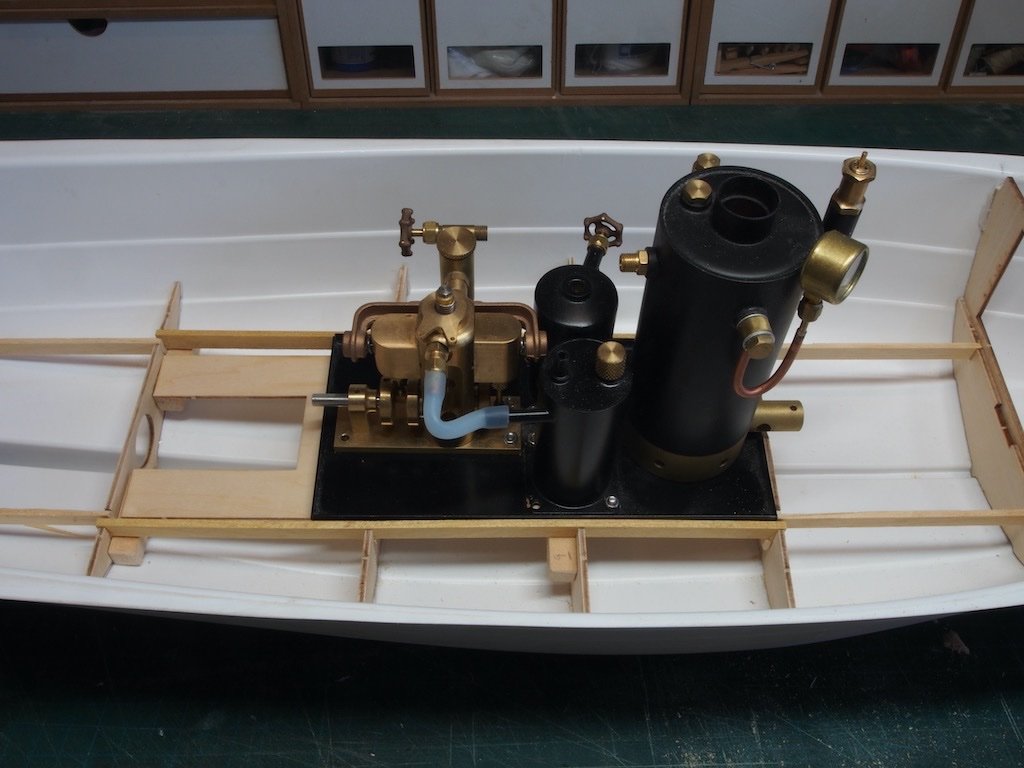
I have decided to hold off on trimming the excess ABS from the topsides. After reading a caution from another member (Wayne @a49kid) doing this build, I decided it would be prudent to test the fit of the deck. As can be seen in the photo below, it is not a very close fit. It only just reaches at the stern and does not follow the line of the gunwhale very well at all. I will therefore keep the ABS intact for now. I also decided to diverge from the sequence given in the instructions and fit the internal floor frames prior to fitting the inboard gunwhale and upper frames. After fitting the longitudinal stringers, I read in Wayne’s log where he found that he had to move the stringers outboard to accommodate the additional width of the(non-kit) steam engine. So, some minor surgery, a visit to the scrap box for spares, and a little fettling was required to account for this. And the steam engine now fits comfortably (just placed temporarily in position for the photo). I'm glad that Wayne is ahead of me in progressing his build - I will be able to learn from his encounters and hopefully avoid any more traps!
- 57 replies
-
- live steam
- radio
-
(and 2 more)
Tagged with:
-
Looks like you’ve made a lot of great progress there Wayne. I may “borrow” some of your ideas as I progress my own build.
- 31 replies
-
- African Queen
- Billing Boats
-
(and 2 more)
Tagged with:
-

The African Queen. My First Listing and First build here.
gjdale replied to a49kid's topic in New member Introductions
Wayne, Simply keep adding updates in the reply section of this thread. My purpose in planking the ABS hull was to add a little strength and rigidity to the hull. Initially, I was thinking of then adding a fibreglass coating as well, but will probably not do that now. The original boat was a steel hull, not wooden (just the topsides and decking were wood), so once it is planked and painted, it would probably be a good thing not to be able to see the planking. Of course, YOU will know that it is planked, and that’s all that matters really. -

The African Queen. My First Listing and First build here.
gjdale replied to a49kid's topic in New member Introductions
I just held the strip of wood in one hand and used the plane in the other to plane the taper (which I had already marked). I would then finish with sandpaper to get into any slight curves the plane could not. I found the easiest way to create the shape was to place sticky tape (the kind you can write on) on the hull to mark the shape, then transfer that to a piece of card (old Manila folder), then cut that out and trace around the card onto the wood strip. Sounds complex and time consuming, but is actually really easy and goes very quickly. -

The African Queen. My First Listing and First build here.
gjdale replied to a49kid's topic in New member Introductions
Welcome to MSW - it would be nice if we knew your name as well. Great to see someone else tackling the same project as me and in a very similar way. Looks like we are both thinking along the same lines here. I’ll follow along with interest - we may be able to exchange some ideas along the way. Straight up, I was pleased to see your comment about leaving the extra top moulding on until the internals and deck are completed. I have been too-ing and fro-ing about when to cut them off. Your comment has convinced me to leave them on for now. I’ve just completed my own version of planking over the ABS hull and am ready to start on the internals. I look forward to following the rest of your build. -
A minor update. Have completed filling and sanding the hull. Now ready to trim back the excess ABS and get on with the build (I think....).
- 57 replies
-
- live steam
- radio
-
(and 2 more)
Tagged with:
-
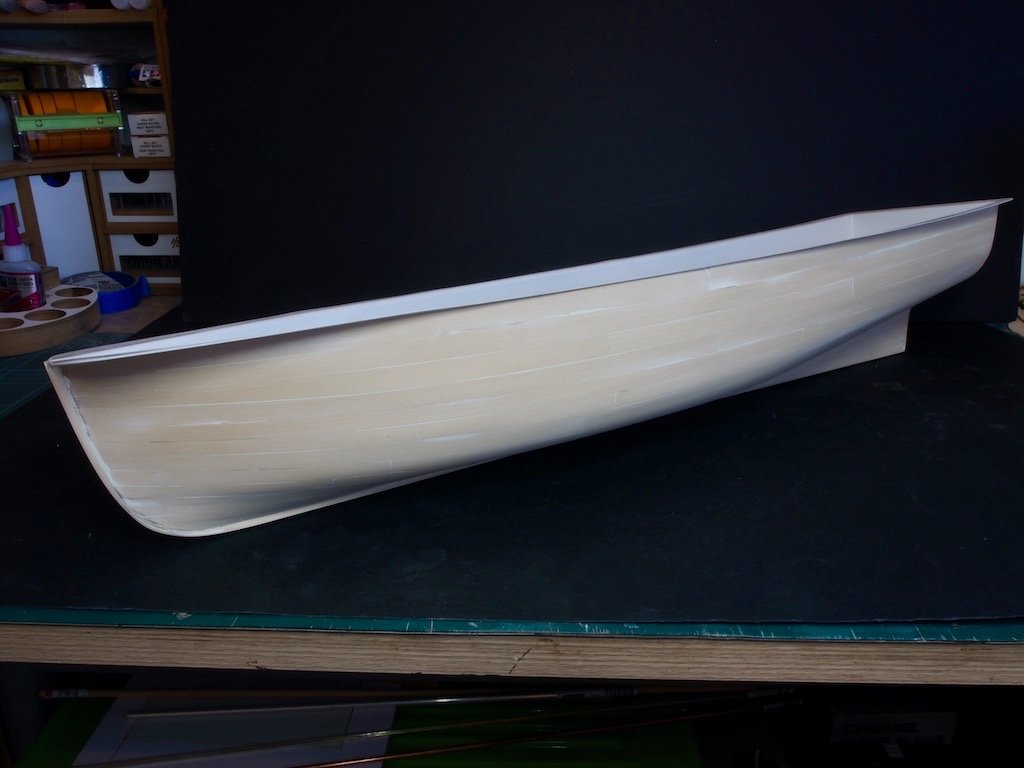
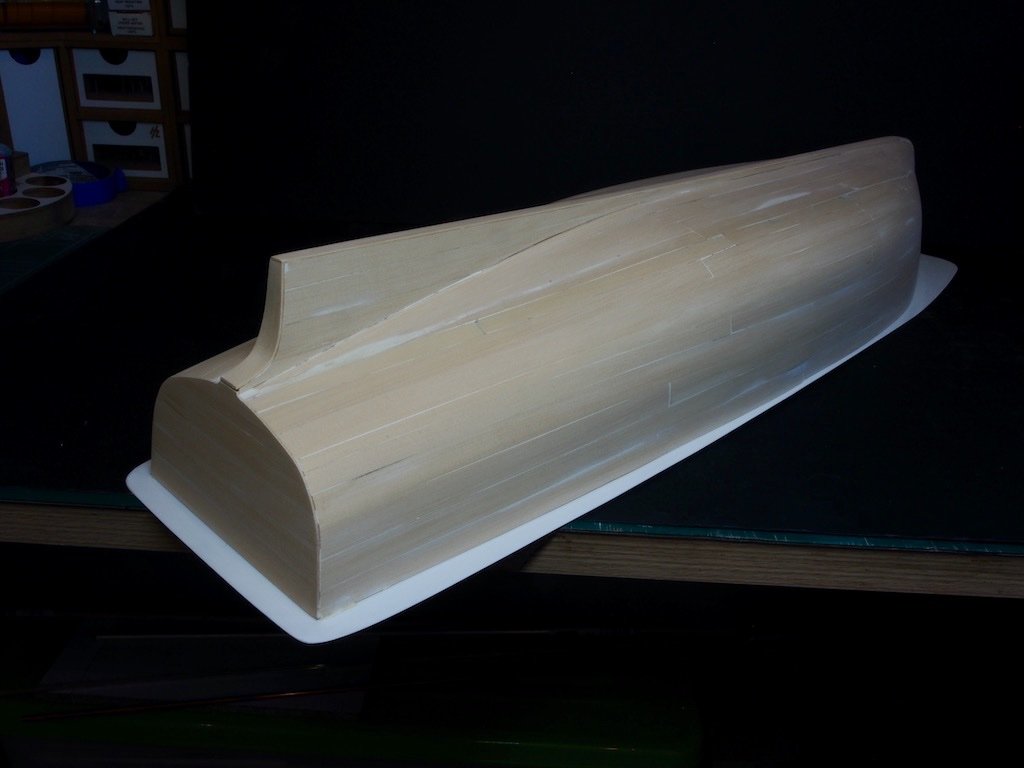
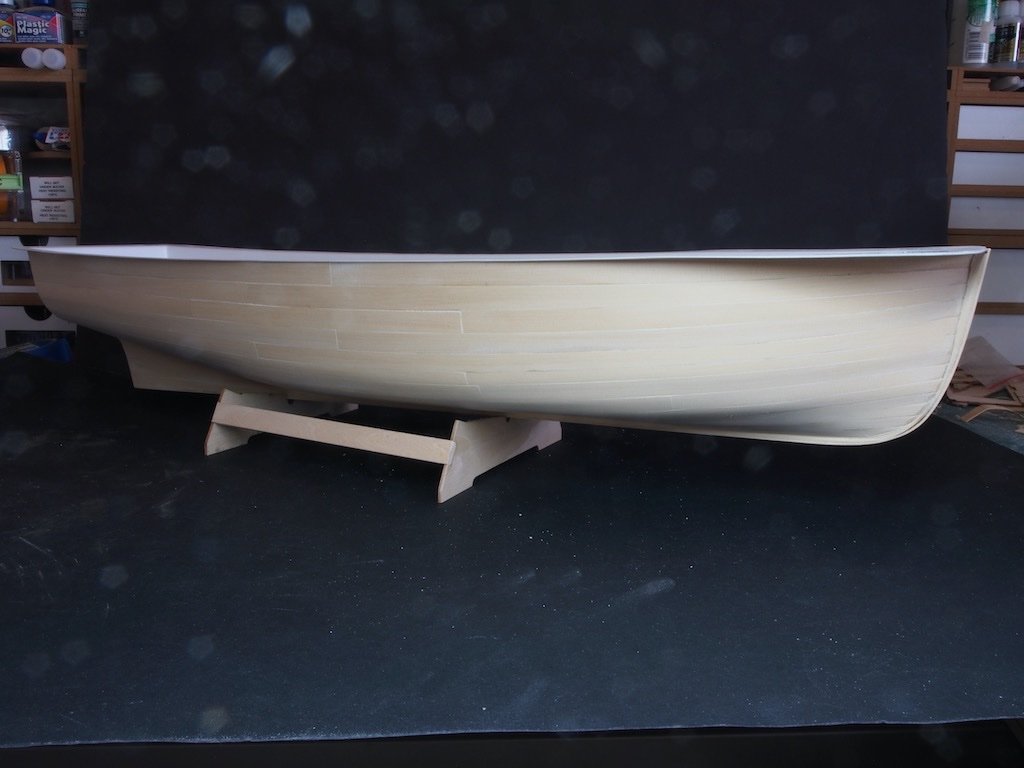
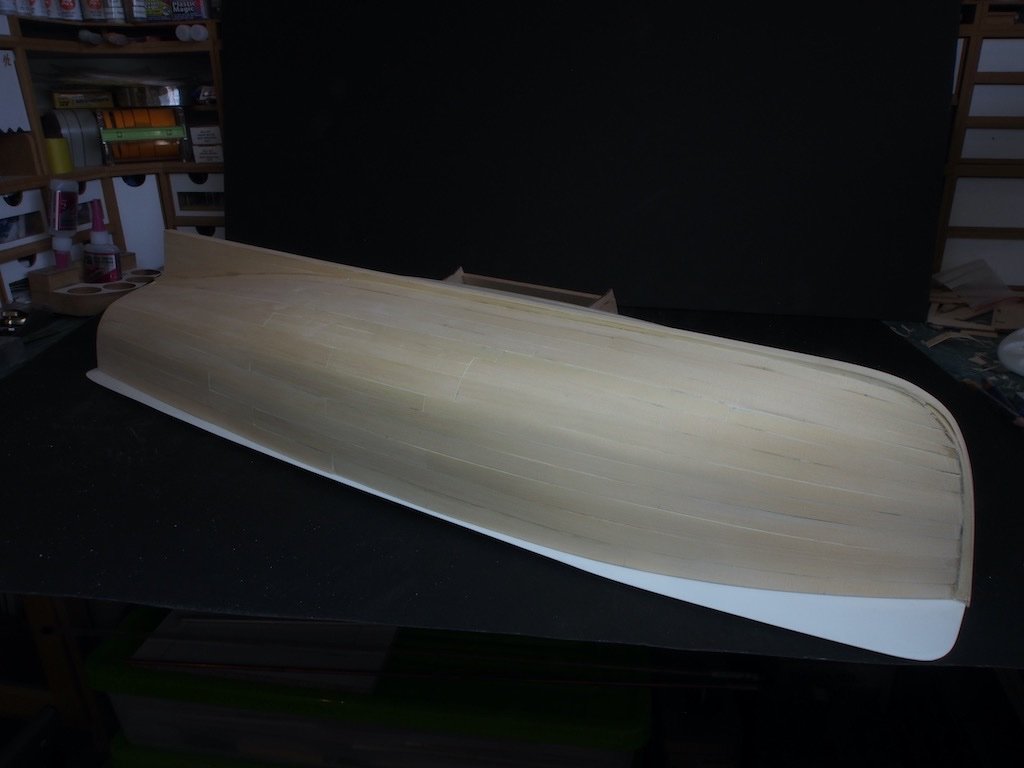
I can’t believe that it has been almost five months since I updated this build log. Life has thrown a few unexpected twists and turns my way recently, and it has only been in the last few weeks that I have felt remotely interested in returning to the modelling desk. I can at last report that the hull planking is complete – at least as far as the initial sanding. I still need to go back and apply some filler into the inevitable gaps, but overall, I’m reasonably happy with the how this has turned out. A couple of overview shots to show progress as well as ‘proof of life’. I’ll proceed with some filler and a final sanding before I trim back the excess ABS around the top of the hull. Hopefully it will not be another five months before the next update!
- 57 replies
-
- live steam
- radio
-
(and 2 more)
Tagged with:
-
Congratulations on yet another outstanding build Glen - I think this one is your best yet (among a whole lot of other outstanding builds).
- 174 replies
-
- Waa Kaulua
- bottle
-
(and 1 more)
Tagged with:
About us
Modelshipworld - Advancing Ship Modeling through Research
SSL Secured
Your security is important for us so this Website is SSL-Secured
NRG Mailing Address
Nautical Research Guild
237 South Lincoln Street
Westmont IL, 60559-1917
Model Ship World ® and the MSW logo are Registered Trademarks, and belong to the Nautical Research Guild (United States Patent and Trademark Office: No. 6,929,264 & No. 6,929,274, registered Dec. 20, 2022)
Helpful Links
About the NRG
If you enjoy building ship models that are historically accurate as well as beautiful, then The Nautical Research Guild (NRG) is just right for you.
The Guild is a non-profit educational organization whose mission is to “Advance Ship Modeling Through Research”. We provide support to our members in their efforts to raise the quality of their model ships.
The Nautical Research Guild has published our world-renowned quarterly magazine, The Nautical Research Journal, since 1955. The pages of the Journal are full of articles by accomplished ship modelers who show you how they create those exquisite details on their models, and by maritime historians who show you the correct details to build. The Journal is available in both print and digital editions. Go to the NRG web site (www.thenrg.org) to download a complimentary digital copy of the Journal. The NRG also publishes plan sets, books and compilations of back issues of the Journal and the former Ships in Scale and Model Ship Builder magazines.


