RGL
-
Posts
5,539 -
Joined
-
Last visited
Content Type
Profiles
Forums
Gallery
Events
Everything posted by RGL
-
 Wow, I just can't use power tools, afraid of losing bits off me. Soo much easier than doing stuff by hand, they are going to look perfect.
- 517 replies
-
- 2
-

-
- Endeavour
- Artesania Latina
- (and 1 more)
-
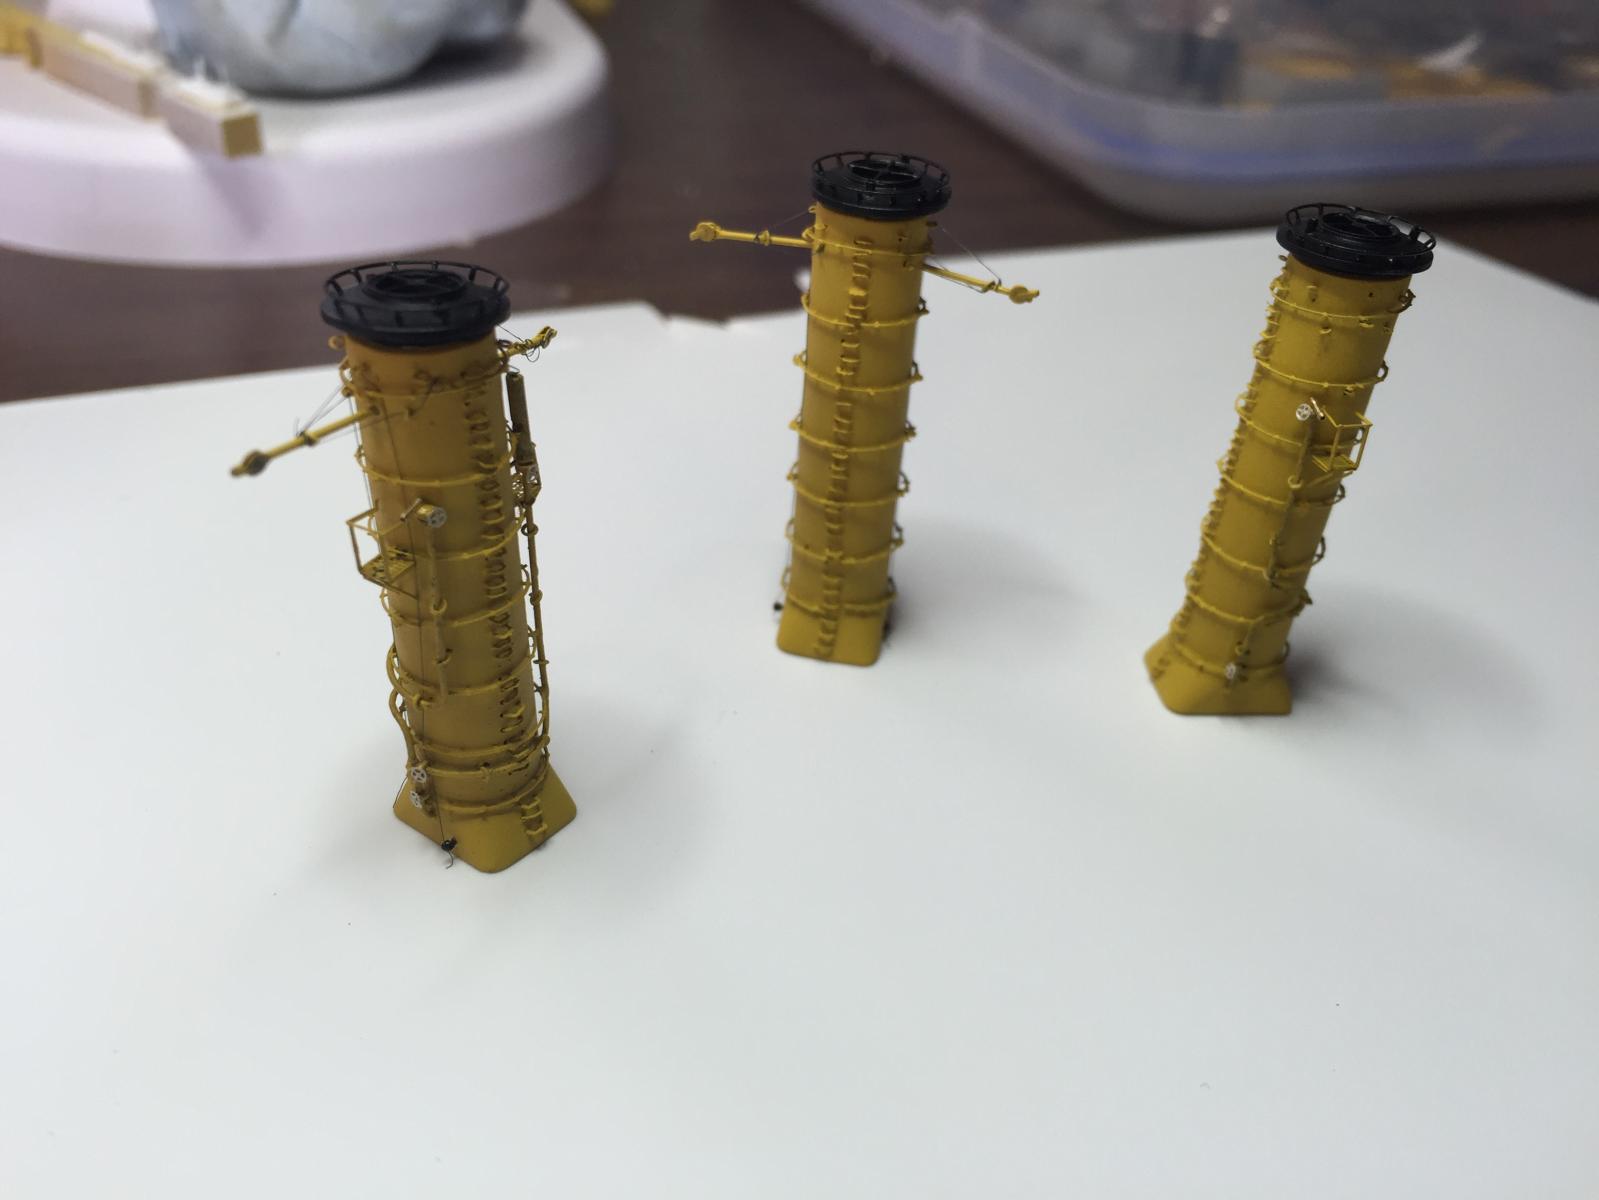
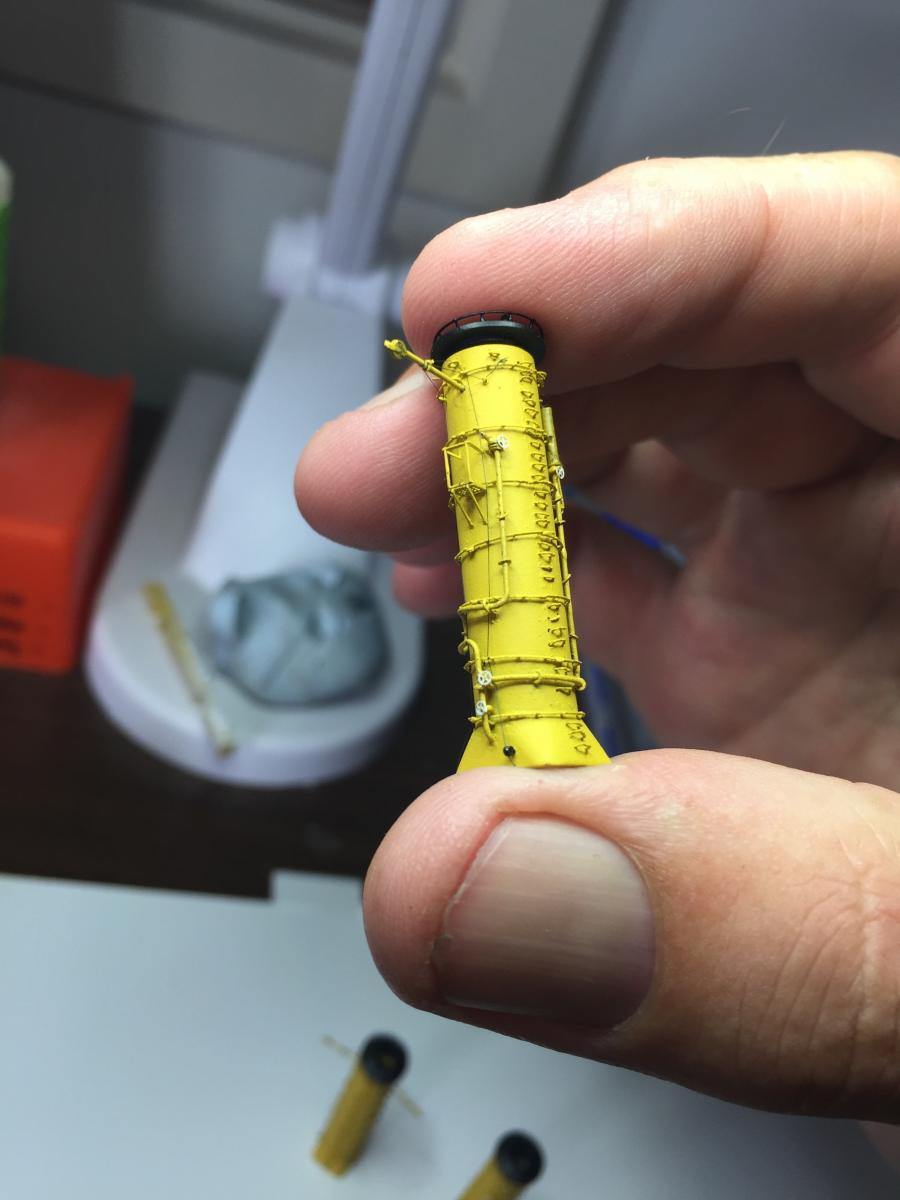
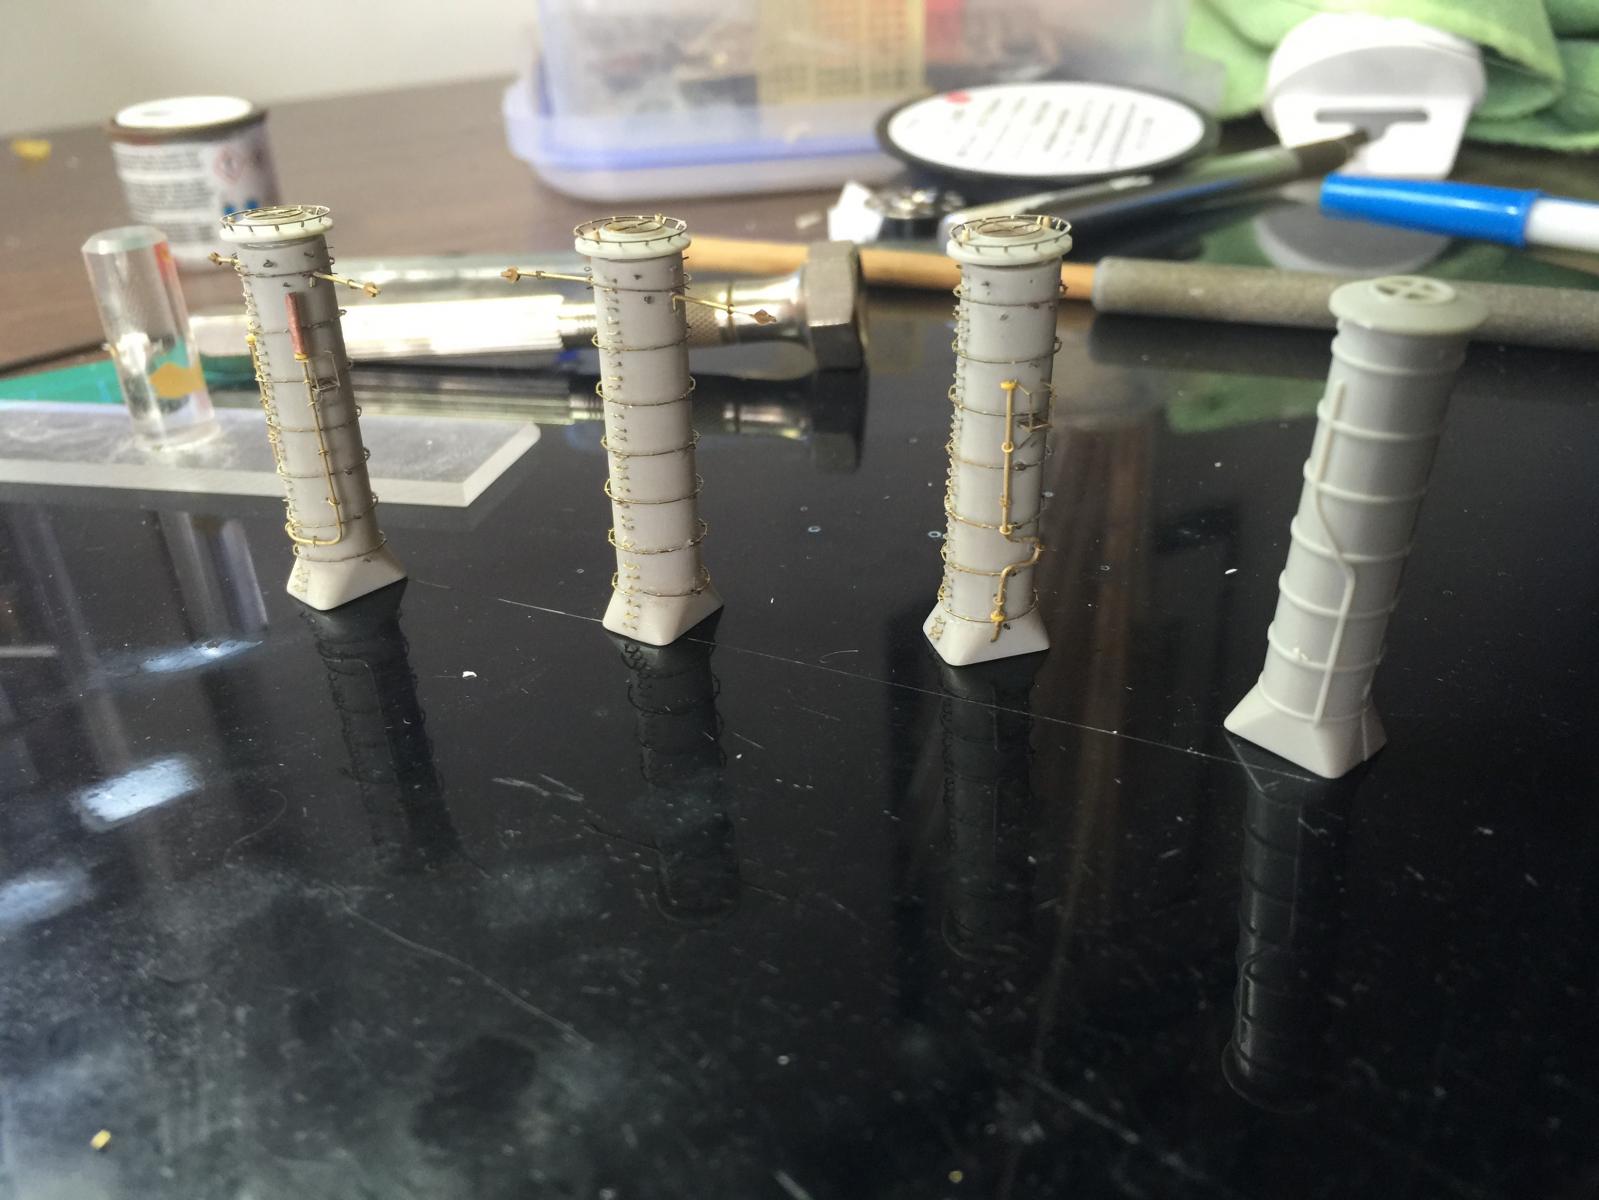
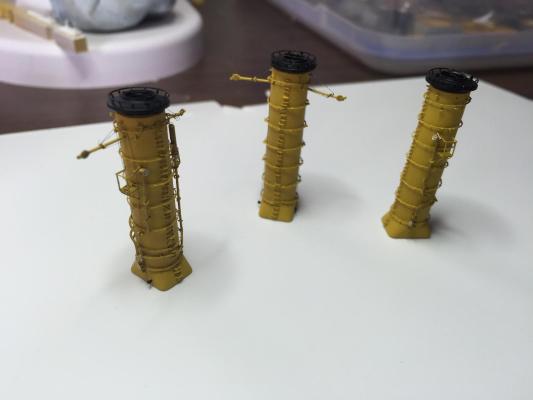
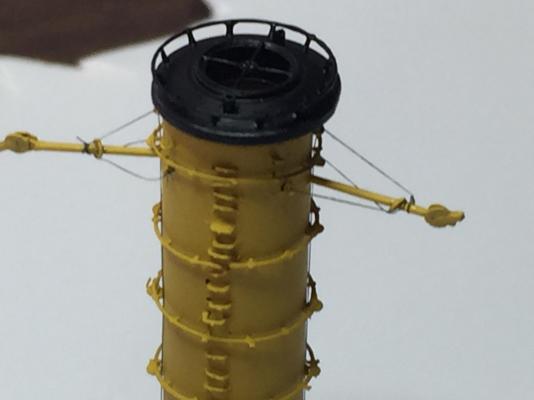
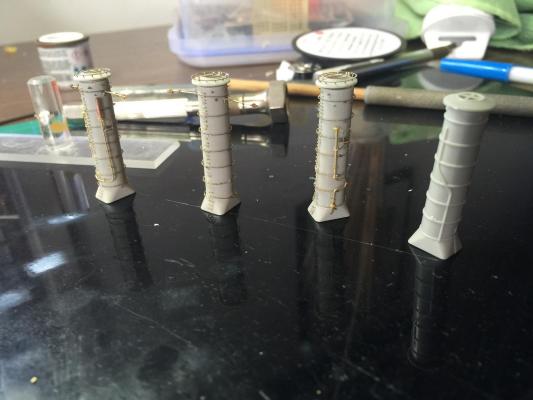
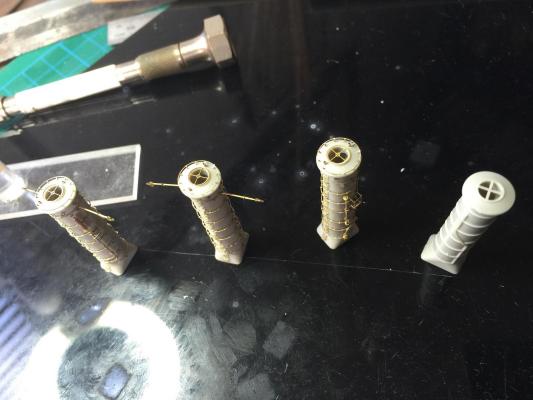
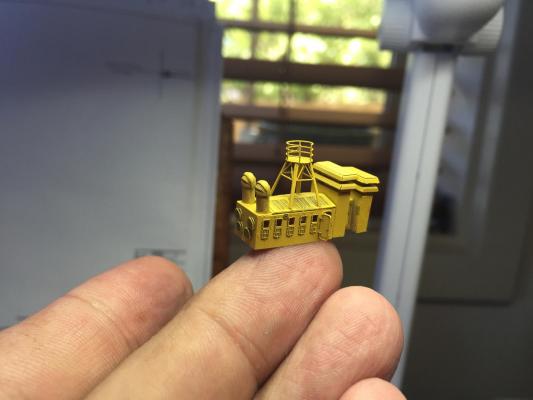
Nearly there with the funnels, just have to align and plonk them on and put on the guy wires. Now they are painted I have added the small brass horns and the small fly wheels, and the rigging for the bits that stick off the fore and aft funnels which i still am unable to find out what they are. they don't look that great on macro but when looked at compared to my hand size they have come out OK.
- 236 replies
-
- 11
-
-
The whole etch thing just seems to take forever at times! Because of the scale you say to yourself where did it go? 2 days work and I can't see it anymore! As long as you know that's all that matters old boy, I'm still trying to rig funnels.
-
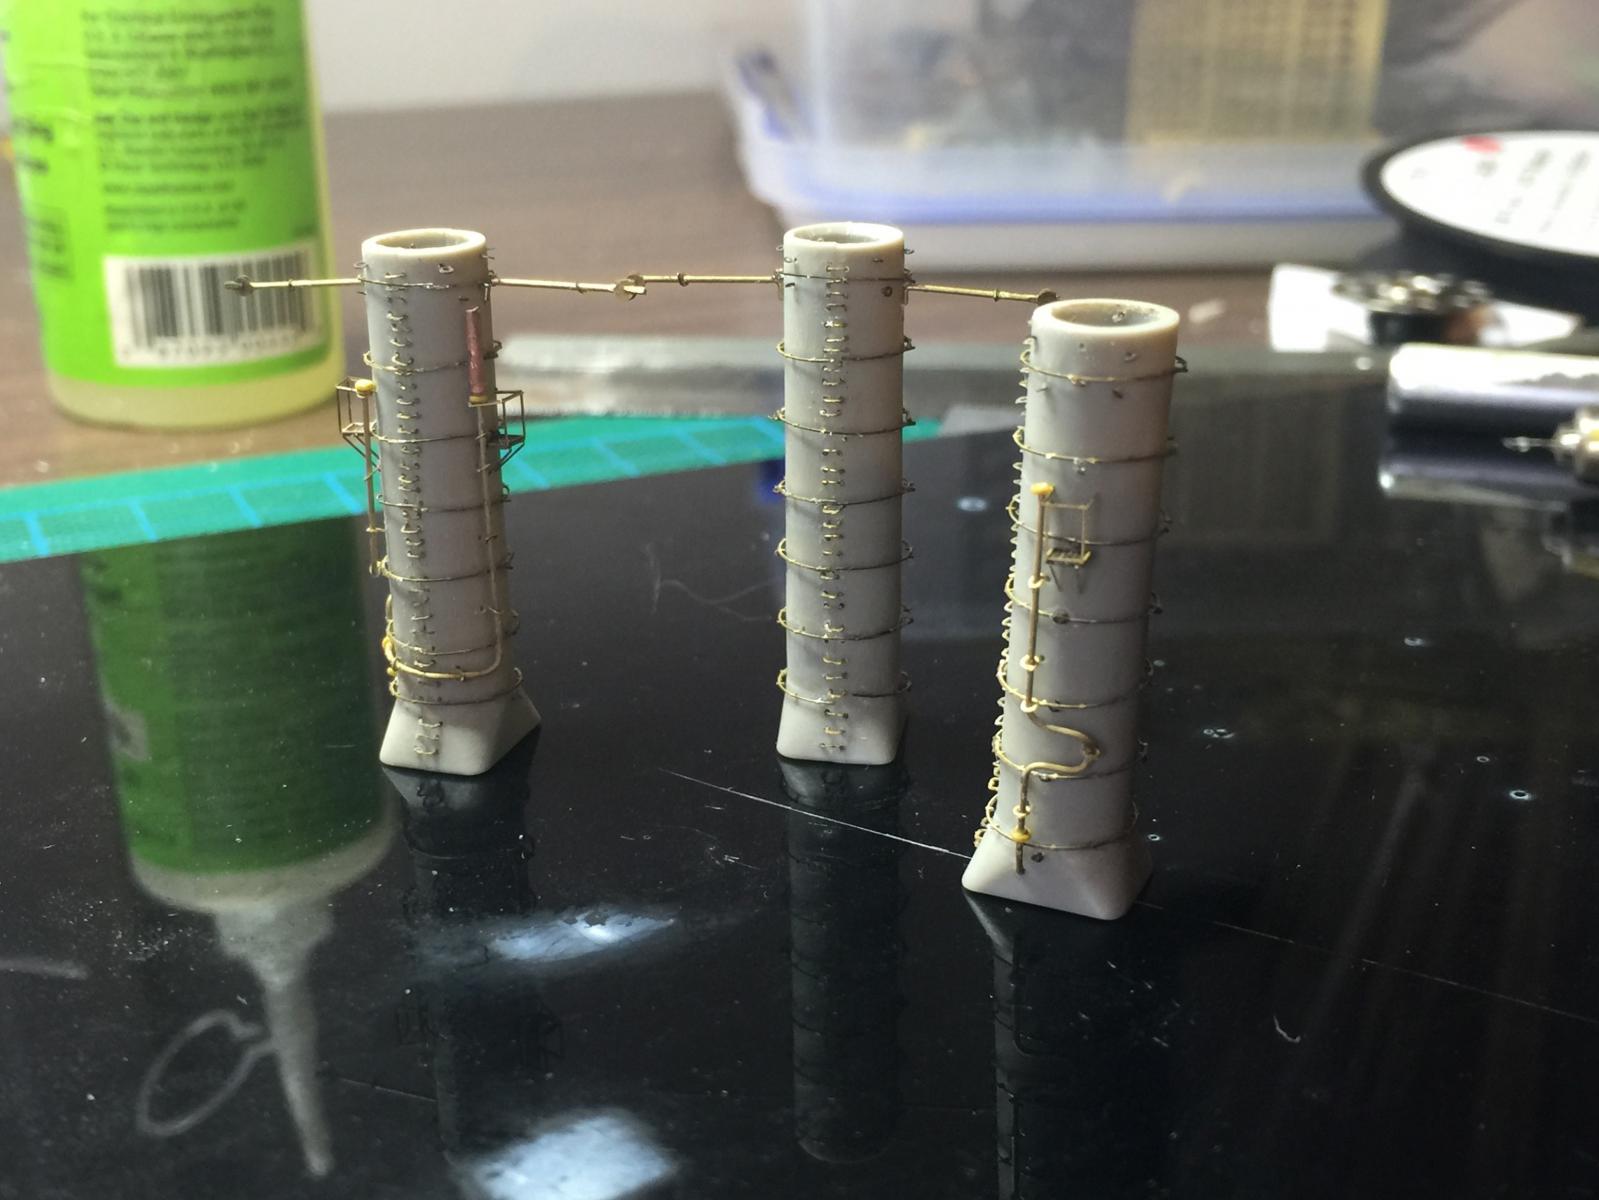
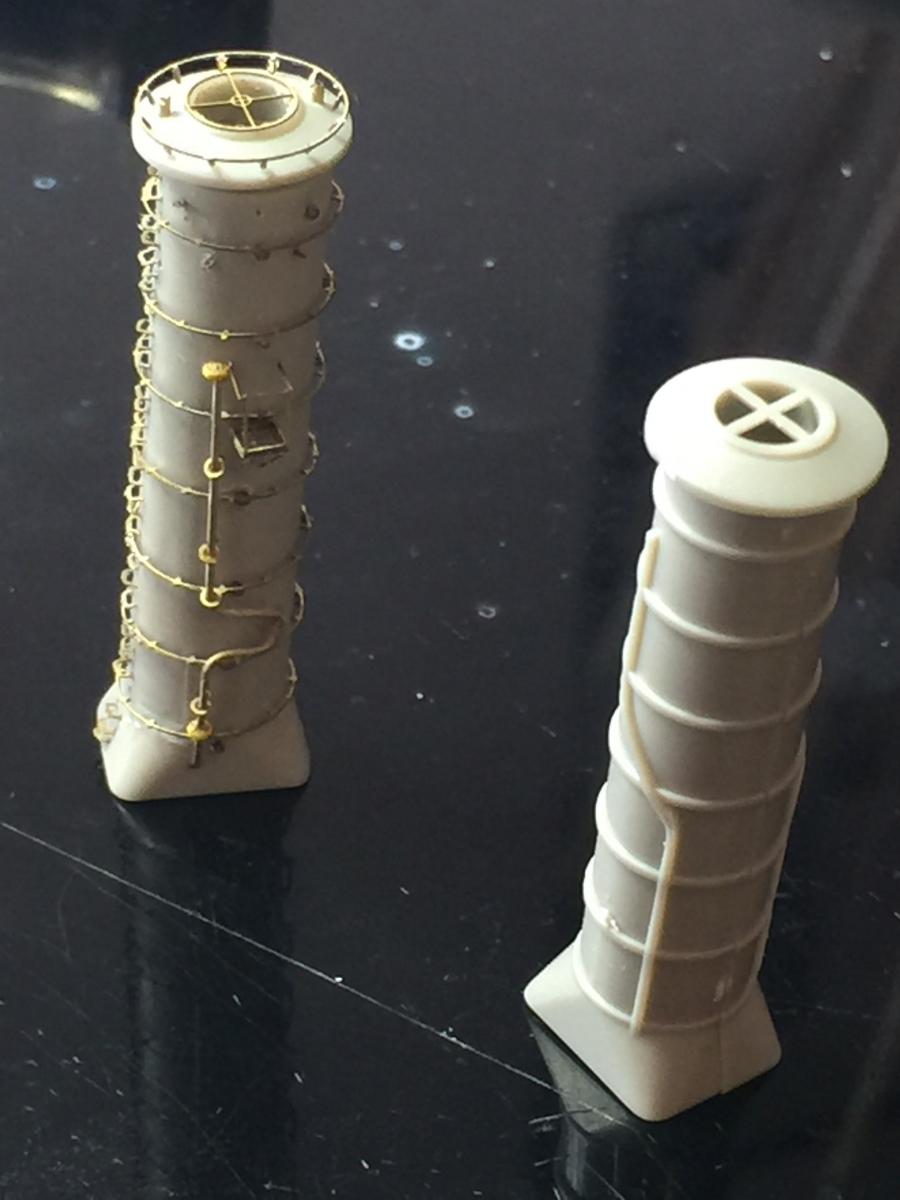
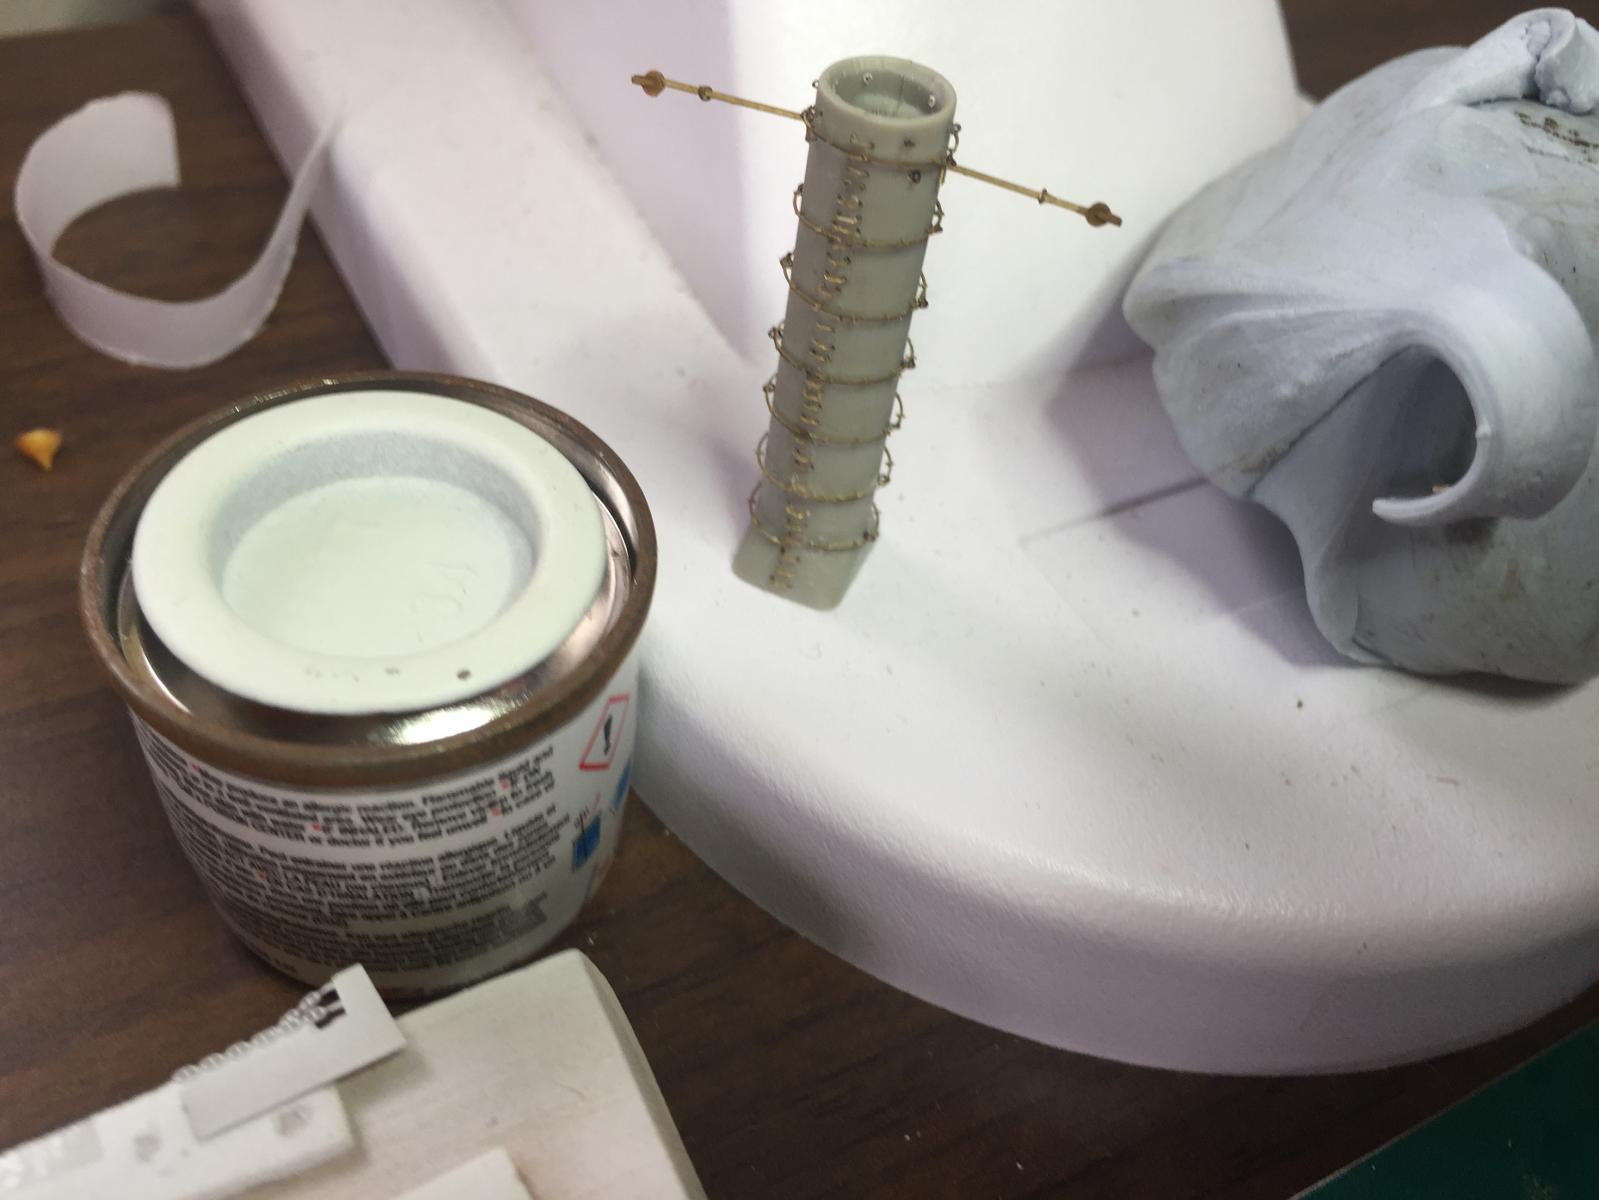
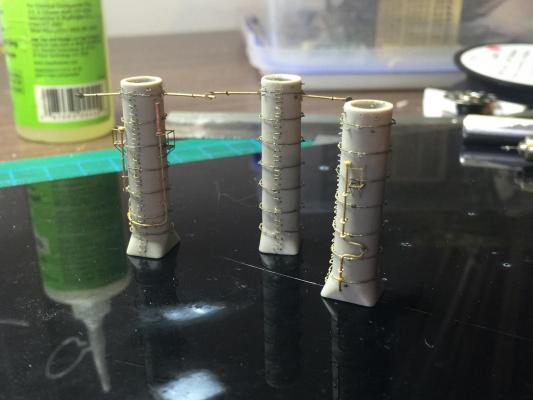
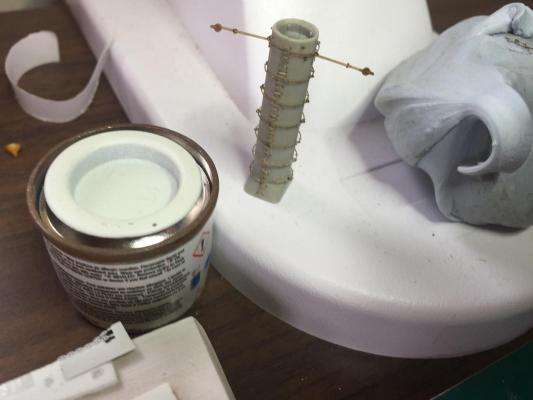
Nearly done with the funnels. A primer coat, fix the gaps that show up, top coat and add some brass horns. I scratch built the pipes on the sides, and added some vents to the top as described in the plans. It's amazing how far we've come since the 1995 kit with aftermarket and bloodymindedness. You can compare what the kit gives you to the possibilities.


- 236 replies
-
- 11
-
-
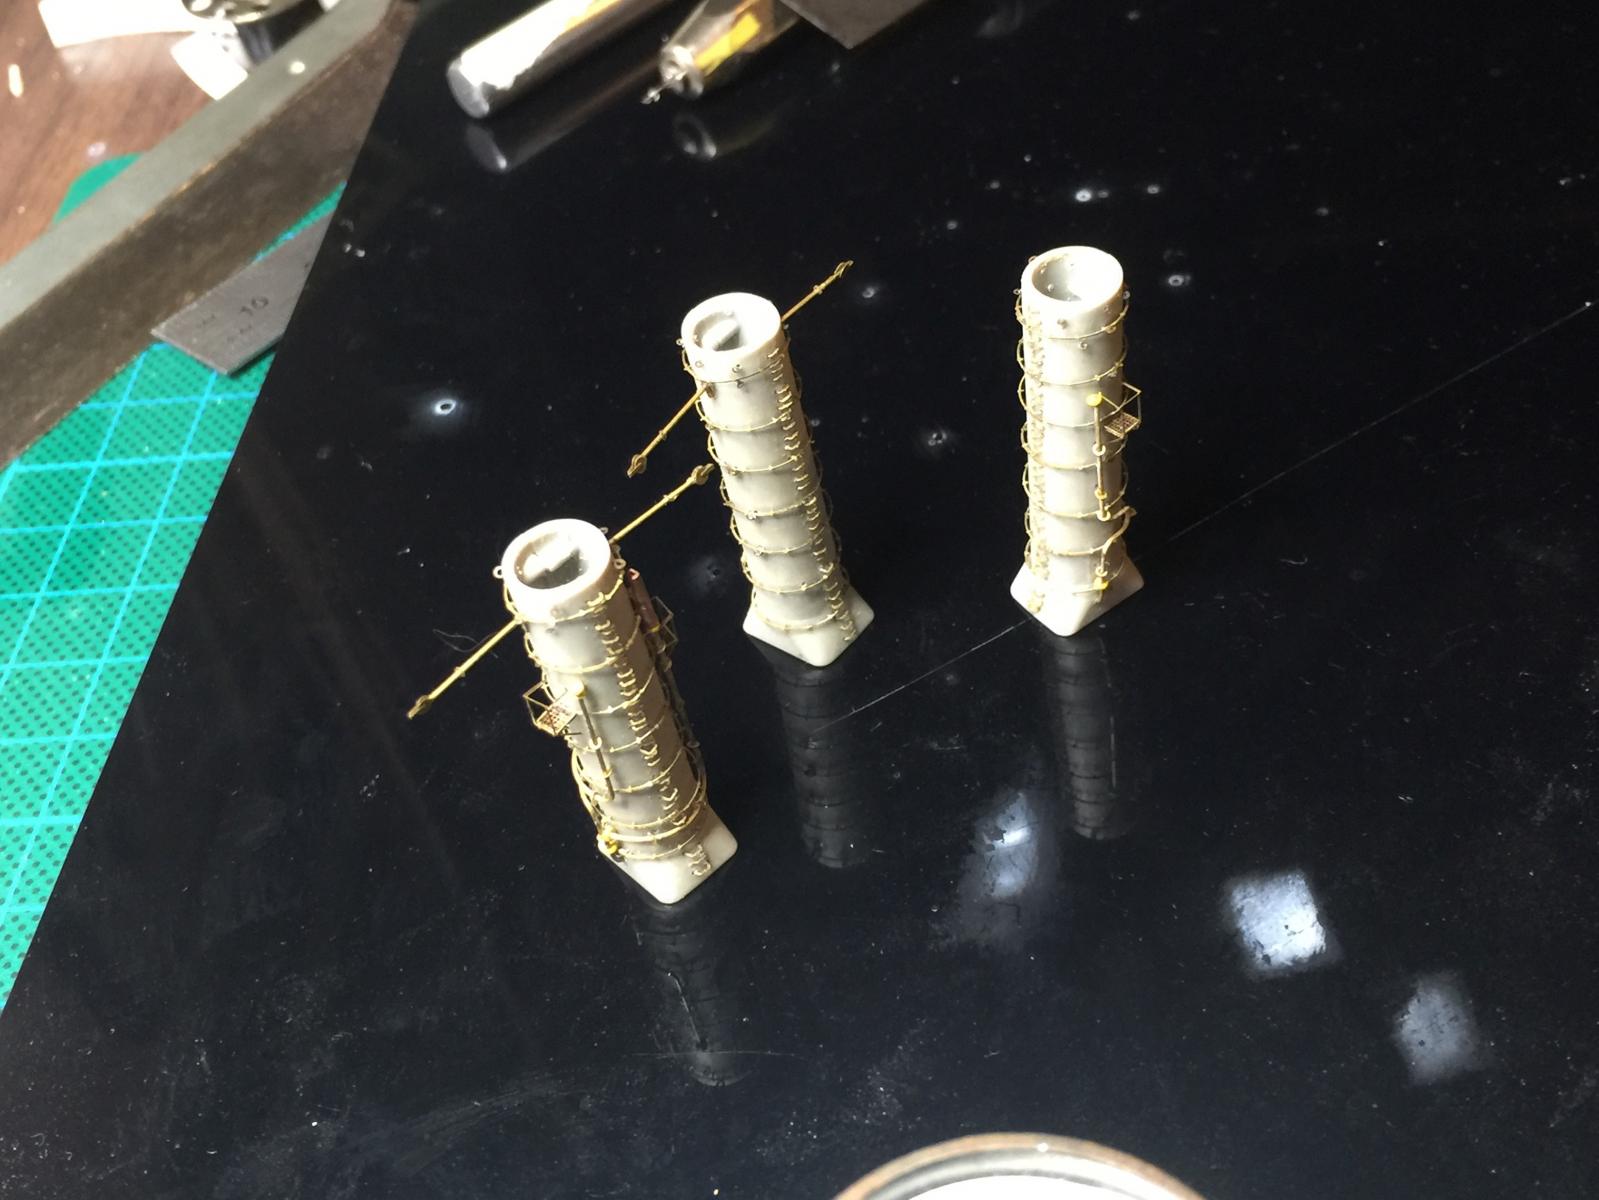
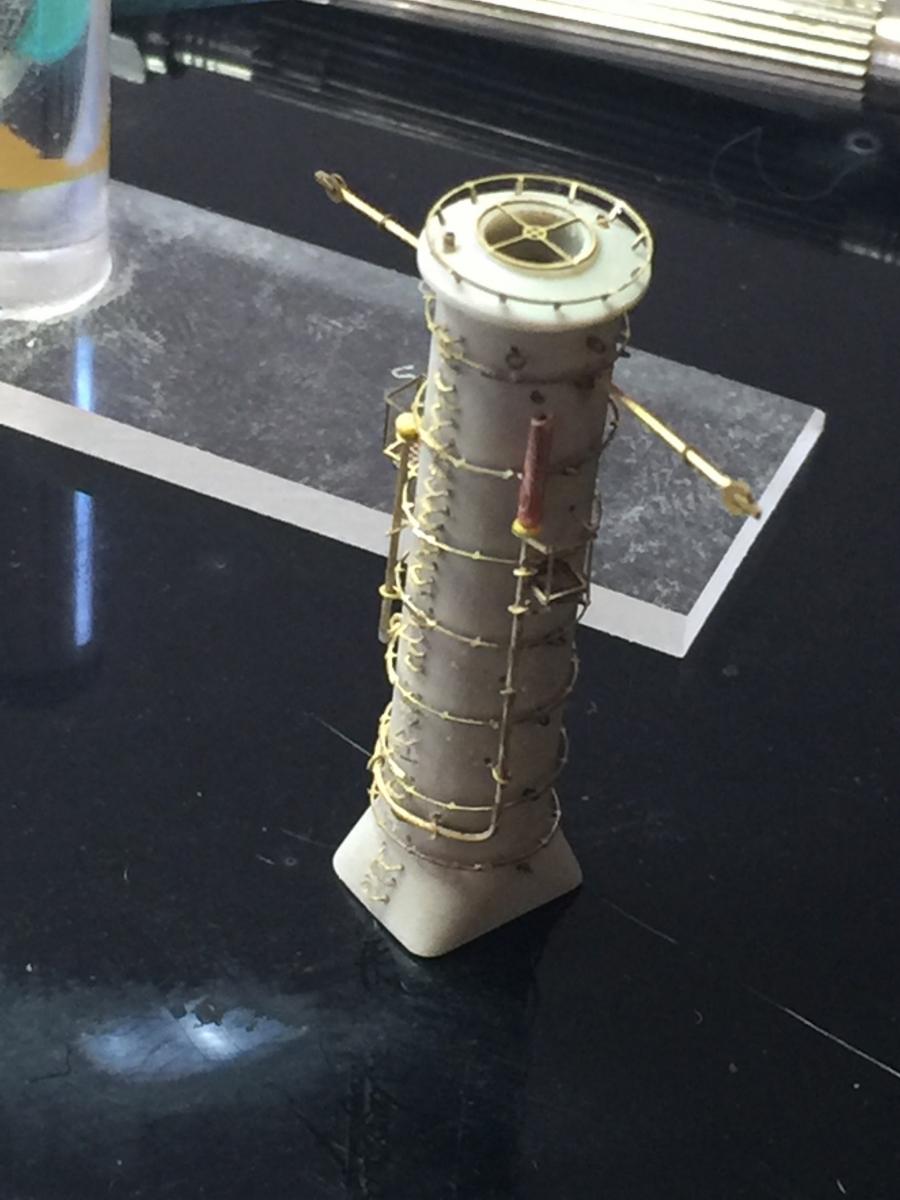
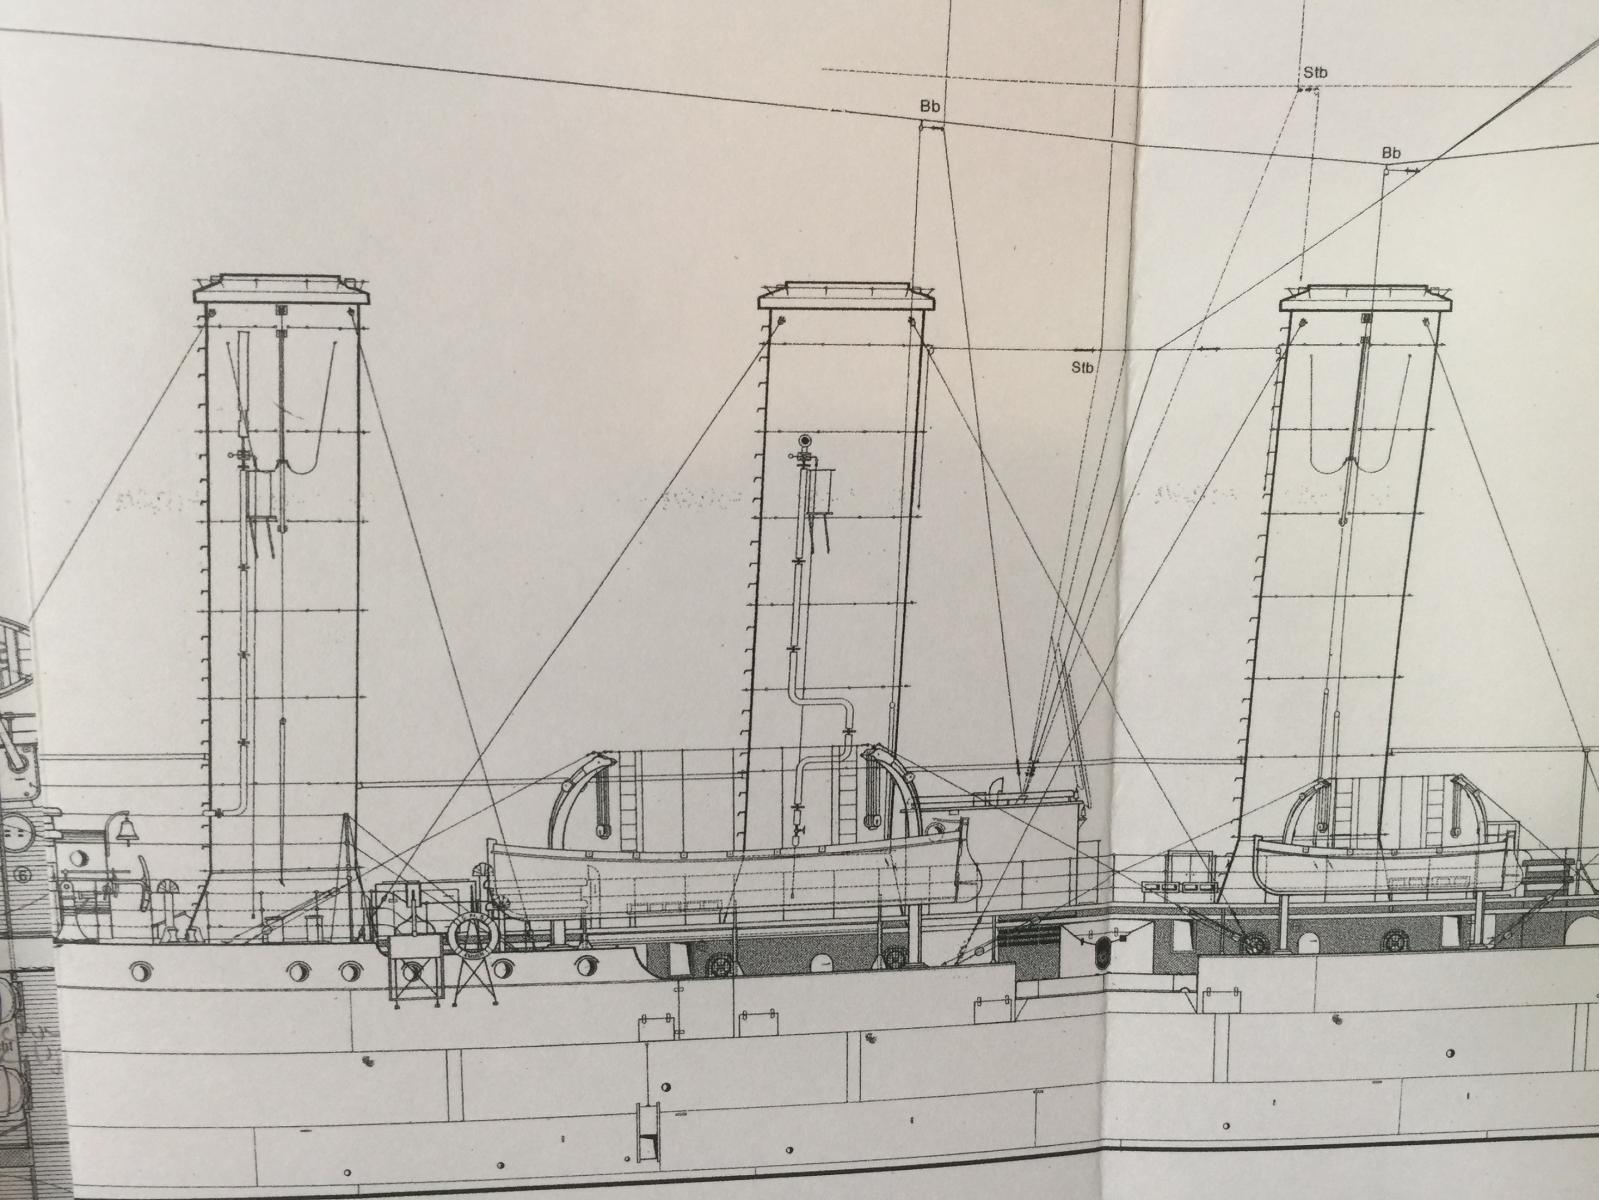
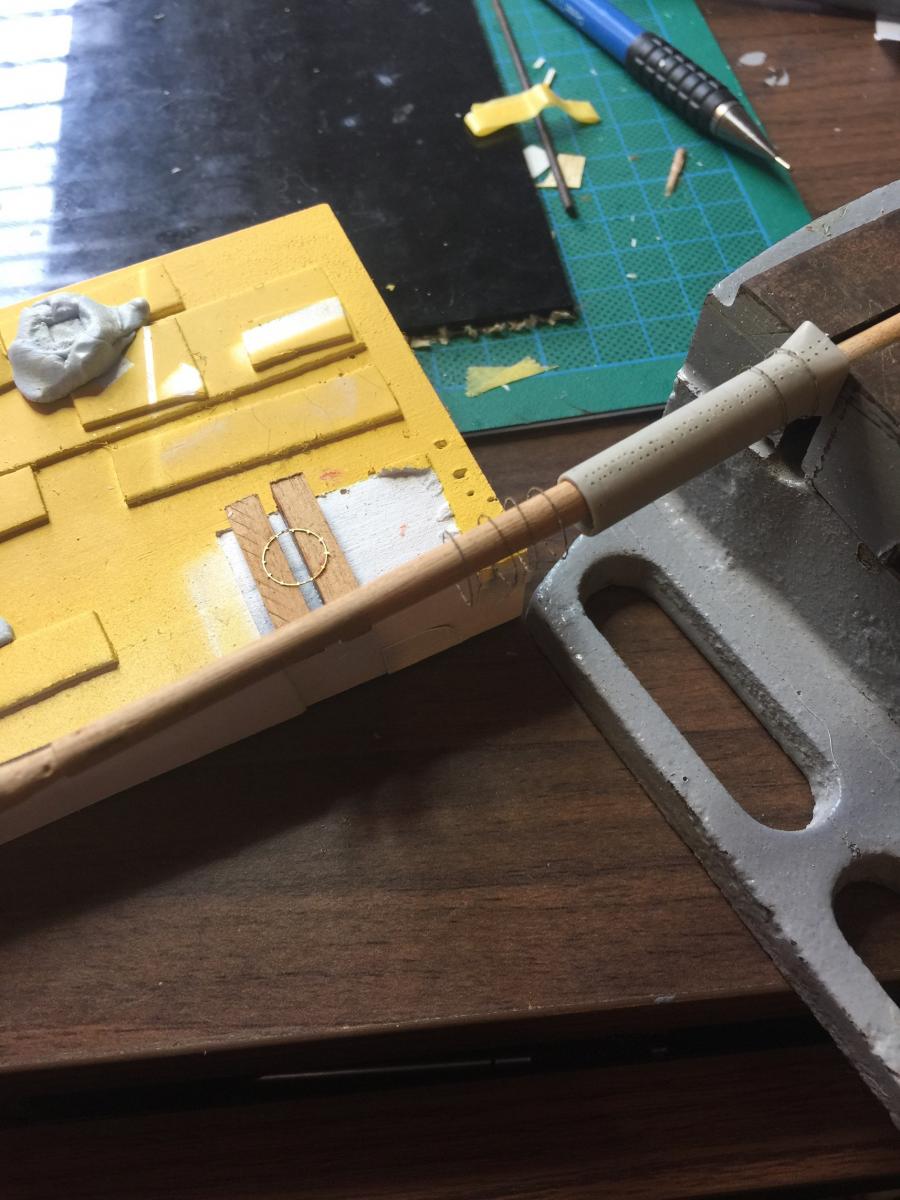
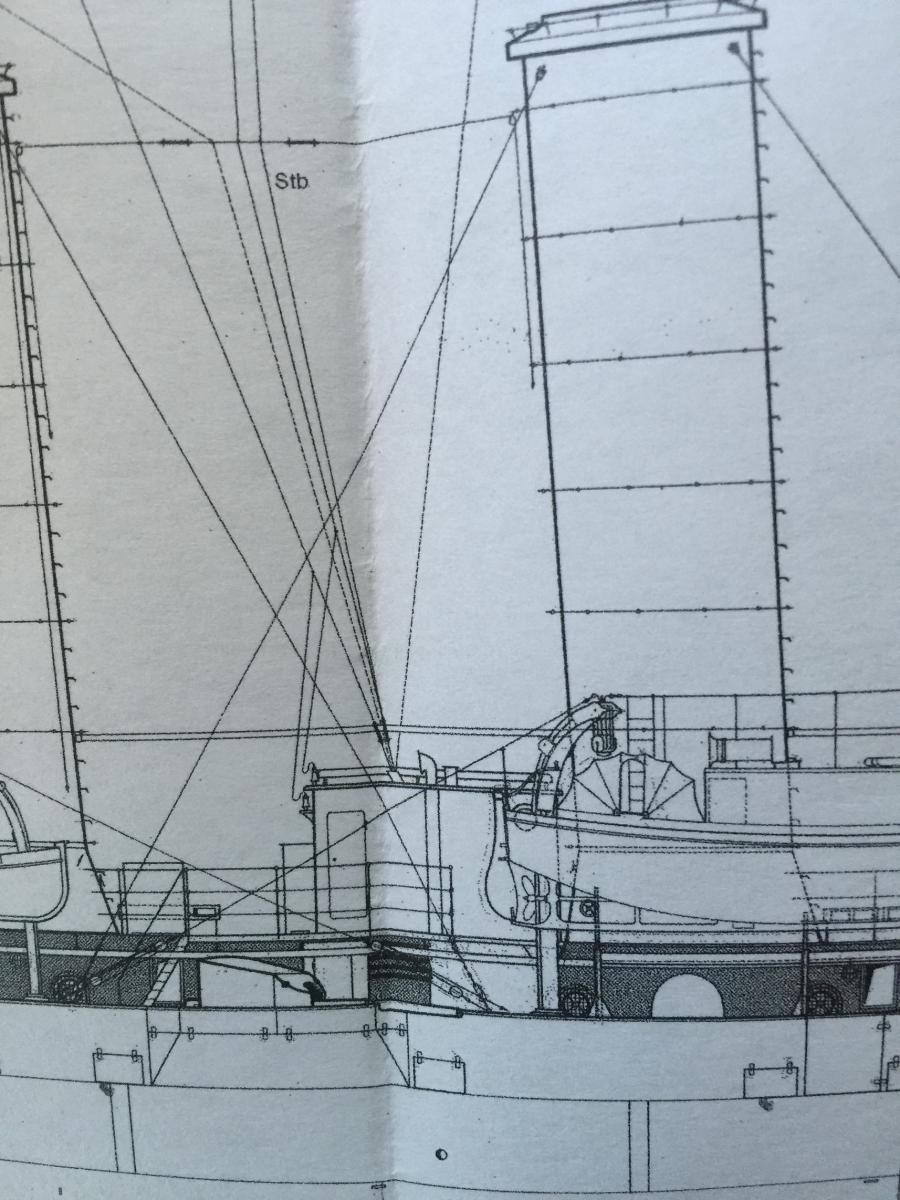
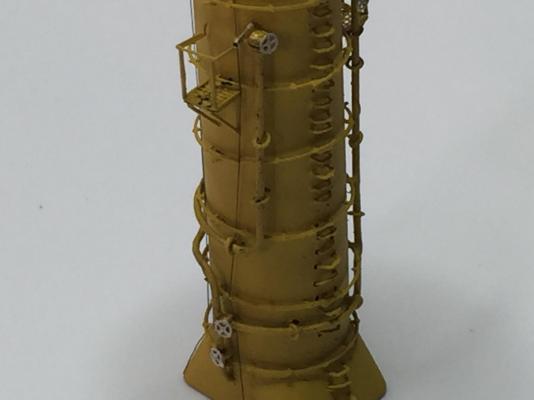
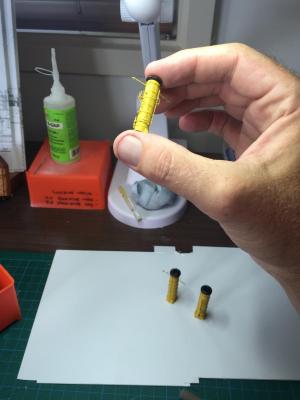
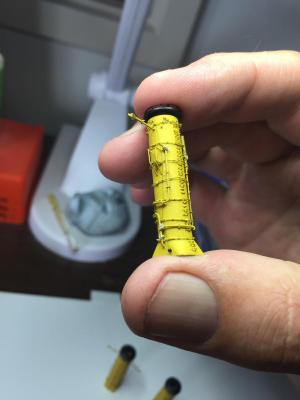
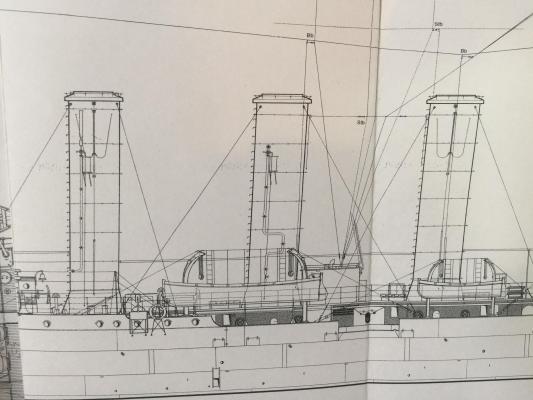
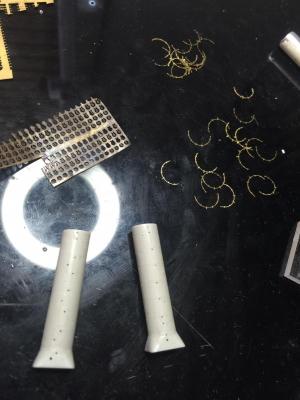
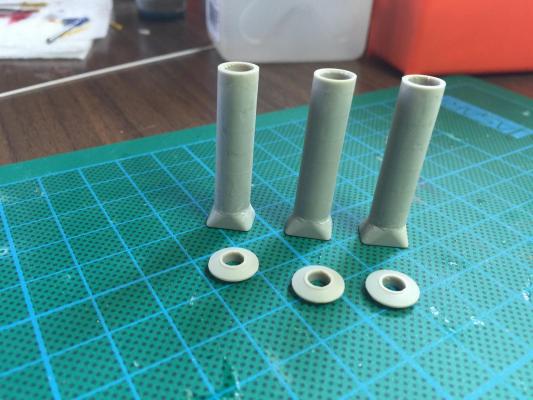
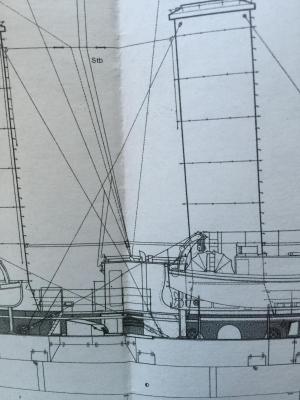
Moving on and thanks for the likes and comments. The Eduard fret has rings designed for the rims that that placed on the funnels. As such I needed to make mantles for them to sit on. This requires the rings to be made into a circle as they come in 2 halves. As you can see I used to little piece of wood so I can CA them together, then run them onto the funnel which is secured on a dowel then sliding them on piece by piece after using some tiny flue rings for them to sit. This has taken me a couple of days to perfect as I started over a few times to get them to run parallel. There are 4 little pieces which sit on the fore and aft funnel. I have no Idea what they are. Anyone? they look like little pulley system which i wonder are used on coaling the ship. The Eduard fret provides a tiny little crows foot which does no correspond with the Huff plans for the attached photo of his model at 1/100 (Which would be a scale far more friendly on my eyes and shaking fingers after coffee. I scratch built some using some tiny brass rod with a pulley at the end and a ring 1/3 from the end which i will attach rigging after I have painted it. I did the aft funnel first to get some dimensions so I could figure out the clearance needed for the steam pipe / Ships horns on the outside. Each funnels also has about 30 individual steps which run up the front of them to the caps (Which I will do after I finish the funnels.


- 236 replies
-
- 11
-
-
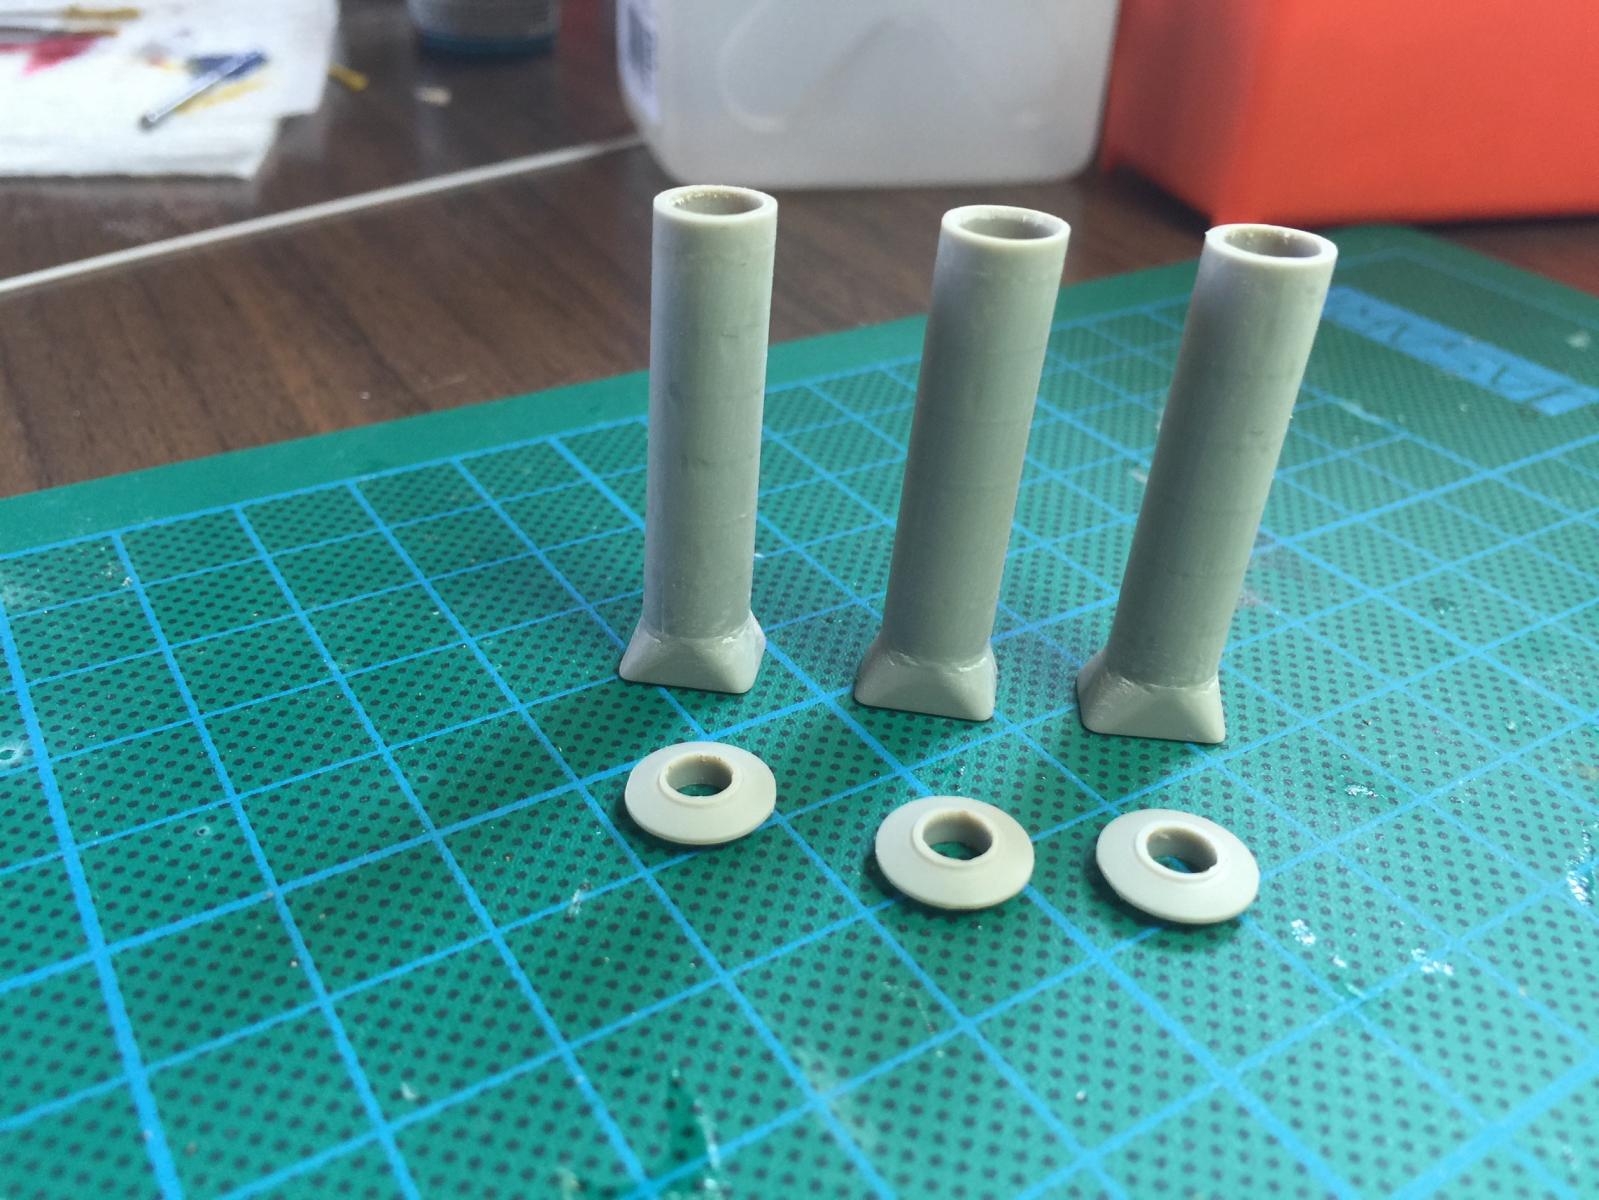
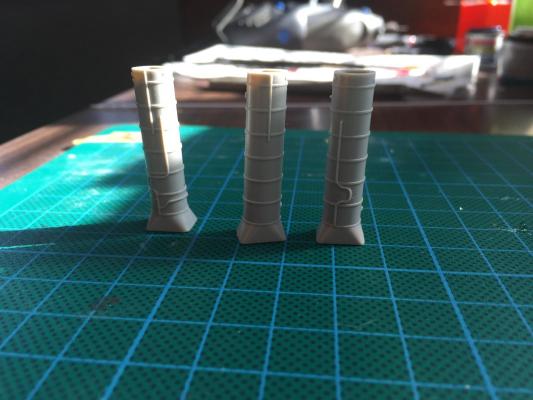
Moving onto the funnels. The kit supplied ones have representations of the rings and steam pipes on the outside. Yep, have to go. Trimmed and sanded. The amount of aftermarket for this will consist of the Eduard fret, flue rings, steps, flywheels and brass rod to replace the steam pipes. A fair bit of work really. If your look at the plans they have an enormous amount of detail to get right.
-
Again legendary stuff, in a way your build is a representation of smelling the roses as one goes through life, not a race to the finish.
-
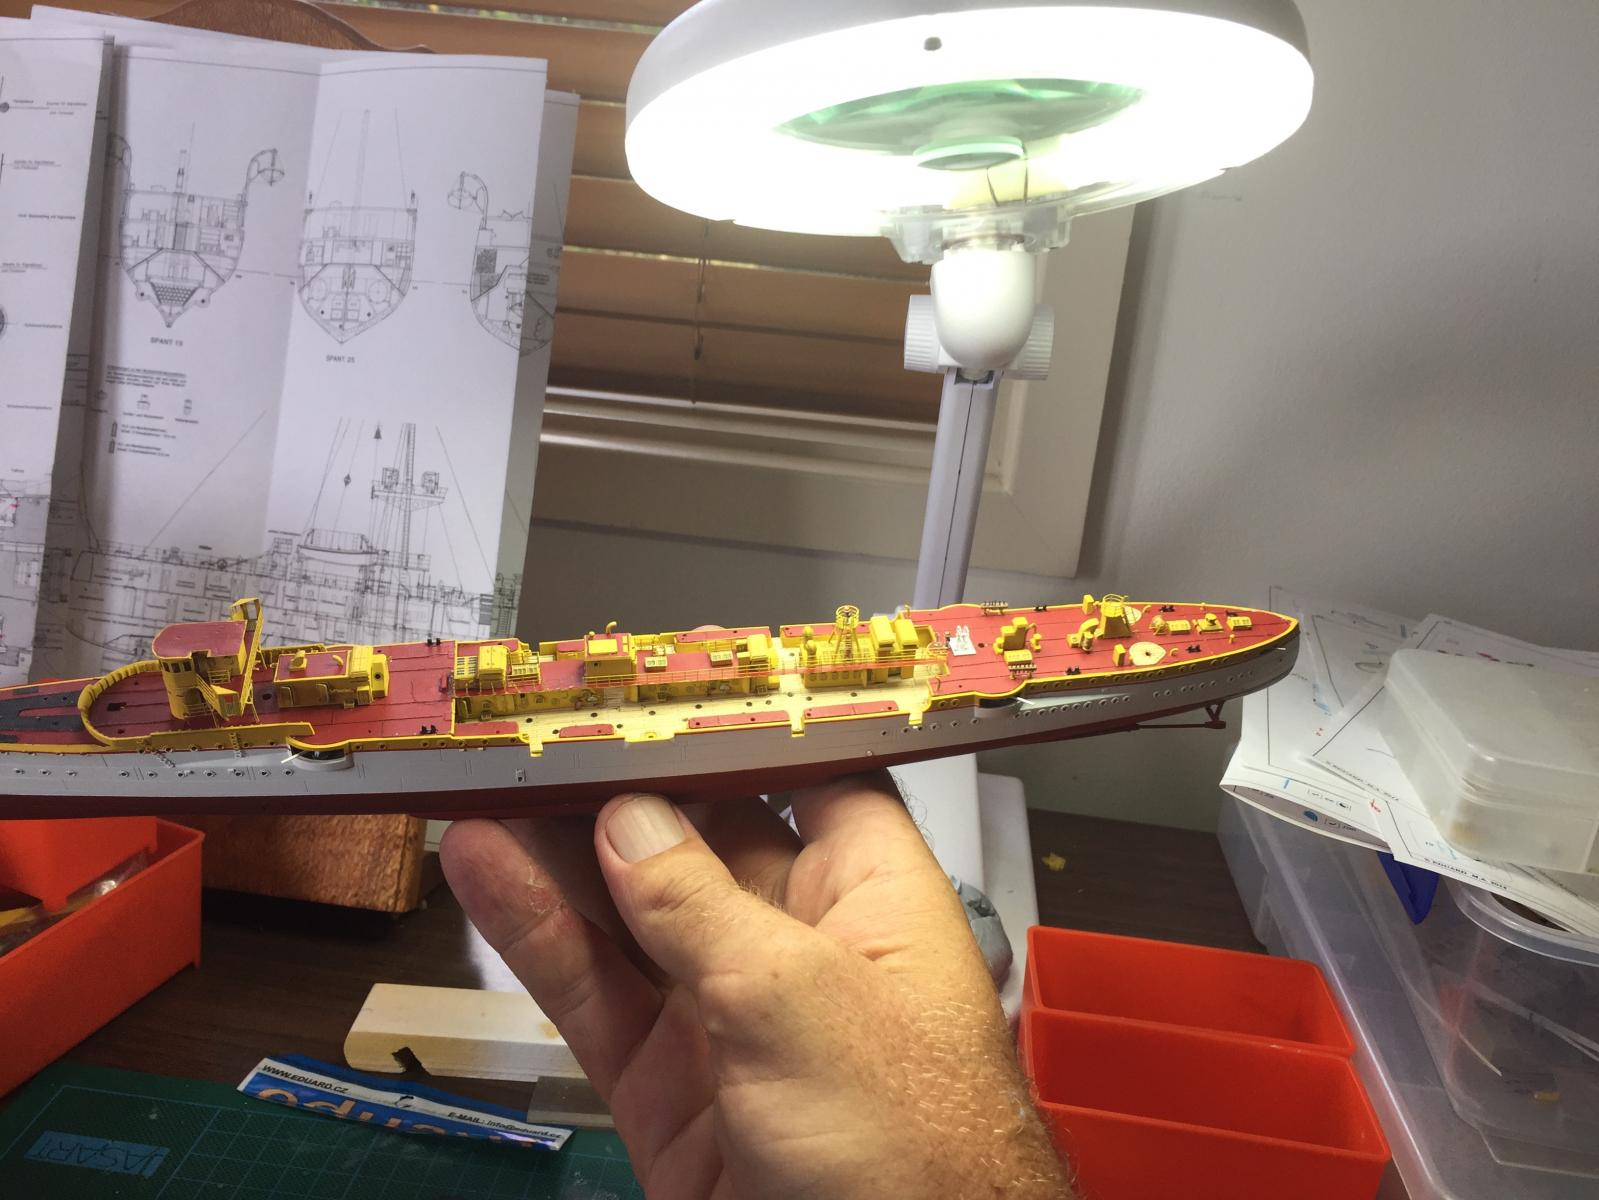
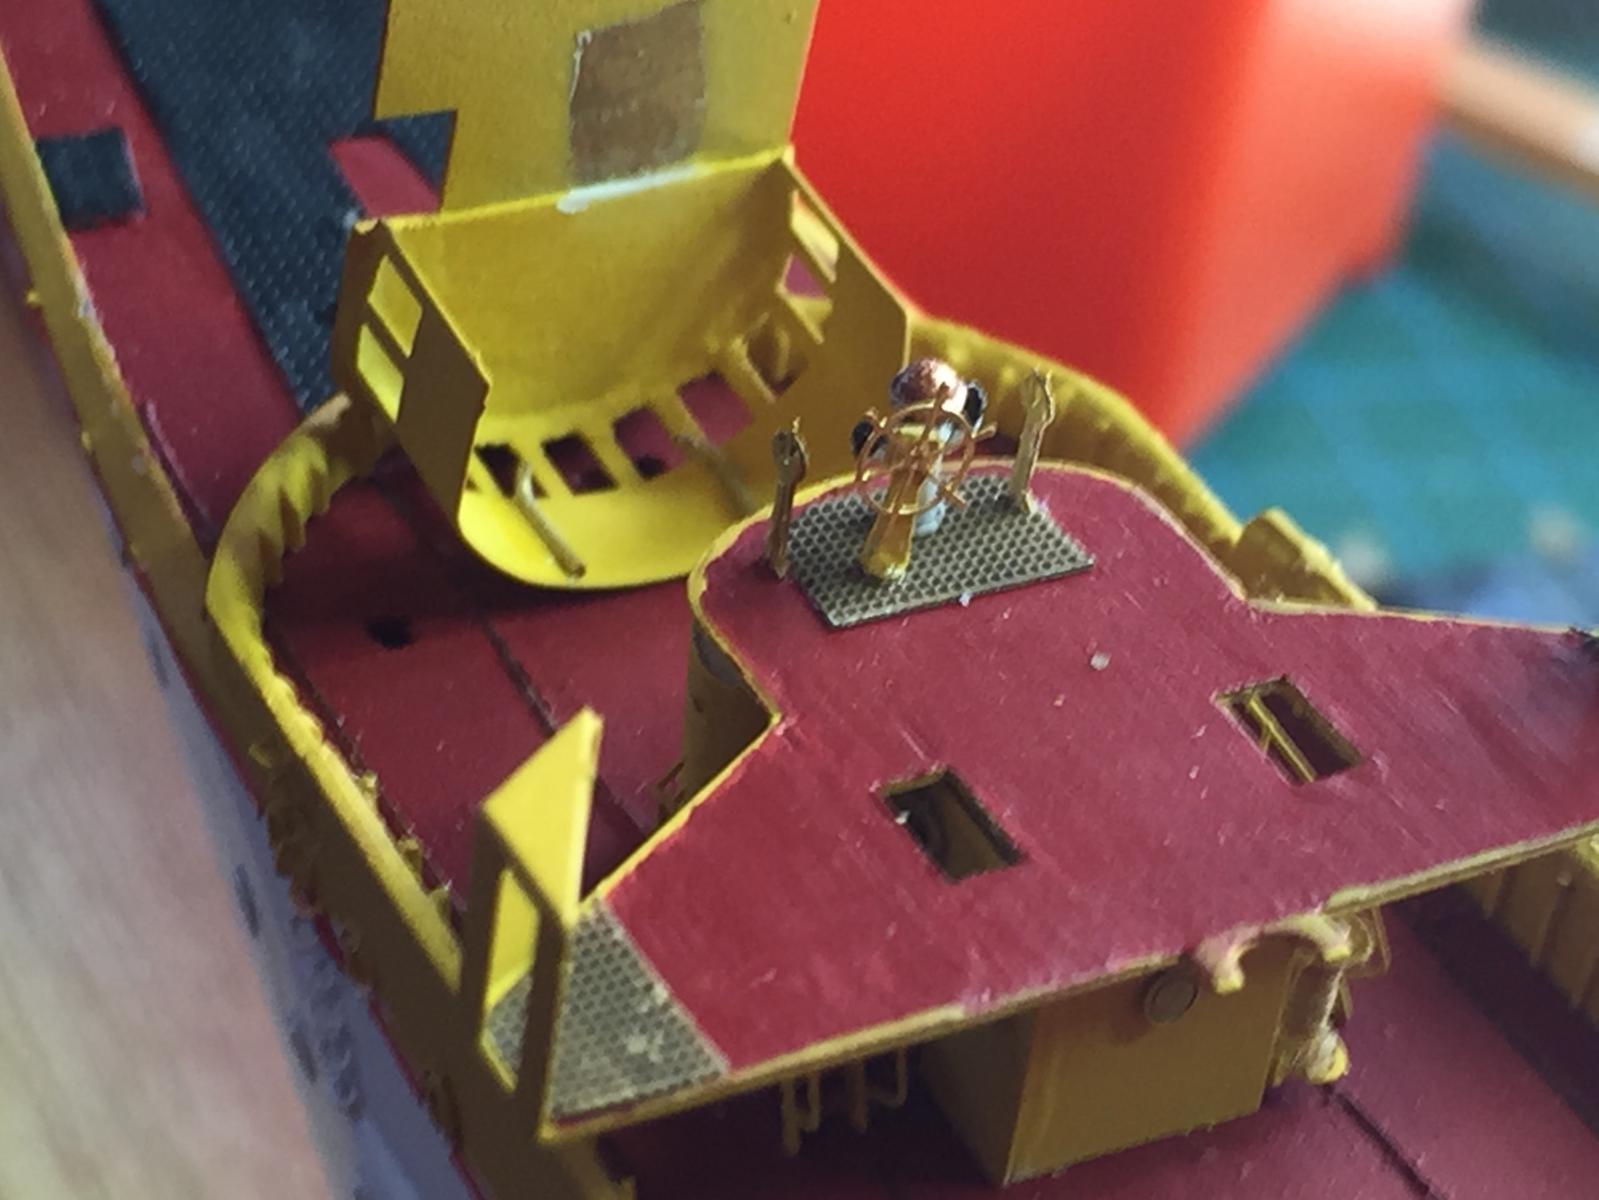
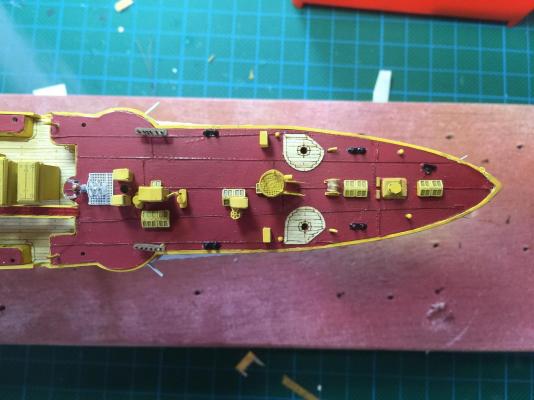
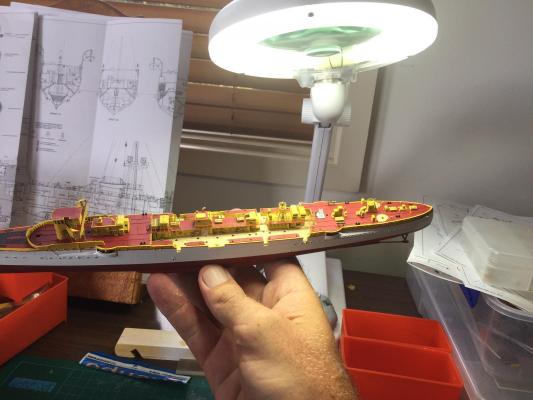
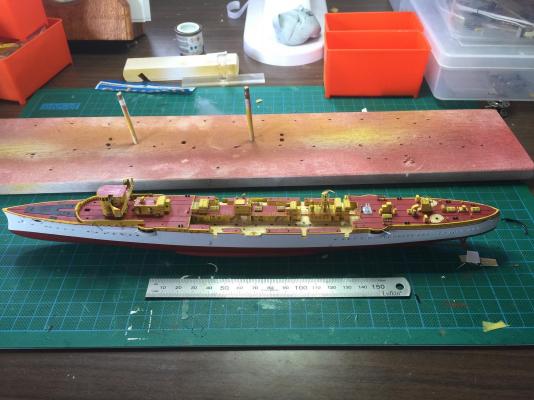
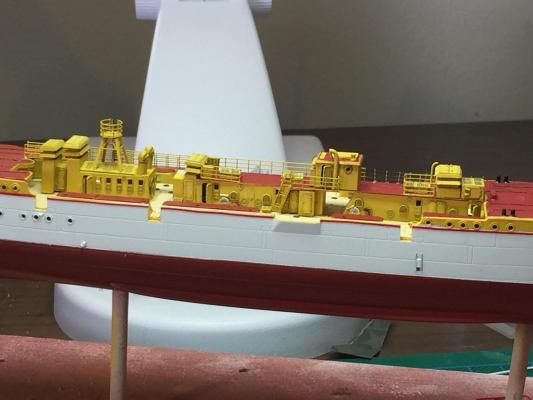
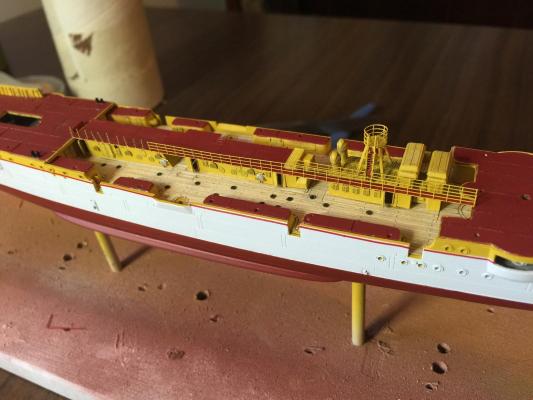
The ammo hoists were made from resin mushroom vents and card, with a spare hoist from another kit. The other vents are from the same alliance model works set. The two speed indicators are north star. I will eventually add the two vents behind the ships wheel which are not glued down as the rear mast needs to go between them. There is an extra cable reel on the rear most large vent. I also added a handle to the chain brake. Sorry the binnacle is kit supplied with two tiny bits of plastic attached to represent the metal they put on compasses to stop the magnetic field of the ship upseting them. Finally some distance shots to show the size to the eye. The back deck only really needs the 2 big guns and 2 little ones which will go on last, a couple of life boat stanchions, and of course a mast. Where required I will put individual stanchions and wire them as well as the propeller guard chains.


- 236 replies
-
- 10
-
-
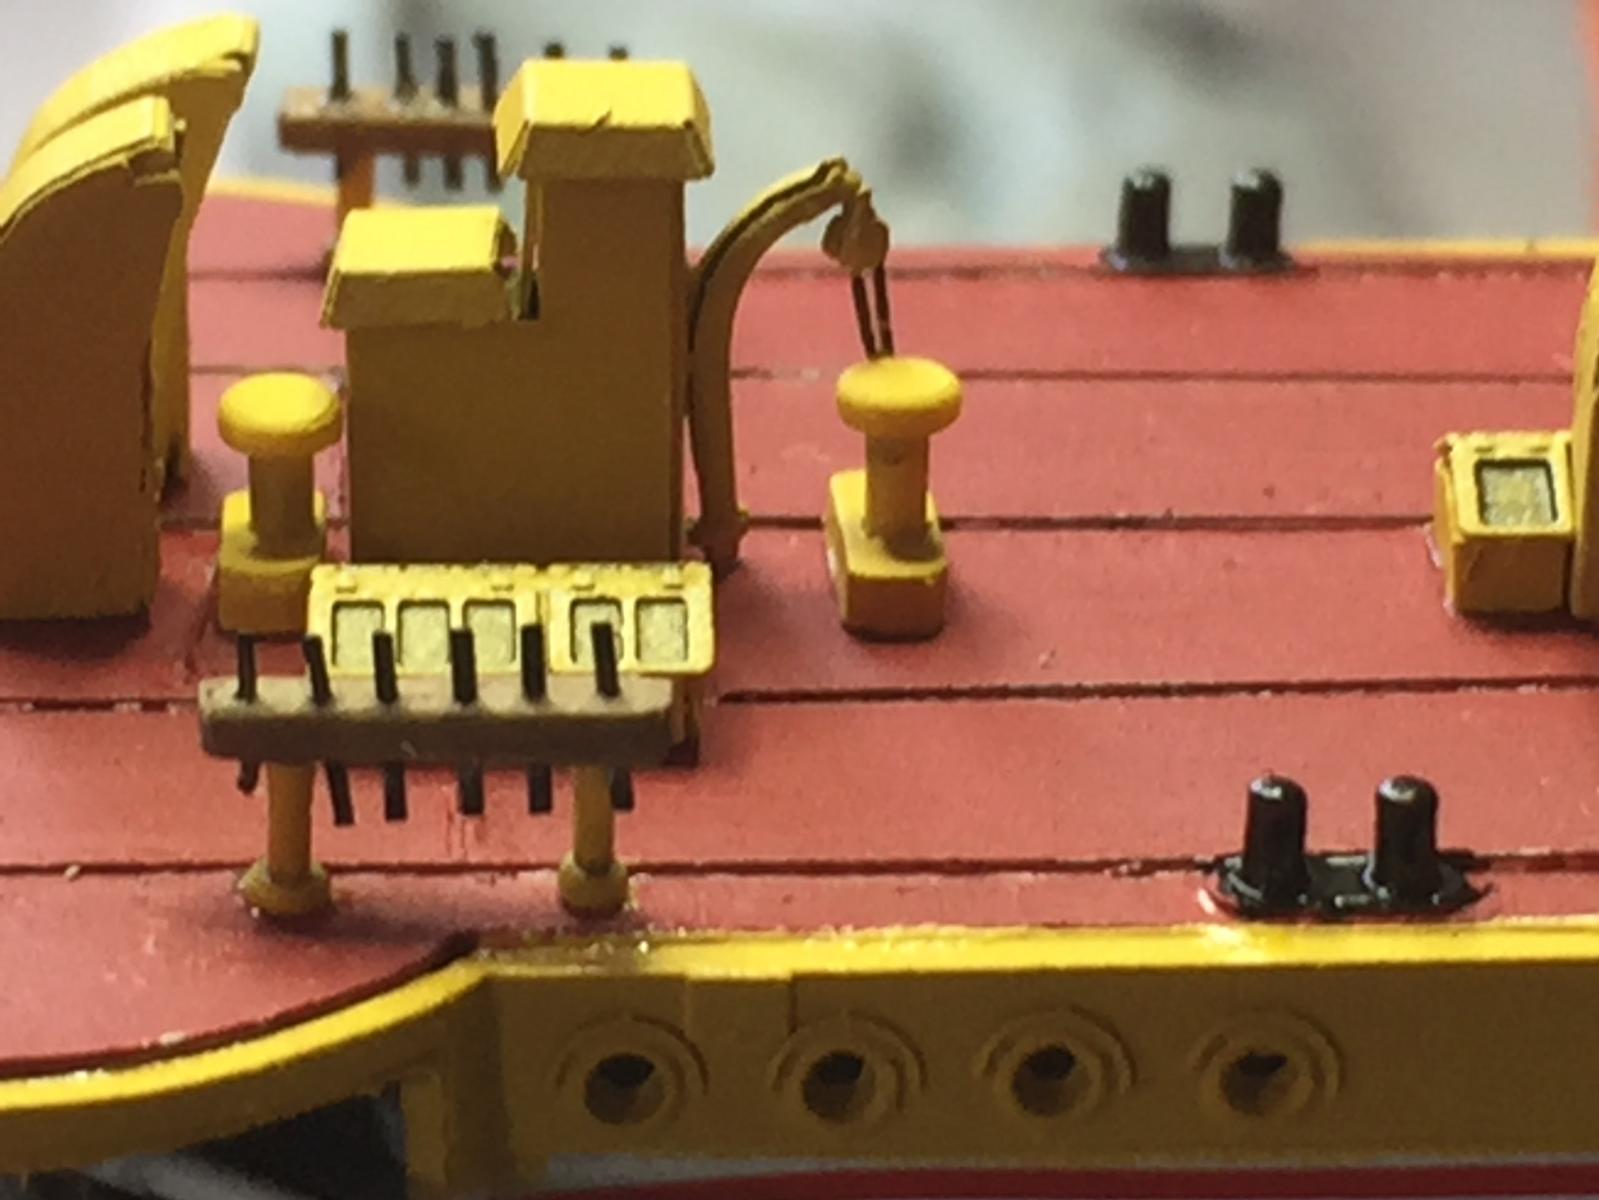
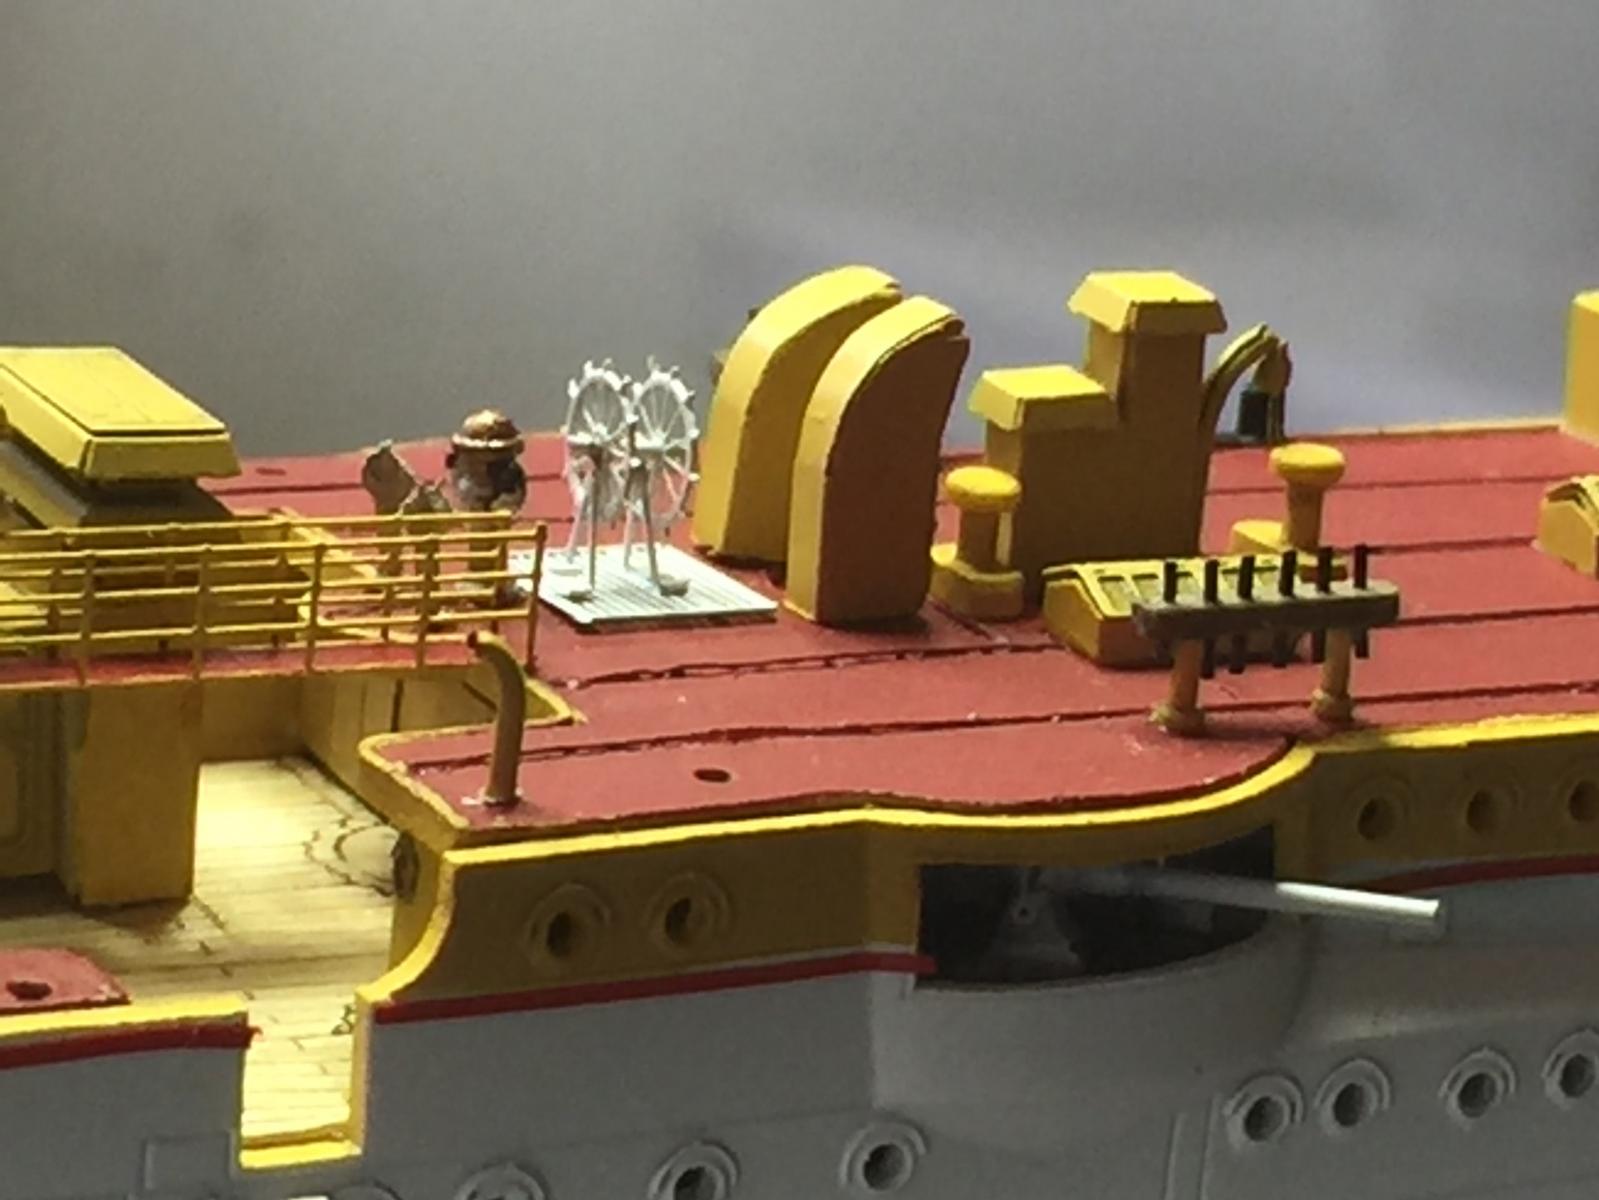
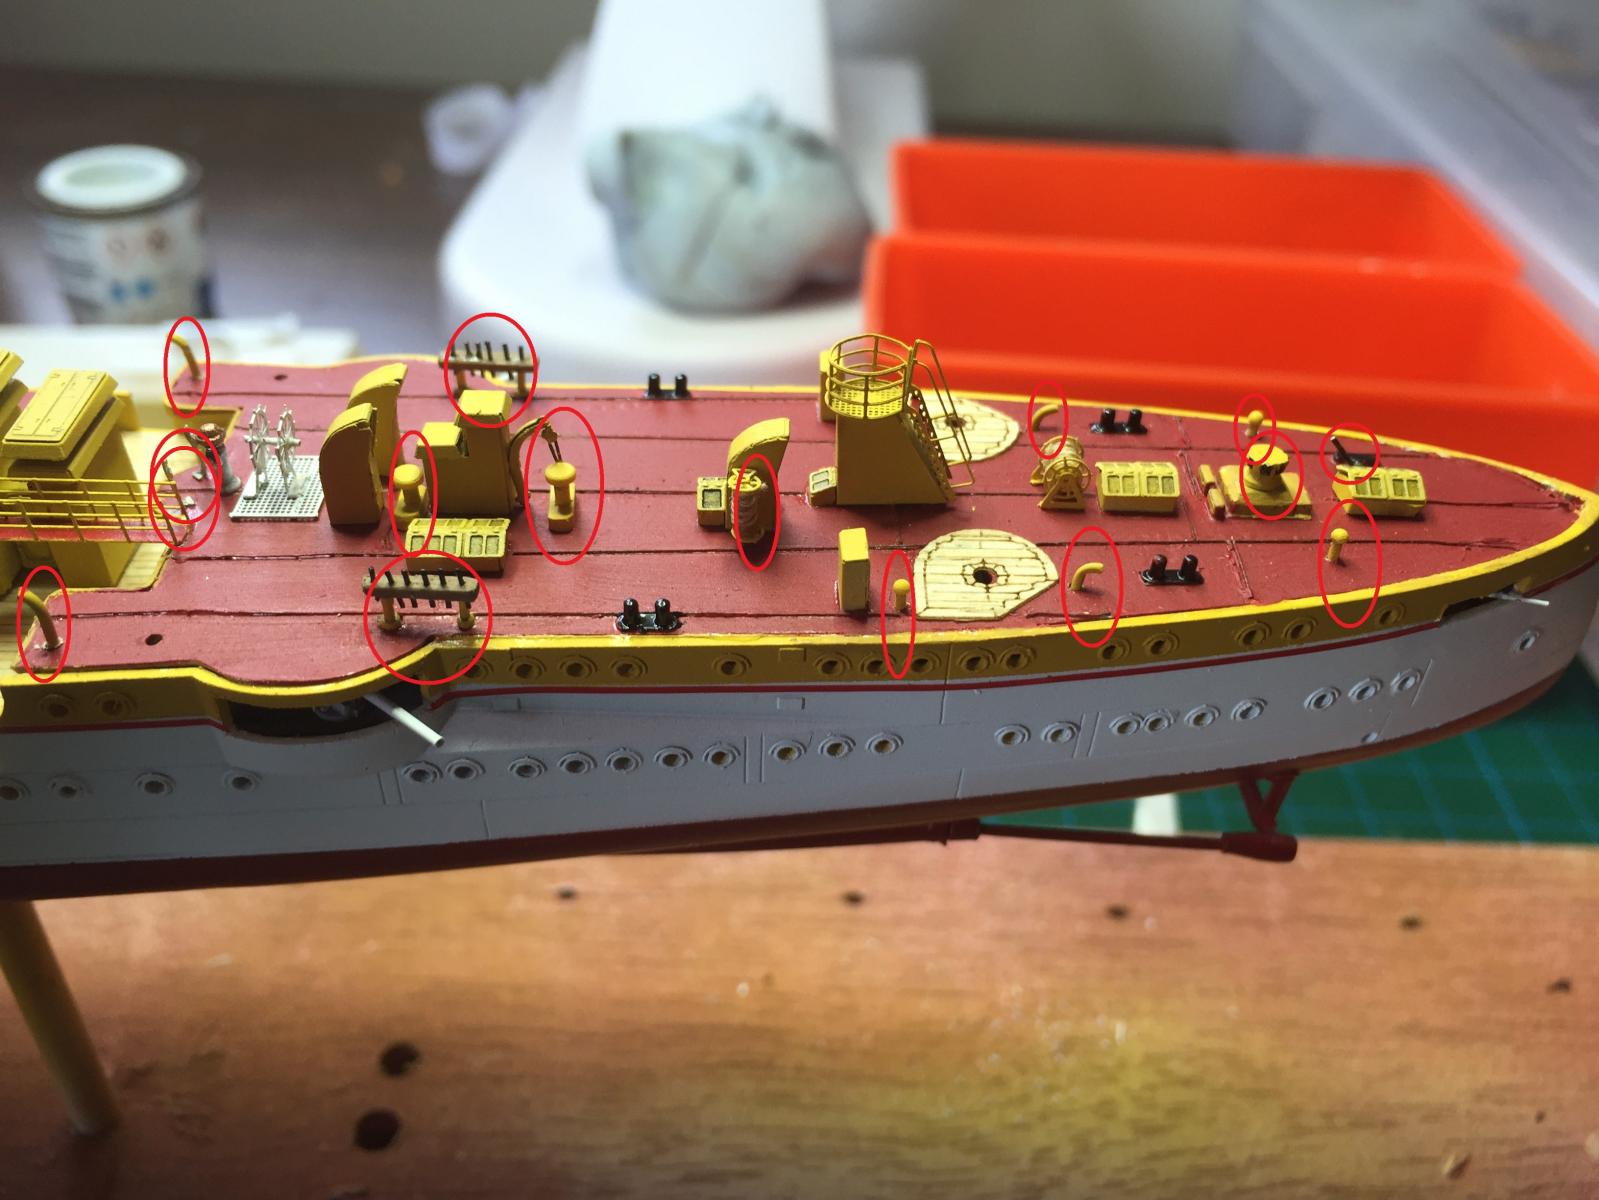
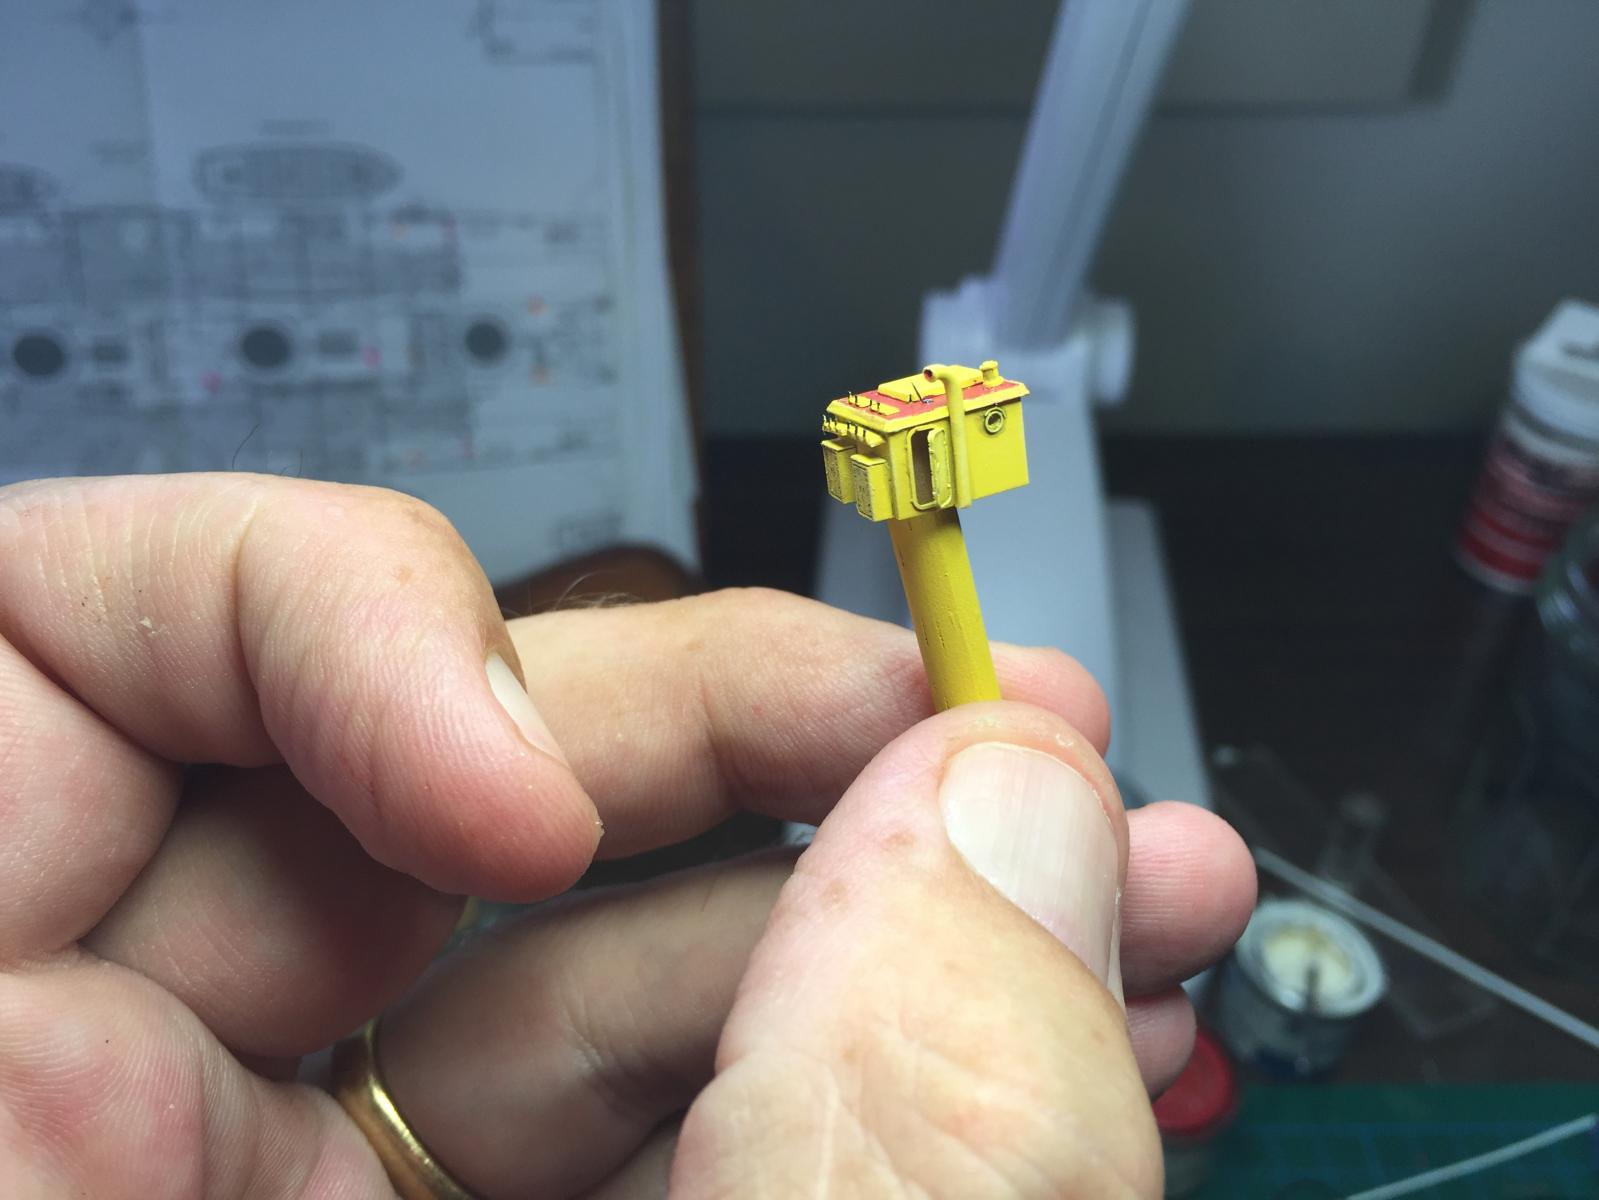
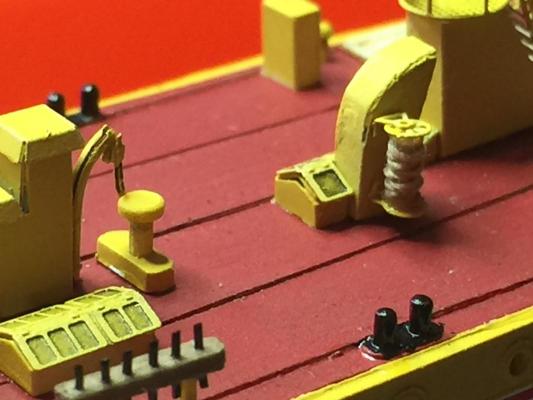
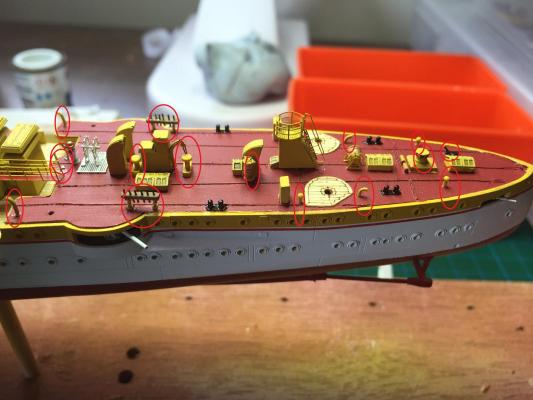
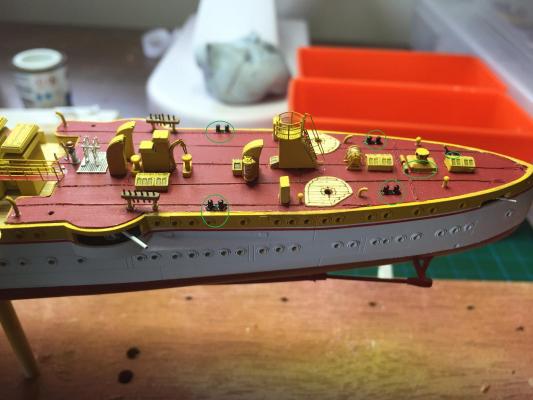
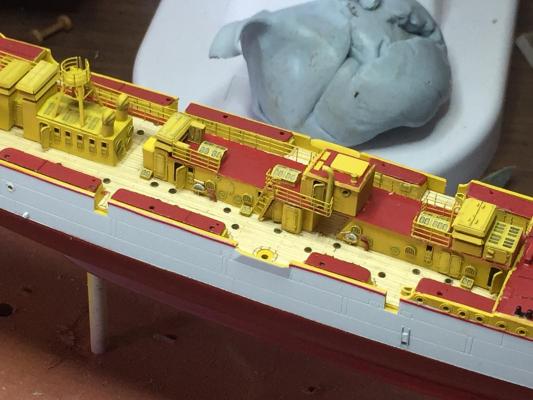
Emden Update. The rear deck has taken me ages. Primarily as it is piece work on a very small scale as well as adding extras to the Eduard set. There is no reference to funnels, Cowl vents, Ammunition hoists and tackle and extra cable reels. The zoomed shots make it look a bit messy but with MK1 eyeball it comes up OK. The first two photos I have circled in red what are extras I have added apart from the Eduard set, and the second photo in green are what was left over from the kit. Basically the bottom on the rear capstan and a chain brake for the rear anchor. I scratch built the pin rails as they would not be out of scale at 1/100 if I used the kit supplied one, as well as scratch building the cowl vents from brass pipe.
-
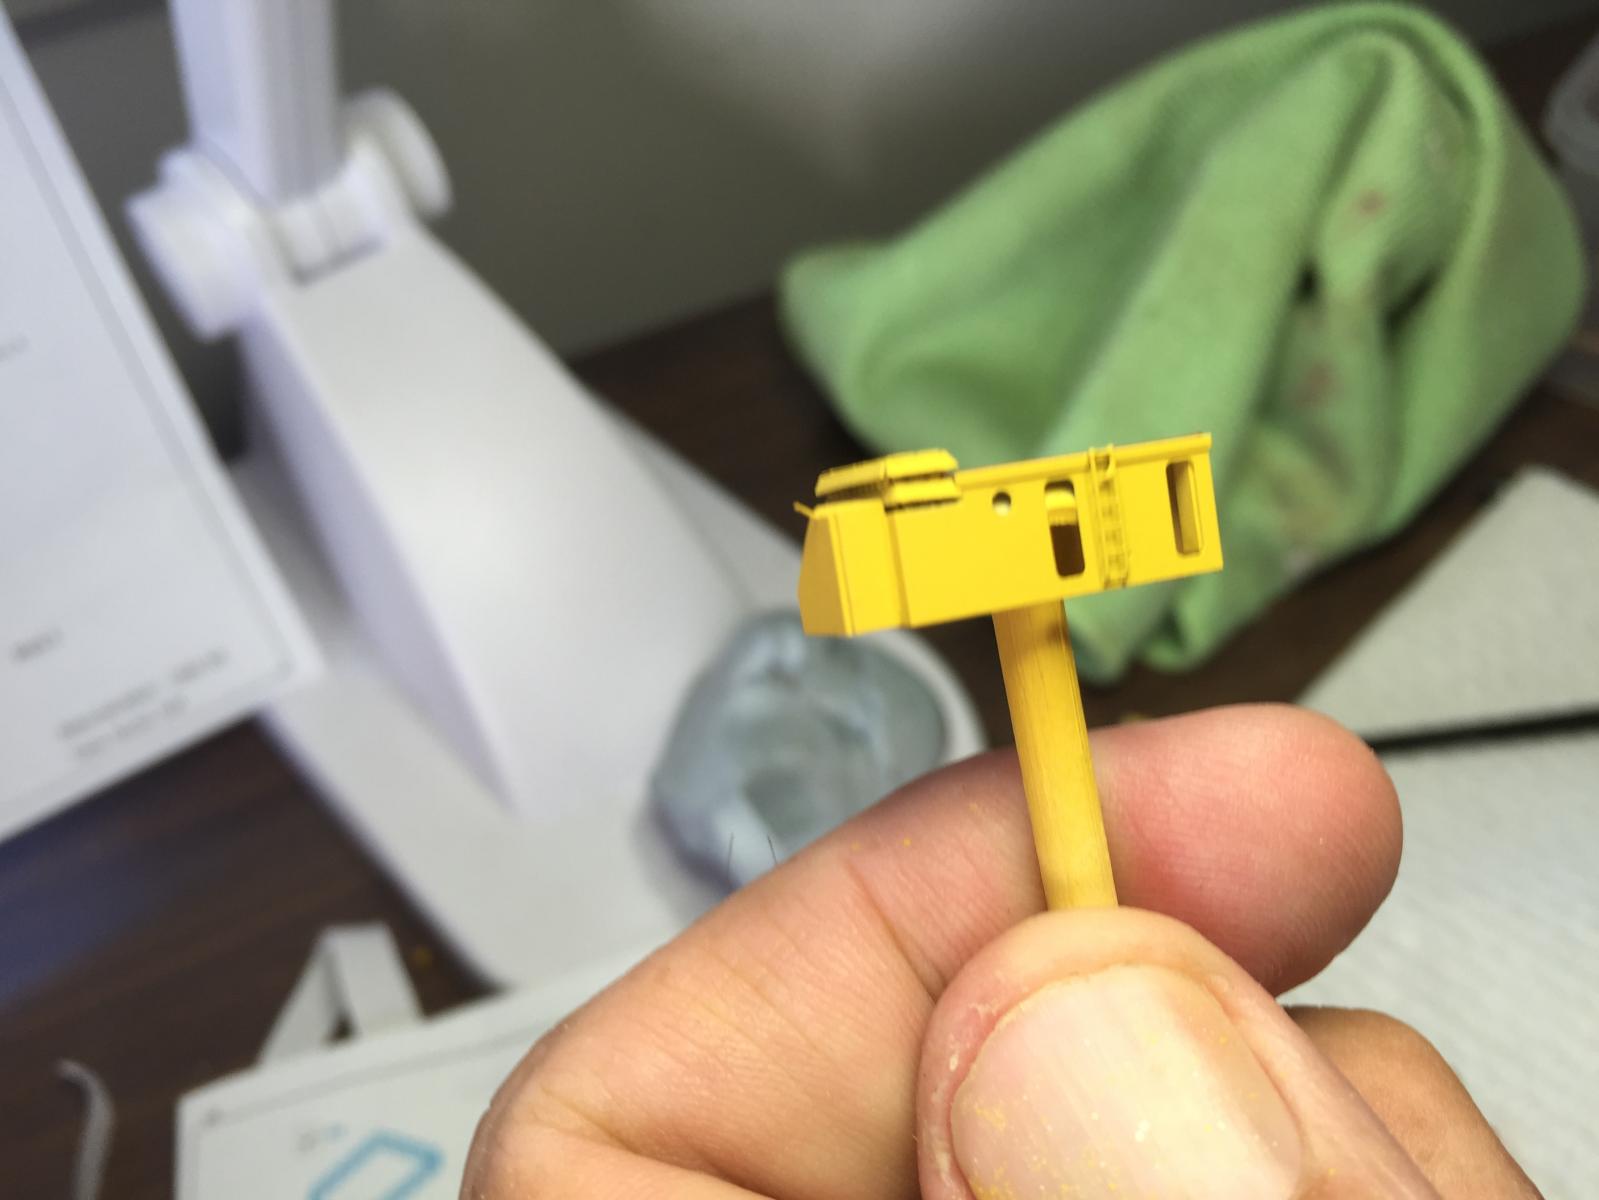
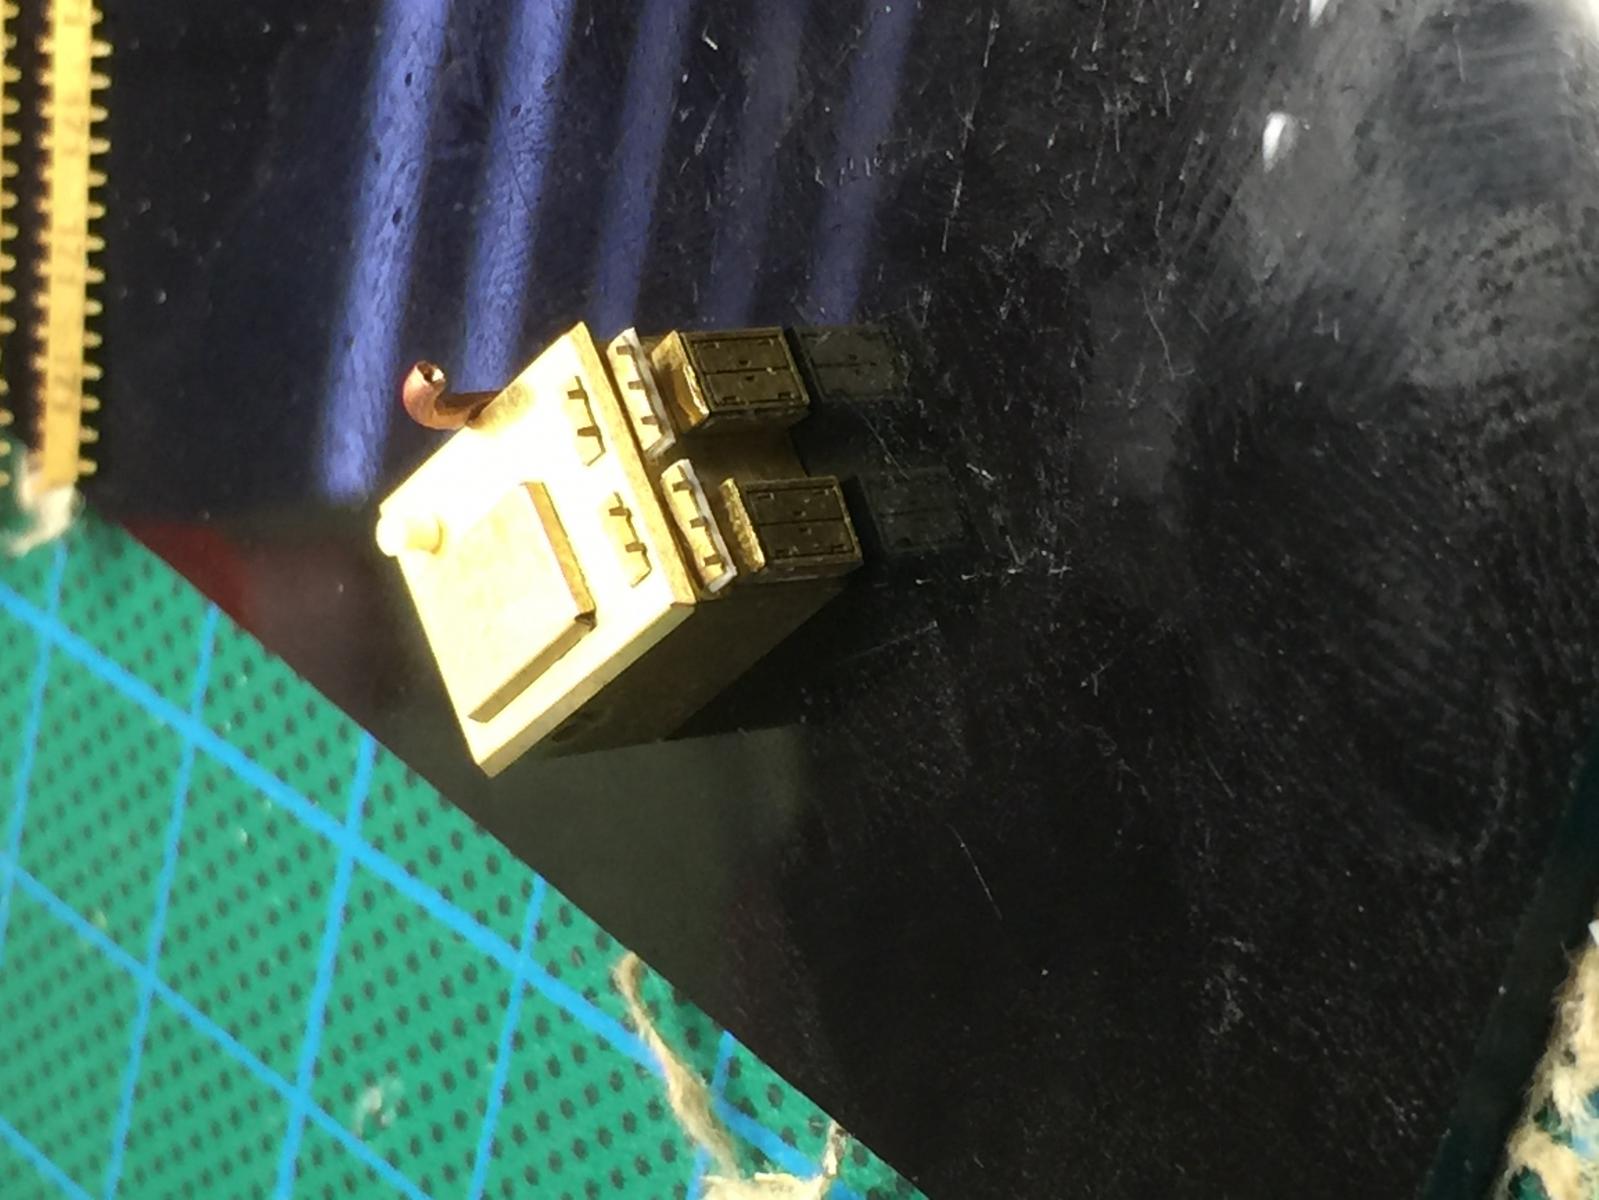
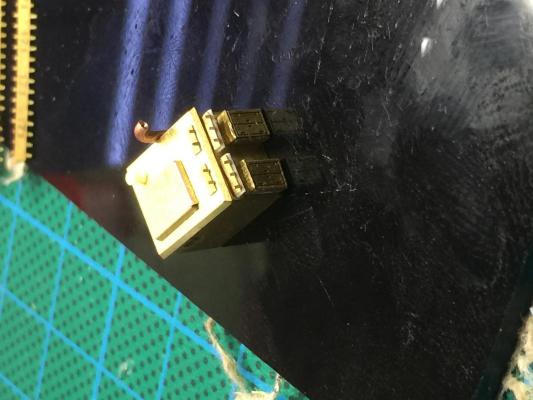
The next is the soldiers equipment room which sits behind the bridge which has additions features such as the cable reel and to the to scale ships bell, a pinrail for the halyards as well as a scratch built funnel on top. Why are the photos upsidedown? Since I went to Windows 10 no matter what I do I cannot get them upright!


- 236 replies
-
- 12
-
-
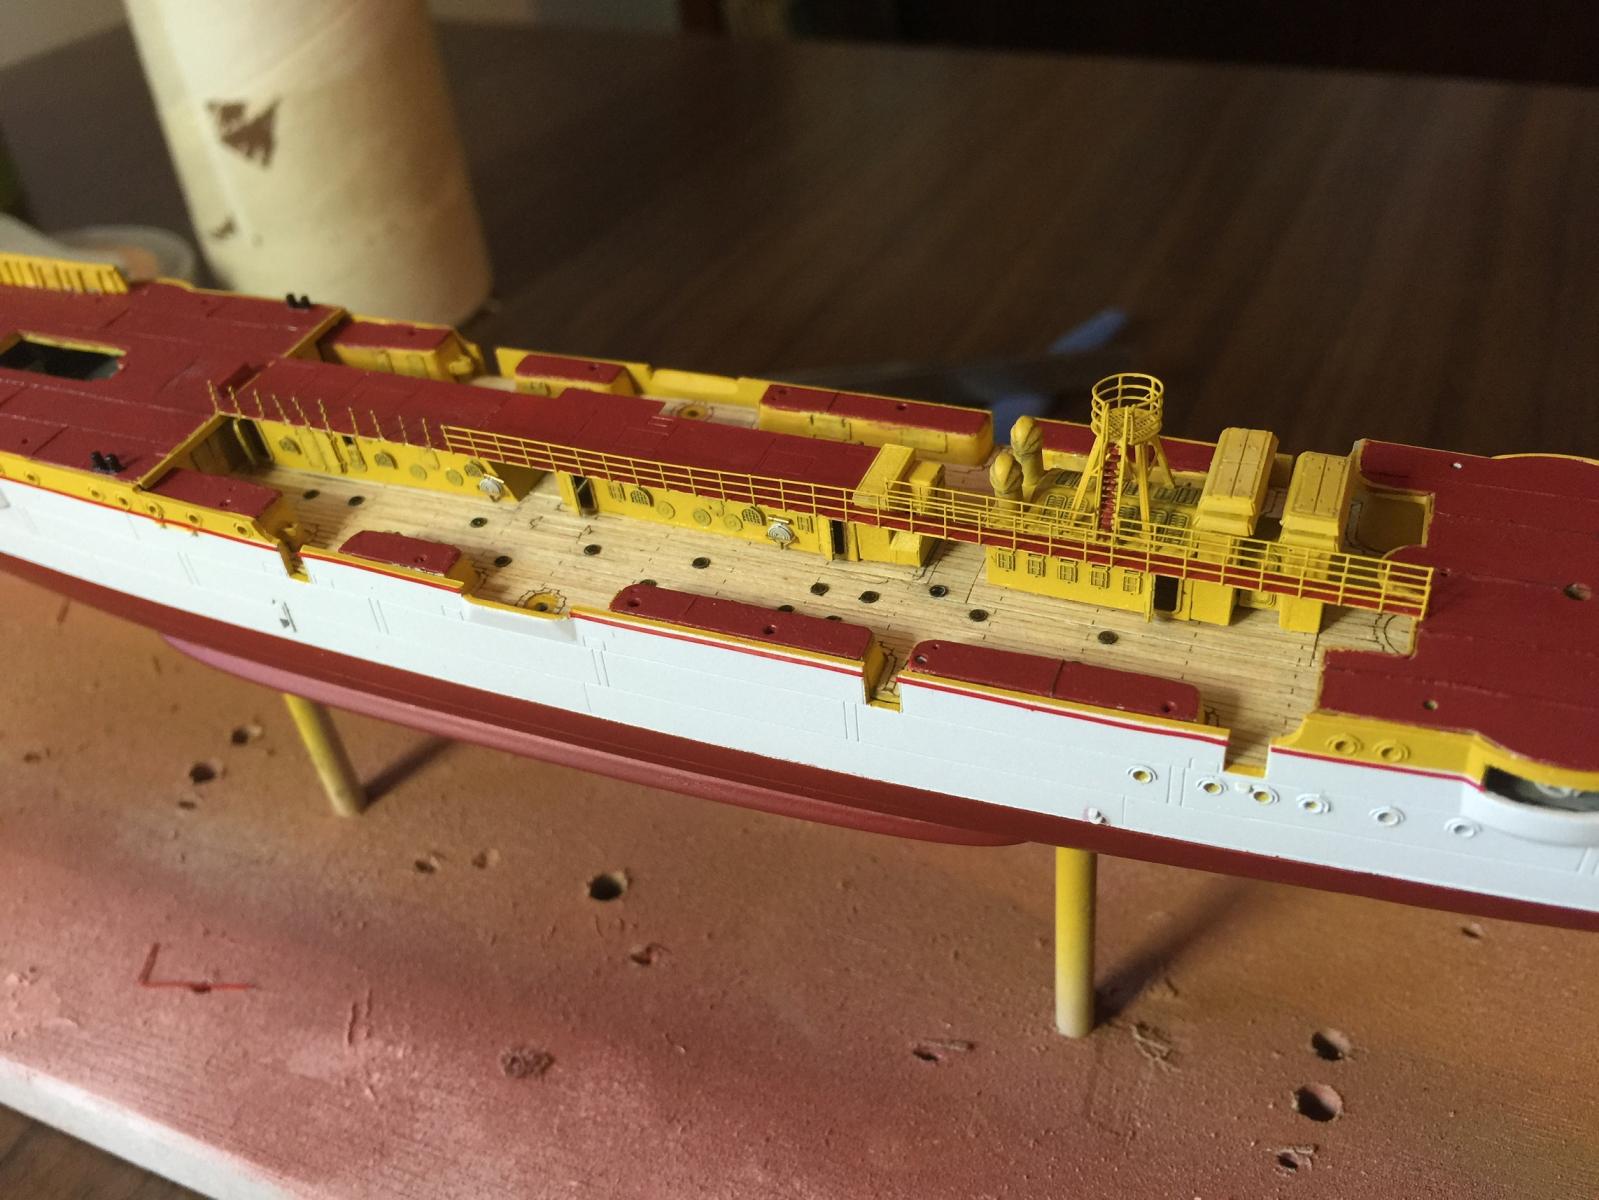
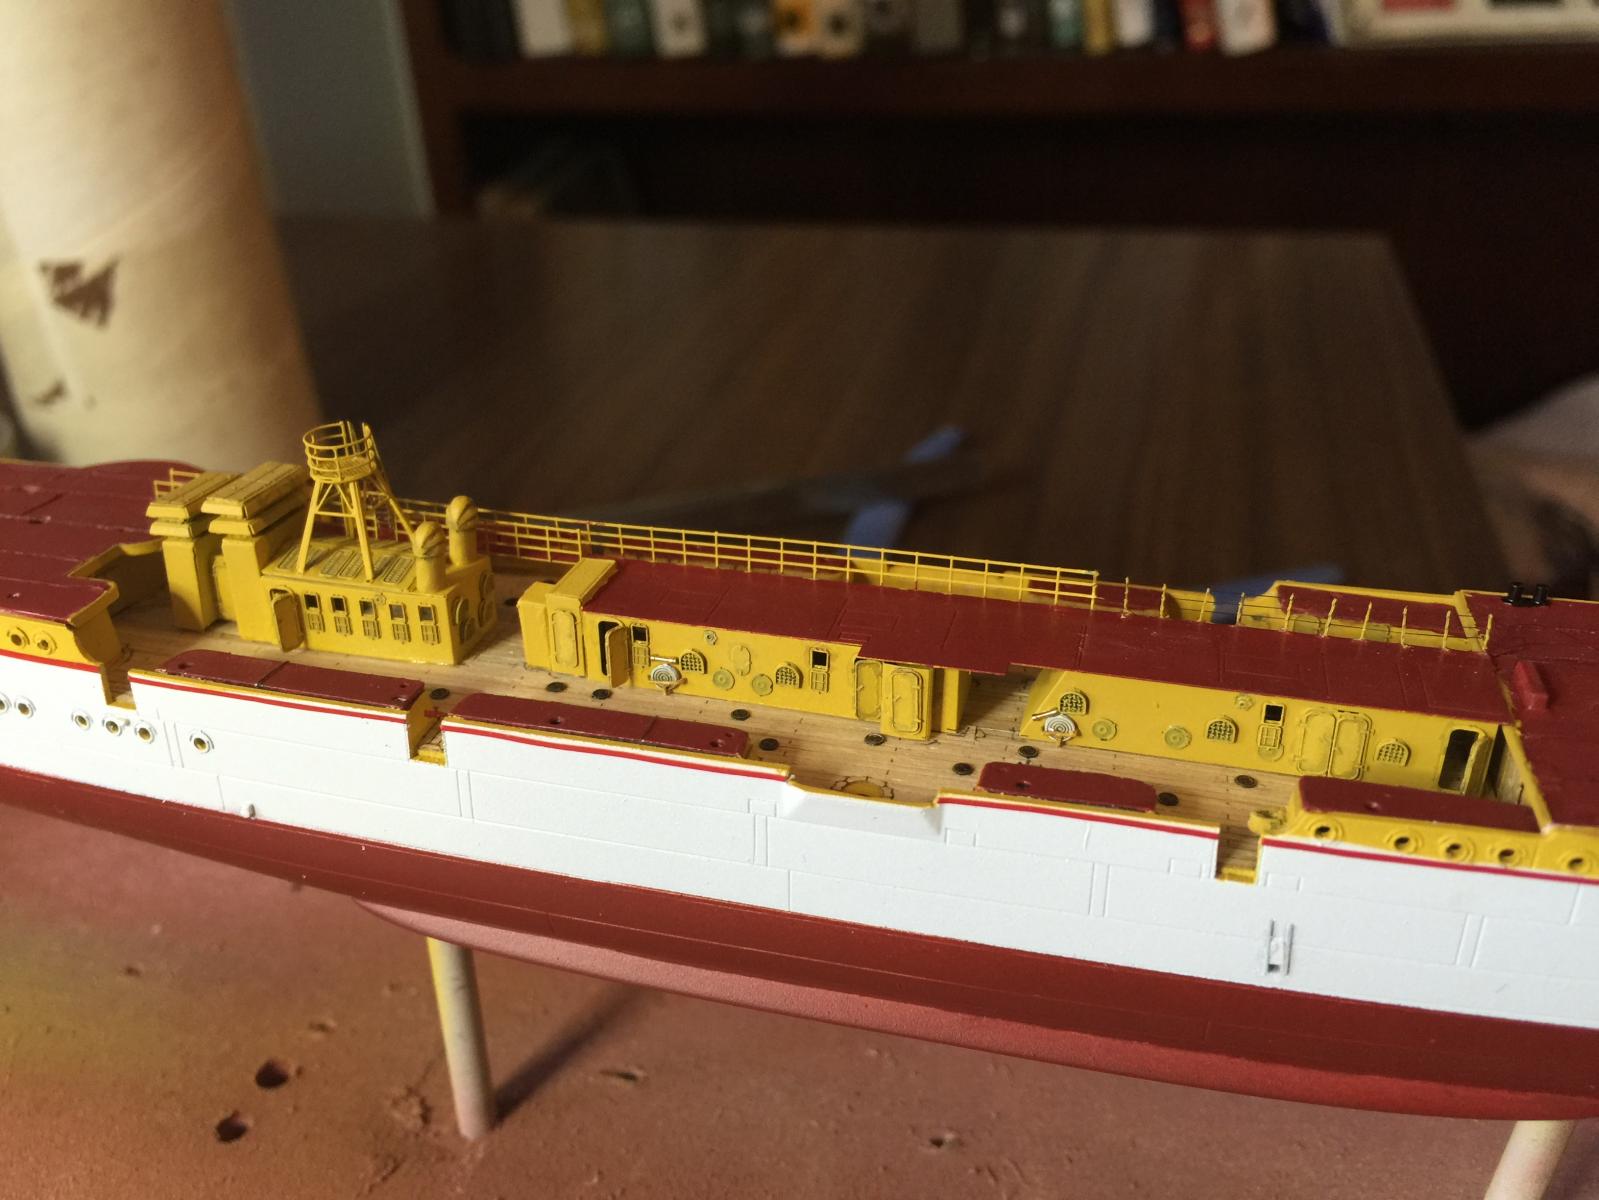
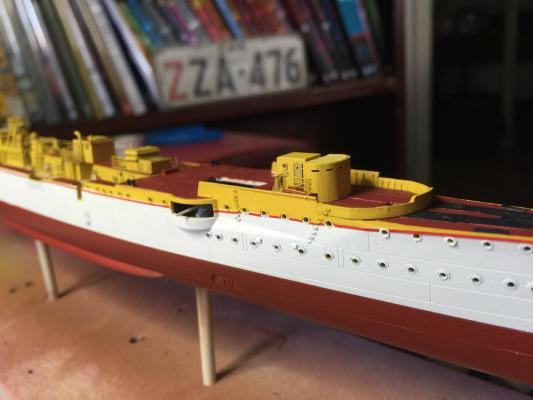
Moving on to the bridge, this was a lot of work to get the curves correct. There is still a little gap on the finished product which I will cover with a strip. I have also deliberately left off the ends of the fly bridge and the top deck as they are just going to get in the road when I do the masts. There is also the matter of 3 pin rails which have to be added which I have made from wood. The eduard fret has etched planking which I covered with Tamiya putty as it is supposed to be linoleum. I have added aftermarket doors and a cable reel attached to the officers quarters below as well as telegraphs binacles and ships wheels.


- 236 replies
-
- 12
-
-
Nice work Dave, there were so many of them I just used aftermarket brass ones that I blackened but you've showed far more discipline
-
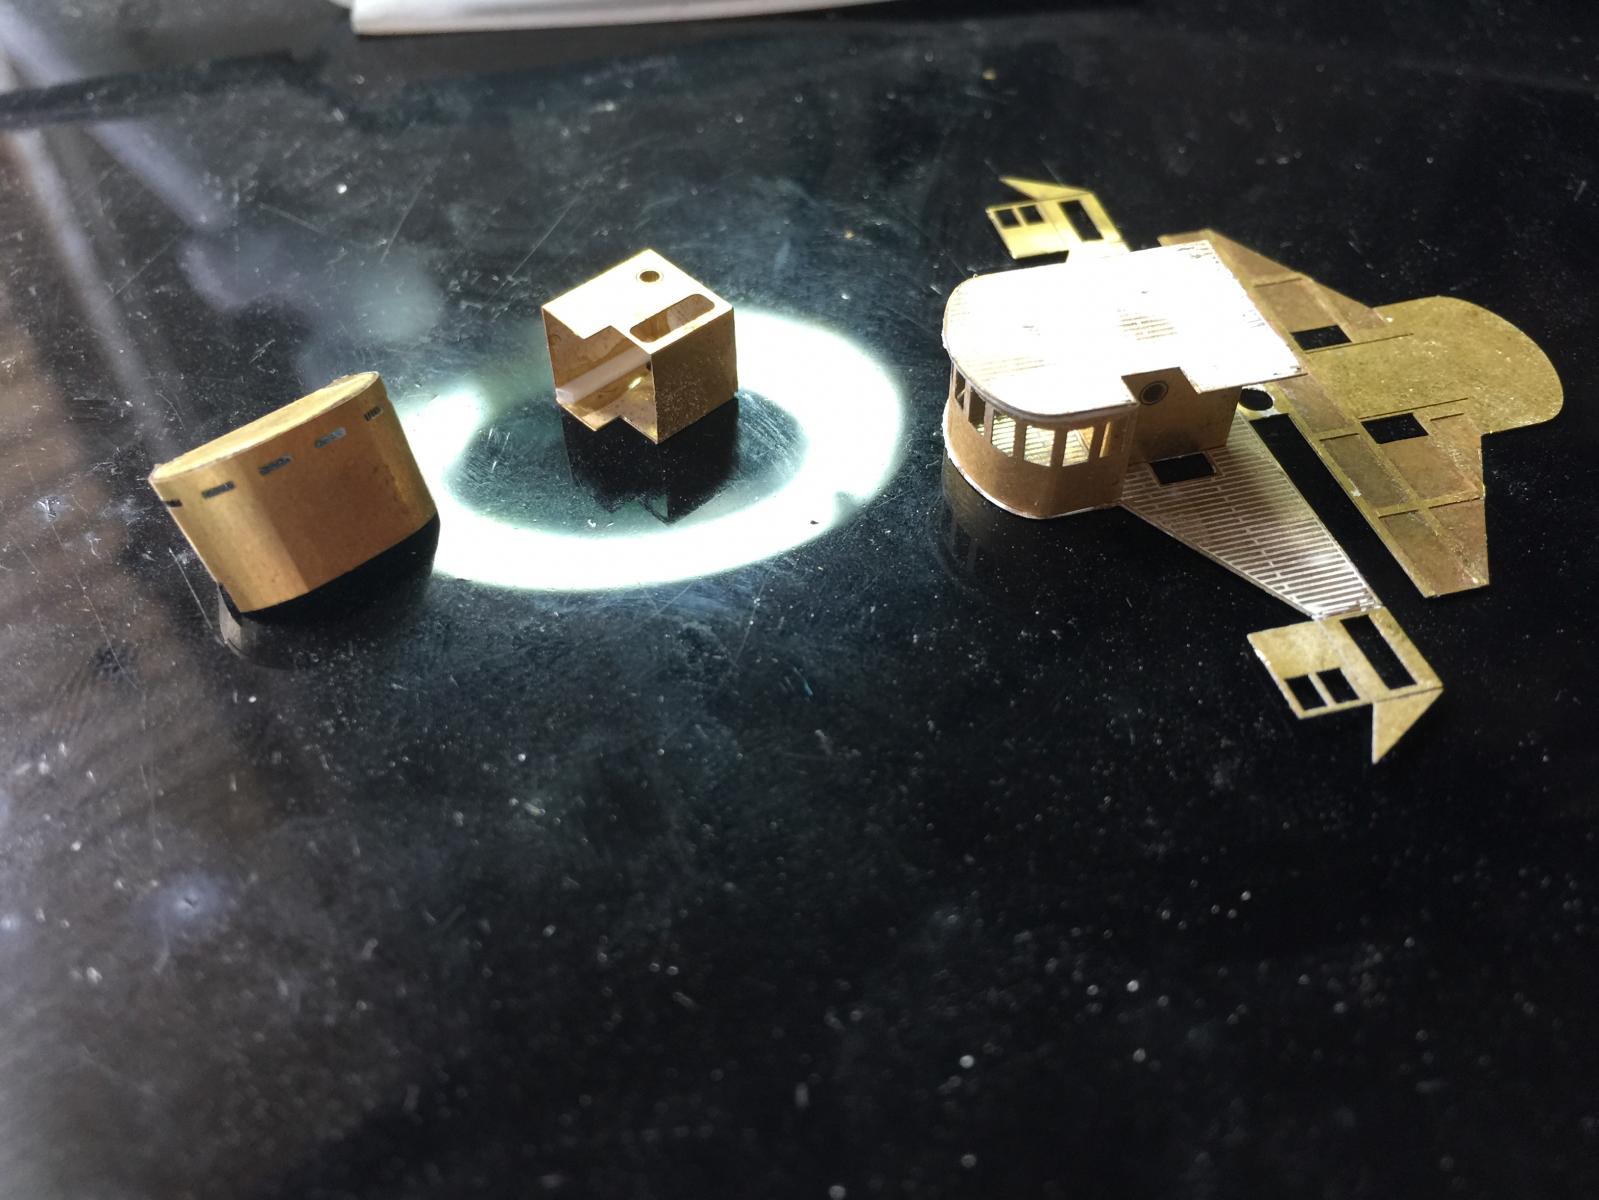
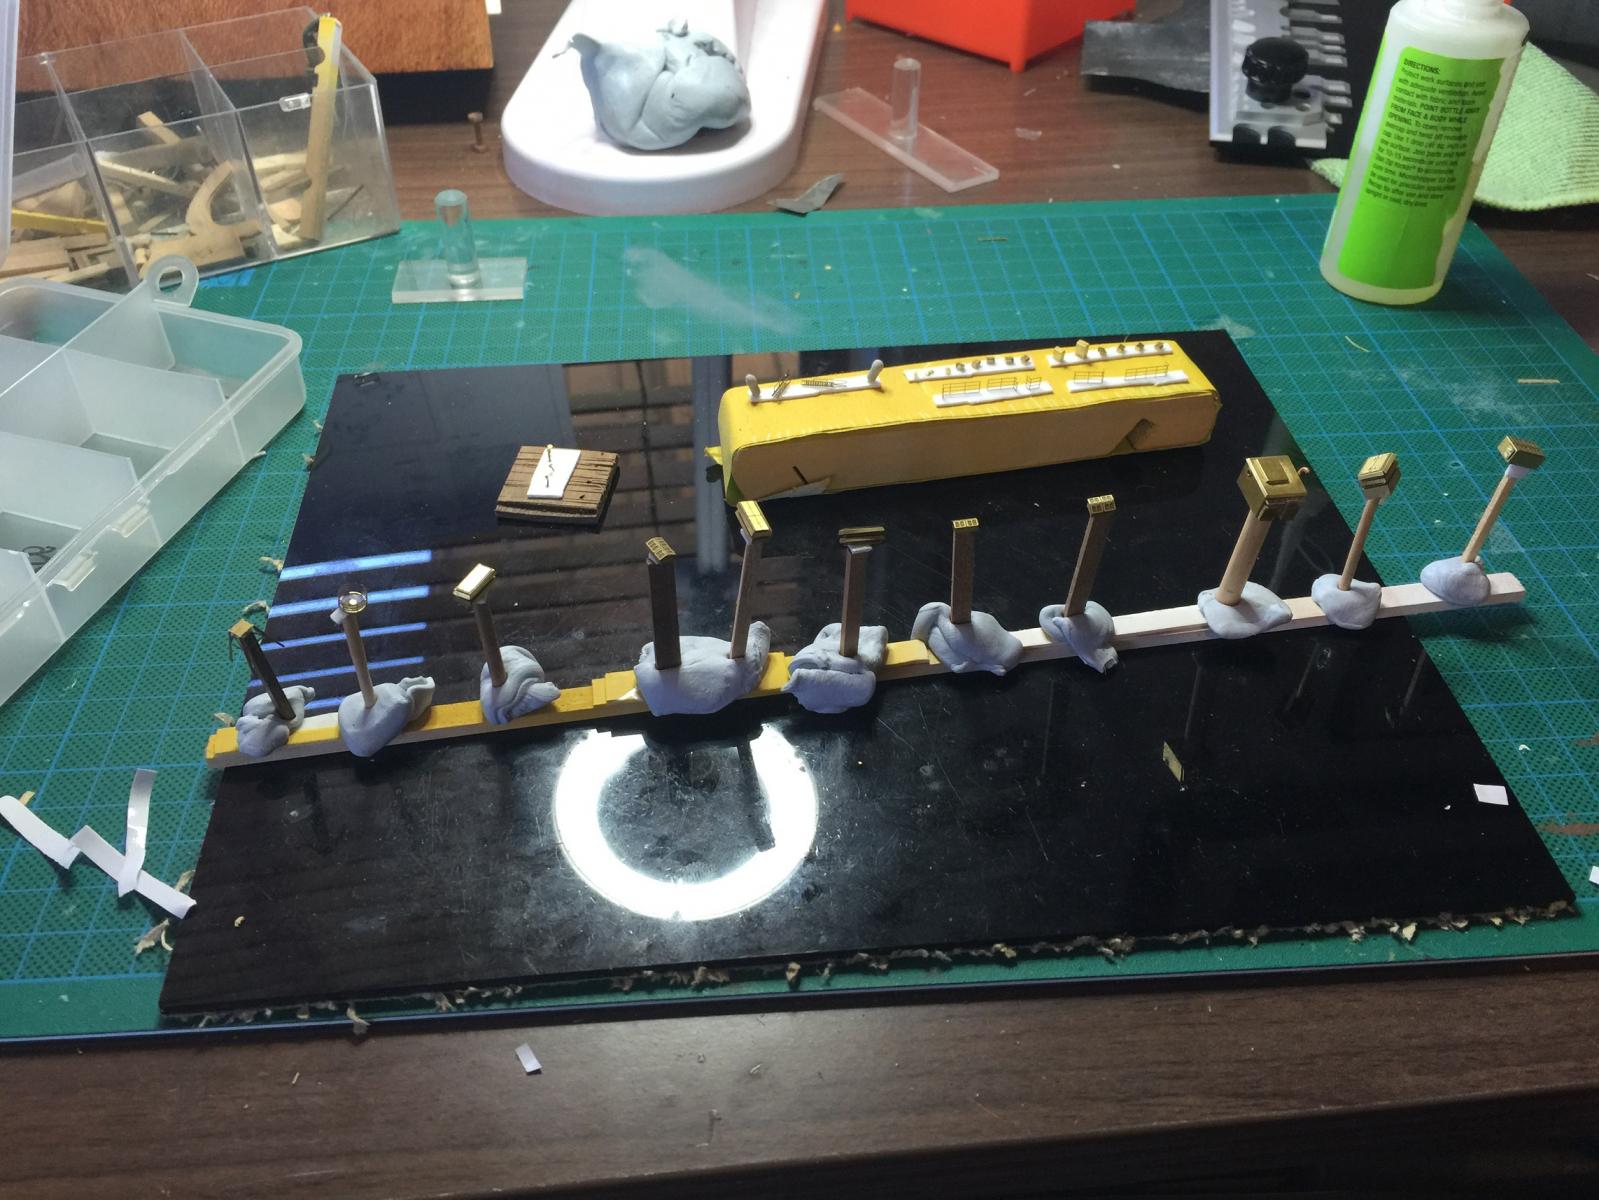
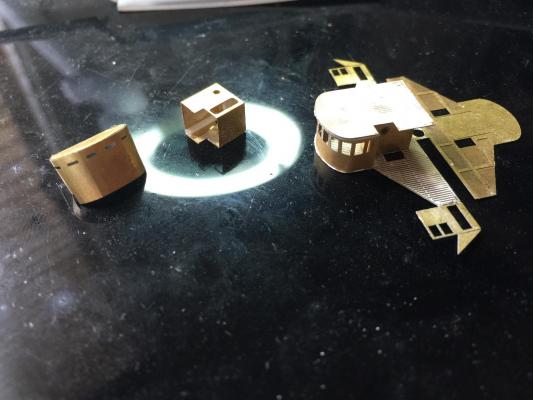
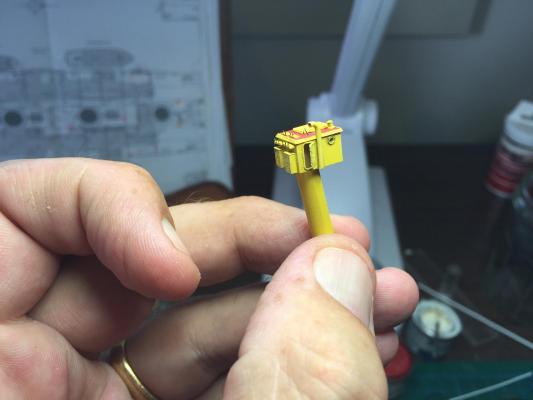
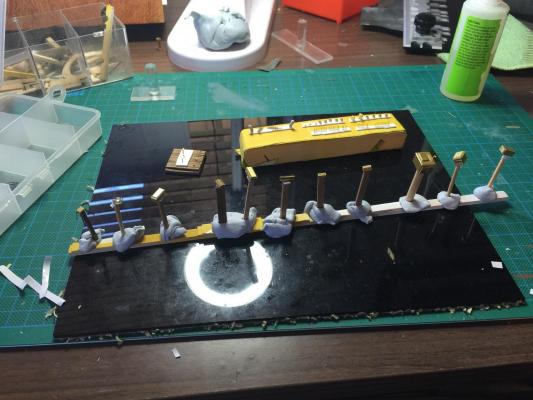
The next lot of photos are of all the things on sticks in the previous photos, which are the amidships vents, lockers and the radio room. The gaps in between will have the funnels. I have also included the fire hydrants with 1mm wheels on top. The radio room is fairly basic so I added a vent scratch built from brass pipe and the telegraph posts that will be required for rigging the radio aerials later. Back to bend and fold, paint then attach etc.


-
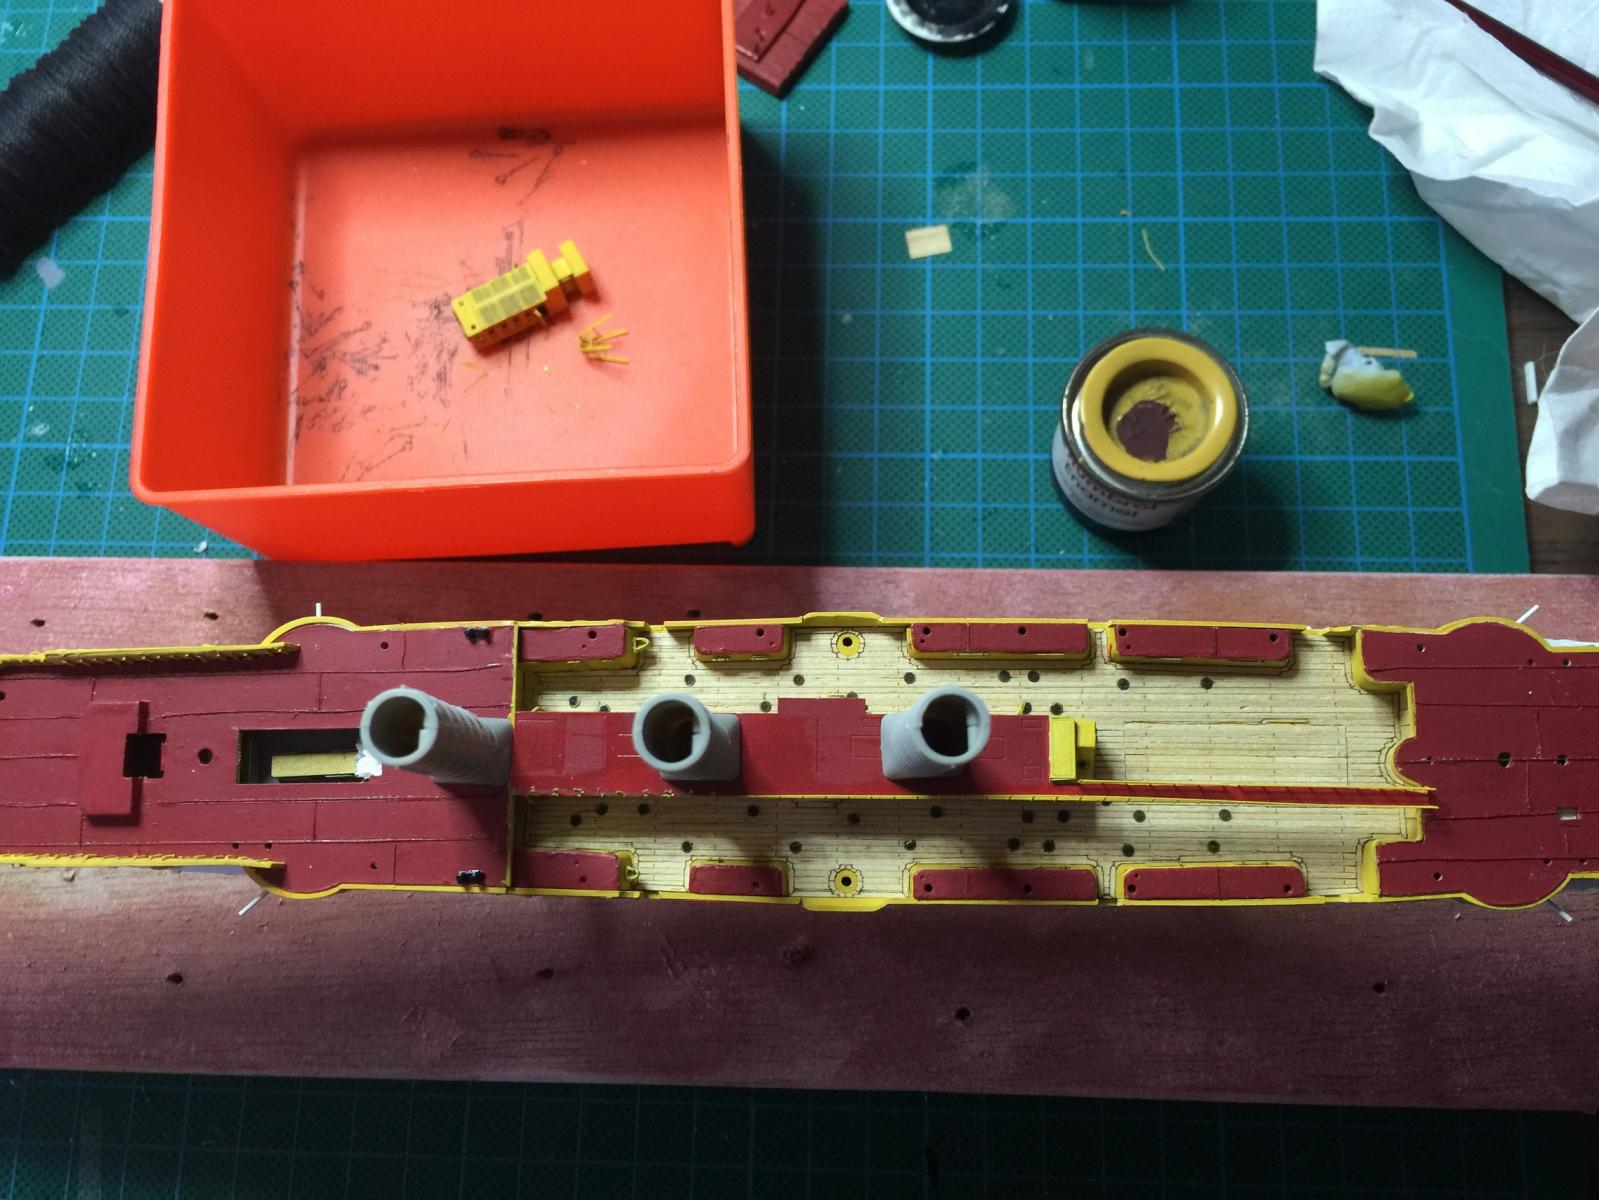
Now that's done I an add the amidships rooms. Nothing lines up of course! I put the funnels together just to check the alignments and where the centre piece with the walkway will have to sit. The funnels will be completely stripped back to bare and then everything will be added to them such as rails, steps, pipes etc. The machine room is complete and added. There are some fire hydrants which I have scratch built and some small skylights which also have to be added. Most of the furniture for the upper deck amidships is complete and just has to be thrown on. You can see a photo of them ready for painting. I got a set of vents from Alliance model works which will be placed all over the decks as per the instructions. I did order some cowl vents from battlefleet models but the owner has apparently left the building so the will all be scratch built.


- 236 replies
-
- 10
-
-
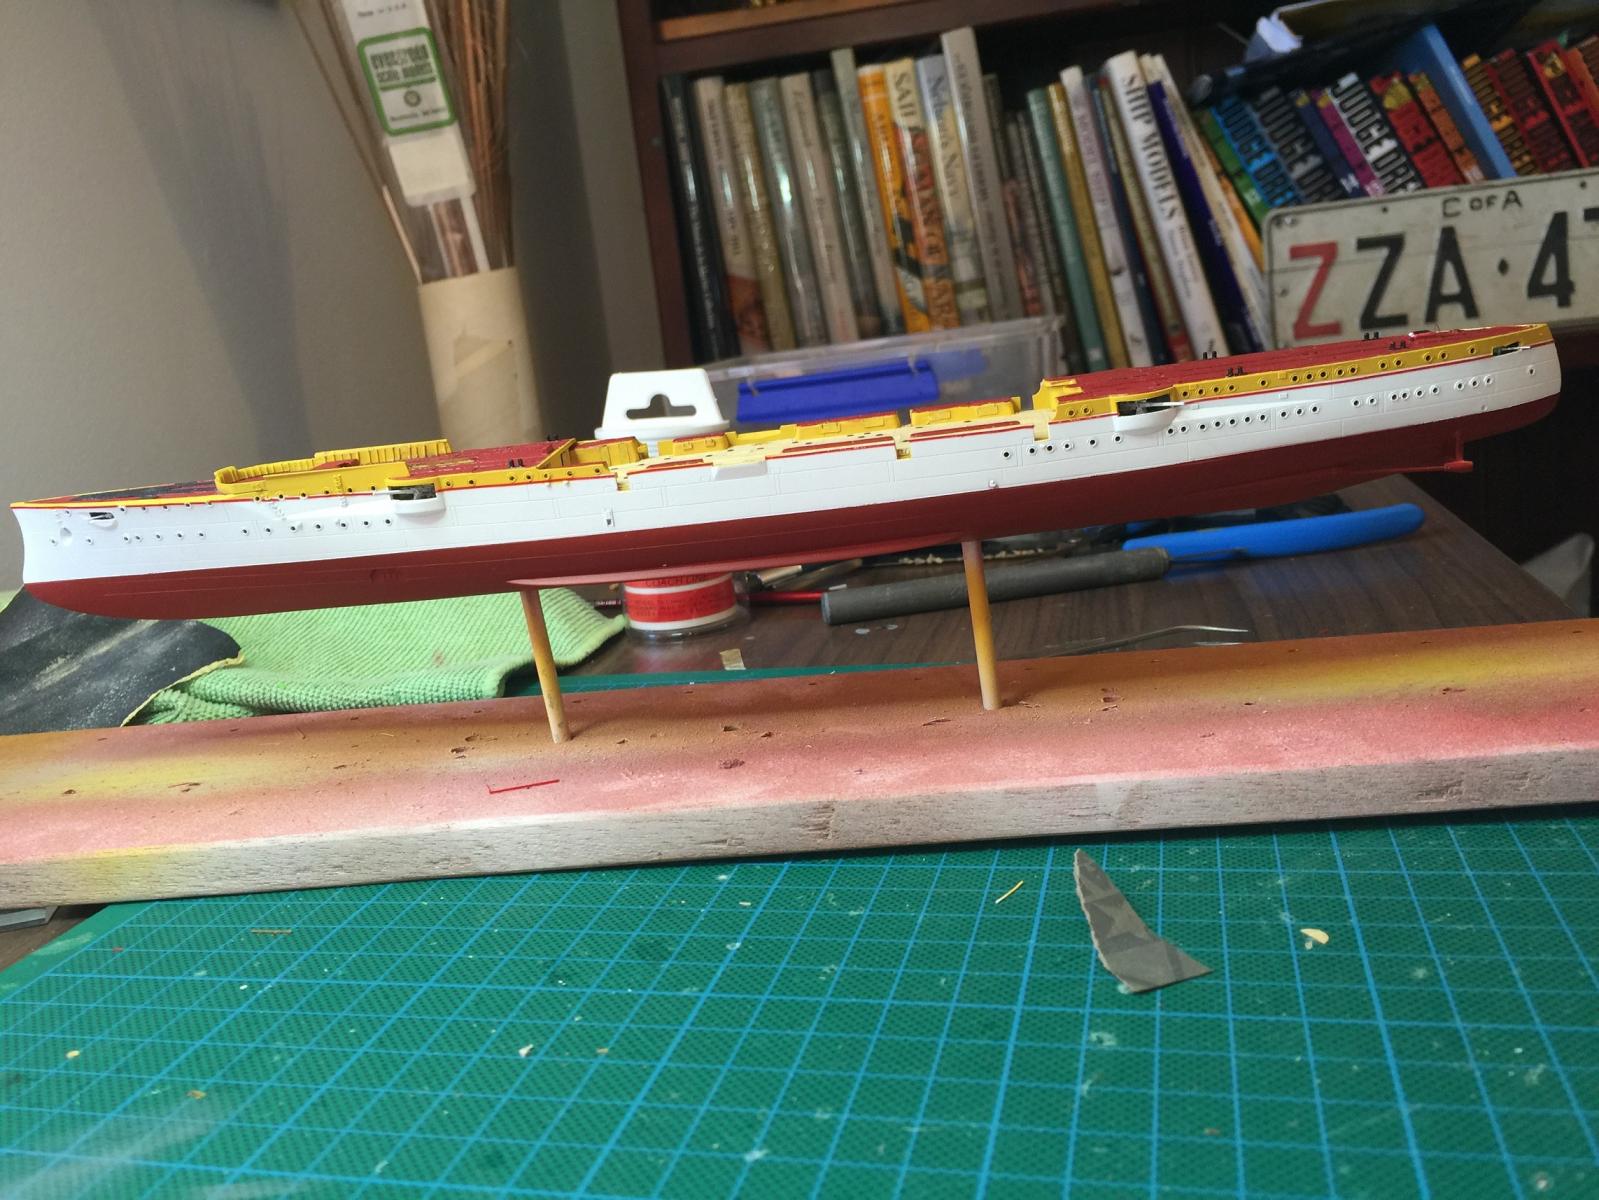
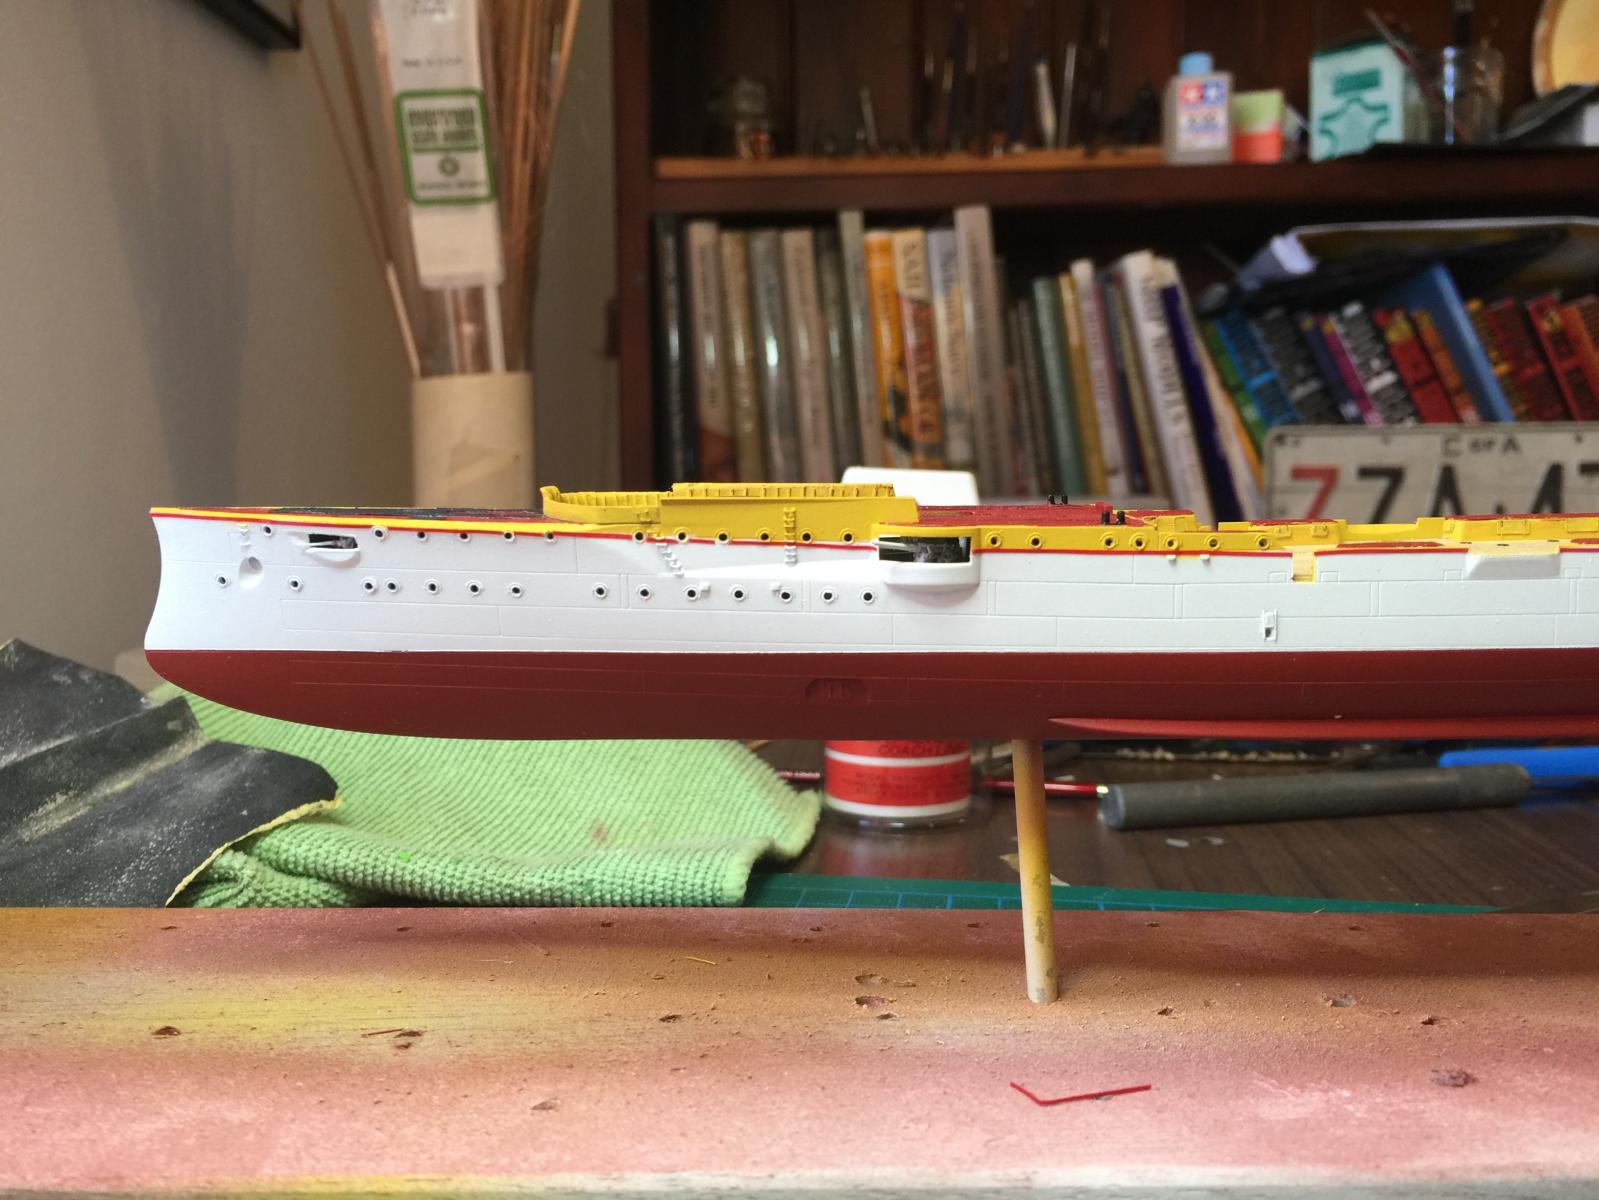
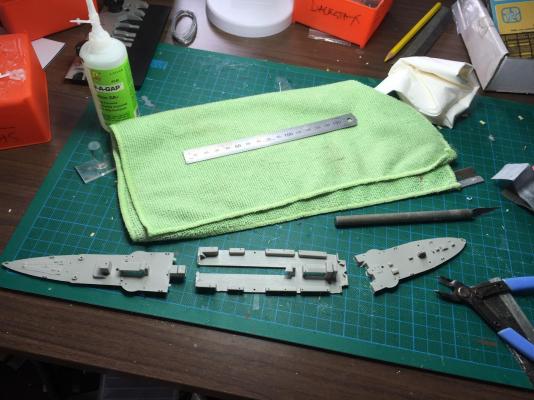
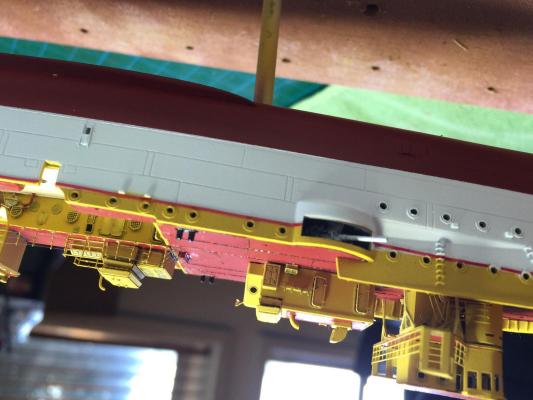
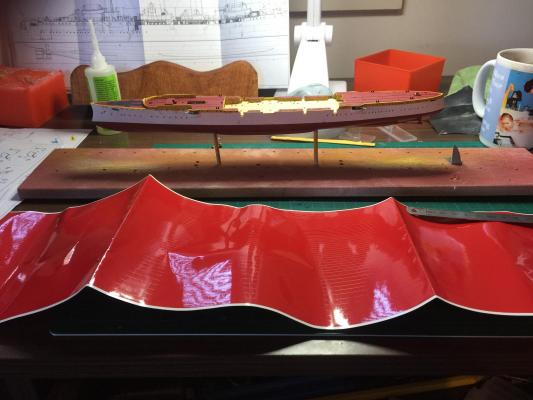
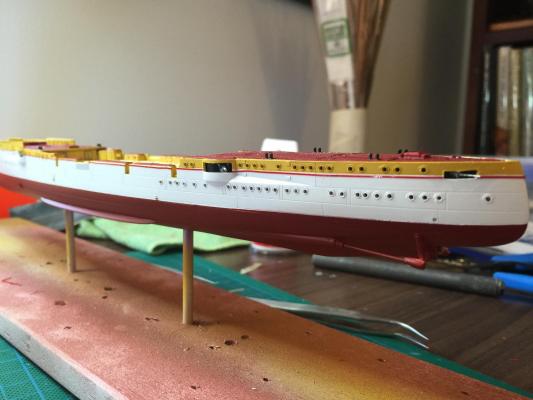
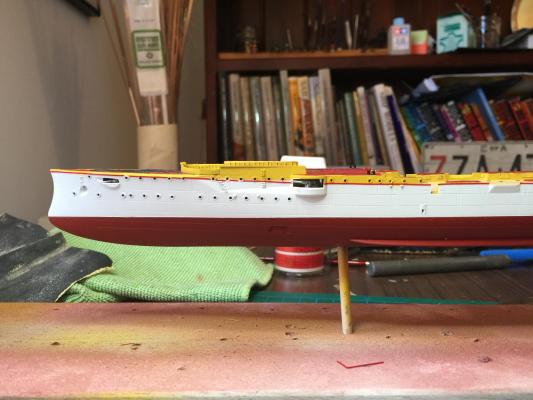
Back to the hull, as I will be handling it a fair bit now, I wanted to get the pinlines done which I got from BEC flags. they say they're .5mm but they are rally about 1mm adhesive strips which are very easy to use. I don't think I could mask at this scale. As you can see from the big red piece of paper it should last a while.

-
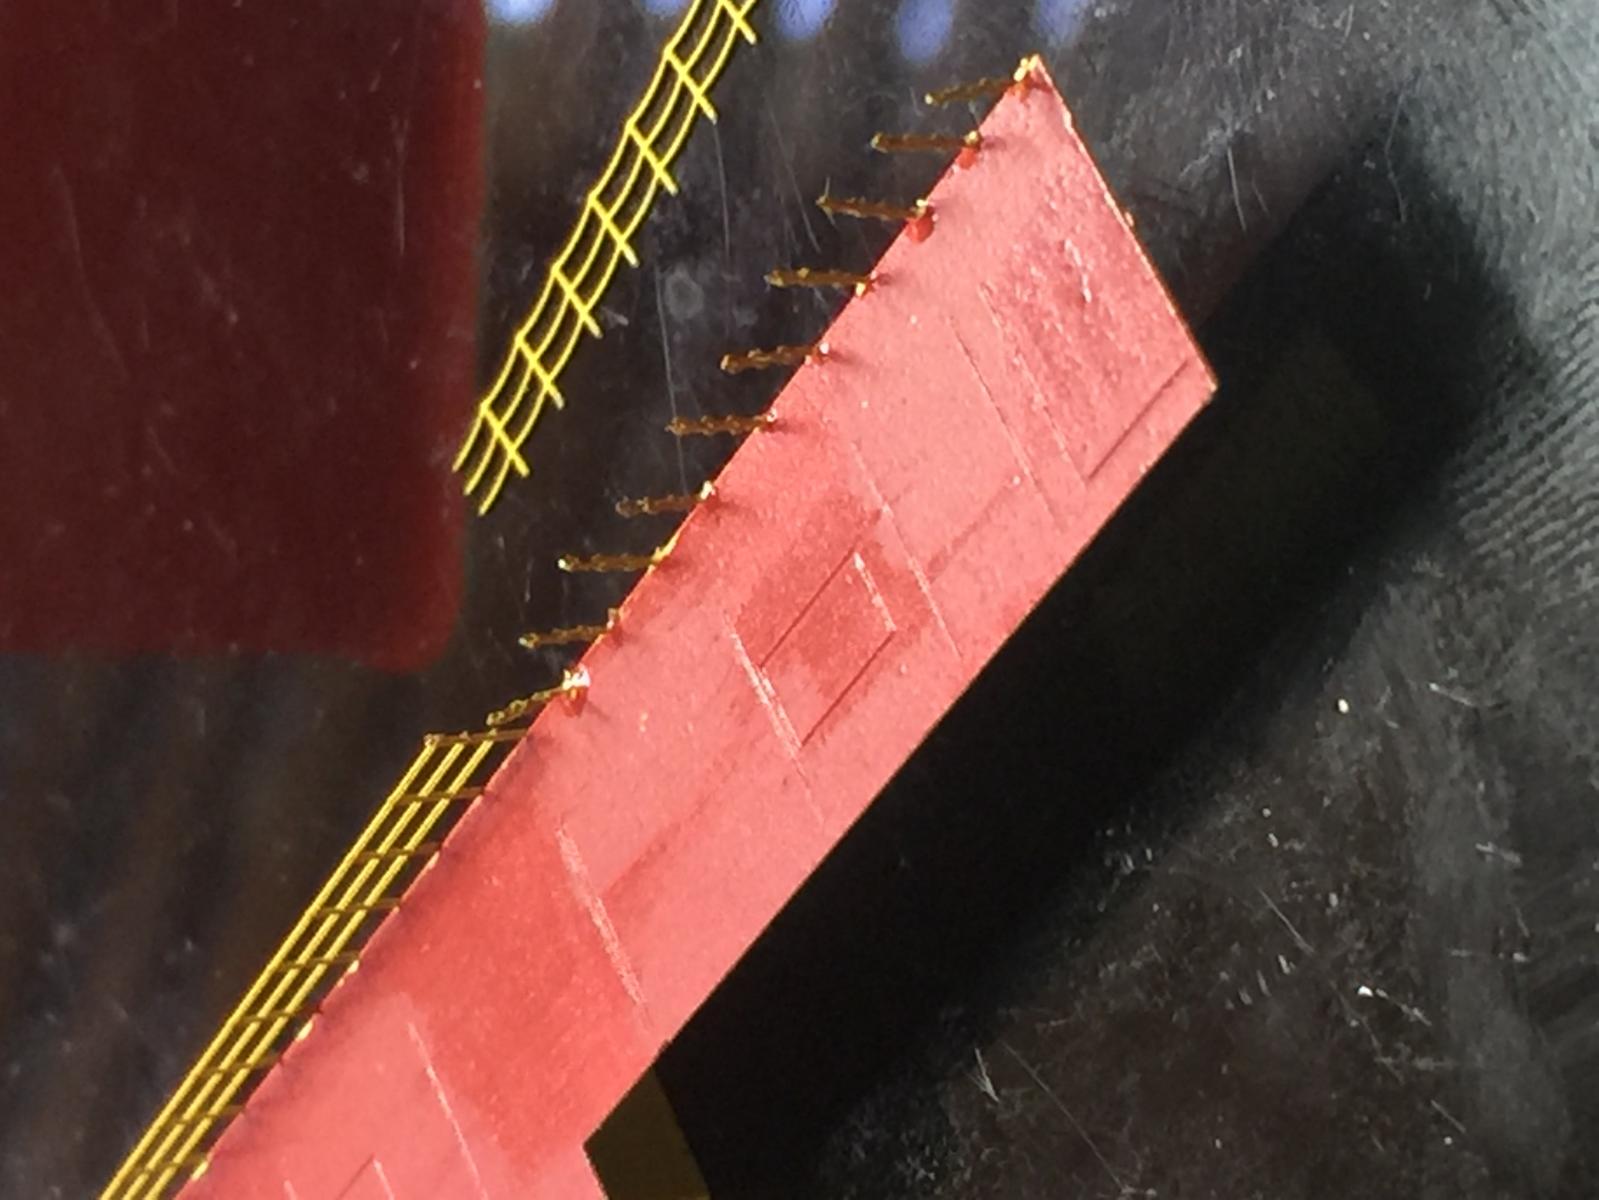
Pat, They are all individual stanchions, with a .5mm bend at the base. Needless to say as i was threading all 30 holes, they continually broke off. Once the lines were in, I held them taught and added more CA (nothing else will work) as they aligned fairly well. Greg
-
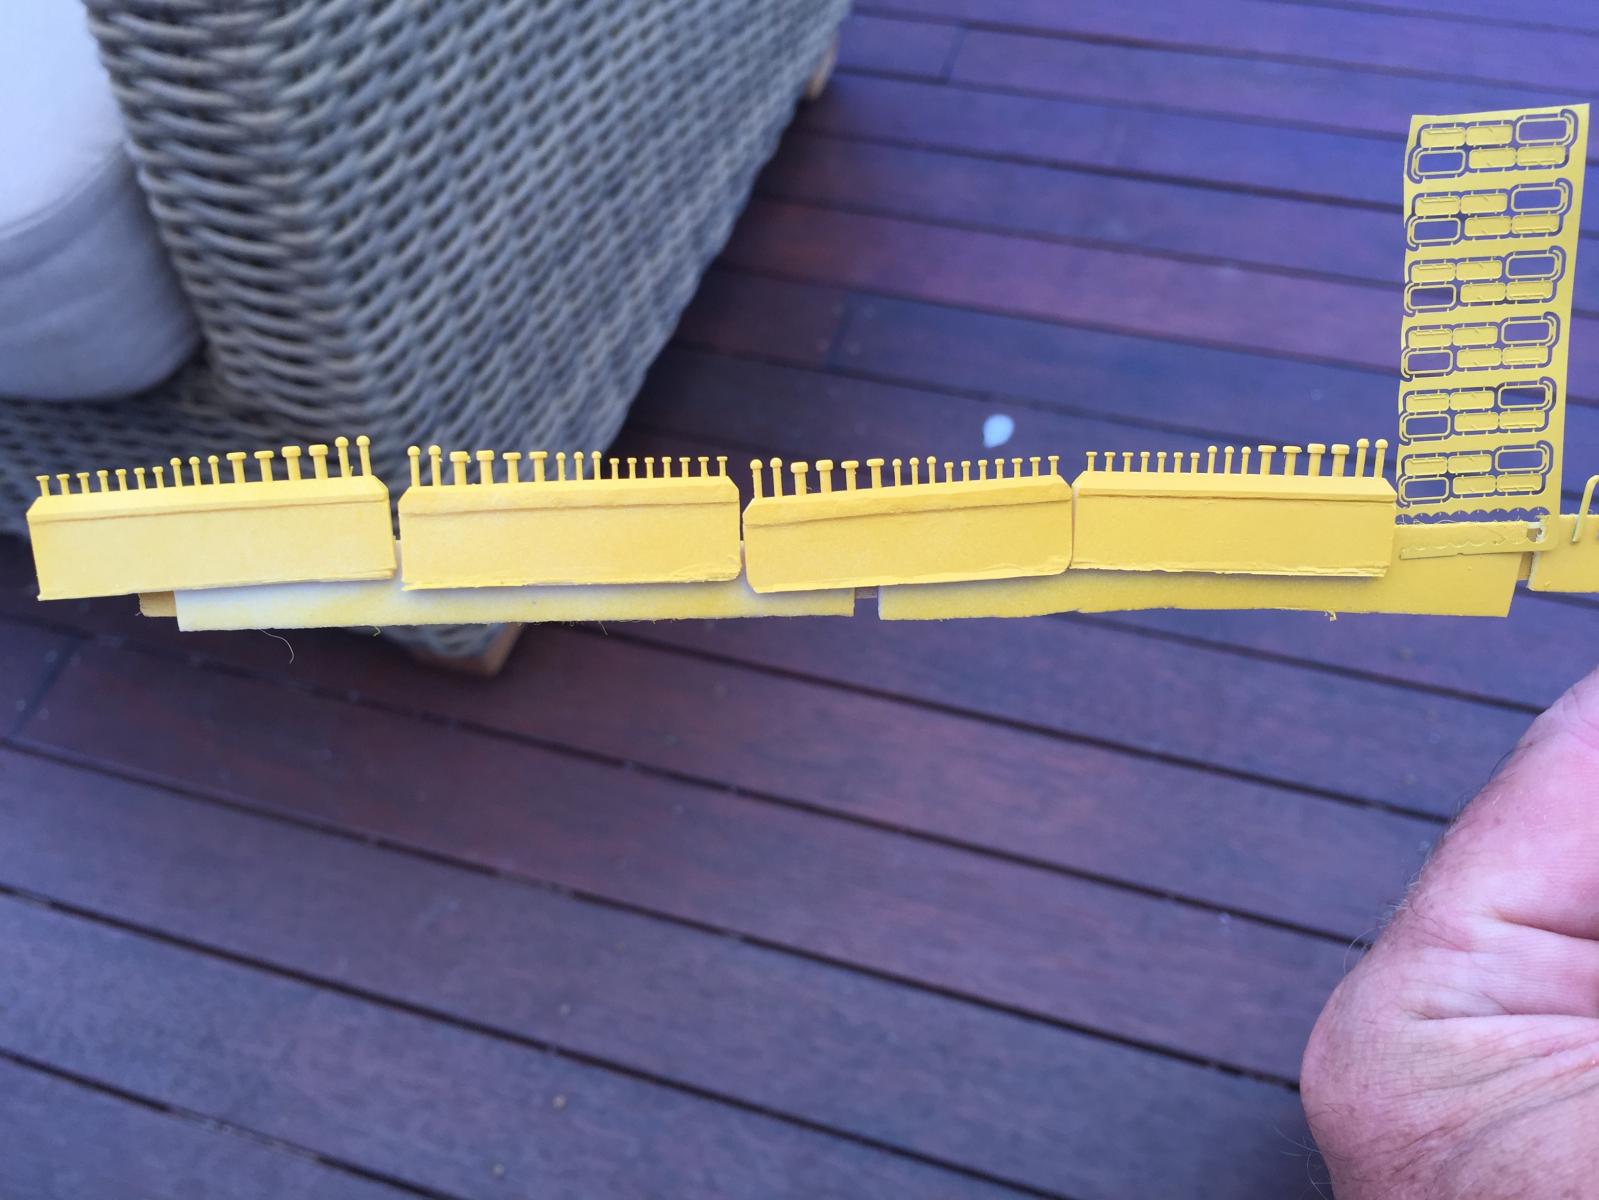
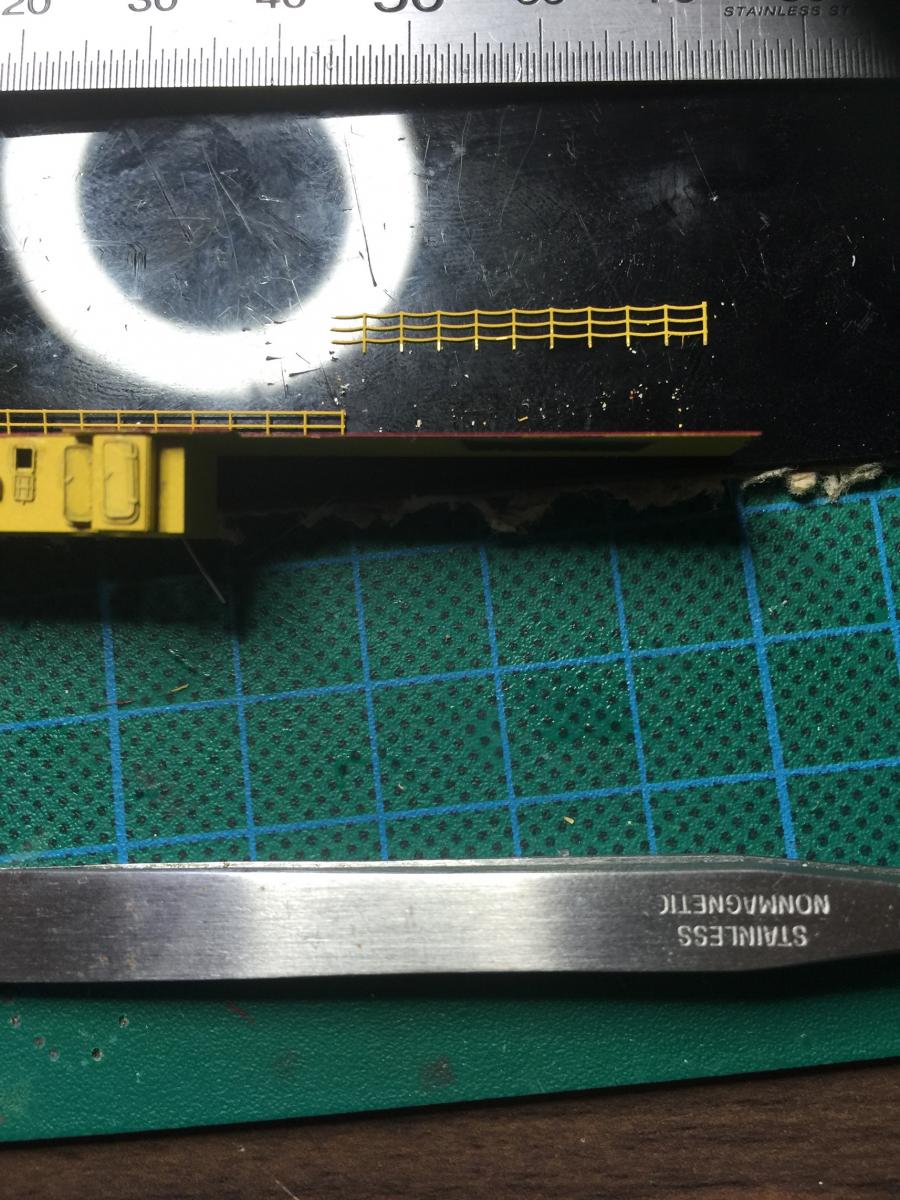
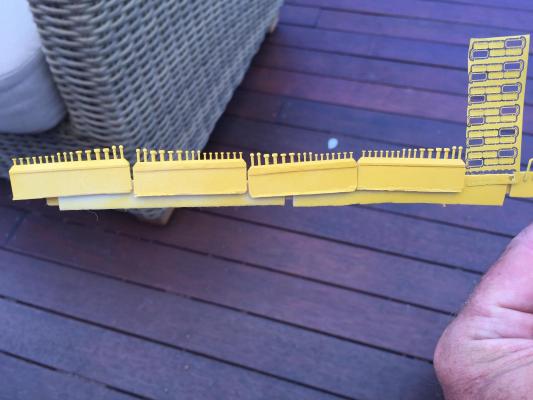
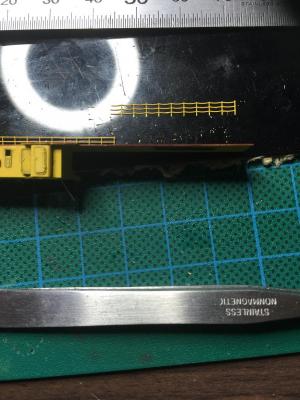
Anyway, on wards and upwards, Flyhawk make a 3 hole stanchion for the Royal navy in 1/350 and it's perfect. So I cut the wavy bit of the railings off, add 10 stanchions and run some line through them. the holds are about .2mm and the line about as thin as a human hair. Its not perfect but I'm happy. It is also a very very painstaking operation getting them to stay upright and also thread the needle. I think I'll send Lidor a photo of the kit when finished and continue the conversation. I'm not going to get a refund nor did I every expect one, maybe an effort to get their product right would be nice.


-
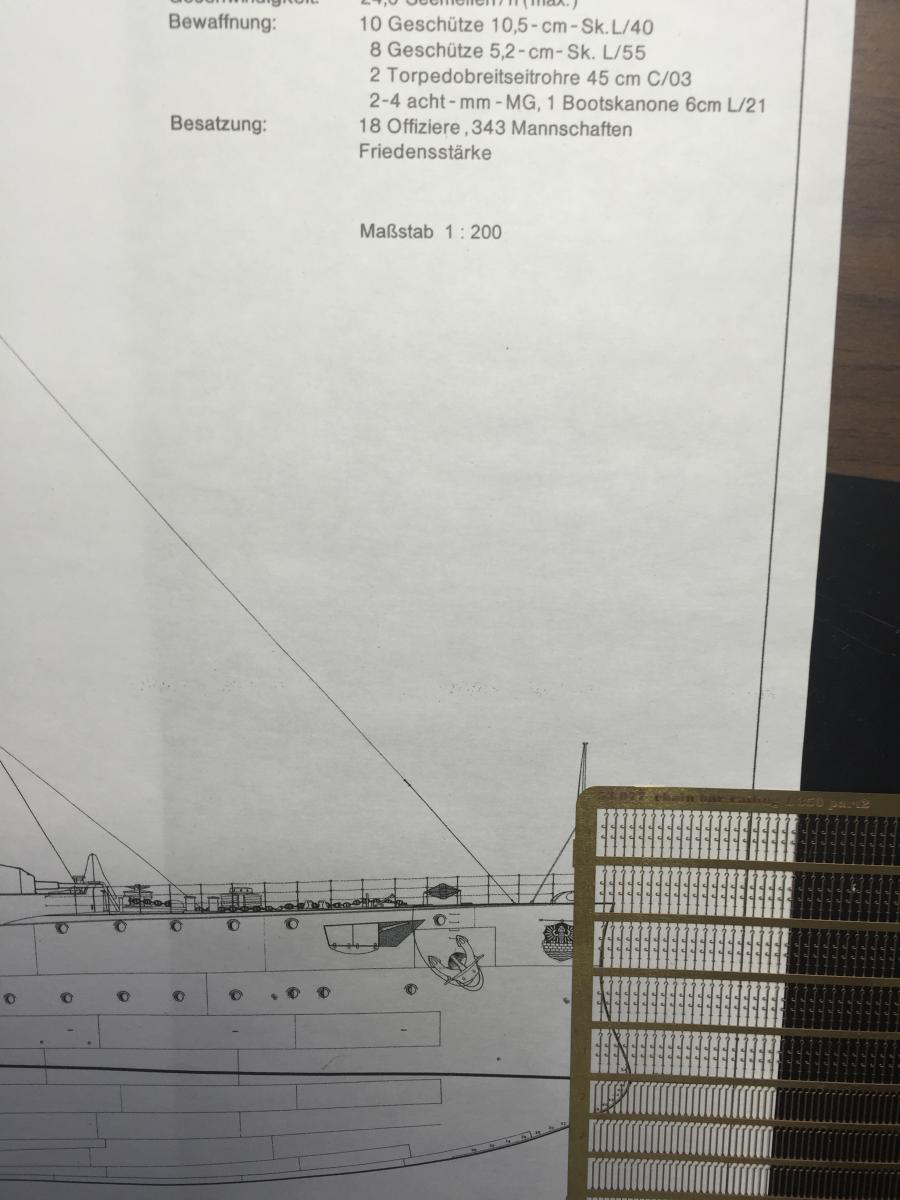
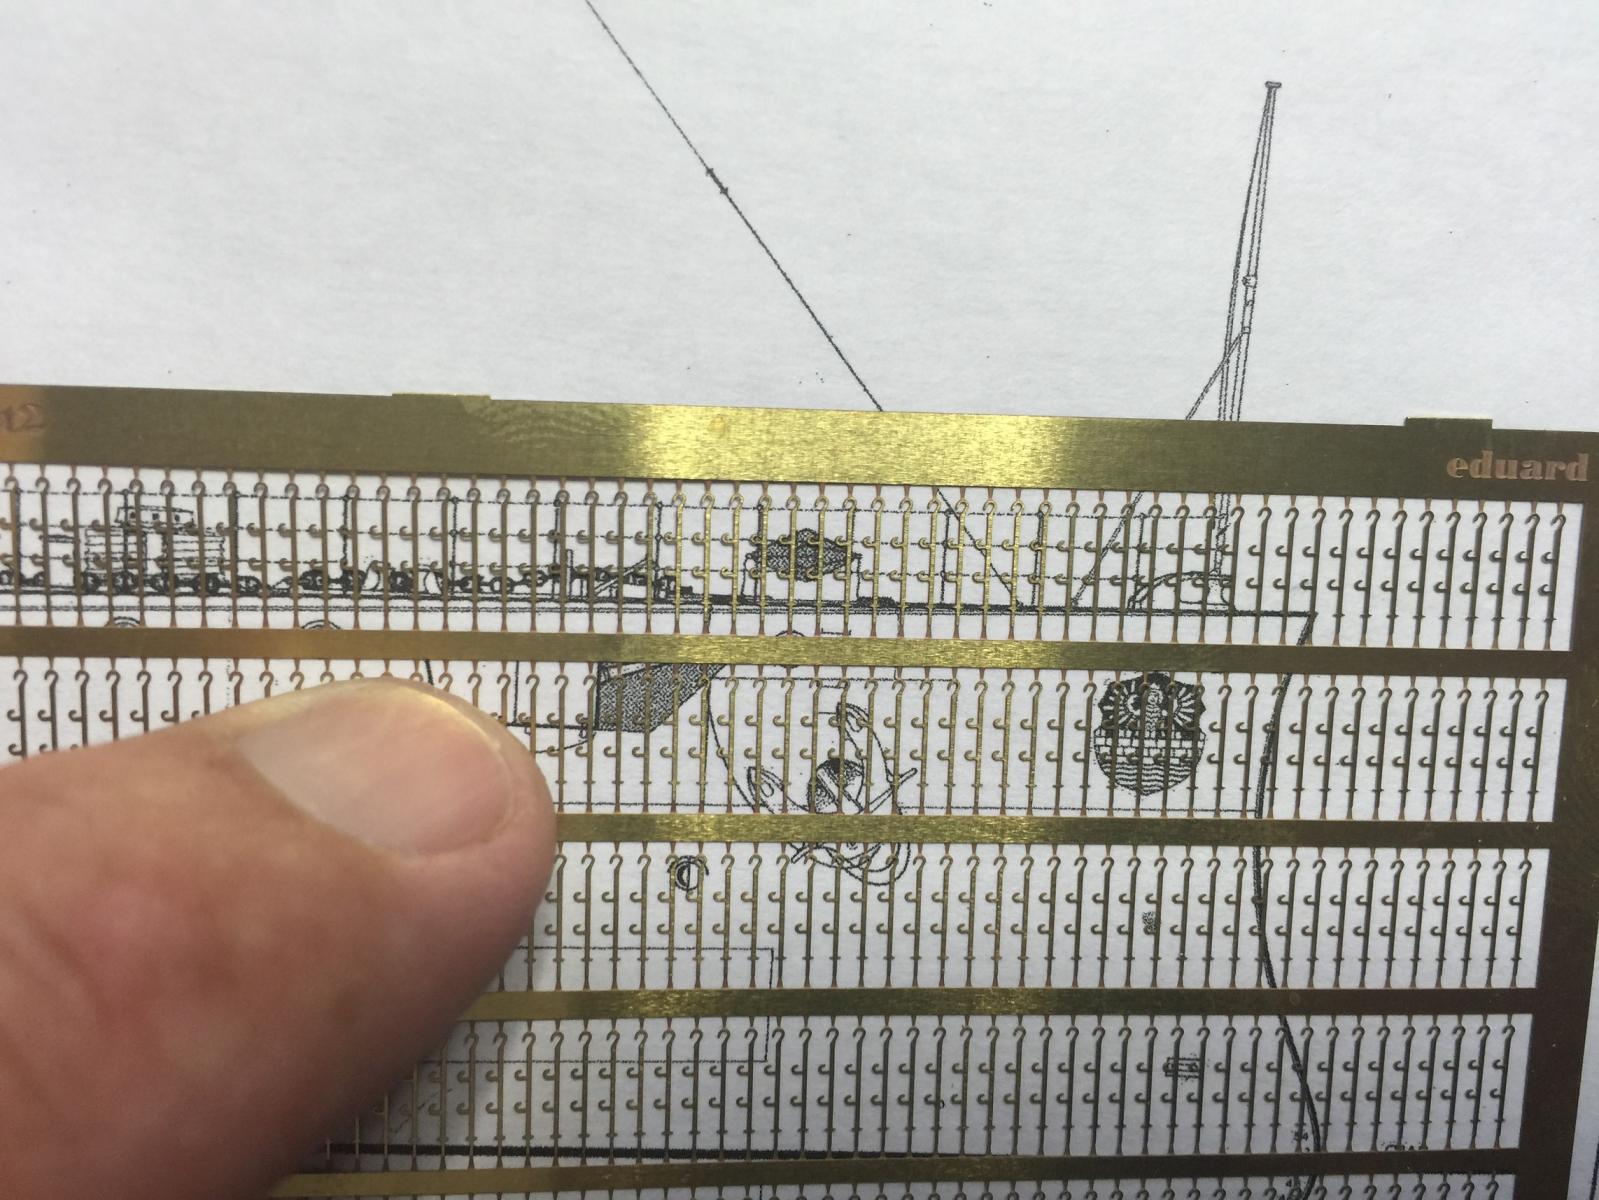
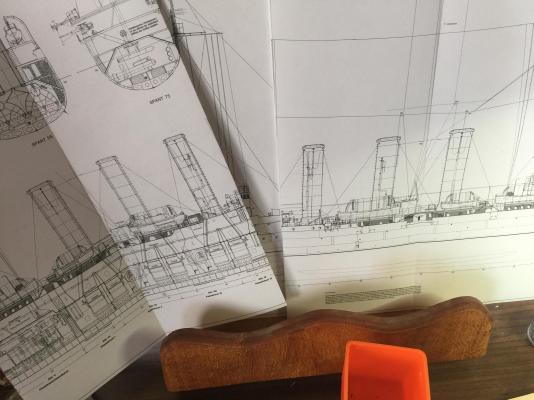
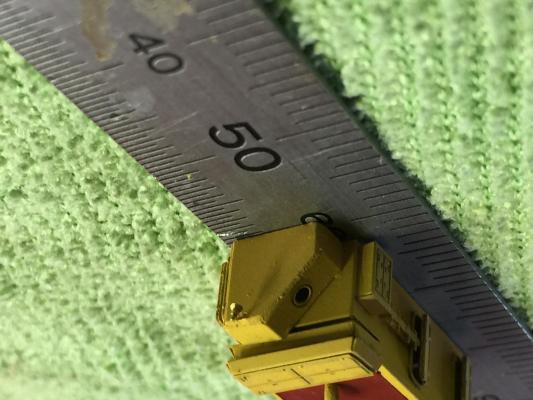
You can see they are a perfect fit. One problem. The plans you can see them compared on are 1/200. So, I contact Eduard support, asking them if there was a mistake and the scale was correct. A bloke called Lidor replies and says he'll get back to me and speak to his people. A week later he replies. Nope, it's 1/350, not 1/200. I then send him the photos above, stating I think they should probably check their slide rules], stating its a fairly expensive piece of kit to get so wrong. Lidor replies and says he'll get back to me. A week of so later I get this: Hello Greg, My colleagues found out that there's actually no problem with incorrect scale of the mentioned set. However, we might understand where the problem lies - during the designing of these railings, there was a different design standard. That's most likely why this set doesn't look that good when compared to our later railings set. This being said, I'm afraid we cannot help you with your request. If you really don't like the look of our railing set, simply don't use it. I'm sorry I only have this kind of reply for you, but at the moment, there's nothing we can do about this issue. Libor Havranek Sigh, the design standard was of course wrong. Basically stiff.
-
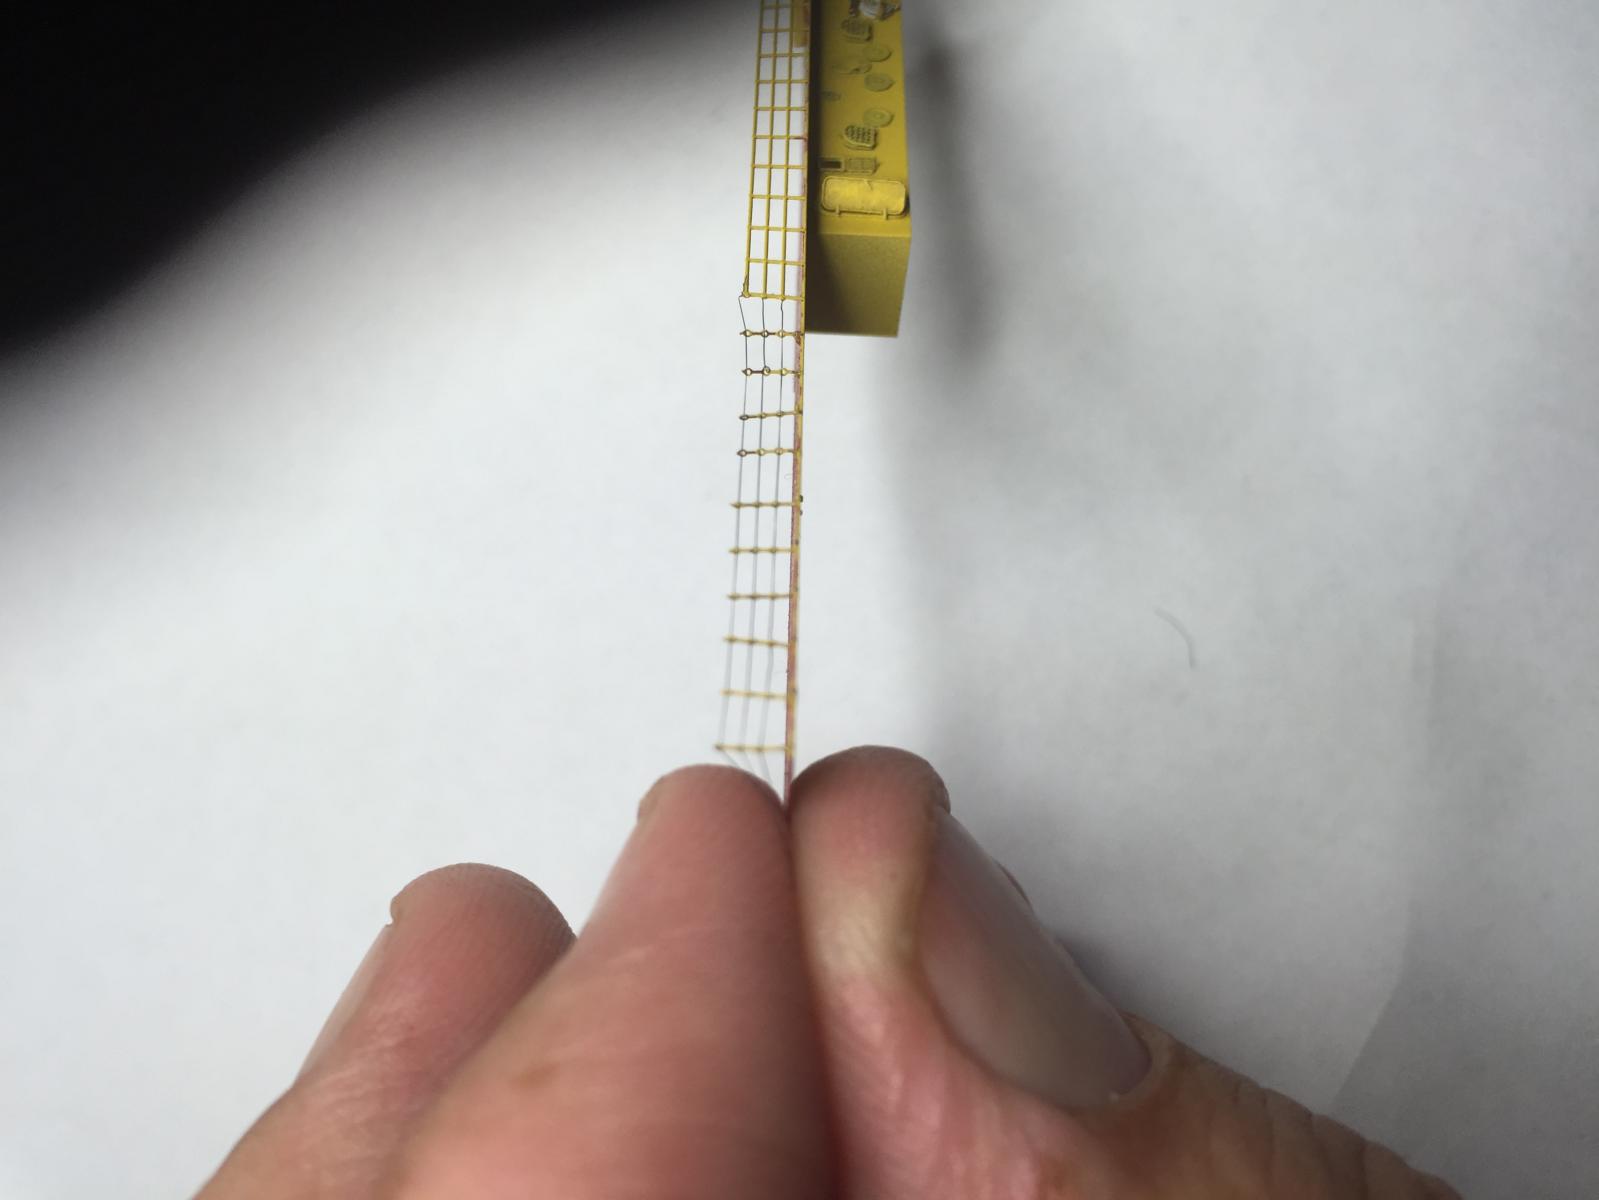
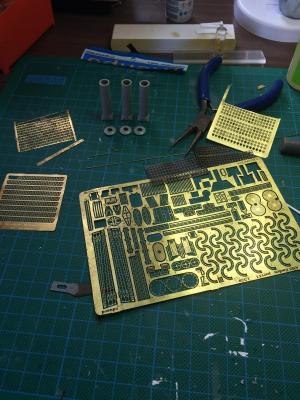
I've been plugging away with the photo etch, bend and fold, bend and fold. I intend to get a lot of the furniture done up, then I'll show a dry fit, then the painted product. As with the Varyag, I wanted to replace all the stanchions that were not solid (ie; they had chain rails, not solid metal ones). This means there is a small section on the catwalk that has chain rails not fixed rails and I have to complete that first before I put it on the models as it will be near impossible. The Tamiya ones I used are only 2 bar but the Emden had 3 bars. Of course I did a little bit of shopping and came across a lovely set of individual 3 bar stanchions with separate photo etched chains in 1/350 from Eduard. $40 or so, so quite expensive, but here are a heap of them, so I can use them elsewhere. Have a look at the photos then read on............


-
Regardless, great work both of you, I can't solder at all!
- 517 replies
-
- 3
-
-
- Endeavour
- Artesania Latina
- (and 1 more)
-
Nice work mate, nothing like a small sorbet between builds
- 24 replies
-
- 3
-
-
- gemini
- orange hobby
- (and 2 more)