RGL
-
Posts
5,077 -
Joined
-
Last visited
Content Type
Profiles
Forums
Gallery
Events
Everything posted by RGL
-
 A simple solution (unless I'm off track here), is to use a pencil and draw on your 4 rows of Wales. Then run that across the midline. Are you going to paint the bottom of the hull? If so the run of lower planks won't matter. Given the blunt bow you'll have to use stealers etc. happy to PM my progress of photos I kept from the old MSW. It is tricky
 -
It took me a full week to get my tackle even slightly right, incredibly fiddly at 1/60 for my fat fingers. Thankfully I only had 4 to do. If I knew of Chucks product months ago it would have been so much easier AND I cheated using commercial hooks. I reckon you're doing alright.
-
Model shipways had a 4 masted lumber schooner, bit Bluejacket still have the Notman
-
Awesome work. You just make it look easy
-
HMB Endeavour by mikec - Eaglemoss
RGL replied to mikec's topic in - Kit build logs for subjects built from 1751 - 1800
Really impressive -
I've PM'd you what I think is the answer
-
Cornwall ship models has some stuff called Krick which I ordered off their site, takes about a week in the post and the shipping is dirt cheap compared to US sites and 5 times as quick. A gunsmith should have blackening (or blueing) as well, probably available in bigger volumes as well
-
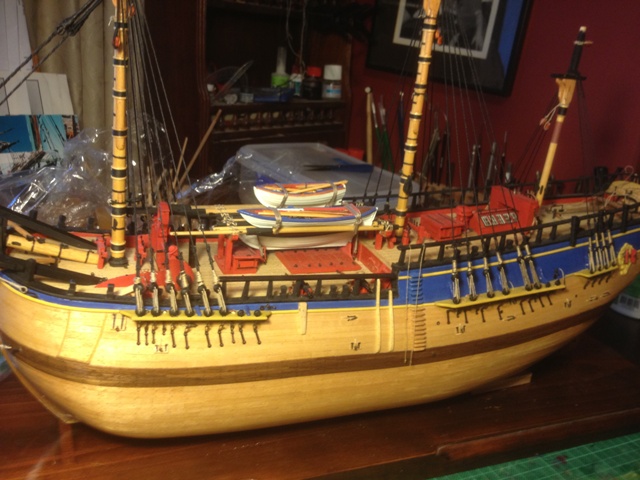
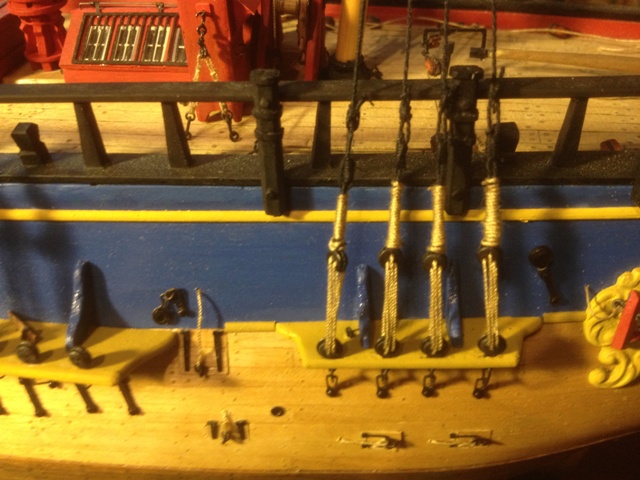
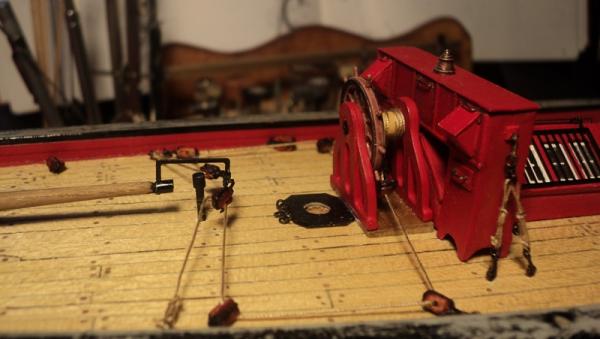
Steering gear revisited. Sooo much clumsier with shrouds, but worth doing. The new blocks are from JB Models. I made my first attempt at using brass to strop the blocks incluing hooks, using 0.2mm copper bashed flat leaving the ends unflattened to make the hooks. Then blackened and attached to the blocks. The final photo is from 2011 when I made my first attempt. They actually look a lot better in real life than the iphone photos.


-
Looks great. Funny how the sketches show bumpkins and the hood over the bowsprit but the AOTS doesn't. I've just tried my own hooks for the first time but just not to your standard. Really impressed old boy.
-
Looks fine. Is it detactable as it may get in the road later! Will you attach an ensign?
-
The first photo was taken years ago when i was setting up the steering gear. I'm completly dissatisfied with the blocks. Thus the next bit of progress or regress, as I decided that i would replace them all. The second photo is of commerically available blocks. The top is from www.JBmodels.eu, the second is the typical block available in kits. The third is from Chuck Pressario's new website www.Syrenshipmodelcompany.com. Both Jerzy and Chuck have made a great product (no I'm not sponsored). number 4 are kit blocks, then JBModels then Syren. The third photo is a close up of a replaced JBModel 3mm block on deck. The fourth photo is a comparison of JBModels small blocks stained maple (3mm) and the kit block which I am replacing on the deck rigging blocks.


-
Could not agree more, if you're getting frustrated walk away for a while. It's supposed to be fun.
-
Great work Paul, love the detail
-
Mine arrived today, a week to Australia, pretty good. Now a little practorium on how to strop a 3mm block? Including a hook?
-
Looks exactly right to me! I think I have we'll and truly exceeded the cost of the kit (which was about $200 in 1999 when I started mine). The Admiral is happy as I'm not a golfer leaving her alone all day while I waste a good walk!
-
I'm just about to replace all my blocks I affixed to the deck as I'm just not happy with them with JBmodels blocks, it's certainly one of the most fiddly procedures. Stropping 3mm blocks is a nightmare!
-
You really are motoring along!
-
Looks like a nice kit, have fun and welcome
-
Looking good
-
Nice work, you're catching me! Lovely clean deck
-
Thanks gents, I'm replacing the deck blocks whilst I still have acess so that's going to slow me down. Then 32 shroud cleats, stays, lower mast yard blocks, figure out how to make metal wrapping for the mast tacke, etc. I reckon at least two more years before I start the yards.
-
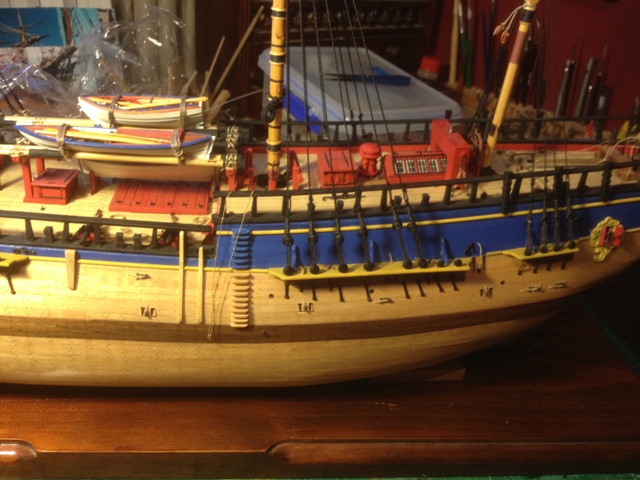
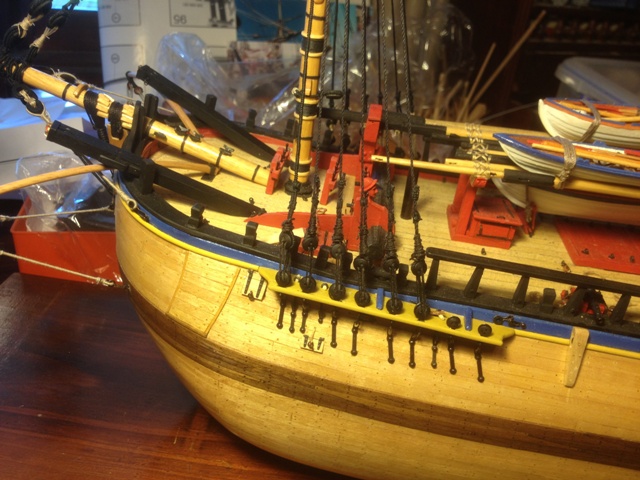
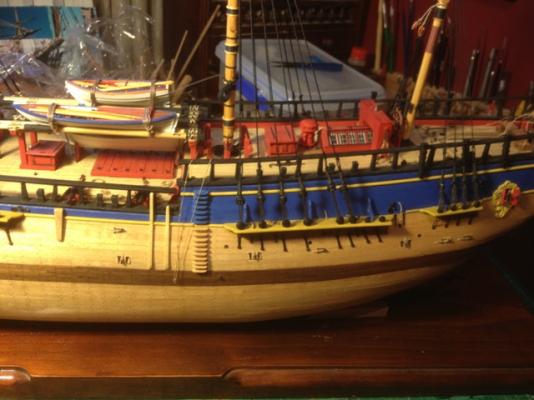
Standing rigging continued. Shrouds finished off sans ratlines. next is to add the shroud cleats.


-
If this is the ships boat, have a look on my log as I included oars and masts. I used to row and the Iars to an 8 were about 10 foot long.
-
Sorry, inner linings