HOLIDAY DONATION DRIVE - SUPPORT MSW - DO YOUR PART TO KEEP THIS GREAT FORUM GOING! (89 donations so far out of 49,000 members - C'mon guys!)
×


Tigersteve
-
Posts
1,327 -
Joined
-
Last visited
Content Type
Profiles
Forums
Gallery
Events
Everything posted by Tigersteve
-
 More natural lighting or just more light in general will help these photos tremendously. Steve
- 335 replies
-
- 2
-

-
- 18th century longboat
- Finished
- (and 1 more)
-
Best of luck! Lots of talented folks on here to help you. Steve
- 33 replies
-
- 1
-
-
- lady nelson
- victory models
- (and 1 more)
-
Look forward to what you decide to do with her display. Also waiting on this surprise you mentioned. Steve
- 335 replies
-
- 3
-
-
- 18th century longboat
- Finished
- (and 1 more)
-
I like the start of your base. Will you cover with glass? Steve
- 335 replies
-
- 3
-
-
- 18th century longboat
- Finished
- (and 1 more)
-
Thank you everyone! I'm feeling much better about this... Steve

- 165 replies
-
- 9
-
-
- finished
- model shipways
- (and 1 more)
-
I'm sure your wheel will turn out great. Too bad the ship's wheel and other things are not just laser cut wood pieces. Steve
- 1,306 replies
-
- 6
-
-
- syren
- model shipways
- (and 1 more)
-
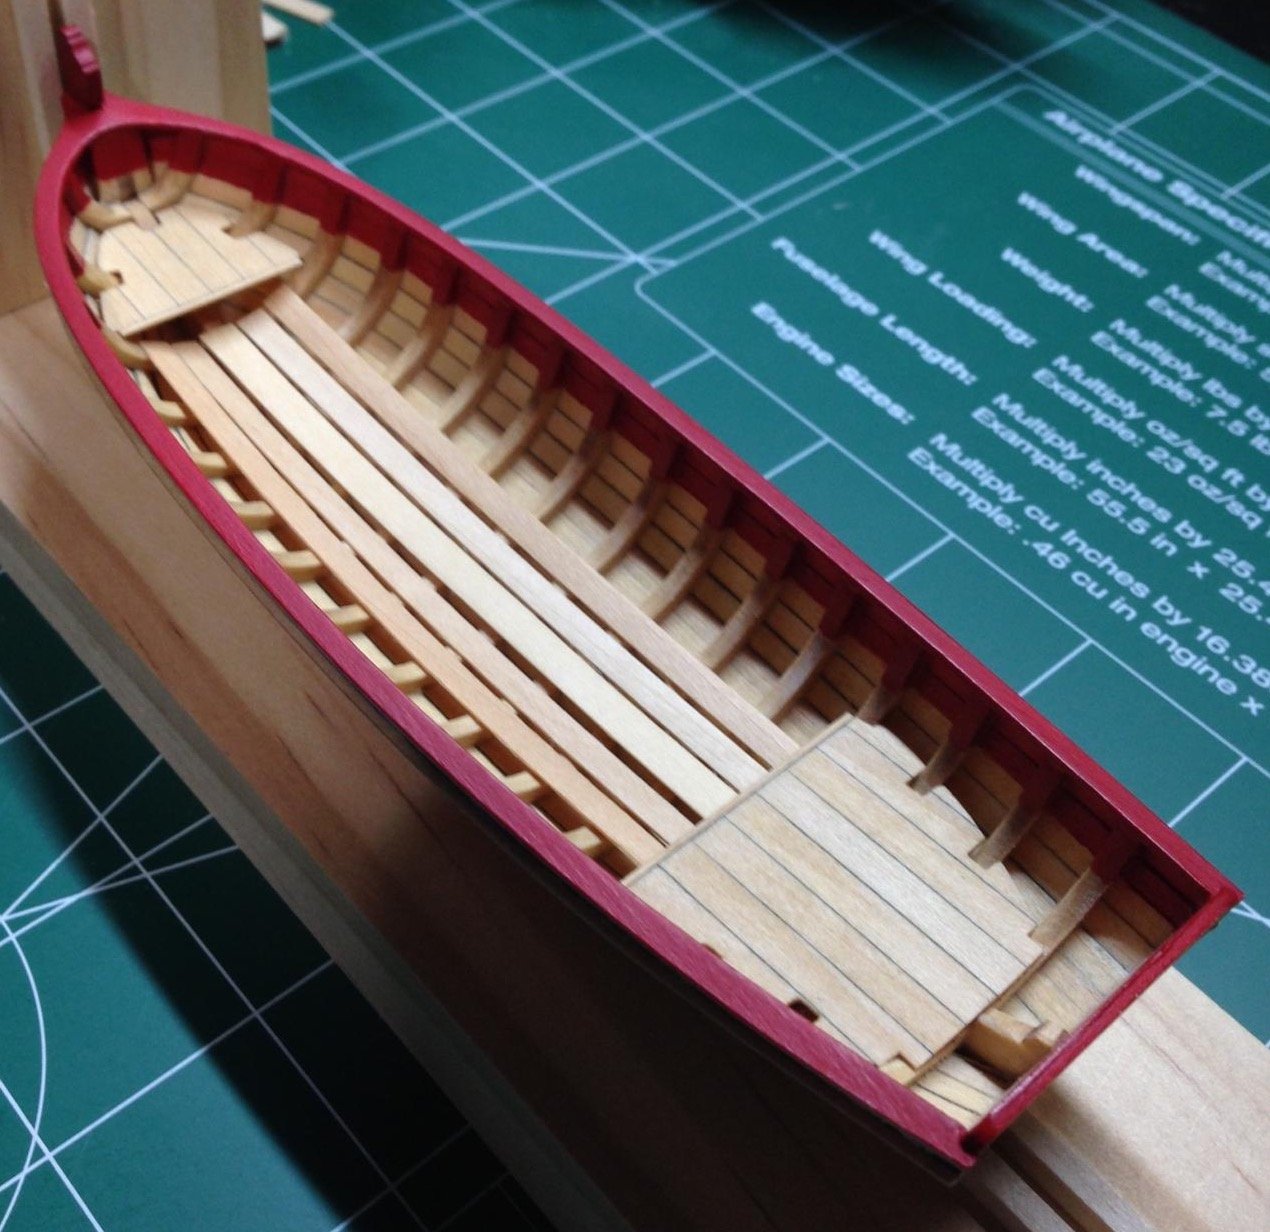
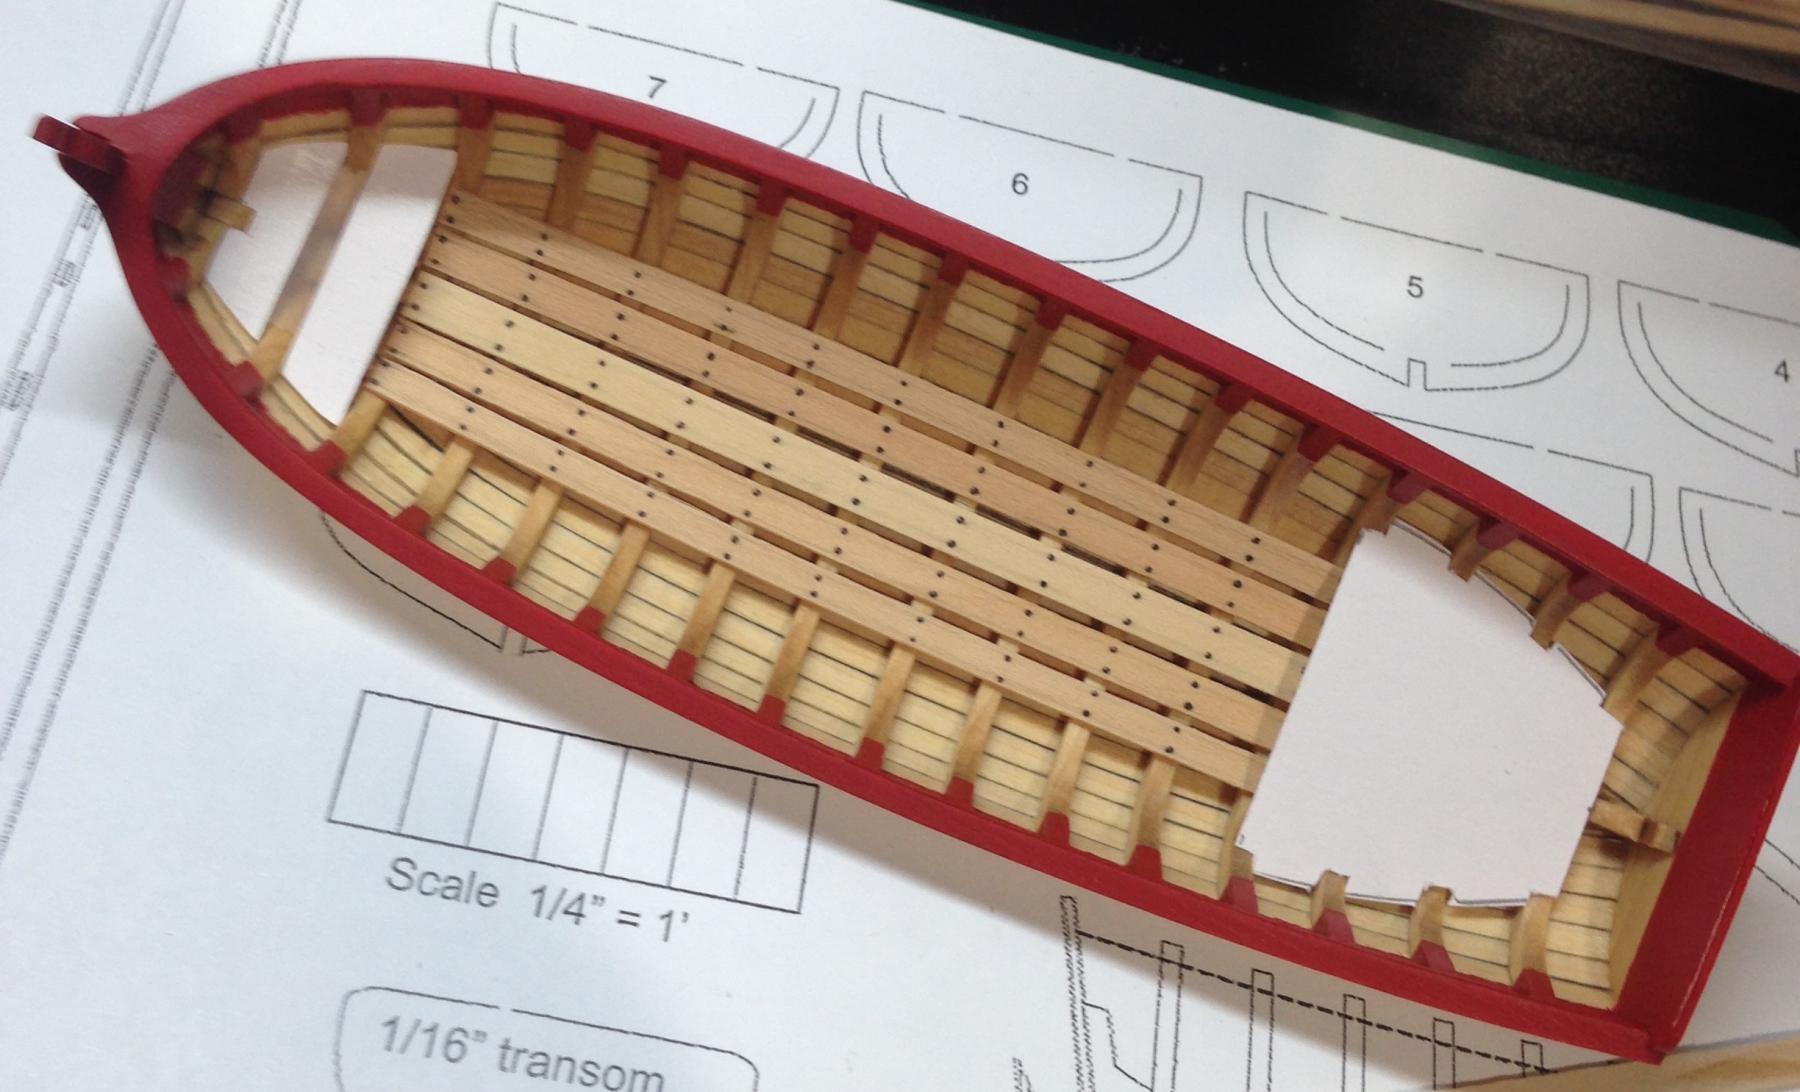
I've been back and forth about this all day. I'm not really happy with the nailhead effect I was going for. They seem out of scale to me and definitely not as clean as should be. I have taken off the platforms and sanded the ink off and done the same with the floorboards. I will re-stain and re-glue. Definitely been getting good practice while working on this kit! I know I wouldn't have been happy if I left it the way it was. I will post a picture when this is remedied. Steve
- 165 replies
-
- 4
-
-
- finished
- model shipways
- (and 1 more)
-
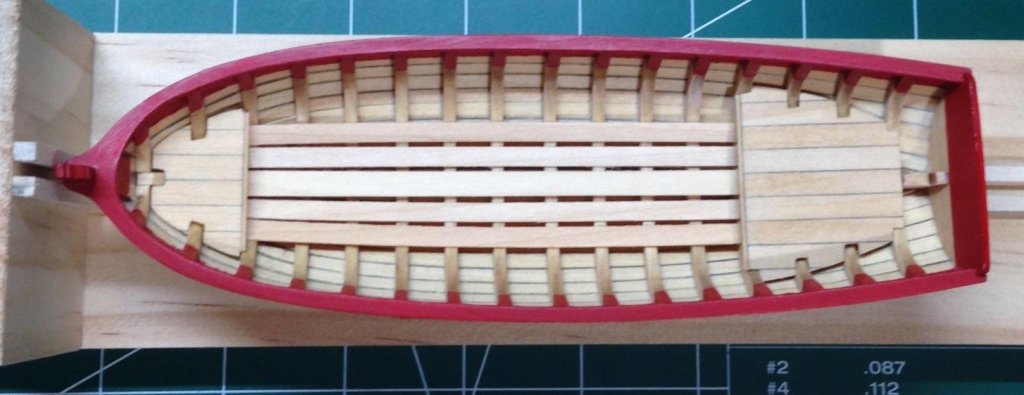
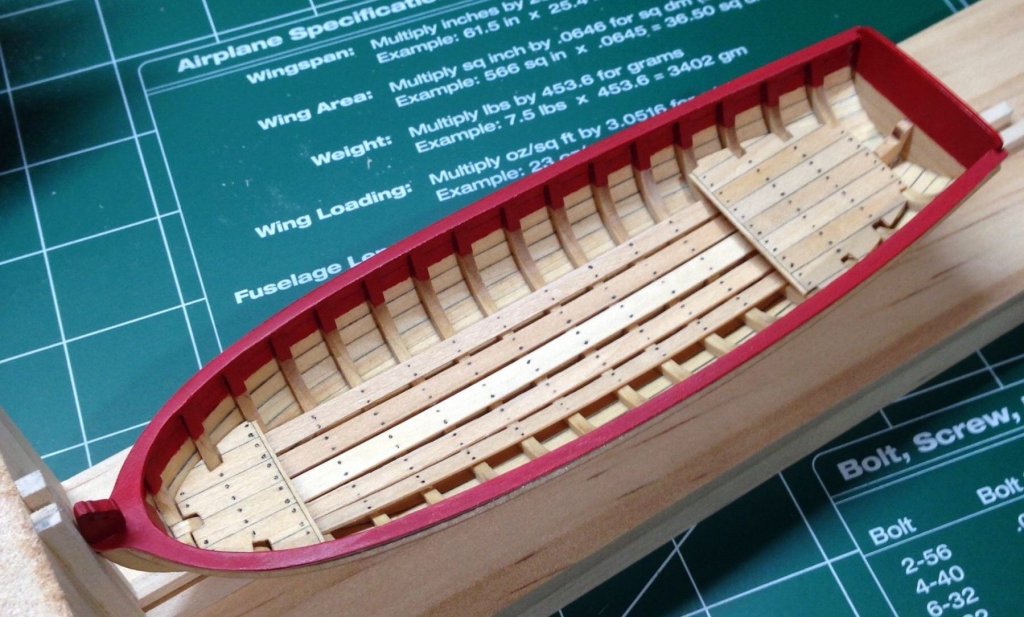
Platforms are done. Nailheads are not as crisp as I wanted but they'll have to do. I glued the edges of the strips where the notches would be. Thank you Erik for the file recommendation. Huge help! Risers are next. Steve

- 165 replies
-
- 9
-
-
- finished
- model shipways
- (and 1 more)
-
Beautiful! Steve
-
Looks like a solid start to me. Take your time and redo something if it doesn't look to your satisfaction. Awaiting your progress. Steve
- 66 replies
-
- 3
-
-
- bounty launch
- model shipways
- (and 1 more)
-
Little too clean- don't you think, Mike? Just kidding it looks great! Steve
- 452 replies
-
- 3
-
-
- cheerful
- Syren Ship Model Company
- (and 1 more)
-
She's looking good. Very clean. Your other hobby work looks sharp as well. Steve
-
Good start. Looking forward to your progress. Steve
- 66 replies
-
- 2
-
-
- bounty launch
- model shipways
- (and 1 more)
-
Well- of course! I may try to use the kits line. We'll see. I will def order from Chuck when I build the Mayflower.
- 335 replies
-
- 4
-
-
- 18th century longboat
- Finished
- (and 1 more)
-
Very cool. I'm interested to see how the line is that came with the kit. I cant imagine its easy to work with. Not even close to that stage yet! Steve
- 335 replies
-
- 6
-
-
- 18th century longboat
- Finished
- (and 1 more)
-
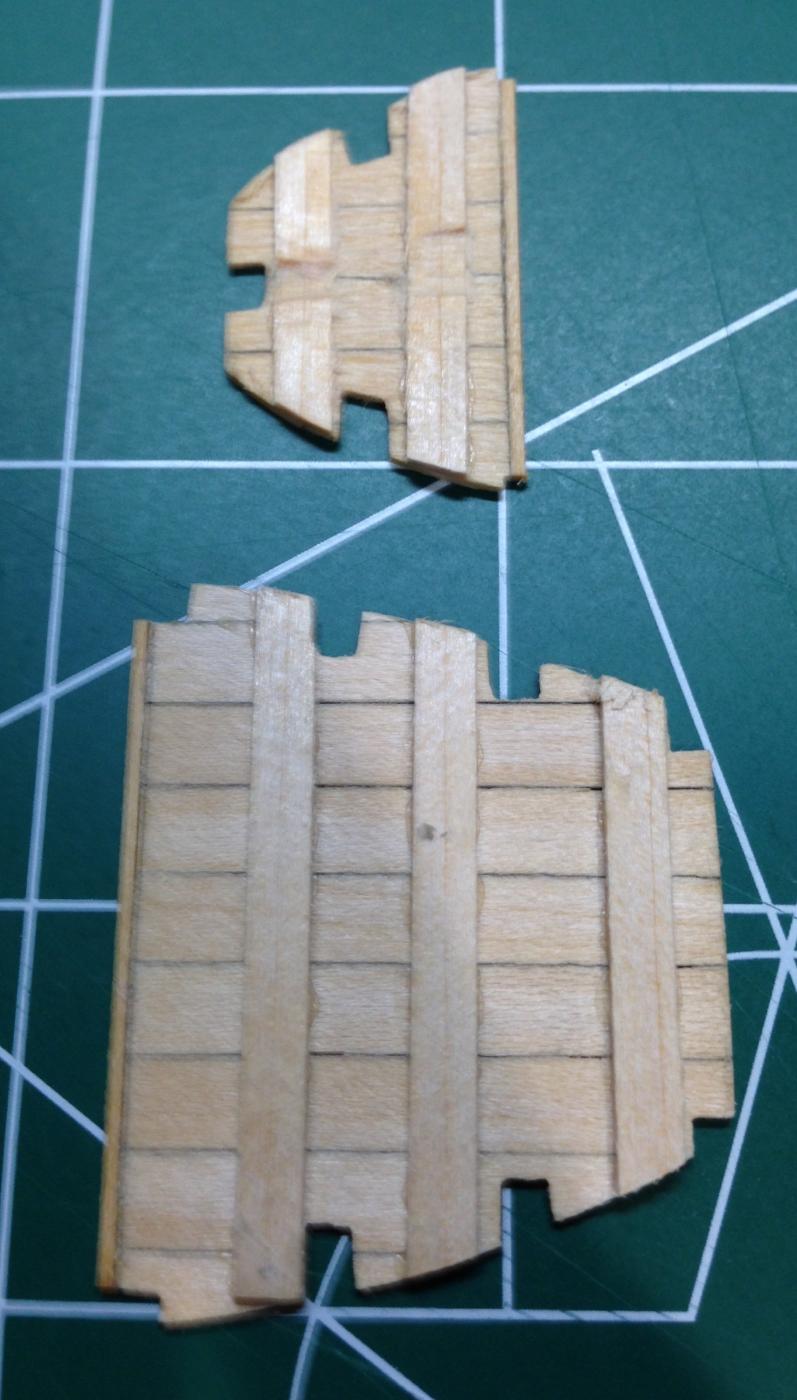
Thanks for the advice. Below is the set of paper templates I had made. That basswood is tricky. Maybe notching the segments before I glue might work better. I think the extra glue should help too. Steve

- 165 replies
-
- 5
-
-
- finished
- model shipways
- (and 1 more)
-
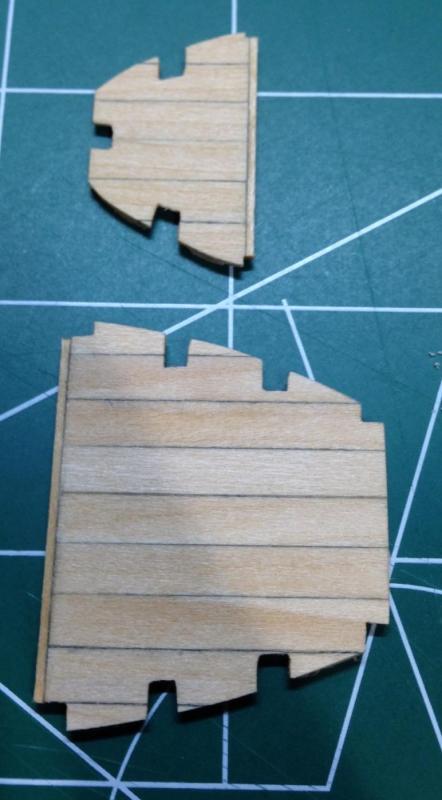
Just a quick update. I'm on attempt three at making the platforms. Notching them out kept splitting the wood. I was able to make the front platform and notch it out but when it was mounted the planks were not straight. So frustrated! I will add some glue inbetween the planks this time and hope it will keep the notched areas from splitting. Steve
-
Seems to be the name of the game. I'm on attempt 3 of making the longboat platforms. So frustrating!
- 129 replies
-
- 2
-
-
- finished
- model shipways
- (and 1 more)
-
Wow!
-
Have you been using water to help bend the planks? I remember you said you wanted to try without using water. Steve
- 129 replies
-
- 1
-
-
- finished
- model shipways
- (and 1 more)
-
Super clean Mike! The paint job looks great and the guns. I don't notice any wood showing under your painted surfaces. Steve
- 452 replies
-
- 3
-
-
- cheerful
- Syren Ship Model Company
- (and 1 more)
-
Chuck, thank you for saying so and thank you everyone for the likes. I appreciate the encouragement. This is a very challenging kit. I like how Model Expo advertises it as an intro for ship modeling. Suppose it's partially because of the excellent practicum. Anyways-I didn't expect it to be easy. Great kit, Chuck! I have your Pinnace and Mayflower next in line. Steve
- 165 replies
-
- 1
-
-
- finished
- model shipways
- (and 1 more)