
HOLIDAY DONATION DRIVE - SUPPORT MSW - DO YOUR PART TO KEEP THIS GREAT FORUM GOING! (89 donations so far out of 49,000 members - C'mon guys!)
×


Tigersteve
-
Posts
1,327 -
Joined
-
Last visited
Content Type
Profiles
Forums
Gallery
Events
Everything posted by Tigersteve
-
 It was tricky to install the windlass. I ended up sanding until it fit into position. Originally, I wanted to add that detail but I was afraid to cut into the risers. Also I wanted to keep moving forward. The drill bit that I had for drilling the hole for the wire broke so I could not add the wire. I ended up gluing it in place. Also knew adding the wire would be very difficult. Steve
 -
The nailing looks good. "Time to move on". I totally get that. You will be obsessing about the next detail anyway. Oh just a tip I learned after. Install the lift rings before you install the thwarts. I know the risers are next for you but keep it in mind. Steve
-
Congrats on the planking. Steve
-
I think this one is going to be a good one. Lol What makes this kit so expensive? Is it because of the amount of walnut wood included? Anyone know? Steve
-
Glad to see you back! There aren't enough Mayflower logs to follow. I have this kit on my shelf for my third build. Look forward to your progress. Steve
-
Looks great! Steve
-
The instructions said to put them in after. I faired the frames then did some sanding on those two pieces before I glued them in. Then I had to do a little more sanding. The frames look good but if you notice any of them off, you should correct it now. It may affect the shape of the boat. Look at the frames from a couple different angles. Happy New Year! Steve
-
Looks good. I would not unglue the skylight either! Lol Steve
-
Yes- keep going. Looks good! Steve
-
Keith- your build of this is awesome. That's a log for all builders of this one to see. Steve
- 66 replies
-
- 3
-

-
- bounty launch
- model shipways
- (and 1 more)
-
The natural stain is not a clear stain. It will darken the wood. Even the pre-stain will darken the wood a little bit. If you scroll through my log you will see the results of the pre-stain and natural stain on basswood. Some of the photos show the wood better. http://modelshipworld.com/index.php/topic/14395-18th-century-longboat-by-tigersteve-model-shipways/page-1# Depends on your preference. Do some tests and see what you like. I have all oil based Minwax except for the polycrilic. Steve
- 66 replies
-
- 2
-
-
- bounty launch
- model shipways
- (and 1 more)
-
Pencil for inbetween the planks. You can pencil one edge of each plank. You do not need to mark the stem and keel. That seam will show anyway. I would not poly until planking is done. I did not have to reinforce the stem and keel. I don't think it's necessary. The wood glue makes a strong bond. Everything is prone to breakage. These parts are small. Hope this helps. Steve
-
Me too Steve
-
It looks fantastic. Good work. The rest should be more "relaxing". Don't forget to pre-stain before you stain. Very fine sanding before. Golden Oak usually turns out darker than people expect. My preference was to use the natural stain. Steve
- 66 replies
-
- 1
-
-
- bounty launch
- model shipways
- (and 1 more)
-
There's a few more longboat builders in the mix now. How's yours coming along? It's been a while and we're waiting for this surprise! :-) Steve
- 335 replies
-
- 3
-
-
- 18th century longboat
- Finished
- (and 1 more)
-
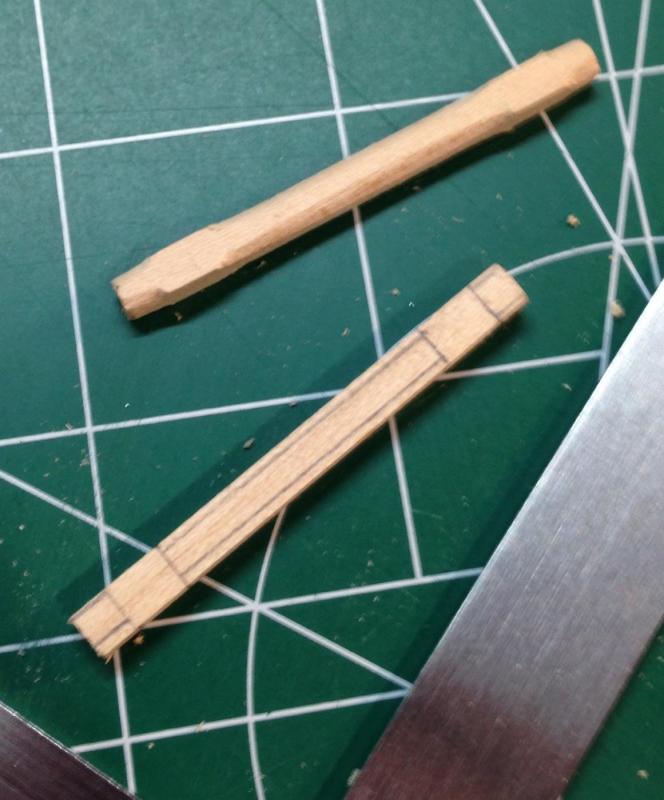
Windlass and handles are complete. I drew reference lines and that helped while filing the shape. This part was enjoyable to make. You'll notice an extra windlass I did freedhand now scrap. I completed the horse. It was difficult to get the wire straight. One of my drill bits broke so no oarlocks for now. Steve
- 165 replies
-
- 7
-
-
- finished
- model shipways
- (and 1 more)
-
Mike- thank you for the compliment! This is a very challenging kit. Just take your time with it and check all the logs. I followed Erik W, Mike Stuntflyer, Bob F, and Chuck's of course. The planning and laying out of all the tick marks for the planking is extremely important. There are no filler blocks needed in this build. The fair-a-frame you got should help to set up your bulkheads square. I look forward to your first steps. Steve
-
I'm curious what you will do with the "bread and butter" boats that come with the kit. Scratch building them will prob take a while although so will the other method. Looking forward to what you do with them. Steve
-
Much appreciated. Thank you. I'm just trying to follow the footsteps of some of the folks who have done a great job building her. From seeing your work I think your boats will turn out great. I can't imagine doing this at a smaller scale. This boat is only 6 1/2 inches! Steve
- 165 replies
-
- 3
-
-
- finished
- model shipways
- (and 1 more)
-
Great work. Very consistent. Steve
-
Yes. His log is a very good example. If you look at the instructions it shows the same. Here's another build log for you. http://modelshipworld.com/index.php/topic/629-18th-century-english-longboat-by-chuck-c1760/?fromsearch=1 Steve
-
That sounds correct. Bob F's log of this build is very well done. http://modelshipworld.com/index.php/topic/1465-18th-century-longboat-by-bobf-model-shipways-148-tri-club/?fromsearch=1 Steve
-
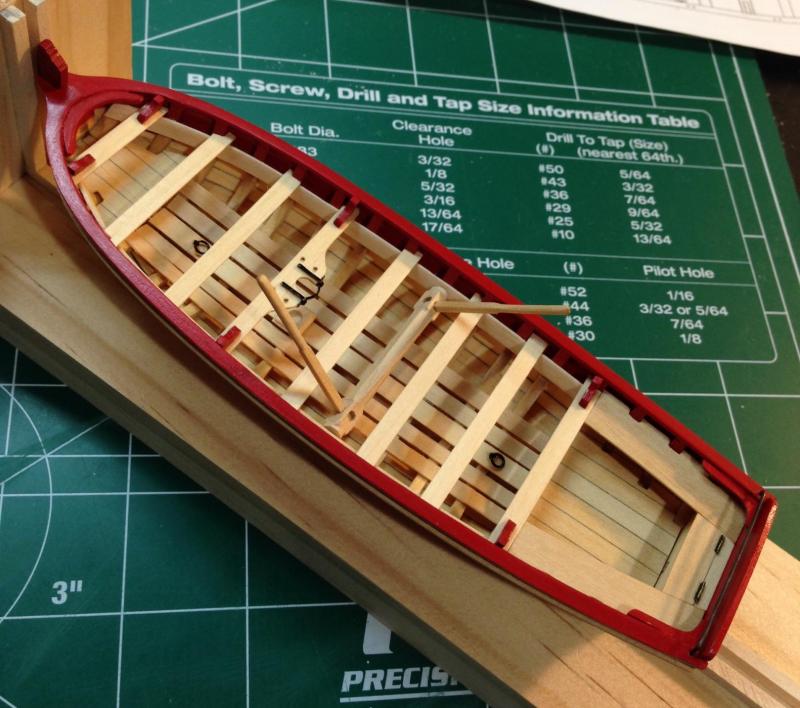
It's been slow going but lots of progress. All knees were shaped, painted, and installed. The one at the bow was most difficult. These parts seem to get smaller and smaller! Locker hinges are installed. I painted the brass strips black and used the eye hooks as hinges. I left those unpainted for contrast. Oar locks and windlass are next! Steve
- 165 replies
-
- 9
-
-
- finished
- model shipways
- (and 1 more)


