HOLIDAY DONATION DRIVE - SUPPORT MSW - DO YOUR PART TO KEEP THIS GREAT FORUM GOING! (Only 20 donations so far - C'mon guys!)
×


Robin Lous
-
Posts
564 -
Joined
-
Last visited
Content Type
Profiles
Forums
Gallery
Events
Everything posted by Robin Lous
-
 Minor update, but I'm very happy this works out and it isn't even that difficult. Another hurdle taken! The hearts. I planned to make them from 0,5 mm styrene sheet with brass wire in the centre. I replaced the brass with styrene also. Punched out 4 mm and 2 mm circles from the styrene sheet. Glued together, drilled a hole and shaped them with a fine sanding stick. When I finished them all, I'll paint them dark brown and varnish them. The finished example on the photo is just under 4mm. I need 21 or 23 of these. And 2 slightly smaller ones. More soon, Robin
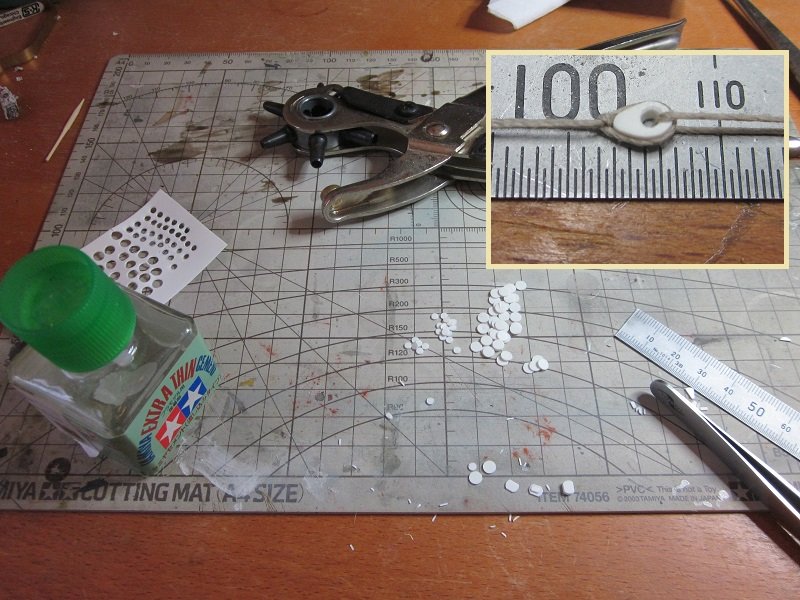
- 473 replies
-
- 10
-

-
- greek bireme
- dusek
- (and 1 more)
-
Looks good, but take it easy. Slow is good, nobody here expects you to finish it anytime soon. Give all you do some thought...before you do it. I love your enthousiasm, but you move like a steamroller...and that's scary. Robin
-
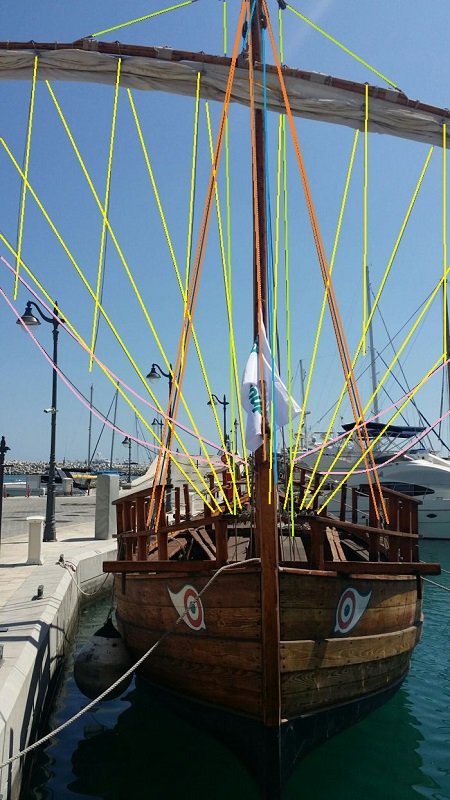
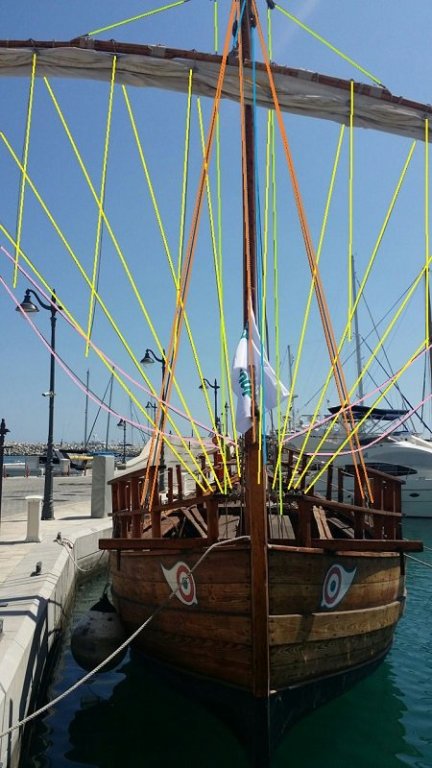
The bottles are just the running gag in my posts. Back to my build...for the rigging I use a photo I found (credits to MESSIS I think, but not sure). It's a reconstruction of a Greek trade. The rigging is extremely helpful to me and I copy it almost 100%.. I color coded all the ropes, so it makes sense to me. I'll also copy the 3 part (instead of 2 part) yard. This is typical ancient Greek ship rigging and it can be used on trade ships, triremes, biremes, pentekontors...anything ancient Greek. To make this work I need a slightly longer mast...more going on above the yard. More soon, Robin
- 473 replies
-
- 9
-
-
- greek bireme
- dusek
- (and 1 more)
-
The first to follow this....not the last for sure! Robin
-
Beautiful!
-
Italian Boats of the Adriatic Sea
Robin Lous replied to jack.aubrey's topic in Nautical/Naval History
Once more...thanks a lot Jack! These boats steal my heart...they're fantastic! Robin -
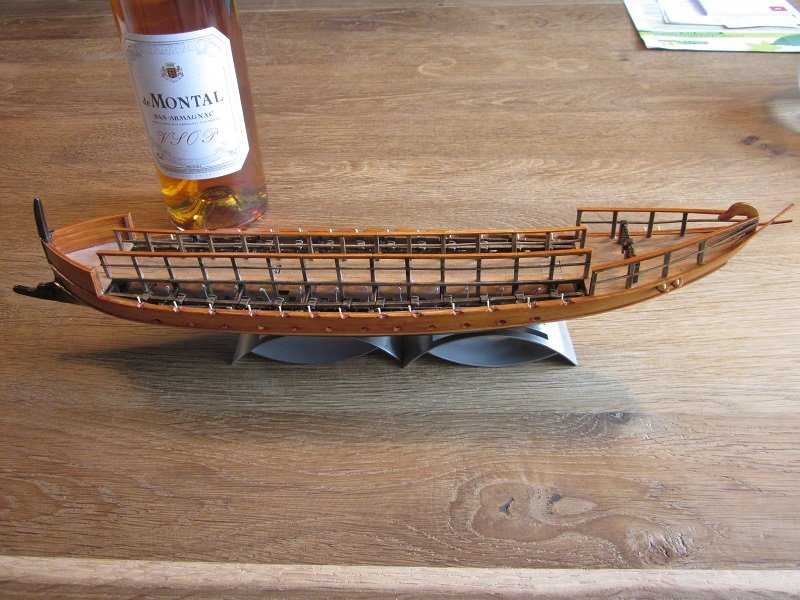
I finished the railing on the rear deck. Did it the same way as the centre deck railing and made sure the height and the distance between the stantions are the same. From the side it looks like a continuing railing now. More soon, Robin
- 473 replies
-
- 12
-
-
- greek bireme
- dusek
- (and 1 more)
-
Sad to hear it's needed, but it's good you take action, otherwise it will keep annoying you. Looking forward to see the deck v2.0 Robin
-
Same here Les. I worked on it for over a year. Lots of scratchbuilding, lots of Perkins pe and lots of other stuff. Perkins pe not easy to work with btw. 90% finished, but it's untouched for 2 years now.
-
Ah! there's the Riva bling bling! It gets better and better...glad you're back, I missed your build reports. Robin
- 414 replies
-
- 3
-
-
- riva aquarama
- amati
- (and 2 more)
-
Checking the pinning of the stantions... Yep....the pinning works! Most likely the most stupendous action you guys ever seen on this forum, but I was curious and couldn't resist. I'll never ever do that again....what was I thinking? It went well, but... geez! Robin
- 473 replies
-
- 10
-
-
- greek bireme
- dusek
- (and 1 more)
-
Not 100% sure this is a good idea, but who knows? Perhaps you can sand the deck more and stain the deck. The tree nails look (almost) black, so they won't get darker, but when the deck gets a darker shade, the nails will not stand out as much as they do now. It's just an idea....best do a test swap before you try (and curse me till the end of time for suggesting this). When nothing helps...and you can't live with it....you can drill out the tree nails and use a lighter filler. (same disclaimer). Best of luck. Robin
-
This is fantastic! The mast reminds me of those beautiful splitcane fly fishing rods. Really cool! Robin
-
That's some serious sanding. Looks good! Robin
-
ah! okey...thanks! In Dutch they're called "jufferblokken" and "stagkousen"...with one or 3 holes, still the same name.
- 473 replies
-
- 6
-
-
- greek bireme
- dusek
- (and 1 more)
-
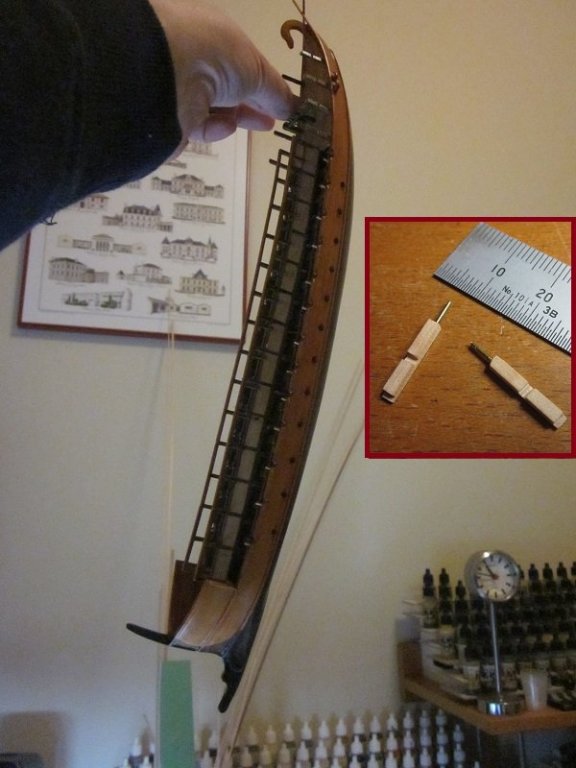
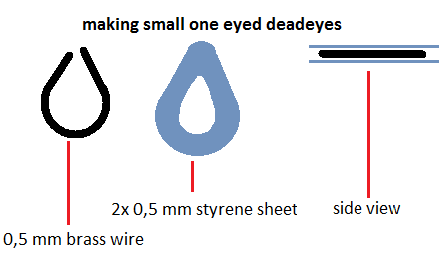
Now busy with the rear deck railing. This will also be slightly different. (who needs a manual anyway? ) And...all the sudden the deadeyes I need become urgent. What I've seen, only one eyed deadeyes were used. It looks like the well know "normal" deadeyes with 3 holes weren't invented yet. I've seen them on the Olympias, but I think they used them for convenience, not because they're period accurate. I need 18 or 20 of these. Small problem....I didn't find the right size ready made. Converted to 1:72 scale...2.5 mm is about the right size, but that's unworkable small. Workable, but still good looking...about 4 mm. I don't think it's doable to make them from wood, so I'll try this.... brass wire in the centre...covered with styrene (Evergreen) sheet. So, the railing, deadeyes...and when I feel like it...the ship's eyes and/or rudders will be next. Oh...and a couple of oars. More soon, Robin
- 473 replies
-
- 8
-
-
- greek bireme
- dusek
- (and 1 more)
-
Italian Boats of the Adriatic Sea
Robin Lous replied to jack.aubrey's topic in Nautical/Naval History
I find this very interesting. Thanks for sharing this Jack. Robin -
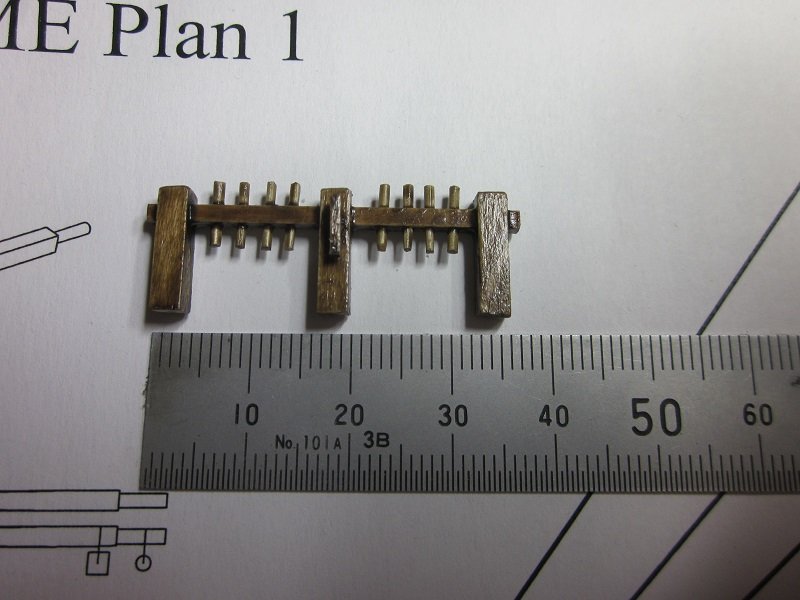
The posts are 3x3 mm, the horizontal beam is 2x2 mm with 1 mm holes for the 1 mm belaying pins...made of thinned down cocktail sticks. The 2x2 mm square holes are in the posts...the horizontal beam is a 1 piece 2x2 mm beam. lenght is 35 mm on the floor + 2x 1,5mm 2 mm beam sticking out on the top. The belaying pins can't fall through the square 2x2 holes, because they're not there.
- 473 replies
-
- 9
-
-
- greek bireme
- dusek
- (and 1 more)
-
With 2 mm pins your calculation is spot on...only...the pins are 1 mm.
- 473 replies
-
- 6
-
-
- greek bireme
- dusek
- (and 1 more)
-
Your planking looks great and the whole thing looks very sharp and clean. Robin
- 165 replies
-
- 4
-
-
- finished
- model shipways
- (and 1 more)
-
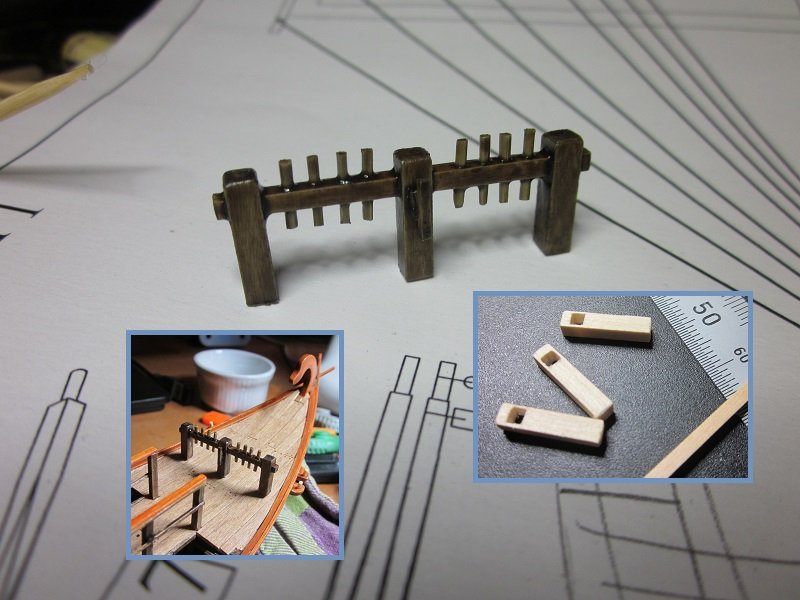
Two updates the same day...unheard of! The pin rail. I managed to make 2 mm square holes in 3x3 mm beams. Wood is wonderful stuff! The rail is 35 mm long. Still a dry fit on the deck. I'll pin it, but I displaced my stash of brass rods. Time to tidy my room I guess. More soon, Robin
- 473 replies
-
- 9
-
-
- greek bireme
- dusek
- (and 1 more)