
Supplies of the Ship Modeler's Handbook are running out. Get your copy NOW before they are gone! Click on photo to order.
×


Robin Lous
-
Posts
564 -
Joined
-
Last visited
Content Type
Profiles
Forums
Gallery
Events
Everything posted by Robin Lous
-
 I used that kind of wood filler also. When you want you can add a few drops of water to it to make it more workable and to get it into smaller gaps more easily. Robin
 -
Thanks gentlemen! Finished the oar ropes and tension cable on the other side and the top row seats. Back to the pin rail I mentioned before. When I done that I can do the rear deck railing. More soon, Robin
- 473 replies
-
- 11
-

-
- greek bireme
- dusek
- (and 1 more)
-
Clutter is good! I want you all to show more clutter! ....so I don't have to feel bad about mine
- 305 replies
-
- 3
-
-
- deagostini
- vasa
- (and 1 more)
-
Neat! I'll pay good attention to what you do with the masts and rigging, because I need to learn about that sooner or later. Specially with my future Duyfken build in mind. Btw....I really like that shade of blue you used. Robin
- 608 replies
-
- 5
-
-
- la couronne
- corel
- (and 1 more)
-
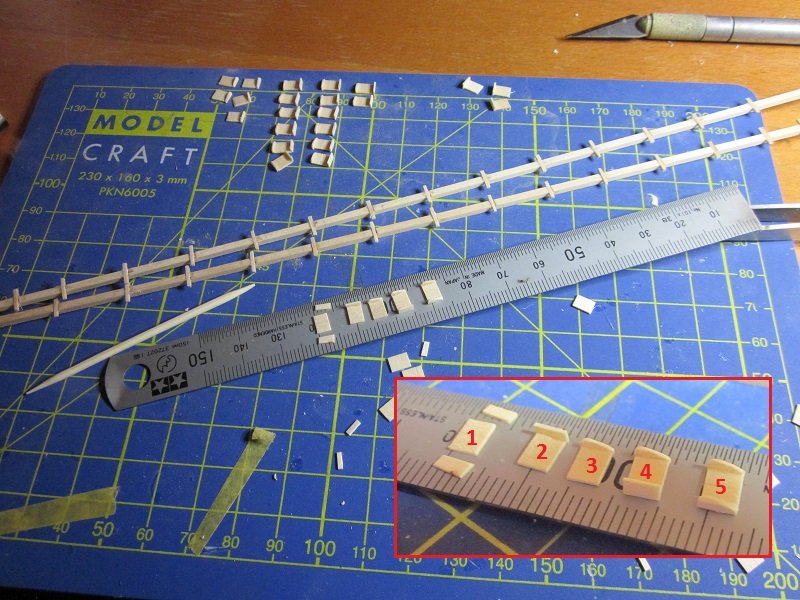
Hi there! I'm not slacking, it's just these darn seats take time to make. It's 0,5 mm thick linden wood...kinda fragile. It's 5 stages to make them. 26 needed for the top rows. My eyes go on strike after half an hour when I do this, so it's several short visits to my workbench now. I guess I get it done on friday and this weekend (that's sunday and monday for me...I work on saturday) I hope to finish the large pin rail also and....I want to paint the ship's eyes this weekend! That's probably the most scary part of the build, but also looking forward to it. I hope I get that right. More soon, robin
- 473 replies
-
- 10
-
-
- greek bireme
- dusek
- (and 1 more)
-
Welcome aboard Bob! Robin
-
Good show Russ! Robin
-
Long...long time ago Was fun to paint a complete army of these funny guys. More or less the same method.
-
Looks good and looks scary! Isn't it difficult to get something like that straight? Those small pointy things sticking out. I can see myself knock them off faster than I can build them. Robin
- 608 replies
-
- 3
-
-
- la couronne
- corel
- (and 1 more)
-
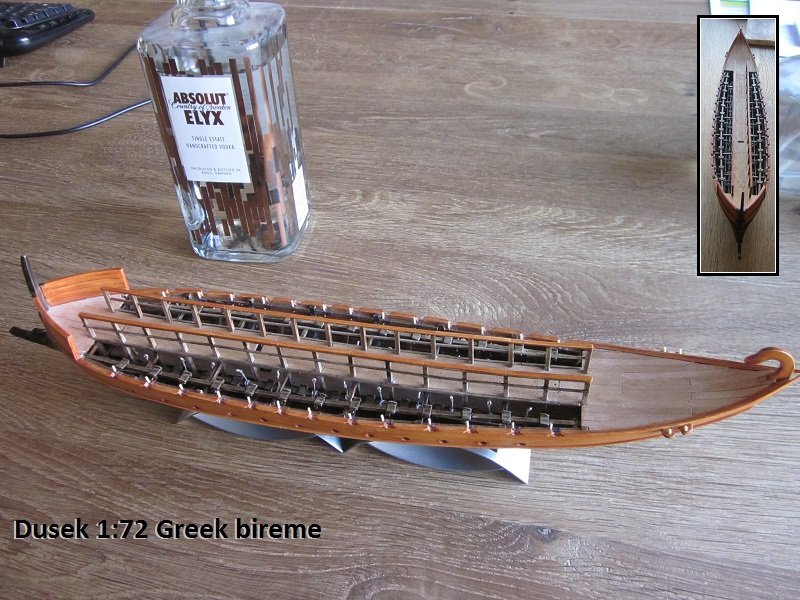
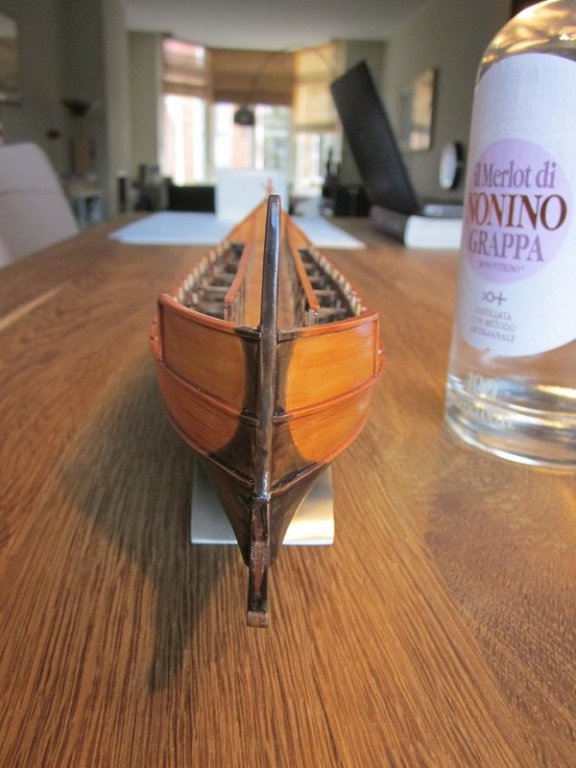
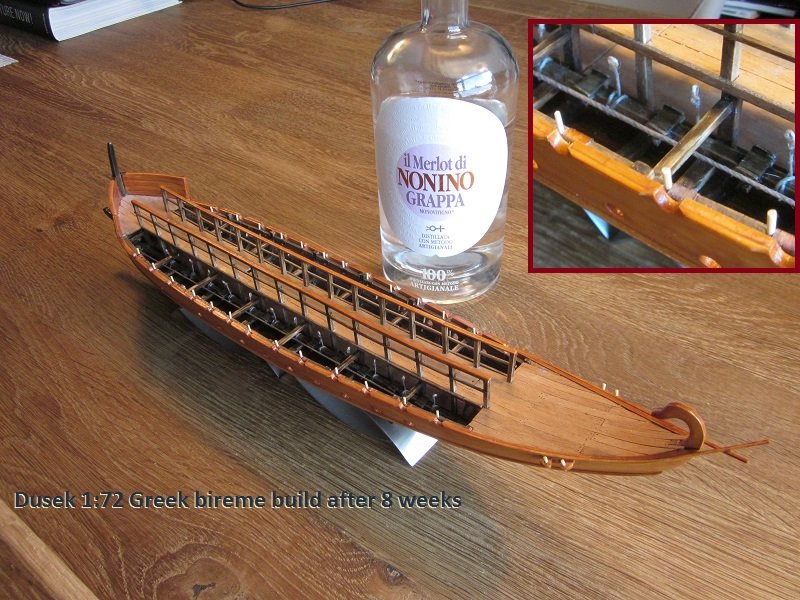
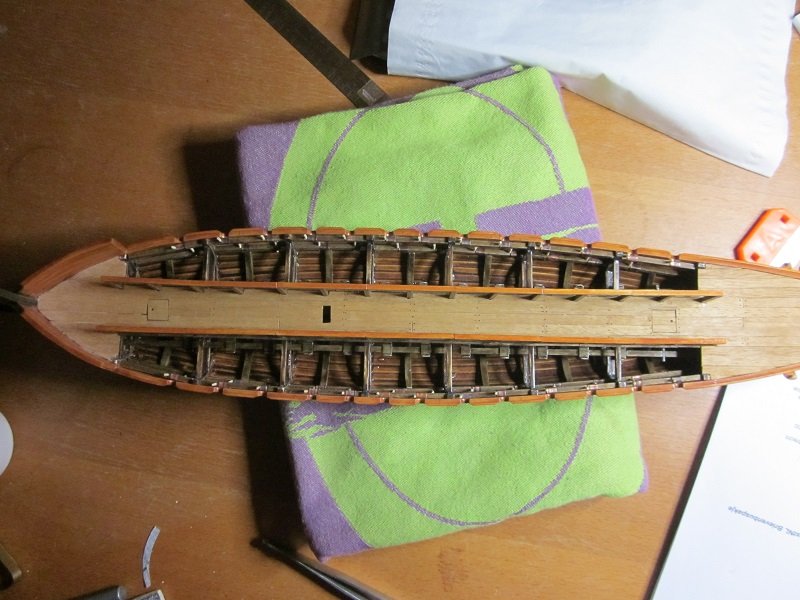
Thanks again guys, Something new to show. I hoped for more, but I underestimated the amount of work again. What else is new? Finished the oar ropes and tensioning cable! err...one side only that is. I hoped to finish both sides and the top rower seats today, but...well...it took longer than expected. Working for 8 weeks on it now. That's not even that much, but I work on it for several hours per day, so not a quick build. Not for me anyway. One more photo...to show the effect of staining part of the bow with ebony. And....I know...the lower wales don't end at the same height. Stupid mistake, but I discovered it too late. Luckily the copper root of the ram will hide it, but still...poor! So, I'll continue with what I done now...and those bloody rower seats. Oh...and I'll do another modification. A fabric (canvas?) sun/rain roof in stored position. The roof was pulled out from the centre deck railing to the side to protect the rowers from the sun and rain. Also used in battle to offer protection from arrows and stones. More soon, Robin
- 473 replies
-
- 12
-
-
- greek bireme
- dusek
- (and 1 more)
-
I don't think you need to worry about sufficient head room, they didn't build for comfort. I've seen decks with even less head room (Batavia). Love your build! Robin
- 756 replies
-
- 2
-
-
- galleon
- golden hind
- (and 2 more)
-
Maybe contact Artesania Latina? Best of luck! Robin
-
Only one glass of white wine. I'm also curious about how it will turn out, but with all the oars in place...not much will be visible of what I do now. Still not wasted, because all the extra interior bits I added (deck, beams, posts, seat detail, tholepins and what more... will make it look more busy and hopefully more realistic. Less boring for sure! Not done much today...the Admiral nuked my shipyard time. We visited friends. Grumpf! More soon though, Robin
- 473 replies
-
- 6
-
-
- greek bireme
- dusek
- (and 1 more)
-
Pfff! What is cheating anyway? Strictly anything different than scaled down original materials and not made the traditional way is cheating. Even the use of electric light, modern glue and (power) tools. Not to mention resin, brass and photo etched details...it's all cheating. Anyone not cheating can raise his hand now.
- 473 replies
-
- 5
-
-
- greek bireme
- dusek
- (and 1 more)
-
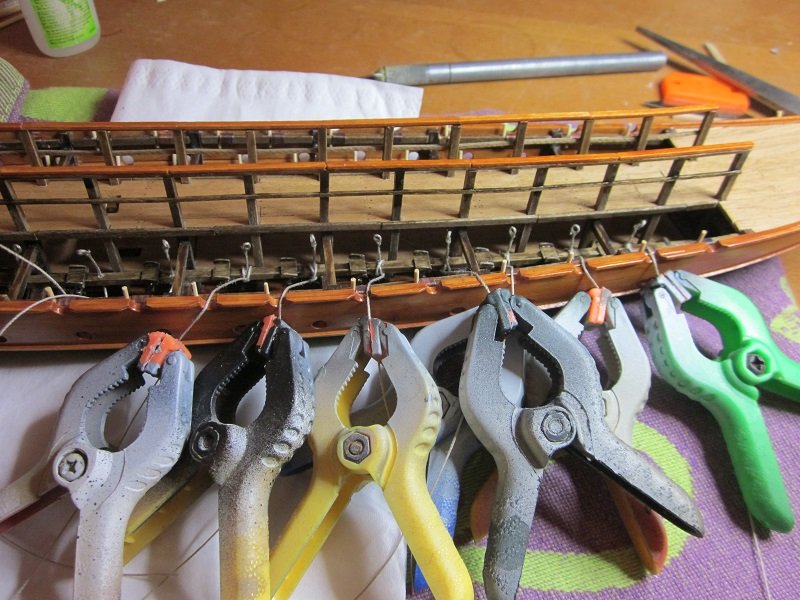
Figuring out how to get the ropes on the beam caused me a headache. The main issues. How to get them tied neatly to a beam you can hardly reach and how to get the lenght right while doing that? I tried, but I didn't manage to get it right. Was busy until dawn trying and thinking how to get it done. Went to bed without finding a solution. Woke up and found the solution after my first cup of coffee! Cheat! When you can't go round...go through! The solution: Drill a 0,5 mm hole through the beam where the rope (0,25 mm) must be. Rope through the hole...secure with a tiny drop of glue to get the exact lenght right....wrap end of the rope around the beam to make the loop. Drop of CA glue on the underside...cut off remaining rope. It's cheating, but that won't be visible, so it's allowed. Robin
- 473 replies
-
- 9
-
-
- greek bireme
- dusek
- (and 1 more)
-
That's an understatement...they look really good! Robin
- 68 replies
-
- 4
-
-
- Arleigh Burke
- BlueJacket Shipcrafters
- (and 1 more)
-
Libations...I had to Google that word! Let's say I focus on enjoying the quality...not the quantity. Tonight was a relaxed shipyard evening....only some dry fitting, research and thinking about what, when and how to do things. That does count as shipyard time also? And..with a nice espresso and a glass of Armagnac! Robin
- 473 replies
-
- 7
-
-
- greek bireme
- dusek
- (and 1 more)
-
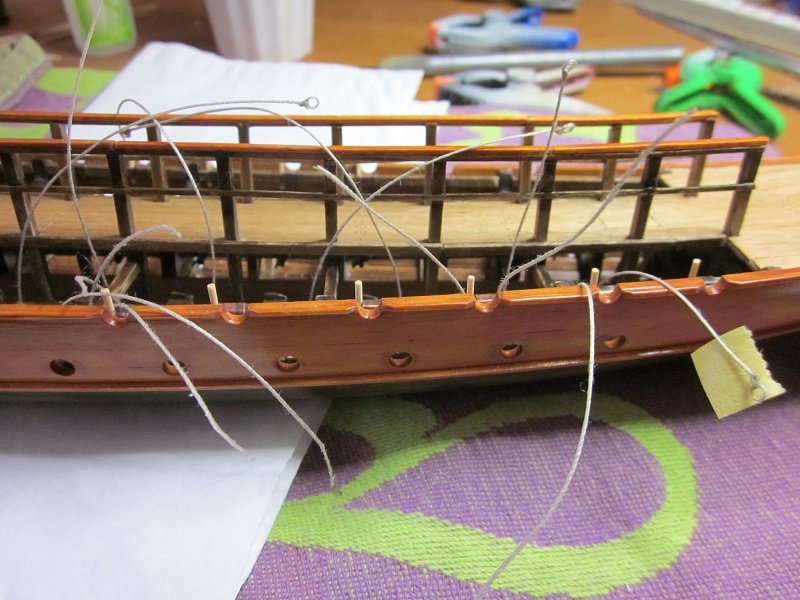
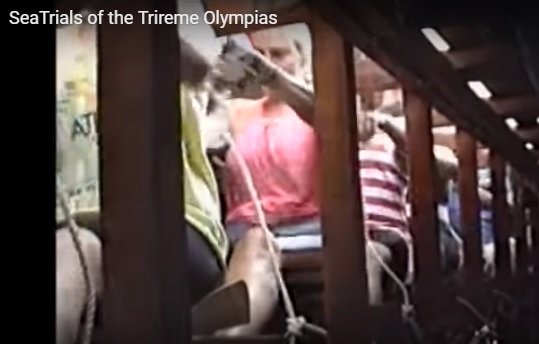
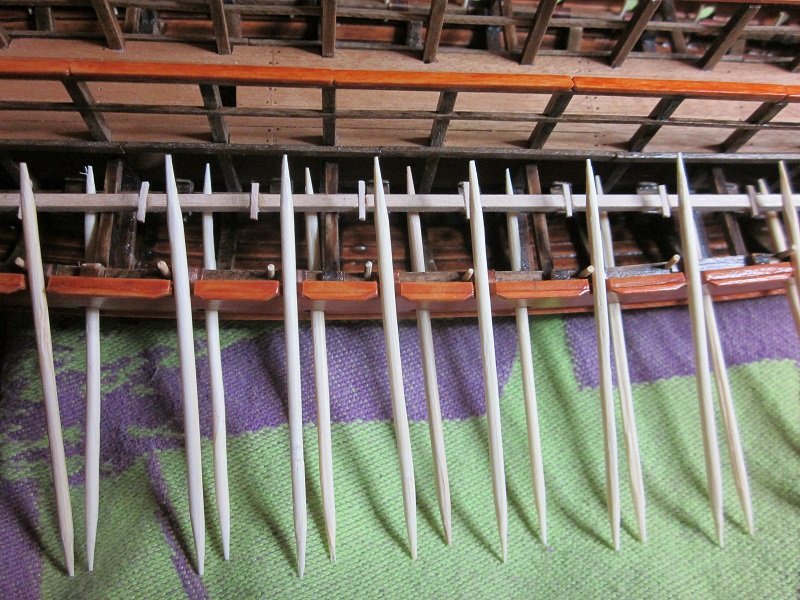
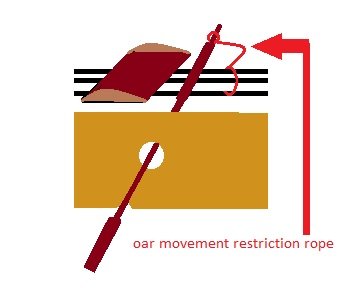
Thanks guys, A bit more about the "oar movement restriction ropes" (OMRR in the Hellenic ship builders and crew manuals...okey...I made that up ). I've seen them on the Olympias lower oars... For some reason only on the lower oars, not on the centre and top oars. Perhaps it's because the complete lack of situational awareness there, but I'm not sure. During the sea trials the rowers there often mentioned they had no clue about what was going on, so it does make sense. Perhaps these ropes were also used on other levels, but not on the Olympias. Making these ropes isn't tough. I can tie them to the seat beams and a nice little loop goes over the oar handle bar. Something like this... but.... Whatever I do...they must go on before I place the top seat beam...or it will become a nightmare job. It will still be daunting to get them on the oar handles when it's time to place them! So...I do this on the side tomorrow. More soon, Robin
- 473 replies
-
- 10
-
-
- greek bireme
- dusek
- (and 1 more)
-
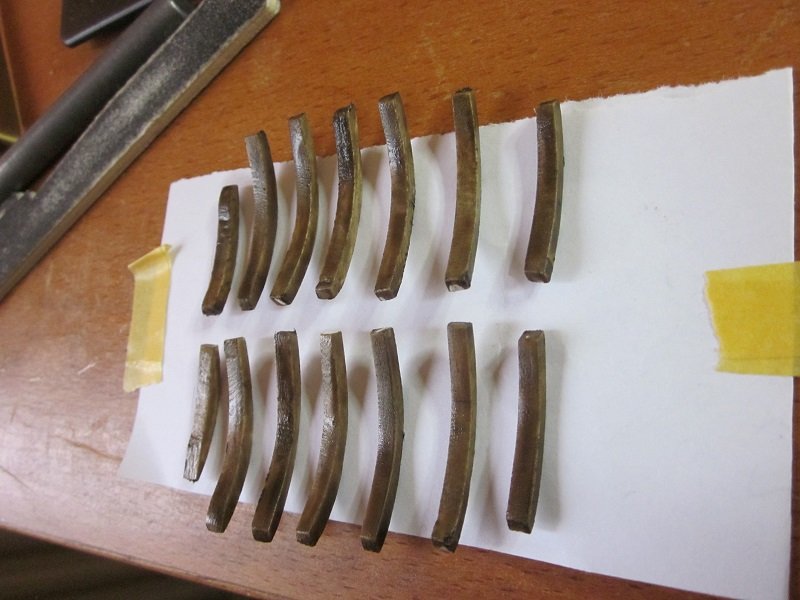
I expected to need a long time to finish the extra frames. 14 ribs...each one made to measure individually, but it went fairly easy. looks a bit like the rib cage of a dug up Neanderthaler. But the 14 extra ribs make the hull interior look more realistic. I think it was worth the extra 2 days. Tomorrow I'll do the tensioning cables and top rower seats....and perhaps the pin rail. More soon, Robin
- 473 replies
-
- 13
-
-
- greek bireme
- dusek
- (and 1 more)
-
After the base wood colour you can also use Vallejo transparent wood stain acrylic paint. And there also transparent woodgrain waterslide decals from Ushi van der Rosten, but you need to be familiar with decals and Microsol to make that work.
-
Liverpool...once the centre of the shipping universe...and no decent model shop. What has become of this world
-
There must be a model shop in Liverpool.
