BenD
-
Posts
477 -
Joined
-
Last visited
Content Type
Profiles
Forums
Gallery
Events
Everything posted by BenD
-

HMS Snake by BenD - Caldercraft - 1:64
BenD replied to BenD's topic in - Kit build logs for subjects built from 1751 - 1800
I made my own banner/Logo with the help of Microsoft paint and a bit of magic from a photoshop editor called GIMP. I think it's decent given that it wasn't professionally made. What do you guys think?
-
HMS Snake by BenD - Caldercraft - 1:64
BenD replied to BenD's topic in - Kit build logs for subjects built from 1751 - 1800
Do you mean coils or rope hanks? Do you really think people would buy that? -
HMS Snake by BenD - Caldercraft - 1:64
BenD replied to BenD's topic in - Kit build logs for subjects built from 1751 - 1800
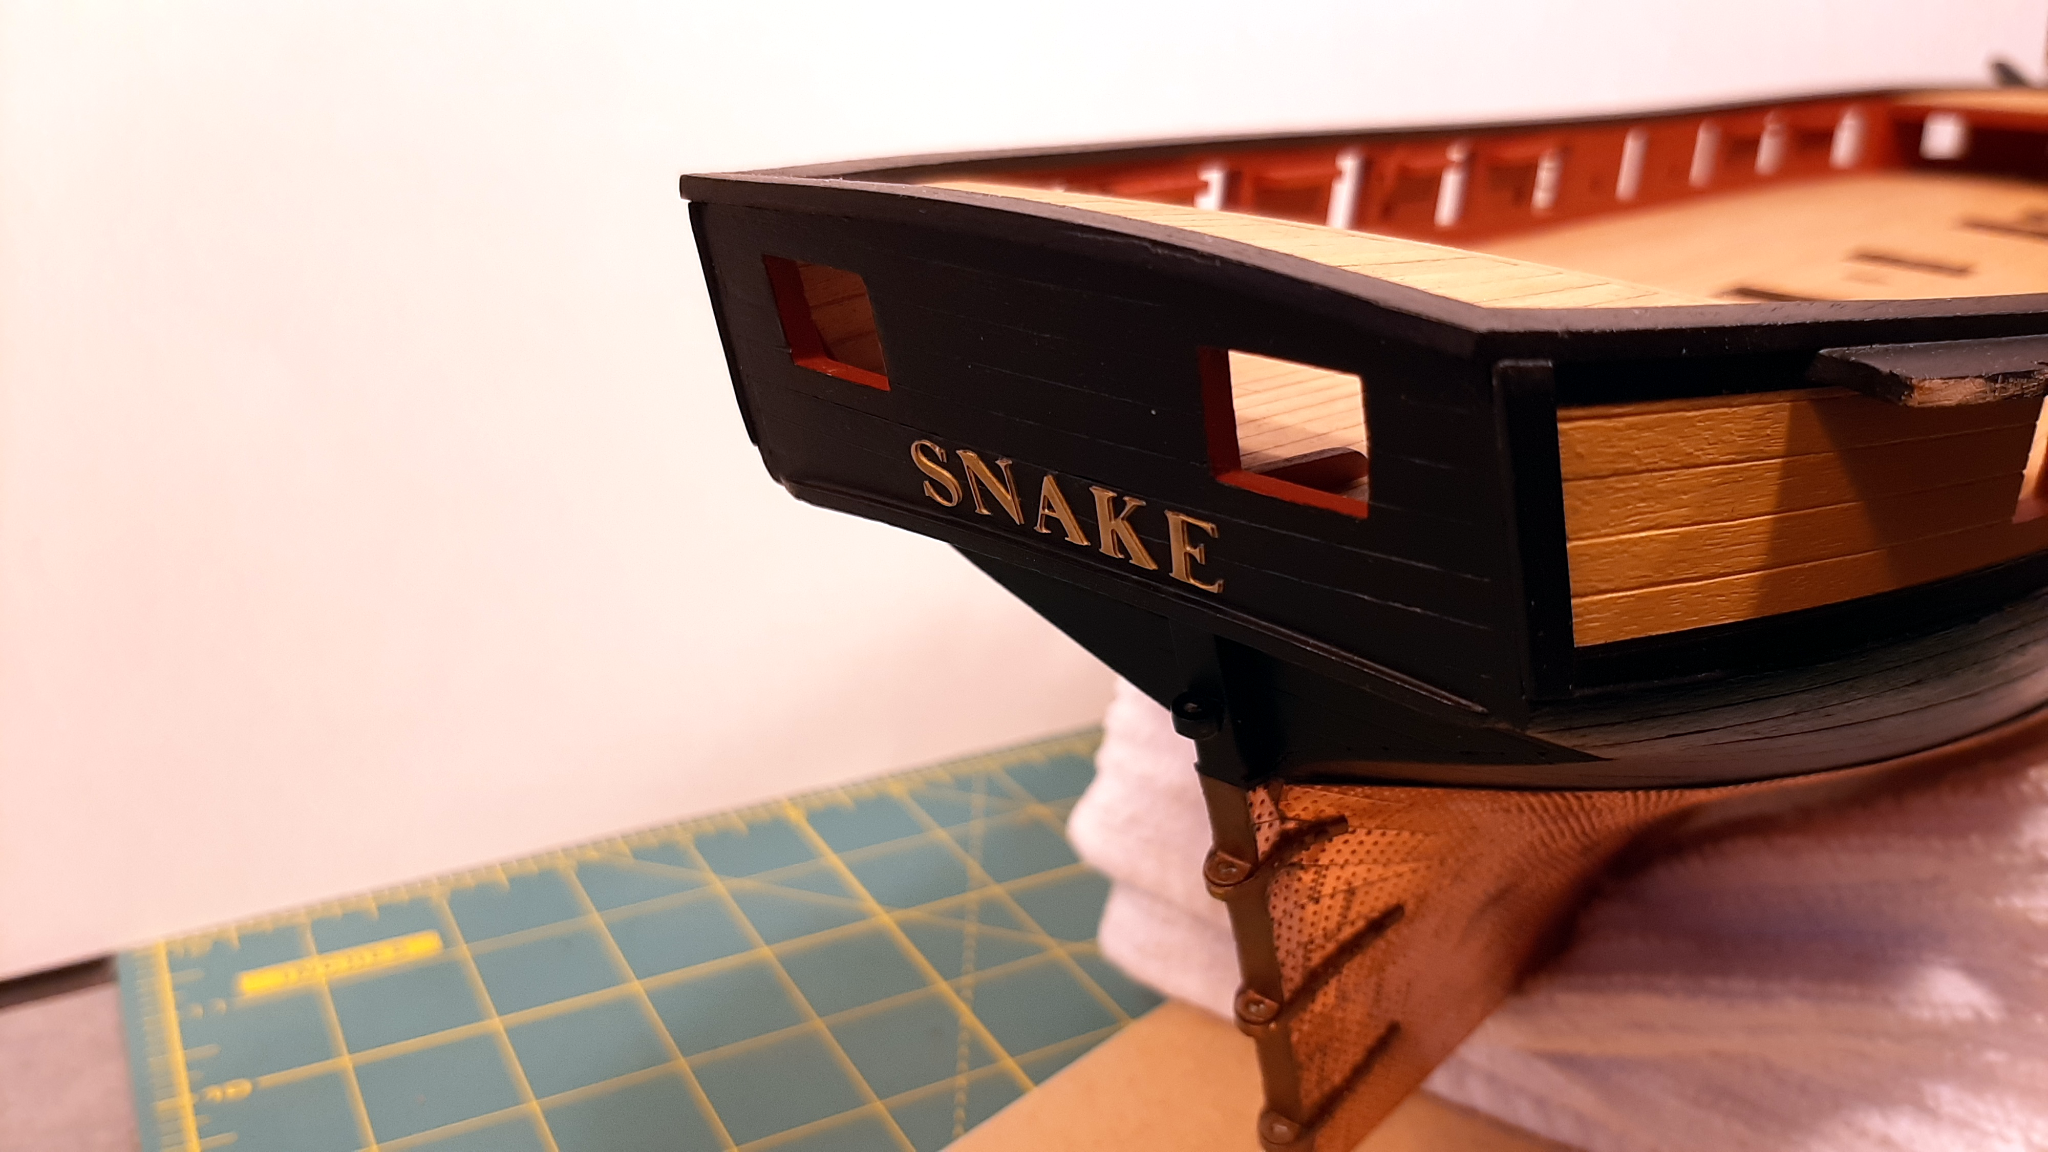
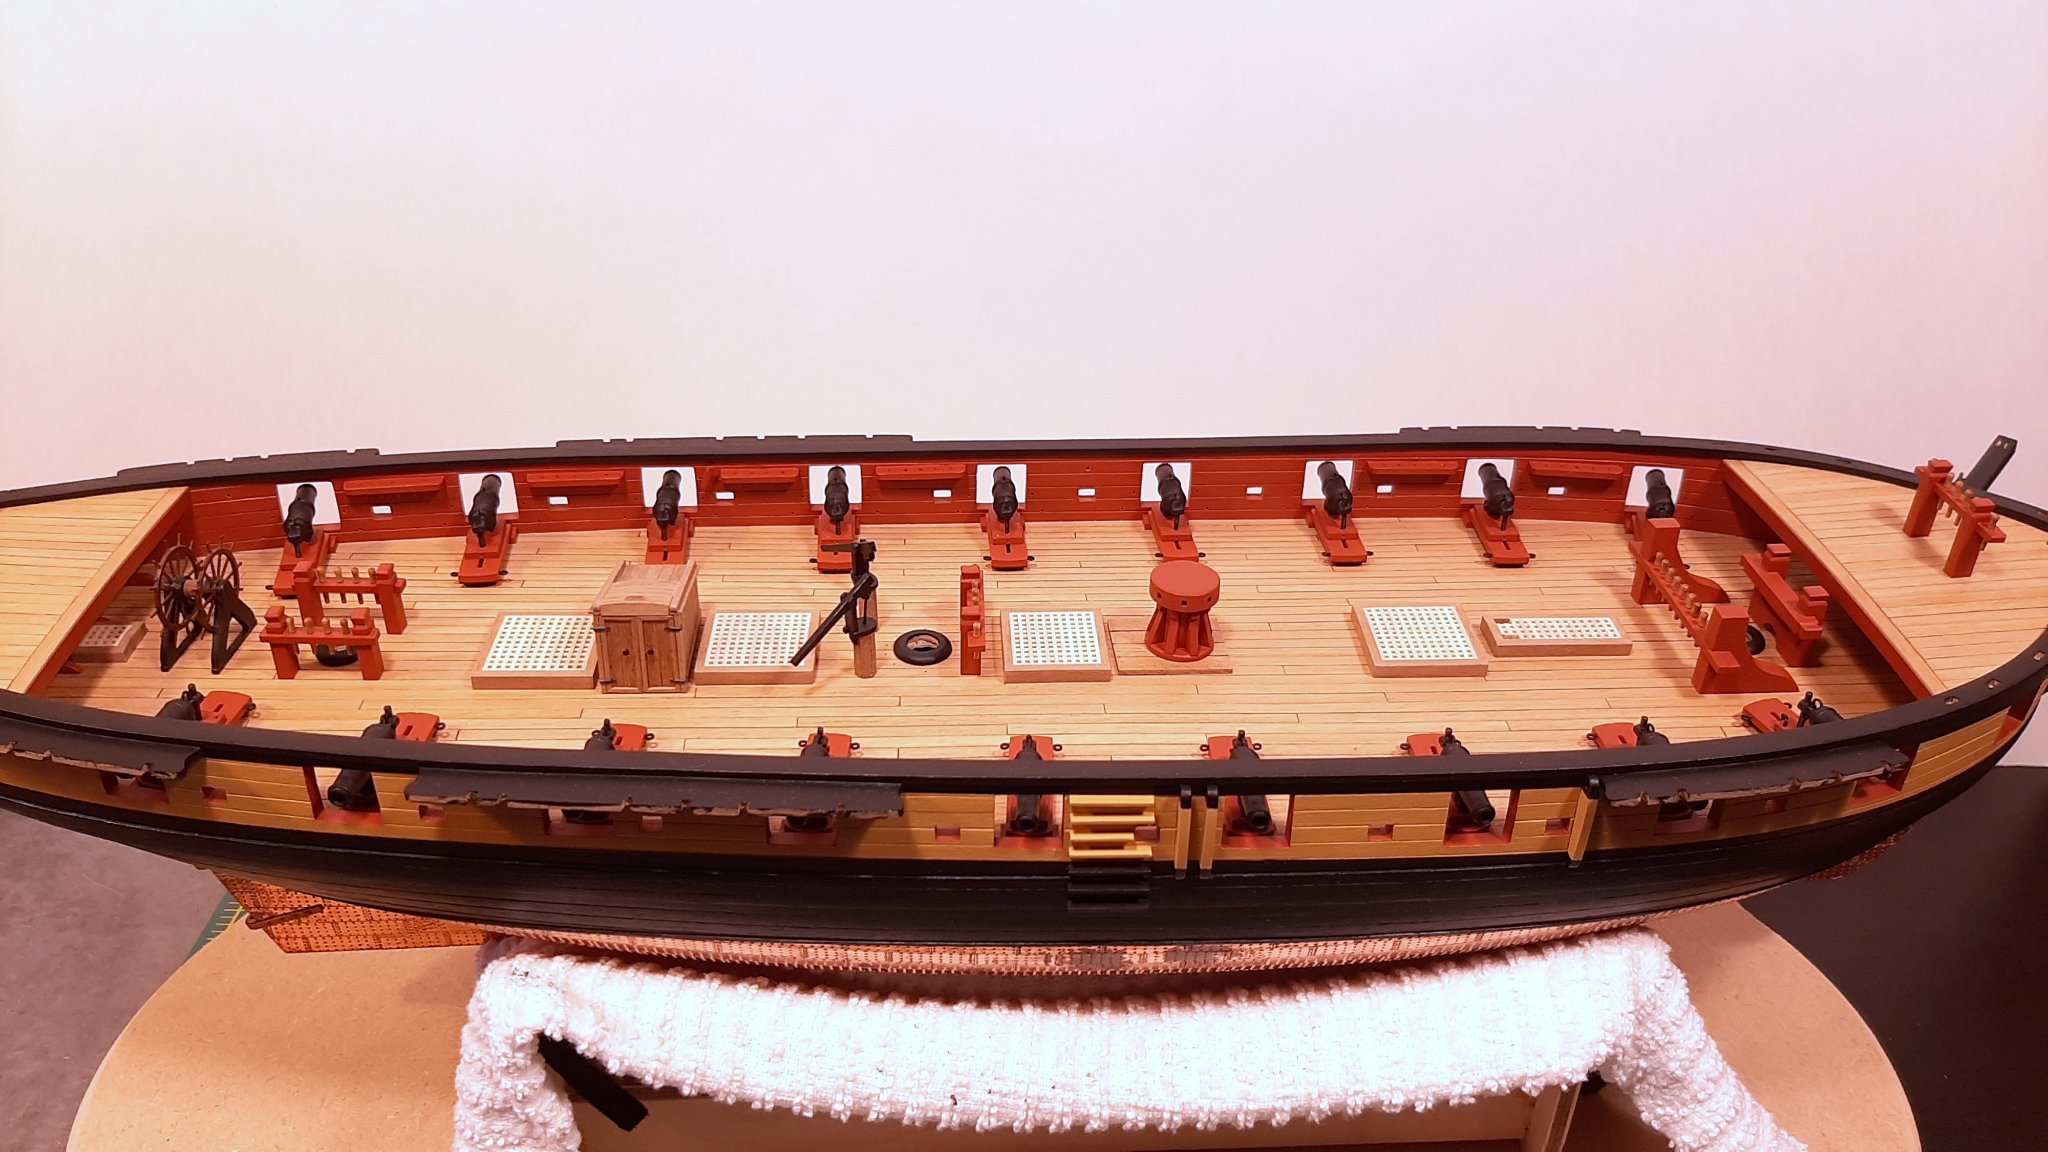
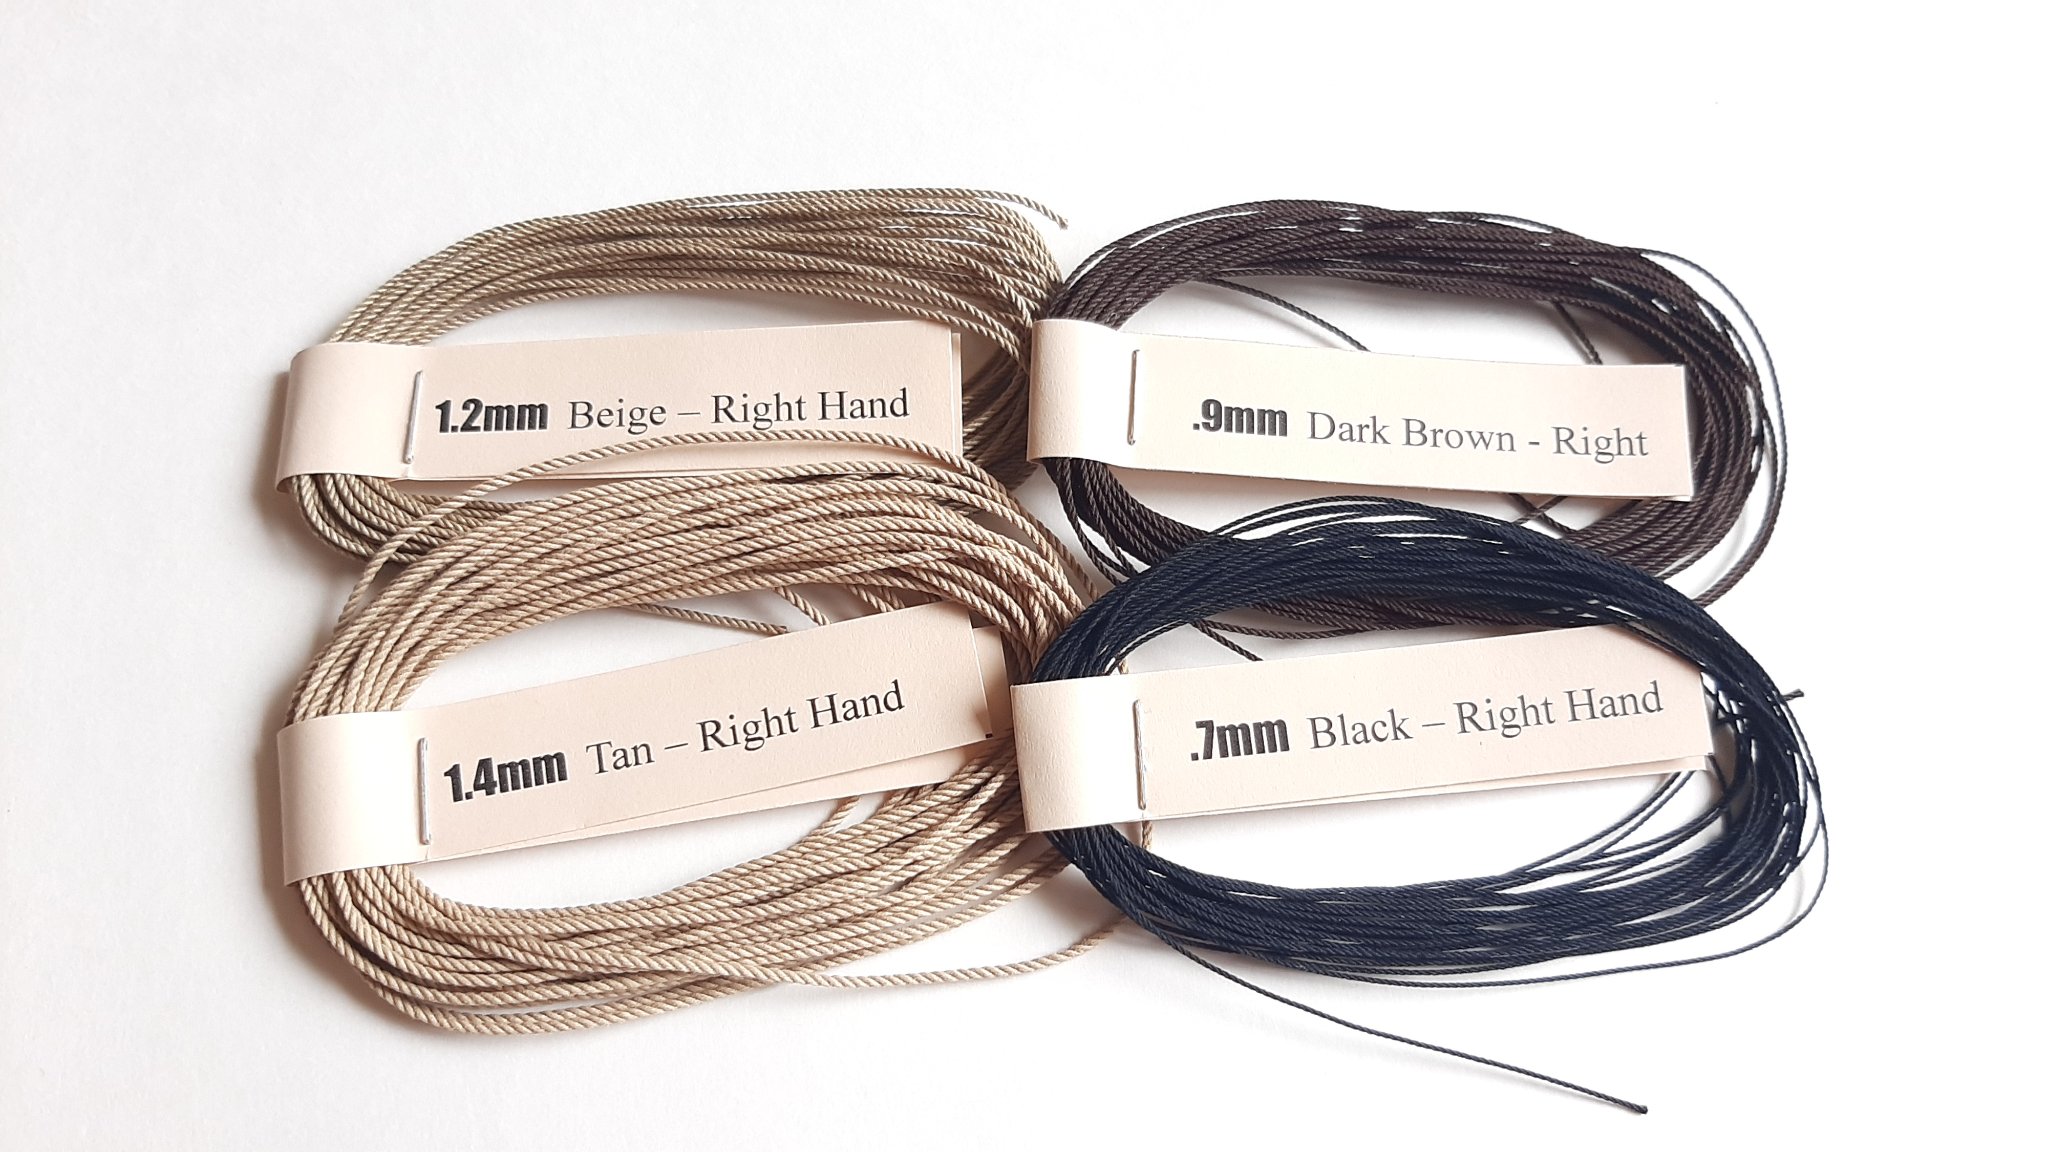
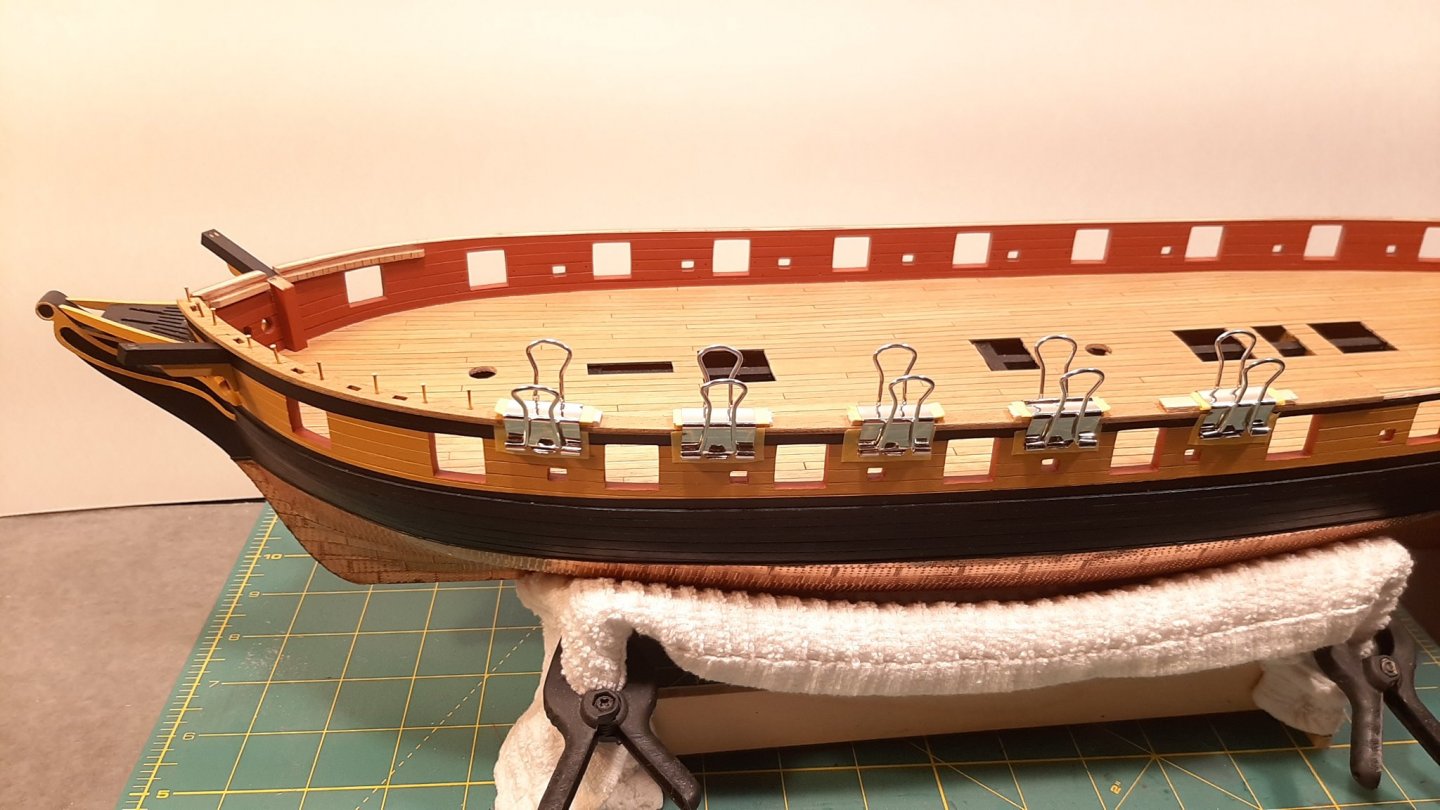
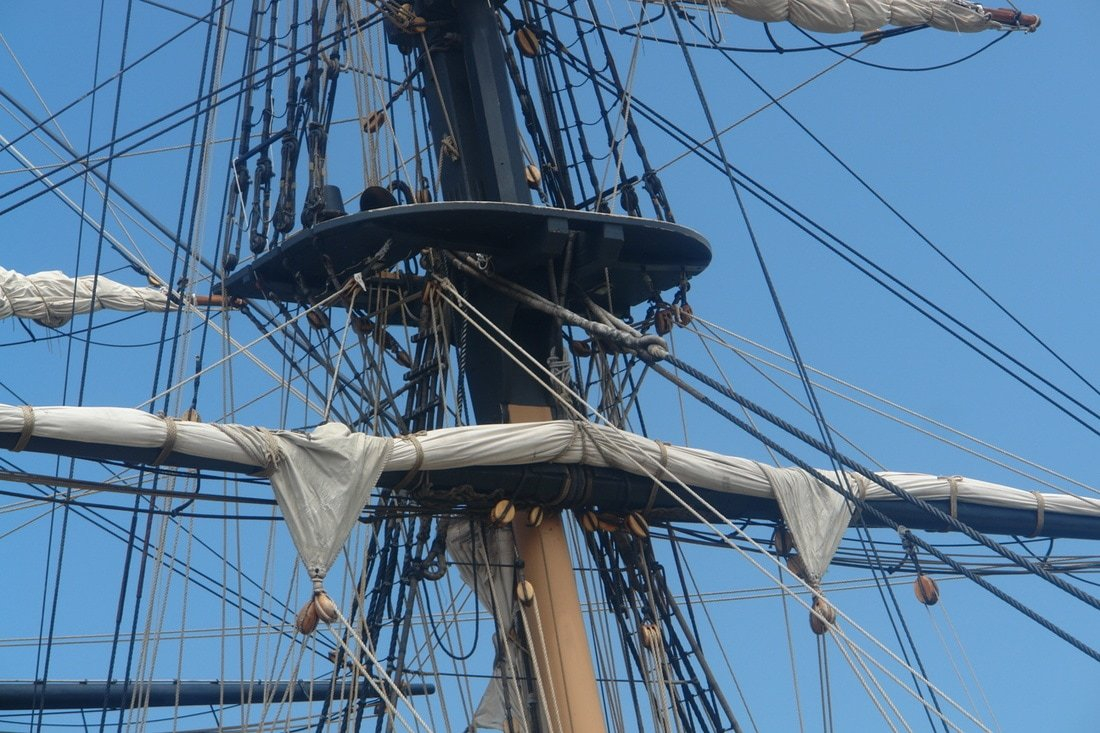
I don't know why this kit doesn't come with letters for the stern or even a stencil. I purchased the letters from Cornwall model boats. They are Amati's 6mm brass photoetch letters. I think they only deck fittings left to do are the shot racks and the ladders for the platforms. Nothing is glued in yet, Not until the rest of the various holes have been drilled. The masts and yards are under construction. I'm going to be rigging the Snake with the option on the right. The middle is a good option as well. I was going to add the left color to my production line but it looks a little off in my opinion. I may add it later if people want something a little darker.

-
Welcome to Model Ship World. The Sherbourne is a really good place to start.
-
That price is justifiable considering the amount of parts and that it looks incredible. Looks like you need a second laser cuter.
- 355 replies
-
- 6
-

-
- vanguard models
- Sphinx
- (and 1 more)
-
THE DAY HAS ARIVED! Your kits are top notch and I have no doubt you made the right decision. Looking forward to your future developments! (HMS Indefatigable please!)
-
Dying/coloring rope; sources for purchase of quality rope
BenD replied to Tomculb's topic in Masting, rigging and sails
As far as I know polyester only sags over time and isn't highly affected by moisture. The baking is to "set" the rope so it doesn't unravel. Another problem with polyester is the shiny texture. -
Dying/coloring rope; sources for purchase of quality rope
BenD replied to Tomculb's topic in Masting, rigging and sails
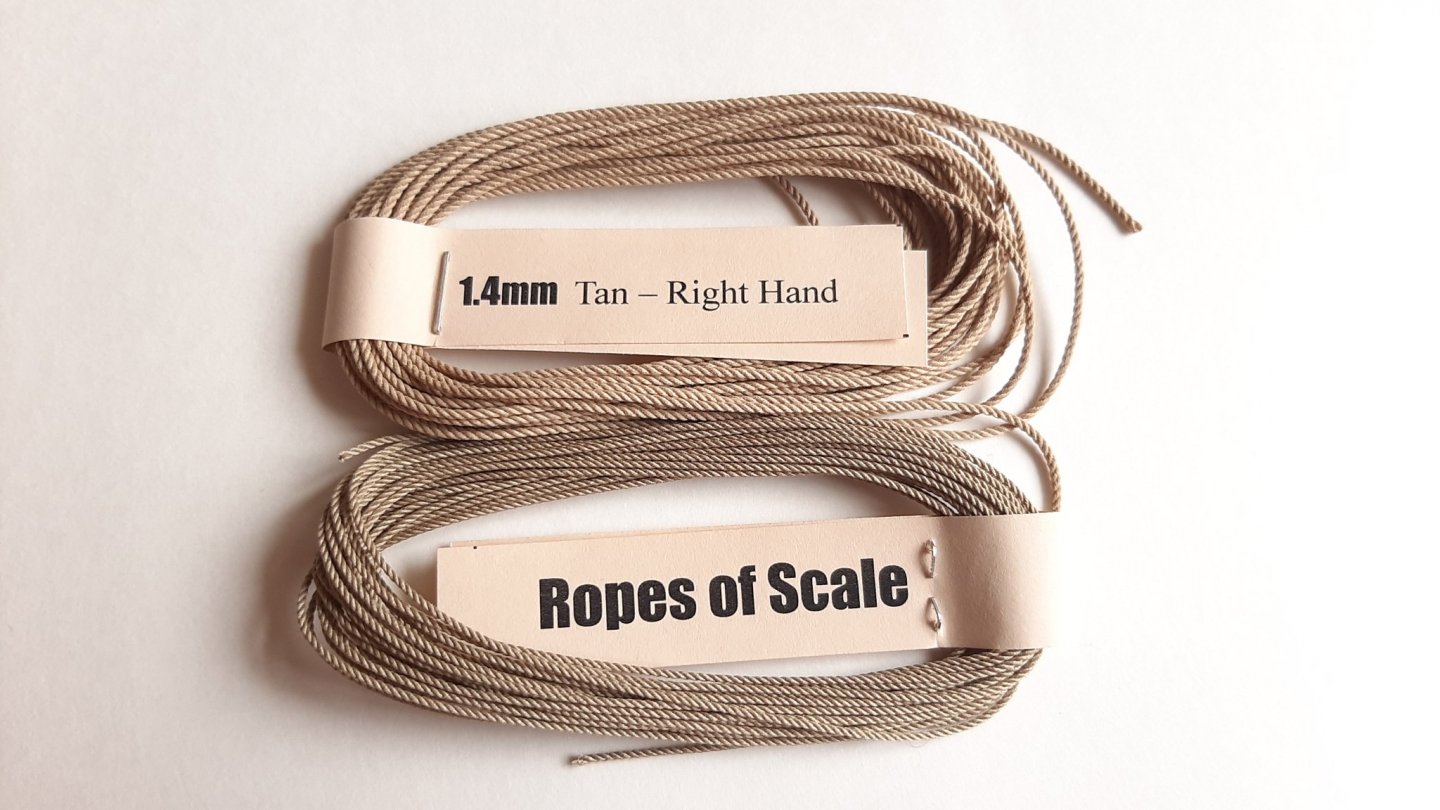
I'm going to be selling rope very soon. I'm hoping to open by the end of the month, Possibly early July. I'll be on the sponsors list. Synthetics tend to do this unless you bake it afterward. My rope does not unravel like this. When you cut it with a sharp blade it will go through a rigging block without unraveling. Ease of use was one of my main concerns along with color and texture.

-
Welcome back. I remember enjoying your Bounty build.
-
HMS Snake by BenD - Caldercraft - 1:64
BenD replied to BenD's topic in - Kit build logs for subjects built from 1751 - 1800
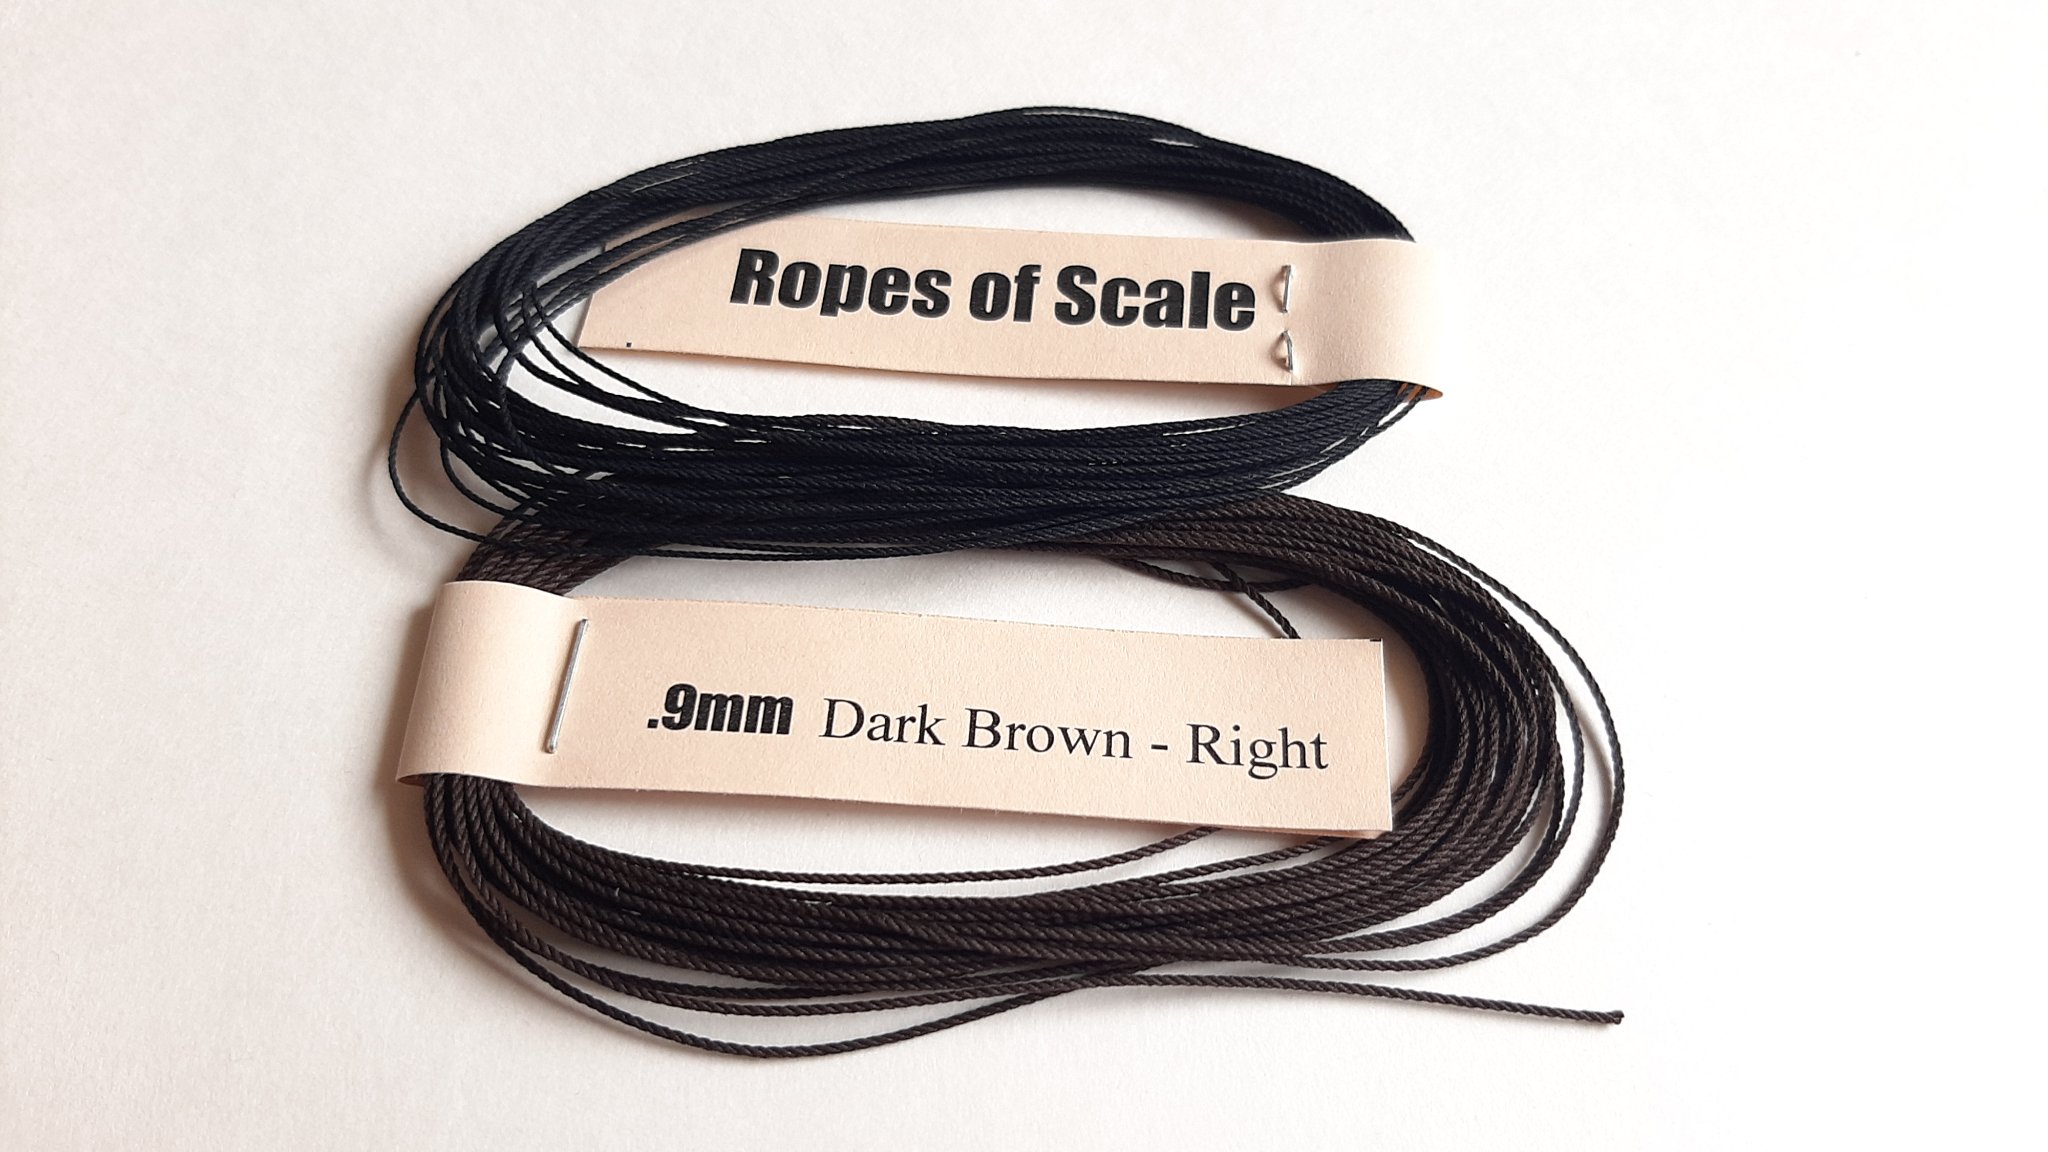
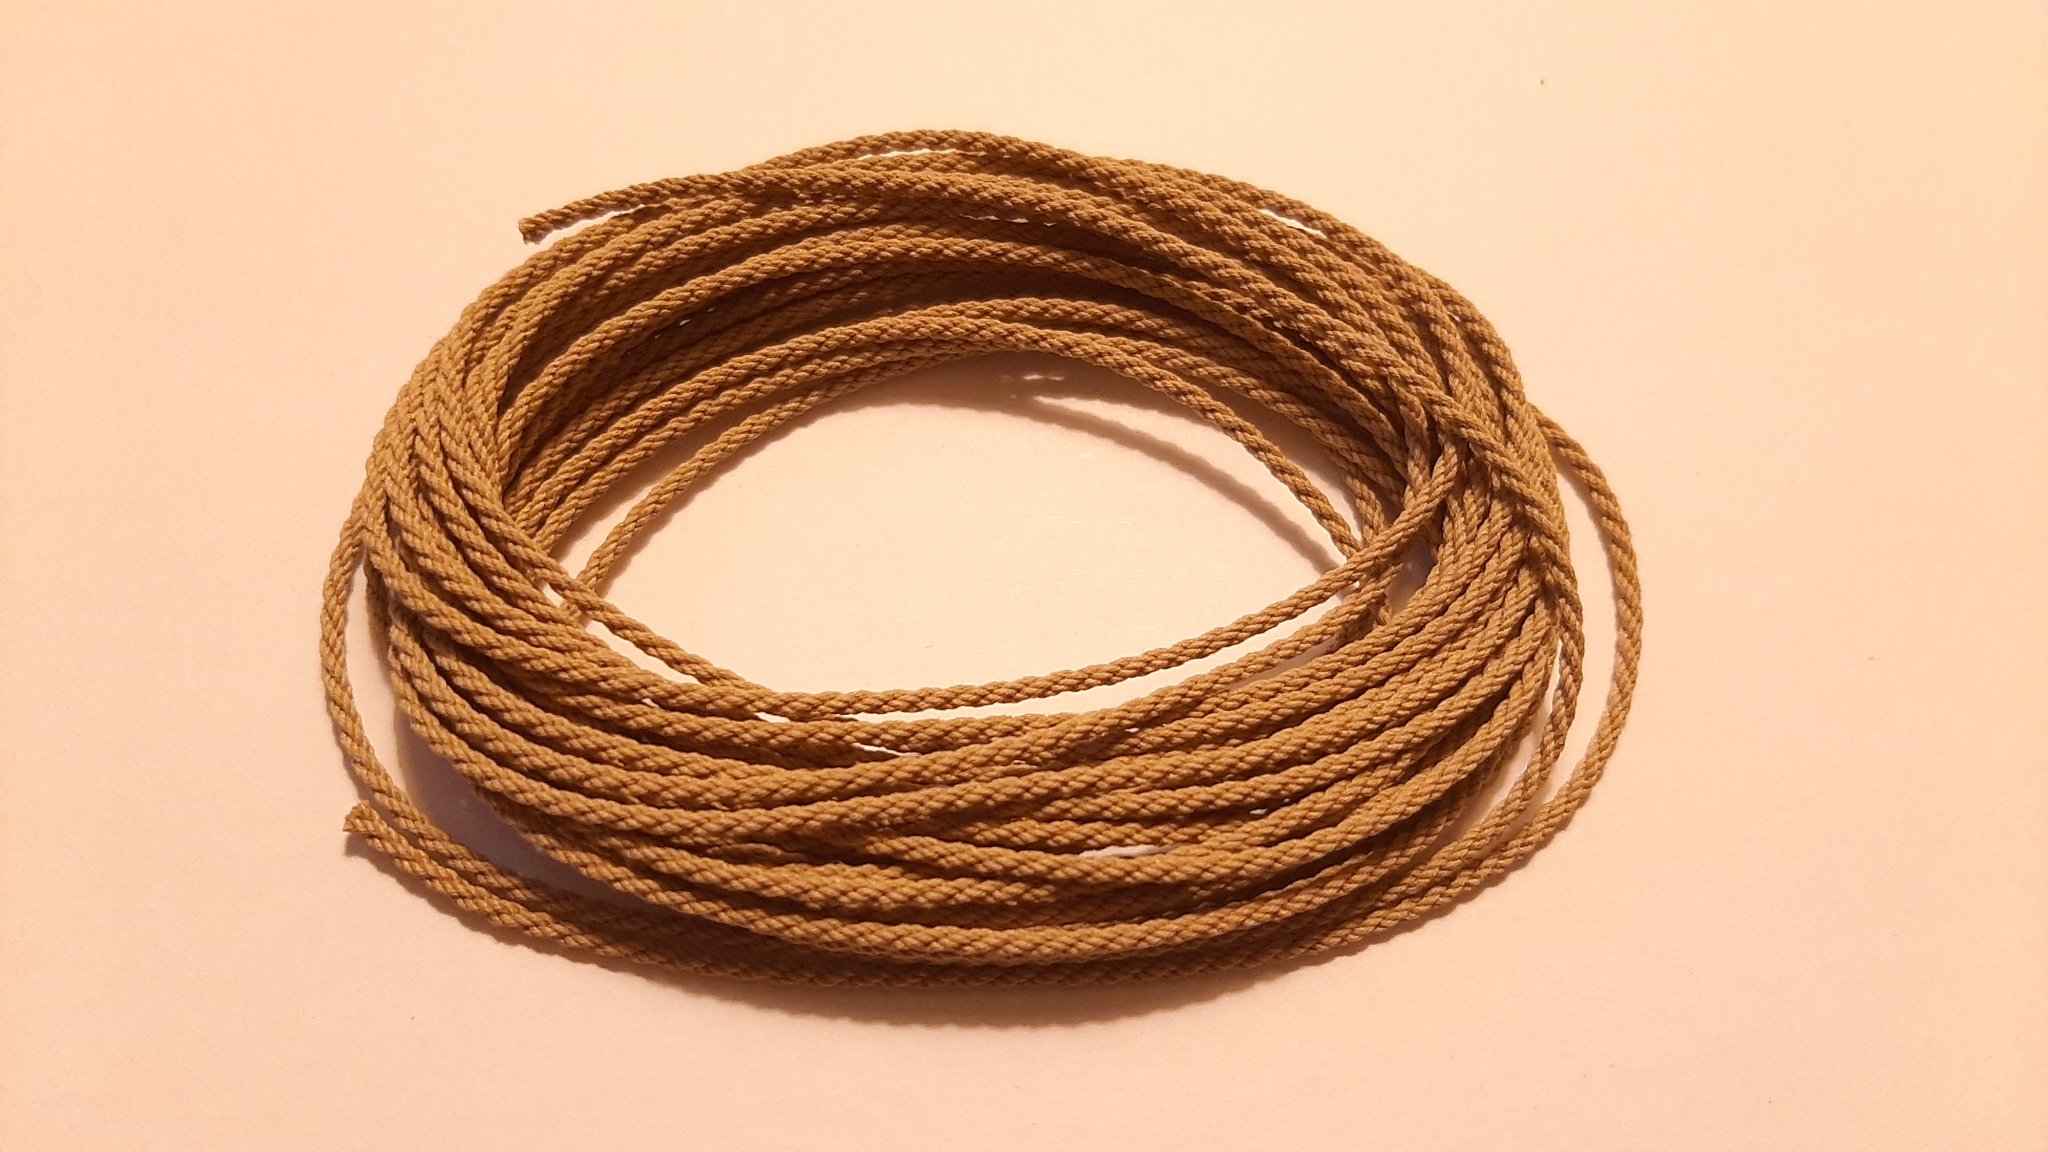
I am quite excited really. I'm making about 20-30 ropes a day now to build up an inventory. I plan on adding cable-laid ropes after opening and should have sizes from .8mm to 3mm. I think having a large variety of colors and sizes is key. I think the running rigging colors I have are a bit lighter than what Chuck had. I will be adding a light brown running rigging to the inventory eventually, That one will probably be close to what he had. The dark brown standing rigging is probably darker than his was but I like it. For standing rigging, I will be adding dark grey and possibly a medium brown later on. These ropes are made with 100% Mako Cotton. I plan on adding synthetics to my inventory eventually. -
HMS Snake by BenD - Caldercraft - 1:64
BenD replied to BenD's topic in - Kit build logs for subjects built from 1751 - 1800
I've been working on rope more than the Snake lately. After completing my fourth ropewalk and much experimenting I'm just about ready to release my line of rope. The site is being worked on and should be up soon. There will be more details upon release when I become a model ship world partner and can post in the trader forum. I'm looking to buy a better camera because the camera on my phone just doesn't do close-ups well. Here are a few pictures.

-
I'm working on that and hope to bring rope to all of you soon. This model deserves some good rope and blocks for sure.
- 355 replies
-
- 8
-
-
- vanguard models
- Sphinx
- (and 1 more)
-
This is extraordinary. I don't think I've seen a kit look like this!
- 355 replies
-
- 6
-
-
- vanguard models
- Sphinx
- (and 1 more)
-
like he said. This kit is something special, There is so much detail and complexity but it looks deceptively easy to build.
- 355 replies
-
- 5
-
-
- vanguard models
- Sphinx
- (and 1 more)
-
This is turning out nicely! The crew on deck really brings it together. I only bought two of the Amati sailors you have, seeing this I think I may get the rest.
-
Thinning the paint you are using will help. Acrylics tend to mostly need water and a bit of flow improver if needed. Don't apply the paint in thick glops but in a thin film and do 3+ coats. Getting a near airbrush finish is possible with some practice. What paints are you using?
-
HMS Snake by BenD - Caldercraft - 1:64
BenD replied to BenD's topic in - Kit build logs for subjects built from 1751 - 1800
Mike thanks, Yes rudder straps not anchor straps lol 😆 late night posting. AJohnson, The platforms just slide right in and are held by the 1mm overhang. I wanted the crooked buggar rails on before adding anything else so I didn't damage anything. -
HMS Snake by BenD - Caldercraft - 1:64
BenD replied to BenD's topic in - Kit build logs for subjects built from 1751 - 1800
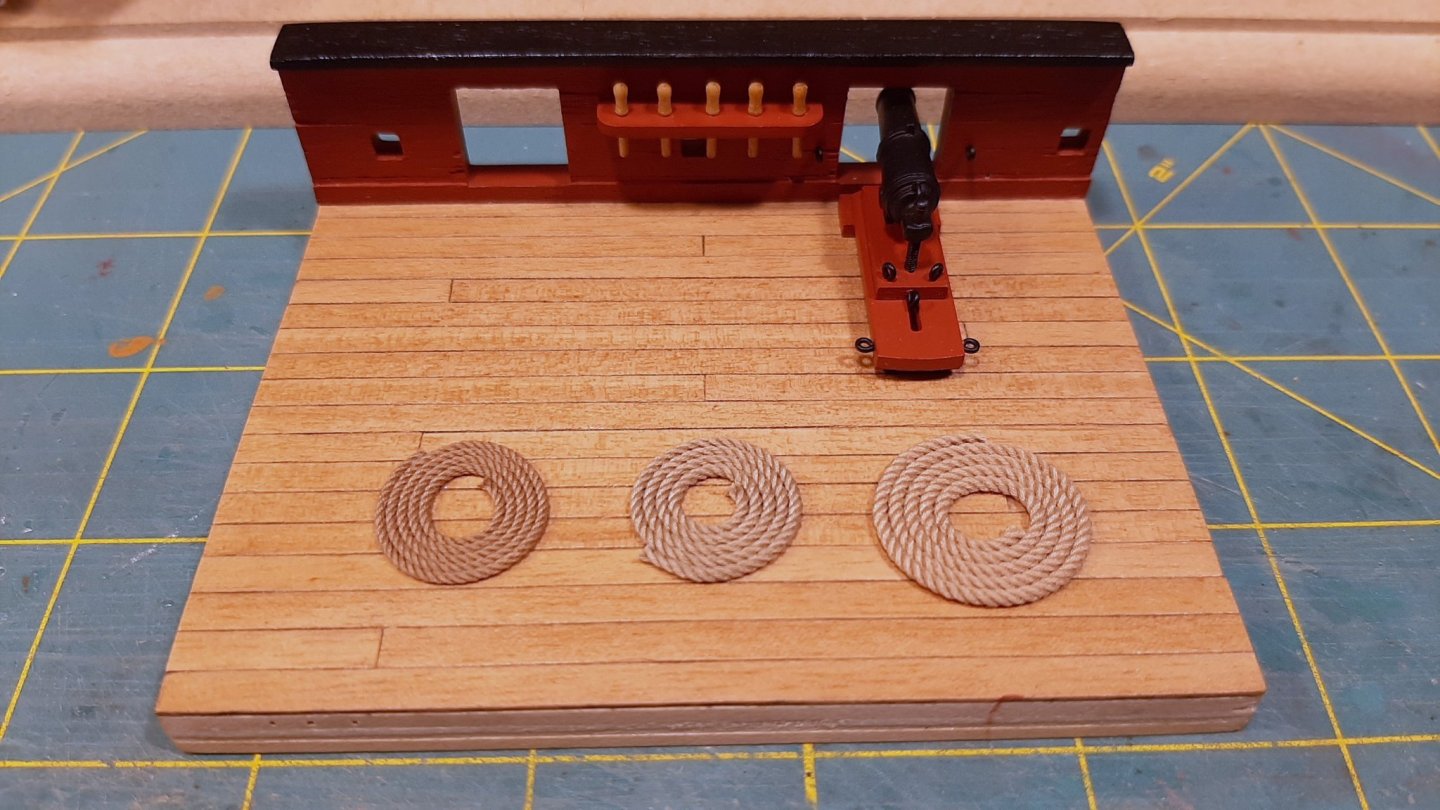
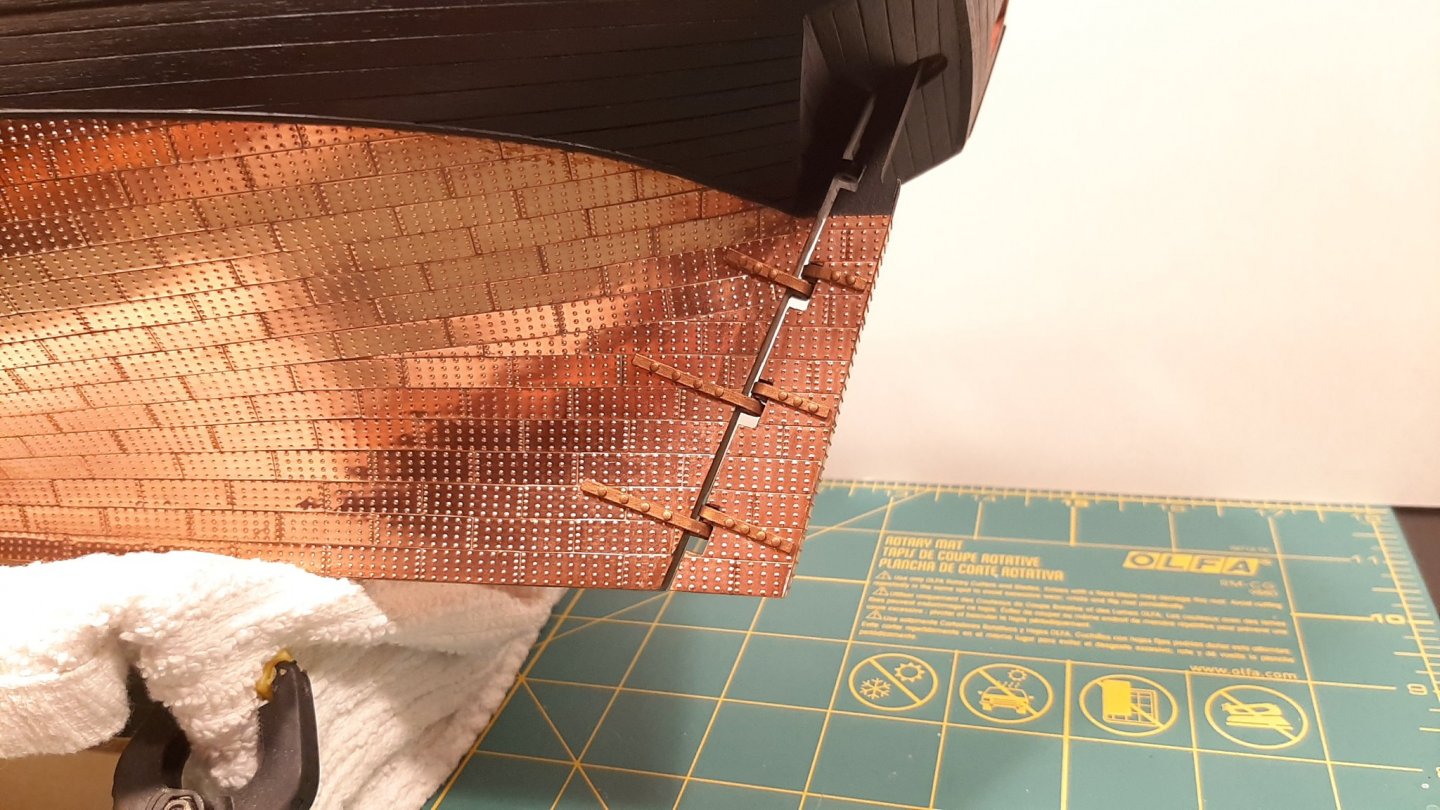
The rudder straps are on! I was dreading doing this but It really wasn't that bad. I glued the straps on then carefully drilled for hours before putting some round head nails in place. No drill bits were harmed 👍 The rails on the other hand were not going on without a fight. I soaked and heat bent them several times but I still needed to nail it in place on the ship. I also cut them into two parts for ease of installation. Here is some of my home made 2mm anchor cable. This is 6 meters long and took about a half hour. You know it turned out right when the ends don't unravel.
-
HMS Diana by ECK - Caldercraft - 1:64
BenD replied to ECK's topic in - Kit build logs for subjects built from 1751 - 1800
The Diana is going be easy for you! That is quite an incredible collection you have there. How long did they take? -
HMS Diana by ECK - Caldercraft - 1:64
BenD replied to ECK's topic in - Kit build logs for subjects built from 1751 - 1800
Looking good! Is that the HMS Snake in the backround? There seems to be an Occre kit in the backround too. Care to show us some pictures? -
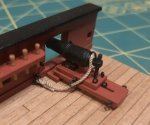
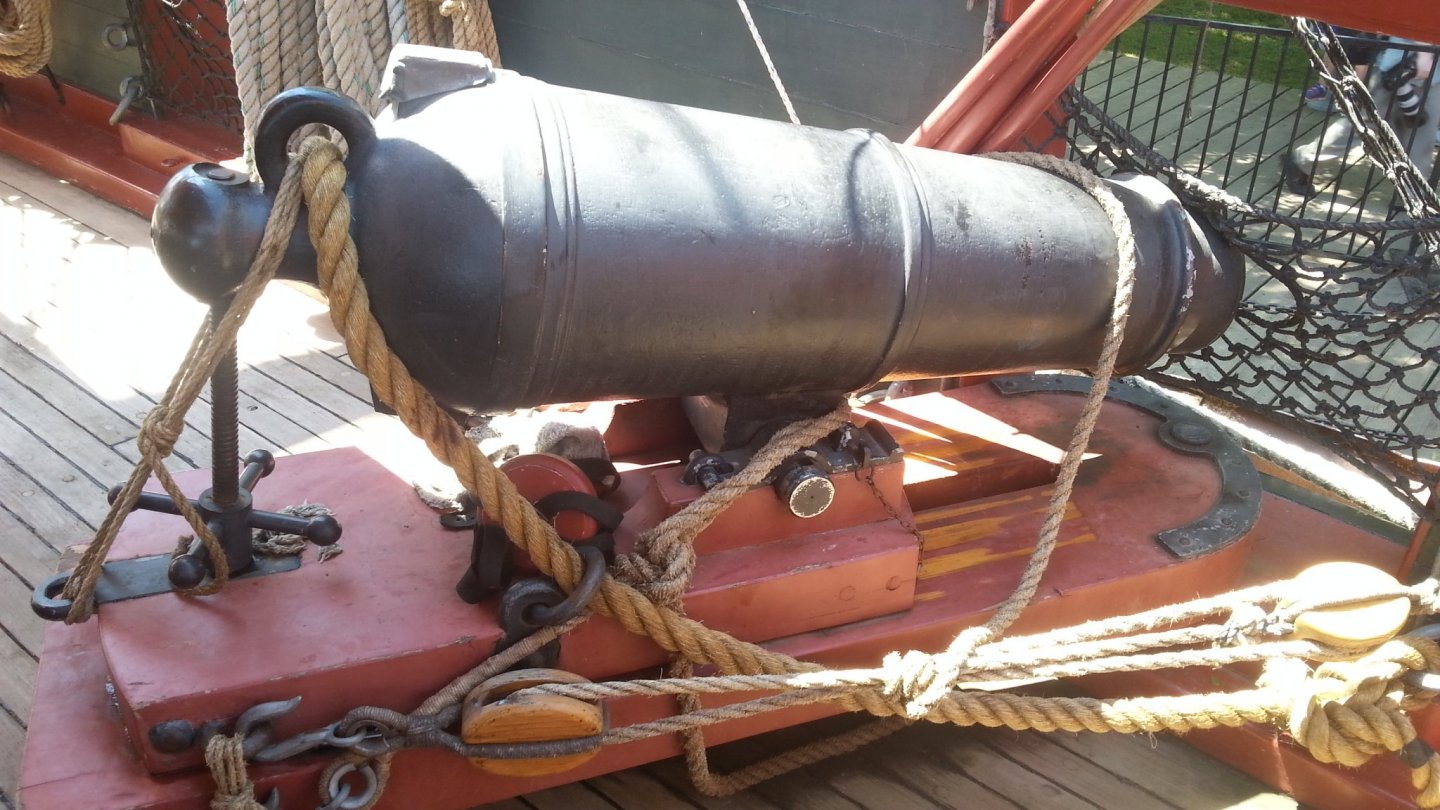
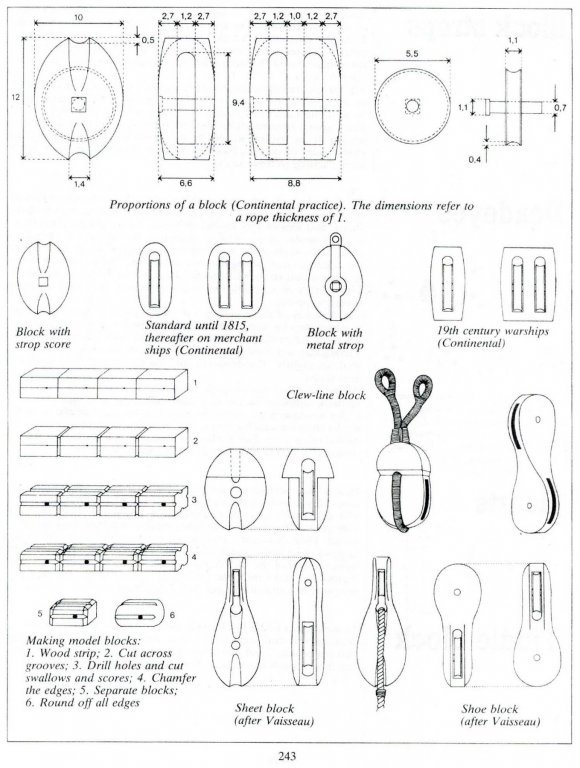
The two holes are for showing the sheave, The wheel that is inside the block. I attached a photo of a Carronade with tackle, look closely at how the rope goes through the blocks. Here is a picture from the Niagrara. Look closely at the blocks.
-
Here is a diagram of how they are made, Hope that clears things up.
-
It's looking ship shape. I think you've past my build stage and I've had a 4 year head start 😆
- 109 replies
-
- 1
-
-
- snake
- caldercraft
- (and 1 more)
-
https://www.model-space.com/gb/build-the-san-felipe.html This link is from Model-space. The kit comes in a payment plan type thing, They sent a portion of the kit every month.
-
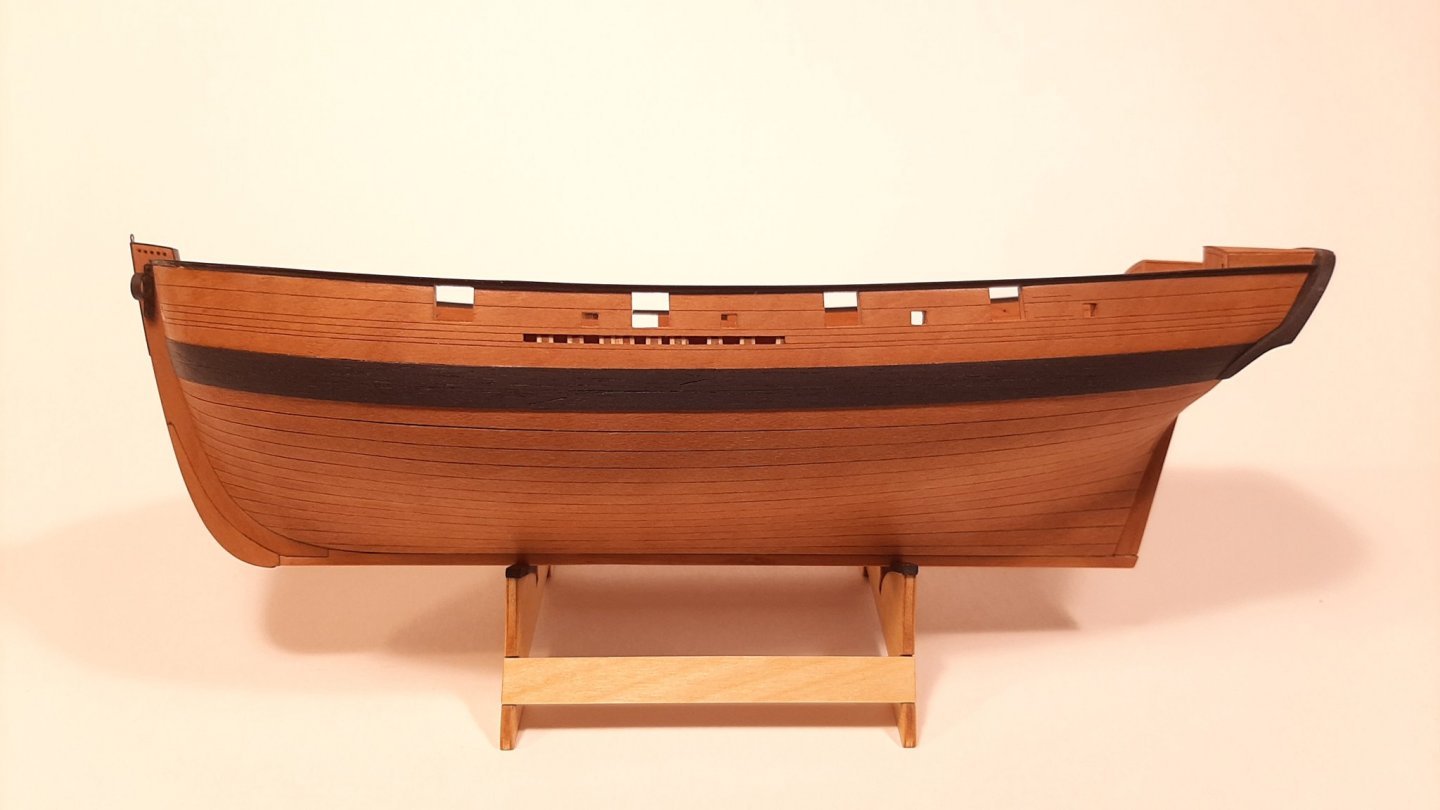
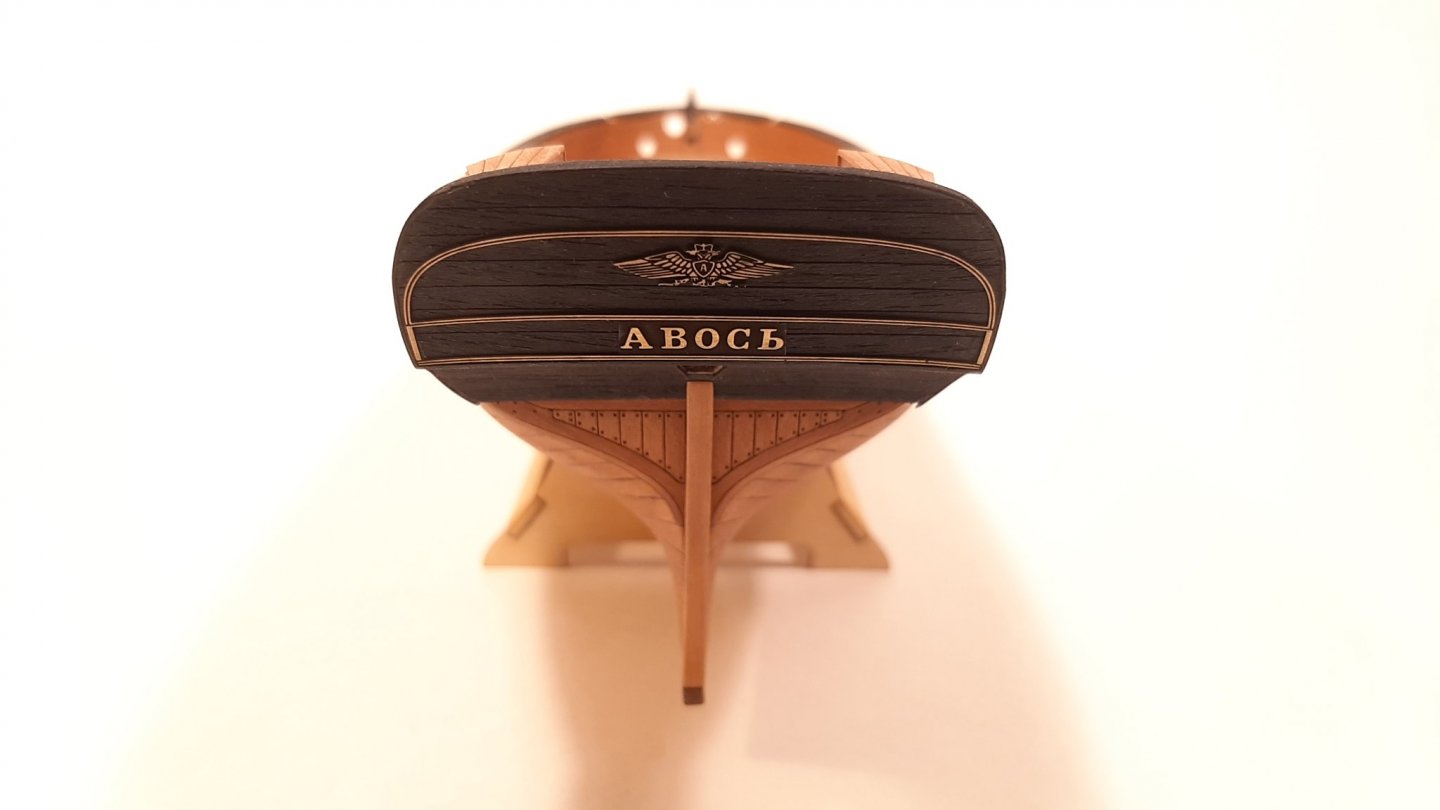
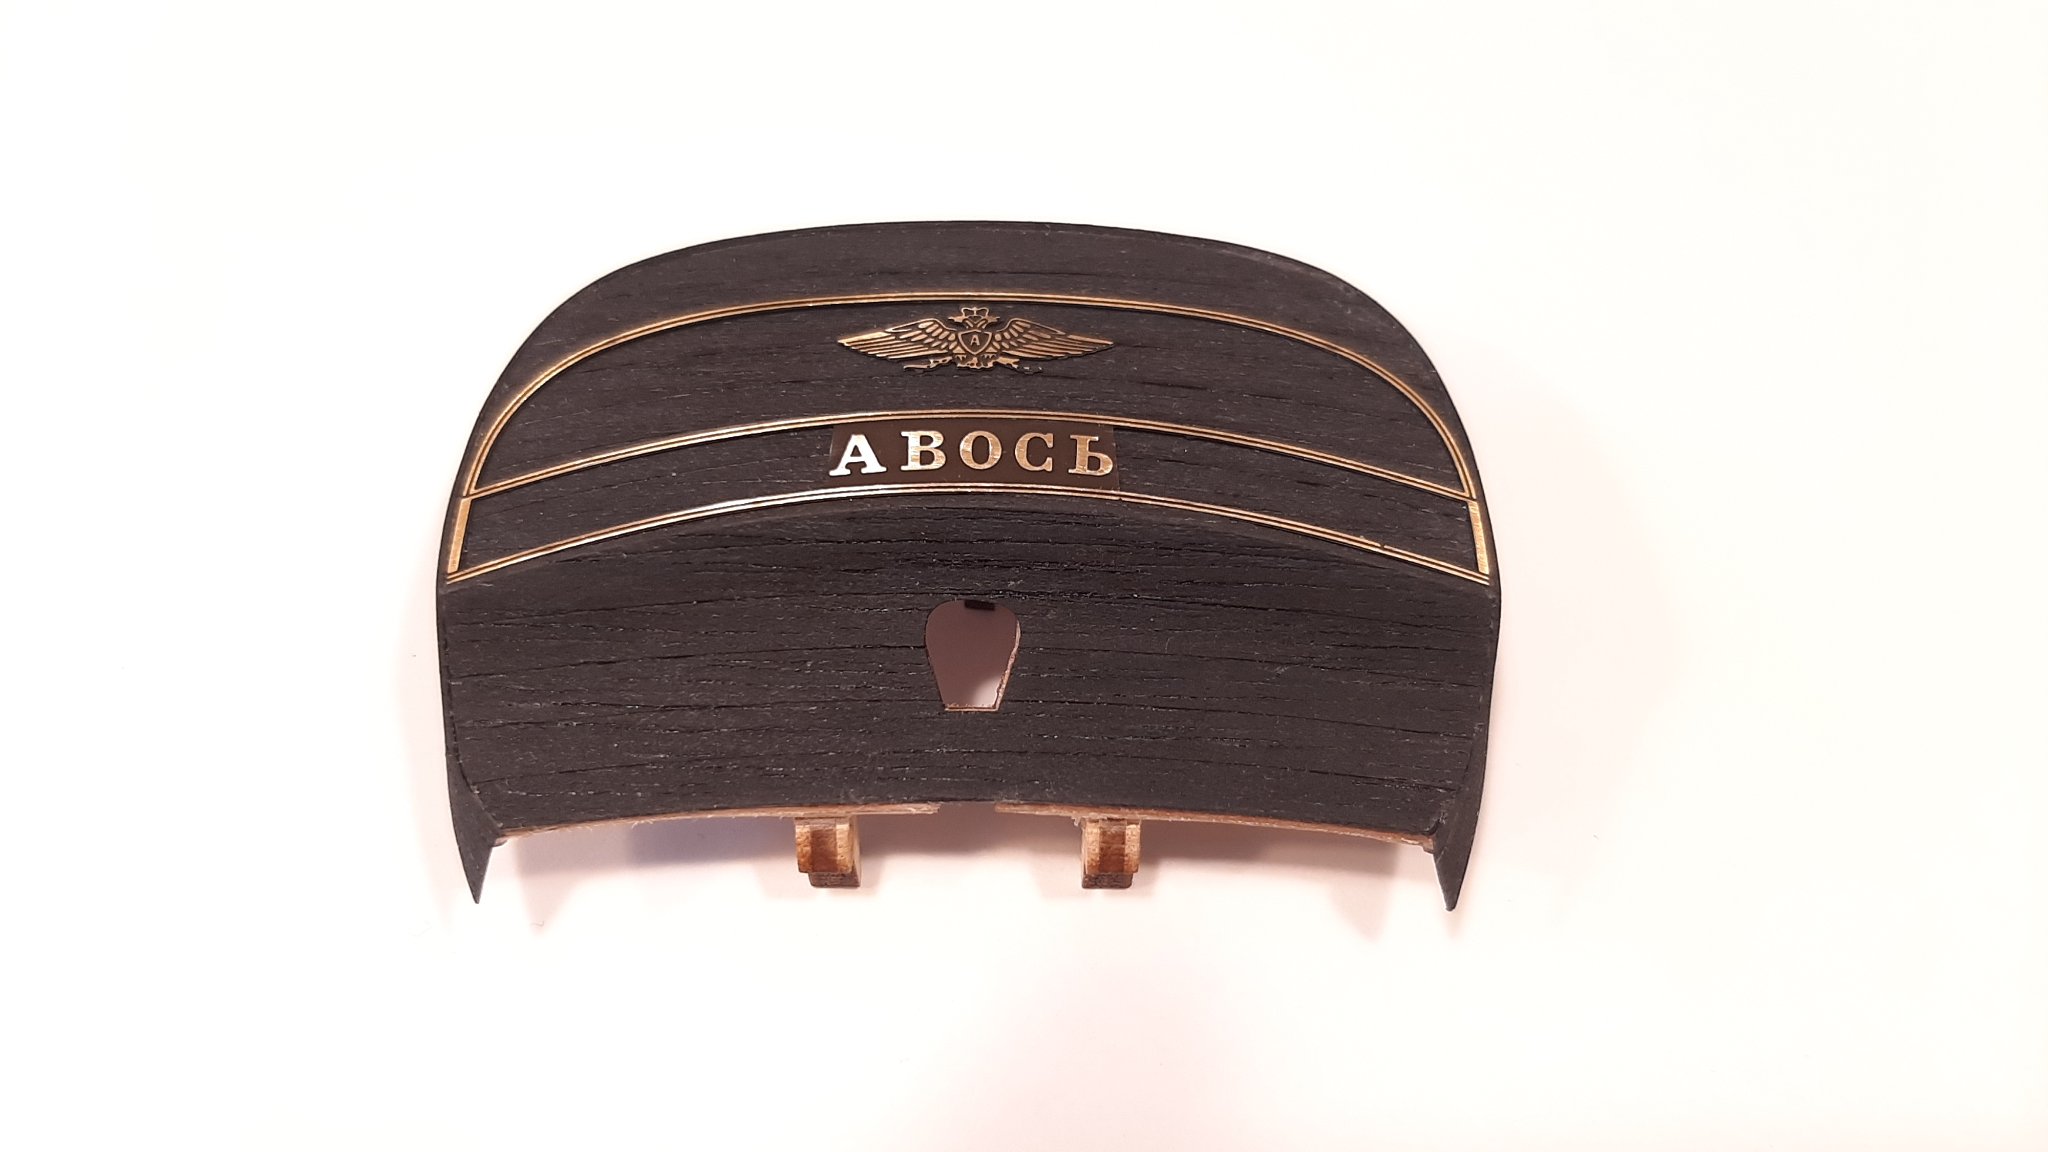
The Prow, Keel, Rudder post, and stern facia have been glued in. The photo etch parts are beautiful in this kit. The stern facia didn't quite fit and there is a considerable gap. I thought I had added enough of a curve in the initial stages of it's construction... everything else has been coming together just fine so we will just call this "human error" and move on.