


flying_dutchman2
-
Posts
1,735 -
Joined
-
Last visited
Content Type
Profiles
Forums
Gallery
Events
Posts posted by flying_dutchman2
-
-
Been sanding the Fluit on the in and outside of the hull.
One of my delema is going to be on how to figure out where the different decks are going to be. I have made many templates to guess where they would be.
I've never built a "more than one deck" ship before. So I had a thought. I could cut off the sides of the hull to where the lower deck starts and then put the lower deck in and built up the bulkheads and the planking to the next deck and so on.
Any suggestions?
Marcus
-
On 12/1/2019 at 9:27 PM, Blue Pilot said:
This is a very interesting ship it will be a great model when you finish her.
That it will be and it is also one of the reasons I am building it. Like I mentioned before, it is the most challenging ship I have ever built
Marcus
- Elijah, Blue Pilot and mtaylor
-
 3
3
-
Been sanding the 1st layer of planking and adding filler as I sand areas that need it.
Most of my sanding is done in an unheated garage and when it is dry outside I bring the belt sander and sandpaper outside and do it on the back patio. Tomorrow till Thursday is going to be dry so I can get a lot done.
Marcus
- GrandpaPhil, G.L., Elijah and 2 others
-
5
-
Popeye the sailor,
Thanks for the link. Cool story and I have seen/been to the opera of 'Die Fliegende Hollander' from Richard Wagner.
Marcus
- Canute, mtaylor and popeye the sailor
-
3
-
Ab,
I plan to sand the hull like you mentioned. Get rid of all the irregularities. The 1st layer is 2mm thick so I can sand a lot. With the Boyer I had many irregularities and sanded the heck out of it, added filler, sanded it smooth and added a 2nd layer.
I took a piece of paper and glued several lengths together and layed it lengthwise on the hull. Drew a wale on it and put the ship away. Come back later on.
I didn't think of it about the balsa. Come to think of it one is limited where the dowels go. Many people both in my local club and here on this site use balsa as filler. When I built the Boyer it was recommended that I use balsa. In the past I used whatever wood I had. My Utrecht is rather heavy because of the filler wood.
My next ship (Heemskerck) will be plank on frame, no balsa or plywood. The ship will be heavy.
Yes, I have heard of Underhill's books.
Marcus
- FriedClams, mtaylor and cog
-
3
-
5 hours ago, G.L. said:
May I draw your attention to an in my opinion excellent course which is going on this forum on planking a (half) hull? It shows an easy way to determine the shape and the curve of hull planks. => Half Hull Planking Project
Toni is a member of my local club and in several meetings she has shown how planking a half hull is done.
Marcus
-
-
Ab,
Thank you for the constructive criticism.
In your opinion do I need to remove the 1st layer of planking and start all over again?
If not, I am planking the 2nd layer per your instruction.
I did force the planks at the bow area.

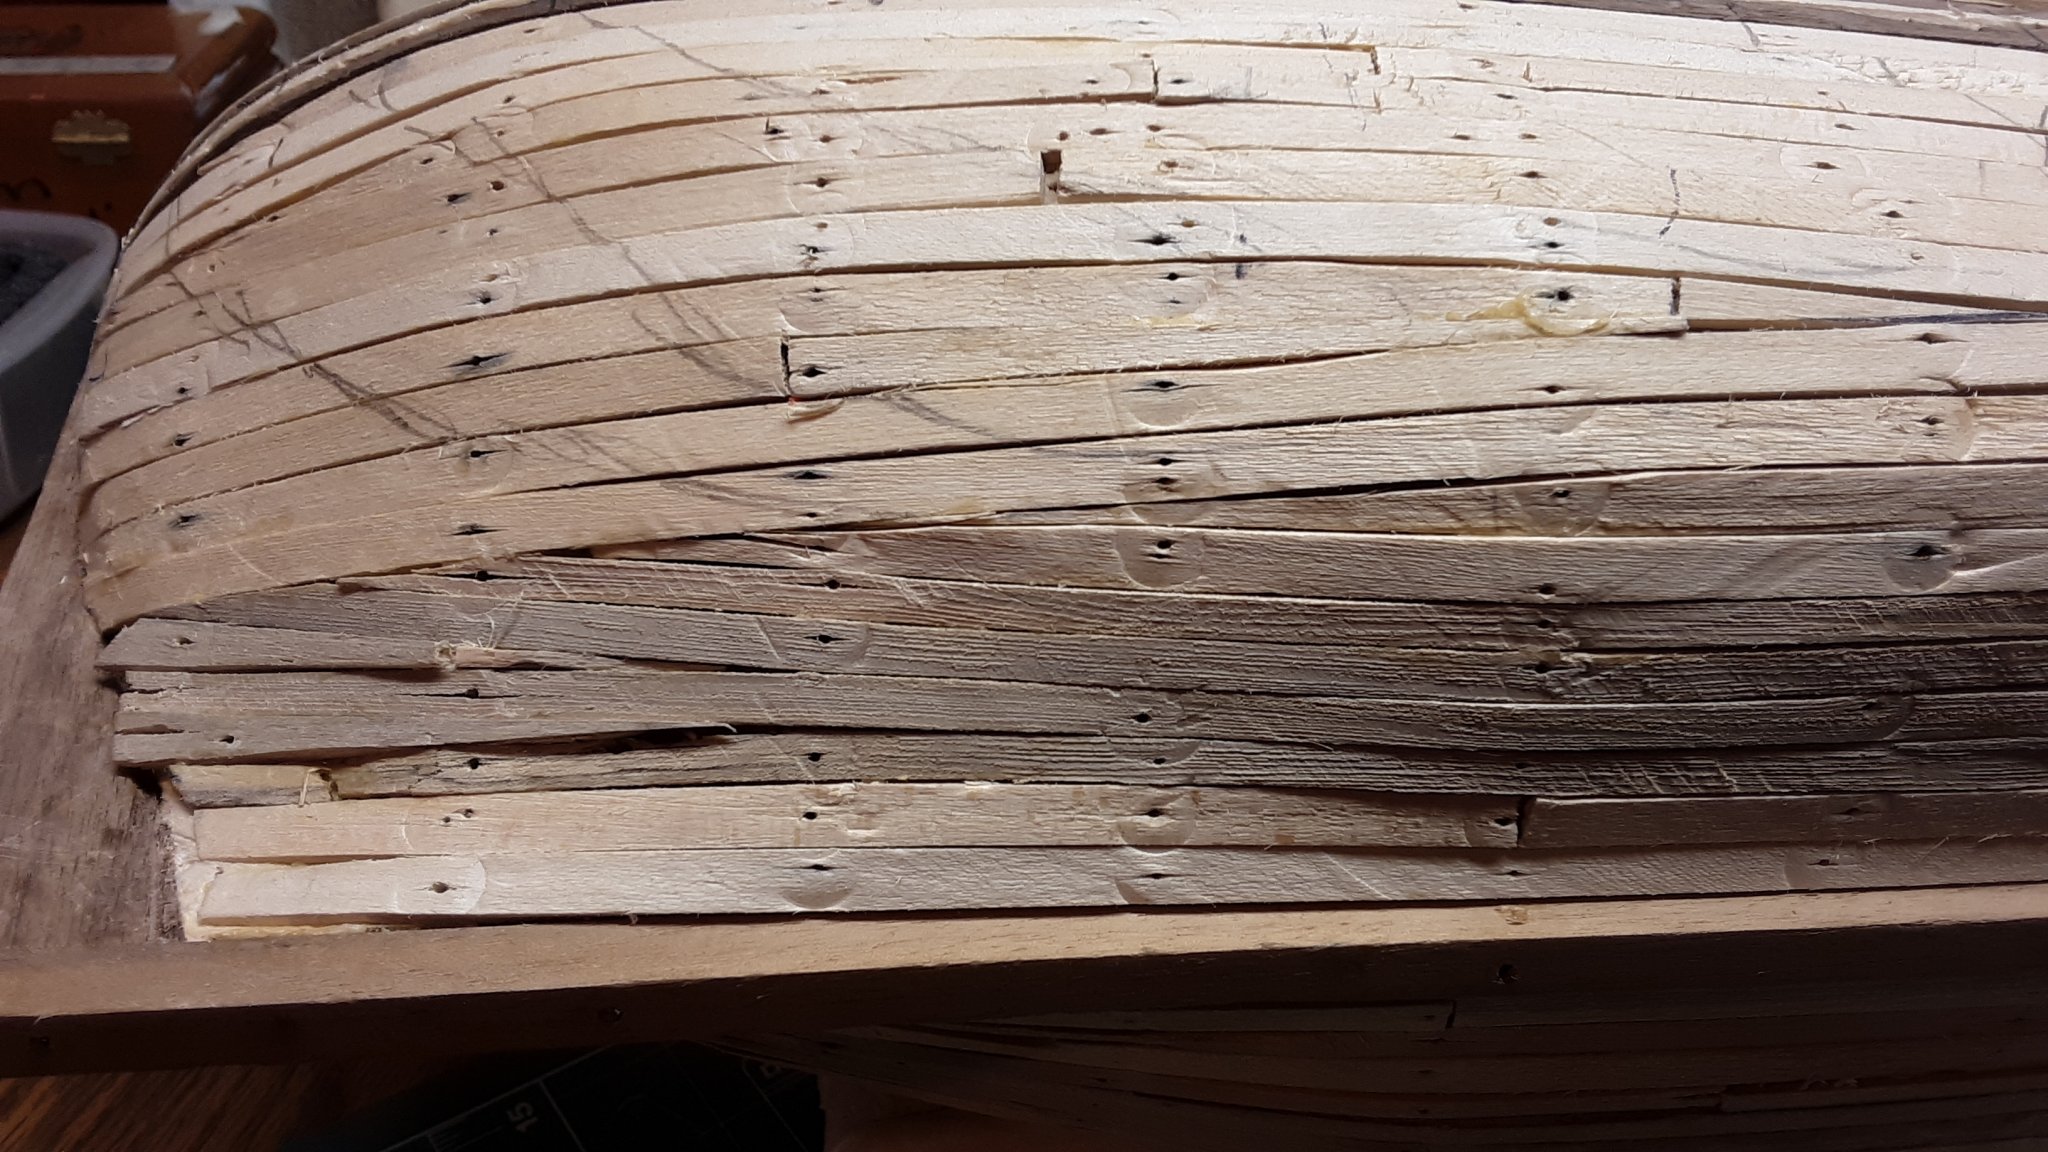
I was trying to copy the planking of the models in the Merchant book. I usually don't do this. While planking my Utrecht and Boyer, no plank was forced.
You are correct about the three bottom installed wales. There is a slight curve from the stern to about the middle of the ship, then they are straight, going slightly up and ending in abrupt corners of the bow. I measured several times to where they were supposed to be and drew the lines on the bulkheads. I will definitely change this in the second planking and get a better curve towards the middle of the ship.
One can see from the area near the keel that the planks are not one piece. That is not possible.

Marcus
-
-
I magna,
Thank you for the explanation.
Marcus
- popeye the sailor, mtaylor and Canute
-
3
-
18 hours ago, Jack12477 said:
It is not the plane but the pilot who flew it, Robert Goebel, a Double Ace. See the very first post for the history .
"Goebel" is a German name not Dutch. Also read about him on the Net and nowhere does it say he is Dutch, or am I missing something?
Marcus
- mtaylor, popeye the sailor and Canute
-
3
-
On 11/7/2019 at 12:30 AM, cog said:
Maybe you should take a look at the periods in which both shapes were used and might find an explanation in that.
Friday I spent almost all day researching the above. Out of numerous articles that I have read (so far), not one discusses this. But I did find other interesting info about Fluits. How they are related to hekboten, katten en boyers.
Marcus
- cog, FriedClams, mtaylor and 1 other
-
4
-
Why is the P-51 called "Flying Dutchman"? Do not see anything related to The Netherlands.
Marcus
- Canute, popeye the sailor and mtaylor
-
3
-
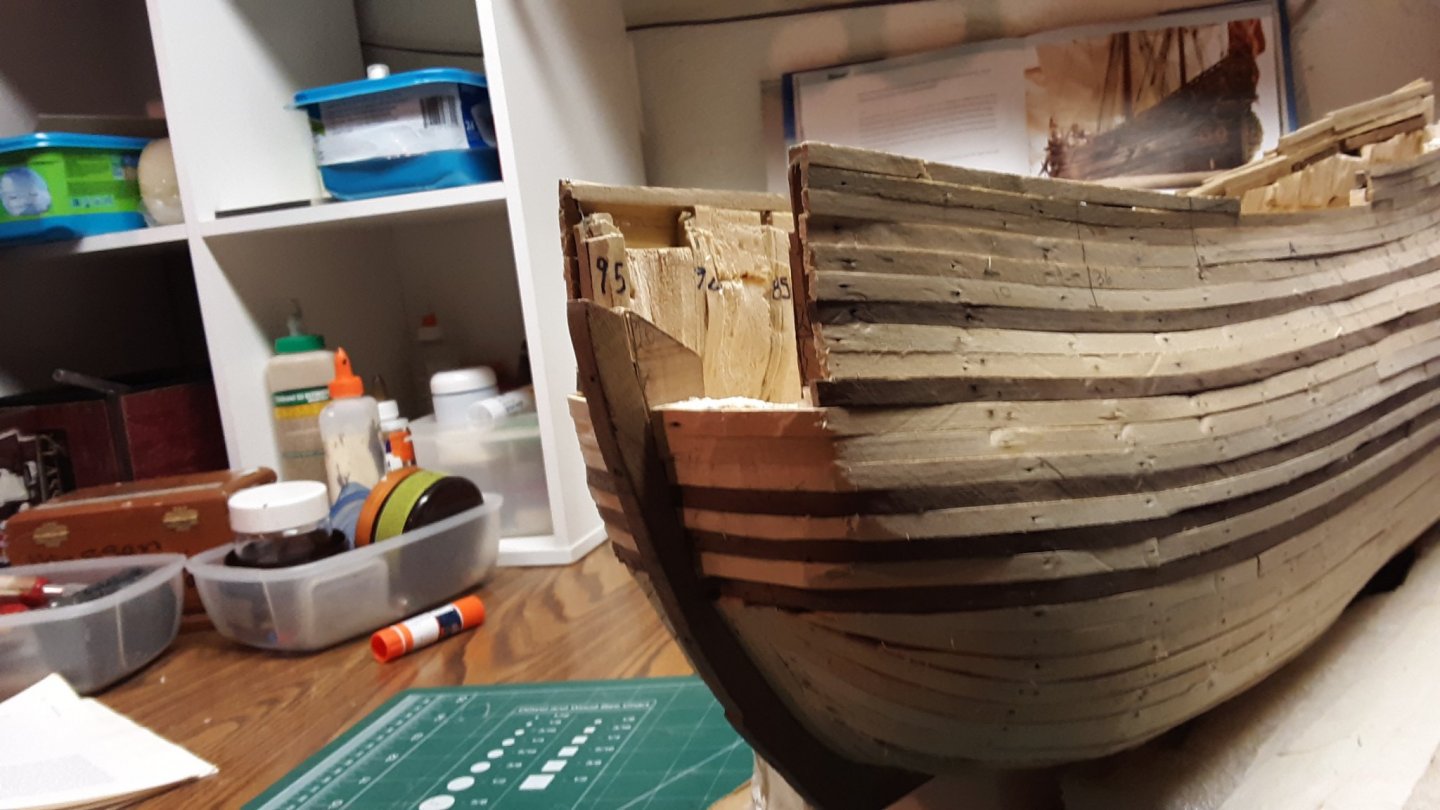
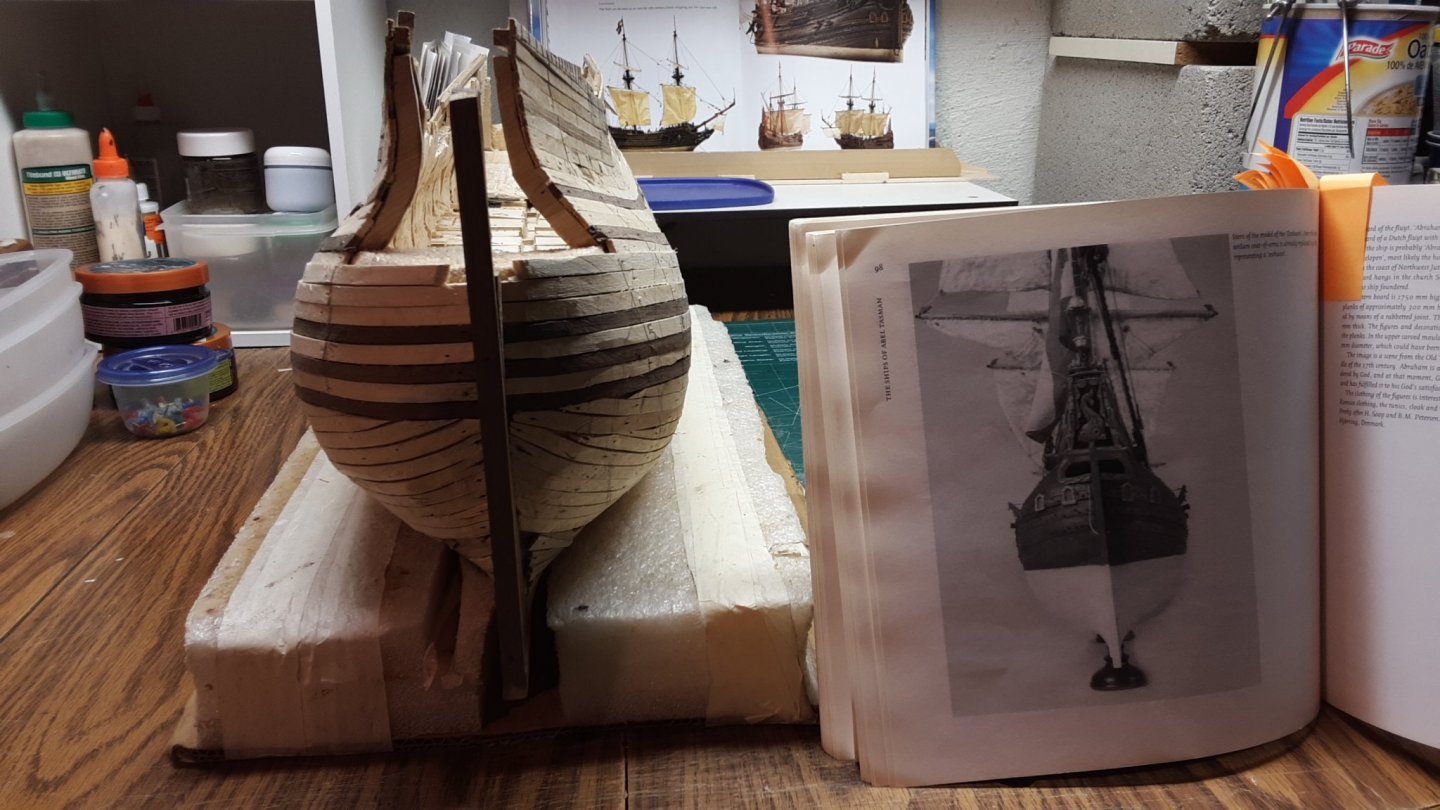
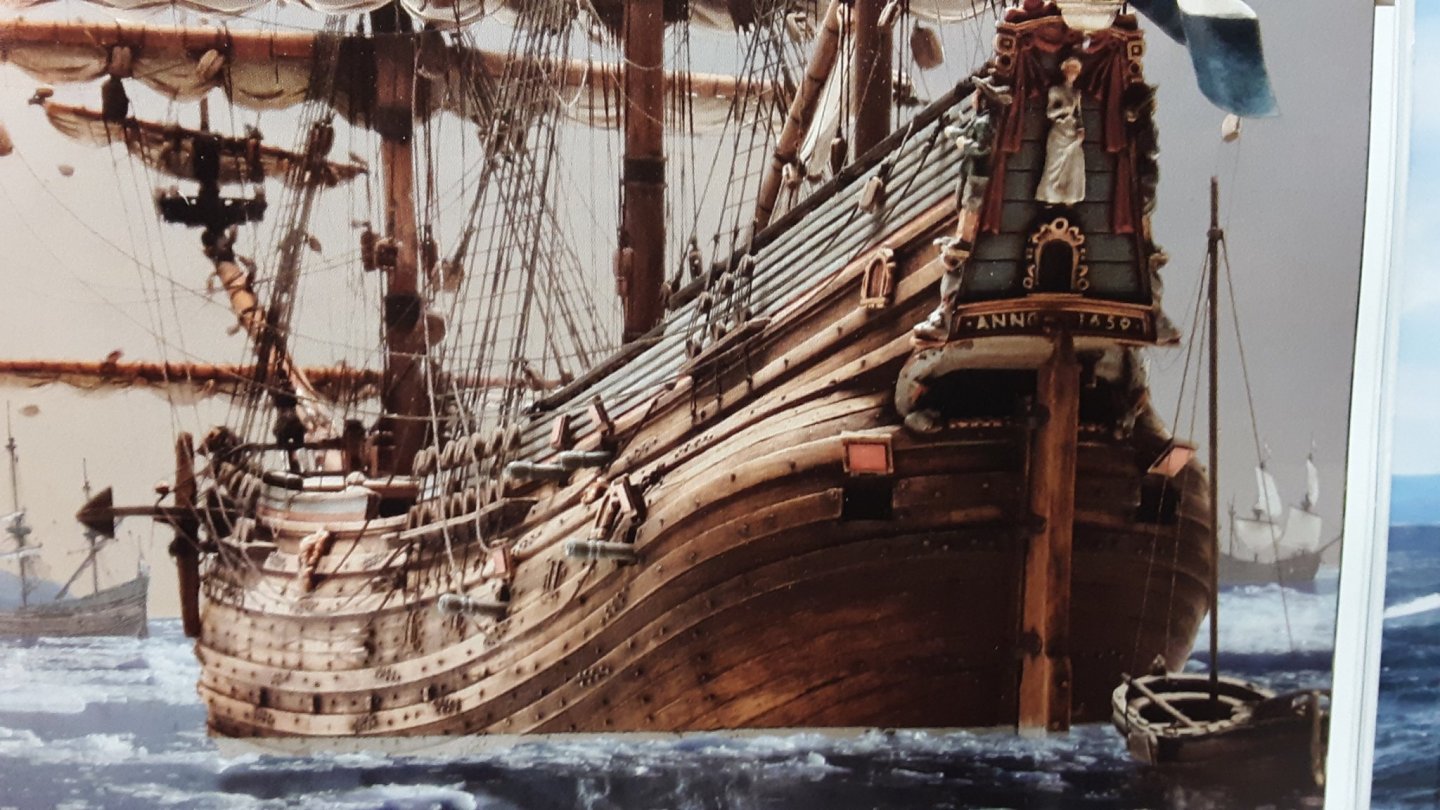
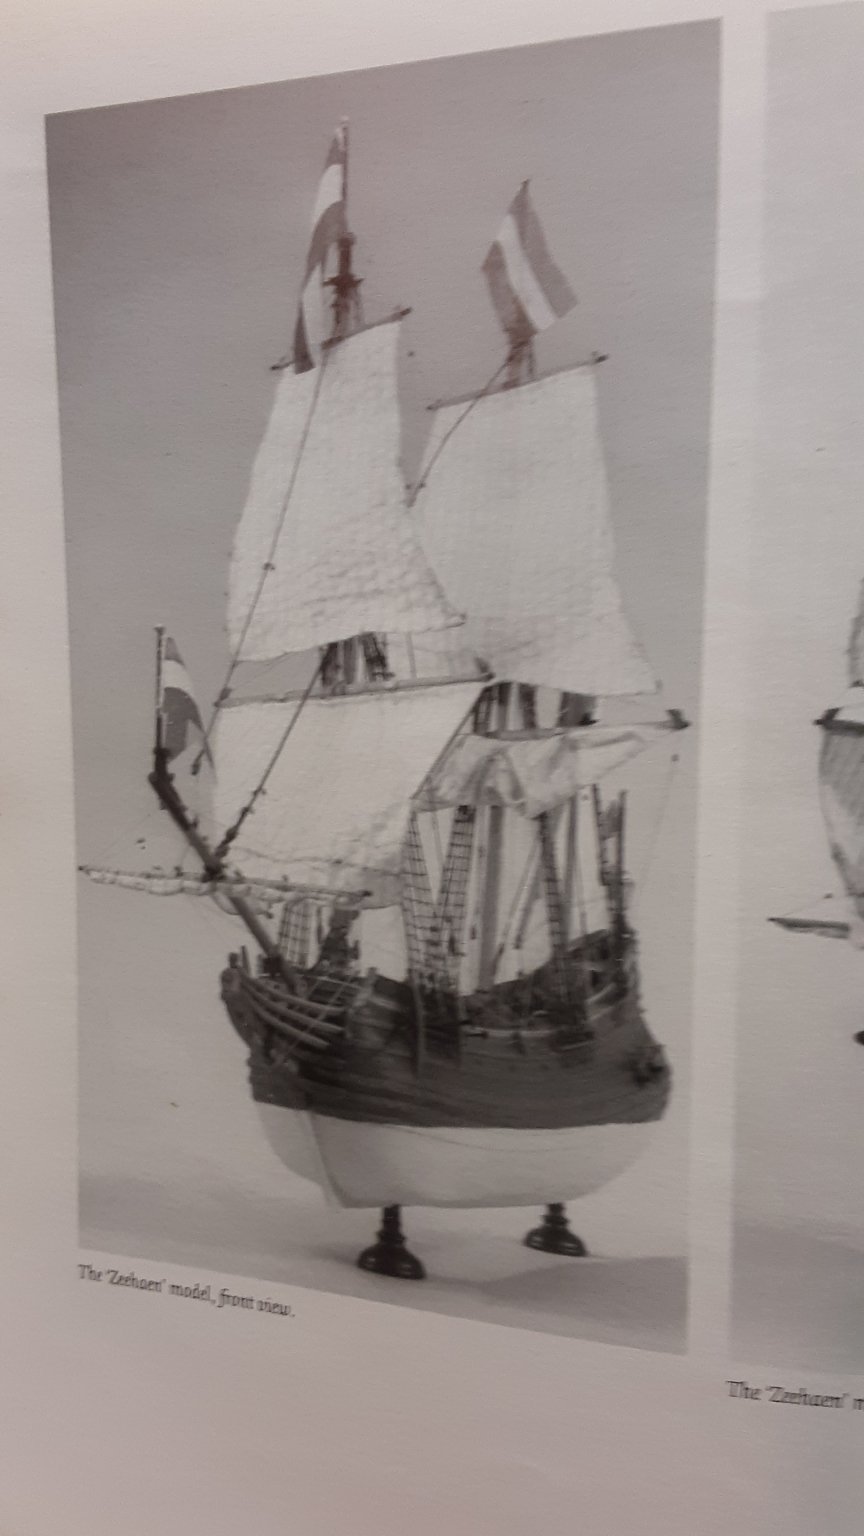
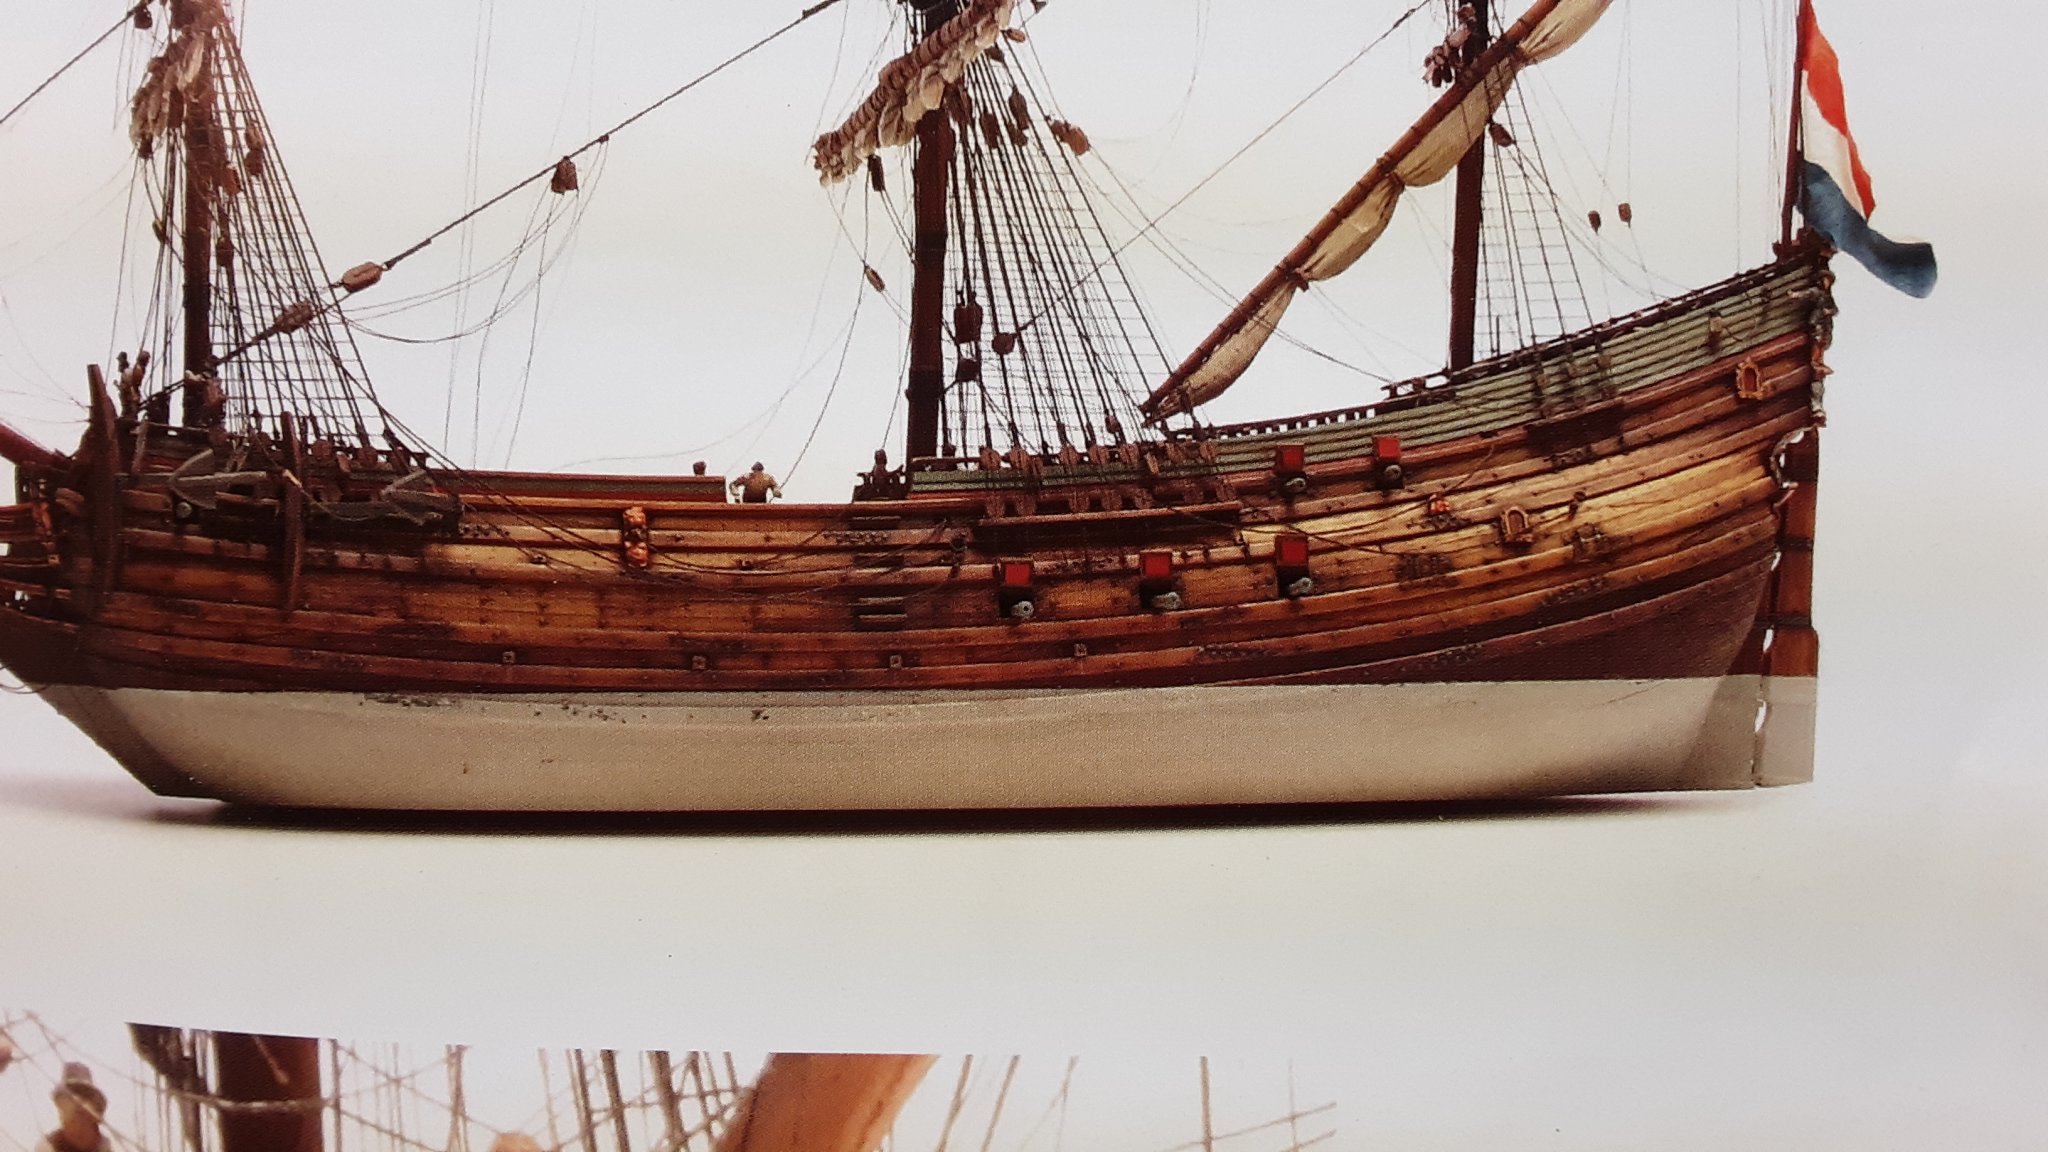
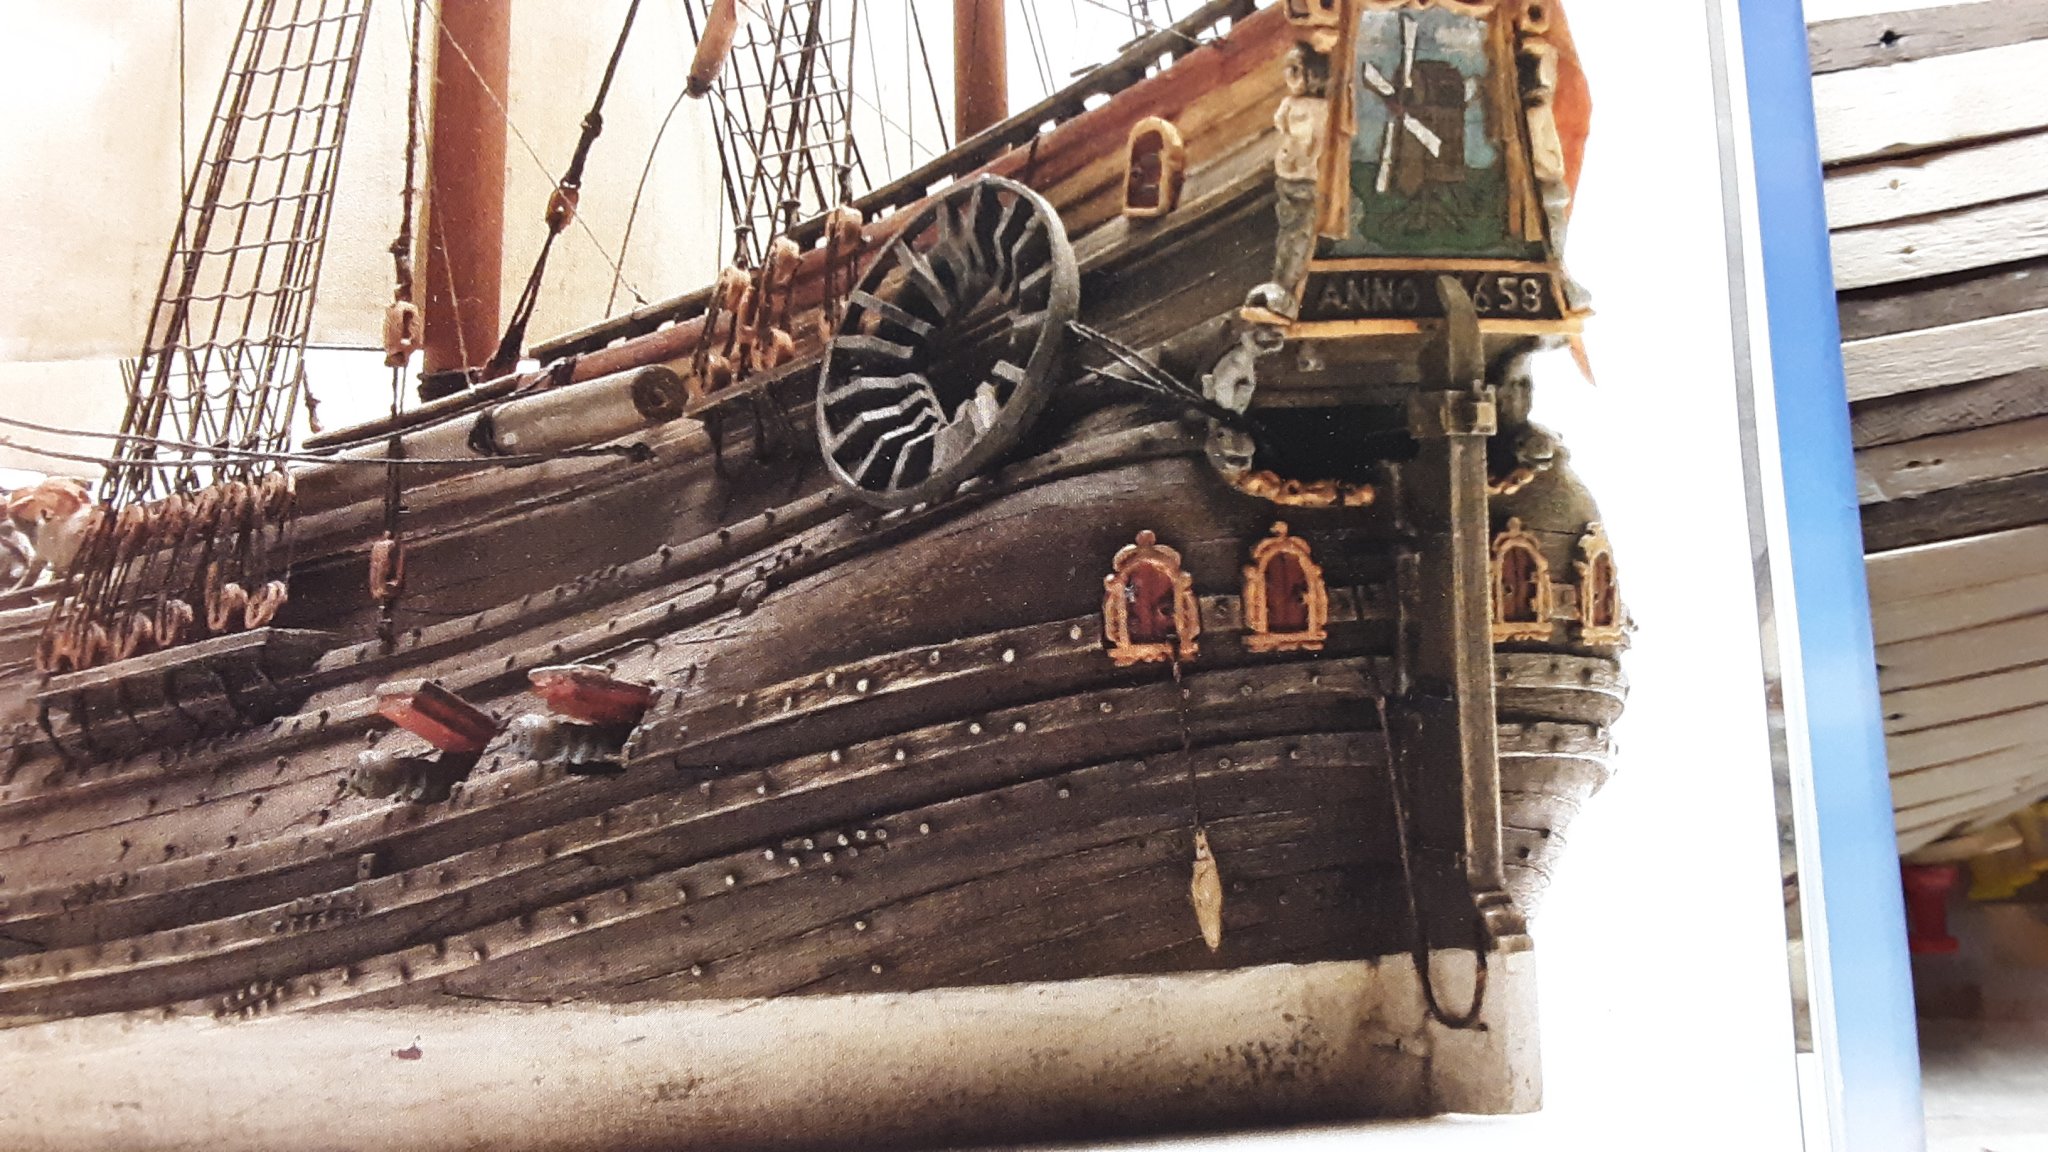
After thoroughly studying the lines plan and making templates in every combination, taking the templates and lining them up where they are supposed to be, I've come to the conclusion that everything checks out.
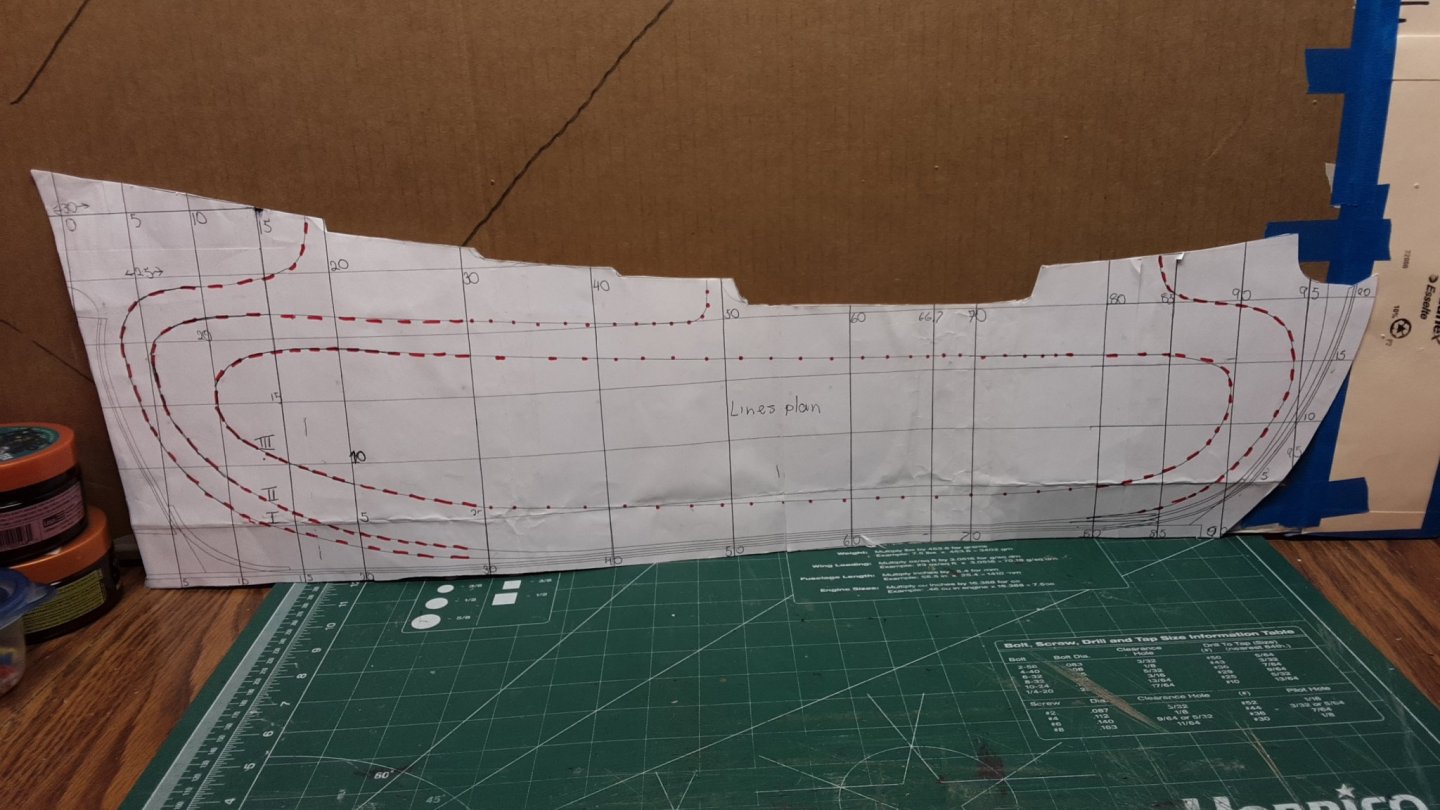

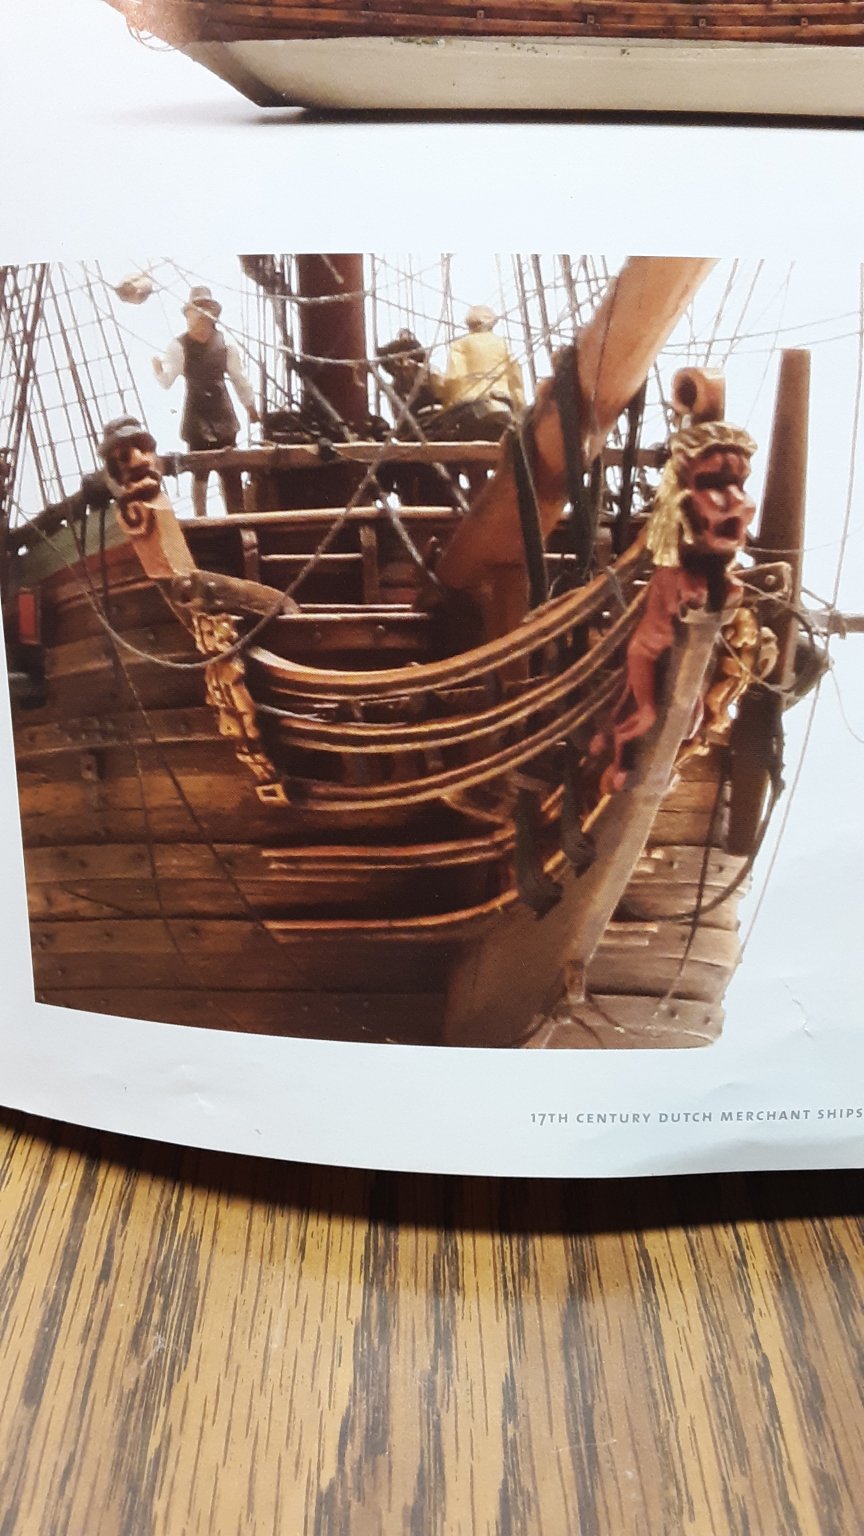
Just to make sure I checked every book, article and research paper that have pictures of Fluits and came to the conclusion that the models in the Merchant book are very different than some of the articles 'and' the Abel Tasman book.
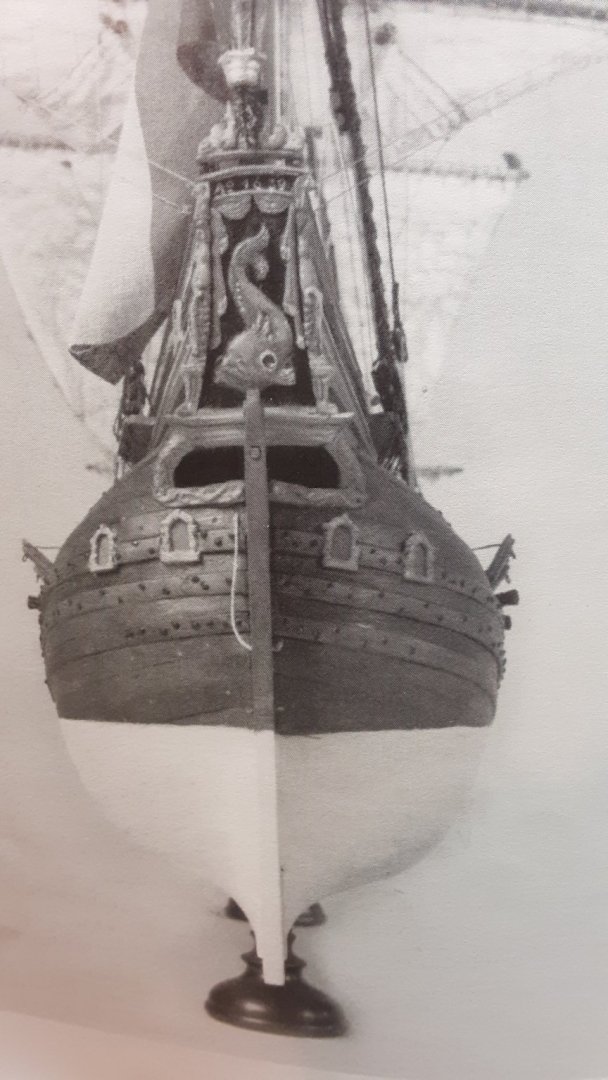
The above picture shows that the hips are smaller than the Merchant book, but looks like my model.
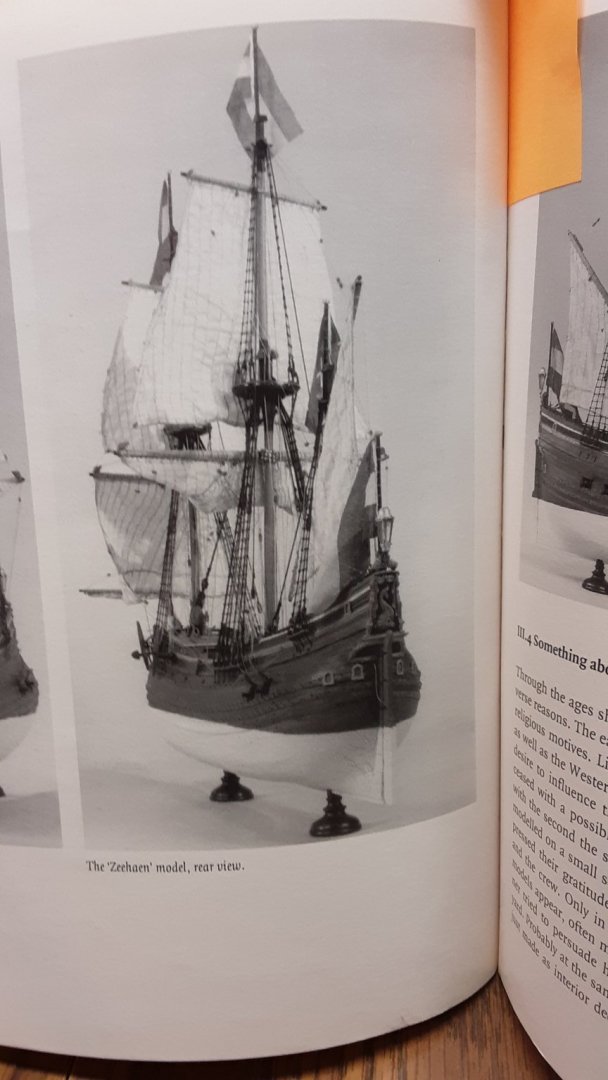
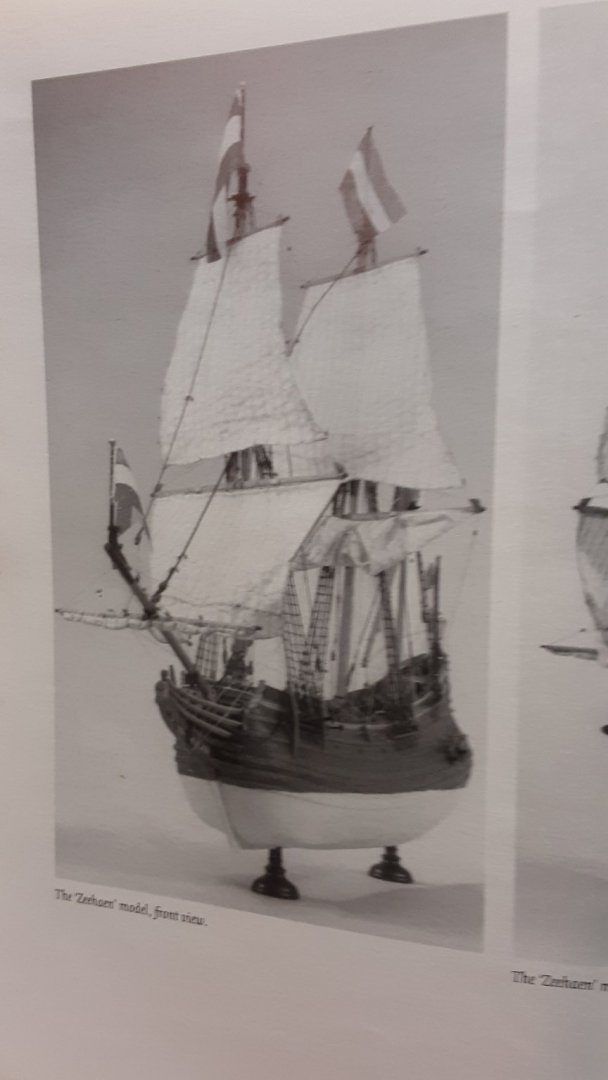
Abel Tasman book
My model is similar to the Abel Tasman model. The hips on both models are smaller than the Merchant book models.
What did I learn from this?
Bofore freaking out. 😱. 😭, check out all your sources. Ships evolved throughout the years. I don't have enough information on the topic, but I know the fluit changed in hip size and length over the years.
There was a type of Fluit for every country and every type of industry the Dutch traded with. I wrote something about that in the 1st or 2nd post.
Next, I need to hollow more out of the inside of the hull so the decks fit.
Sand the outside smooth.
Marcus
- mtbediz, FriedClams, cog and 4 others
-
7
-
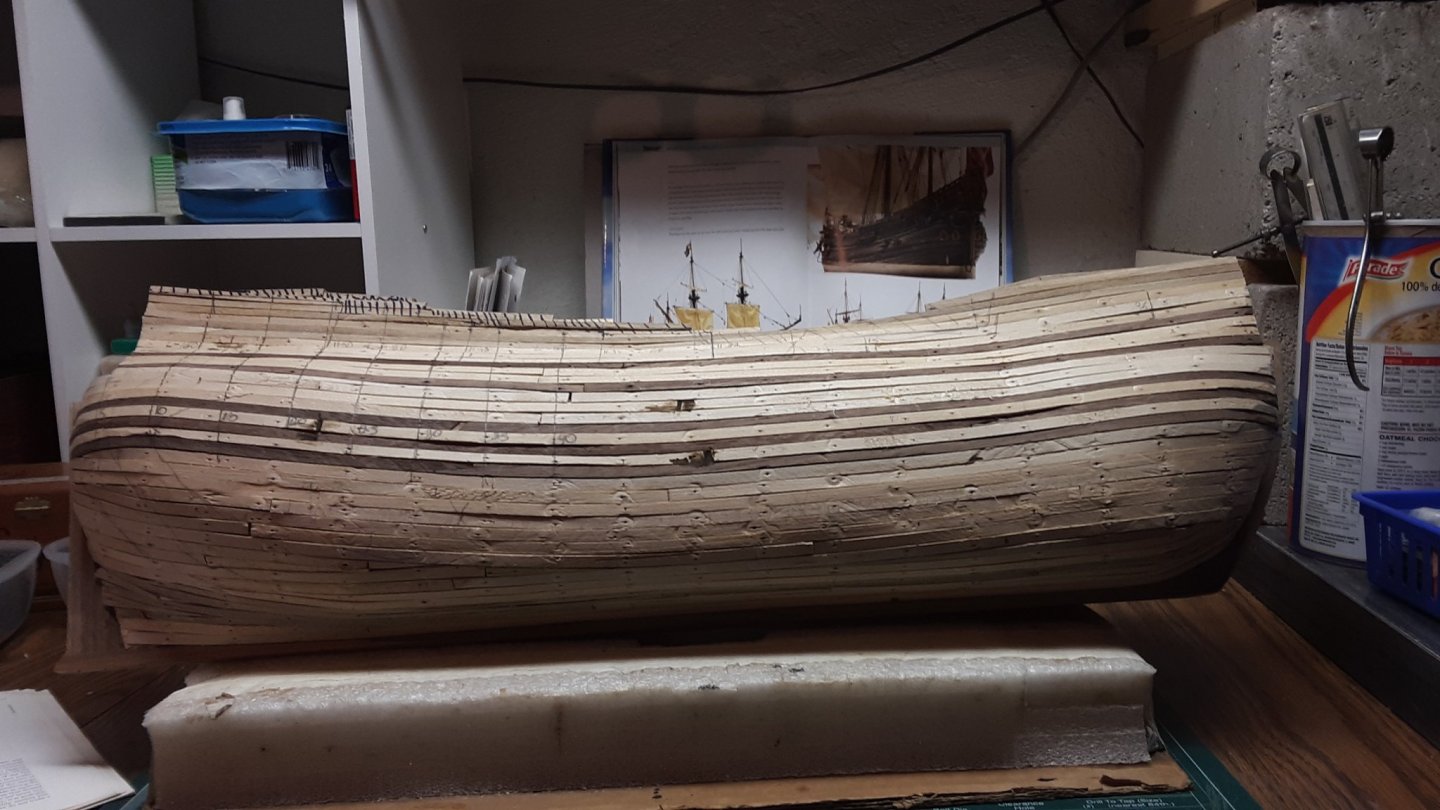
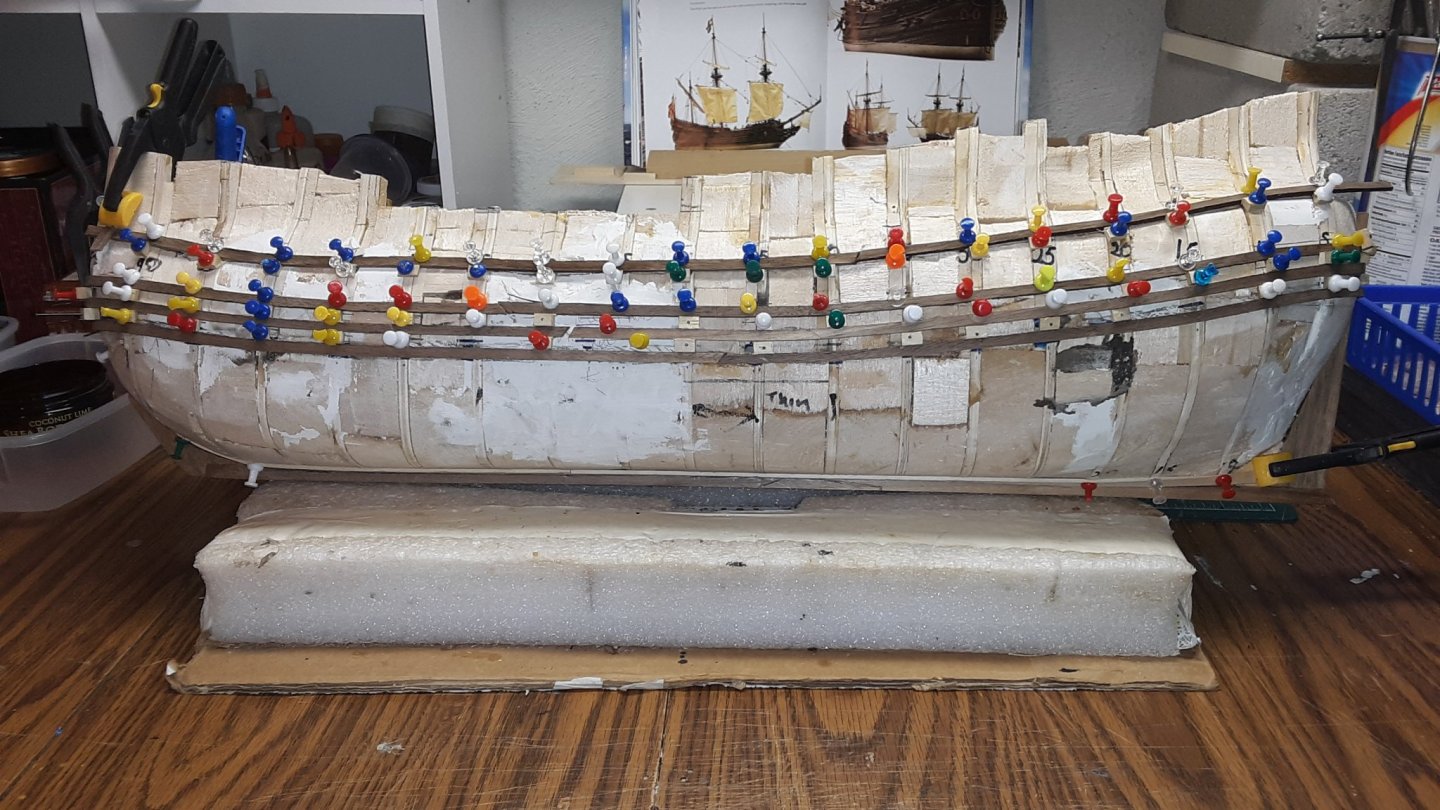
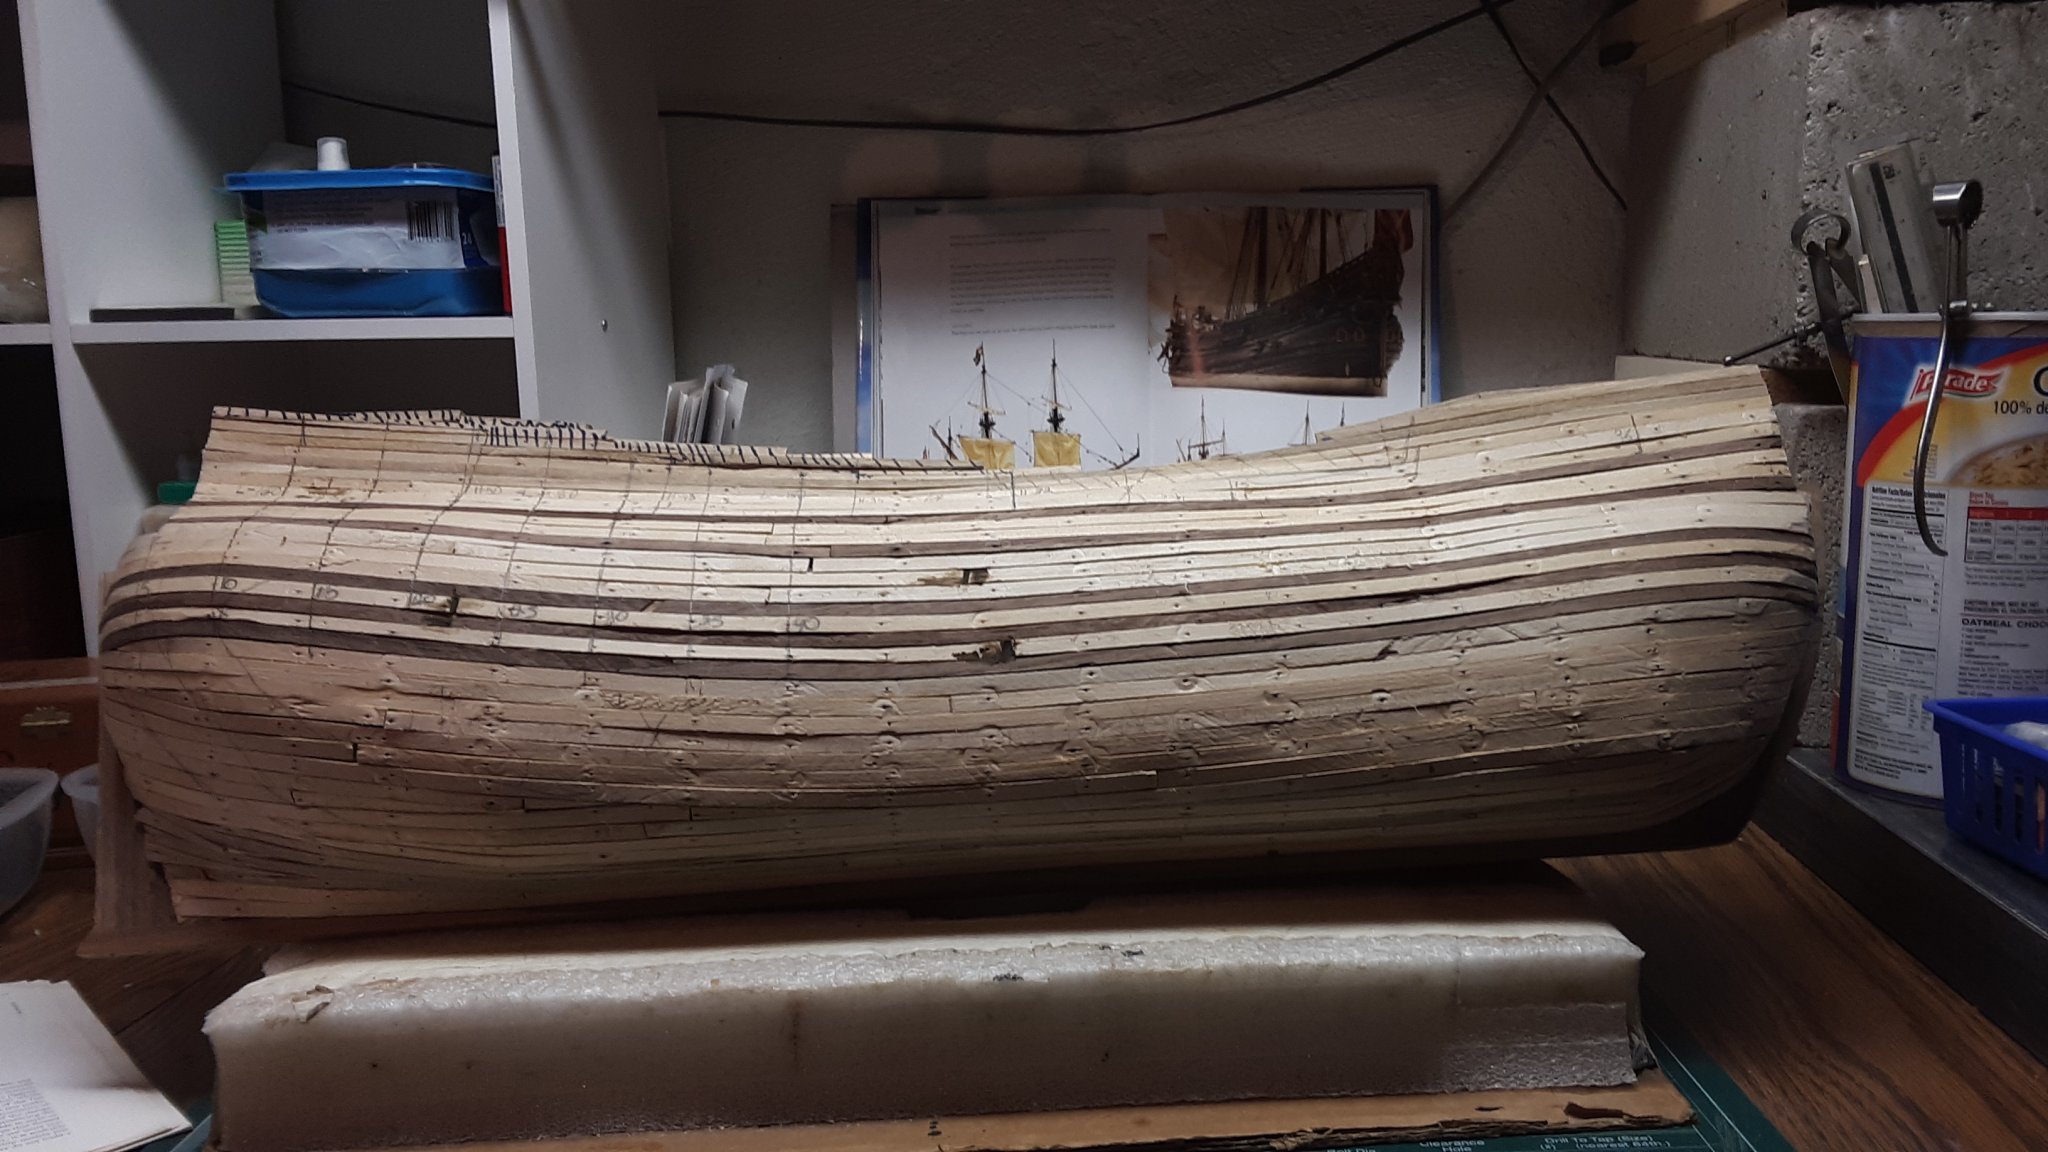
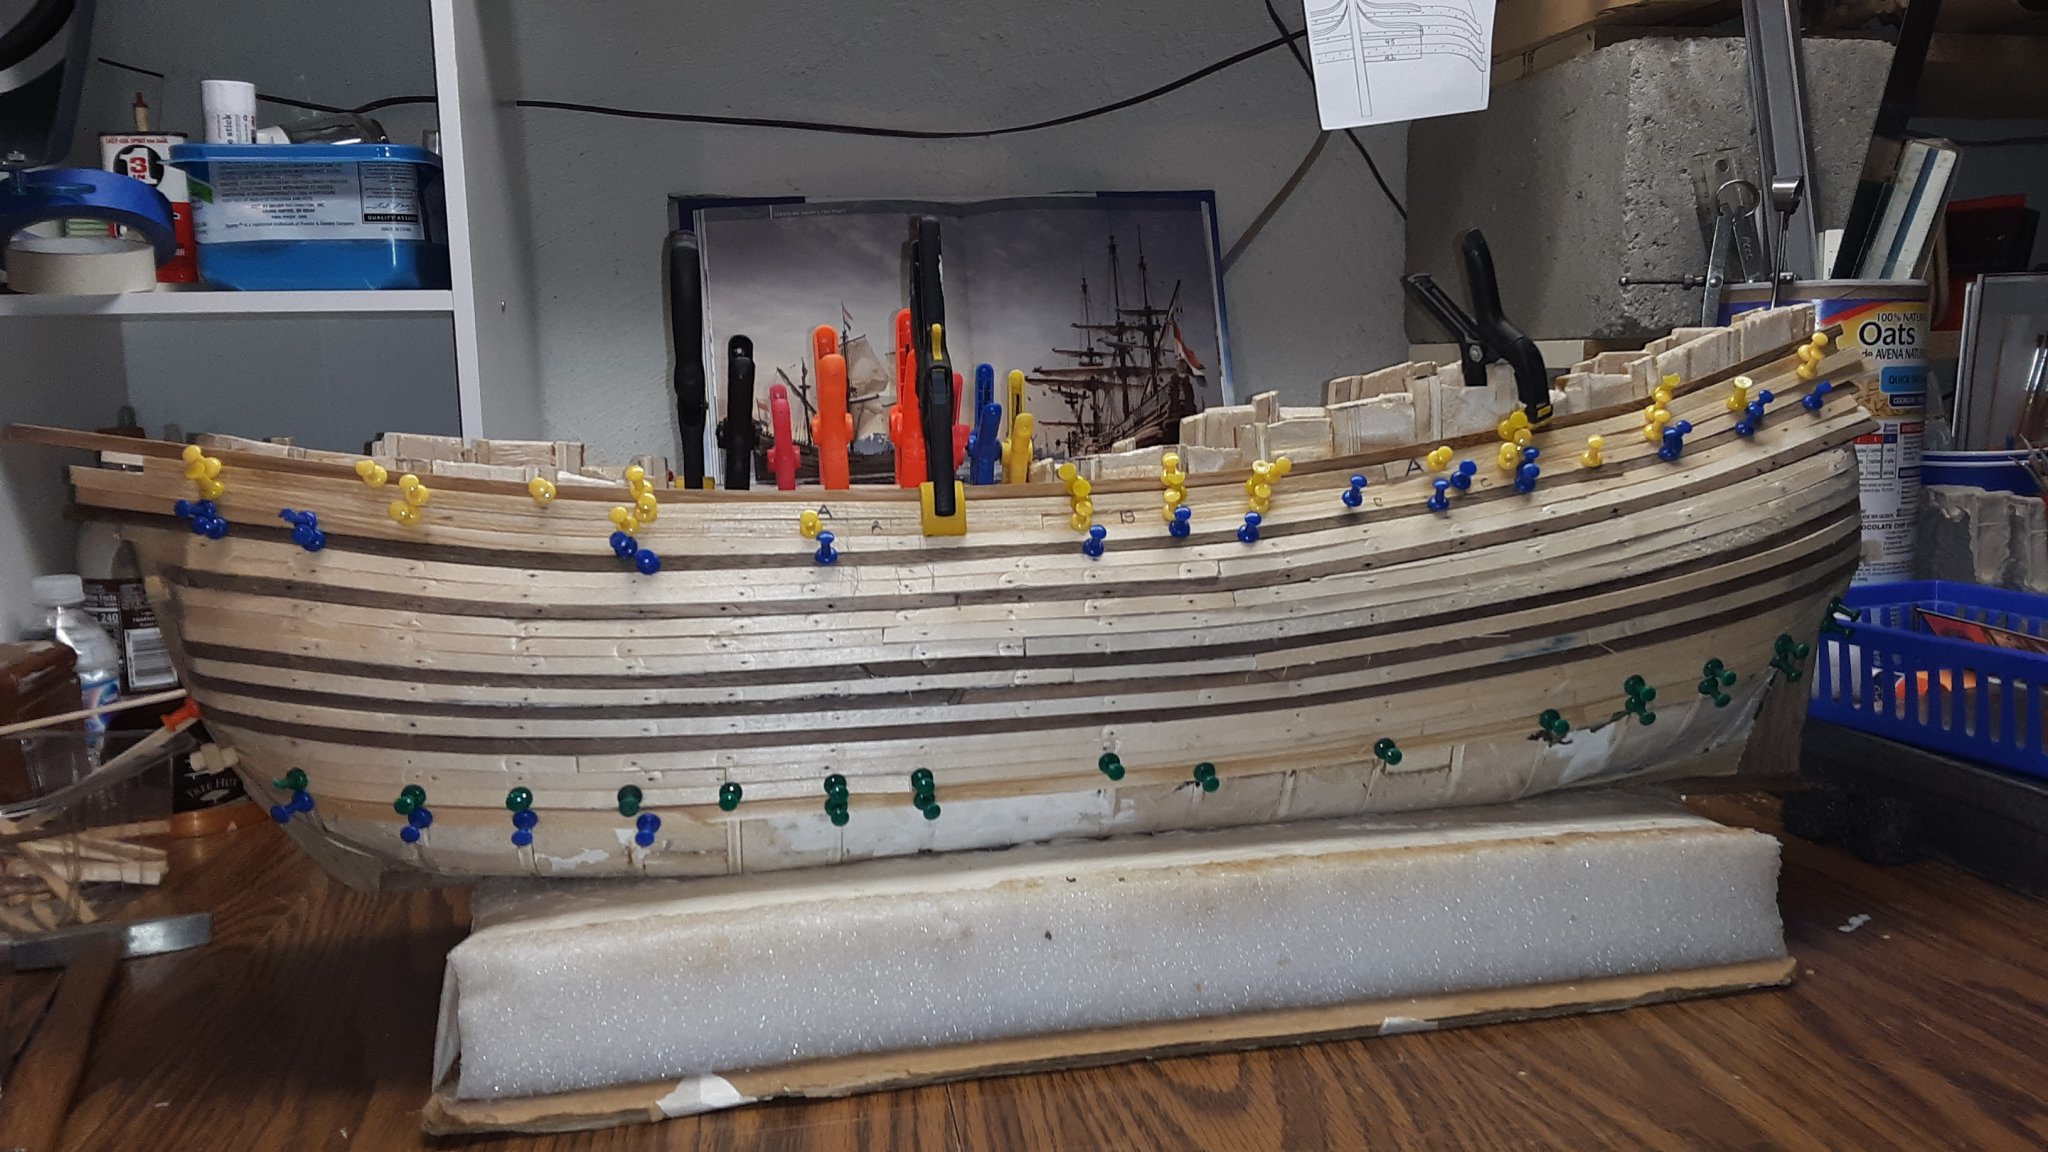
Finished the first layer of planking.


Next I will measure the skinny hip area and see how much to build it up. I will create a stern piece of 5 bulkheads (#5 thru 25) and use that to build it up, so if there are mistakes I can easily undo it and I will not wreck the model if I did it on that.
Marcus
- mtaylor, G.L., GrandpaPhil and 1 other
-
4
-
Phil and Mark, thank you both for the advice. I shall built up the hips. Not too much because it will look weird. I'll use the models in the book as references.
Marcus
- GrandpaPhil and mtaylor
-
2
-
Thank you for all the likes.
I am going to try to explain this and if you don't understand, please feel free to ask questions.
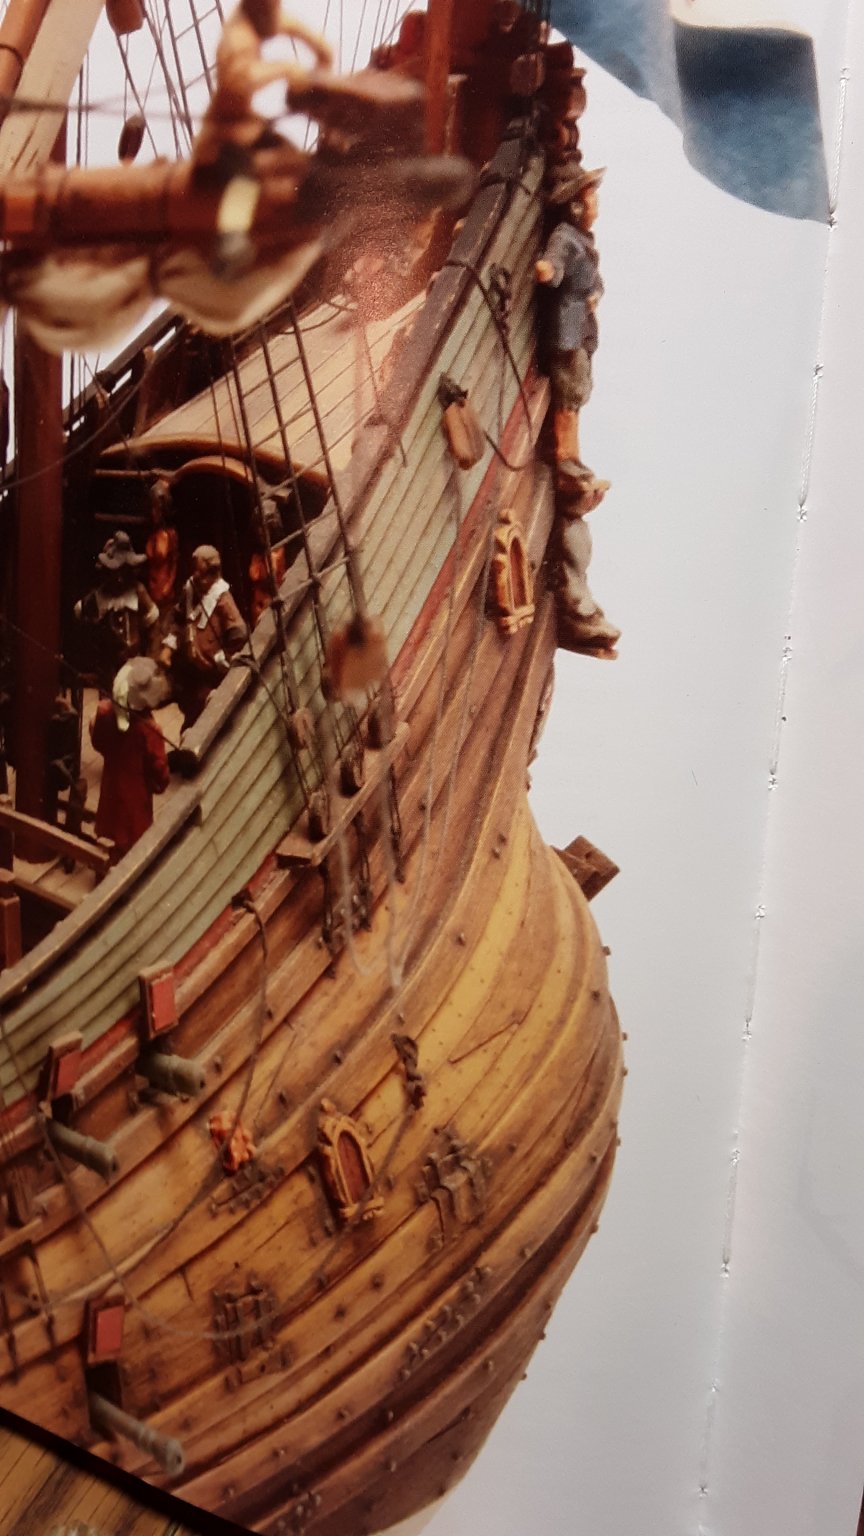
I wanted to plank the Fluit in similar ways as the models in the 17th century Dutch merchant ships book, pages 73 to 77 (look below, pictures from the book and the model).
The wales were installed first and I followed the contours of the ship without a problem.


Then started planking going up and down from the wales and there I got into trouble. Also planked few strokes away from the keel.
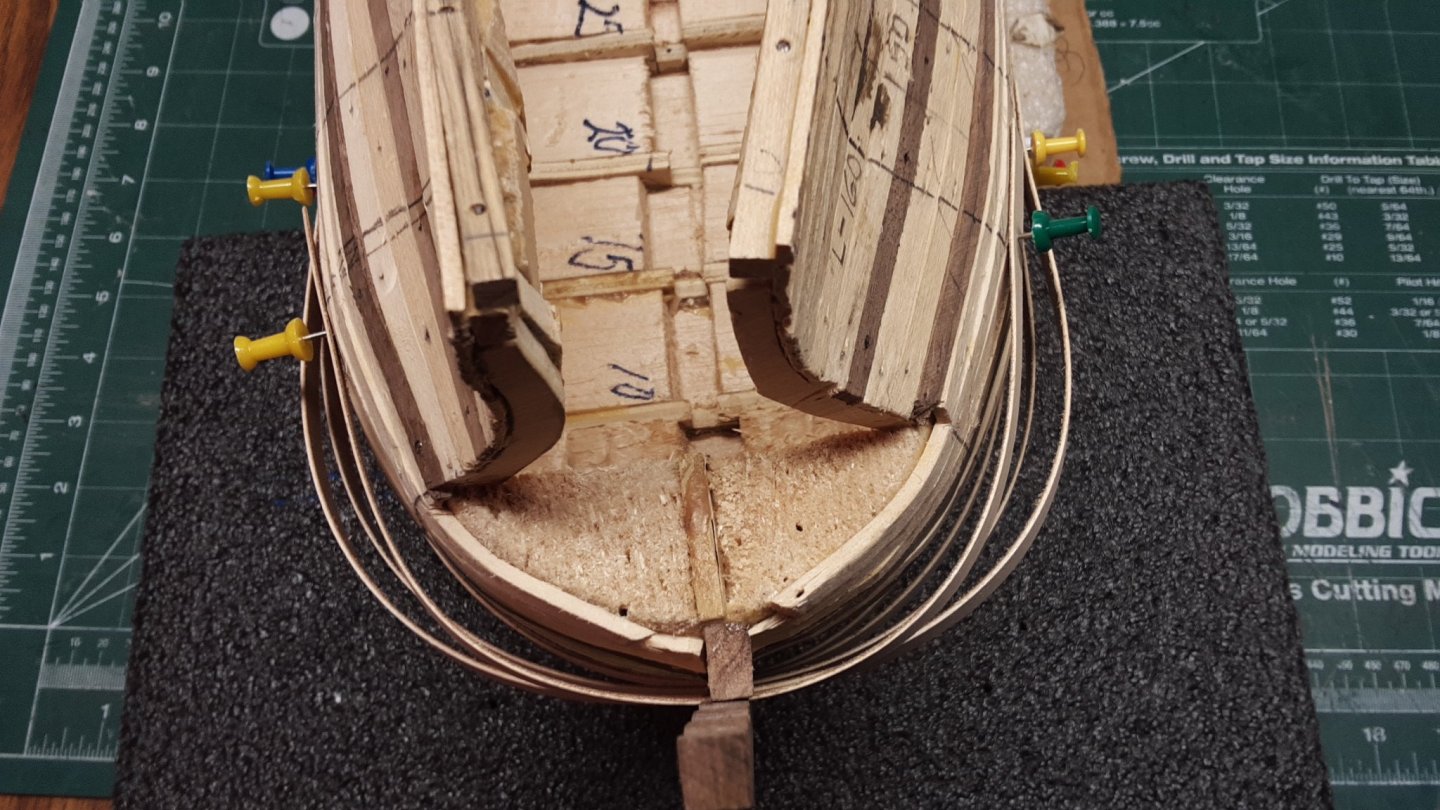
The models in the book show the following: the plank is at its lowest around the middle of the ship.
It then slightly curves up towards the bow and the plank butt, ends up straight at the stem post.

From the bottom wale going up, planking is easy to execute, lots of curves but nothing extreme.
From the bottom wale going down, every planking strip becomes difficult to execute. Not only curved like a 'smile', but the plank is also curved inward (when you hold a plank by its sides with your thumb and pointing finger and putting pressure on the fingers to bowe the plank lengthwise).
All plank butts, end up on an angle against both stern post and stem post on the model.
This is not like the models in the book.

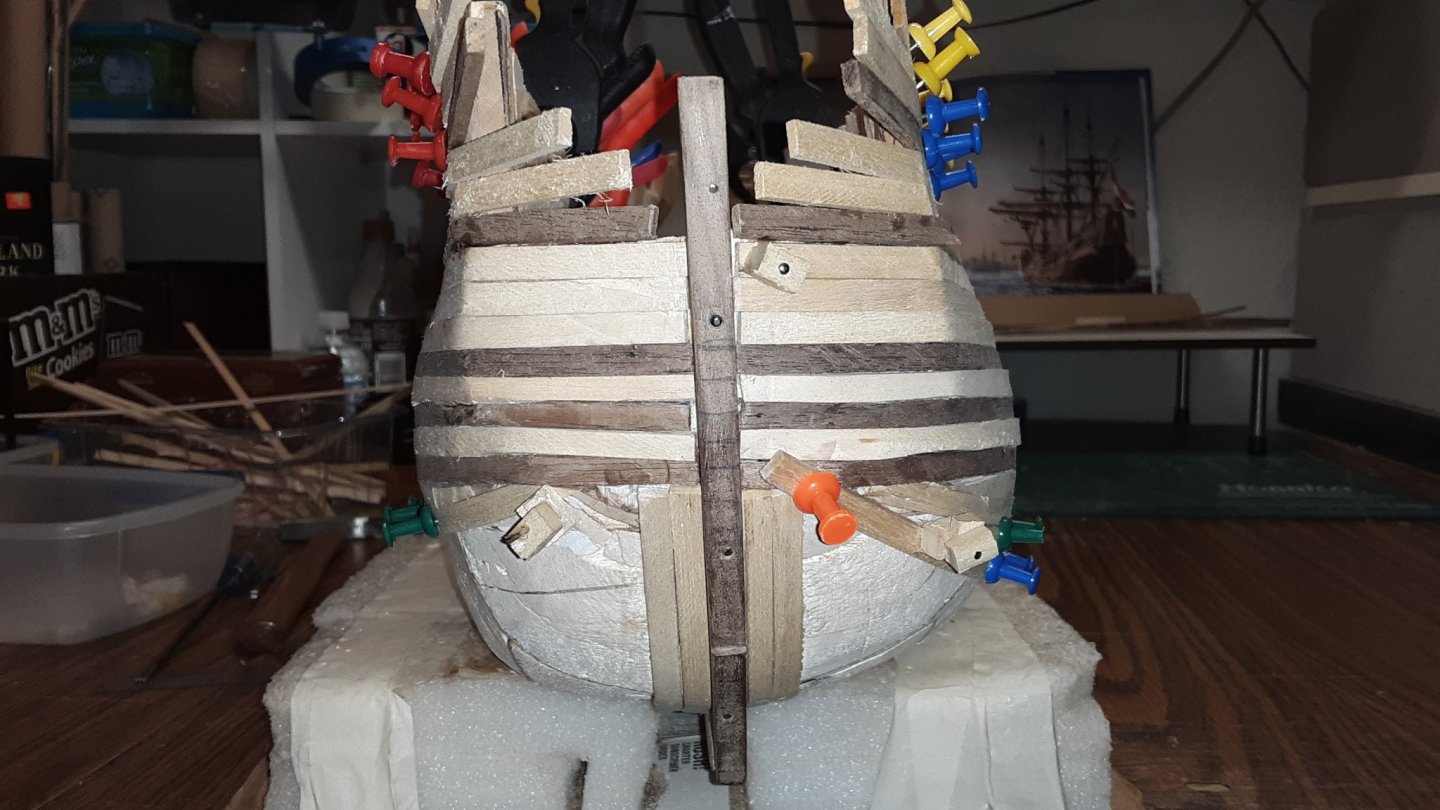
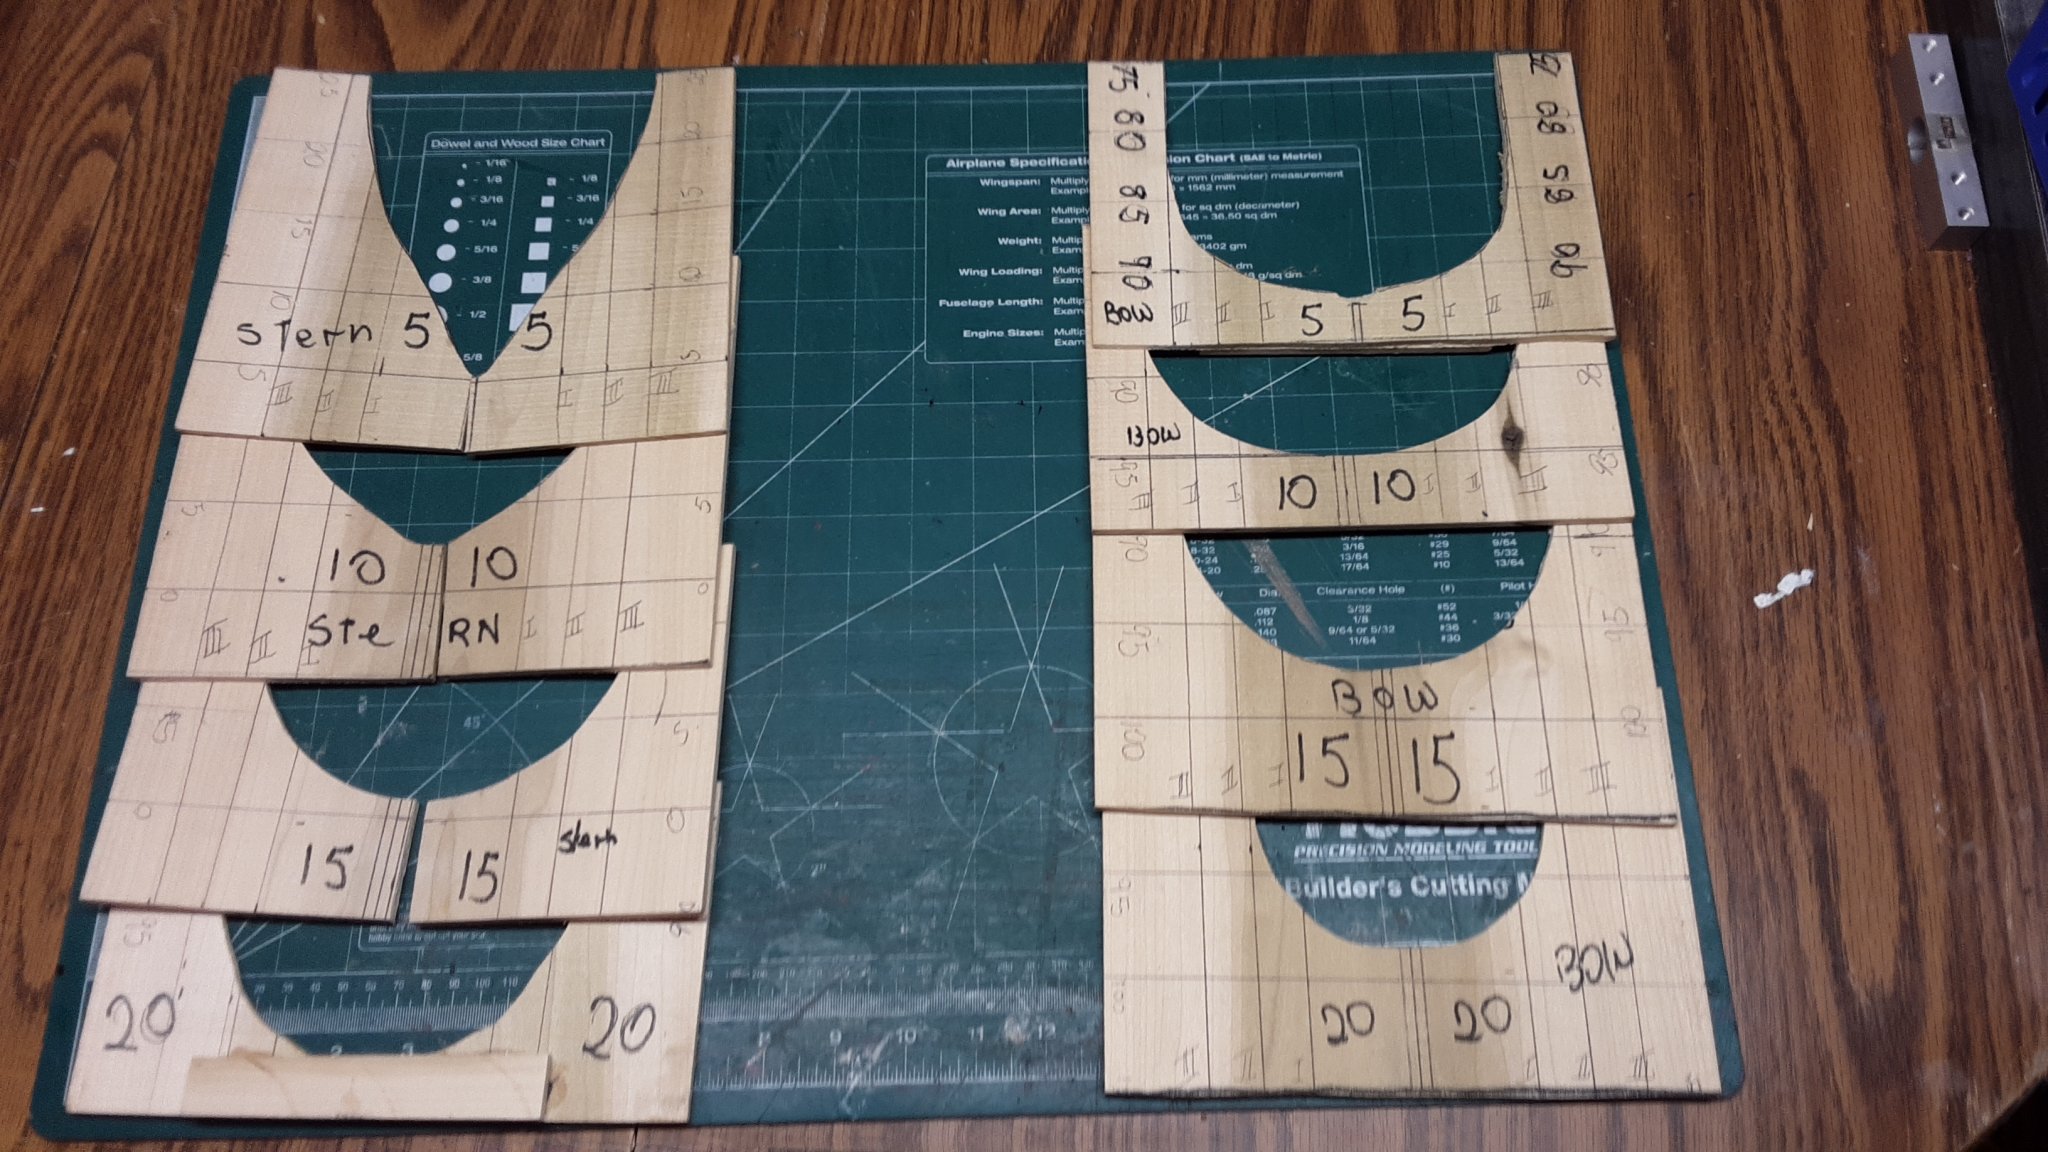
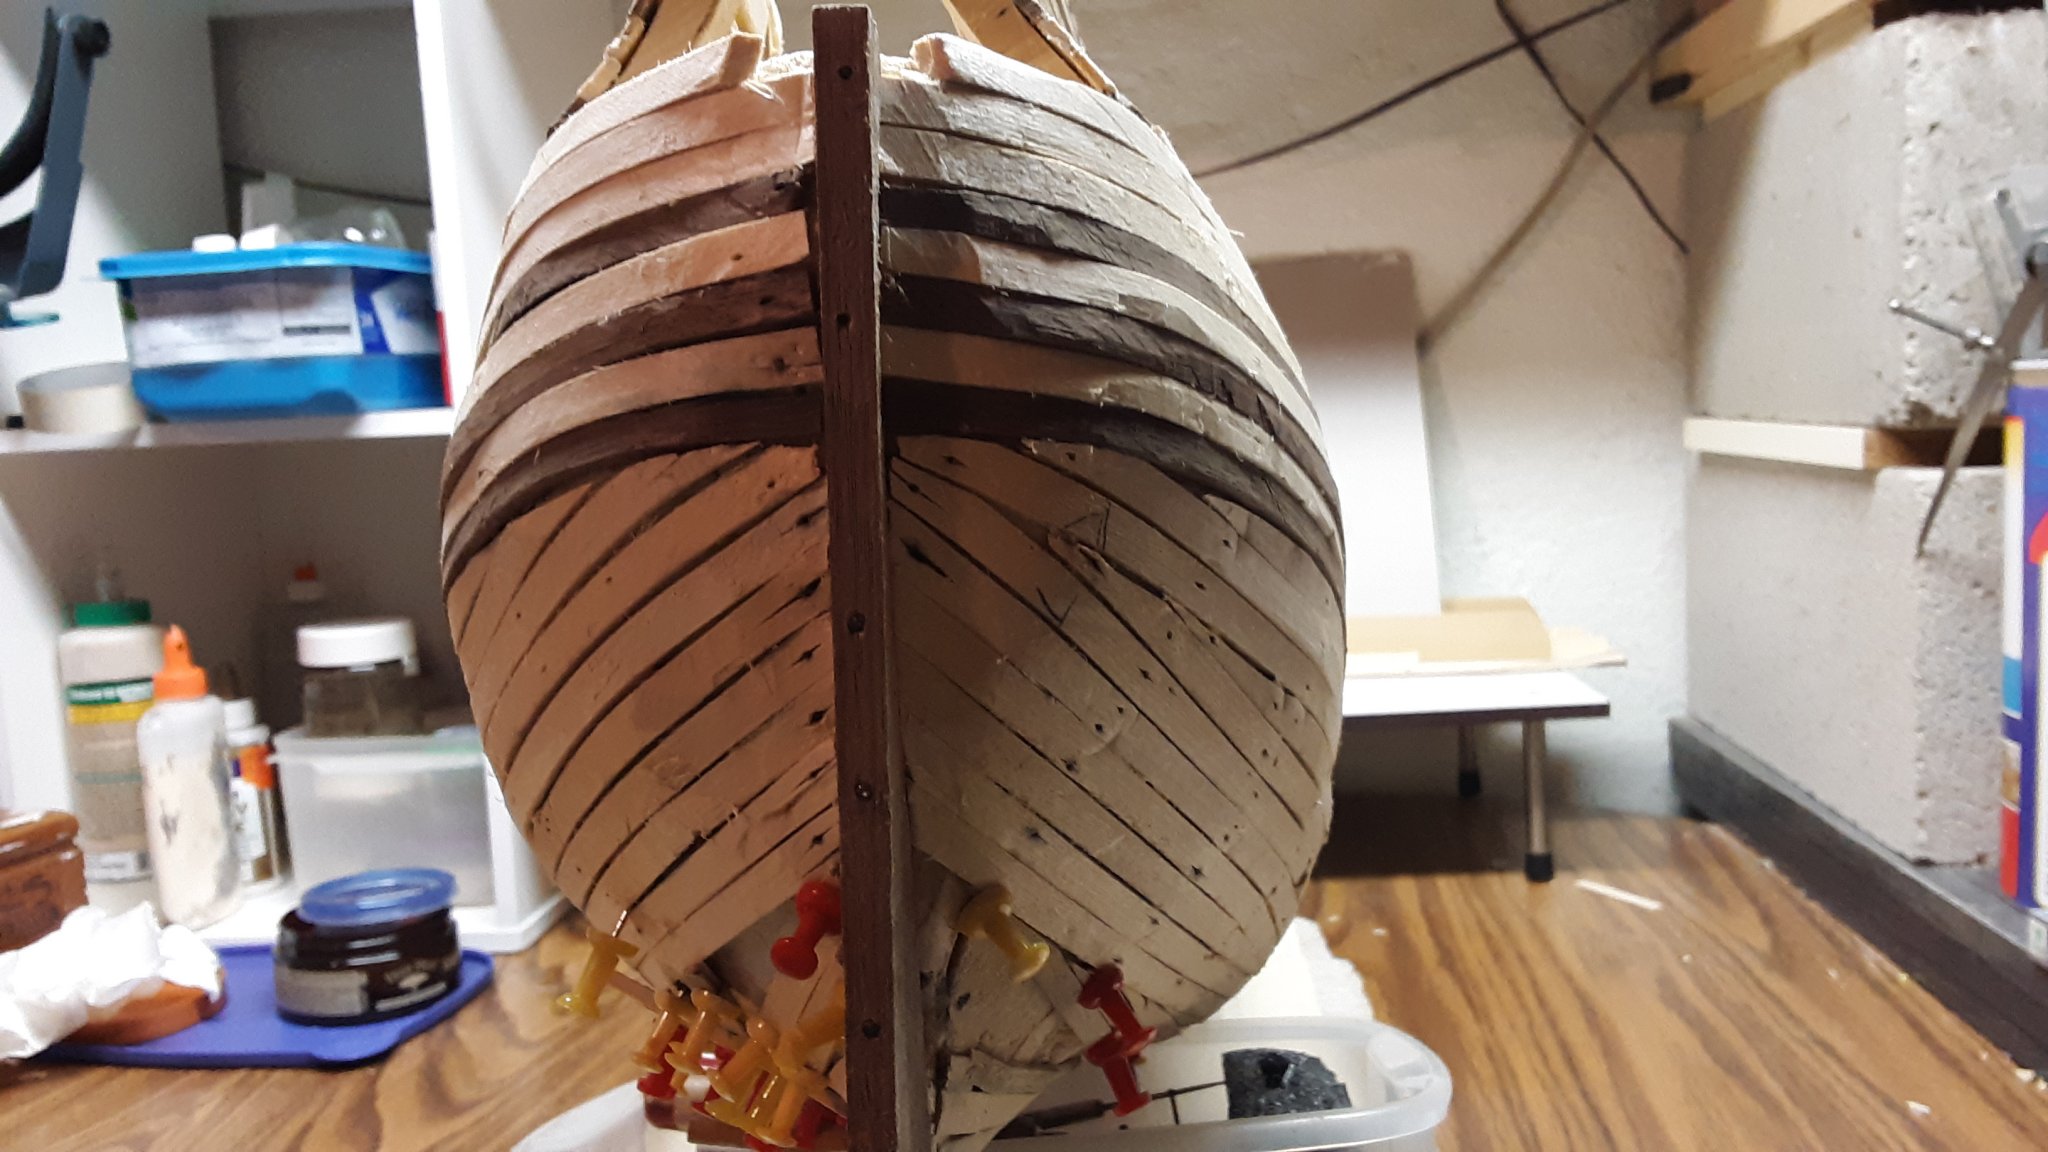
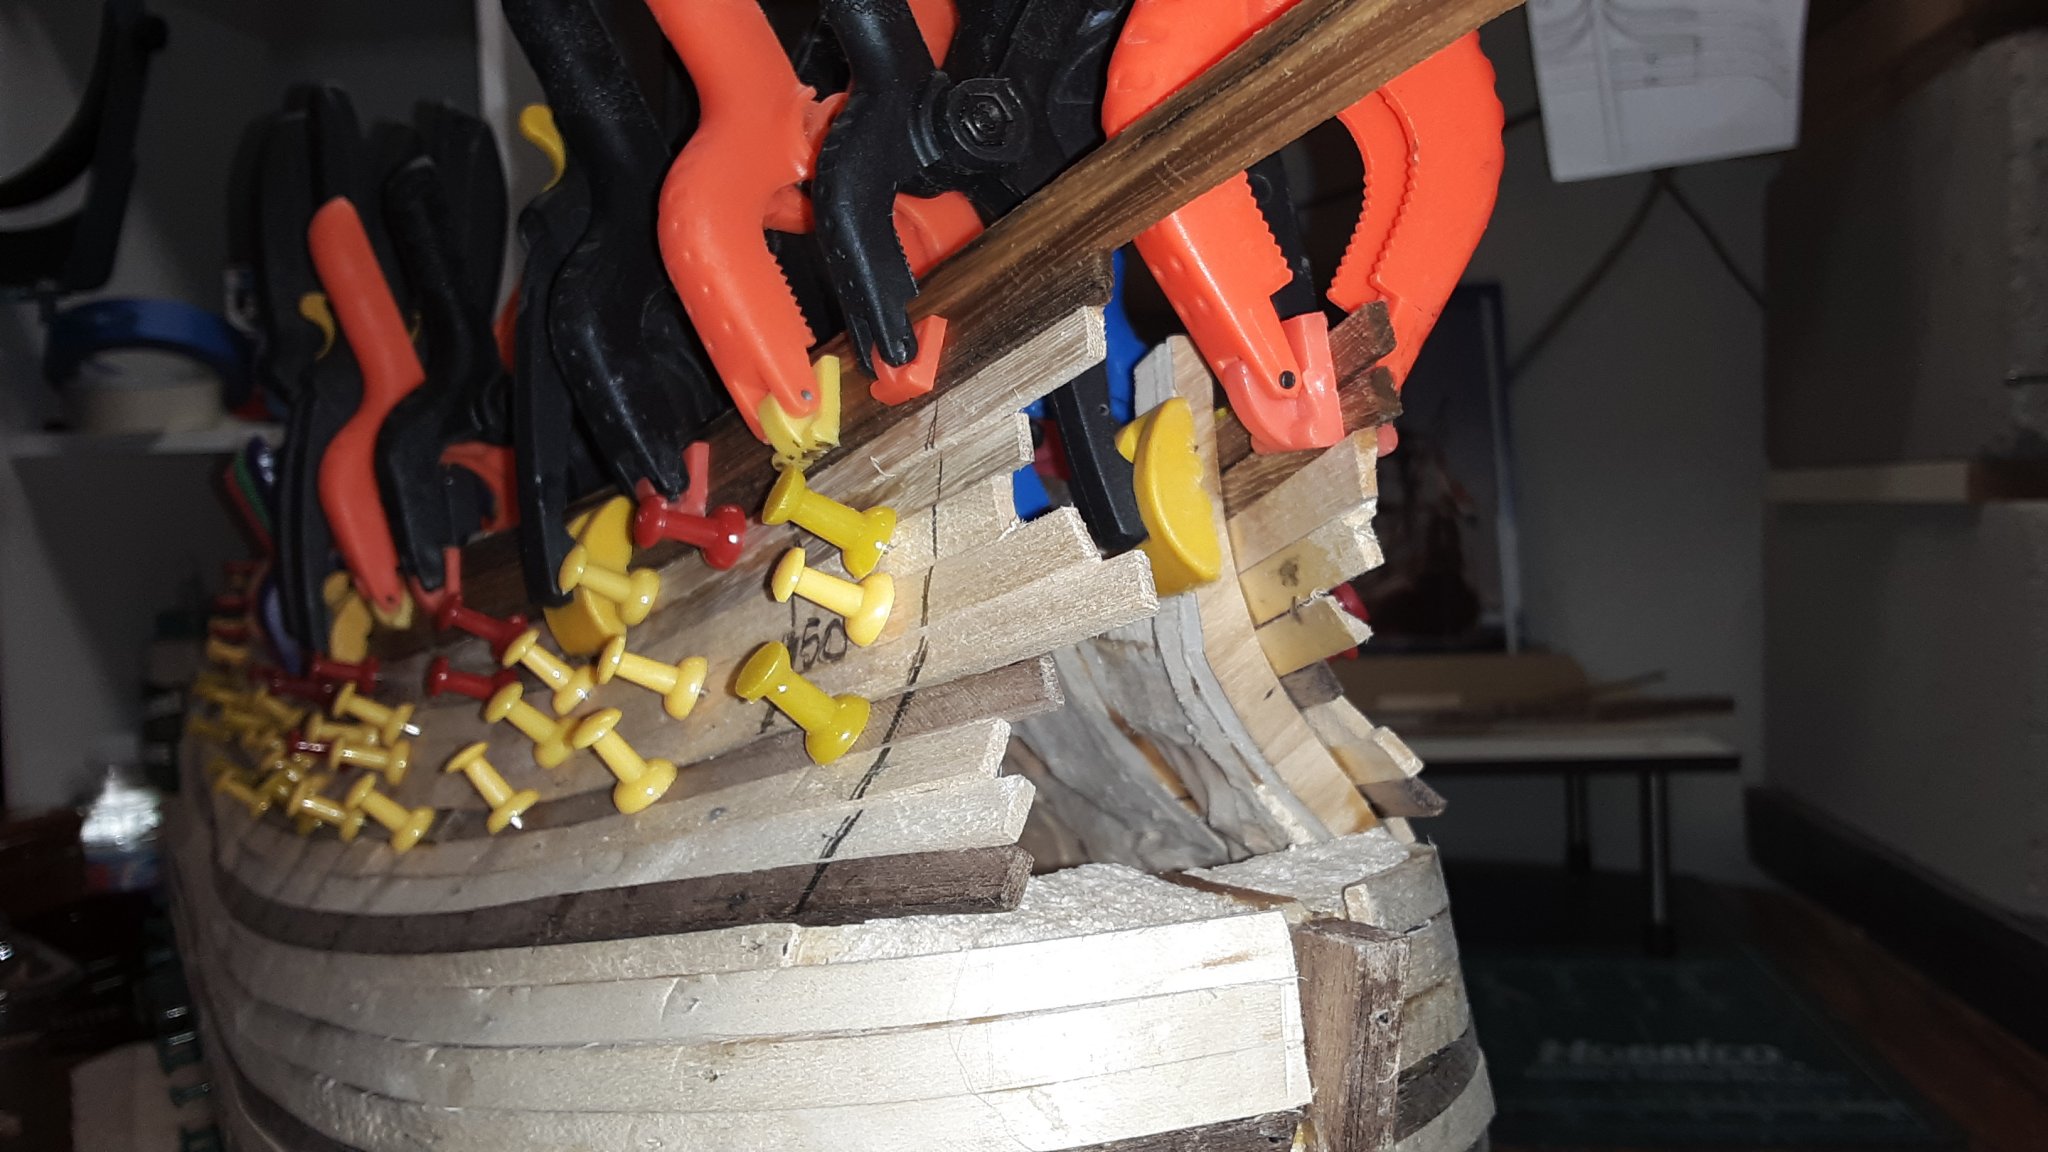
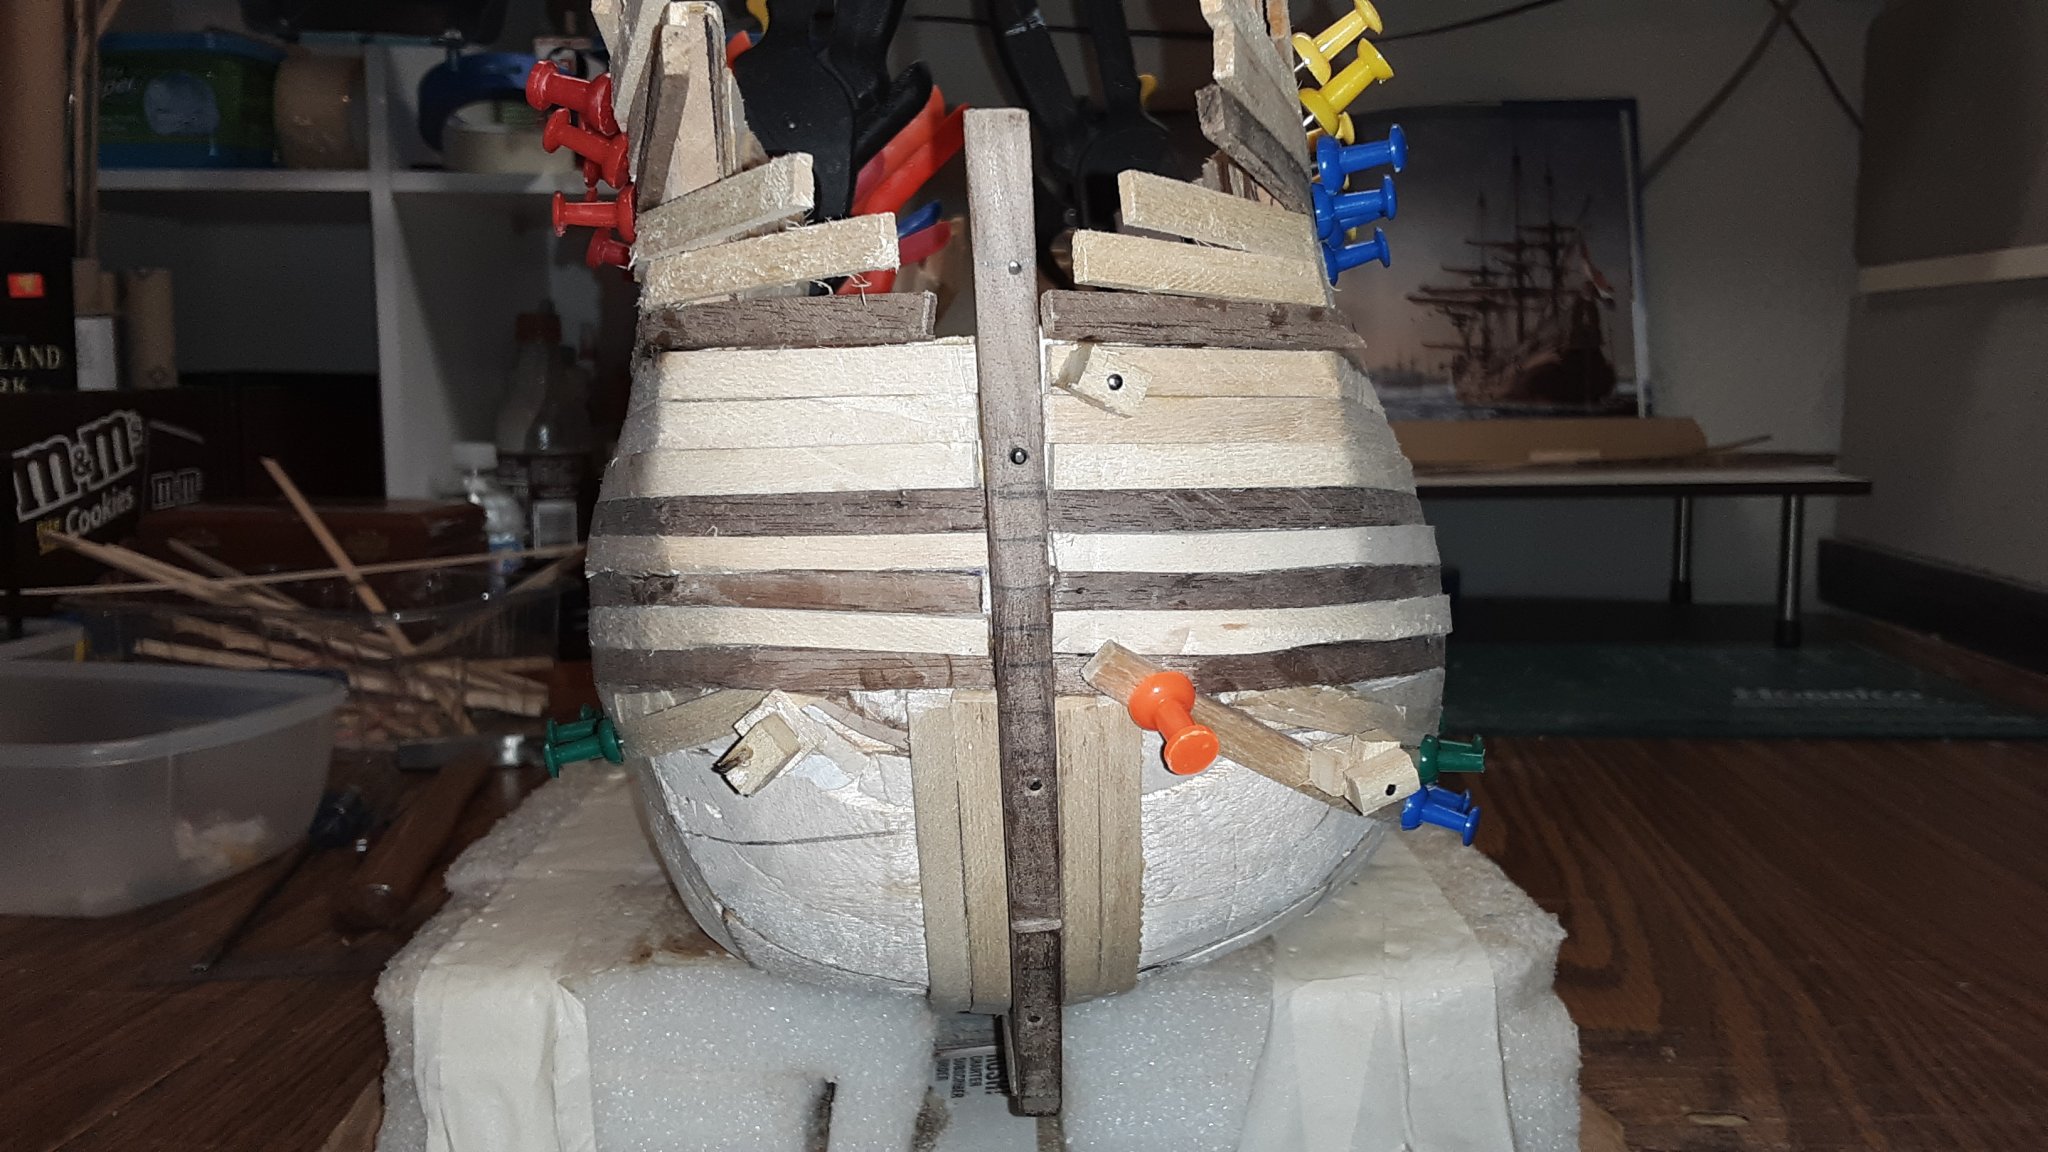
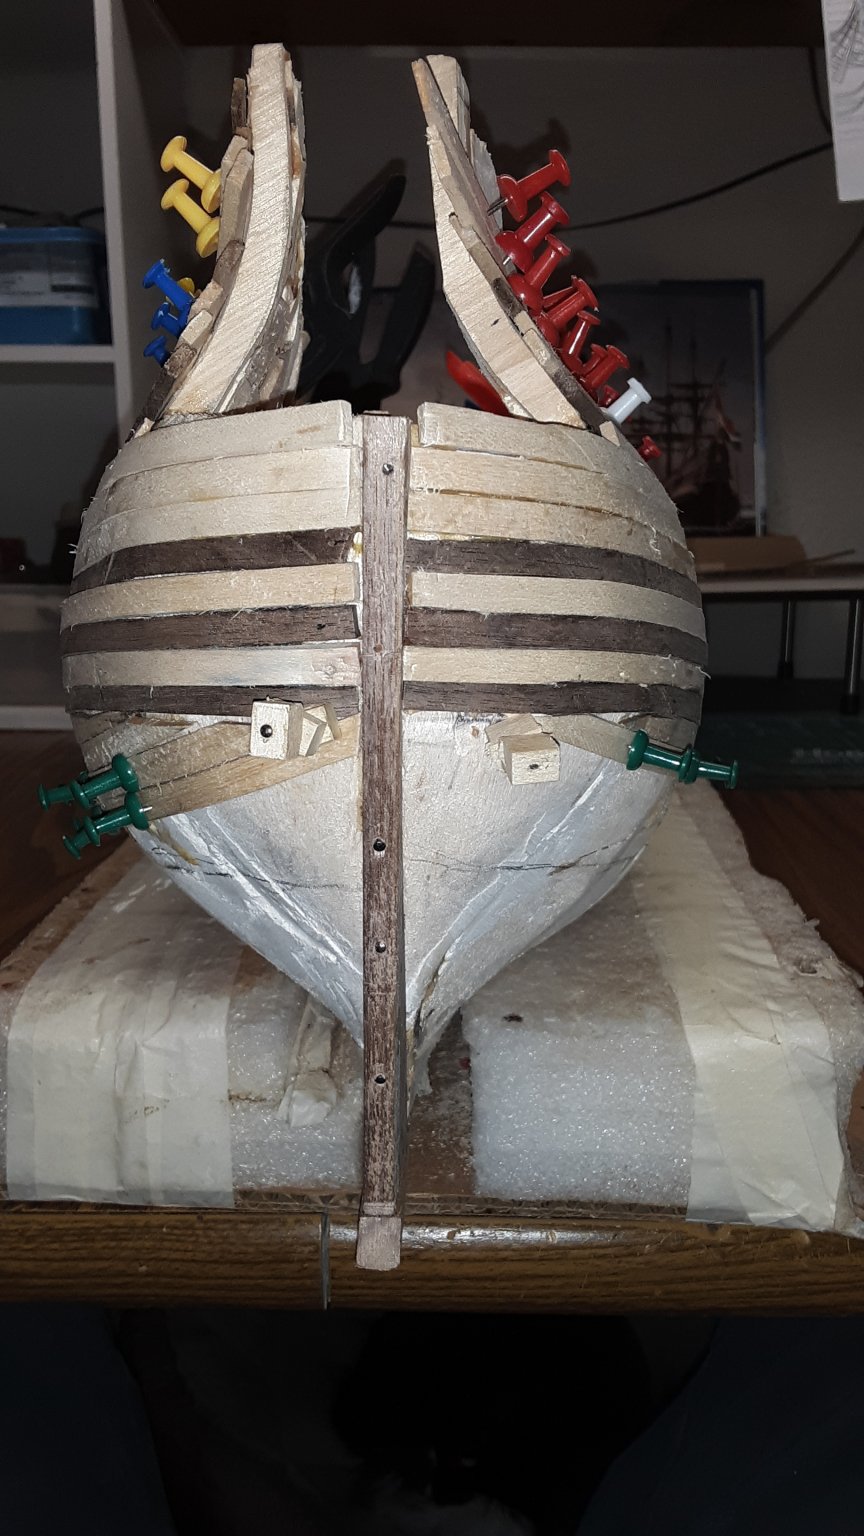
Bow


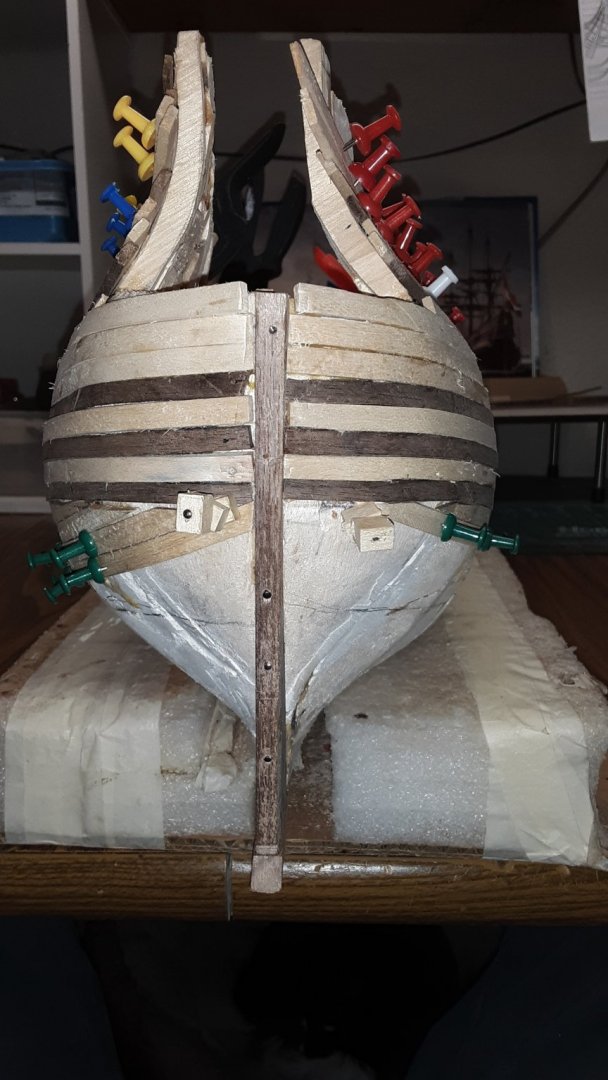
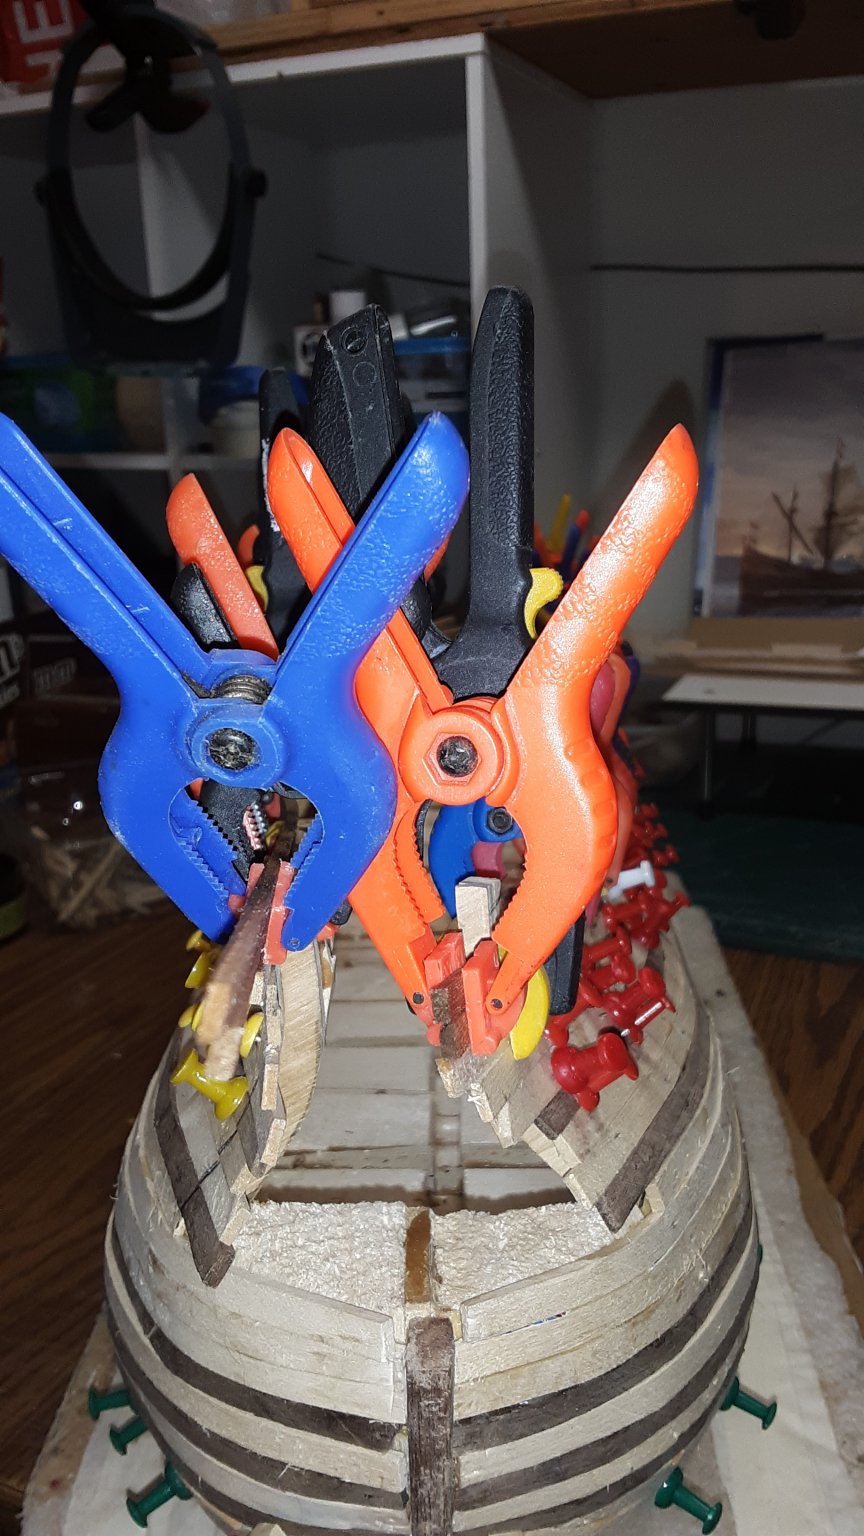
Stern
In the book the stern area is much more bowed then my model. The models in the book have fat hips, whereas my model has skinny hips. It still curves. (I'll figure this out when I built my next sectional Fluit, just the bow and the stern).


Skinny hips
Fat hips
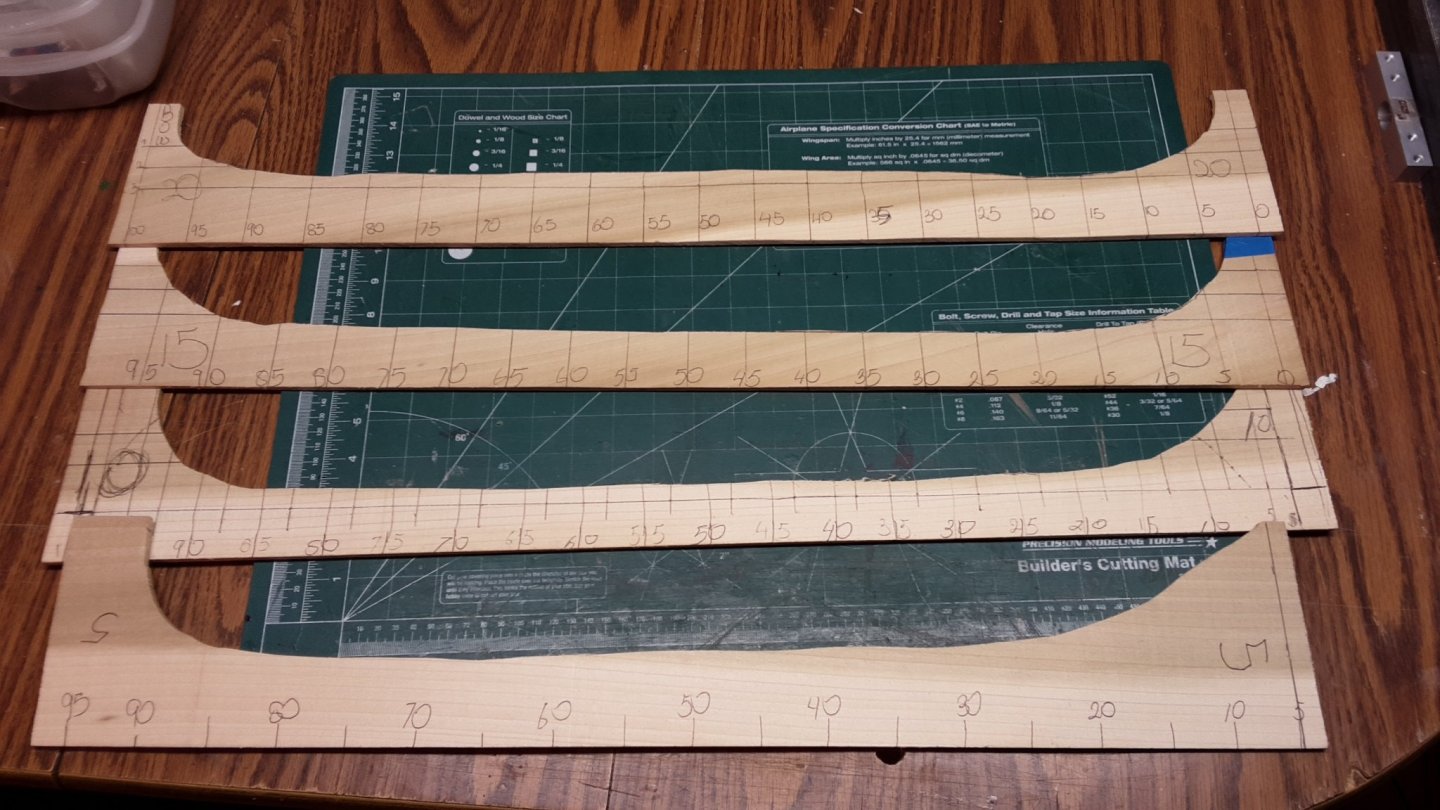
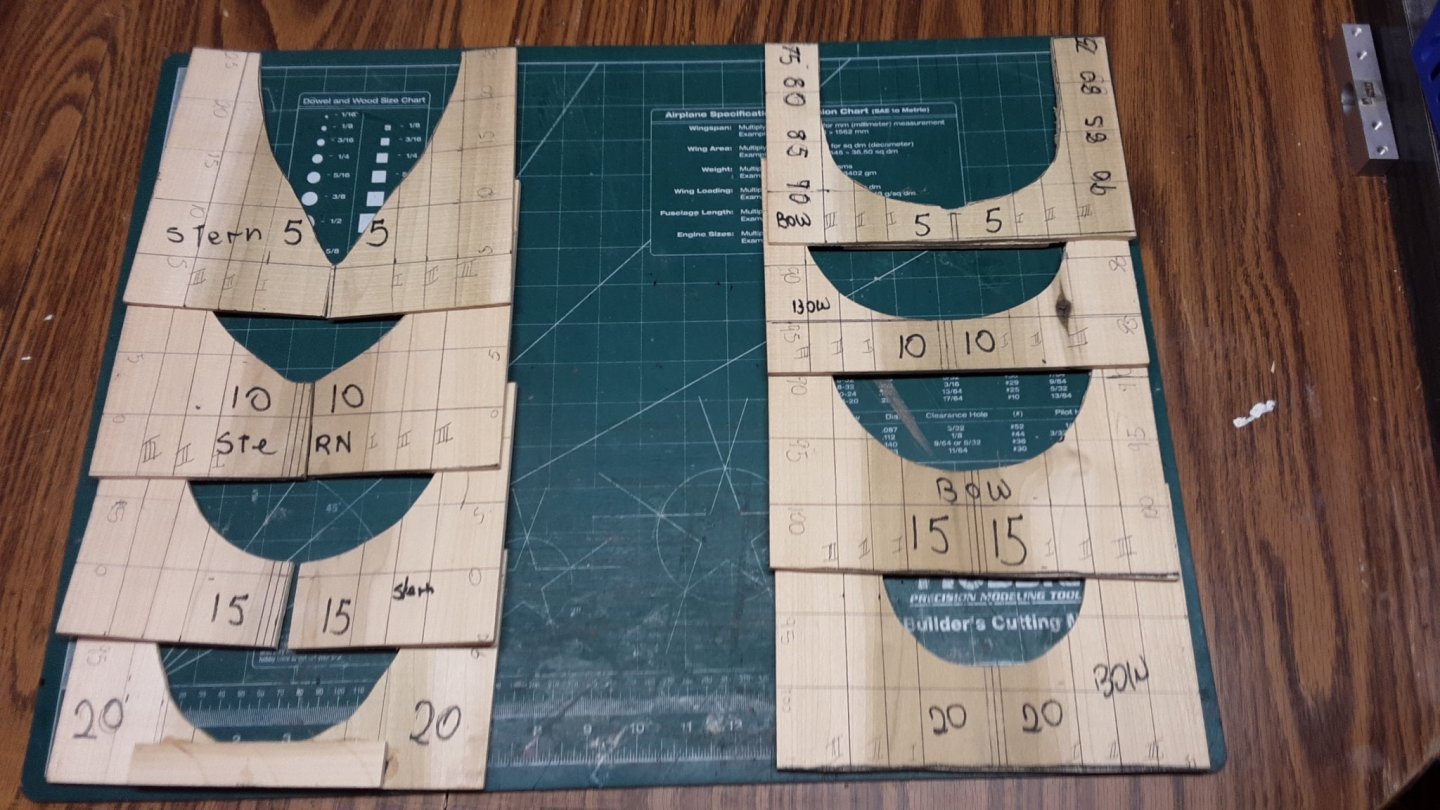
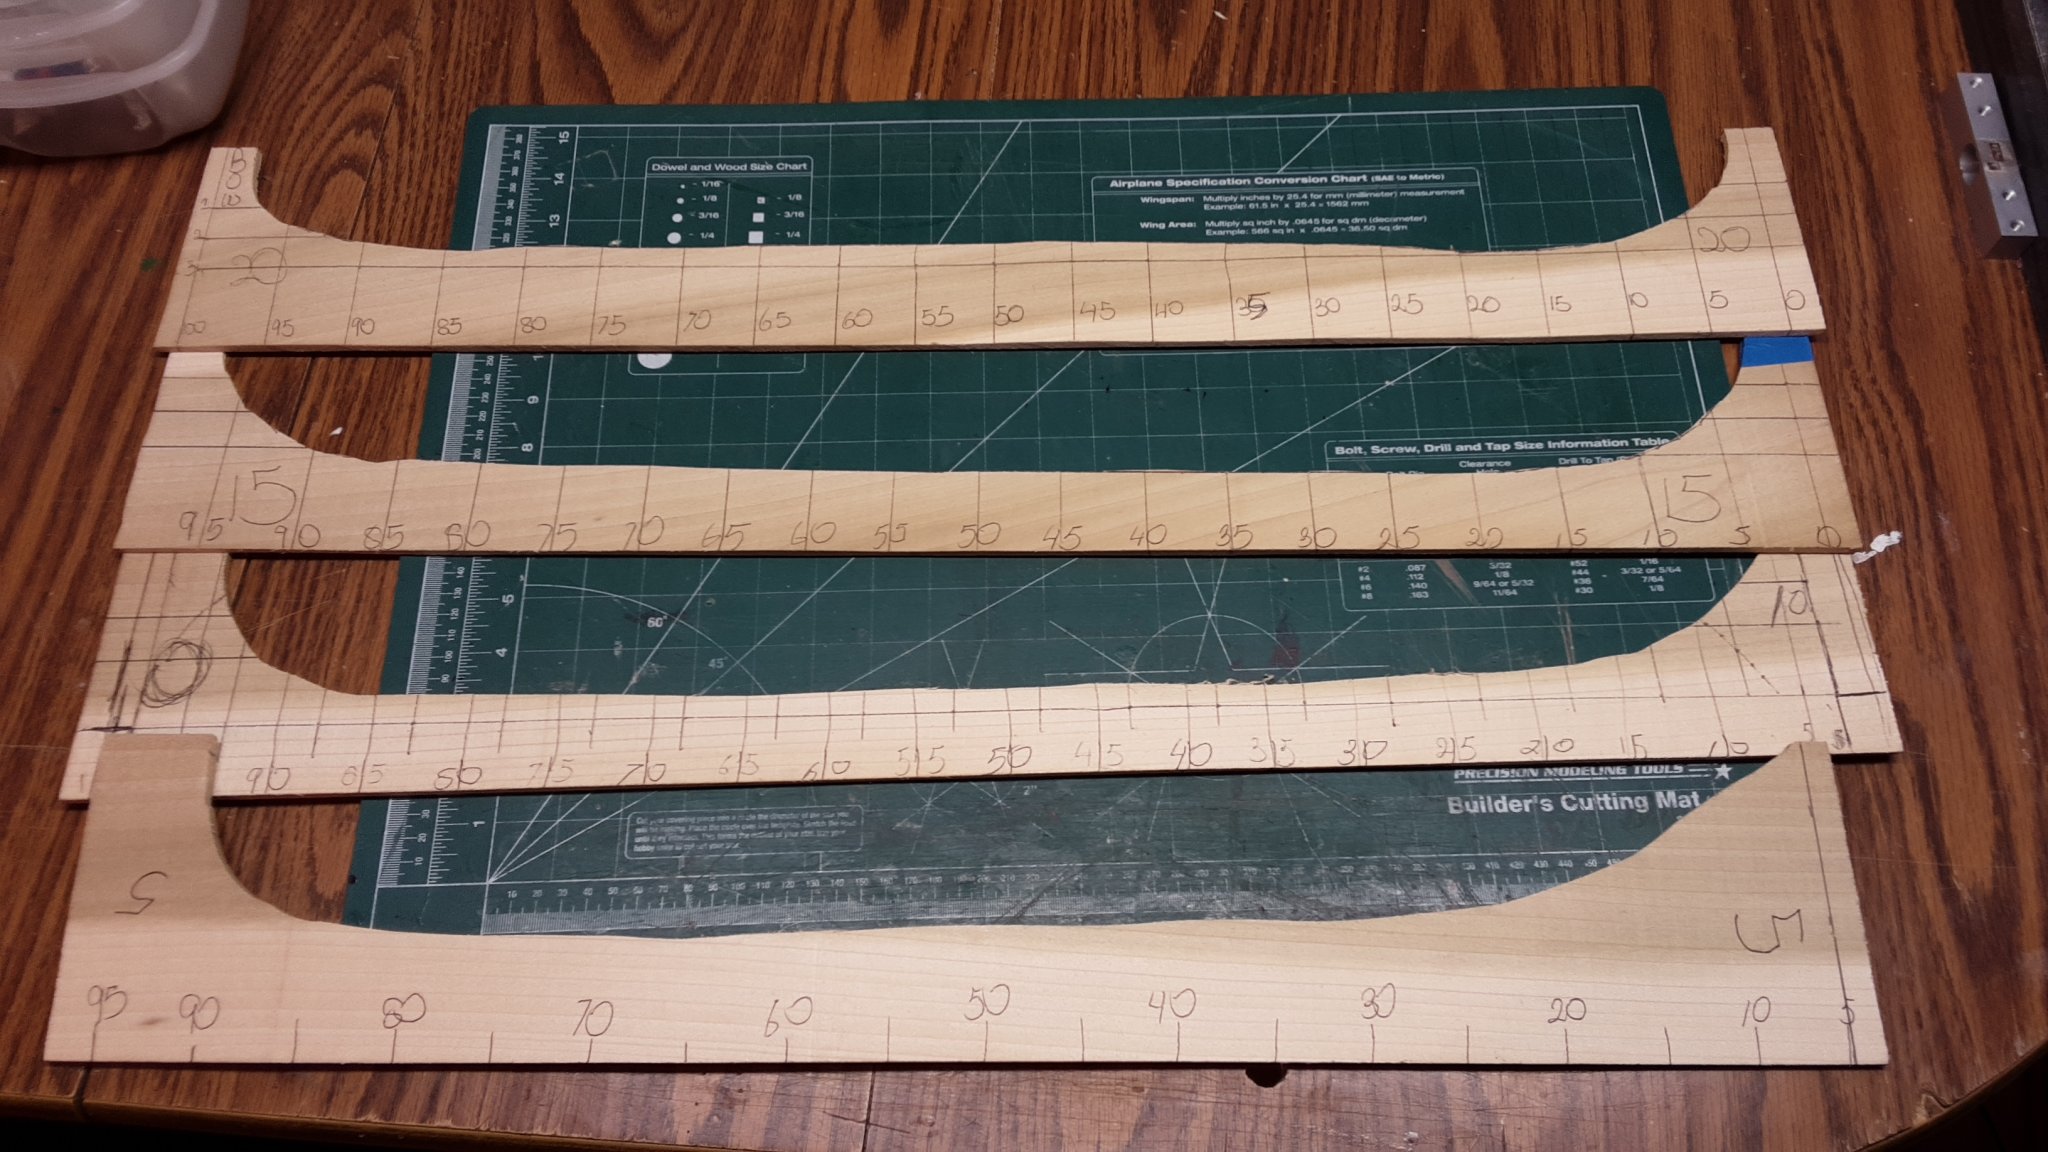
Furthermore, when I cut out the stern bulkhead #5, #10, #15 and #20 and spaced them 38mm of each other it was what the plans looked like.
Looking at the models in the book bulkhead #0 (if there is such a thing) is the same width as bulkhead #5.
Conclusion
I read on other forums that planking a Fluit was a difficult exercise. (maybe I should have built a Cat first, which is similar to a Fluit).
I cut out the bulkheads correctly and lined them up with spaces correctly.
I am just not getting the fat hips.
*********
I could start all over......... not doing that.
I could saw (cut off) her where bulkhead #30 is and recreate the ship from bulkhead 5 to 30 with bigger hips.
Leave the ship as is and install the second layer of planking like what the book shows.
See if it is possible to built up both the bow and stern to get the results (bigger hips) of what is in the book.
If you got this far, thank you for reading.
Marcus
- Landlubber Mike, GrandpaPhil, G.L. and 2 others
-
5
-
-
-
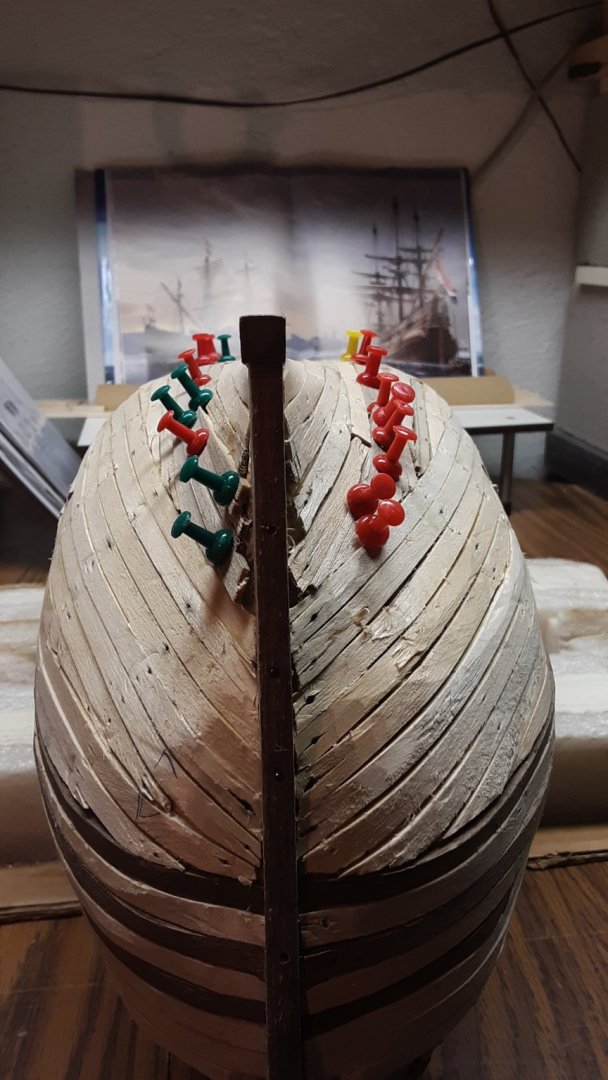
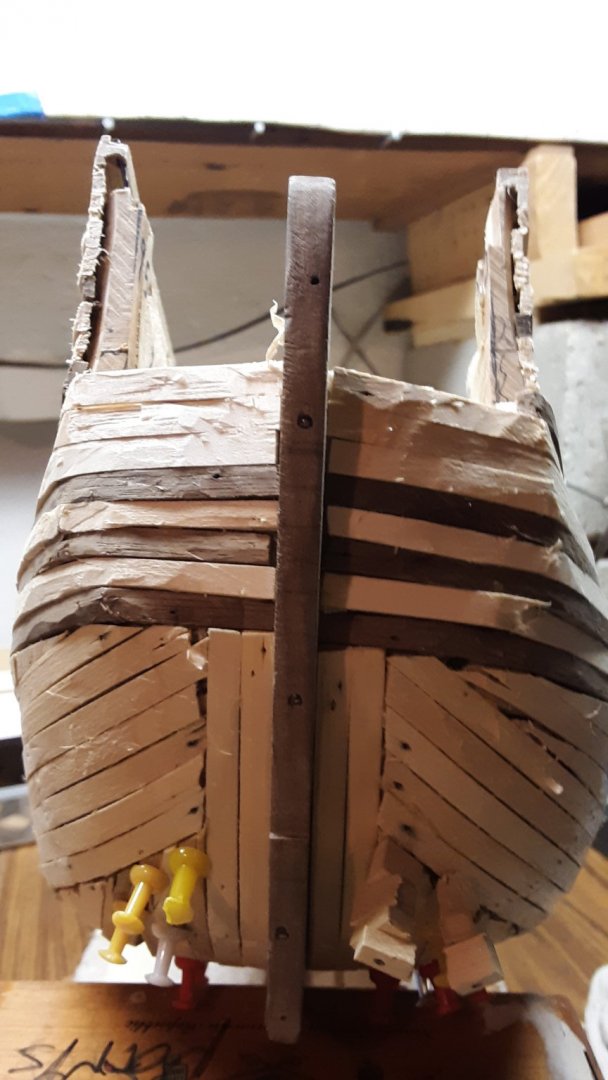
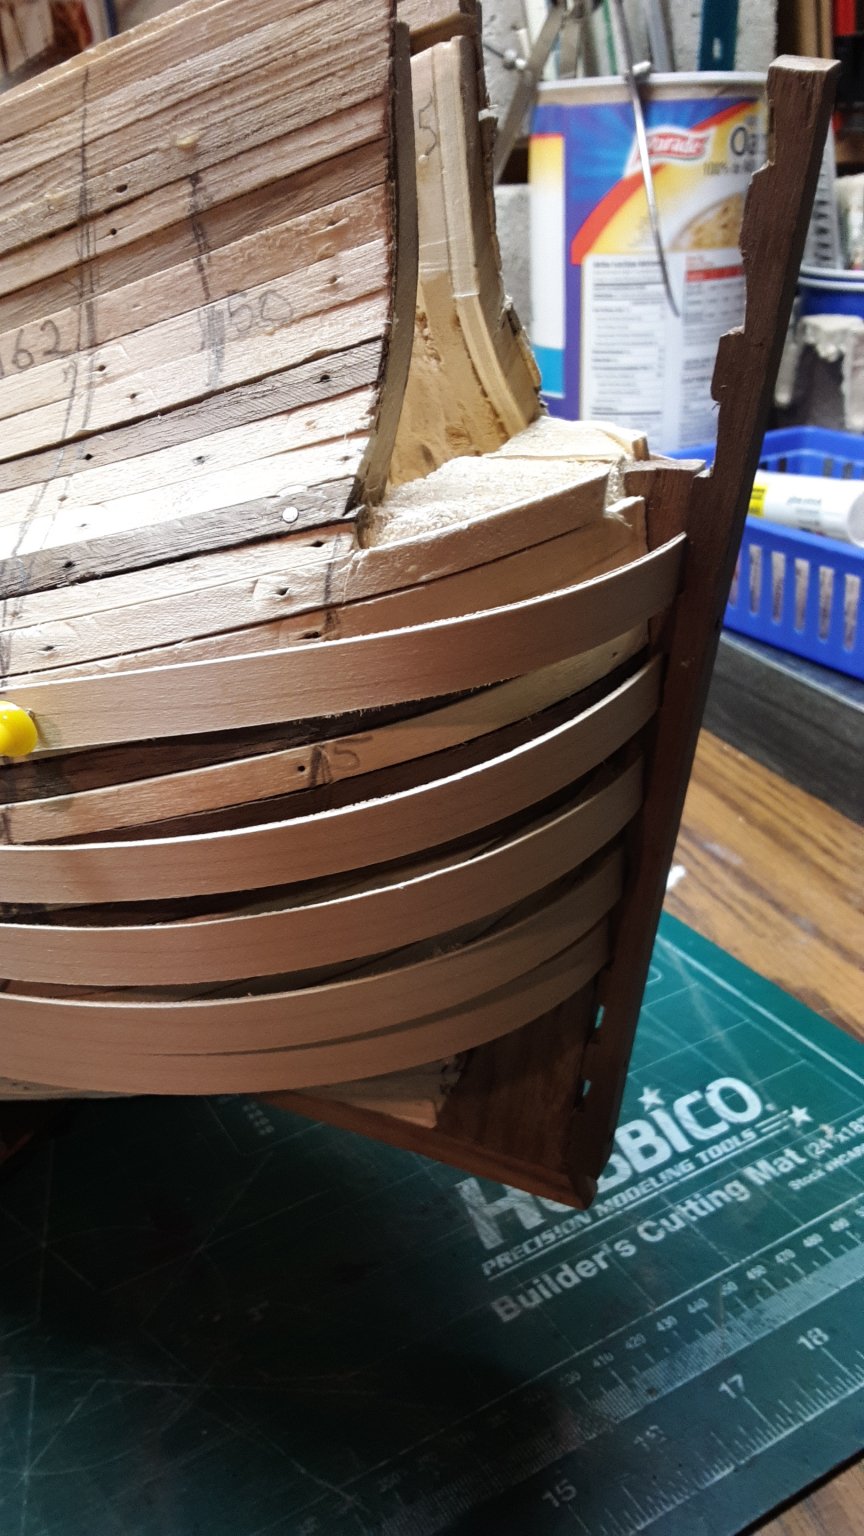
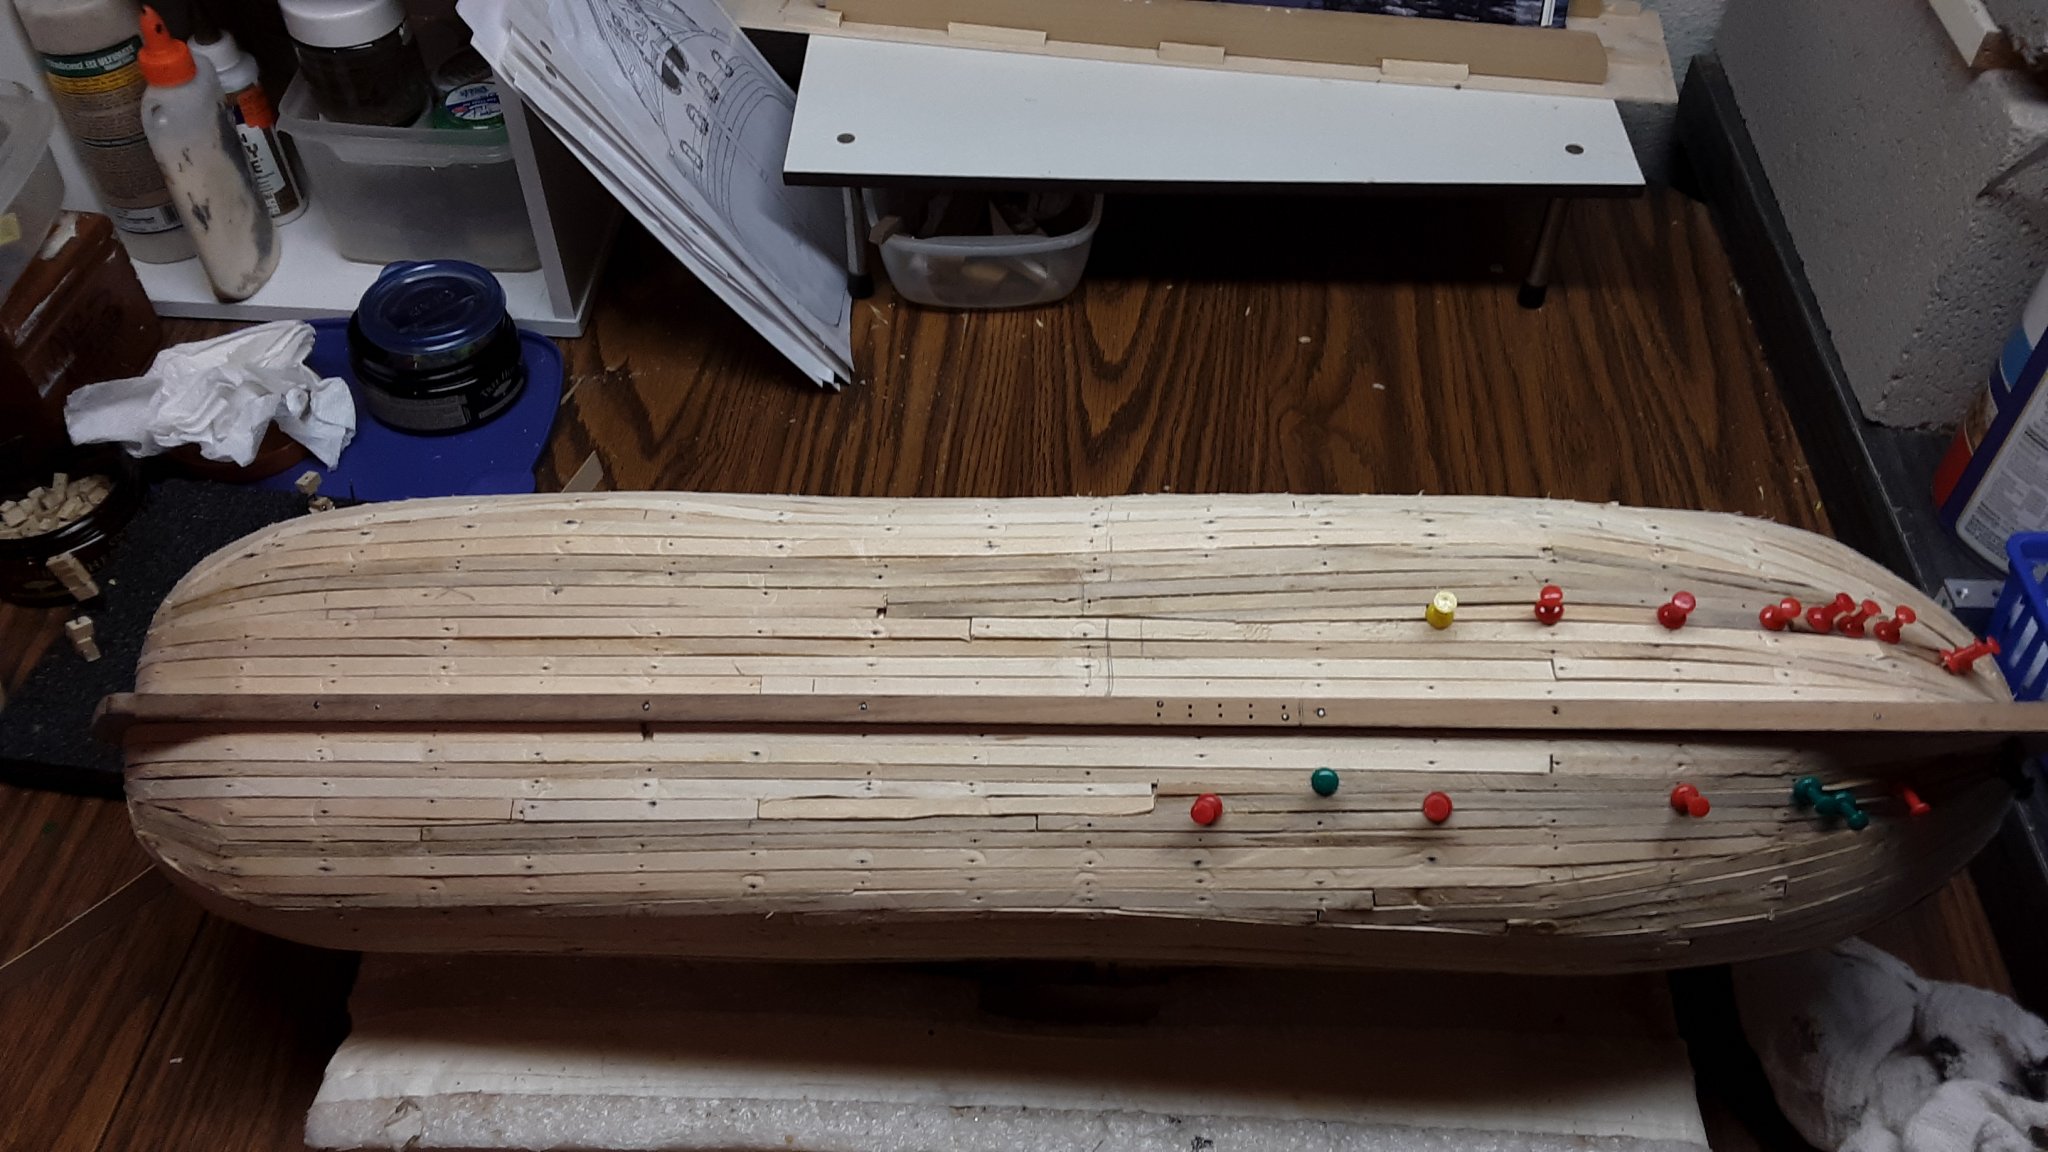
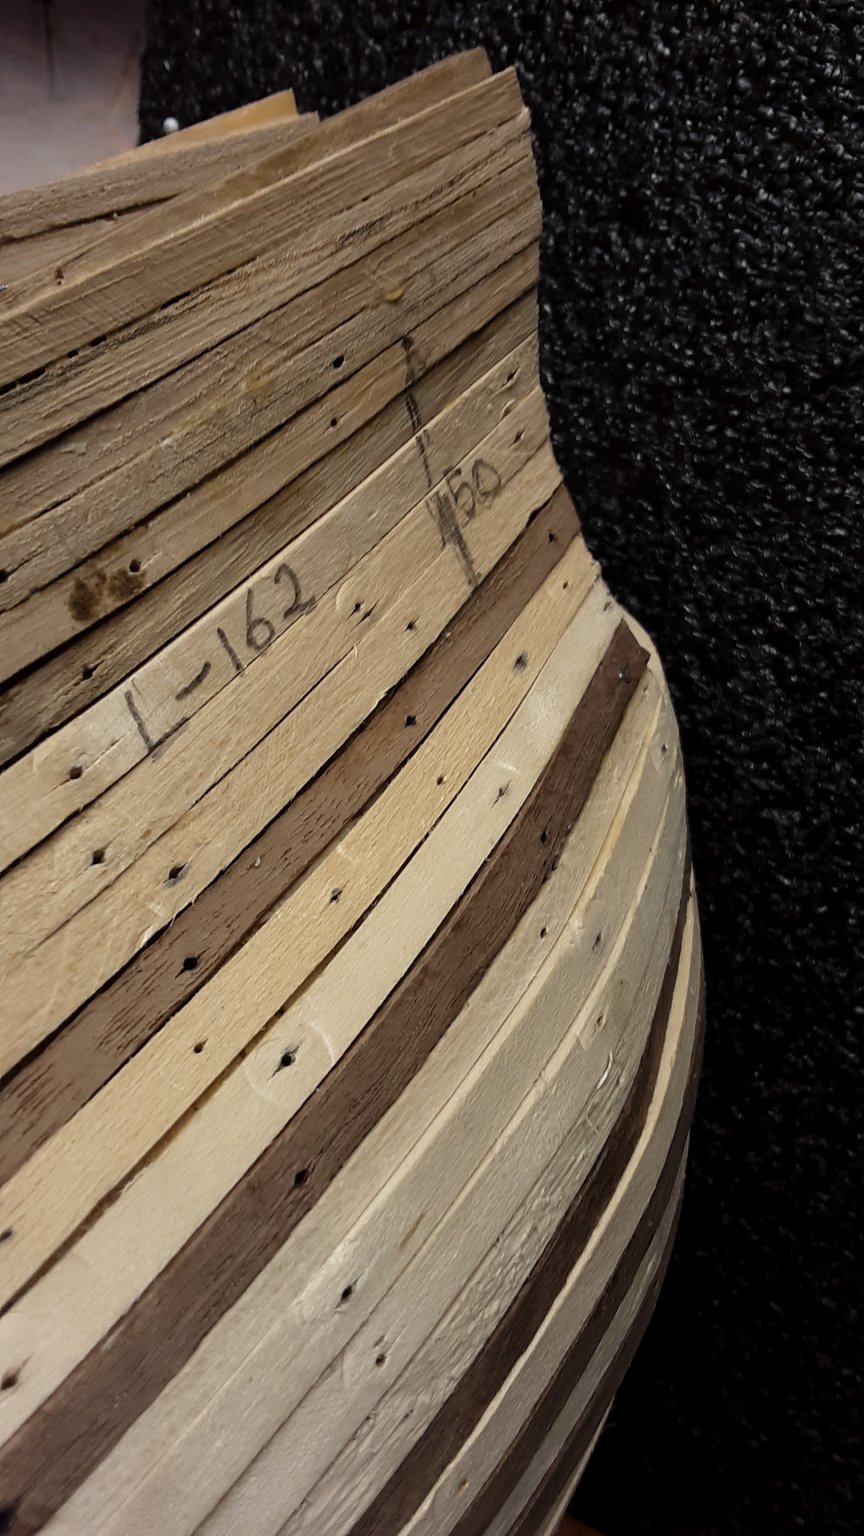
Here is some more planking 😁, the walnut shows where the wales are going to be.
Getting a bit boring?
There is progress......

Bow
Stern
Marcus
- G.L., FriedClams, mtaylor and 1 other
-
4
-
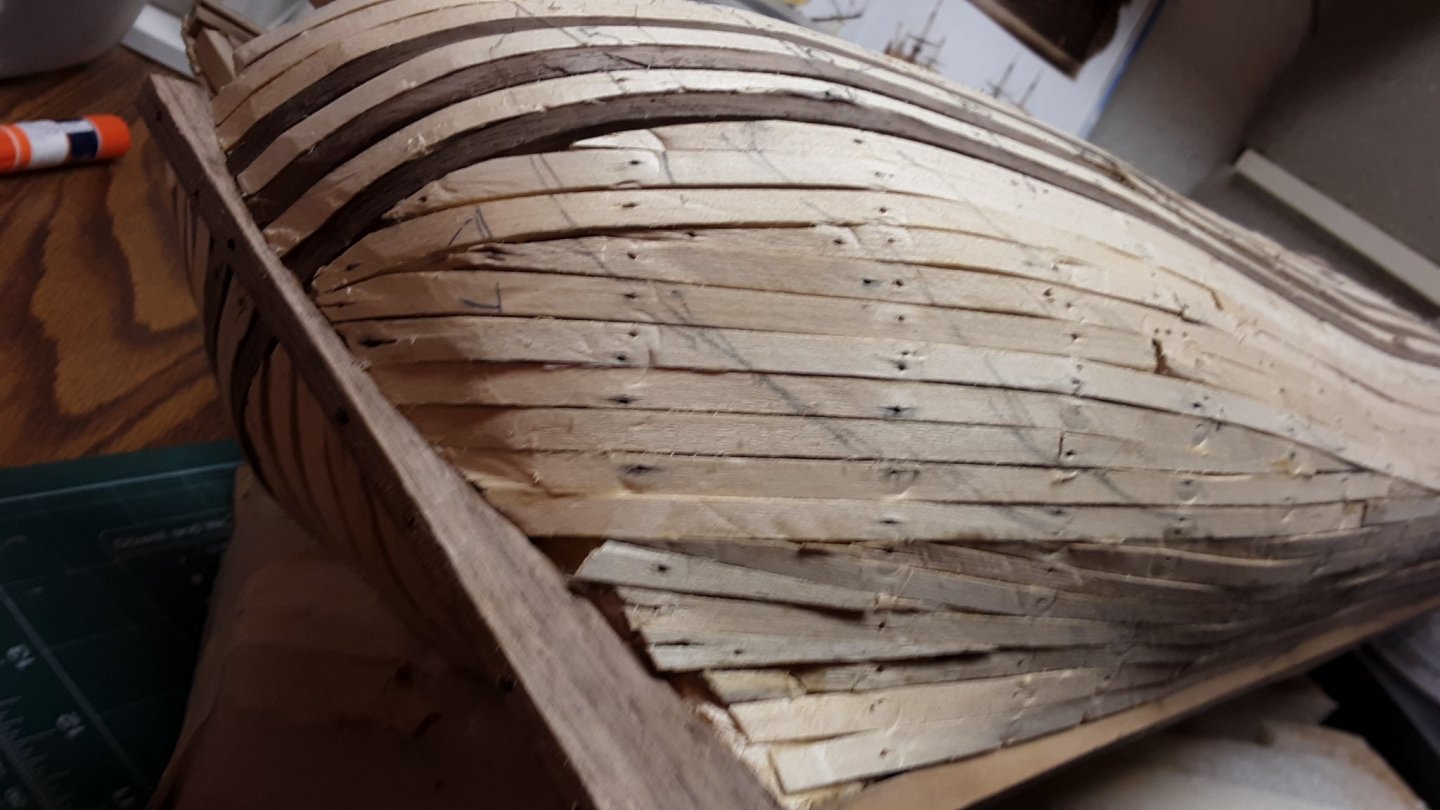
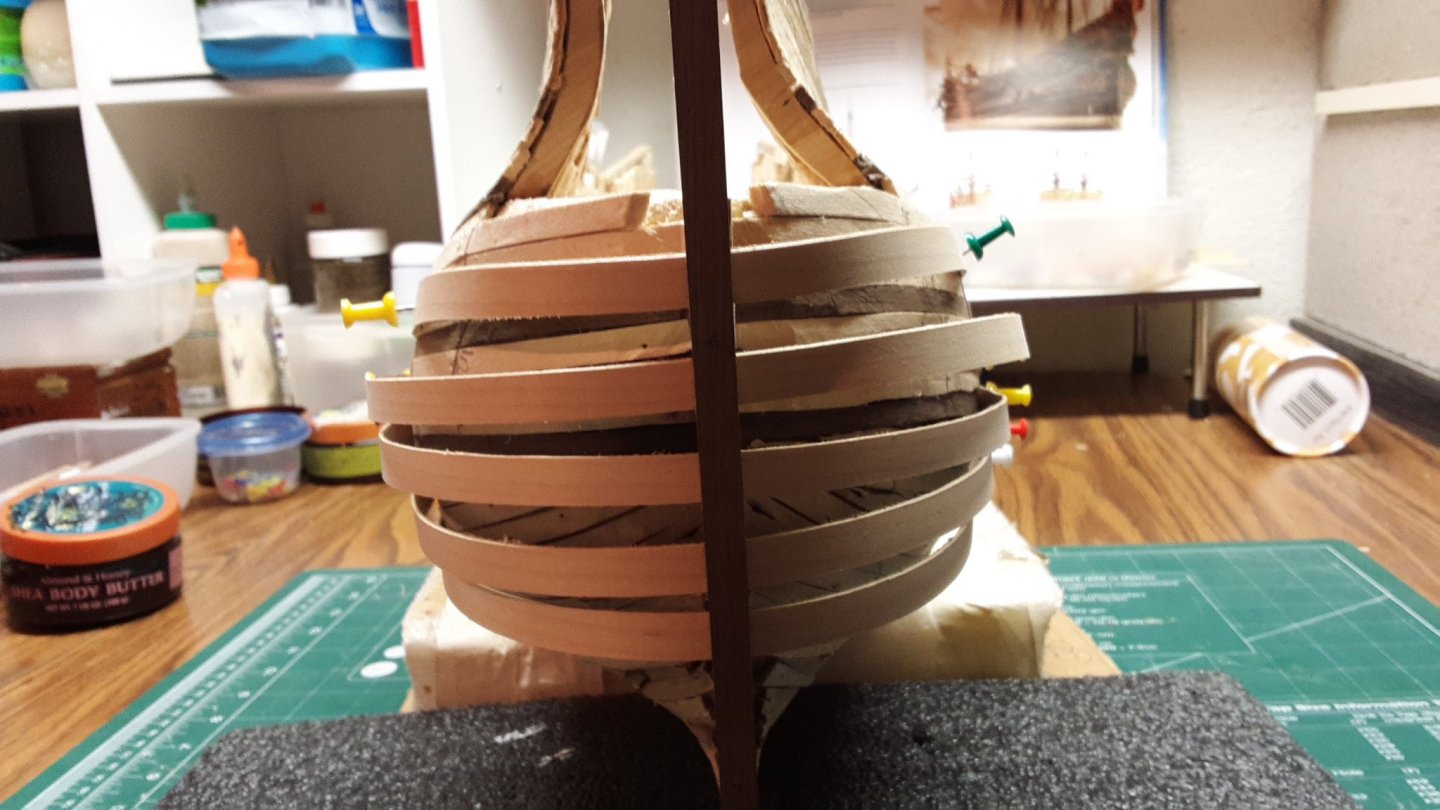
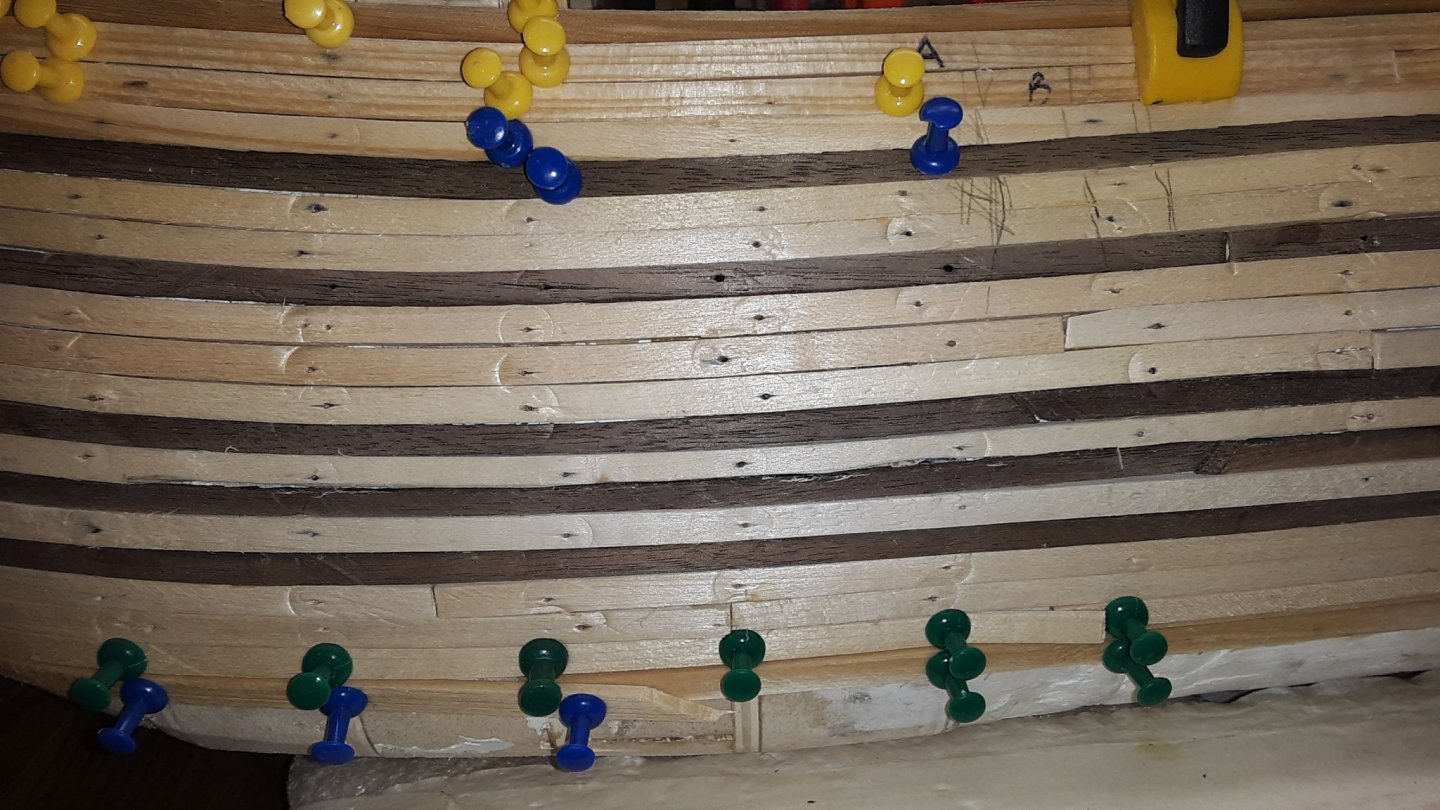
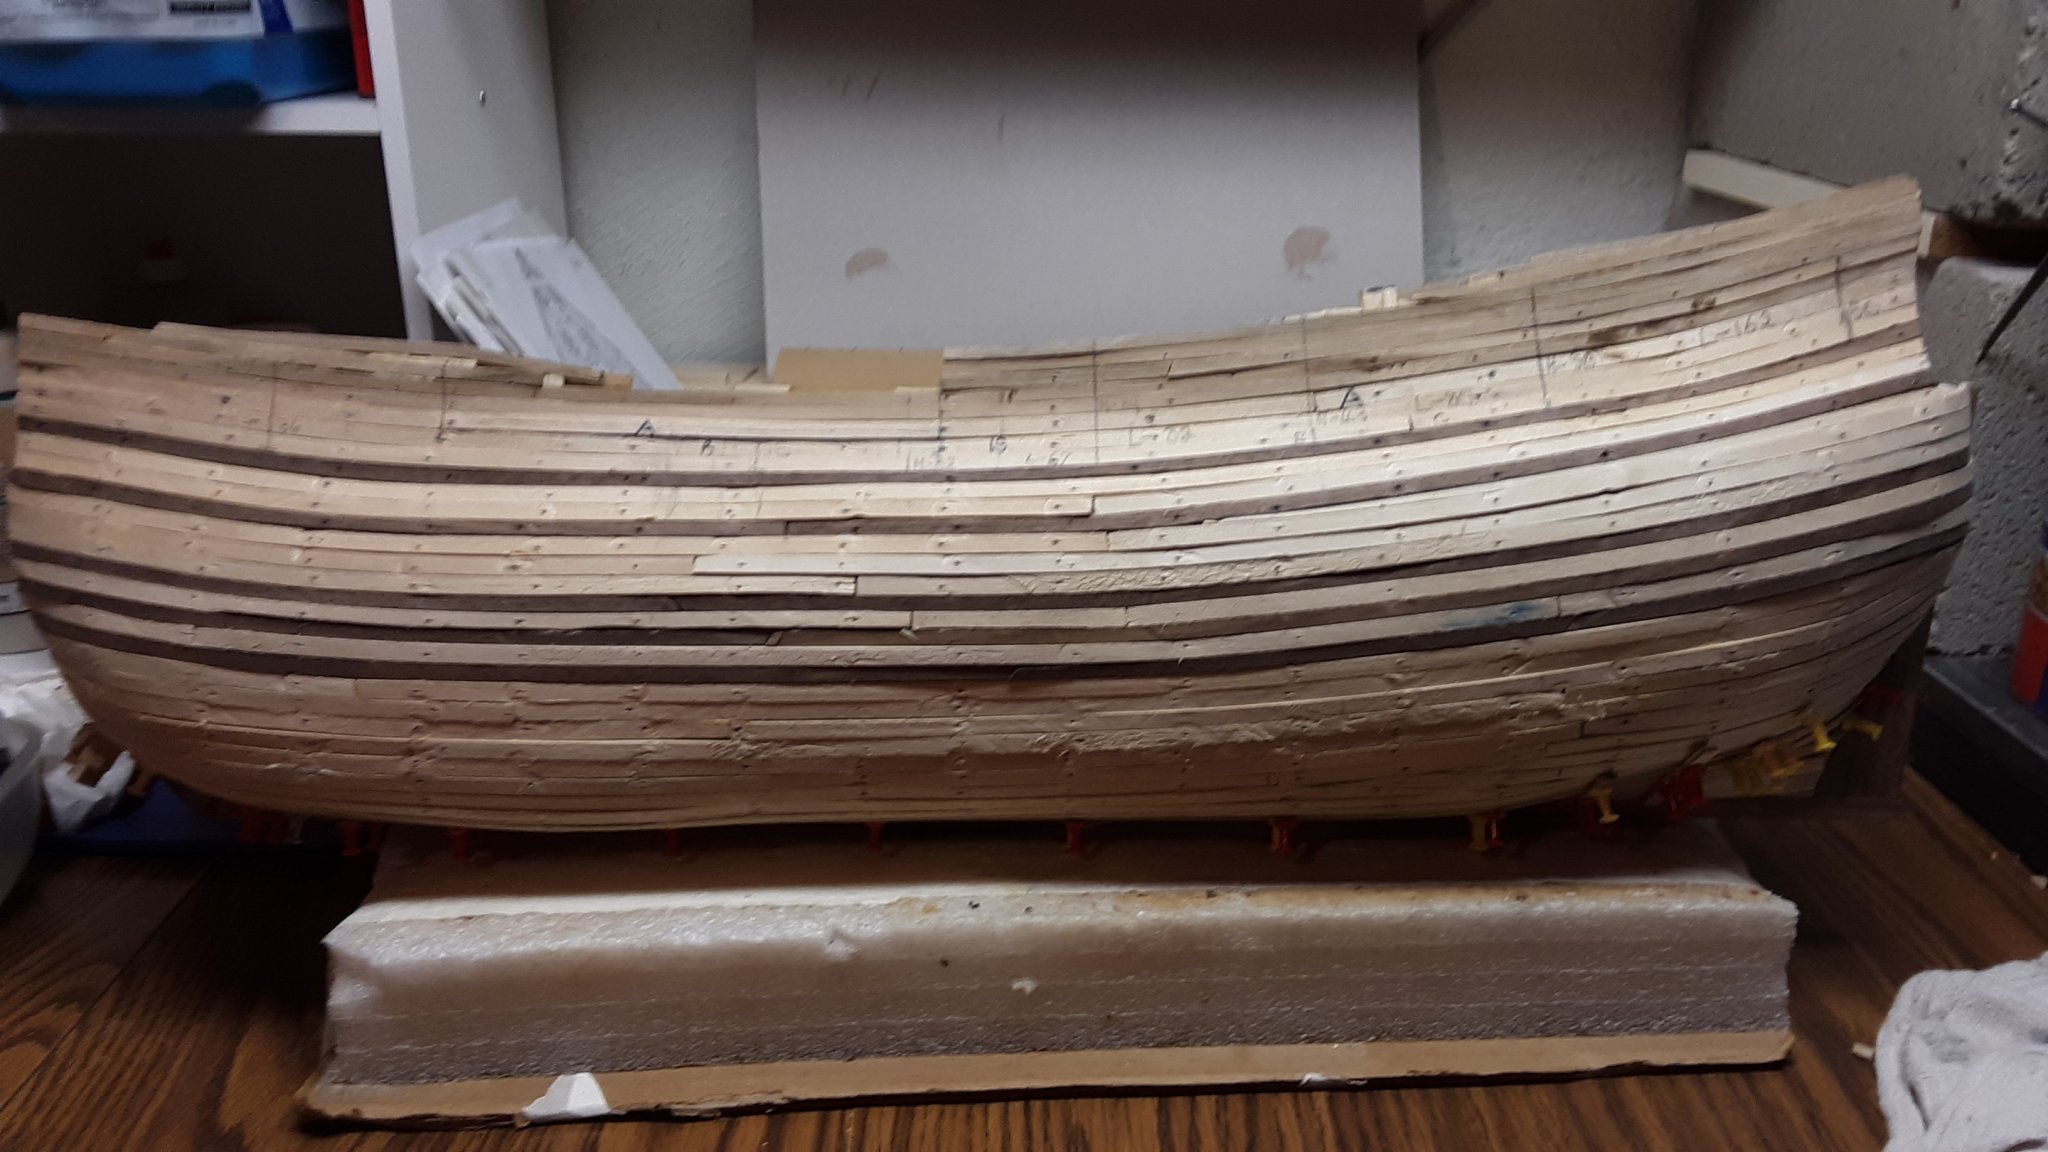
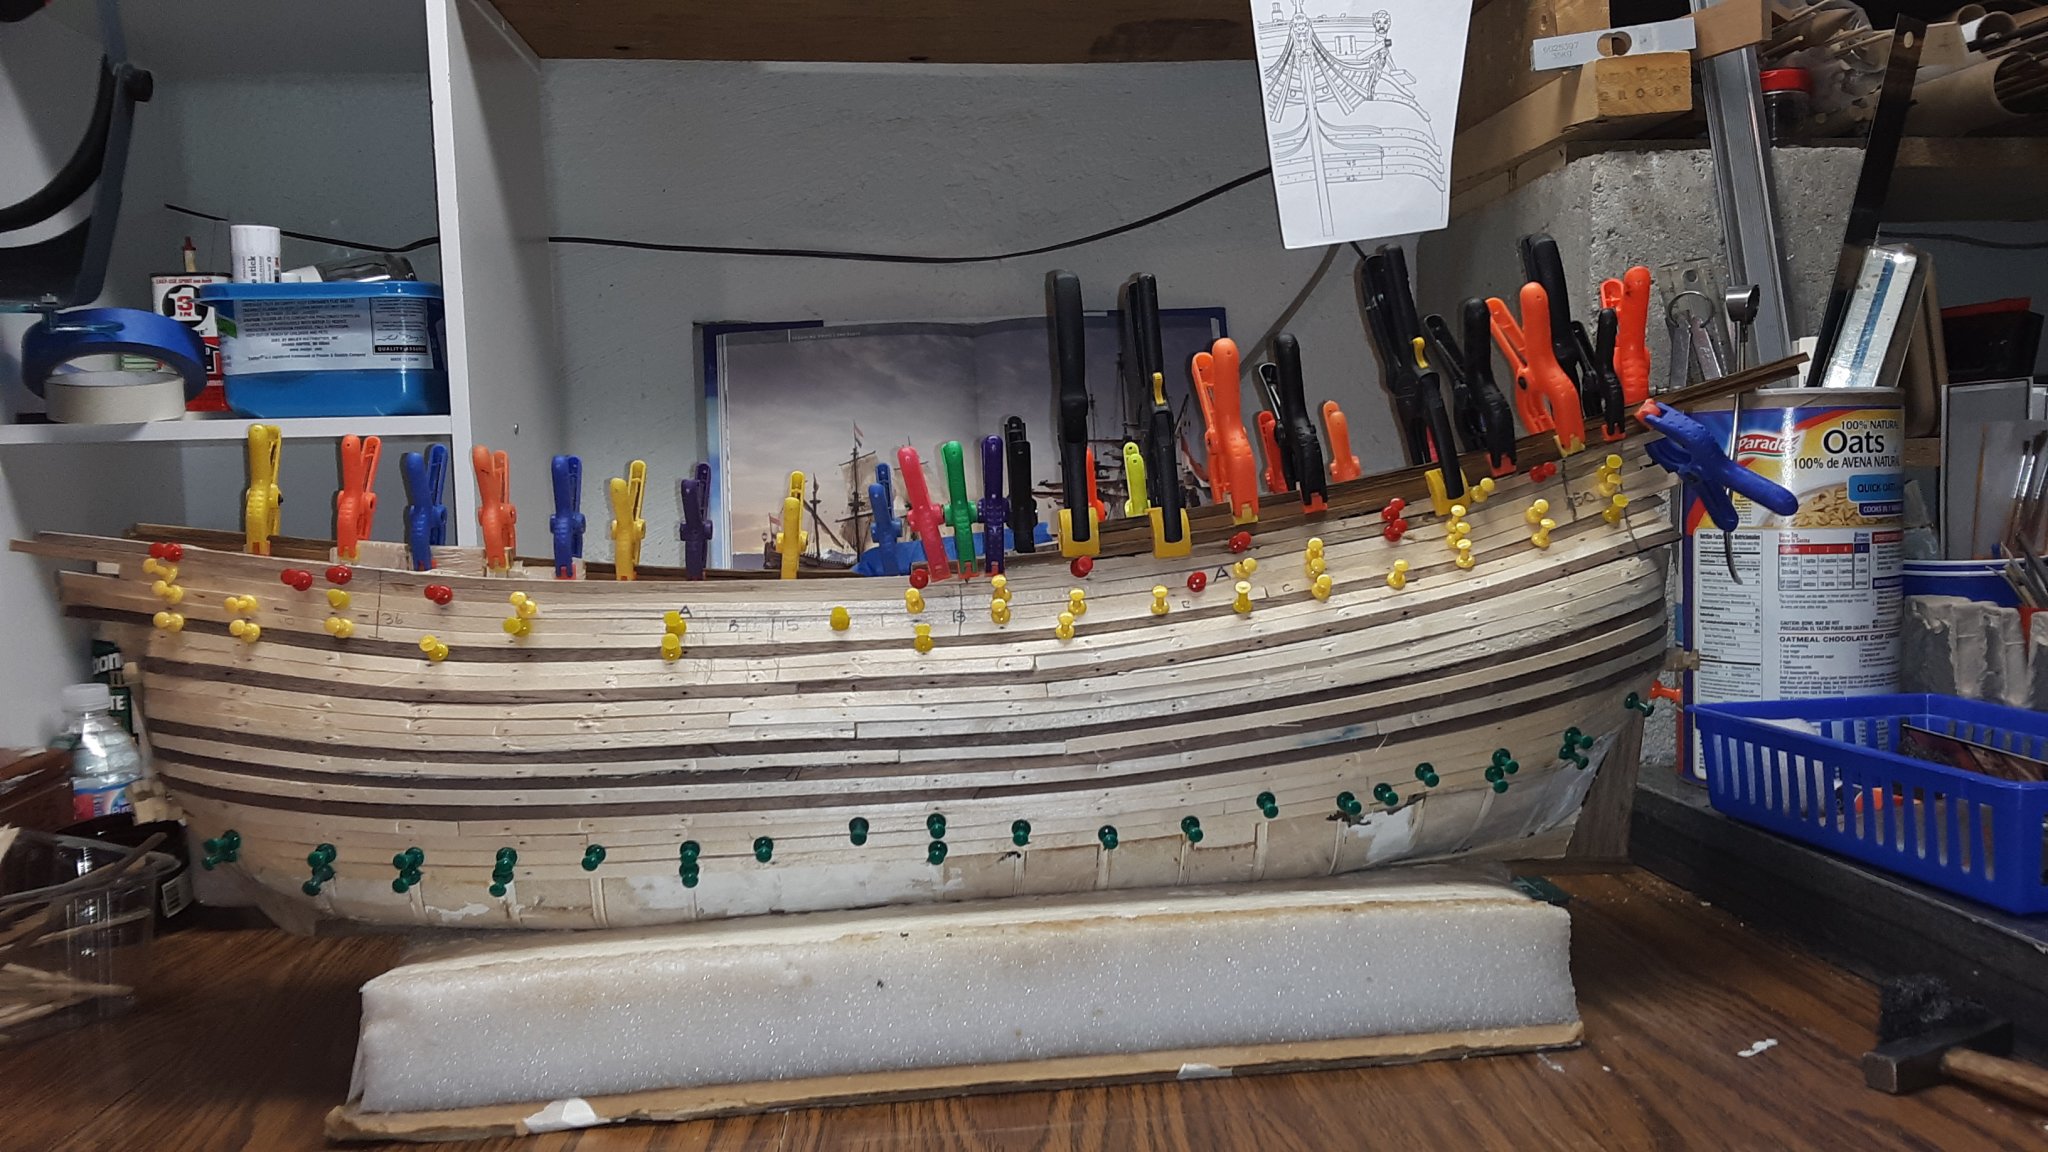
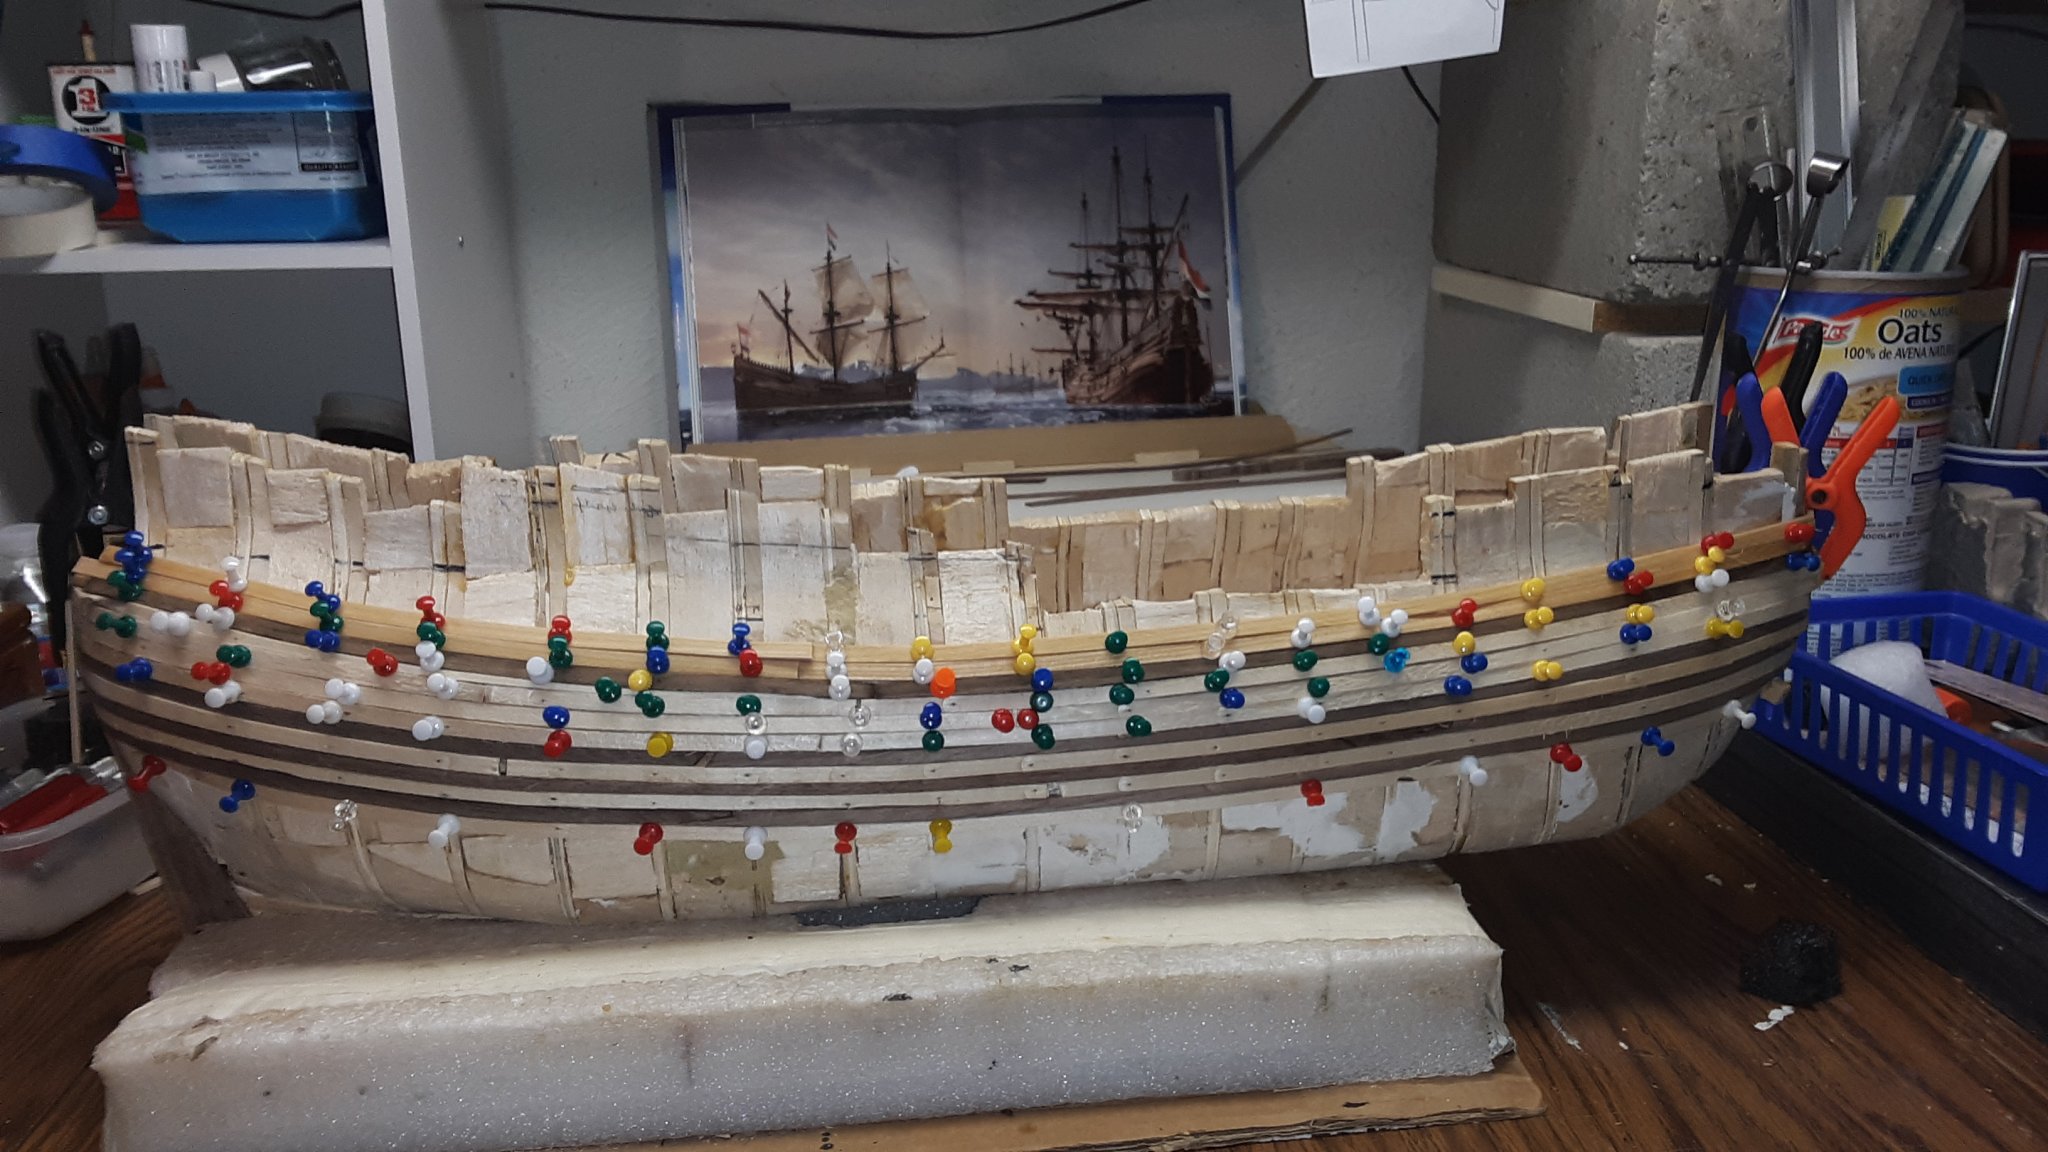
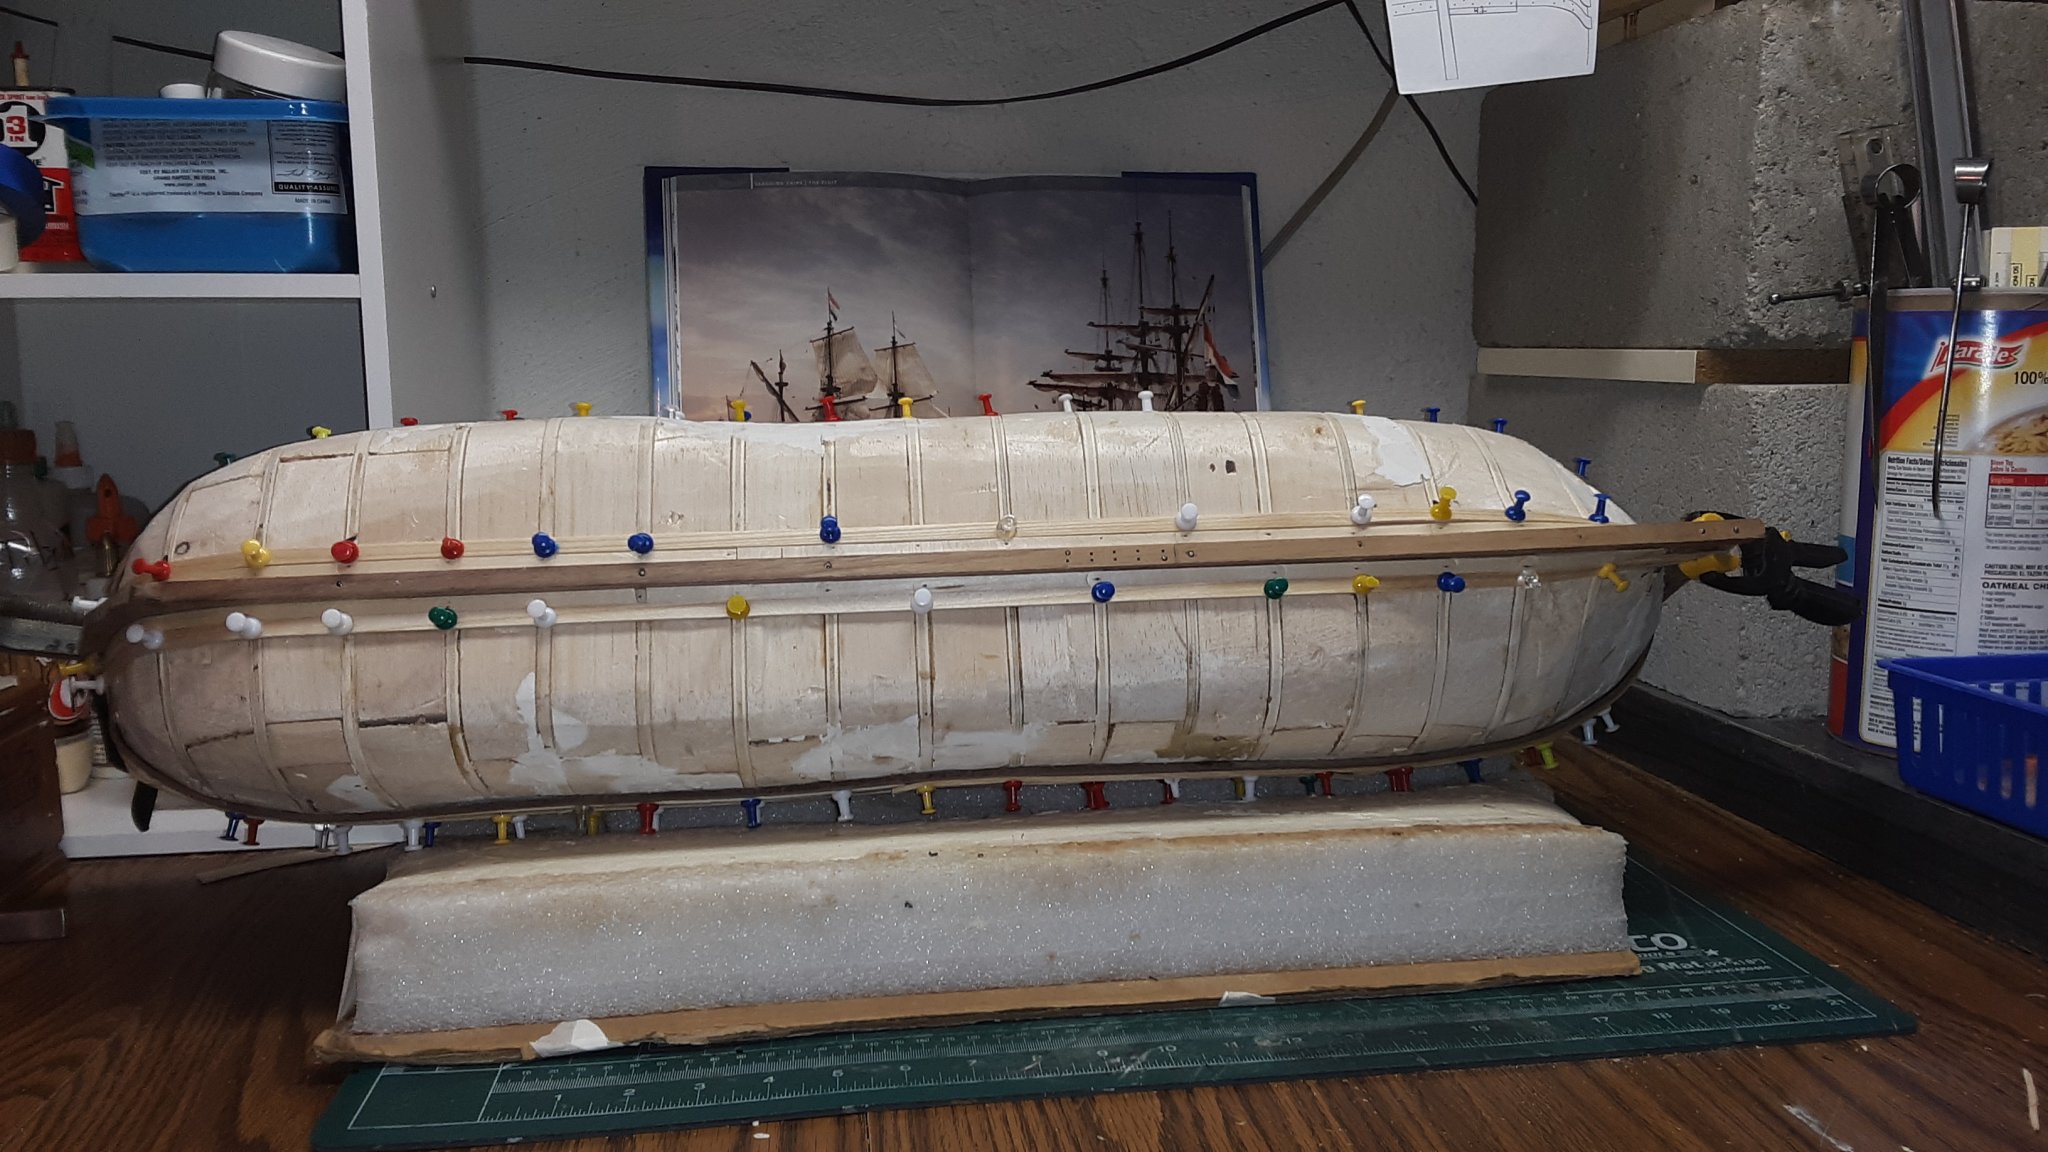
More planking of the 1st layer. Planking the area between the stern and where the poop deck is to be placed is a challenge. Basswood soaked for 4 days to get it thoroughly wet, then slowly bending it 2 ways and pinning it down with pushpin. Lots of pins used.
It is a tedious process.


Marcus
- cog, G.L., Landlubber Mike and 3 others
-
6
-
-
More questions.
Are there any plans available for the ship modeler of the 74 gun ship William Rex?
I picked up that little booklet from the Rex last time I was at the Rijksmuseum. The booklet has plans on several pages but they are rather small for me to use if I want to build that model.
I have that book from the Valkenisse, 1717 - VOC Retourschip by Rob Napier. There are 4 sets of plans just none for the masts, sails and rigging.
Can you recommend any books, articles, etc that show masts, sails and rigging for that type of Ship and from the Dutch 1700.
After seeing the Prins Willem and the Mercurius at the Rijks and the den Ary and d'Gerechtigheid at the National Maritime museum, I just have to build a VOC Retourschip.
Thanks
Marcus
-
Thanks for all the likes and comments.
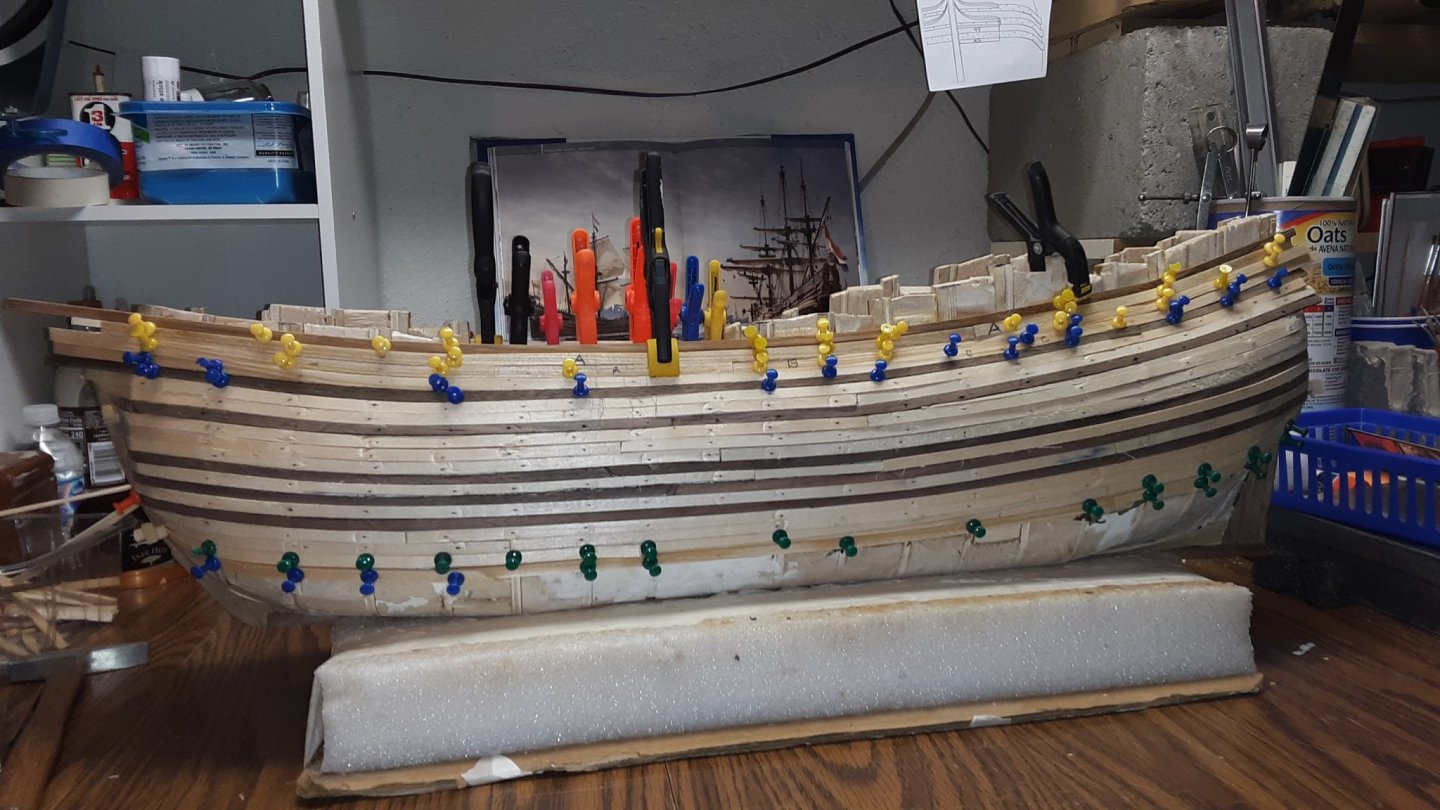
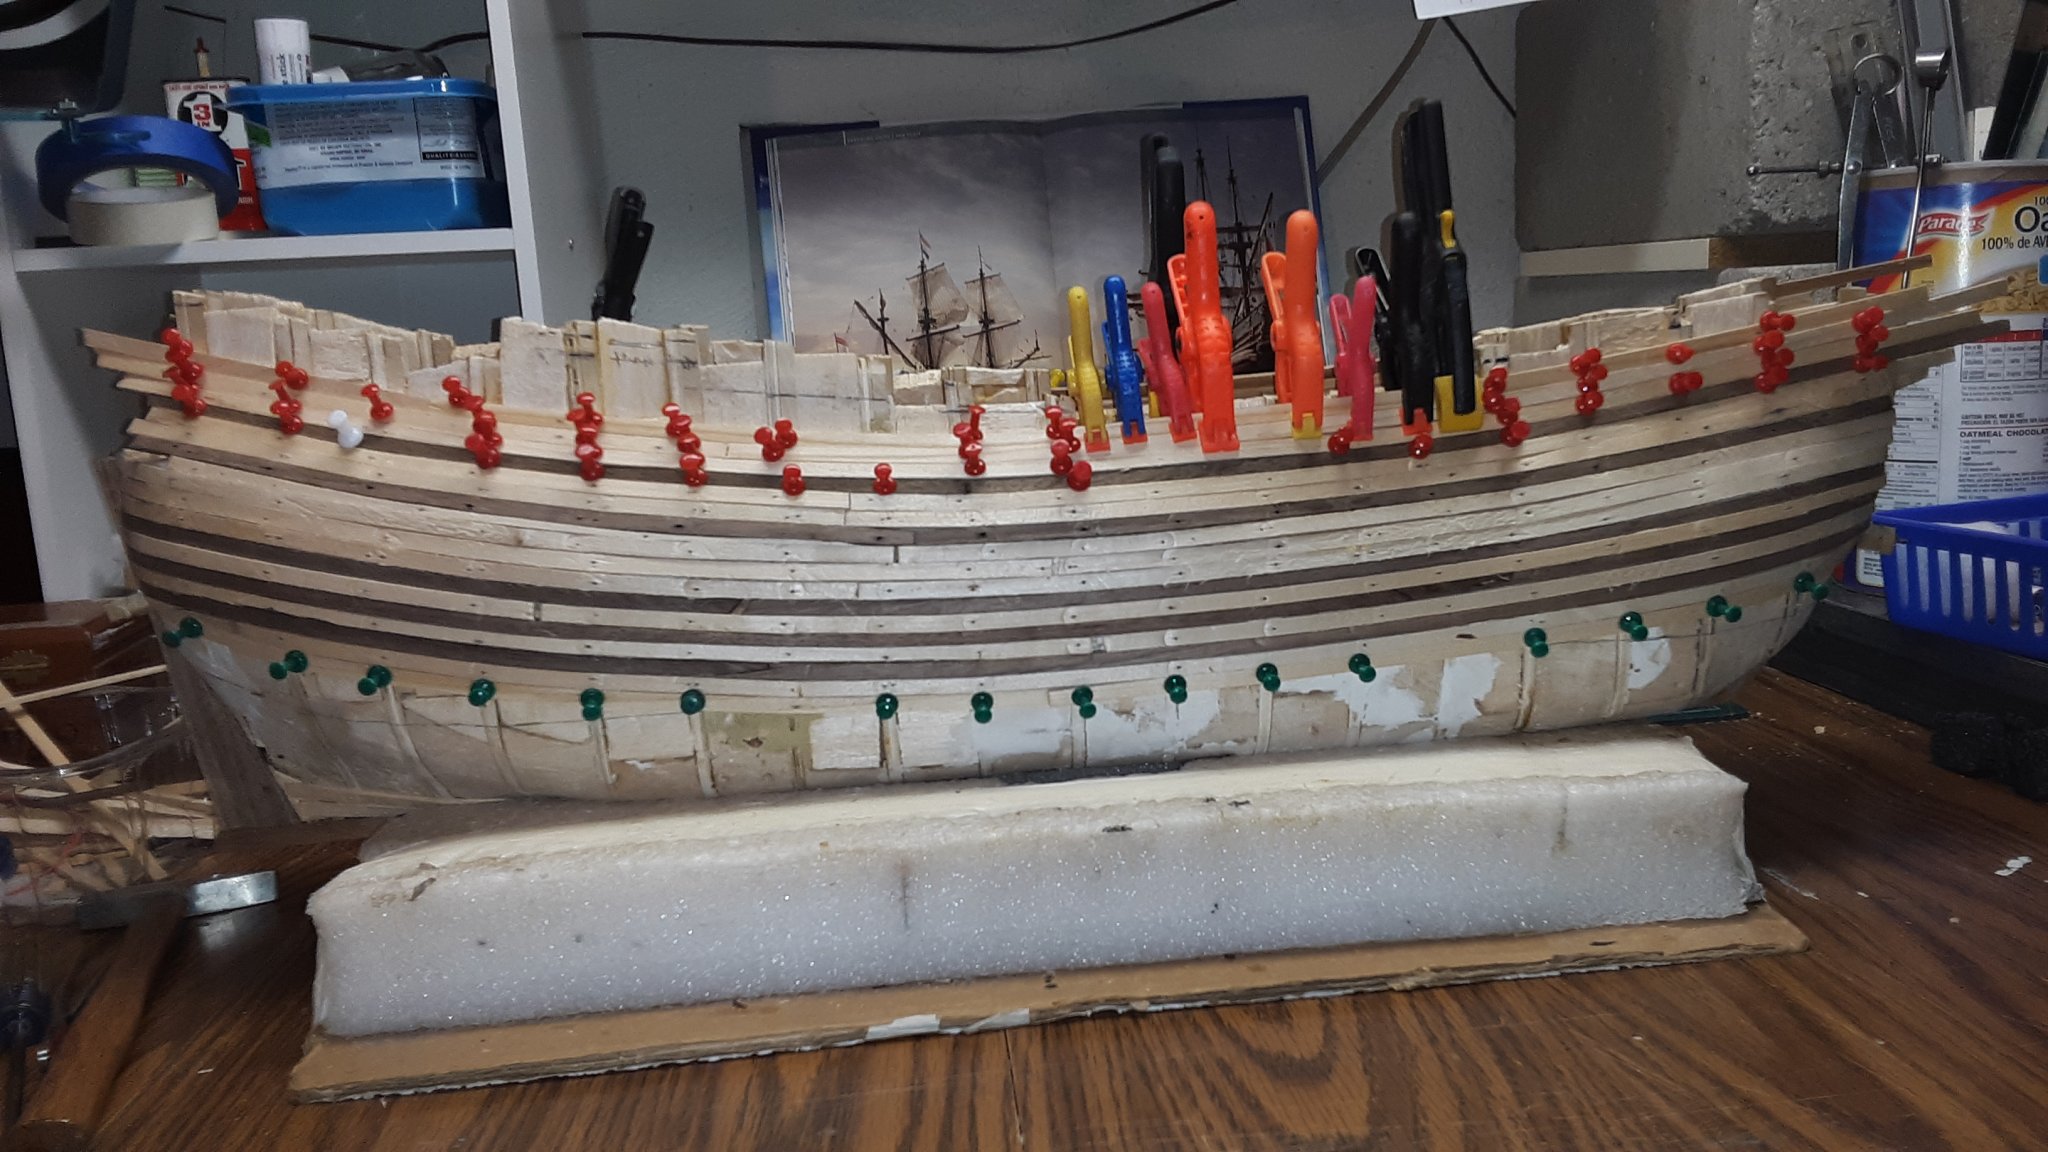
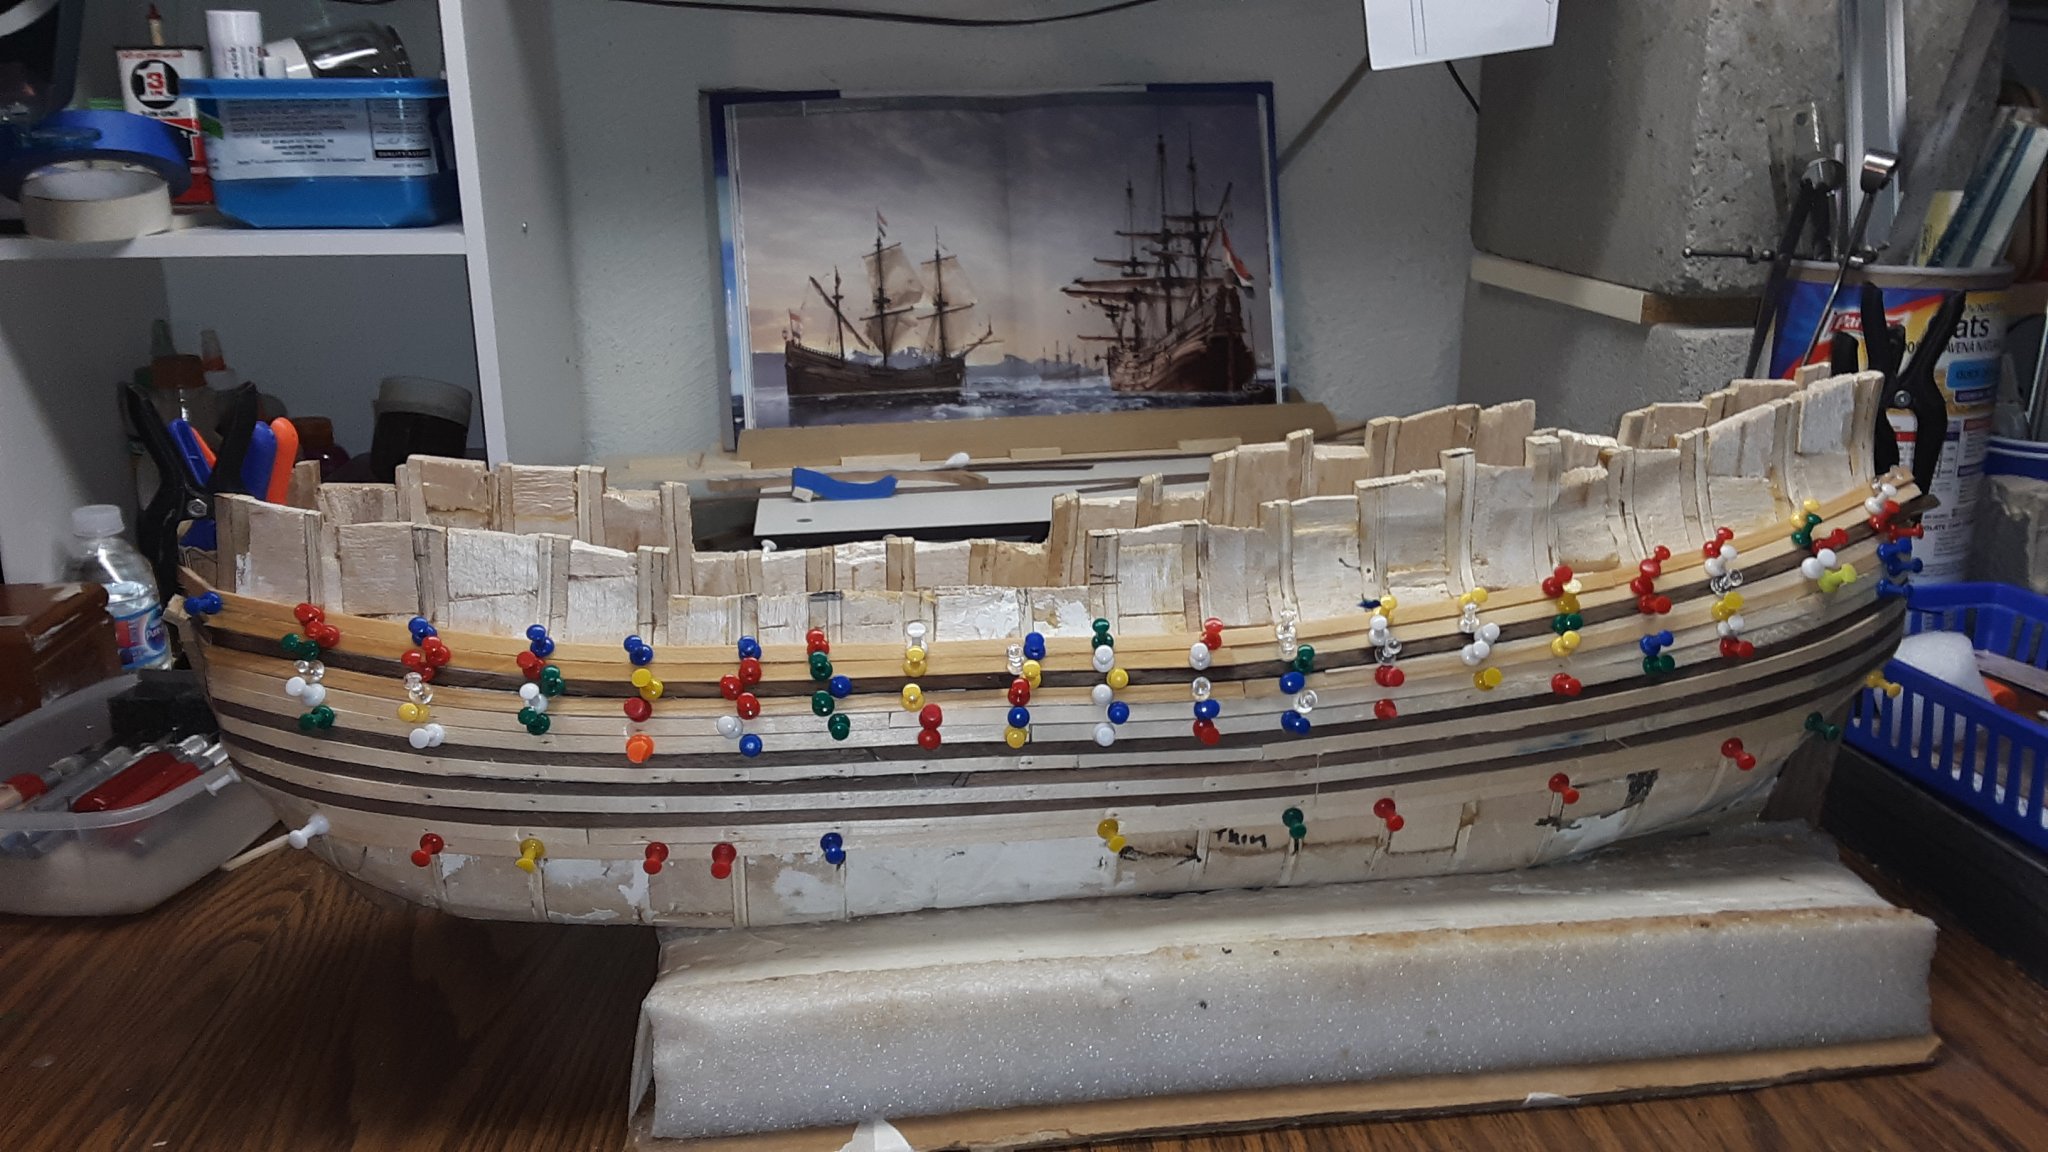
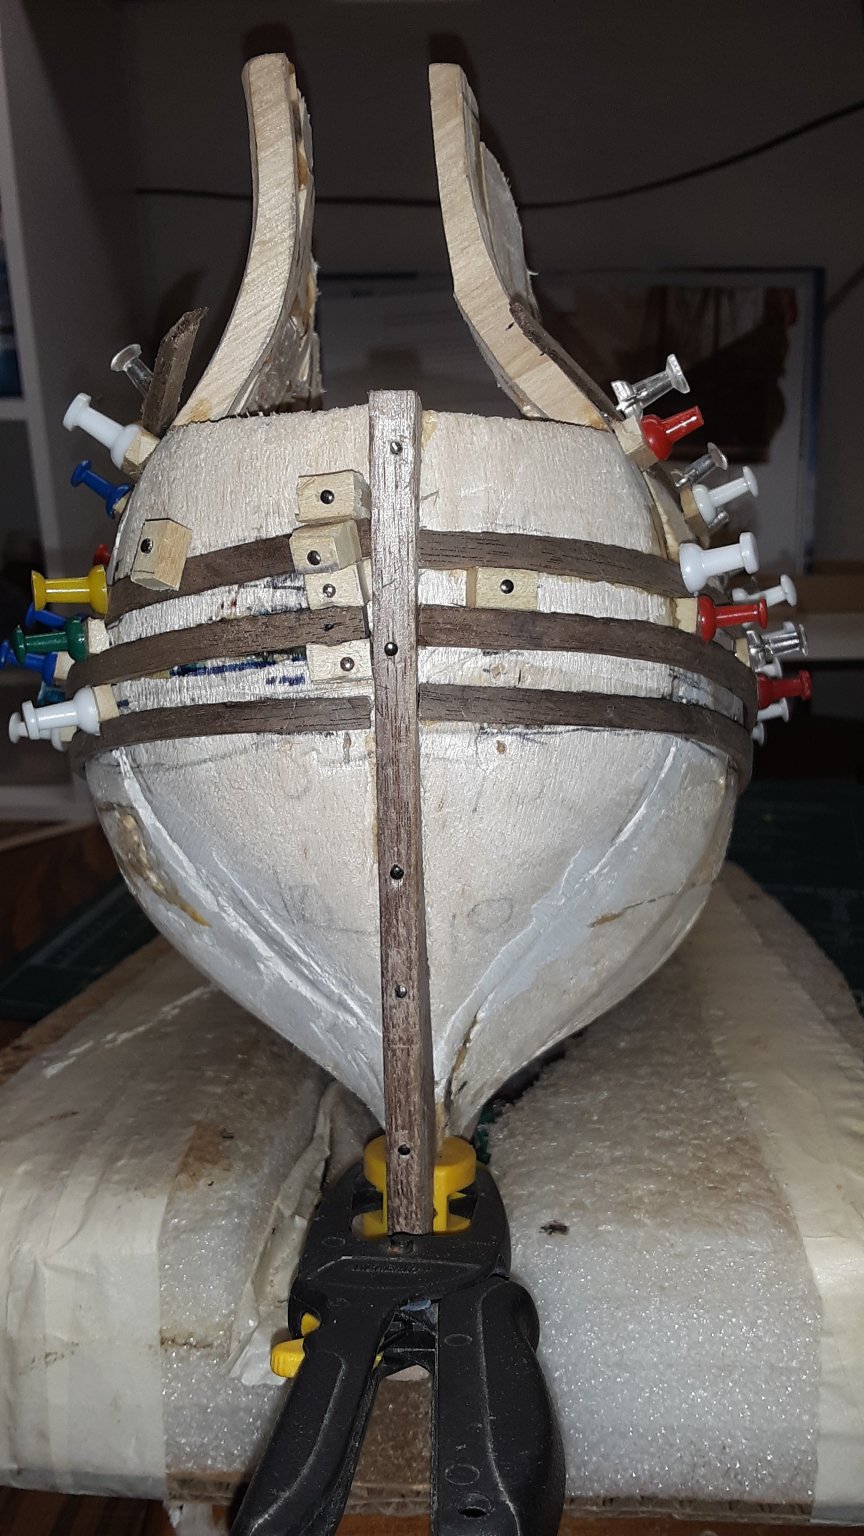
On both sides of the Fluit the lower 3 wales have been glued on. The 1st upper wale is pinned to the hull and drying. Towards the stern this plank has to be bend in two different directions.
 Lots of pins used, a "PIN FOREST"
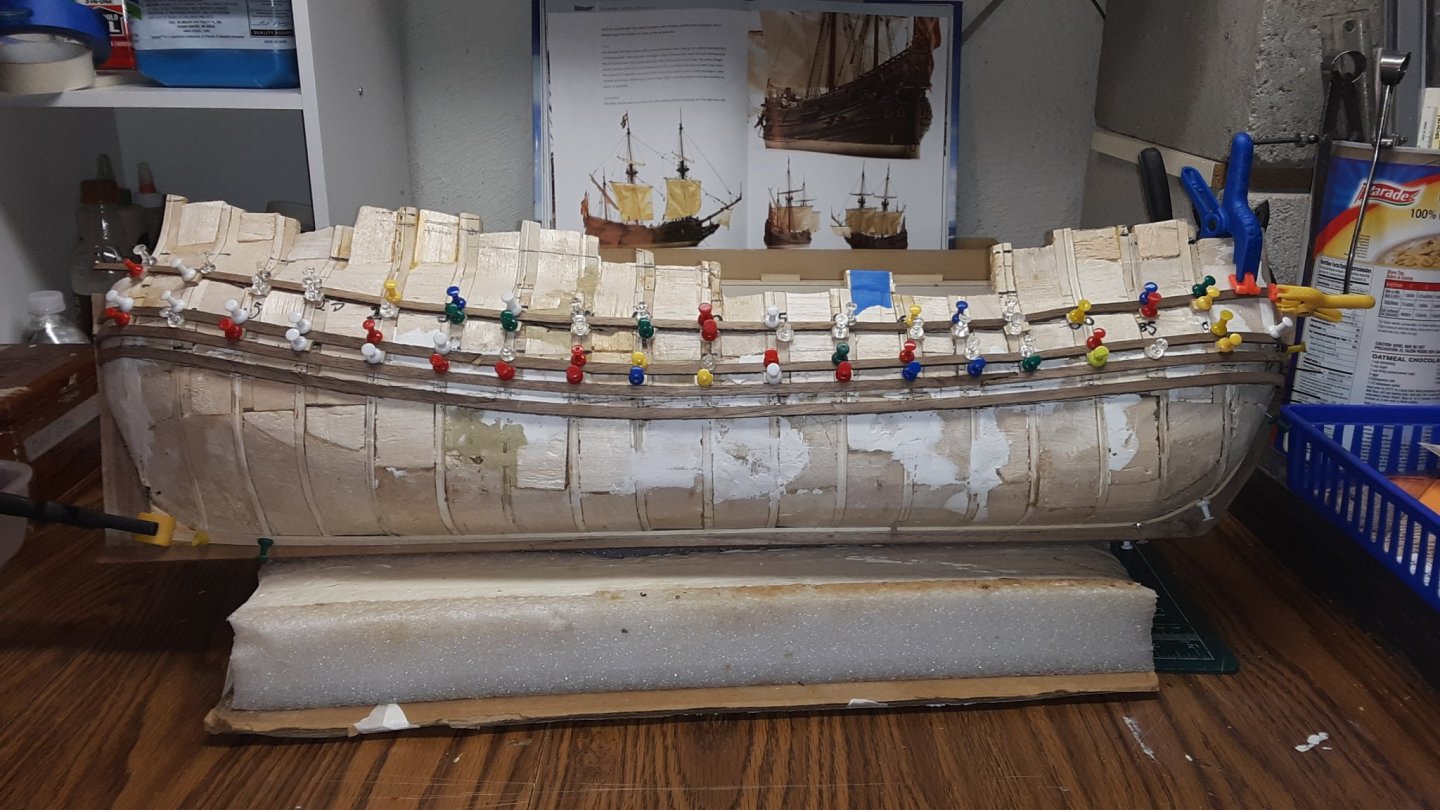
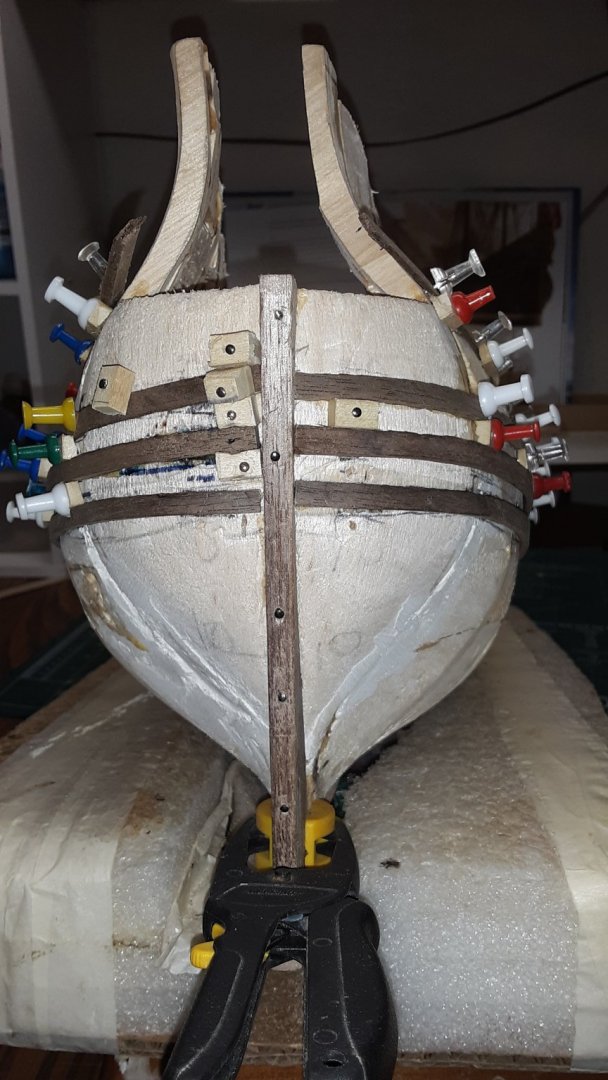
Stern.
After the 3 lower wales with enough space between them for the 1st layer of planking, I should have done this differently.
After the 1st lower wale, I should have installed a strip of basswood next to it and then a strip of walnut, etc. Instead, I made little blocks and pinned those between the wales.
Complete Waste of Time!! Oh Well.......
Started planking the 1st layer with basswood started with strips next to the keel. I was going to follow the planking pattern from the Fluit pictures in the book but they are all different so I will follow the pattern from the Boyer which is similar to Fluit planking.

Marcus
- G.L., GrandpaPhil, cog and 1 other
-
4


Zeehaen 1639 by flying_dutchman2 - 1:37.5 - Dutch Fluit of Explorer Abel J. Tasman
in - Build logs for subjects built 1501 - 1750
Posted
Mark and Ab, thank you both for your suggestions and I plan to install deck beams as I need the curve of the deck.
I plan to install all decks. There are a few decks you won't see but I am doing it for practice.
Marcus