


flying_dutchman2
-
Posts
1,735 -
Joined
-
Last visited
Content Type
Profiles
Forums
Gallery
Events
Posts posted by flying_dutchman2
-
-
-
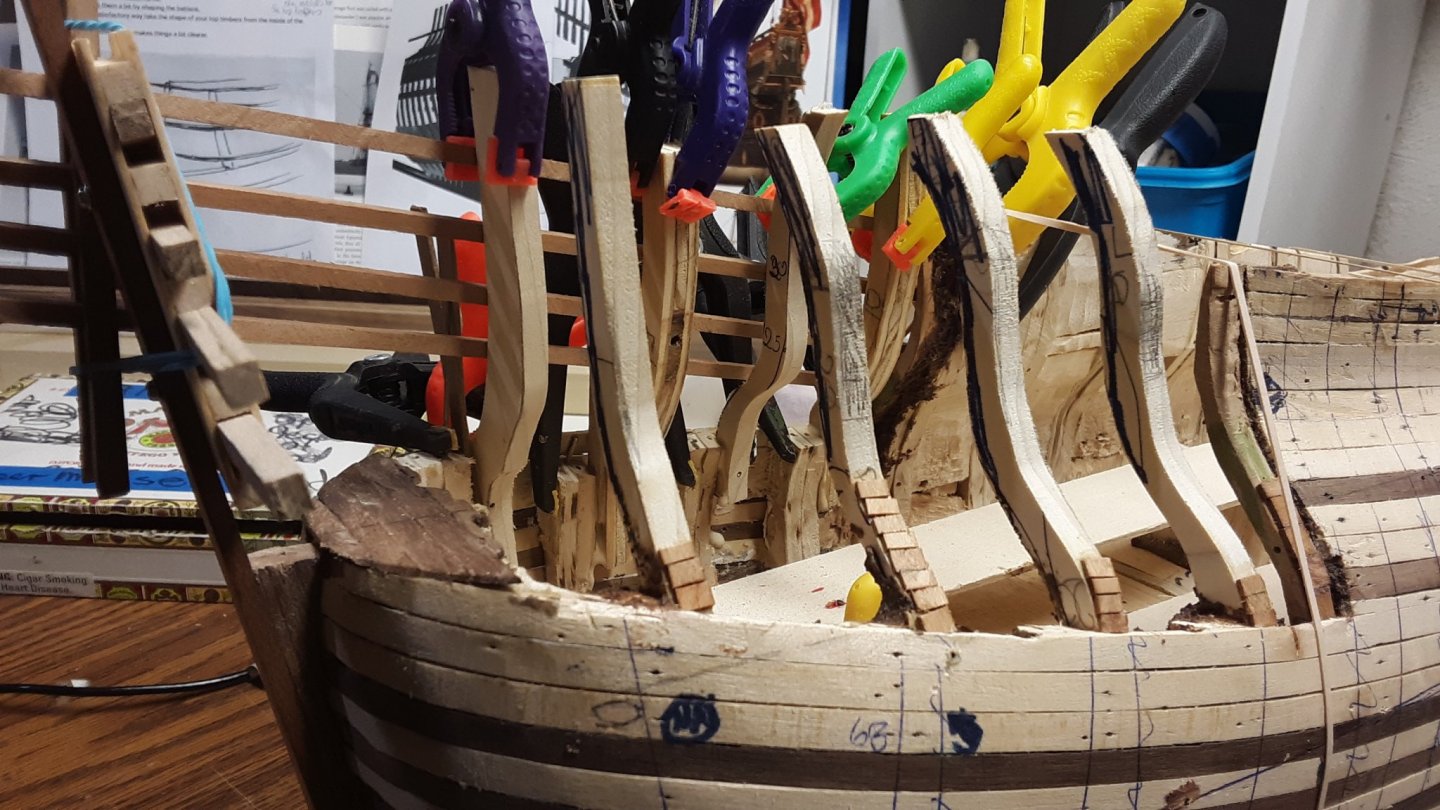
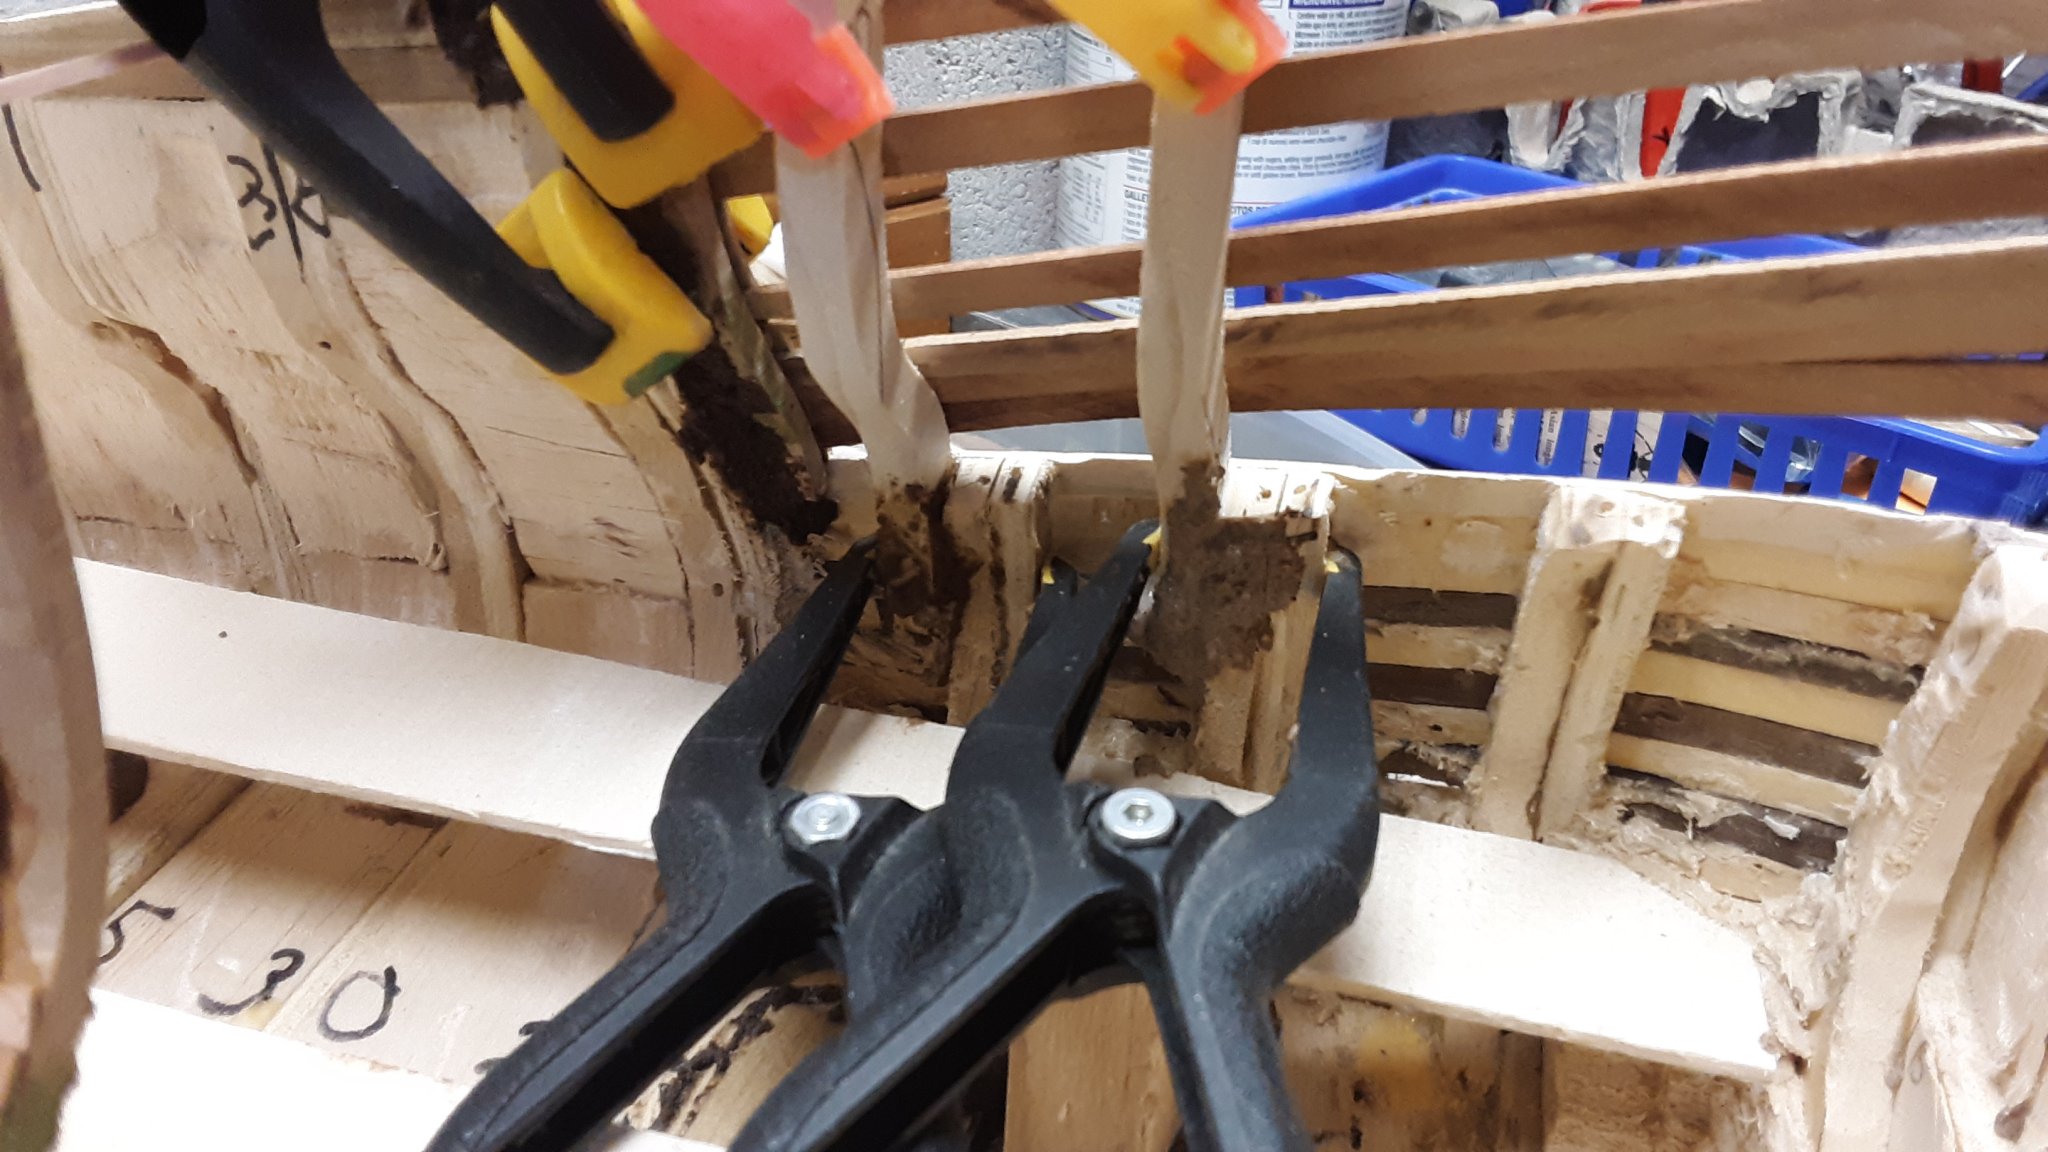
The frame pieces are straight and it glued up nicely. Some areas on the frames need to be lightly sanded.
Did the same process for the opposite side.
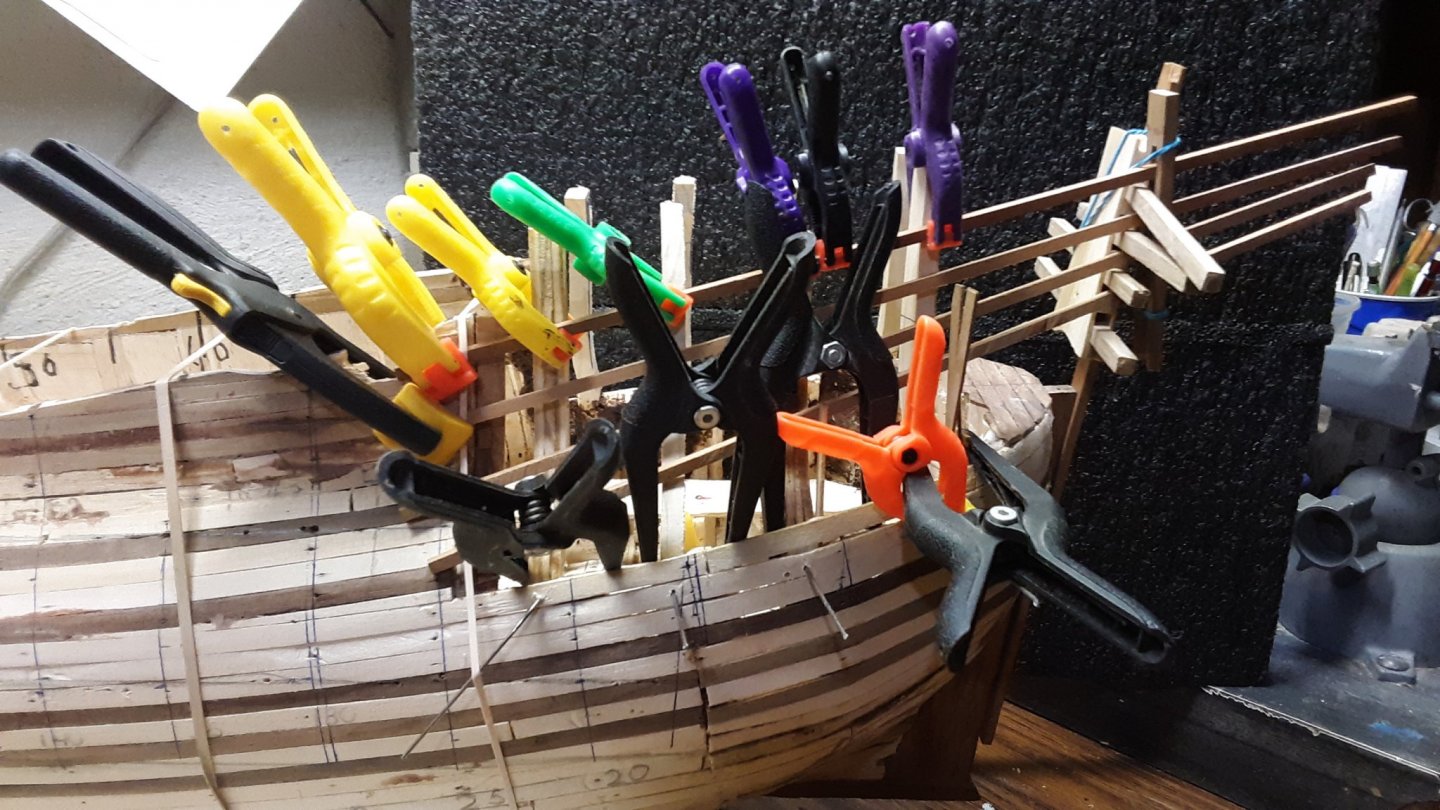
The metal pieces go through the planking and frame pieces. The 90 degree angle keeps the frame pieces from moving down into the hull.
Marcus
-
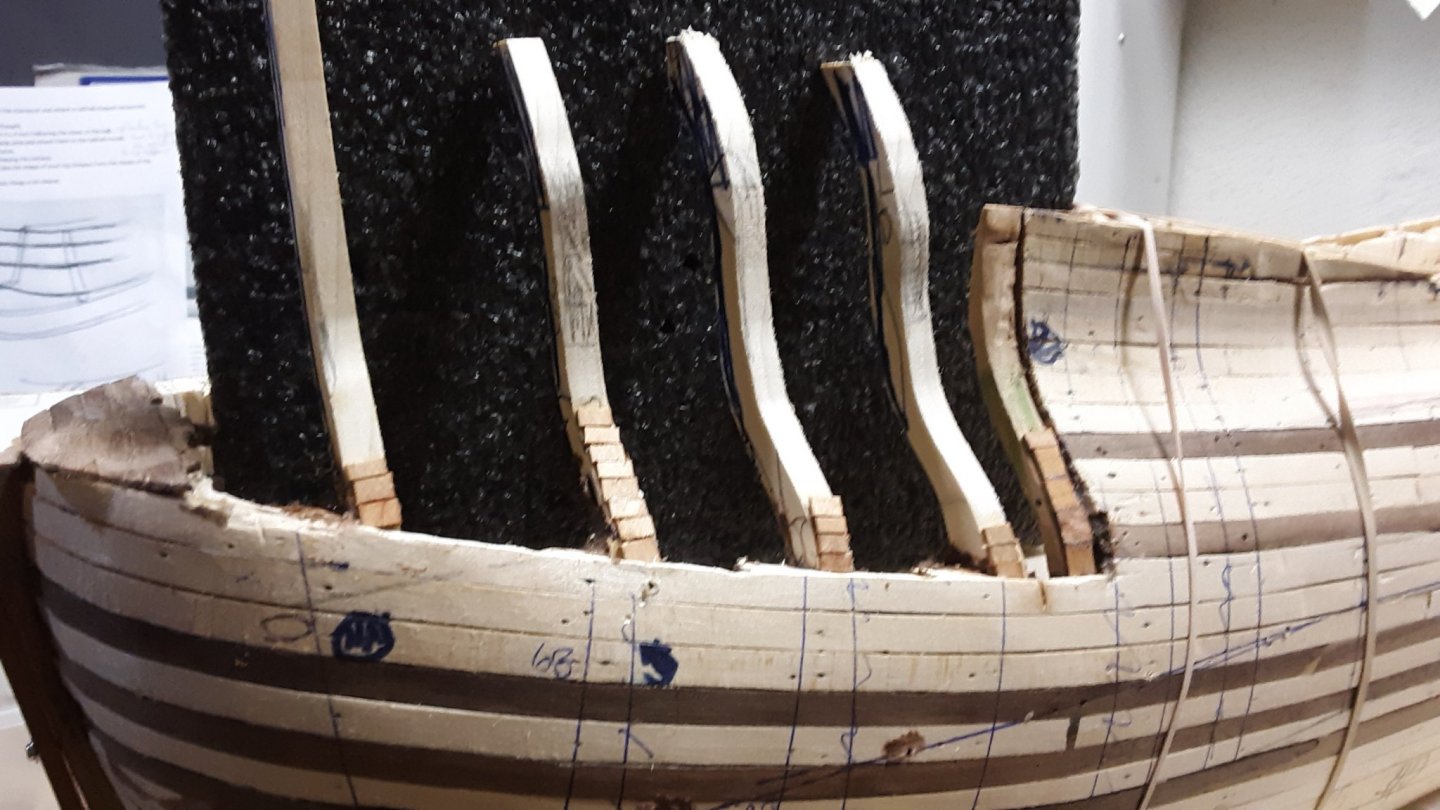
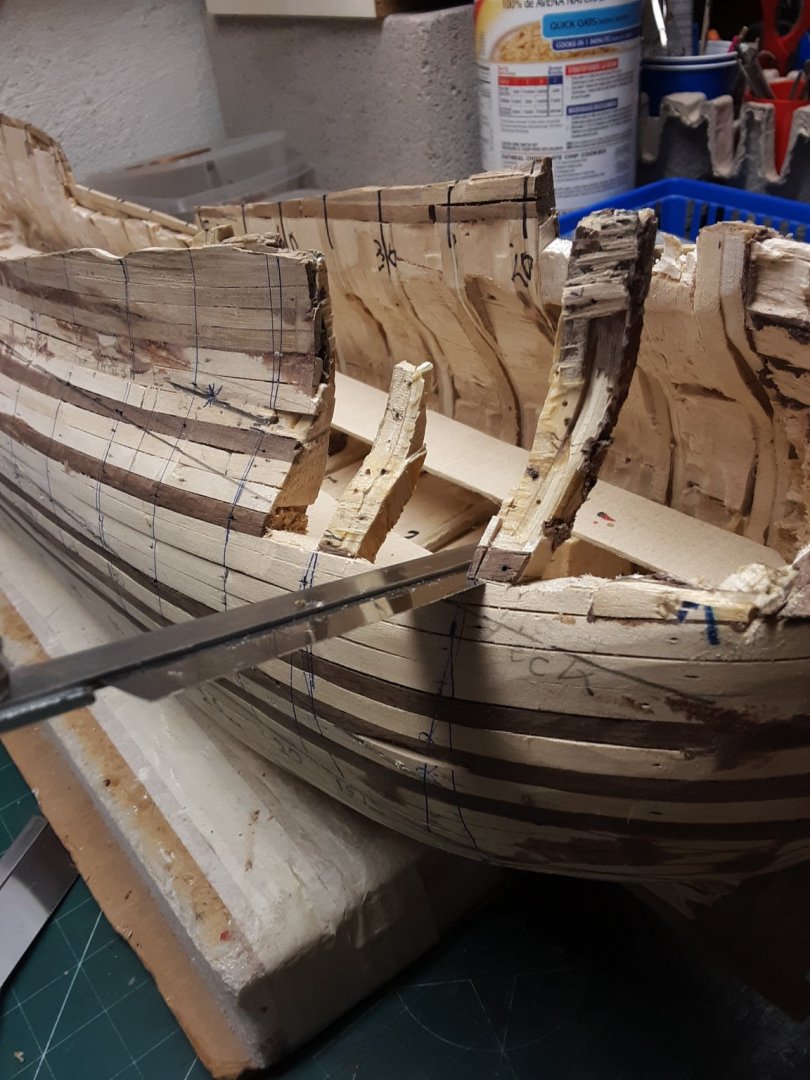
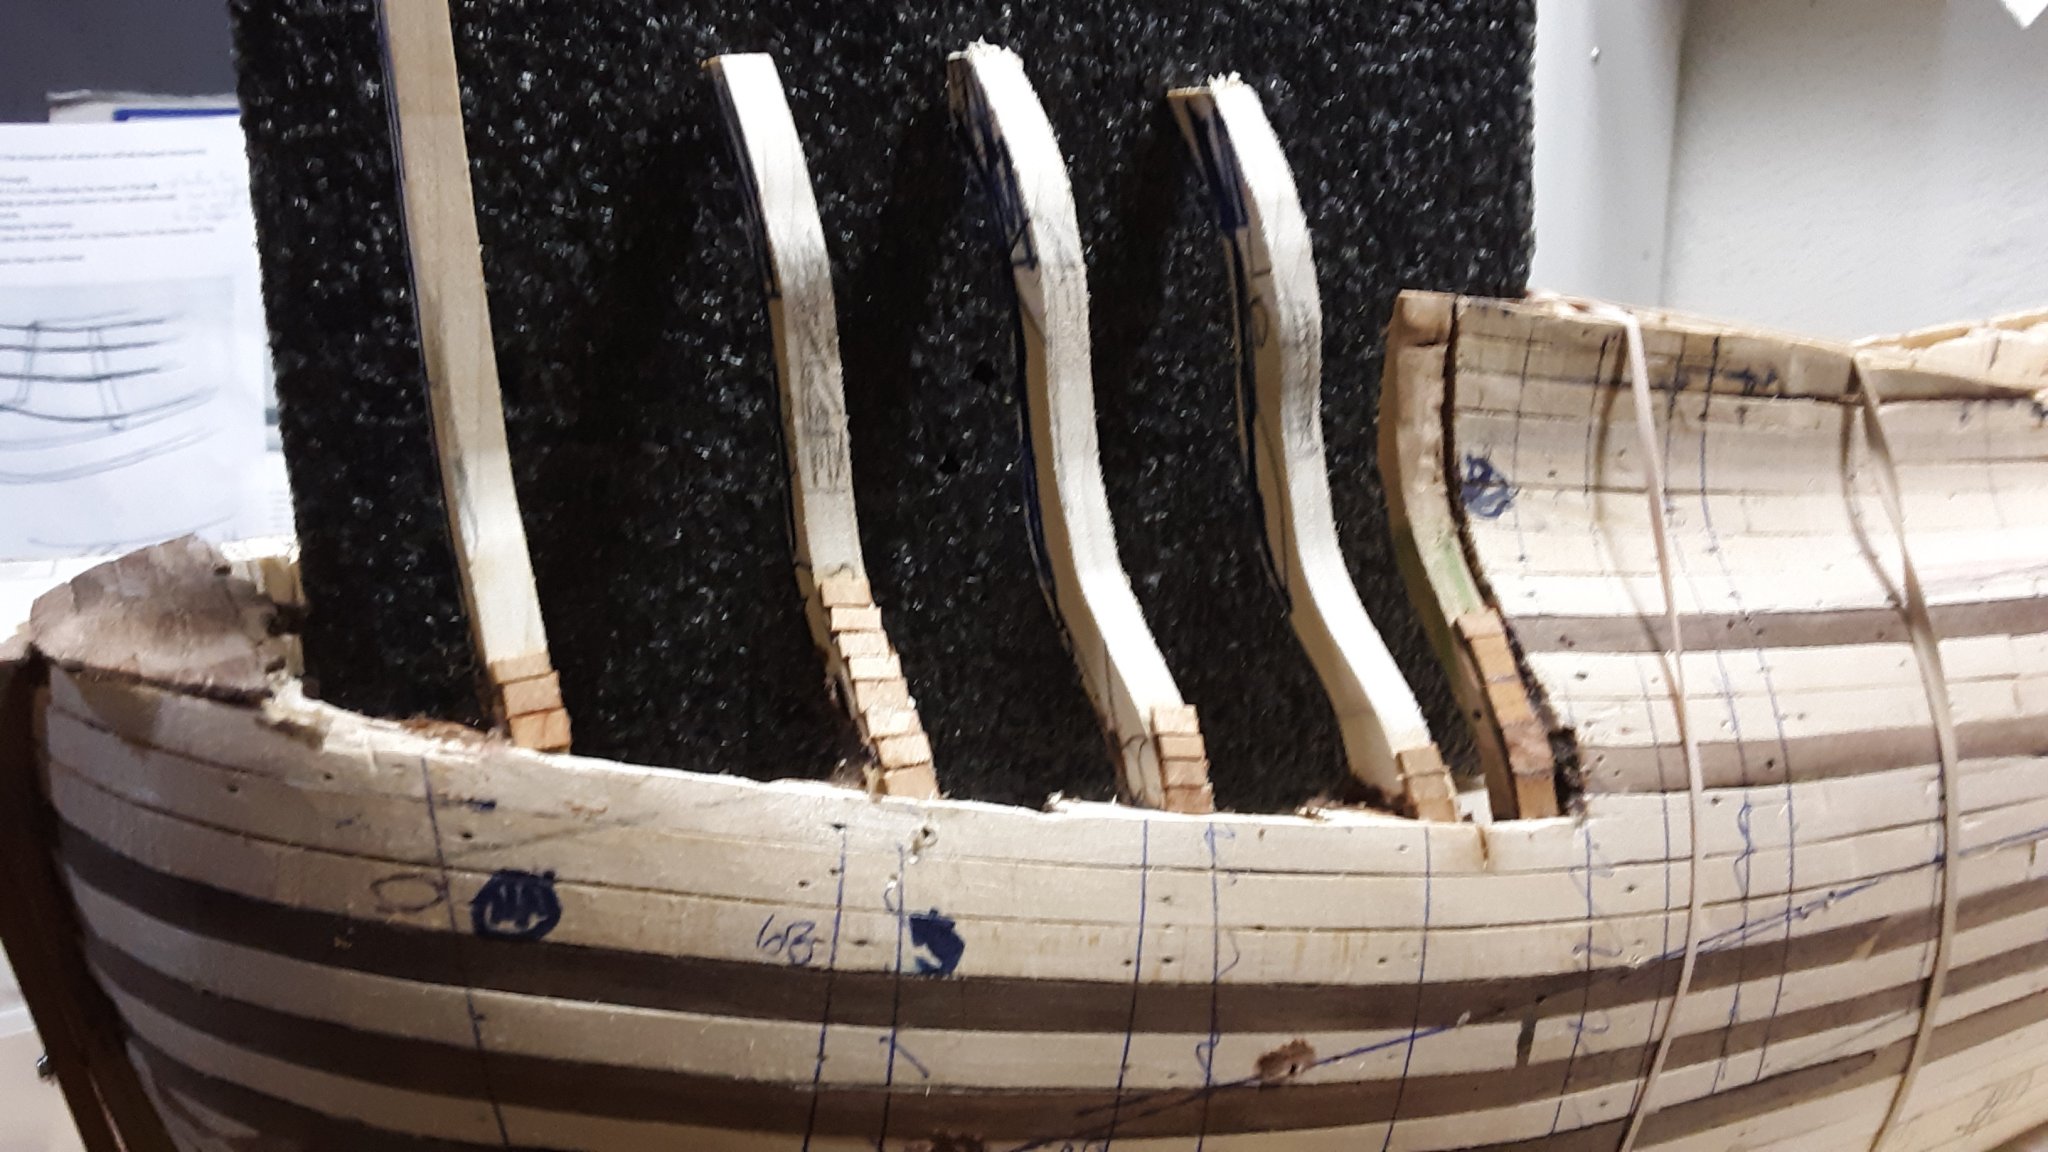
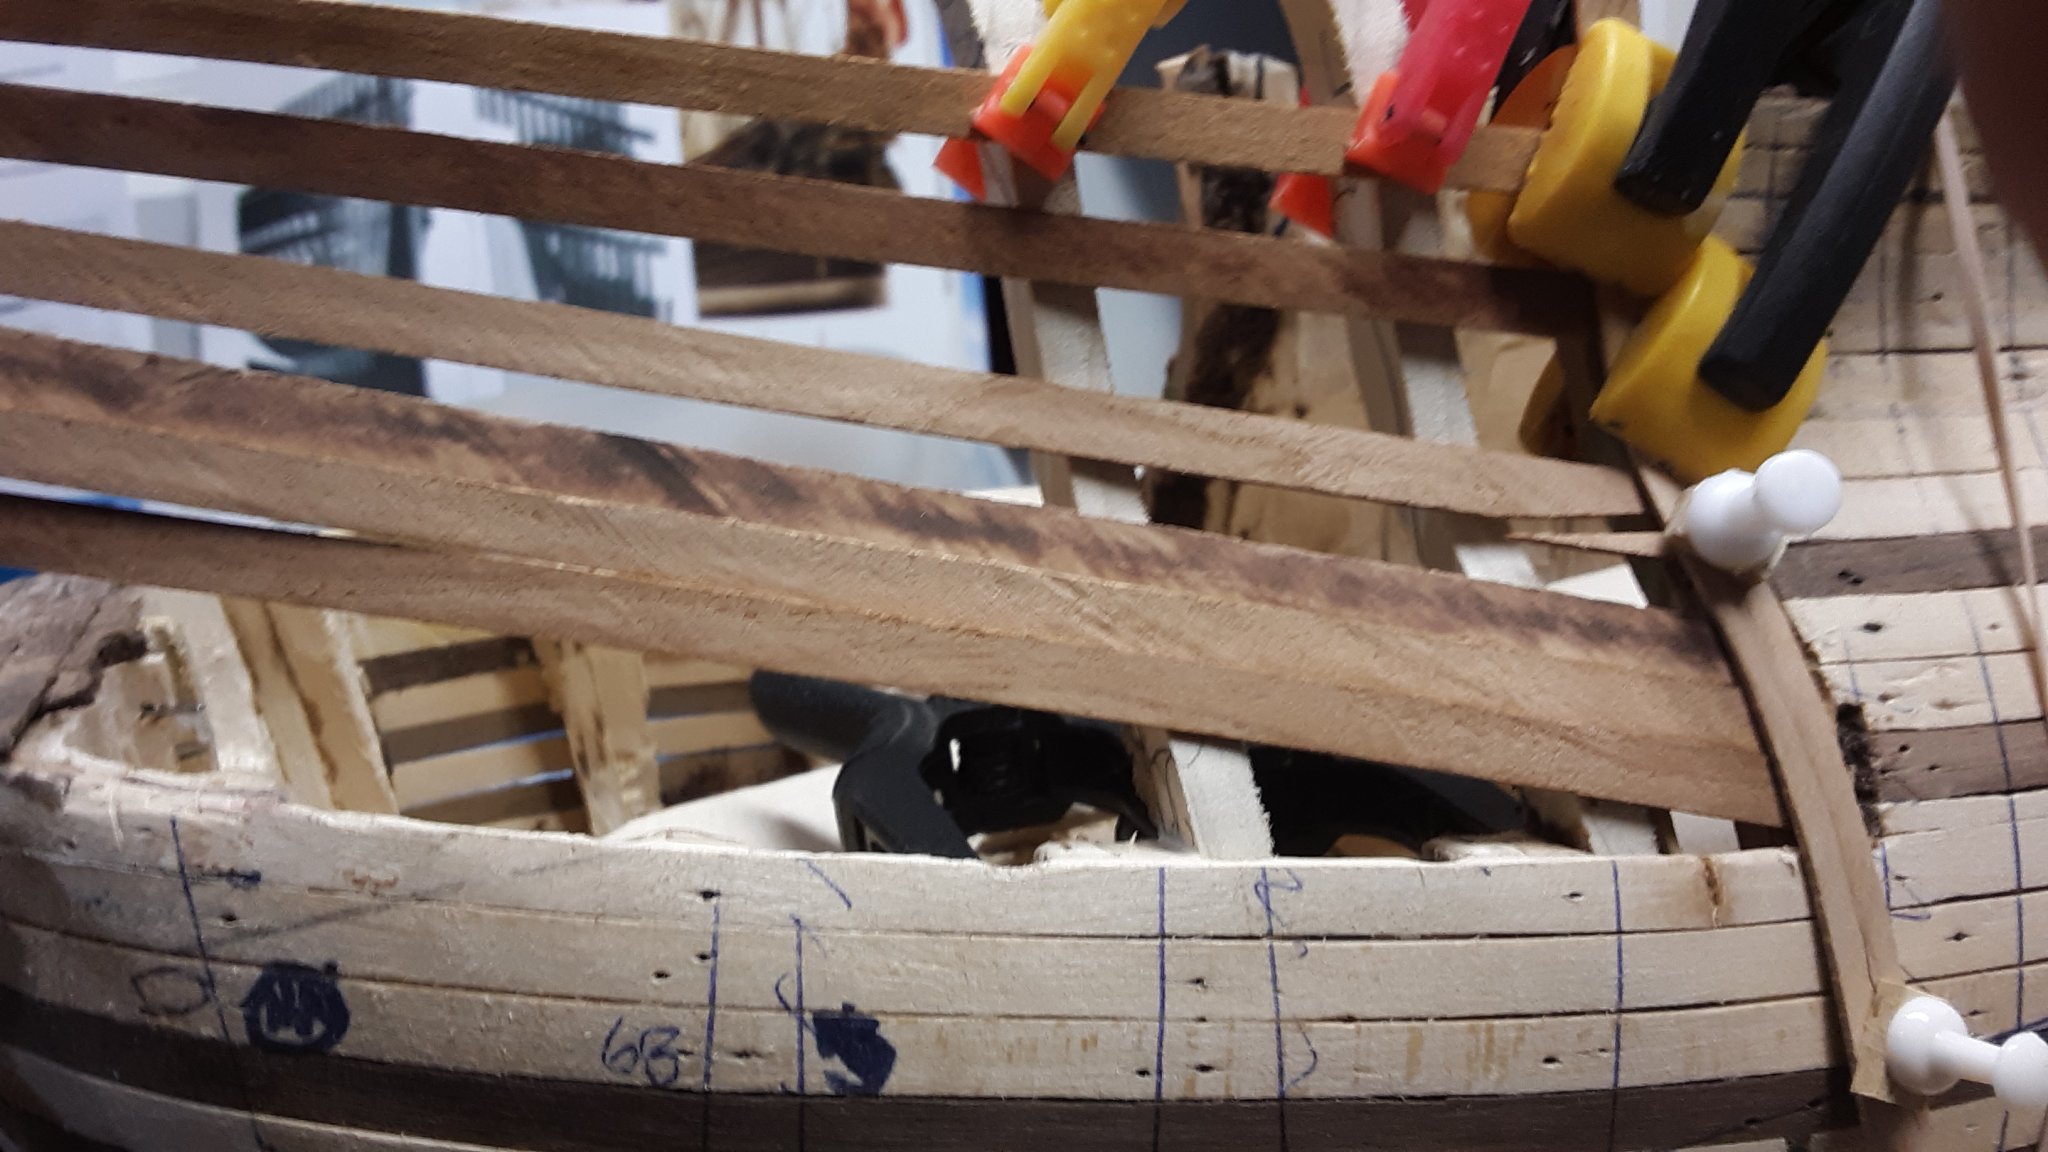
After measuring and remeasuring, doing some more dry runs and staring at it, I laid out the frame pieces needed to built up the area.
Stared at it some more and dry fitted one more time, I glued the frame parts one by one with Tightbond III glue (over kill). Clamped the frames making sure they fitted exactly where they are supposed to be.


The planks are dry fitted so I know how the contours of the frames are and that it all fits.

I am satisfied with how it all looks. The hips of the ship are round. It is definitely different compared to what I did in the first place.

I will do the other side tomorrow.
Marcus
- Louie da fly, G.L., bruce d and 3 others
-
 6
6
-
-
15 hours ago, Ab Hoving said:
Excellent Marcus, you are on the right track now!
Next be aware that your real planks should curve upwards to the stern to get the sheer you want.
Always keep an eye on the lines....
Ab,
Thank you for the encouragement and as always, thank you for your guidance in building this ship.
Marcus
-
20 hours ago, Louie da fly said:
Very impressive, Marcus. I'm following this design evolution with great interest. I'm not sure I have the courage to pull apart and rebuild to the degree you're doing it
 .
.
Steven
Steven,
Either I do a drastic re-do or start all over again. If I left it the way it was the area would be too much of an angle instead of straight up.
I have learned a lot from the drastic re-do as I want to build another Fluit and it will be much easier knowing what I should look out for.
Marcus
- GrandpaPhil and mtaylor
-
2
-
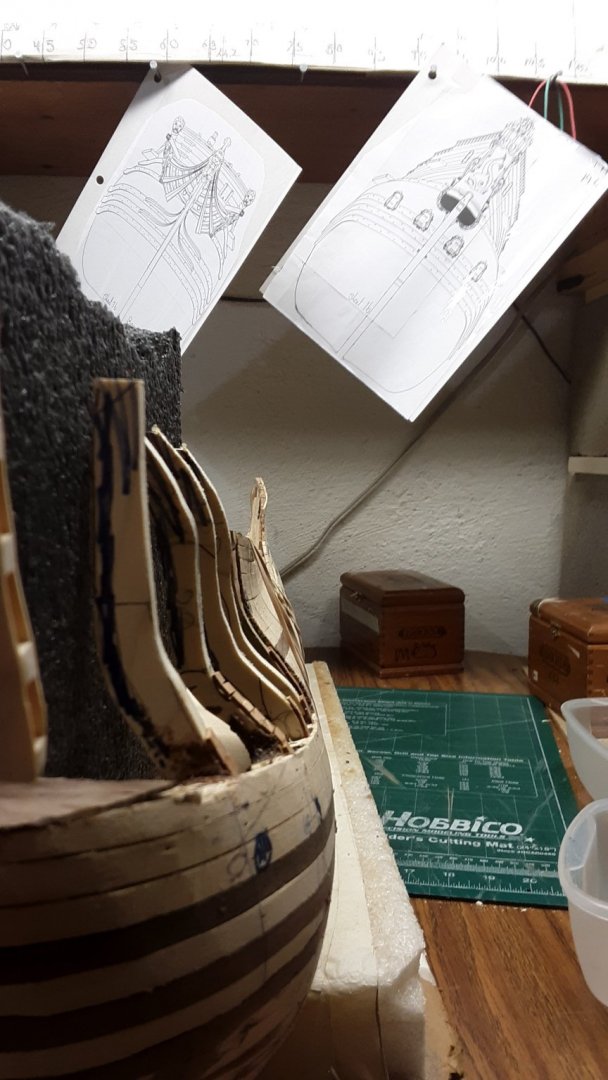
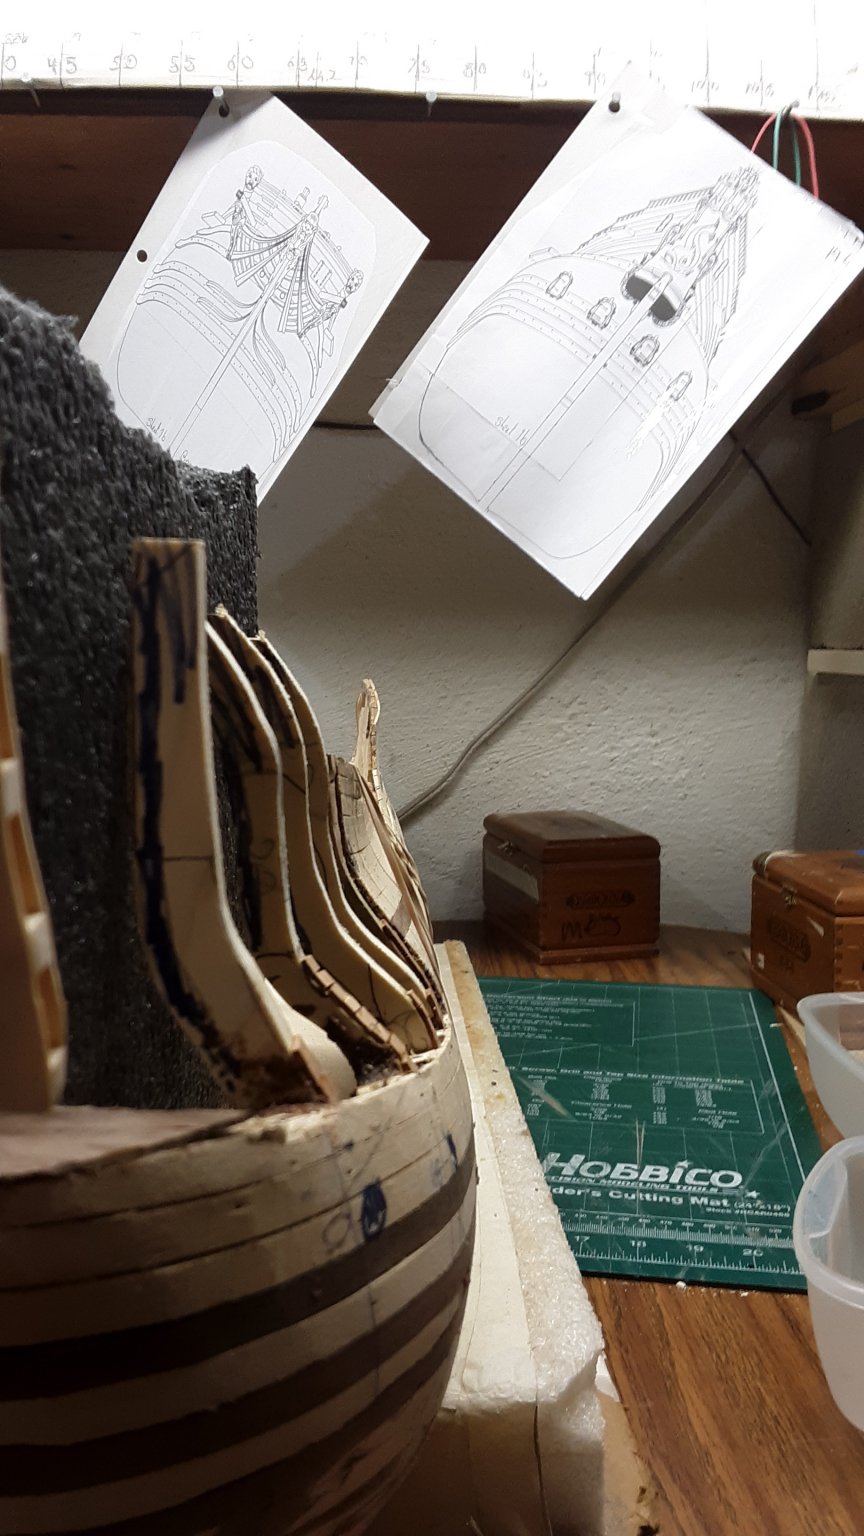
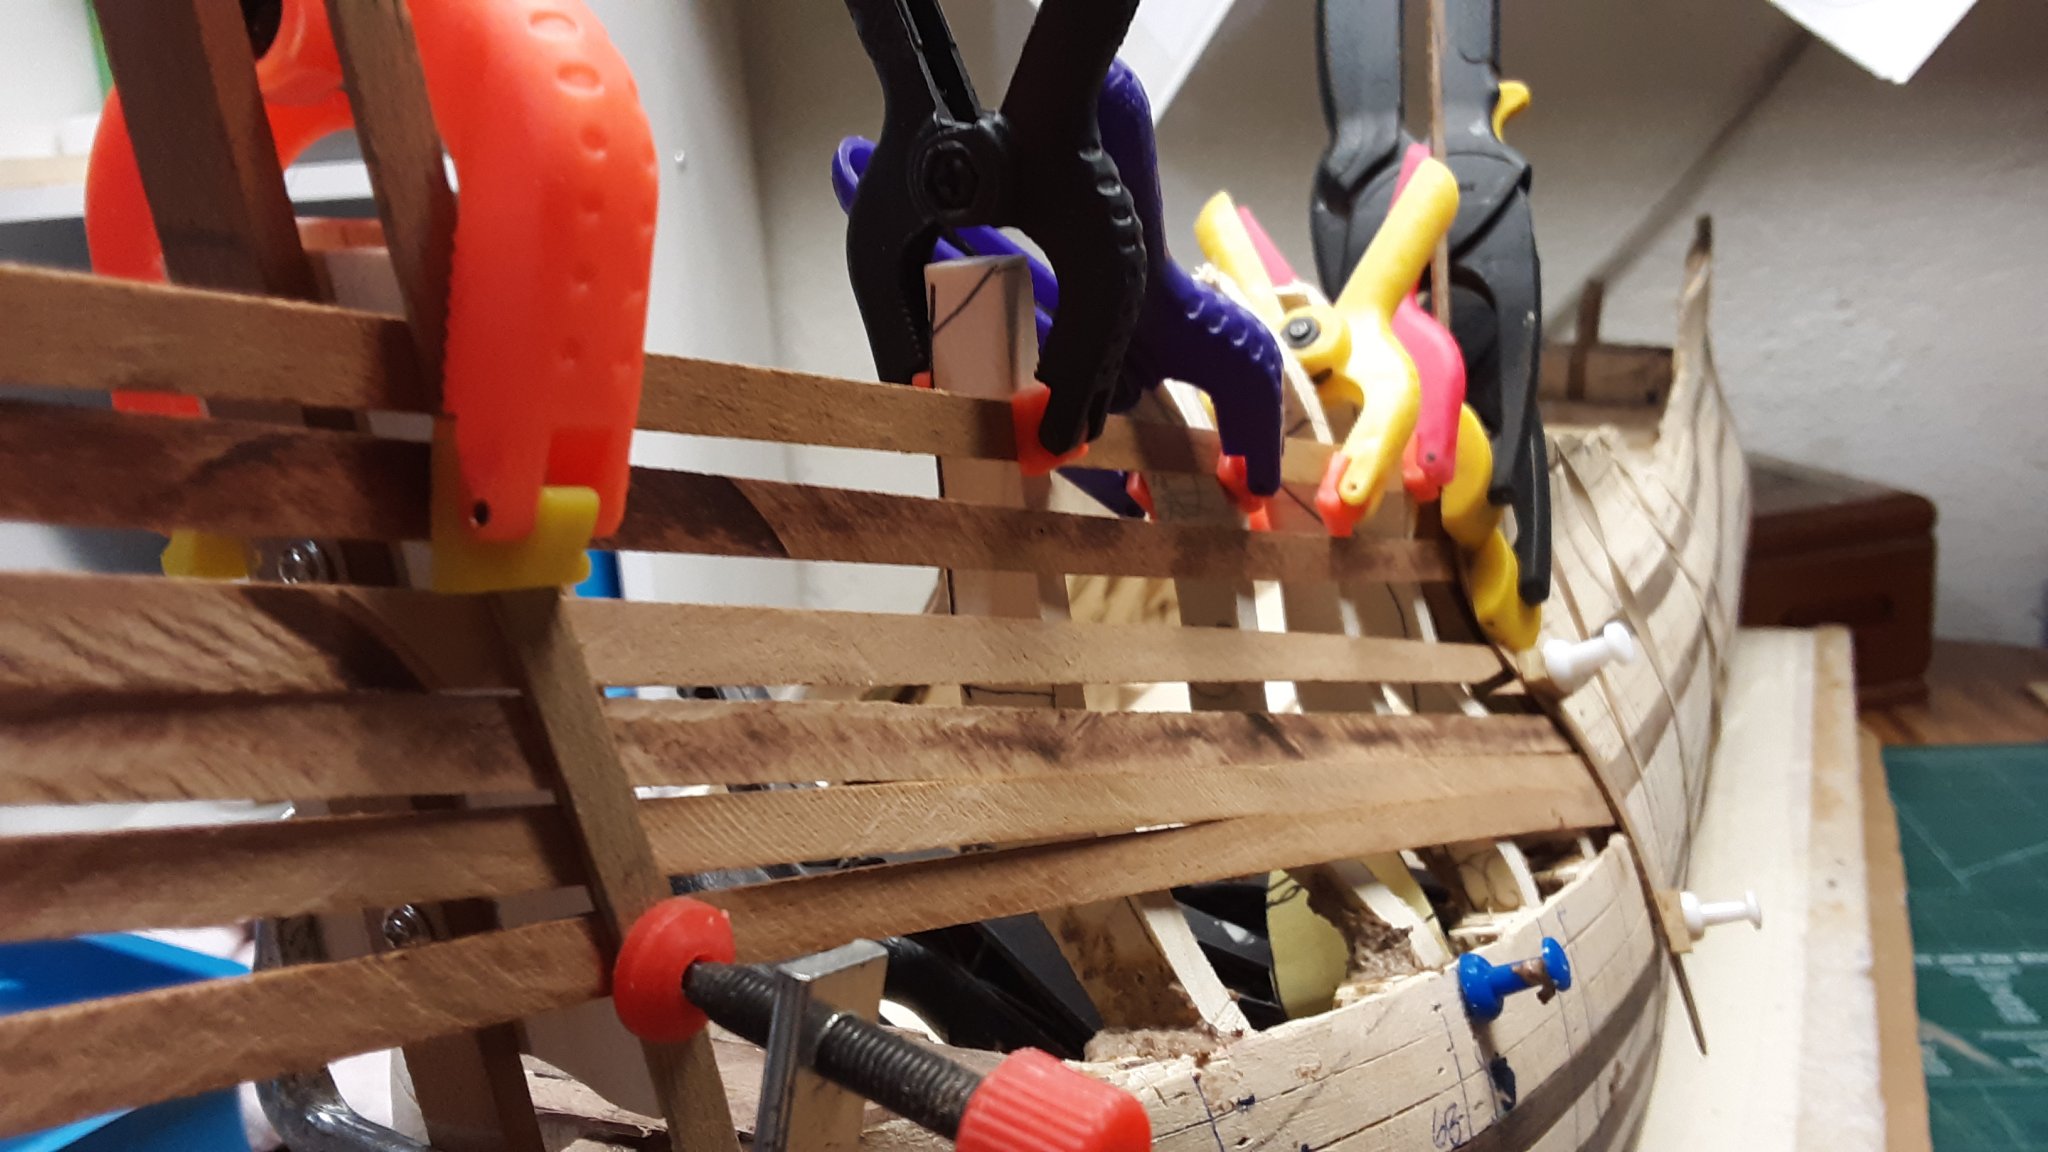
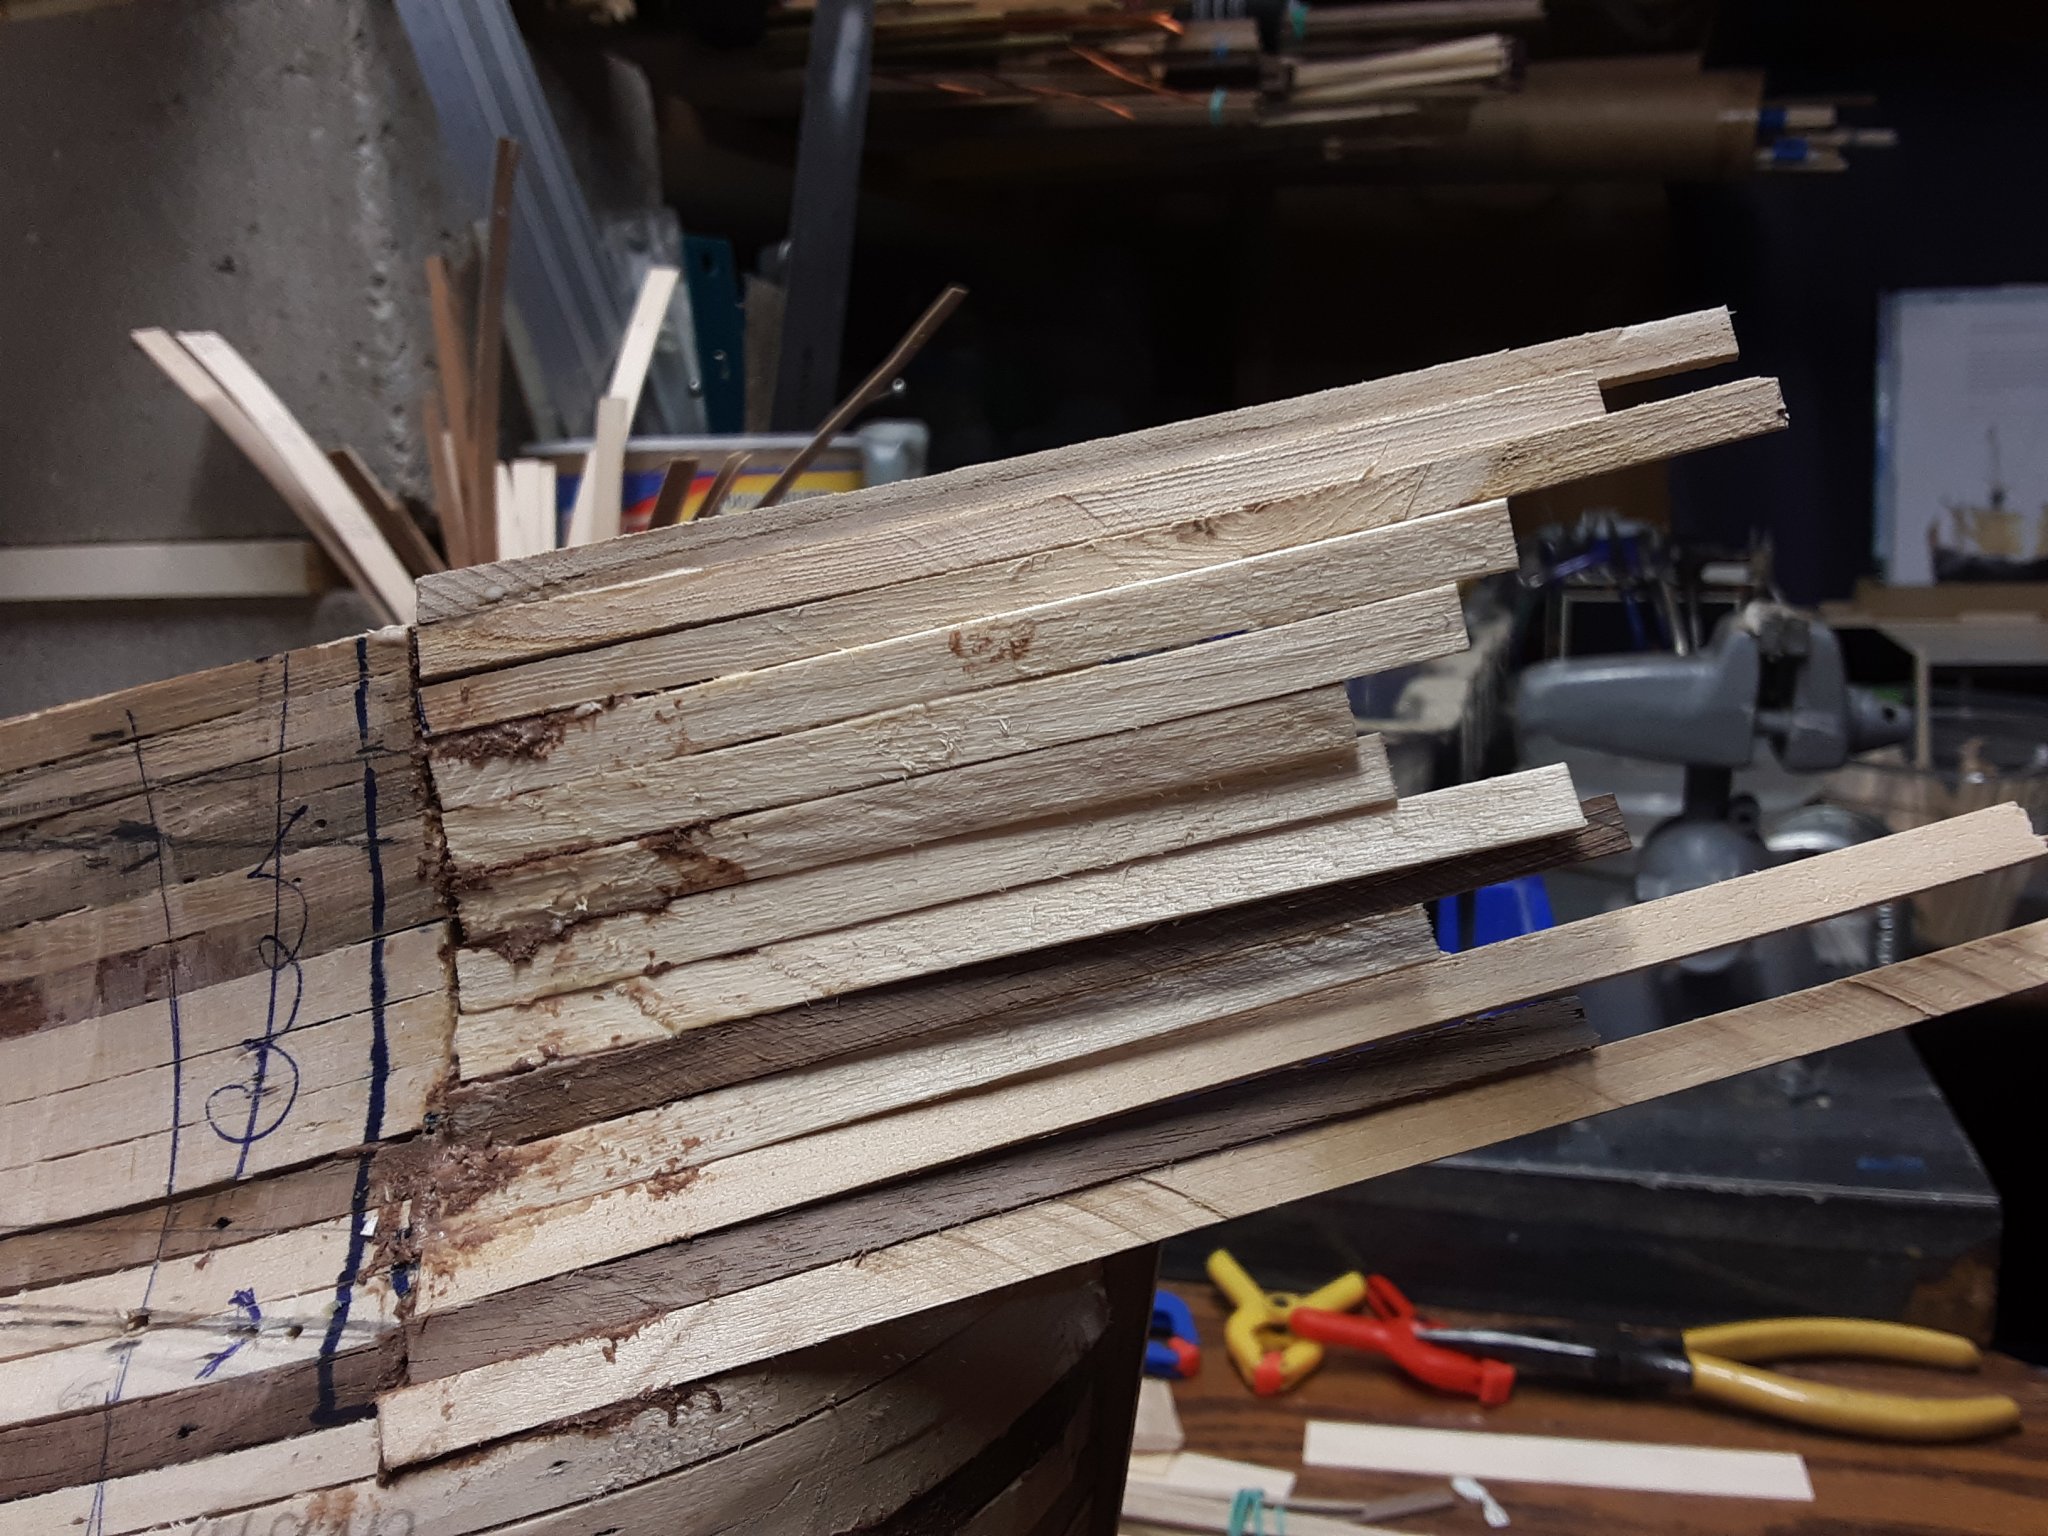
I did a dry run of the shape of the re-do area. I like to get a visual of it all before anything becomes permanent. It looks so much more like a Fluit.

This time the temporary planks end up in the middle of the ship compared to last time.
Next I will remove all the planks and and use the battens to follow the natural curve of the ship.
I created lots of molds from scrap wood and I have also made molds from card. They will be fitted and sanded to shape to fit the missing pieces.
Marcus
- GrandpaPhil, tarbrush, mtaylor and 2 others
-
5
-
Kees,
The details are amazing (hartstikke hartstikke mooi) And I agree with cog about the guider piece. I was surprised to see that.
Marcus
- kees de mol and mtaylor
-
2
-
-
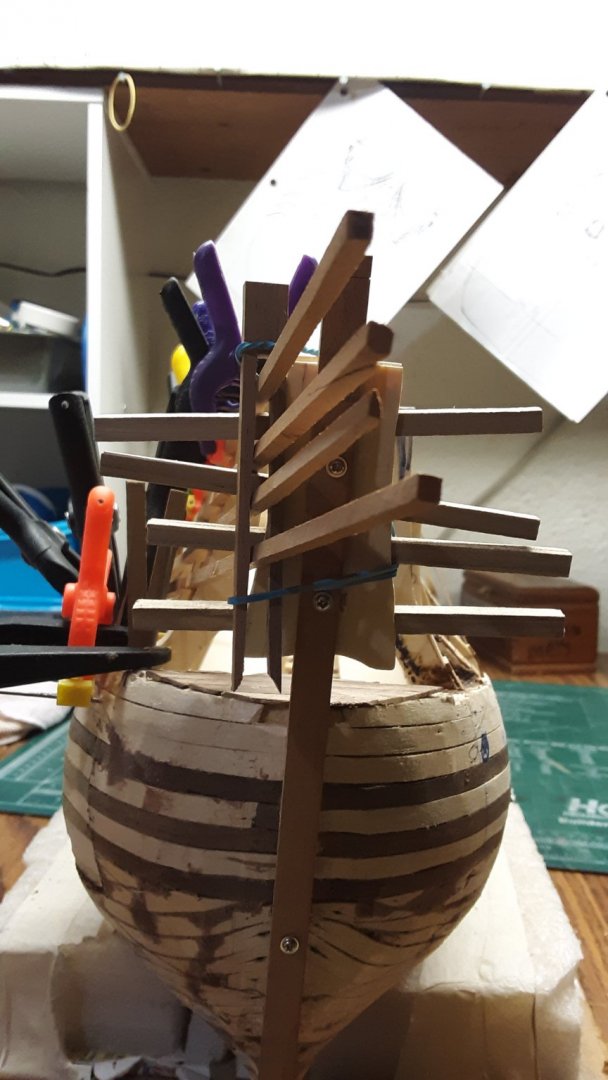
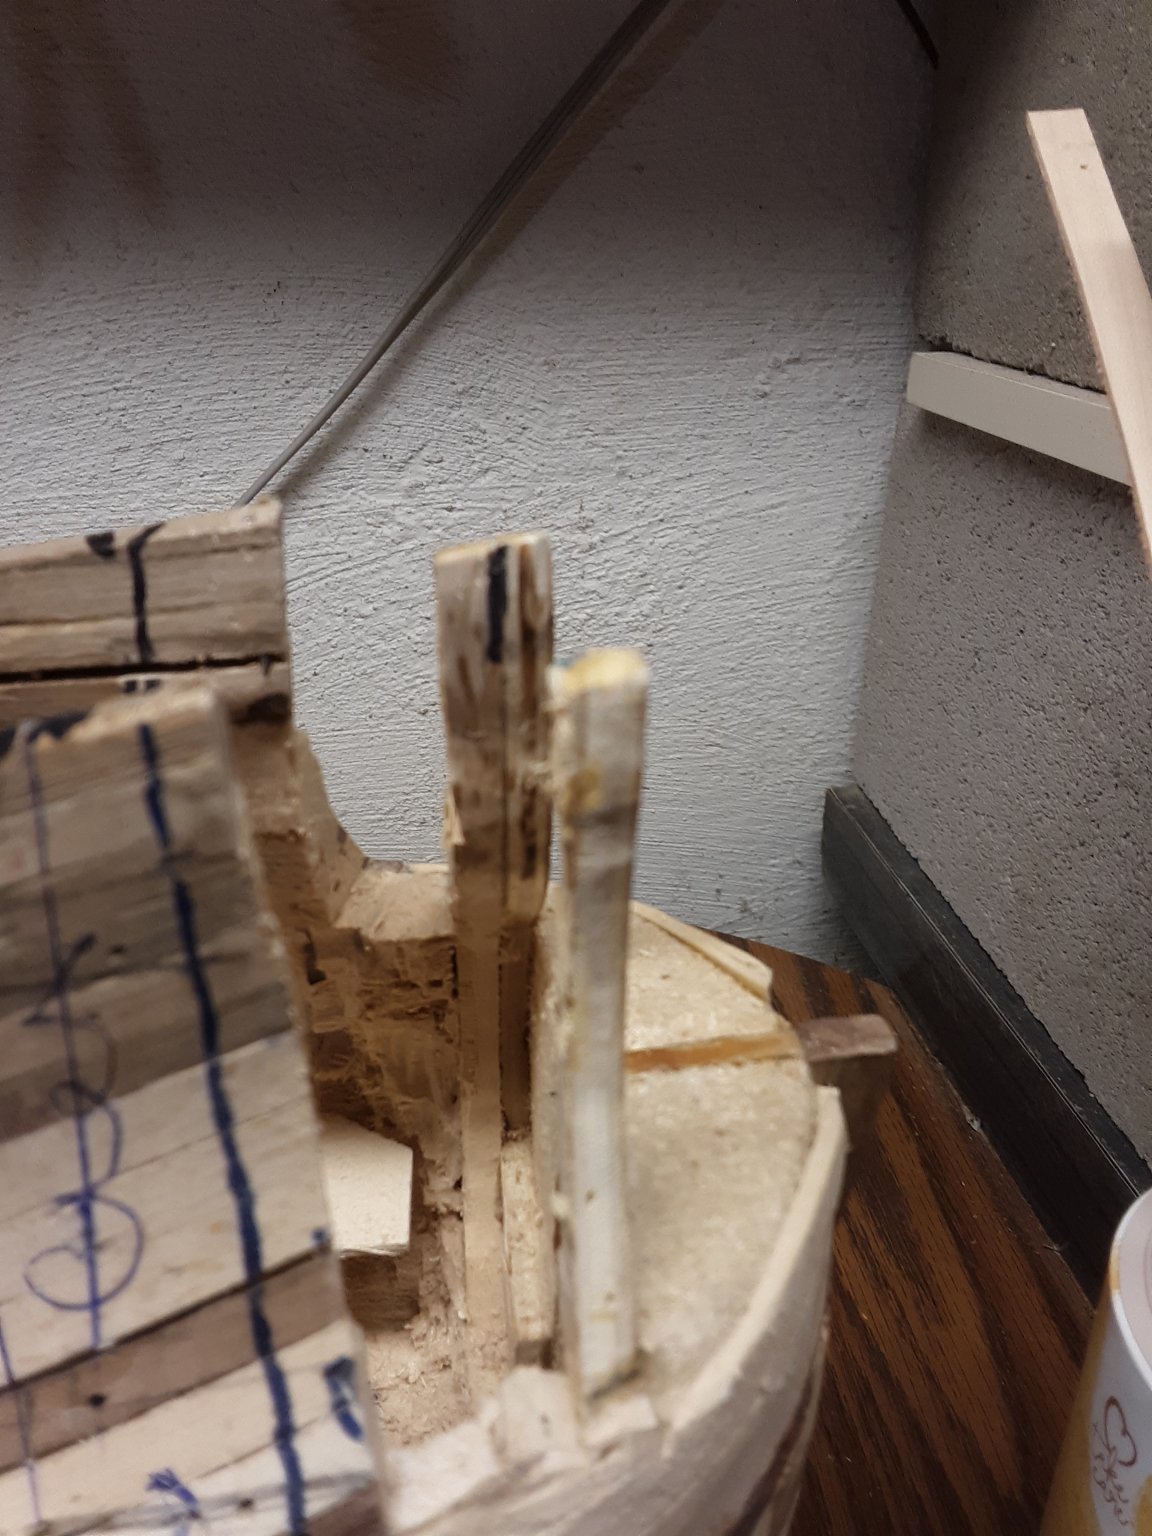
Here is my batten screwed into the back of the sternpost with a temp. Taffrail-shaped mould.

My somewhat stiff but still flexible battens are 2mm by 2mm square dowels of basswood (it is what I have handy) which I will use.
Other material I am experimenting to use is 2-ply, 1.5mm thick maple veneer.
Marcus
- Landlubber Mike, Omega1234, Baker and 3 others
-
6
-
Hi Ab,
Thank you very much for this suggestion. The sketch is very helpful and I am implementing this.
I tried a 4mm by 4mm batten and it isn't that flexible. 1mm by 4mm is better.
Let me start working on this template.
Marcus
- mtaylor and FriedClams
-
2
-
Did not do anything on the Fluit for about a week. Stared at the area that has to be changed. I measured and remeasured the area over and over. Did make a brass template
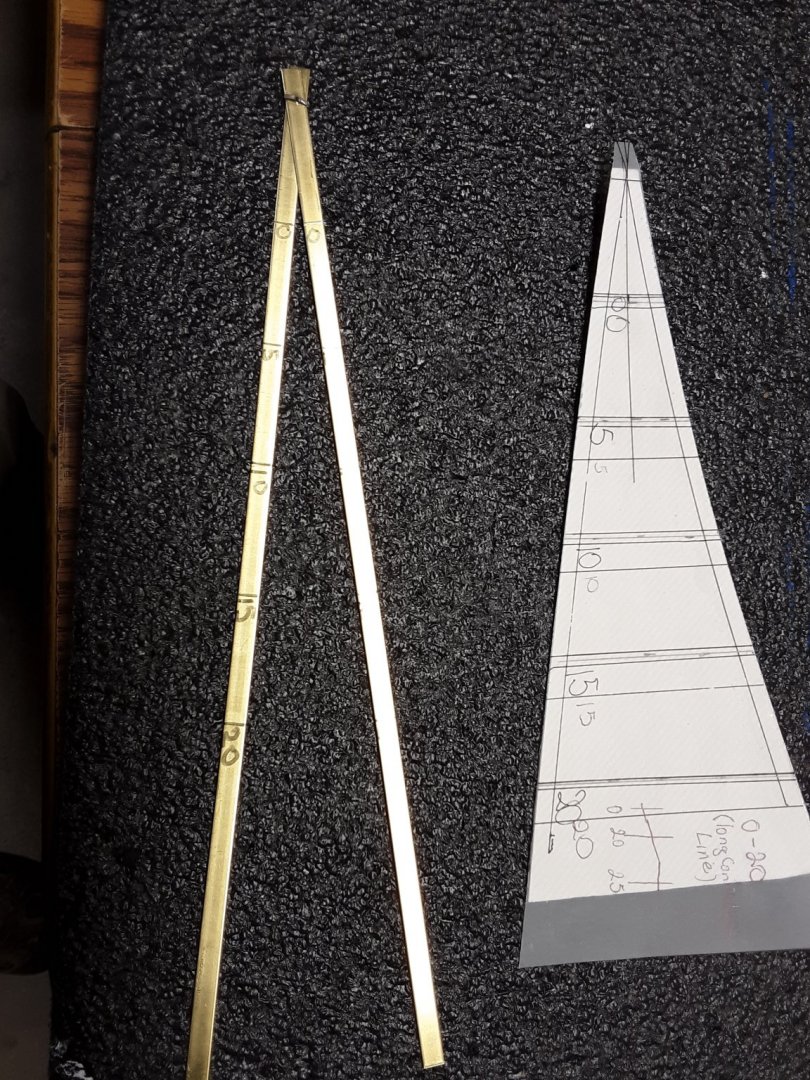 to make sure that I end up in a point behind the rudder
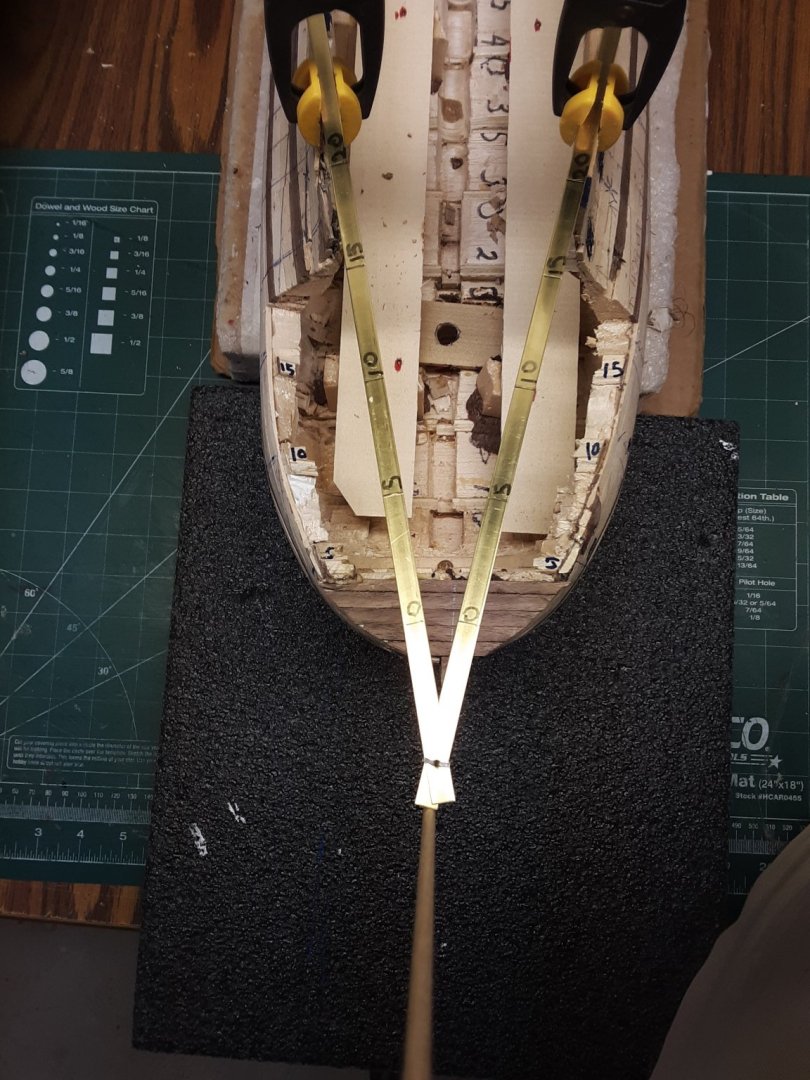
and that the angle of the railings are correct.
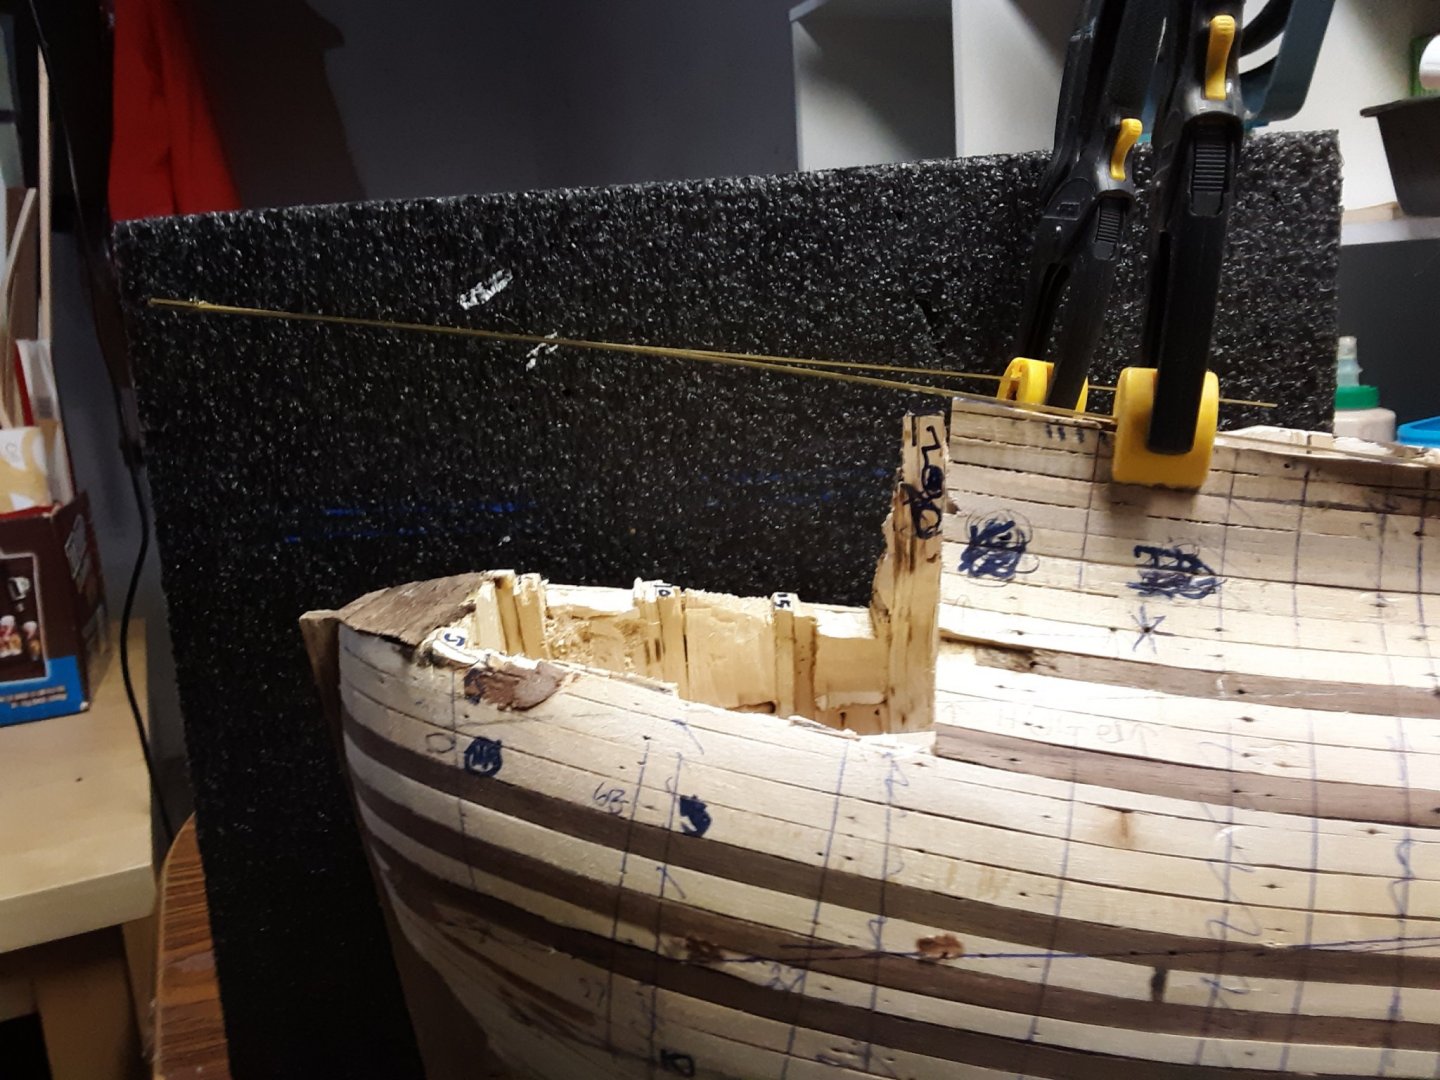
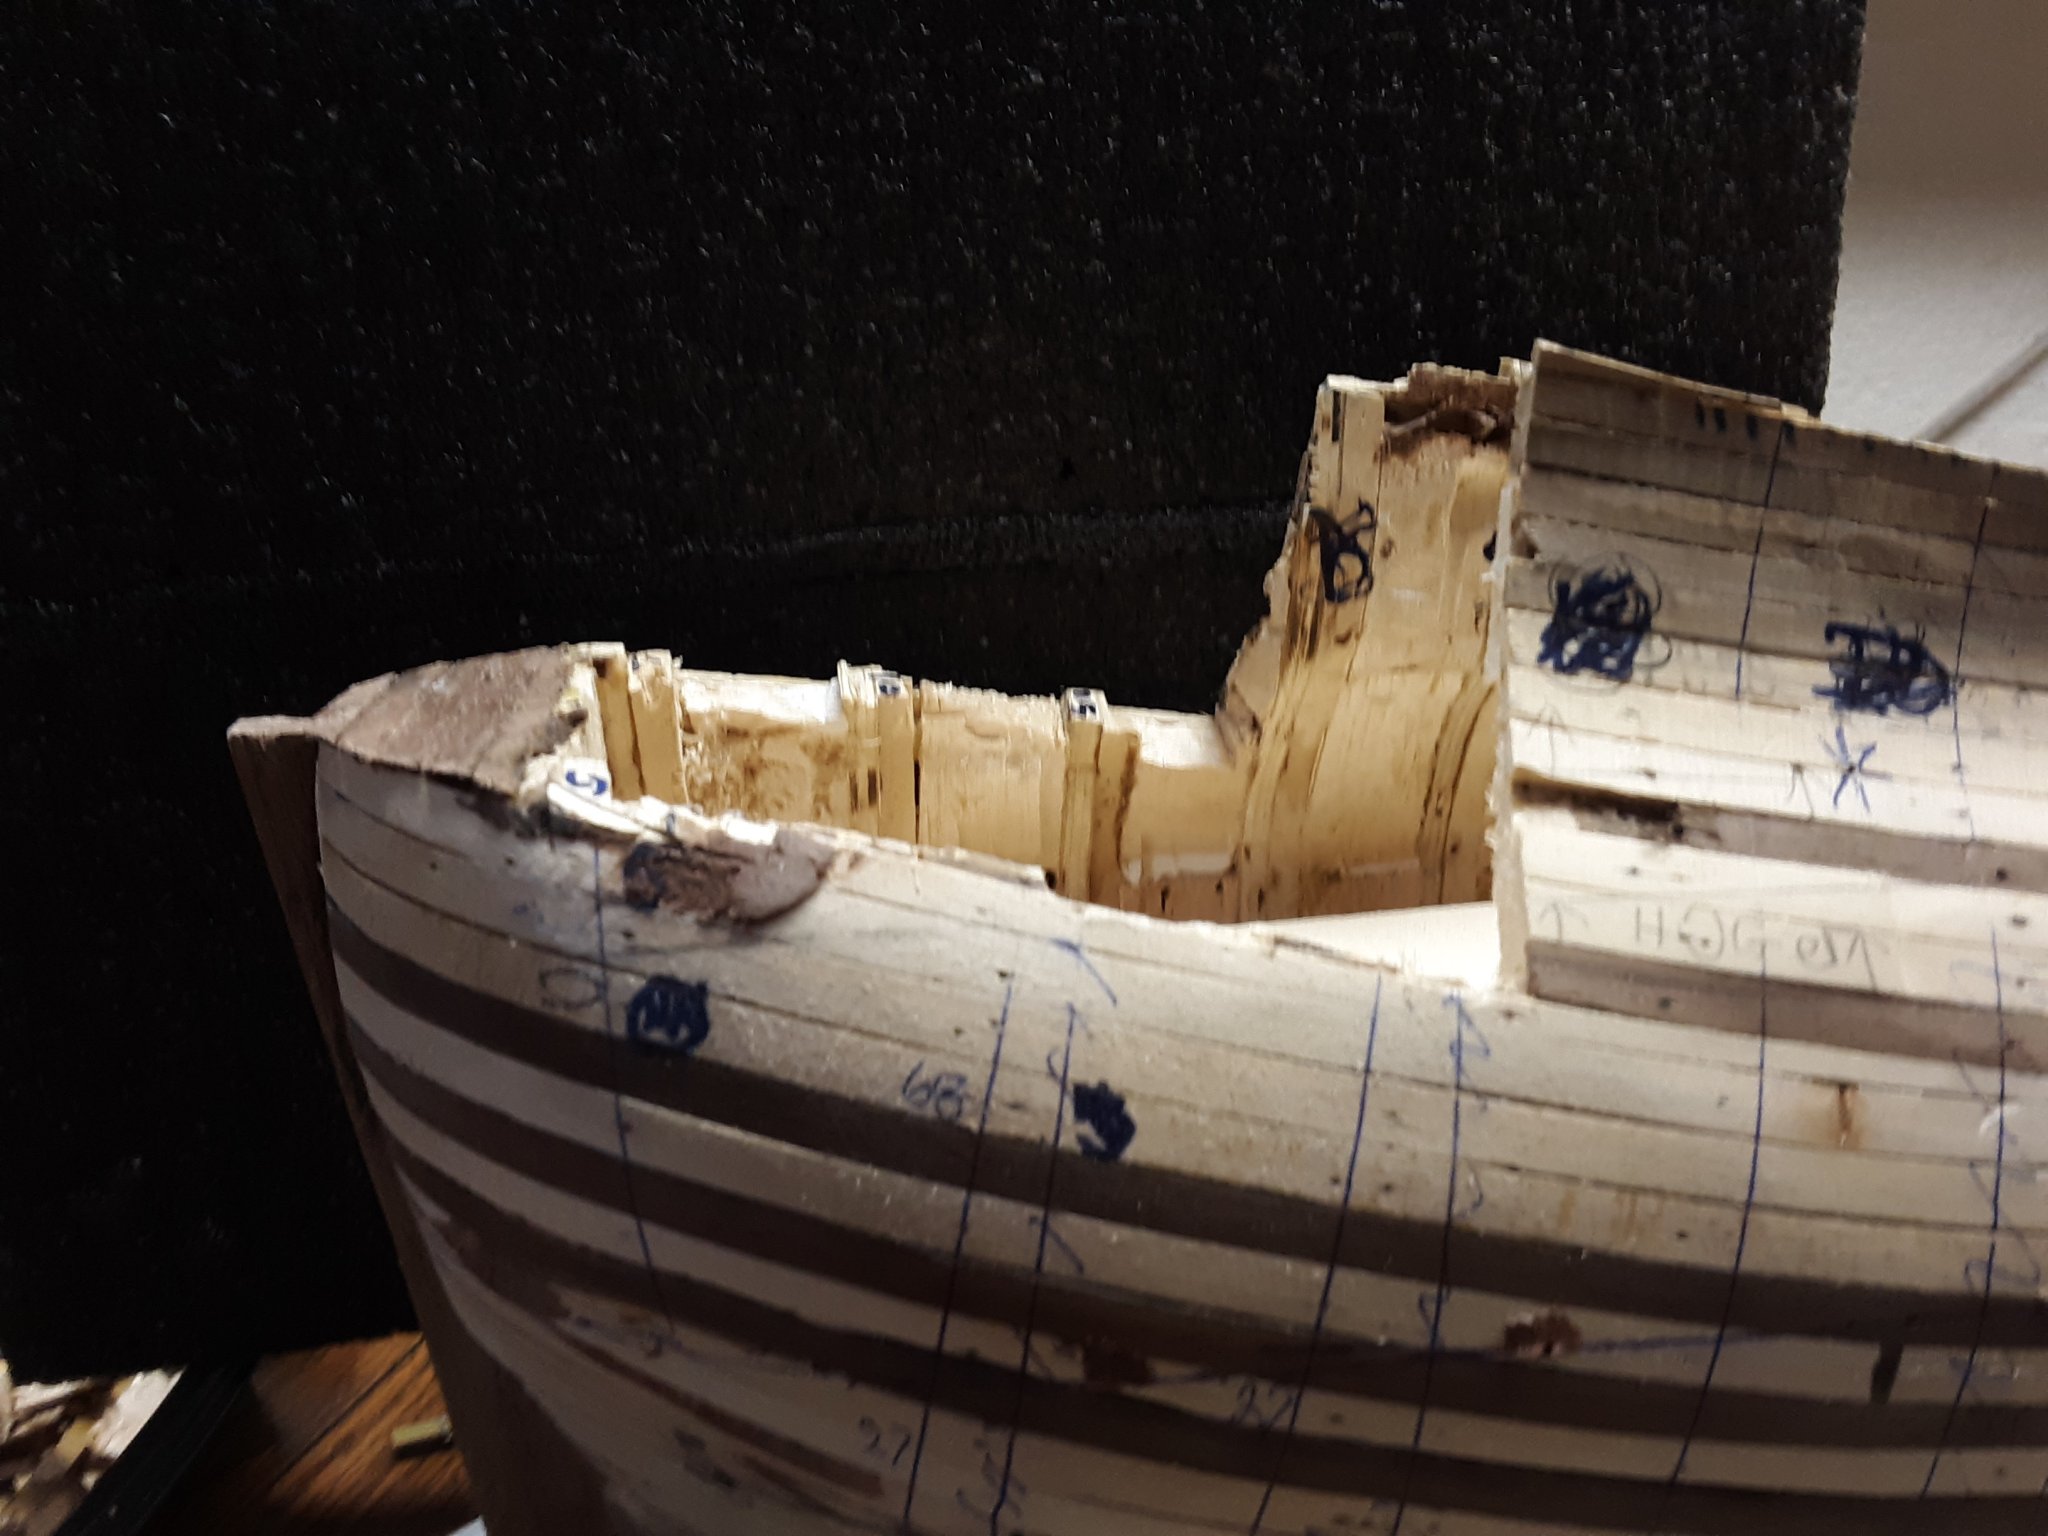
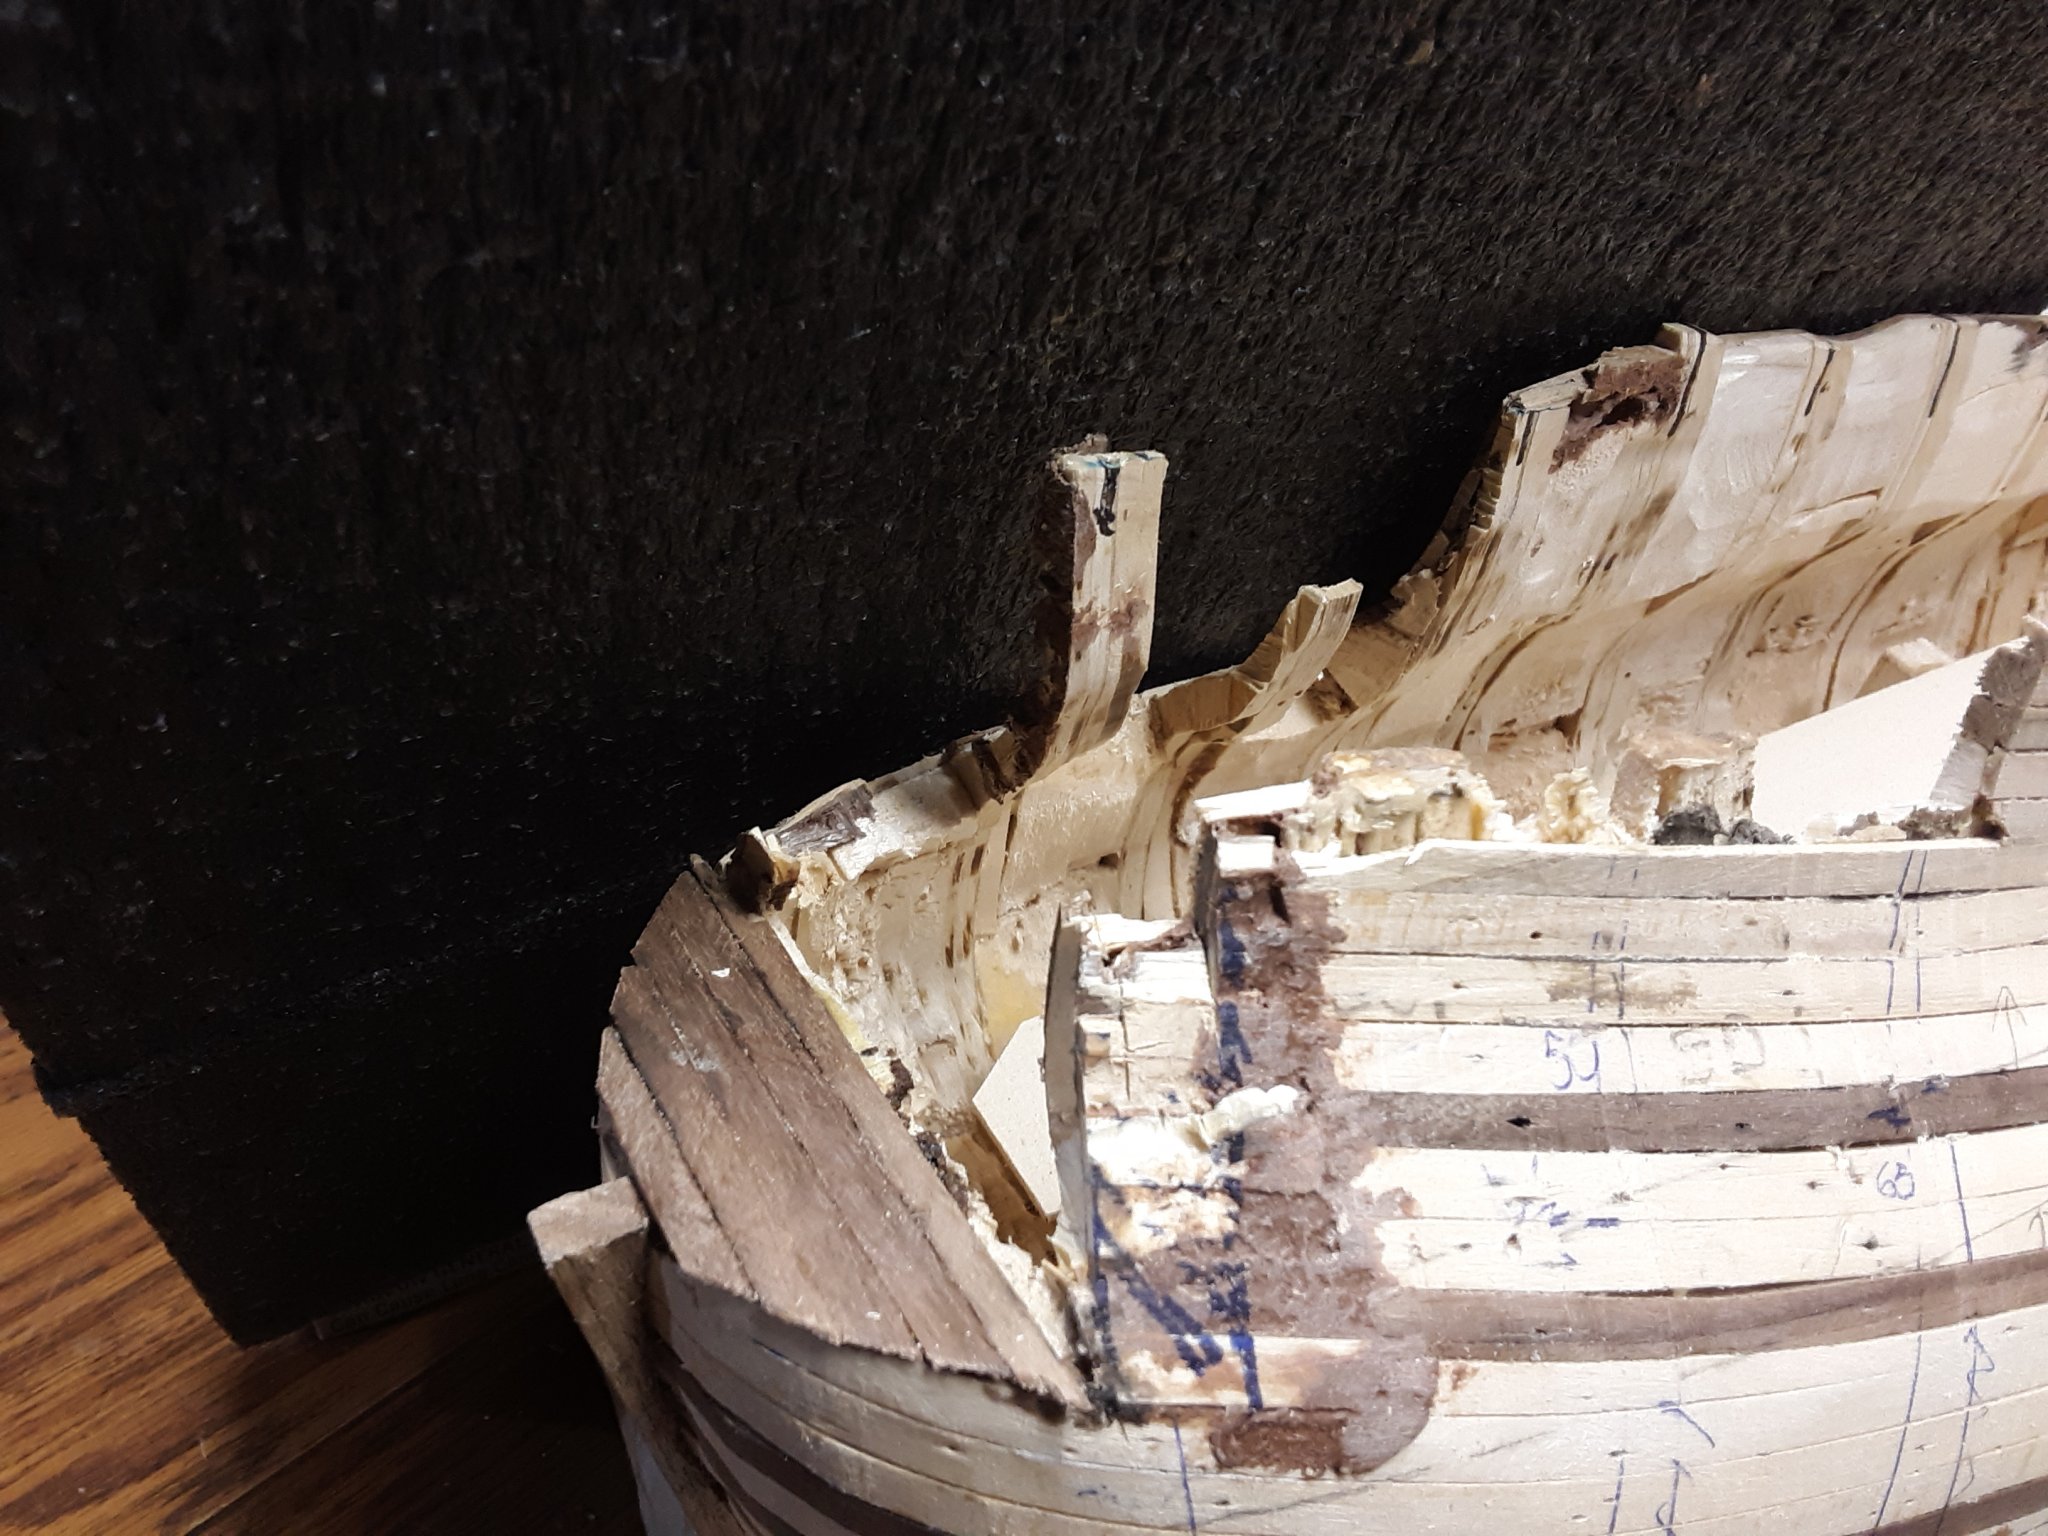
So today removed not just the planking but also part of the bulkheads (no. 5, 10, 15) on the stern. I still need to remove the planking from bulkhead 20 and 25 and replace with new planking which will cover from bulkhead 25 to 5 for both sides.
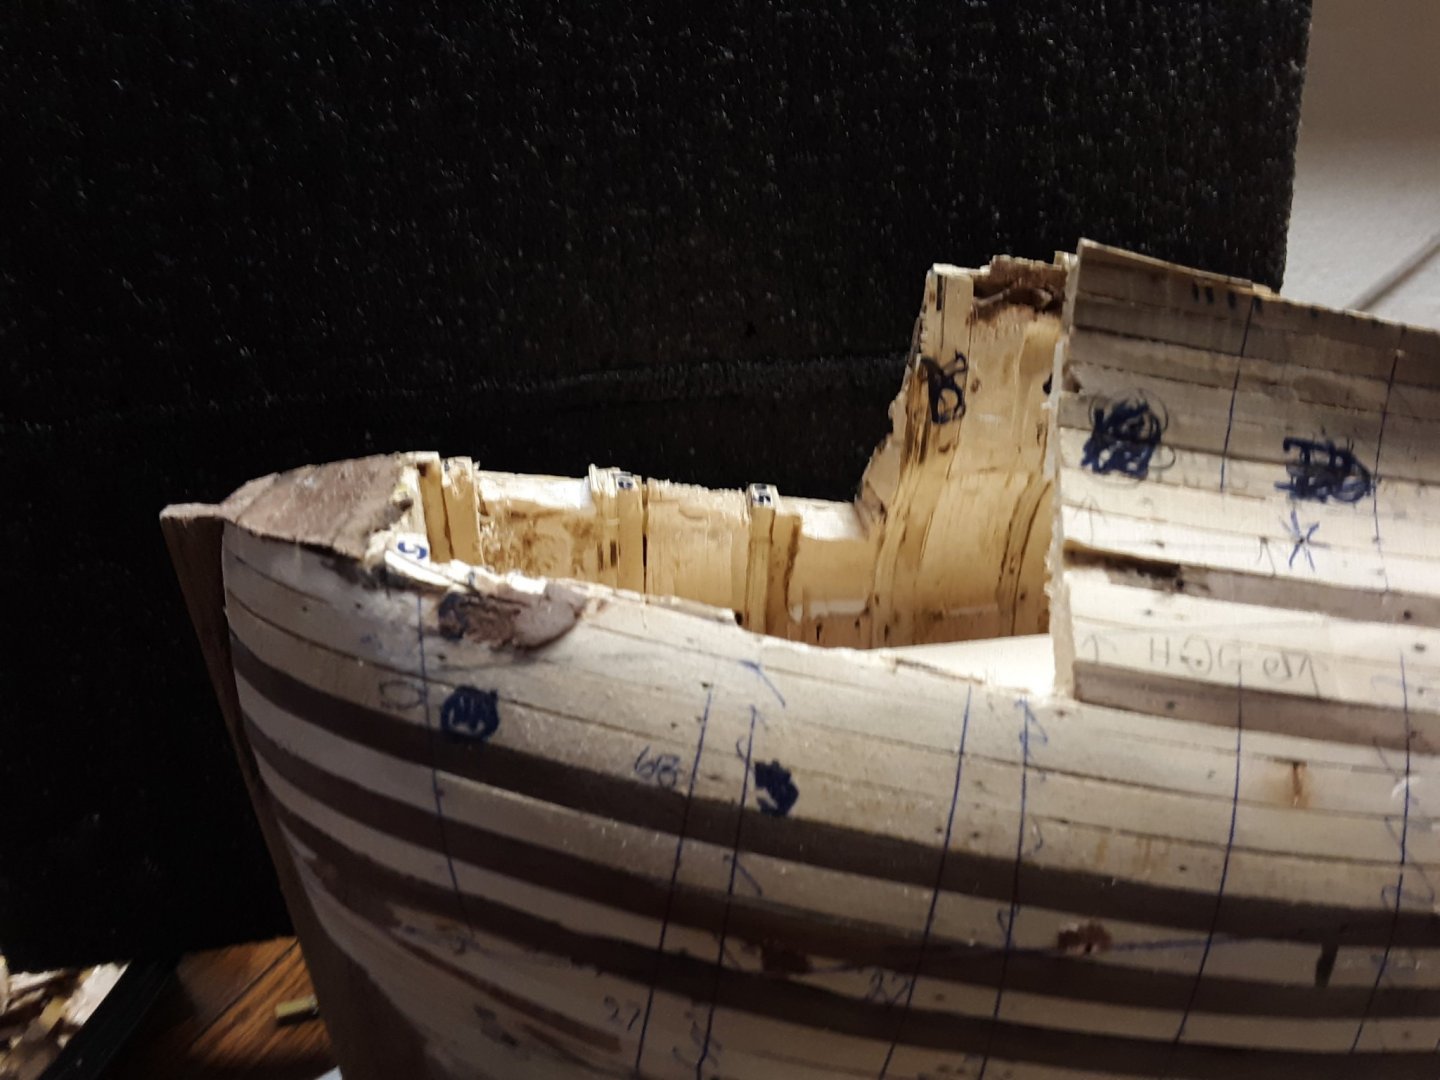
This area will be sanded flat.
Where the bulkheads have been removed I will replace with new pieces of bulkheads, which I need to cut out with the Scroll Saw.
I have been working very slow on this.
Marcus
- FriedClams, Baker, GrandpaPhil and 3 others
-
6
-
-
-
Jan,
It is wood. Redo as many times as you want.
Marcus
- FriedClams and mtaylor
-
2
-
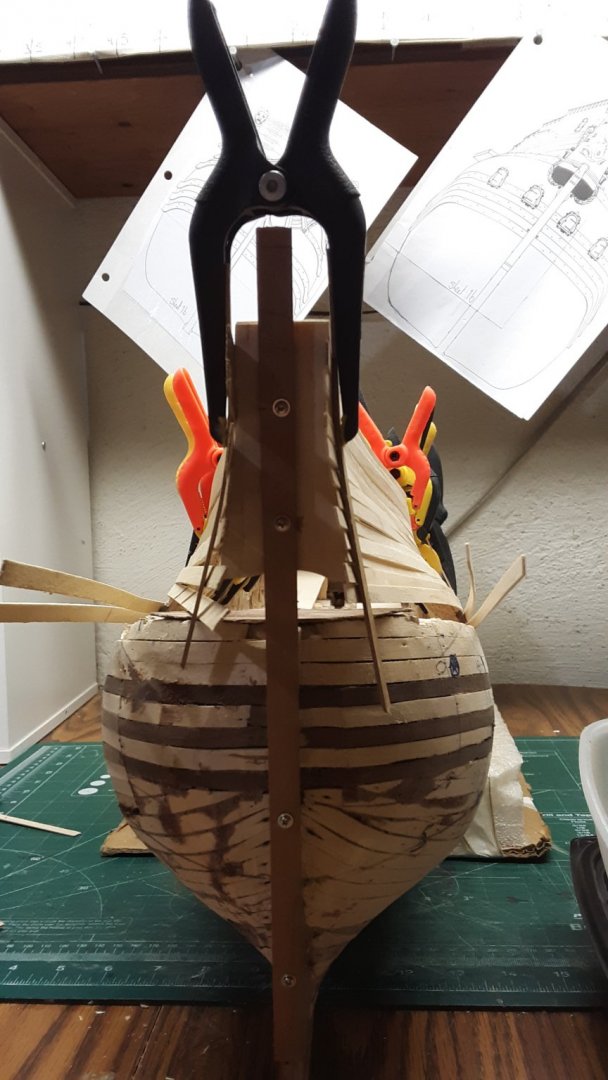
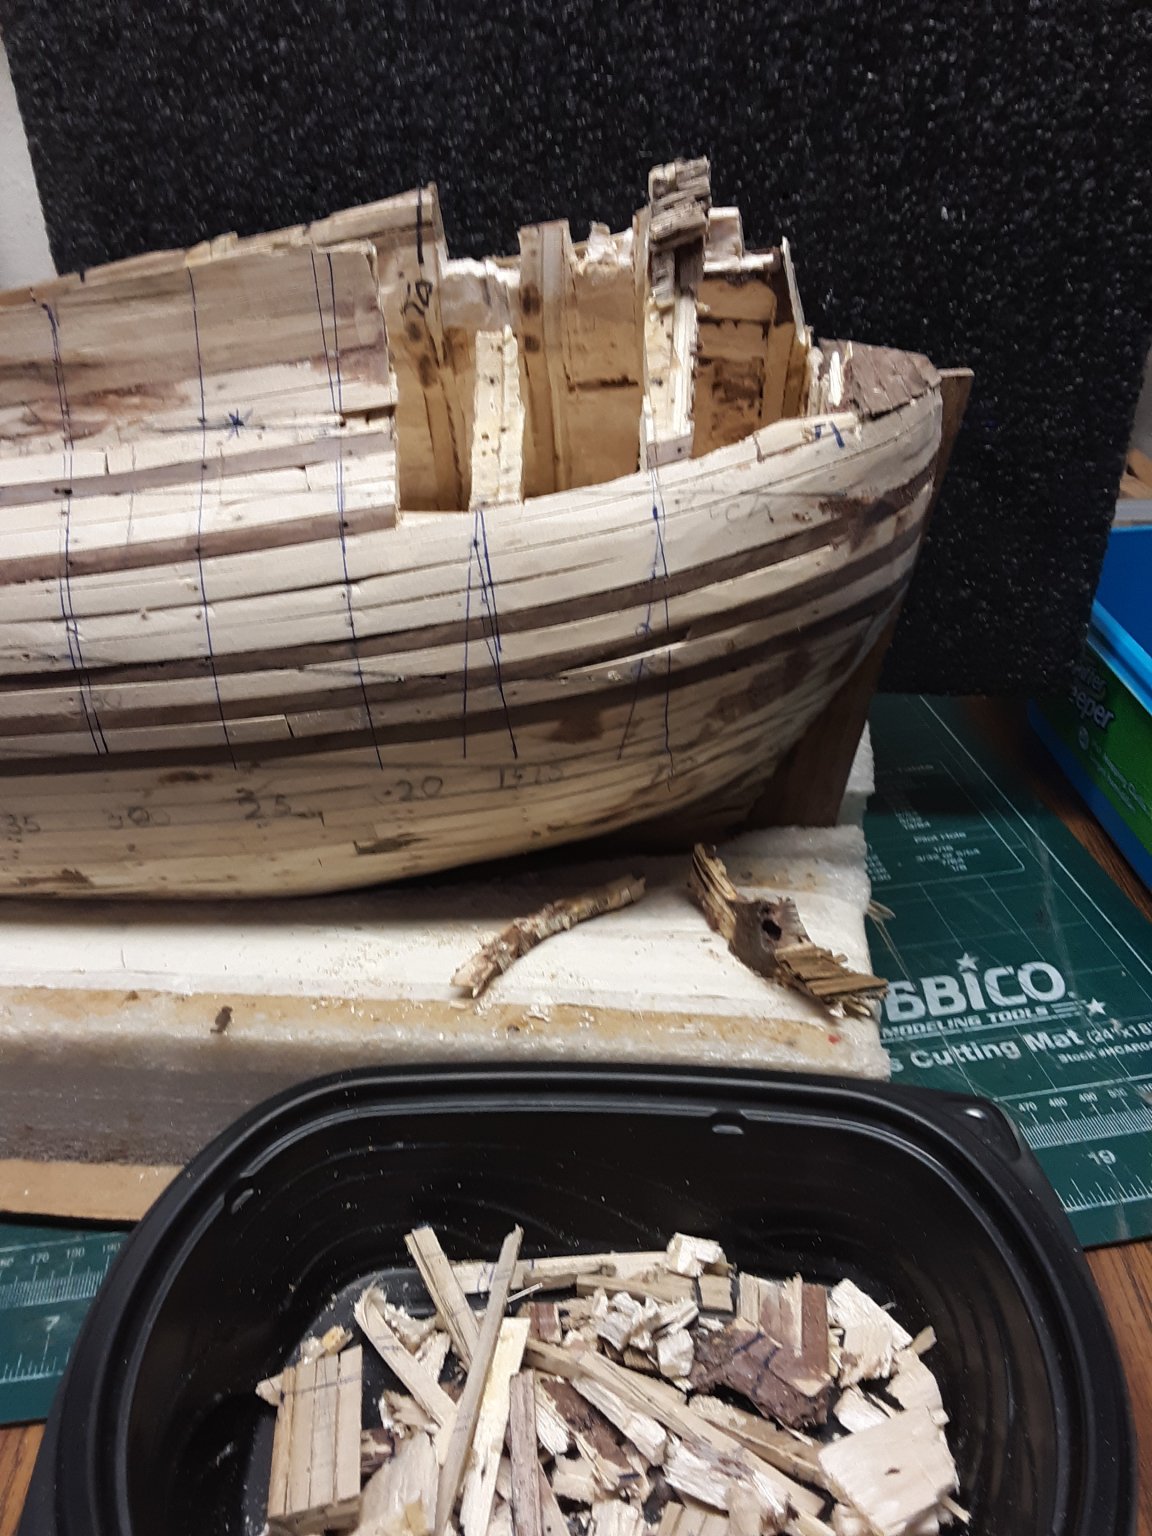
Drastic re-do.
I have started removing the planking in between frame 5 and 10 on both sides and the side where the overall planking leans too much outward between frames 5,10,15, and 20. I may just go further to frame 25, 30 and 35.
Have to do this slowly as I don't want to rip it too fast as I may break something I don't want to.


I will probably cut the frames as well and install new ones. It would then be easier to plank.
I looked at all the pictures I have from Fluits and on some have there planking stop just above the stem and some show the planking a little further out of the end of the rudder.
Marcus
- Landlubber Mike, GrandpaPhil, Baker and 3 others
-
6
-
-
-
16 minutes ago, Roger Pellett said:
Am I correct that the oval piece surrounding the rudder port, yellow in the 3D rendering is actually a structural member tying the upper and lower hull sections together?
Roger
Roger,
Seems to me but Ab would be a better judge of that as he has built several Fluits in his lifetime.
Marcus
-
10 hours ago, amateur said:
When you are goung to rip the planking off between frames 5-10, is there any way to ensure that although offf-center, the stern will be vertical?
Jan,
Possibly, but then I need to start at frame 30 and remove a lot more.
The main reason why it is off is that the planking starting from frame 30 going to frame 5 is bent/bowed towards the outside. Don't really know how this happened because before the planking was installed all the frames were nice and even.
Marcus
-
Ab,
I am never ashamed of redoing a model. With building the Utrecht, I got it right after the third try. I was continually having problems with the stern. Seems that is where I always have a problem with. Same with the Boyer.
I also appreciate your constructive criticism and you show this with pictures.
I think it is safe to say that you are the only modeler on MSW that has built several Fluits and I am in the process of building one. So I rely on you, Jan and a few other Dutch people to give me advice.
Marcus
- Blue Pilot and Baker
-
2
-
Ab,
Yes, there is a symmetry problem Thanks a lot for the 3D designs. The second picture is a lot of help.
I will either pull the planking further out or rip everything out between bulkhead 5 and 10 and redo the horizontal planking.
I will probably take it all out between bulkhead 5 and 10 and start over, (sorry, thinking out loud).
Jan,
You are correct in your observation of the right side to be closer to the hartline. I can't change that anymore.
Marcus
- Blue Pilot and mtaylor
-
2
-
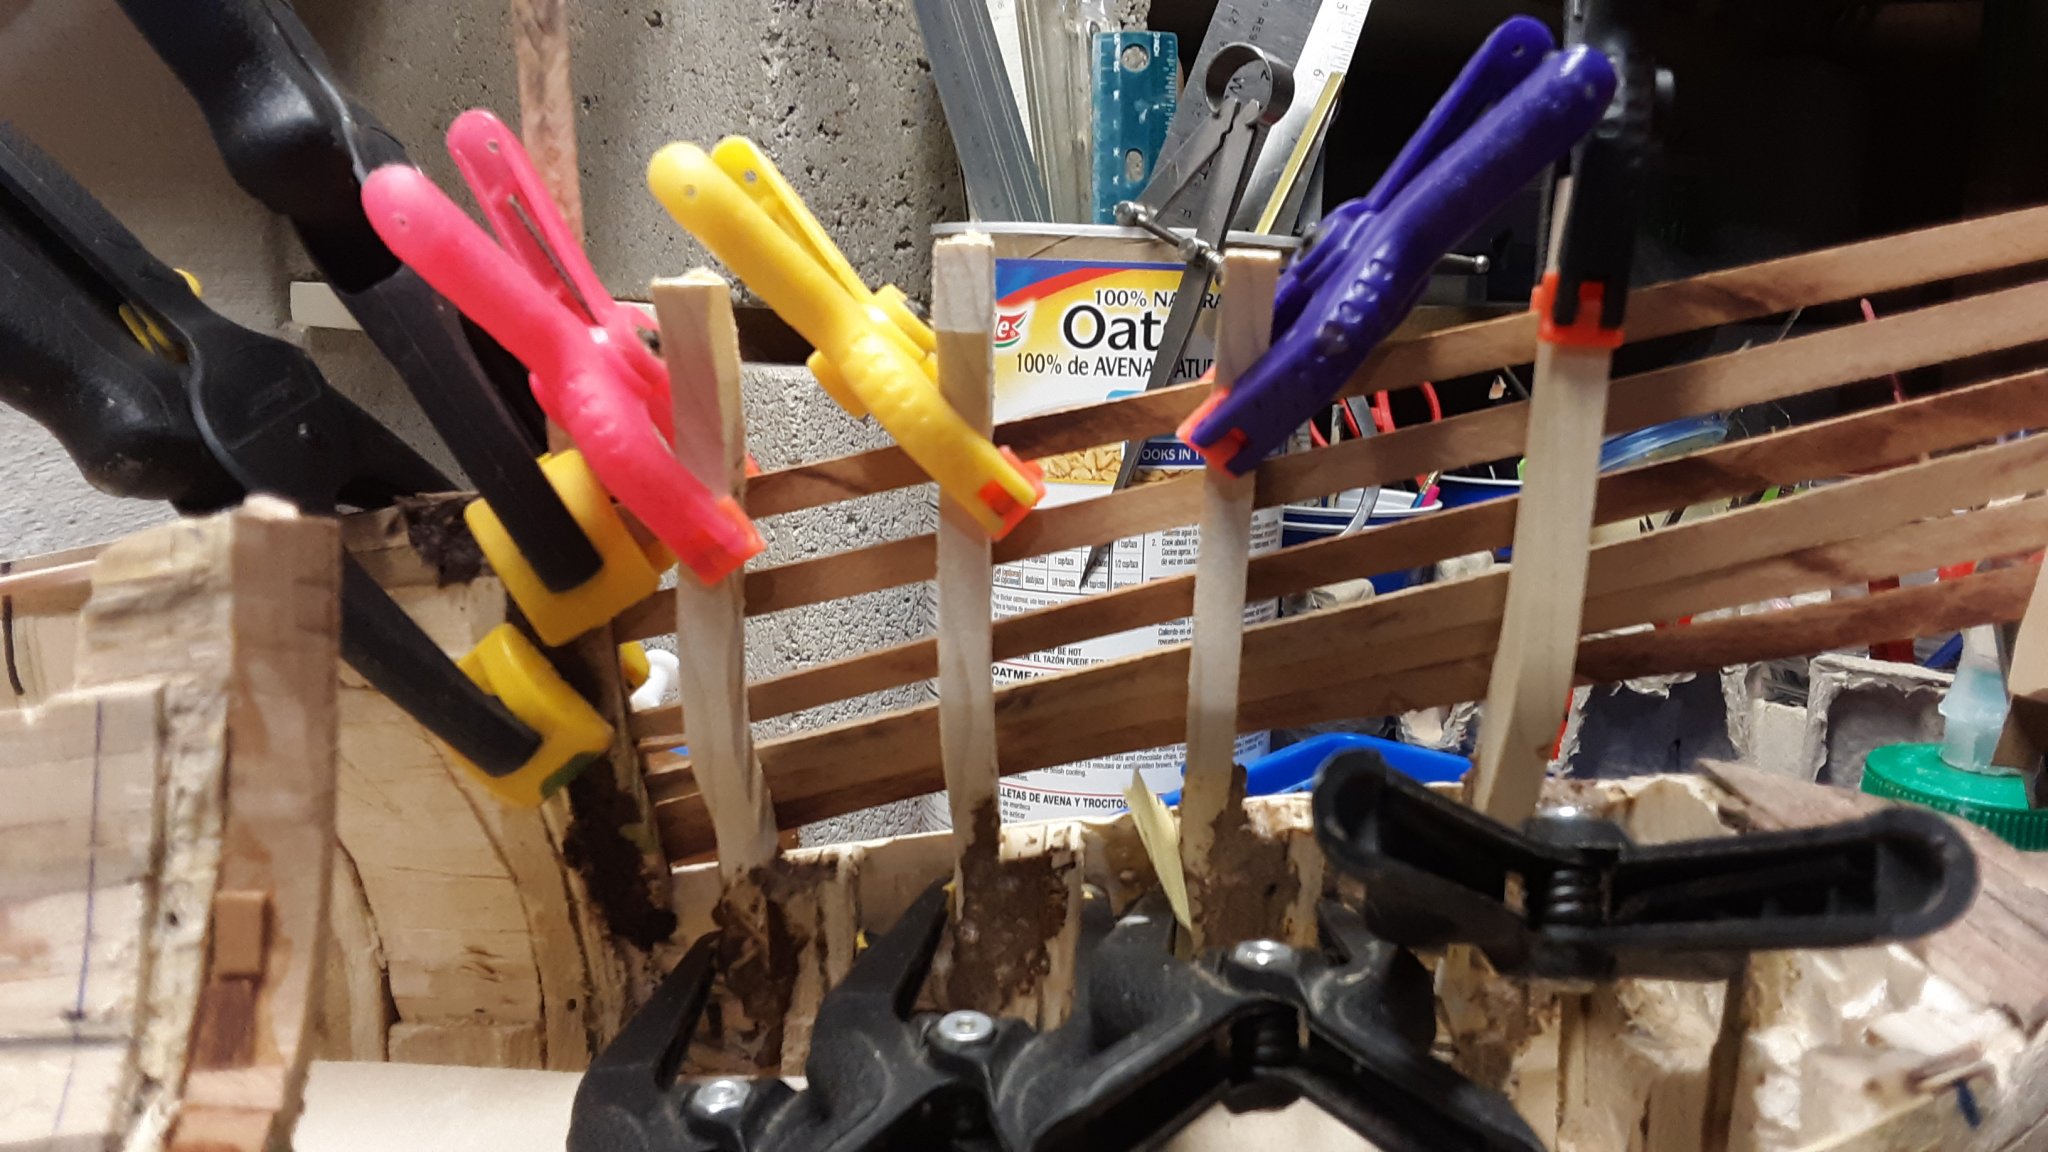
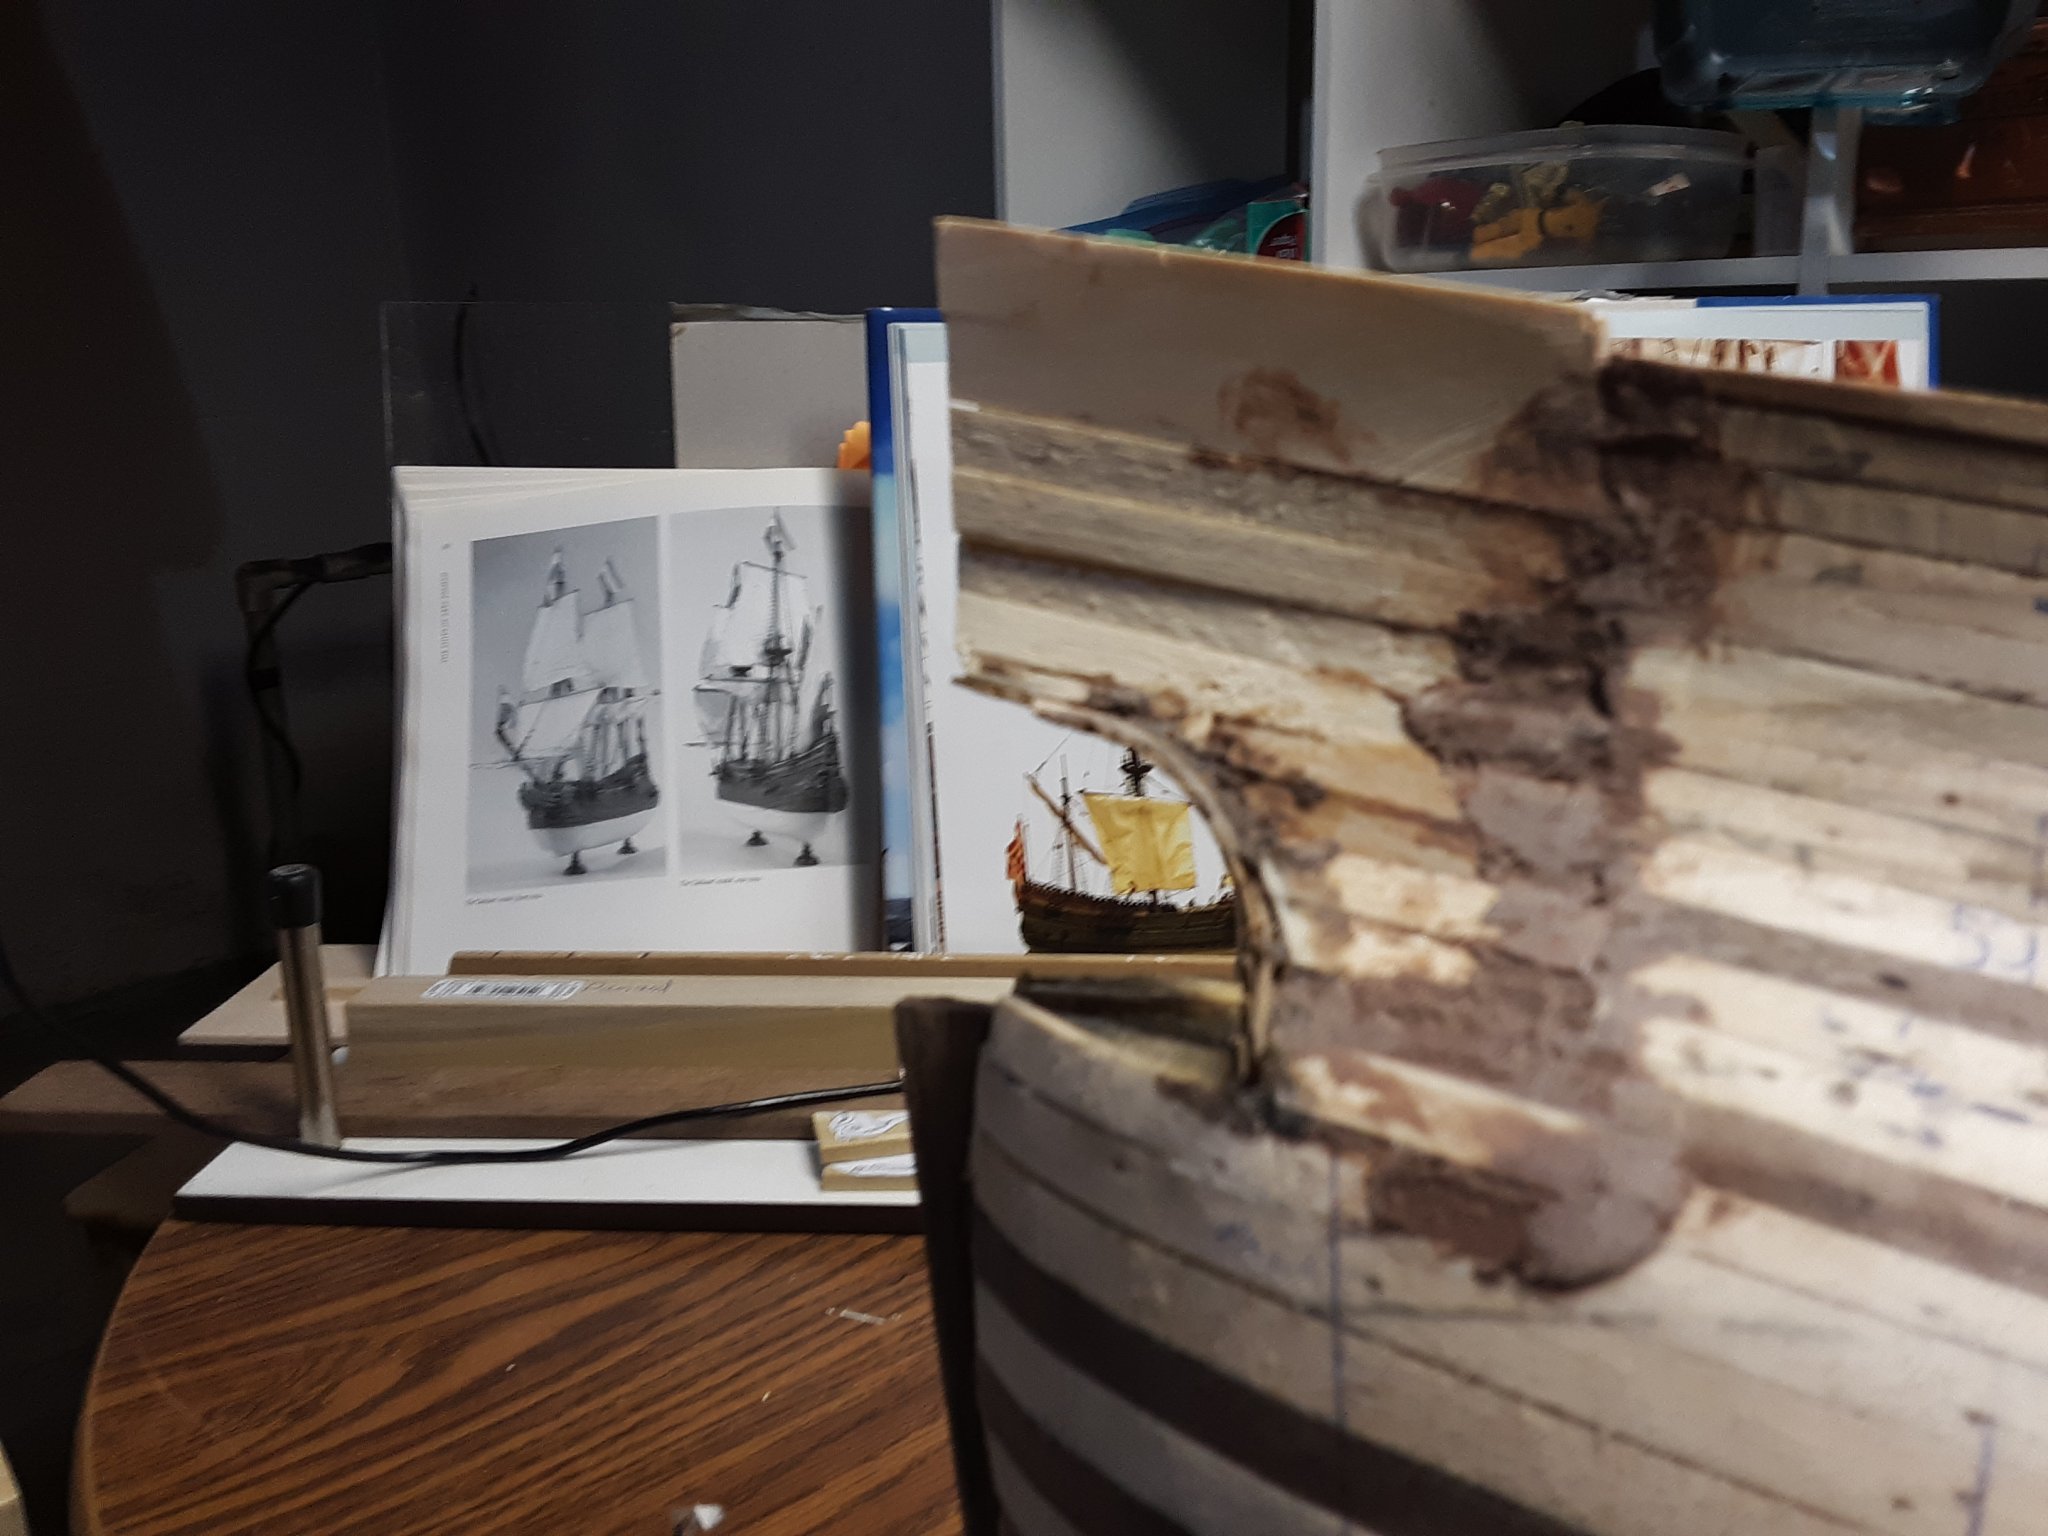
Took drastic measures and removed the planking between bulkhead 5 and 10.


Redid the planking so they would extend way over the rudder.
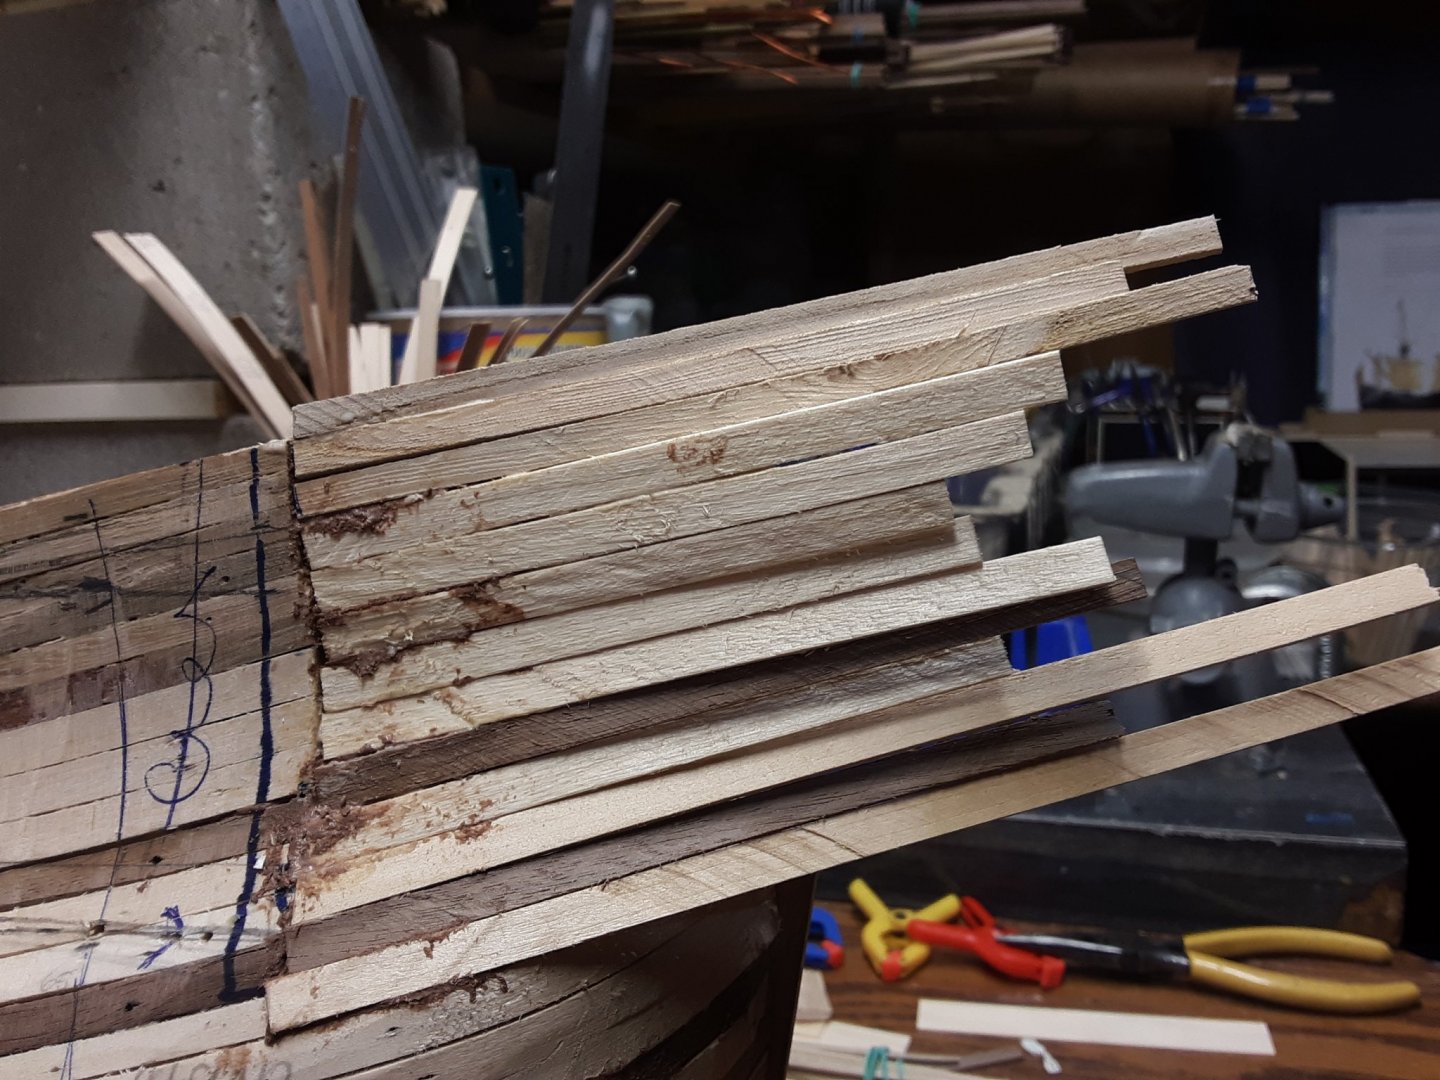
Combination of wood glue and sawdust was used to fill in the gaps. Most of this will be sanded away.
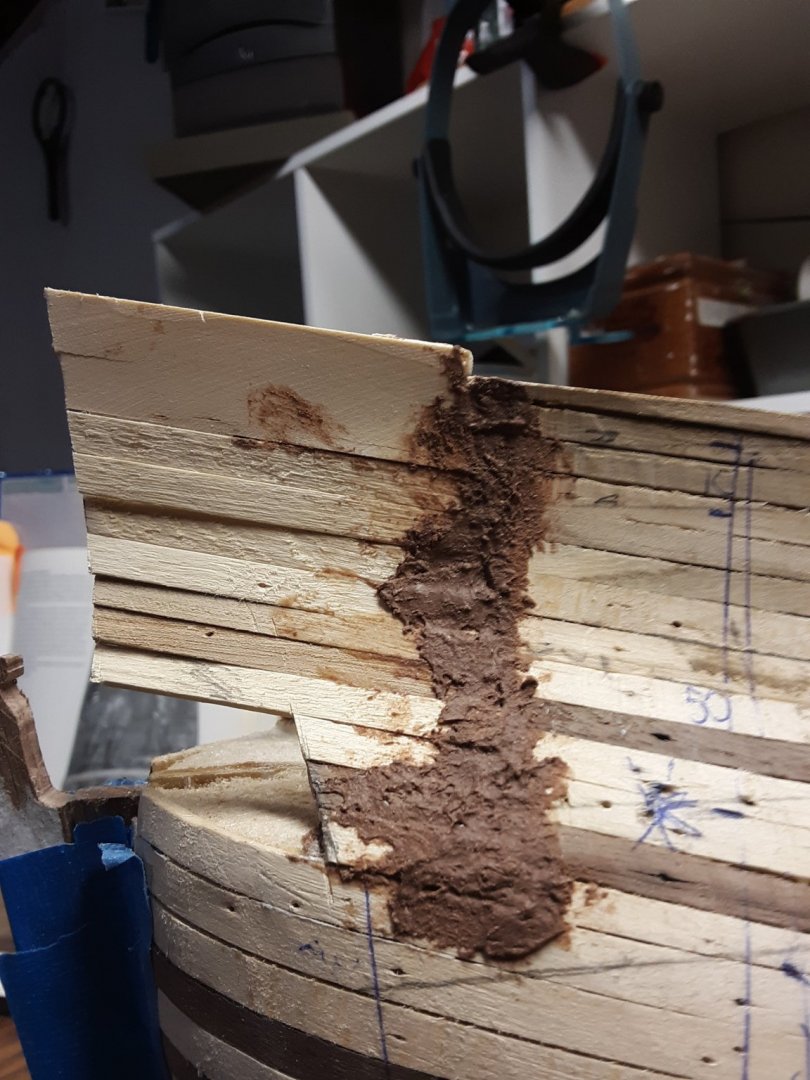
Both sides are done and drying overnight.

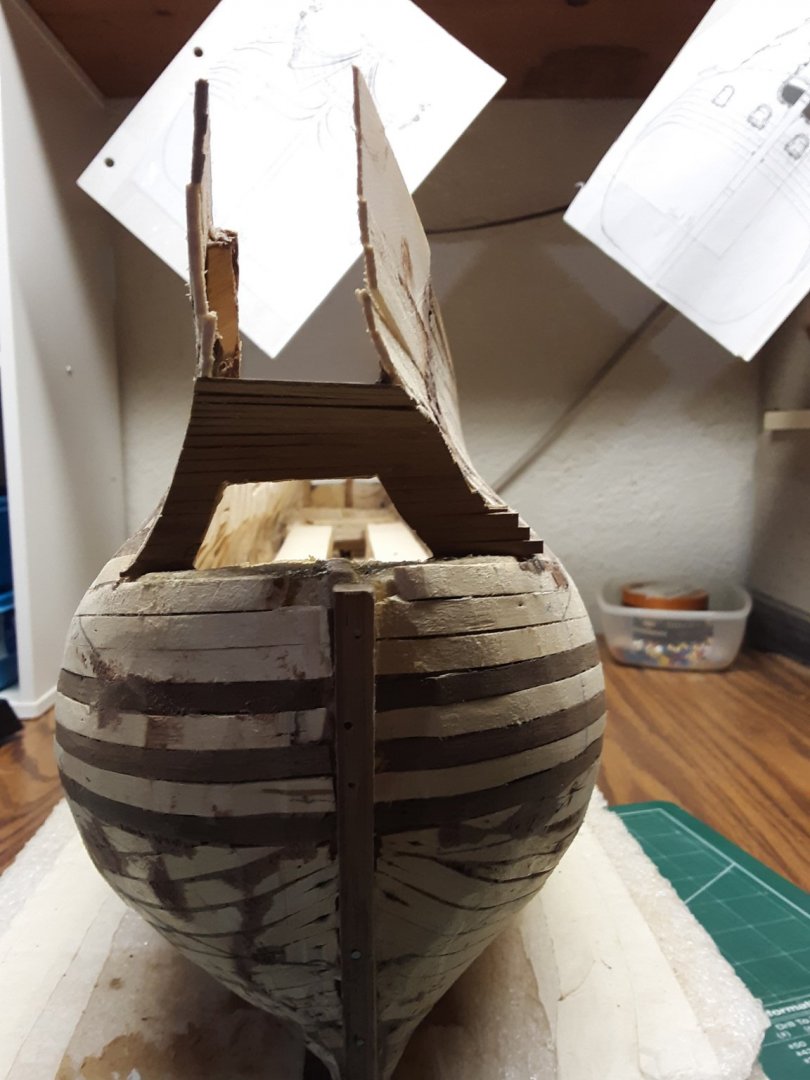
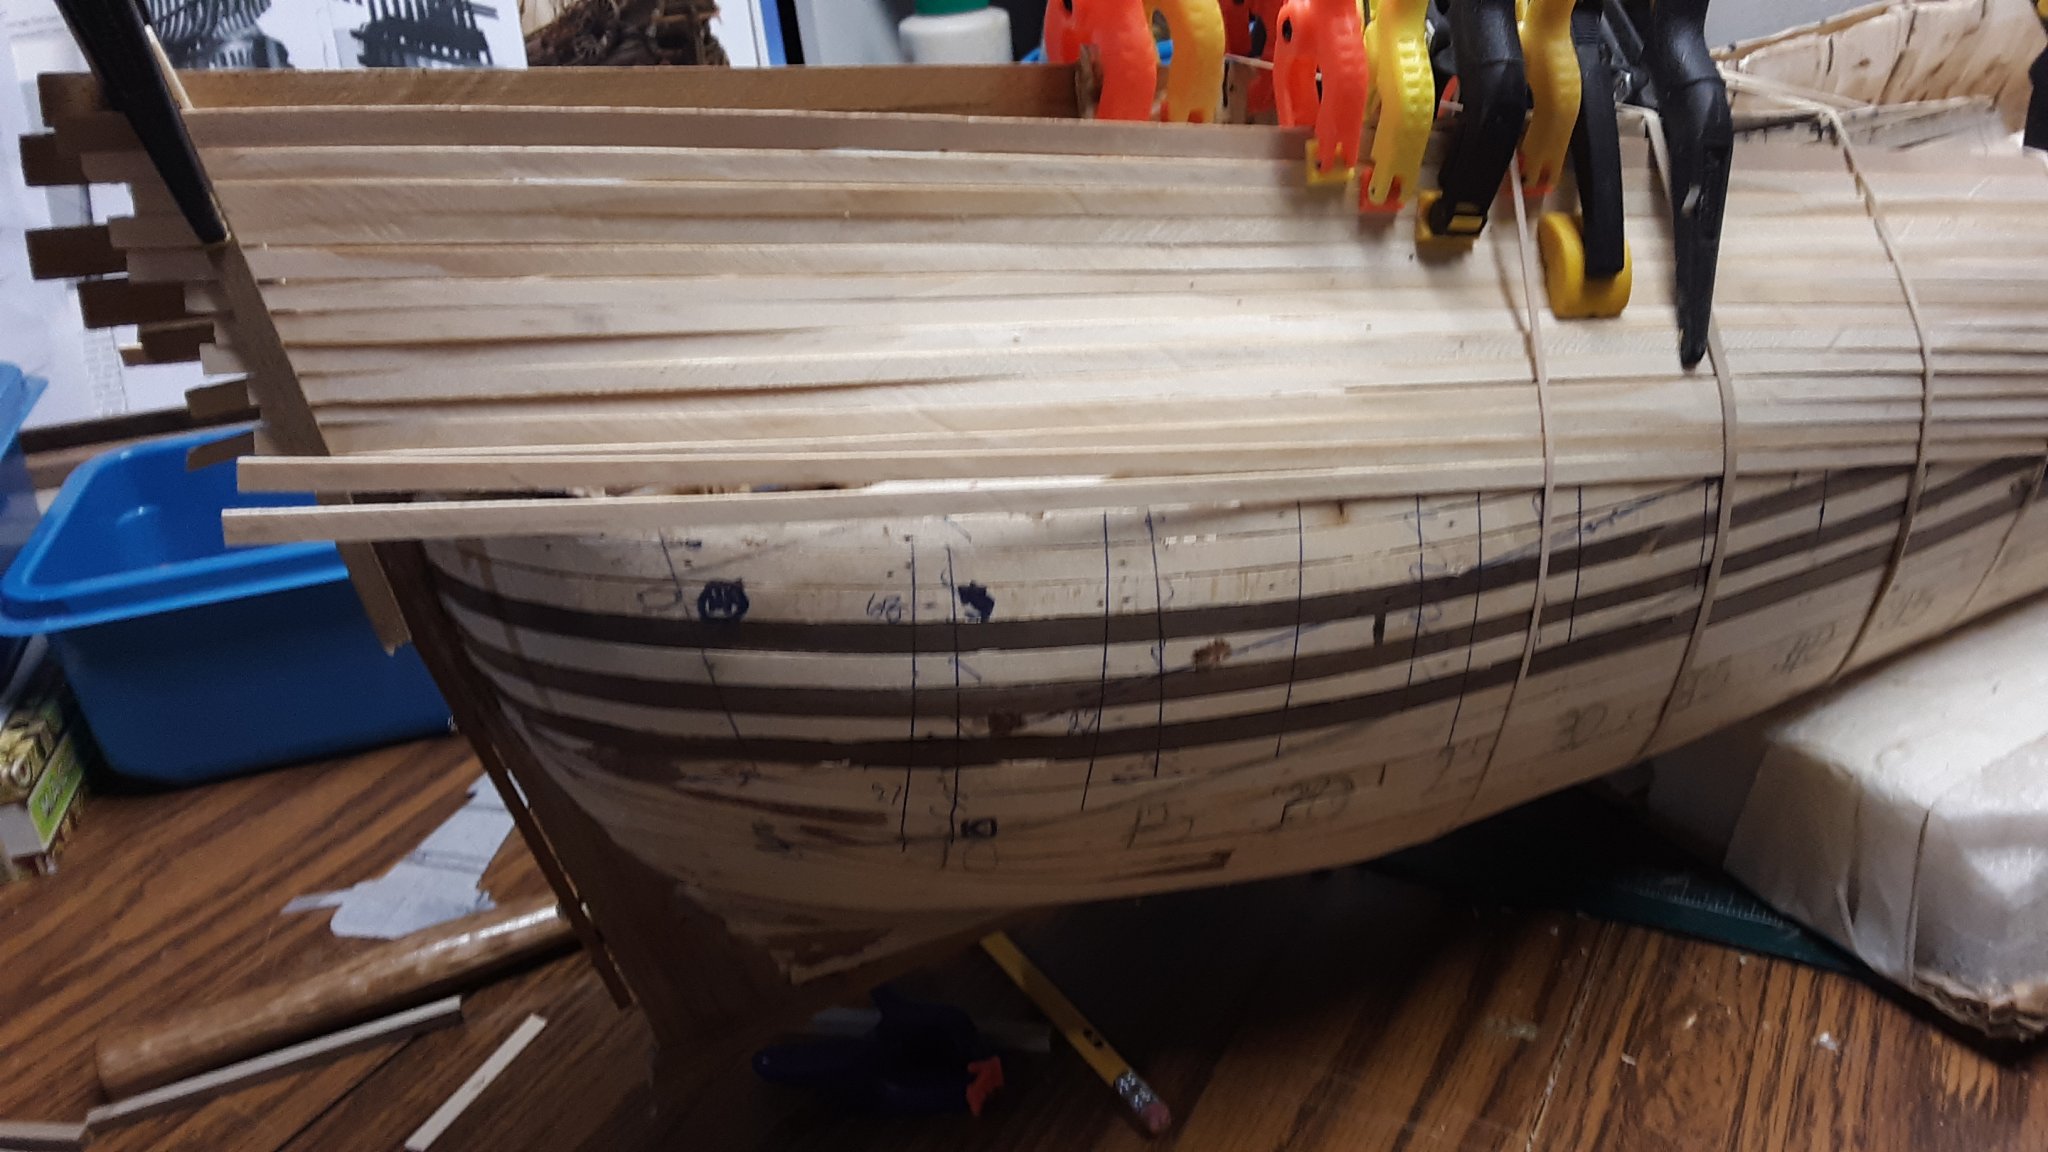
I have been having a lot of trouble with the stern. When you look at the Fluit from the top and side there is nothing wrong. But when you look from where the tiller goes into the ship, there is a whole lot of wrong.
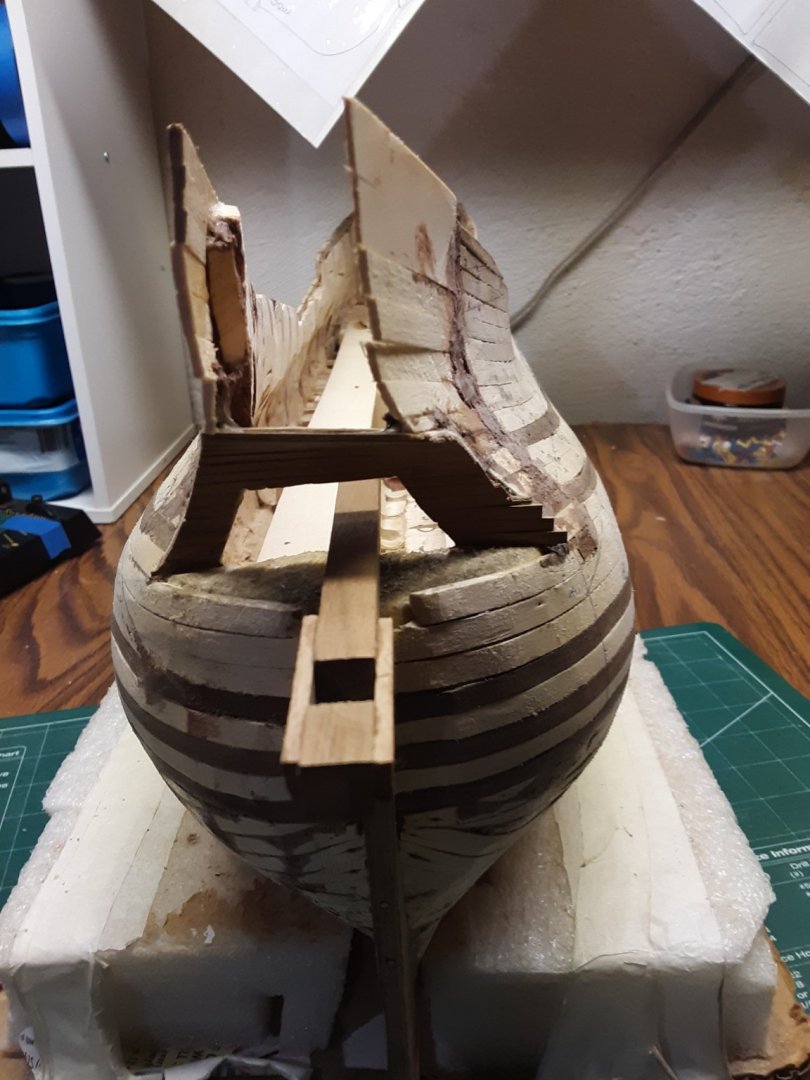
The ship overall has all the curves the way the plans show me and it all looks pleasing to the eye. Nothing is abrupt. The bottom 3 wales are placed correctly and the upper 2 need to be higher in the stern area than they are now. This will be done with the second layer of planking.
BUT (here it comes)
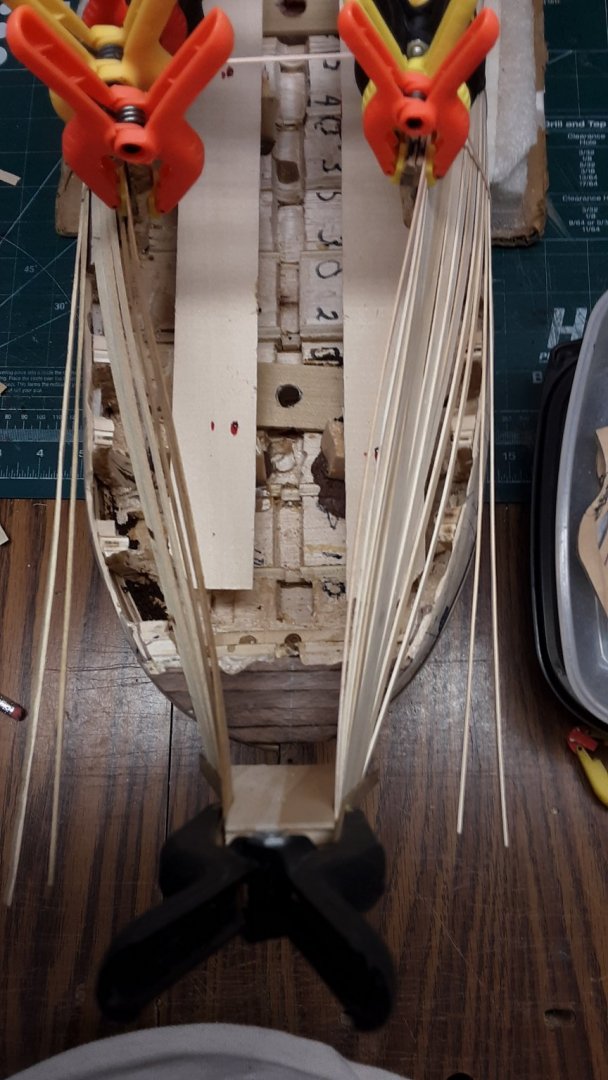
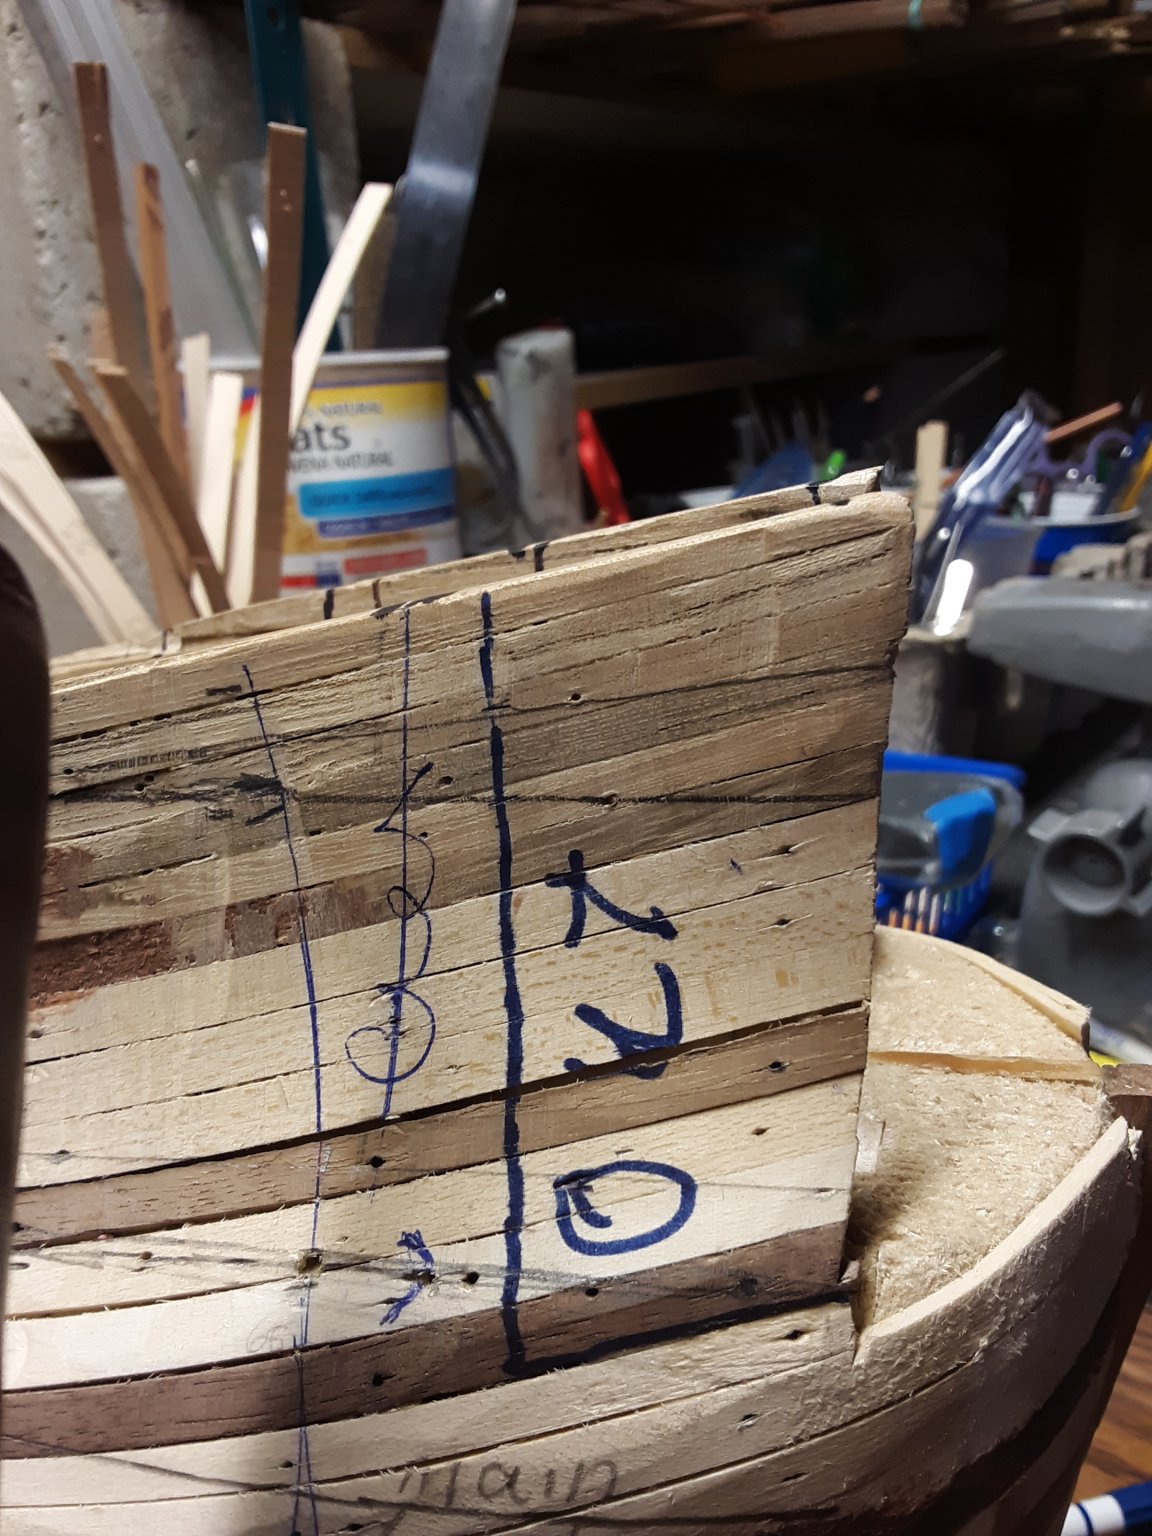
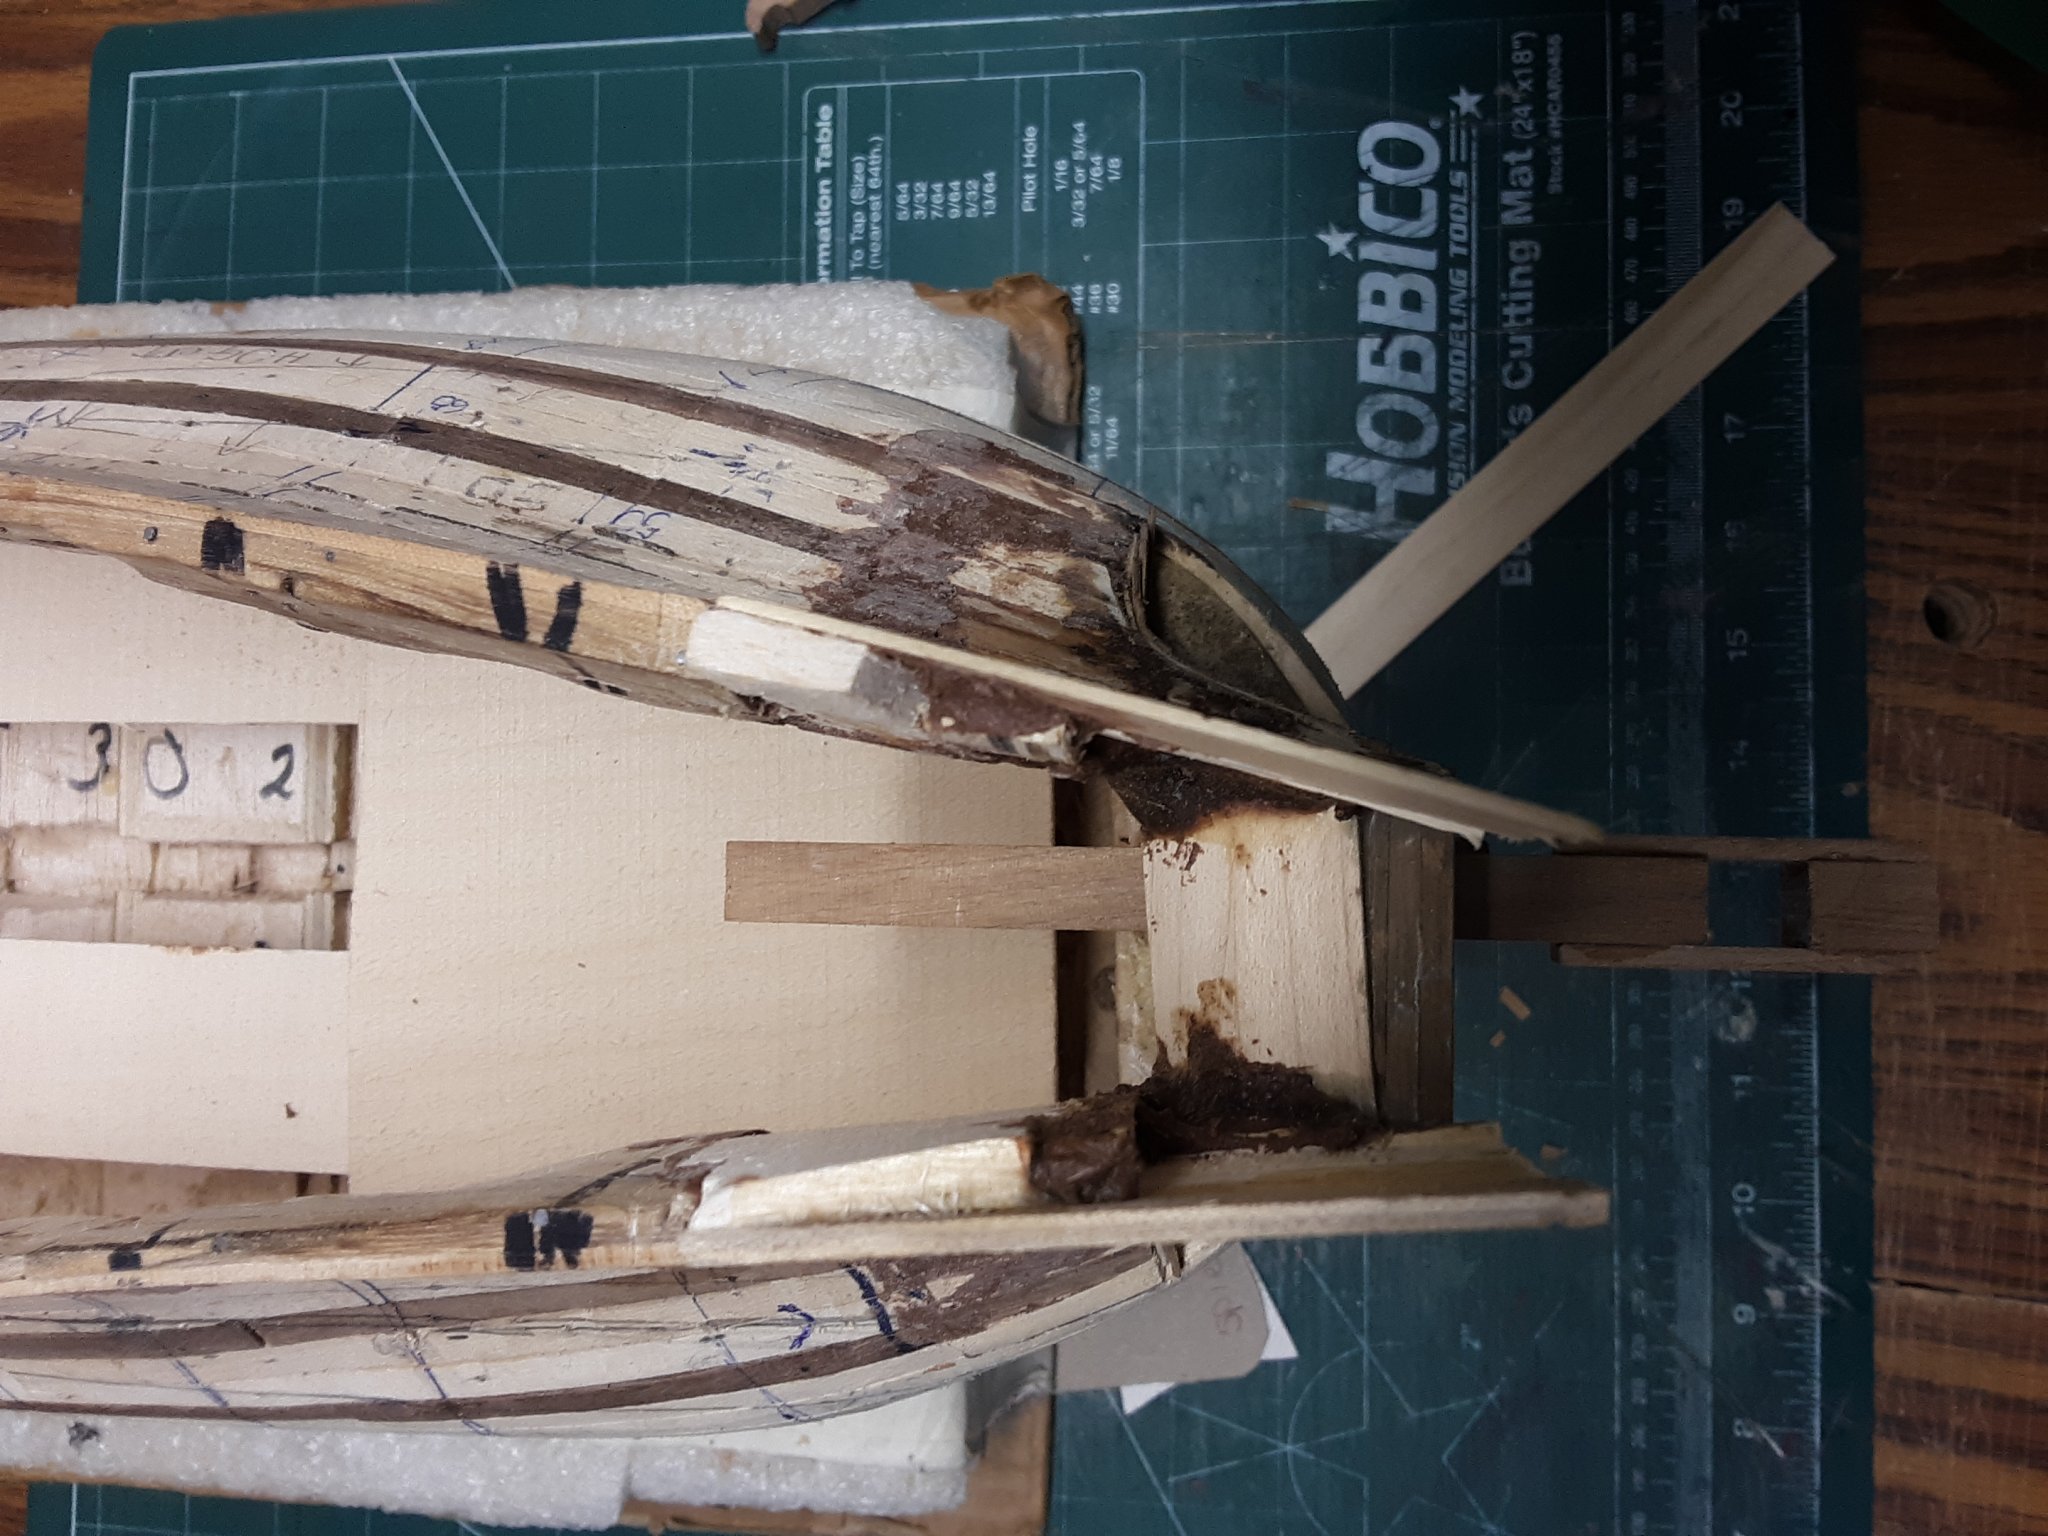
When I planked the bulkheads towards the stern, it didn't end up in a point above the rudder - see below-, that is the area that makes the boat look way off.

Top view. Tiller rests on the rudder post and you can see I am way off, by 12mm.
Have to figure out how I can move it all towards the middle.
I don't want to trash the model and start all over again or remove the planking from bulkheads 30 to 5.
One area where the tiller goes into the ship there is a 90 degree curve opening. It is bigger than the plans and what the pictures of Fluits in books show.
All in all the further I get into this build the more I think that I should have build the 'cat' first as it looks somewhat like a fluit. Setting that thought aside....... I will continue with this build.
Marcus

-
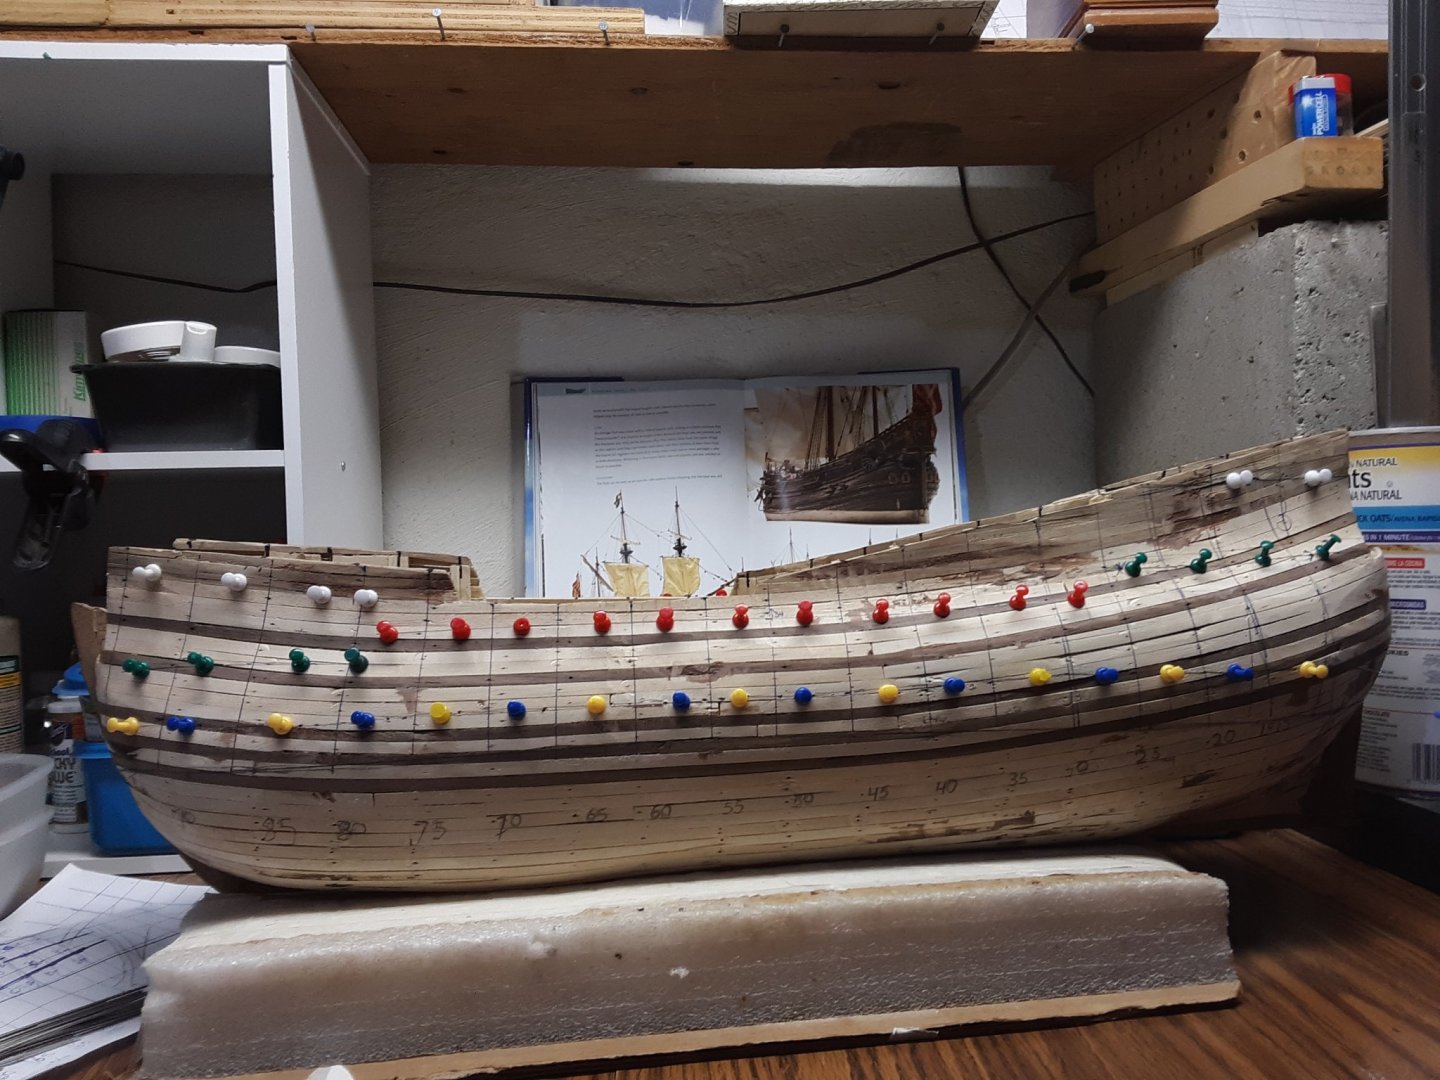
Measured where the waterline is to be and from there on, go up to measure where the other decks will be.
The colored push pins depict where the different decks will be located.
Started creating beams for the lower deck (which will not be visible) and before it goes in I need to measure where the masts will be.
Marcus
- mtaylor, GrandpaPhil, Blue Pilot and 3 others
-
6


Wilhelmina VII (KW140) 1914 by kees de mol - Scale 1/25 - Herring Lugger
in - Build logs for subjects built 1901 - Present Day
Posted
Kees,
Again, excellent details. I also like the many pictures you upload of a particular project you would be working on.
Marcus