


flying_dutchman2
-
Posts
1,735 -
Joined
-
Last visited
Content Type
Profiles
Forums
Gallery
Events
Posts posted by flying_dutchman2
-
-
Thanks for all the likes and comments.
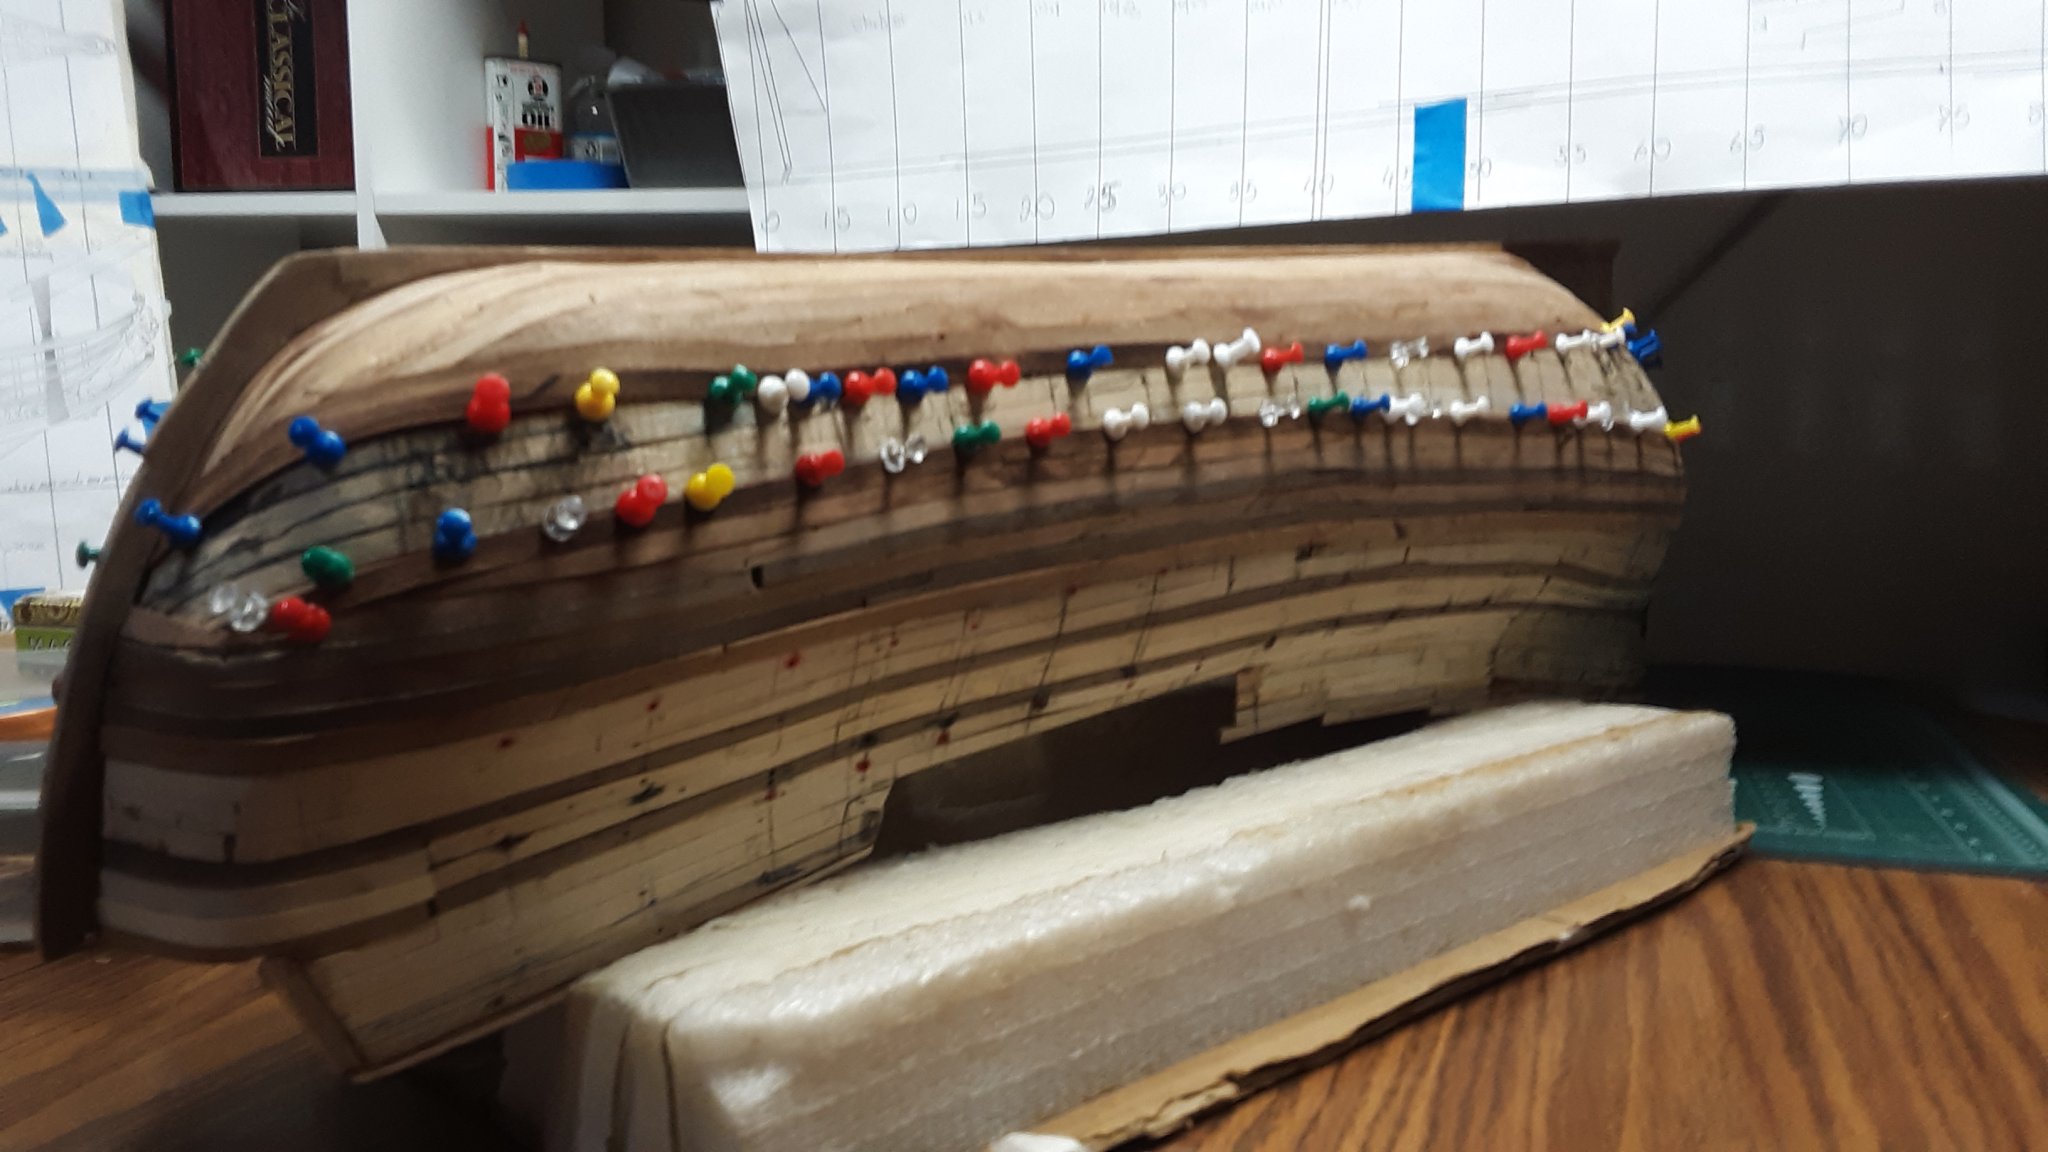
Installed 2 thin strakes of 5mm wide cherry planks above the upper wale. I am using narrow planks because the contour of this part of the hull curves inwards on the left and right and outwards on the up and down.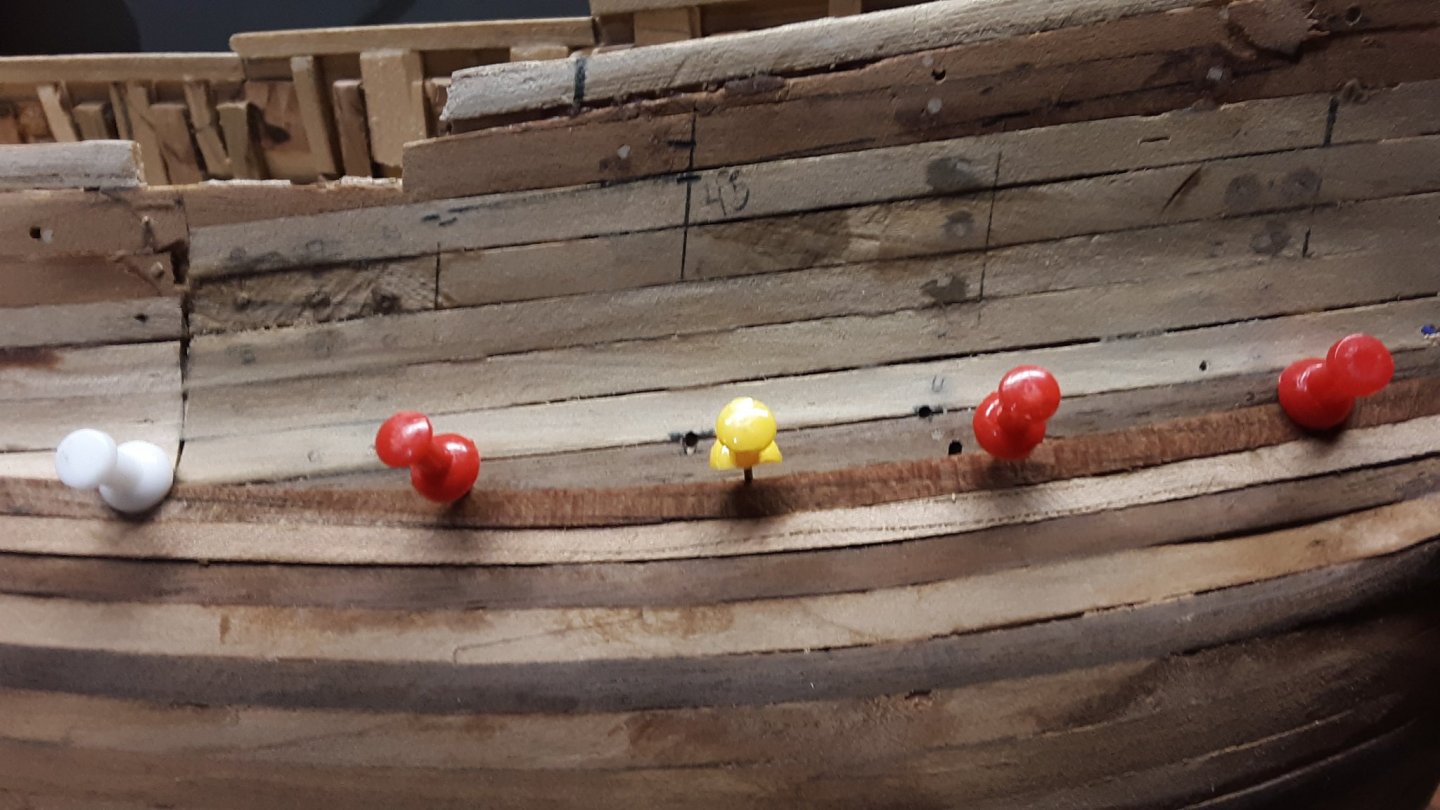

Once they are glued on two, 2mm narrow straks (wales) will be installed and from there on clinker built planking wall going all the way up.
Marcus -
Thanks for the comments.
We've had a pretty wet July and that is why the grass is green and growing fast.
Usually around this time of the year it is pretty much straw colored and dormant.
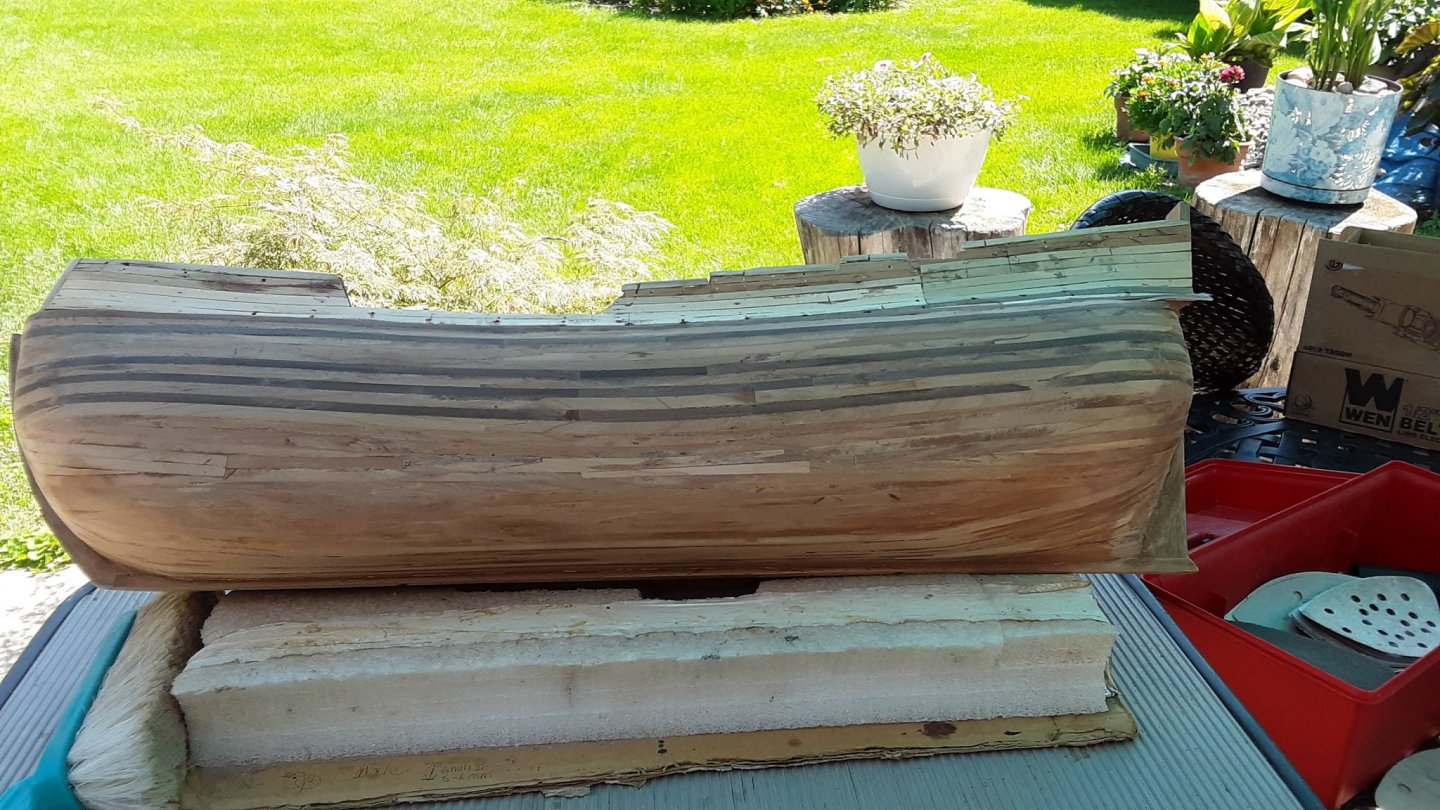
After this sanding it is starting to look like a Fluit. I am not very happy with the hips. They should be more rounded. My next fluit will have rounder hips. That fluit will be a whaler.
Marcus
- Louie da fly and G.L.
-
 2
2
-
Thanks for all the likes.
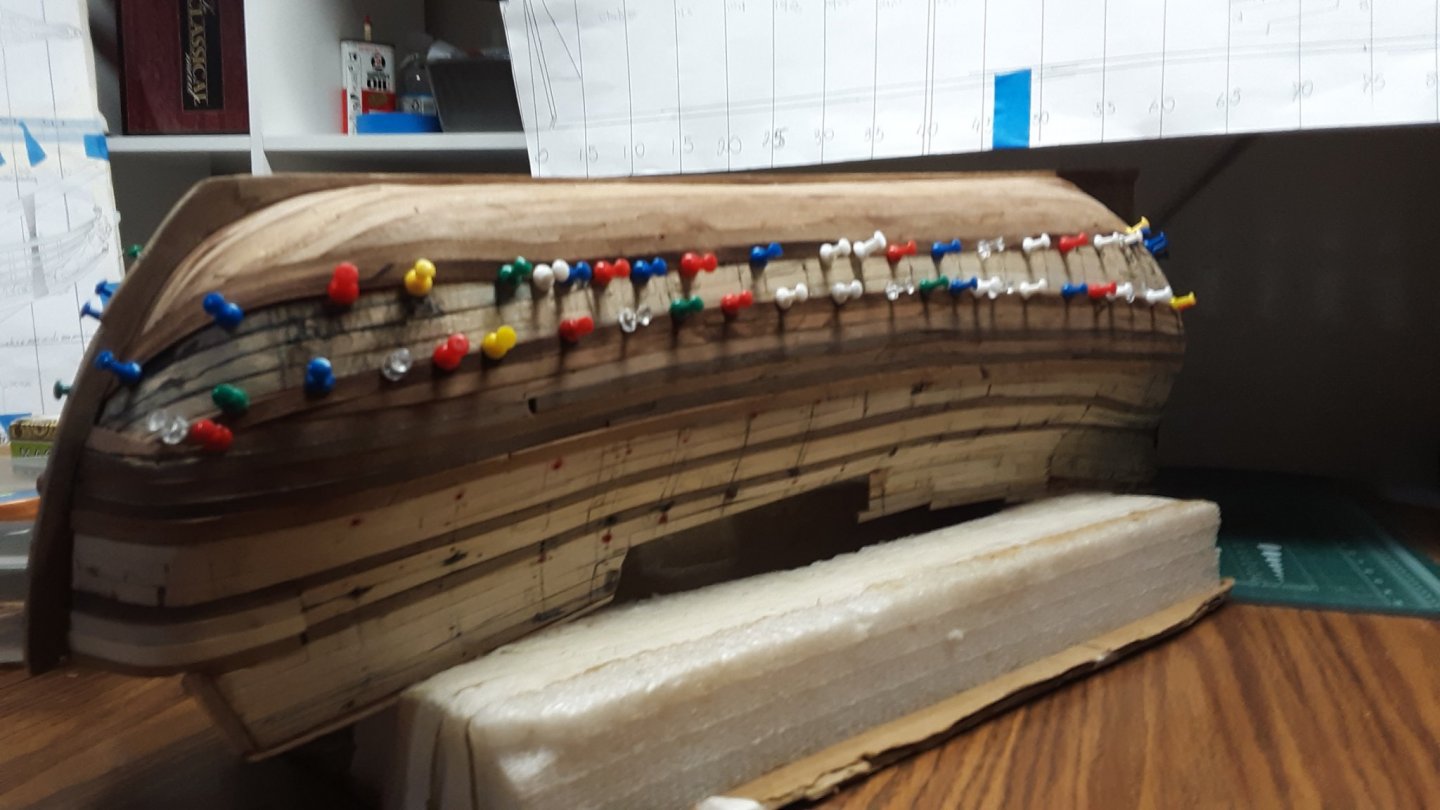
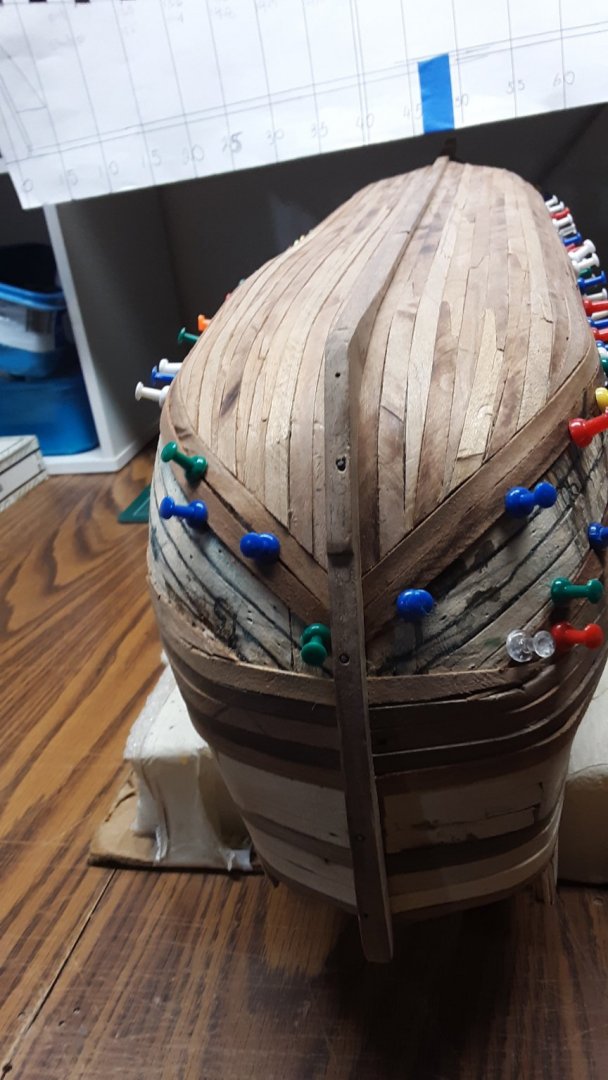
Did some serious sanding of the hull today and it is coming along nicely. Still need to do a few areas. Once done I will plank the sides of the hull. Sand some more and then glue the 3rd and final layer of the wales.
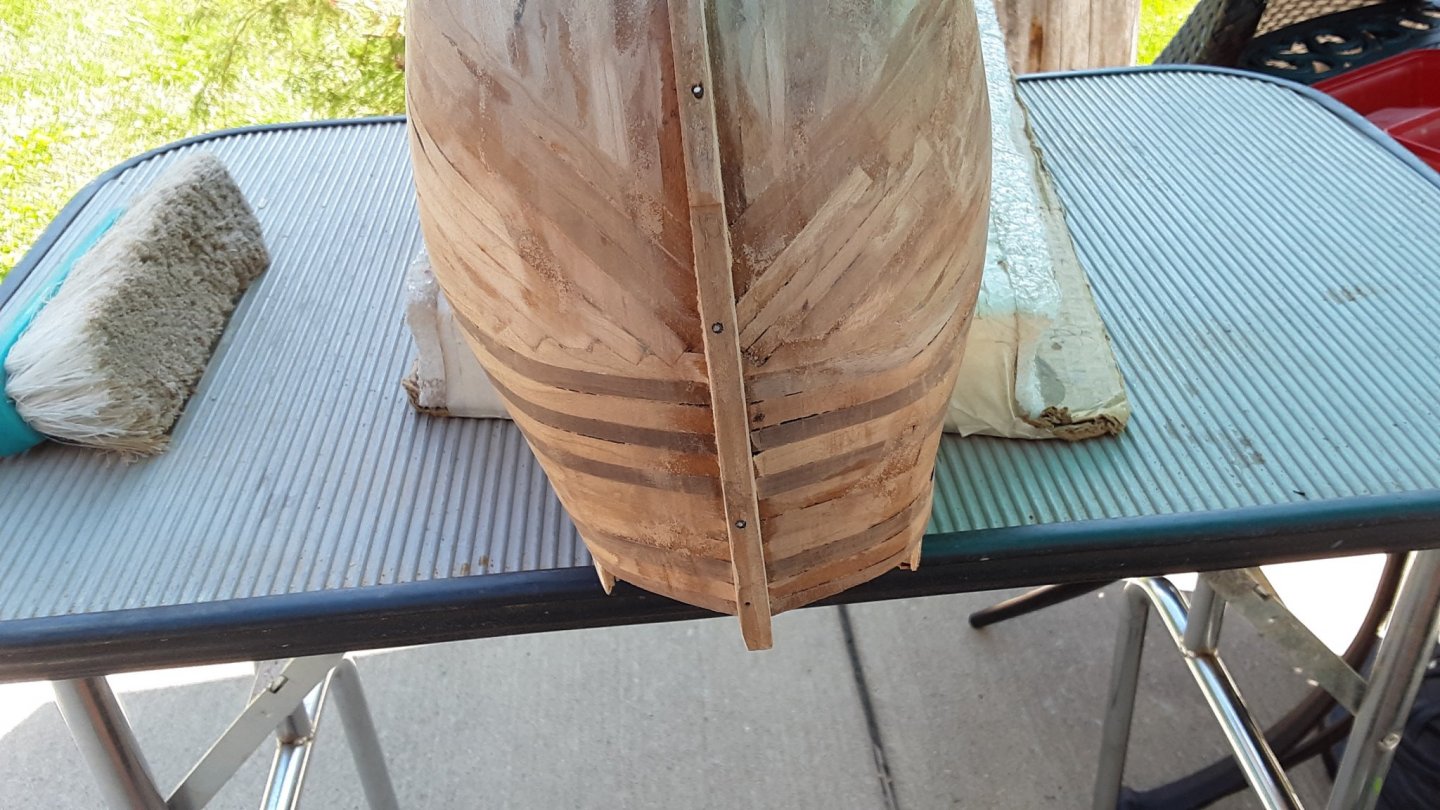
Repaired the right side of the bow.
Marcus
-
Repaired the bow and added crack filler.


Did a first sanding of the hull, patched the cracks again and will do a second sanding in the next couple of days.


After that, will finish the rest of the planking on the sides of the hull. From looking at all the pictures I have from Fluits this area is clinker built. I will continue to study the books.
Marcus -
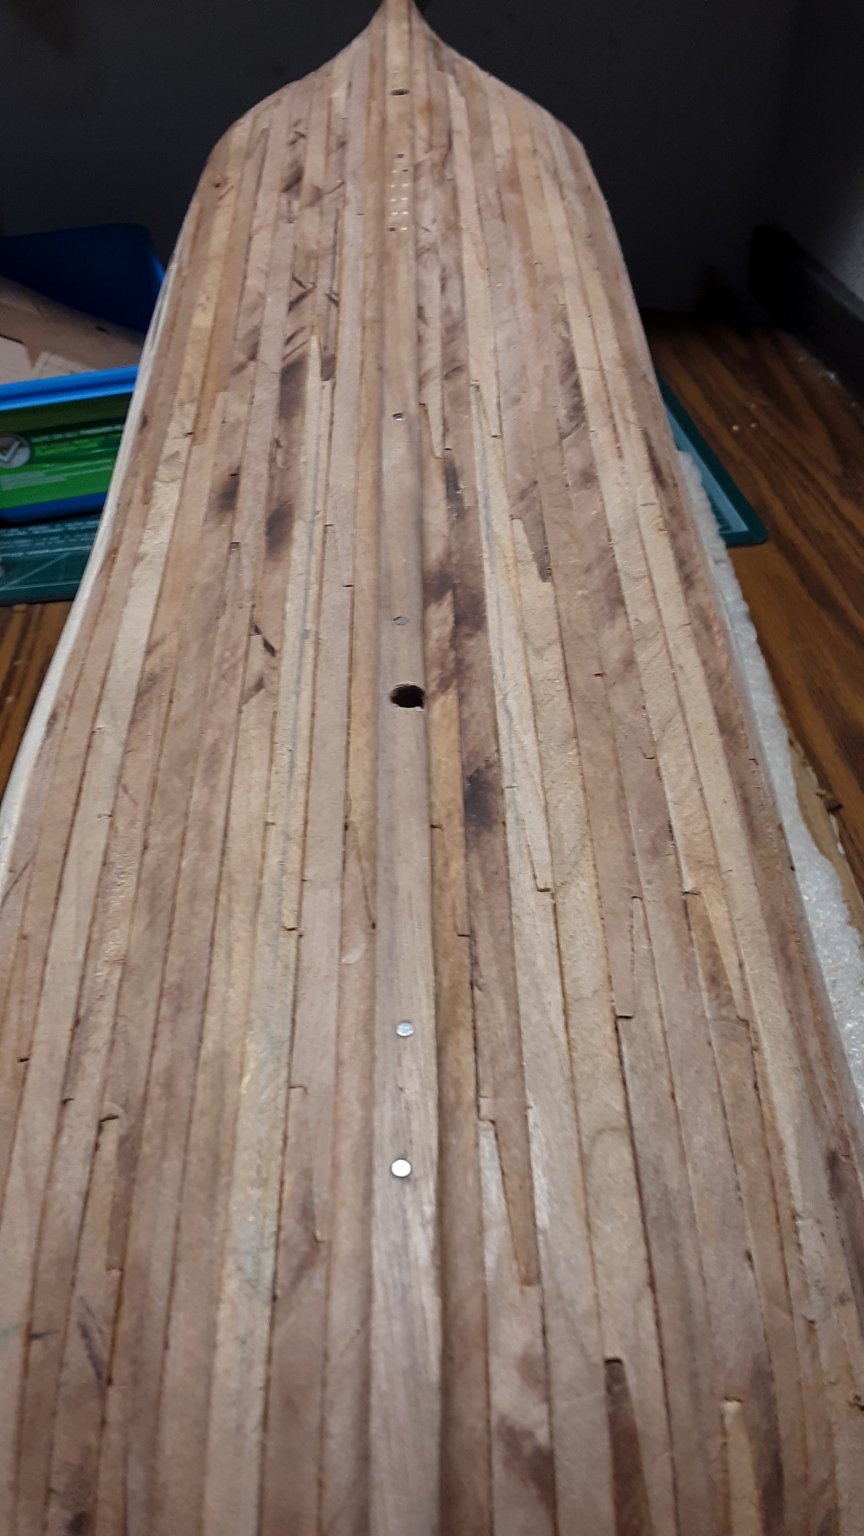
Today wasn't as hot so I decided to do a rough sanding on the part of the hull that has a second layer of planking.
I sand an area and leaving the sawdust on the hull. Then I take a mixture of glue and water and brush this on the hull mixing with the sawdust pressing this in the cracks that are between the planks. I do this until the cracks are eliminated and the hull is smooth.


The black square on the bow is where I sanded a bit too much. So I will cut it out and re-plank the area.

Marcus- Archi, YankeeD, GrandpaPhil and 2 others
-
5
-
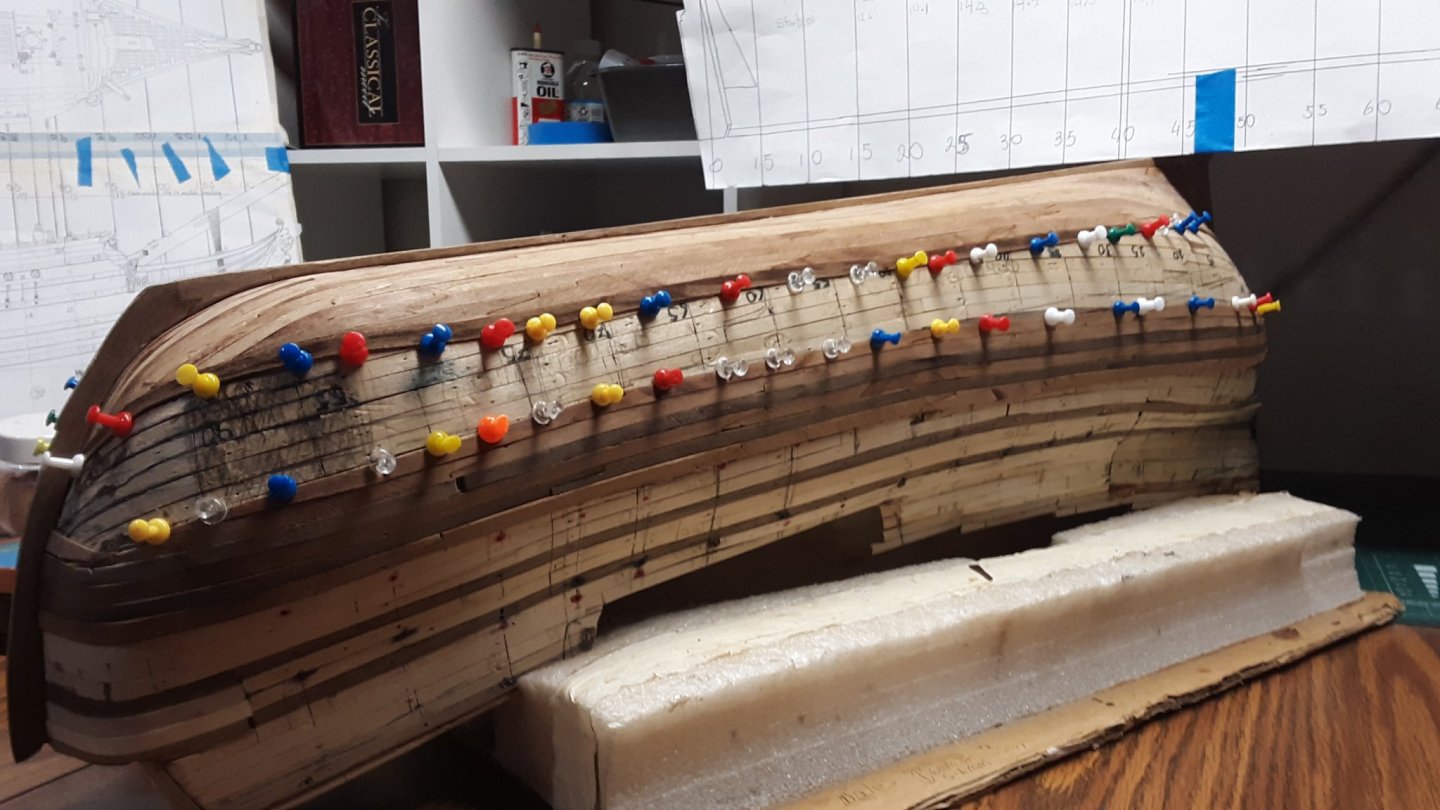
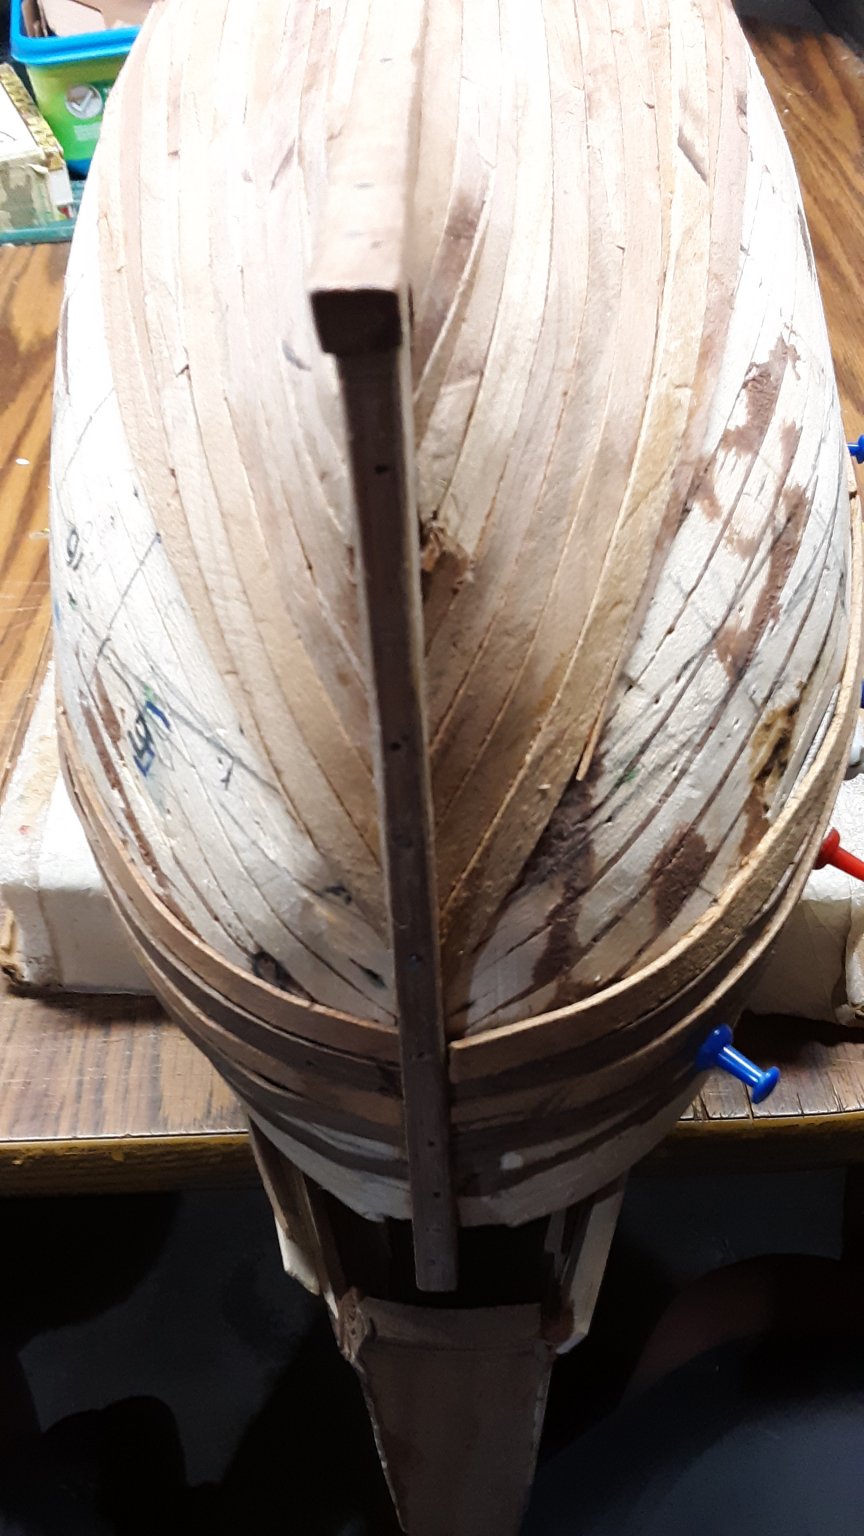
The second layer of planking is finished on main area of the hull. What is left is the sides and the hip area.
Once planking is completed there will be much sanding to do to get it all nice and even.
The final planking will be the last planks for the wales.
I did some dry fitting of positioning the different decks and masts as this will give me complete picture of what it will look like.


Marcus- gieb8688, mtaylor, GrandpaPhil and 2 others
-
5
-
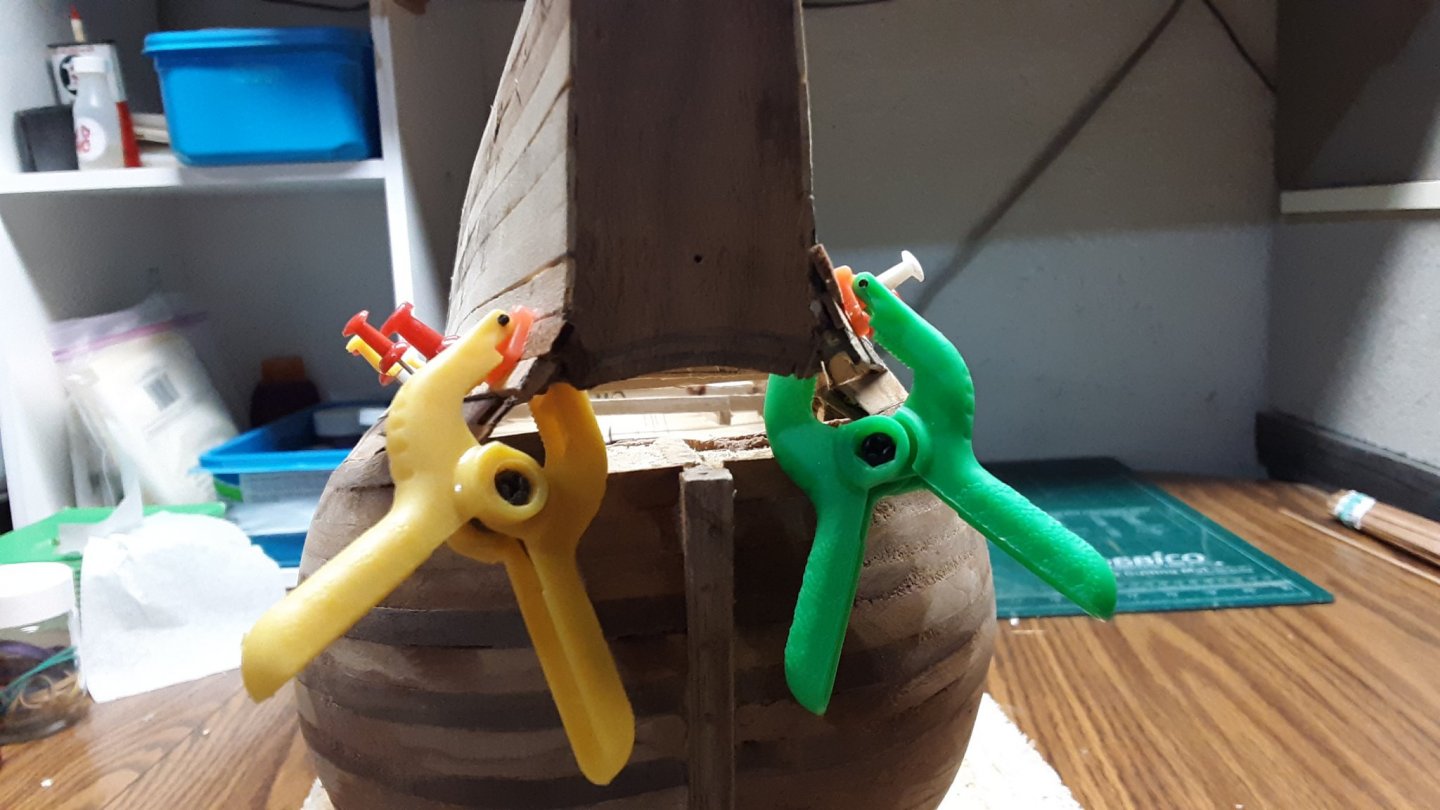
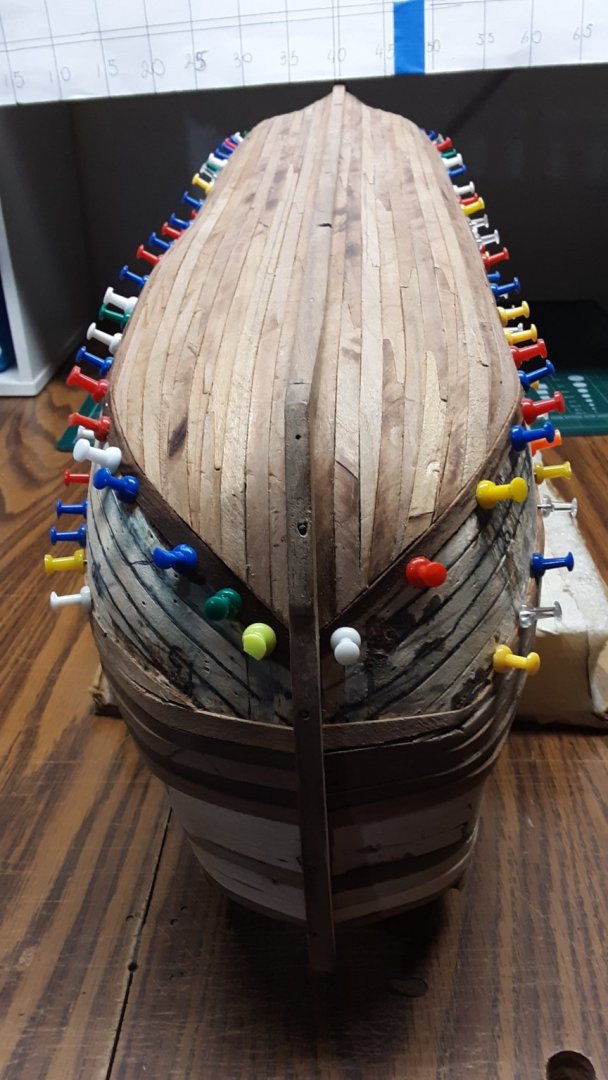
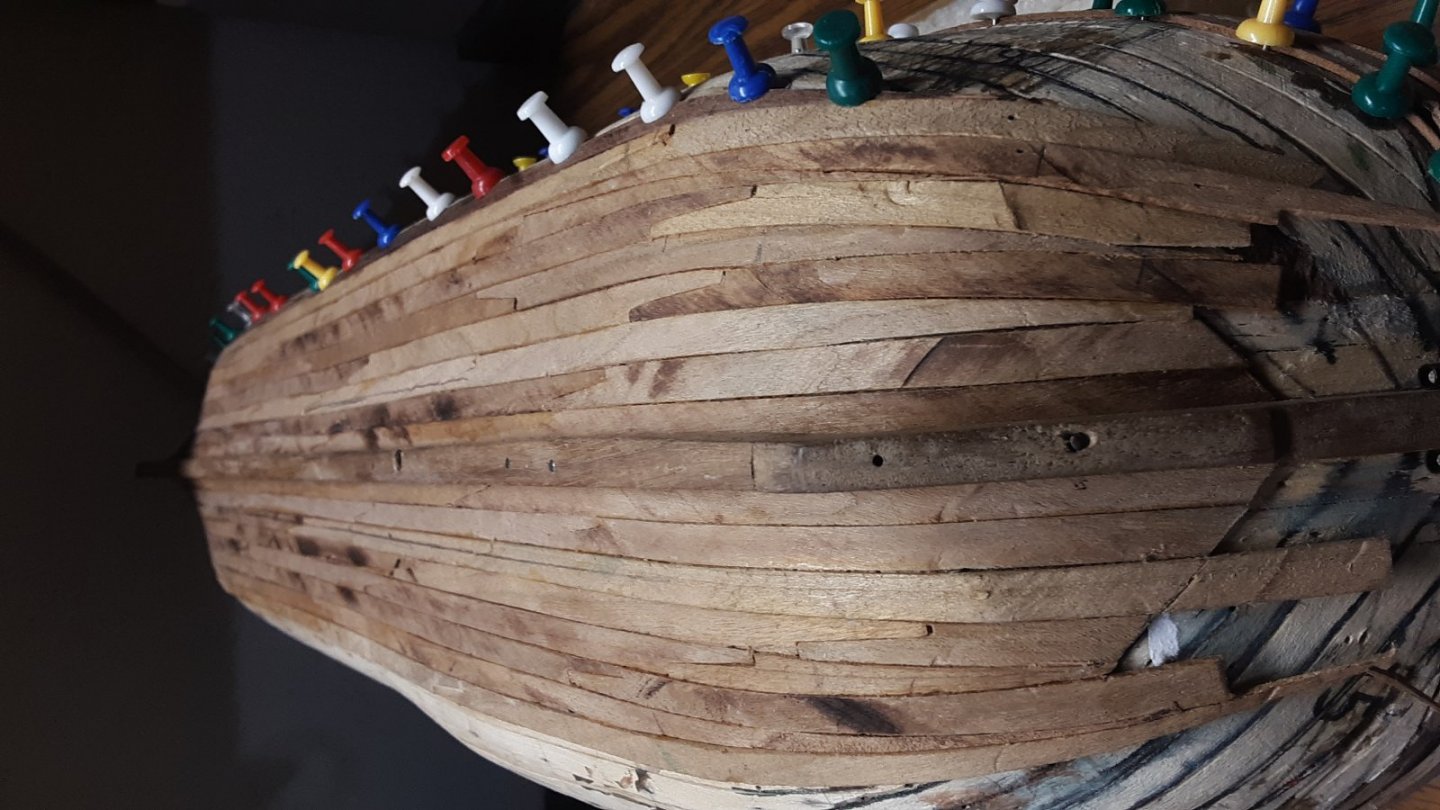
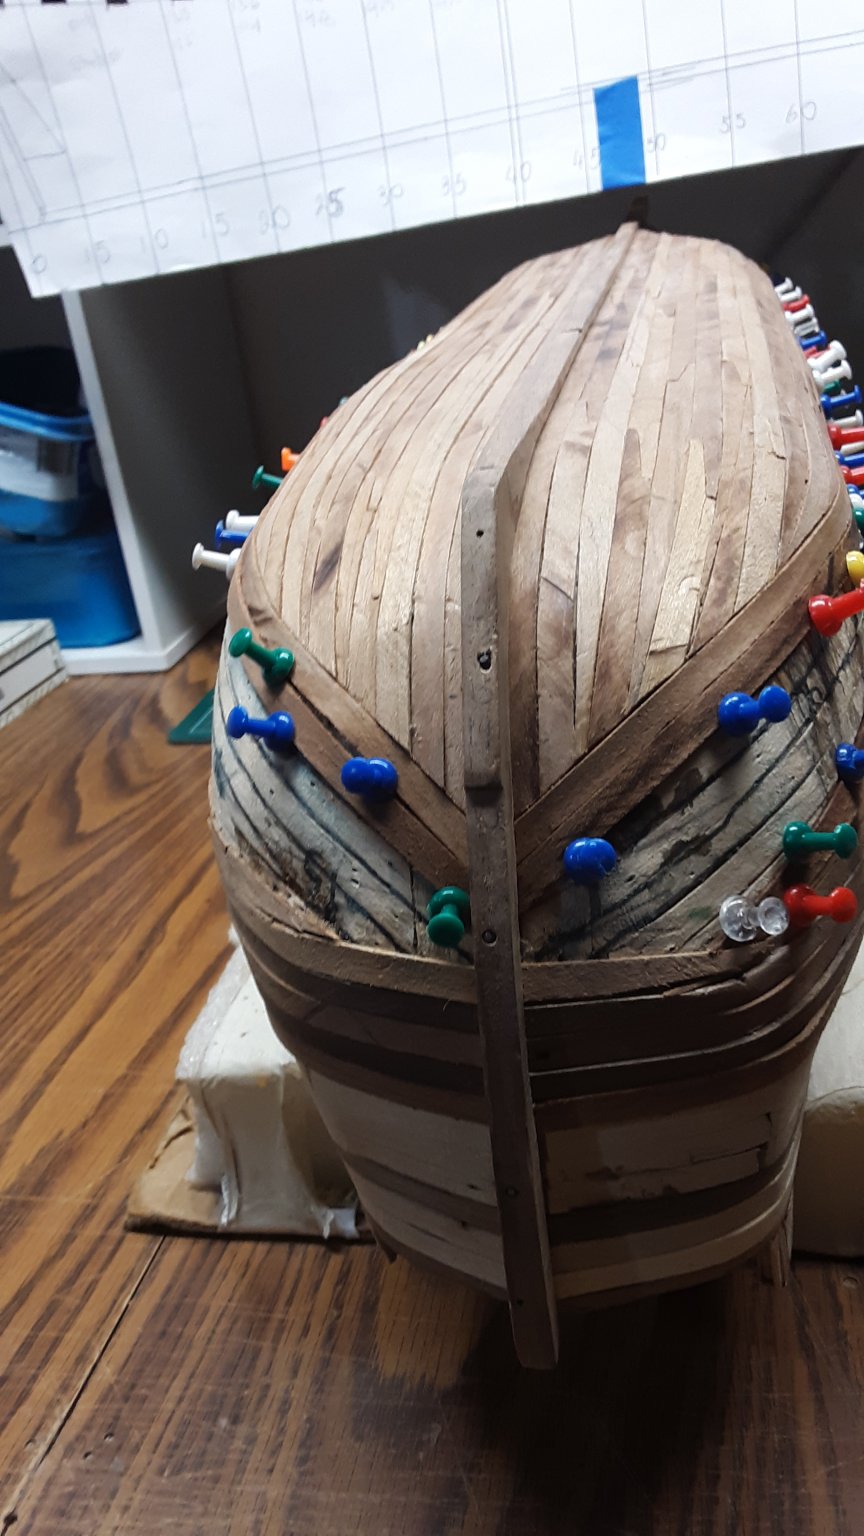
Second layer of planking on one side below the upper deck is completed. As I mentioned before planking the bluff bow is an exercise on its own. Planking the hips is not as difficult as I thought.


Planking the sides from the upper deck up, should be easy. Once all planked the sanding begins.
Marcus- gieb8688, Louie da fly, mtaylor and 2 others
-
5
-
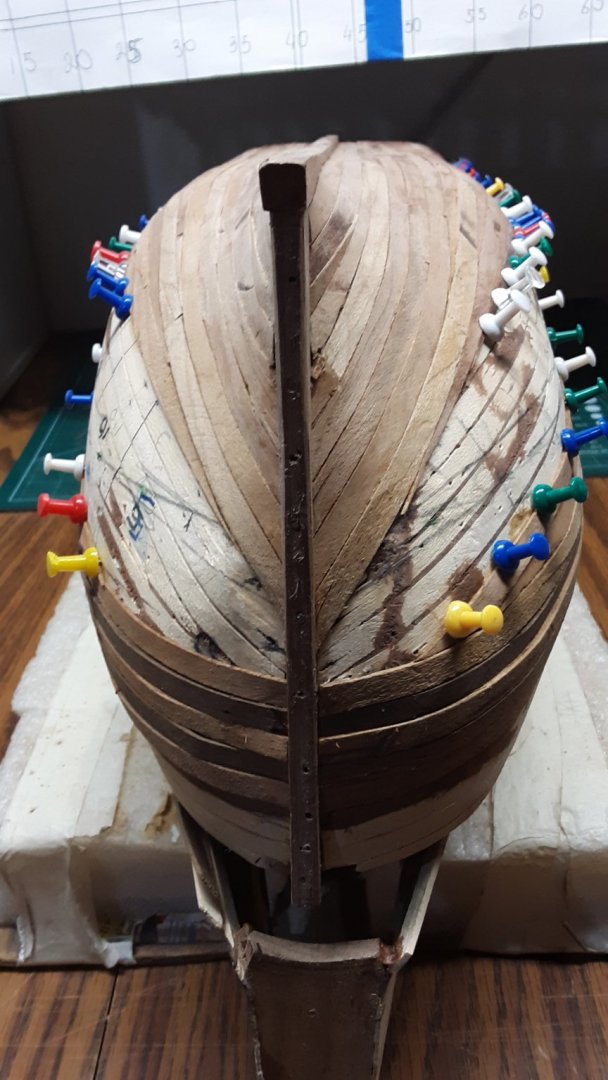
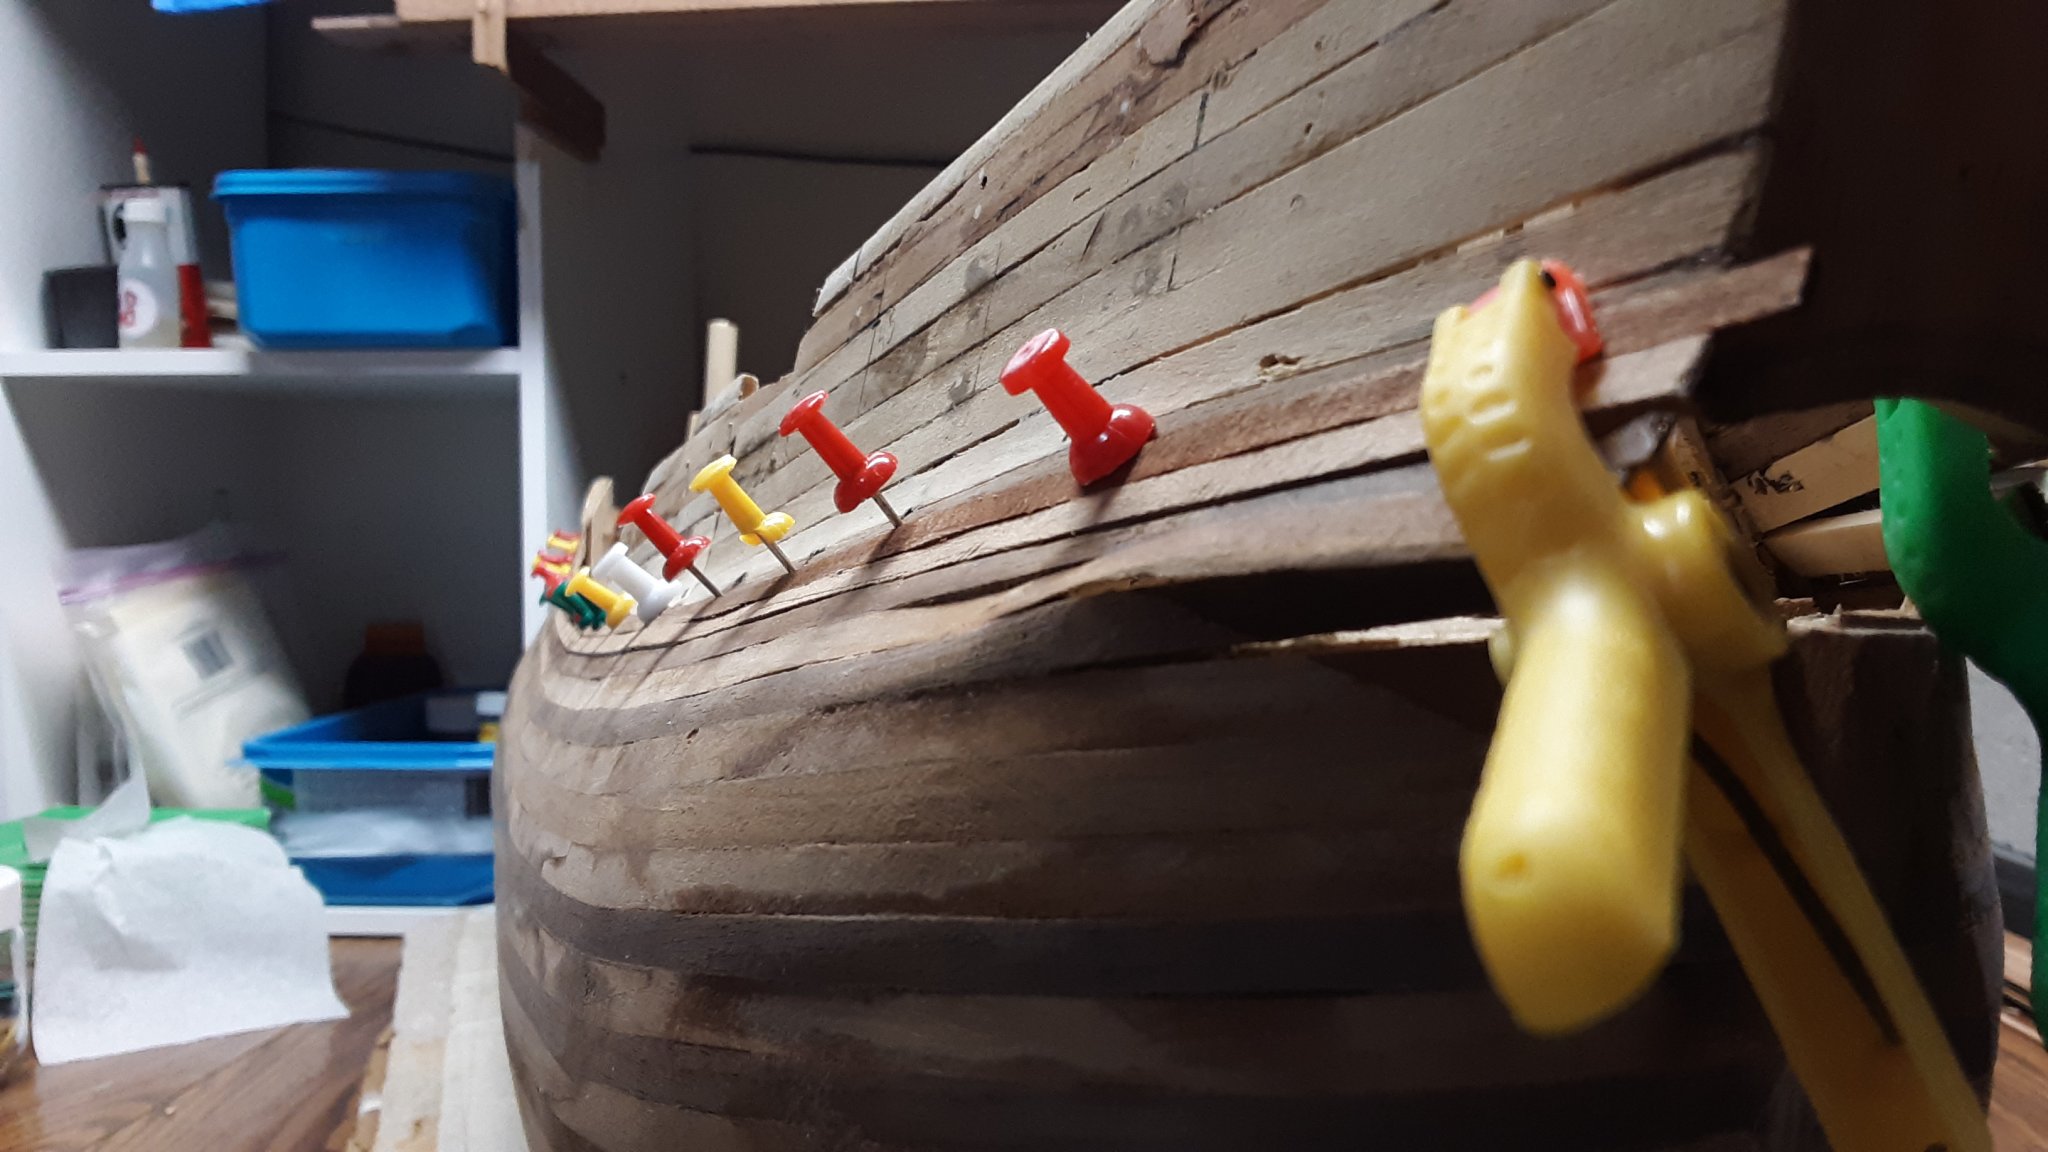
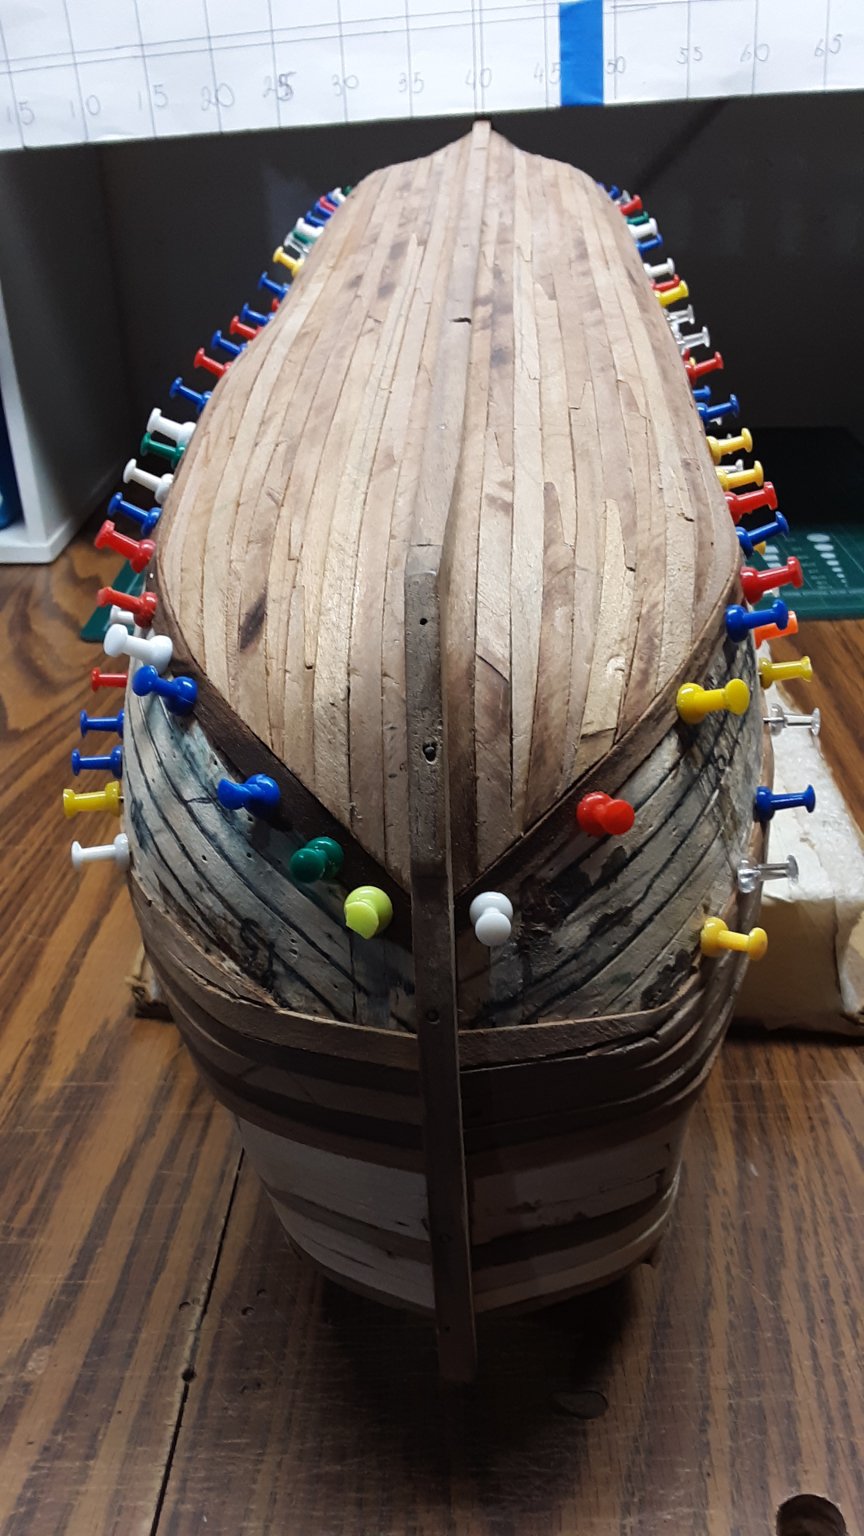
Now comes the fun part.
The scarph joints that are next to the stem of the bow are copied from the 'Statenjacht Utrecht book'. I find that it has a neat appearance. What I don't know is that was it used on fluits. It makes sense as these planks need to be hooked into the plank next to it. I have re-done some of the planks like this instead of letting them go into a point (in Dutch that would be, naar niks).

The following picture shows how the planks will becoming together. Once dry I will cut them lengthwise so two planks become one.

In general the width of the cherry planking is between 6.2mm and 6.5mm. Once I started planking the 'hips' of the Fluit, the planks are between 5.9mm and 6.1mm in width. Slightly narrower but it makes for an easier lateral bending of the planks.
I've made several mistakes with shaping the frames of the hull and now I am paying for it by using slightly narrower planks and fiddling with the narrower area in the middle of the hull. Live and learn. I won't be making that mistake on my next Fluit de 'Langewijk'.
Marcus- gieb8688, G.L. and GrandpaPhil
-
3
-
Beautifully executed. You do excellent work.
I love the lines of this ship. Have to make this one myself one of these days.
Marcus
- FrankWouts, EJ_L, mtaylor and 1 other
-
4
-
On 6/3/2020 at 6:46 PM, RussR said:
In my opinion a sailing ship without sails is a raft. A sailing ship sould have sails (furled or unfurled). The model to me looks unfinished without sails. All of your rigging will be viewable from different angles anyway.
If I am going take years to finish why stop at the sails?
I am a bit late to comment, but I so agree with the above. I hear lots of modelers say that the sails hide the rigging. That is a load of manure.
When you don't include the sails, the model is not finished.
Marcus
-
Thanks for the compliments and likes.
Did a few more strakes. Most of the planks are 20cm long and all the joints work out.
Marcus
- gieb8688, GrandpaPhil, Archi and 2 others
-
5
-
On 6/15/2020 at 11:18 AM, Ab Hoving said:
Marcus: I missed your recent updates about planking the fluit. Problems?
Ab,
Little here and there. I take my time planking the hull. I made some mistakes early on and one can see that.
I will be building more fluits in the future, such as the Langewijk. My goal is to master the buding of a fluit.
Marcus
-
-
-
Steven,
Thank you for the history lesson and thank you for the compliment on the scarphs and tbe planking.
Marcus
- mtaylor and Louie da fly
-
2
-
-
Thanks for all the compliments, comments and likes.We've been having some very nice weather (30 to 34°C, I love the heat) so no work on the boat. Nice weather = outside in the garden.Did do a few strakes here and there last week.
 Scarph joints.
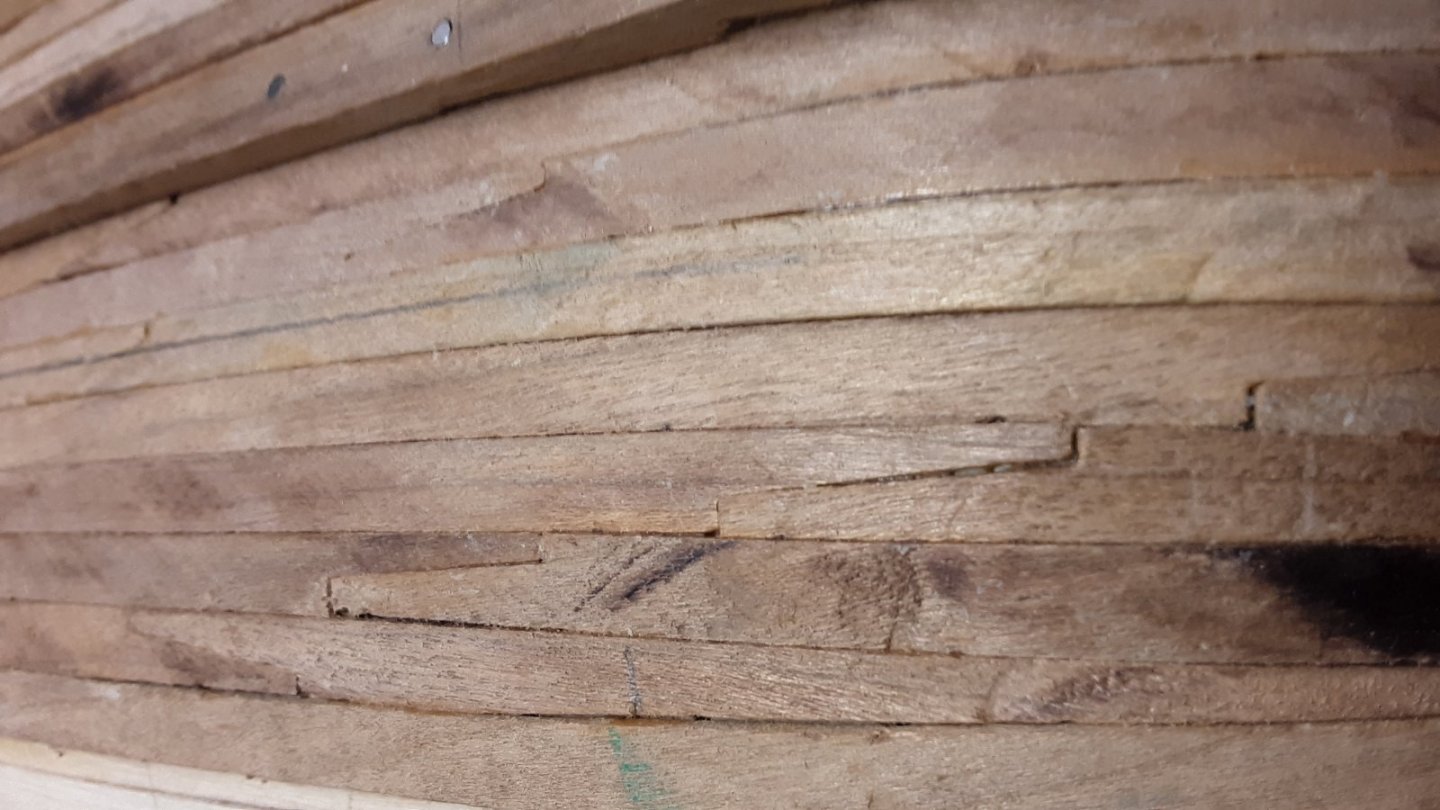 Creating the joints is working out nicely. I am very happy with the progress I am making.Marcus
- cog, gieb8688, GrandpaPhil and 2 others
-
5
-
Looking good and you are doing a great job on the masts.
Marcus
-
https://www.modelbouwforum.nl/threads/ghost-ship-schaal-1-28.262681/
https://www.modelbouwforum.nl/threads/2017-fluitschip-sint-laurens-1675-1-87.206710/
Hans from the Kolderstok company told me that the next kit he is putting together is the Fluit Zeehaen.
Marcus
-
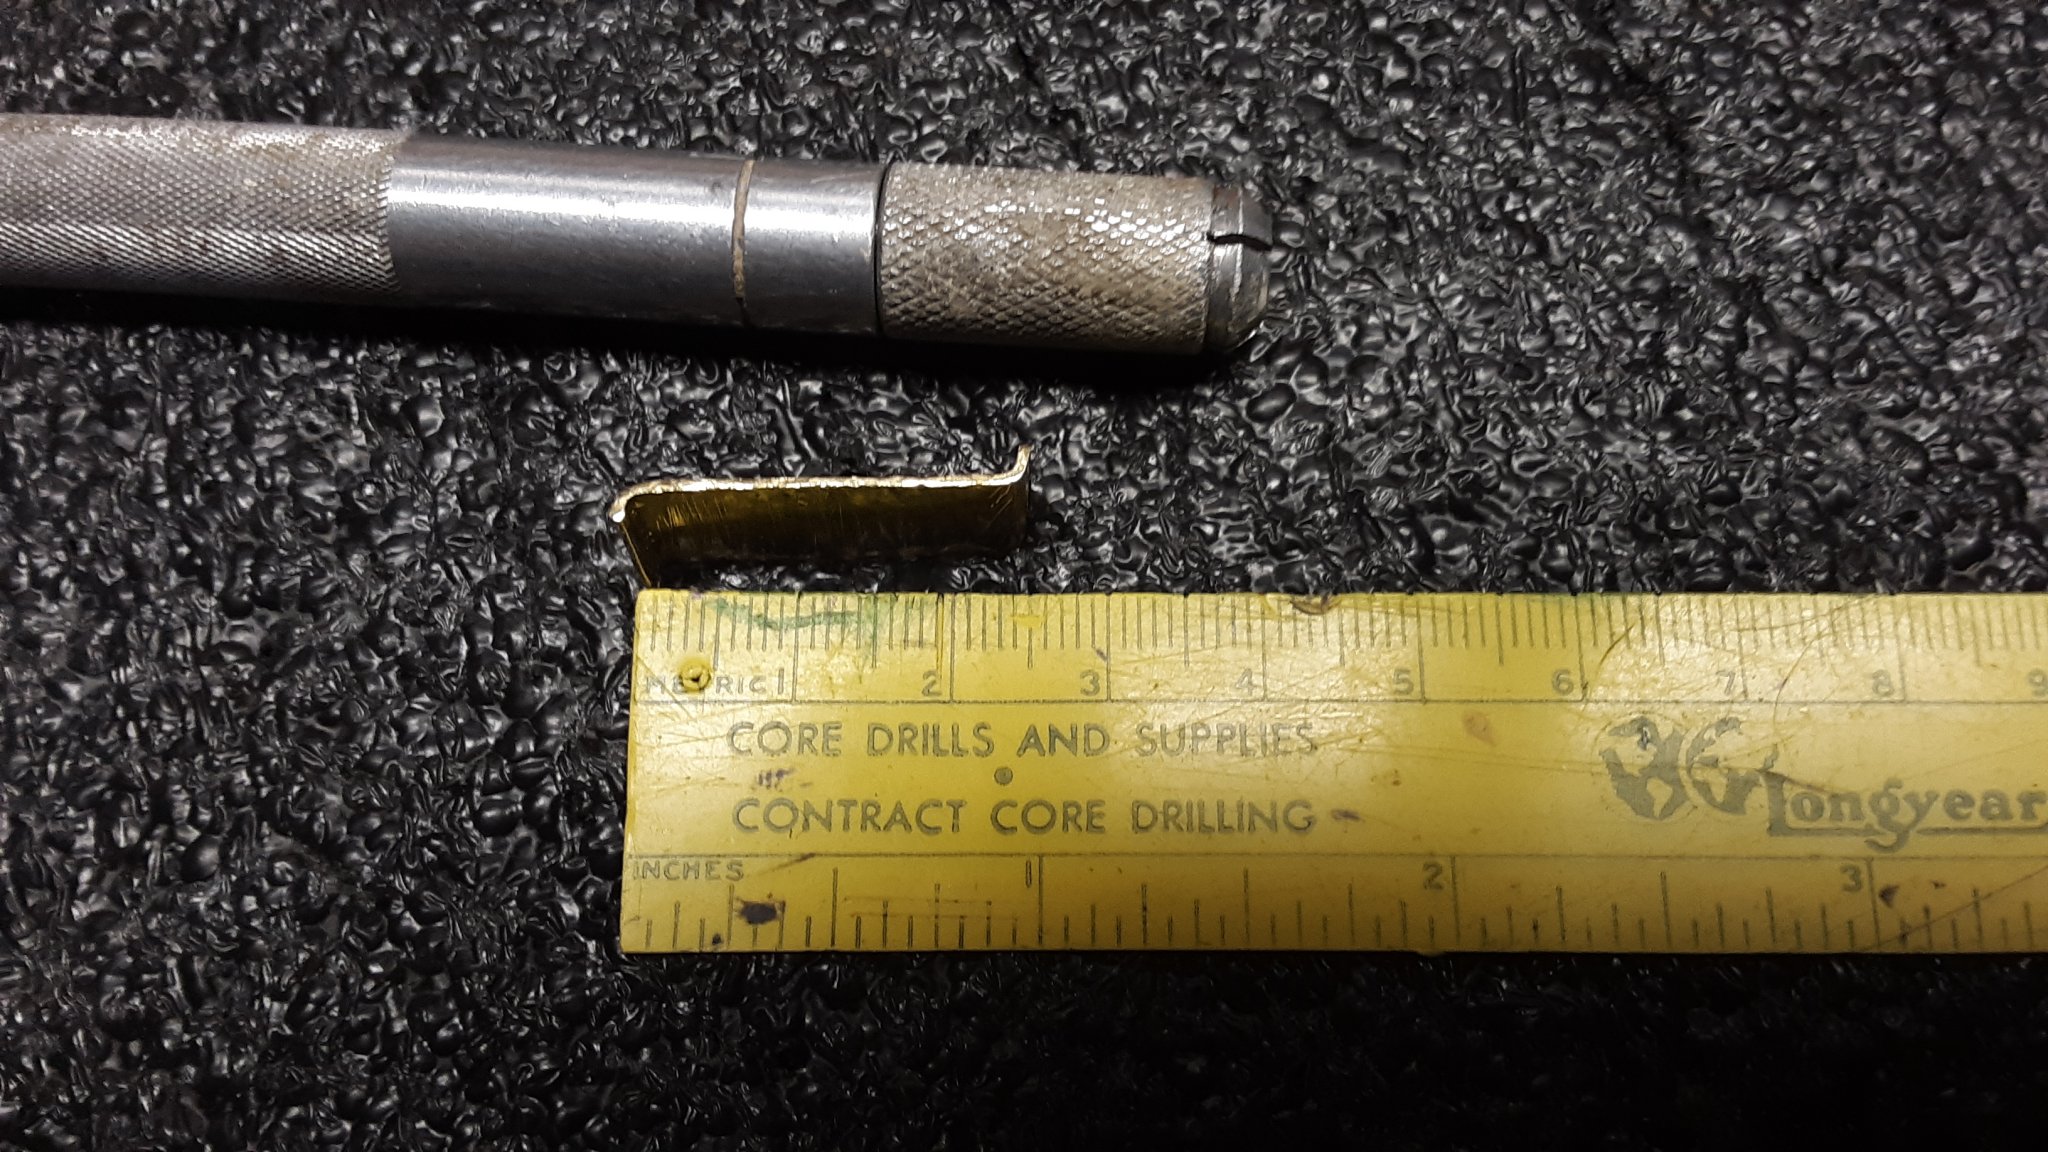
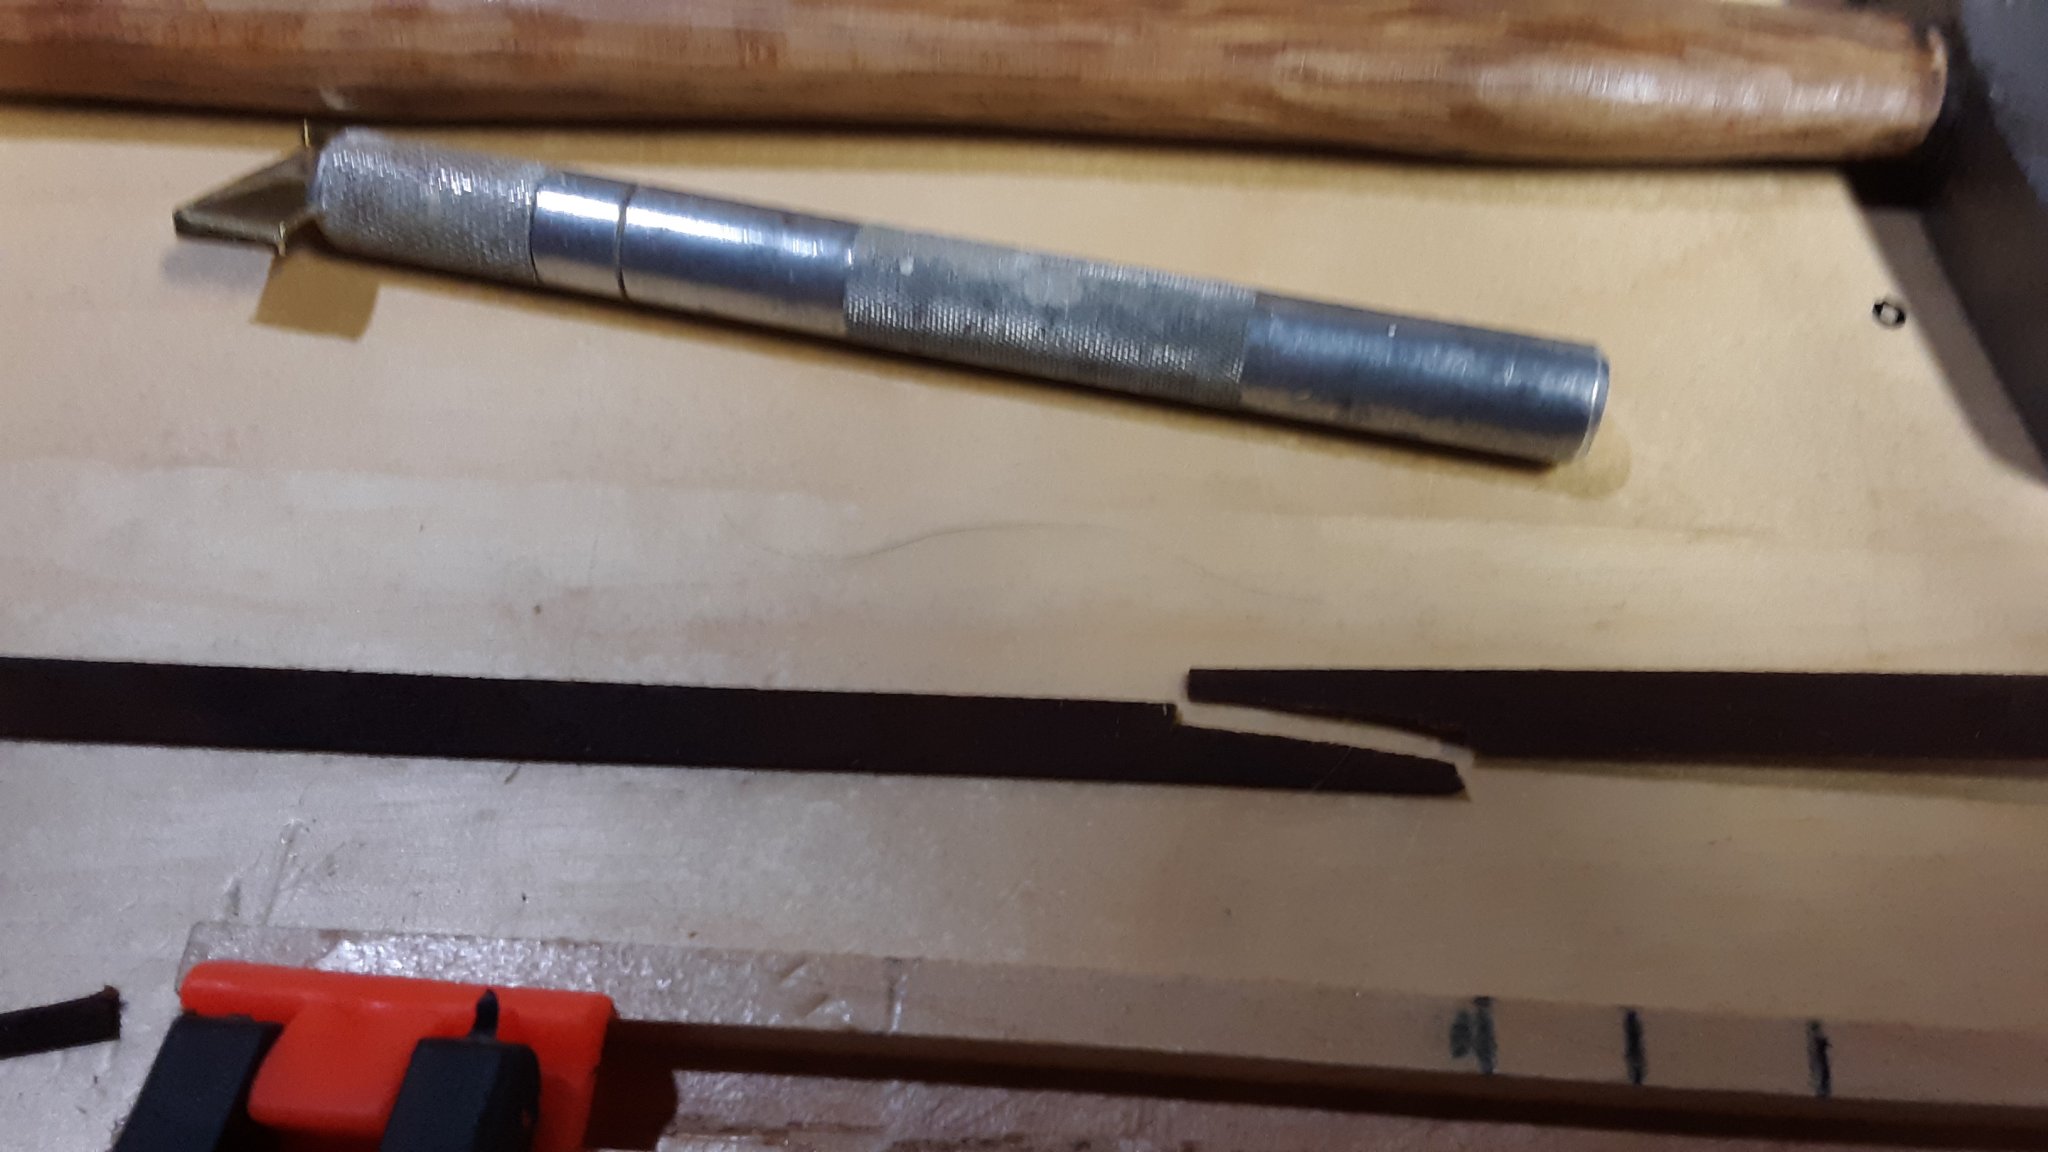
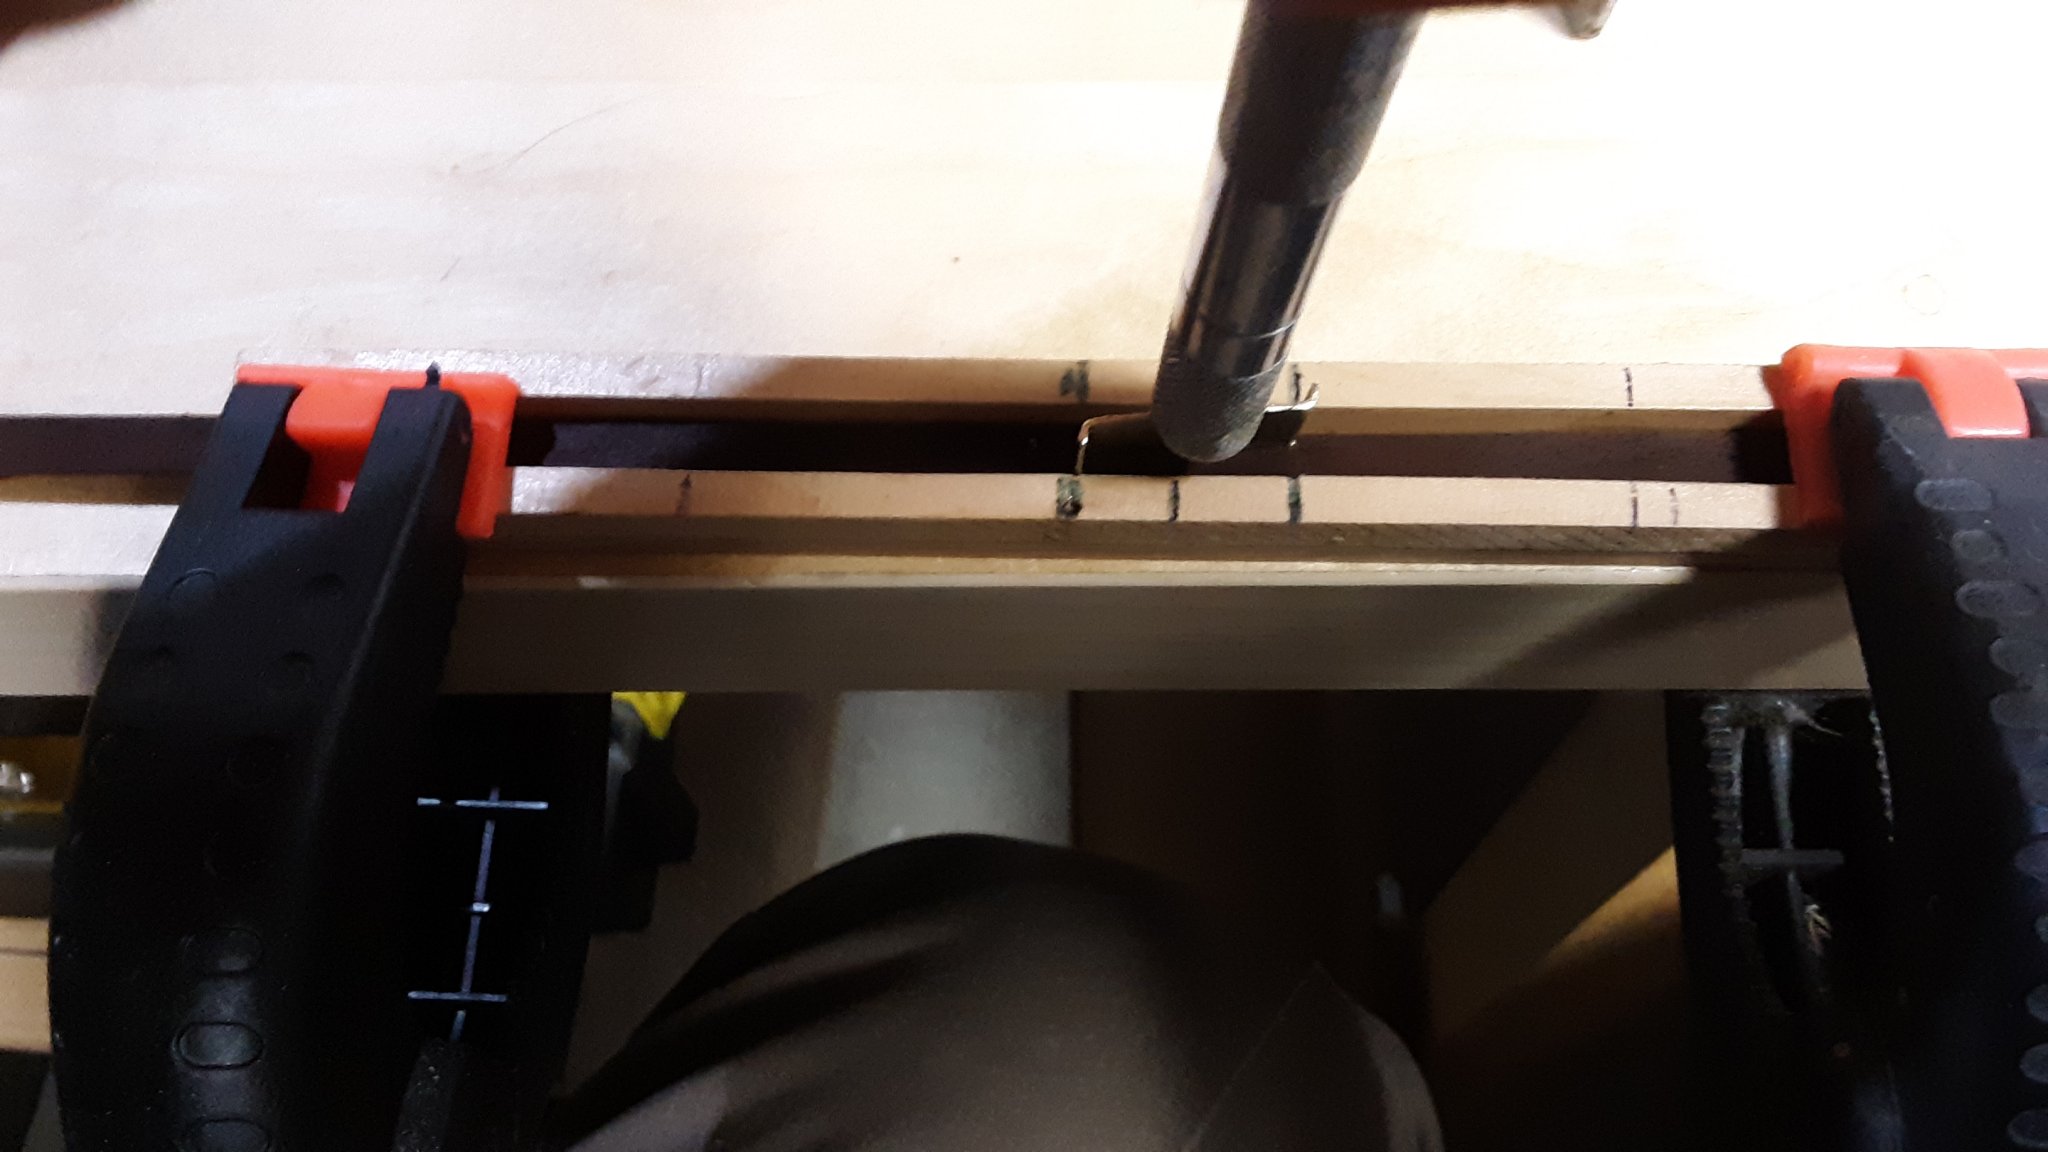
My gadget for cutting scarph joints. Piece of 1mm thick brass at 25mm total length and the curved areas are each 2.5mm long.
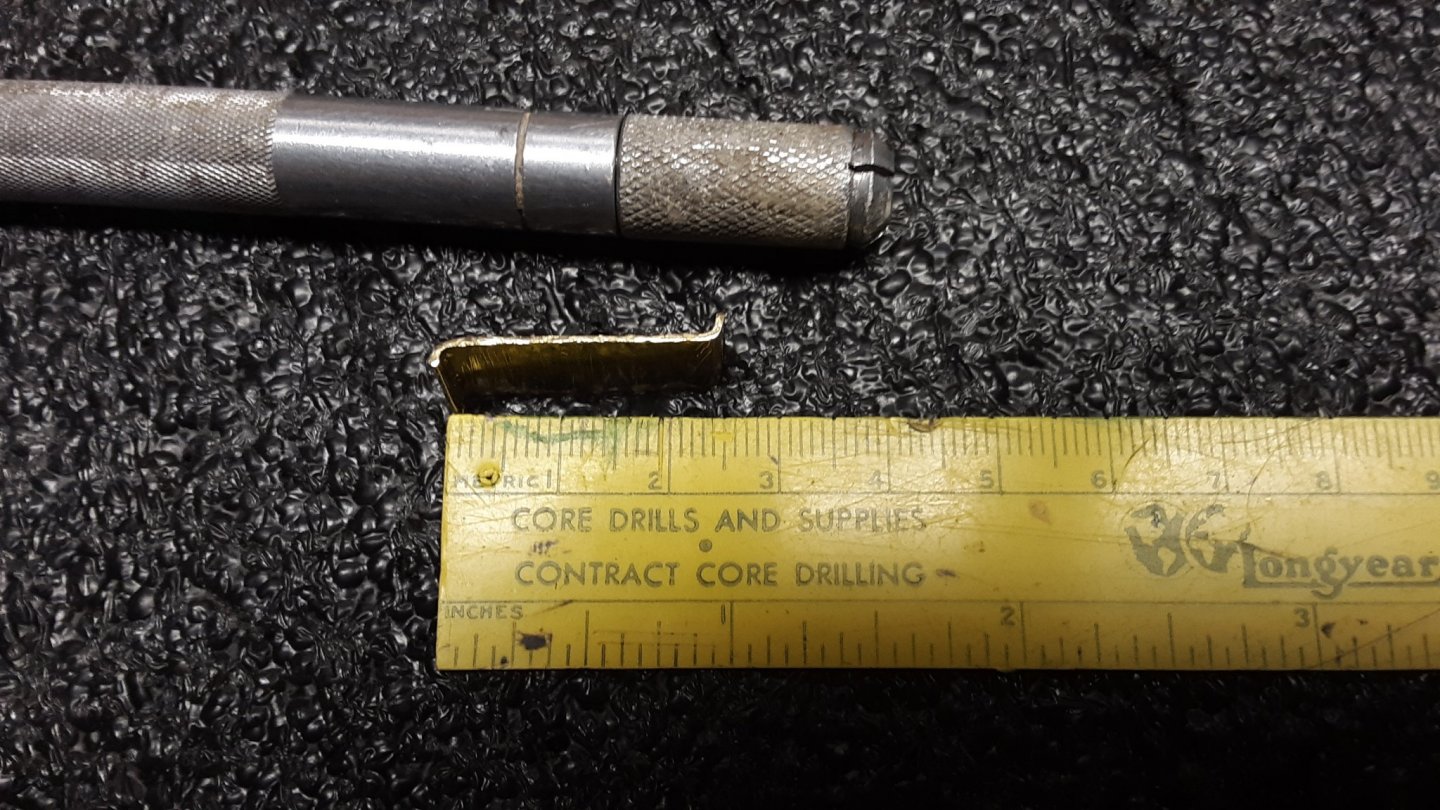
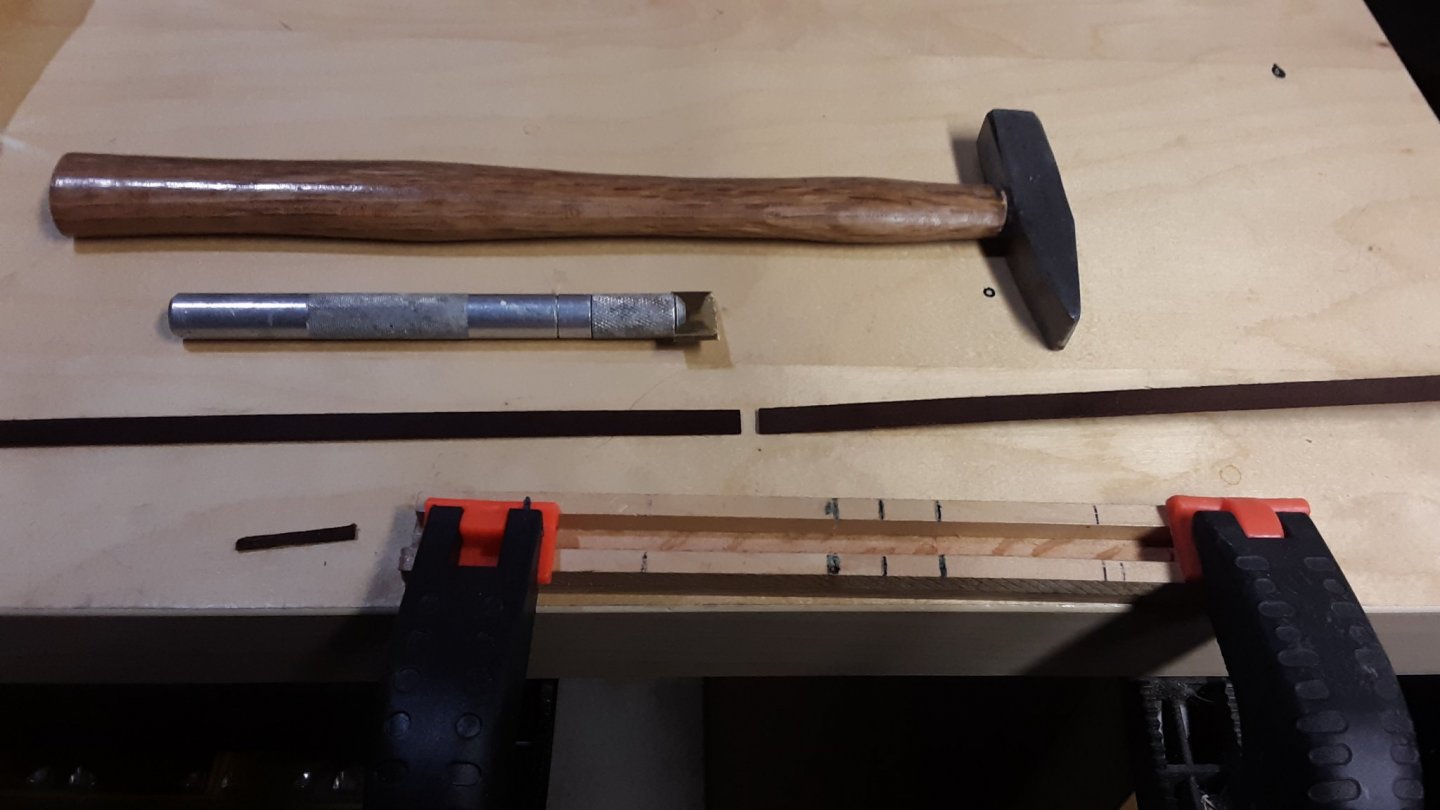
So the straight area is 20mm long. I use a x-acto knife holder to hold the 'scarph joint cutter blade' and with a hammer pound on the cutter to create the joints.

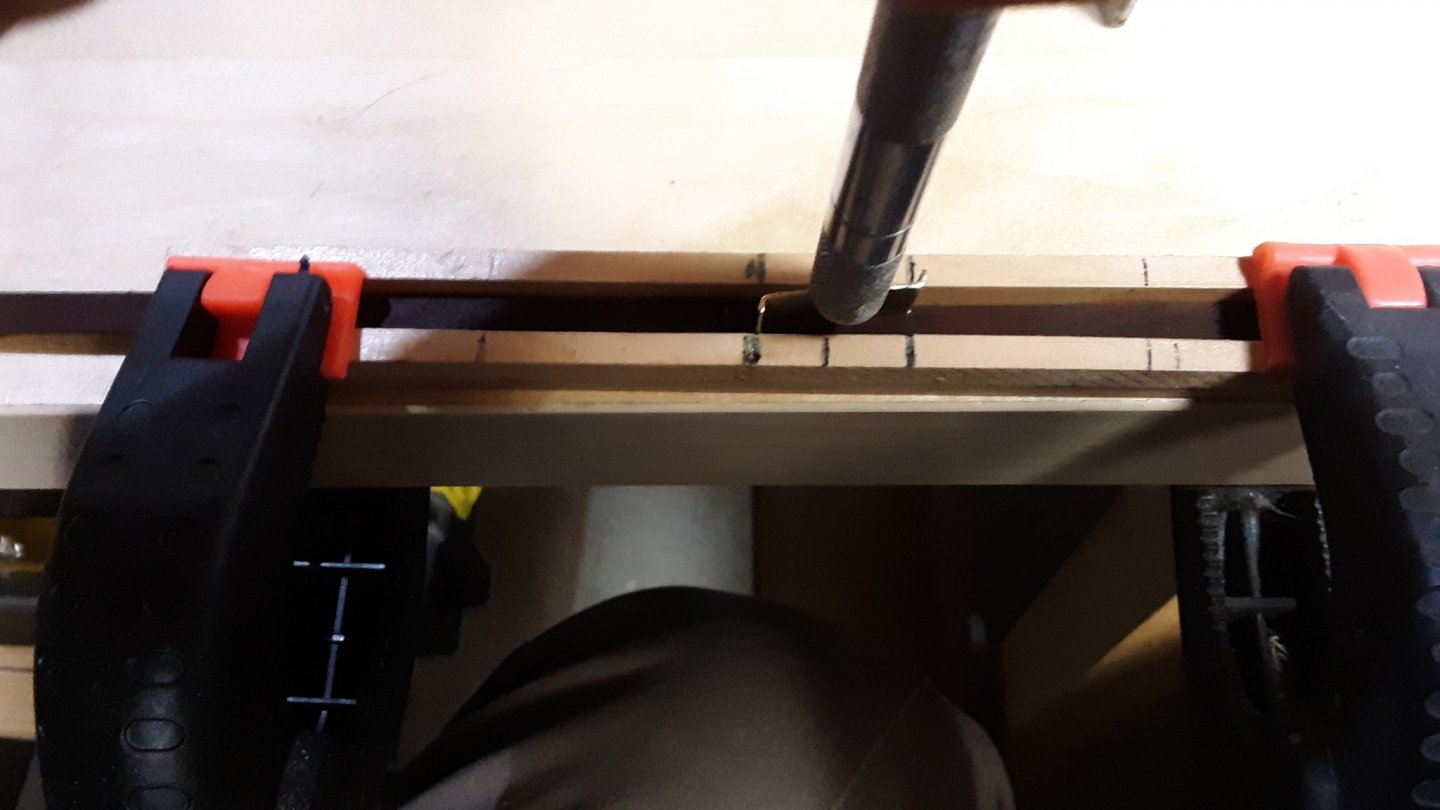
Also I filed an edge on the cutter.
Marcus
-
Thank you for all the likes and comments.
2nd layer of planking continues.
I have looked at other planking from Fluits on a Dutch forum and they are different for every fluit build. Some have close to the same as my Zeehaen.
My bow is not as bluff as some of the ships in 17th century Dutch merchant ships book. So there are mistakes I have made. I sanded too much wood from the bow and instead of a tight and small curve, it is a much larger curve. It has been suggested I should fill it out where my bow is dented. I will do that through planking.
This is not the only Fluit I am building, I plan to do another one with cannons and will be smaller in length but the same scale.
So I did a few more strakes. Two strakes a day.

Scarph joints ar3 working out very well.


Adding steelers at the early stage of planking.
Marcus- G.L., mtaylor, GrandpaPhil and 1 other
-
4
-
-
Started with the second layer of planking and using cherry as the 2nd layer and walnut for the wales. Practicing with getting the scarphs correctly placed together and doing it near the keel as this is an area which most people will not see if I make a mistake. Once I get to the bilge area I should be good at it.


I will be planking for a while.
Marcus- GrandpaPhil, Louie da fly, G.L. and 3 others
-
6
-
Beautifully executed. Looking really good.
Marcus


Zeehaen 1639 by flying_dutchman2 - 1:37.5 - Dutch Fluit of Explorer Abel J. Tasman
in - Build logs for subjects built 1501 - 1750
Posted
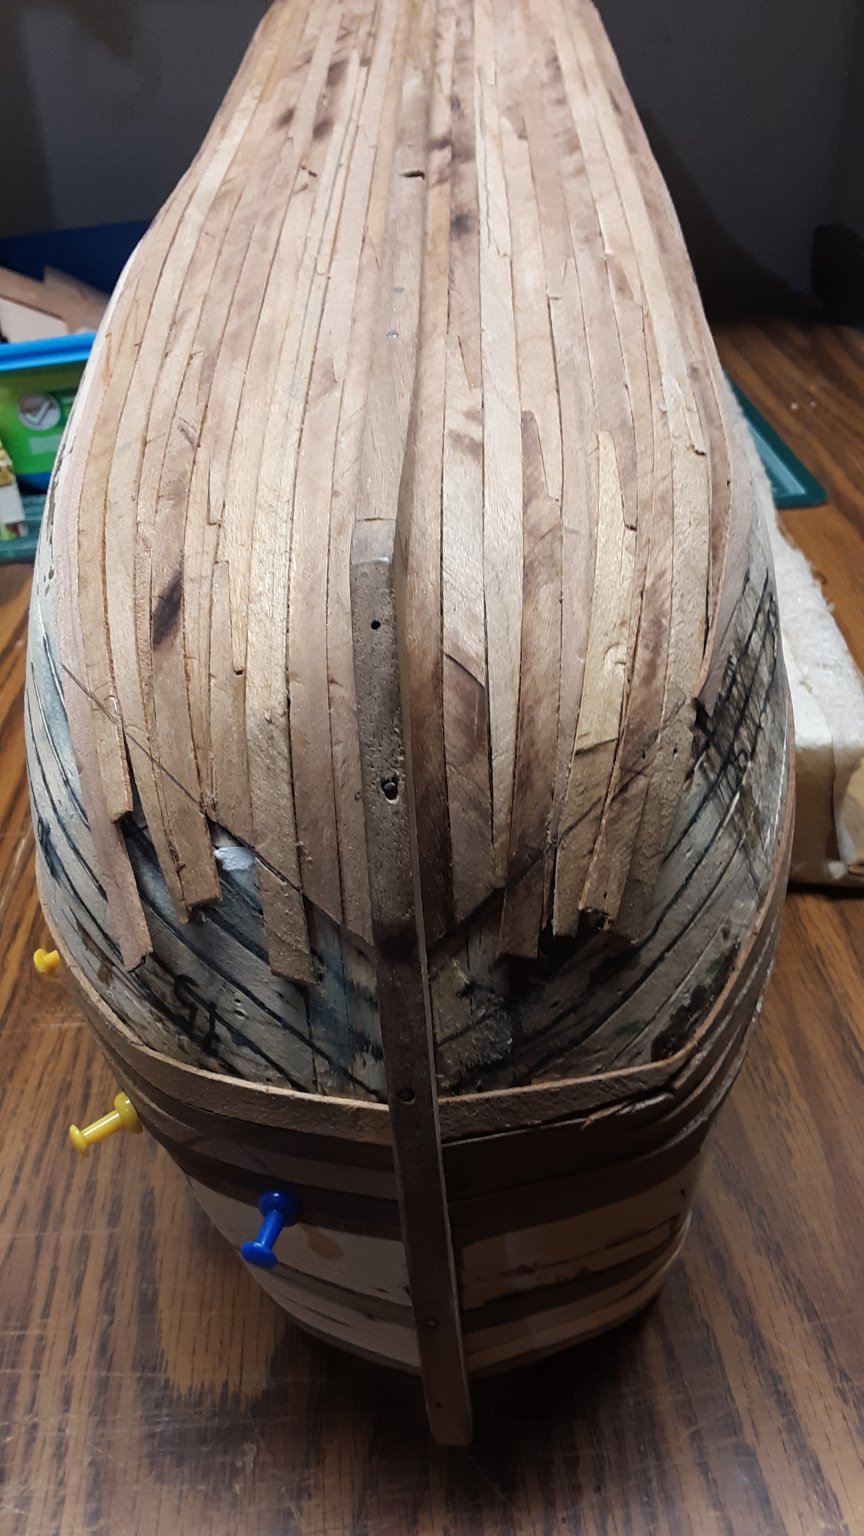
Thanks for all the likes and comments.
Made a minor mistake on the hull planking towards the stern. The strakes on each side of the hull did not meet equally going towards the stern.
So I removed 4 strakes with a chisel, sanded the rest of the area and reinstalled the first new strake.
Marcus